Welcome to NGB and our for the Starfield Grunt Work mission! This guide will walk you through starting the mission and detail the necessary steps for its completion. If you need help with a specific mission objective, check the quick links section to find the most relevant information easily.
PLEASE NOTE: Some planets referenced in our guides and walkthroughs won’t match yours due to how Starfield was created. What you do and the places you visit on those planets should be the same in these situations.
Grunt Work is one of the faction missions for the United Colonies (UC) that you can pick up at New Atlantis. This mission will automatically begin after completing the Supra Et Ultra faction mission.
Starfield Grunt Work Mission Guide
Speak to Crew Chief Herath at the New Atlantis Spaceport
Make your way over to the launch pad at the Spaceport and speak with Herath near a ship.
Make Contact with the Settlers on Tau Ceti II
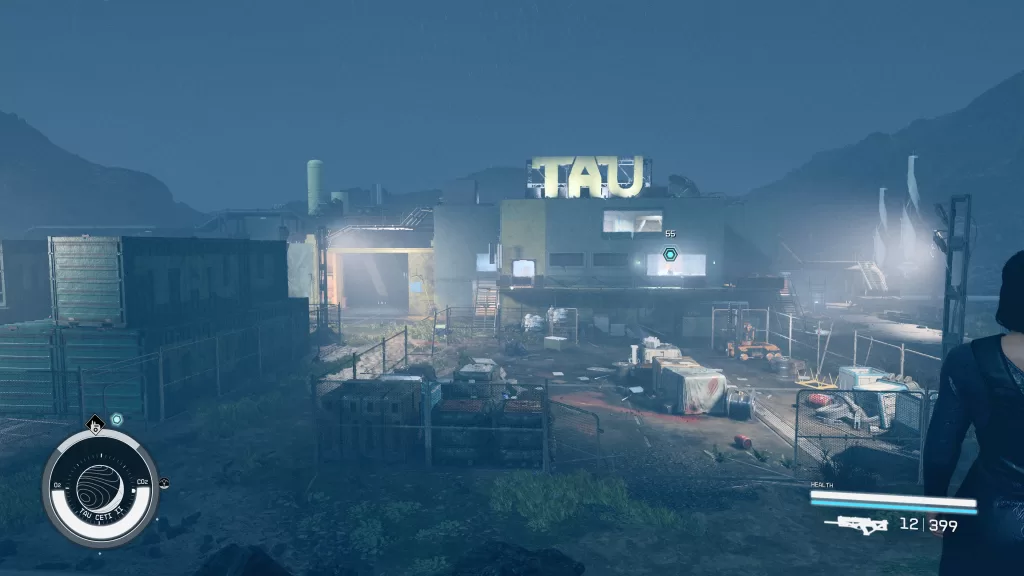
Travel to Tau Ceti II in the Tau Ceti System, and then land at the Tau Gourmet Production Center. After exiting your ship, make for the buildings east of the production center to find that they’ve been trashed. Watch for The New Atlantian 01 magazine in a room on the lower level!
Exit these buildings, and then approach the landing pad with a destroyed ship.
Speak to the Woman
A woman will speak with you, telling you that she unlocked the doors. Make your way into the building with TAU on top and talk with Hadrian on the second floor.
Restore the Security System Connection
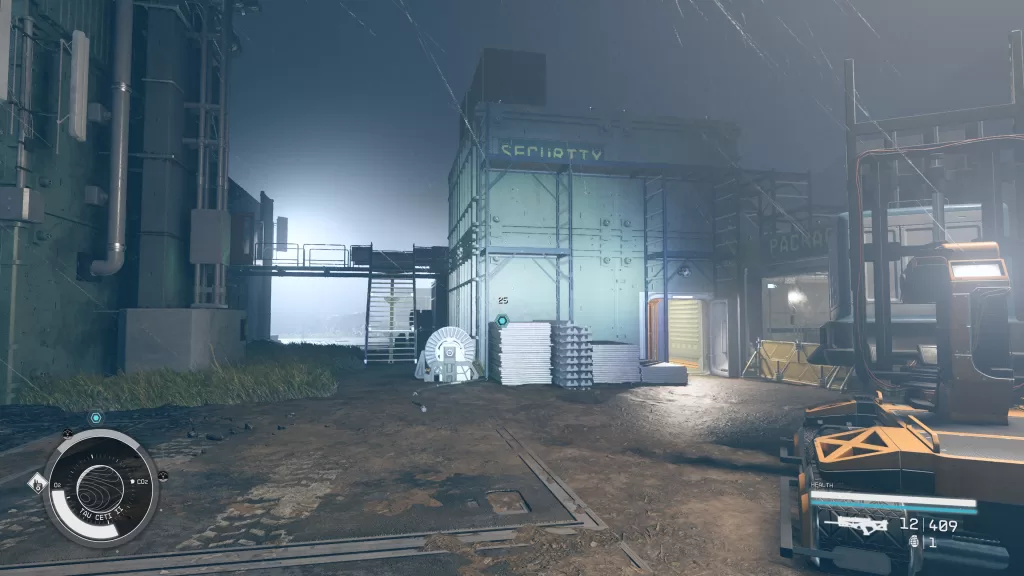
After learning what creature brought chaos down on this place, we decided to take it out! To do this, we’ll need some help from the turrets situated strategically around the plant. To restore the security system connection, make your way to the building marked “Security” and interact with the large yellow machine on the first floor.
Once on the “Tau Gourmet: Remote Security Connection” computer, select “Security System Connection Status” then “Reset Security Connection”.
Tune the Livestock Tracker to 183.5
Head into the adjacent room and interact with the Tau Gourmet: Livestock terminal. Select “System Status: Off” then “Turn ON Tracking System.” Next, select “Tracker Frequency Tuner” and input “183.5: Targets (1)”.
Kill the Terrormorph
Now is the time to bring this thing down!! To make your job easier, restore power to the 3 “Kill Lanes” by interacting with the circuit breakers on the roofs while being mindful of the distance between you and this creature (as shown in the upper right corner of your screen). You can easily kill it by letting the turrets do all the work for you! Once it’s down, loot the Terrormorph Cell Sample.
Return to Hadrian
Make your way back to Hadrian. Speak with her, then follow her to a microscope. After learning more about the situation, she’ll give you credits!
Return to Commander Tuala
Upon speaking with Commander Tuala, the Grunt Work mission will be completed! Besides receiving EXP and credits, you’ll also receive a Calibrated UC Vanguard Pilot Skip Pack, Calibrated UC Vanguard Spacesuit, and UC Vanguard Space Helmet.
Welcome to NGB and our walkthrough for the Power From Beyond mission in Starfield! This guide will walk you through starting the mission and detail the necessary steps for its completion. If you need help with a specific mission objective, check the quick links section to easily find the information needed.
PLEASE NOTE: Some of the planets referenced in our guides and walkthroughs may not match yours due to how Starfield was created. In these situations, what you do and the places you visit on those planets should remain the same.
Power From Beyond is one of the main missions you’ll randomly pick up while exploring the universe after completing the Into the Unknown mission. Completing Power From Beyond will result in the artifacts granting you a new power. You’ll also get this mission multiple times taking you to different planets and moons to get new abilities.
Power From Beyond Walkthrough
Locate and Land at the Anomaly Site
A couple of things can actually start the mission and they are listed below.
Scan a Planet
Land on a Planet
Travel to the Orbit of a Planet
Once you detect the Scanner Anomaly, you’ll then be able to land your ship there.
Discover the Temple
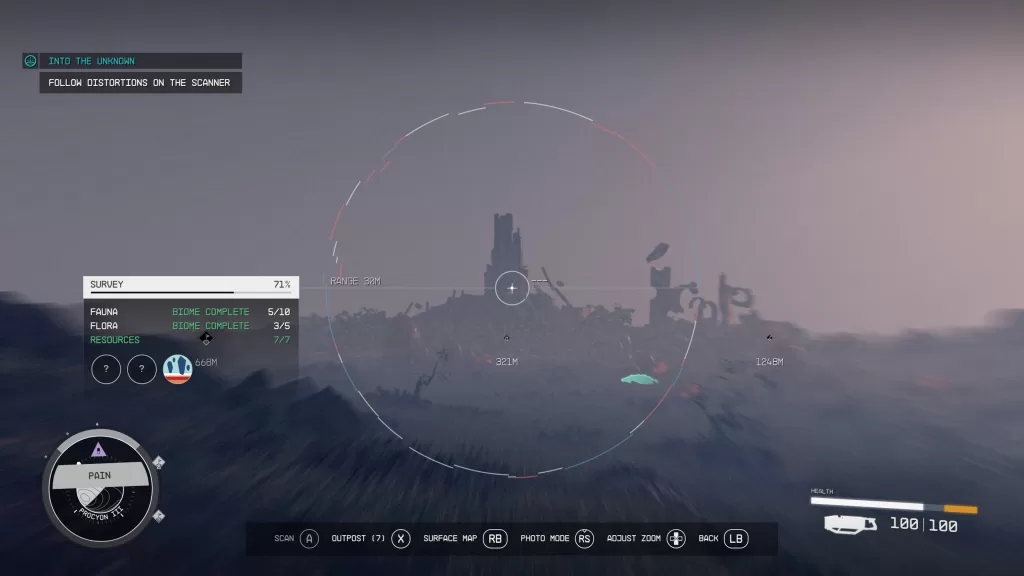
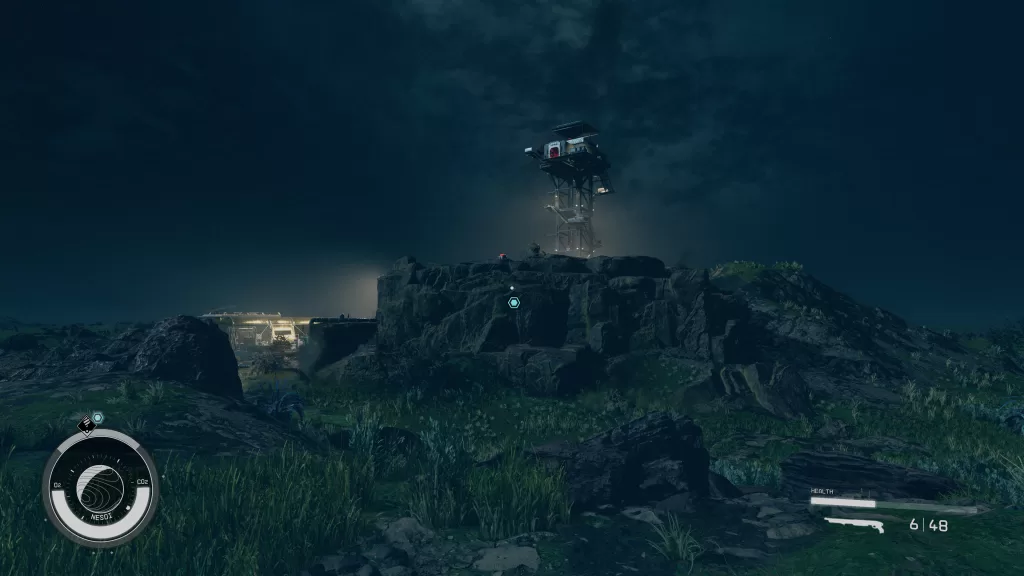
Now that you’re on the planet, you’ll need to use your scanner to locate the temple. Once the scanner is on, you’ll need to check out different directions until the scanner starts to look distorted as seen in the image below. Head in that direction, correcting your course as you go, until the majority of the scanner is distorted. That will then lead you to the temple (a tall structure that kind of looks like a tower). Temples can also be hidden in the deserts or blocked from view by the native terrain.
Solve the Temple Puzzle
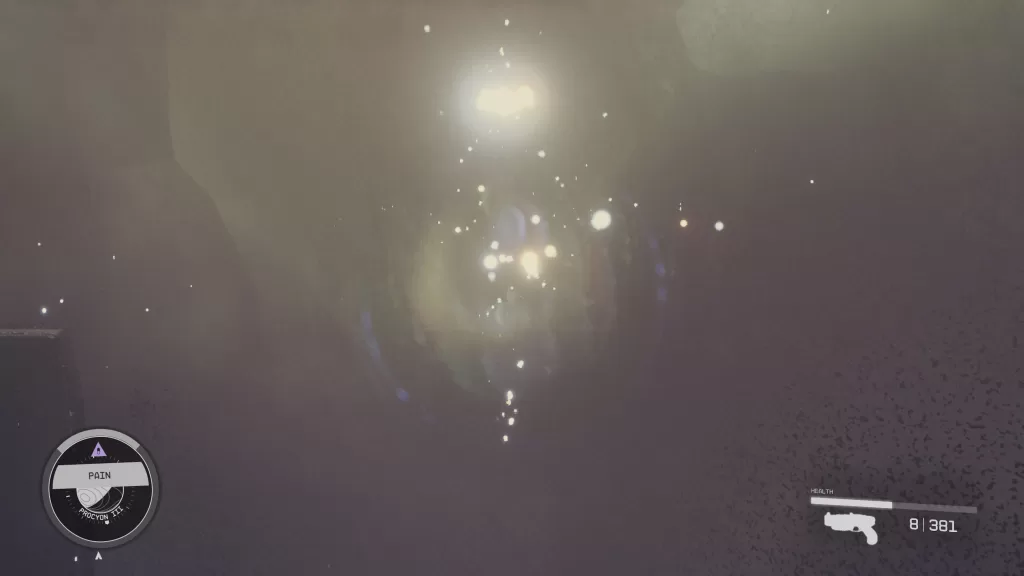
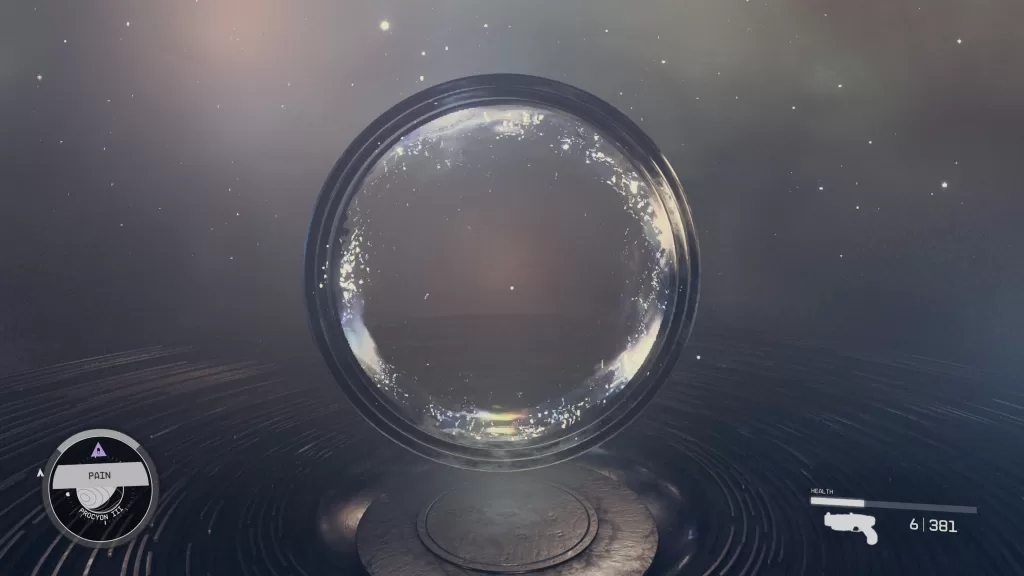
After locating the temple head inside to reach a singular room with three circular rings in the center. They will start spinning indicating that the puzzle has begun. To solve it, you’ll need to pass through a sphere of light (pictured below) multiple times. Once done enough times, the three spinning rings will stop forming a stargate. Please note that the amount of times you need to pass through the orb of light appears to be random. Sometimes you can complete the puzzle in 30 seconds other times it can take a few minutes. Also, the sphere of light is on a timer. If you don’t pass through it quickly enough, it will disappear the move to another location. I’ve noticed that when this happens, that’s when the puzzle takes longer to complete.
Receive the Power
With the puzzle solved, the only thing left to do is enter the center of the right. You’ll then be granted a new power and the mission will be completed rewarding you with some EXP.
Additional Starfield Guides and Walkthroughs
Be sure to check our main Starfield Guides and Walkthroughs page for additional content on Starfield, such as additional guides to assist you during your adventures in the Settled Systems!
Welcome to our guide for the Groundpounder mission in Starfield! This guide will walk you through starting the mission and detail the necessary steps for its completion. If you need help with a specific mission objective, check the quick links section to easily find the information needed.
PLEASE NOTE: Some of the planets referenced in our guides and walkthroughs may not match yours due to how Starfield was created. In these situations, what you do and the places you visit on those planets should remain the same.
Groundpounder is one of the misc missions you can pick up while exploring space. To start it, you’ll be hailed by a ship that will be paying it forward by telling you not to travel to the Altair System as it is filled with Spacers meaning something big is going on there.
*We were traveling to Procyon A system when it happened to us*
Groundpounder Walkthrough
Go to the Altair System
Set a course for Altair II in the Altair System then land at Research Outpost U3-09. As soon as you land, a group of Spacers will be assaulting the outpost. You’ll need to take care of them and enter the main facility.
Find Private Mahoney
Inside the research station, you’ll have more Spacers to deal with. From the entrance, take a left through the Research 01 doorway followed by another left into the Security room. Head to the back of the room and go down the stairs. Look for the storage room then go inside to find Private Mahoney.
Clear the Spacers Outside the Infirmary
Travel west from the storage area through the server room (and Spacers) then head up the stairs just past it. The upper level will be filled with more Spacers. After you make quick work of them, enter the Comms Center. Speak with Lezama inside.
Find and Rescue Lieutenant Torres
Head back to the stairs you took to reach this level then use the keycard you got from Lezama to unlock the door with the stairs leading to the third floor. Head up and clear out the Spacers. You then want to climb another flight of stairs between Labs 02 and 03. You’ll never guess what’s up there! More Spacers!!! Wipe them out then look for the Head of Research room. Go inside to meet Tores and Dasari
Rescue Captain Myeong
Make your way to the southeastern side of the room then head down the stairs to find the office. Enter the office in time to see the captain get swarmed by Spacers. Deal with them then speak with her after.
Liberate Research Camp on Altair II
Head back to your ship and use it to travel to the Research Camp on the same planet. Make your way to the Research Camp then take out the Spacers there. Afterward, enter the airlock and speak with the survivors inside.
Talk to Lieutenant Torres
Make your way back to the Research Outpost and tie in with Torres who’ll be waiting for you near the landing pad with the captain.
Defeat Spacers in Space!
Time for a space battle! Return to your shop and head up to space. You’ll need to defeat the Spacers orbiting Altair I and Altair V.
Land on Research Outpost U3-09
Return to the Research Outpost on Altair II but make sure you’re ready for a fight. There will be a horde of Spacers you’ll need to take down to save everyone at the outpost. After defeating the initial wave of Spacers, two more will be dropped off via drop ship. Defeat them all then speak with Torres in front of the outpost to complete the mission. You’ll be rewarded with 300 EXP, some credits, a Peacekeeper and some ammo to go with it.
Additional Starfield Guides and Walkthroughs
Be sure to check our main Starfield Guides and Walkthroughs page for additional content on Starfield, such as additional guides to assist you during your adventures in the Settled Systems!
Welcome to NGB and our walkthrough for the Starfield Into the Unknown mission! In this walkthrough, we’ll cover the objectives you’ll need to complete for this mission! If you’re here looking for help with a specific mission objective, please check out the quick links section which should point you to the right section!
Into the Unknown is one of the main missions you’ll need to complete to beat the game. To start it, simply complete The Old Neighborhood main mission and you’ll receive it automatically.
Starfield Into the Unknown Mission Walkthrough
Talk to Vladimir
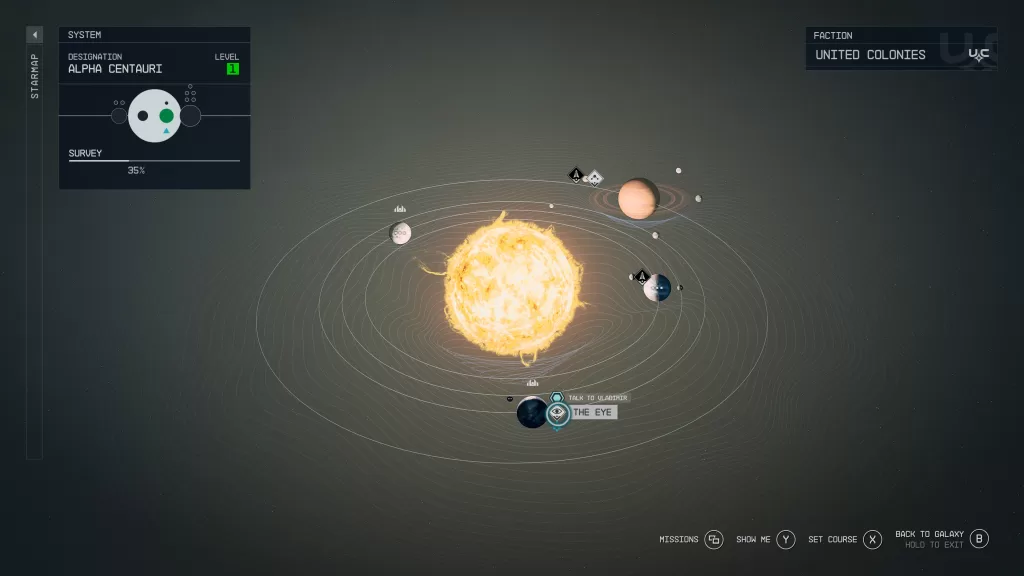
Travel to the Eye space station orbiting Jemison in the Alpha Centauri System and dock there.
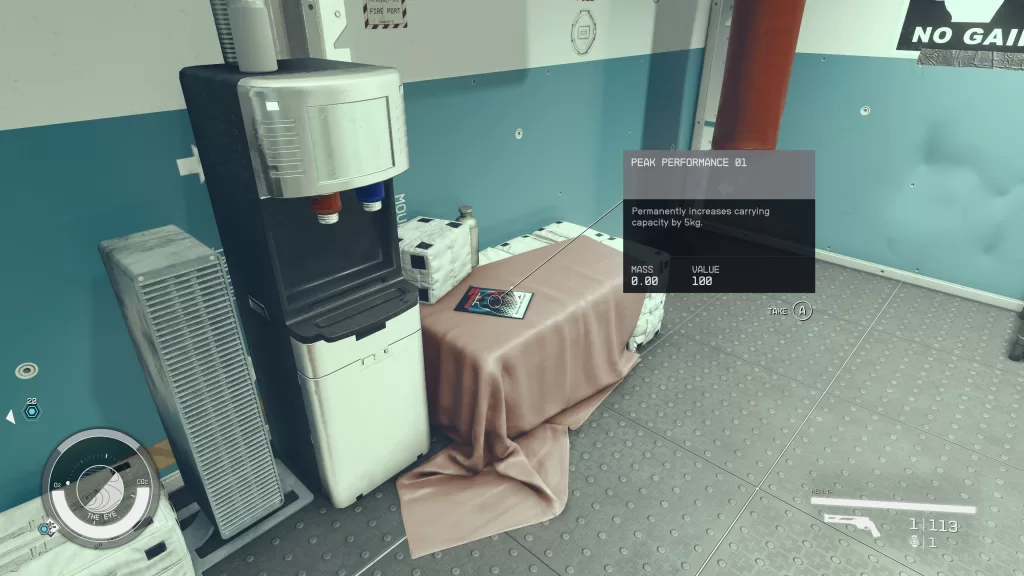
After you board the ship, follow the path forward to Scanning Control where you’ll find Vladimir. Speak with him to get your nickname! You’ll also get a couple of new objectives. On this ship, you can find the Peak Performance 01 magazine in the workout room in the Facilities F01 wing.
Find Andreja & the Artifact
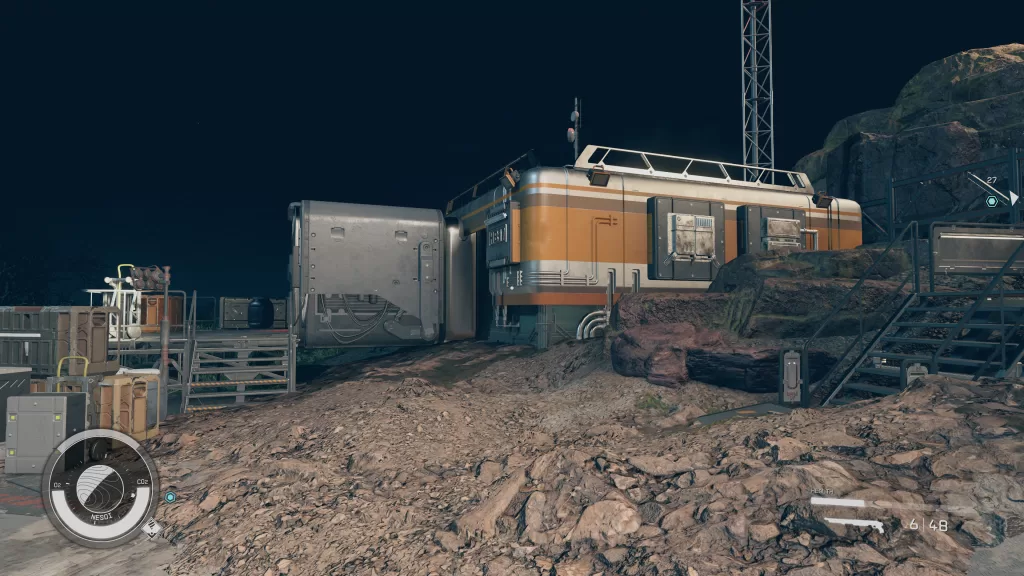
Open your mission and make it active then travel to one of the two planets it shows as it is randomly chosen. Andreja will be on the one with an Abandoned Mine. Once there, land at the Abandoned Mine then exit your ship and follow the objective marker to reach an abandoned mine.
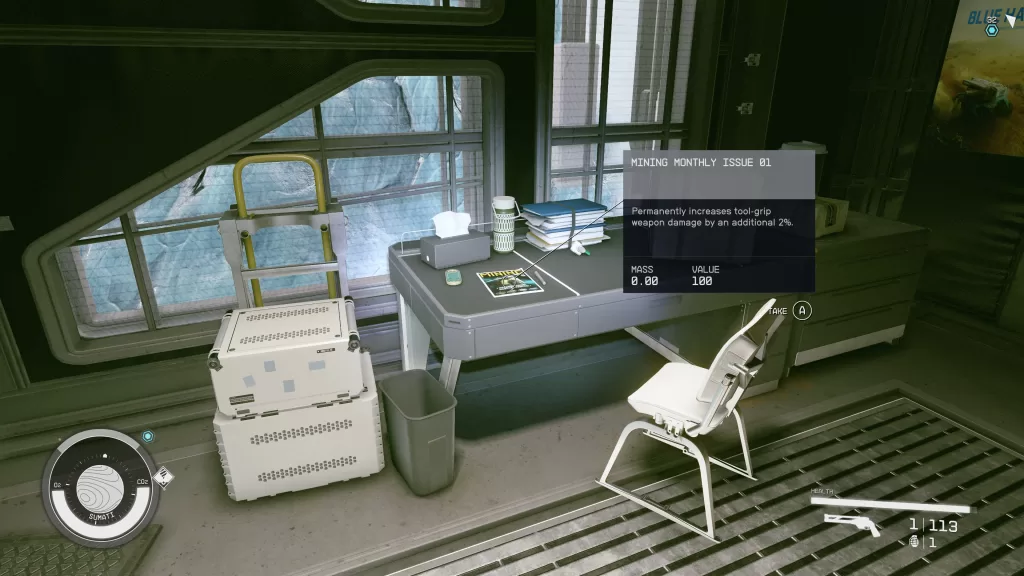
Before going into the Deep Cave, check out the small room nearby (with a mine near the entrance) to find the Mining Monthly Issue 01 magazine inside.
Andreja will greet you as soon as you enter. After introductions, continue to follow the path further into the cave. Near where you first meet Andreja, you’ll find a computer where you can reprogram a robot to follow and protect you. You may need it as the way forward is swarming with Ecliptics. You’ll find the artifact when you reach the cave depths. Use a cutter to break it free then snag it.
Go to Piazzi I
This planet most likely won’t match up to the one you get as they are randomly assigned, but what you do on the planet will be similar if not, the same.
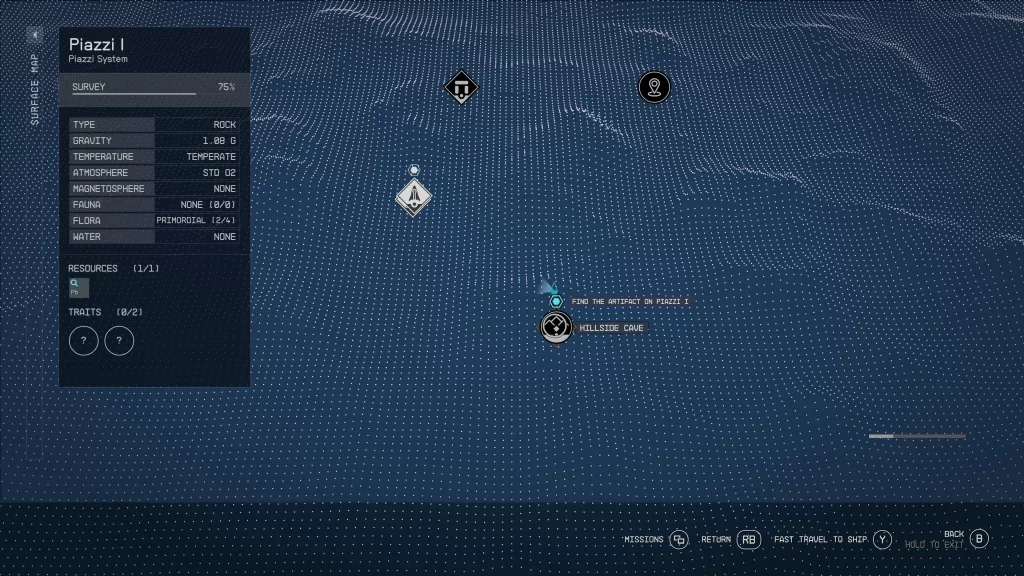
To reach Piazzi I, you’ll need to travel to the Piazzi System northwest of Alpha Centauri. Once there, land at the Hillside Cave on Piazzi I.
Find the Artifact on Piazzi I
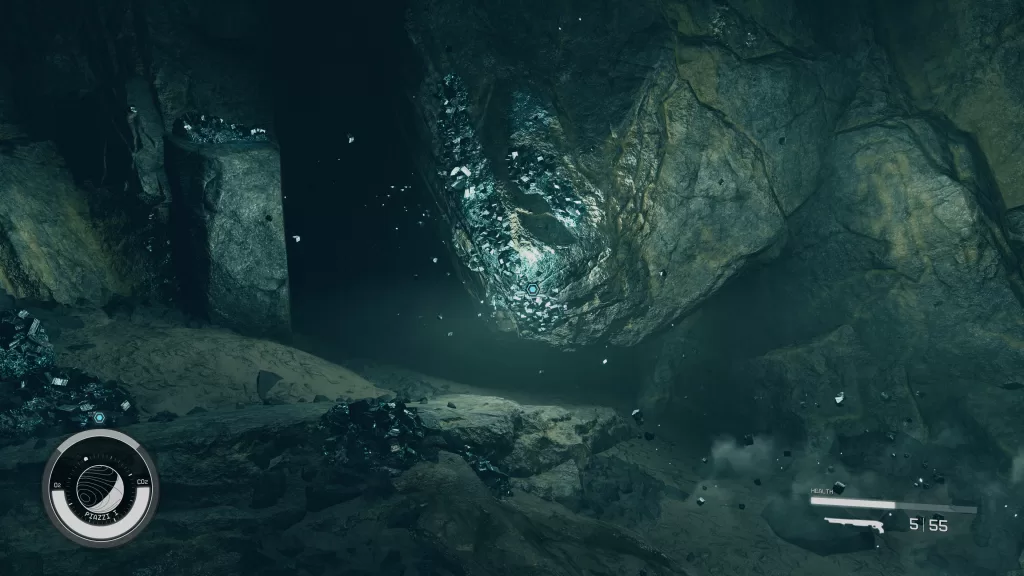
After disembarking from the ship, start heading southeast towards the objective maker. This will eventually bring you to a cavern you’ll want to enter.
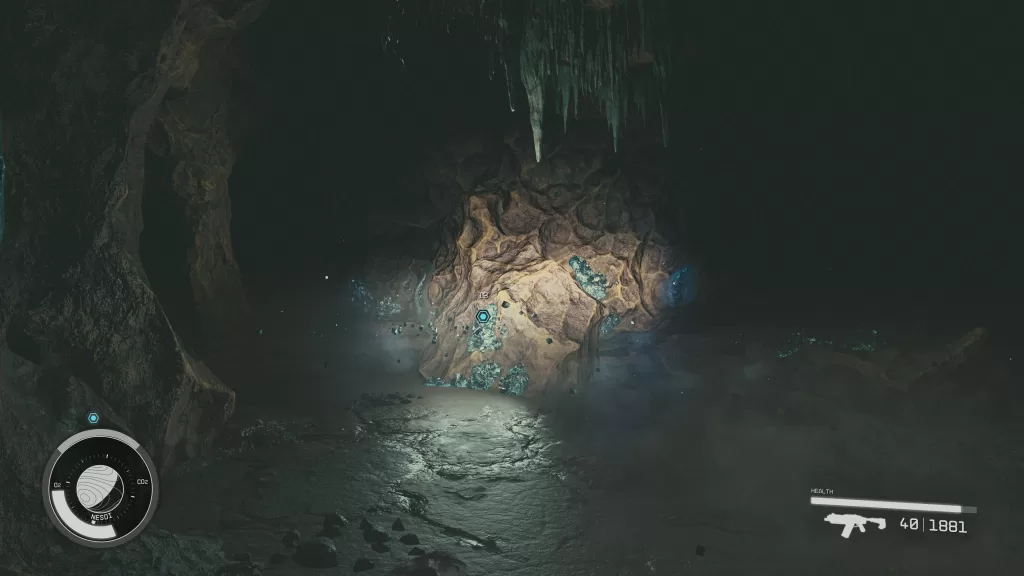
Inside the cavern, keep descending heading deeper into it until you reach the artifact. You’ll then need to use a cutter or something to free the artifact so you can collect it. Keep an eye out for the few turrets scattered around in the cave.
Add the Artifacts to the Collection
Now that you have two more artifacts, take them back to the Lodge and add them to the table in the Library. After a scene with the group, head back up to the Eye to speak with Vladimir. He’ll say that he found a large anomaly matching the signatures of the artifacts and send you to Procyon III.
Go to Procyon III
Head back to your ship and set a course for the Procyon A System northwest of Alpha Centauri. From there, you can travel to Procyon III and land at the Scanner Anomaly. After disembarking from your ship, you’ll need to open your scanner and use it to track the anomaly. This means the circle you normally see on the scanner will have pulsating wiggle lines indicating an anomaly in that direction. You’ll need to follow this until the whole thing is pulsating, pointing you toward a mysterious structure.
When you reach the structure, it will be revealed to be the temple. Head inside to find a device matching the artifacts on the table in the Lodge’s library. This is also the start of a puzzle. There will be a diamond-shaped object that looks similar to the cosmos (shown in the picture below).
You’ll need to pass through it multiple times as it moves around the room until the rings in the center of the room stops spinning. After you’ve accomplished this, head to the center of the ring to be granted magic space powers.
Return to Lodge
Exit the temple and return to your ship then fly back to the Lodge in New Atlantis. Head into the library and approach the members of Constellation to trigger a cutscene during which Vladimir will request you demonstrate your new power to them. Do so then speak with him afterwards to complete the mission. You’ll be rewarded with 400 EXP, some credits, and 3 med packs.
Welcome to our guide for City and Settlement Locations in Starfield! This City and Settlement Locations guide will list the cities and settlements we’ve come across while exploring the final frontier, along with which planet they are on and what system they are located in. We’ll focus mainly on places with quests you can complete or a plethora of shops you can buy or sell at.
City and Settlement Locations
Akila City
System: Cheyenne
Planet: Akila
Cydonia
System: Sol
Planet: Mars
Neon
System: Volii
Planet: Volii Alpha
New Atlantis
System: Alpha Centauri
Planet: Jemison
The Clinic
System: Narion
Planet: Deepala (orbiting)
Additional Starfield Guides and Walkthroughs
Be sure to check our main Starfield Guides and Walkthroughs page for additional content on Starfield, such as additional guides to assist you during your adventures in the Settled Systems!
Welcome to NGB and our Starfield guide on the Executive Level mission. This guide will walk you through starting the mission and detail the necessary steps for its completion. If you need help with a specific mission objective, check the quick links section to easily find the information needed.
PLEASE NOTE: Some of the planets referenced in our guides and walkthroughs may not match yours due to how Starfield was created. In these situations, what you do and the places you visit on those planets should remain the same.
Welcome to our walkthrough for the Executive Level mission in Starfield! Executive Level is one of the faction missions for Ryujin Industries. You’ll automatically begin this mission after completing the Sabotage mission.
Executive Level Walkthrough
Lobby Board Members
For this mission, you’ll need to rally the board members to vote in your favor on two topics: acquiring Infinity LTD and continuing researching the Internal Neuroamp.
The actual choice is completely up to you and how you want to steer the future of Ryujin Industries. It has no impact on the outcome of the mission and only slight changes to your rewards. You’ll always receive 350 XP and 13,400 credits. Depending on the option combination you chose, you’ll receive different items such as a hippolyta, digipick x2, etc.
After you make your decision and watch the meeting unfold, the mission will complete! You’ll now be able to obtain missions on the Operations floor from Imogene.
Additional Starfield Guides and Walkthroughs
Be sure to check our main Starfield Guides and Walkthroughs page for additional content on Starfield, such as additional guides to assist you during your adventures in the Settled Systems!
Welcome to NGB and our Starfield guide on the Sabotage mission. This guide will walk you through starting the mission and detail the necessary steps for its completion. If you need help with a specific mission objective, check the quick links section to easily find the information needed.
PLEASE NOTE: Some of the planets referenced in our guides and walkthroughs may not match yours due to how Starfield was created. In these situations, what you do and the places you visit on those planets should remain the same.
Sabotage is one of the faction missions for Ryujin Industries. You’ll automatically begin this mission after completing The Key Ingredient mission.
Sabotage Walkthrough
Meet Dalton in His Office
Enter the elevator in Ryujin Tower and ride it to the Executive Offices. Once there head up the stairs and speak with Dalton in the security room.
Take a Seat in the Conference Room
Follow Dalton to the conference room and sit down to partake in the meeting.
Meet Veena in the Neuroamp Division
Head down to the Research and Development floor and speak with Veena. After your conversation, sit on the Neurosurgery Operating Table to begin the operation. Once it’s over, speak with Veena again.
Perform the Experiment
Exit the room and head up the stairs to the observation deck where you’ll receive a tutorial on how to use the manipulation device. Follow the tutorial to put Demarcus under your control. To open the door, have him interact with the keycard on the table behind him then the door to open it. Once you’ve successfully completed the experiment head down to Veena and speak with her after she finishes talking to Demarcus.
Talk to Masako in Her Office
Head up to the Executive Offices and speak with Masako in her office. She’ll present you with 2 options on how to infiltrate Infinity LTD. For Option A, you’ll gain access to the maintenance access on the roof and need to be completely stealthy the whole time! As you can assume, you’ll start on the roof for this option! For Option B they’ll give you an identity as a slight cover and assign you with a meeting to get you into the door. You’ll then use your acting skills to talk your way out of things. If you select Option B, you’ll start in the Marketing Department. Select whichever option you’d prefer! No matter you’ll choice, you’ll have 3 targets:
Lucas’ computer in the Executive Offices
Faye’s computer in Research and Development
Obtain the prototype in R&D
For this mission, you’ll be given an Operative Suit and Helmet! Make sure to put them on to help you avoid detection!!
Talk to Dalton / Meet Ularu in her Office
Depending on who you sided with, you’ll speak with either Dalton or Ularu before beginning the infiltration. If you sided against Ularu, you’ll need to speak with Dalton to hand over the slate then wait for his analysis. If you sided with Ularu, you’ll speak with her.
Infiltrate Infinity LTD
Head over to New Atlantis on Jemison in the Alpha Centauri System. Once there, head to the Commercial District to find the Infinity LTD building.
Depending on whether you chose Option A or B, you’ll have 2 ways of infiltrating the building.
Option A – Roof Access
If you want to avoid people the whole time, make your way up to the roof via the door to the right of GAL Bank, which is on the right side of the Infinity LTD building.
Option B – Marketing Floor
Speak with the receptionist on the first floor who will direct you to the nearby elevator. Take it up to the Marketing floor then head straight ahead to find Aelys. He’ll suggest that you take a seat in the waiting area to wait for your appointment. Proceed to the couch and take a seat. Aelys will interrupt you shortly after mentioning that you can explore the facilities on the floor while you wait.
(Optional) Sabotage the Heating System
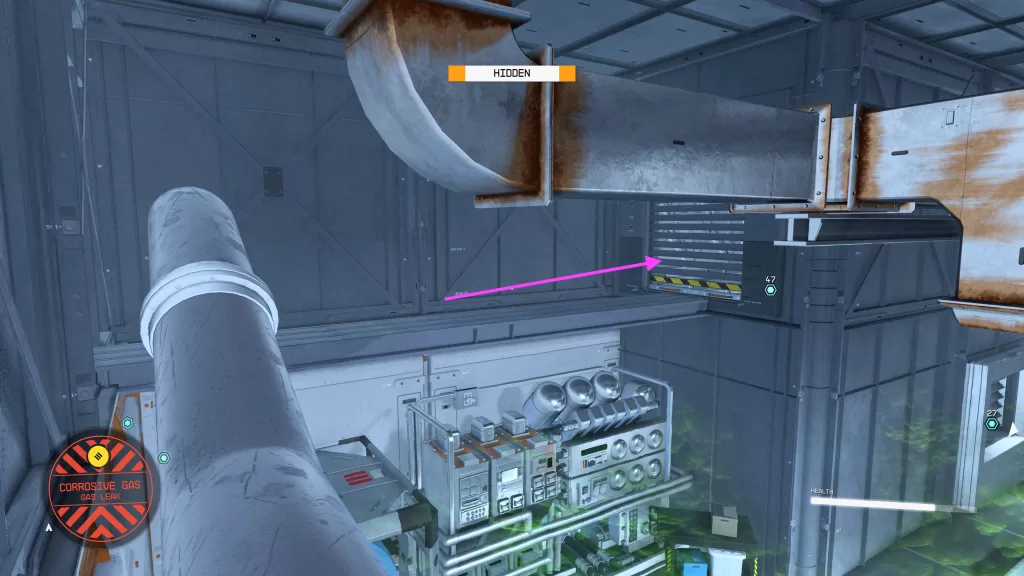
You’ll want to do this objective first before attempting to move to a different floor as doing this will clear out all the people from the building except the guards. This will make sneaking around waaaayyyy easier plus you’ll get to use your new manipulation skill! Once Aelys leaves (if you’re on the Marketing floor), enter the elevator and ride it up to the Roof Access. Once you exit the elevator, take a right to find a vent. Enter this vent to find a guard in the room ahead on the other side of some spinning fans.
Manipulate this guard to flip the switch next to him causing the fans to stop spinning. Once you’ve completed this task, drop down to the area underneath the fans then take a right. At the T, take a left to find the Mainentance Systems computer. Interact with it then select the following:
“Critical Systems”
“Heating [!]”
“Activate System”
“Yes”
With a gas leak detected, all nonessential personnel will leave the building. Now’s your chance to explore with fewer eyes watching for you!
Run The Program on Lucas’ Computer
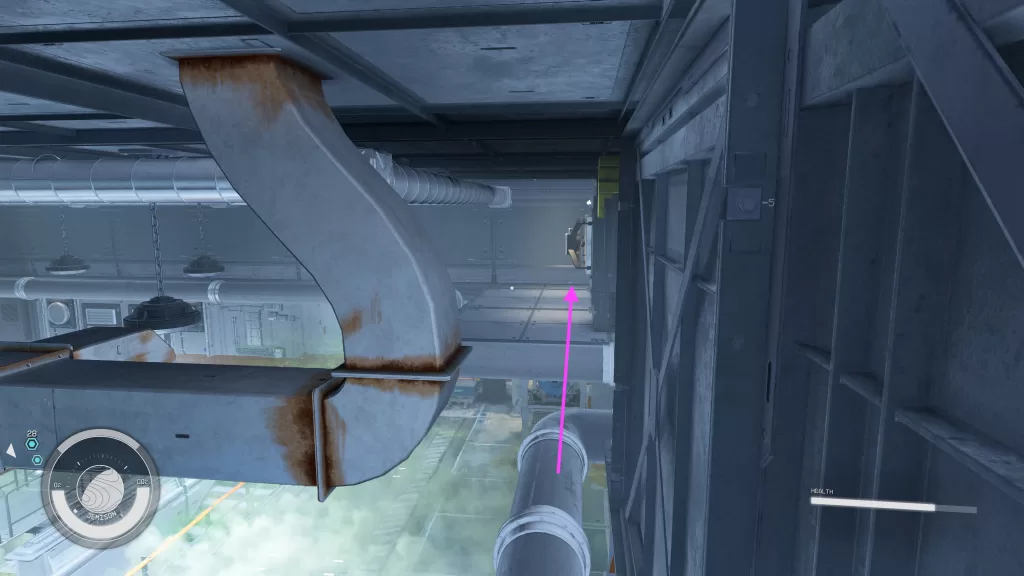
Head back towards the T in the path to find a vent. Take this vent and follow it until you emerge on the rafters of the ceiling. Immediately turn around and head northeast.
At the end of the path, there will be a door with a label of “Executive Offices” to the right.
Be mindful of the guard patrolling it. Wait until he turns his back then drop down and unlock this novice door. Quickly head inside and unlock Lucas’ computer. You’ll need to select the “Overseer Program” to run the program on Lucas’ computer.
Find a way Into Research and Development
To exit this room, wait for the guard to turn his back then jump over the rail on the left side near the door.
You’ll then be in the rafters again! Enter the vent to the northwest.
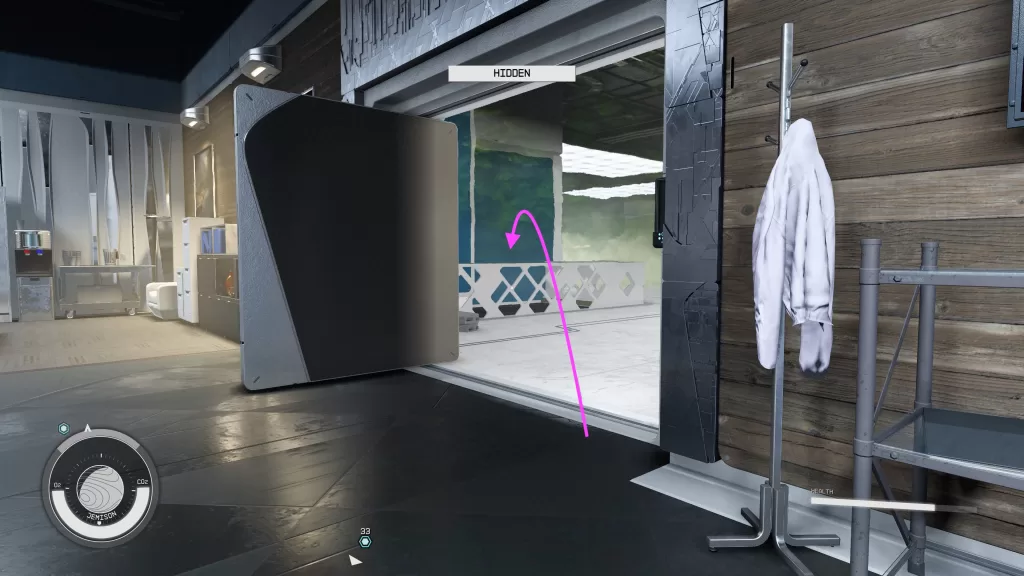
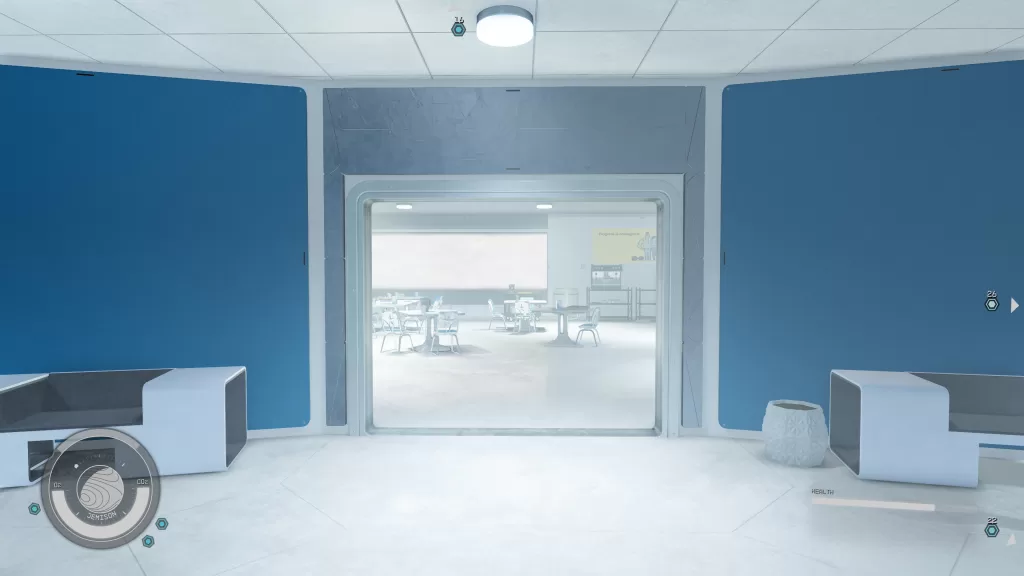
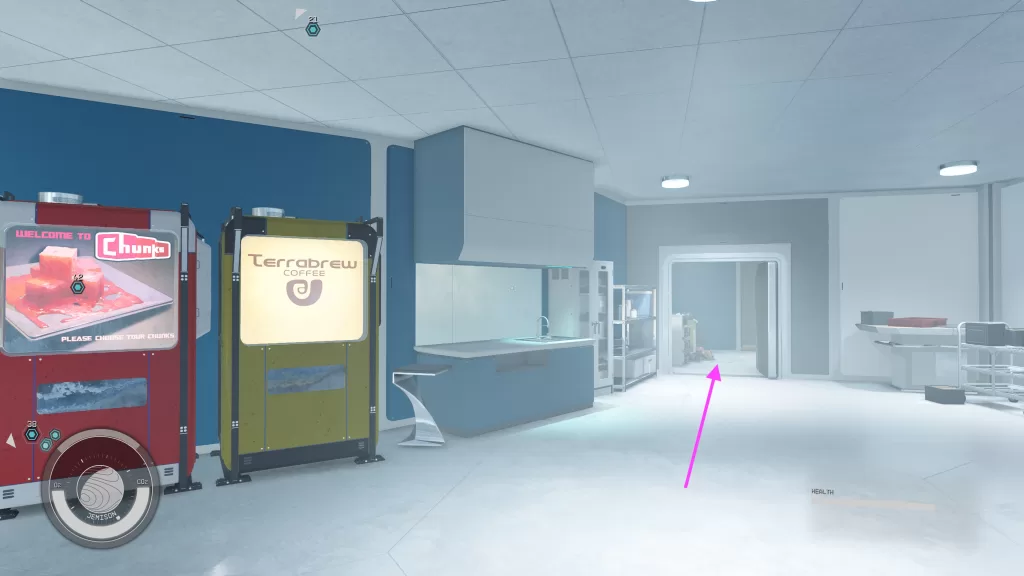
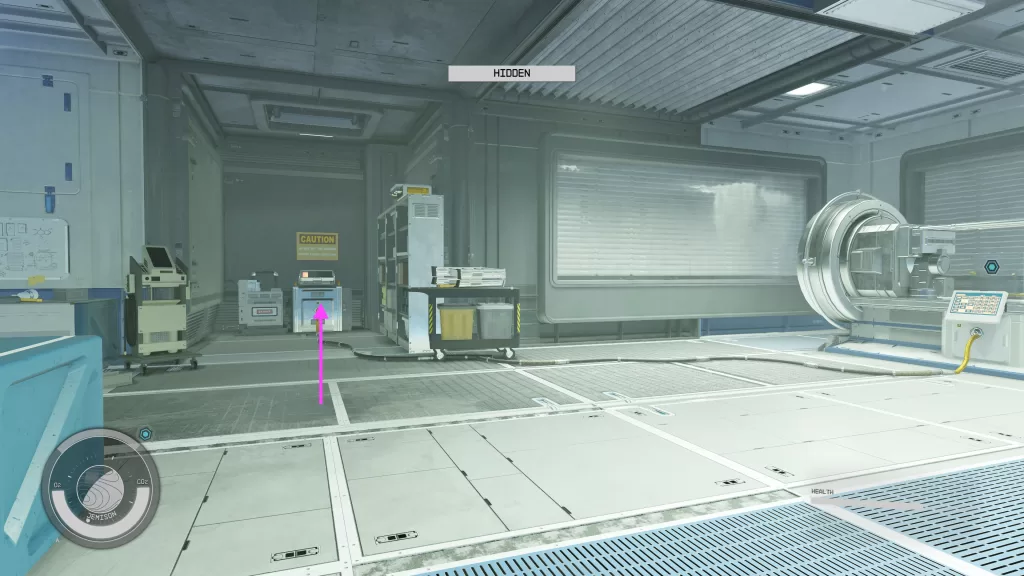
Once in this vent, follow it until you emerge in a bathroom. Exit the bathroom and take a left. Be VERY careful as there are a lot of guards in this area! Remember to use your manipulation skills to guide them away! Take a left and follow the hallway until you spot the cafeteria.
Enter this room and take a left. Follow it to the end and enter the door to reach a small storage room with a vent.
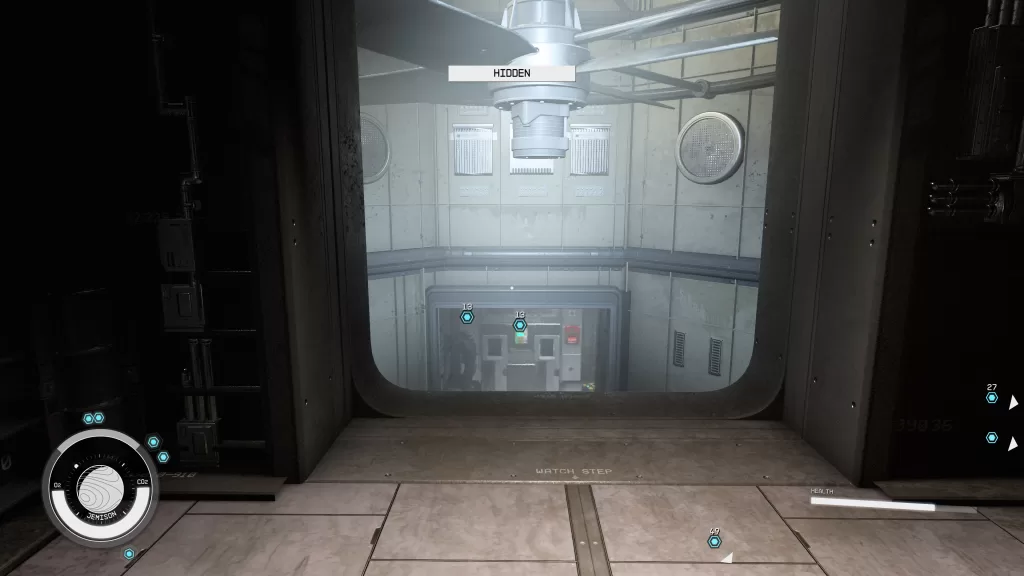
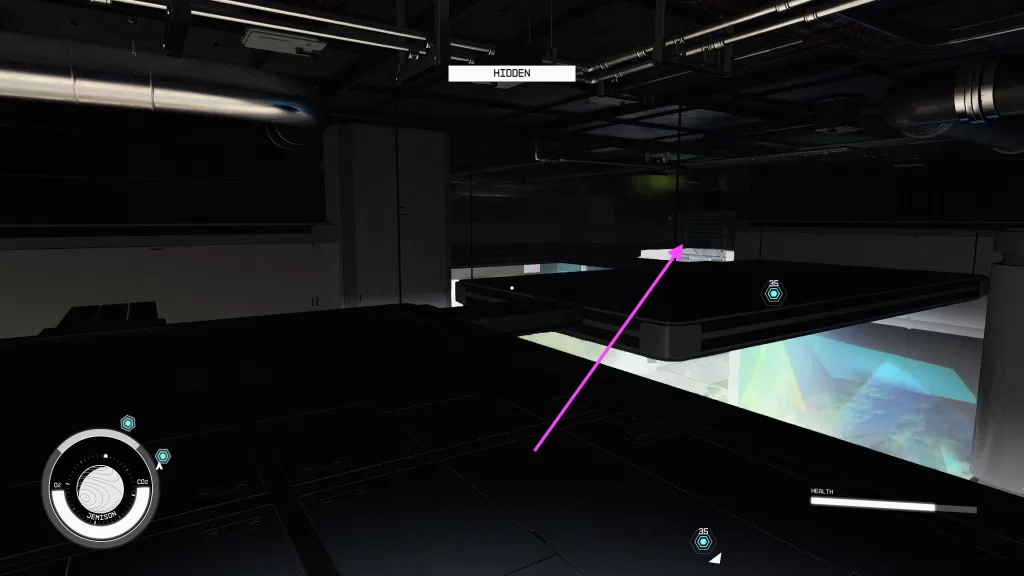
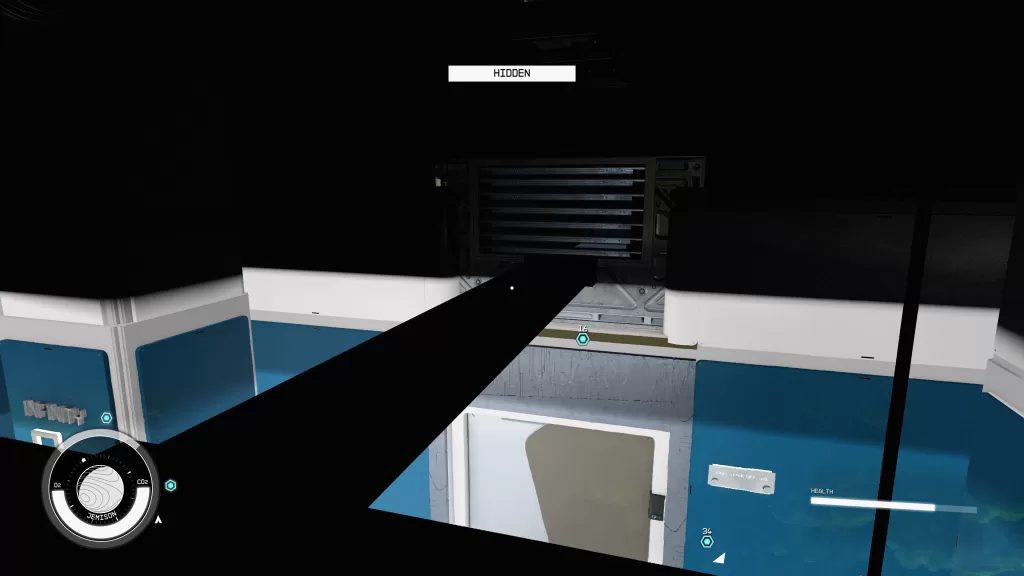
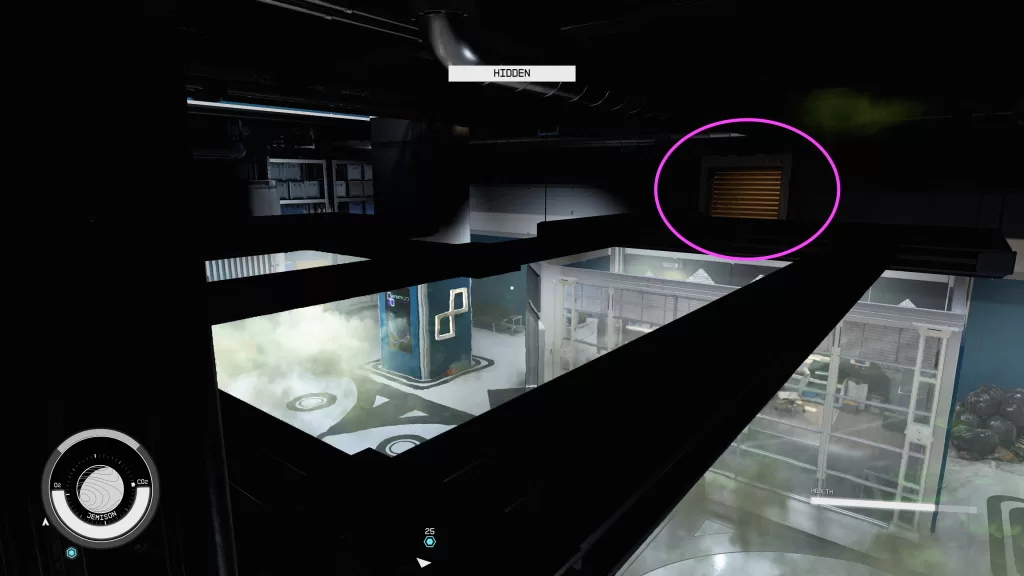
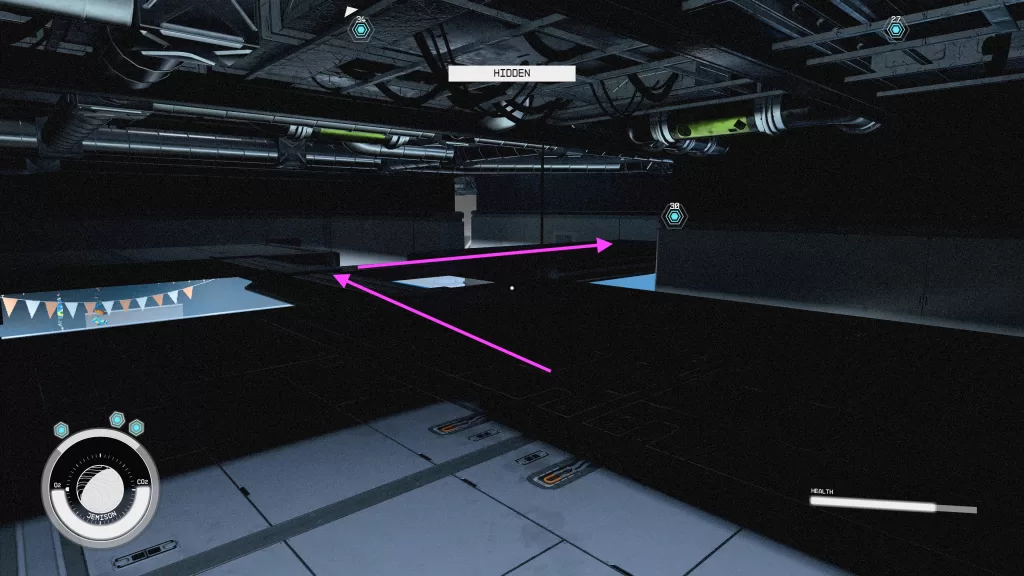
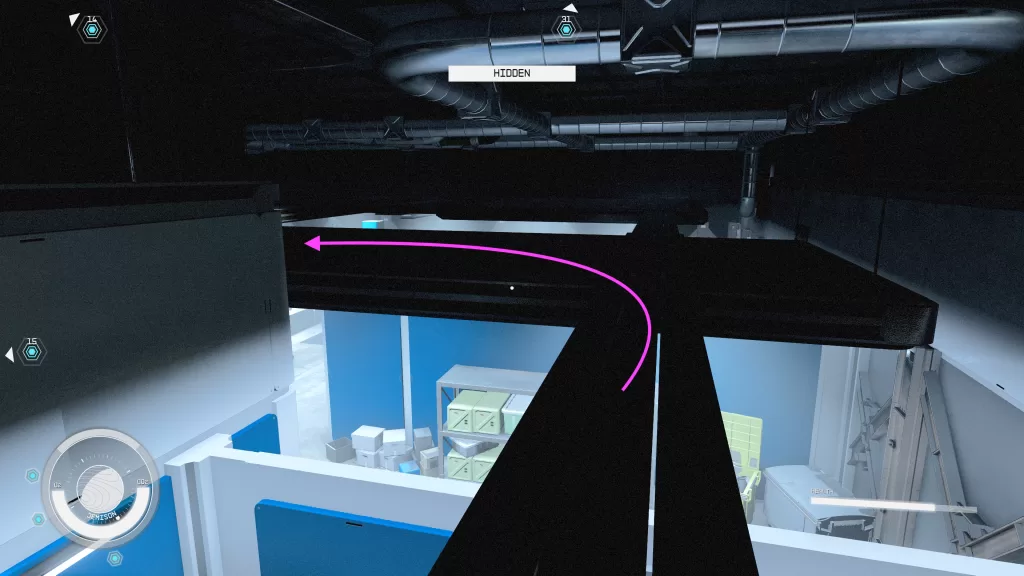
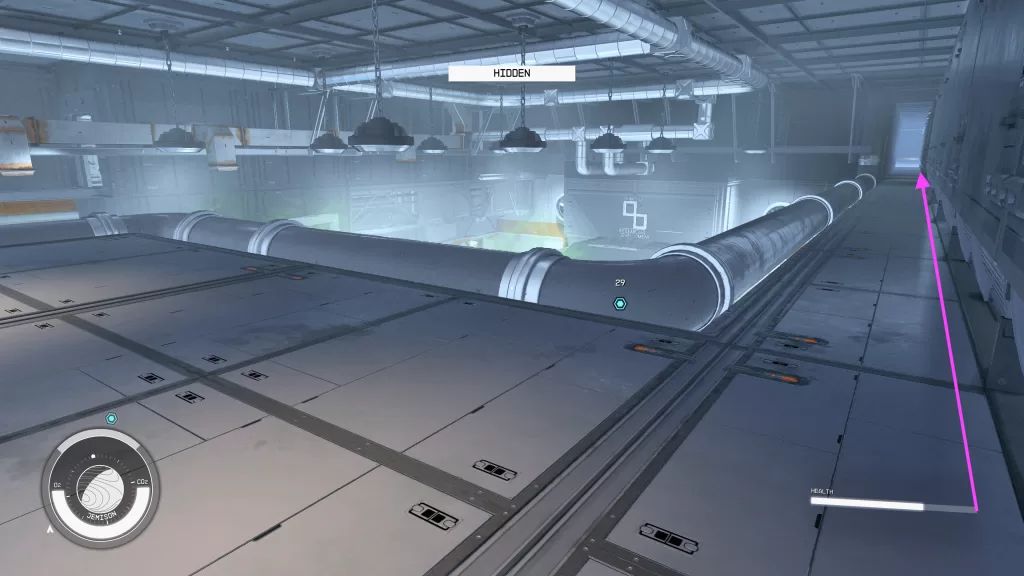
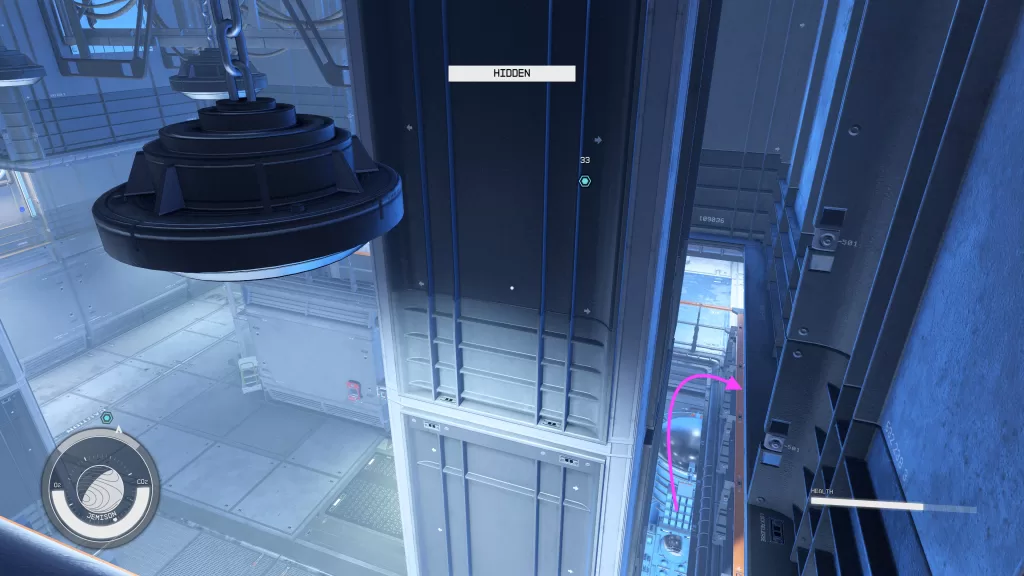
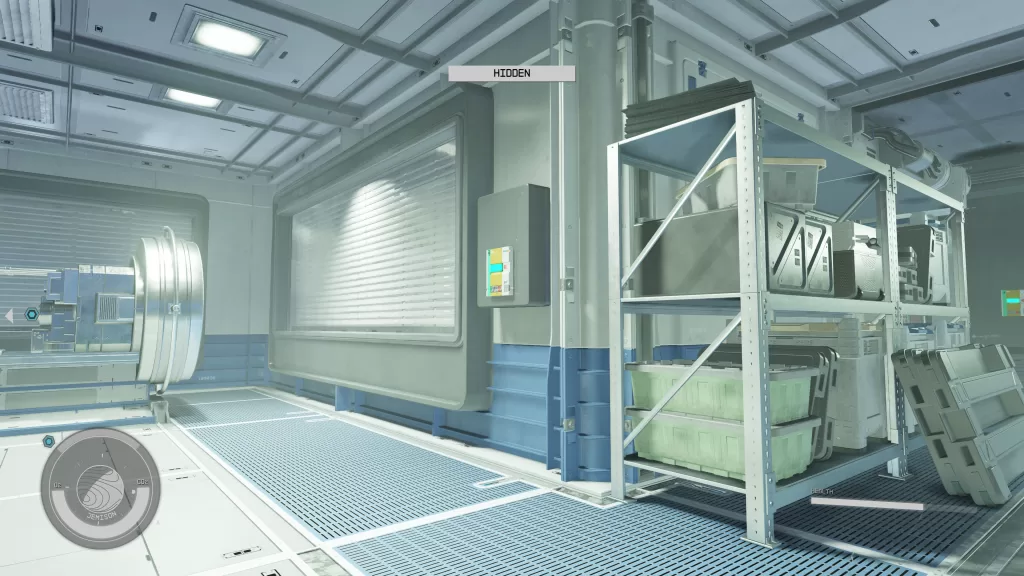
Climb on into the vent and descend. When you emerge from the vent, you’ll be on the rafters of a room. Sneak your way to a vent on the other side. Follow the path shown in the pictures below to reach this vent!
You’ll need to be careful when entering this vent as a guard can spot you! Once inside, you’ll find that you’re in an elevator shaft. Drop down to the bottom and enter the vent. Be mindful of the guard patrolling this corridor as you jump across to the pipes on the other side. You’ll have 2 tasks in this area to complete!
Run the Program on Faye’s Computer
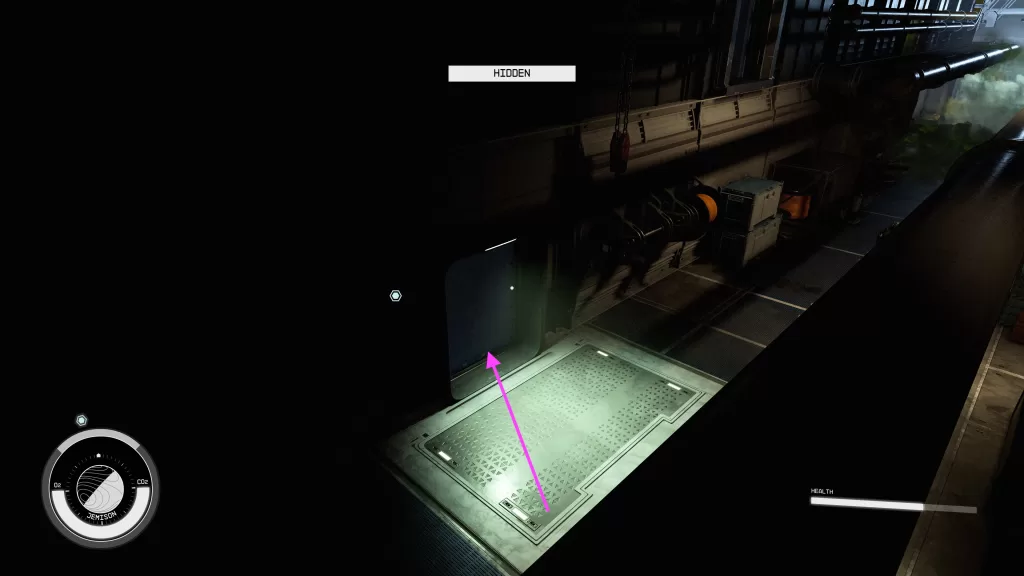
Jump back to the other side of pipes and follow them to reach a vent.
Head inside then exit via the hatch. Be careful in this room as there are guards in the windowed room in front of you. Take a right and head up the stairs to reach Faye’s office and interact with her computer. Select “Overseer Program” to run the program on Faye’s computer. Make sure to loot the R&D ID Card from her desk near the cooler!
Obtain the Neuroamp Prototype
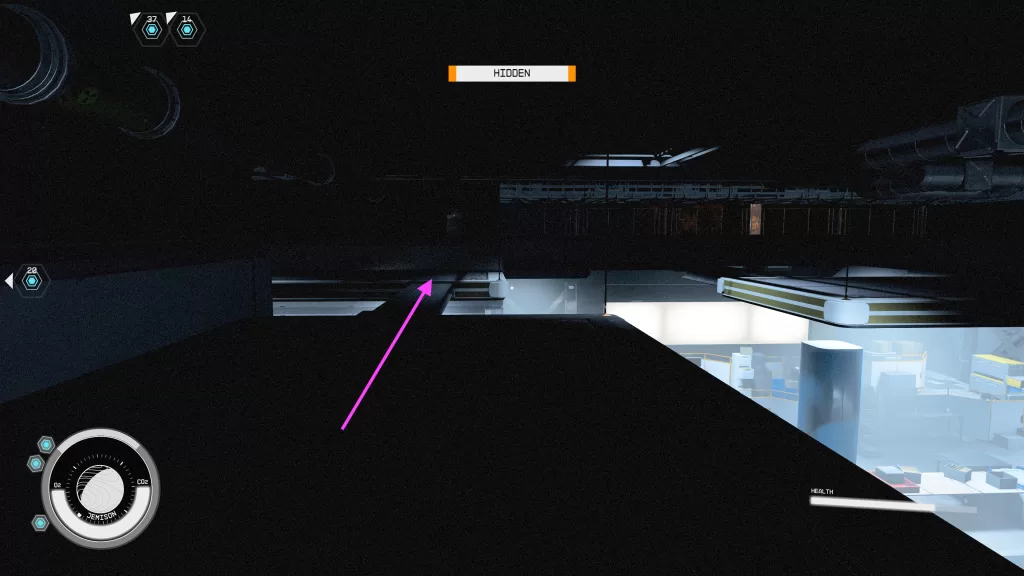
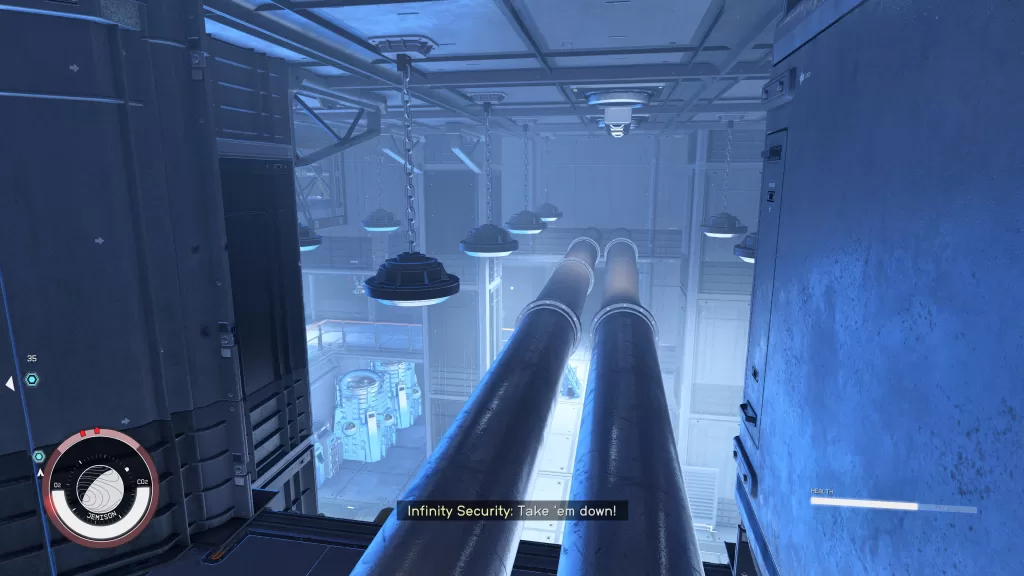
Exit Faye’s office and head down the stairs. Head straight and return to the vent in the bathroom. Follow it. When you reach the pipes, head forward then take a left. Continue straight ahead, jumping to the set of pipes in front of you. Quickly run to the corner as the turret will spot and shoot you. Wait in the corner until all the red goes away and you’re hidden again.
From this point, continue along the path. Hug the wall to remain undetected!
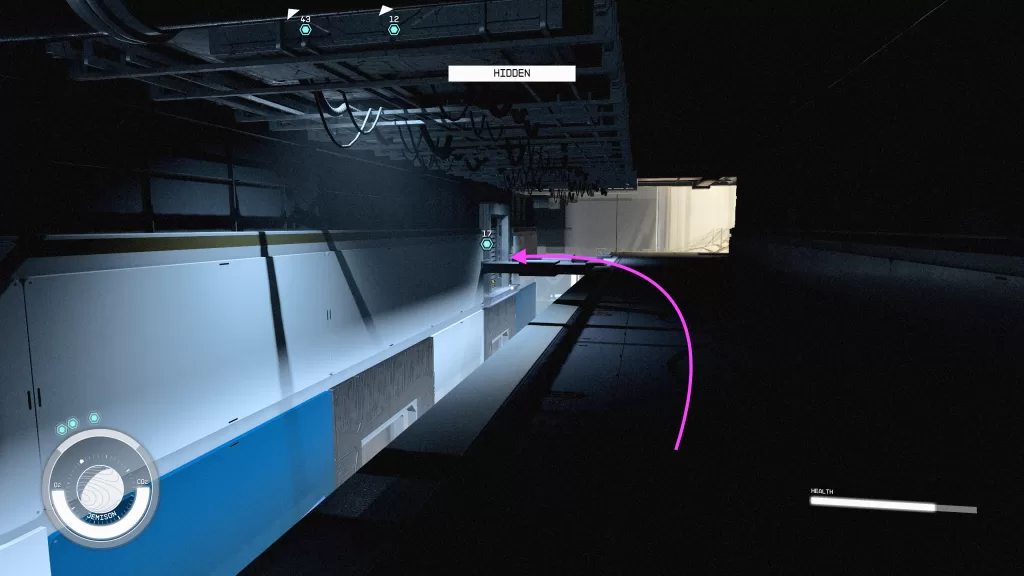
When you emerge from the part with the two walls you’ll be attacked again by a turret. Quickly sprint across the pipes and wait behind the tall column until your fully hidden again!
Drop down on the side of the pipes closest to that column to land on an upper walkway. Be mindful of the guard wondering around! You may need to use manipulation.
Follow the walkway to reach the room above the red Secure Access doors where the turret controls can be found on the computer. Once you deactivate the turret, head down the stairs and interact with the Emergency Alarm to the left of the Secure Access door to turn off that annoying sound! Afterwards, activate the ID Card Reader also to the left of the door to open it.
Head stealthy like into the next room as you can be seen in here! To the right of the prototype, you’ll find a switch on the wall that shuts the shutters… use it!
Afterwards, head to the left of the prototype to find the Security Access Controls under the caution sign. You’ll need to unlock this expert lock to deactivate the alarm rigged to the prototype.
Before you loot the prototype, explore the room to find some goodies, namely a golden science crate and the Cyber Runner’s Cipher 05!
When you’re ready, open the holding chamber then loot the Internal Neuroamp Prototype.
Deliver the evidence to David Barron
Unfortunately, you won’t be able to fast travel out of here! To get out, return to the vent in the bathroom. Backtrack to the spot where you first entered this area to find the elevator. Be mindful of the security guard then drop down and take the elevator to the Entrance where your freedom awaits!!
Travel to the SSNN Field Office in the Commercial District of New Atlantis at Jemison in the Alpha Centauri System. Once there, speak with David.
Report to Masako at Ryujin Tower
Travel to Ryujin Tower at Neon on Volii Alpha in the Volii System. Once there, speak with Masako on the Executive Offices floor. You’ll then need to listen to the broadcast with her. When it has finished, continue your conversation with Masako. Afterwards, the mission will finally complete!
Additional Starfield Guides and Walkthroughs
Be sure to check our main Starfield Guides and Walkthroughs page for additional content on Starfield, such as additional guides to assist you during your adventures in the Settled Systems!
Welcome to NGB and our Starfield guide on The Key Ingredient mission. This guide will walk you through starting the mission and detail the necessary steps for its completion. If you need help with a specific mission objective, check the quick links section to easily find the information needed.
PLEASE NOTE: Some planets referenced in our guides and walkthroughs may not match yours due to how Starfield was created. In these situations, what you do and the places you visit on those planets should remain the same.
The Key Ingredient is one of the faction missions for Ryujin Industries. You’ll automatically begin this mission after completing the Guilty Parties mission.
The Key Ingredient Walkthrough
Meet Masako in Veena Kalra’s Office
Hop in the elevator and take it to the Research and Development floor. Approach Masako then speak with her. You’ll find out that the plan is to get this tech implanted in your head. Unfortunately, you don’t have a choice in this matter.
Travel to Carinae III-a
Set off for Carinae III-a, a moon of Cariane III in the Carinae System. Once there, land at CM Station RC-1.
Enter the CM Station RC-1 Mine
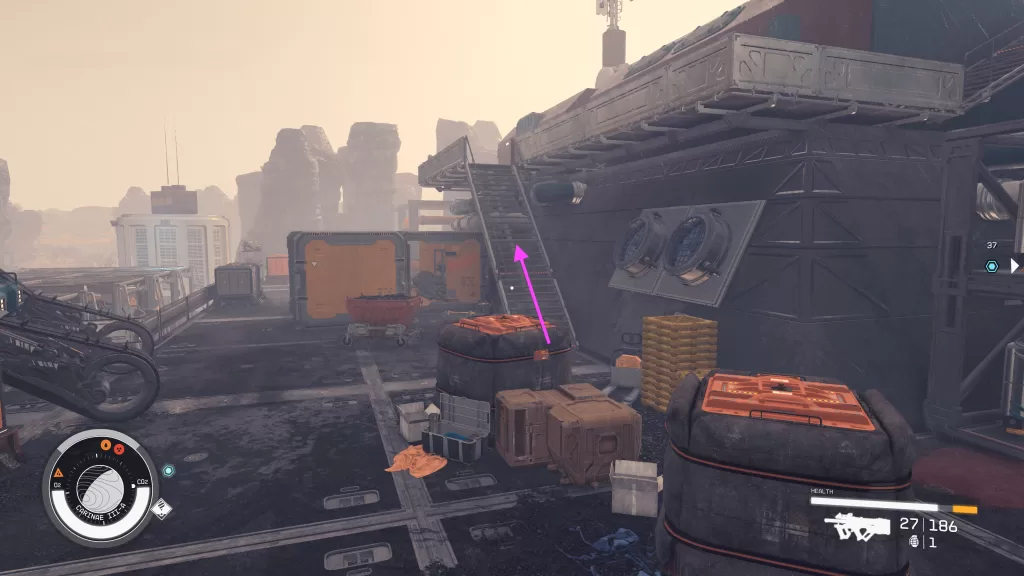
To enter the CM Station RC-1 Mine, you’ll need to head up the stairs on the west side of the giant structure then enter through the door at the top.
Once inside, work your way through the area to reach a set of stairs leading down. Take them to find the entrance to the mine.
Discover What Happened at CM Station RC-1
Just before exiting the first room, look to the right on a cart by the doorway to find the Mining Monthly Issue 02.
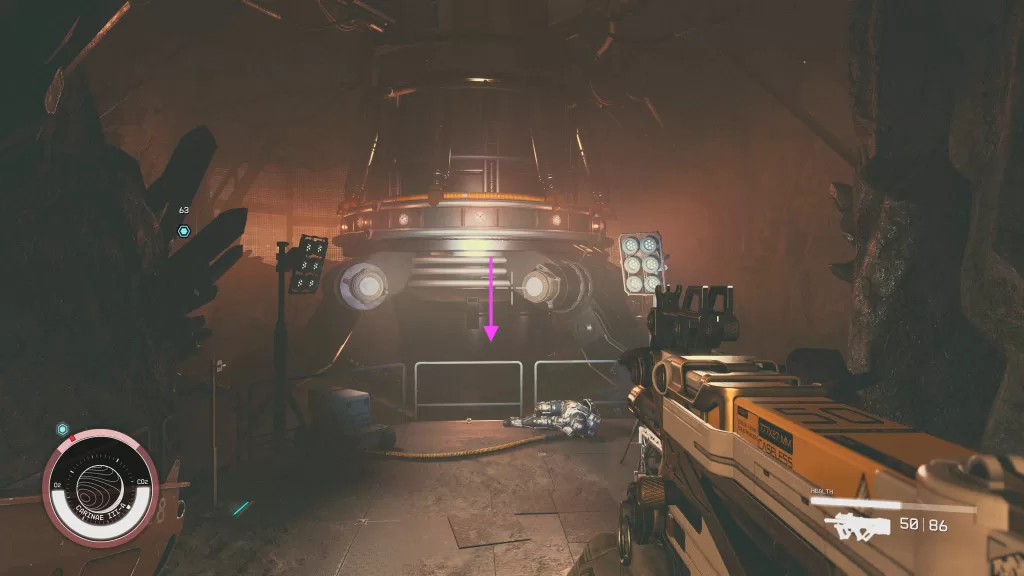
When you reach the large cavern with a drilling machine in the middle, make sure to drop down into the pit to loot some goodies!
We also had really rare ore here to mine! When you’re ready to keep exploring, take the linear walkway and defeat all the enemies you find along the way! At the end, press the switch!
Prepare yourself because when you go in the next room you’ll need to fight a group of enemies including a high level dude! Once you take down the high level enemy, loot his corpse to receive Contract Orders. Next, either read these orders then interact with the computer in this room to learn about what happened to the shipment and at CM Station RC-1.
Travel to the Clinic in the Narion System
Travel to the Clinic orbiting Deepala in the Narion System.
Discover What Infinity LTD is Doing at the Clinic
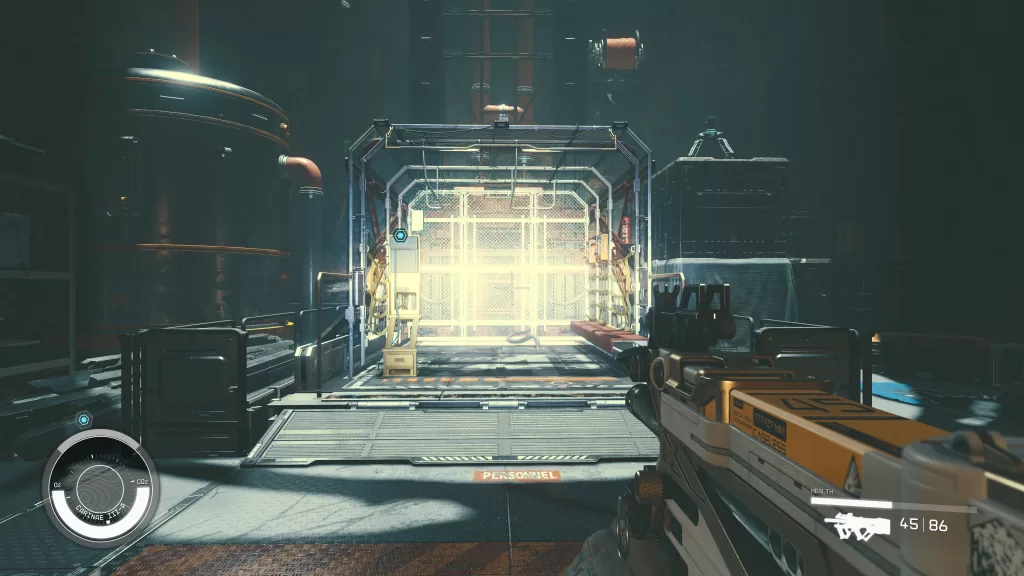
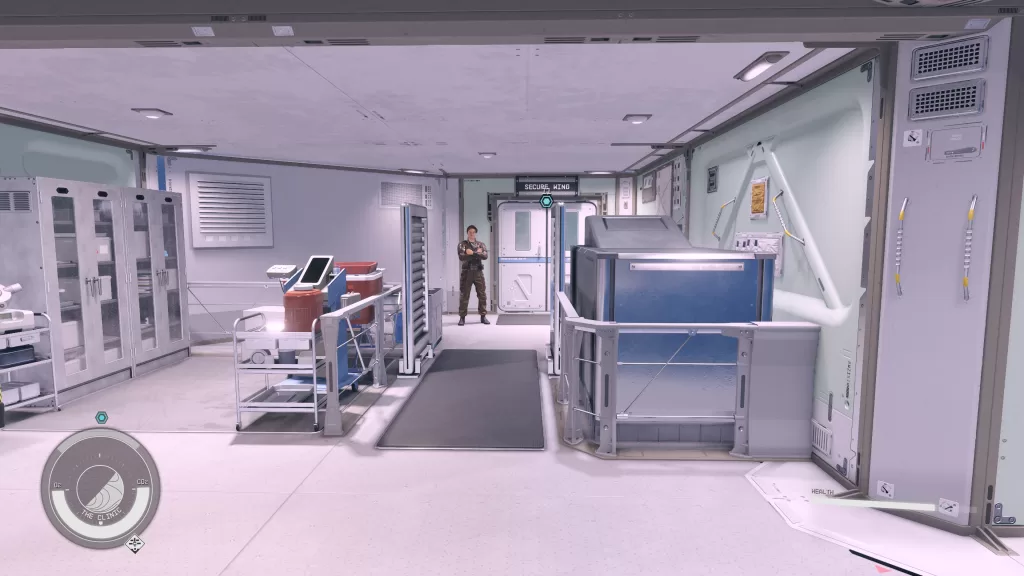
Once on board, head to the right of the reception desk to enter the Secure Wing.
As you approach the door, the guard will stop you. Use your persuasion skills to get through or if you have the Medicine skill, he’ll let you just walk right in. Enter the first room on the right to be stopped by Sean. Persuade him to tell you about what the Clinic has been doing on behalf of the Infinity LTD. When you switch over talking to Dr. Lane, you’ll have the opportunity to leave their names out of your report and can further extort them for 4000 credits to do so.
Retrieve the Rothicite Shipment
After speaking with the doctors, interact with the briefcase on the table across from Dr. Lane’s desk.
Return to Veena at Ryujin Tower
Head into Ryujin Tower and take the elevator up to the Research and Development floor. Speak with Veena in her office. Once the mission completes, you’ll receive 250 EXP and 4800 credits.
Additional Starfield Guides and Walkthroughs
Be sure to check our main Starfield Guides and Walkthroughs page for additional content on Starfield, such as additional guides to assist you during your adventures in the Settled Systems!
Welcome to our walkthrough for the Collect Biosuppressant for Dr. Darvish activity in Starfield! This guide will walk you through starting the mission and detail the necessary steps for its completion. If you need help with a specific mission objective, check the quick links section to easily find the information needed.
PLEASE NOTE: Some of the planets referenced in our guides and walkthroughs may not match yours due to how Starfield was created. In these situations, what you do and the places you visit on those planets should remain the same.
How to Start The Collect Biosuppressant for Dr. Darvish Activity
This activity can be started by speaking with Dr. Darvish at the Clinic orbiting Deepala in the Narion System.
Collect Biosuppressant for Dr. Darvish Walkthrough
Where to Find Biosuppressant
We found our Biosuppressant resources by looting random chests throughout the universe! You’ll need a total of 3 for this activity. Happy hunting!!
Rewards for turning in Biosuppressant
Once you’ve found 3 Biosuppressants, return to Dr. Darvish to hand them over. As a reward, you’ll receive 780 credits.
Additional Starfield Guides and Walkthroughs
Be sure to check our main Starfield Guides and Walkthroughs page for additional content on Starfield, such as additional guides to assist you during your adventures in the Settled Systems!
Welcome to NGB and our walkthrough for the Guilty Parties mission in Starfield! This guide will walk you through starting the mission and detail the necessary steps for its completion. If you need help with a specific mission objective, check the quick links section to easily find the information needed.
PLEASE NOTE: Some of the planets referenced in our guides and walkthroughs may not match yours due to how Starfield was created. In these situations, what you do and the places you visit on those planets should remain the same.
Guilty Parties is one of the faction missions for Ryujin Industries. You’ll automatically begin this mission after completing the Background Checks mission.
Guilty Parties Walkthrough
Talk to Imogene on the Operations Floor
Head down to the Operations Floor then approach Imogene’s office. Speak with Yuko Serrano to learn that Imogene’s not there.
(Optional) Speak with Dalton
Before setting out, report back to Dalton on the Executive Offices floor. He’ll want you to alert Benjamin Bayu to the situation first as he owns Seokguh Syndicate to keep their business relationship intact.
(Optional) Talk to Benjamin Bayu
Head for the Astral Lounge. Once inside, take the elevator up to the VIP Balcony. Exit the elevator then head left and follow the hallway all the way around to the dead end. Benjamin can be found in Booth 4. Talk to him. He’s willing to cooperate for a price. You can either persuade him or do a favor for him.
Find Imogene in the Seokguh Syndicate Hideout
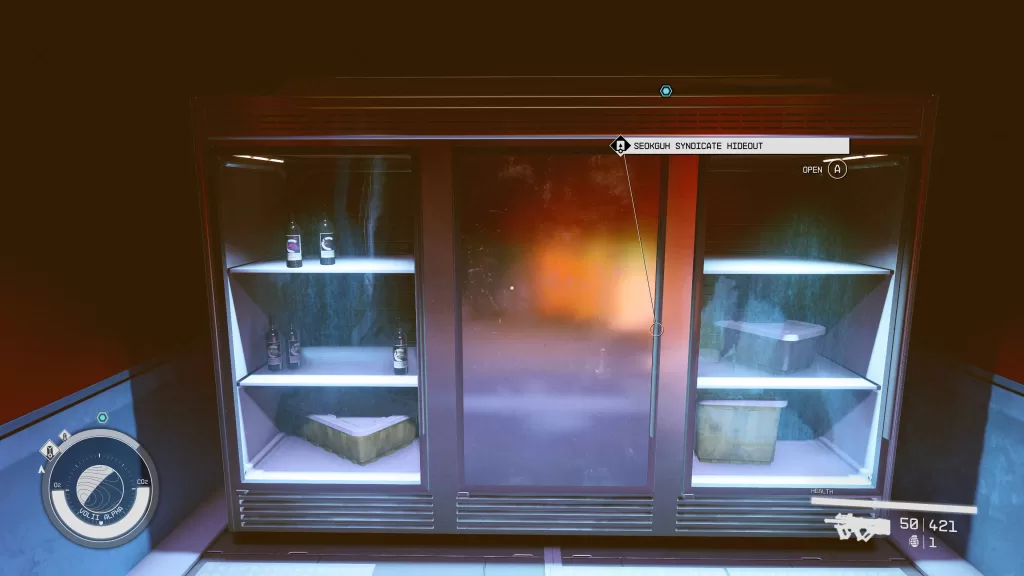
Make your way to Frankie’s Grab & Go by taking the transition to EBBSIDE located to the left of Mining League. Once in Frankie’s Grab & Go, speak with Franchesca Moore behind the counter. She’ll warn you to avoid the third floor. Enter through the door to the left to find a small room with a cooler. Interact with the crack on the right side of the middle section to find the entrance to Seokguh Syndicate Hideout!
Once in the hideout, head straight and continue to the very back of the room where you’ll find a set of stairs leading up. Take them then head through the brown doors to reach the Syndicate Backroom. Speak with Imogene there. After you hear her out, you’ll be able to decide her fate.
Give Dalton New Evidence
She’ll thank you and will stay in hiding until the coast is clear.
Bring her in
She’ll refuse to come with you. After exhausting all her options, you’ll still only bring the slate back to Dalton.
Attack
She’s Level 22. Take her out then loot her body to get the info on Ularu. Despite the bloodbath that occurred in this room, the Syndicate will not attack you when you leave. When you report back to Dalton, he’ll be mad that you killed an innocent person, but you’ll still receive the same rewards as all the other alternatives.
(Optional) Talk to Yuko
Yuko will be waiting by the elevator to get the latest scoop. You can ask her what the information is worth to her but she won’t give you any credits.
It’s none of her business
She says fine, enjoy your time with Dalton and that it will trickle back to her anyway.
Imogene claims Ularu is setting her up as a mole
She’ll be surprised by the information and suggests to bring this information straight to Dalton and skip confronting Ularu.
Tell her to ask Dalton for your report.
You’ll get the same response as the first option above.
(Optional) Confront Ularu on the Executive Offices Floor
When you confront her, she’ll ask you to wait then proceed to shut the door and engage the locks using her computer. During the conversation you’ll be given a choice: to side with her or Masako.
Side with Ularu
If you side with Ularu, you’ll have the option to hand the slate over for her to destroy. Since you showed her loyalty, she says that she’ll contact you later with more details about the plan. Afterwards, you’ll need to speak with Dalton and lie to him.
Side with Masako
You can tell Ularu she won’t get away with this or just attack her.
If you tell her she won’t get away with it, head down to talk to Dalton. You’ll be able to “[Give Slate] This can prove Imogene’s innocent. And Ularu herself confessed.” He’ll believe you! As a reward, you’ll receive 250 EXP and 4800 credits.
If you attack her, loot the keycard off her corpse to leave the room. Upon leaving, Maeve will approach you asking about Ularu. She’ll then tell you that Dalton’s pissed and wants to speak with you immediately. Head on down and speak with Dalton. He’ll scold you for not bringing the news to him first and complain that there is now a lot of clean up to do. As a reward you’ll receive 250 XP and 4800 credits.
Return to Dalton at Ryujin Tower on the Executive Offices Floor
If you chose to ignore the optional objective to confront Ularu, make a beeline to Dalton. Give him the slate and you’ll receive 250 XP and 4800 credits.
Additional Starfield Guides and Walkthroughs
Be sure to check our main Starfield Guides and Walkthroughs page for additional content on Starfield, such as additional guides to assist you during your adventures in the Settled Systems!
Search
This site uses cookies. By continuing to use this website, you are giving consent to cookies being used. For more information on cookies, view our Privacy Policy.OkPrivacy Policy