Below is our walkthrough for Chapter 4 of The Gunk! Objects that you can scan for the encyclopedia are in the pinky purple font color! Remember that if you scan all the available items in The Gunk, you’ll earn the Space Archeologists achievement! Please also pick up all the materials that you find as you explore the area. You’ll need these materials to unlock upgrades for Pumpkin (your hand device). If you obtain all the upgrades, you’ll receive the All In achievement!
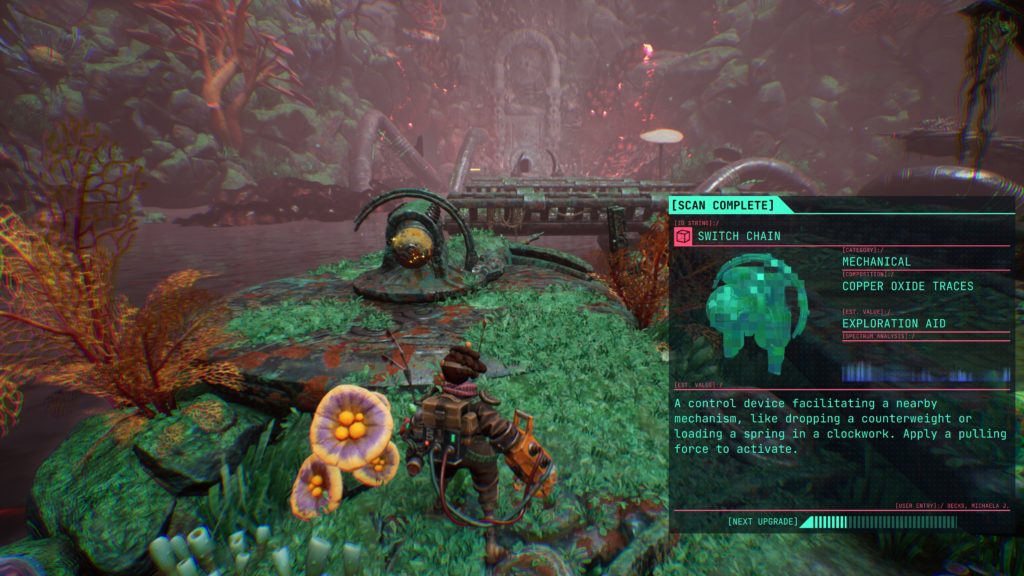
At the start of Chapter 4, scan the Switch Chain, which will be directly in front of you just before the lake.
Use your device to pull the chain. This will cause the first bridge to snap into place. For this large area, we are going to start on the right side. Take the right path and jump across the rocks in the lake to reach the Mulligan Melon. Grab it and throw it across the way to clear the rubble.

Return across the rocks and take the yellow ledge up to continue forward through the newly cleared path. You’ll spot a yellow dot to shoot with the plasma pulse. Scan it to unlock the Photosensitive Trigger.

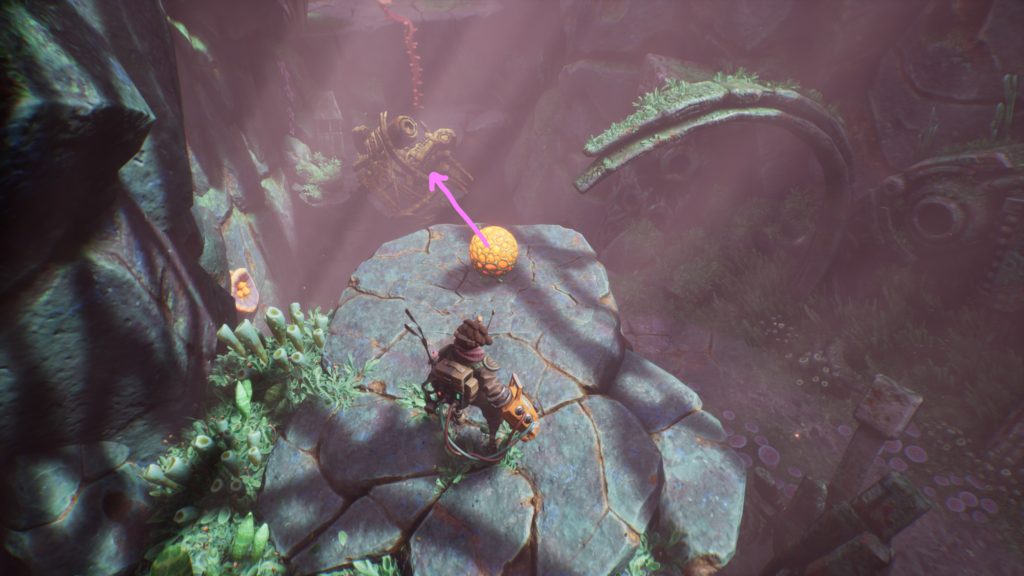
Shoot the trigger to open the door then continue forward. When you reach the Mulligan Melon, grab it and throw it at the 2 clusters of gunk to cause the tongue plants to unfold.

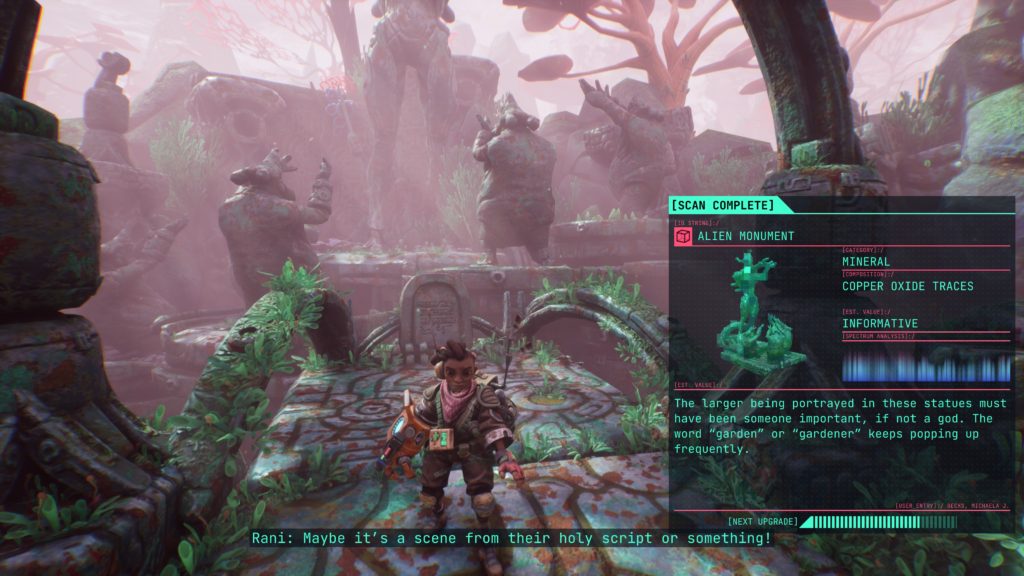
Make your way across the bridges then shoot down the melon when prompted to destroy the rubble blocking the way forward. Crouch under the rock. In this next area, scan the tablet in front of the statues to the right side to receive the Alien Monument entry.
Continue forward. When you reach the open area with a long way down you’ll spot a tongue plant curled up. To uncurl it, shoot both Mulligan Melons.
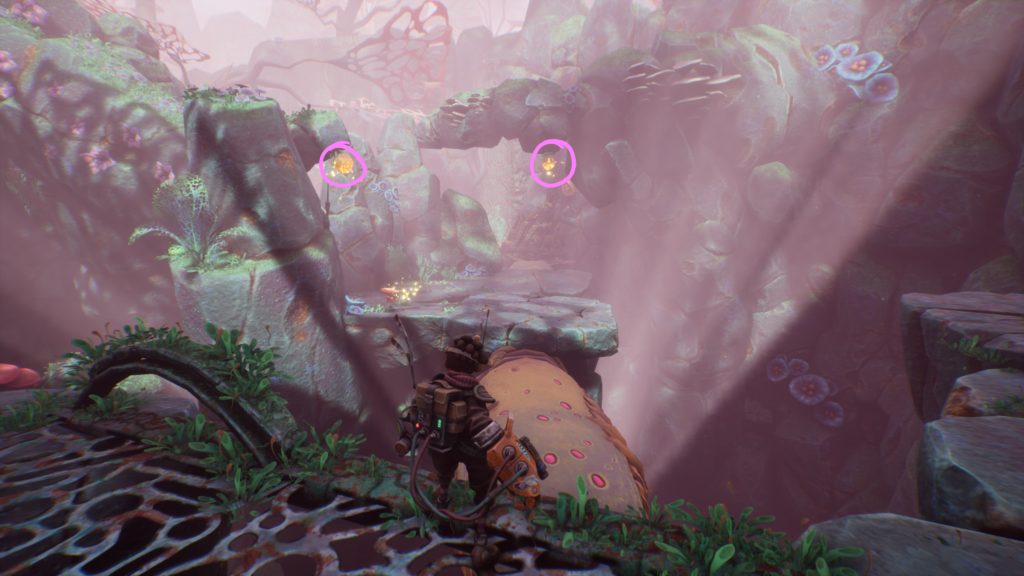
After the gunk has been cleared, proceed forward across the first tongue. On the middle platform, you’ll notice some Rhiza Twine. On the other side of the twine, look down into the chasm for rubble blocking a cave. Shoot down a melon then throw it at the rubble to destroy it. Climb on down the twine and enter the newly opened cave. Head inside to claim the cache of materials! Return up top and shoot down another melon. Throw it across the second tongue to clear the rubble there. Proceed forward. In the Polluted Lake, clear out the gunk then active the Chain Switch near the water. Next, shoot down the nearby Mycelium Coil and drop it onto the Energy Fissure to continue along the path. Use the Rhiza Twine as a shortcut to reach the starting area!
Now it’s time for the other side! Make your way back to the first Chain Switch and climb up the Rhiza Twine. Ignore the twine to your left that leads down and follow the path straight ahead to reach another twine. Take this one down to loot the material in the cave. Return to the other Rhiza Twine and follow it down. Climb up the ledges to the left to reach a melon. Grab it then throw it across the way to remove the blockage on the twine. Make your way over there then follow the path to reach a trigger. Shoot it to open the door then proceed forward. Eventually, you’ll reach an area where rubble blocks the way forward so look for a path on the left side.
Remove the gunk to reveal a melon which you’ll need to throw at the rubble across the way.
Jump down and proceed across the newly accessible path. Use the hanging melon to clear the rubble to continue forward. There will be a total of three rubbles to clear in this area. The one near the path you came from contains collectible materials and the other two are the way forward! After you proceed forward, make sure to scan the tablet in front of the statue in the next area to receive the Alien Monument entry!

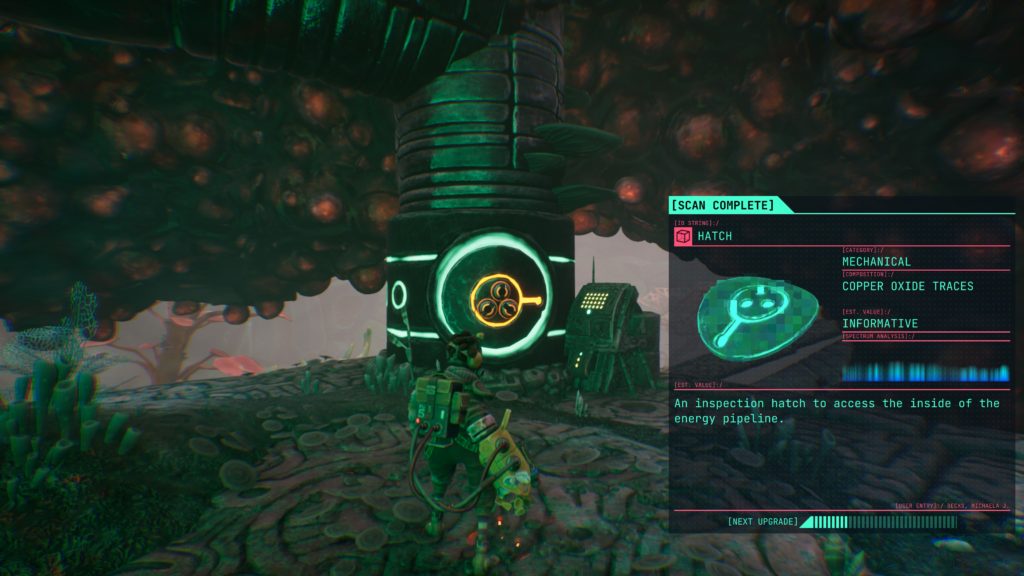
Collect the coil on the left side then bring it to the Energy Fissure on the opposite side to create a mushroom. Climb up it to proceed forward. Clear the gunk then pull the last switch. Turn around and crouch through the opening. On the other side, you’ll find a twine. Climb down the shortcut then make your way back to the starting area. Trek across the long bridge then place a beacon in the area indicated on the left side. Return to the Campsite to make some upgrades if you wish then proceed through the dark tunnel next to the beacon whenever you’re ready to continue. Follow the path forward to reach Gunk Tower. Unlike previous areas, only clear the gunk needed to proceed forward up the tower. It’s impossible to clear it all up now. The only exception to this is when you see small “hostile” gunk floating around. Clear up the gunk here to create a green space where there are some collectible materials. Eventually, you’ll reach a Hatch and Ancient Control Panel to scan. They are right next to each other!
Use your device to pull the 3 bolts out of the hatch causing it to open. All the gunk will be blasted away along with Chapter 4!
Click here for the next walkthrough on Chapter 5 of The Gunk!