Obtained: Interact with the poster in Tallyway Station
Speak with Oletta
Speak with her near the train station.
Take Pants
Grab the Titus’s Pants from Oletta.
Get Prime Devil Meat
Head up the nearby ladder and run across the roof to reach a cavern containing a bunch of devils. Defeat them to get 4 electric prime devil meat and 4 radioactive prime devil meat.
Lure Bella out with Prime Devil Meat
Use either the electric meat or the radioactive meat to draw Bella out.
Place Titus’ Pants
Place the pants in front of her on the ground.
Protect Bella
Defeat the Beliks that spawn once Bella is done sniffing the pants.
Follow Bella
After defeating the enemies, follow after Bella. You’ll need to protect her from Beliks that spawn along the way.
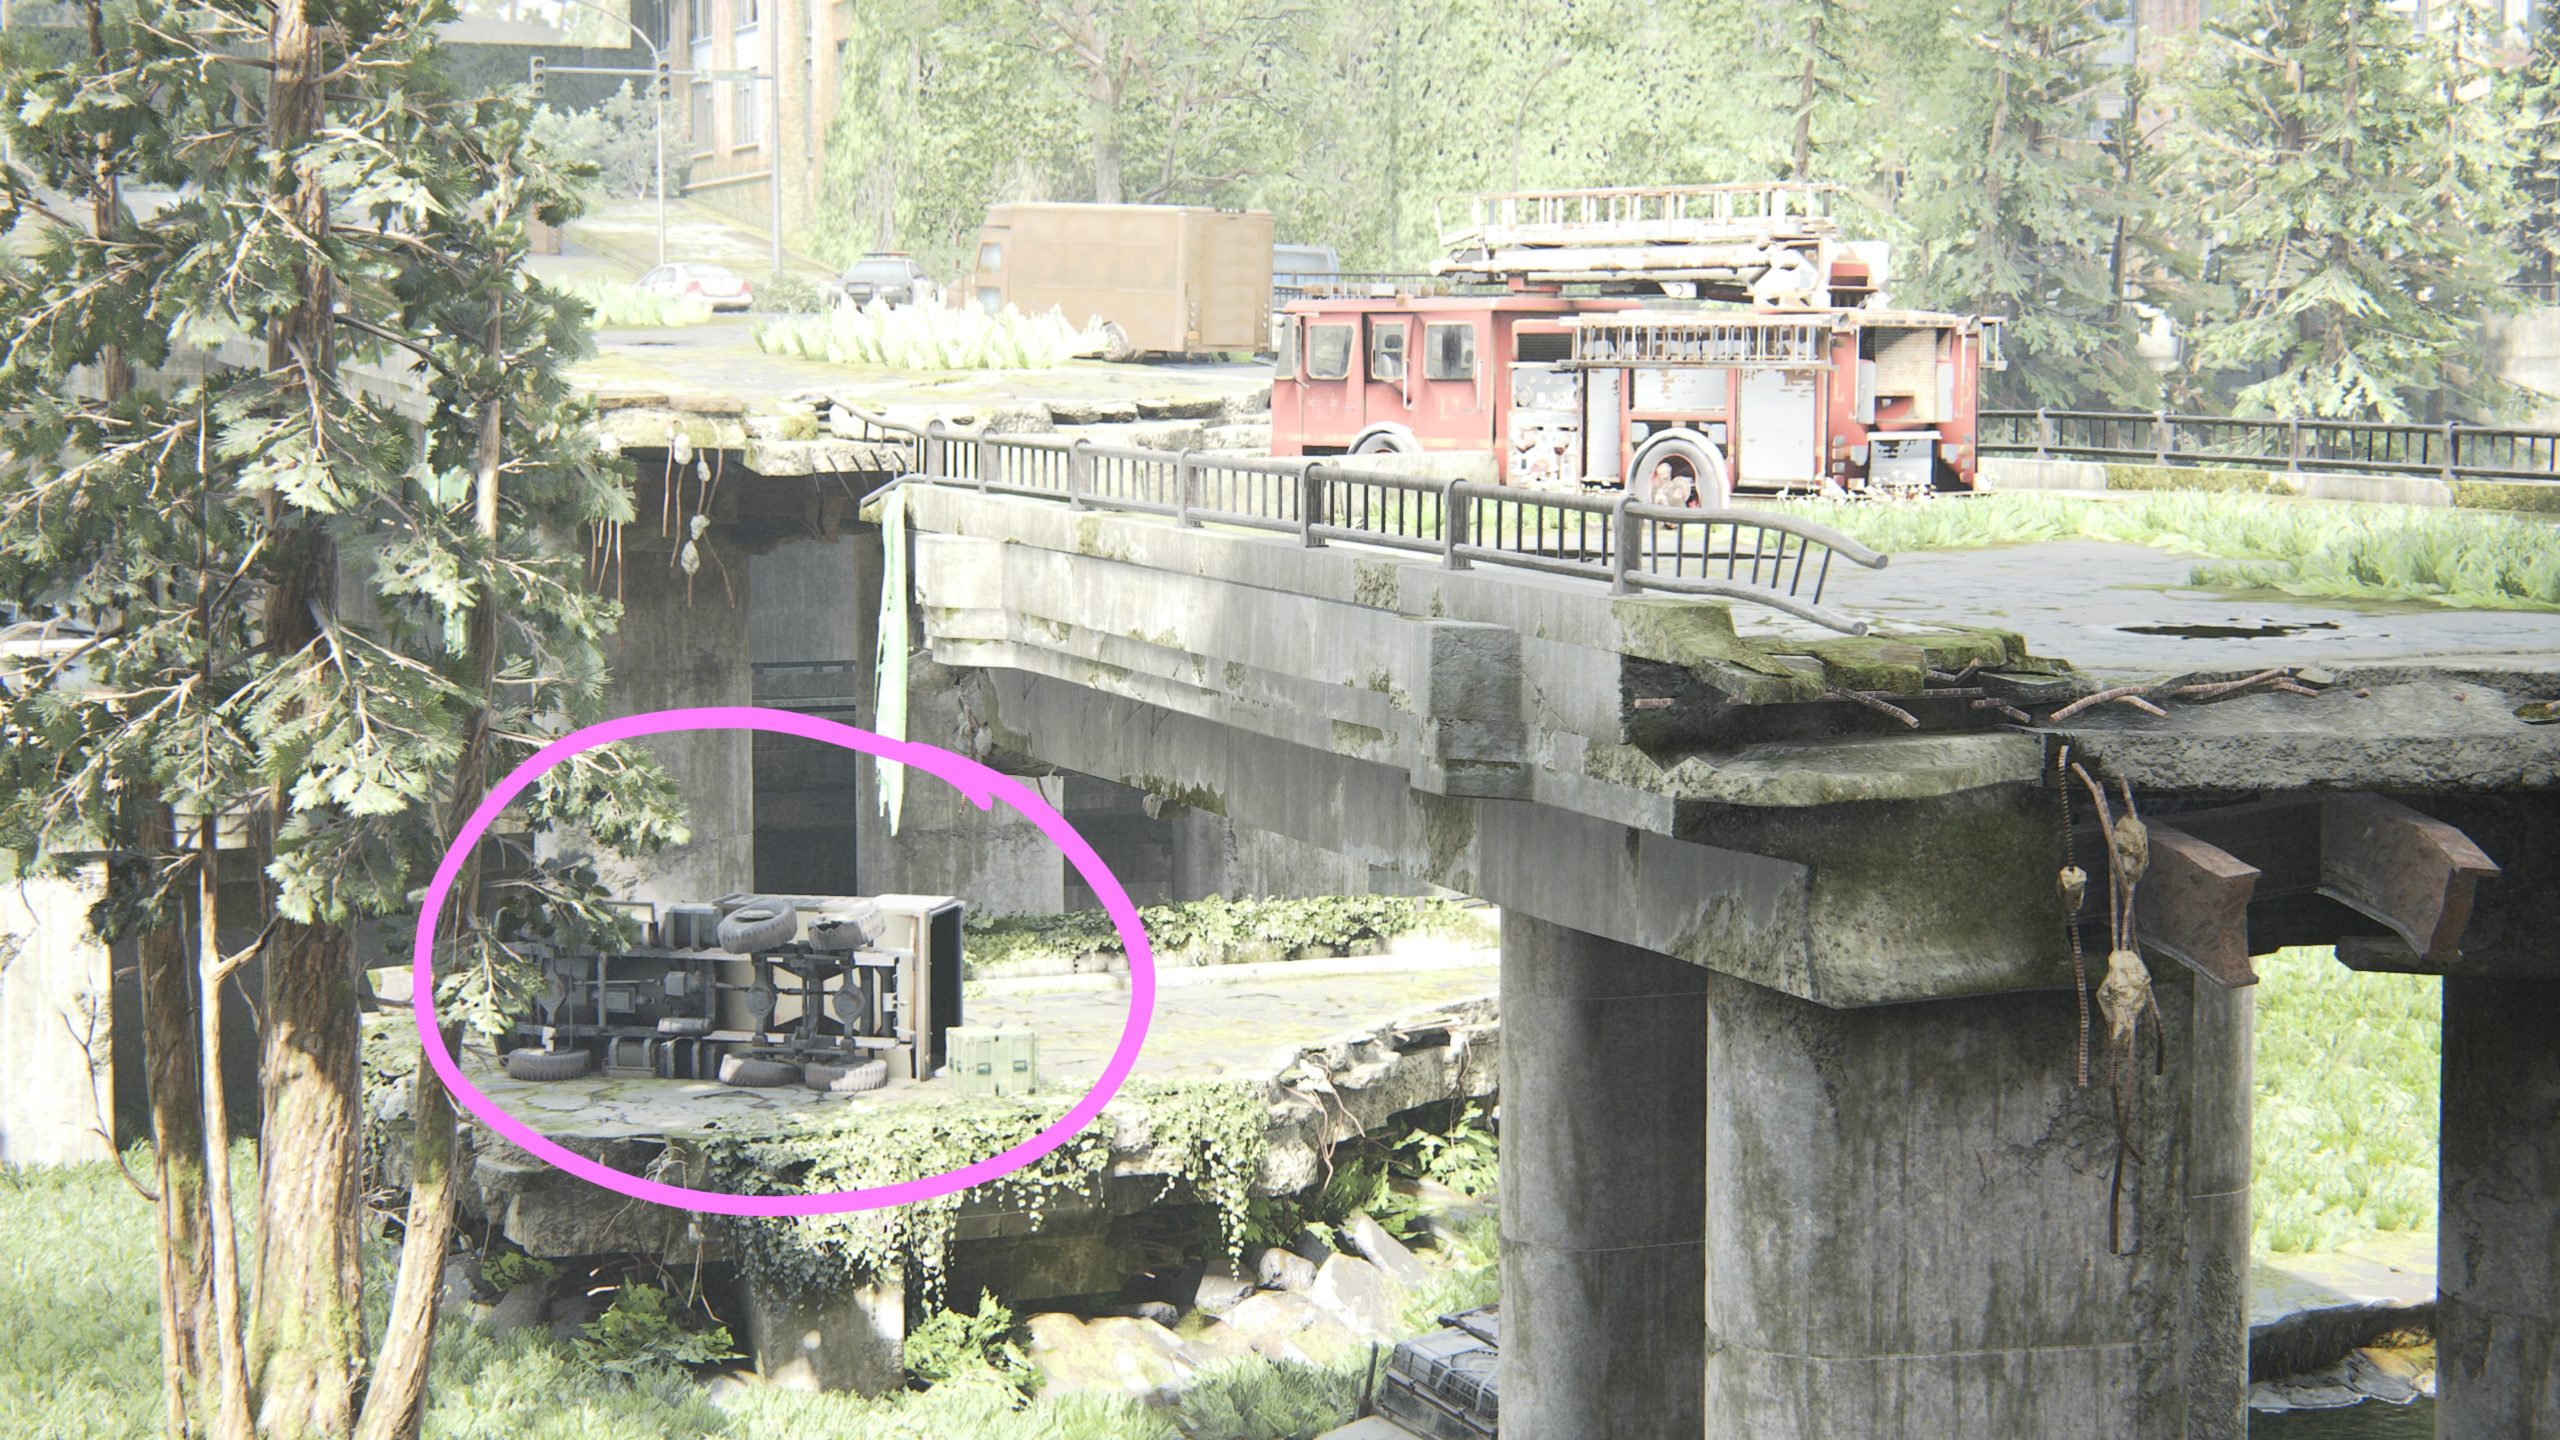
This manual can be found in the back of a truck between 6th and 7th Avenue underneath the highway. You can reach it by using the rope attached to the fire truck. Repel down then swing onto the platform to reach the truck.
Stealth Training Manual
We found this manual on the second floor on a table in the first bedroom closest to the stairs.
Hillcrest
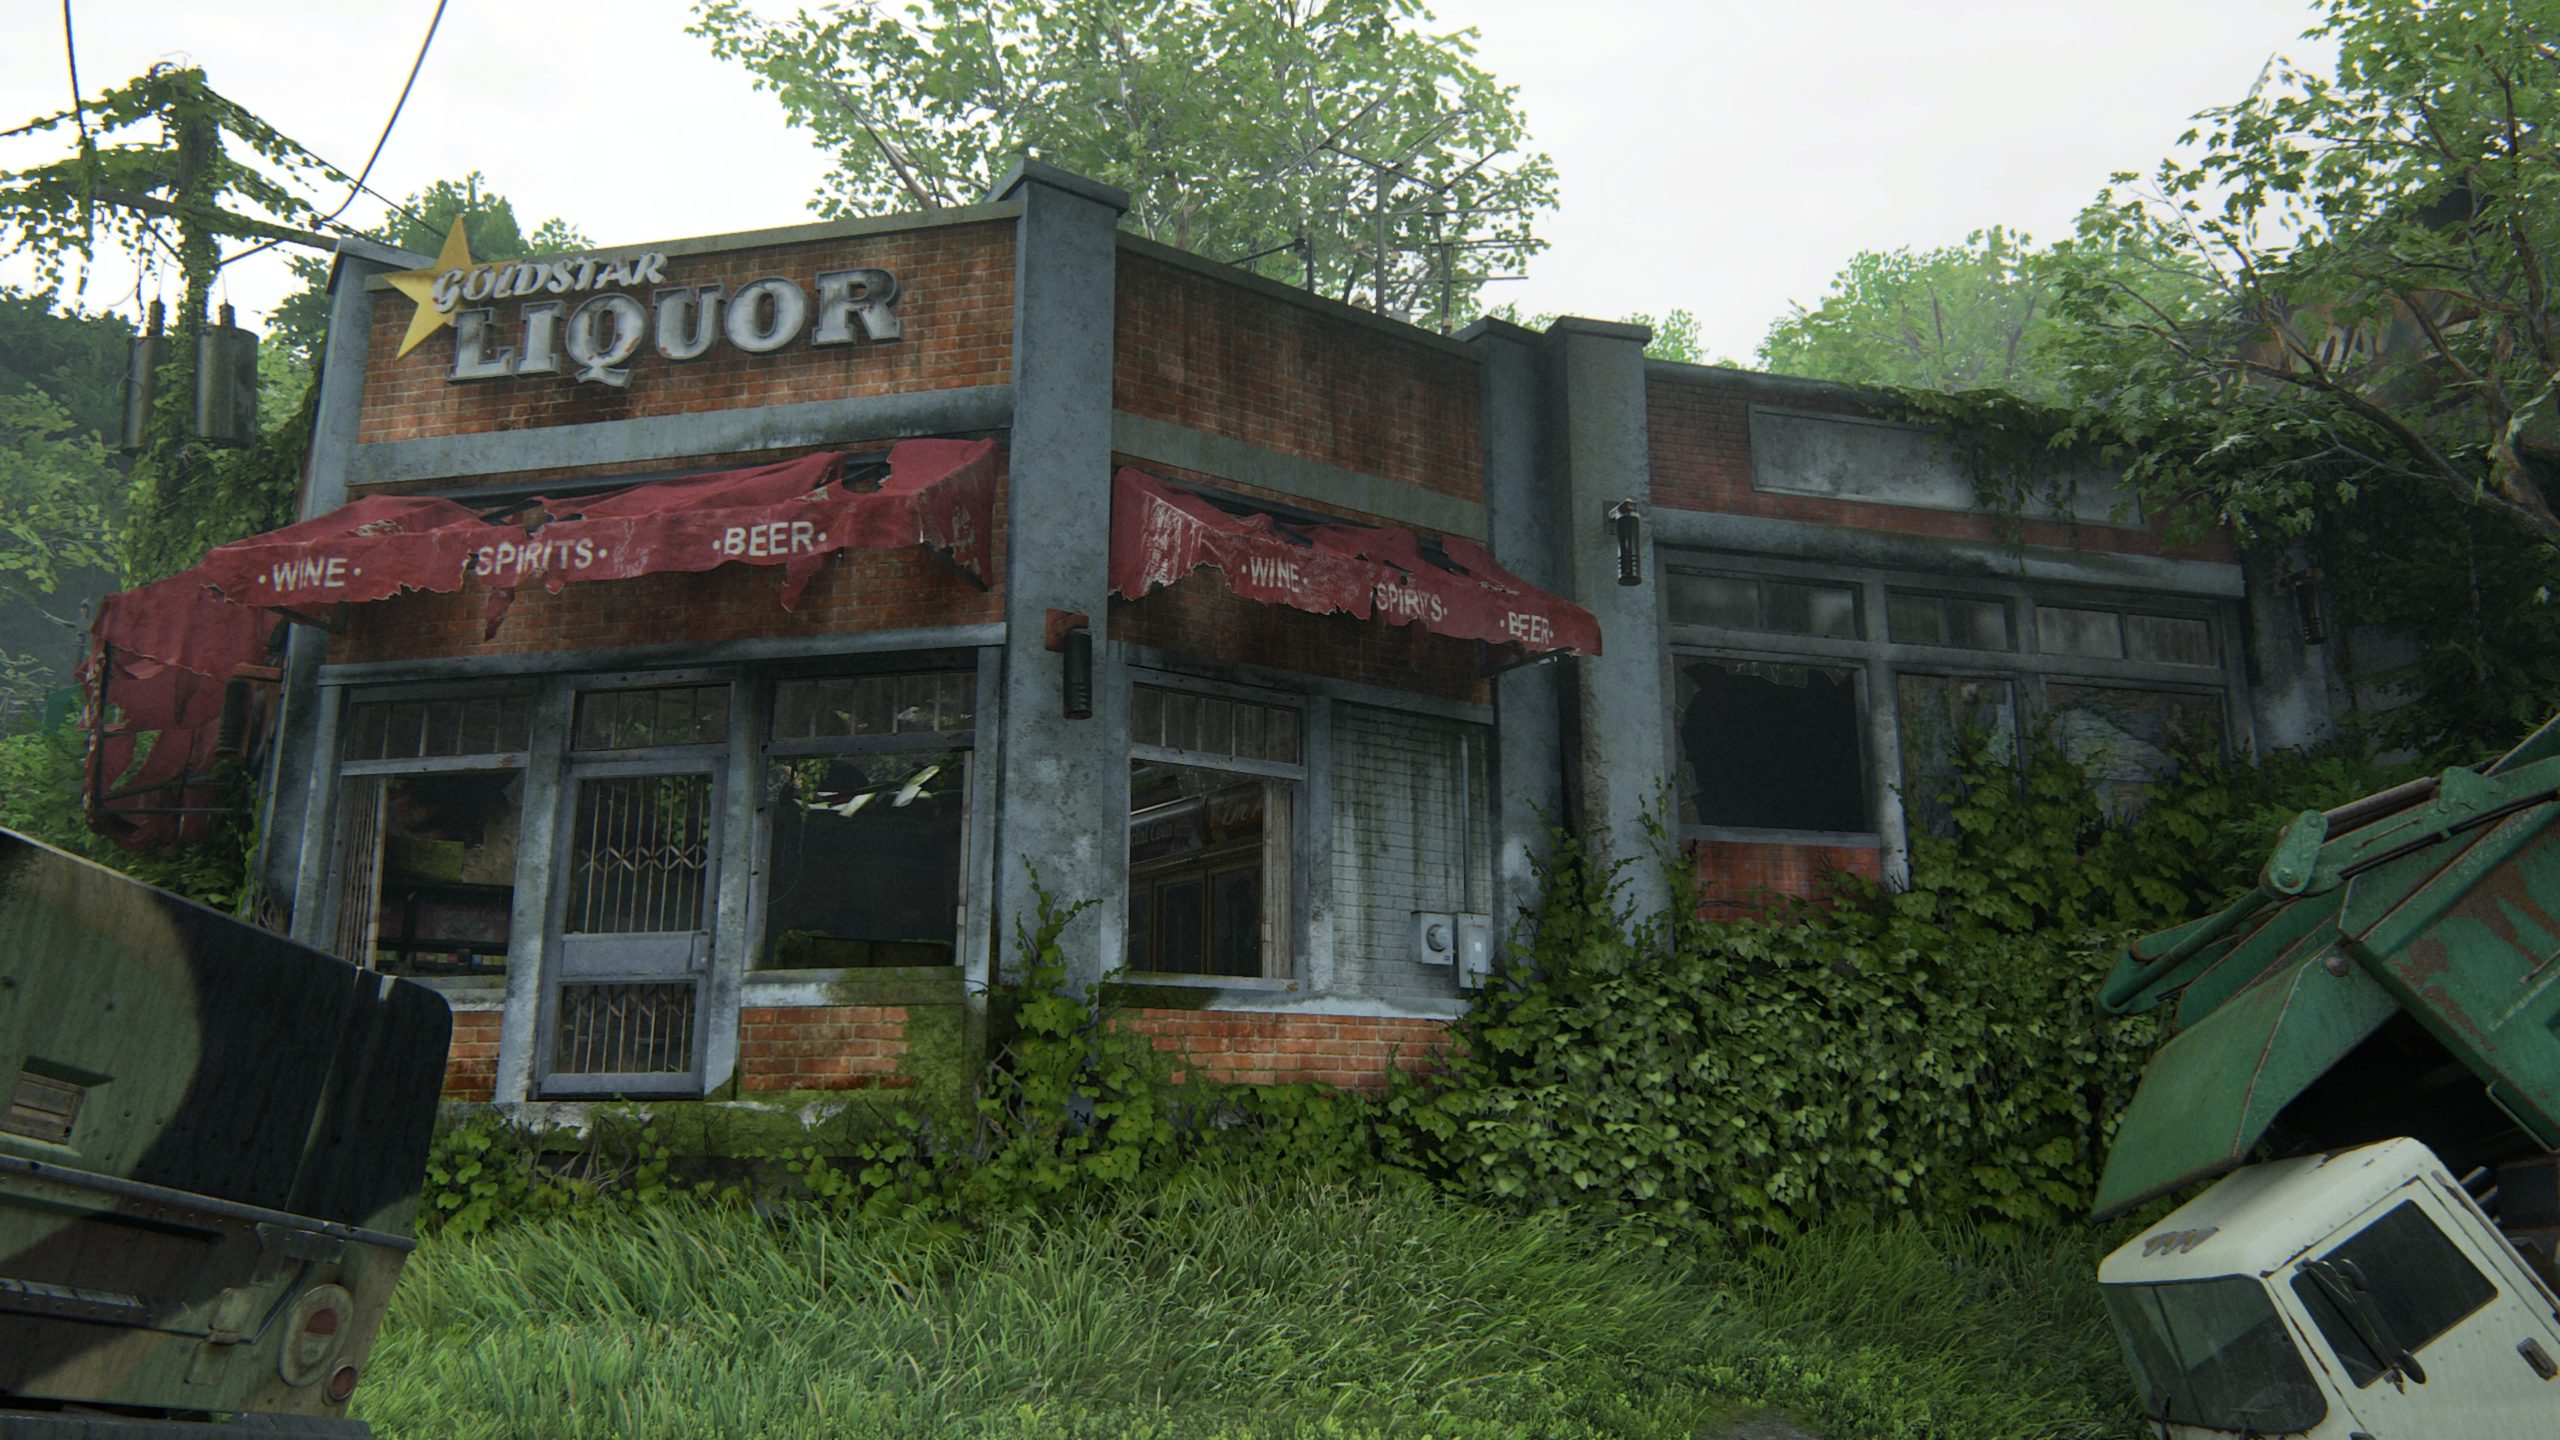
Precision Training Manual
Enter Goldstar Liquor then proceed to the basement. Work your way past 2 Shamblers then crawl under a broken section in the wall. You will emerge in a room with a broken staircase. Head up the staircase to find the manual on the floor in the children’s room.
The Seraphites
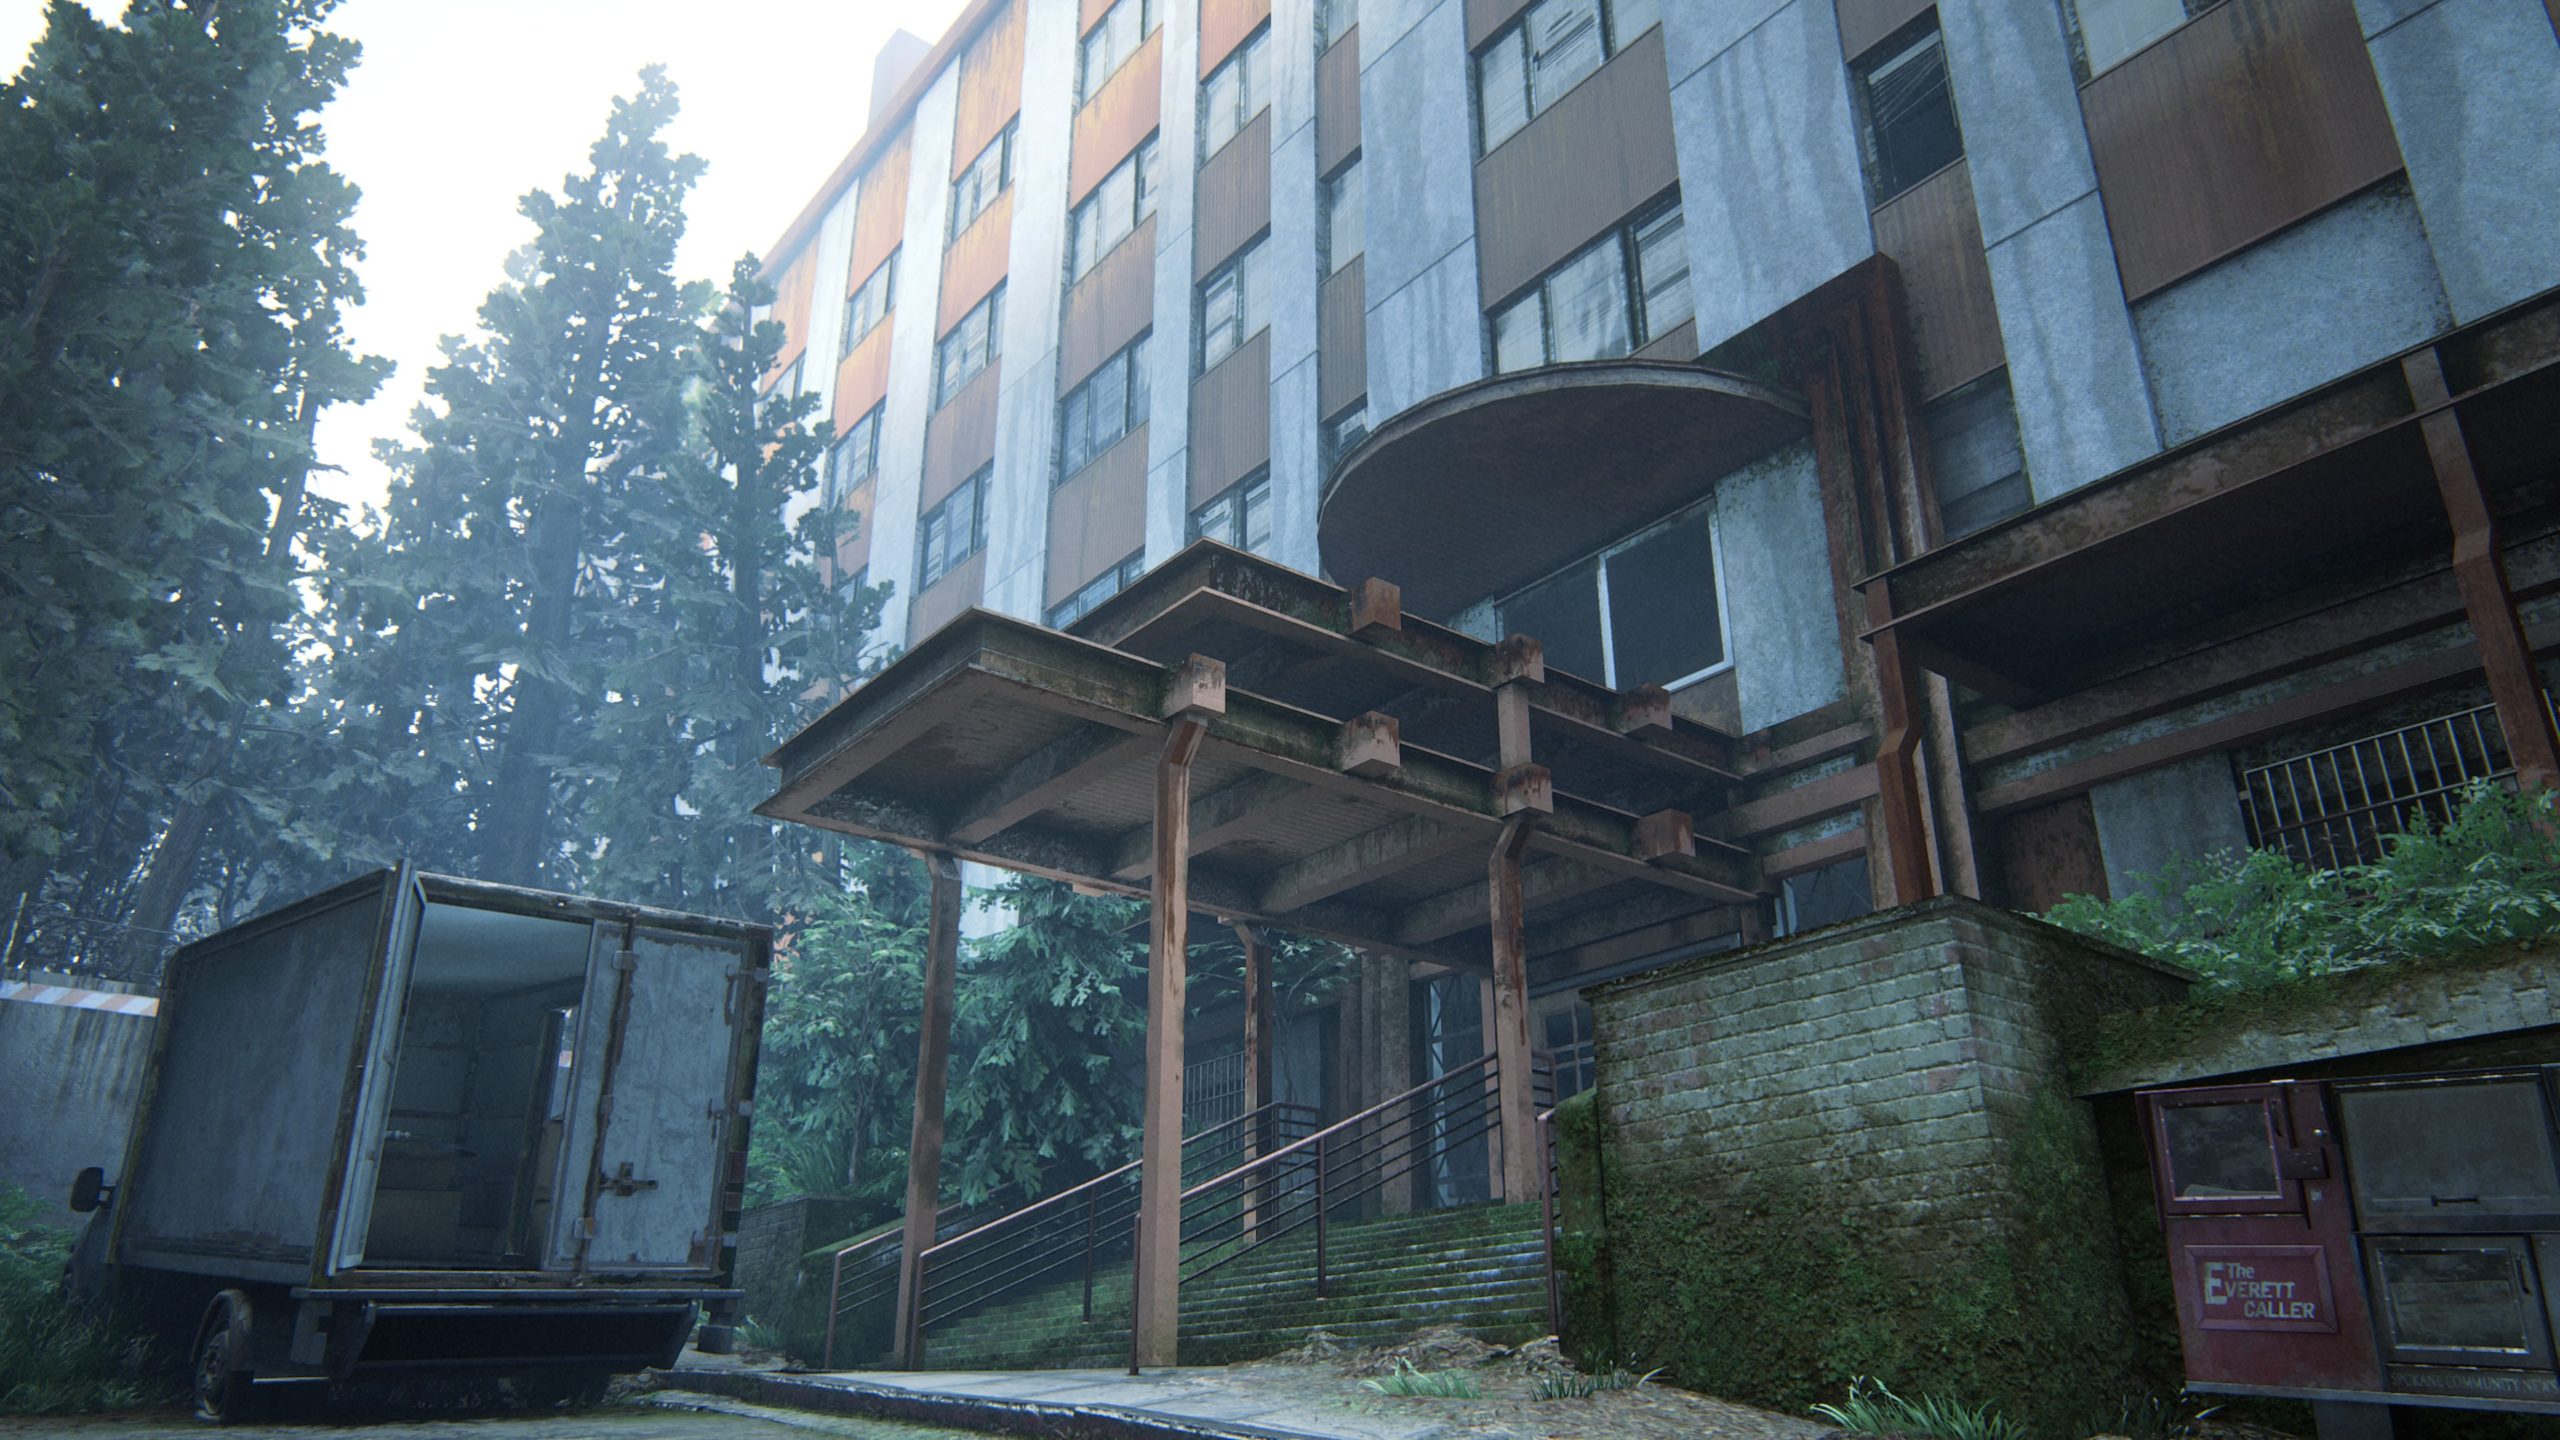
Explosives Training Manual
This manual can be found in the bedroom of the tall apartment building that is white and orange-ish. When you reach the building, climb up the delivery truck in front of it to reach the top of an overhang. Climb in through the window then take the leftmost door. The artifact will be in the bedroom on the bed.
On Foot
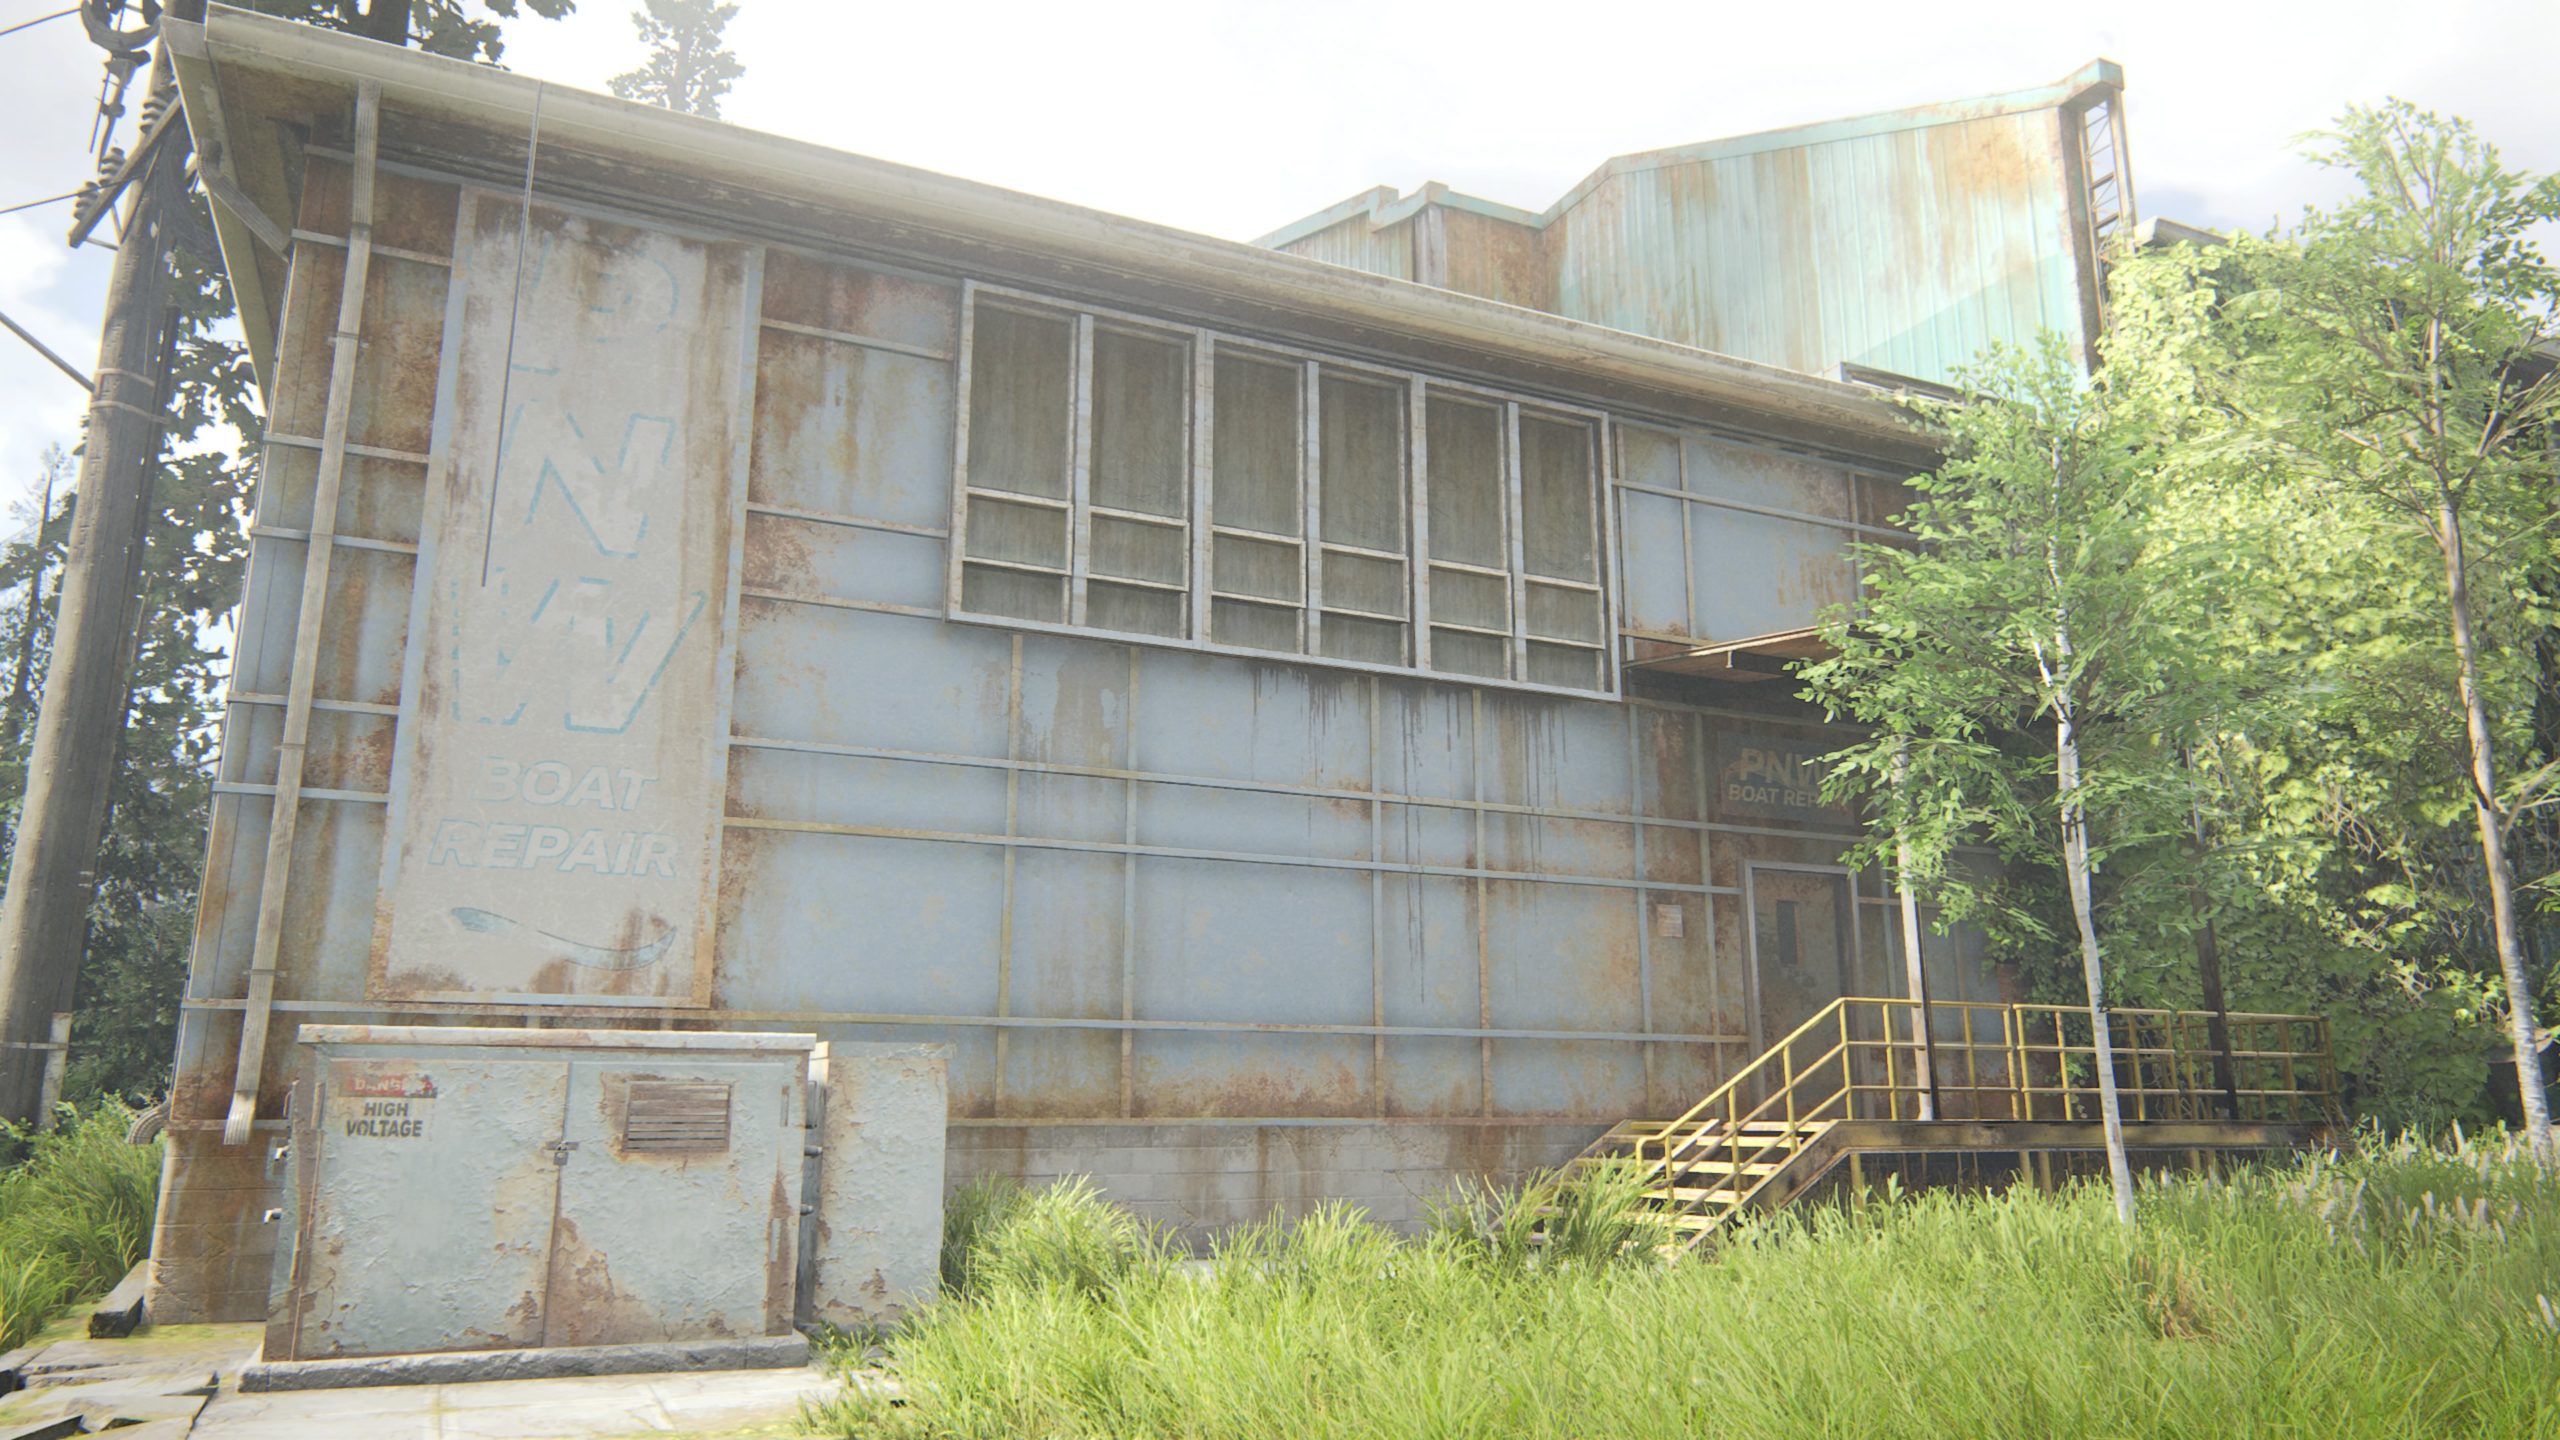
Stealth Training Manual
This manual can be found inside the boat hanging from the ceiling of the Boat Repair Shop.
Hostile Territory
Unstoppable Training Manual
This item can be found in the building across from Tang Fabrics & Imports. There will be a broken window in this building that you can climb through. The item is in the kitchen.
The Forest
Weapons Training Manual
This manual can be found in La Rosa’s Auto Body Shop in the office.
The Coast
Crafting Training Manual
This manual can be found in a safe. The safe can be found in the helm of the ship, which is at the very top of the ship. The safe code is 90-77-01, which can be obtained from reading the Mutiny Note artifact.
Below is a guide on all the workbenches in The Last of Us Part II!
Patrol
Library
After starting up the generator in the library, the workbench will be illuminated as part of the story. Head on over and interact with it.
Downtown
Corner of Marion Street and 4th Avenue
This workbench can be found at a military checkpoint on the corner of Marion Street and 4th Avenue.
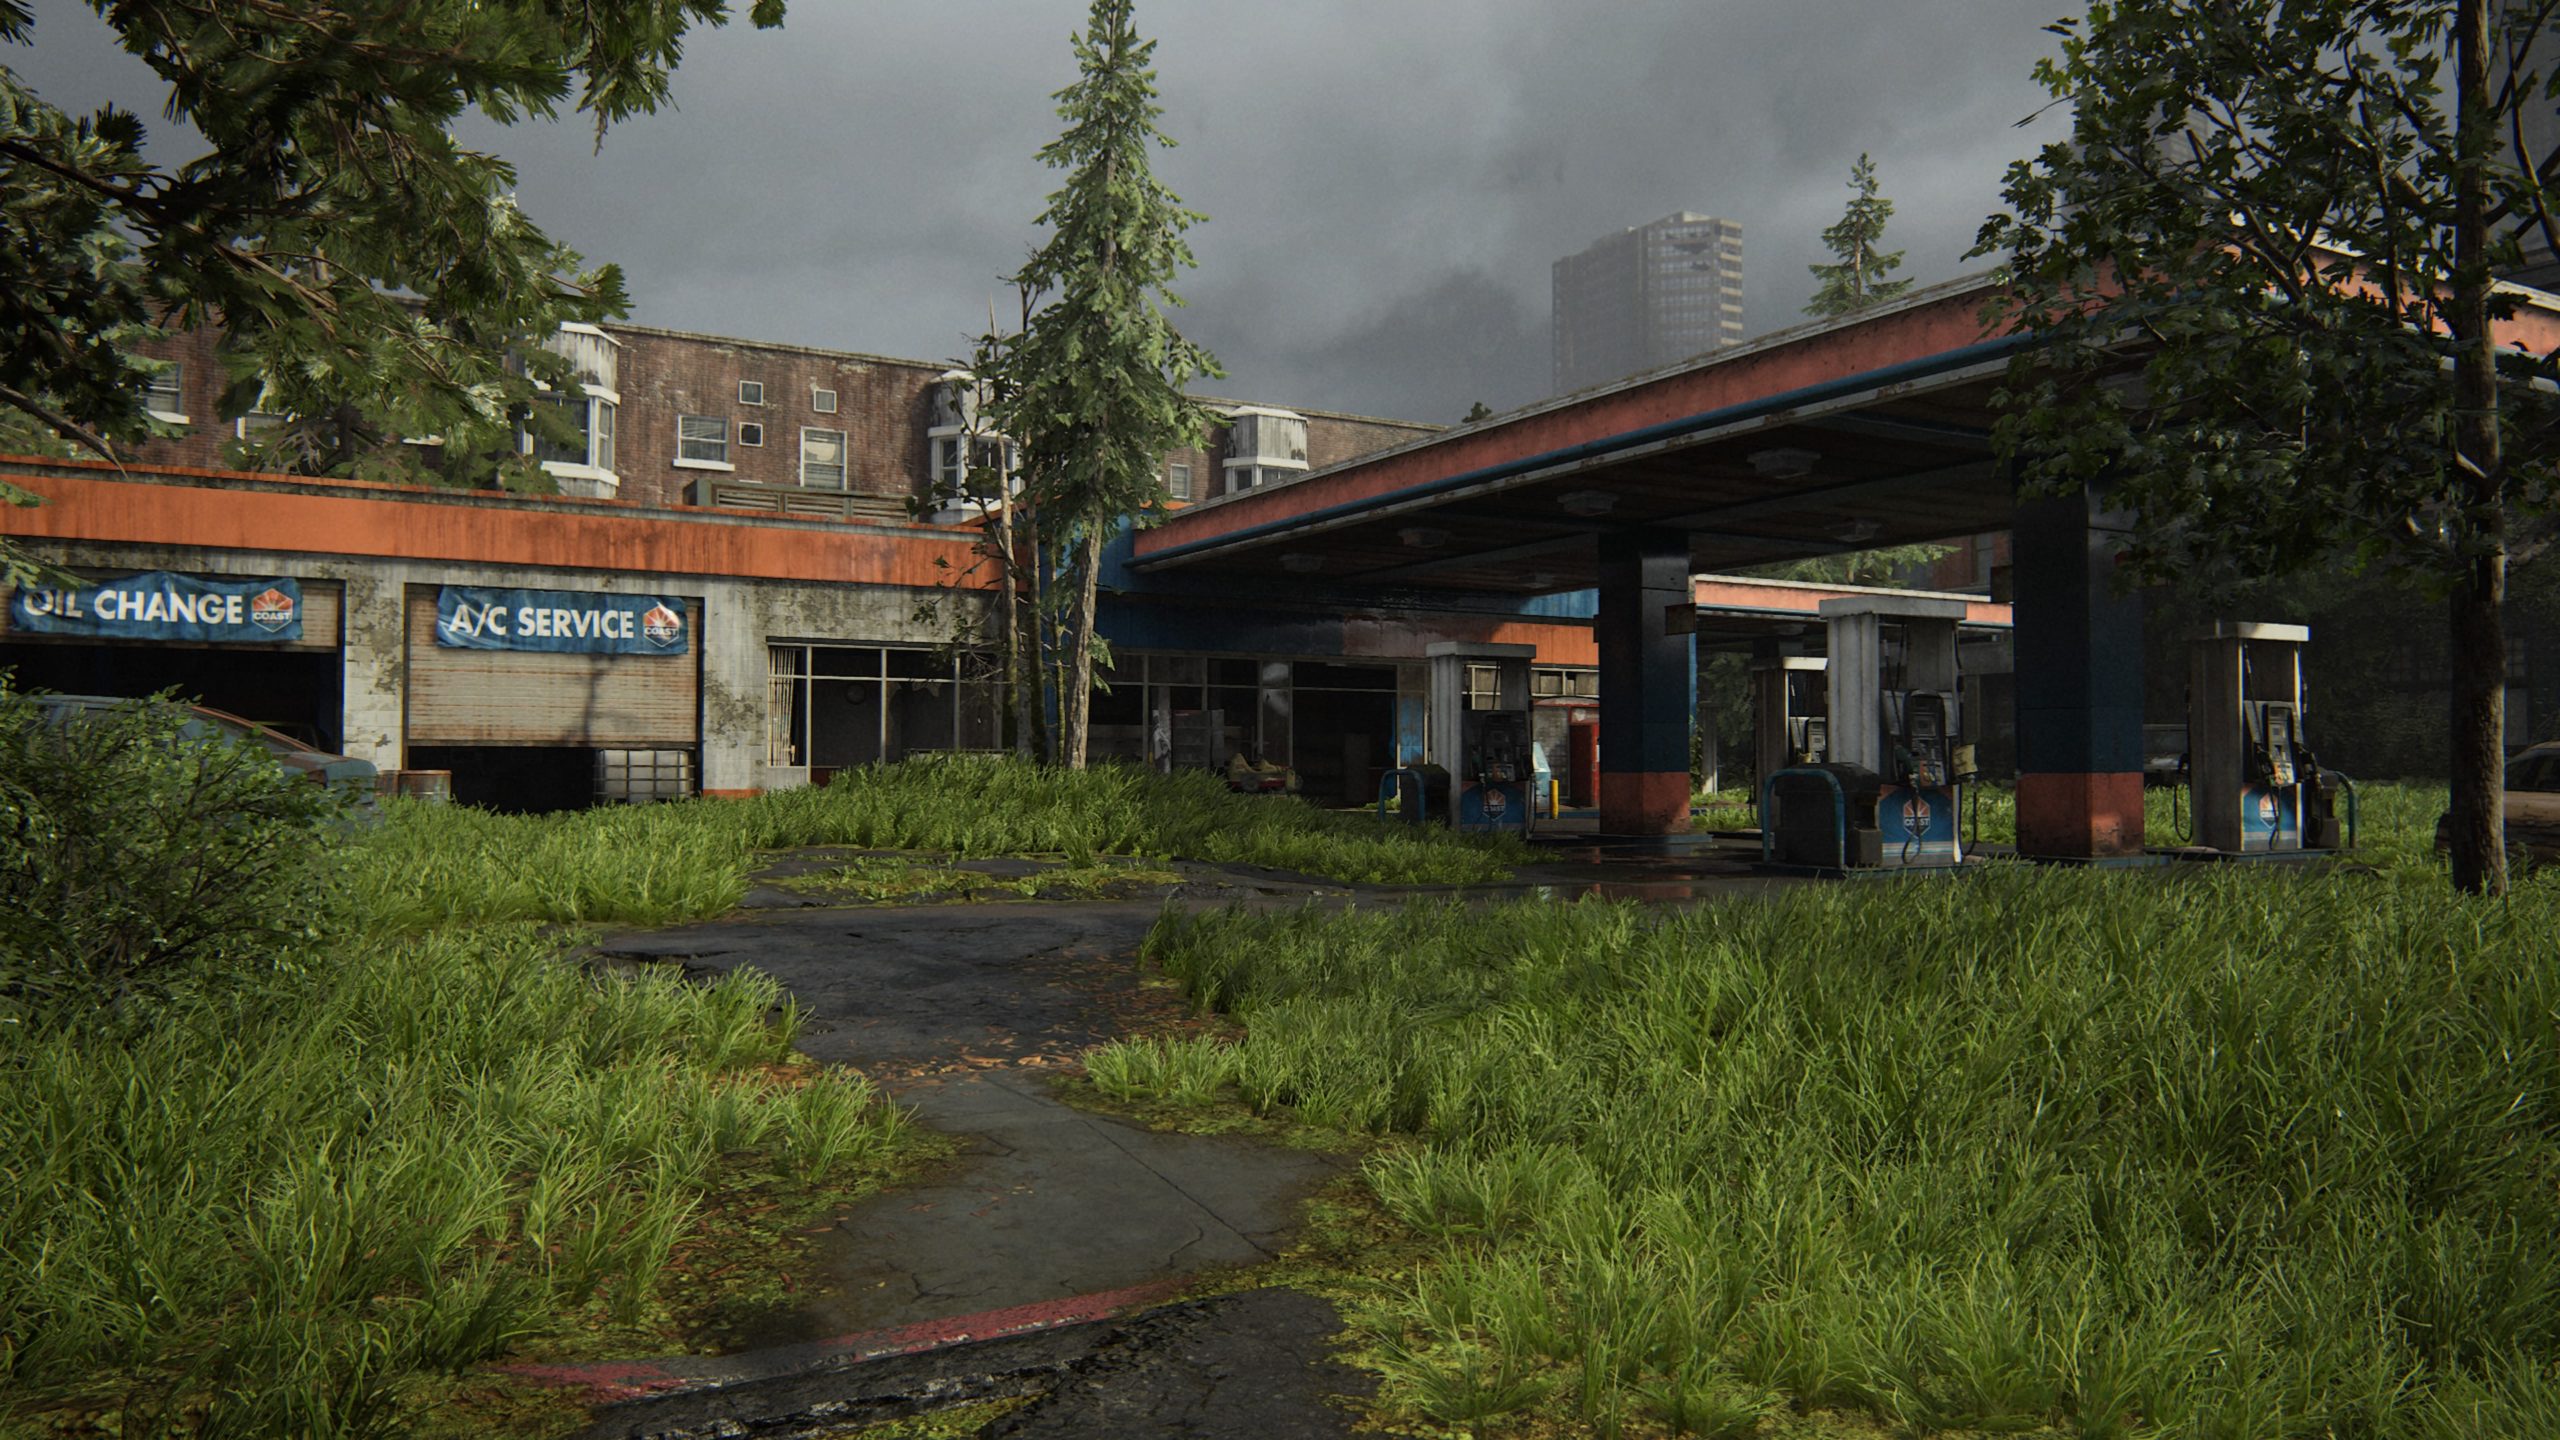
Capitol Hill
Gas Station
This workbench can be found in the garage of the gas station.
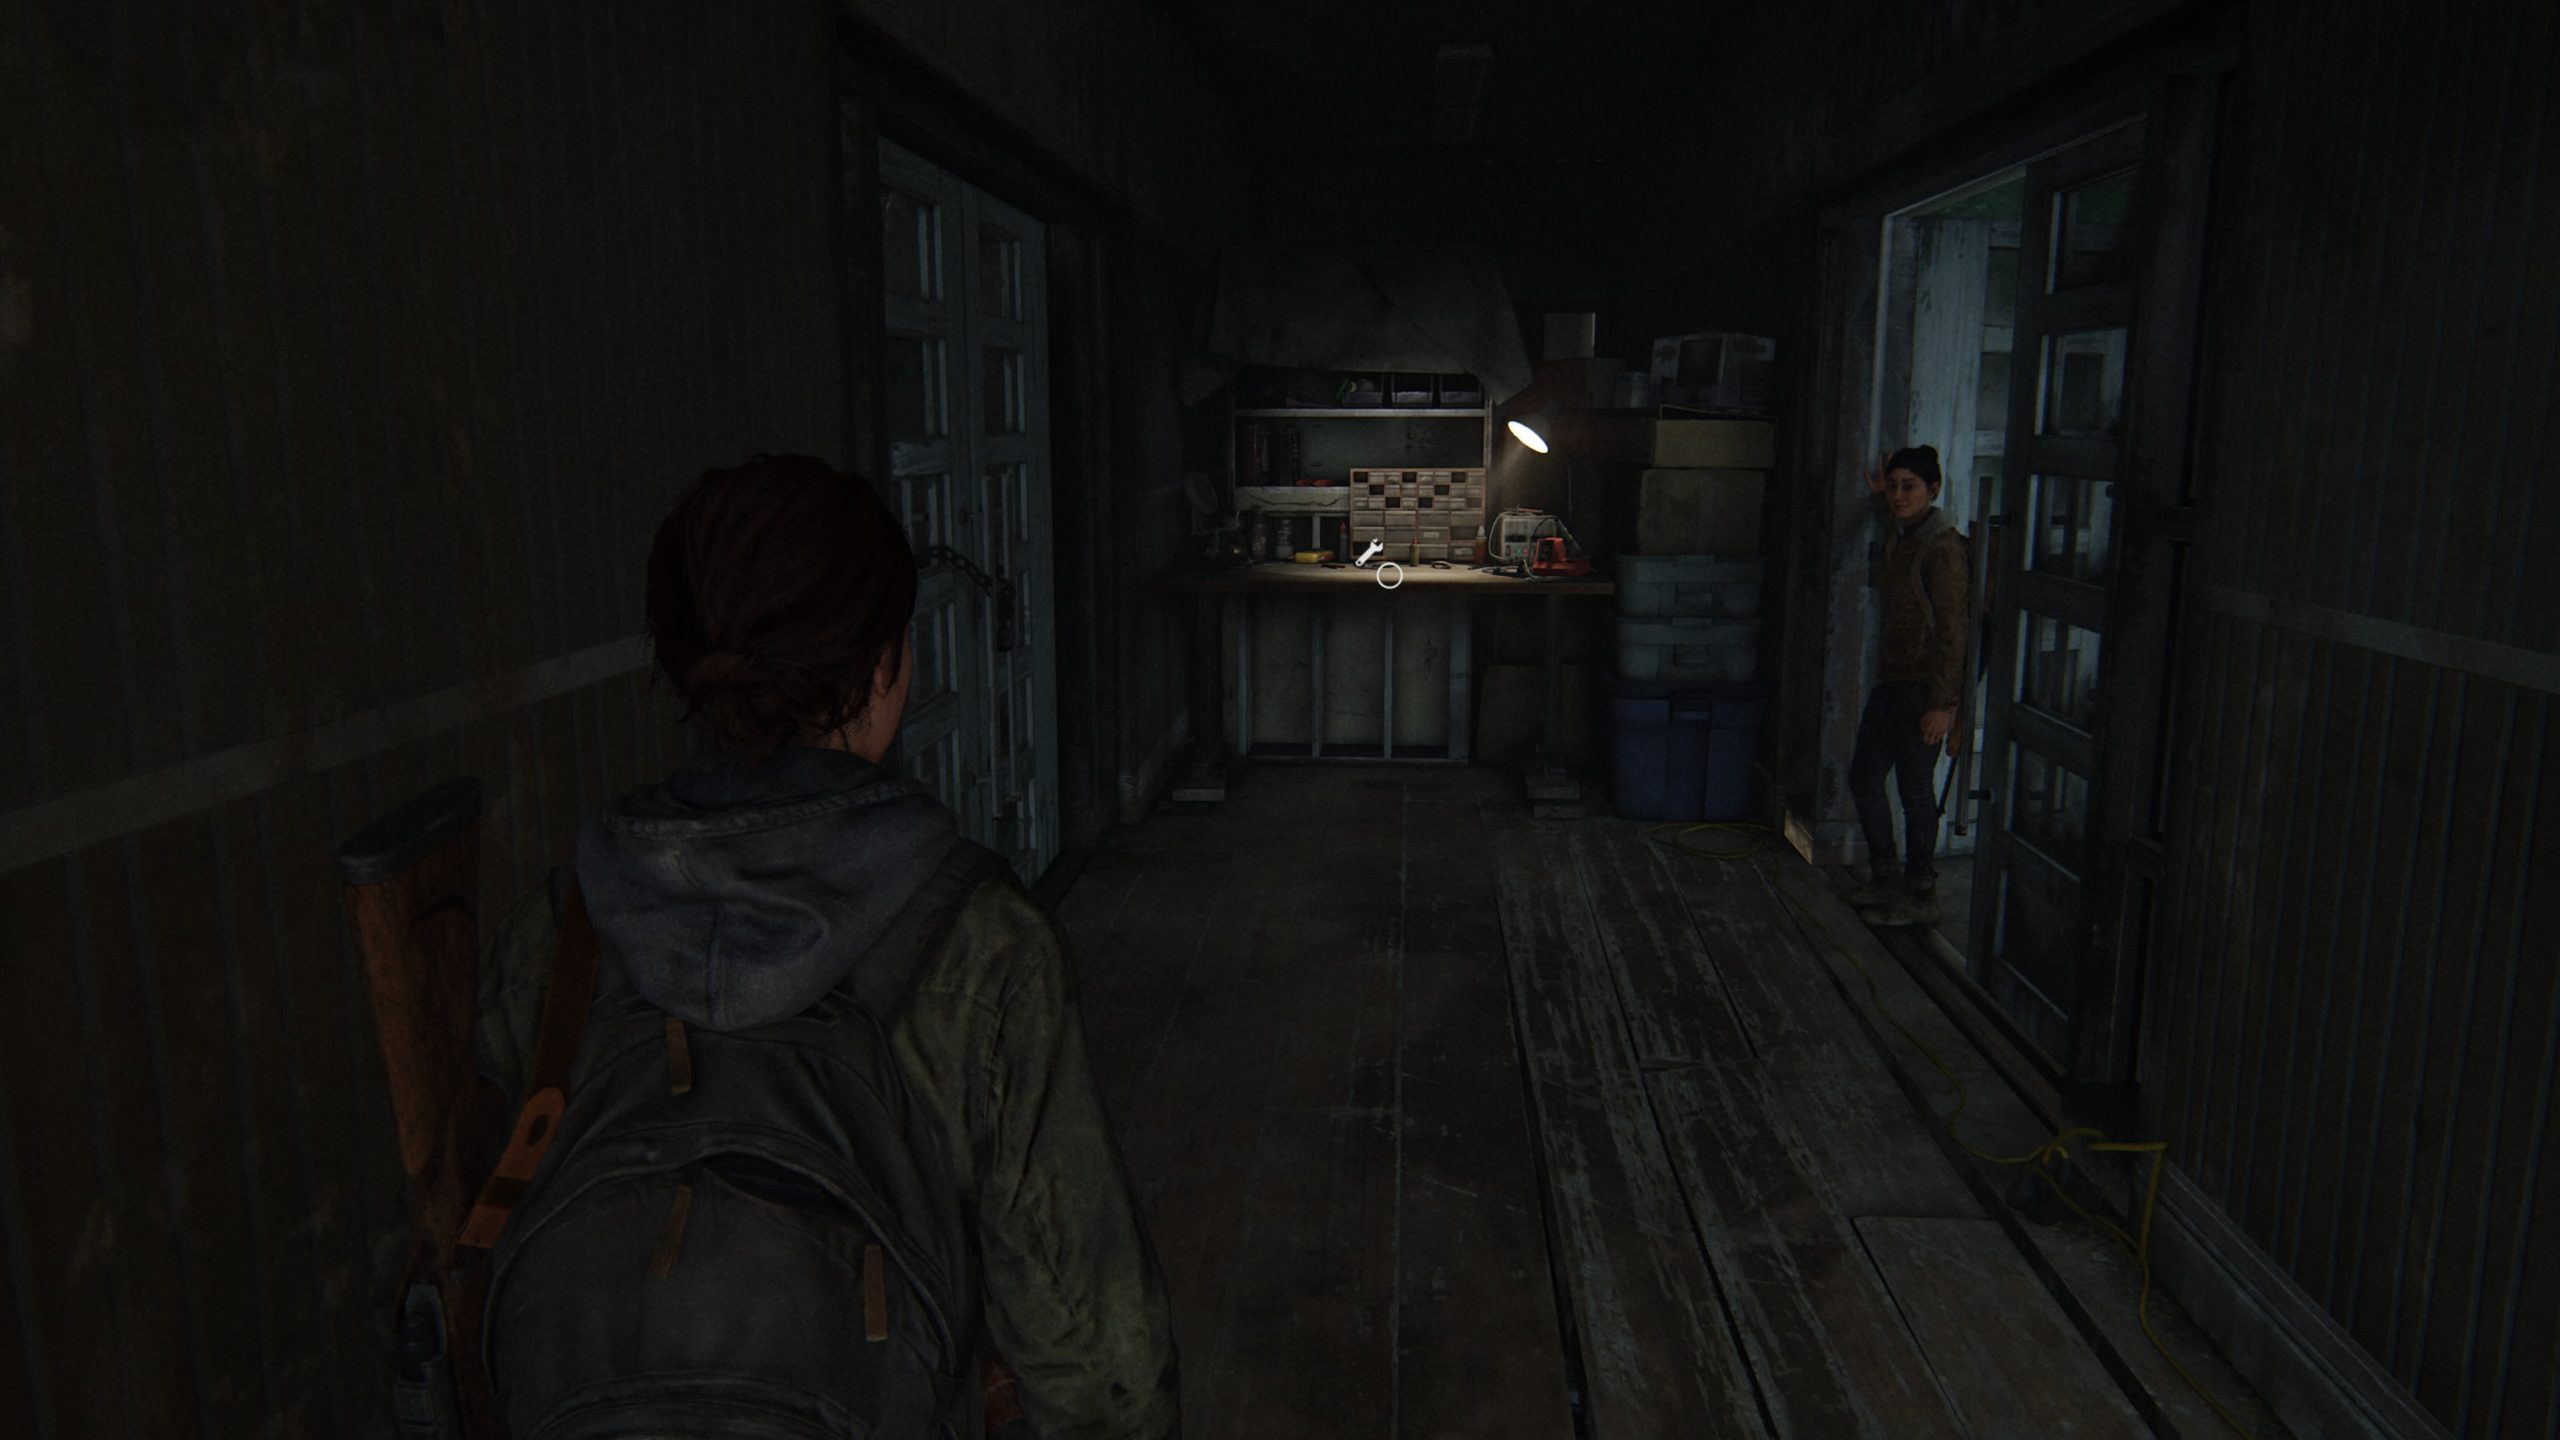
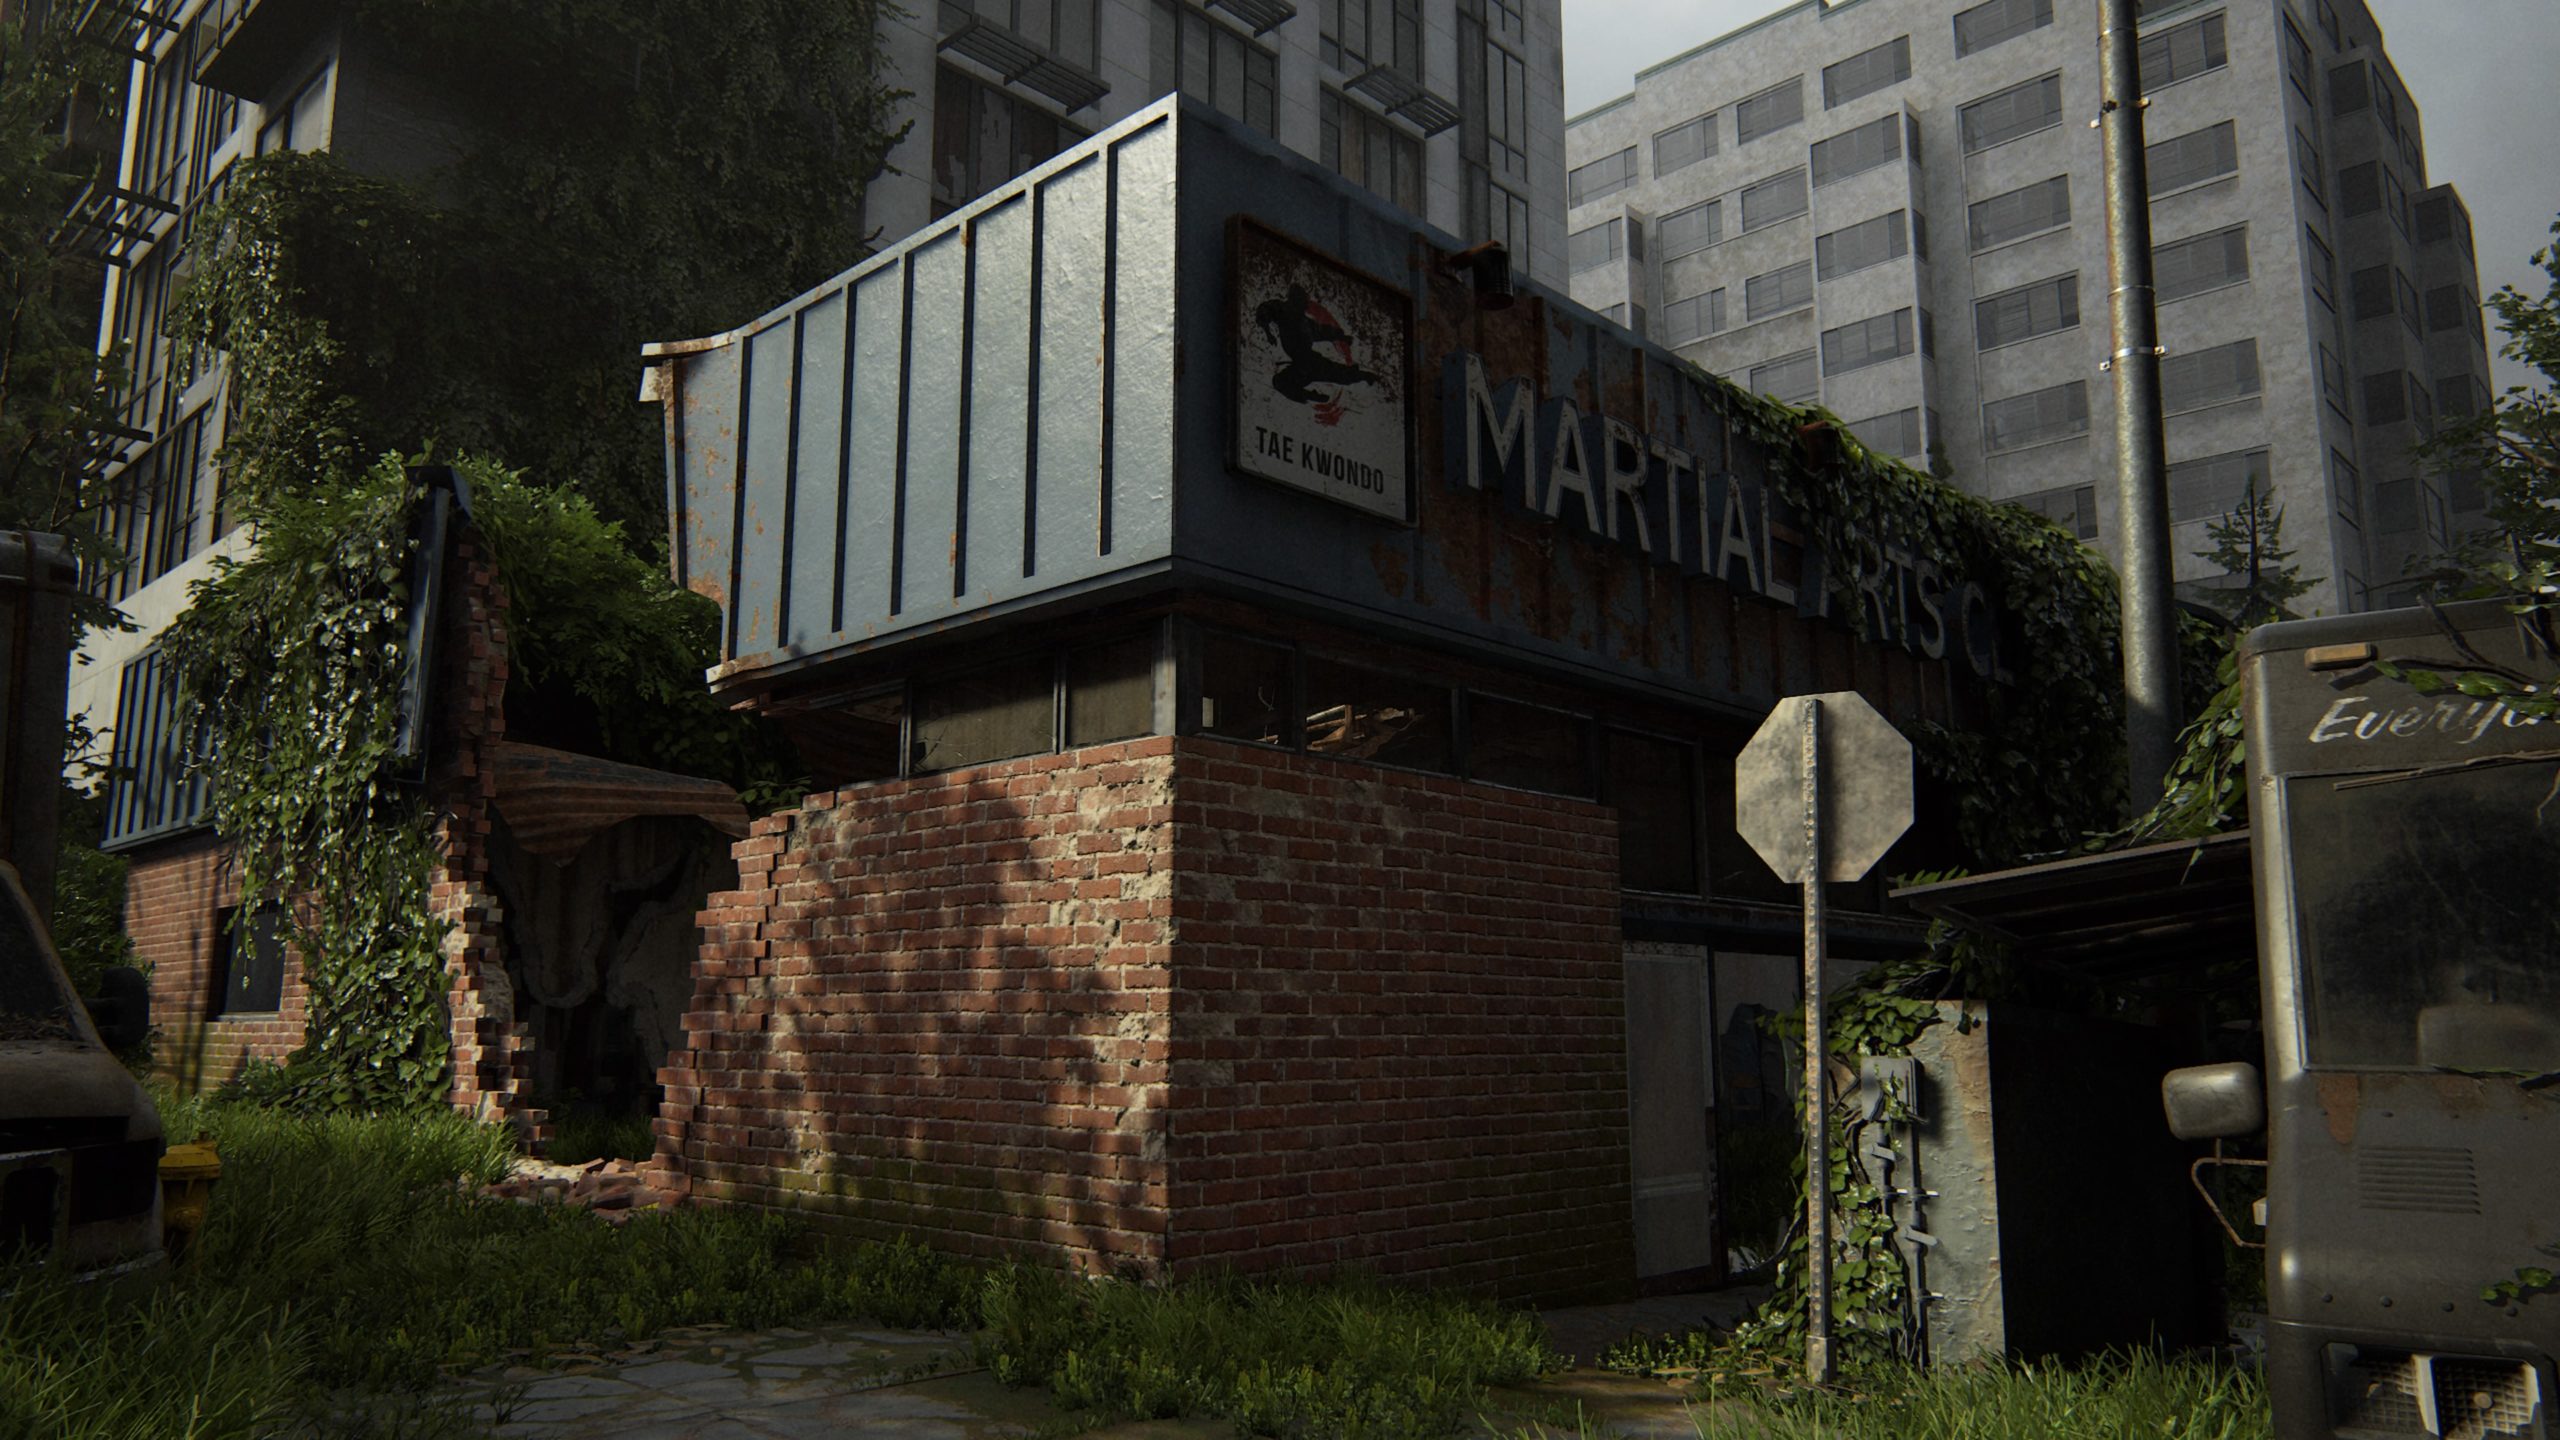
Martial Arts Building
The workbench can be found down the hall in a back room of the martial arts building.
The Tunnels
Storage Room
After entering the red lit room, you will need to climb a ladder on the right side to reach a walkway containing a rope. Head to the right side of the walkway to find a door leading to a storage room that contains this workbench.
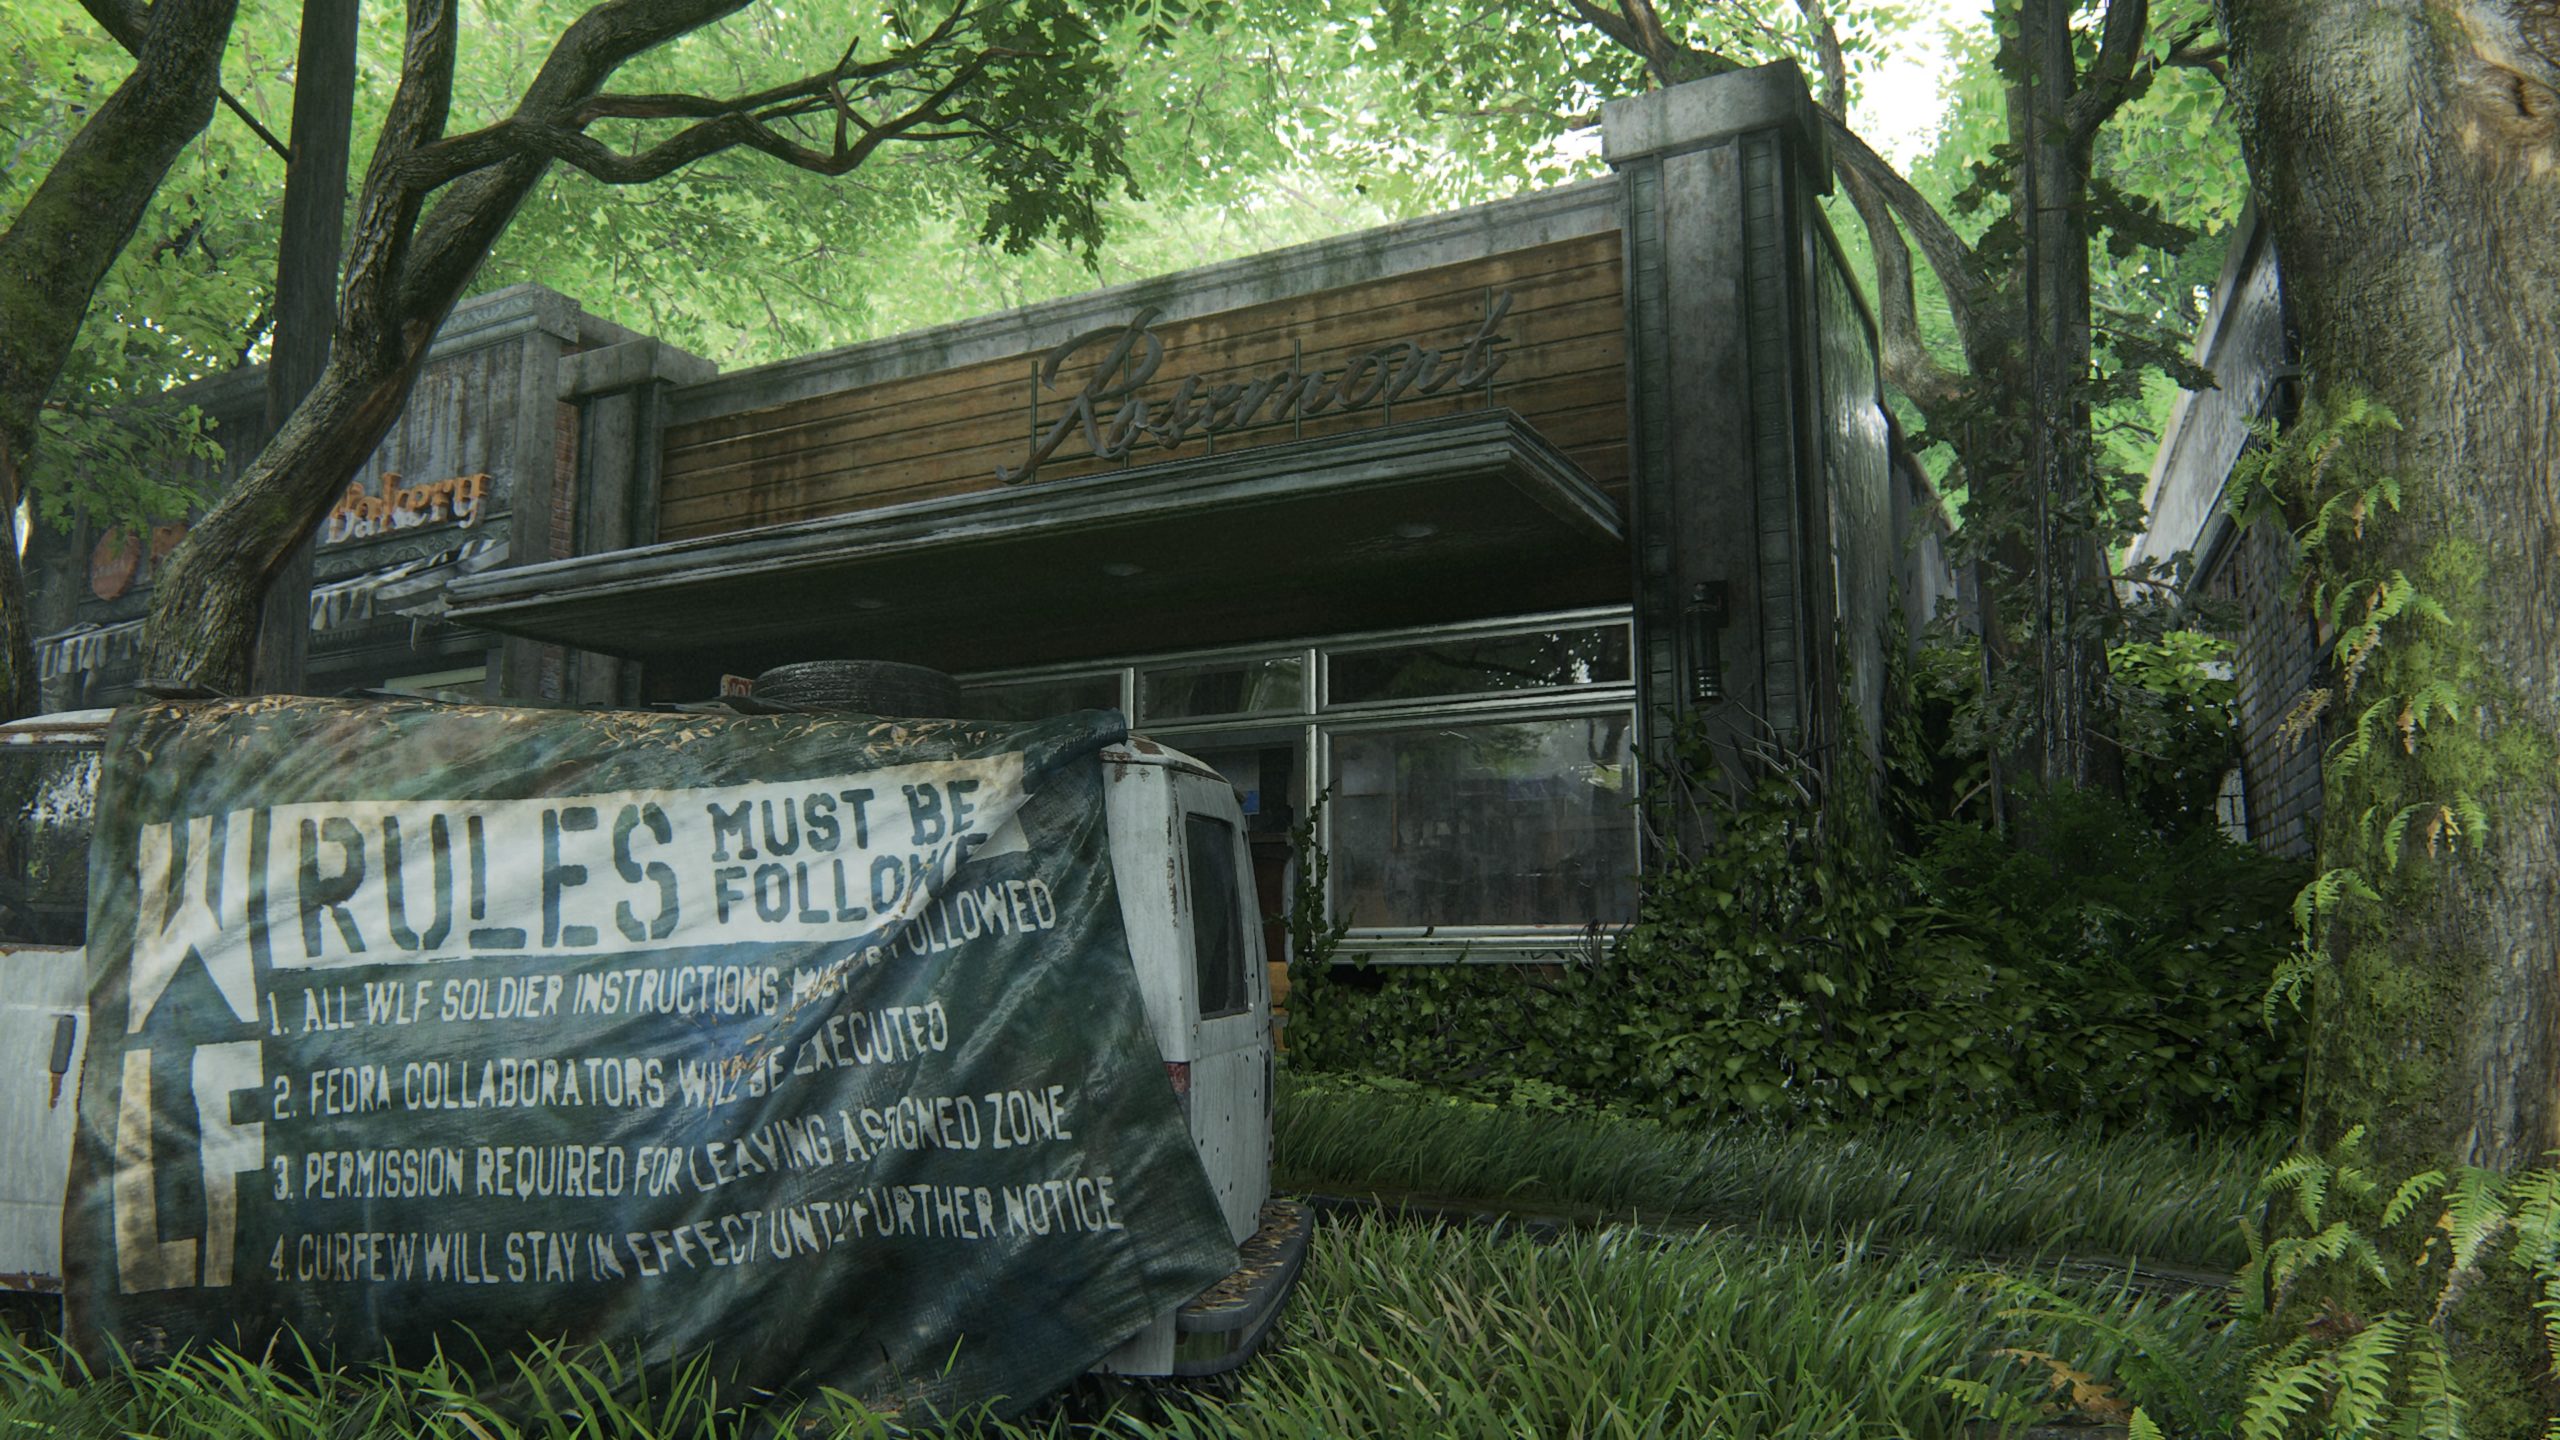
Hillcrest
Rosemont
This workbench can be found in the basement of the clothing store.
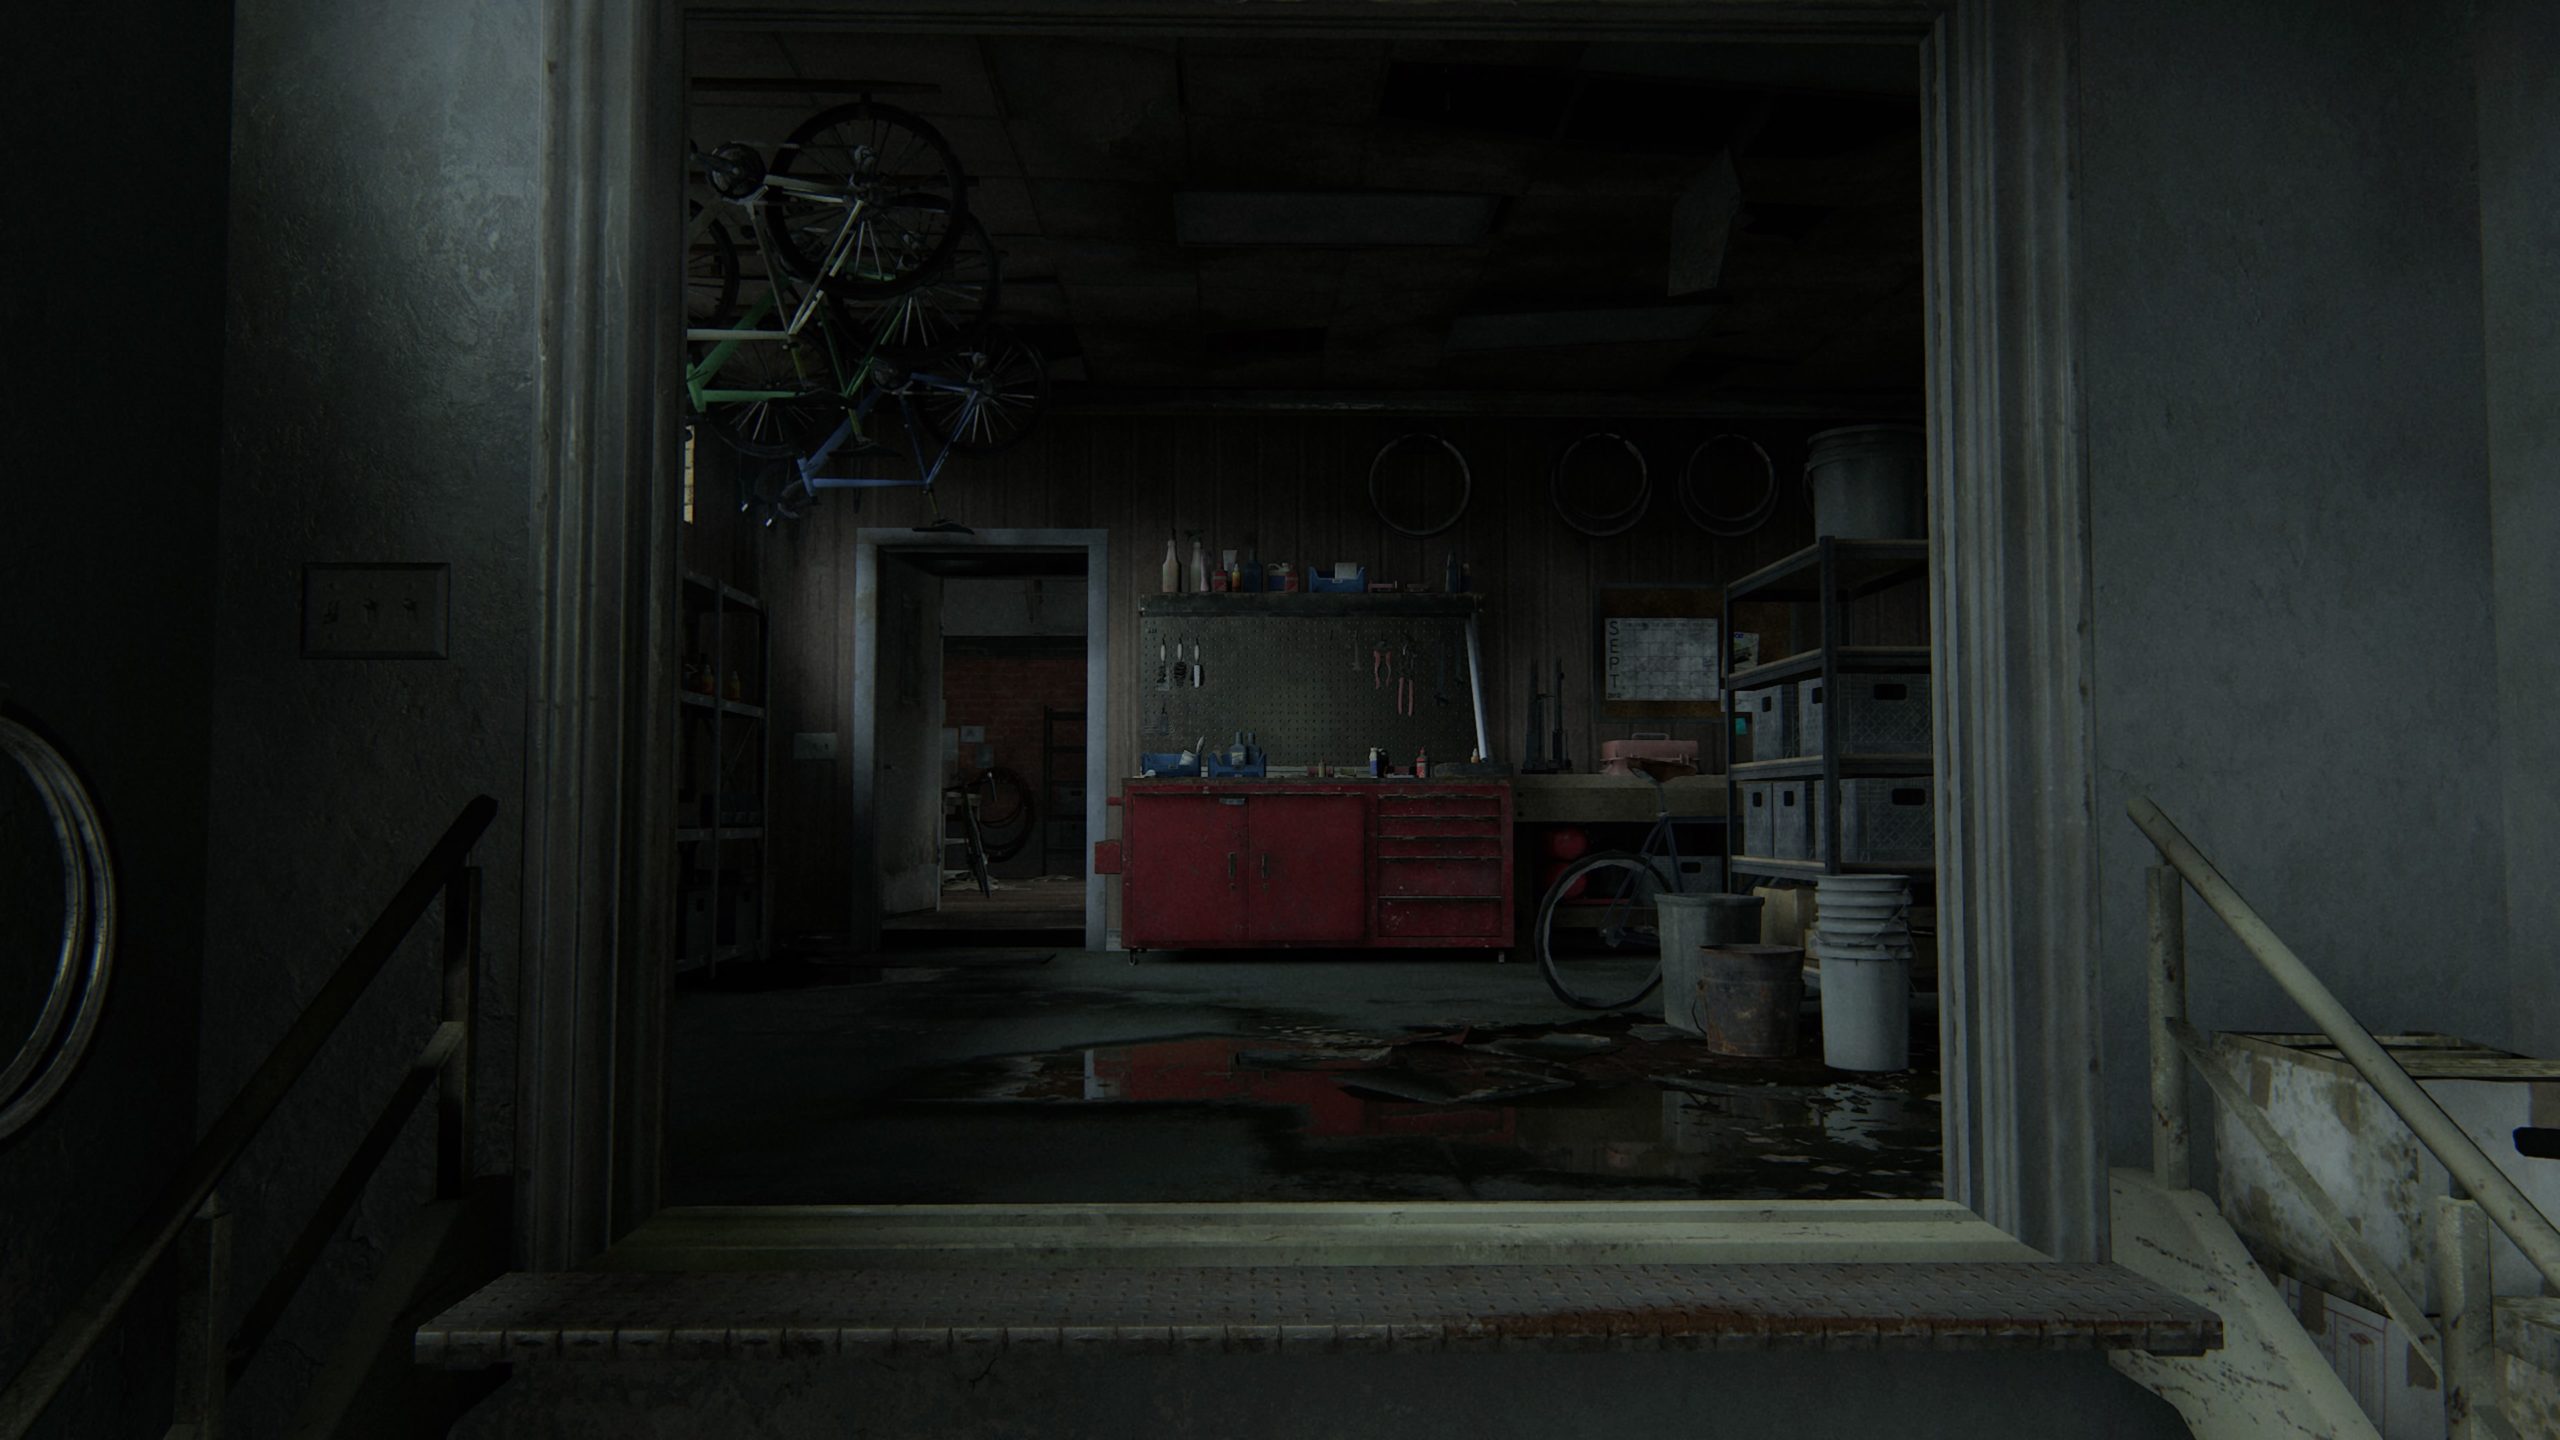
Bicycle Shop
After heading through a set of big red doors you will need to open a gate, causing a dumpster to slide out. Use the dumpster to reach the roof of a nearby structure to progress with the story. Once on the roof, you’ll need to drop down then climb up a hole in the wall. The workbench will be straight ahead near some handing bicycles.
The Seraphites
Apartment Building
This workbench can be found in the kitchen of the tall apartment building that is white and orange-ish. When you reach the building, climb up the delivery truck in front of it to reach the top of an overhang. Climb in through the window then take the leftmost door and follow it through the hallway to find the workbench at the end.
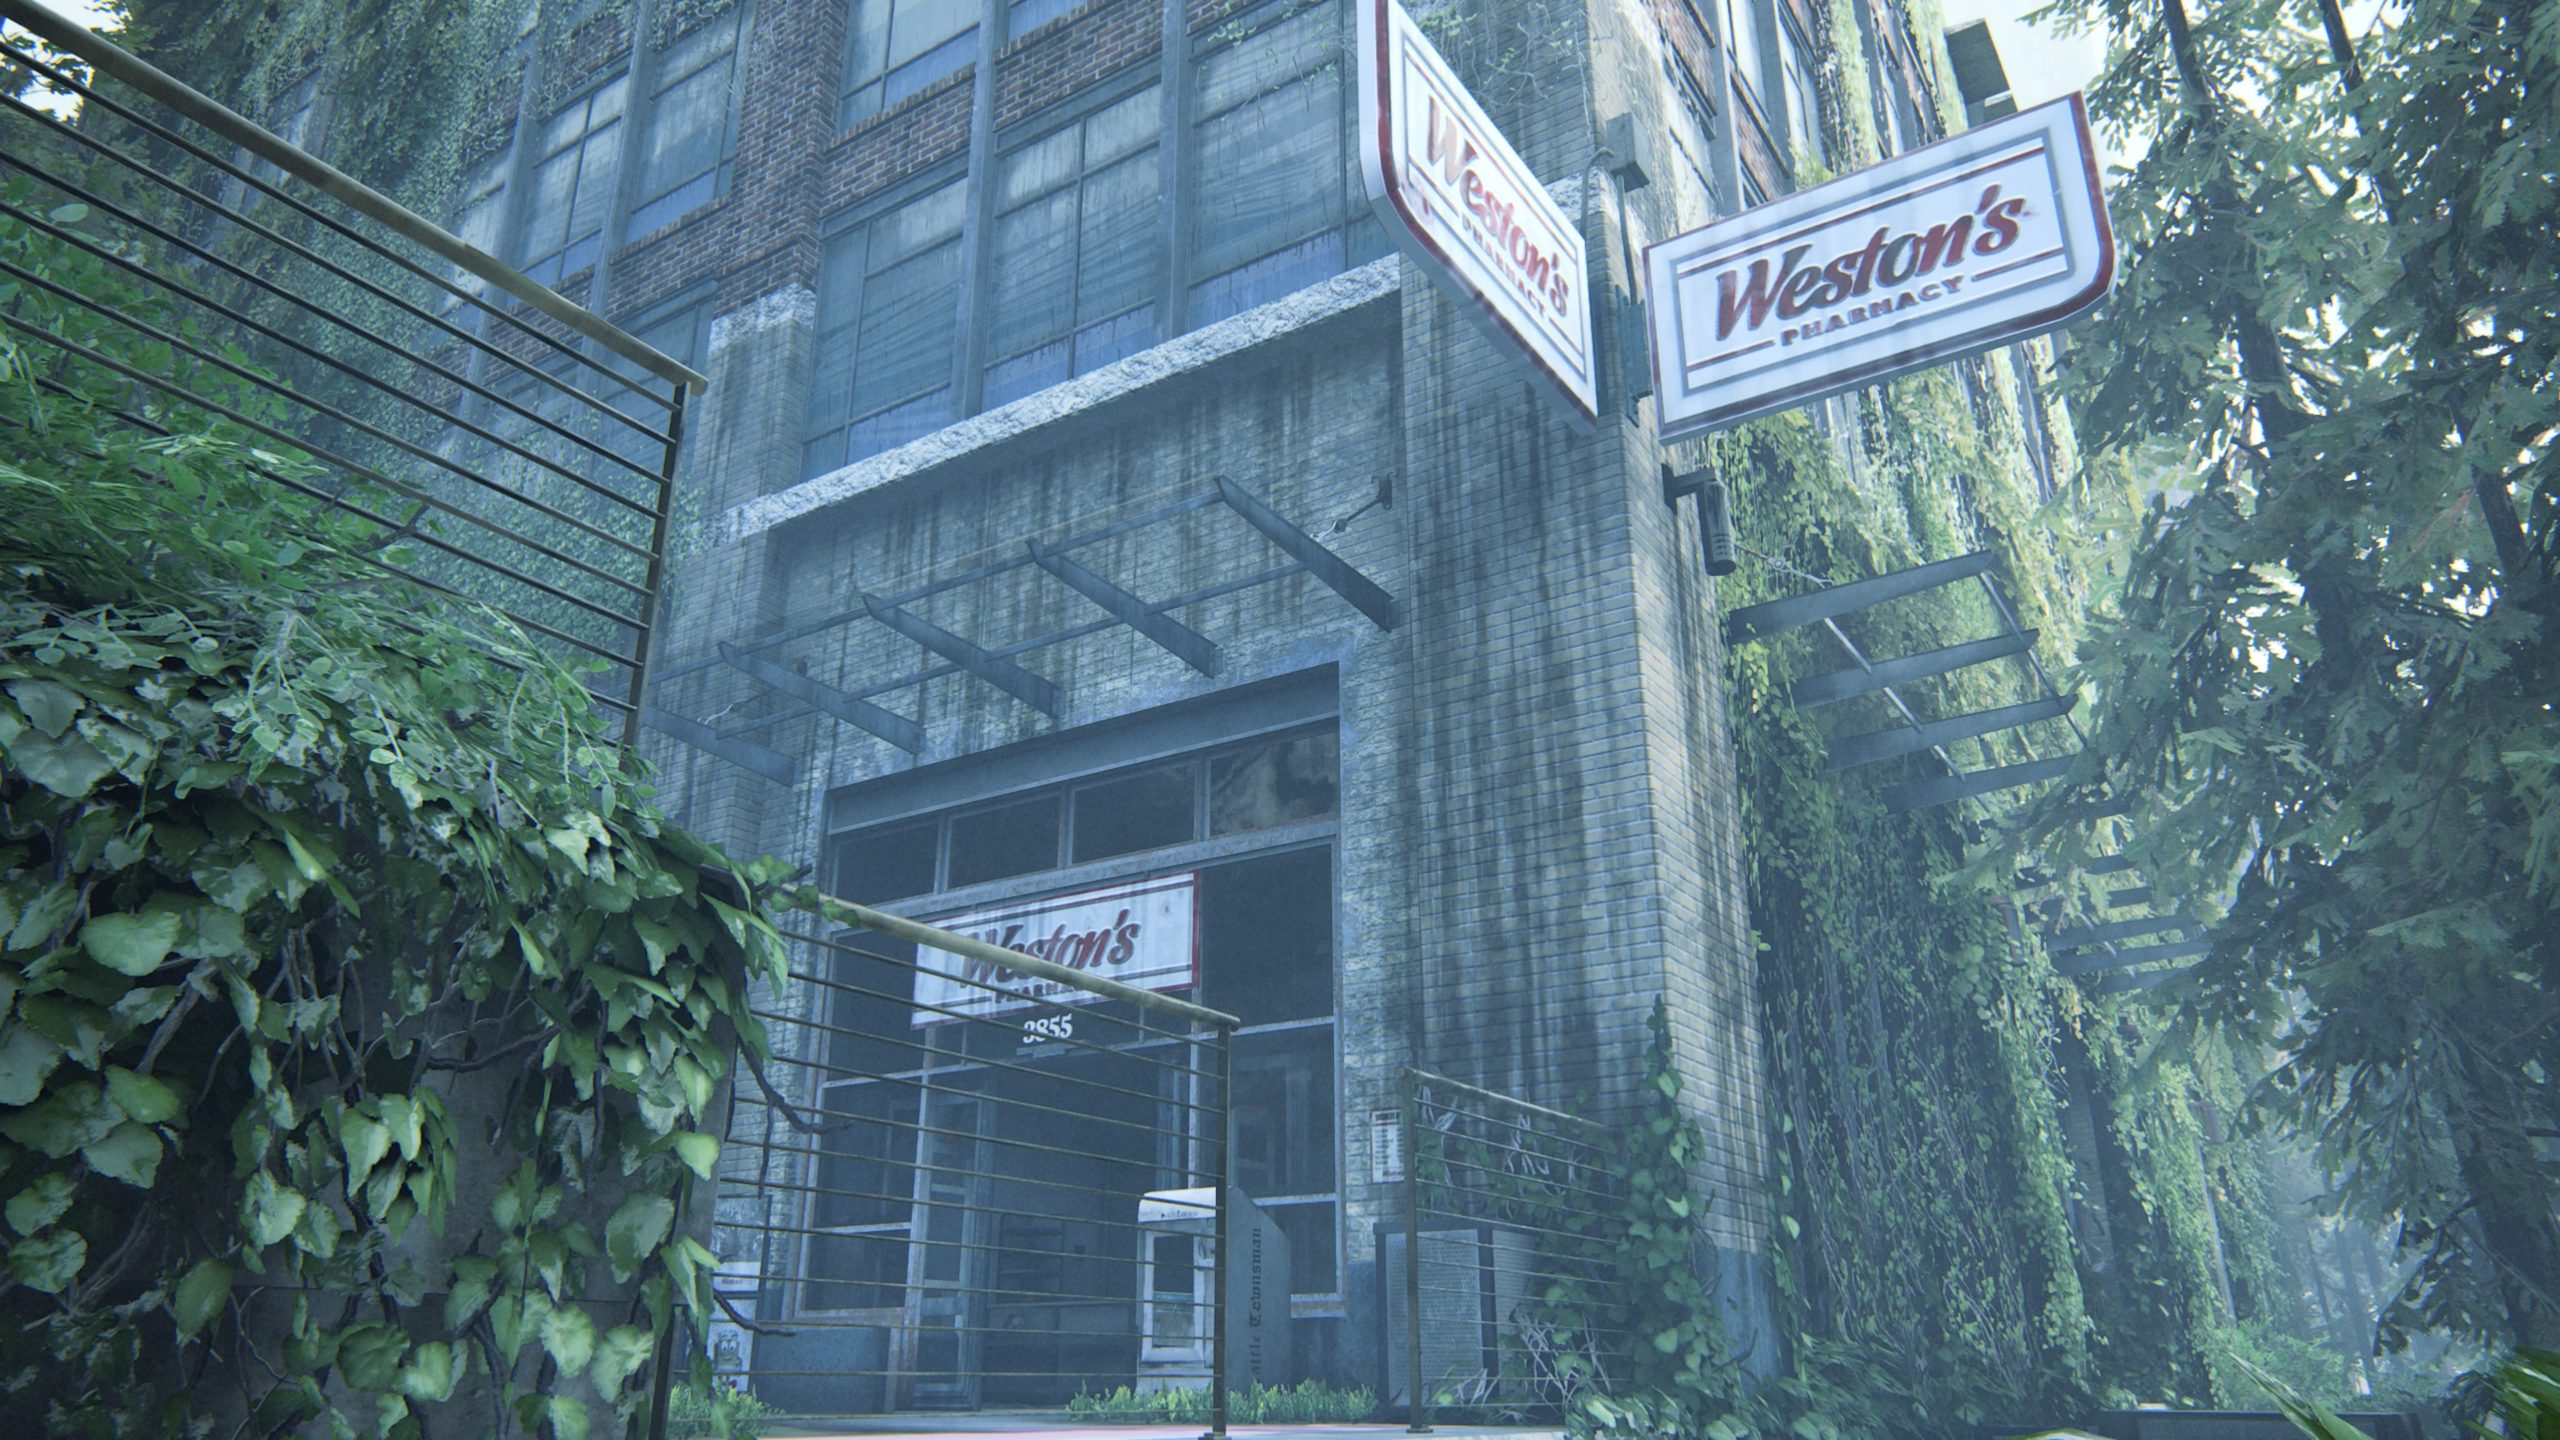
Weston’s Pharmacy
This workbench can be found in Weston’s Pharmacy. To reach it, you will need to crawl through a hole in the wall in the middle of the store.
Road to the Aquarium
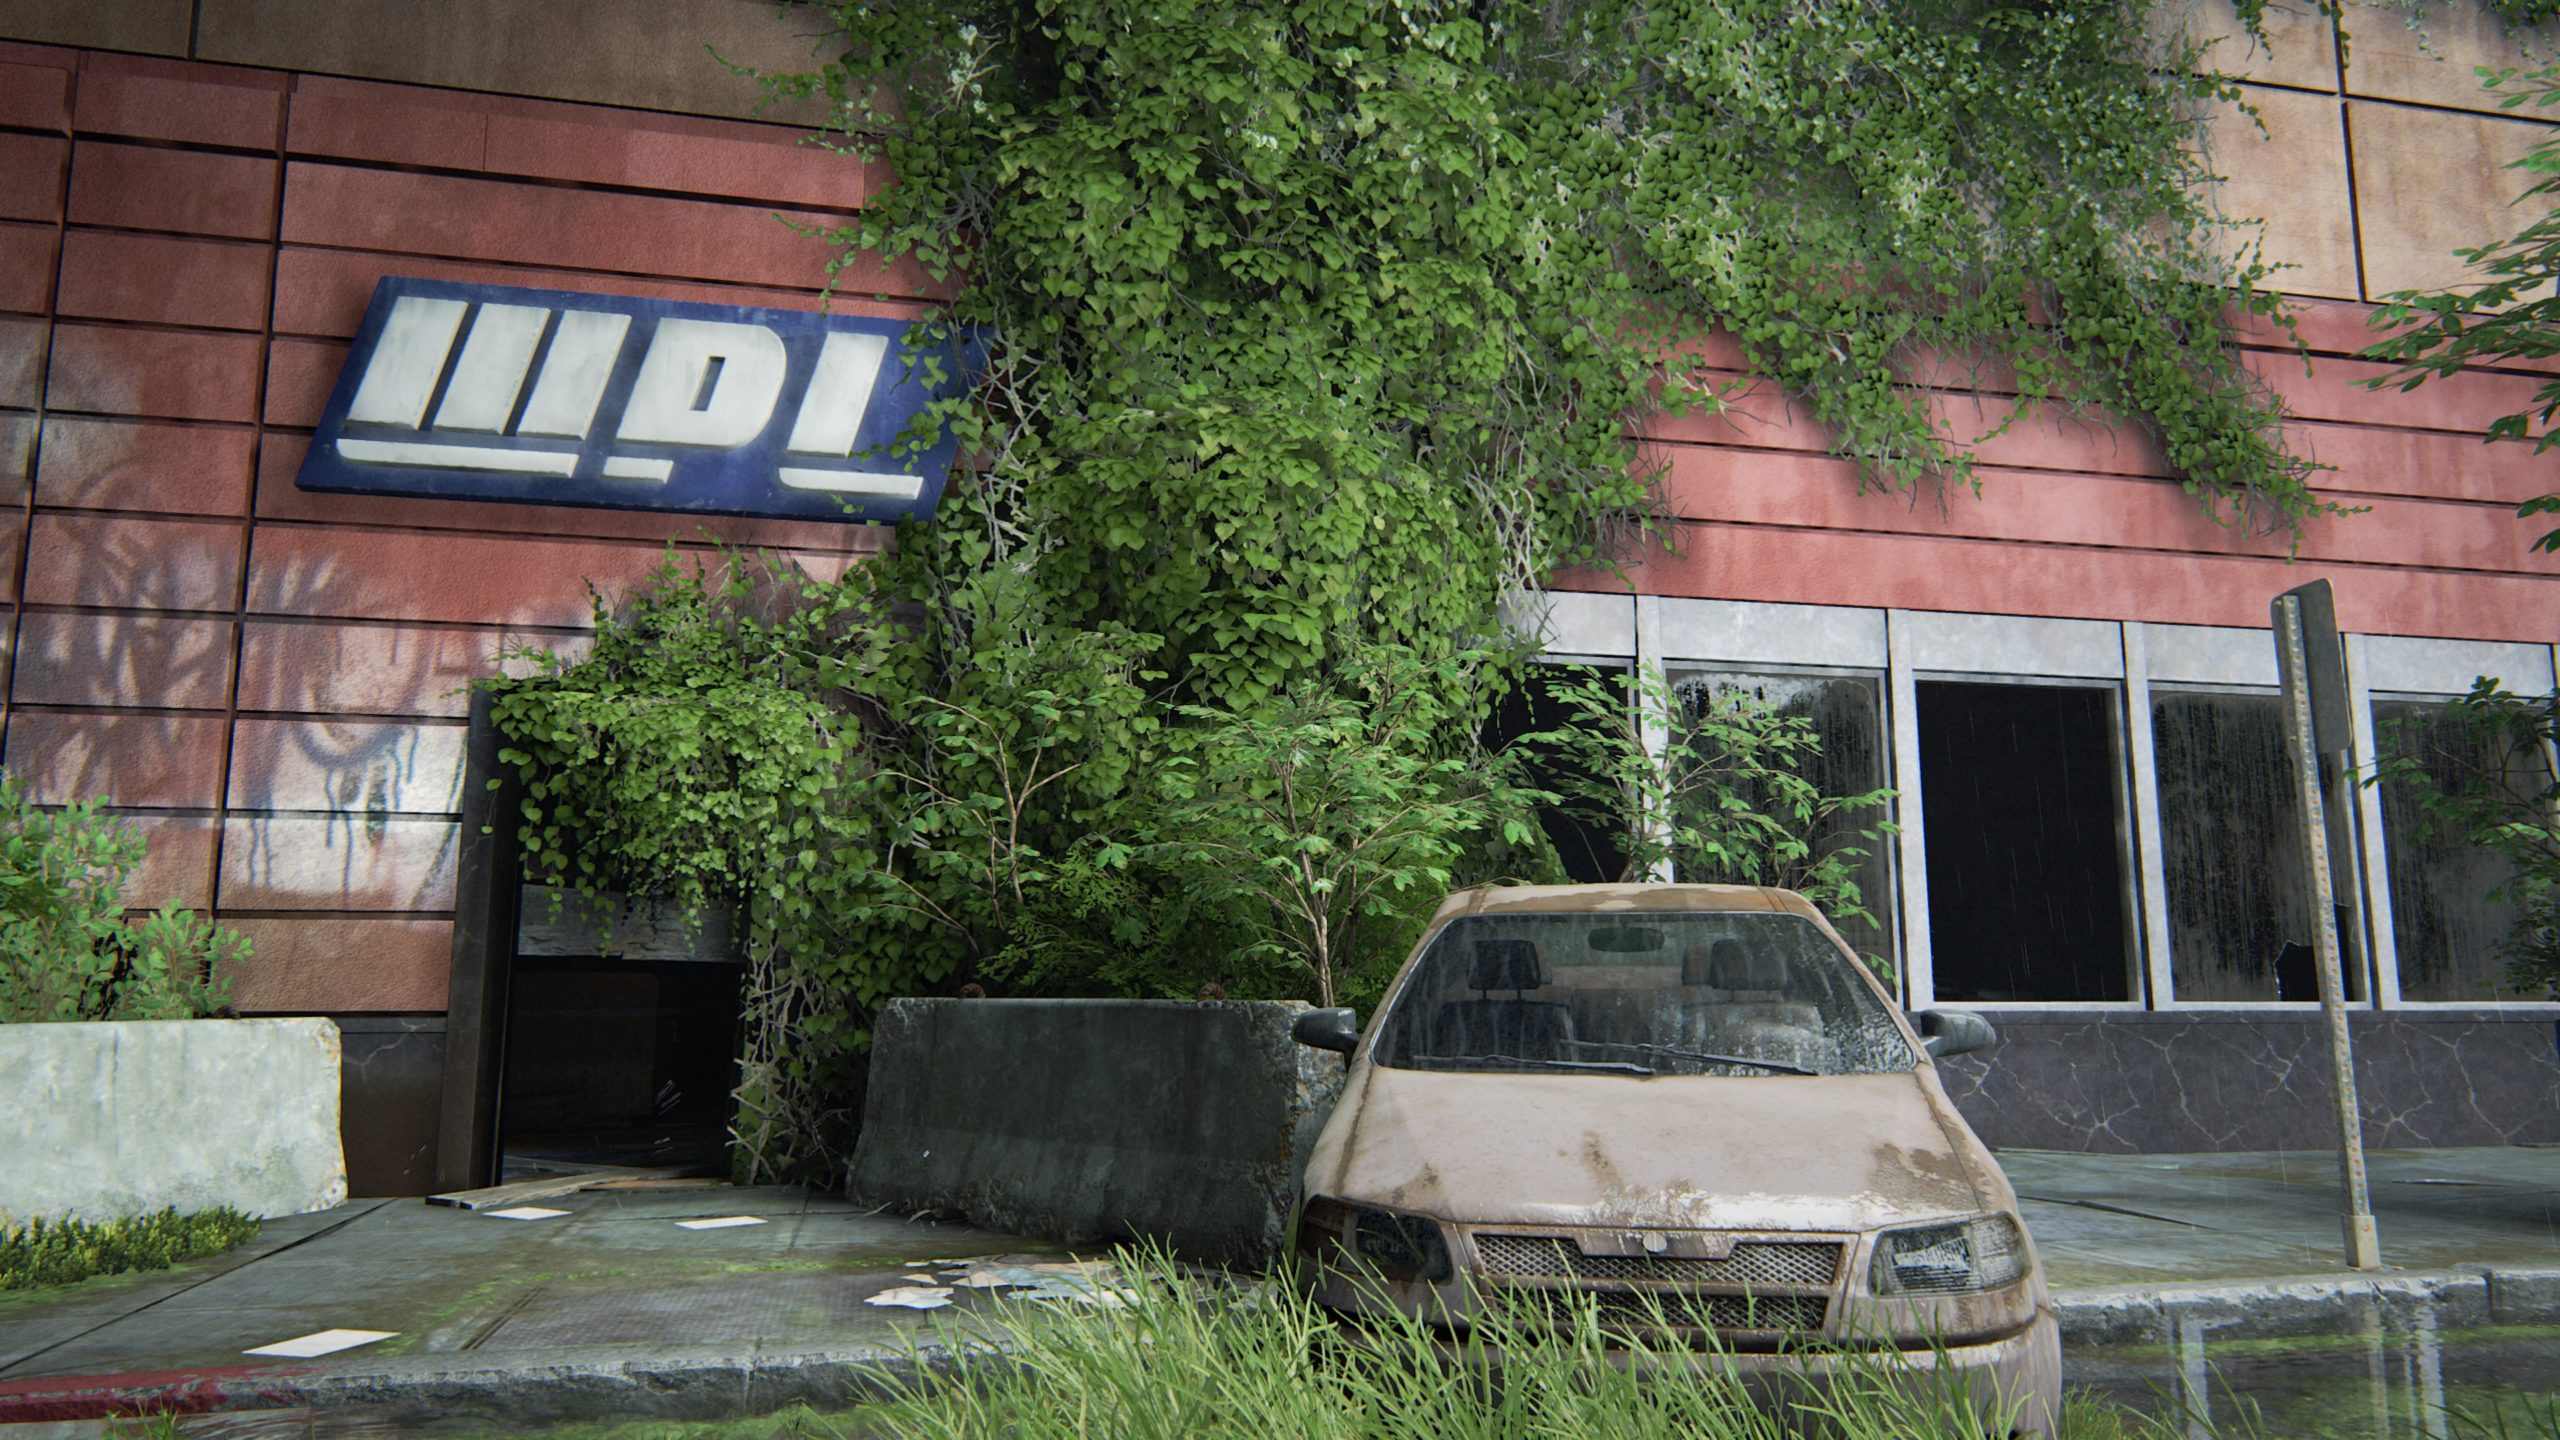
WPL
This workbench can be found in the shipping and packing center. To reach the room containing the workbench, you will need to climb under a fallen filing cabinet blocking the doorway.
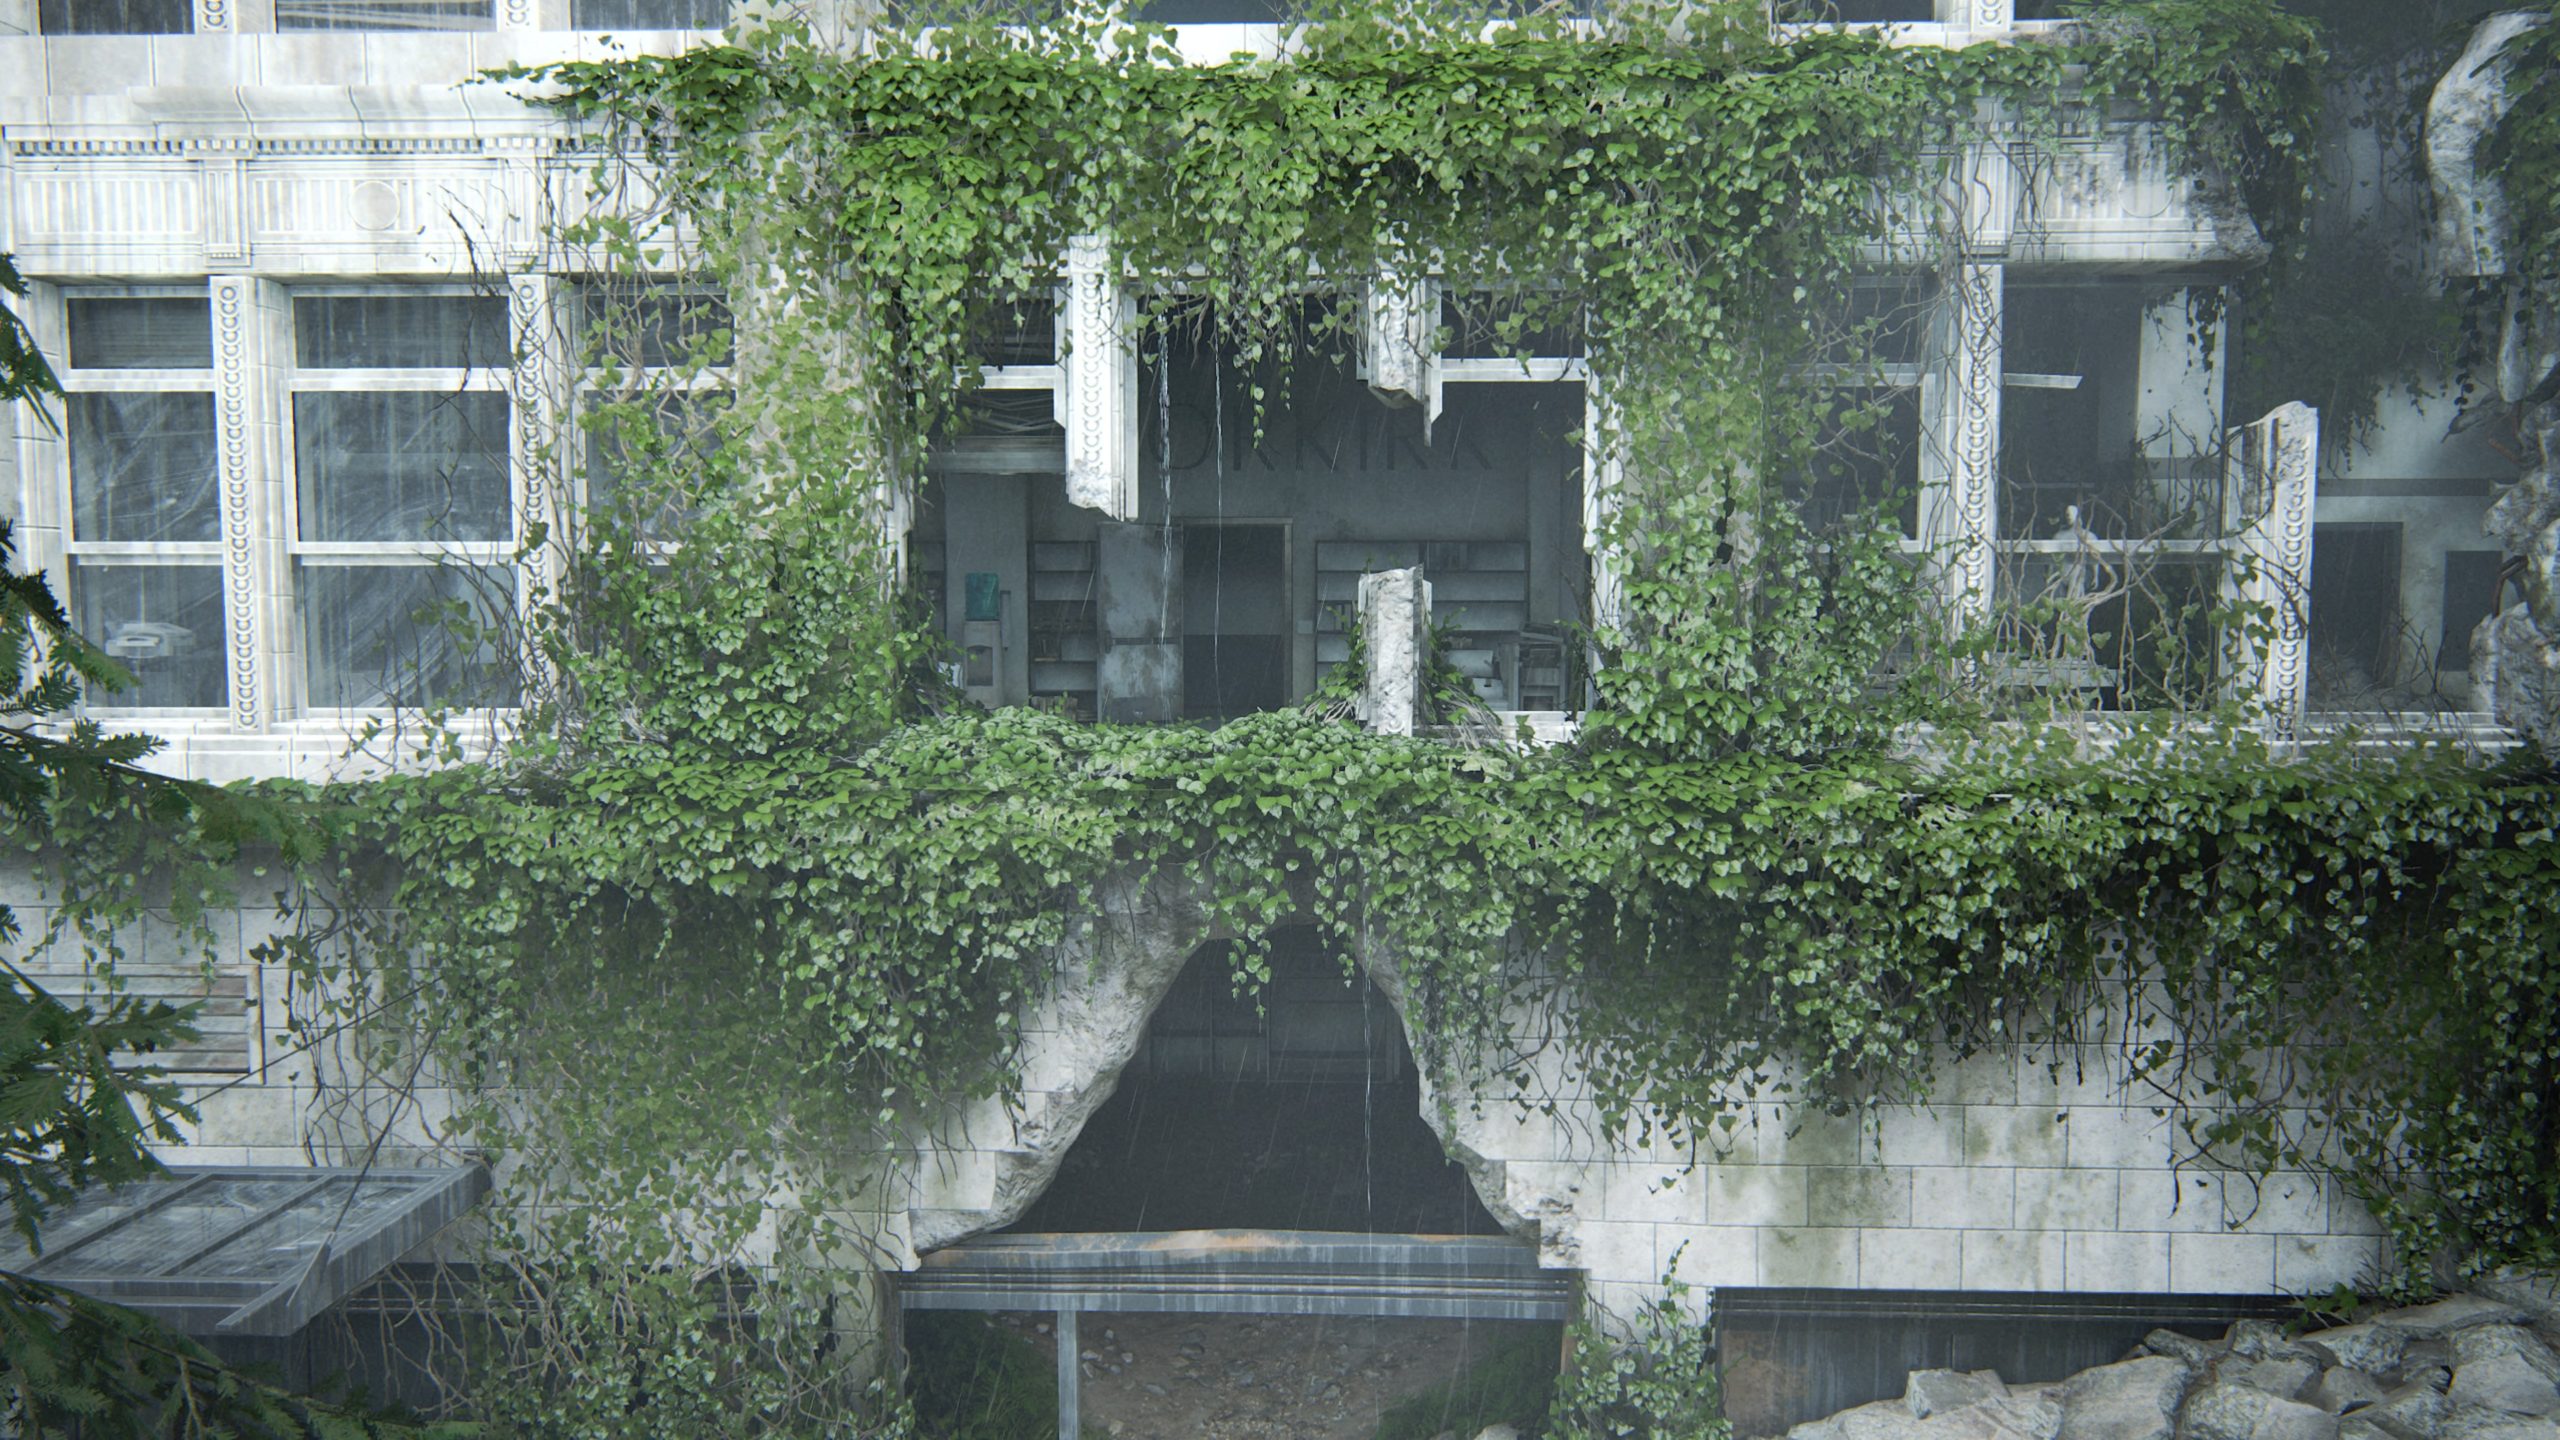
Ruined Building
After diving under rubble blocking the path forward as part of the story, you’ll exit the river and come to a ruined building. Jesse will mention that they should head up to the bridge to get their bearings. Make your way to the second floor and look for the room with the Norkirk sign on the wall to find the workbench.
The Flooded City
Manufacturing Building
After you restart the boat when it dies, head forward a short way to find the Seattle Sleep Warehouse. Take the path on the left in front of the warehouse to find a manufacturing store with blue barrels in the front. Enter the building to find the workbench.
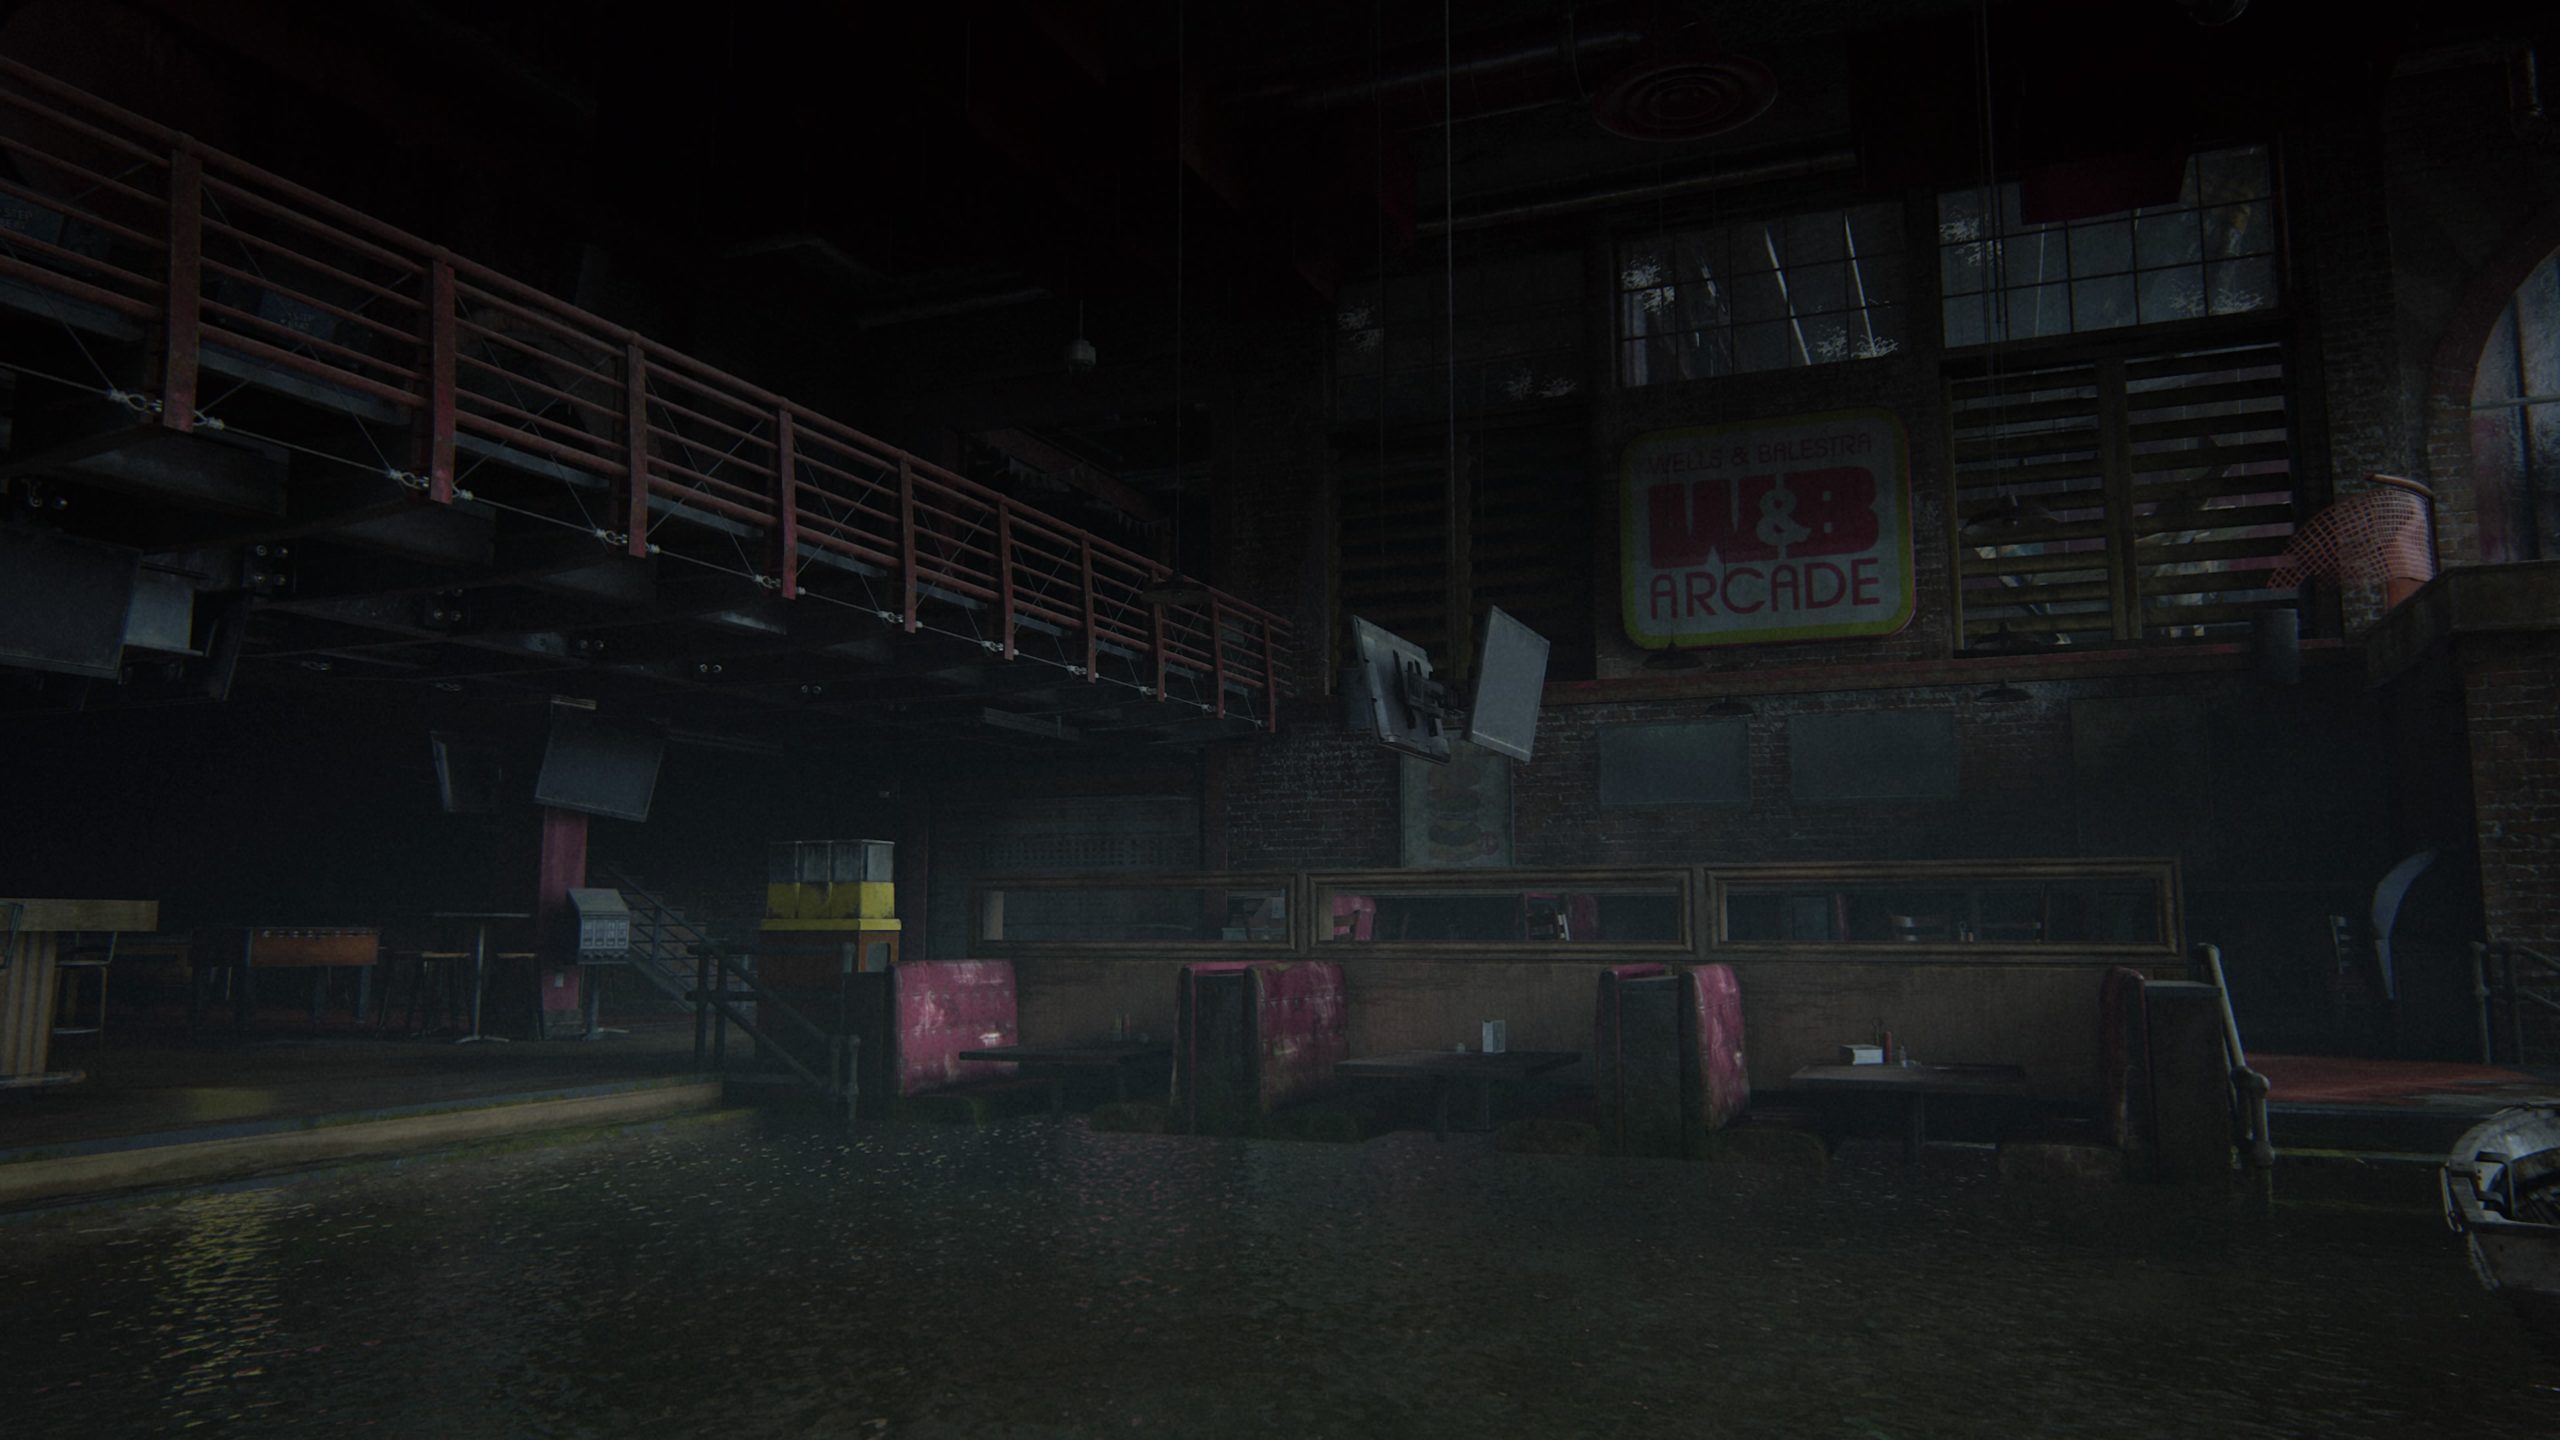
W&B Arcade
This bench can be found on the second level of W&B Arcade.
On Foot
Boat Repair Shop
After using a cable to enter the Boat Repair Shop, you can find this workbench to the left of the blue stairs leading up.
The Forward Base
Inside Base
The workbench can be found in the first big white tent to the left of the path after checking in.
Hostile Territory
Ruined Skyscraper
This collectible is located in a ruined skyscraper. You will need to climb under some rubble and push a container out of the way to exit into a room with “Fresnel” written on the reception desk. The workbench will be located in the next room.
The Forest
La Rosa’s Auto Body Shop
This workbench can be found in La Rosa’s Auto Body Shop.
The Coast
Building
At the start of this chapter, you’ll jump over a fence and enter the first building on the other side. The workbench will be in this room.
The Shortcut
Interbay
This can be found in Interbay.
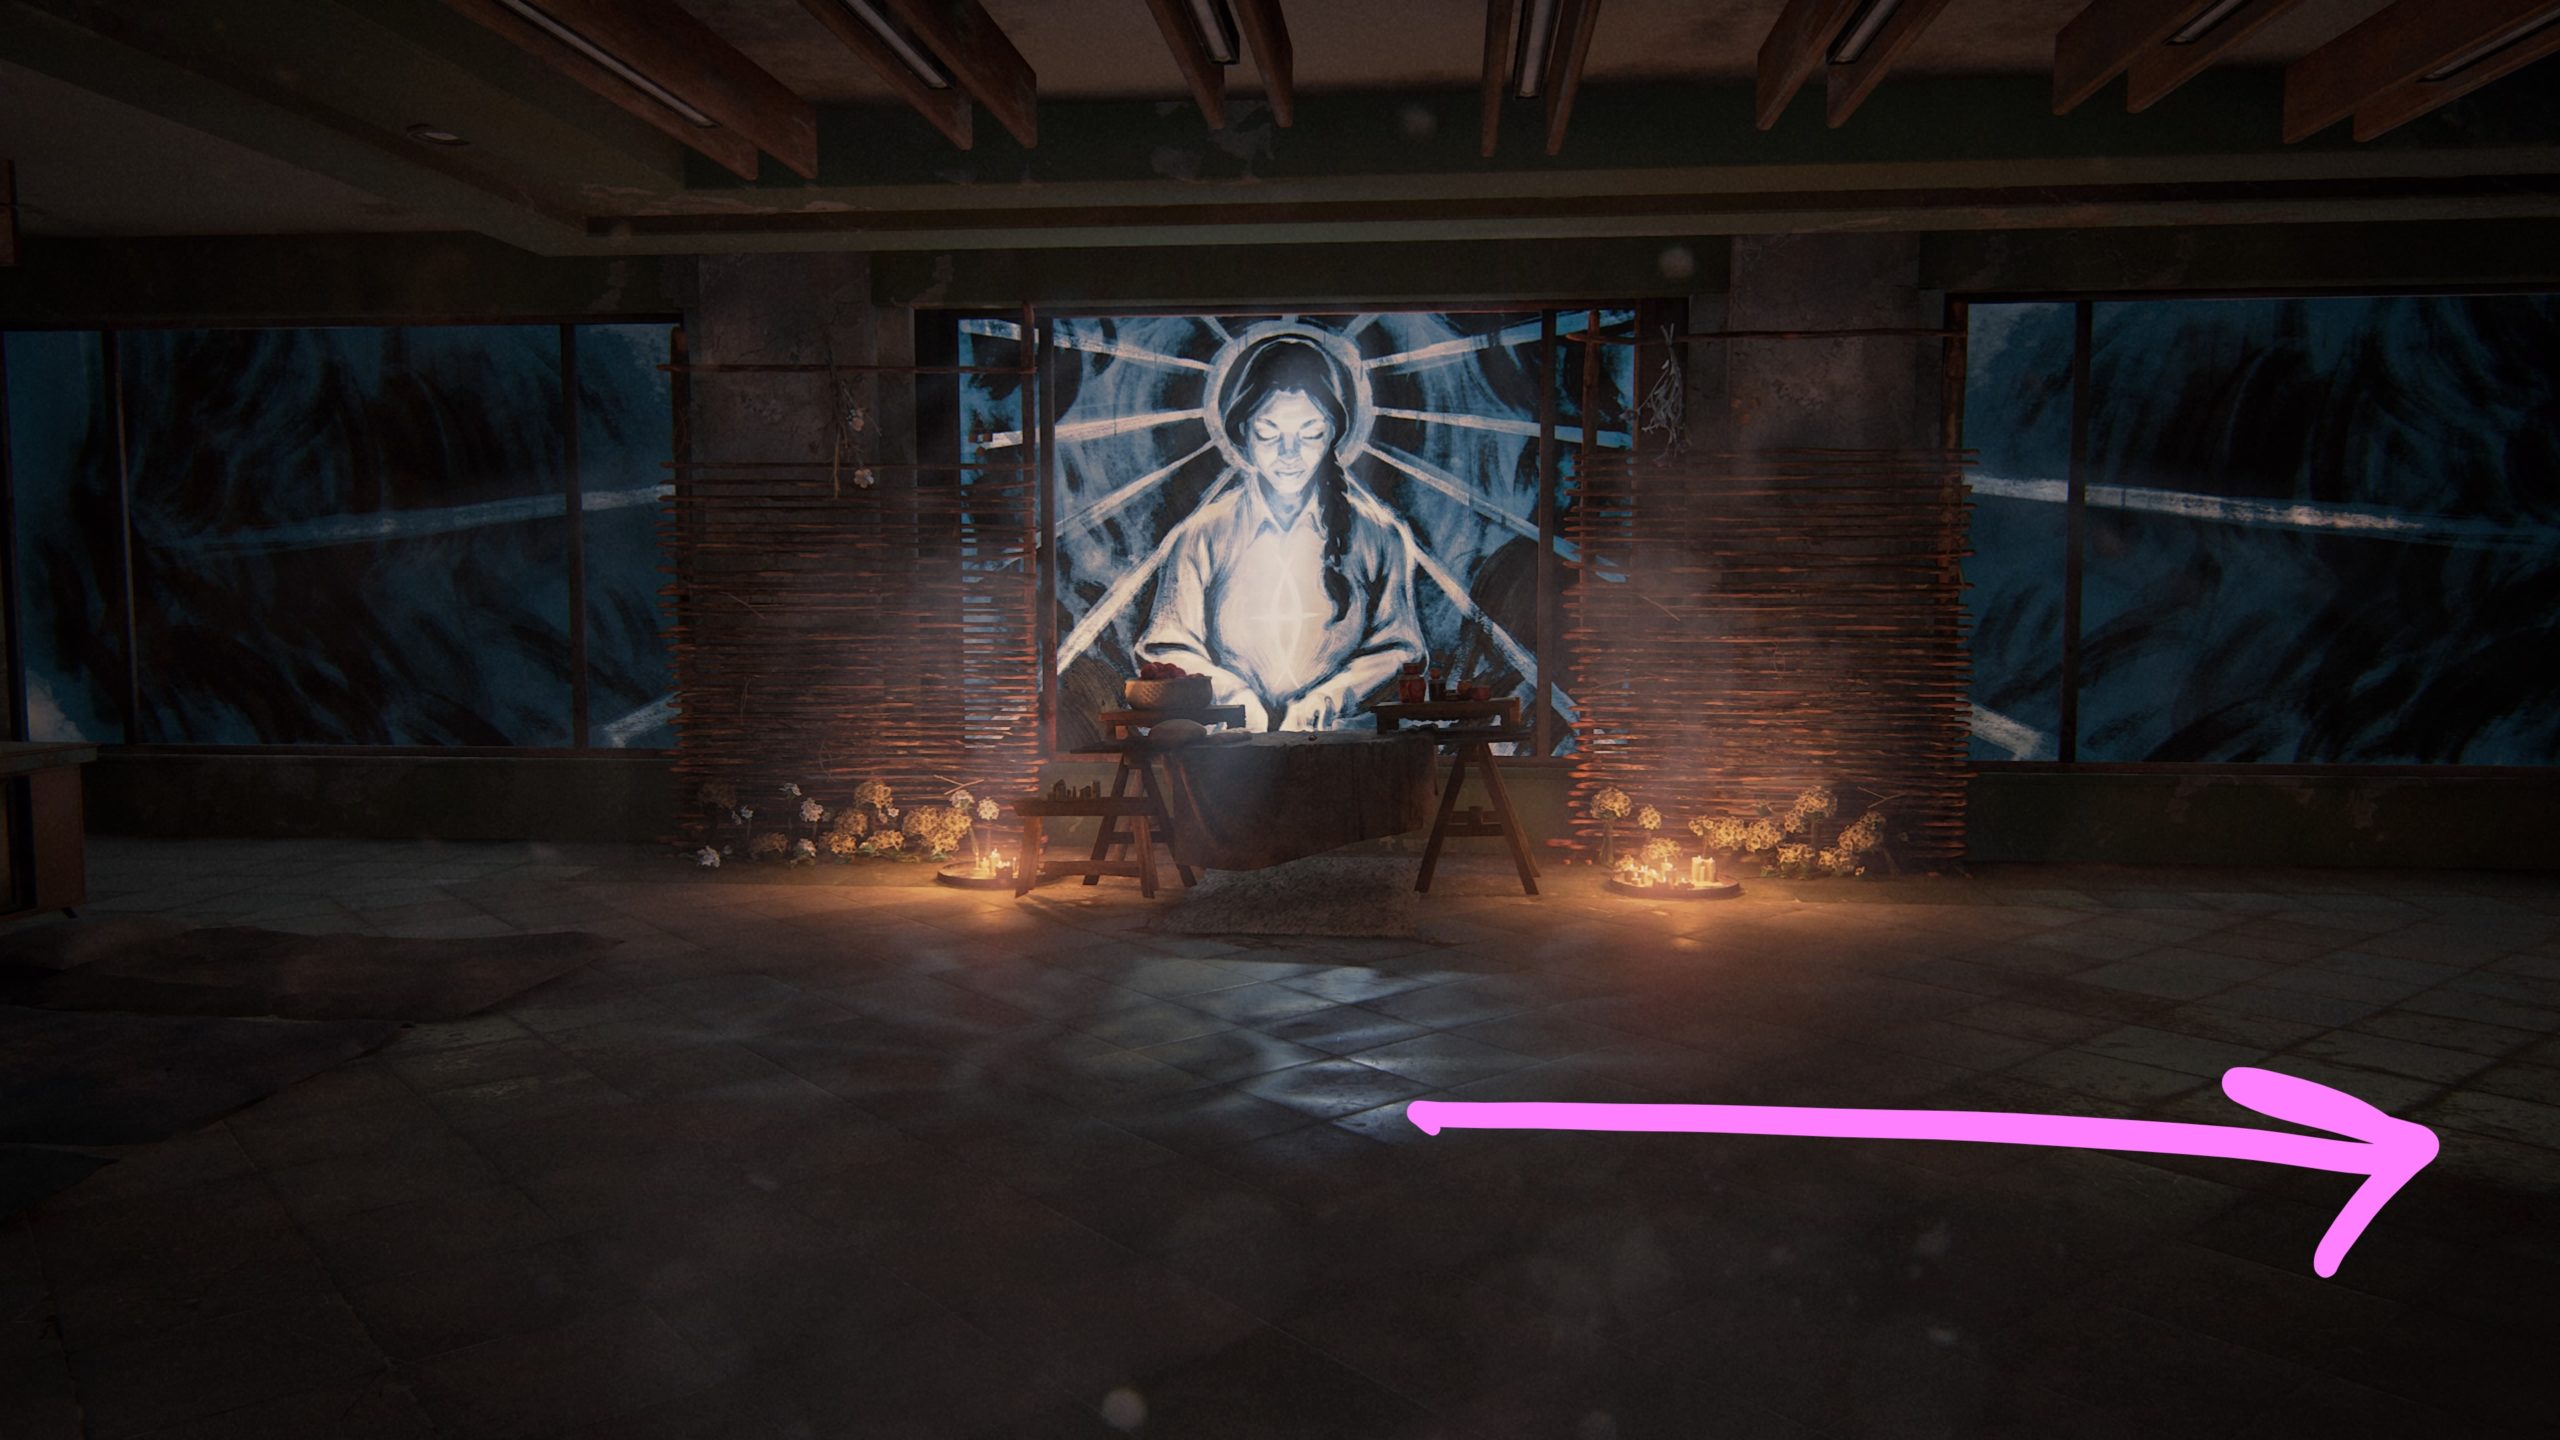
Shrine
This workbench can be found in the room to the right of the shrine.
Ground Zero
Hospital
The workbench is located in the room with the generator.
The Island
Wooden Lodge
After spotting Issac in his boat as part of the story, you will pass by a lookout tower then arrive at 2 wooden lodges across from each other. Enter the one on the left to find the workbench in the back.
The Escape
Radio Station
At the radio station, Lev will lower a ladder for you to climb up. Once you reach the top, climb through the open room on the right to enter the room contain the workbench.
Pushing Inland
House
As you progress through the level, you will have to use a car to climb up onto a roof with a Clicker on it. The workbench can be found downstairs in the kitchen of the above house.
The Resort
Shed
This is located in the shed with a circular saw to the right of where the Infected was chained up.
Below is a guide on the 1 artifact that can be found in The Overlook chapter in The Last of Us Part II.
Artifact – Seth’s Note
After you crawl underneath a house as part of the story, you will arrive at the front of the house. Climb through the window on the right side of the door to find this artifact on a desk in that room.
Below is a guide on the 2 trading cards and 1 artifact that can be found in the Waking Up chapter in The Last of Us Part II.
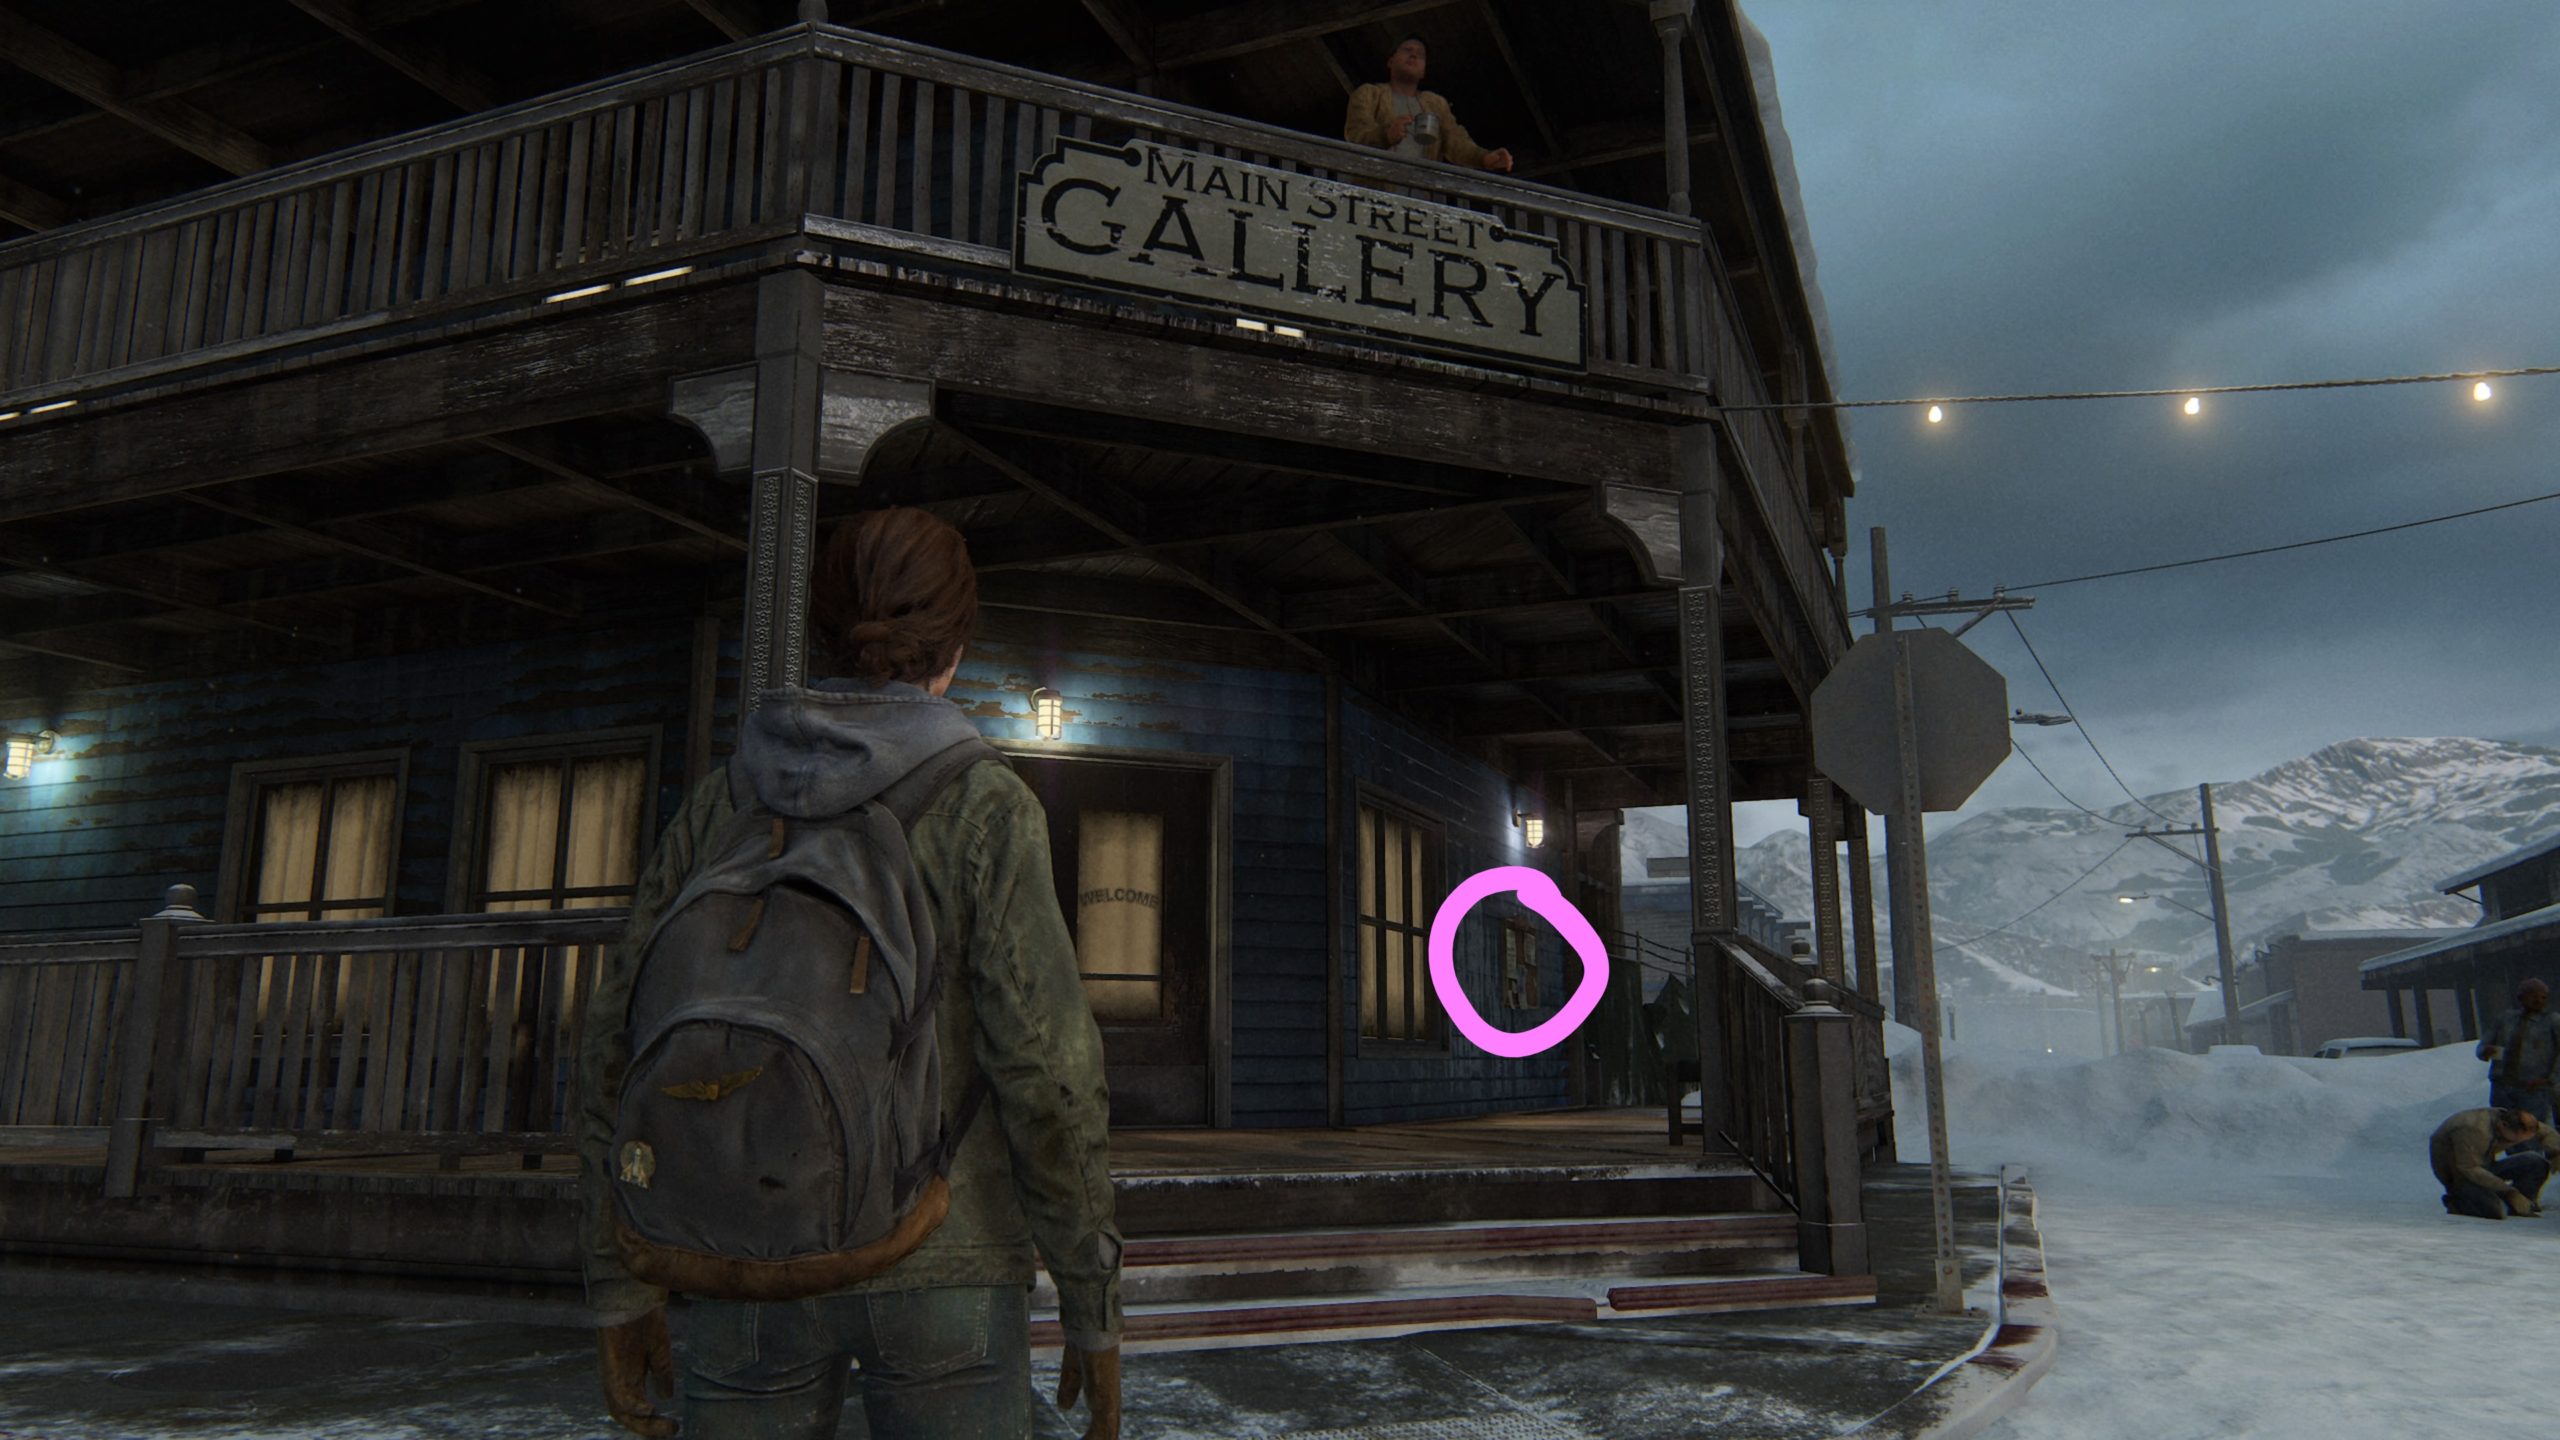
Trading Card – Seismicayla
This card can be found on Main Street Gallery’s Help Wanted bulletin board, which can be found to the right of the main doors on the outside of the building. *NOTE: You will need to collect this artifact before heading into the Tipsy Bison.
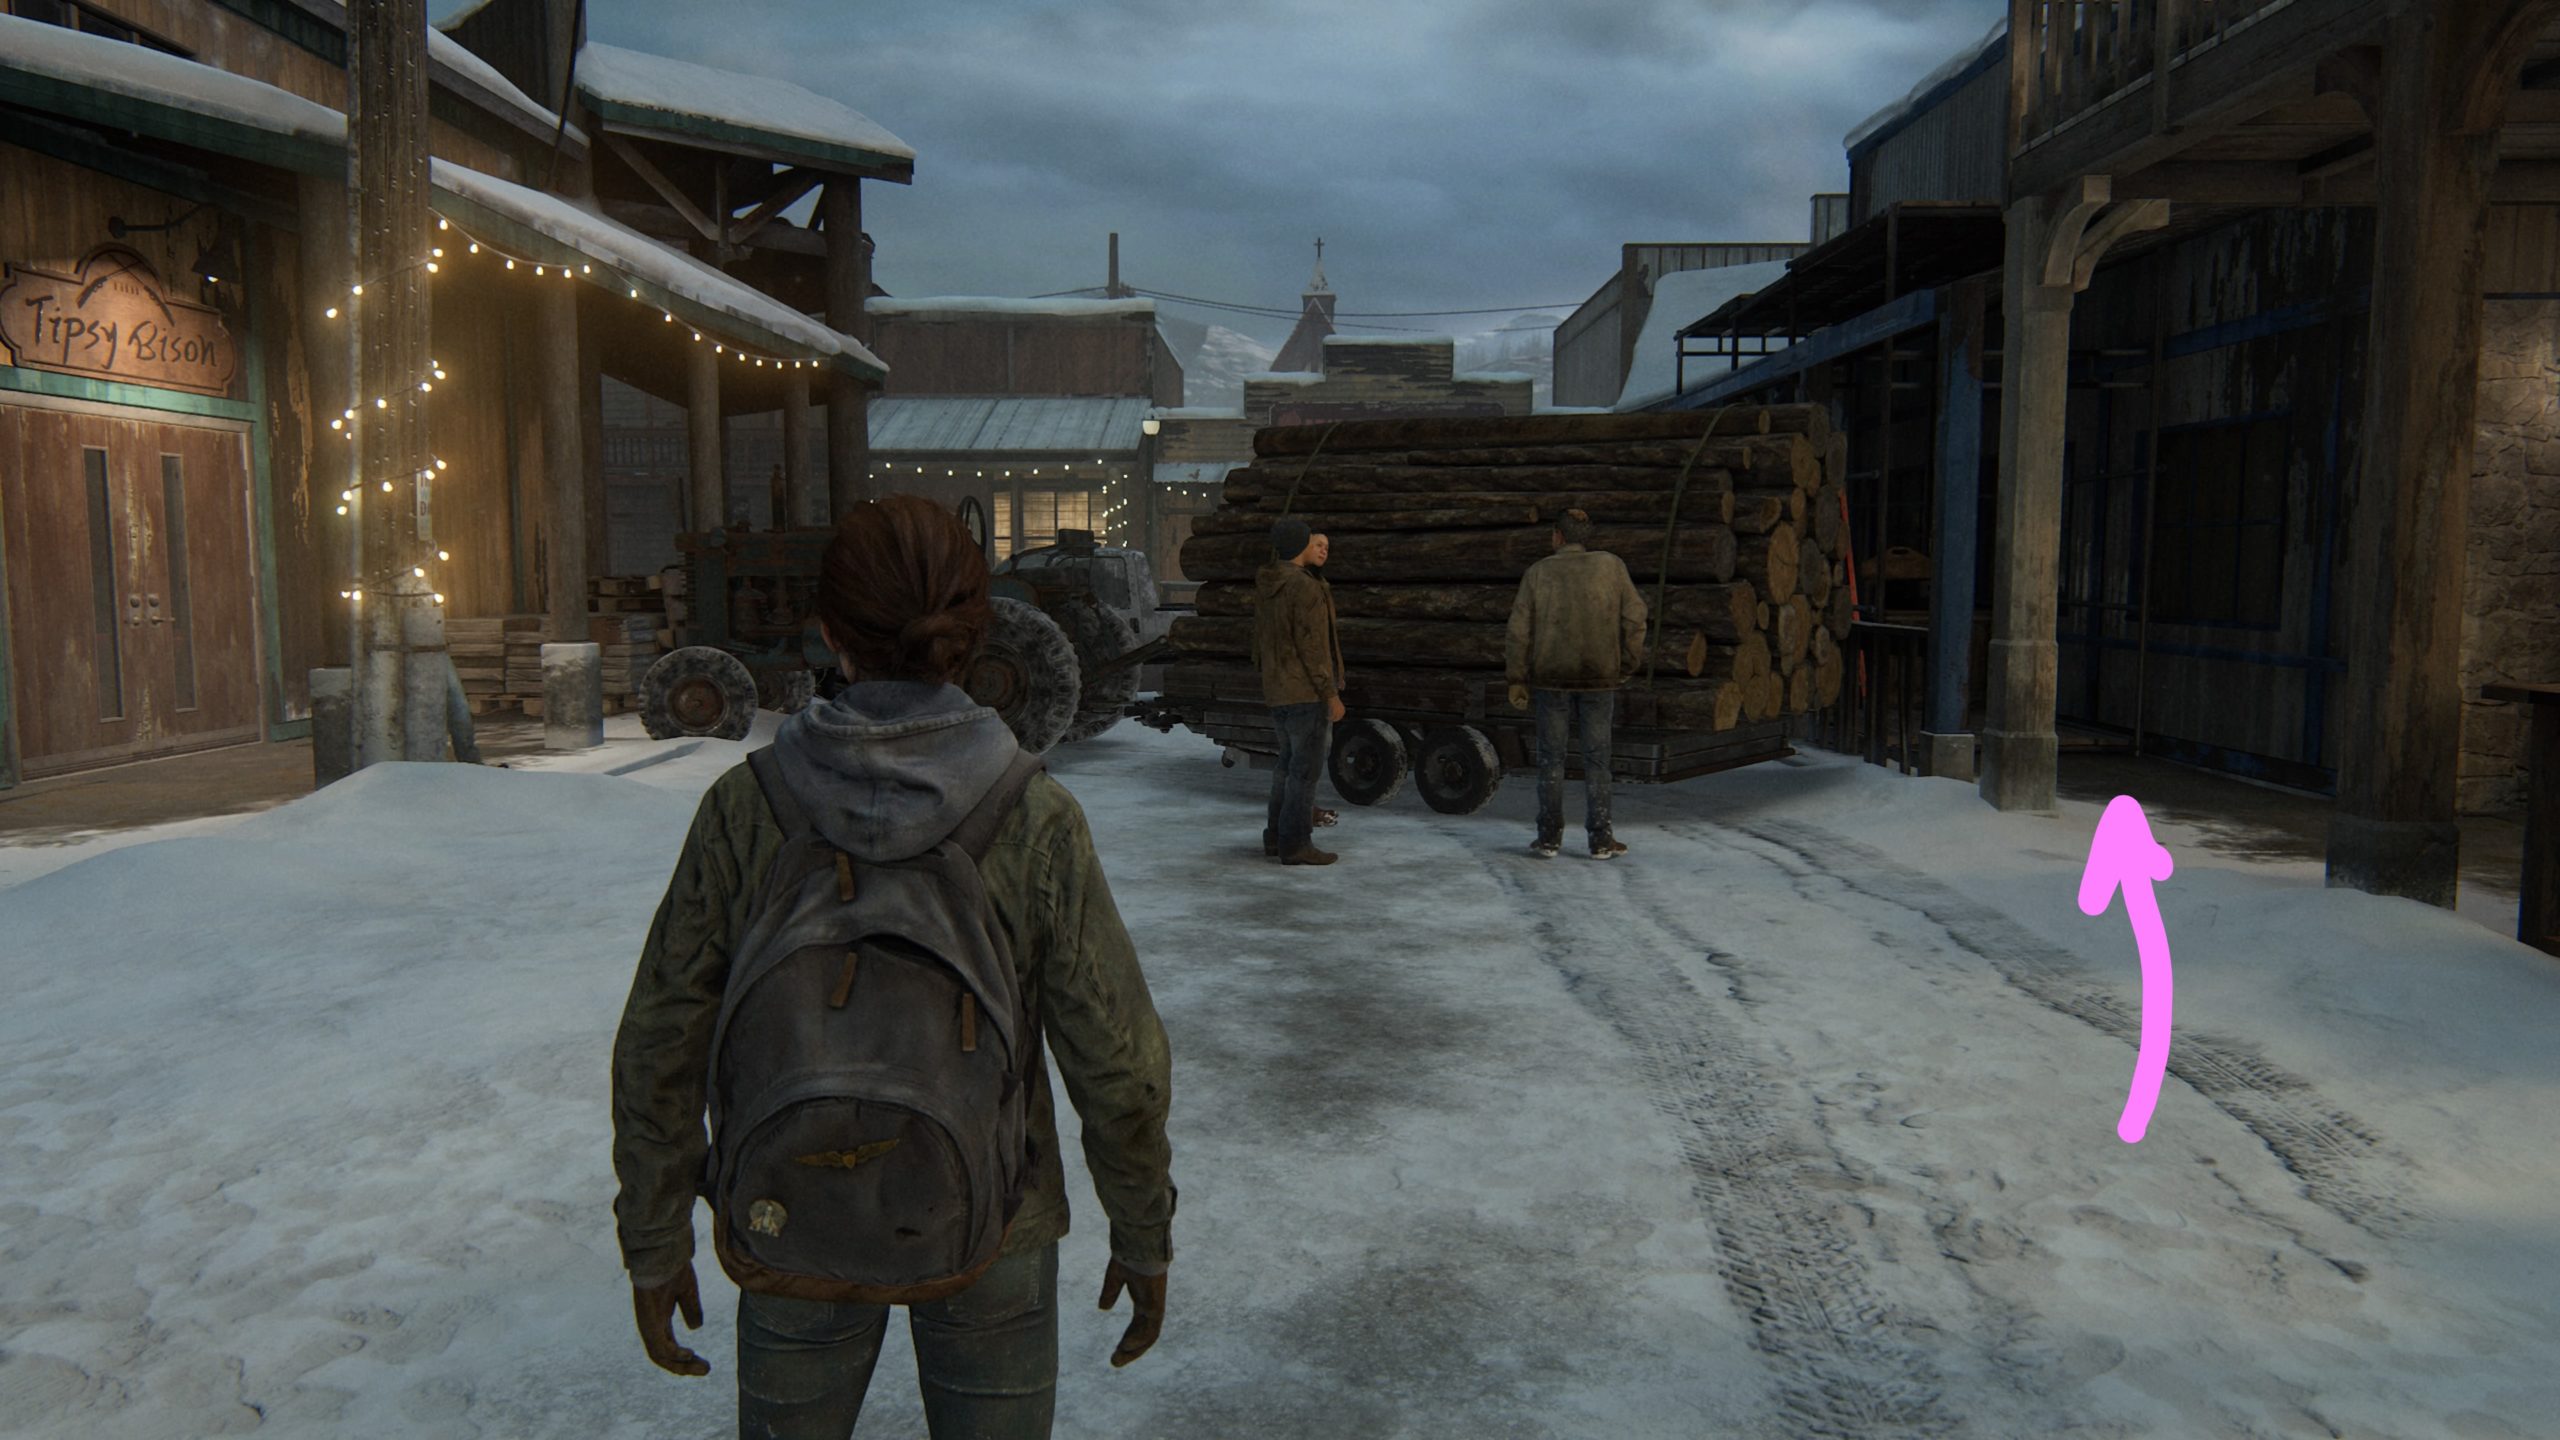
Artifact – Volunteer Request
This artifact is located across from the Tipsy Bison behind the cart with all the logs under a blue overhang near a ladder on a crate. *NOTE: You will need to collect this artifact before heading into the Tipsy Bison.
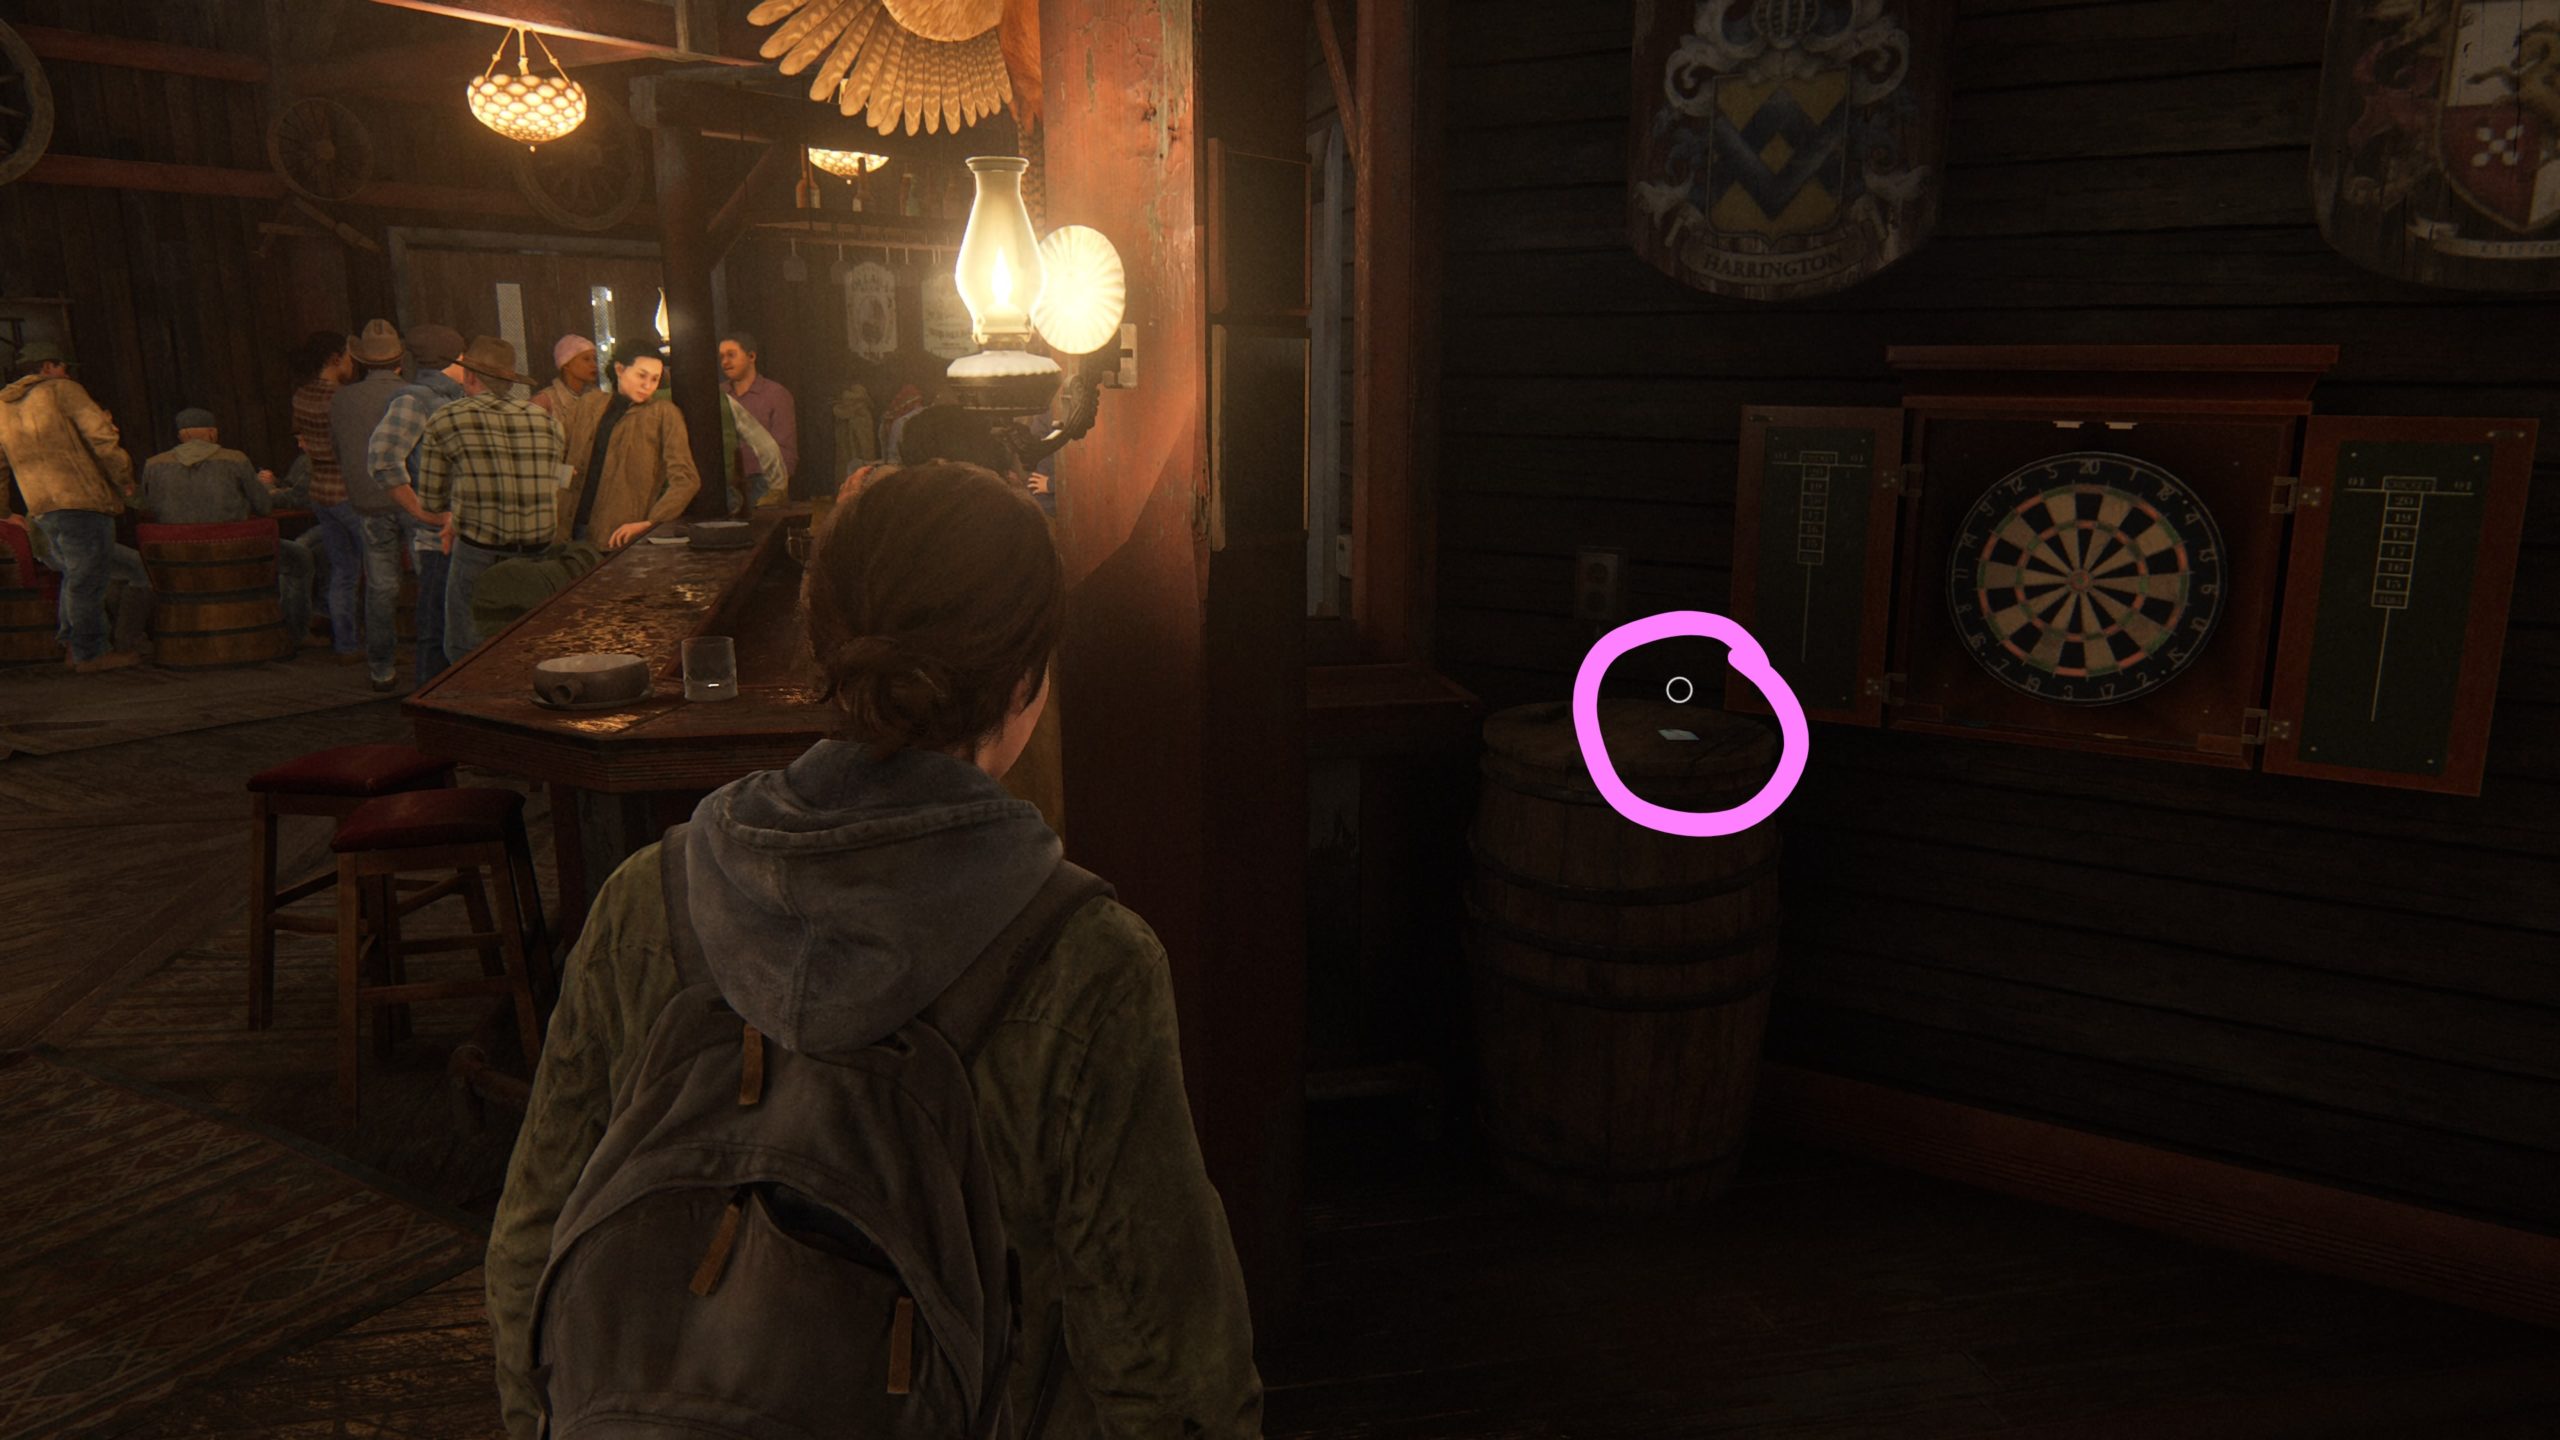
Trading Card – The Keene Twins
This card can be found on a barrel next to a dart board near the bar in the dining hall.
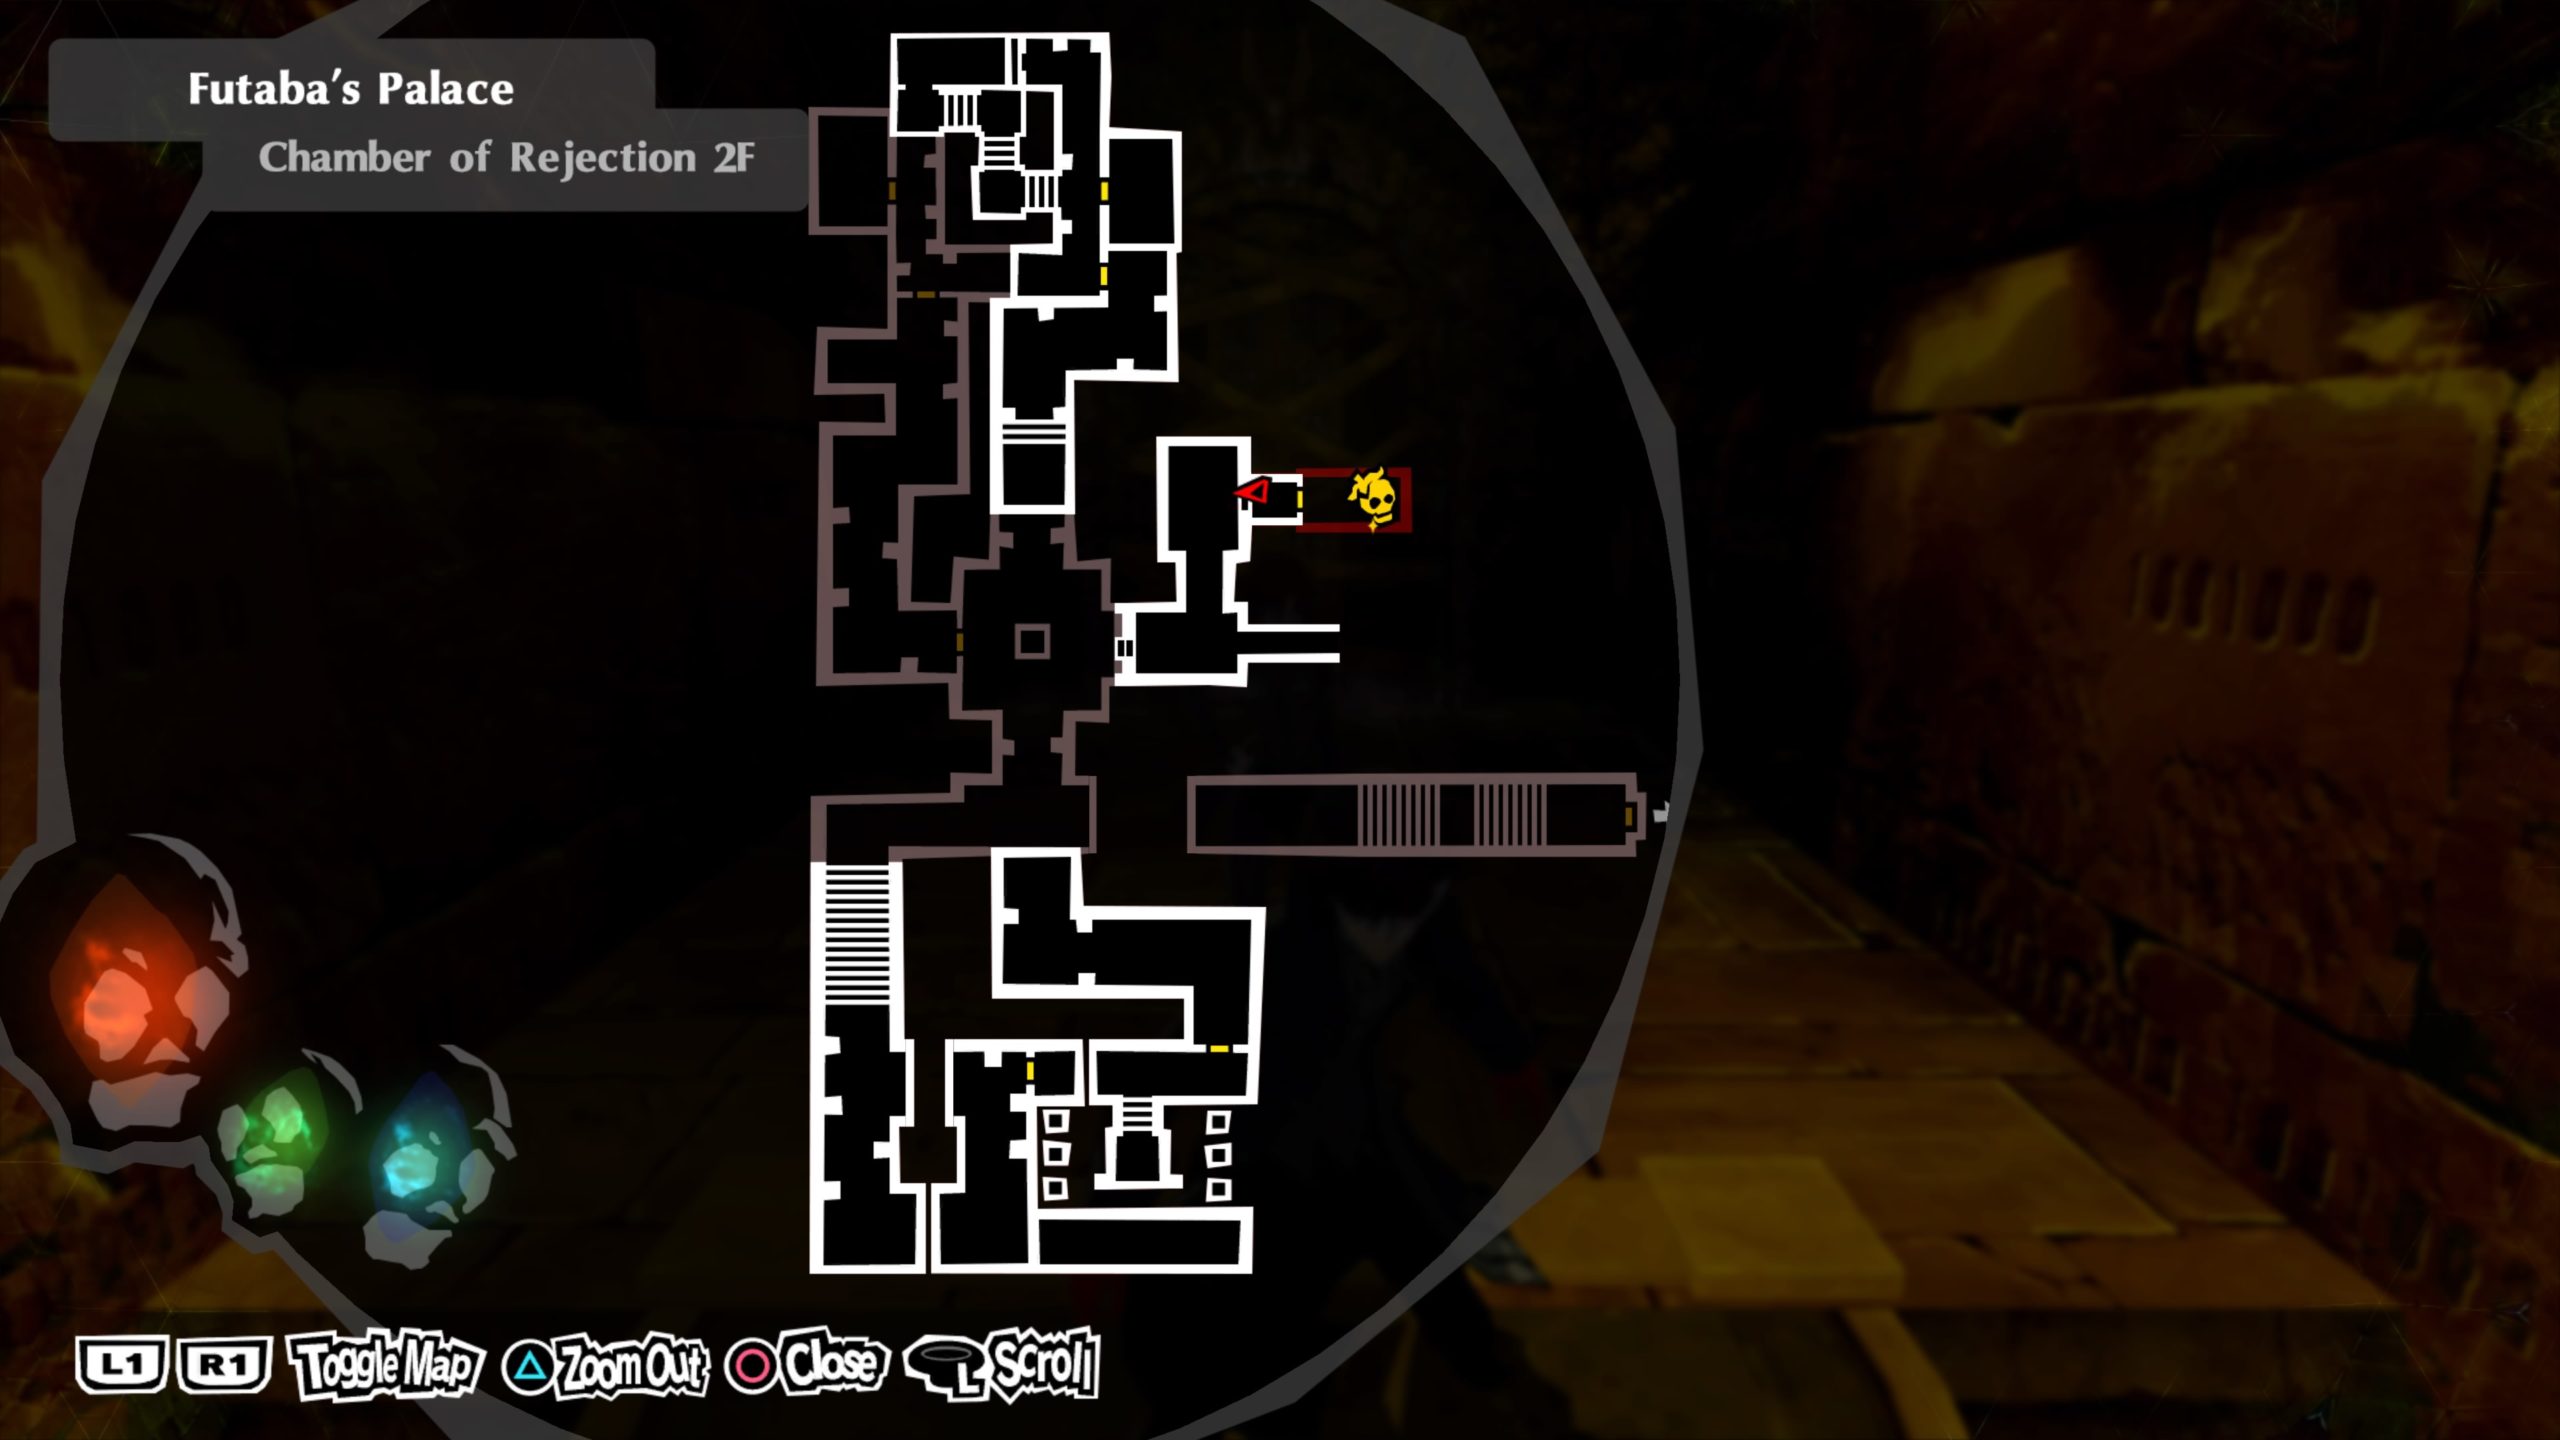
From the Corridor Bottom Safe House, work your way forward until you reach the mural with Futaba and the three birds. The Will Seed can be found just before this room in a side room with a treasure chest on block. You will have to climb up the top of a sarcophagus to the right of the chest to reach the seed.
Green Wrath Will Seed
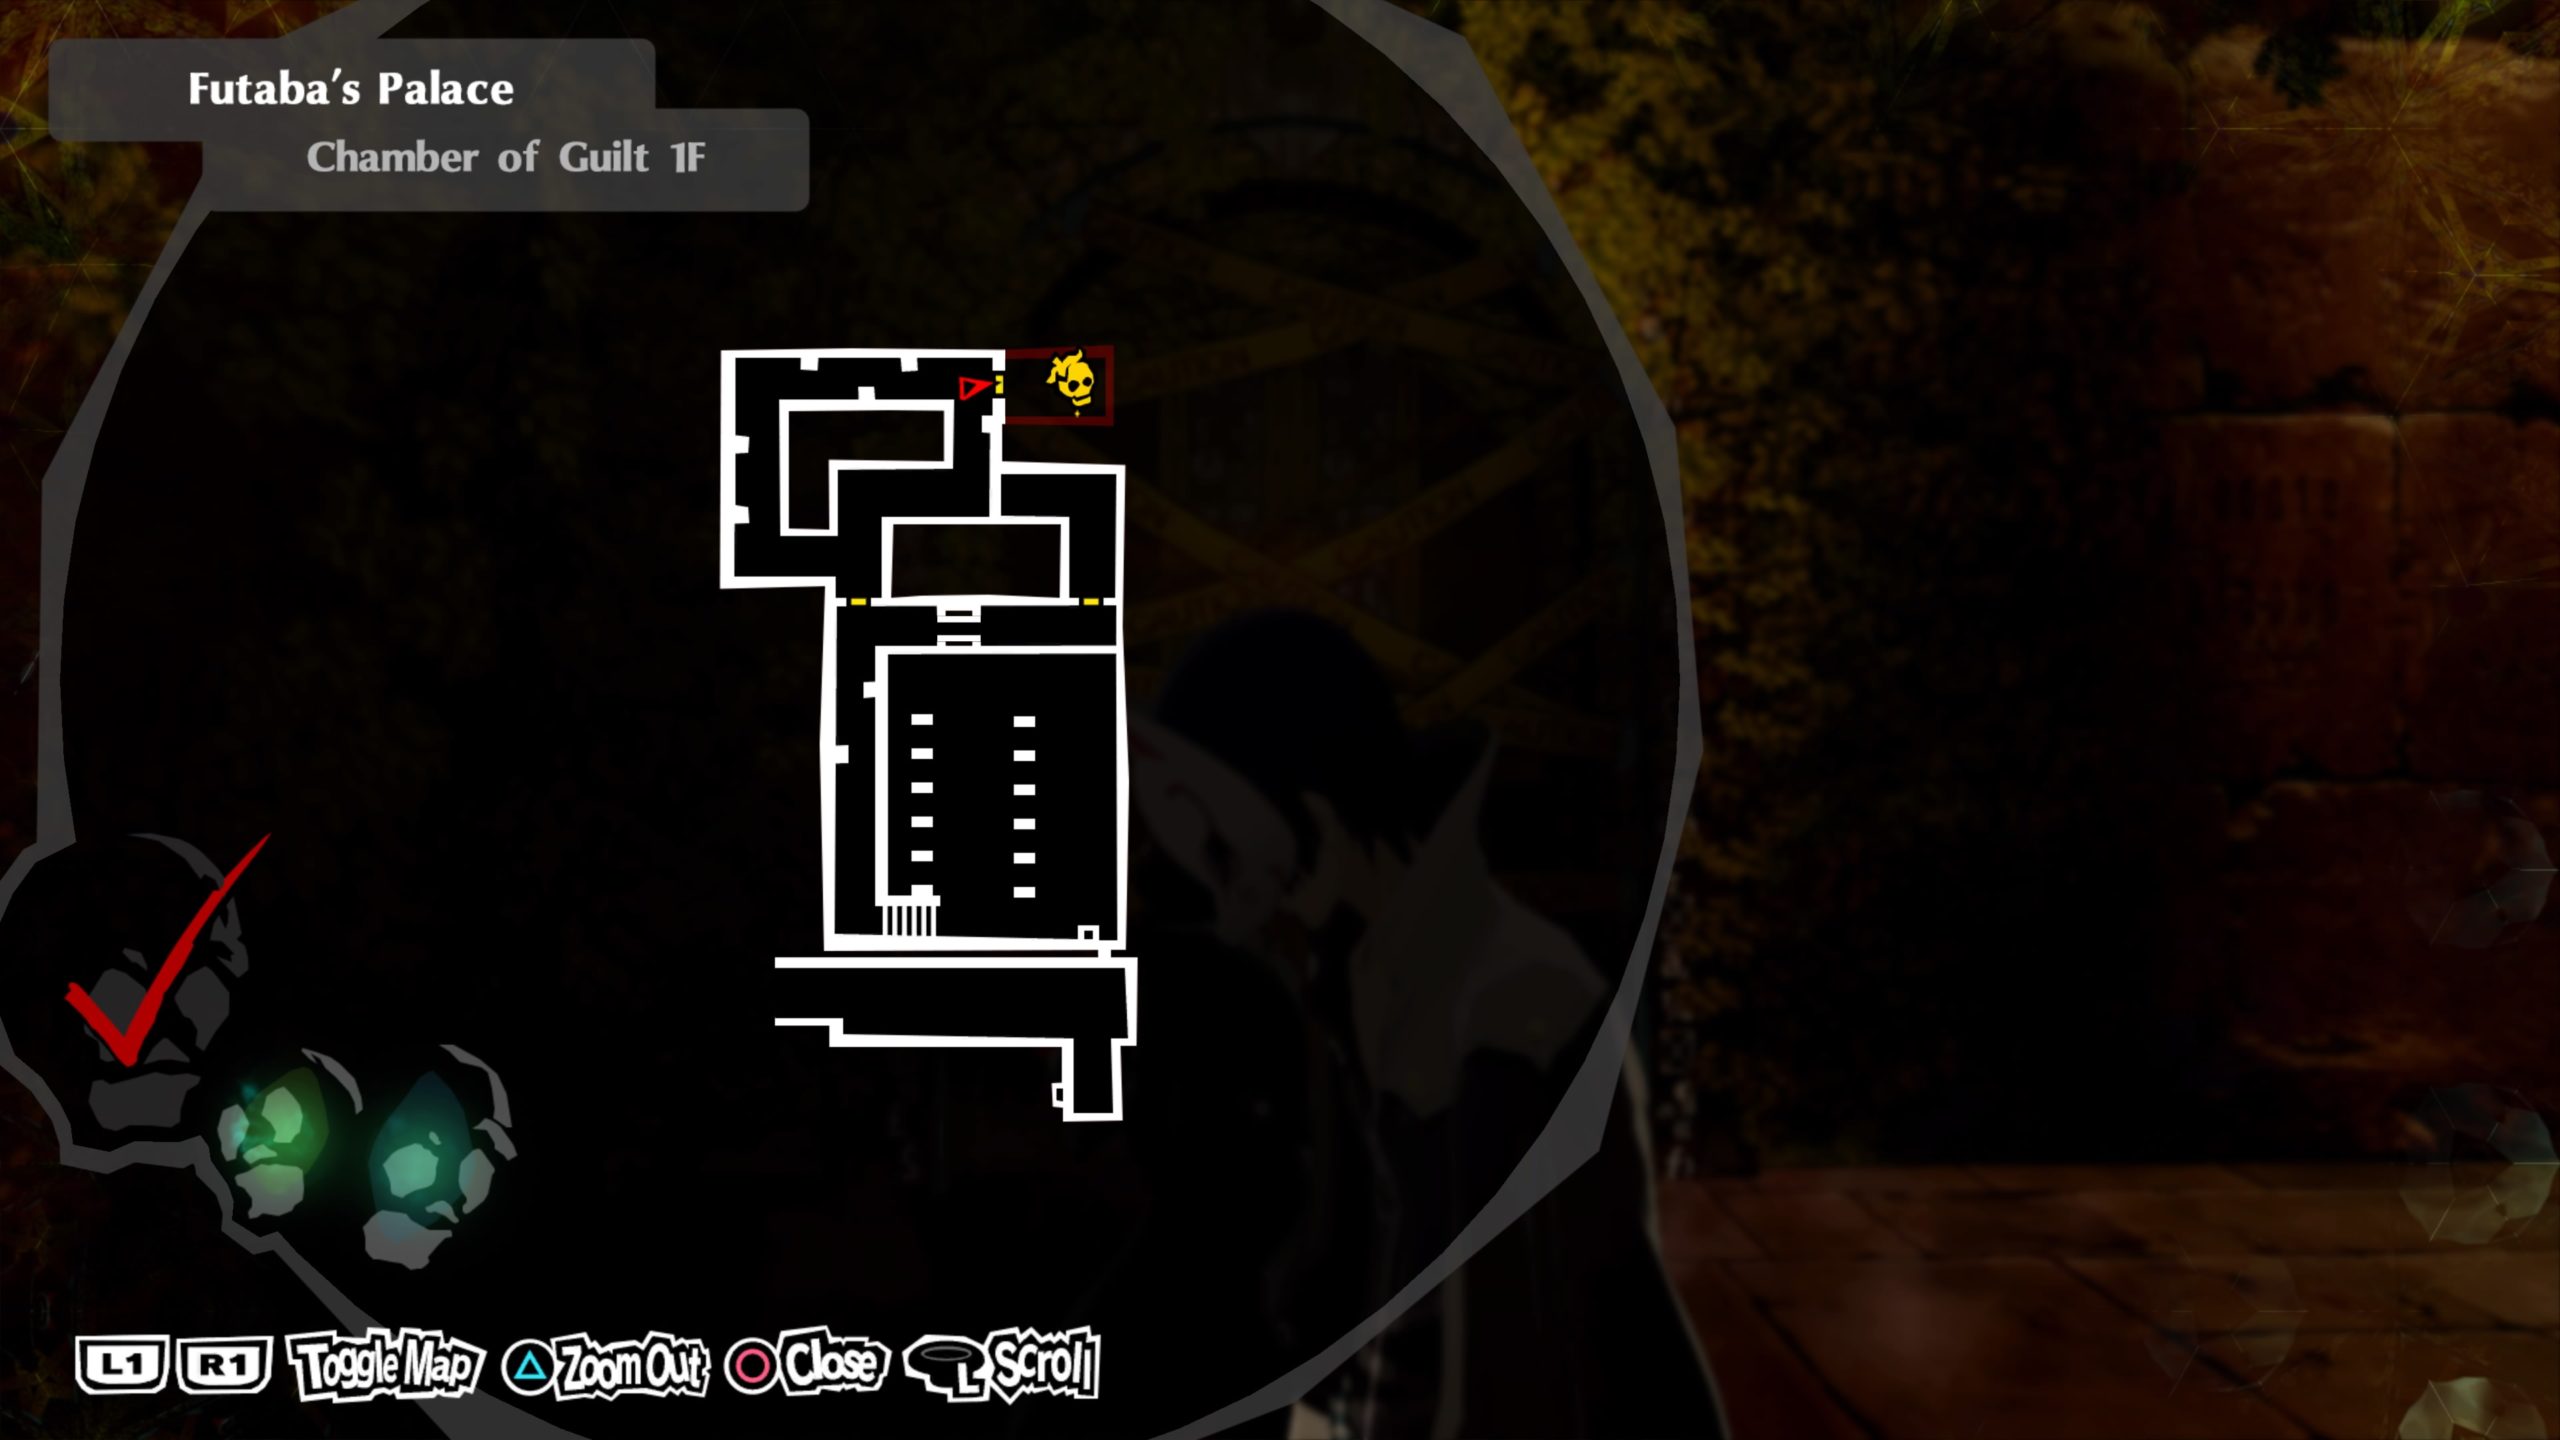
This seed can be found just past the big open room with all the sarcophagus in the middle of it (across from the Corridor Middle the Safe House). To start the puzzle, you will need to follow the trail of giant balls east to reach a ledge with a stone slab on it. Interact with the slab to start the puzzle (B10011 and R01100). To solve this puzzle, turn on the sarcophagus that are in the 0 position starting from the blue and red orbs. Once they match the codes, press the button near the slab in the room to open the red sealed door in the corner. Follow the path in this room left to reach the seed.
Blue Wrath Will Seed
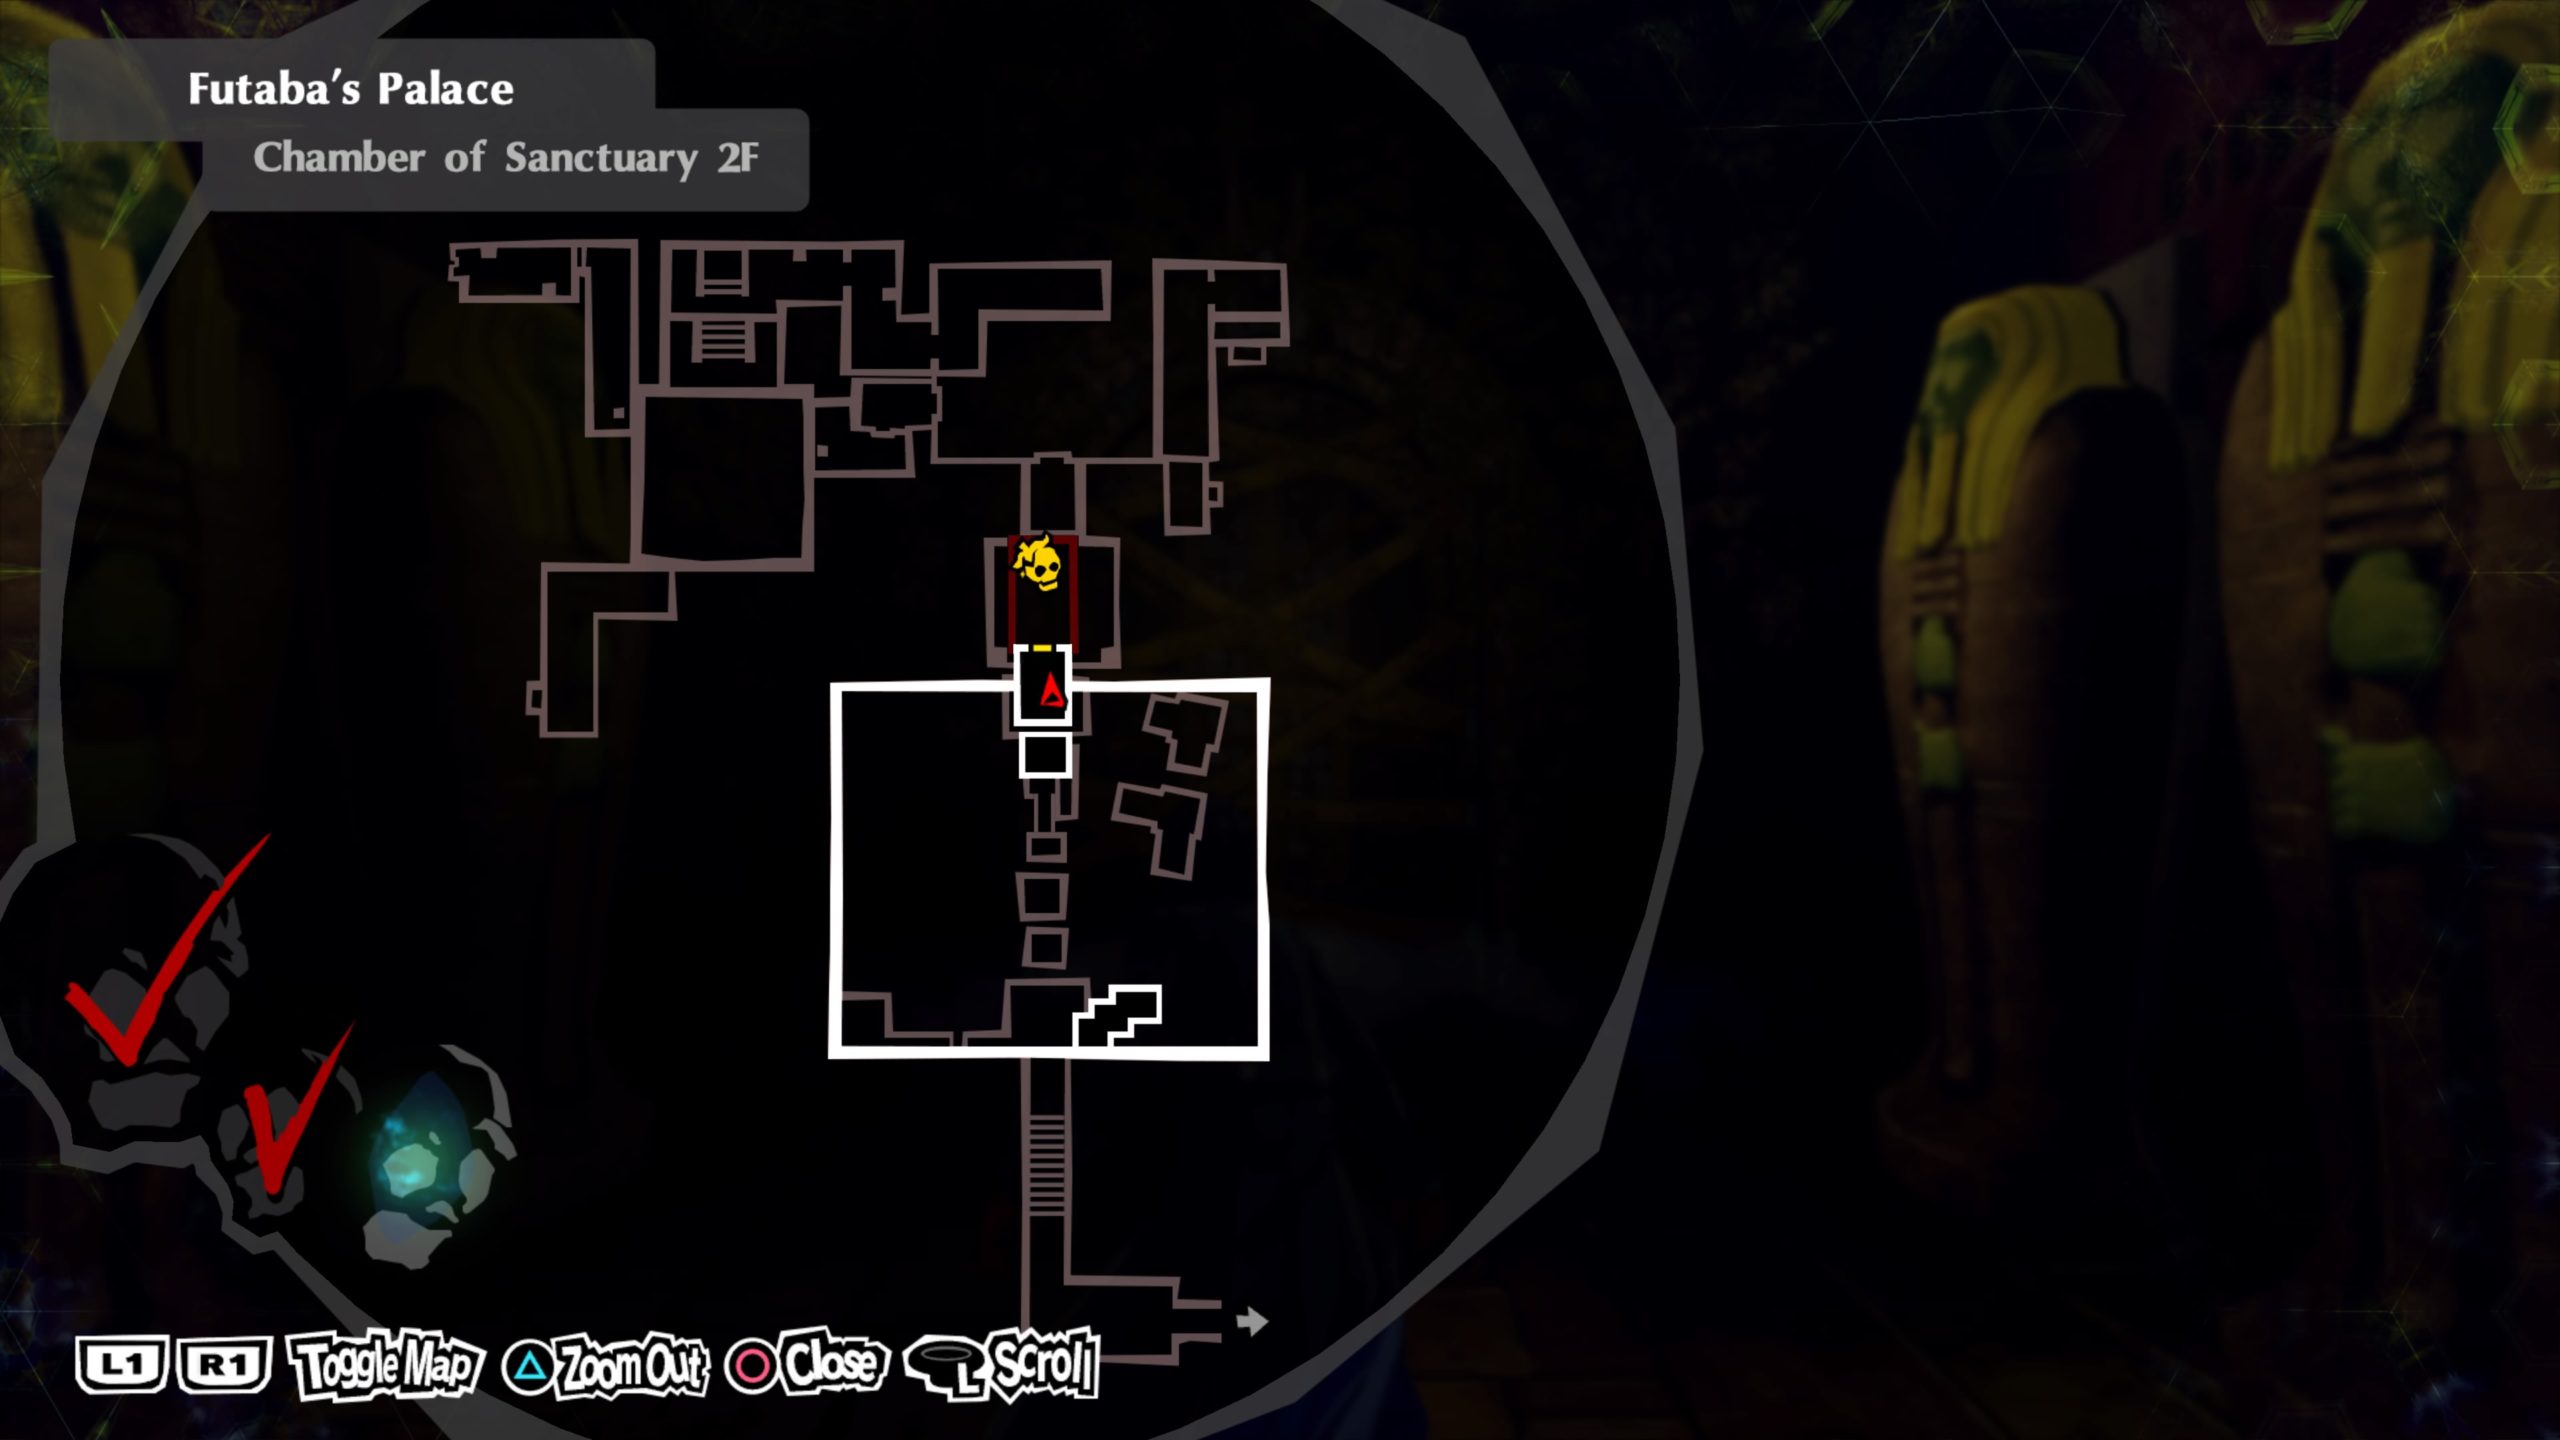
The last seed can be found in the Chamber of Sanctuary 2F just before the last mural in the palace. You will need to look for the giant room with the two giant Egyptian statues and the floating gems shooting out light. You will need to climb onto the head of the right statue to grapple to the platform leading to the Will Seed. It’s guarded by an enemy weak to fire.
*NOTE: The progress on this Confidant will be restricted by your level.
Abilities
Rank 1: Group Guillotine
Rank 3: Lockdown
Rank 4: Special Treatment
Rank 8: Guillotine Booster
Rank 10: VIP Treatment
Rank 1
In order to get the Strength Confidant, you will have to wait for Justine and Caroline to task you with creating a Jack Frost with Mabufu. To do this, you can fuse Succubus with Taki Mitama. When you create the Jack Frost, it should level up and learn Mabufu. Show it to the twins to unlock Rank 1.
Rank 2
For Rank 2, you will need to obtain a Ame-no-Uzume with the Frei skill. You can create her using Succubus and Jack Frost. Then you can use a skill card to teach her Frei. Show her to the twins to achieve Rank 2.
Rank 3
Rank 3 has you creating a Flauros with the Tarukaja ability. To do this, you will need to do an advanced fusion using Berith, Eligor and Orobas. Eligor should have Tarukaja already, so choose to inherit the skill during the fusion. Show the Flauros to the twins to reach Rank 3.
Rank 4
Rank 4 tasks you with creating the Phoenix with the skill Counter. The easiest way to do this is to use Yaksini with Counter and fuse her with a strength persona like Shiisaa or Kelpie and inherit Counter. Show Phoenix to the twins to reach Rank 4.
Rank 5
Rank 5 has you creating a Setanta that has the Rakukaja skill. To do this, you will need to obtain the persona Lamia who happens to start out with the Rakukaja skill. Fuse that with a priestess persona like Apsaras or Silky to create Setanta and inherit Rakukaja. Speak with the twins to reach Rank 5.
Rank 6
Rank 6 will require you to create a Neko Shogun with the Dekaja skill. The easiest way to do this is to fuse Orobas with a Fool like High Pixie to create Sudama inheriting Dekaja. Use Sudama in the fusion of Neko Shogun and choose to inherit Dekaja. Show Neko Shogun to the twins to reach Rank 6.
Rank 7
Rank 7 tasks you with creating a Lachesis with the Tetraja skill. The easiest way to do this is to use Principality that knows Tetraja in a fusion with a Magician like Sandman to make Thoth inheriting Tetraja. You can then fuse Thoth with Anzu to create Lachesis and inherit the Tetraja skill. Show it to the twins to reach Rank 7.
Rank 8
Rank 8 tasks you with creating a Hecatoncheires with the skill Masukunda. You will need to use Lilim, who can learn Masukunda naturally by leveling up, in a fusion with Anzu to make Hecatoncheires. Choose to inherit the skill Masukunda then show it to the twins to reach Rank 8.
Rank 9
Rank 9 tasks you with creating a Bugs with the skill Samarecarm. You will need to fuse together Pixie, Pisaca and Hariti using the advanced fusion. Hariti learns Samarecarm naturally by leveling up. Choose to inherit the skill Samarecarm then show it to the twins to reach Rank 9.
Rank 10
Rank 10 tasks you with creating a Seth with High Counter. Seth is an advanced fusion using Isis, Anubis, Thoth and Horus. The easiest way to do this is to complete The Killer who Takes out the Trash Mementos request. High Counter is the rewards. Choose to inherit the skill High Counter then show it to the twins to reach rank 10.
*NOTE: You must choose the first option if you want to romance her.
I want us to date. (+0)
We’ll be friends forever. (+0)
Choice 4 (If DID NOT romance her)
That’s a great way to see it. (+2)
You’re overthinking it. (+2)
Let’s win the next one. (+2)
Choice 5 (If DID romance her)
Anything for you. (+2)
It was all a big coincidence. (+2)
It was love at first sight. (+2)
Rank 10
The choices don’t matter since this is the last rank up!
Search
This site uses cookies. By continuing to use this website, you are giving consent to cookies being used. For more information on cookies, view our Privacy Policy.OkPrivacy Policy