Guides

Metro Exodus – The Two Colonels Diary Page Locations

by Chappie in


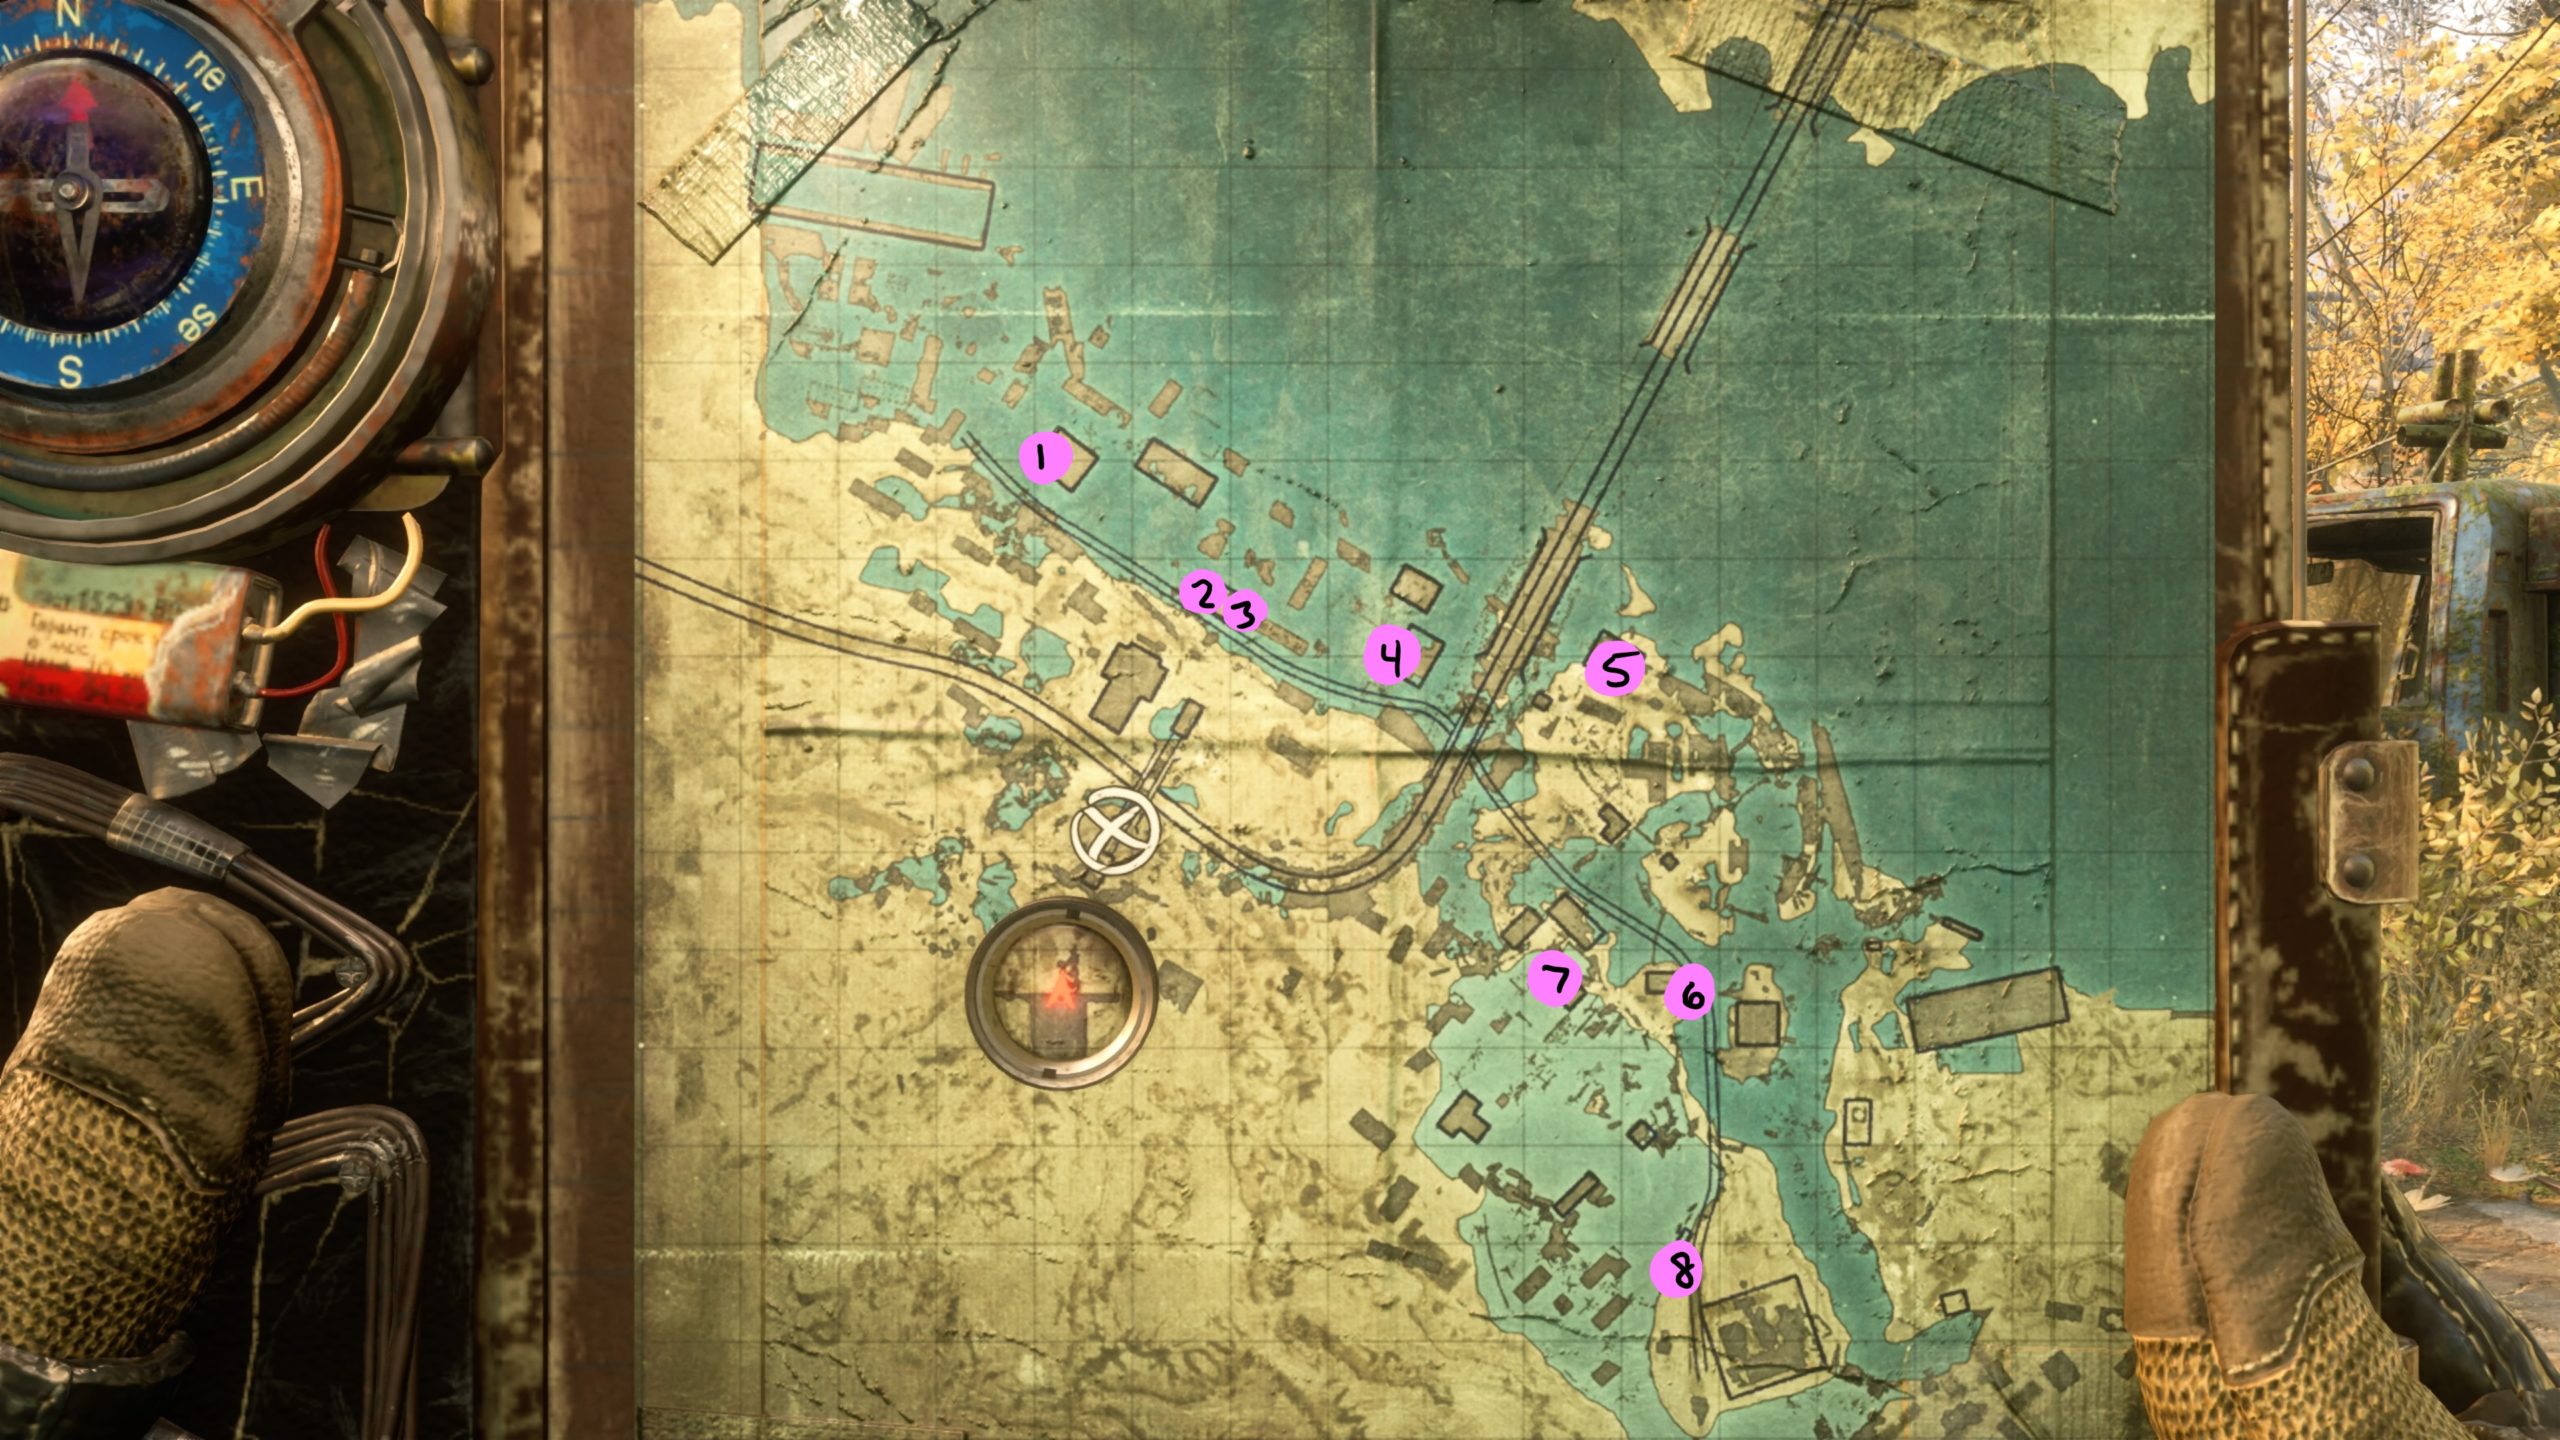
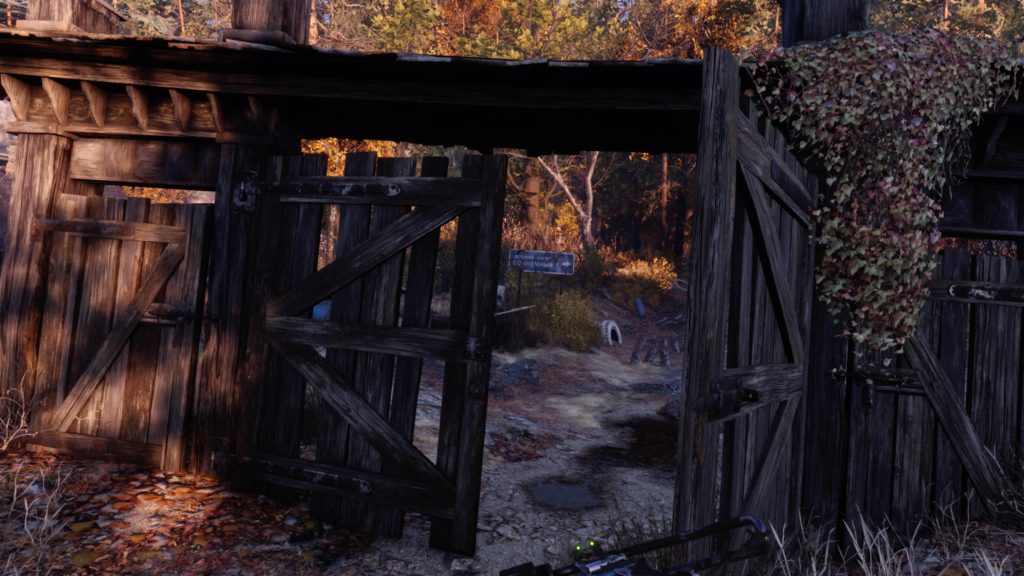
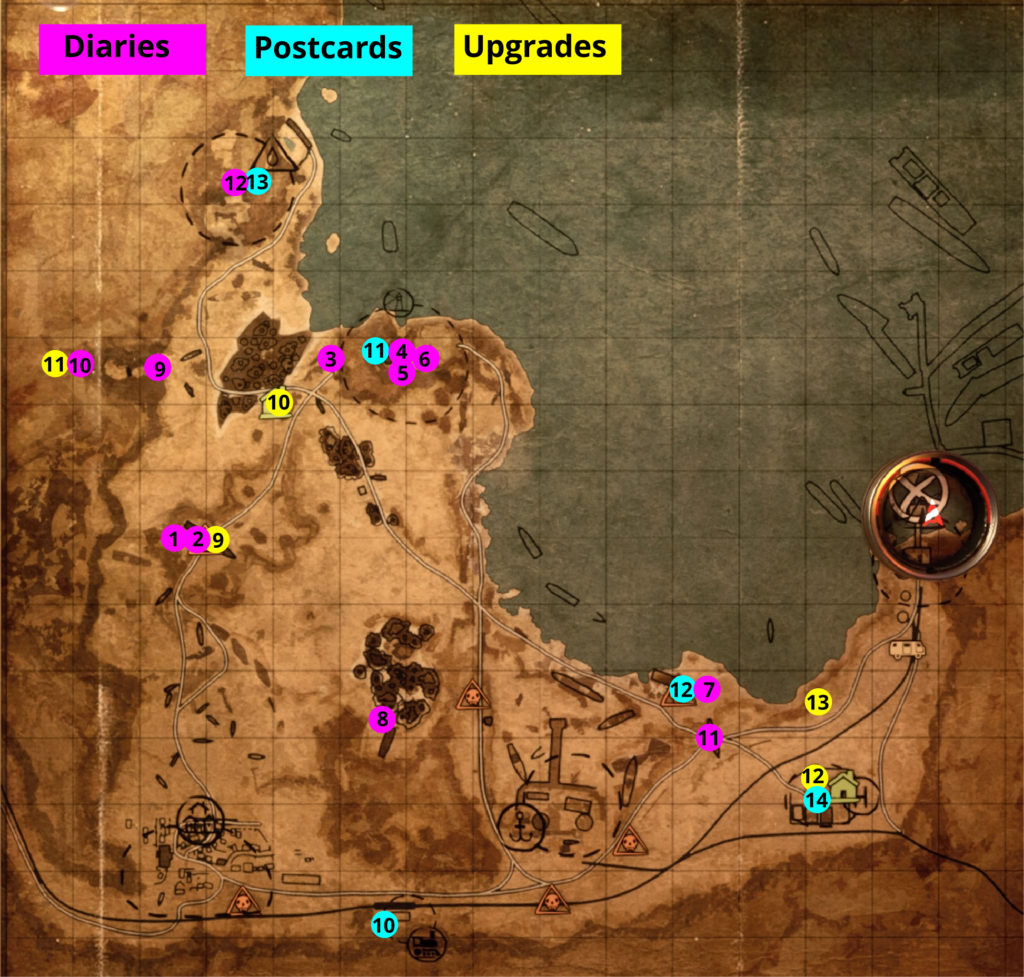
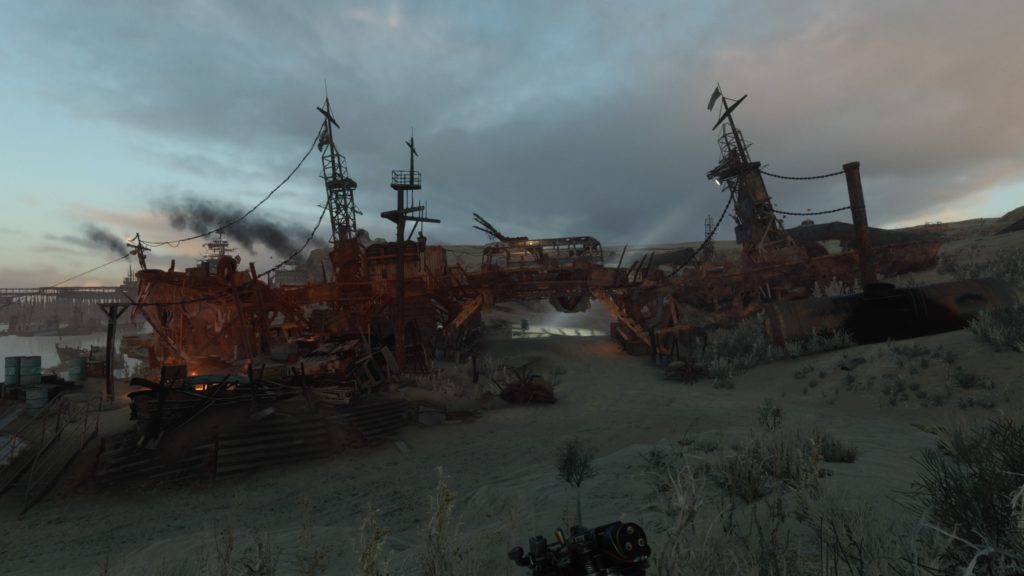
The Two Colonels DLC in Metro Exodus has 9 diary pages to collect. If you obtain all 9 diary pages, you will receive The Whole Picture Trophy/Achievement. Below is a listing of the locations for all the diary pages. You will need to collect them in this order, since you can get locked out of areas as you progress through the story.


Foreman’s Diary 1

When you first gain control, head down the stairs and proceed forward through the hallway, burning the slime as you go. At the end of the hallway, turn right and head through an open doorway to find the diary on a metal table straight ahead.


Foreman’s Diary 2

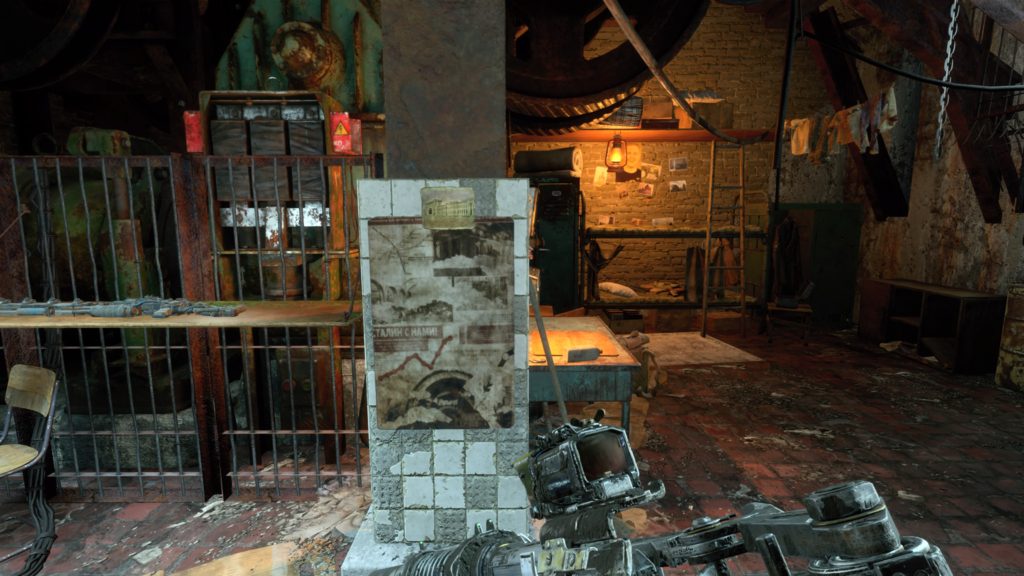
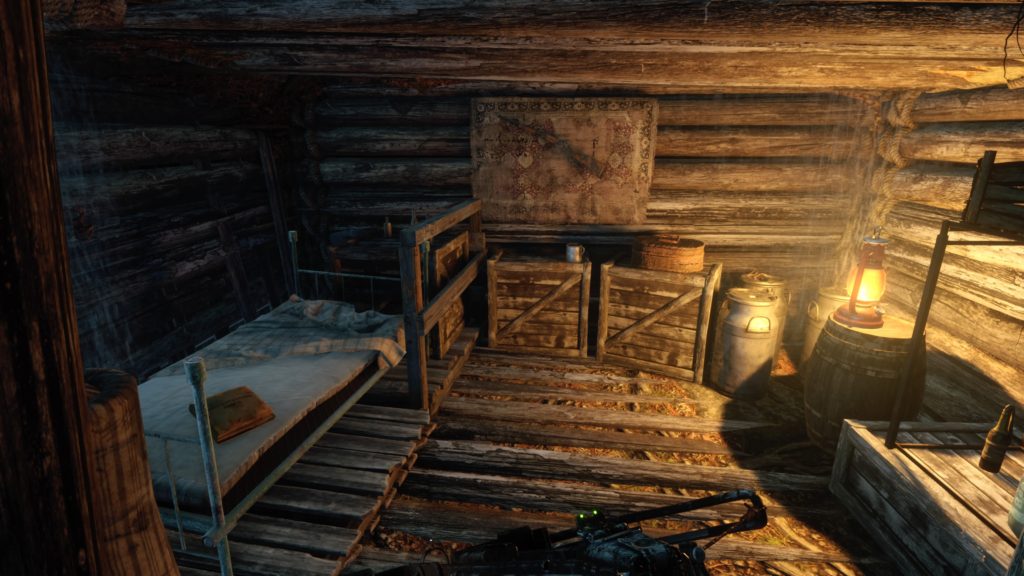
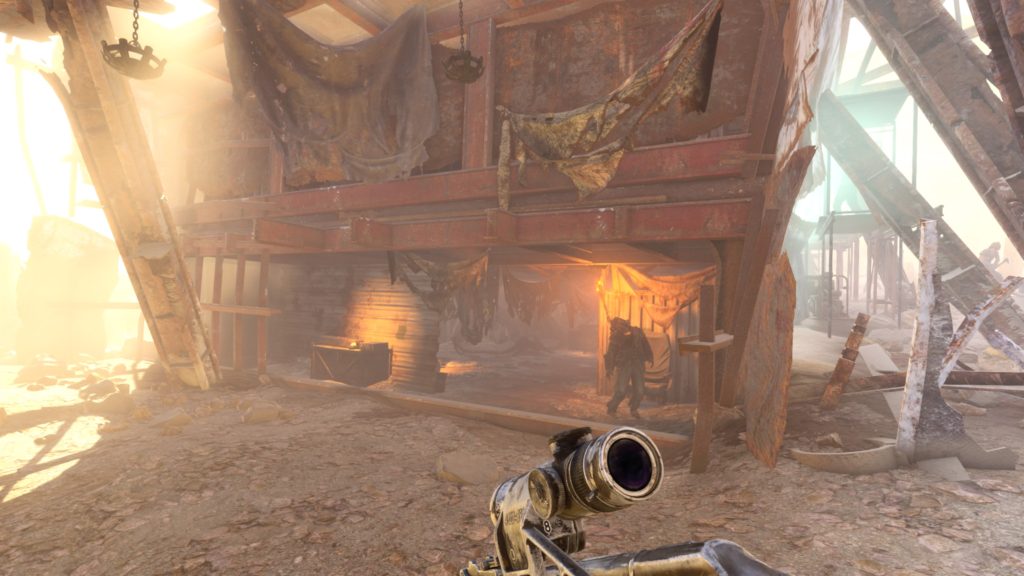
When you reach the room with the first workbench and a generator, take the door to the right of the workbench and follow the hallway to reach a storage room containing the diary on a green metal shelf next to a table containing large boxes.
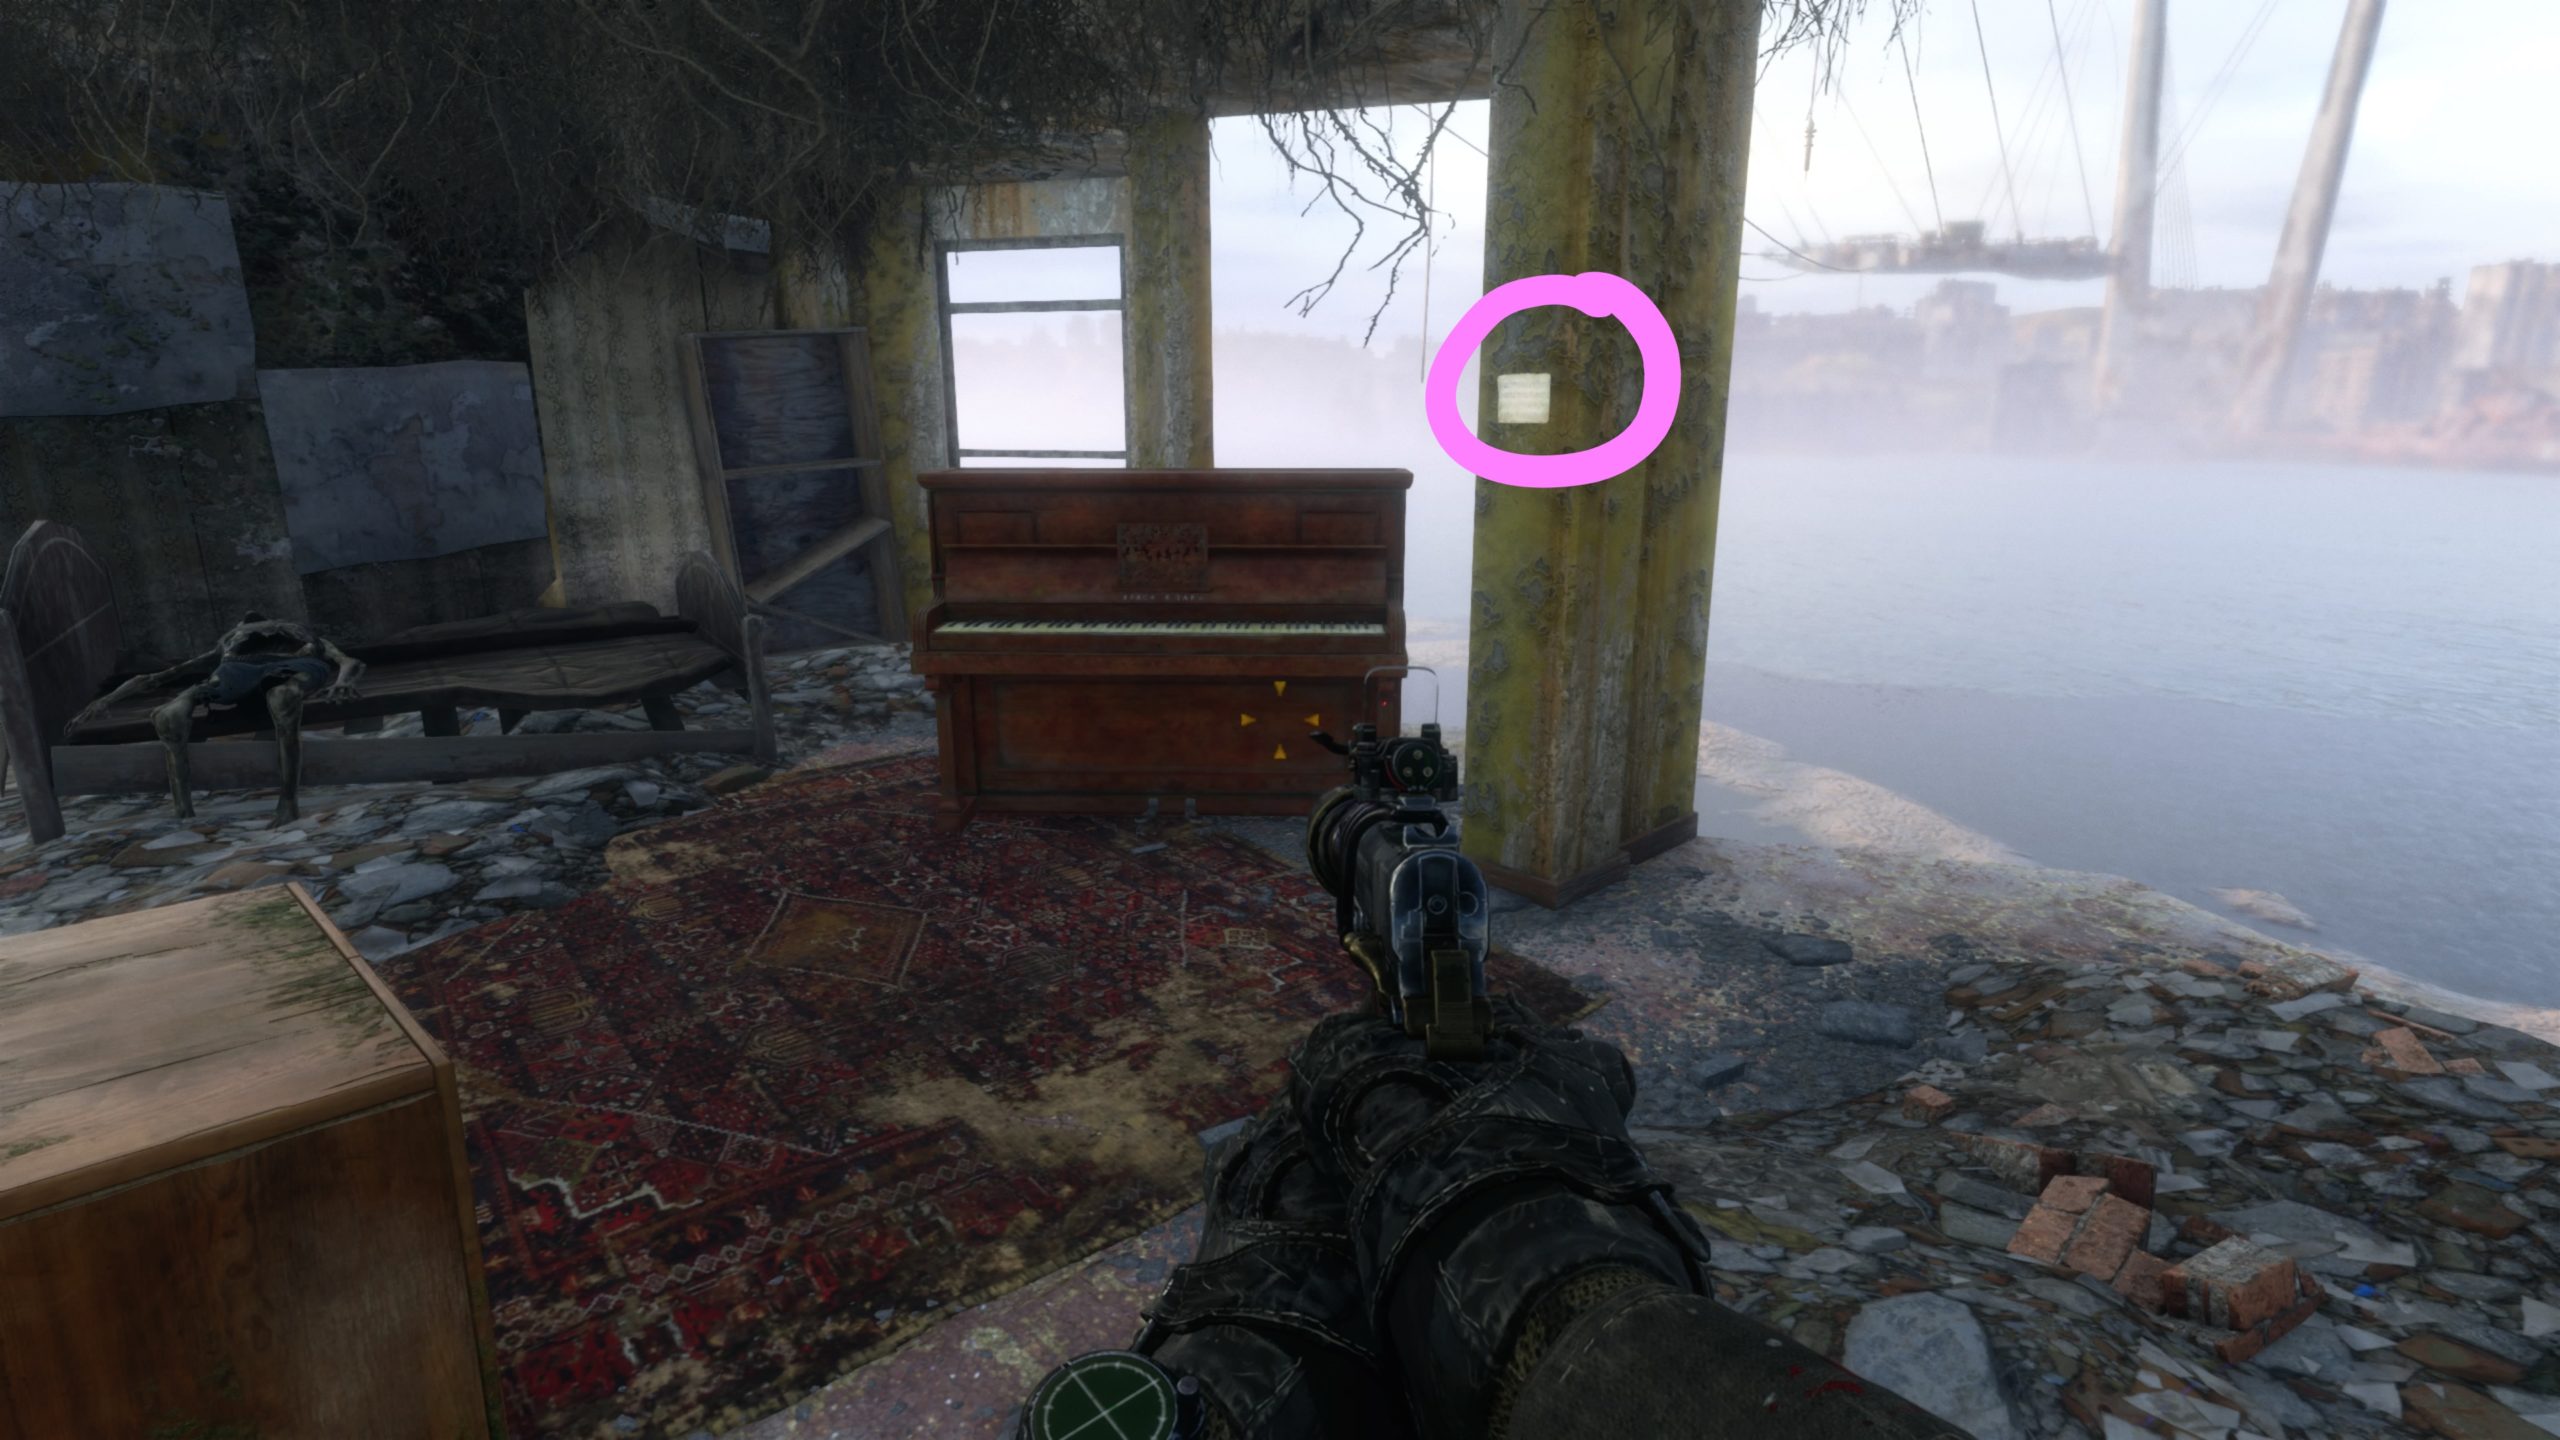
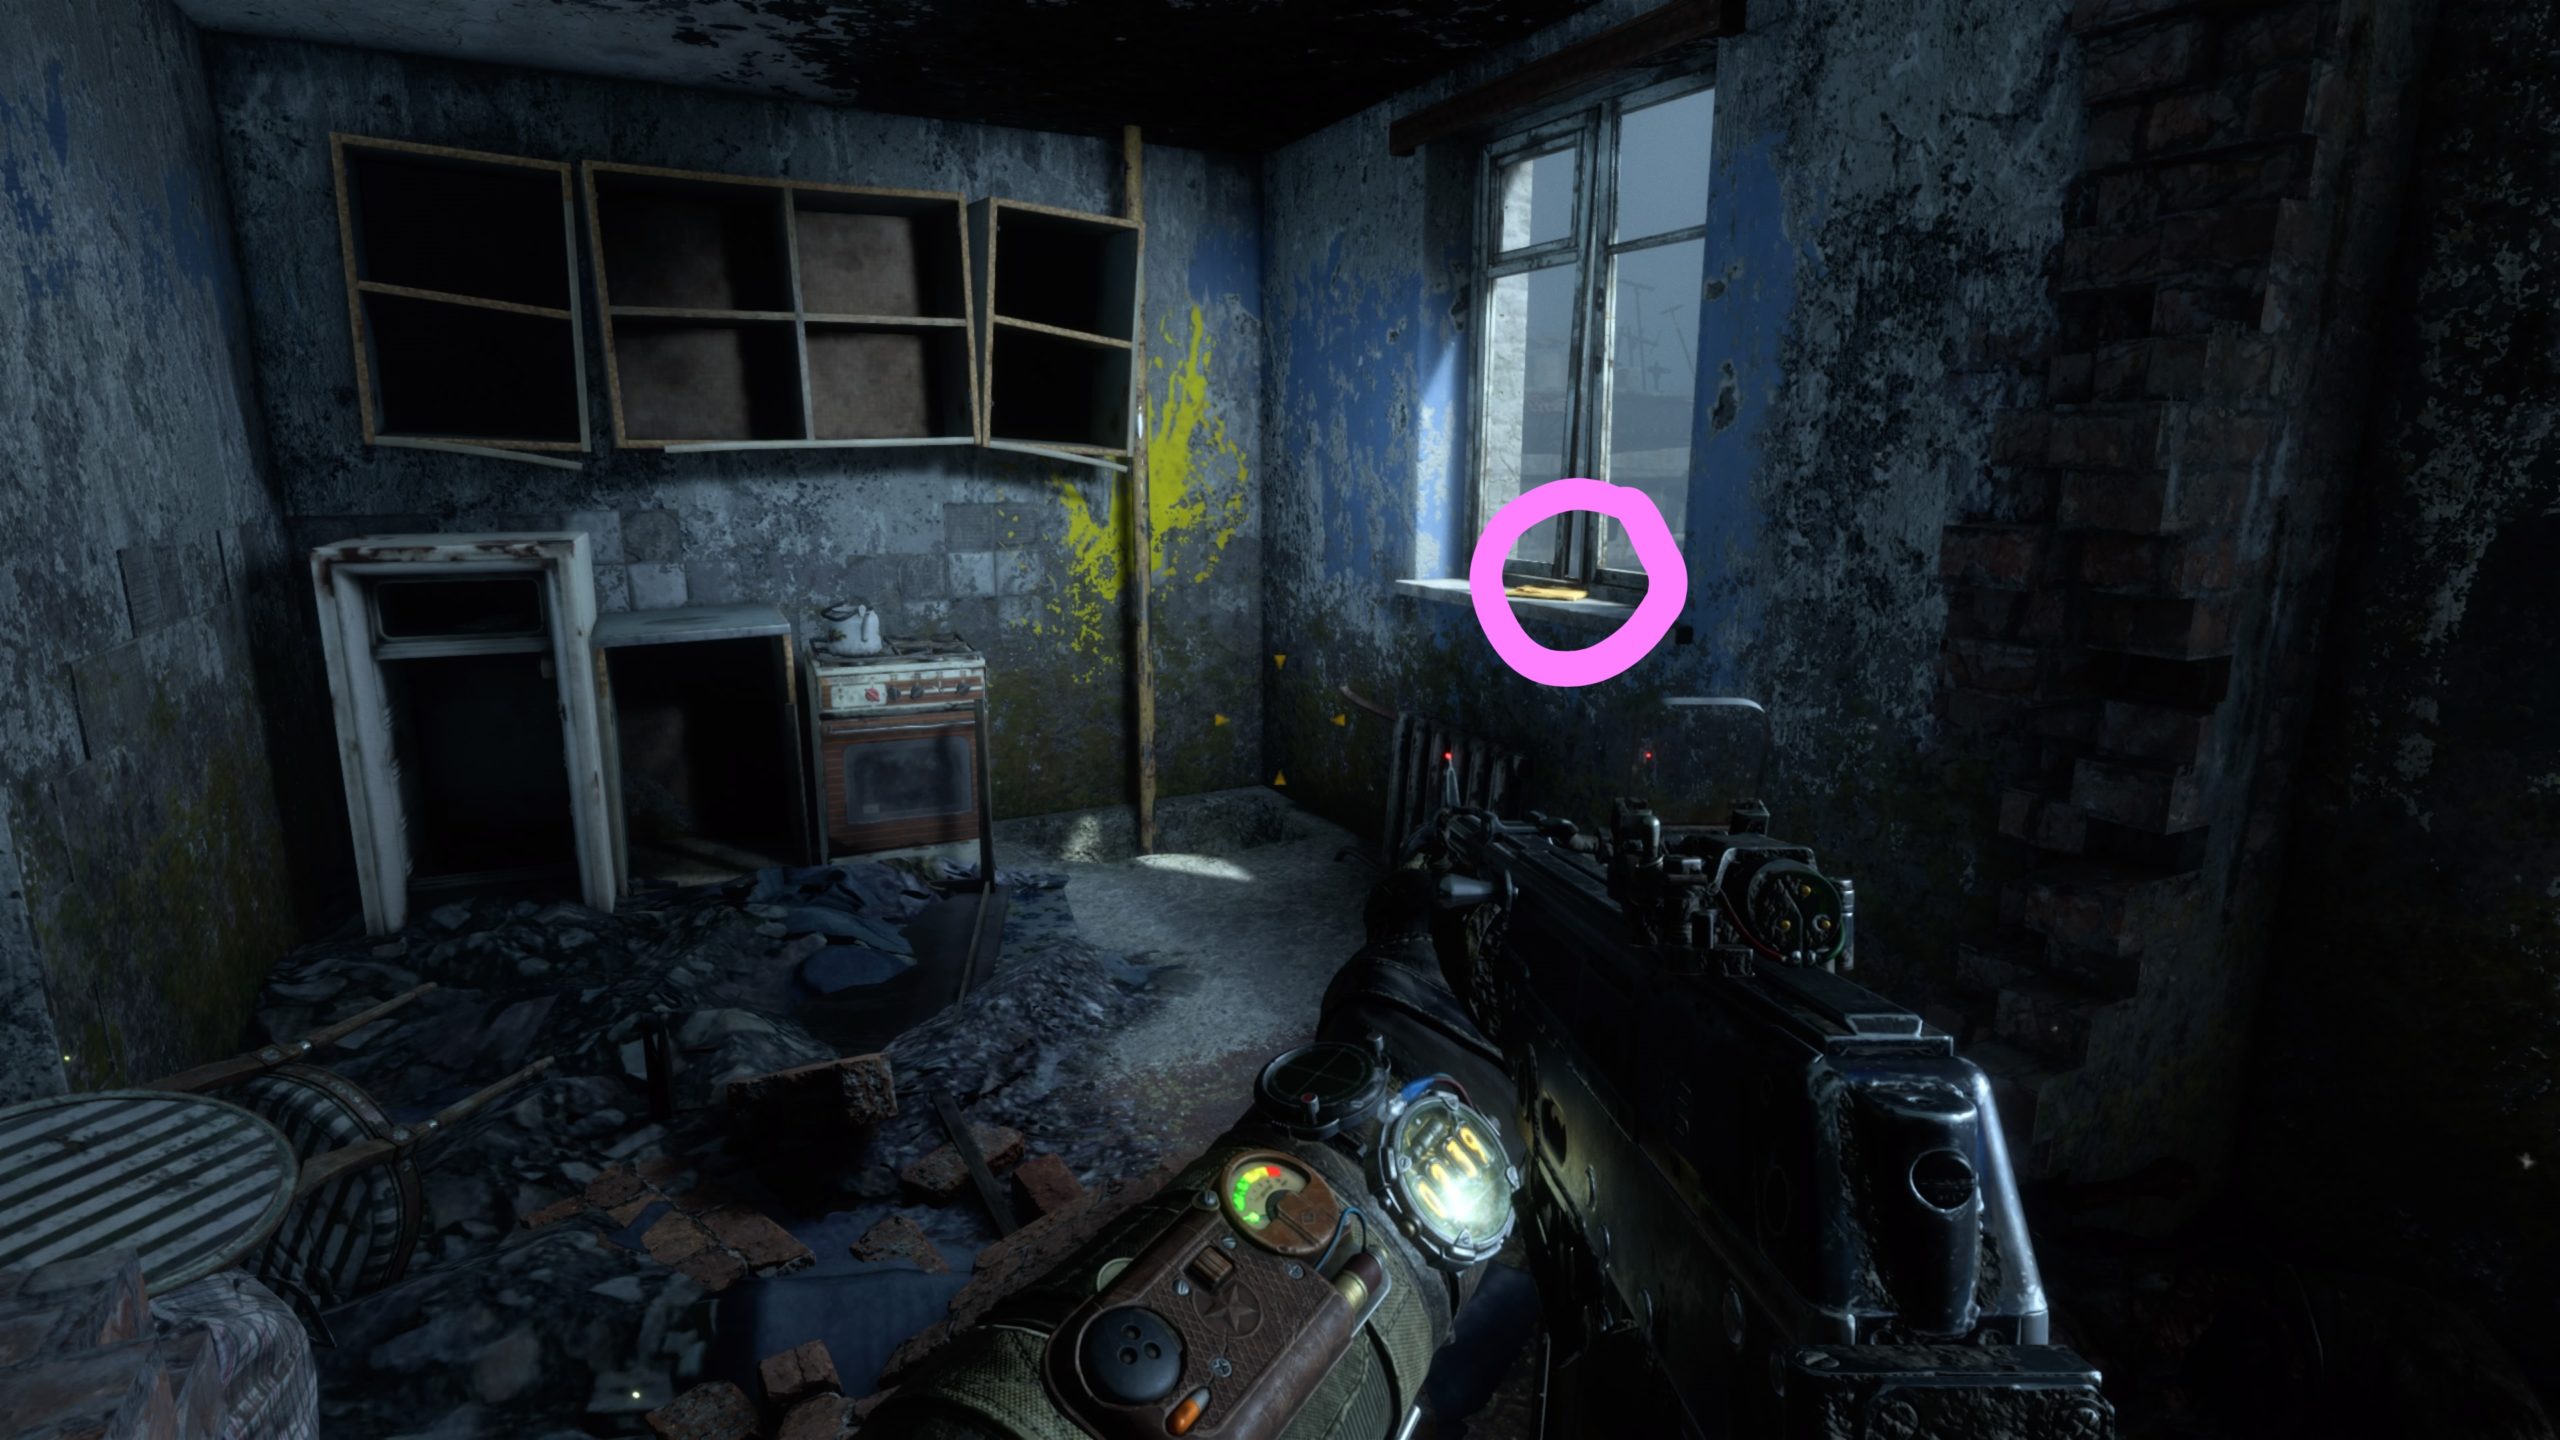
 

Worker’s Note

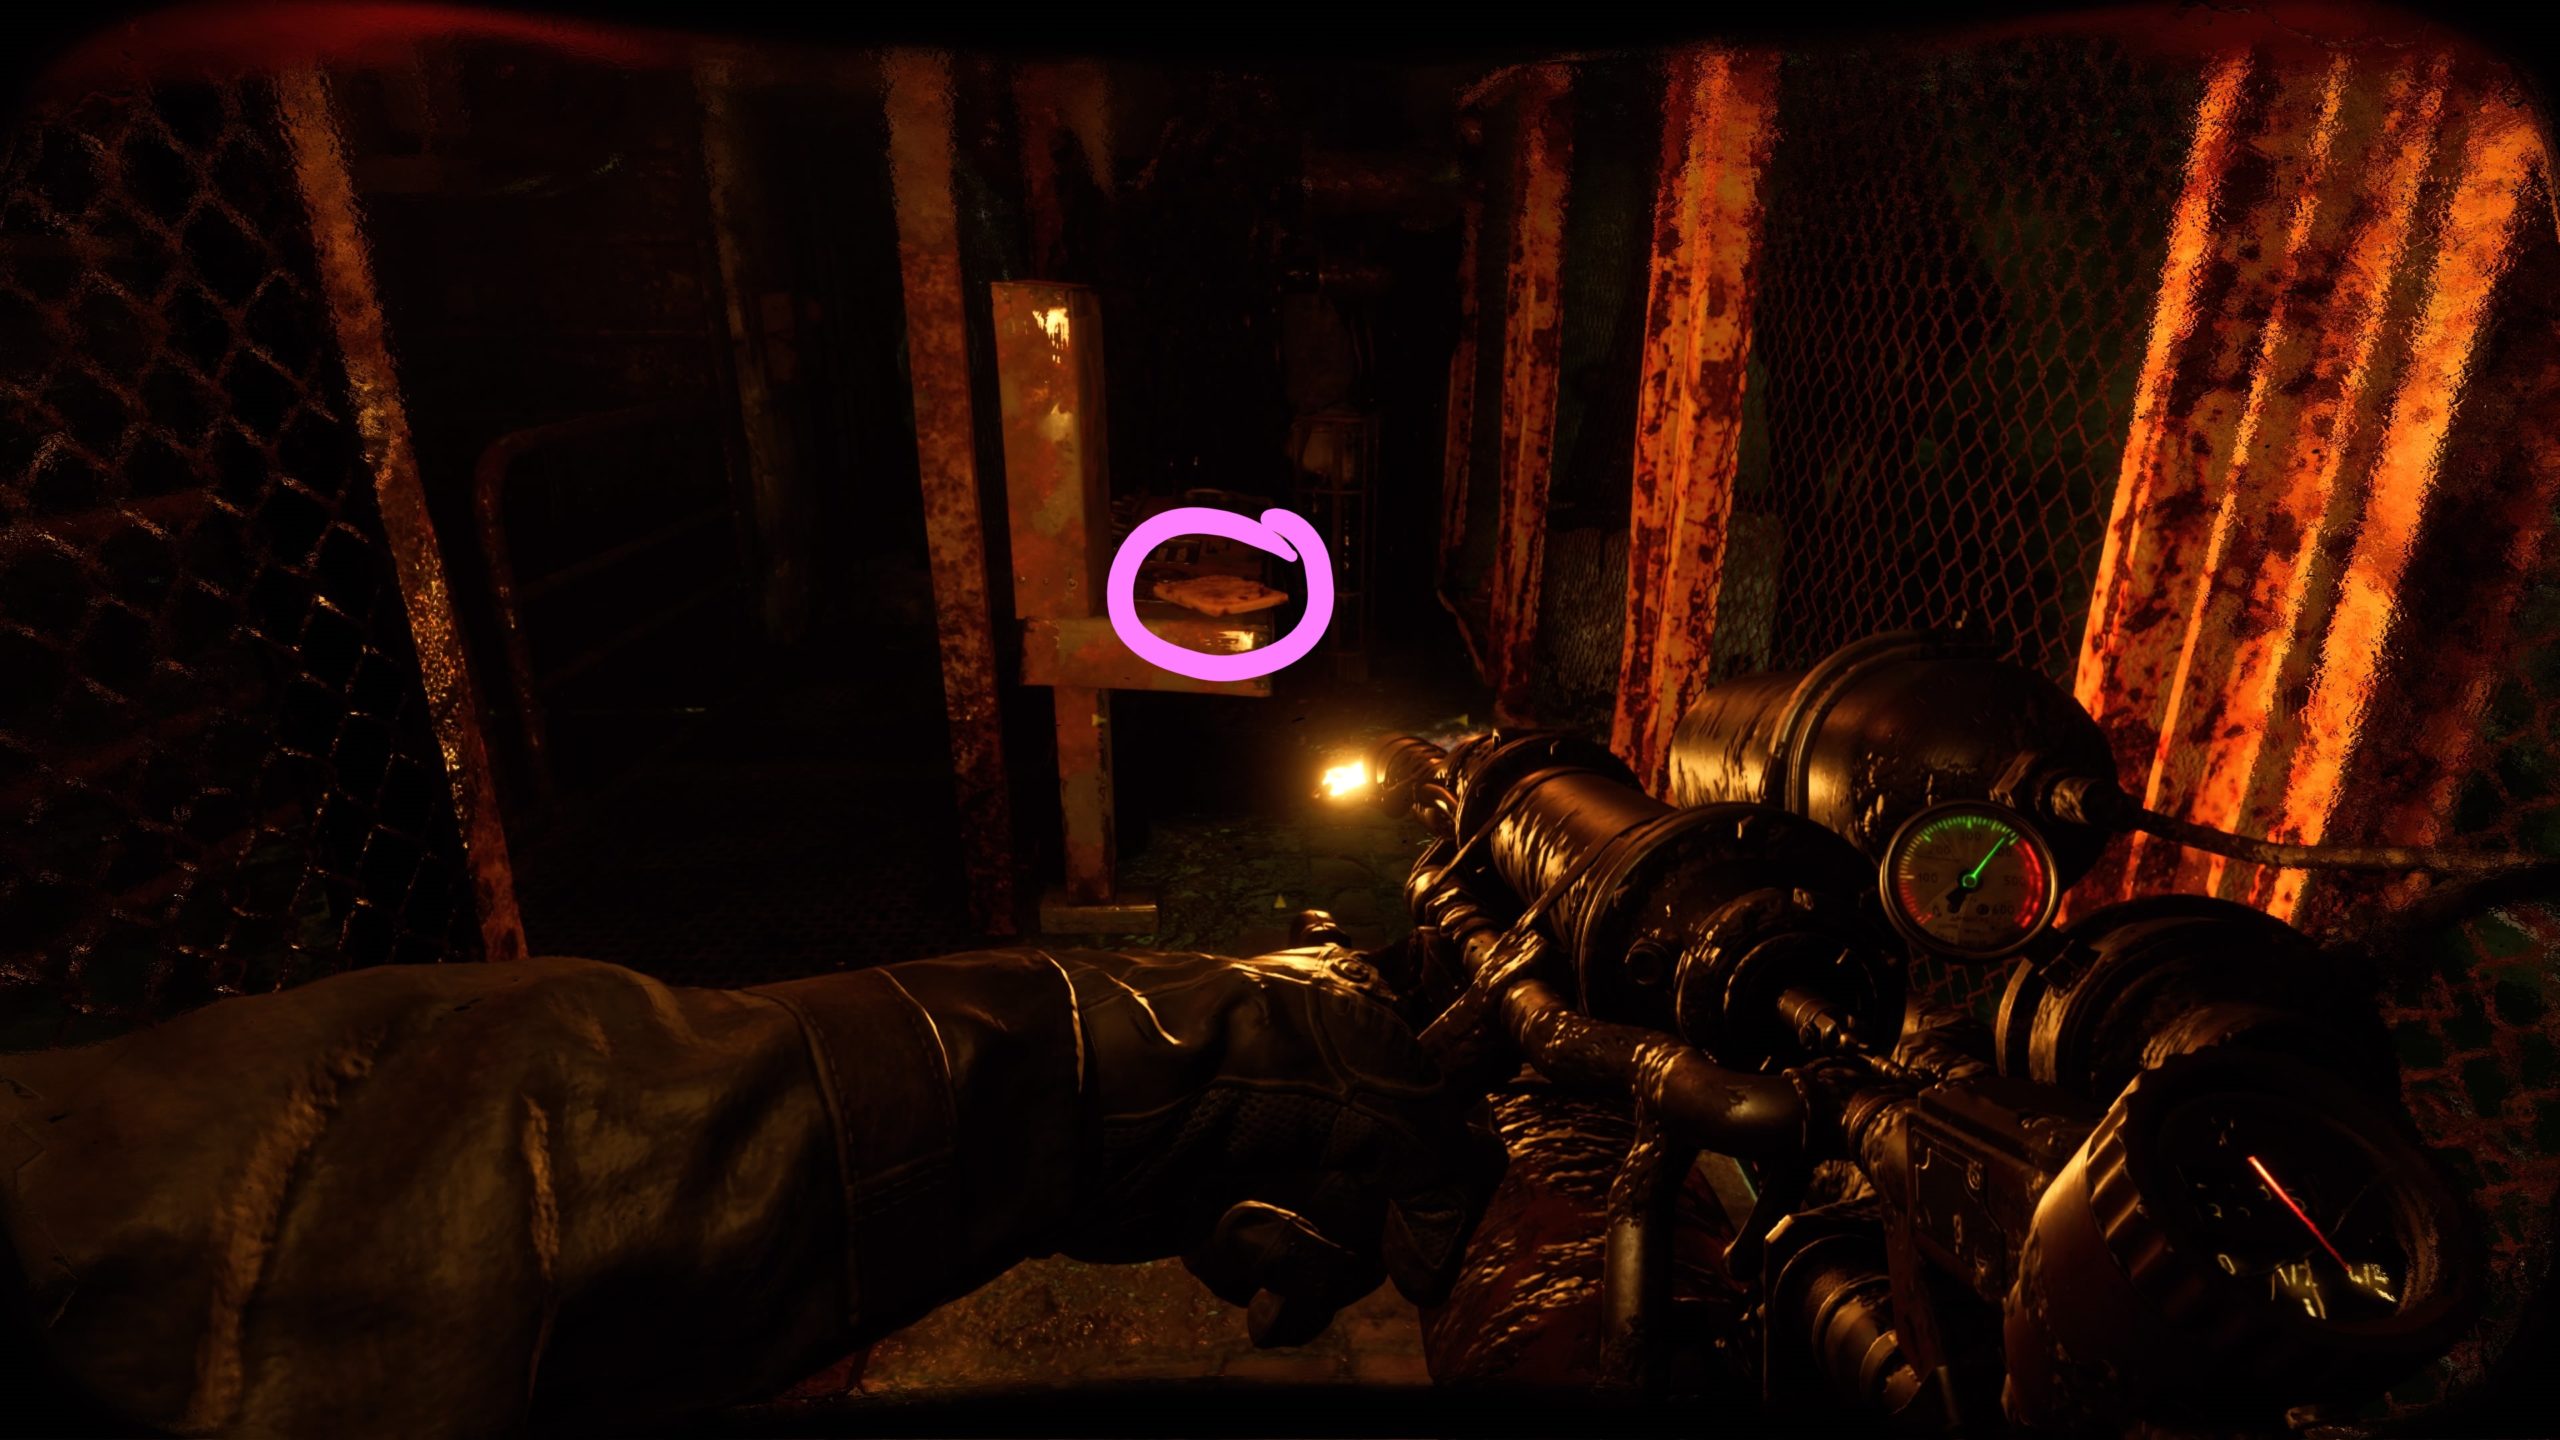
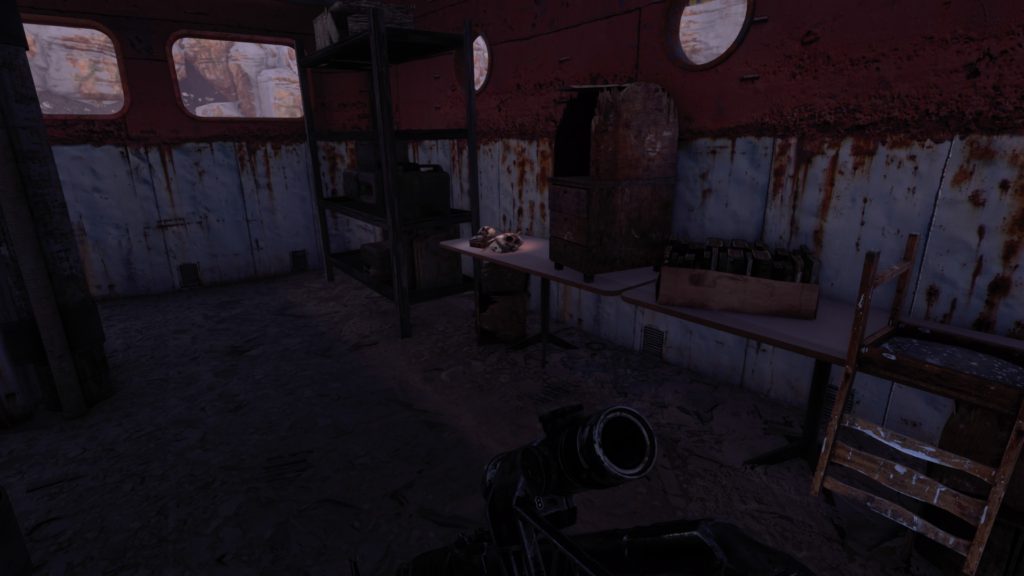
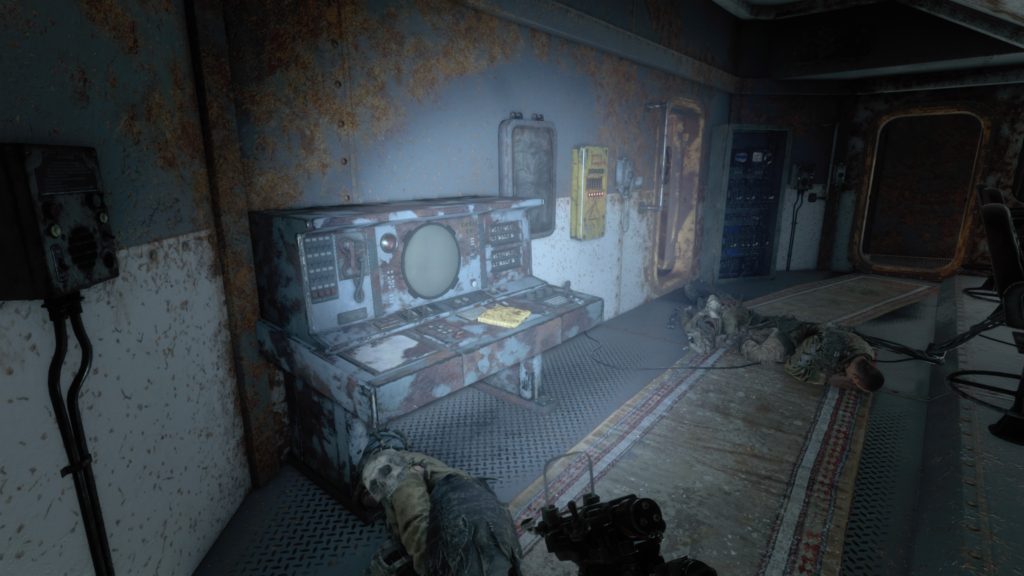
Starting at the second workbench (accessed by going through a hole in a bathroom wall), head through the door leading to a hallway and follow the hallway to the end. Once at the end of the hallway, kick open the door on the right side and head through it onto a metal walkway. Take the first left to find the diary sitting on a metal console.
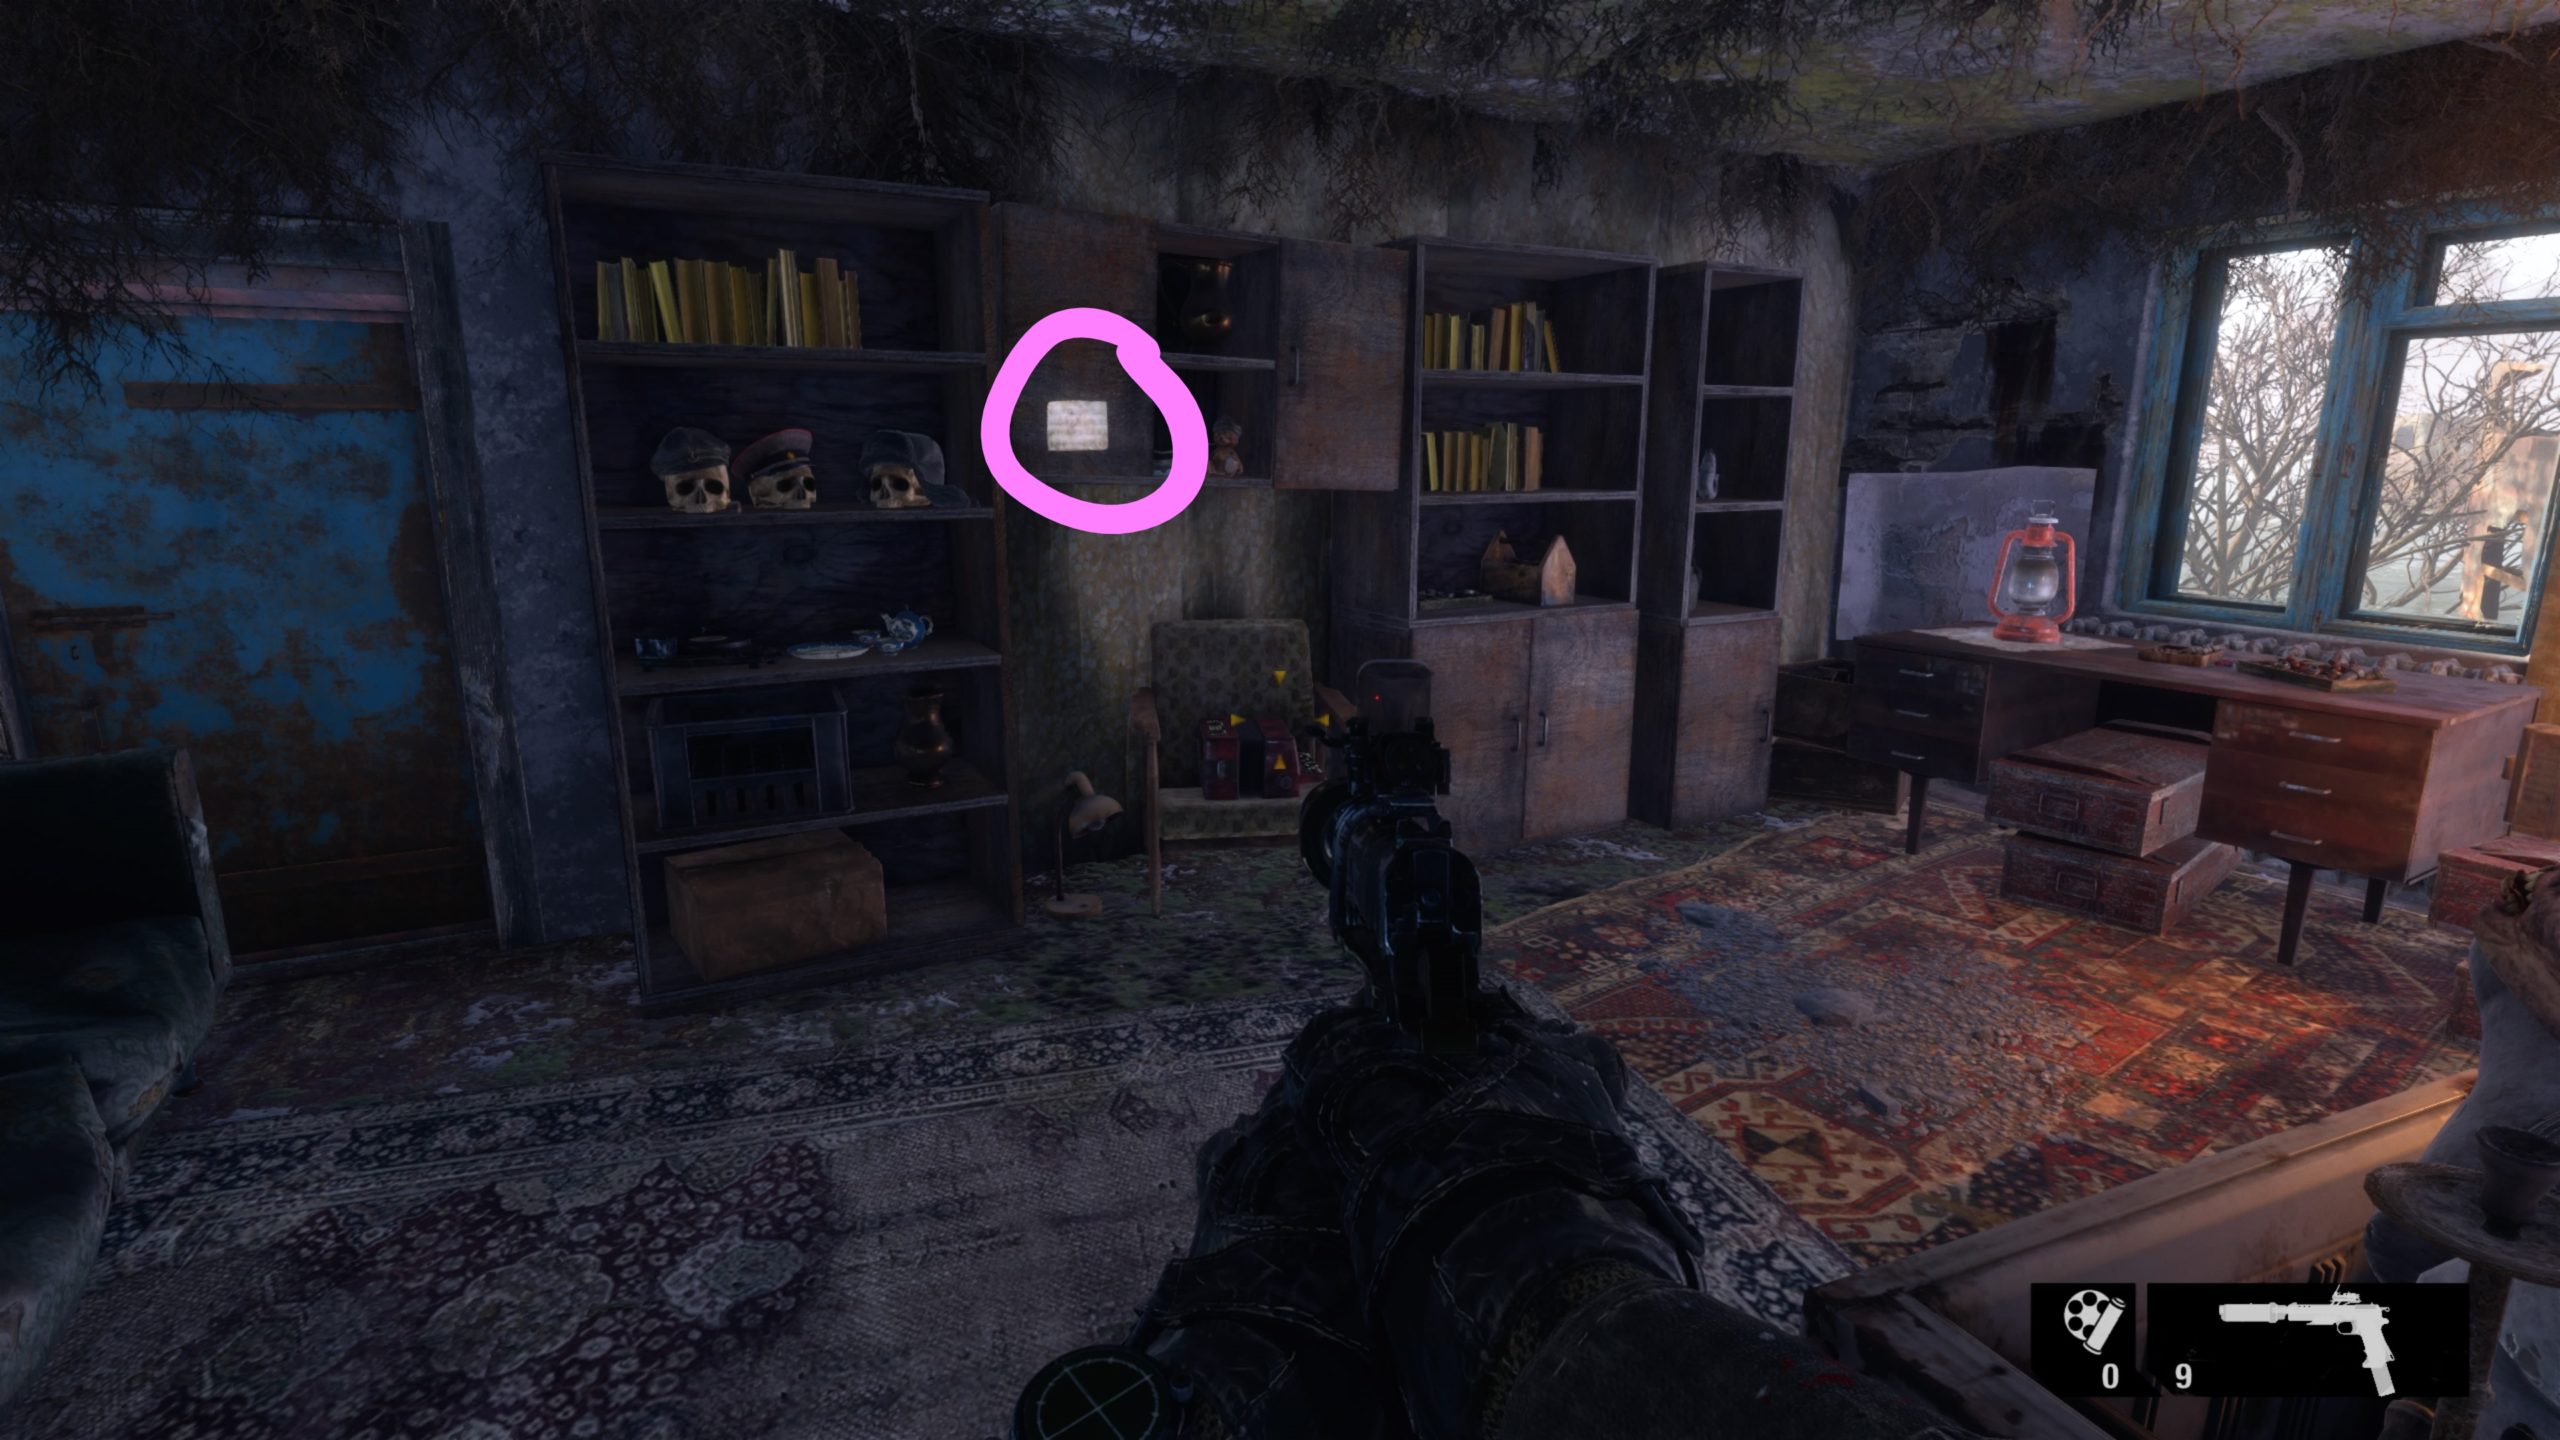
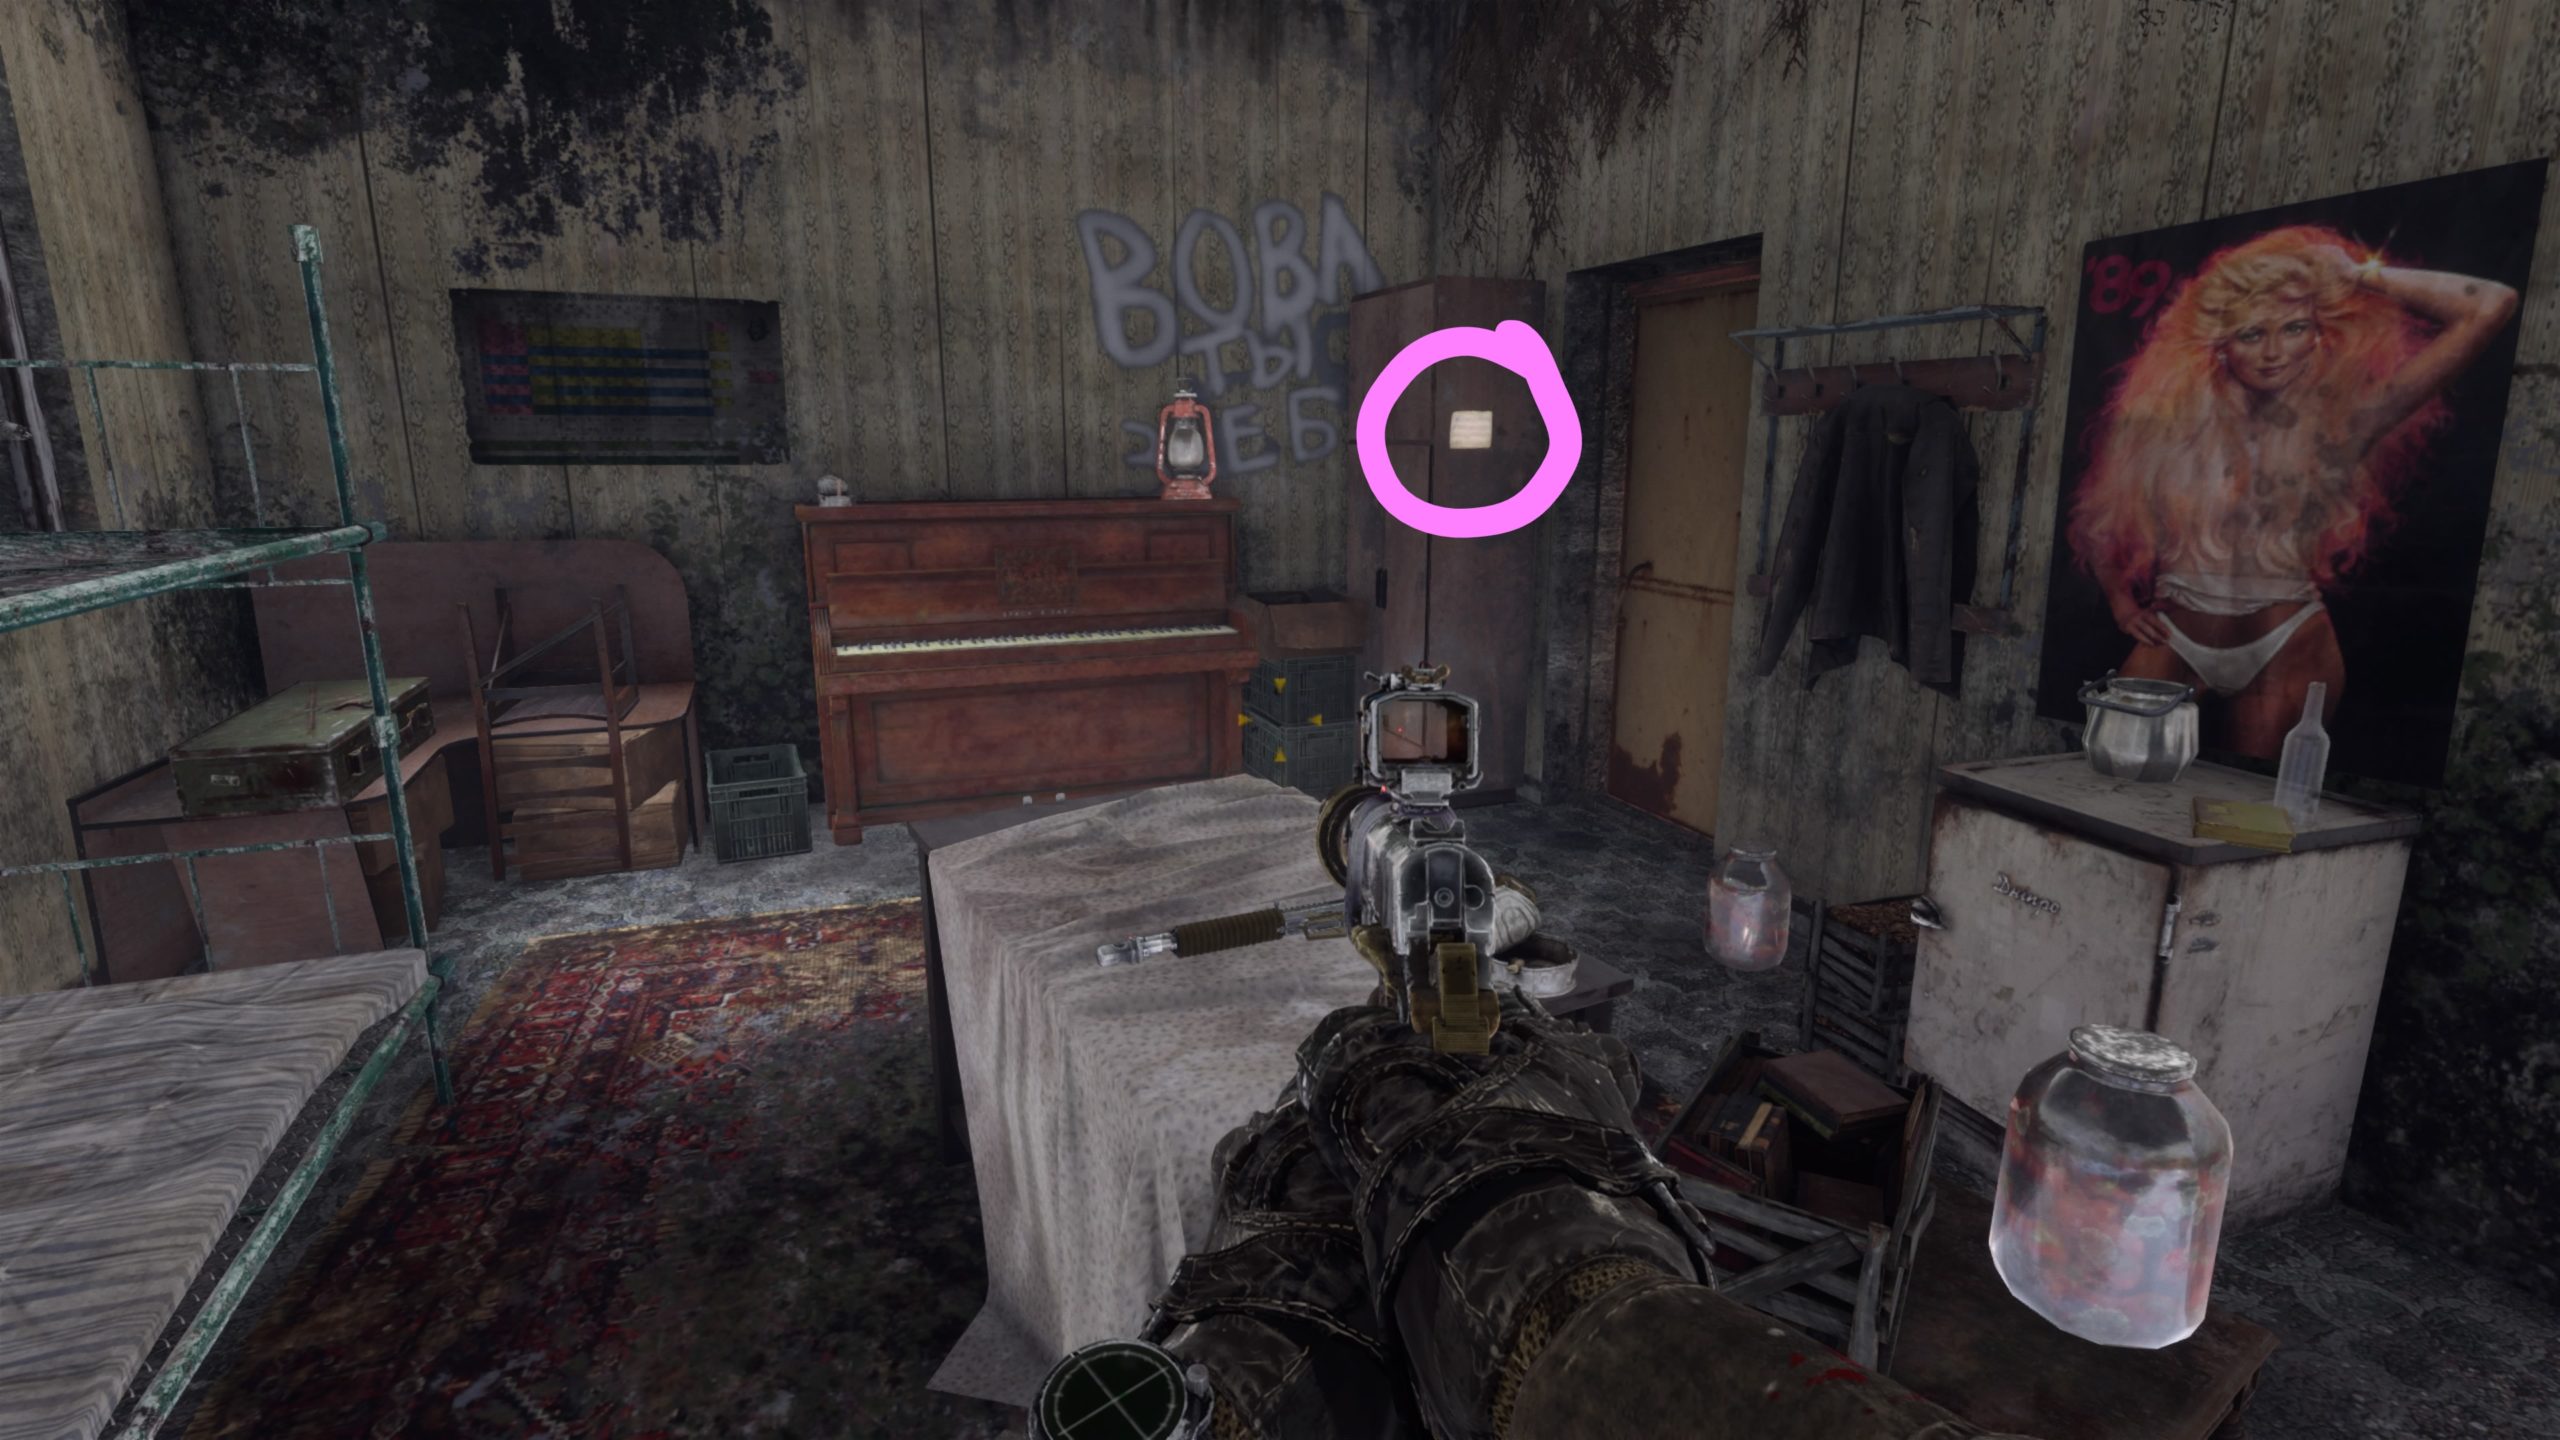
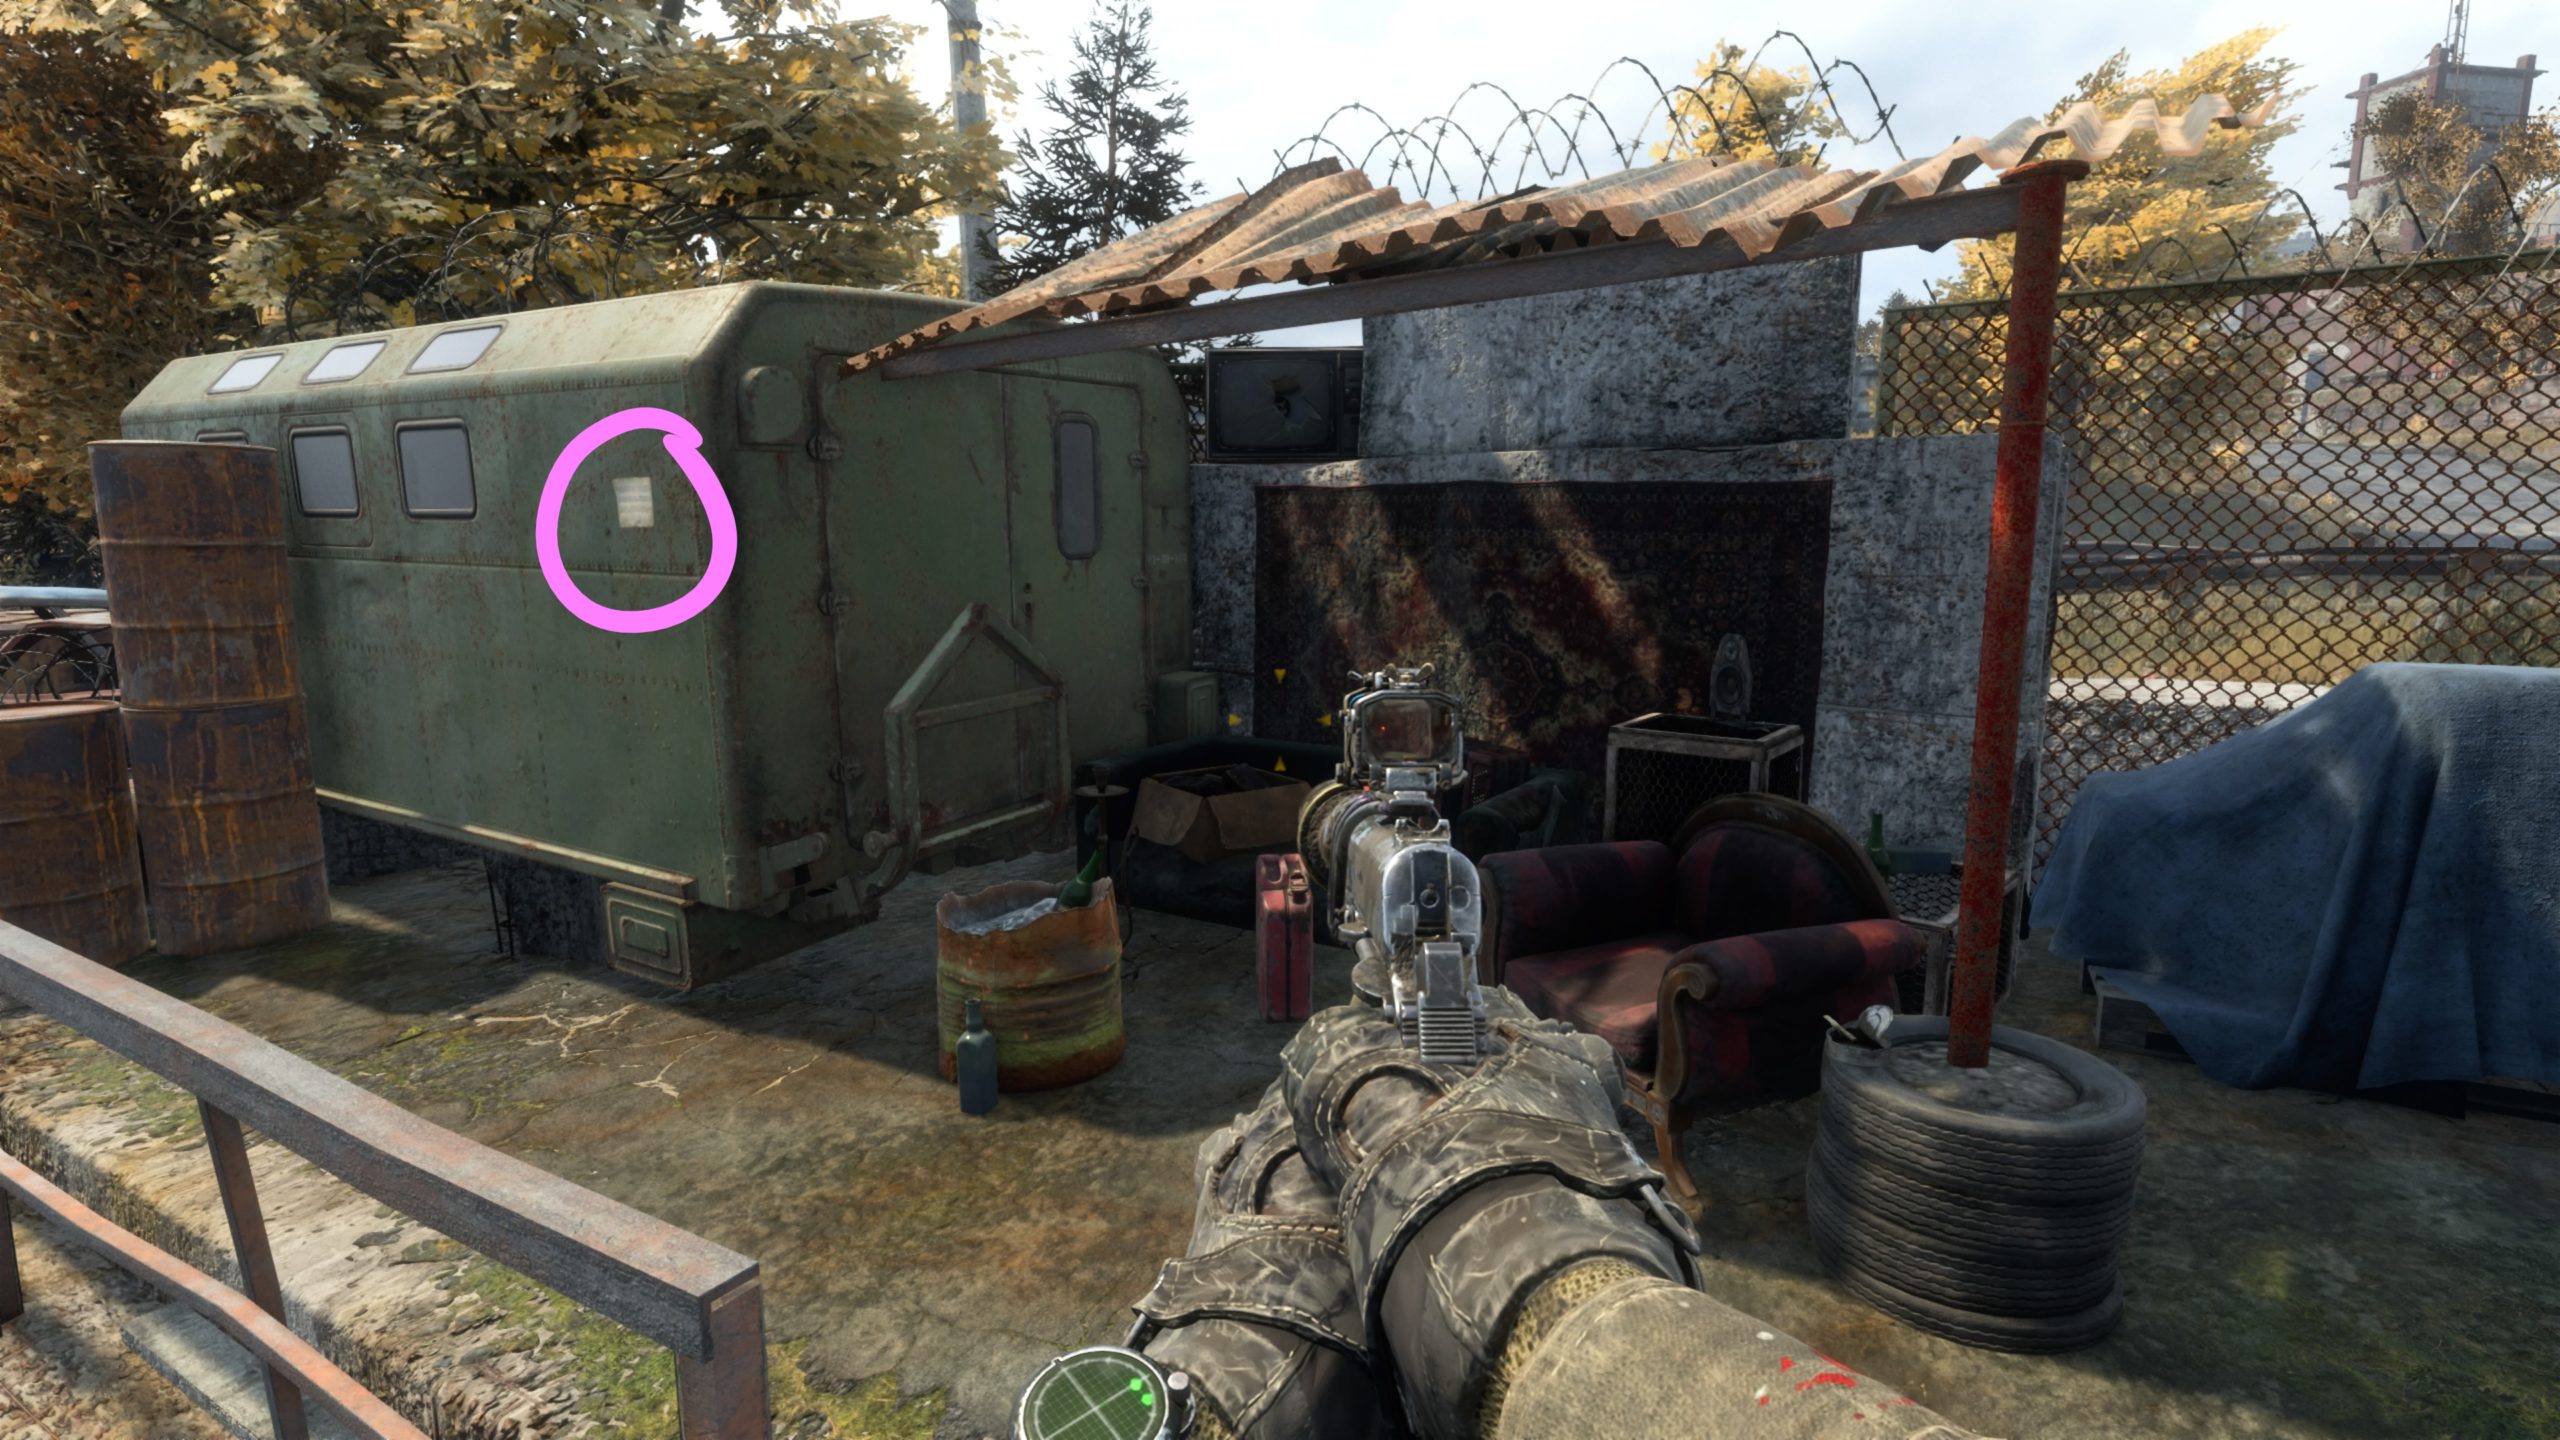
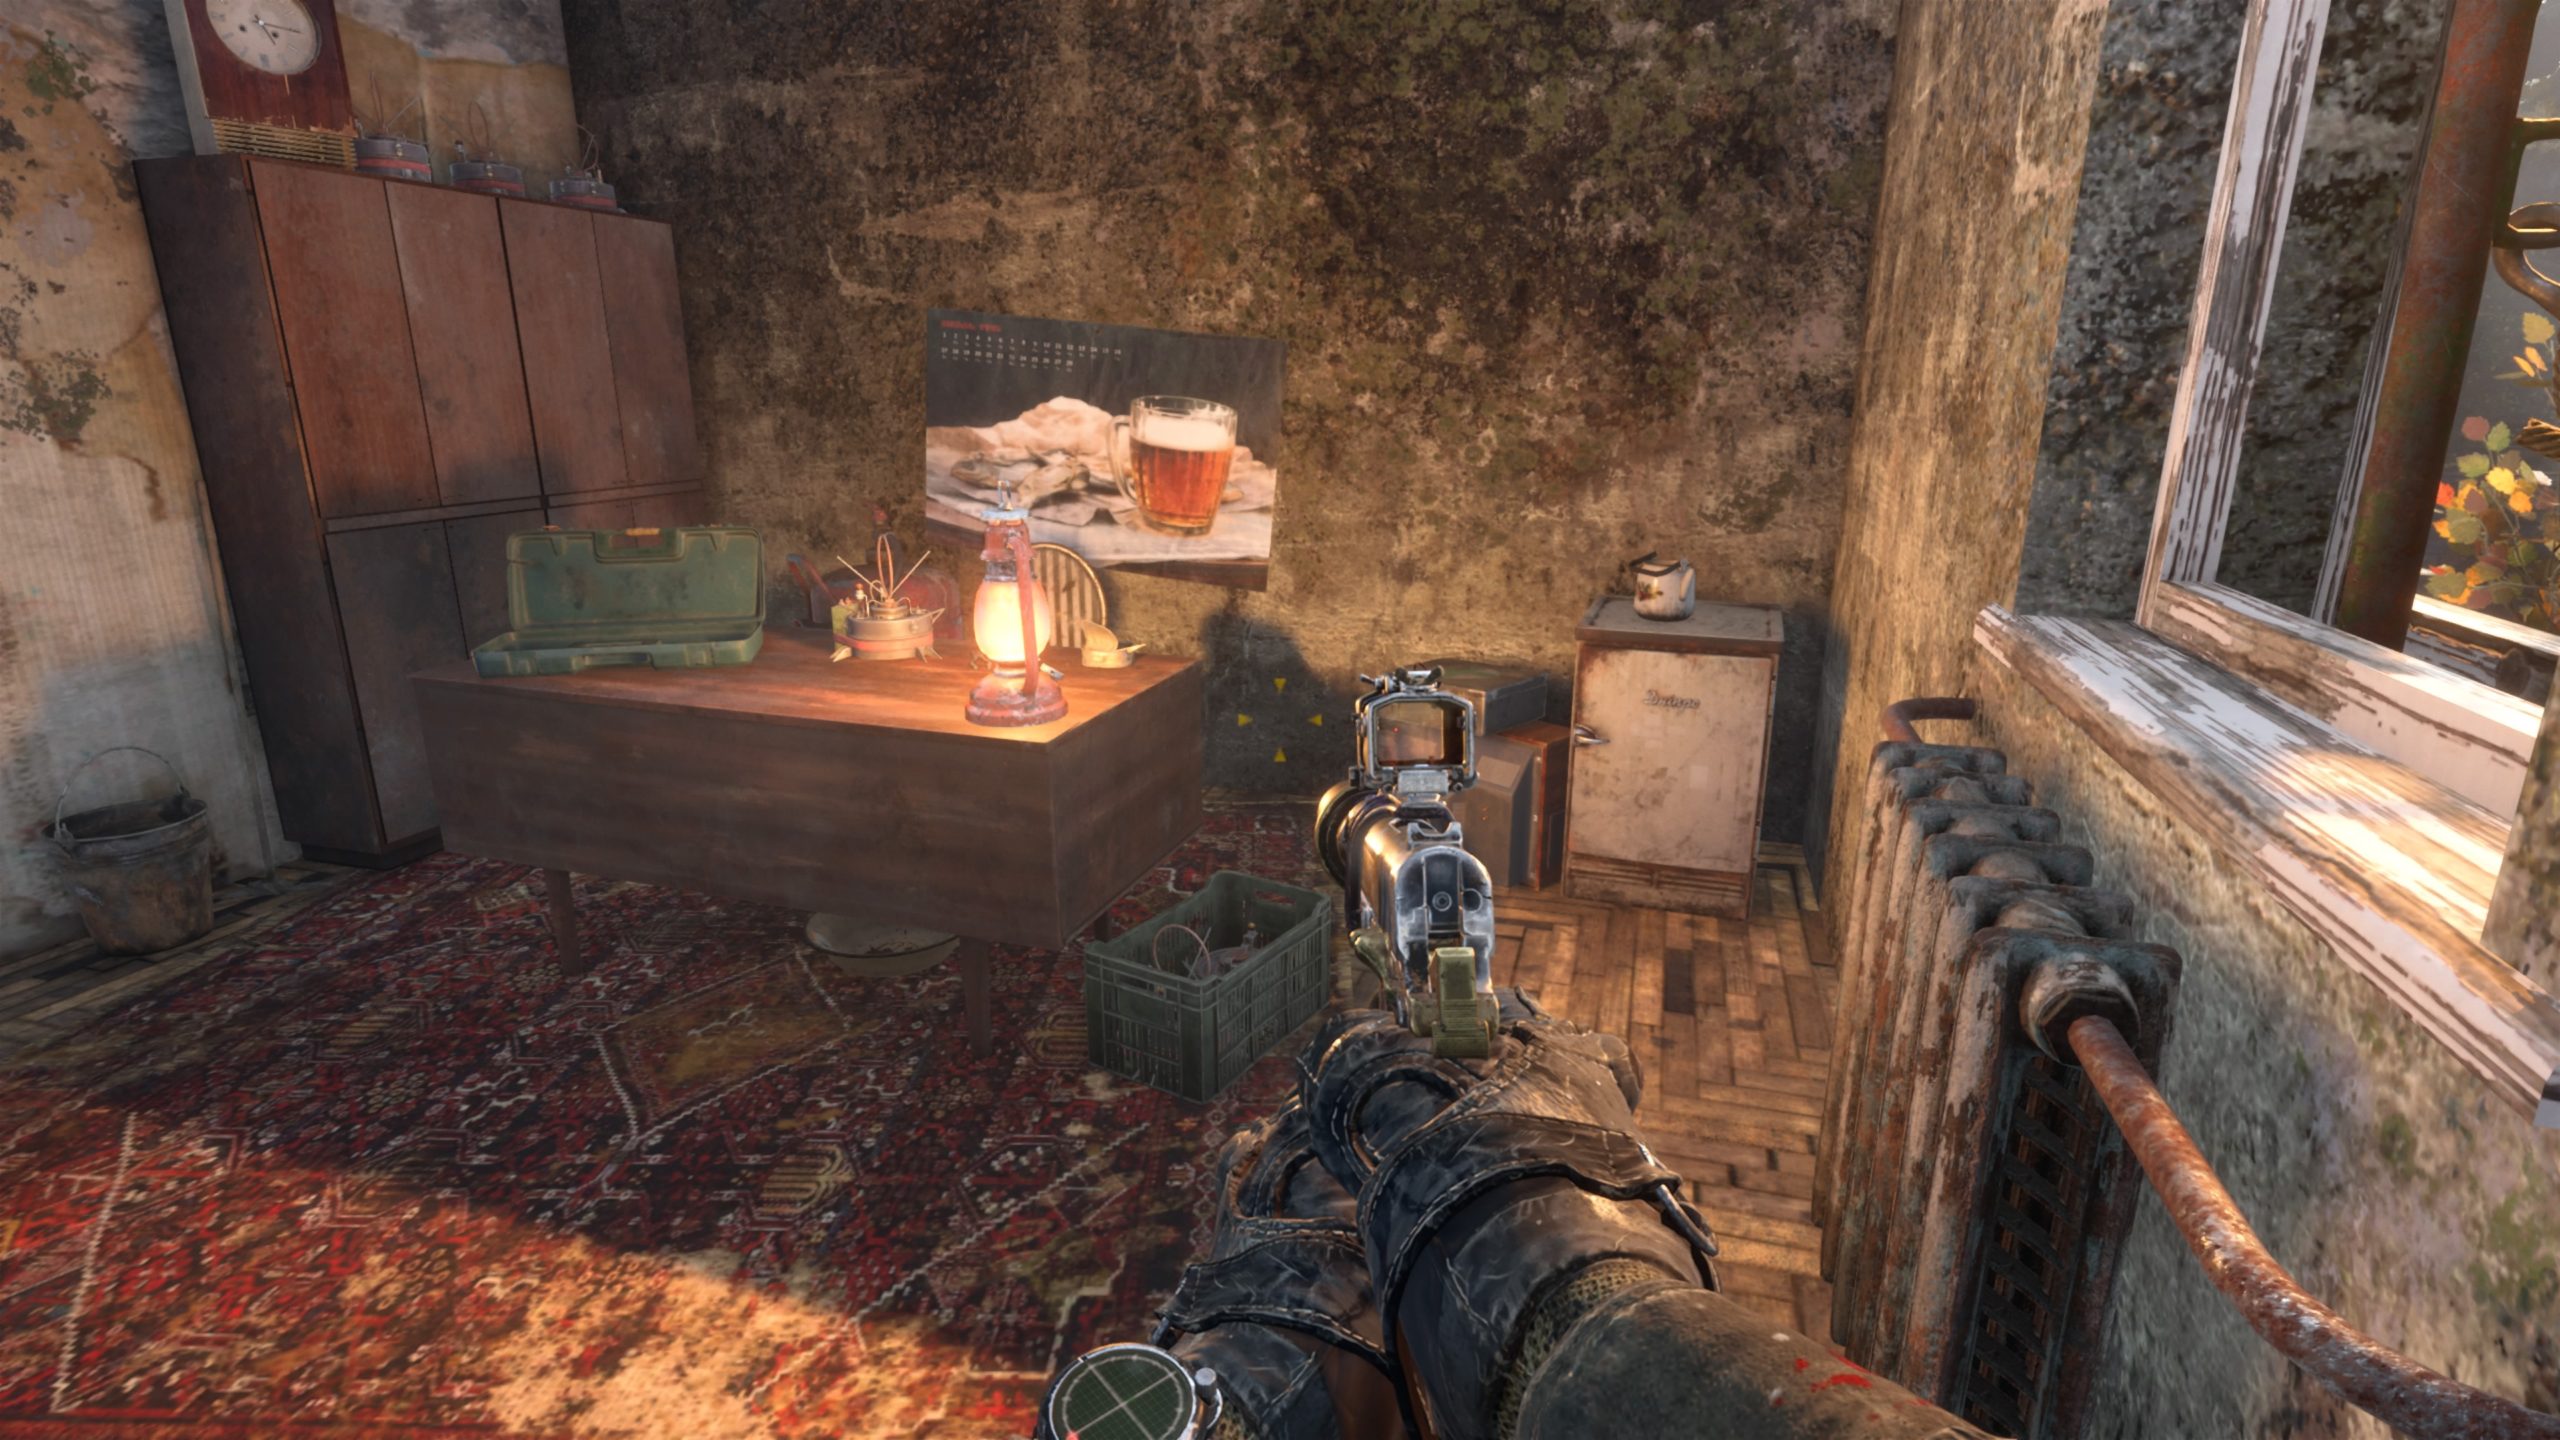
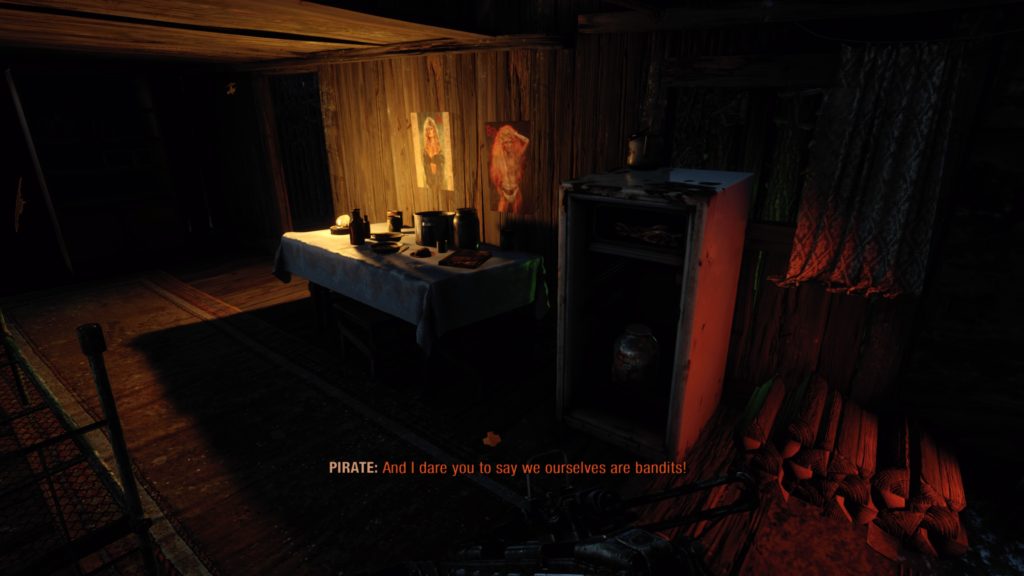
 

Trader’s Note

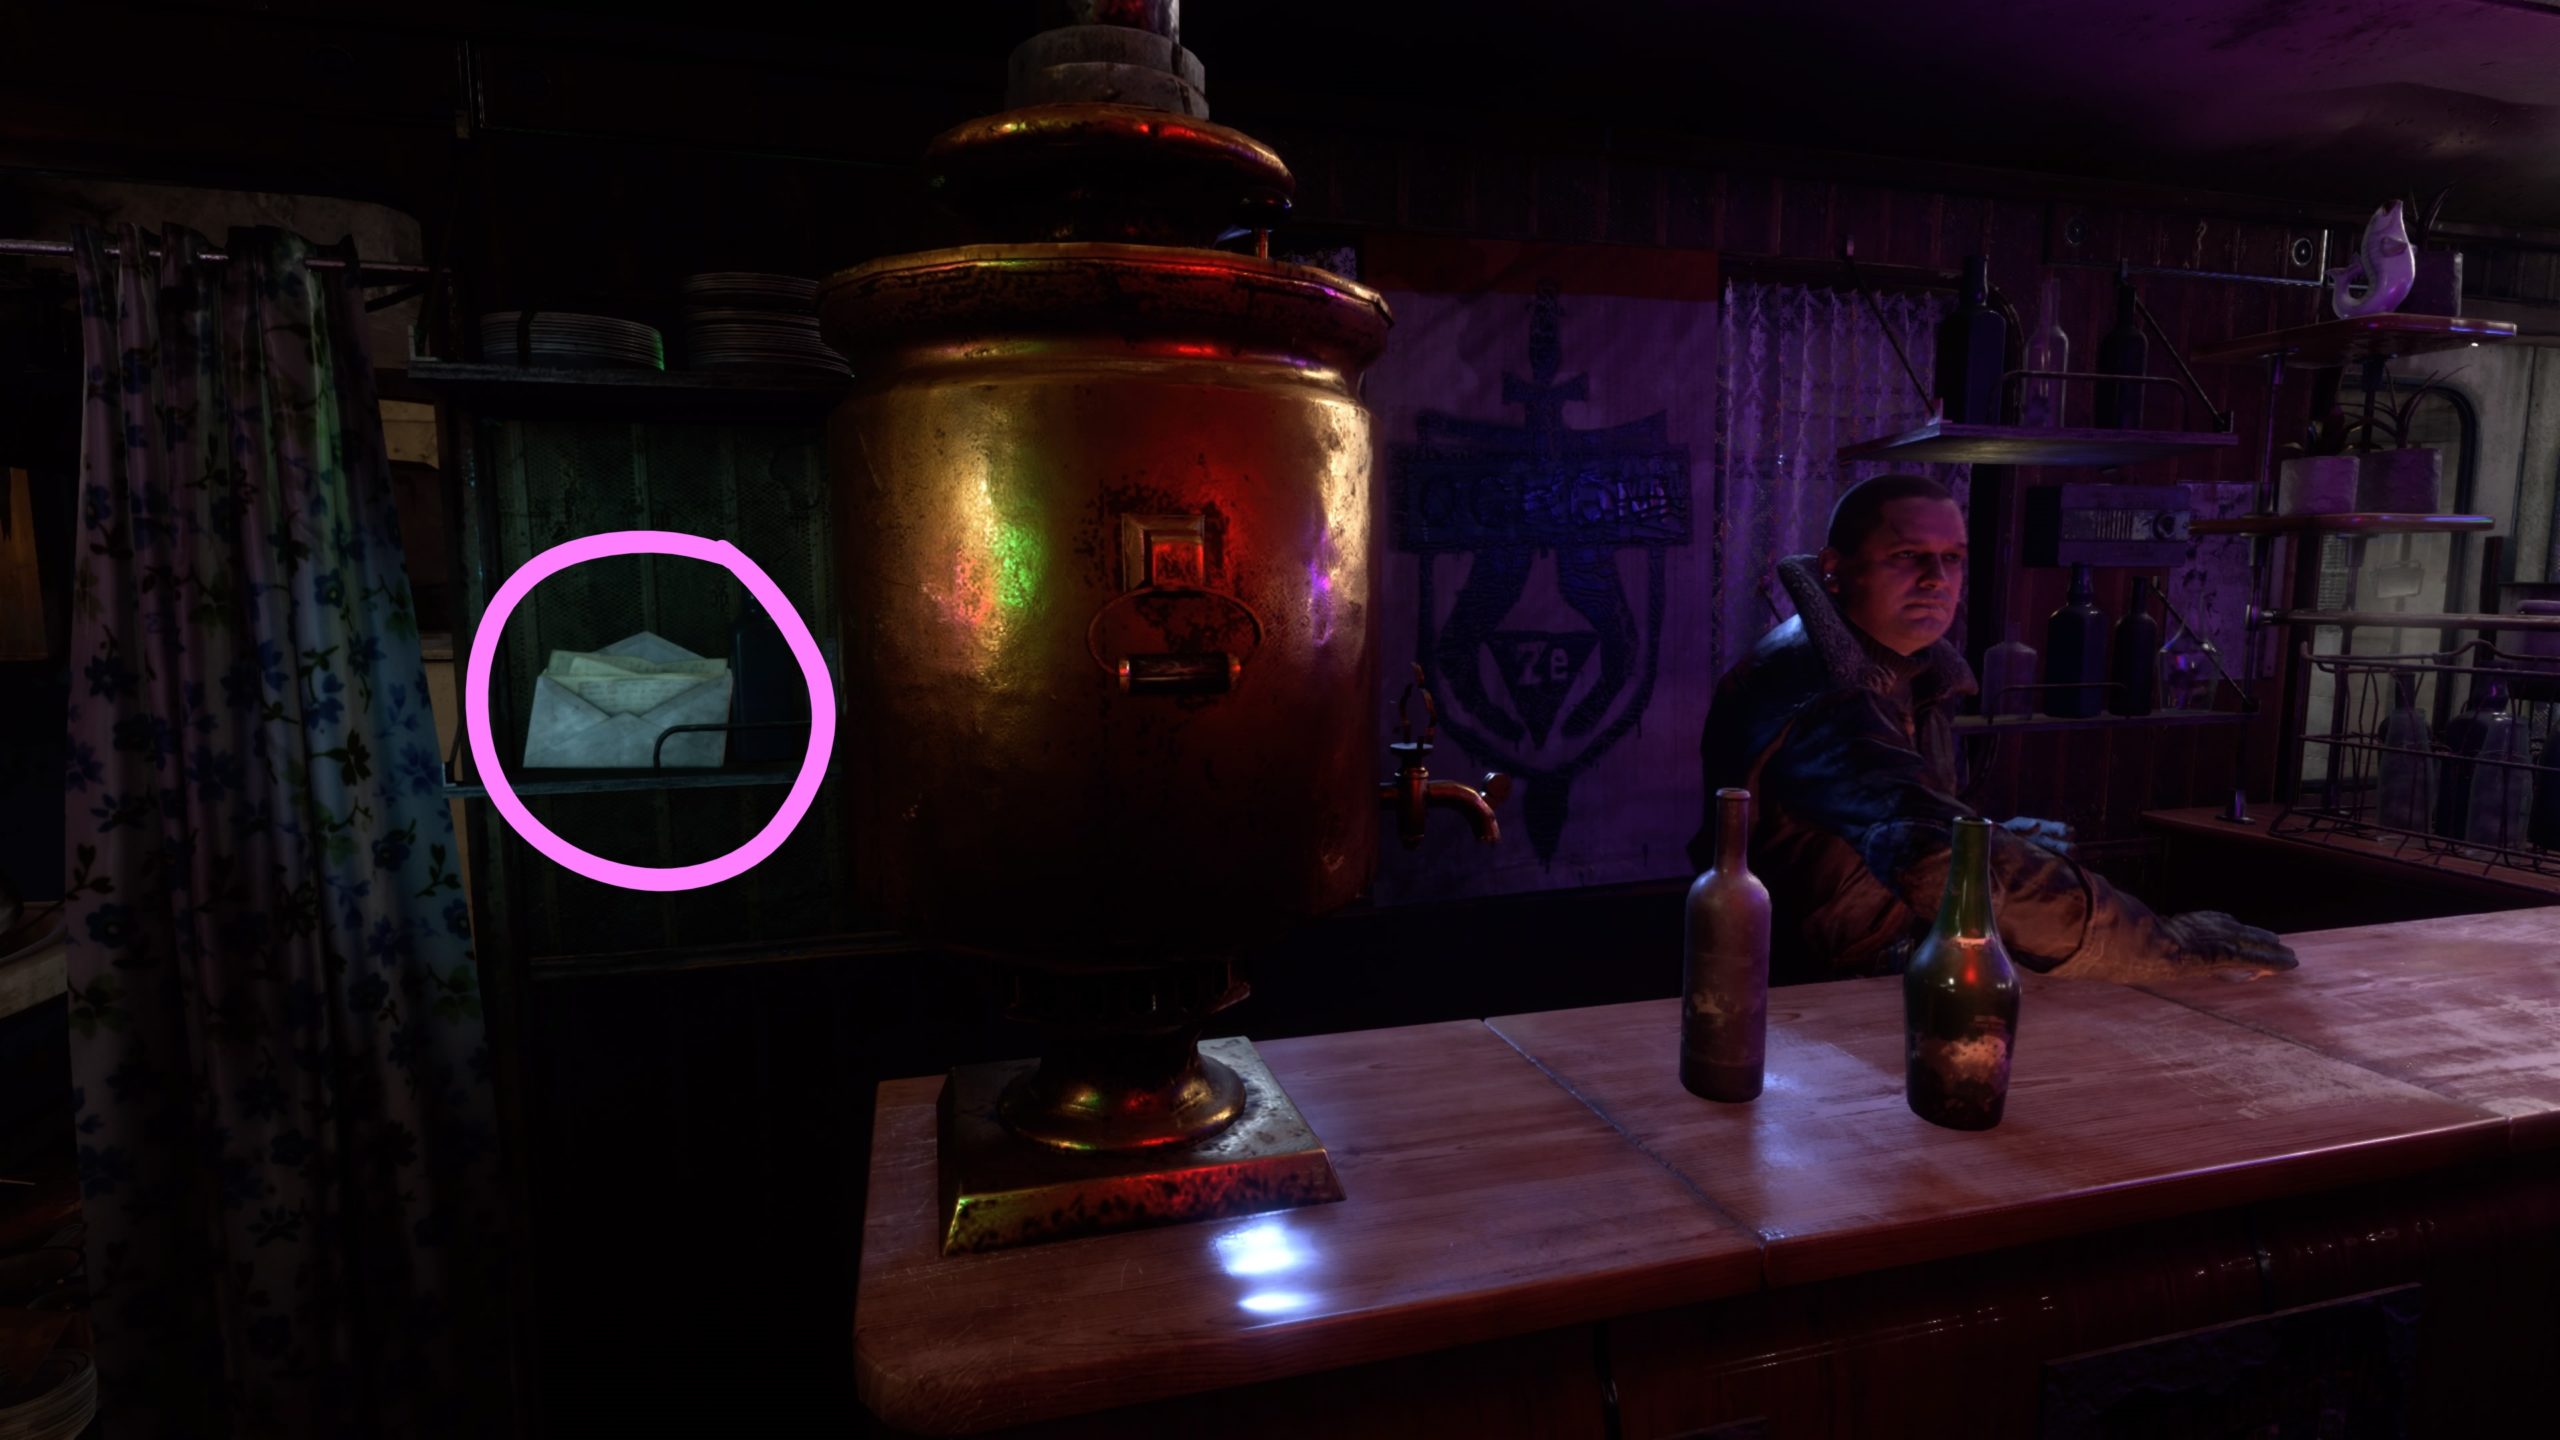
After you speak with the General, you’ll head home to your son. On the way, you’ll pass through a bar. The note is located to the left of the bar on a shelf.
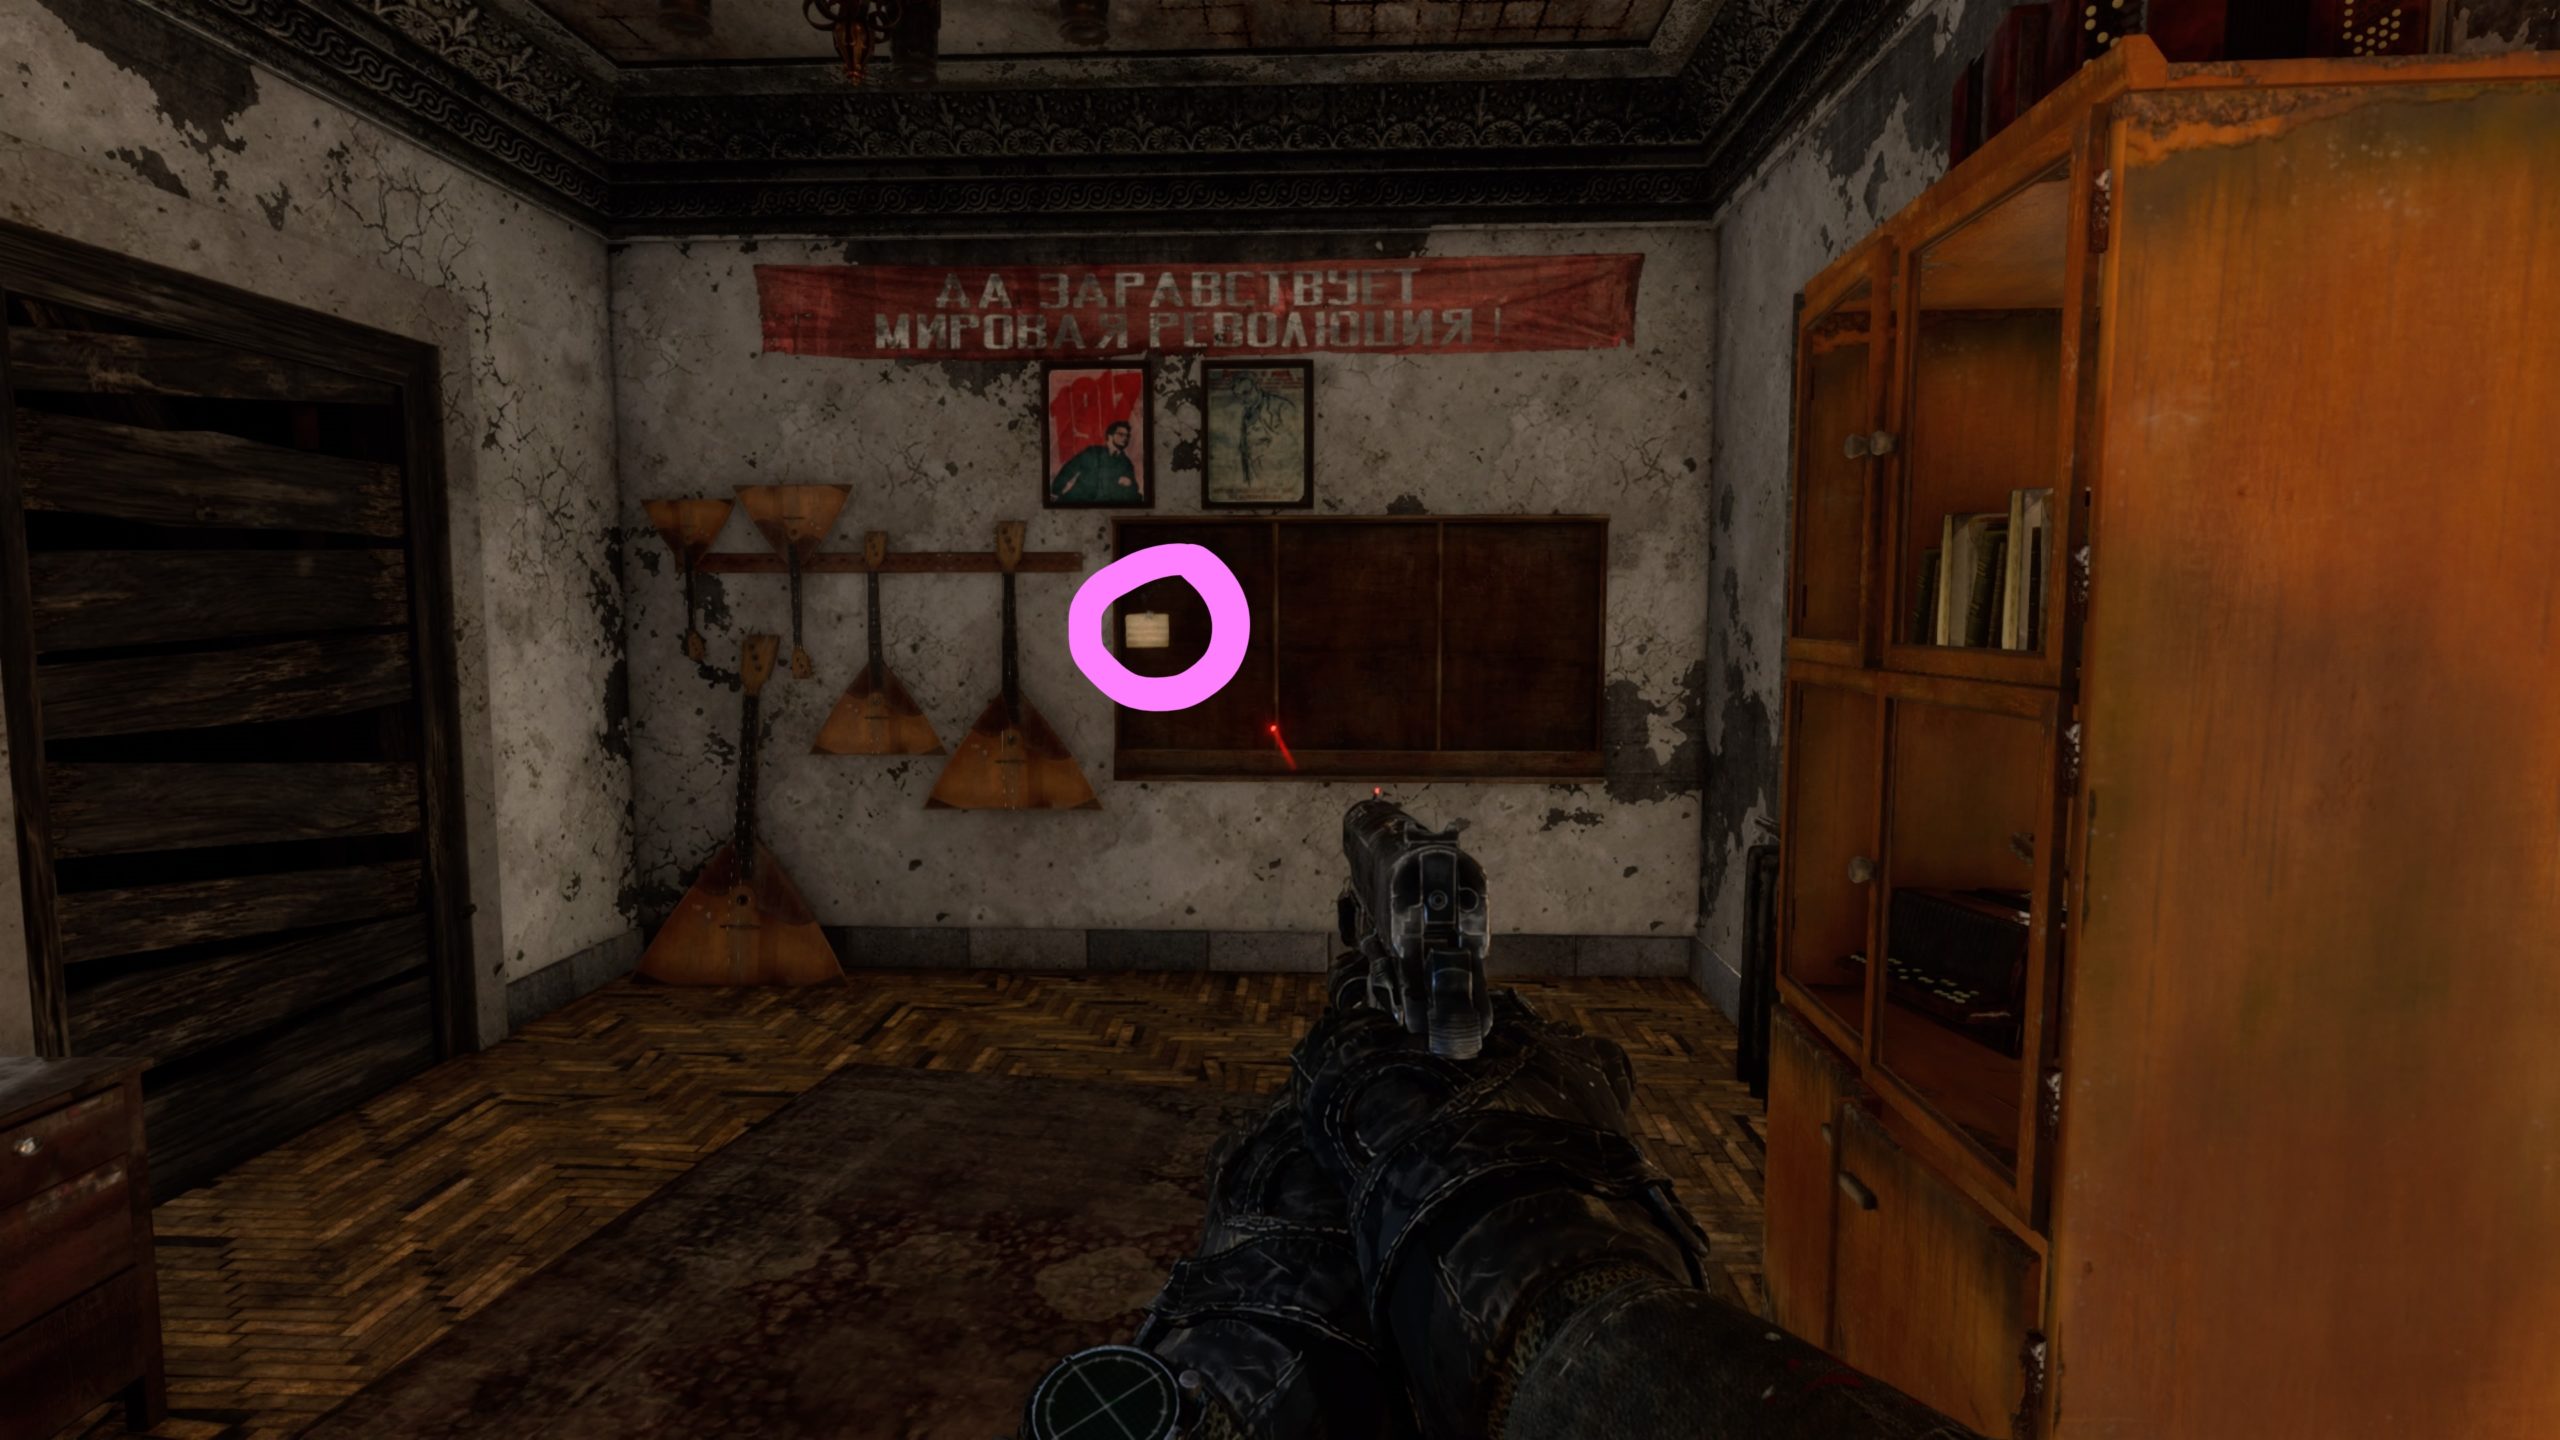
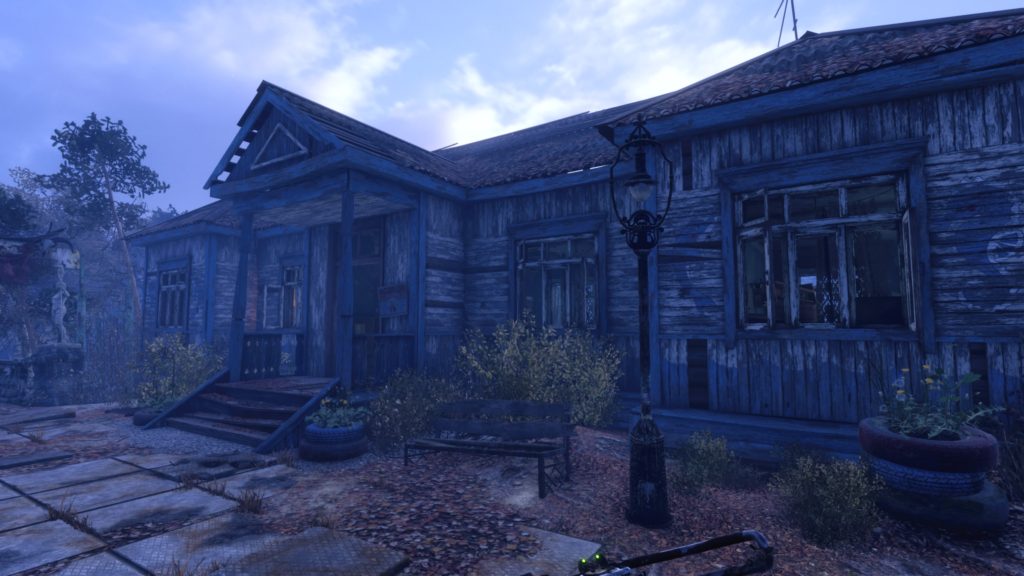
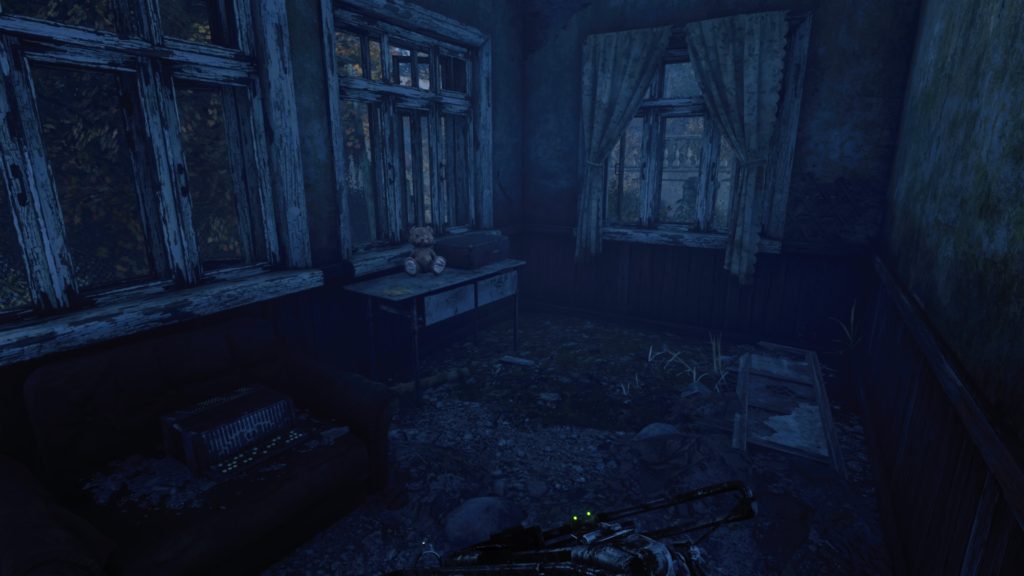
 

Letter

After you leave Petrovich’s house, head to the table across the way on the other side of the railing. The diary will be located on this table next to a scale.


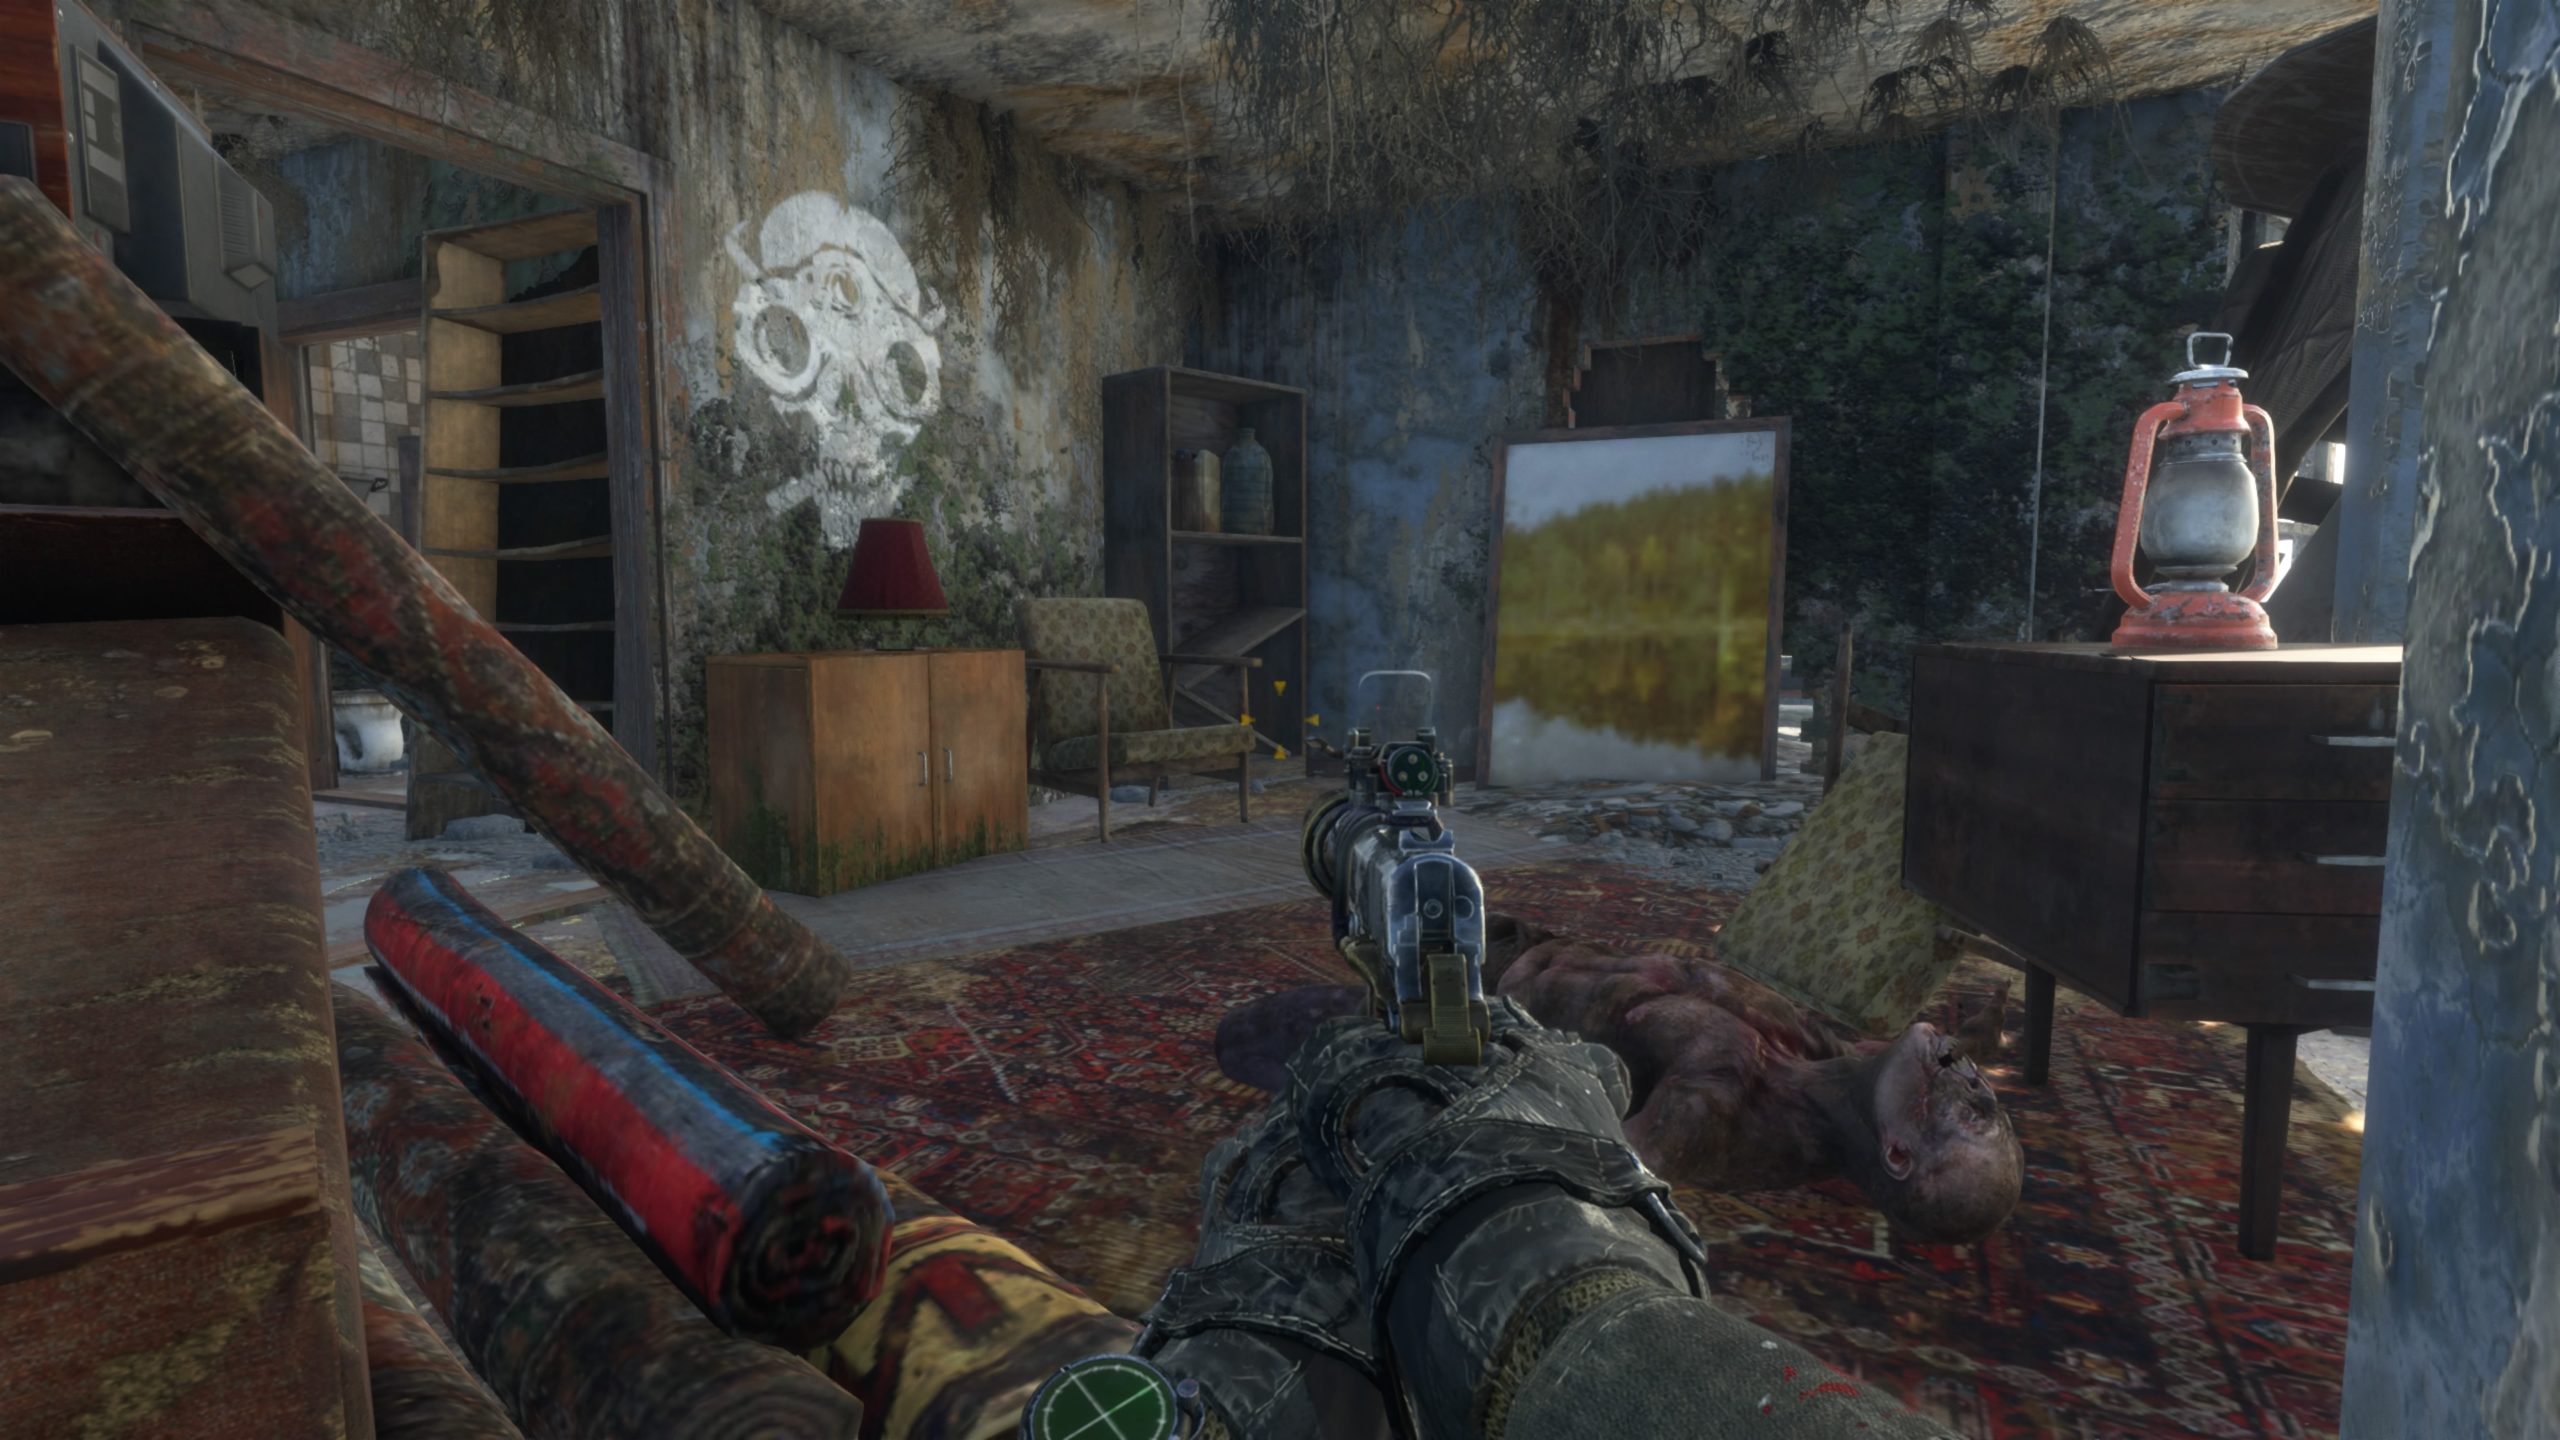
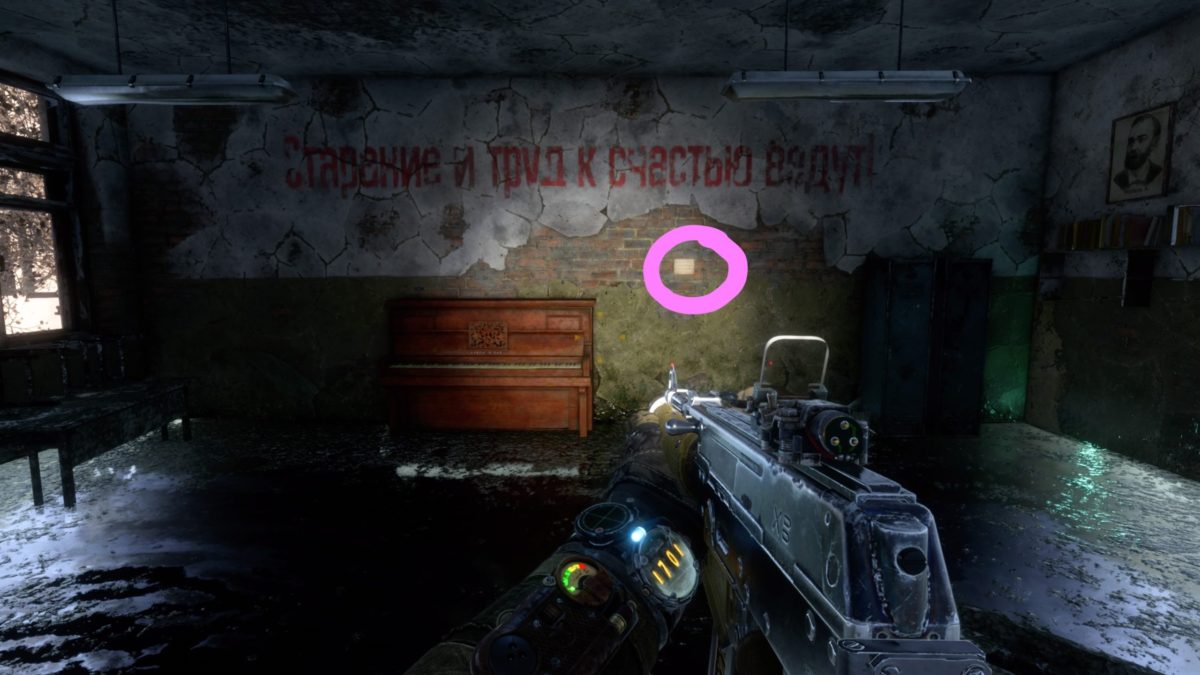
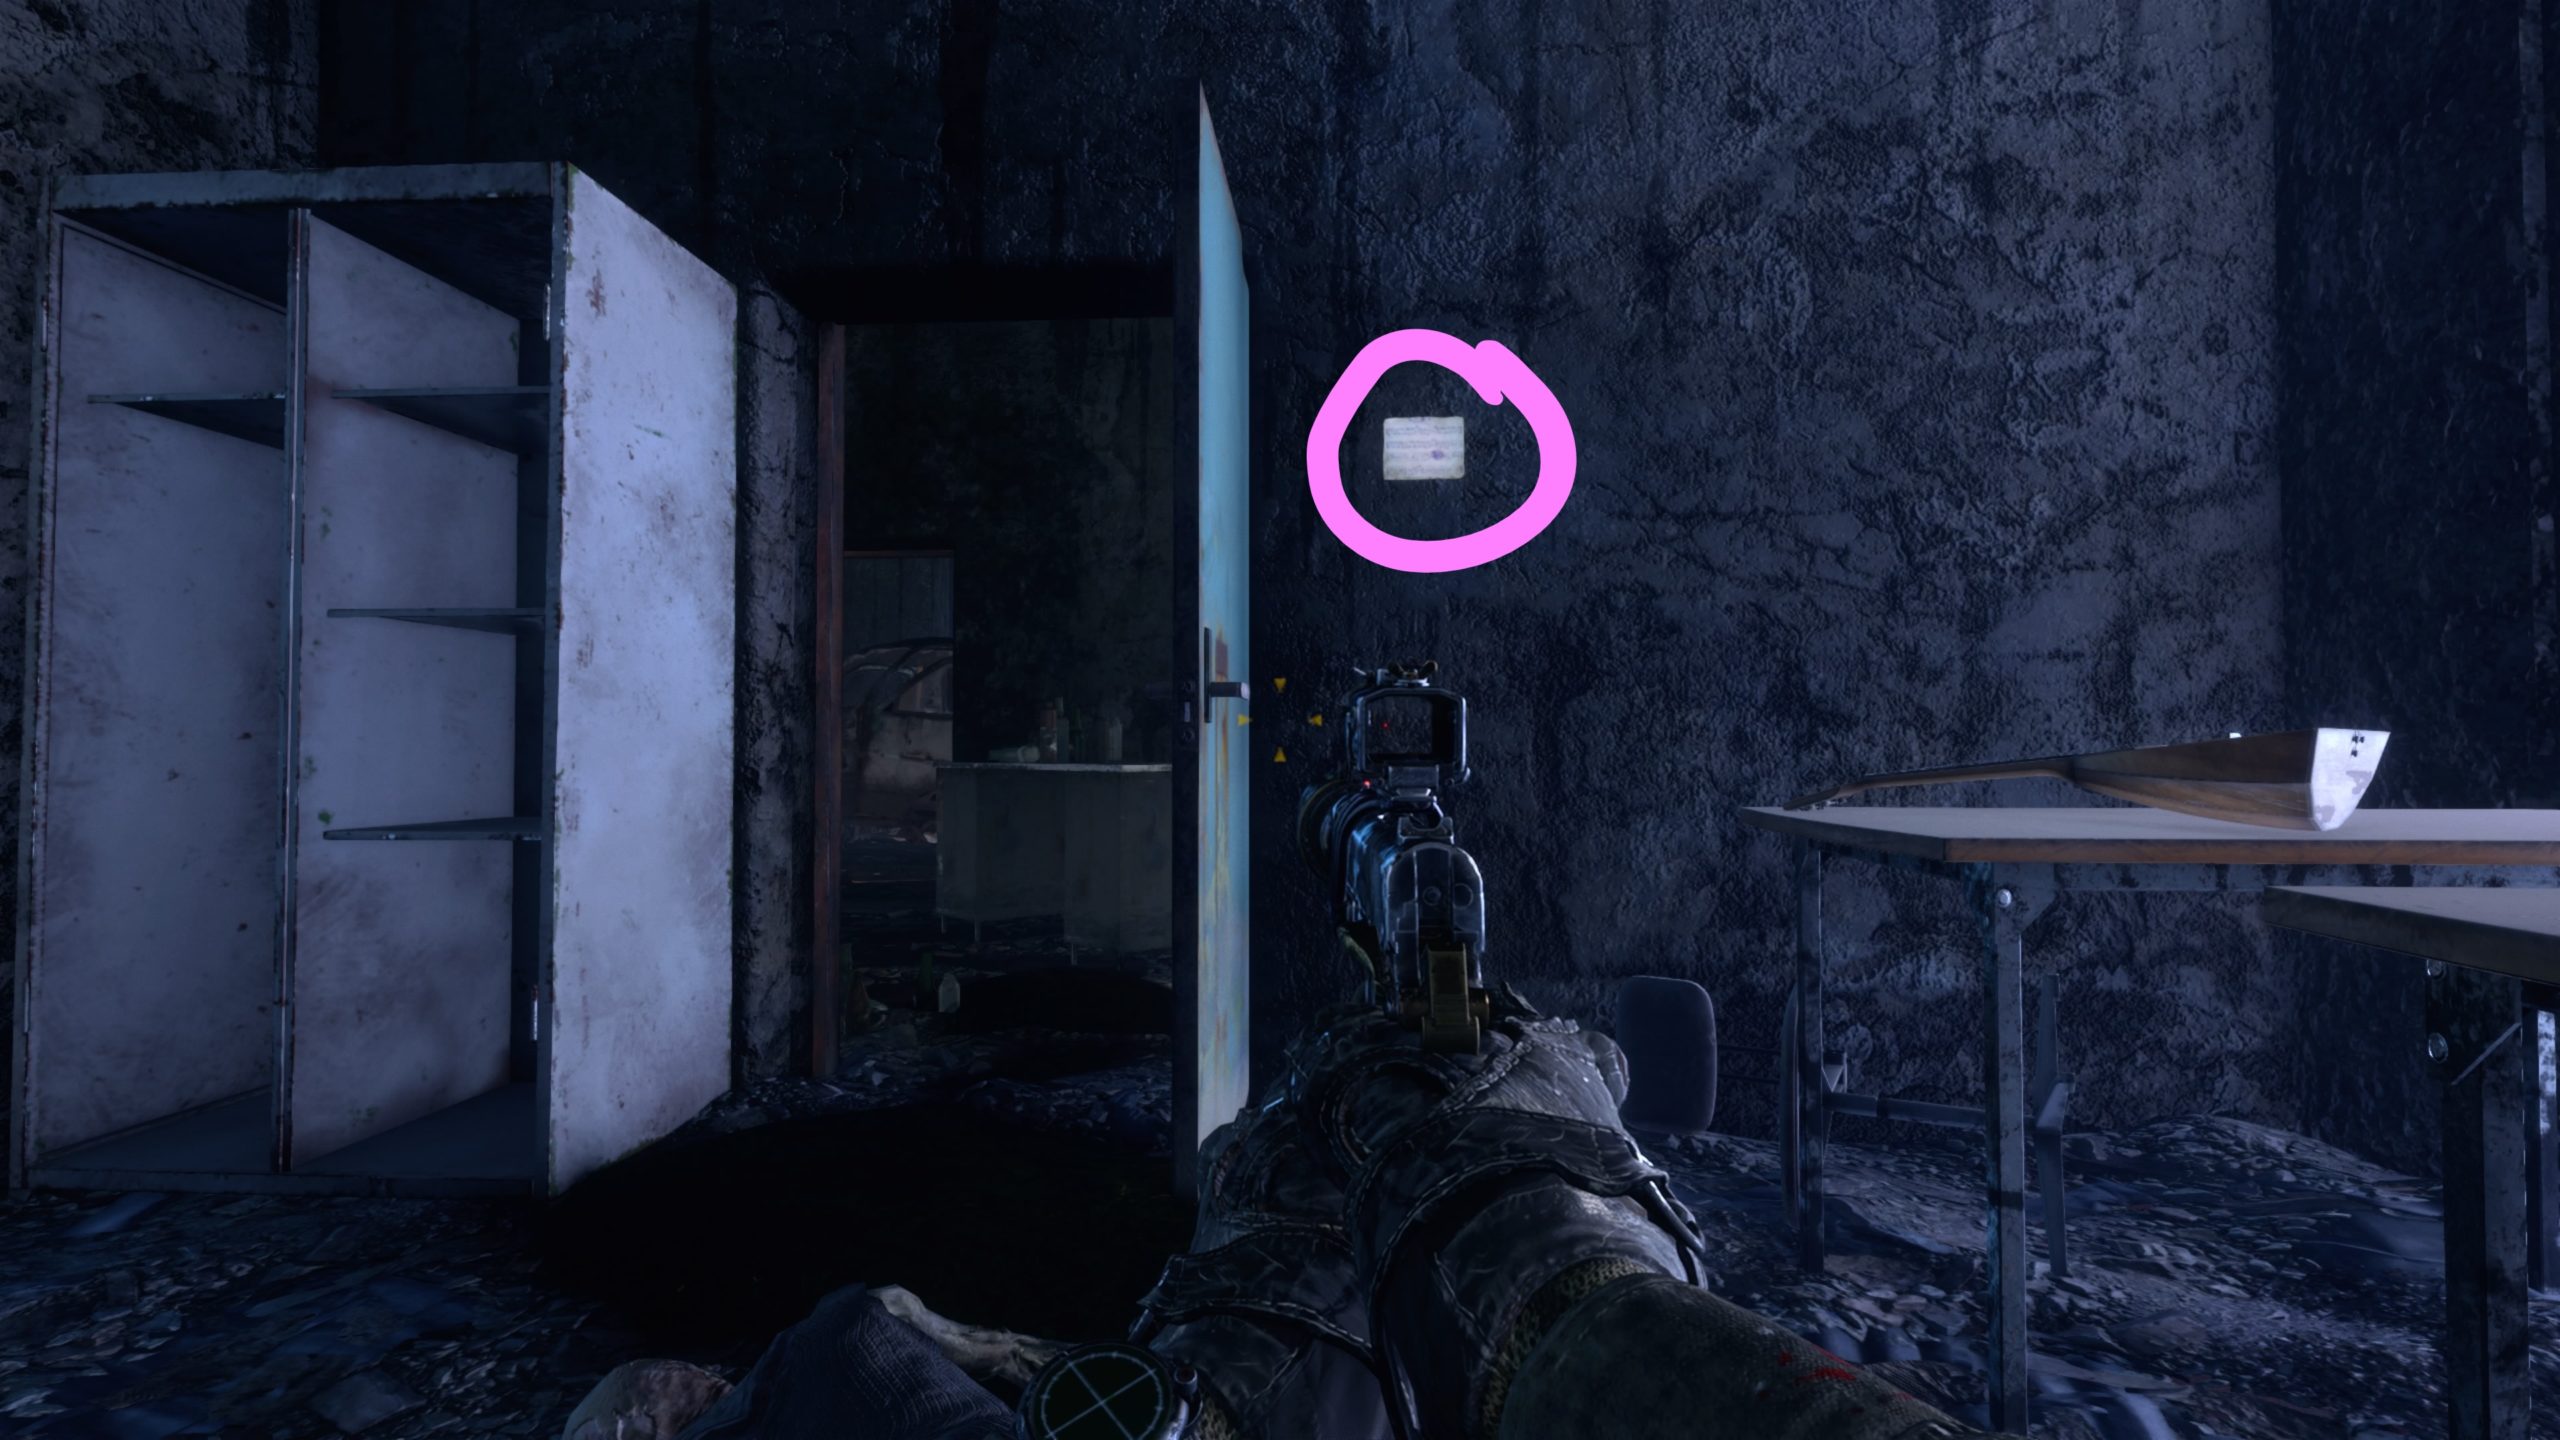
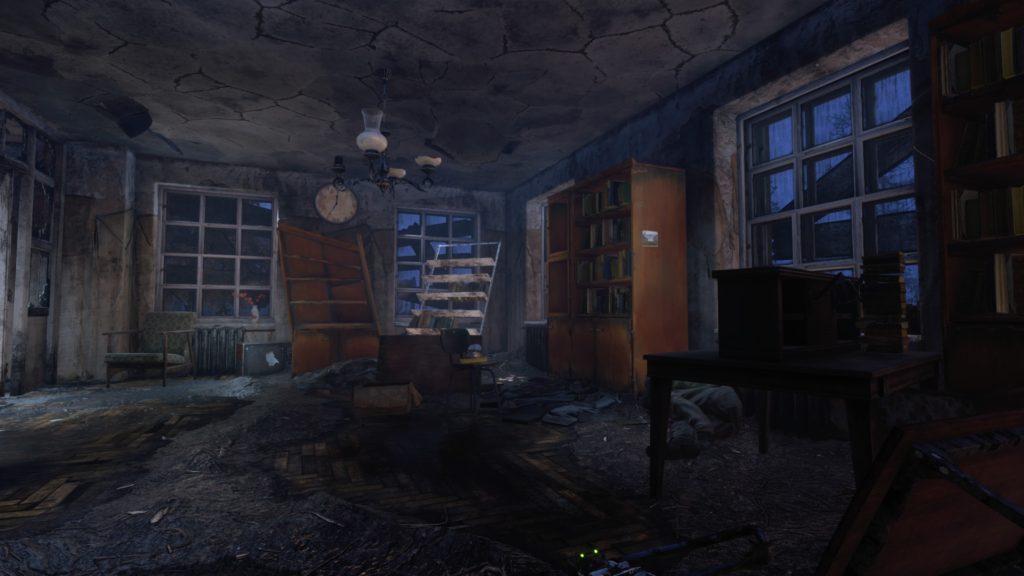
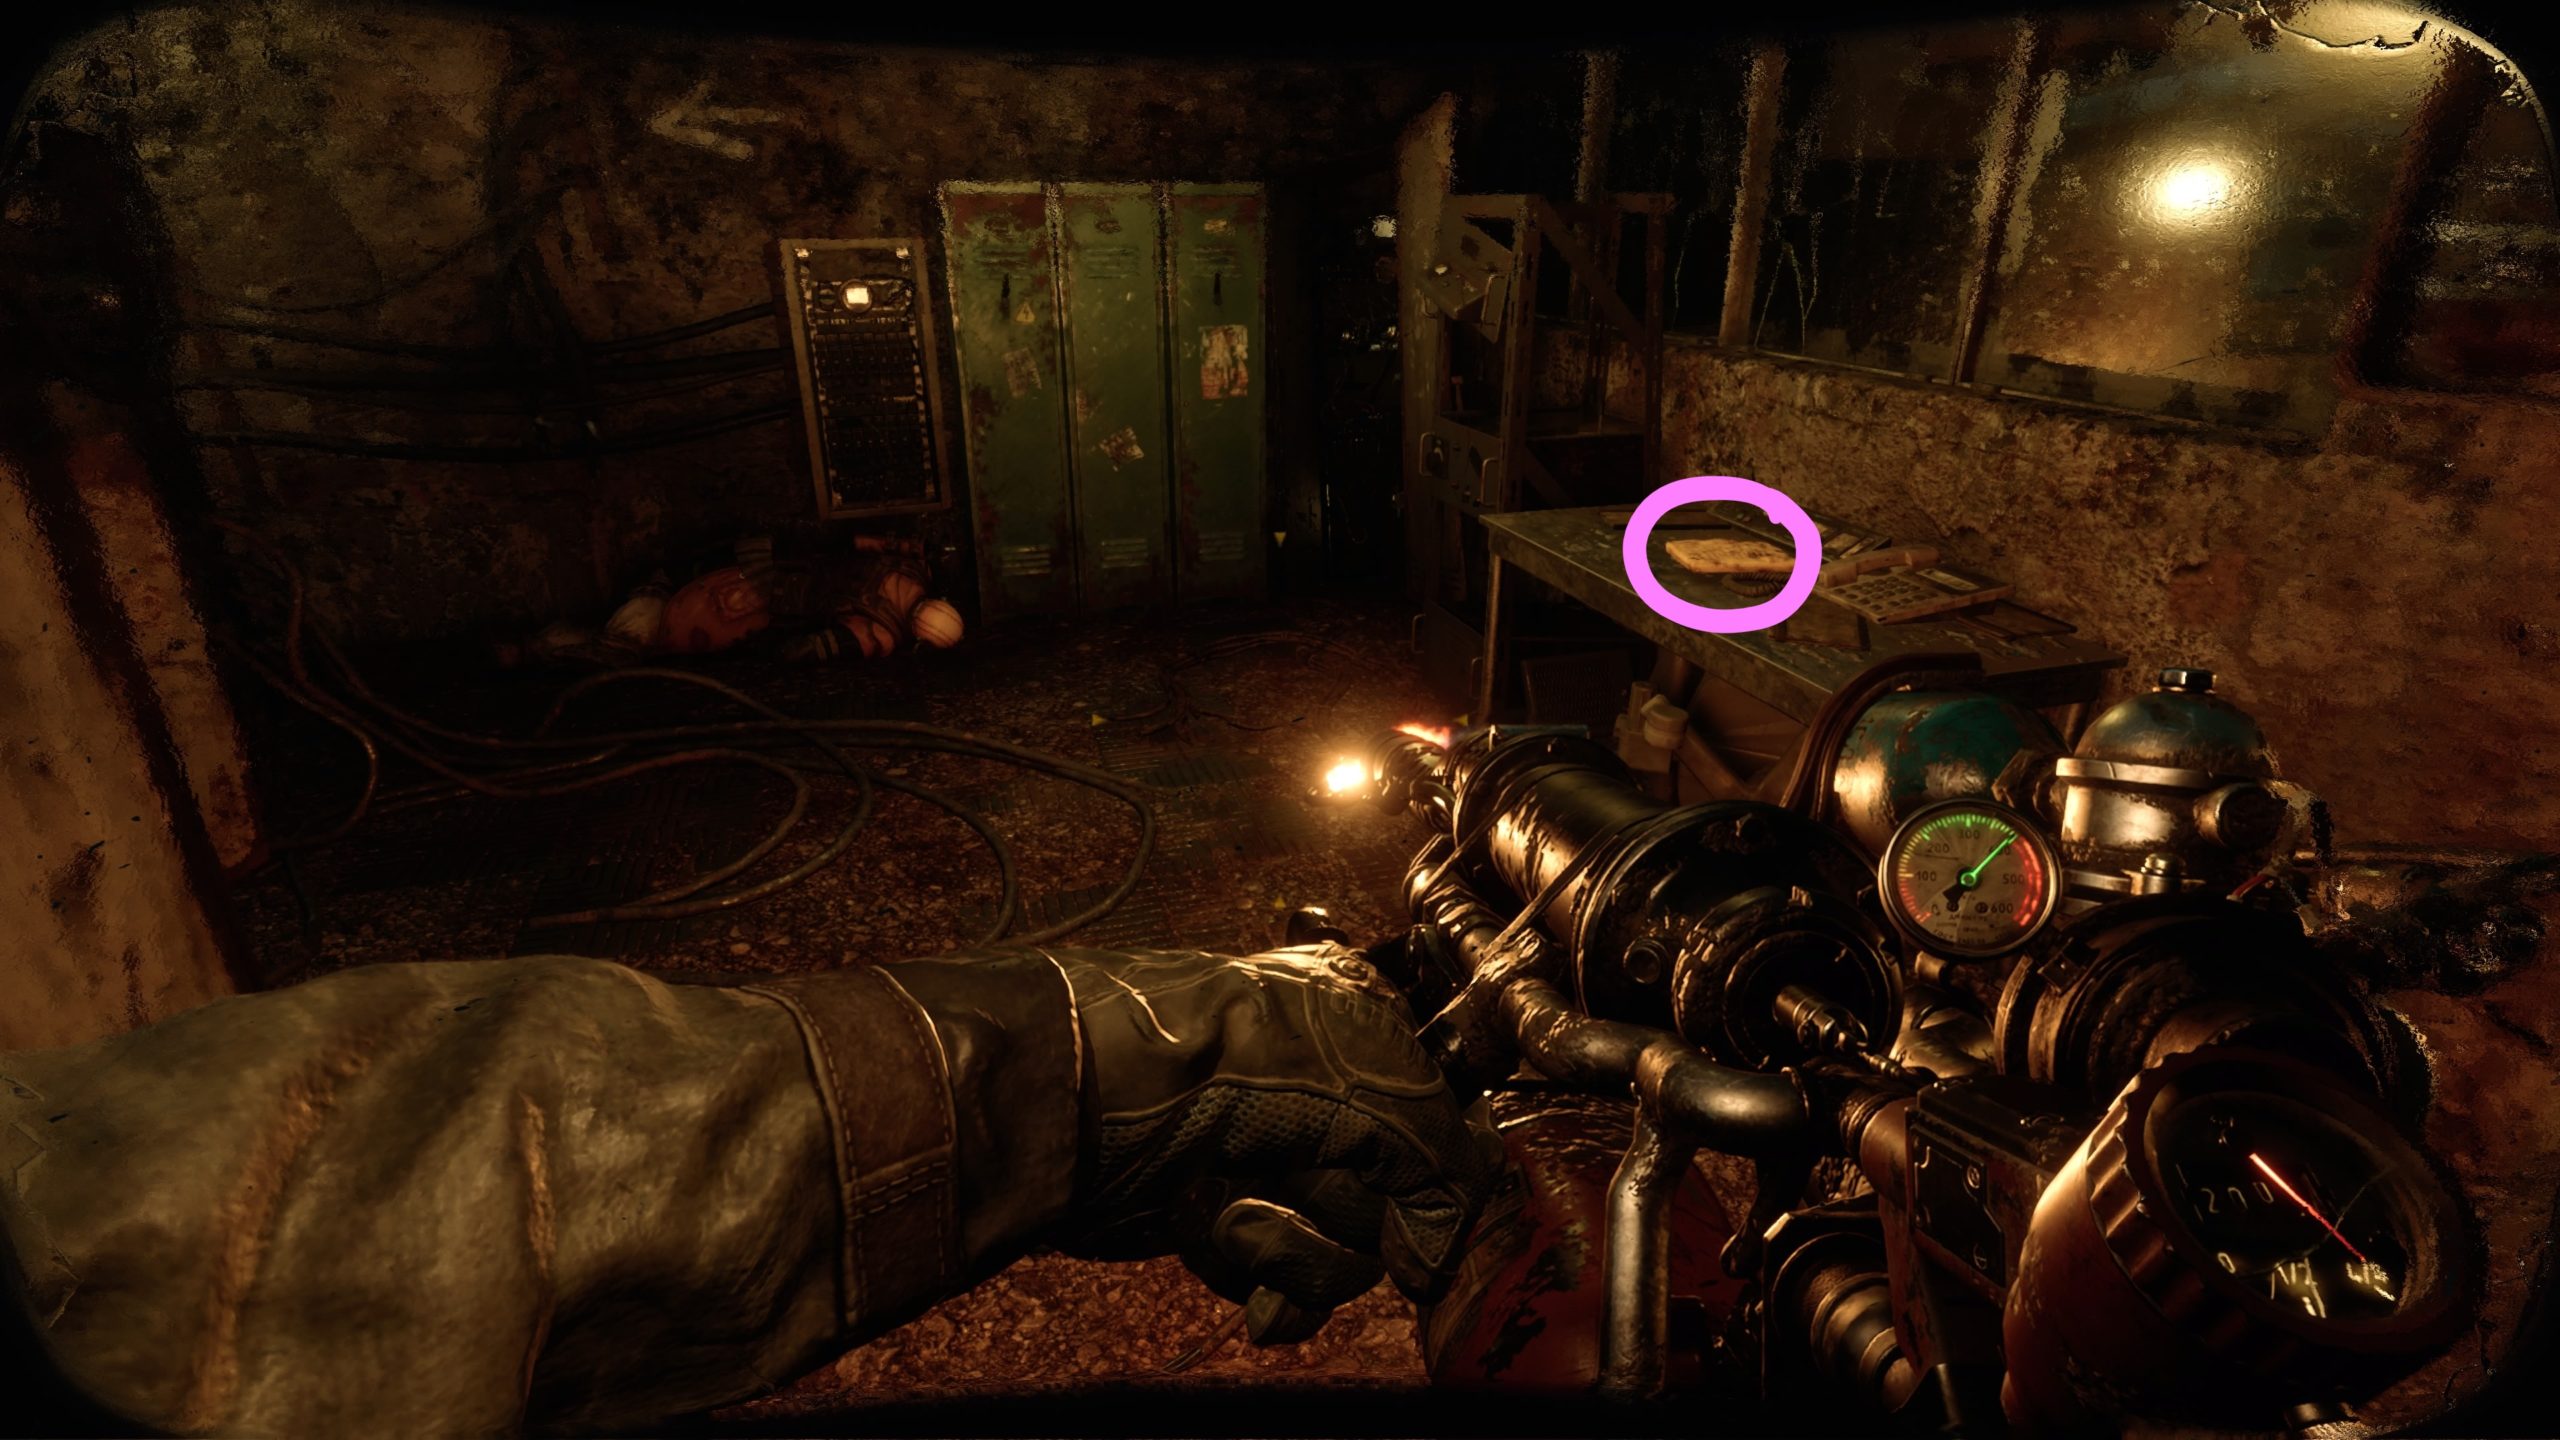
Investigation Report

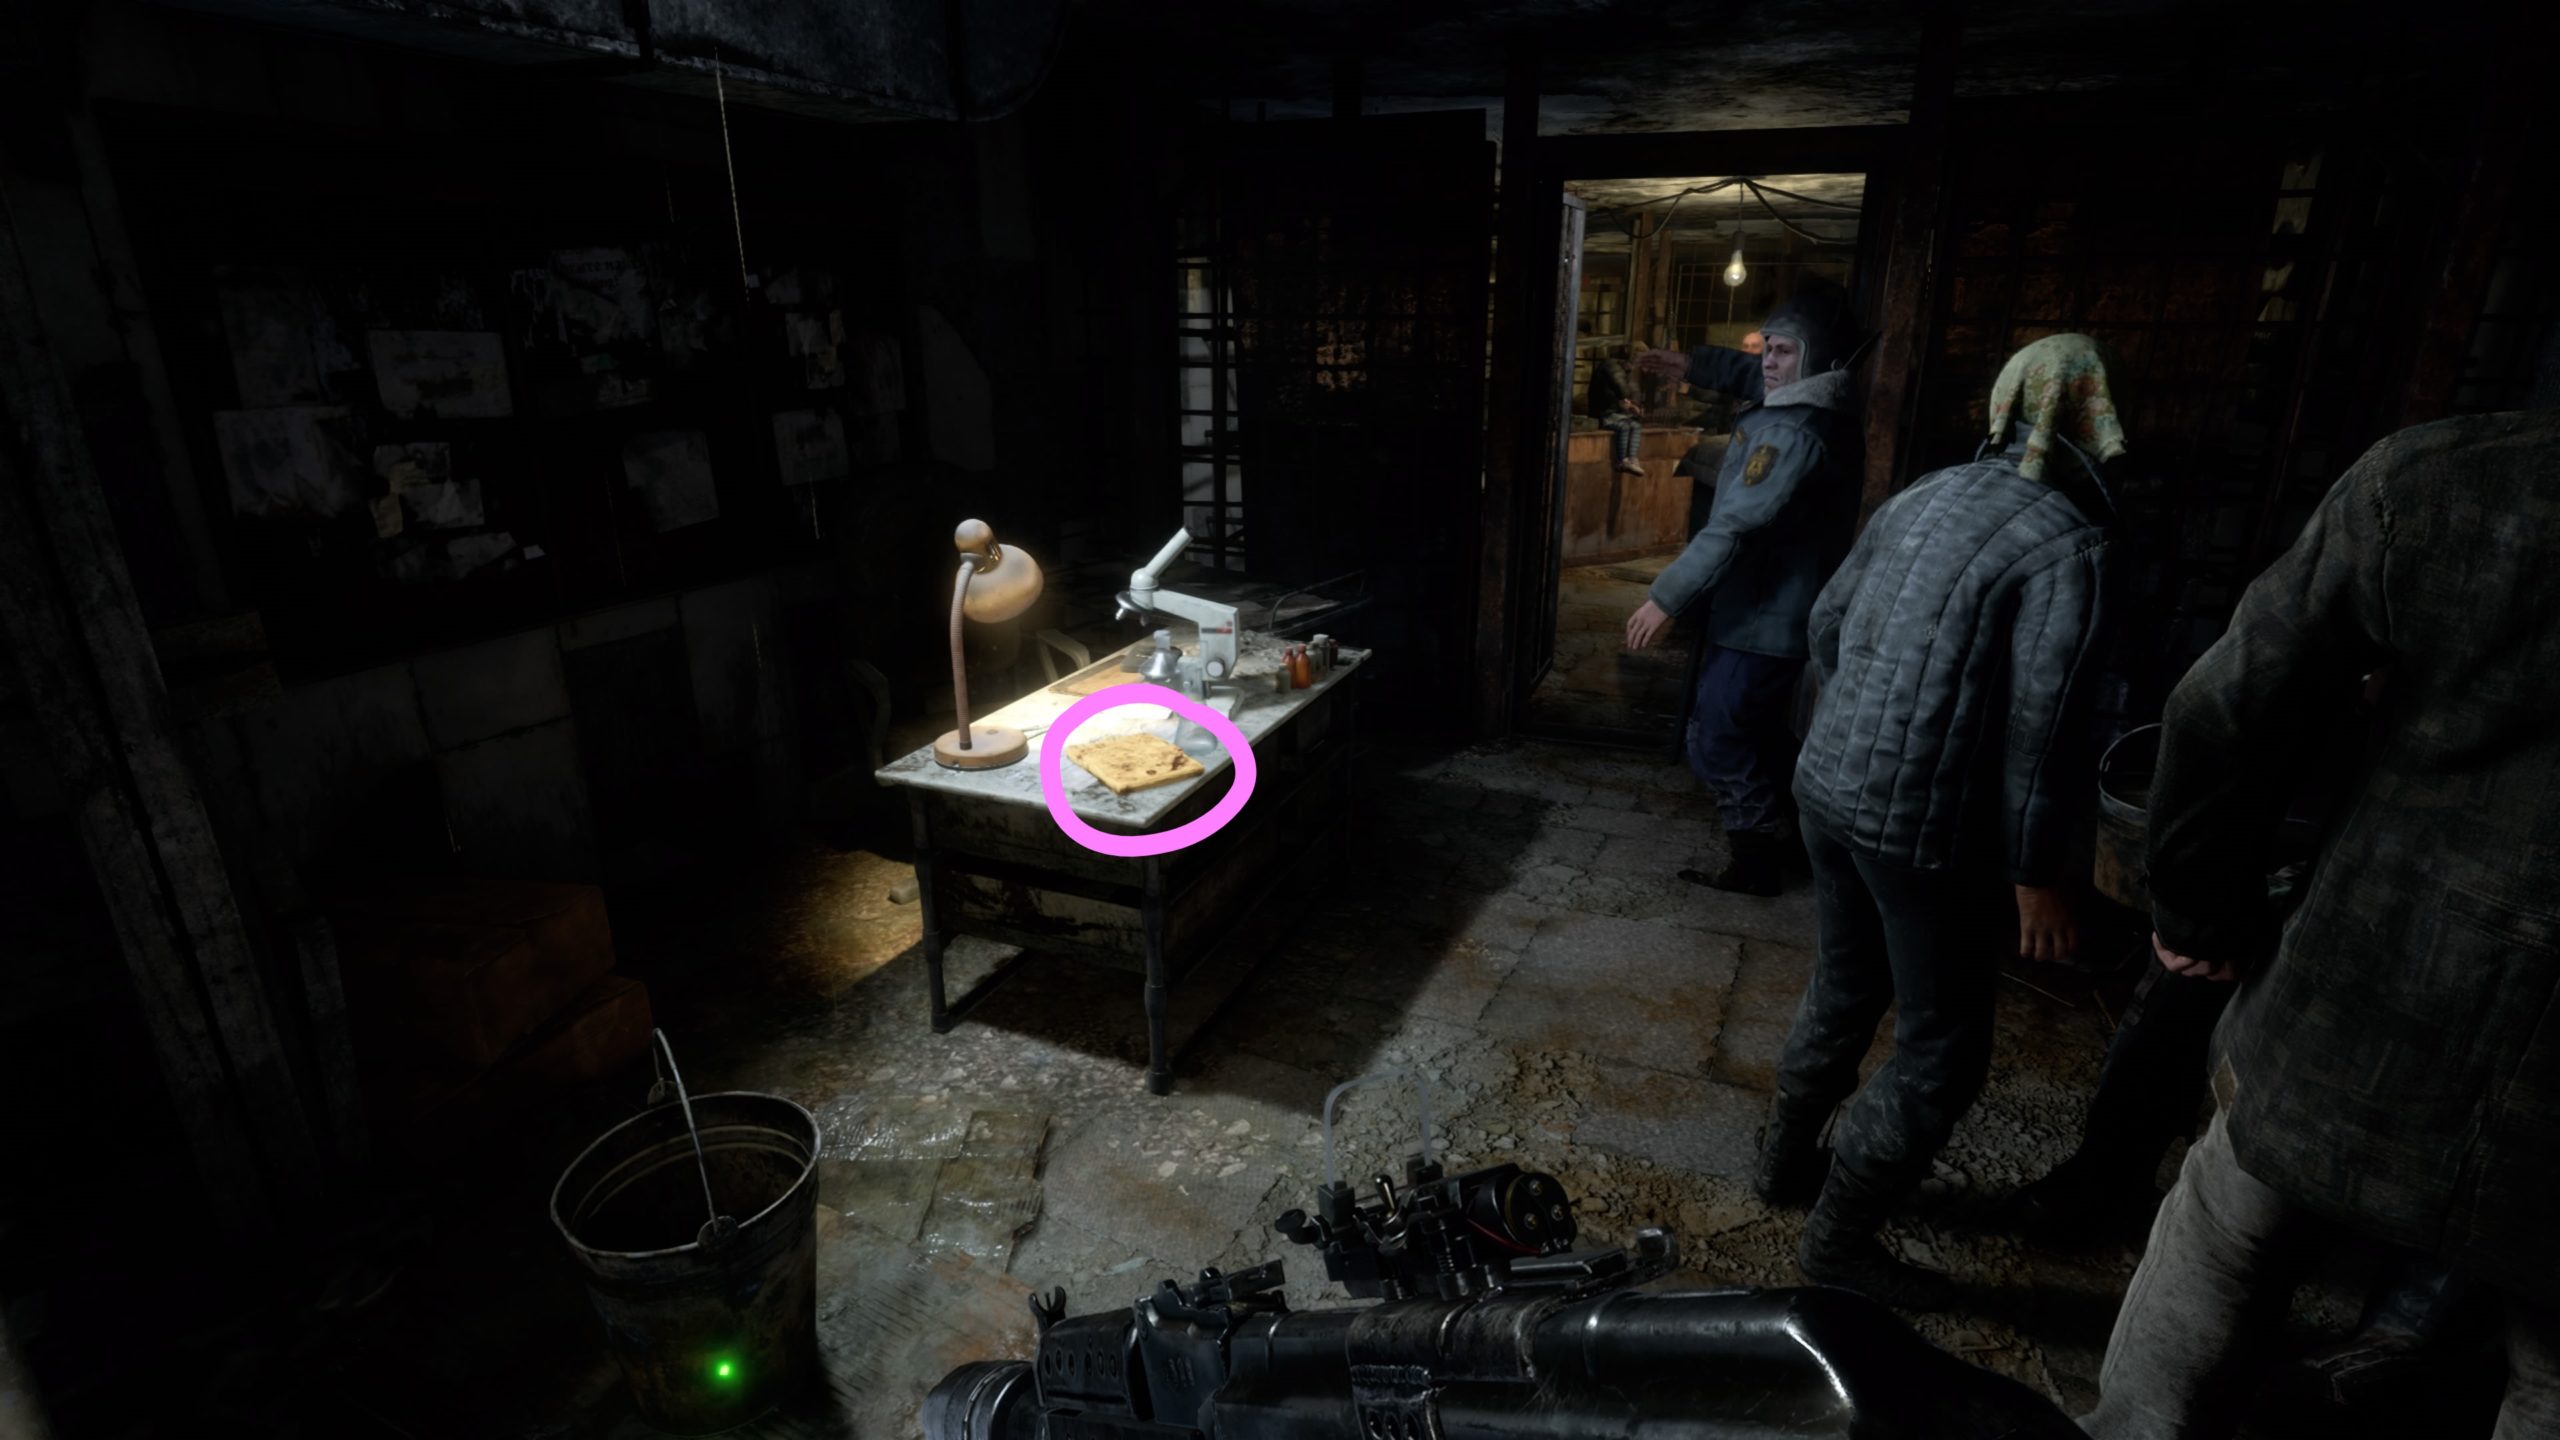
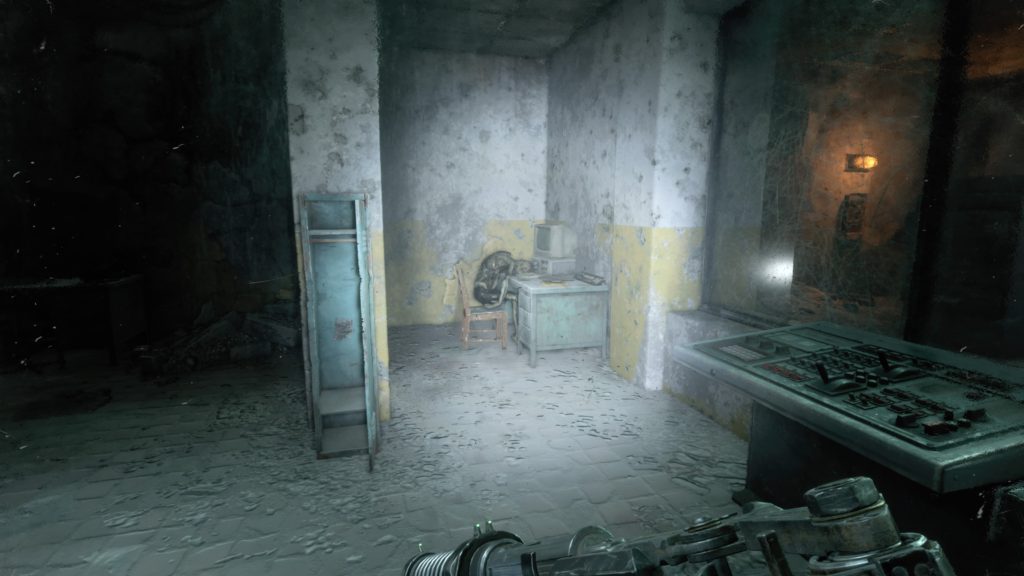
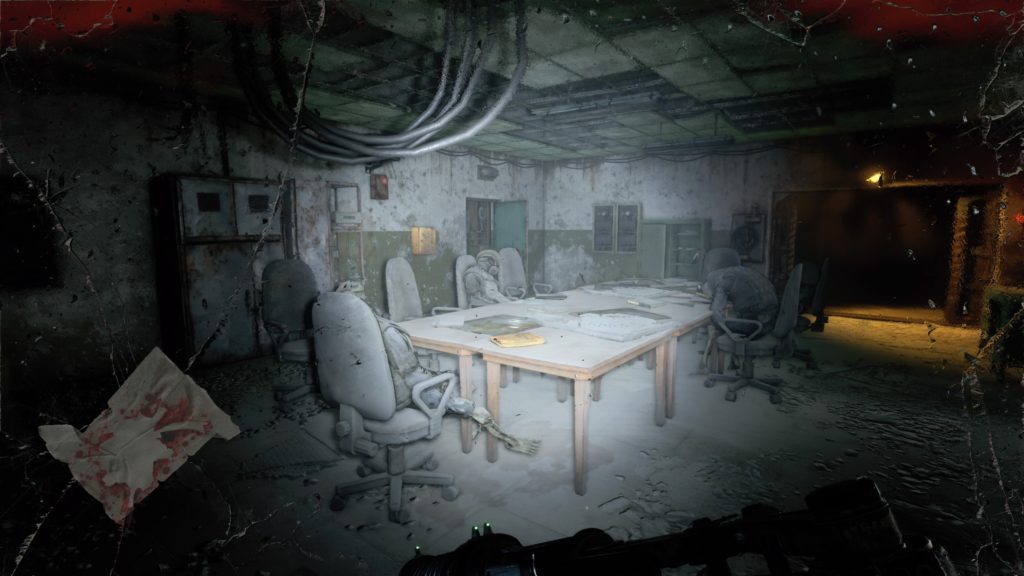
When you take control of the Colonel during the rioting, exit the armory with the workbench and head right down the hallway to enter the med bay. The diary will be located on a table under a lit lamp just before the door the soldiers opened for you.
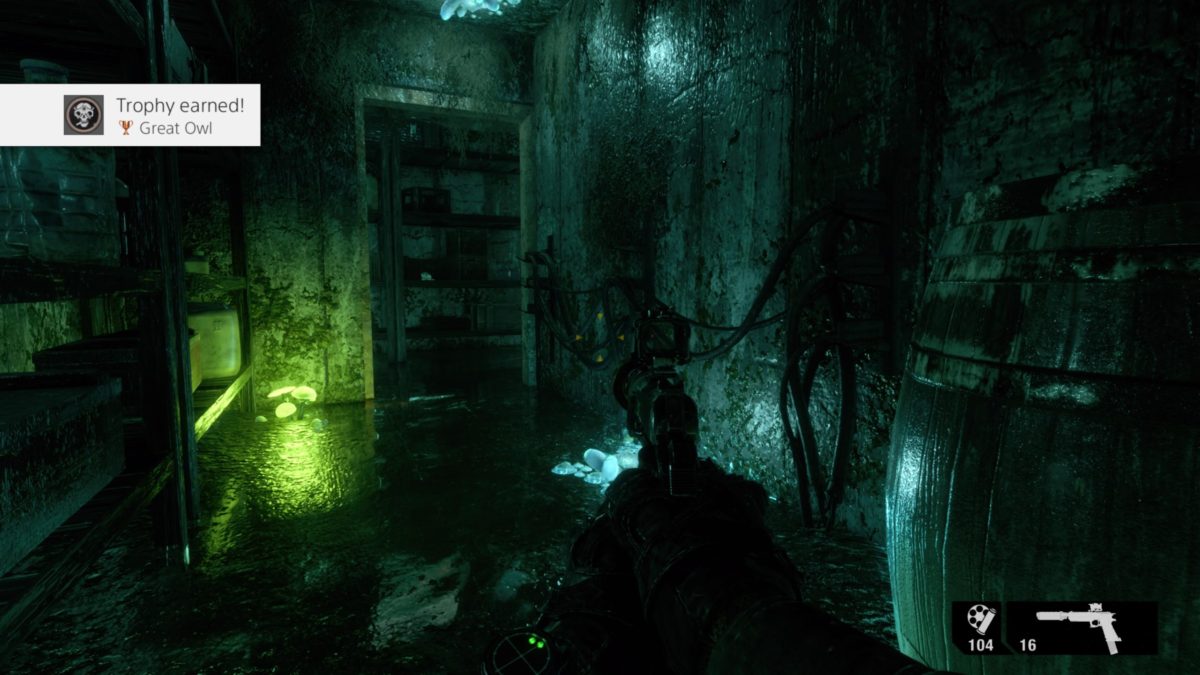
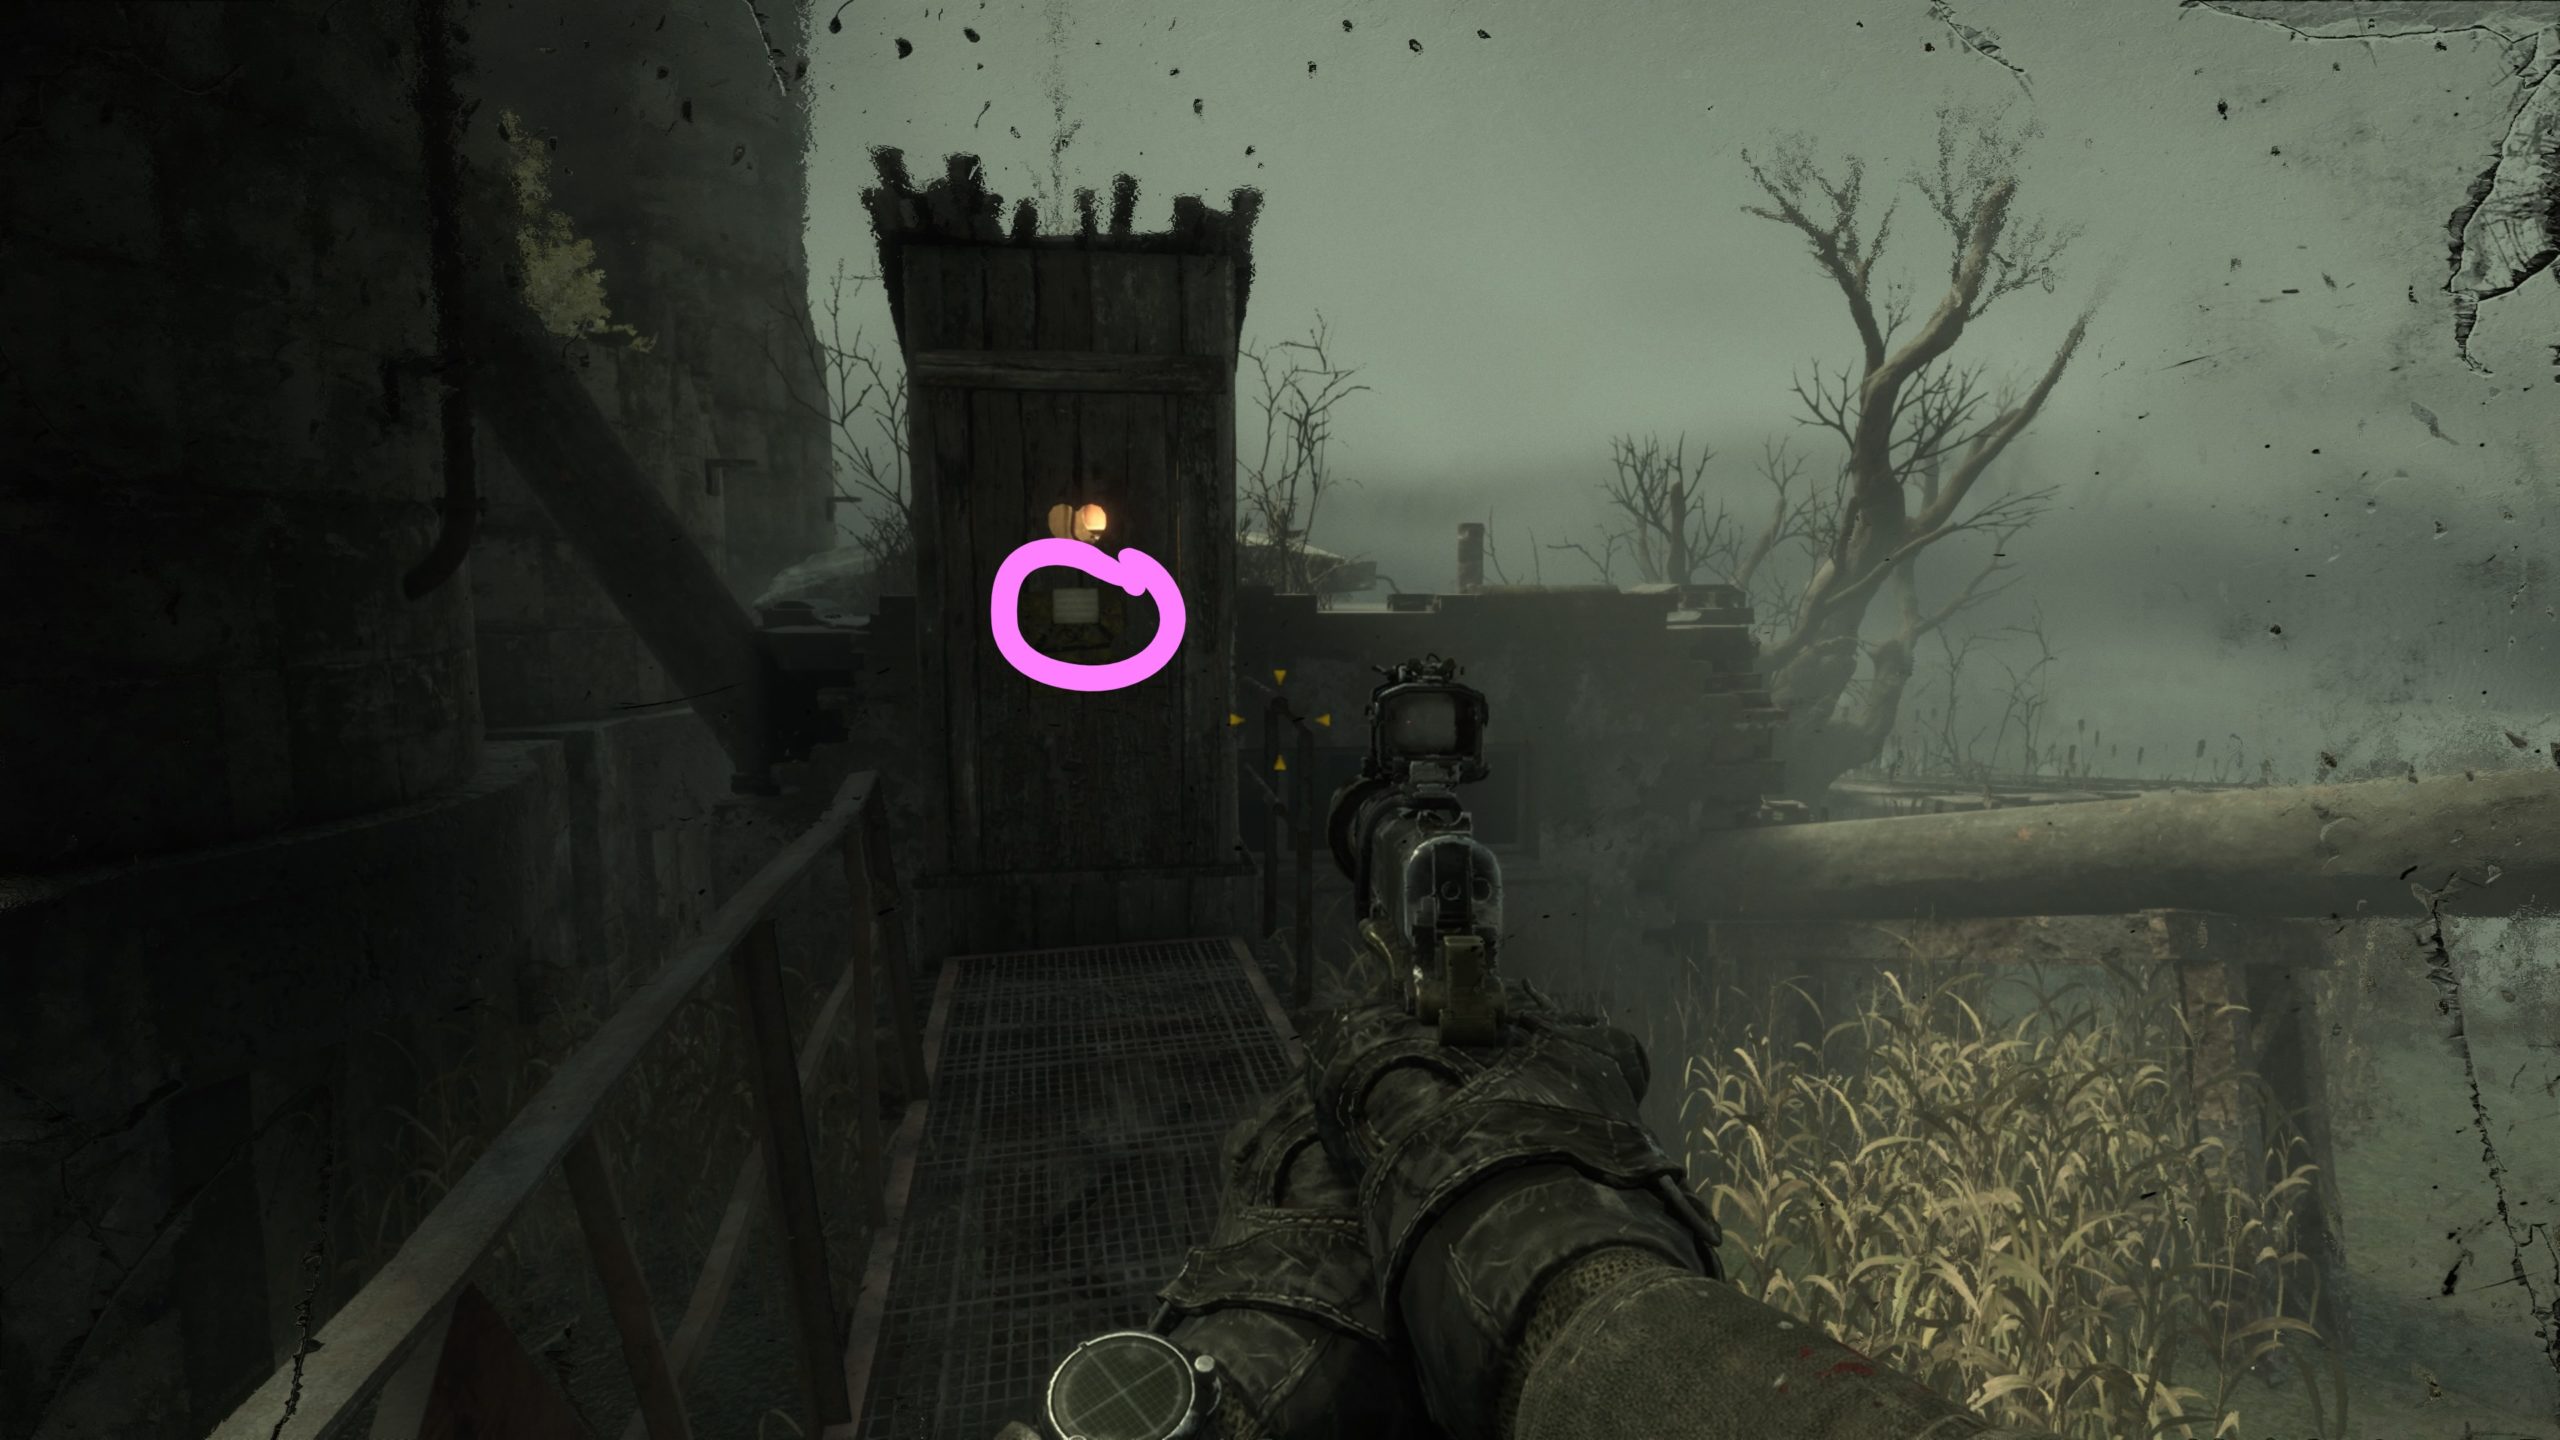
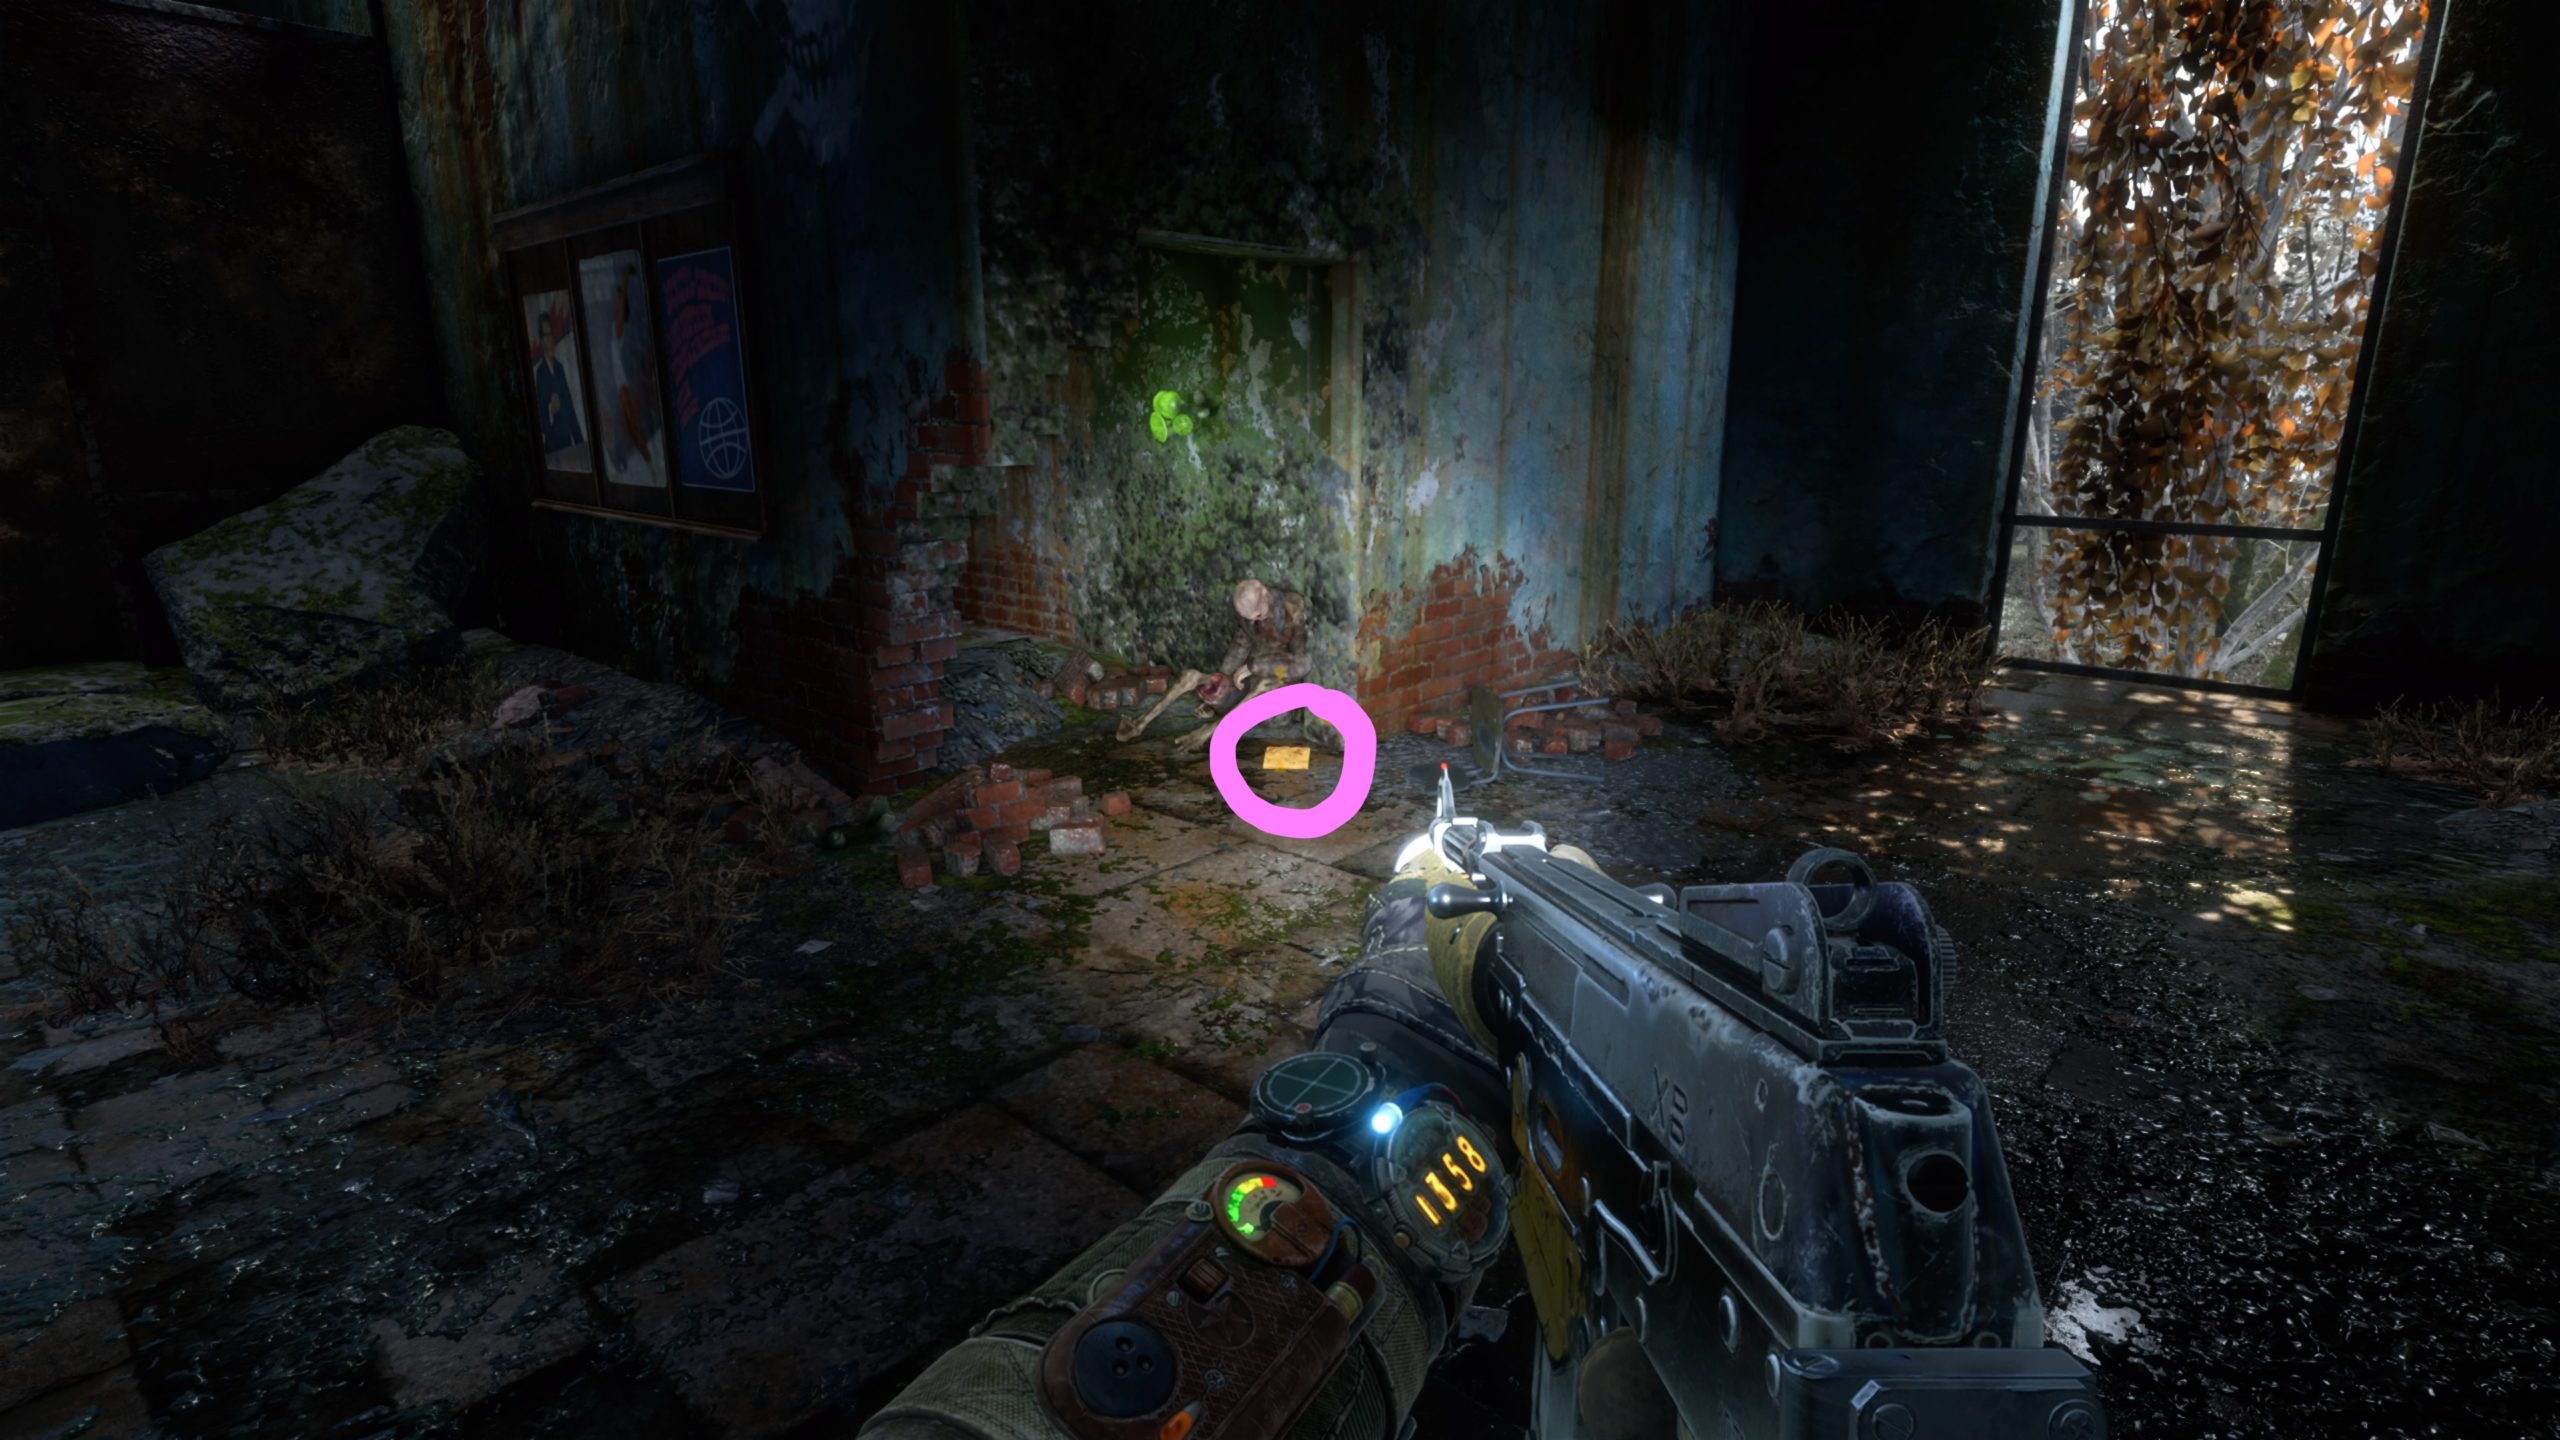
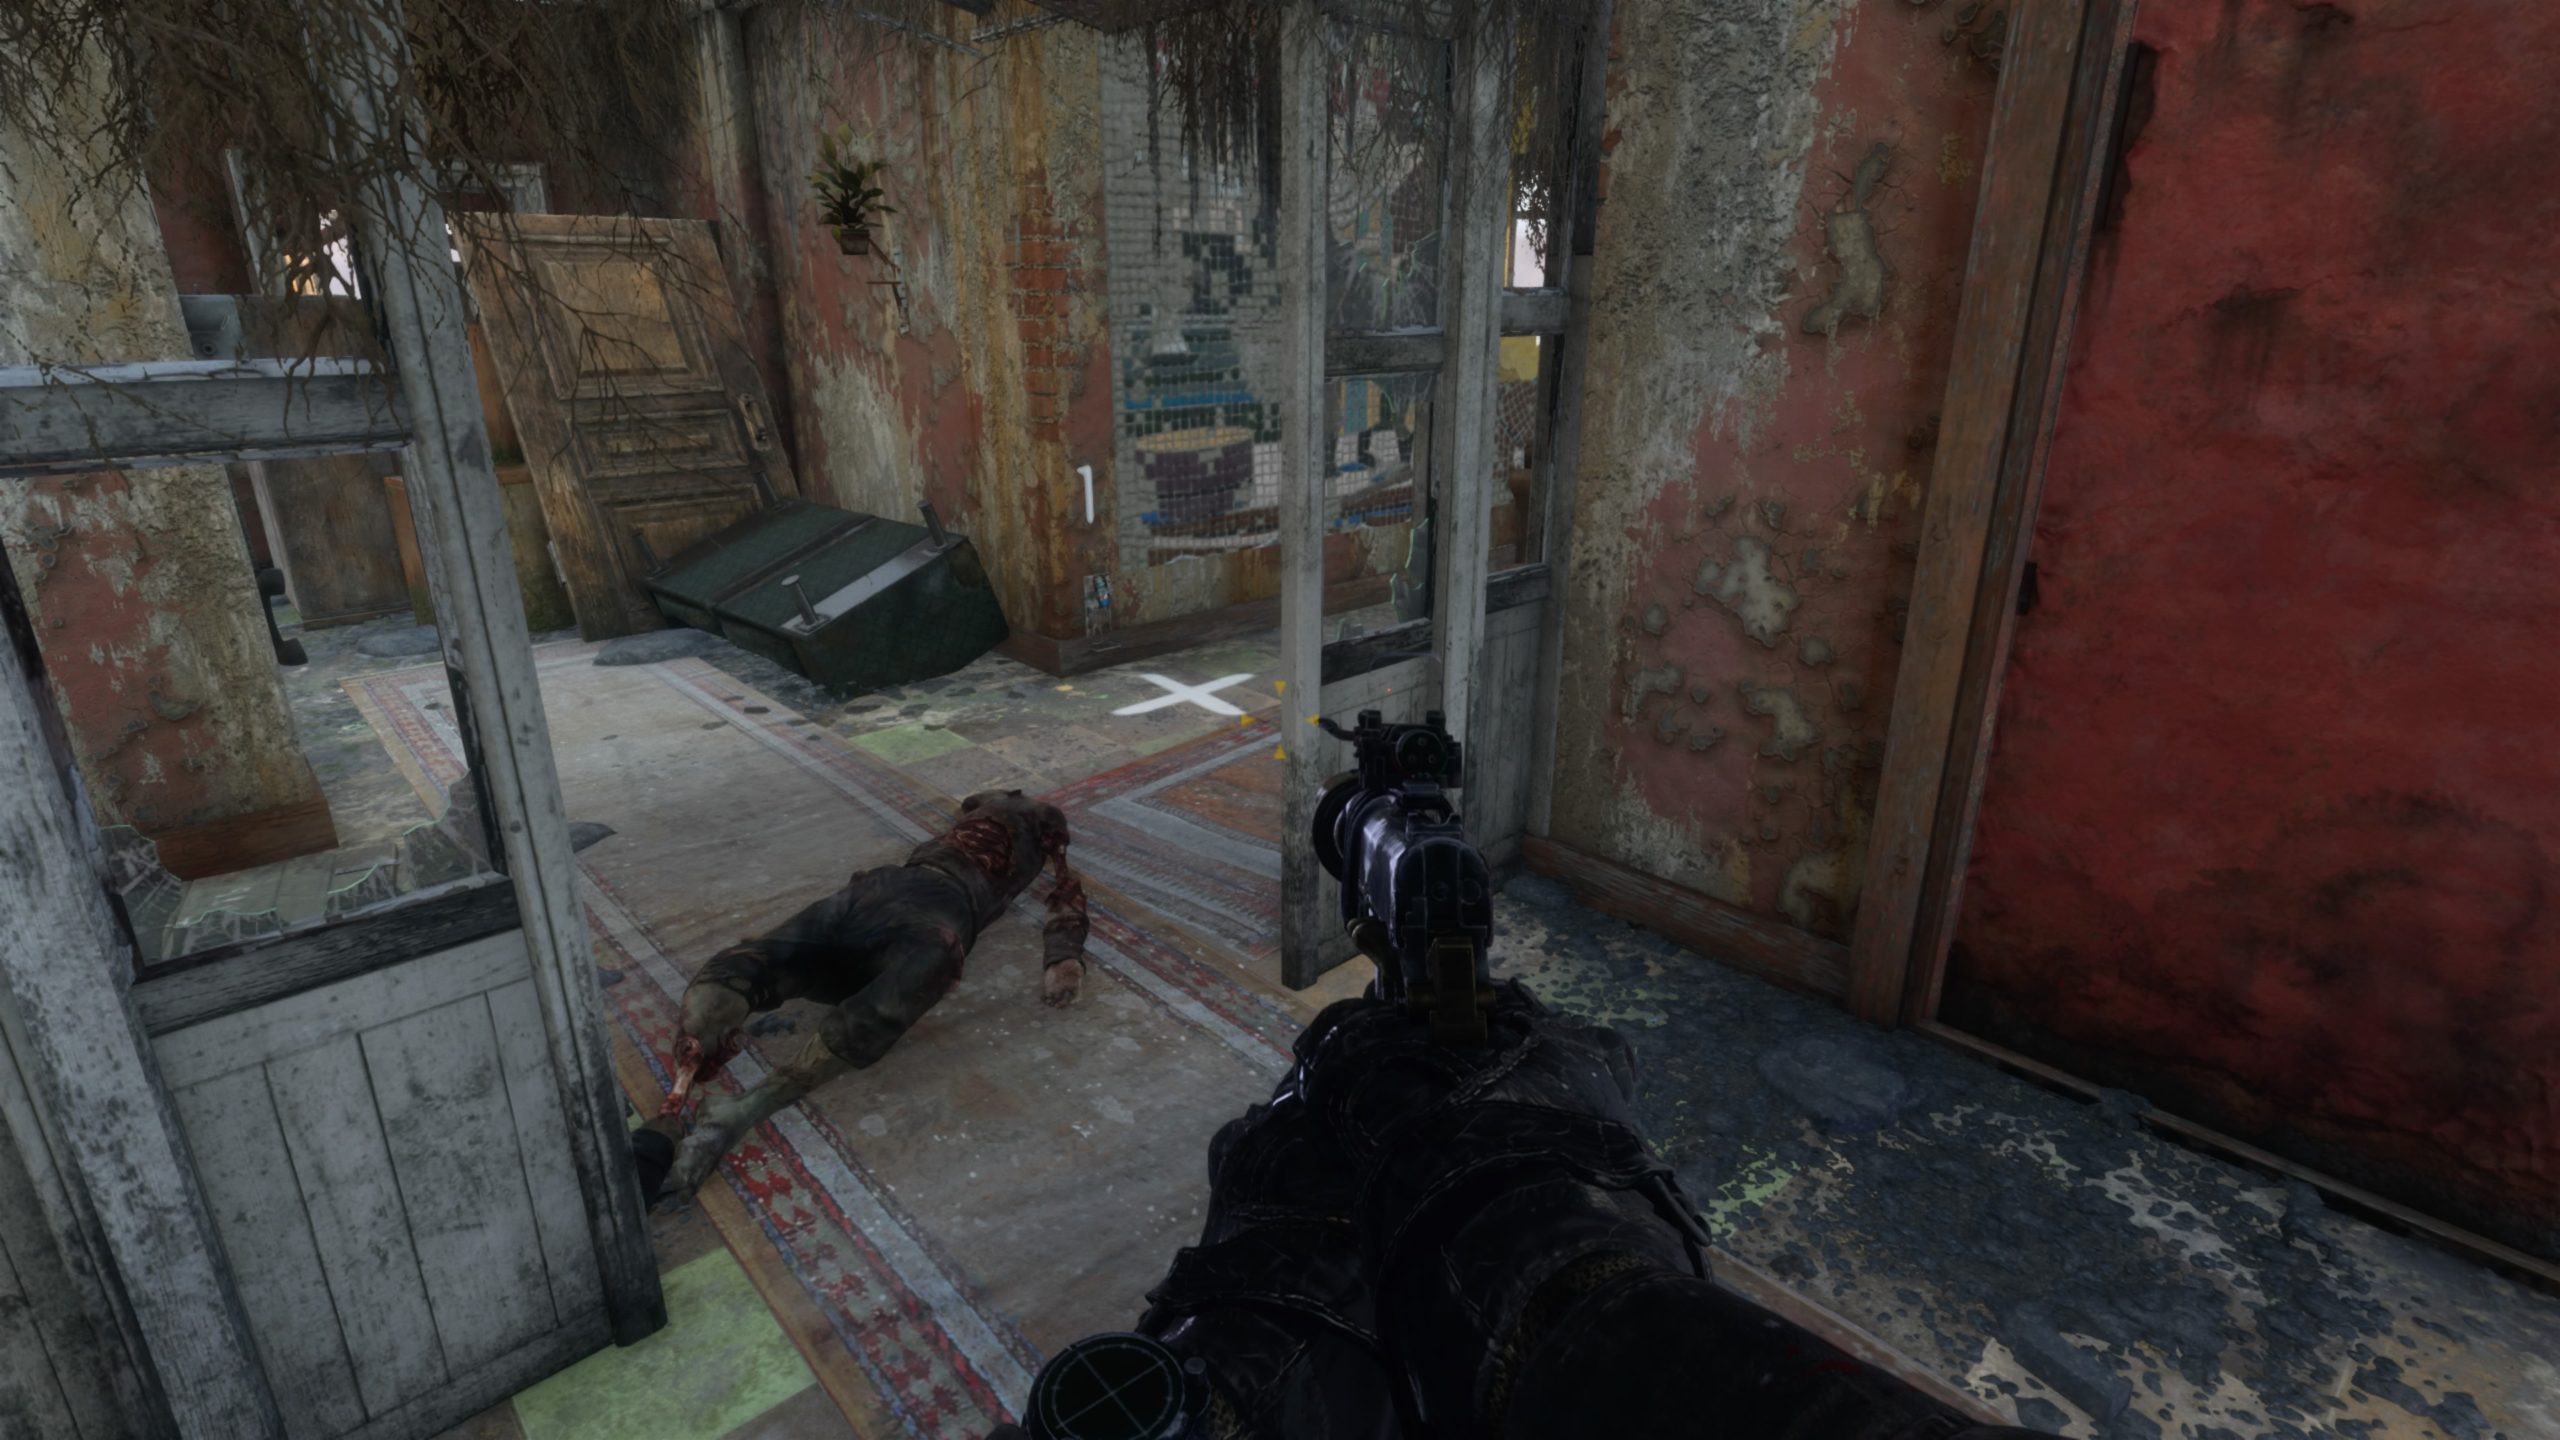
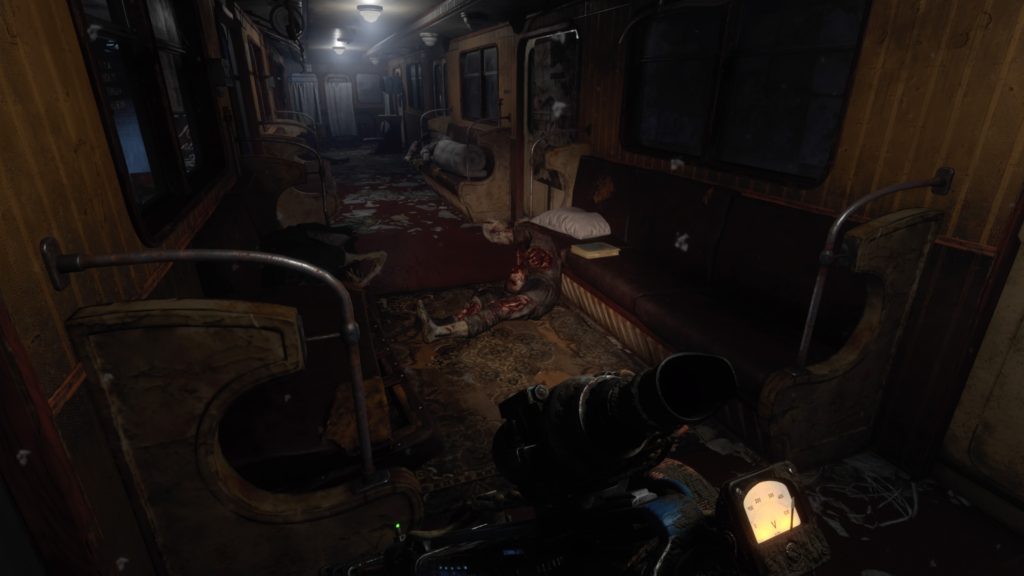
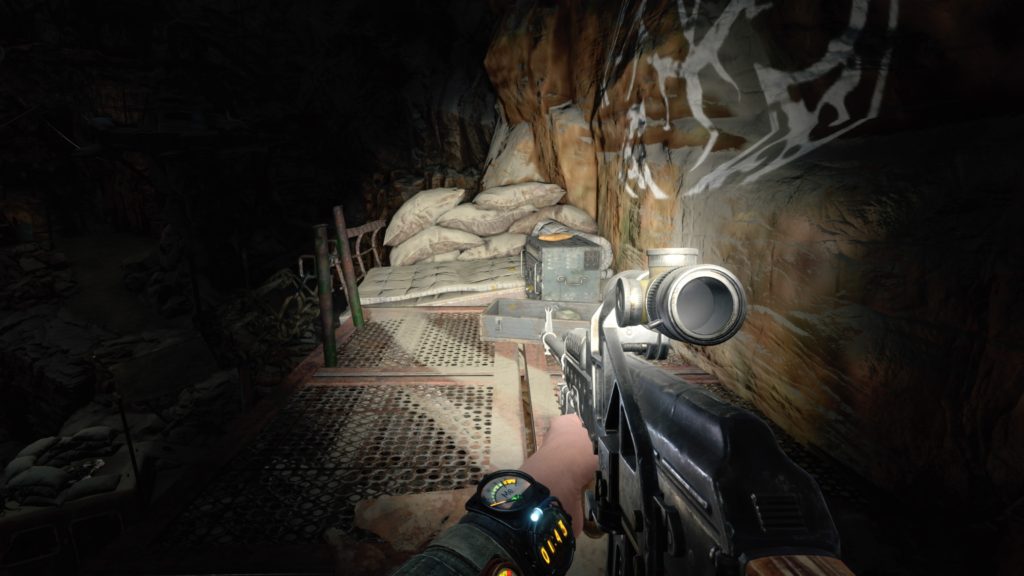
 

Stalker’s Diary 1

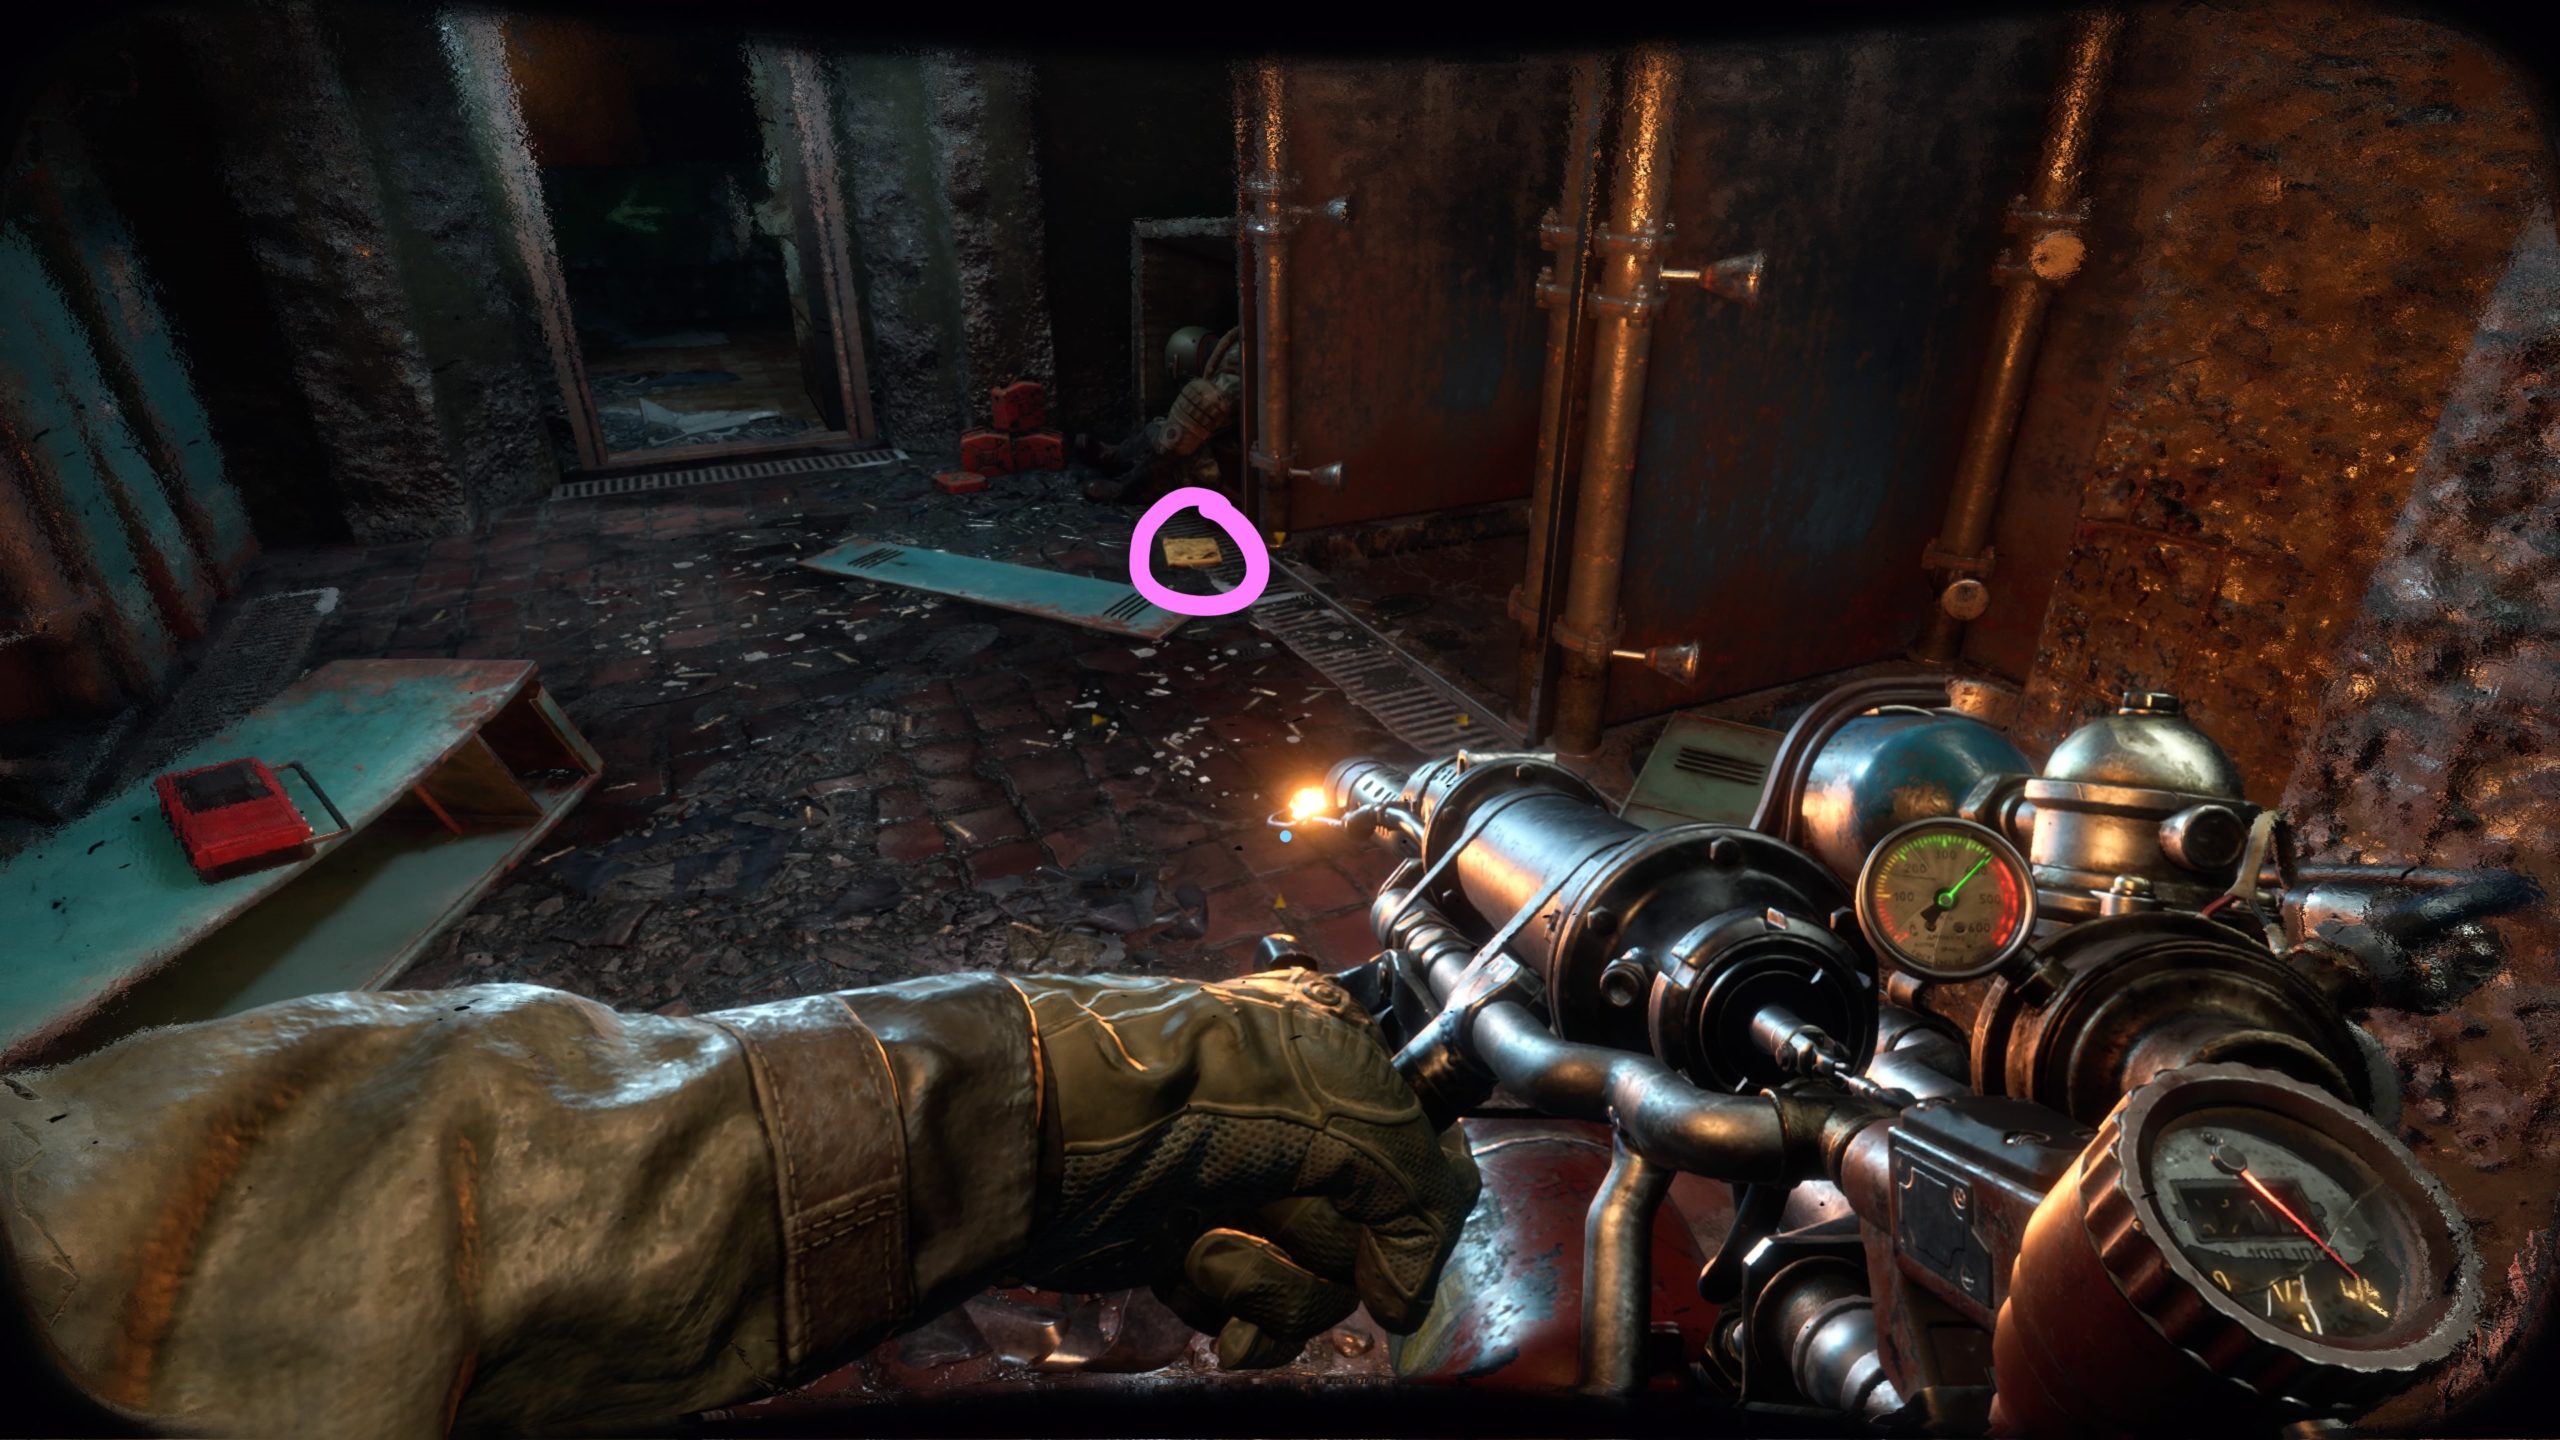
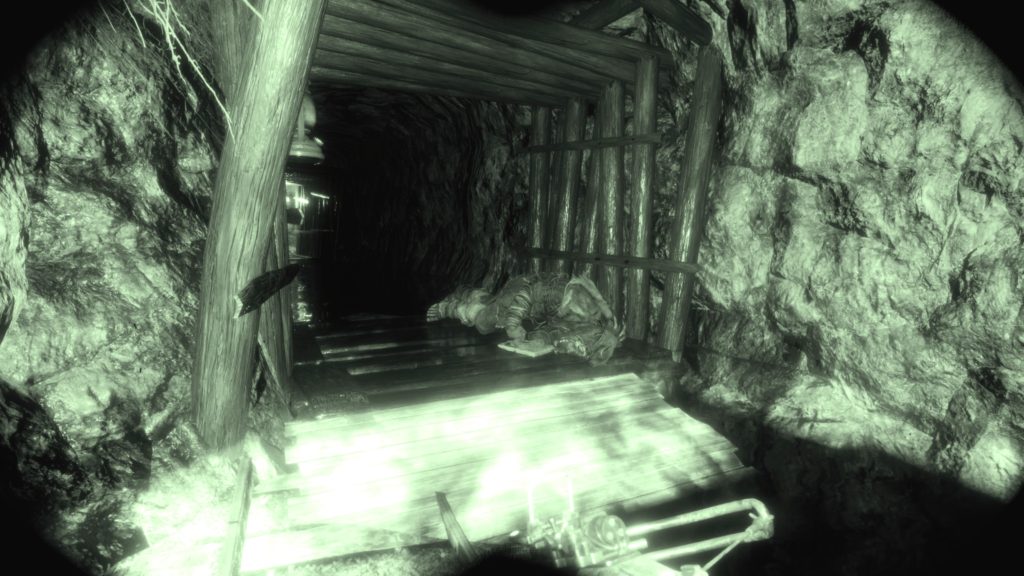
When you gain control of the Colonel after the cutscene where everyone was gassed, head down the concrete stairs to enter a shower room. The diary will be located on the ground.
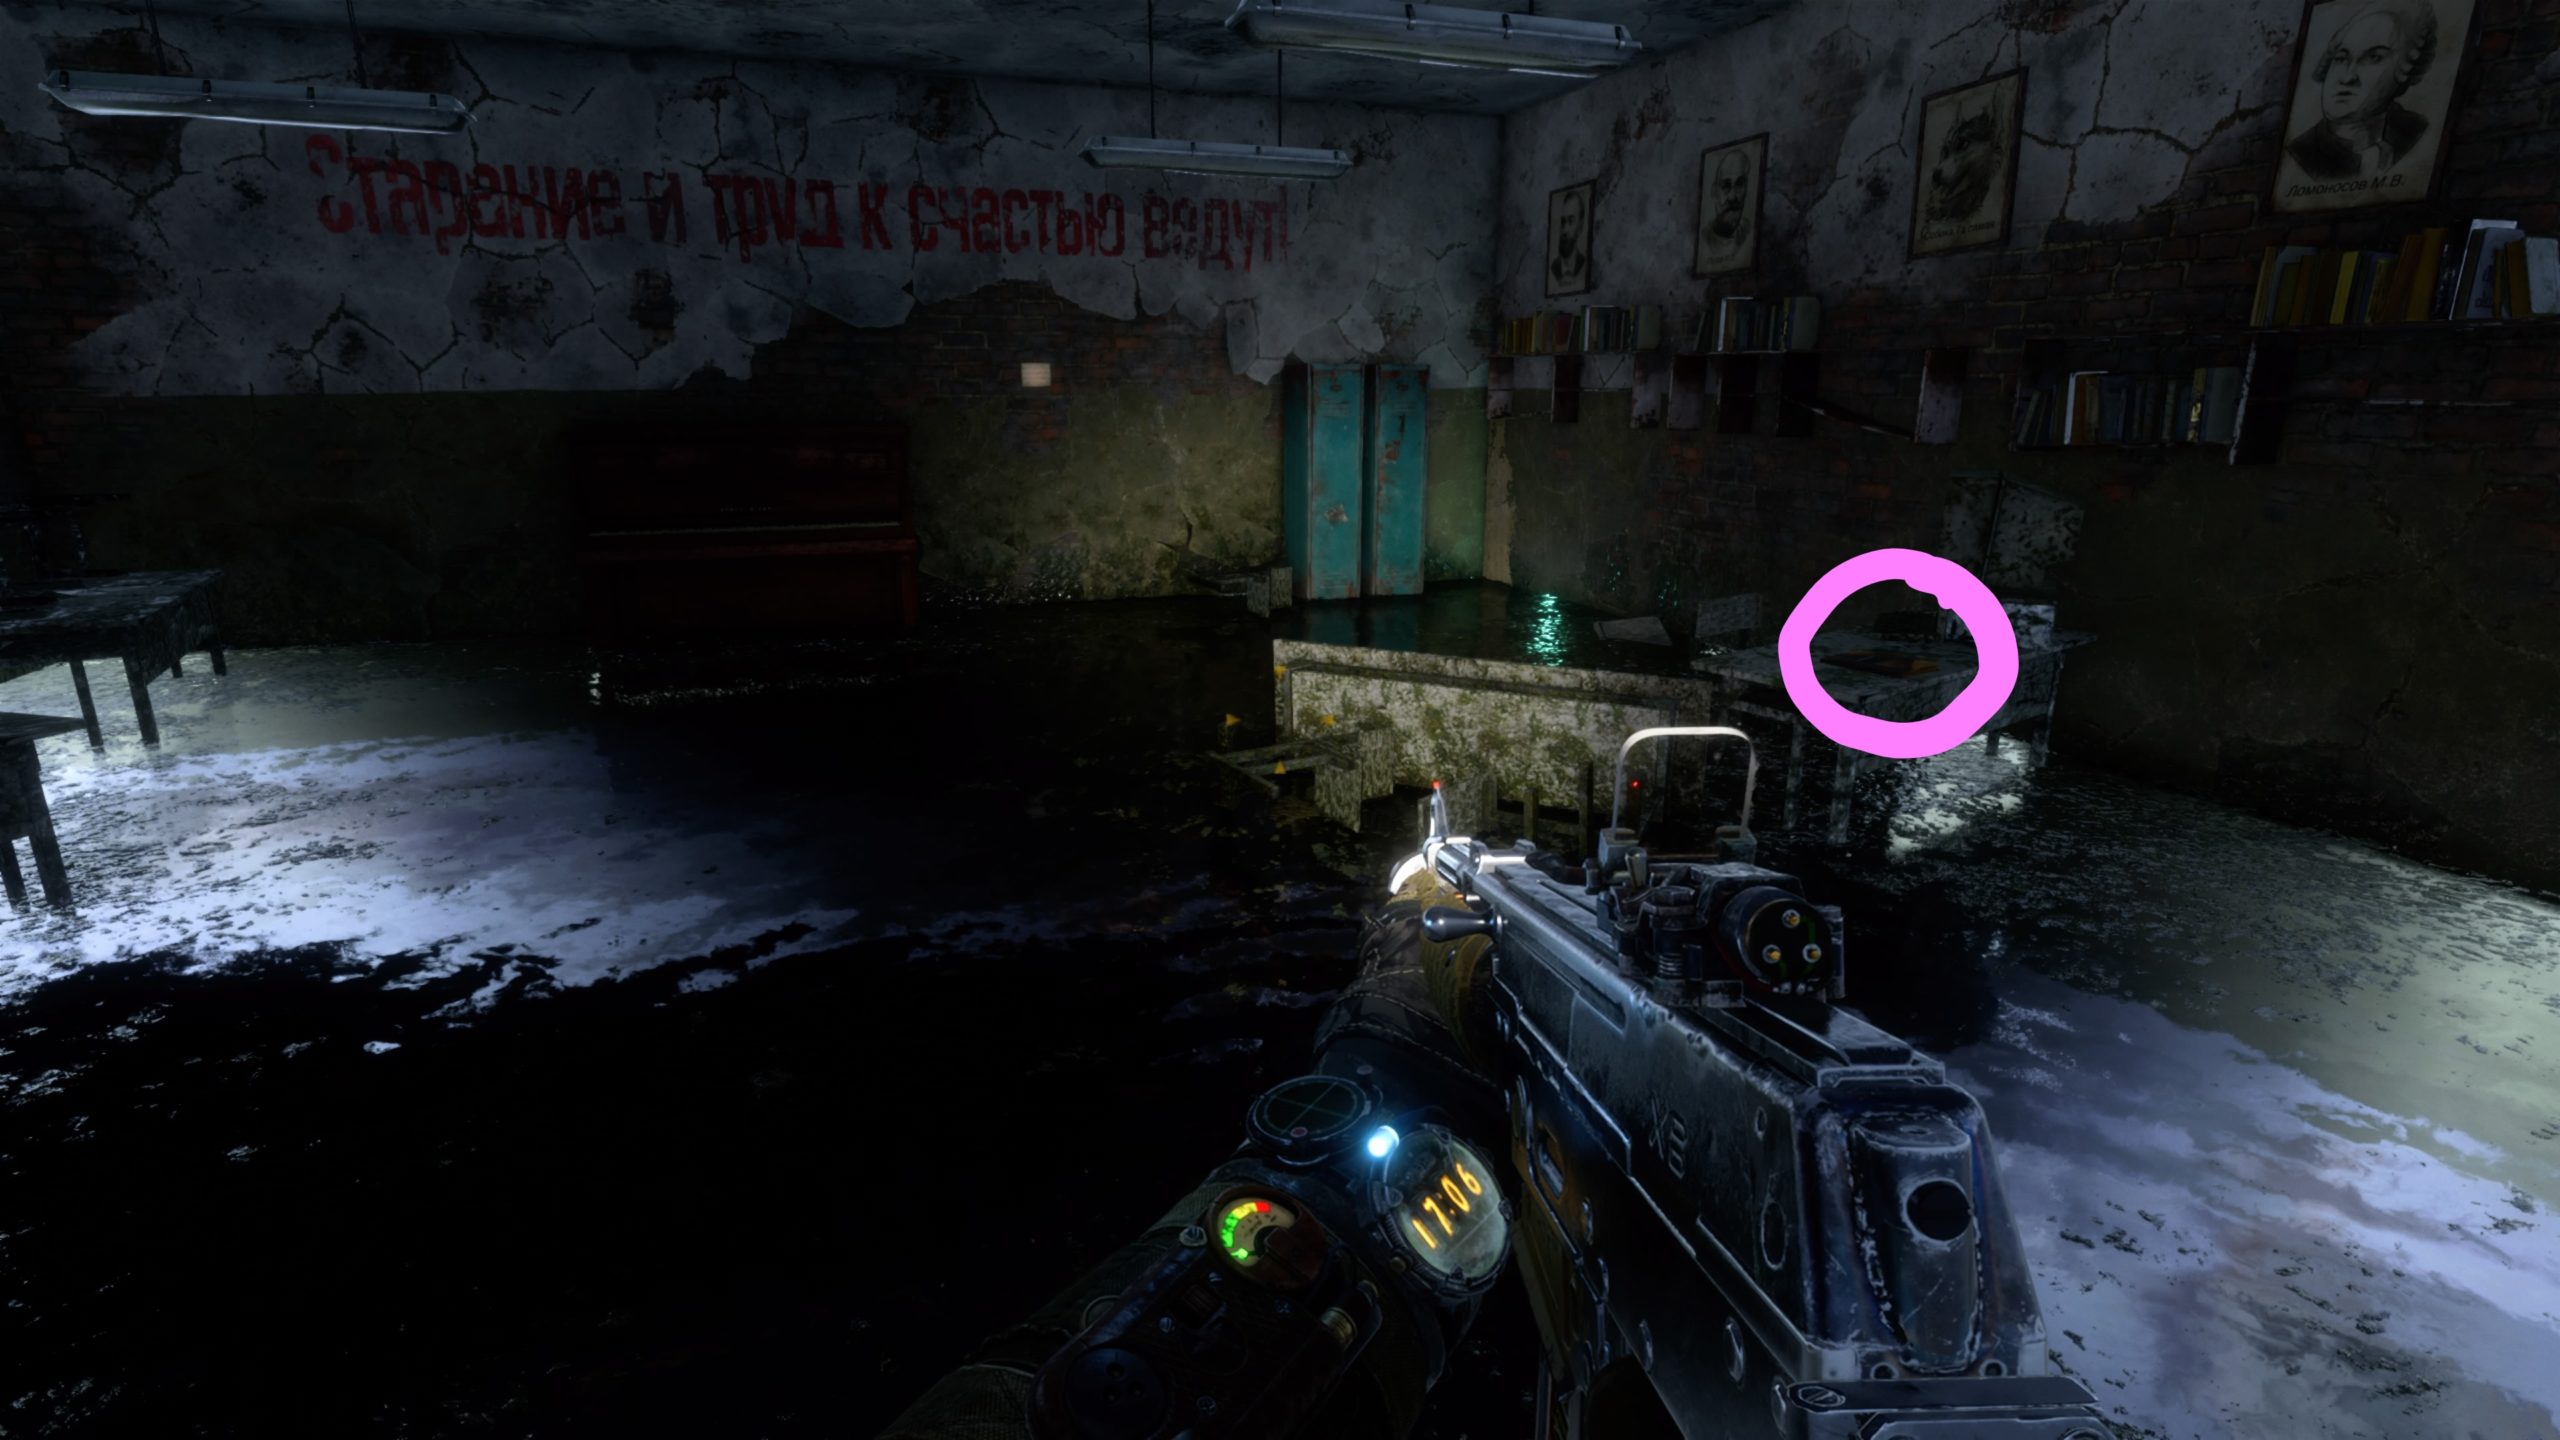
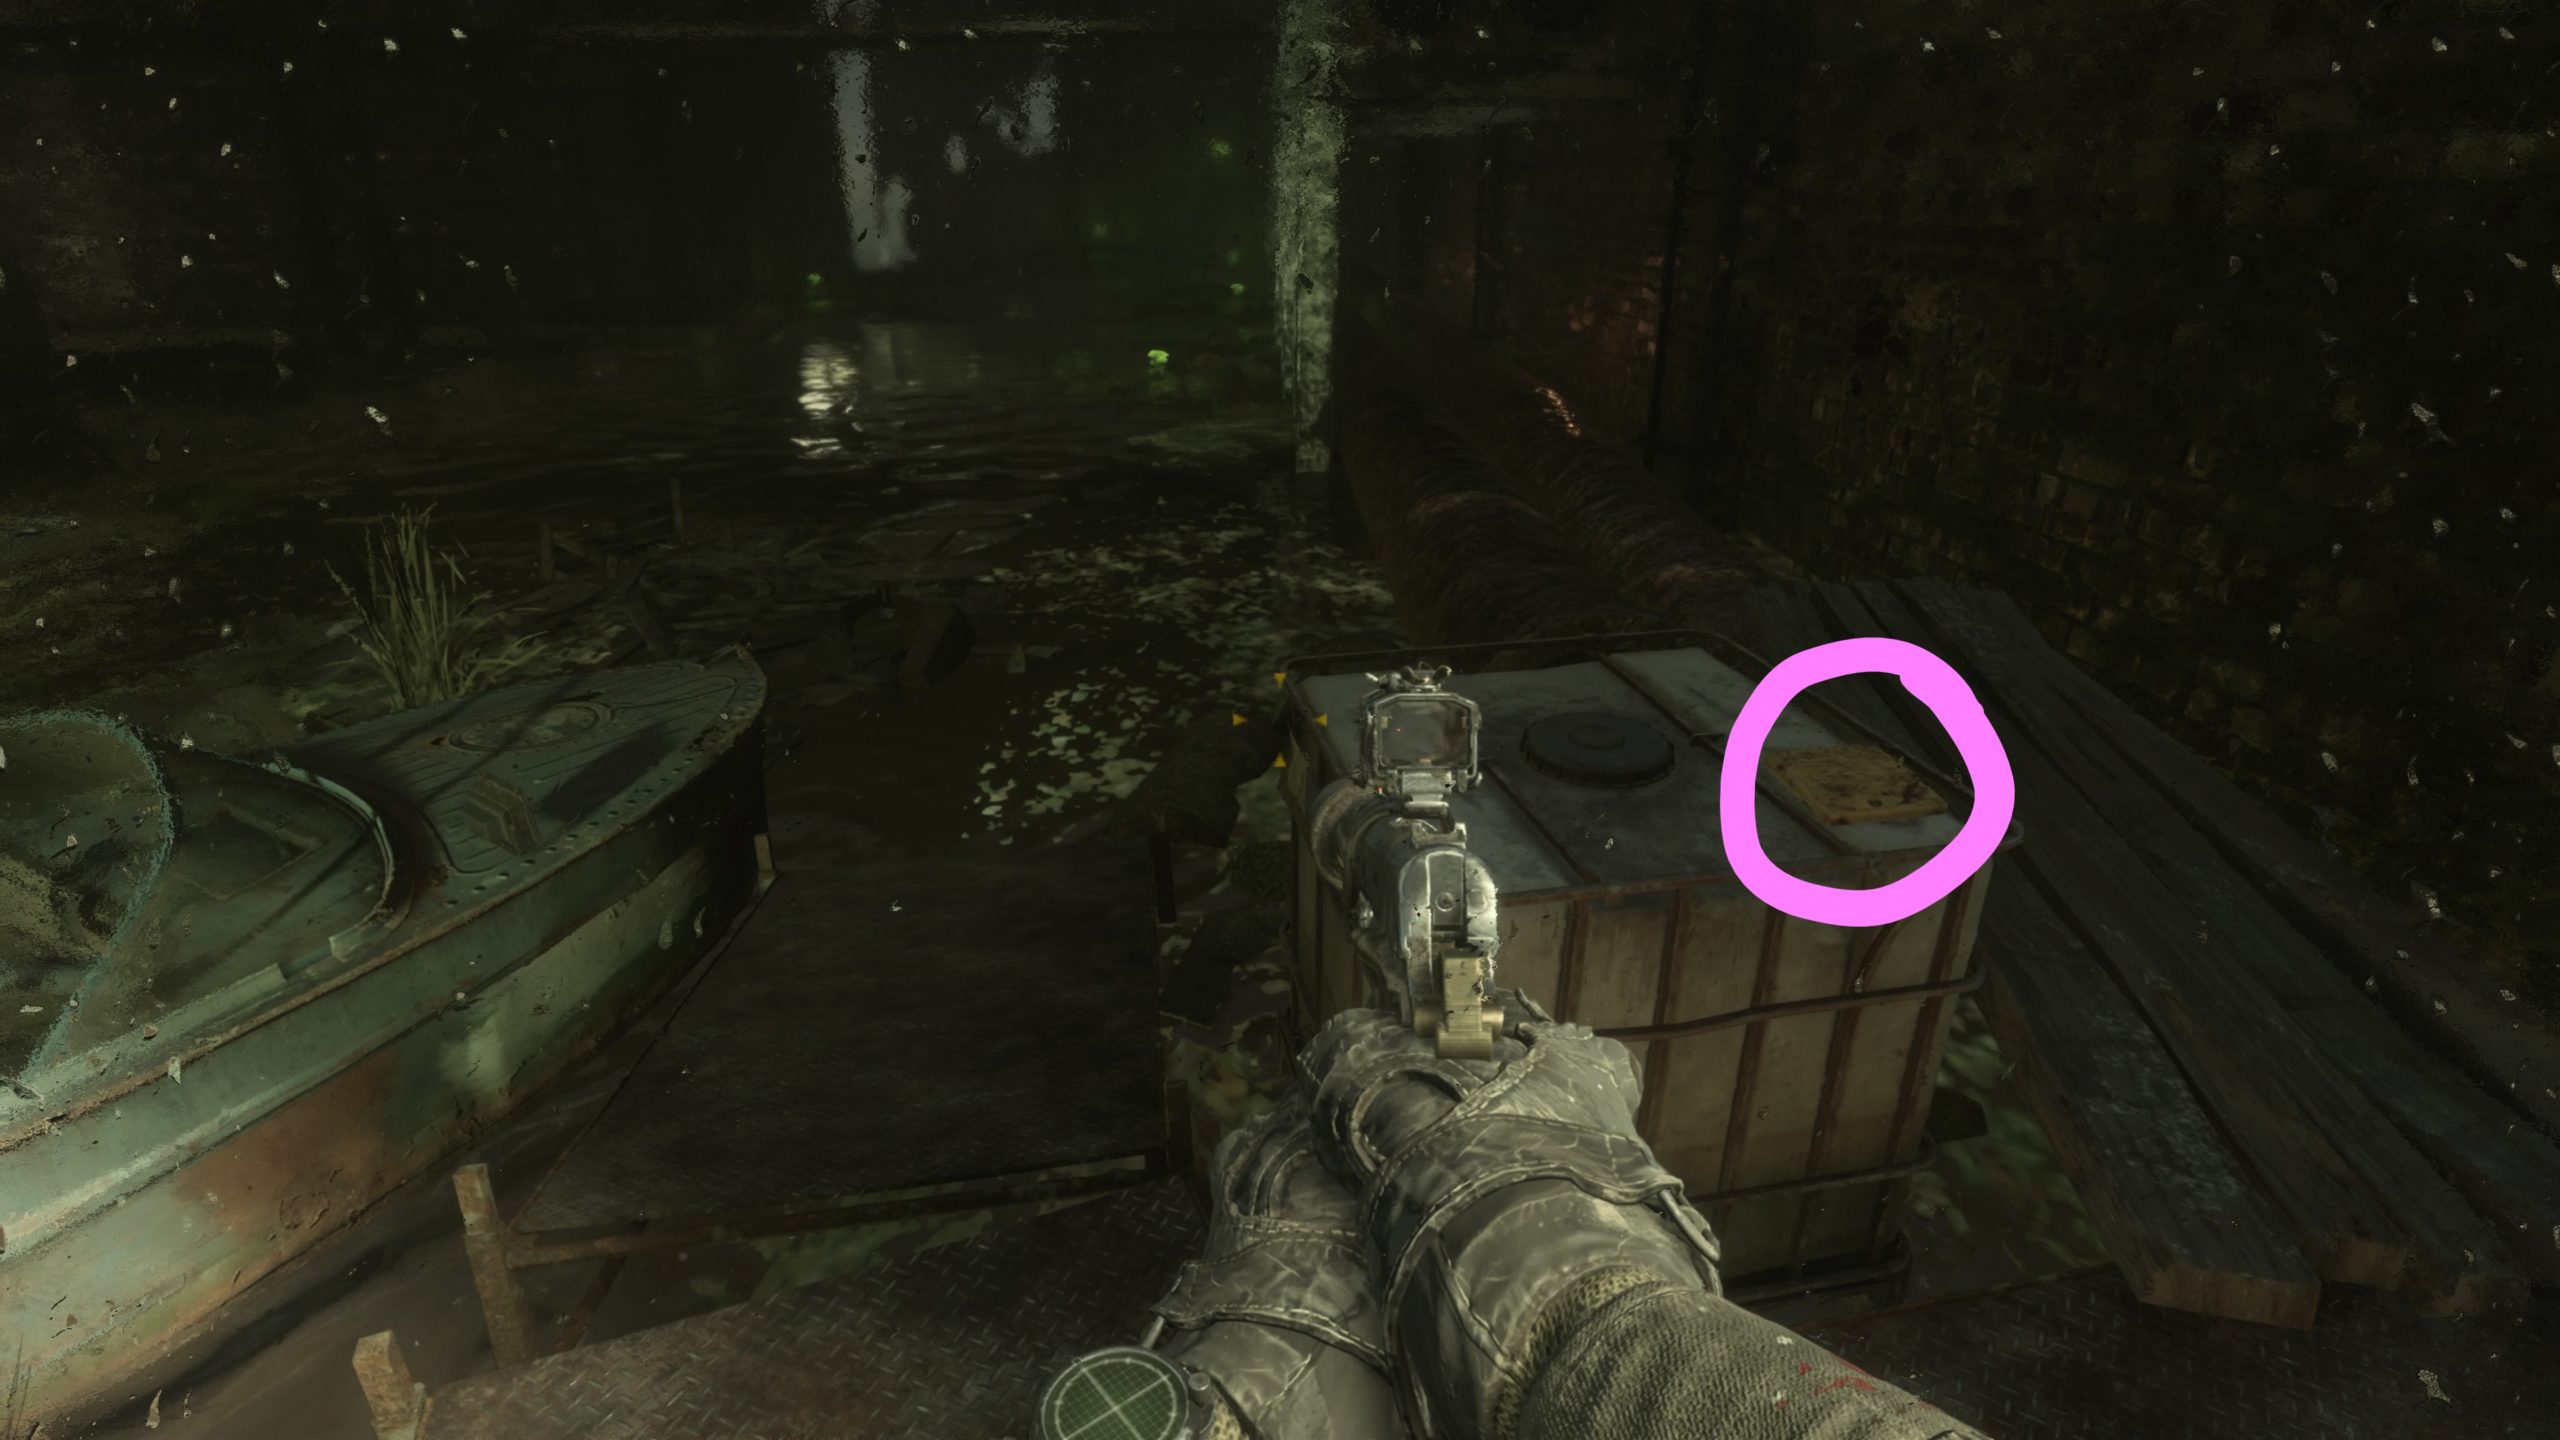
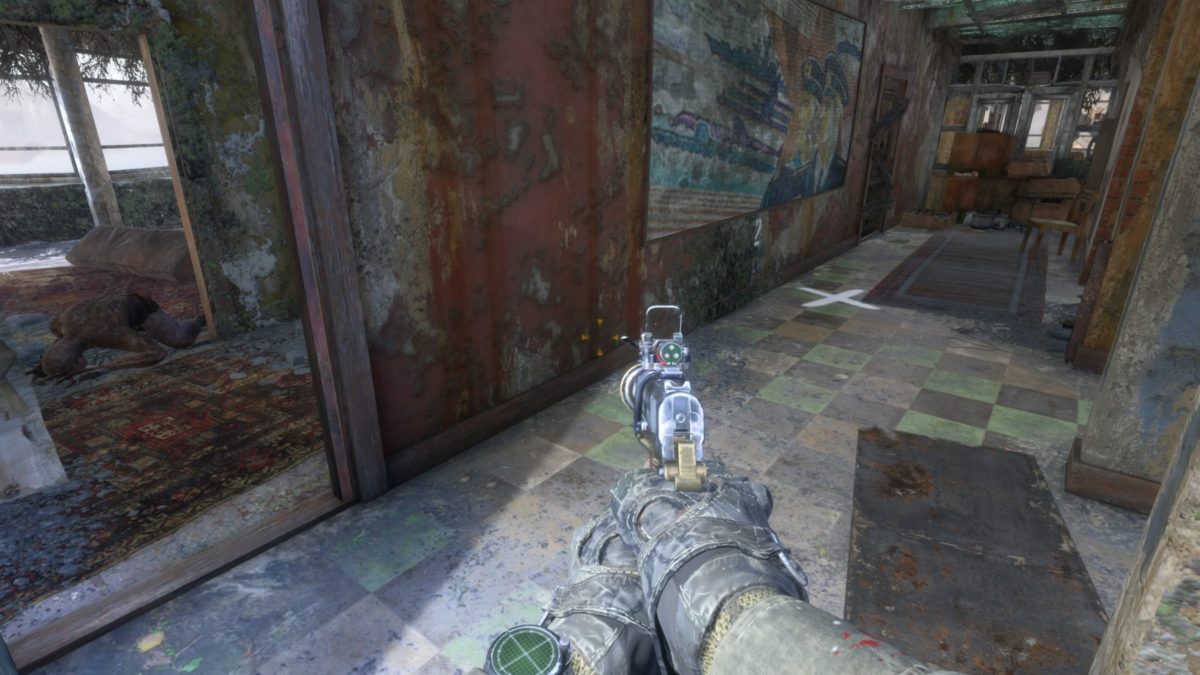
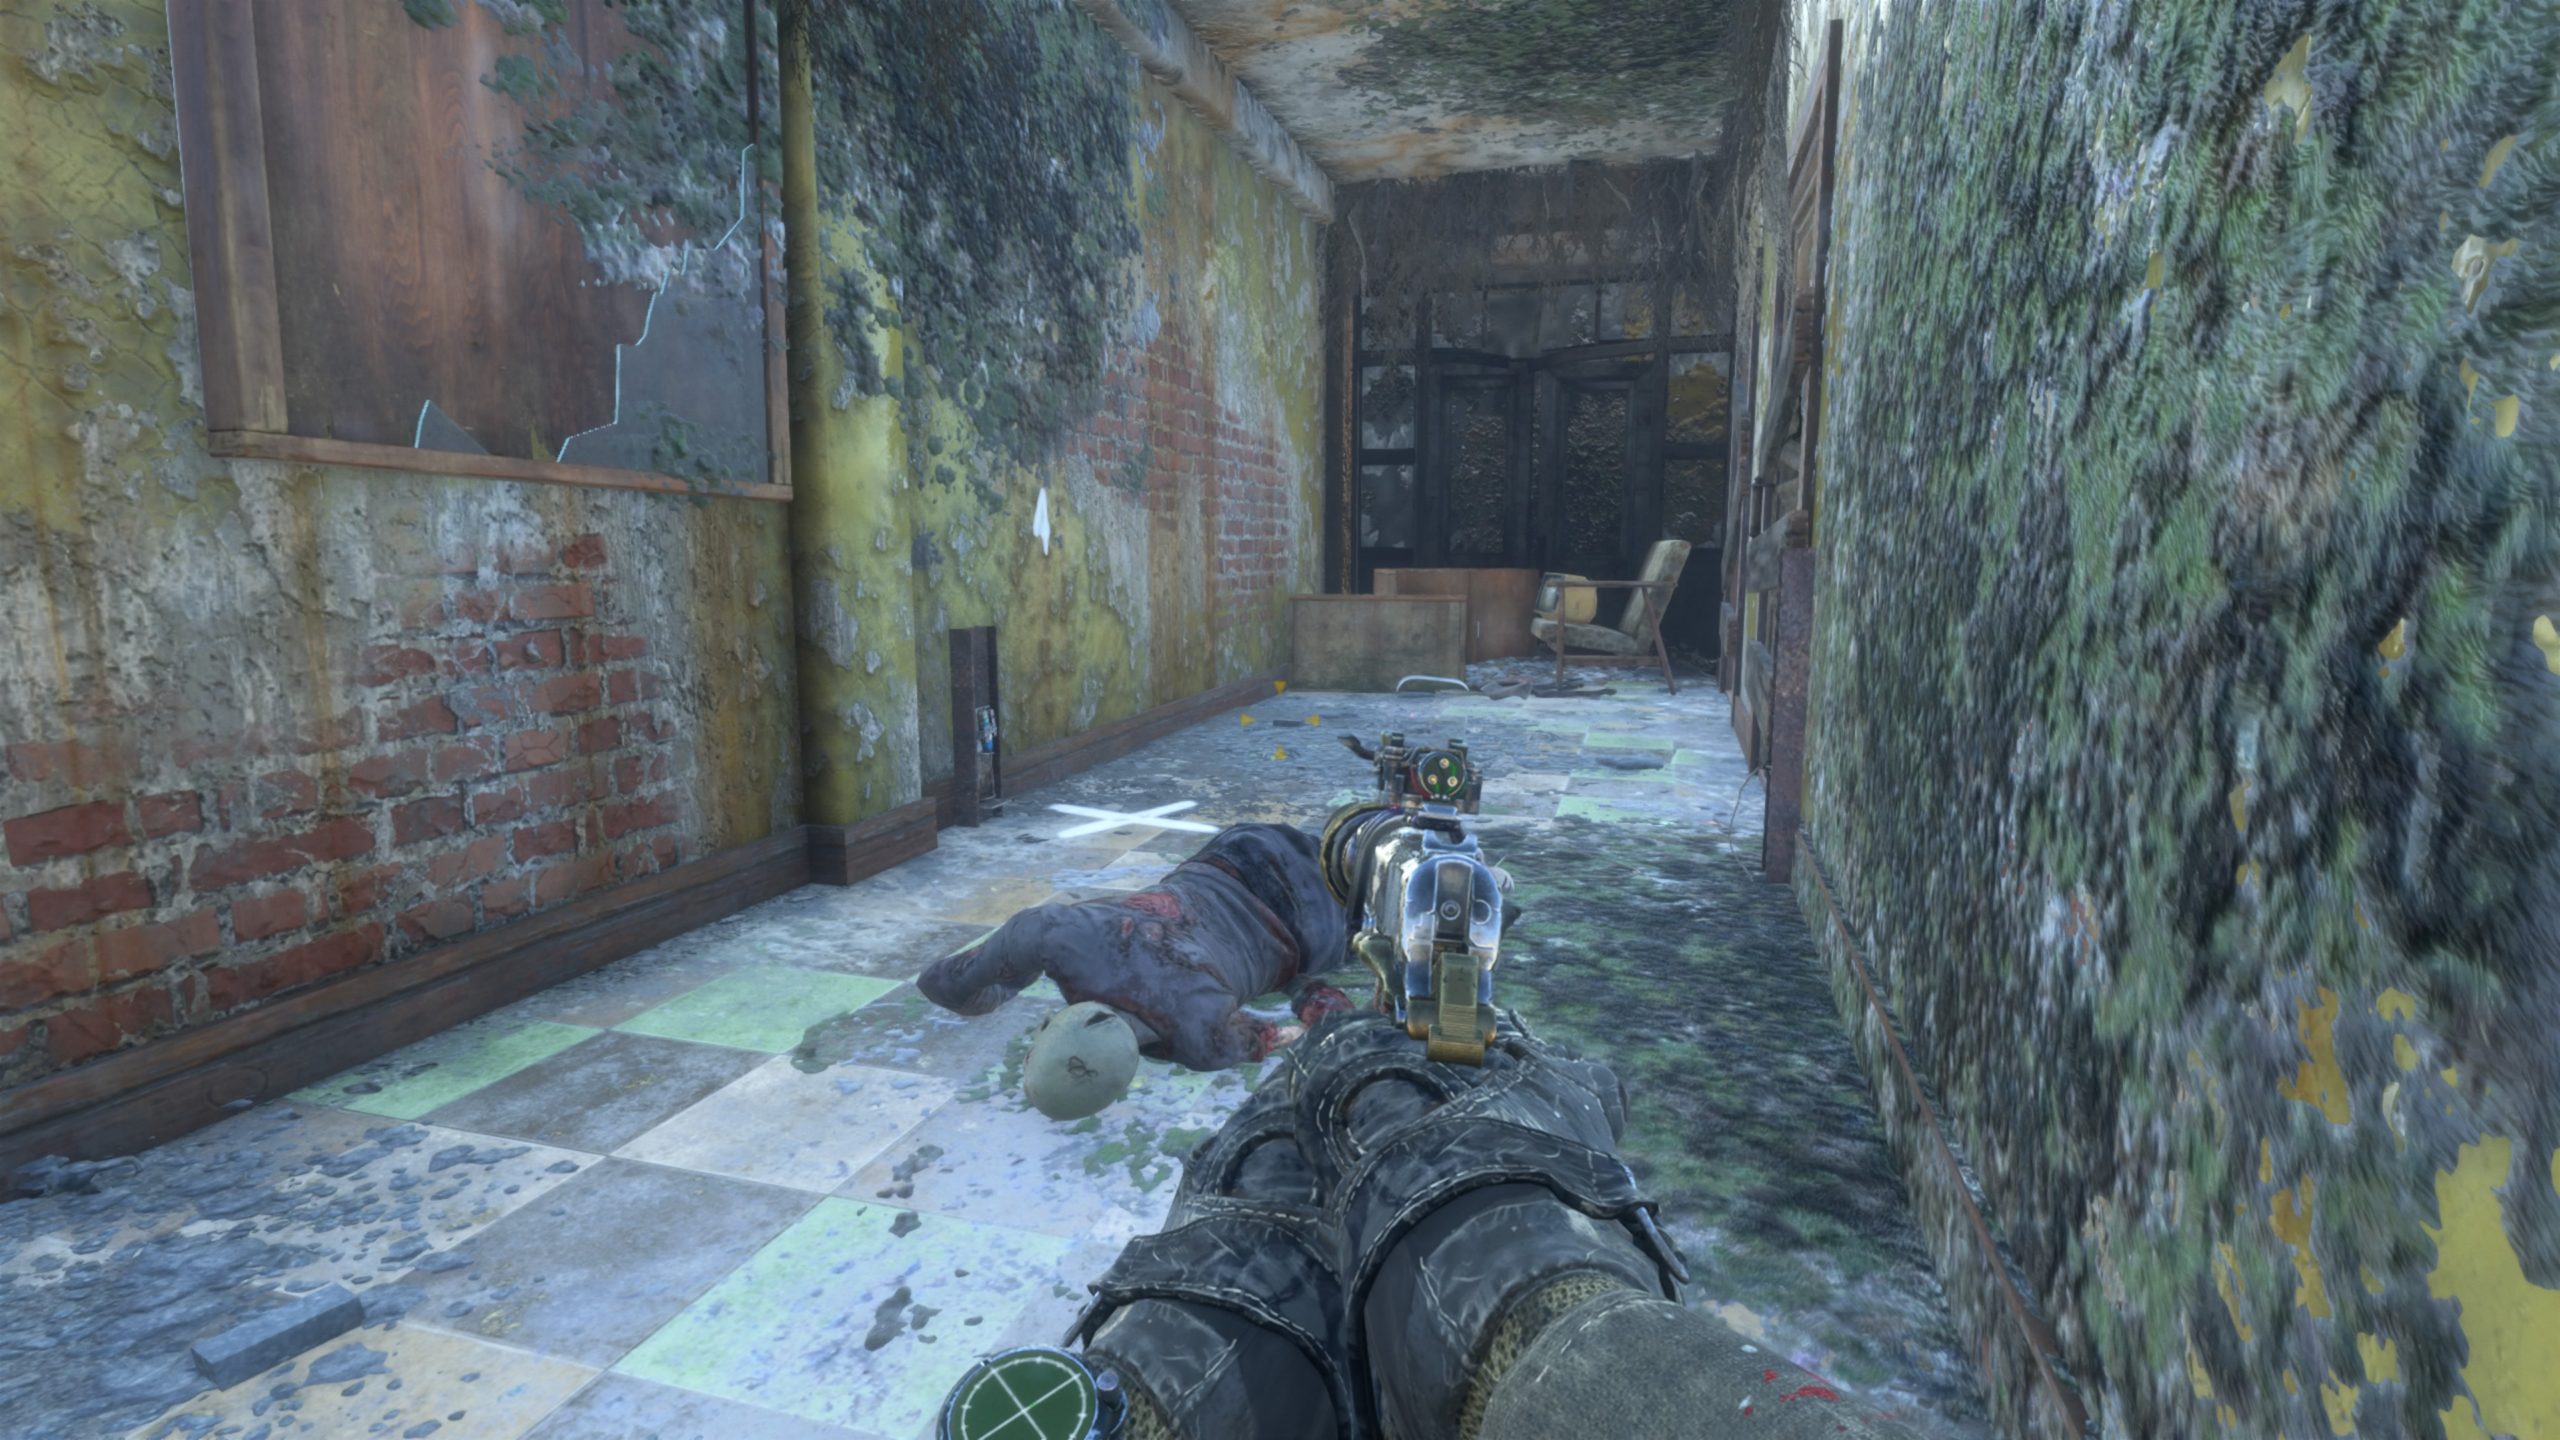
 

Stalker’s Diary 2

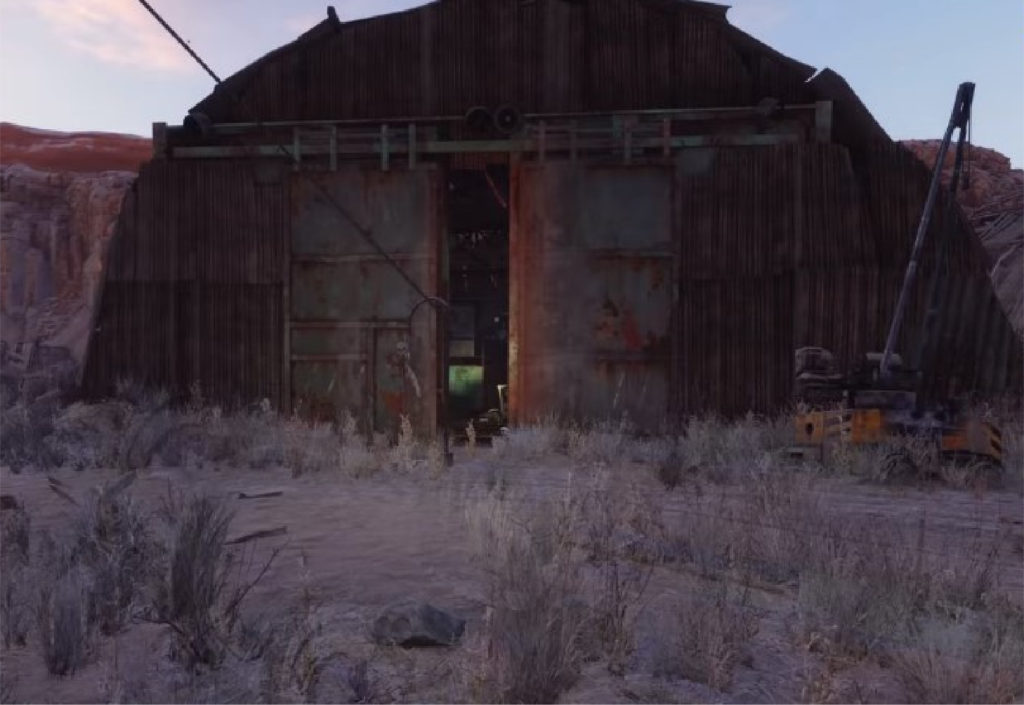
After fending off the hordes of enemies in the big, open, garage-like room, head through the newly opened giant metal door. Take a right and head through a doorway to enter a stairwell. Descend down the stairs to reach a room with three sets of elevator doors (all marked with an “X”. Take a left, passing through a giant doorway, followed by a right through an open door. Head down the flight of stairs to arrive in a flooded room. Turn left and make your way through this room then head up the flight of stairs. Turn right to find the diary on a metal table.
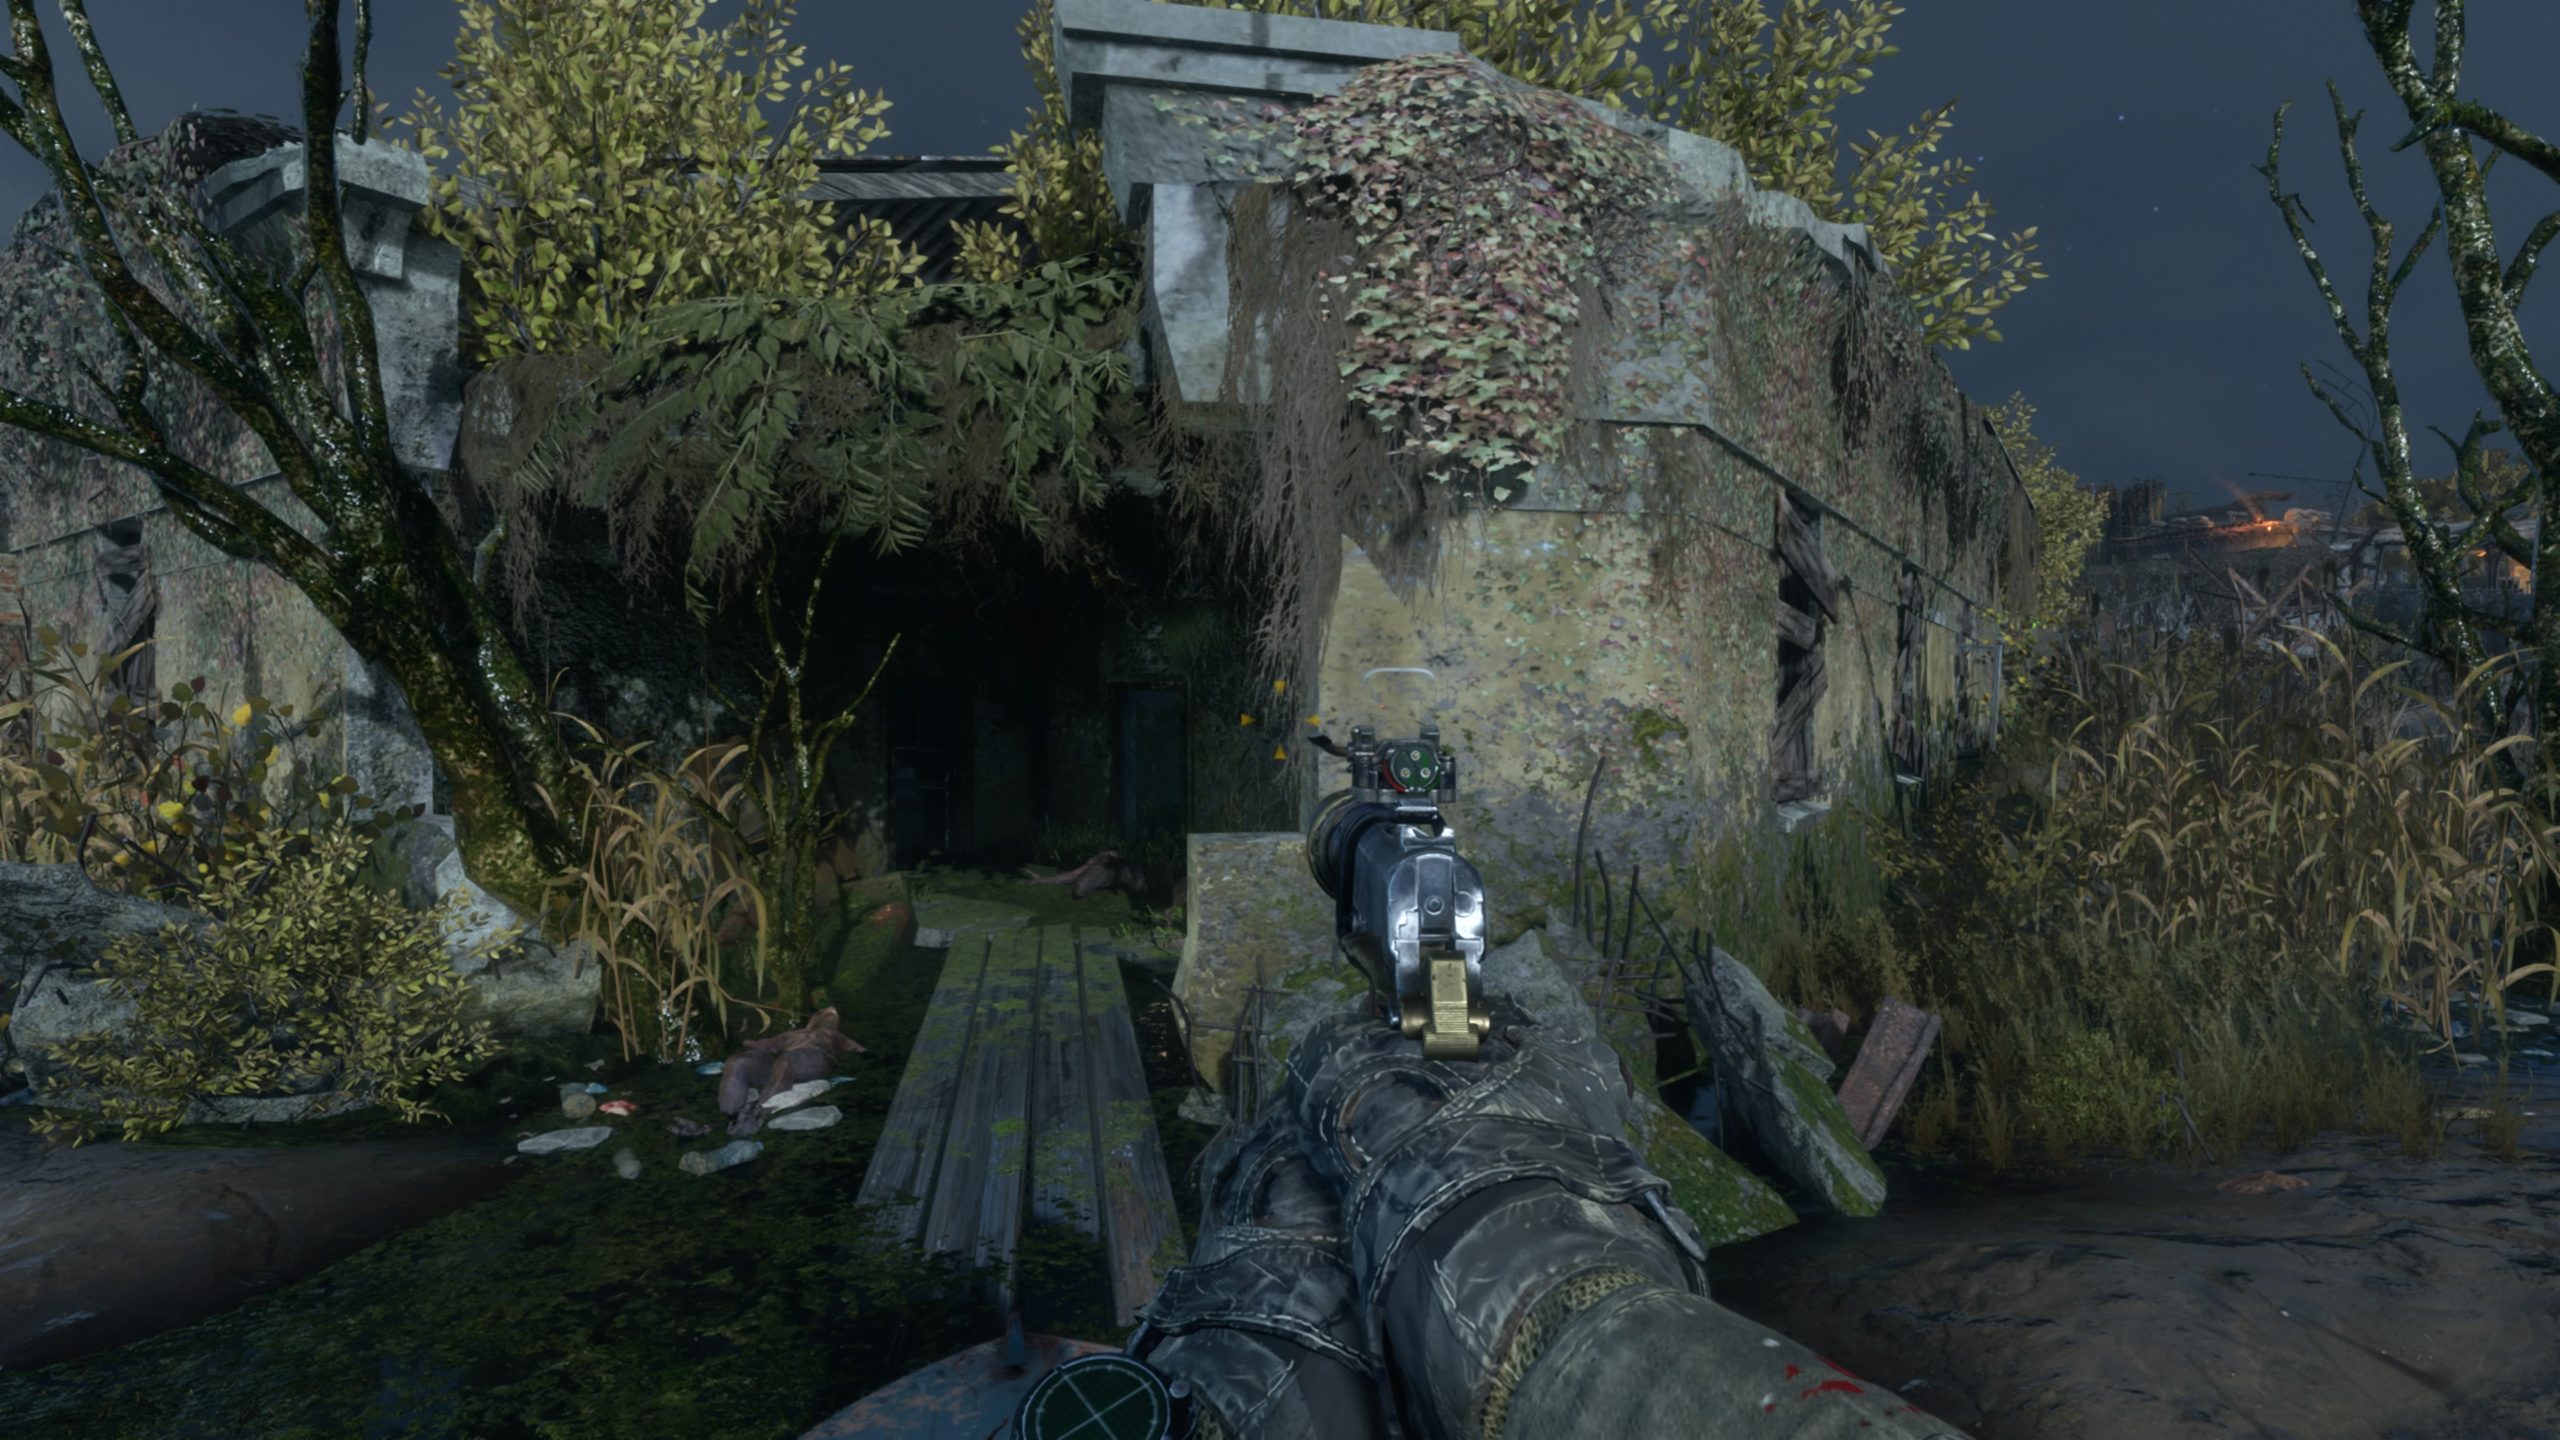
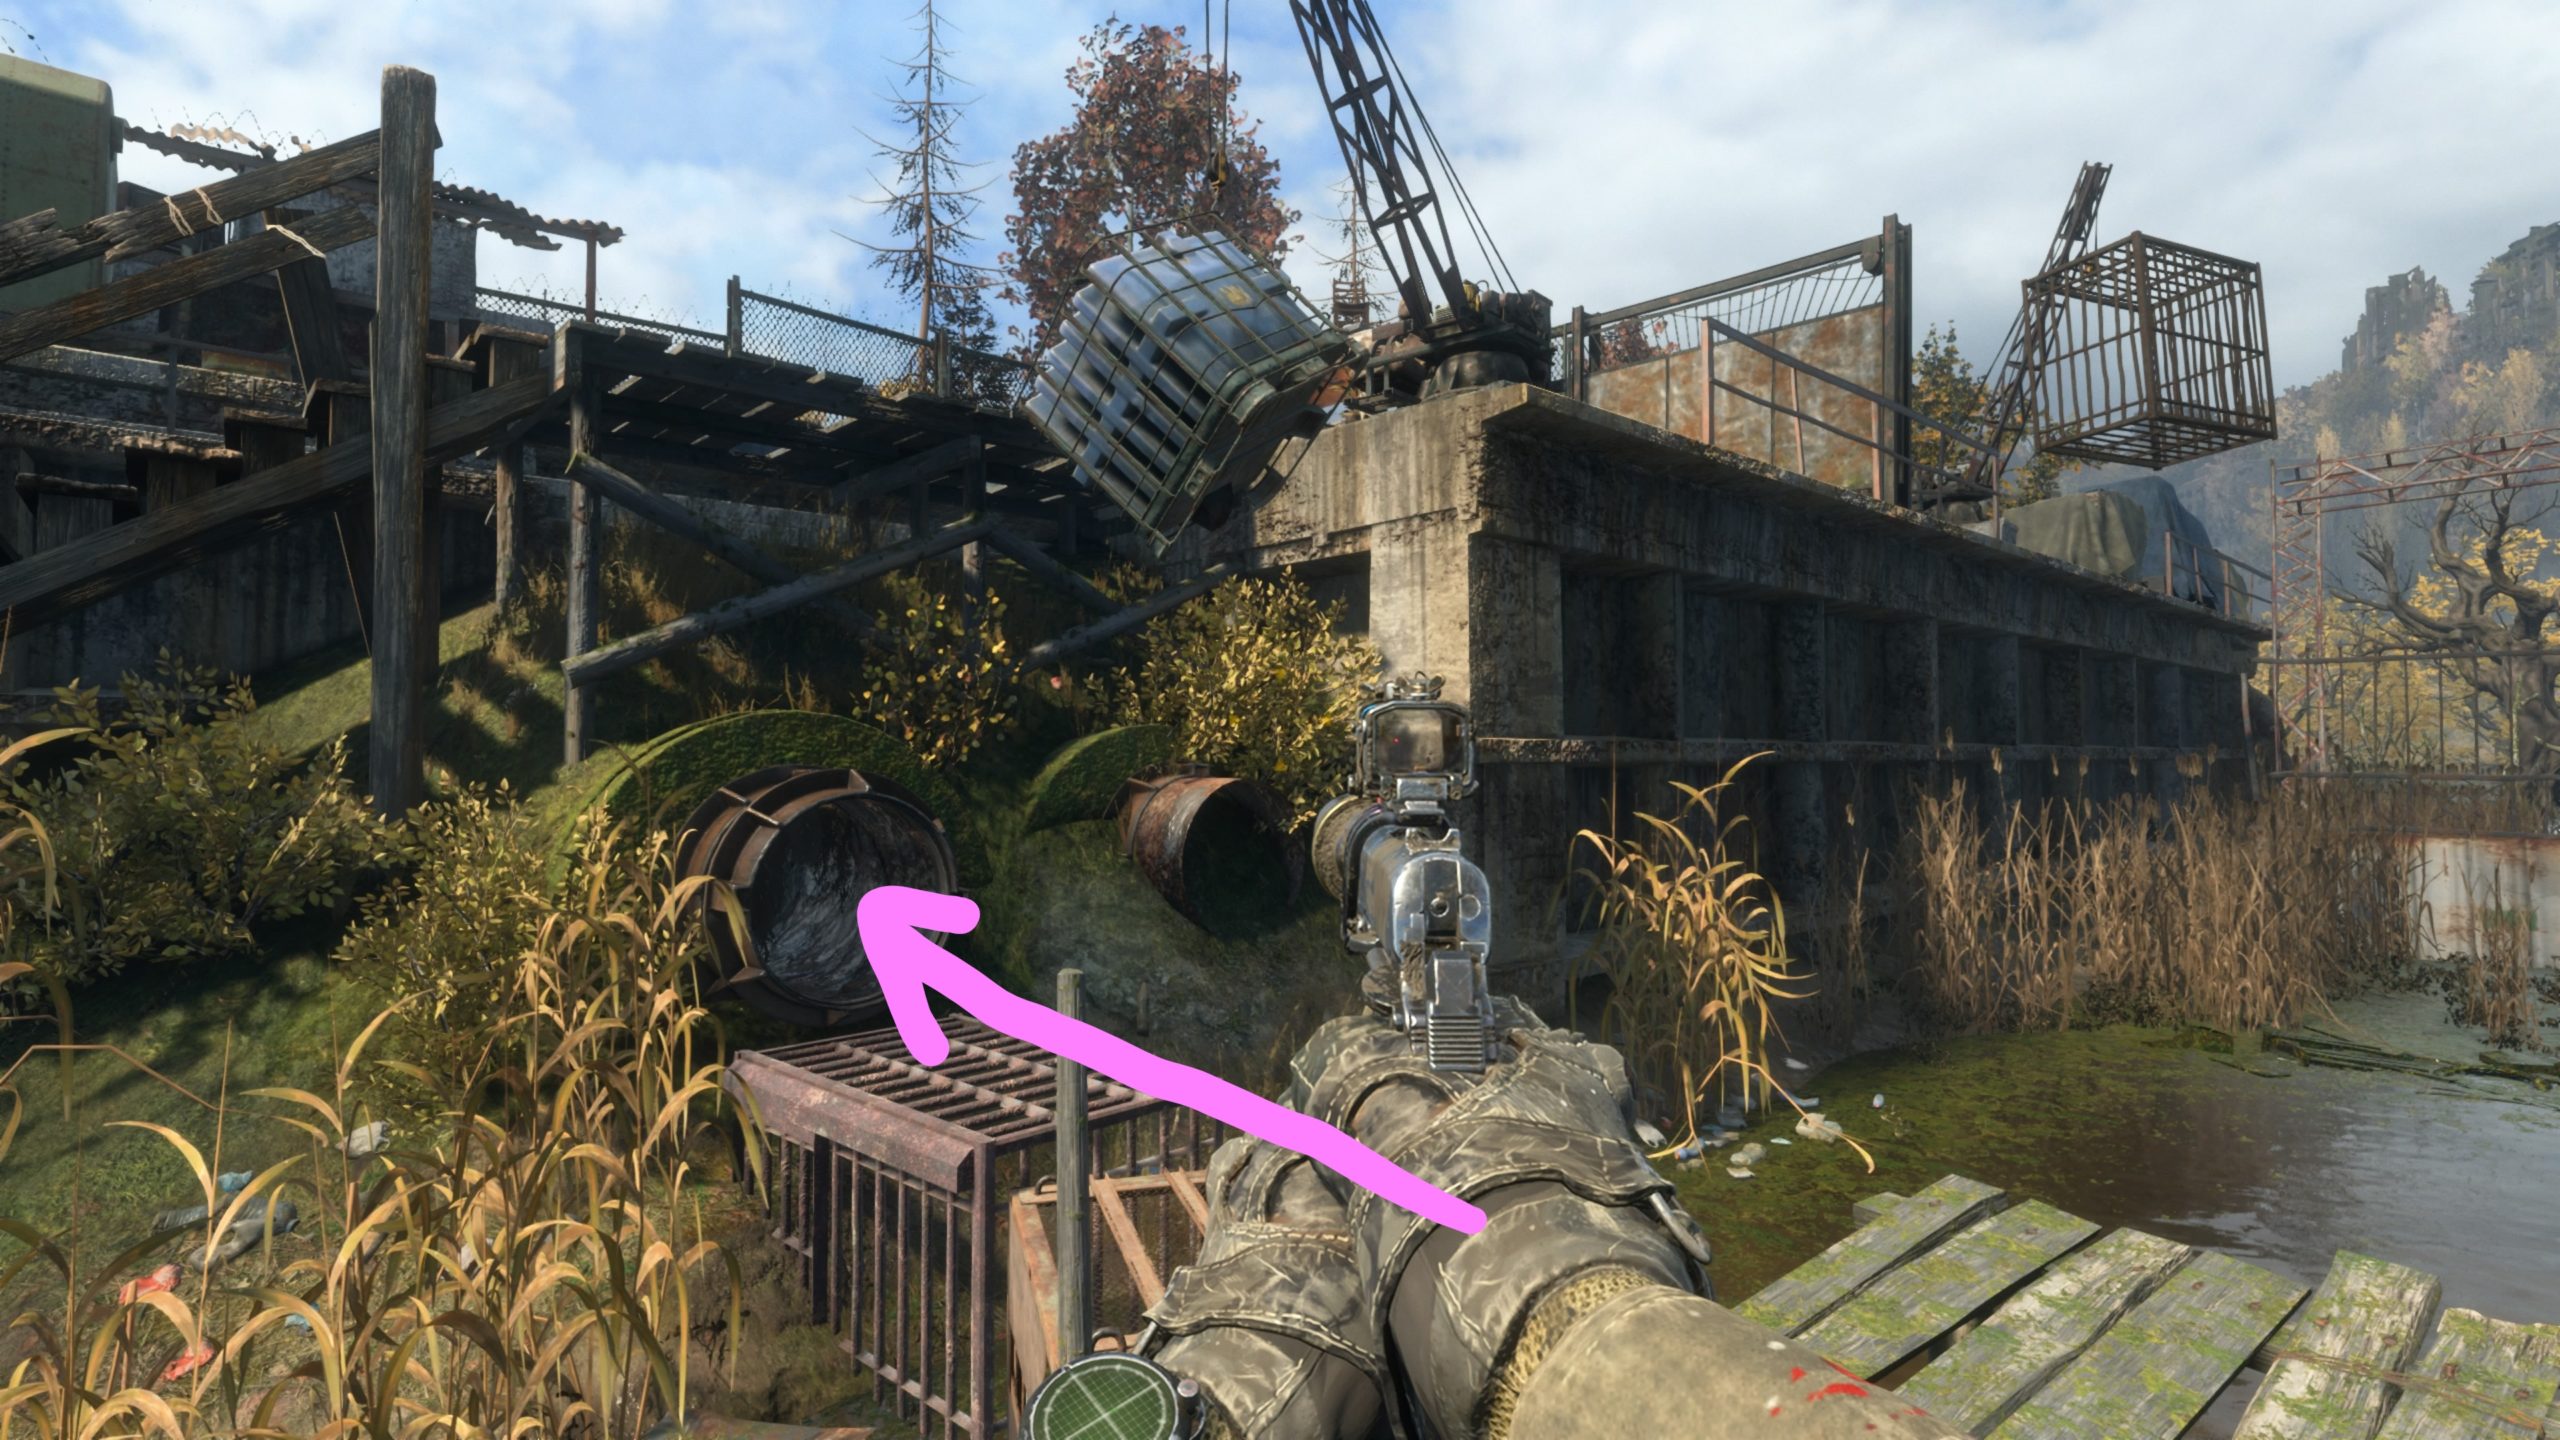
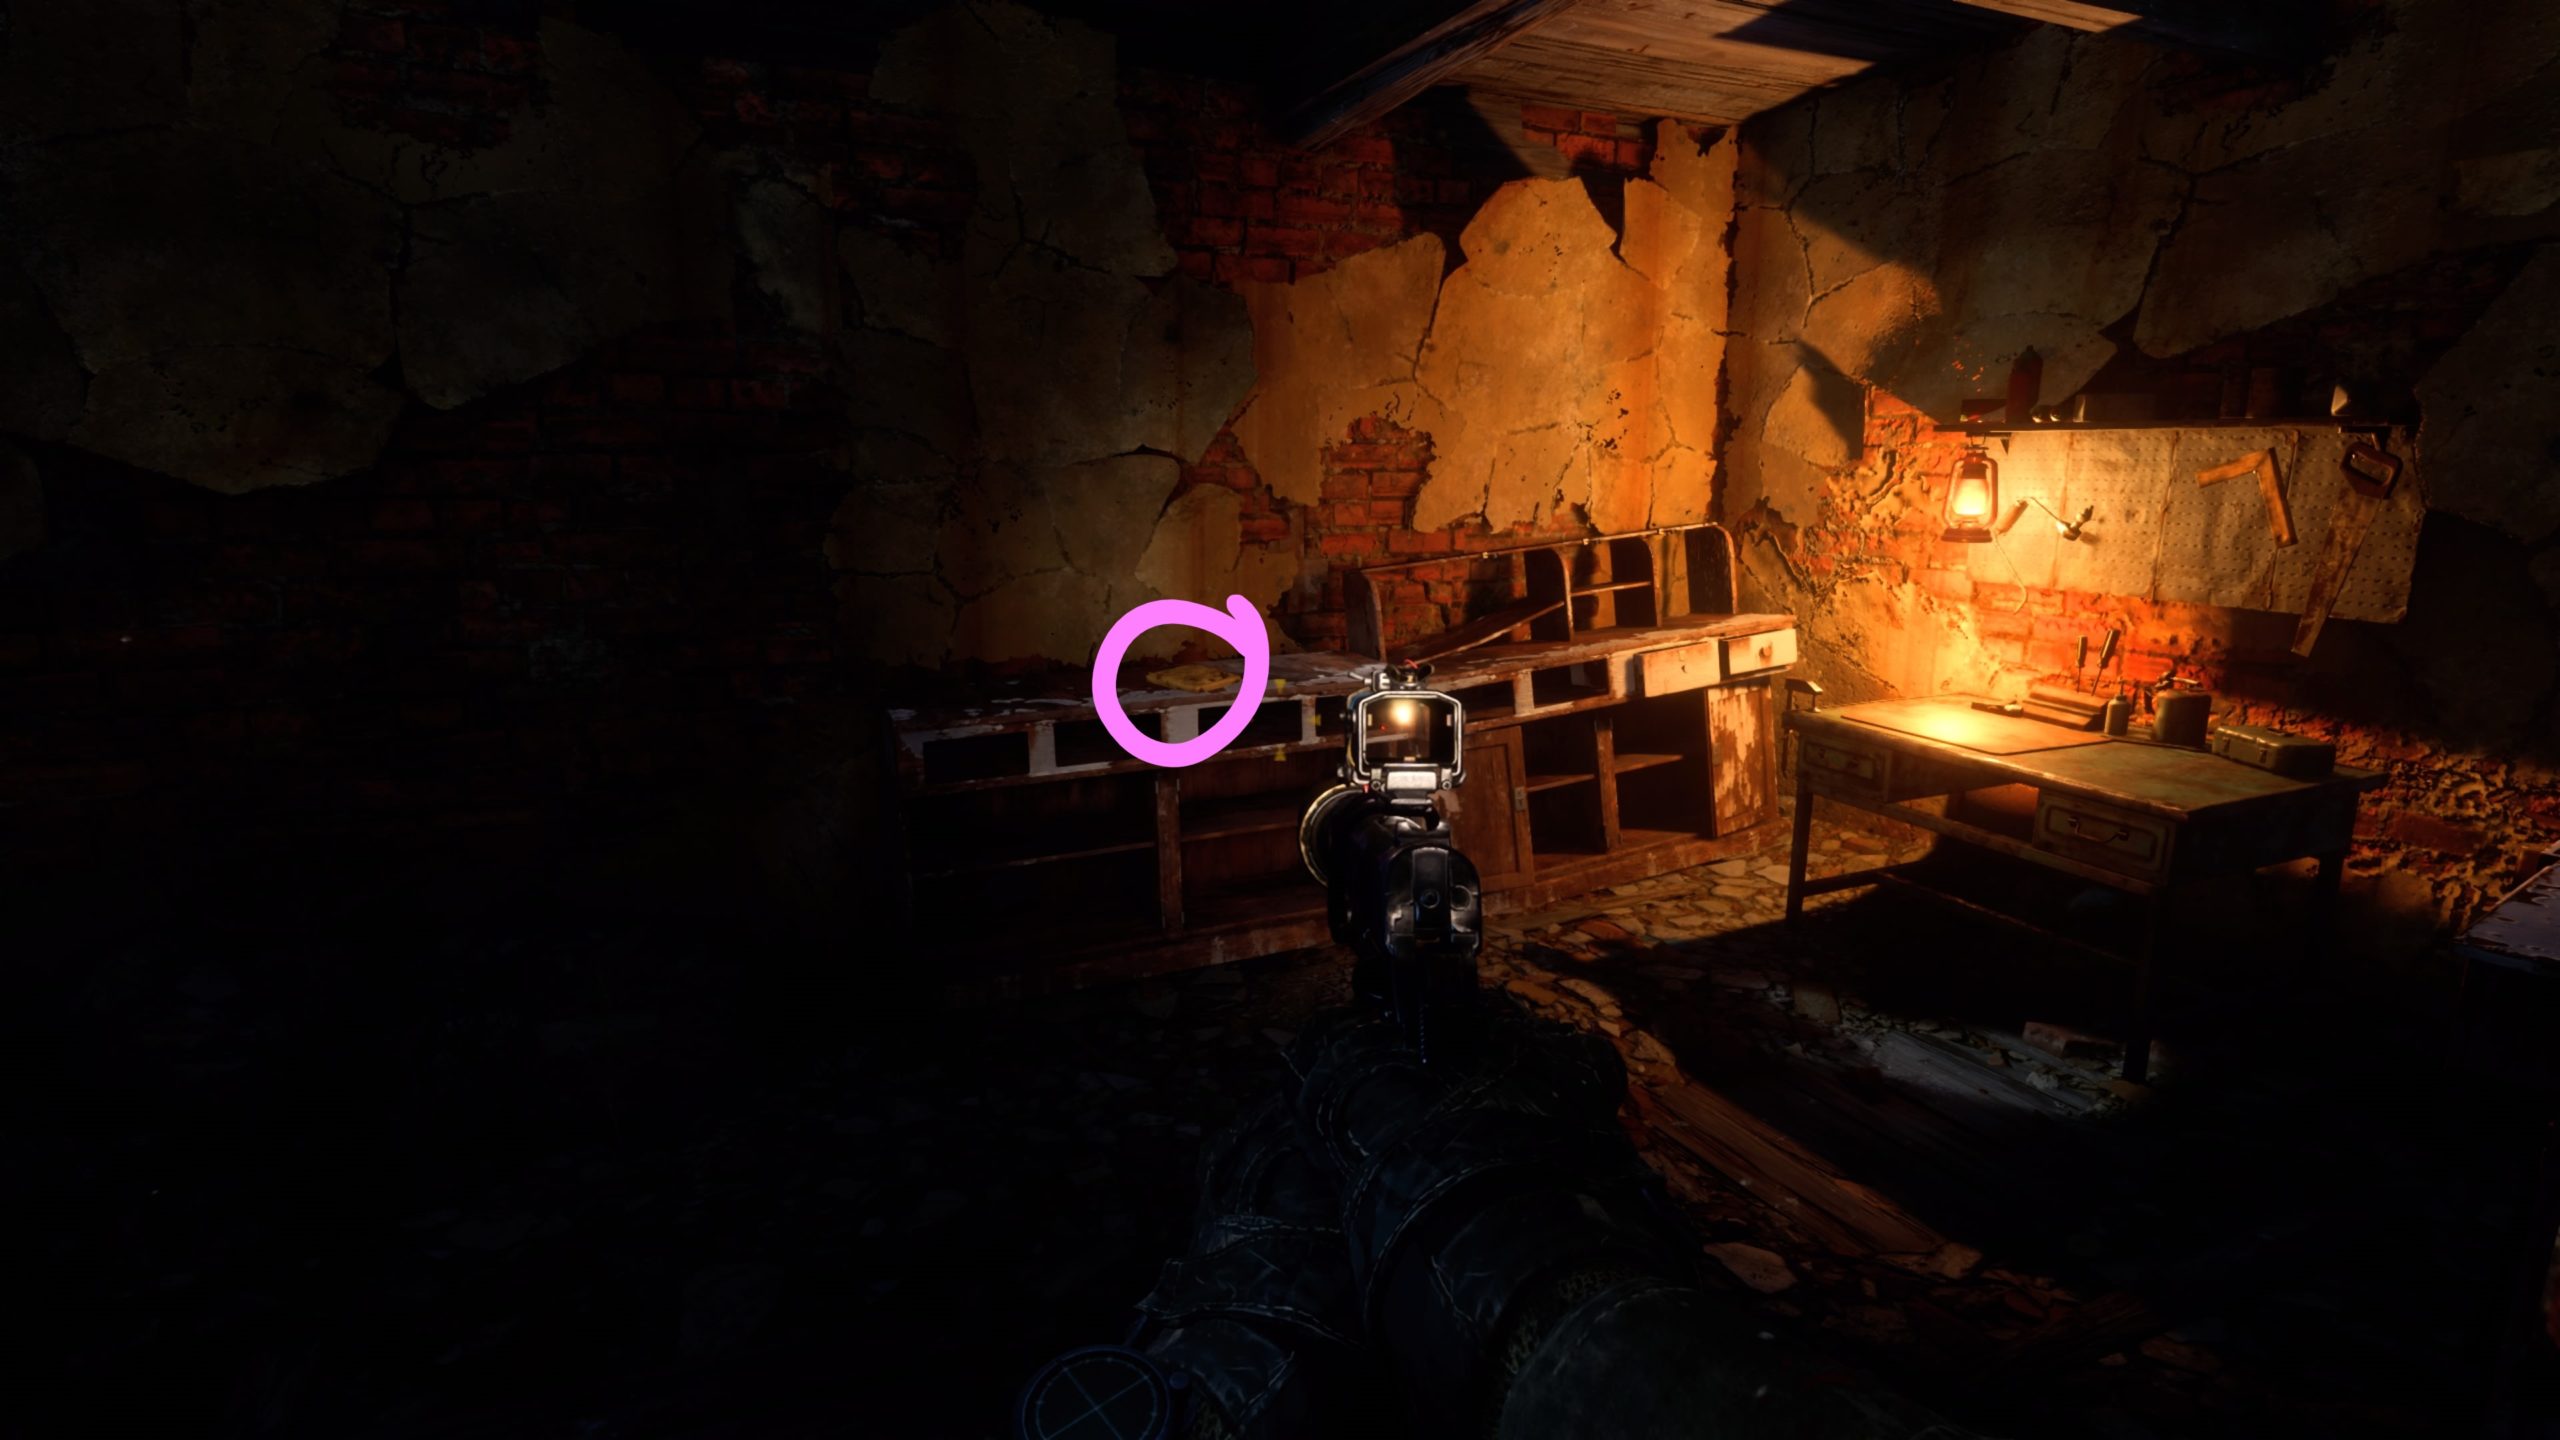
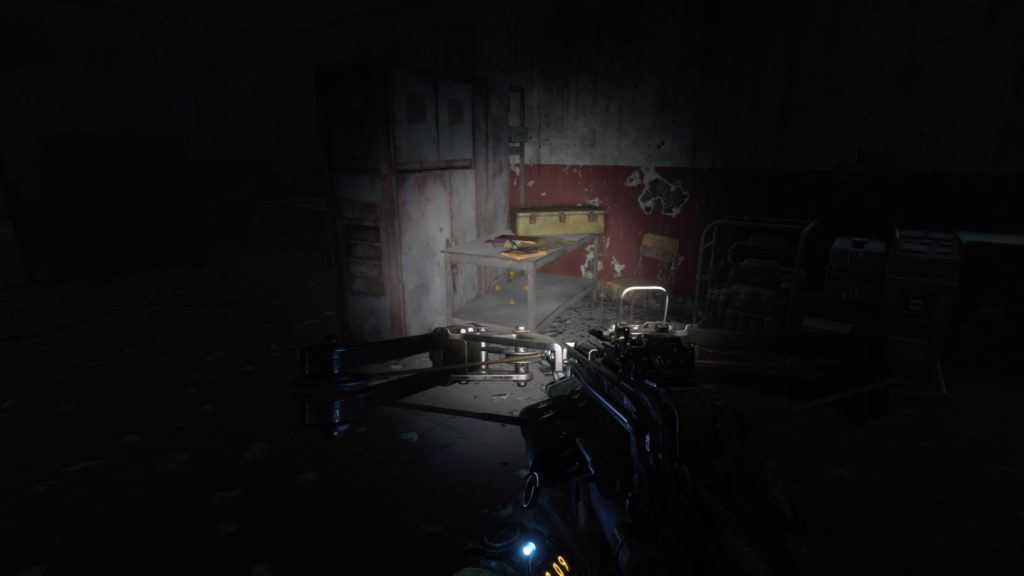
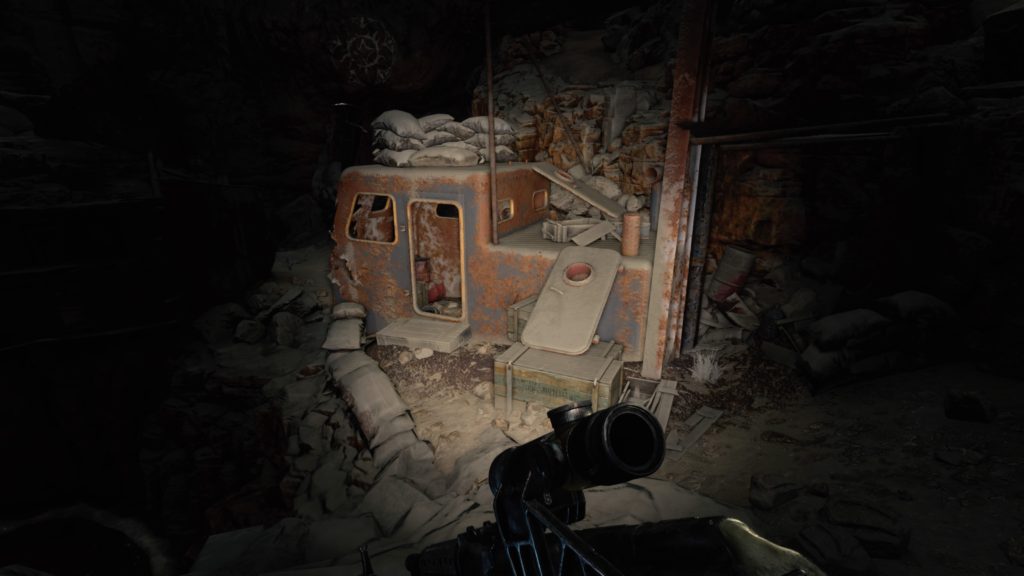
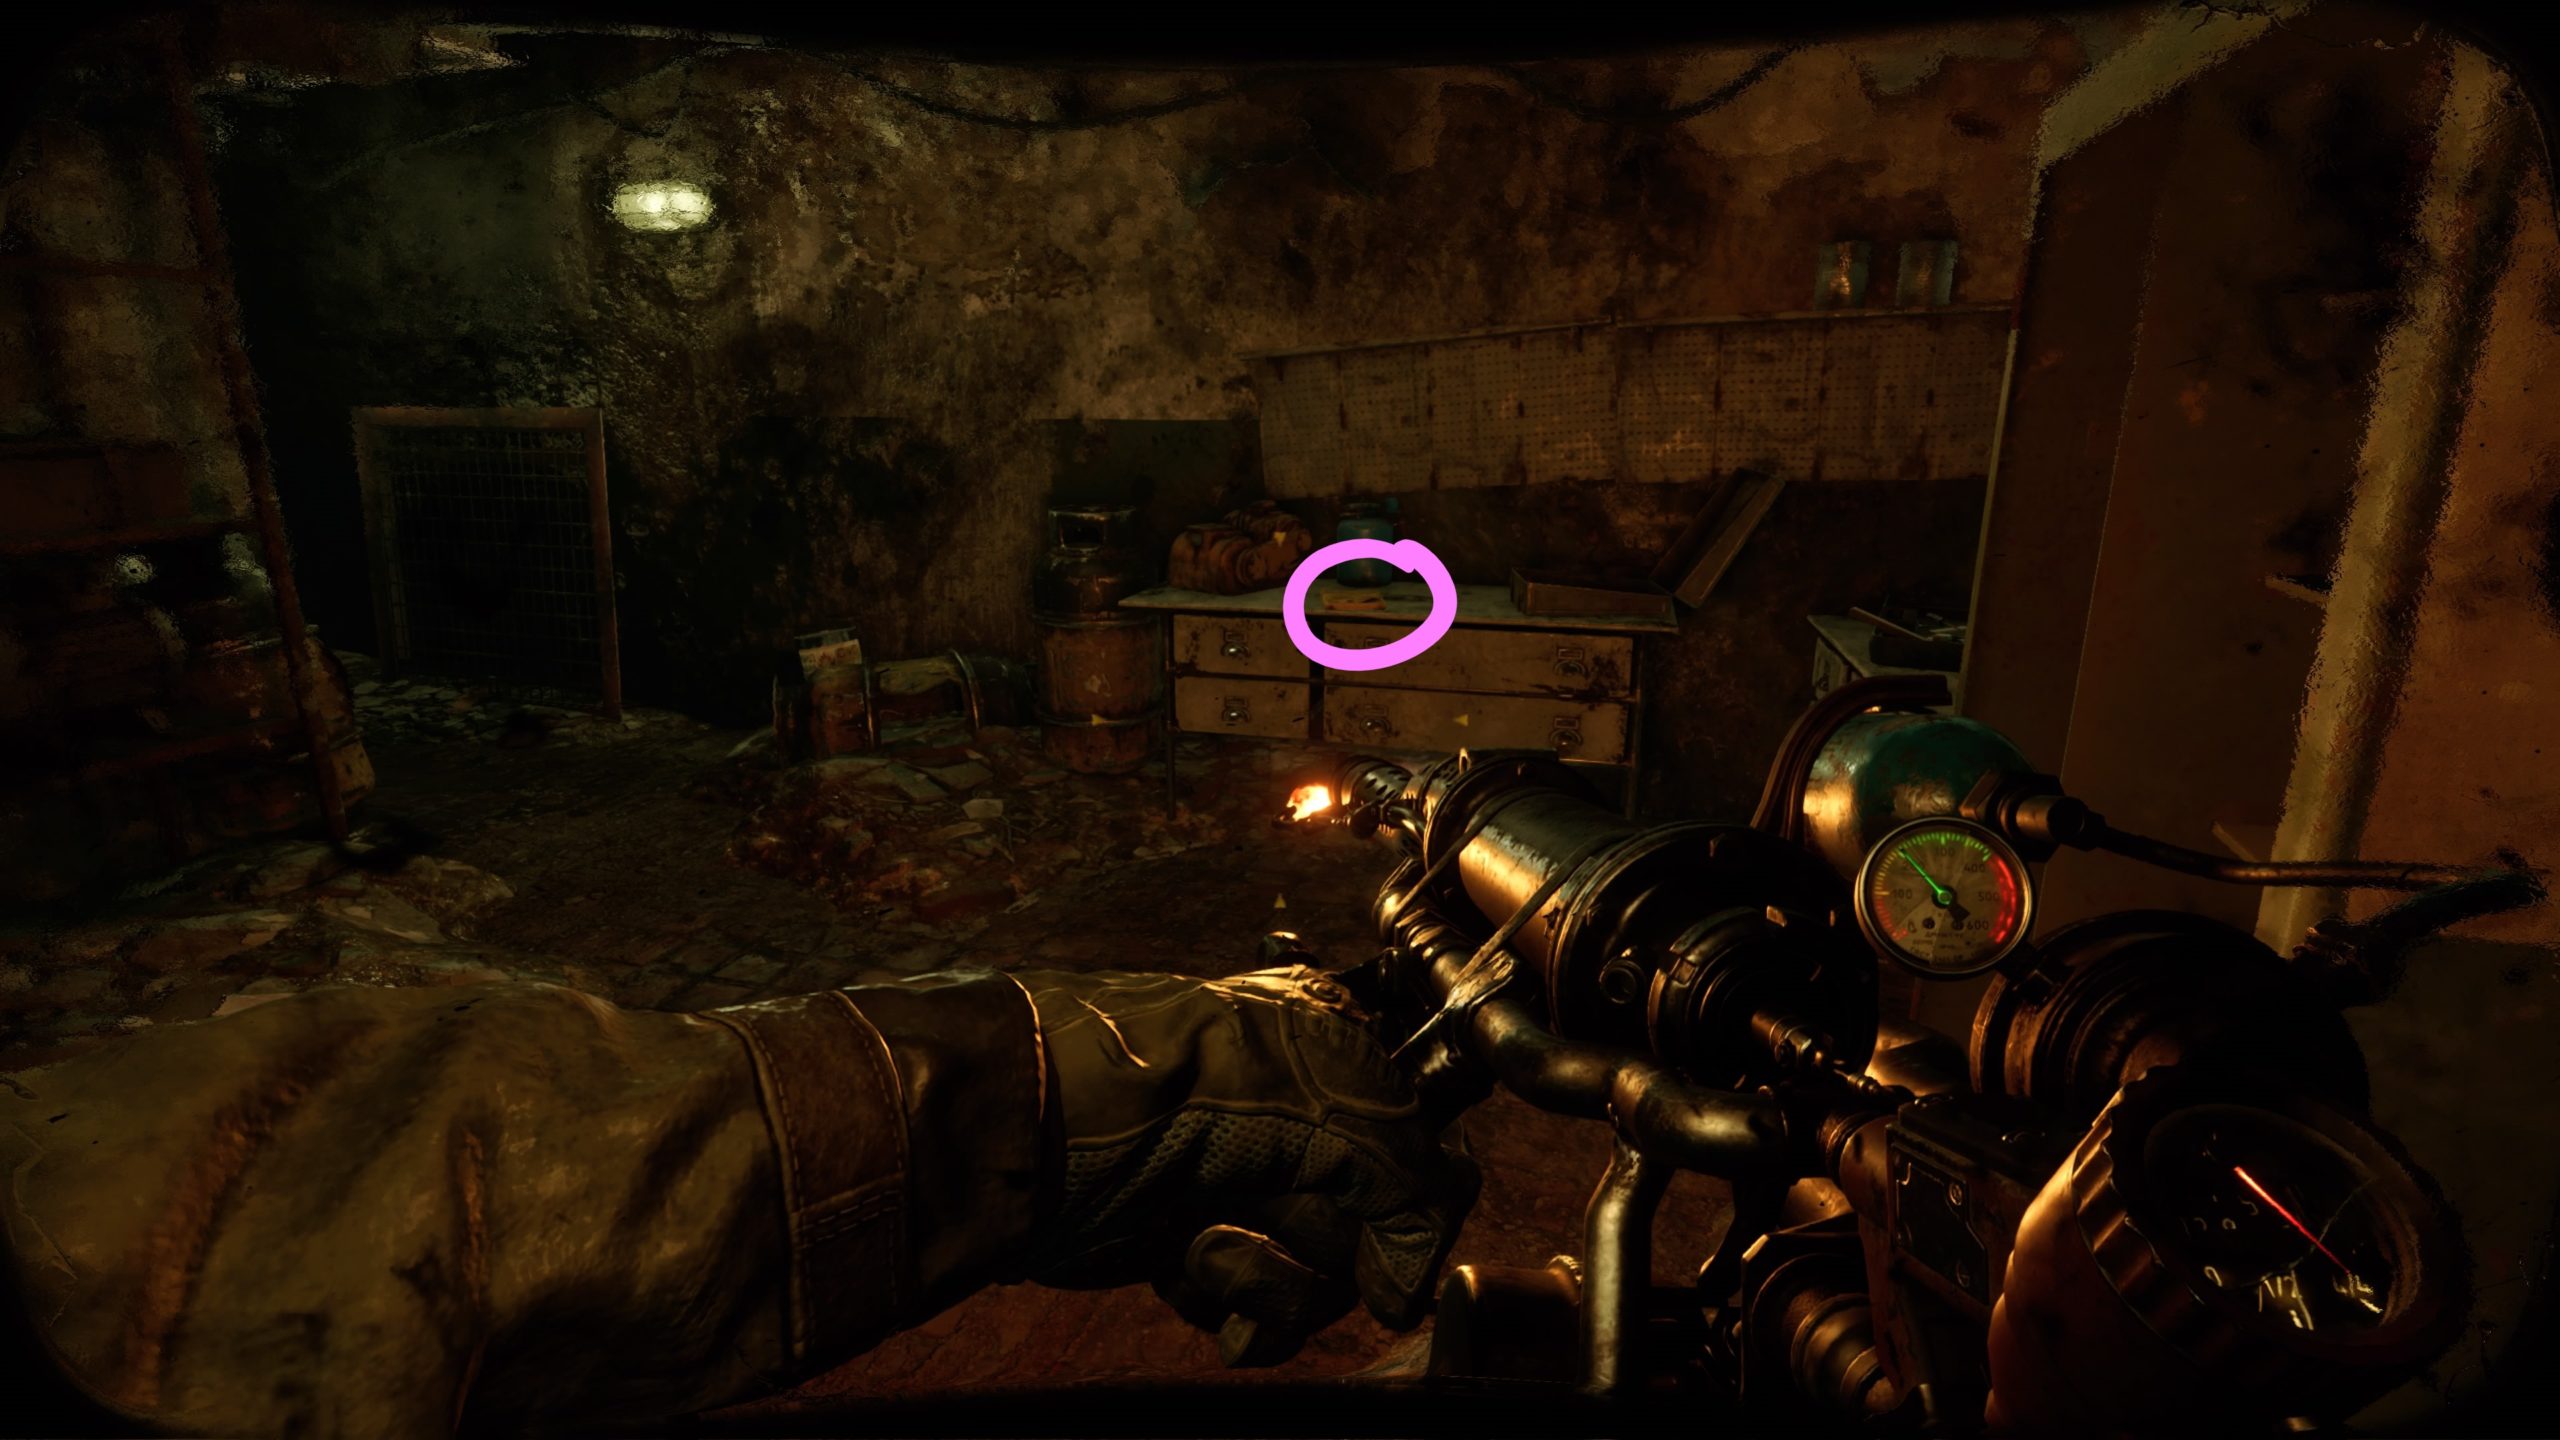
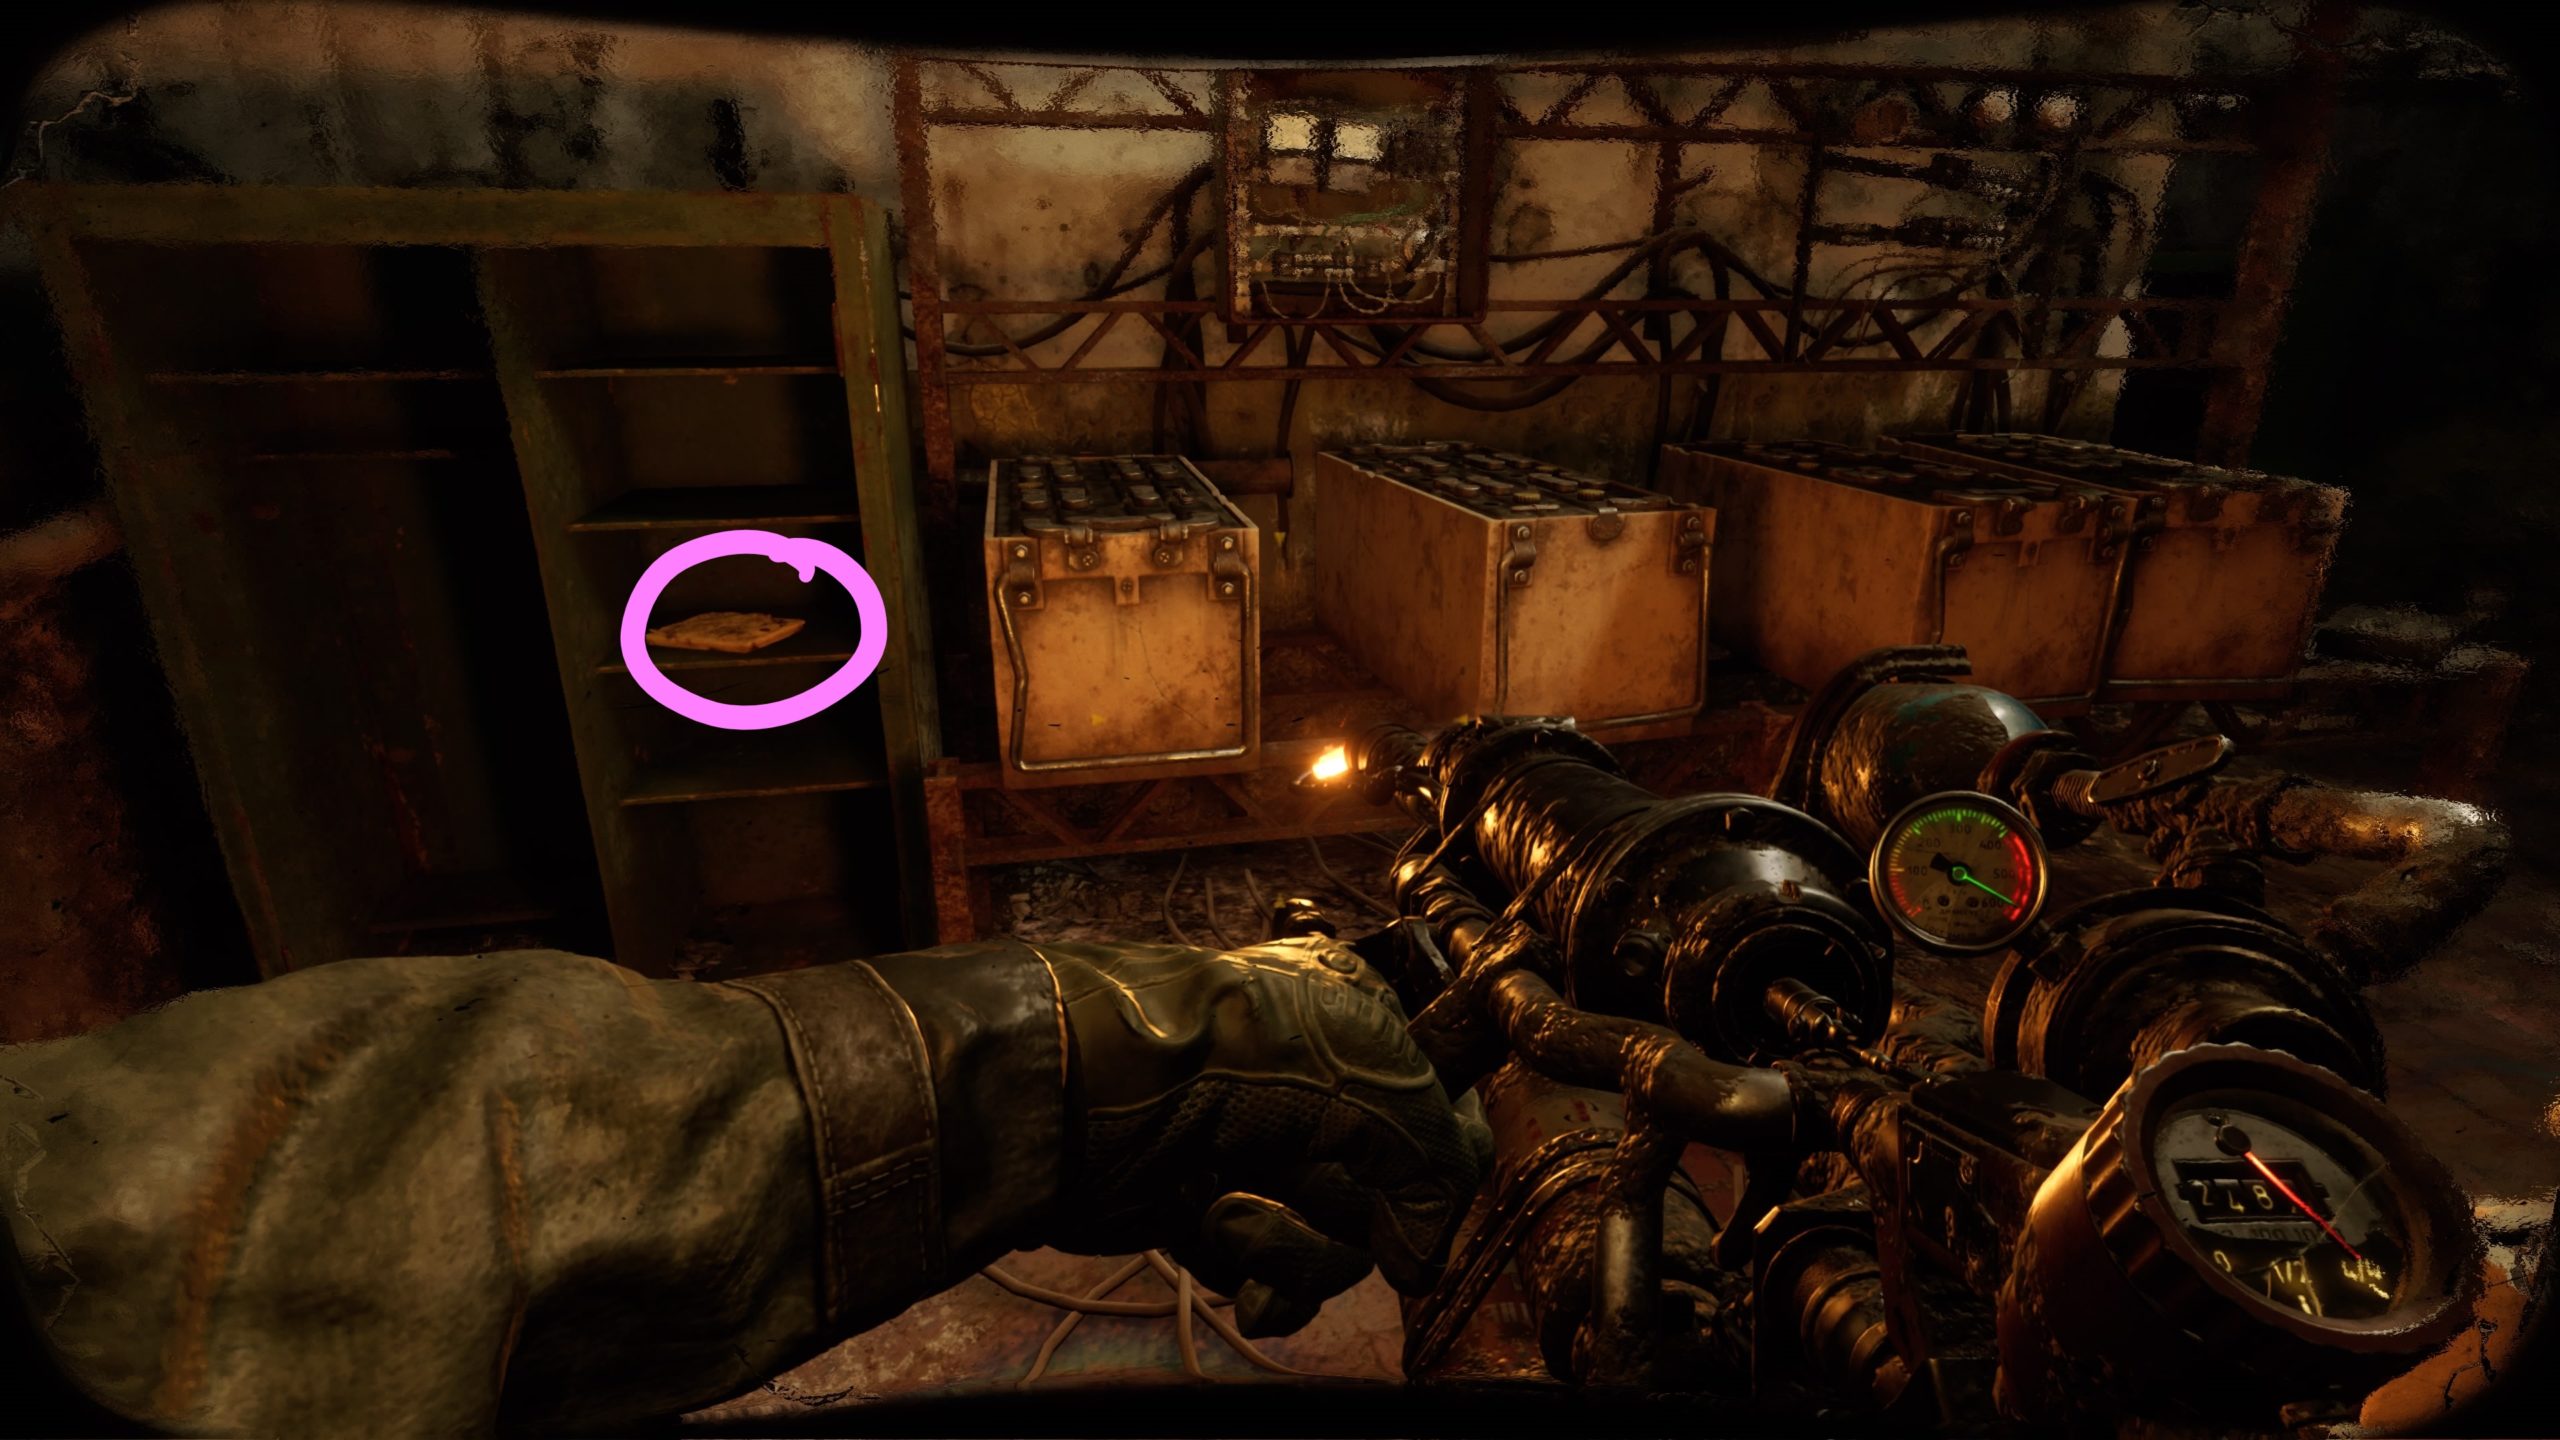
 

Stalker’s Diary 3

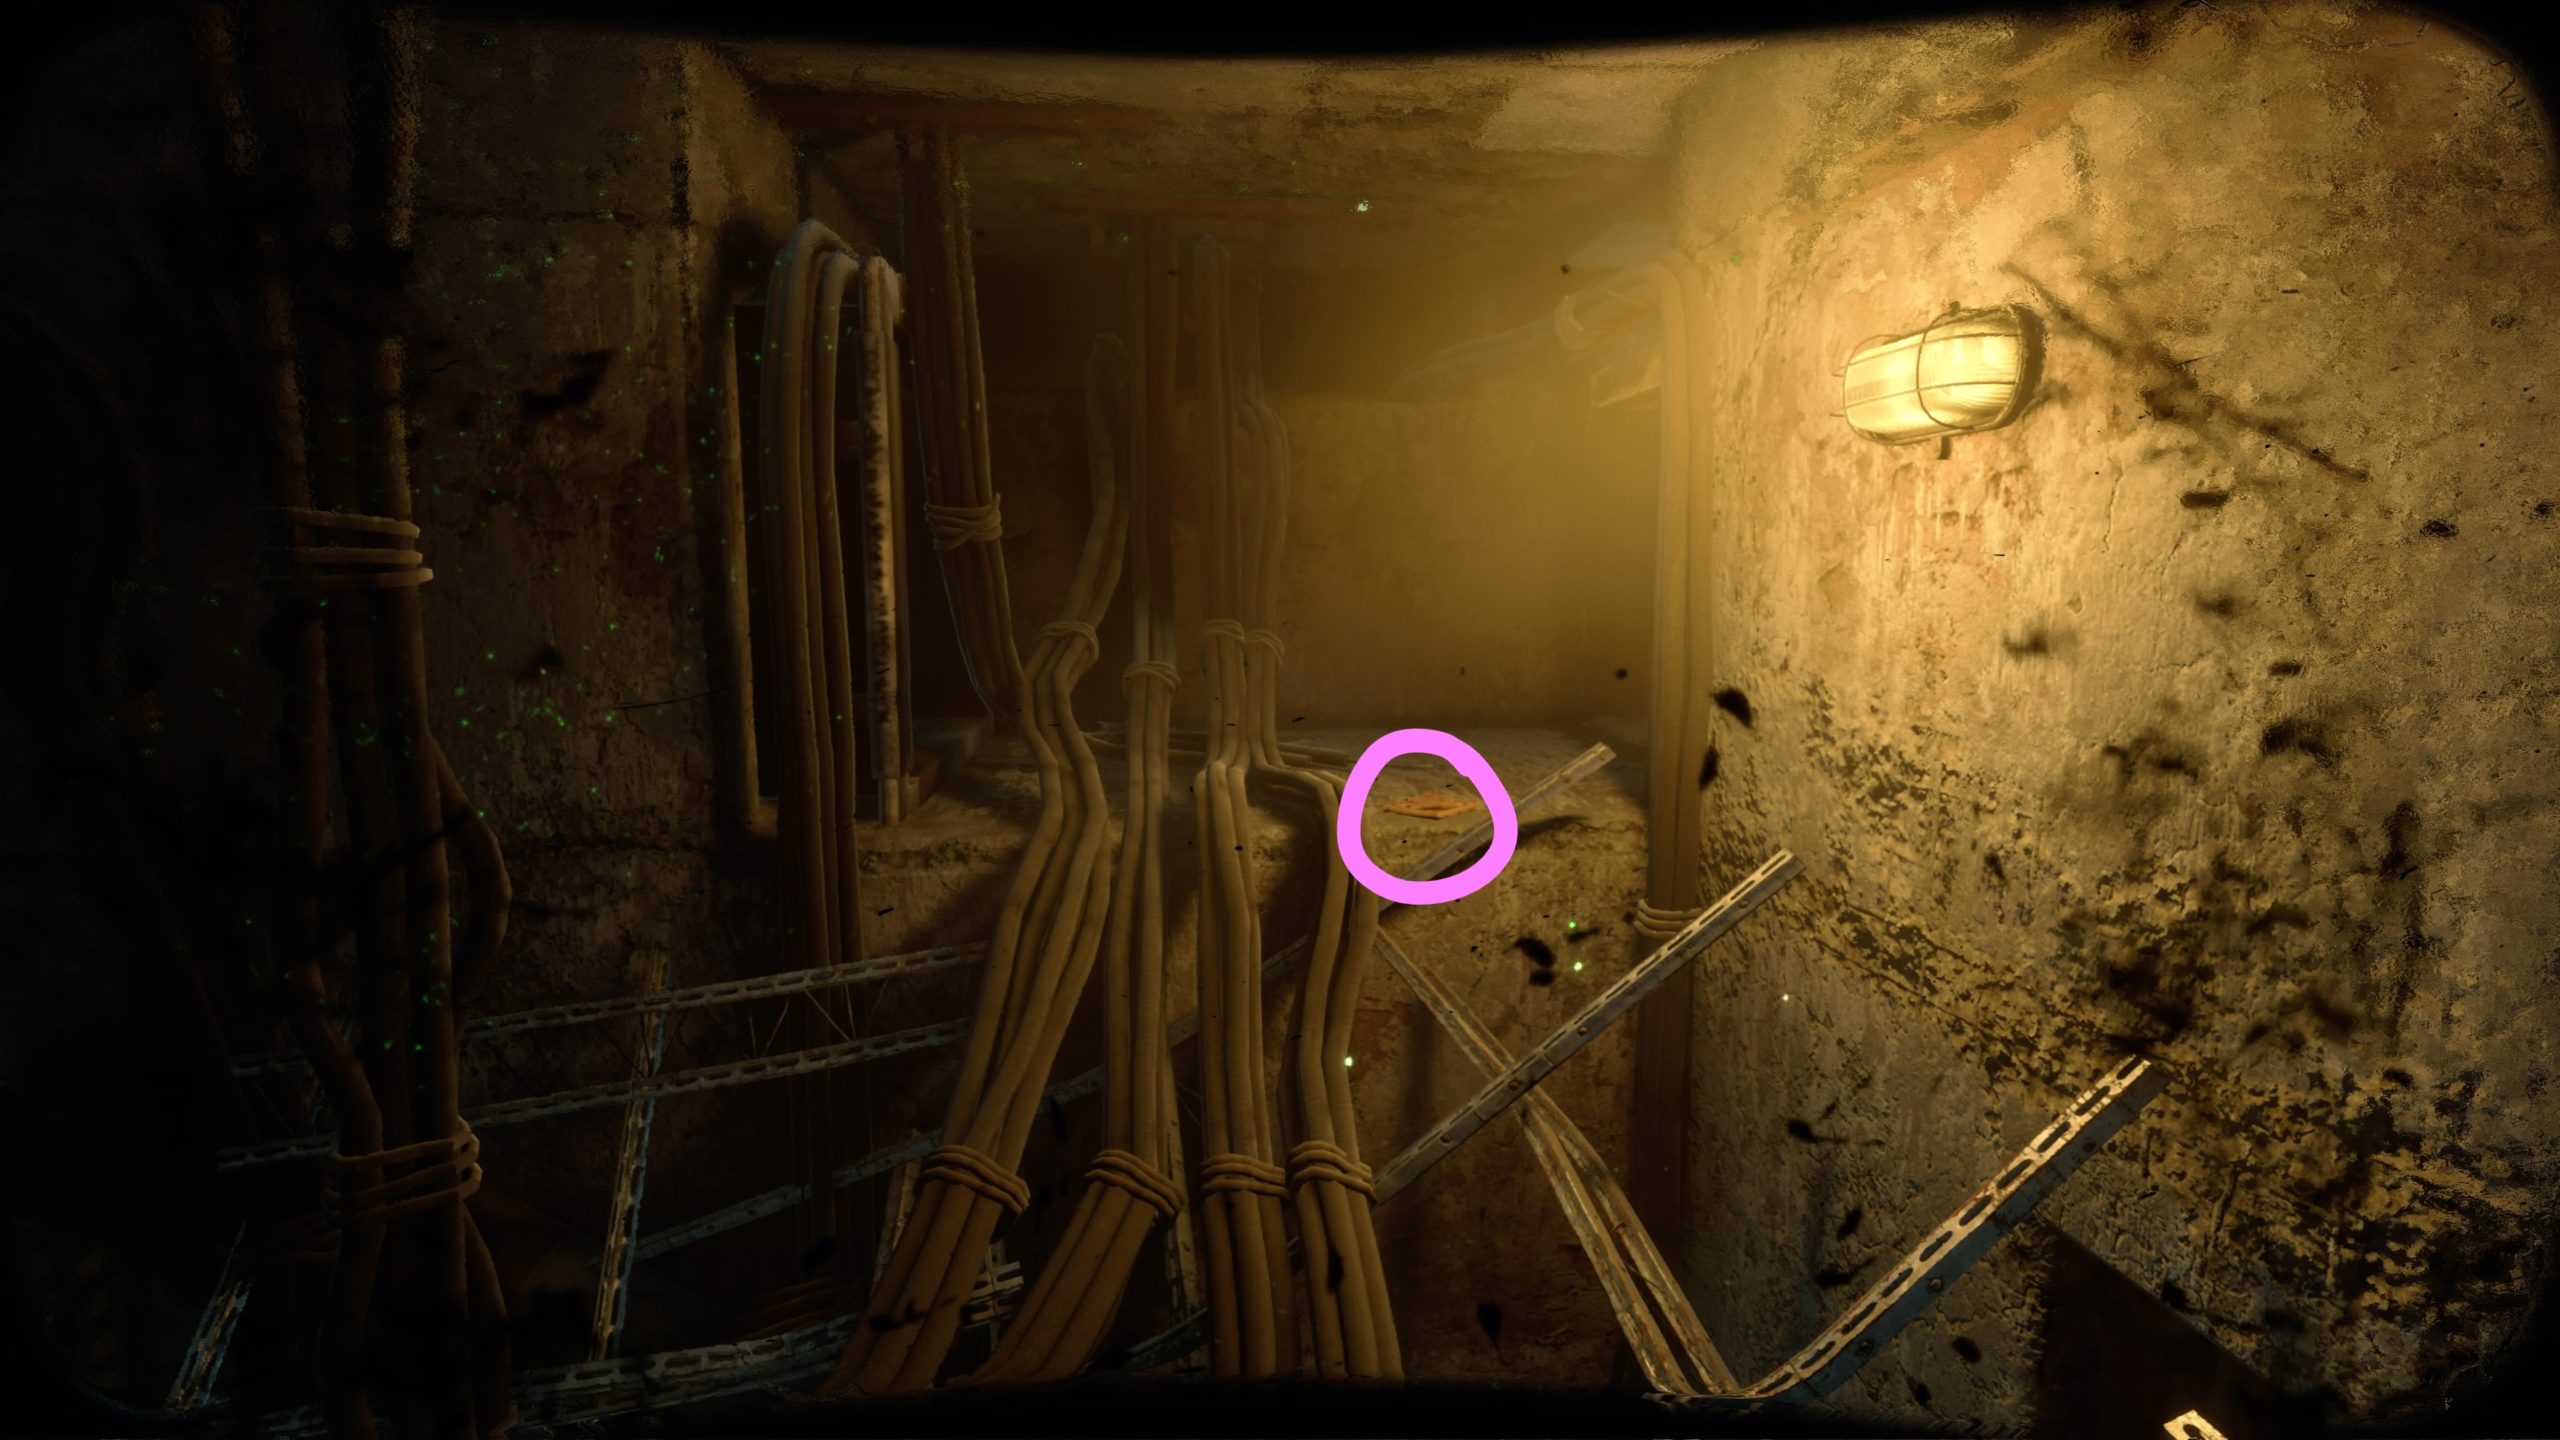
After fighting the Blind One and falling down the elevator shaft, you’ll find yourself in a dark room filled with metal scrap. Head up a metal frame of the drop ceiling towards the yellow light to find the diary on a concrete ledge next to some tubing.


Guides

Metro Exodus – Sam’s Story Night Hunters’ Secret Stashes

by Chappie in

*NOTE: There are 8 Night Hunters’ secret stashes to collect in the Metro Exodus Sam’s Story DLC. The stashes are listed below in the order that they can be obtained during the main story. Please make sure to collect them as you go. If you progress too far in the story, you will be locked out of the locations that contain the stashes.


Secret Stash 1

As soon as you dock the boat, head up the stairs and take a left at the top. Follow the hallway to the end, passing through a doorway. Take a left through the doorway to reach an office-like room. Exit out the door on the other side of the room to come to a large open room filled with water. Head straight across the wooden plank to reach a stone platform (middle platform). On this platform, drop down to the wooden planks below and crouch through the small opening. Head across the flooded room then go up the stairway at the end to find the stash at the top of the stairs.


Secret Stash 2

After you dock the boat, head into the submerged building just past the red flag. Work your way through the partially submerged level until you reach a doorway with a white skull above the threshold. Enter through this doorway to find a red door on the left side of the room. To the left of the red door, look for the hole in the brick to find a rope. Cut the rope to gain access to the room behind the red door that contains the stash.


Secret Stash 3

From the previous stash, keep working your way through the partially submerged first level until you reach a ladder at the end. Take the ladder up to reach the second level of the building. Head through the doorway and take a right to find a set of stairs near a bookshelf. Take the stairs up to reach the third level. Enter the open doorway in the corner of the room near some yellow paint smudged on the wall. Head through the blue door straight ahead to enter a room with a workbench in the corner. Exit out of the right side of the room through a hole in the wall onto a balcony. Head past the first doorway to find a second doorway with a white skull painted on the right of it. Kick down the cabinet to enter this room. Shoot the middle jar on the bottom shelf to reveal the stash.


Secret Stash 4

After exiting the Captain’s boat, jump down into the half submerged bedroom and exit out of the doorway on the far right side of the room. Head down the hallway and take a left at the end to enter a big open room with stairs on the right side. Head up the stairs to come to a wall with a white skull on it. Take a right and pass through the cloth hanging from the ceiling to find a hidden ledge to climb up on. Enter this small room with some beat up furniture and a mattress. Crawl under the table to reach the room containing the stash.


Secret Stash 5

After your drunken adventures with the Captain, you will be tasked with setting up traps in his base. After you find the location for Trap 3, head down the hallway to reach wooden scaffolding. Pass over the scaffolding to enter another room on the same level. Head forward through a couple of rooms to reach a larger room at the end with a painting leaning against the wall. Kick the painting to find a secret room that contains the stash.


Secret Stash 6

Dock on the western tip of the building near a good section of the wall that is missing. There will be a wooden plank to walk up. Walk across the plank and take the first door on the right, passing through the next room, to arrive in a hallway. Take the first right then head behind a bookshelf to find a small opening underneath a table. Climb under there to reach a secret room containing the stash.


Secret Stash 7

During the main story, you’ll have to sneak through a bandit camp to reach the Fire Depot. You’ll enter the bandit camp by traveling along a makeshift wooden bridge that connects to a hole in the side of a building. Once in the building, head through a doorway to enter a hallway filled with can traps hanging from the ceiling. Head down the hallway disabling the traps as you go. When you reach the end, head through the doorway and take a right up a pair of stairs to get to the second floor. At the top of the stairs, swing right heading through two doorways and bringing you to a room with two open windows. Head through the window on the right to locate a building with a white skull across from it. Enter the doorway to the left of the white skull then take a right to head into a storage area that contains three switches on the wall. Turn on the switches in the following order: right, left then middle. This will unlock the metal door behind you, allowing you to gain access to the stash.


Secret Stash 8


After you dock the boat, head up the stairs and take a left to find a gas can near a couch. Use the gas can to fuel the generator in front of the bus. Head back down the stairs towards where your boat is docked and head towards the blue container hanging from the crane to locate a pipe. Approach the pipe for a prompt to climb through it. The pipe will lead you to a secret room containing the stash.


Guides

Metro Exodus – Sam’s Story Harmonica Melodies Sheet Music Collectibles

by Chappie in

*NOTE: There are 9 harmonic melodies (sheet music) to collect in the Metro Exodus Sam’s Story DLC. The melodies are listed below in the order that they can be obtained during the main story. Please make sure to collect them as you go. If you progress too far in the story, you will be locked out of the locations that contain the melodies.


Melody 01

After you dock the boat, enter the school via a window and work your way to the part of the building containing a set of stairs leading to the second level. Facing the stairwell leading up, follow the hallway right and take the first left into a classroom to find the sheet music hanging on the wall next to a piano.


Melody 02

Head to the theater occupied by bandits and make your way to the second level. Once on the second level, make your way to the east side of the building to find a room filled with bookshelves. Just outside this room, there will be a window in the hallway with planks connecting it to another window in a sealed off room. Head across the planks and enter the sealed off room to find the sheet music on a bulletin board near some triangular guitars.


Melody 03

After you defeat the sniper, exit the door and head towards the boat. Instead of entering the boat, take a left in front of the boat and follow the walkway to a blue door. Enter the door to find the sheet music on the wall straight ahead.


Melody 04

After your drunken adventures with the Captain, you will be tasked with setting up traps in his base. Head to the floor below his sleeping quarters via the stairwell. Next, head through the doorway, passing a red door on your right, and take a right to reach a brown sofa at the end of the room. Facing the sofa, jump over the wall to the left marked with yellow paint. Follow the path forward to reach a room with a piano and a corpse resting on a bed. The sheet music will be located on a pillar next to the piano.


Melody 05

The sheet music is located at the scout outpost. After you dock your boat, head towards the outpost and make your way to the ramps. The sheet music will be located on the wall next to a workbench.


Melody 06

The sheet music is located at the car dealership on the wall behind a blue door in a break room.


Melody 07

This sheet music is located on a wooden cabinet to the right of a piano.


Melody 08

The sheet music is located on the door of an outhouse which is reachable via a walkway connected to the roof of the medical building.


Melody 09

After you dock the boat, head up the stairs and take a left to find the note on the side of a large green container.


Guides

Metro Exodus – Sam’s Story Diary Pages

by Chappie in

*NOTE: There are 11 diaries to collect in the Metro Exodus Sam’s Story DLC. The diaries are listed below in the order that they can be obtained during the main story. Please make sure to collect them as you go. If you progress too far in the story, you will be locked out of the locations that contain the diaries.


Note to Korzh (Diary 1)

The diary can be found next to a corpse in a doorway on the second level of the building. As soon as you dock the boat, head up the stairs and take a left at the top. Follow the hallway to the end, heading through the doorway, to find the diary on the left side in the doorway/broken section of wall.


Absence Note (Diary 2)

After you dock the boat, enter the school via a window and work your way to the part of the building containing a set of stairs leading to the second level. Facing the stairwell leading up, follow the hallway right and take the first left into a classroom to find the diary on a desk next to a computer.


Survivor’s Note (Diary 3)

During the main story, you will be required to slide down a yellow pole located in a kitchen near the top of the building to find the Captain. The diary will be located on the window sill to the right of the yellow pole.


A Note from Korzh (Diary 4)

After you exit the Captain’s boat, head into the partially submerged building to find a bedroom. Exit through the doorway on the far side of the room and take a left at the end of the hallway. Take an immediate left and pass through this room to enter another room with a ladder on the left side. Climb up the ladder to find the diary on a chair in the corner of the room.


Company Charter (Diary 5)

In order to obtain this diary, you will need to open the safe located at the car dealership. To open the safe you will need to get the password from each brother. You can reach the first brother via boat in the location marked on the map above. There will be a dock next to the first brother’s boat. After you exit your boat, speak to the brother inside to learn that his half of the password is 1, 2, 3, 4. The second brother can be found in a truck in a barn after you fight the Batwing in the junkyard. Speak with him to learn that his half of the safe code is also 1, 2, 3, 4. Once you have received both codes, head to the car dealership. The diary is located in a safe behind a blue door.


Engineer’s Notes (Diary 6)

After you defeat the Batwing in the junkyard, you will be able to access this area. Watch out for all the traps leading up to this building. Climb up the ladder on the side of the building and head into the room. The diary will be on the safe in the corner of the room behind the desk.


A Note from the Boss (Diary 7)

After you pass through the bandit hideout, raise the draw bridge and hope in your new boat, head to the T-shaped building slightly southwest. Once you dock your boat in the T-shaped building, you can find the diary on the dock on top of a large crate.


Tail’s Diary (Diary 8)

This diary is located on a table next to a guitar near the roof of the medical building.


A Guard’s Journal (Diary 9)

After you dock the boat, head up the stairs and into a bus. The diary is located on a table across from the workbench.


Boss’ Notice (Diary 10)

After you grab the fire suits, head up the stairs and cross the room. Pass through a metal gate to find the diary on a table at the base of a staircase.


Seryi’s Note (Diary 11)

After you collect the above diary, head up the stairs to the roof and use the zip line. Head forward towards the old, crumbly building (make sure you dismantle the mines). The diary is located on a table near the workbench.


Guides

Metro Exodus – Trapper Trophy Trap Locations

by Chappie in

*NOTE: During the main story, the Captain will task you with setting traps in his hideout. If you set all five traps, you will earn the Trapper Trophy. Below is a complete listing of all 5 traps.


Trap 1

After your drunken adventures with the Captain, you will be tasked with setting up traps in his base. Head to the floor below his sleeping quarters via the stairwell then head through the doorway, passing a red door on your right, to find the first trap to set.


Trap 2

From the previous trap, head forward down the hallway towards the brown sofa. Jump over the wall to the left marked by the yellow paint. Proceed through the rest of the floor. Eventually you will pass through two bathtubs and come to a staircase leading down to the next level. Instead of going down the stairs, take a left to find the trap in the middle of the hallway on the left side.


Trap 3

From the previous trap, take the stairs in the hallway down. When you reach the bottom, take a right and head down the hallway to find the location of the third trap just before the doorway.


Trap 4

From the previous trap, head down the hallway to the wooden scaffolding. Pass over the scaffolding and through several rooms until you reach a room with a painting leaning against the wall and a white skull painted on the wall (location of Secret Stash 5). Enter through the doorway to the left of the skull and exit through another doorway to head outside. Travel across the wooden scaffolding and follow the path forward until you reach a room with a bright red door. Open the door and take a left to find the location of the trap near a corpse.


Trap 5

From the previous trap, head back down the hallway towards the red door and take a left to enter a room with cans hanging from the ceiling. Pass through this room and exit through a broken section of wall to arrive in a bathroom. Work your way through the bathroom to reach a red door. Open the door and go down the stairs. The location to set the trap will be at the bottom of the stairs next to the doorway.


Metro Exodus
Guides

Metro Exodus – The Dead City Collectibles (Diaries and Postcards)

by Chappie in


Postcard 20

After entering the Metro and fighting the first batch of enemies, follow Miller into a room.  The postcard will be on the white metal cabinet between two blue lockers to the right of the door.


Radiogram Transcript

In the room with the hanging cages where Miller mentions that it reminds him of the execution pit from Moscow, the diary will be up the ramp to the right on a metal table next to a corpse.


Weathered Report

From the previous collectible, keep heading forward and eventually you will head up an escalator. Miller will talk about how the soldiers used chlorine to kill the people in the Metro. The way forward will be blocked, so Miller mentions using the service tunnels. You will then head to the other side of the area and kick a door open. Head forward through two rooms to enter a room with red and white walls. The diary will be sitting on a table in the left side of the room.


Orders

This diary will be on a map board in the command center where Miller radios the Aurora.


Postcard 21

This postcard will be on the end of the metal support column in the command center where Miller radios the Aurora.


Notebook

After leaving the command center, head up the wooden stairs to the right of the danger sign and keep following the path until you reach a train car. Enter it and turn left to find this diary on a seat on the right next to a corpse.


Worn-Out Diary

From the previous diary, keep heading deeper into the Metro until you come to the boat. Ride it forward until you reach a wooden platform that has sandbags piled on it just before a red gate. Dock the boat and head through the doorway. At the end of the hall, turn right and follow the left wall all the way to the end. From there turn left and pass through another doorway at the end of the hallway. In the room squeeze through the blue door in the middle of the room and use the fallen lockers to head through a hole in the wall. This will drop you into another room. The diary will be in this room on a table to the left.


Browned Note

After finishing the boat section, a cutscene will play. When you regain control of Artyom, follow the illusion down the train platform. When you reach the end, take the escalators up and keep pressing forward past the ticket gates and into a hallway. As you reach the end of the hallway, a teal door will be on your left. Head through it to find this diary sitting on a TV to the left of a desk.


Dusty Notebook

Keep heading forward from the previous diary and eventually you will make it outside. Follow the path forward until Artyom has a flashback to when the war started. Shortly after that, you will jump into a hole with a tank sticking out of it leading to a tunnel. Facing the tank, head left until you come to a dead end. This diary will be next to a couple of skeletons frozen in the snow.


Shipping List

From the previous diary, turn around and follow the tunnel to the other end. Keep moving forward until you meet a Blind One (monkey). After a brief cutscene, you will enter a building where the stairs forward are blocked by a power operated gate. Work your way to the top floor of this building to reach an overhang leading to an adjacent building. Jump over to the other building and take the right path passed the wooden shelves and a skeleton on the ground. Continue by taking another right and jumping to the bottom of a stairwell. Open the blue door at the bottom to find this diary on a metal kart.


Previous Chapter Collectibles – Autumn


Metro Exodus
Guides

Metro Exodus – Autumn Collectibles (Diary)

by Chappie in


*There are no postcards in this chapter.


Kataya’s Note

Follow Krest to the front of the train and sit down at the table to listen to Miller going over the plan. Once he’s finished, head back into the passenger train car and make your way to the workbench. This diary will be sitting on a counter across from the bathroom.


Previous Chapter Collectibles – The Taiga

Next Chapter Collectibles – The Dead City


Metro Exodus
Guides

Metro Exodus – The Taiga Collectibles (Diaries and Postcards)

by Chappie in


Postcard 15

After gaining control of Artyom and obtaining the crossbow from the white statue, head right and pass the front of the house to enter a shack with some laundry hung in front of it. Once in the shack, turn left into the back room to find the postcard on a broken mirror.


Note on a Crossbow Bolt (Diary 1)

From the white statue where you got the crossbow, head past the left side of the house to the wooden gate. This diary will be on a crossbow bolt suck on the other side of the left fence. If it is not there, reload your last checkpoint and it should show up.


Unsent Letter (Diary 2)

From the previous collectible, turn right and follow the road across a bridge ending up on a sidewalk path leading to a statue at the end. Follow the path and take a left at the statue (break the statue using your melee for a trophy) to reach a schoolhouse. Enter the school to find this diary on the first desk to the left.


Postcard 16

From the previous collectible, exit the school and turn right towards the broken bridge. Head down the left part of the bridge towards the pond and keep left, passing a tree with a skull and bones. Walk through the broken fence and into the building. Follow the path straight ahead to find the postcard on the left bookshelf next to the window straight in front of you.


Little Kid’s Note (Diary 3)

From the schoolhouse, head straight across the broken bridge, jumping over the gap. Enter the first building on the right (there will be three pirates in here) and head to the room on the right side. The diary will be to the right on a table.


Solemn Oath (Diary 4)

From the previous collectible, exit the building and head right up the stairs to the gazebo. Once at the gazebo turn left and enter the building with the tower on the right. Take the stairs in the middle of the building to the top of the tower to find the diary on a wooden crate next to a zip line.


Dusty Diary (Diary 6)

From the previous collectible, take the zip line and follow the path forward until you come to a treehouse on the left. Climb the ladder and the diary will be immediately on your right sitting on a crate.


Alchemist’s Log (Diary 5)

From the previous collectible, take the zip line down and head straight ahead into the enemy’s campsite. The diary is located behind the guy whistling on the bed. Note: You cannot sneak up on him because you will break a stick every time no matter what angle you try, which will alert him of your presence. Highly recommend doing a quick save beforehand.


Lost Diary (Diary 7)

Head slightly northeast from the treehouse. You will spot an arched tree with a shack behind it on the water’s edge. Enter the shack via the side near the water to find the diary on a wooden crate next to a metal bucket.


Dusty Notebook (Diary 8)

From the last collectible head west back across the road until you see a tree’s roots growing around a cave in the cliff. Be mindful of the wolves in the area and enter the cave. The diary is located on a desk at the end of the cave.


Calligraphic Note (Diary 9)

After you get your backpack back, follow the path forward until you reach a totem next to a treehouse. Turn left at the totem and follow the path until you reach a wooden entryway. Turn right just before the entryway and follow the fence until you reach a section of broken fence. Head through the gap and into the building straight ahead to find the diary resting on the fireplace.


Scribbled Note (Diary 10)

When you reach the enemy village via the zip line, take the rope bridge right and follow the path until you reach the hut with the drummer. Use the ladder on the right side just before the drummer to reach the ground level. Enter the building on your left. The diary will be on the table in the left side of the room.


Worn-Out Letter (Diary 11)

After you leave the enemy village via zip lines, follow the path into the cave on the right with the wooden entrance. The diary is located right inside the cave on a bench to the right.


Crumpled Note (Diary 12)

The diary is located further inside the cave tunnel next to a corpse just before a ladder.


Postcard 17

After exiting the cave and proceeding through a building, head down the stairs and proceed to the house straight ahead. The diary is located on the wall next to a door frame in a room with a sunflower tablecloth.


Dirty Diary (Diary 13)

After you pass under the extended arm of an excavator and exit the village, follow the path forward until you reach the river’s edge. Turn right and follow the road to the end where you will find the diary sitting on a table. Alternatively, after leaving Olga in the church, head down the ladder and follow the path straight. When you reach the cross straight ahead, turn right and follow the path along the cliffside to reach a rope ladder you can kick down. Climb down the ladder and head straight ahead, turning right to follow along the water’s edge. The diary will be located at the dead end sitting on a table.


Hunter’s Note (Diary 14)

Work your way back through the village to reach a graveyard/church on the north side of the village. Alternatively, from the central campsite, head up to the church gate to find the diary on the ground next to a corpse leaning against the gate on the right side.


Weathered Note (Diary 15)

After leaving Olga in the church, head down the ladder and follow the path straight. When you reach the cross straight ahead, take the left path down the stairs until you reach a gazebo overlooking the water below. The diary is located on the left side of the gazebo on a sack.


Folded Note (Diary 16)

From the previous collectible, take the zip line down and follow the path to the left until you come to an enemy village. Climb up the ladder to enter the village and work your way through until you come to a shack with two oars crossed and a life preserver in the middle over the doorway. Head into this building and the diary will be straight ahead on a table.


Postcard 18

After leaving the boat, you will need to work your way through the three step electrical puzzle to gain access to the Admiral’s room (which is part of the story). The postcard is located in this room to the right on the wall with a bunch of postcards/pictures. (Note: By entering this room, you will complete the trophy of 5 o’clock: Take part in the Admiral’s tea party on the Taiga level.)


Blood-Soaked Letter (Diary 17)

After leaving the Admiral’s room via zip line, head into a tunnel and work your way through. Head up a set of yellow stairs and grab the red gas can to the left of a large red door in a room with green walls. Carry the can down the stairs and into the room below to put the gas in a generator. Head back up the yellow stairs and flip the switch to the right of the large red door, opening it. The diary is located under a corpse straight ahead.


Unfinished Letter (Diary 18)

After exiting the underground tunnel and meeting up with Alyosha, head through the town into the second house on the left with two vehicles parked in front of it. The diary is located on a table straight ahead after entering.


Postcard 19

From the above collectible, head into the next room on the left. The postcard will be on the green wall directly to the left of the doorway.


Previous Chapter Collectibles – Summer

Next Chapter Collectibles – Autumn


Metro Exodus
Guides

Metro Exodus – Summer Collectibles (Diary)

by Chappie in


*There are no postcards in this chapter.


Tokarev’s Note

From Artyom’s room, turn right heading towards the workbench. Exit the passenger car and head onto the train car carrying the diesel fuel. Walk past the fuel tank and turn right to find this diary on a workbench across from Artyom’s van.


Previous Chapter Collectibles – The Caspian

Next Chapter Collectibles – The Taiga


Metro Exodus
Guides

Metro Exodus – The Caspian Collectibles (Diaries, Postcards and Upgrades)

by Chappie in


Postcard 10

At the beginning of the chapter after exiting the train, head into the room of the destroyed building right next to the train on the south side. This postcard will be immediately to the left side of the entrance hanging on a wall.


First Mate’s Diary (Diary 1)

Enter a makeshift stronghold in a giant boat via an entrance on the right (east) side of the road and head straight through slave quarters. Take the metal stairs at the end and the diary will be on a table just past the first shipping container on the right.


Leader’s Letter (Diary 2)

From the above collectible, keep working your way through the second level slave quarters. When you reach the end, take a yellow ladder up to reach the deck of the ship with some shipping containers. Head through the doorway straight ahead and take the ladder on the left side of the room to reach a higher ledge in the room (there will be three enemies in this room). Follow the ledge into the next room and keep moving forward. When you reach the yellow ladder at the other end of the room, head right to find the diary located on a table next to a radio.


Motion Scanner (Upgrade 9)

From the above collectible, head up the yellow ladder and then head into the room slightly to the left. The upgrade will be located on a wooden table on the right side of the room.


Extra Bright Flashlight (Upgrade 10)

This upgrade is located in a boat safe house near the rock tunnel entrance to the lighthouse in the northwest corner of the map. When you enter the boat, note that there is a tripwire just before the upgrade. The upgrade is on a crate to the left of the cot.


Letter to Son (Diary 3)

After entering the rock tunnel entrance to the lighthouse, use the zip line to cross the gap. Head across two bridges and keep following the path a short way to find a dead bandit next to a glow stick on the ground. The diary is to the left of this corpse on a rock.


Postcard 11

The postcard is located at the top of the lighthouse on a wall immediately to the right after entering.


Memo (Diary 4)

Follow Giul to a satellite facility underground east of the lighthouse. Work your way through the facility and you will eventually drop down a hole in the floor. When you fall down, you will be in a room with a lantern on a table. Keep heading forward and turn left before the closed metal door with a giant 03 next to it. Head down the short hallway and turn right into the first cubicle. The diary will be located on a desk next to a red typewriter.


Image Analysis (Diary 5)

From the previous collectible, keep working your way forward until you come to a large command center. Head towards the map and take a right. Follow the hallway and pass through the bathroom to emerge into another hallway. Enter through the passage to the right just before you reach the metal doors (you will have to crouch to enter the small passageway). The diary will be located on a desk on the right side of the room next to a corpse sitting in a chair.


Family Photo (Giul’s Request)

Giul’s mother is holding the photo in her arms and can be found through the teal door on the left side of the room from the above collectible.


Last Orders (Diary 6)

From the previous collectible, head into the server room and keep working your way through. Eventually, you will come to a fallen vent duct, which you will need to climb up to make your way through the vents. After you drop down from the vent into an archive room, head through the doorway directly behind you. The diary will be on the conference table where the skeleton is sitting at the head of the table.


Shopping List (Diary 7)

Locate a large boat with red on the bottom and blue on the top near the water north of where the intersecting roads make an “x” in the eastern part of the map. Enter through a hole on the front right side of the ship (opposite end of the image of the Baron on the ship). Climb up a short yellow ladder and walk up a set of metal stairs. Once at the top, turn right and follow the path up the second set of metal stairs. Climb the ladder on the right side to enter a large room filled with enemies. Take the path on the right leading to a yellow switch box where you can turn out the lights to this room. Take a left down the metal set of stairs. Once at the bottom, turn right to drop down to a slightly lower level and follow the path right to the end. Turn left heading past the circular windows and head up a small flight of stairs. Turn right at the top and head through the metal door with the blinking light and skulls. Head through the door and note that an enemy with a machine gun is in this room. Hug the right wall all the way to the end and head up the metal stairs on the left. Swing left and head into the doorway between the two red banners with a white symbol. The diary will be on the right on a console.


Postcard 12

This postcard is located in the same room as the above collectible between the door and yellow switch box.


Diary Fragments (Diary 8)

The diary is located in a large boat at the base of the large landmass. The diary can be found in the same room as the Hermit on a crate near the windows.


Baron’s Letter (Diary 9)

The diary is located west of the northernmost safe house near the entrance to the bandit hideout in the ravine. The diary is located on a wooden crate under a metal umbrella next to a truck.


Death Note (Diary 10)

From the above collectible, continue into the ravine and kill all the enemies. Once the enemies are dead, a rope ladder will drop from the cliff. Climb up this rope and the diary will be on a barrel to the right next to a corpse.


Armored Glass (Upgrade 11)

This upgrade is located to the left of the previous collectible on a wooden crate.


Charred Note (Diary 11)

From the red and blue boat that contained the Shopping List, head south until you see a structure over the road that has a bus on top. Turn left into the enemy camp. Past the chairs on the right climb up a yellow ladder.  The diary will be located at the top on the right side on a crate.


Letter to the Artist (Diary 12)

After meeting up with Damir in the northwest corner of the map, follow him until you slide down the rock leading to the caverns that once use to be a town. Head forward past a red barrel and turn left taking the ramp to the top. The diary will be on an old radio sitting next to a bed.


Postcard 13

From the above collectible, lower the rope ladder on the left and climb down. The postcard will be straight ahead (north) in the rusty truck next to the driver side door.


Postcard 14

Enter the airfield in the southeastern part of the map and head to the intact hanger on the right. Head all the way to the back of the hanger. The postcard is located on a wooden crate in the middle of the last row of shelves. The postcard is a little hard to see with night vision because it is in a ray of light.


NVD Amplifier (Upgrade 12)

This upgrade is located in the same airfield as the above collectible. Head to the main building with a Demon nest attached to the front of it. Work your way to the top, fighting Humanimals as you go. This upgrade will be located on a chair in the safe house right next to the workbench.


Consumables Carrier (Upgrade 13)

Located north of the airfield safe house in a cave along the water. The cave will be down the slope to the right of a man claiming to be the real Baron. The upgrade is to the right of the workbench.


Previous Chapter Collectibles – Yamantau

Next Chapter Collectibles – Summer