Below is a walkthrough for Chapter 6: The Stolen Ring in Fire Emblem Engage. This guides picks up after leaving the Somniel!
Paralogue: Budding Talent
Location: Tea-Field Village
Once you reach the World Map, a tutorial on paralogues will pop up. Make your way over to the Tea-Filled Village to witness a dialog event between the residents leading to a fight where the Divine Dragon and their allies come to the aid of the village. Make sure you speak with Jean on the map near the clinic to enlist his aid. During this fight, you can receive the below items. After defeating all of the enemies, Jean will officially join you. Also, make sure to explore the village after the battle and collect all of the items and adopt any animals before leaving.
Item
Obtained
1,000 G
Dropped from an enemy
1,000 G
Dropped from an enemy
Defense Tonic
Visit the house in the southwestern corner near where your units start
Energy Drop
Visit the house in the southeastern corner
Poleaxe
Dropped from an enemy
Rewards: Surge, Pure Water
Mountain Settlement
When you’re ready to proceed with the chapter, head to the Mountain Settlement. After a dialog event, you’ll have to take out bandits occupying an abandoned village and recover the ring. The party will split up with Alear following Yunaka to secure the ring while the others take on the main force of bandits. You’ll also be introduced to the darkness/fog mechanic. Please note that you can receive the below items during the battle.
Item
Obtained
Hammer
Dropped by an enemy
Longbow
Dropped by an archer enemy
Talisman
Dropped by the bandit boss
Torch
Dropped by an enemy
Defeat all of the bandits to win the battle. You’ll then be free to explore the town and adopt any animals in need of a good home! When you leave the area, another dialog event will occur.
Intermission: The Somniel
If you return to the Somniel, head towards Vander on the east side of the area. The game will then prompt you that the Records Hall is available. Another thing to note is that if you bought the season pass, head over to Lookout Ridge to get the Emblem with Edelgard, Dimitri and Claude from Fire Emblem Three Houses. Dining also becomes available in the Cafe Terrace. When you’re done, leave to proceed with the next chapter.
Below is a walkthrough for Chapter 6: Serial Disappearances in Akihabara in Digimon Story Cyber Sleuth: Complete Edition.
Akihabara
When you regain control of the sleuth, head for Akihabara. Once there speak to the three people with locks above their heads on both sides of the road using the “Akihabara Disappearances” keyword. Make sure to keep an eye out for the Digimon Medal on the ground near the Weird Nerd Boy along the sidewalk on the other side of the road. That same boy will have the info you need including the “Florist Staff” keyword. There will then be three more people for you to talk to. The one you want is the Prim & Proper Four-Eyes lady near the access point. After speaking with her, return to the Weird Nerd Boy for another conversation of the aggressive variety.
Comimani Forum
Use an access point to travel to the Comimani Forum in EDEN. There will be six people with ! above their heads. You’ll need to speak with all of them but the Country Girl wearing the blue and yellow outfit will give you the location of your next destination. You can then exit EDEN.
Nakano
Travel to Nakano then head to the bookstore on 3F and speak with the Country Girl there. You’ll then need to make your way to the detective agency.
Detective Agency
Back in the agency an event will trigger.
Kowloon
Use an access point to travel to Kowloon Lv. 1 then make your way to the park in the next area. Talk to Arata to begin the search for the data which can be found in the last area of Kowloon Lv. 1. Use your Code Scan Hacking Skill on it to trigger a fight against the virus-type Digimon, Wisemon. Defeat him then exit EDEN.
Akihabara
Head to Akihabara then make your towards the shop to find Arata triggering an event. Doing this will trap you in Akihabara until you finish the next section of story.
Akihabara???
Head right past the Access Point and follow the road east. Along the way, keep an eye out for a chest you’ll pass containing a Farm Expansion Plugin. When you reach the end of the path head north for an event with Suedou. Continue heading north then take a left and follow the path to the end where you’ll find an orb. Approach it to start a fight against a GoldNumemon. Backtrack to the road you met Suedou on and head east passing another access point taking you into a new area. Now just follow a path to reach Nishino triggering a cutscene. You’ll have two fights back to back here. The first will be against Wisemon again. After defeating him, a Dead Eater will show up that you’ll also need to defeat. After stopping the Death Eater, a lengthy event will trigger where you’ll receive 1,000 CSP.
Digimon
Armadillomon
Gaomon
Hawkmon
Numemon
Vegimon
Detective Agency
When you regain control of the Sleuth, there will be two cases on the whiteboard you can pick up, I’m Not a Flower Person… and Red Fists and Hot Sweat! You can find guides for them here if you need some guidance. Once you complete one of the two cases, another case titled Nakano Underground will be added to the board. Accepting that case will progress the story. You can use the same guide as before for a guide on the case.
Broadway 4F (K-Cafe)
Head up to the 4th floor of Broadway and enter the K-Cafe. Inside speak with Ryota sitting at one of the tables. After the conversation, return to the detective agency and accept his case on the board.
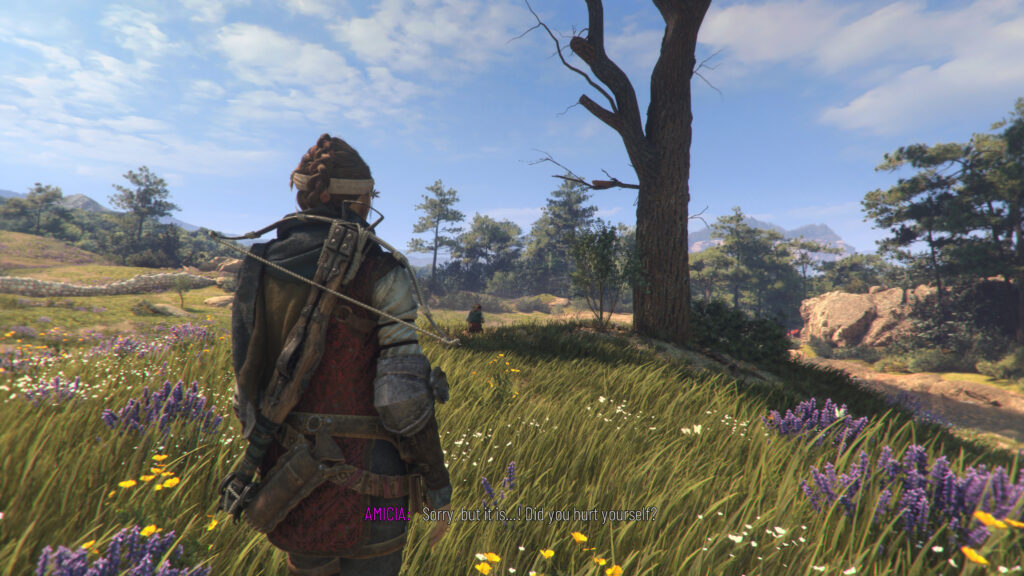
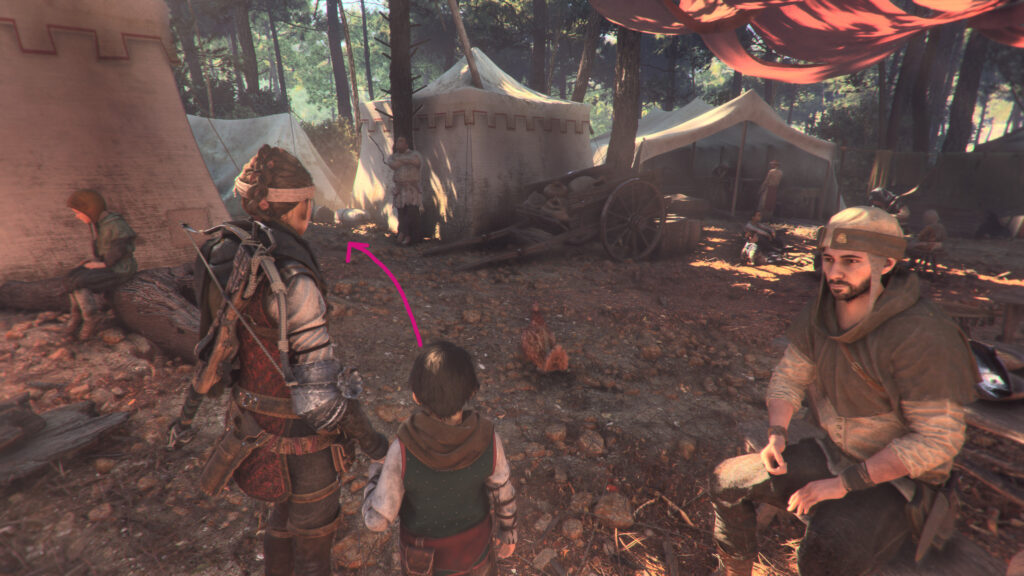
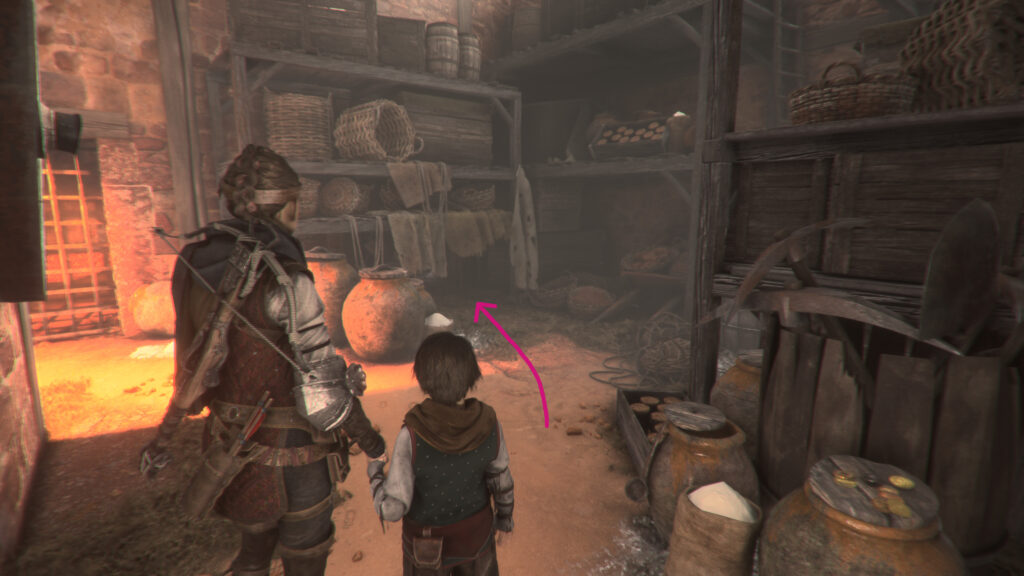
Below is a walkthrough for the collectibles found during Chapter VI: Leaving all Behind in A Plague Tale: Requiem. Make sure to always pick up a knife if you see one so you can open the secret chests!
Hugo’s Collection: Jay
When you reach the flowery meadow at the start of the chapter, you’ll race to a tree with Hugo. Approach the tree and interact with Hugo to receive the feather.
Souvenir: Imagine You’re Flying!
Head to the central area in the camp. Follow the path left just past the campfire then take a left just before the man leaning against a tree.
This will bring you to a trail that you’ll need to follow to the end. Interact with the swing to receive the souvenir.
Secret Chest
Once you’re inside the church/building, look for a shelf with cloth hanging over the edge then crawl under it to find the secret room containing the chest.
Souvenir: Which colour do you want?
Continue through this building from the above chest. You’ll eventually reach a workbench. Climb up the ladder to find a bunch of fabric.
Jump down the ledge then interact with Hugo to trigger an event where he’ll change your bandage. Afterwards, the souvenir will trigger.
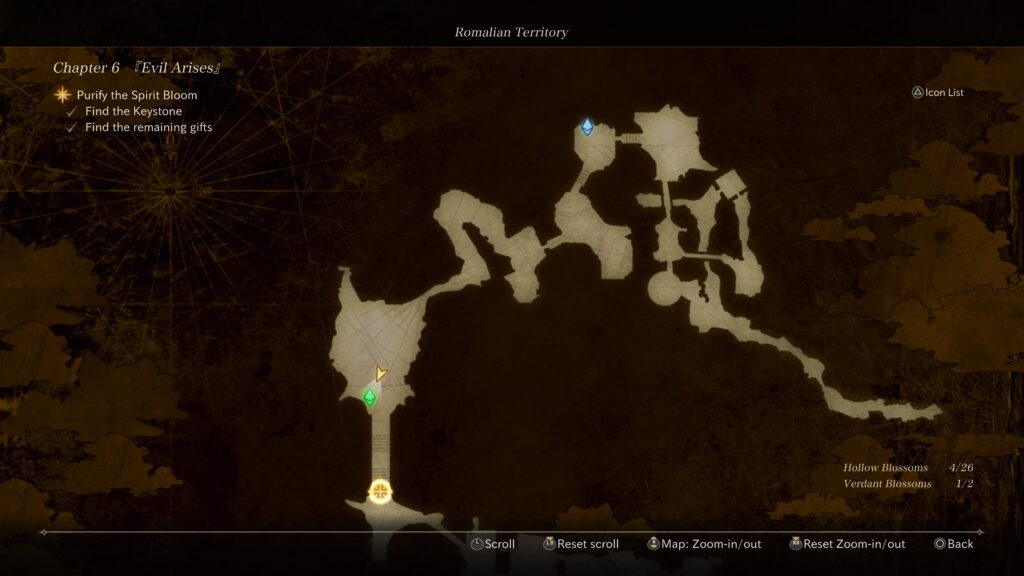
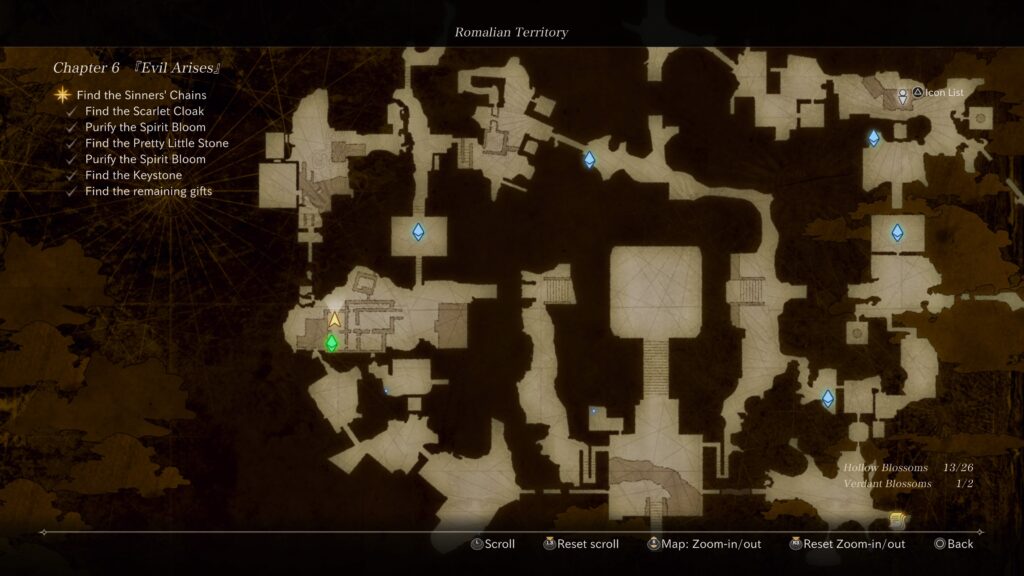
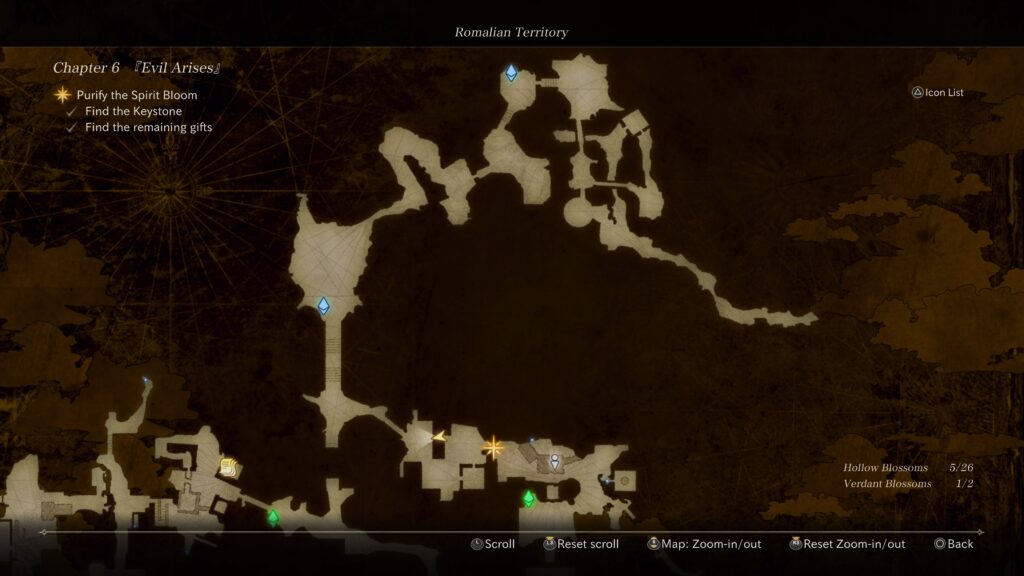
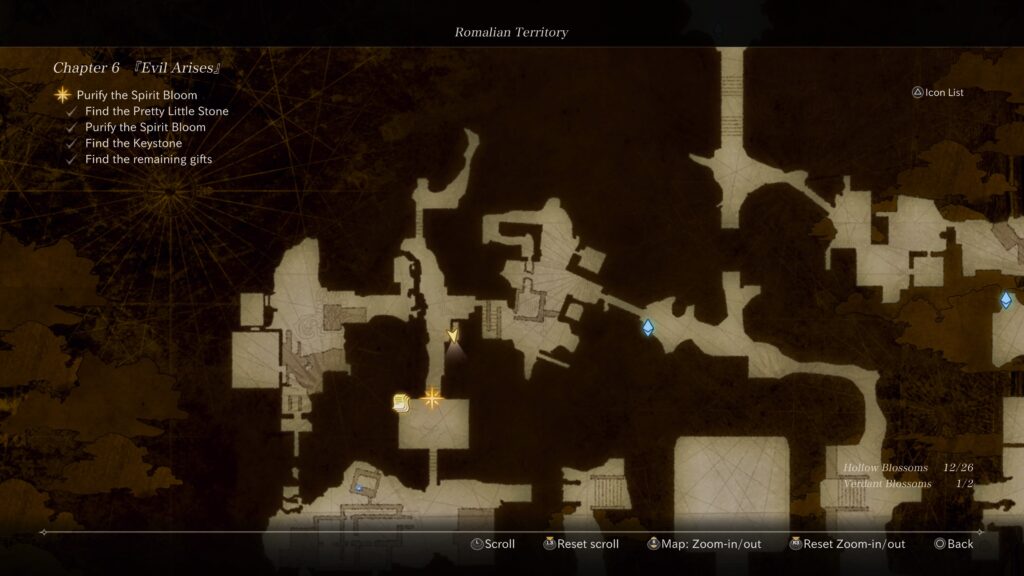
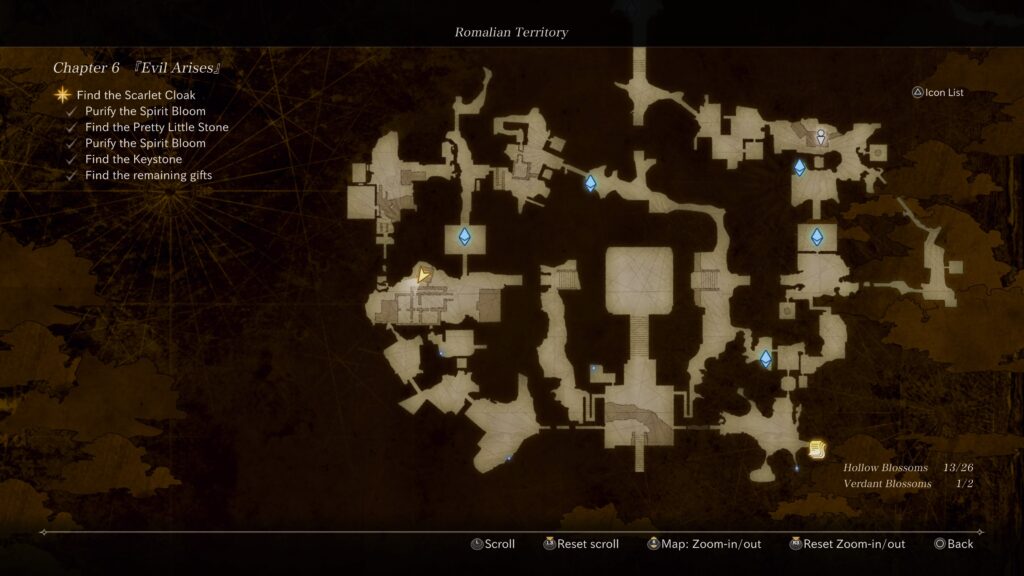
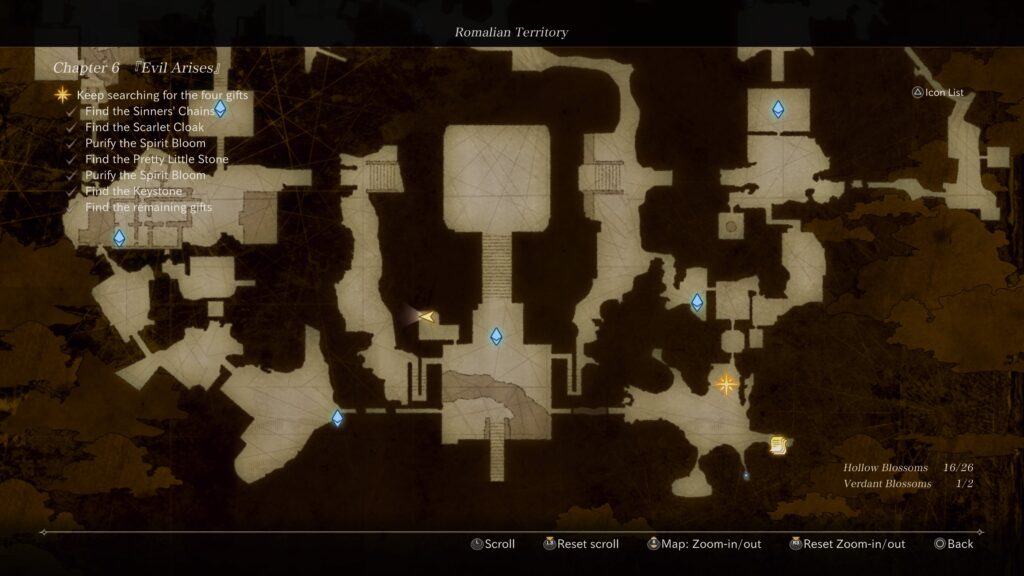
Below is a guide on where to find the relics during Chapter 6: Evil Arises in Valkyrie Elysium.
Find the Keystone
Work your way through this level until you reach a large open area with a dragon enemy just before a large wooden door. Defeat this enemy then loot the item it drops.
Find the Pretty Little Stone
This relic can be found after you clear a Spirit Bloom south of the fourth Storage Camp.
Find the Scarlet Cloak
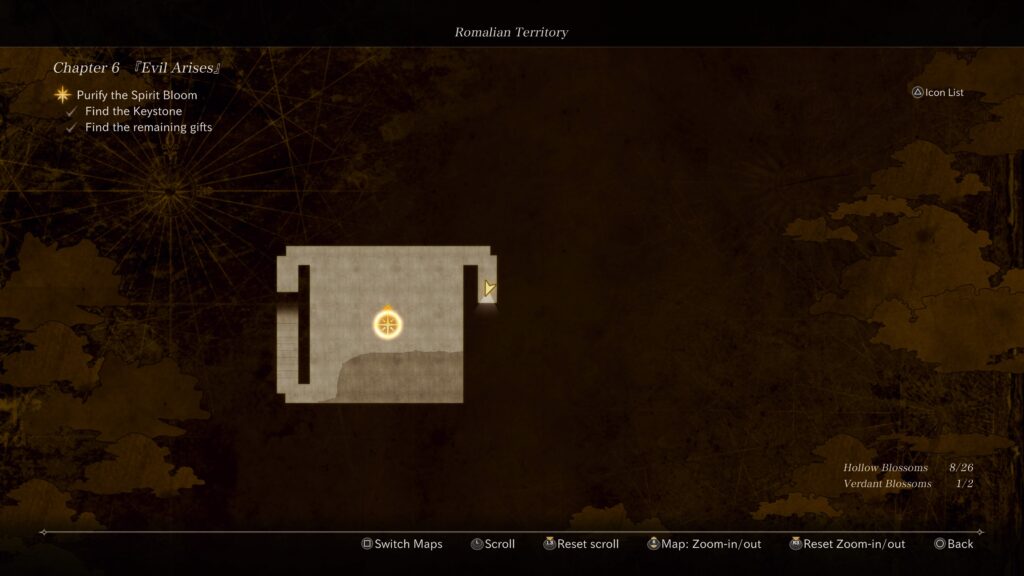
This relic can be found in the prison just past the seventh Storage Camp (Eastern Temple). It will be behind a Spirit Bloom growing in a cell. To unlock this cell, you’ll need the Prison Key, which can be found upstairs in a red chest.
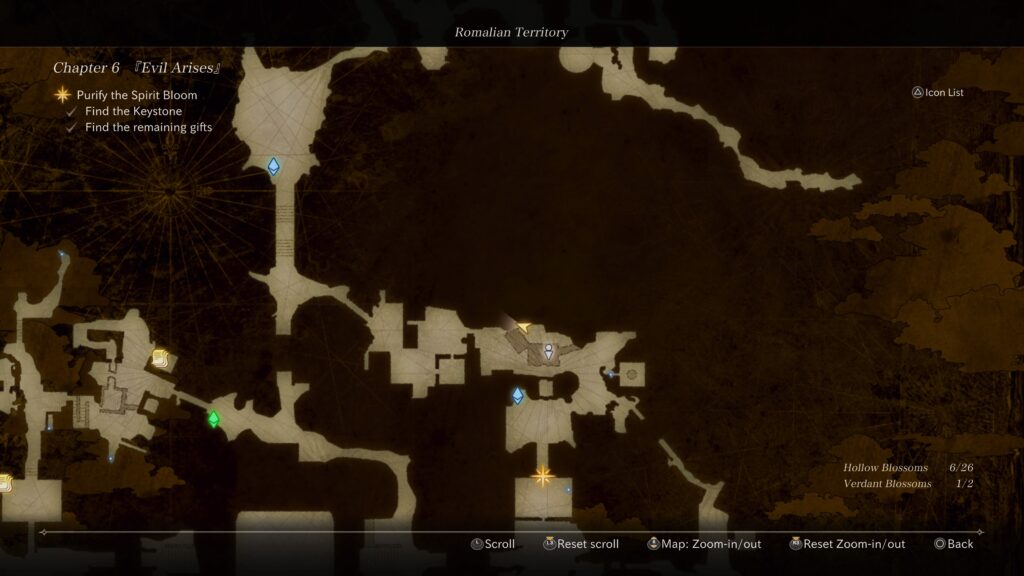
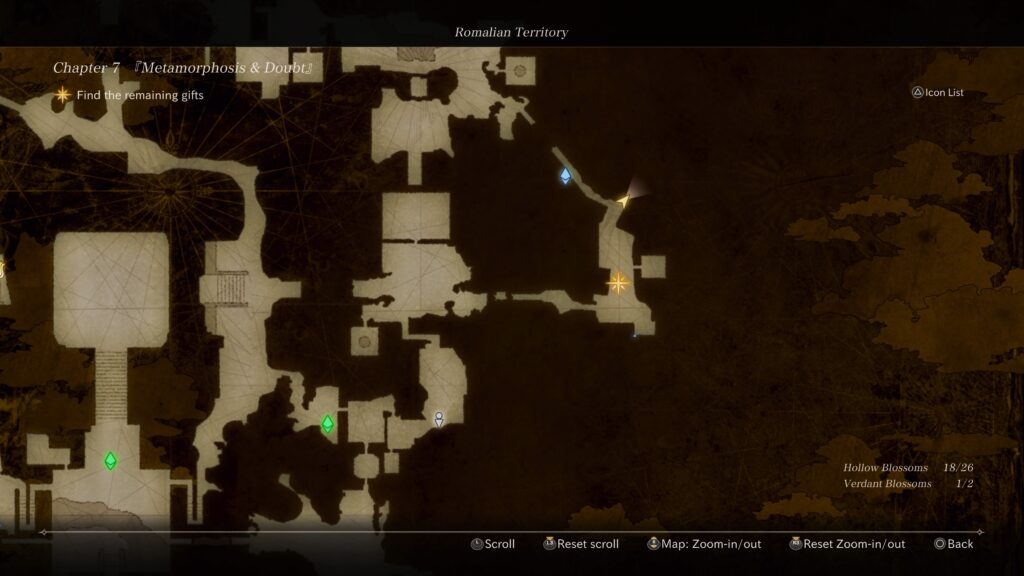
Below is a guide on where to find the hollow and verdant blossoms around the Romalian Territory in Valkyrie Elysium. For the purpose of this guide, all of the blossoms were obtained during the Chapter 6: Evil Arises and Chapter 7: Metamorphosis & Doubt main quests.
Chapter 6: Evil Arises
Servant Einar
From the starting area, head forward. After you fight the second group of enemies, you’ll see a barred door. Instead of going through this door, head west to find this blossom at the end of the path.
Fresh-Faced Teacher
After clearing the Spirit Bloom, you’ll come across two bridges. After jumping over the second broken bridge, the blossom will be to your right.
Verdant Blossom
After clearing the Spirit Bloom, you’ll come across two bridges. After jumping over the second broken bridge, take a right then follow along the wooden fence. Loot the chest in the ruined building to receive the First Belltower Key.
Once you have the key, backtrack between the first and second bridge. There will be a door there that you can unlock using the key.
Head through the doorway then go down the stairs to find the blossom.
Youthful Stone Enthusiast
From the first Storage Camp, head south up the stairs then make your way to the ruined building on the left side to find the blossom behind it.
Impassioned Soldier
This blossom can be found in the large open area with the dragon enemy and first relic. Instead of heading through the large wooden doors, head to the north side to find the blossom in a small pond.
Lamenting Giant
This blossom can be found under a set of wooden stairs after the second Storage Camp. To reach it, you’ll first need to clear the Spirit Bloom to remove the vines.
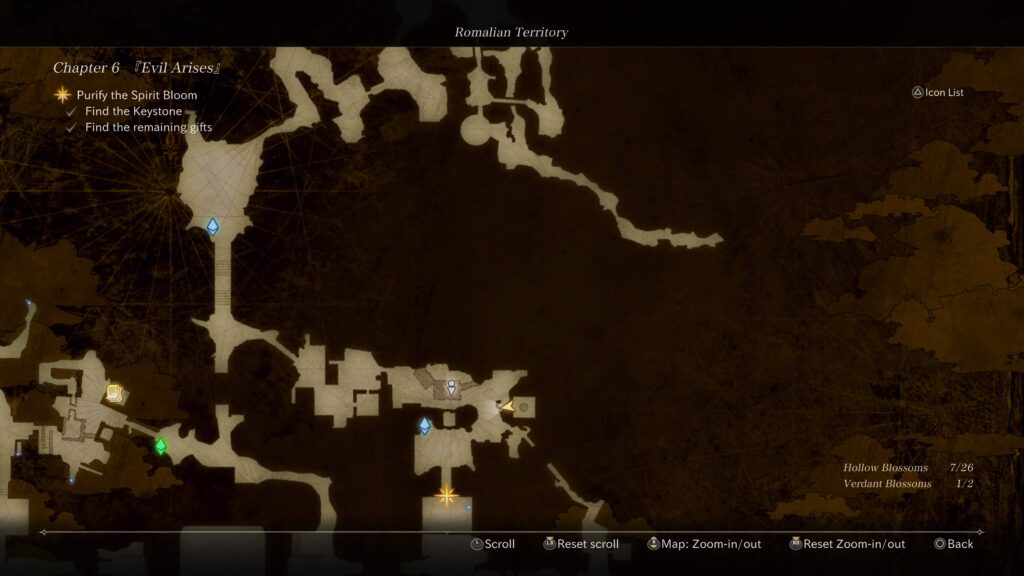
Knowledgeable Elder
From the third Storage Camp, use the Soul Chain to reach the second level of a ruined building. Jump across the street to an adjacent balcony then head through the doorway to find Armand. Go down the stairs then outside to find the blossom.
Lost Mother
From the third Storage Camp, head east to find a house on the hill. The blossom can be found on the roof of this house. You’ll need to use the House Key to open it. This key can be found in a chest next to the above blossom.
Young Lumberjack
Head to the area just past the third Storage Camp, solve the puzzle then defeat the enemies. Head to the small side room and clear away the boxes to find this blossom.
Melancholy Tailor
This blossom can be found north of the fifth Storage Camp at the top of some stairs.
Eldest Daughter of Fate
This blossom can be found west of the sixth Storage Camp (Central Temple Bridge) in the village after jumping off a roof.
Lurking Faerie
This blossom can be found northwest of the sixth Storage Camp.
Jade Bard
This blossom can be found west of the sixth Storage Camp in the building just before the next objective showing the way forward.
Frowning Scholar
This blossom can be found just southwest of the seventh Storage Camp (Eastern Temple).
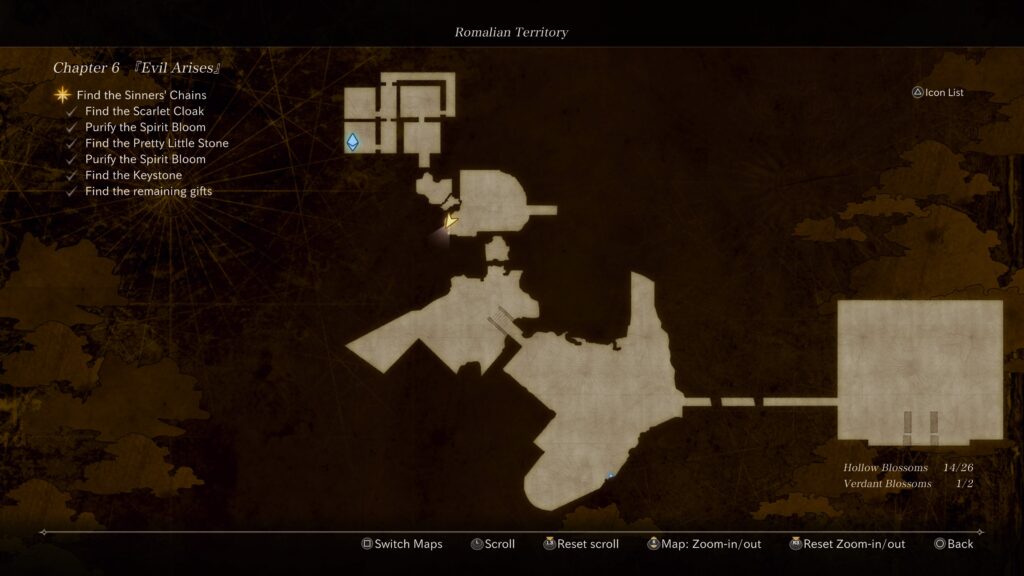
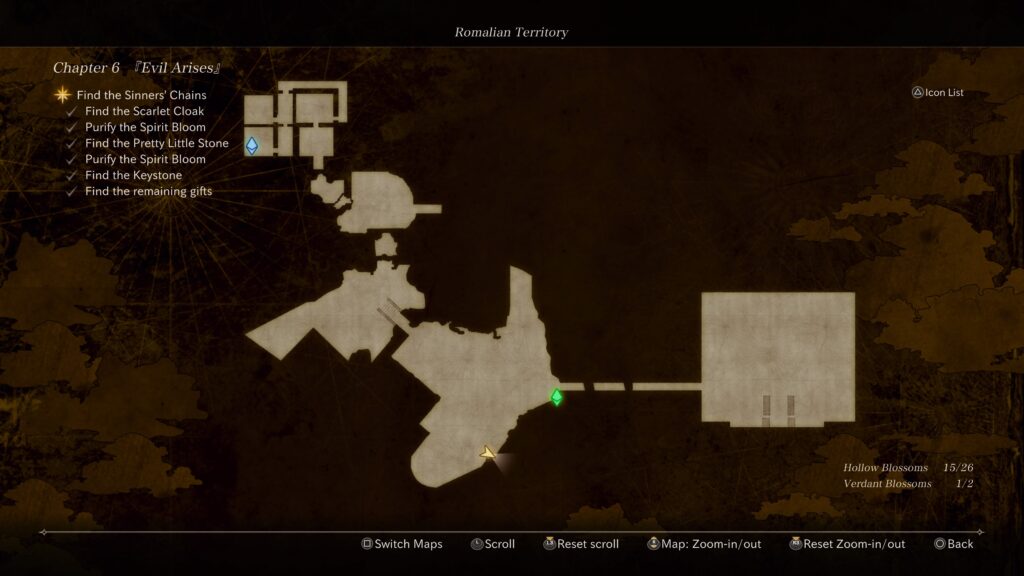
Redheaded God of War
This blossom can be found just outside of the jail.
Gold-Munching Giant
This blossom can be found just south of the nineth Storage Camp (Fallen Bridge).
Highland Elder
This blossom is located next to the nineth Storage Camp (Fallen Bridge) under an overhang.
Merciful Priest
This blossom can be found in the southeastern part of the map just past the nineth Storage Camp.
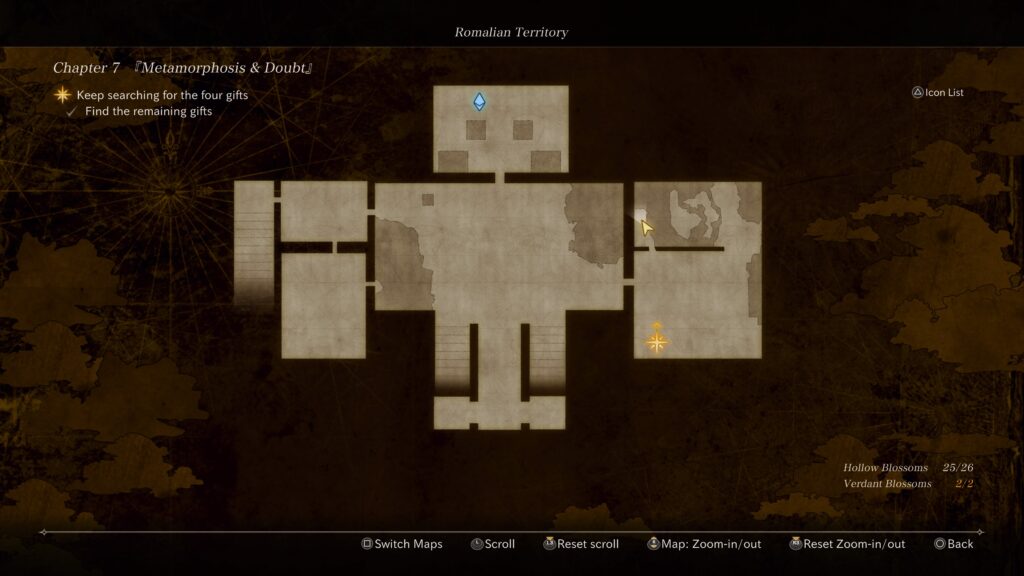
Chapter 7: Metamorphosis & Doubt
Indigo Faerie
This blossom can be found down the path from the first Storage Camp.
Endlessly Running Horse
This blossom can be found south of the first Storage Camp just before a set of stairs.
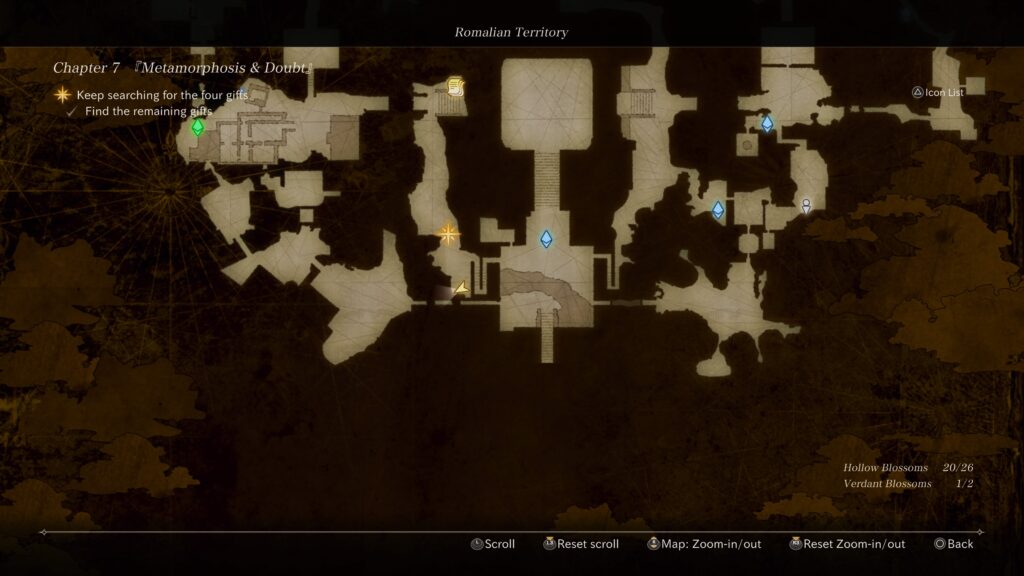
Galdba Grave Keeper
This blossom can be found west of the central Storage Camp just before some brambles (puzzle) you have to burn down.
Daydreaming Spinner
This blossom can be found after the sixth Storage Camp in the doorway of a ruined building on the northwestern side of the map.
Shield-Bearer Battle Maiden
This blossom is located in a ruined house west of the sixth Storage Camp.
Mottled Snake
This blossom can be found east of the seventh Storage Camp.
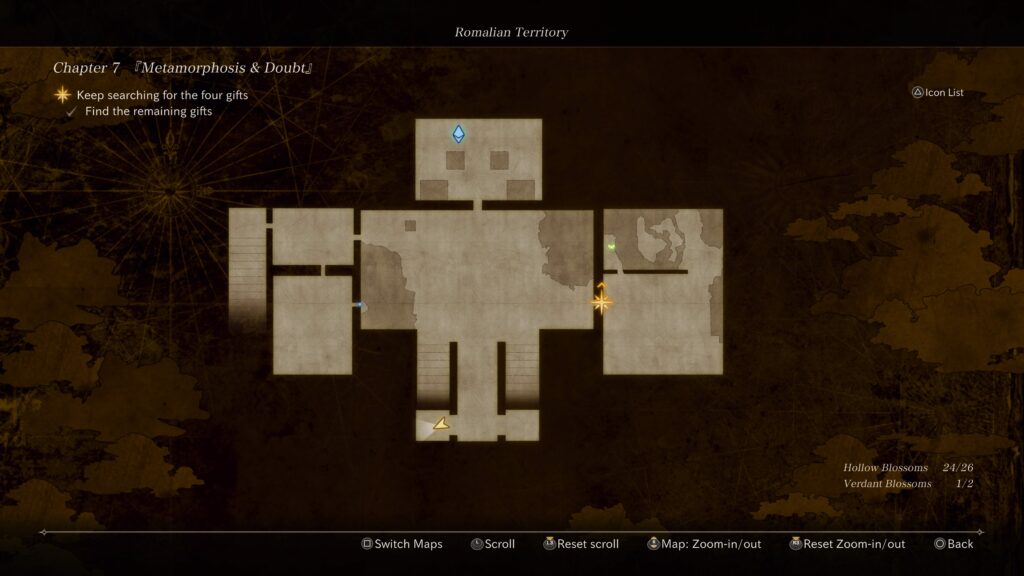
Left-Handed Ferryman
This blossom is located in the palace at the end of the level under the stairs leading up to the second level.
Dancer from Abandoned Village
From the palace entrance, head right going west through the doorway. Keep heading west to reach a flight of stairs heading up. Enter the room at the top of the stairs then drop through the hole in the floor to find the bloom.
Verdant Blossom
This blossom can be found on the eastern side of the palace behind a locked gate. To raise the gate, pull the lever next to the door.
Resident of a Doomed Country
This blossom can be found on the top level of the palace in the western stairwell just before the altar.
Below is a walkthrough for Chapter 6 in Voice of Cards: The Beasts of Burden.
Newterra
Once in Newterra, head east until a cutscene triggers. When asked who’s opinion will you ask, select Pulche. He noticed a village to the northeast and you’ll all agree to head for it. Make your way directly to Silent Village as there are no chests along the way.
Silent Village
Once in the village, investigate the following:
Claw-Marked Ruin
Weapon Shop Ruin
Inn Ruin
Eerie Ruin
Apothecary Ruin
You’ll receive a Supreme Salve!
Sturdy Building
During the cutscene, arrange the three scraps of paper in order to receive the Newterra Map.
The cutscene will immediately lead into a fight. Defeat the creature that has 30 attack, 150 HP and 15 defense. Afterwards, you’ll have to make a choice of fighting through the unknown creatures or the Steelborough soldiers. Make your choice as it doesn’t matter. You’ll be fighting the creatures either way! Interact with the monster card to your right. Instead of fighting the monsters, you’ll be up against the two soldiers. They both have 26 attack, 80 HP and 12 defense. Defeat them then leave the village!
Newterra
Upon leaving the village, you’ll need to consult with your friends about what to do next. Select to ask Pulche. Afterwards, explore the area to find the below! When you’re ready to press forward, head to the northeastern corner of the area to find Monster Town. Upon getting near the town a cutscene will trigger. Choose to flee then select Fairy Dust.
Chests
2000G
East of Silent Village
Ring of Perseverance
Southwestern corner of area
Supreme Salve
Northwestern corner of area
2500G
Northern part of area
Events
Bloodied Doll
Find the owner
Keep it! See event below under the Silent Village section!!
Pretend you never saw it
Monster through telescope (Magemoth)
Attack!
Sneak up on it
Monster runs off
Ignore it
Roving Market
Speak with the Wandering Merchant! He will want an Ice Tortoise with 3 stars or above. The Ice Tortoise can be found in Snowfield and Newterra. As a reward, you’ll receive an Omnipanacea and the Seasoned Monster Tamer Certificate! This will pop the Seasoned Tamer trophy!
Speak with the Wandering Merchant again. This time he will want a Tailtoad with at least 3 stars. Tailtoads can be found in Endwall. As a reward, you’ll receive a Cursestay Ring and the Expert Monster Tamer Certificate! This will pop the Expert Tamer trophy!
Speak with the Wandering Merchant yet again. This time he will want a Magemoth with at least 3 stars. Magemoths can be found in Newterra. As a reward, you’ll receive a Supreme Inspirilixir and the Master Monster Tamer Certificate! This will pop the Master Tamer trophy!
For his last, most difficult request, speak with the Wandering Merchant to learn that he wants you to bring him a Seastone of any star ranking, which can be found in the Underground Passage.
As you do not have access to this creature yet, you’ll have to wait on this request. You can also visit the shops here to find the following:
Armorer
Steel Blades
Mercenary’s Blades
Hawksblade
Mercenary’s Sword
Mistralblade
Magic Staff
Thunderstaff
Sage’s Staff
Tamer’s Whip
Femme Fatale’s Whip
Knight’s Armor
Frostmail
Steel Breastplate
Knight’s Chainmail
Warrior’s Mail
Adventurer’s Attire
Martialist’s Garb
Firestay Ring
Waterstay Ring
Lightningstay Ring
Windstay Ring
Lightstay Ring
Darkstay Ring
Poisonstay Ring
Numbstay Ring
Freezestay Ring
Bindstay Ring
Cursestay Ring
Ring of Life
Ring of Compassion
Item Shop
Salve
Quality Salve
Omnisalve
Quality Omnisalve
Antidote
Curative
Defroster
Unsealer
Dispeller
Pepper-Upper
Serum
Panacea
Inspirilixir
Bomb
Invigorant
Protectorant
Soothstone
Oil Pot
Corrosive
Destruct-o-Box
Zapsmoke
Smoke Bomb
Bellwether
Bill of Good Fortune
Pet Shop
Slime
Iron Tortoise
Lesser Troll
Orc Child
Centaur
Wererat
Ogre
Red Fungo
Skull Soldier
Dryad
Voltwasp
Gargoyle
Venomslime
Magma Tortoise
Salamander
Death Crawler
Ice Tortoise
Snowy Treant
Lost Soul
Ghost
Devilwasp
Orc Wildling
Wyvern
Darktoad
Undine
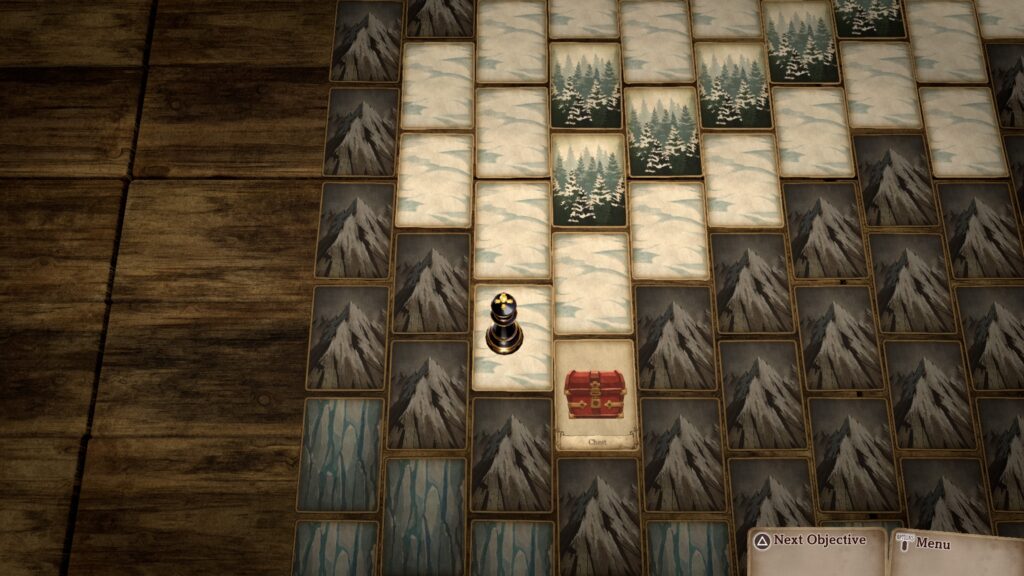
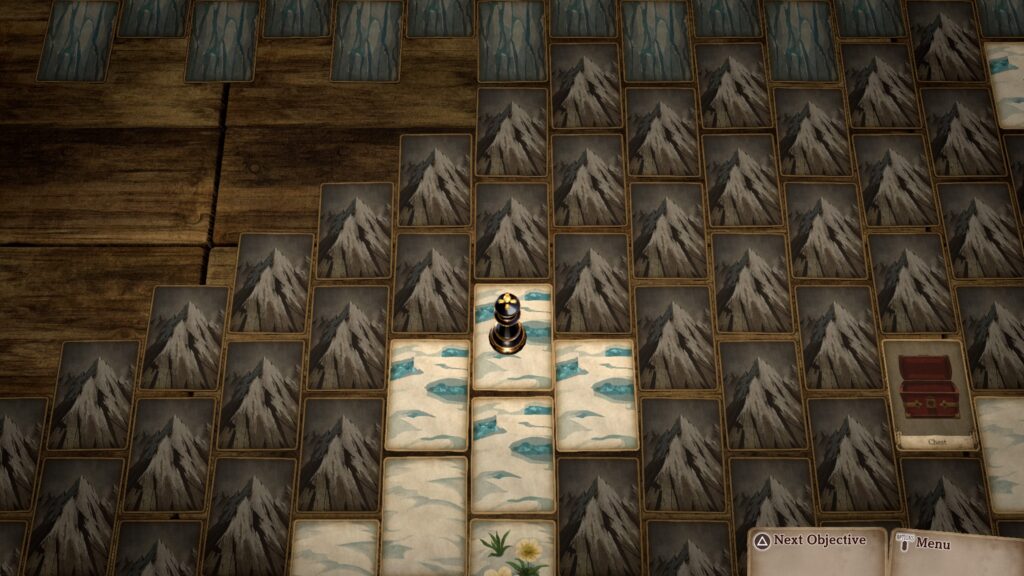
Snowfield
While you’re out exploring for the Wandering Merchant’s event monsters, make your way to Snowfield. In Chapter 5, you should have received a treasure map in Endwall. Click here for the Chapter 5 walkthrough on where to find it! Make your way to the icy cards north of the flower card to find a chest containing the Stardust Raiment!
Monster Town
After entering the town, you’ll be given the opportunity to explore it to find the below! For story progression, interact with the Pet Shop. You’ll then be tasked with finding a plate in the Silent Village.
Characters
Wolf Villager
We chose to throw a Bill of Fortune and were given a Supreme Inspirilixir.
Mayor’s Residence
You’ll receive a Thunderstaff!
Shops
Armorer
Hawksblade
Evilsbane
Sage’s Staff
Dragontwist Whip
Darkmail
Warrior’s Mail
Spangle Dancewear
Firestay Ring
Waterstay Ring
Lightningstay Ring
Windstay Ring
Lightstay Ring
Darkstay Ring
Poisonstay Ring
Numbstay Ring
Freezestay Ring
Bindstay Ring
Cursestay Ring
Ring of Life
Ring of Compassion
Ring of Evasion
Gemstone Ring
Item Shop
Salve
Quality Salve
Supreme Salve
Omnisalve
Quality Omnisalve
Antidote
Curative
Defroster
Unsealer
Dispeller
Pepper-Upper
Serum
Panacea
Omnipanacea
Inspirilixir
Bomb
Invigorant
Protectorant
Soothstone
Oil Pot
Corrosive
Destruct-o-Box
Zapsmoke
Smoke Bomb
Bellwether
Bill of Good Fortune
Bill of Godly Fortune
Silent Village
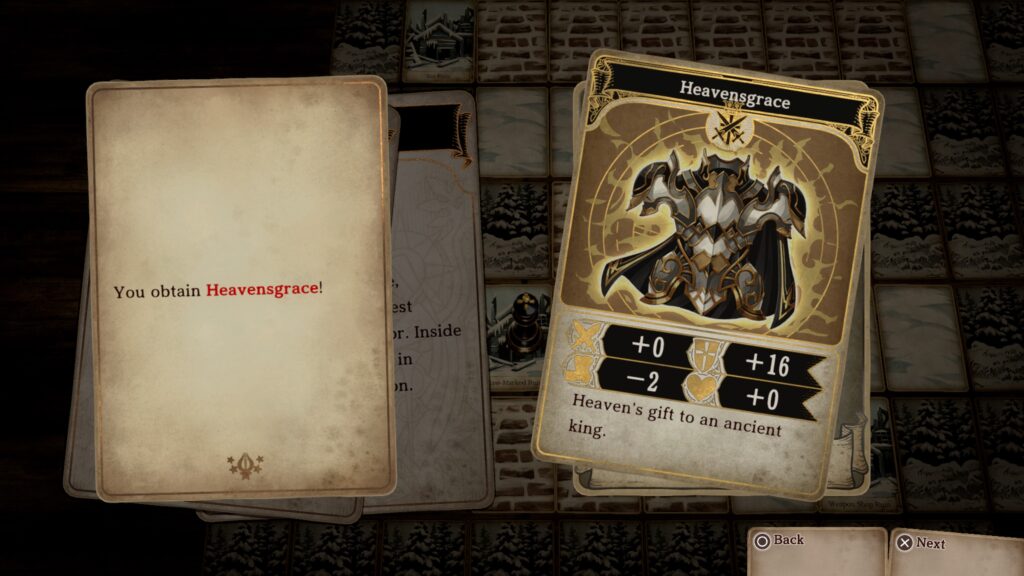
Return to Silent Village. Interact with the Claw Marked Ruin to trigger an event with the Bloodied Doll (if you previously picked it up!). You’ll receive the Heavensgrace! You’ll also receive the Smeared in Blood trophy!
To find the plate, interact with the Sturdy Building. Once you’ve gotten the Wooden Plate, exit this town and return to Monster Town.
Monster Town
Once in Monster Town, hand the plate over to the Pet Shop owner. If you have finished exploring the town, select “Save the Humans!” to trigger a fight against the monster. Defeat it then defeat all the monsters in town! Once everyone has been defeated, a boss fight will trigger! This monster has 42 attack, 280 HP and 25 defense. Defeat it to get your revenge!
Afterwards, we chose to listen to what the mayor said first instead of just killing him. He gave us the Mayor’s Residence Key. You’ll then have to decide whether or not to kill him. Since he wished to die to join his friend, we granted him that request and he thanked us. If you don’t, he seems sad to be alive and mumbles that he guesses his friend will just have to wait a little longer. Either way it does not impact the completion of Chapter 6. When you’re ready, enter the Mayor’s Residence to finish the chapter!
Below is a walkthrough for the Solomon Chapter 6 quest in Eastward.
See What’s Going On
Head towards the crowd on the train car to trigger a dialog event.
Find Your Weapons
Work your way to the Storage Car avoiding the enemies along the way. You can also get a gear part and advanced gear part from chests along the way. When you reach the Storage Car a dialog event triggers ending with you getting your weapons back and acquiring the Cog Shooter.
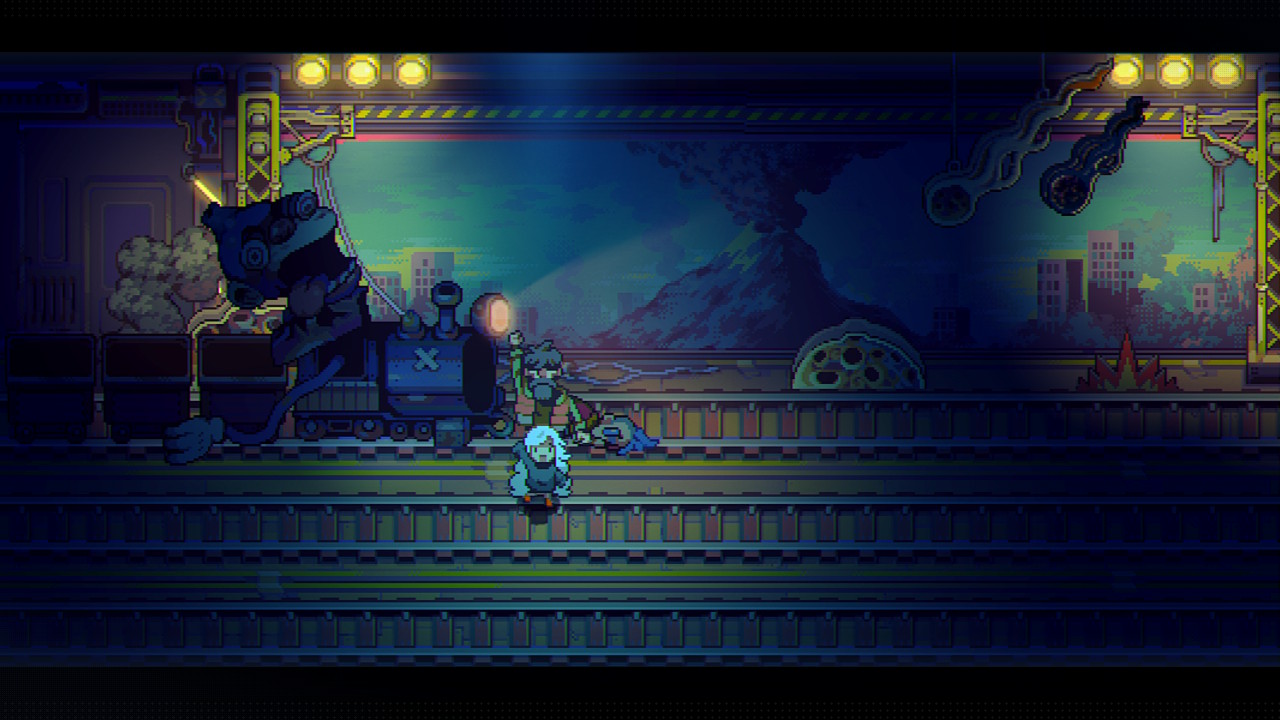
Take Down Solomon
Head east down the train using your new Cog Shooter. When you reach the third to last floor in the Human Factory, there will be a chest with a Heart Orb there. In the second to last car, you’ll get locked in and have to defeat two giant miasma monsters. Enter the last train car will trigger a dialog event then move to the next area to reach Solomon’s Chateau. Save up and make any dishes you want. When you’re ready head east to find Solomon. For this fight, Solomon will be driving a train. It will drive by on one of three tracks. After a couple of passes, it will stop allowing you to damage it (while also shooting bombs at you). After dealing enough damage, Solomon will be ejected from the train allowing you to damage him before going back in. You’ll have to do this three times to beat him. After the first time, he will have monkeys on the train that drop banana bombs and attack you. After the second time, the track the train comes on will be covered in flames. When you defeat him, a dialog event triggers and you’ll receive Solomon’s Key (Strenght).
Find the Rocket
Exit the room and head left (west) to reach the theater. Speak with old Solomon wearing red and blue glasses then head for Solomon’s Chateau to the far right side of the train. When you find Daniel speak with him to trigger a dialog event. When prompted chose the answers below.
Below is a walkthrough for the Monkollywood Chapter 6 quest in Eastward.
Explore the Area
Exit the train to arrive in the Theater and speak to Monkey Mother. Head to the next car (Dressing Room 1) then enter the first room on the left. Speak with Producer Padrino to receive a Monkollywood Contract. Check out the other rooms on the train car, then speak with Spazio blocking the stairs towards the end of the train car to head up. After the dialog event, head to the left side of the train car to find a chest with 3 tokens. Approach the set to trigger a dialog event with Favoloso leading to a min-game. You’ll need to break as many bottles as you can by hitting the ball at them. When it’s over another dialog event triggers.
Act in the Movie
Head down to the 1st floor of the Dressing Room then go to the Storage car to the east. Keep heading east until you trigger another cutscene ending with you getting a Prop Gun. You’ll then be tasked with filming a couple of movie scenes where John blasts things with his new gun.
Find the Rocket
Follow the train east to reach the next train car then speak with Spazio.
Get Some Rest
Head back to Dressing Room 1 and enter the first room on the far left then speak with Producer Padrino. Choose to take a rest to end the quest.
Below is a walkthrough for the Eastward Bound Chapter 6 quest in Eastward.
Find a way to Ester City
Head into Alva’s Lab for a short dialog event with Sonic Punk. When it concludes speak with the bot again and exhaust all dialog options to learn that the only route east is by the Main Rail. Next head to Tayama’s in Midtown for a dialog event then head to the backroom for another with William. You can also head to Dragon Market for another dialog event then head down to the dock and speak with Mung for yet another one. Do whatever cleanup around town you want then speak with William to leave for a dialog event. When you regain control of John, head to the train platform and speak with William for a long dialog event.
This site uses cookies. By continuing to use this website, you are giving consent to cookies being used. For more information on cookies, view our Privacy Policy.OkPrivacy Policy