Location: Sapphire’s Run
Obtained: Speak with Psycho Krieg
Scratch Krieg
Go ahead and give him a good scratch 7 times.

Location: Sapphire’s Run
Obtained: Speak with Psycho Krieg
Scratch Krieg
Go ahead and give him a good scratch 7 times.
Location: Sapphire’s Run
Obtained: Speak with Psycho Krieg
Find parade harpoon
Head west to the floating rock with a withered tree on the top of it to find the harpoon in the skeleton of a fish.
Give parade harpoon
Head back to Psycho Krieg and hand over the harpoon.

Location: The Psychoscape
Obtained: Interact with the glowing orange orb near the Castle Crimson Map Transition (after completing Castle Crimson)
Find distorted thought
Travel through the portal to Castle Crimson.
Speak to P.A.T.
Fast travel to the Castle Crimson – The Walls Fast Travel Station and make your way to the objective just past the room with all the staircases heading every which way. Speak with the legged gun.
Get AP rounds
Head into the next room and defeat the Bullet Riders to collect the ammo.
Return to P.A.T.
Travel back to P.A.T. and speak with it.
Feed P.A.T.
Place the ammo on the ground near P.A.T. You will need to do this 3 times.
Follow P.A.T.
Follow behind the gun.
Clear out enemies
Defeat all the enemies in the room that it uncovered.
Escort P.A.T. to its nest
Follow P.A.T. a short way forward.
Find thief
Head towards the objective in the large room.
Kill thief
Defeat General Blisterpus.
Get P.A.T.’s father’s schematic
Pick up the loot dropped by General Blisterpus.
Return to P.A.T. with schematic
Head back to P.A.T.
Hang schematic
Put the schematic on the wall where indicated.
Crouch on egg
Literally crouch on the egg for 10 seconds until it hatches.
Pick up P.A.T.’s baby
Go ahead and pick it up to complete the quest.

Location: Castle Crimson
Obtained: Interact with Sane Krieg
Reach buzz-axe
Take buzz-axe from Sane Krieg.
Lay buzz-axe to rest
Place the buzz-axe into the hole.
Give eulogy for buzz-axe
This will automatically start.
Do something
Shoot the buzz-axe.
Listen to Krieg’s eulogy
Just sit back and listen!
Bury buzz-axe
Interact with the dirt to shovel the dirt.
Location: Castle Crimson
Obtained: Interact with Sane Krieg
Stay
Do as the objective says!
Slap some sense into Krieg
Melee him to complete the quest.

Below is a guide on the Gehenna’s Most Wanted Crew Challenge in Borderlands 3 Bounty of Blood DLC!!
Ipswitch Dunne
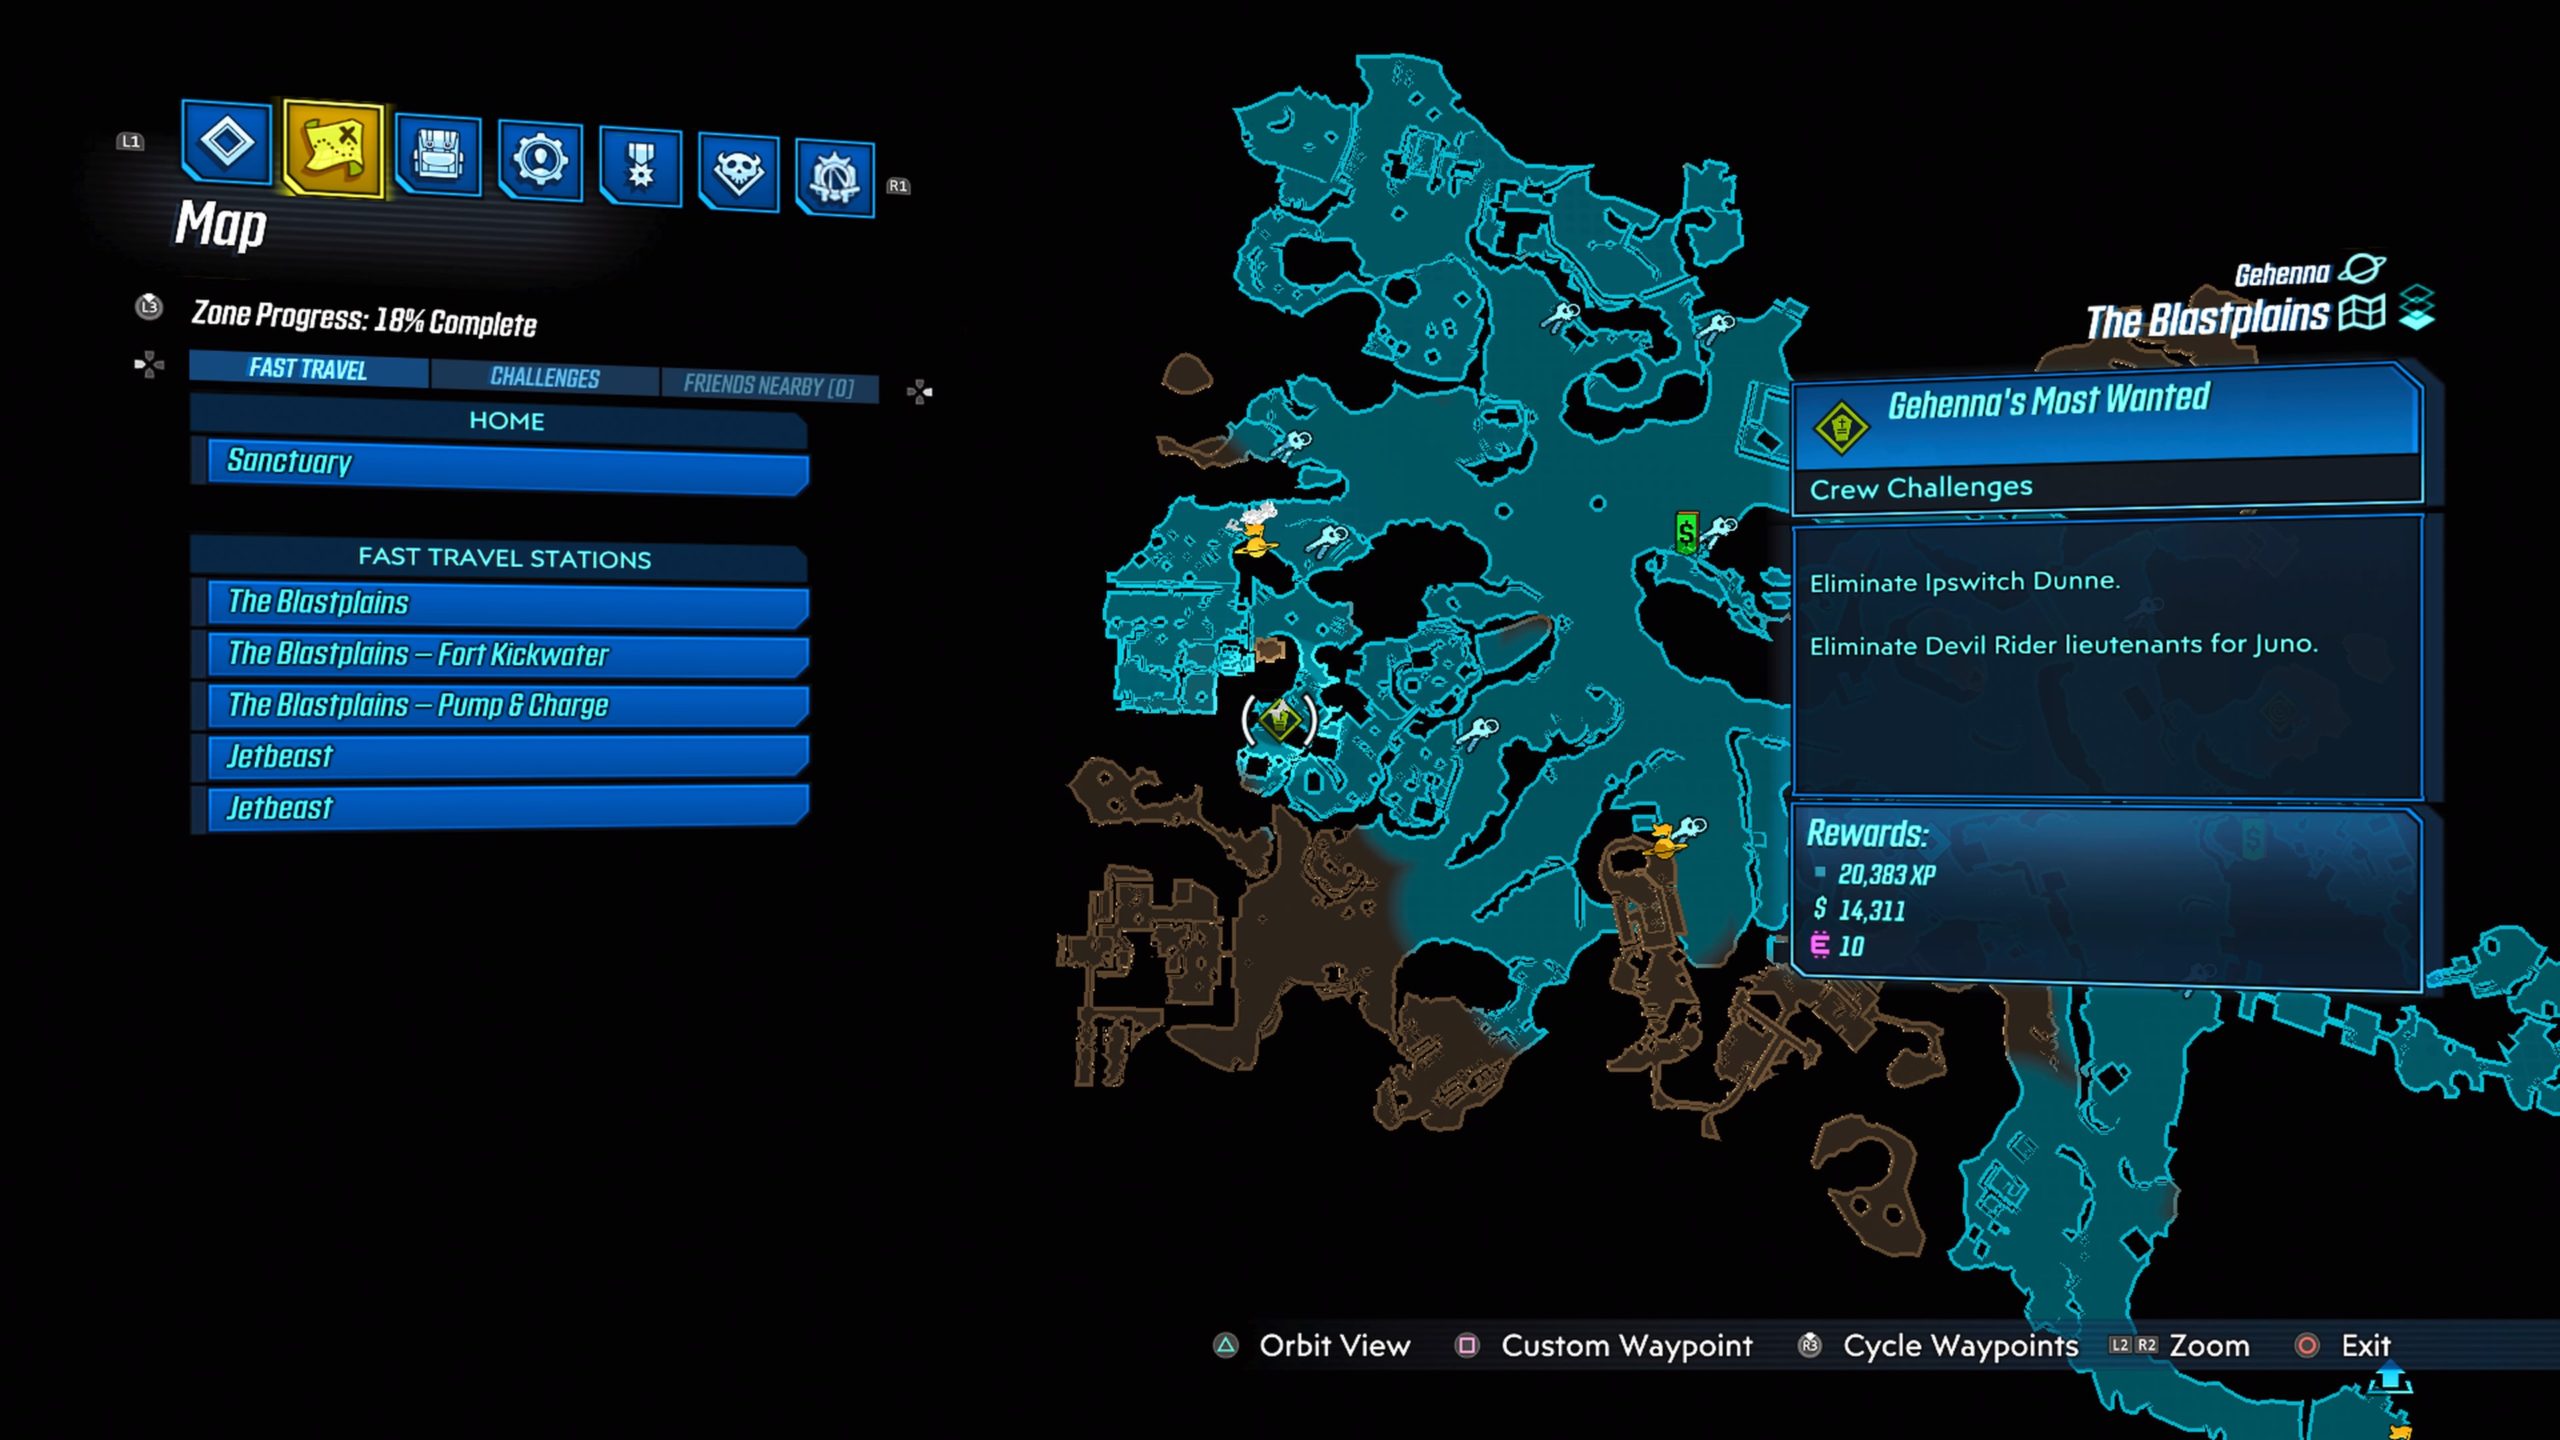
The Ipswitch Dunne can be found in Fort Kickwater.
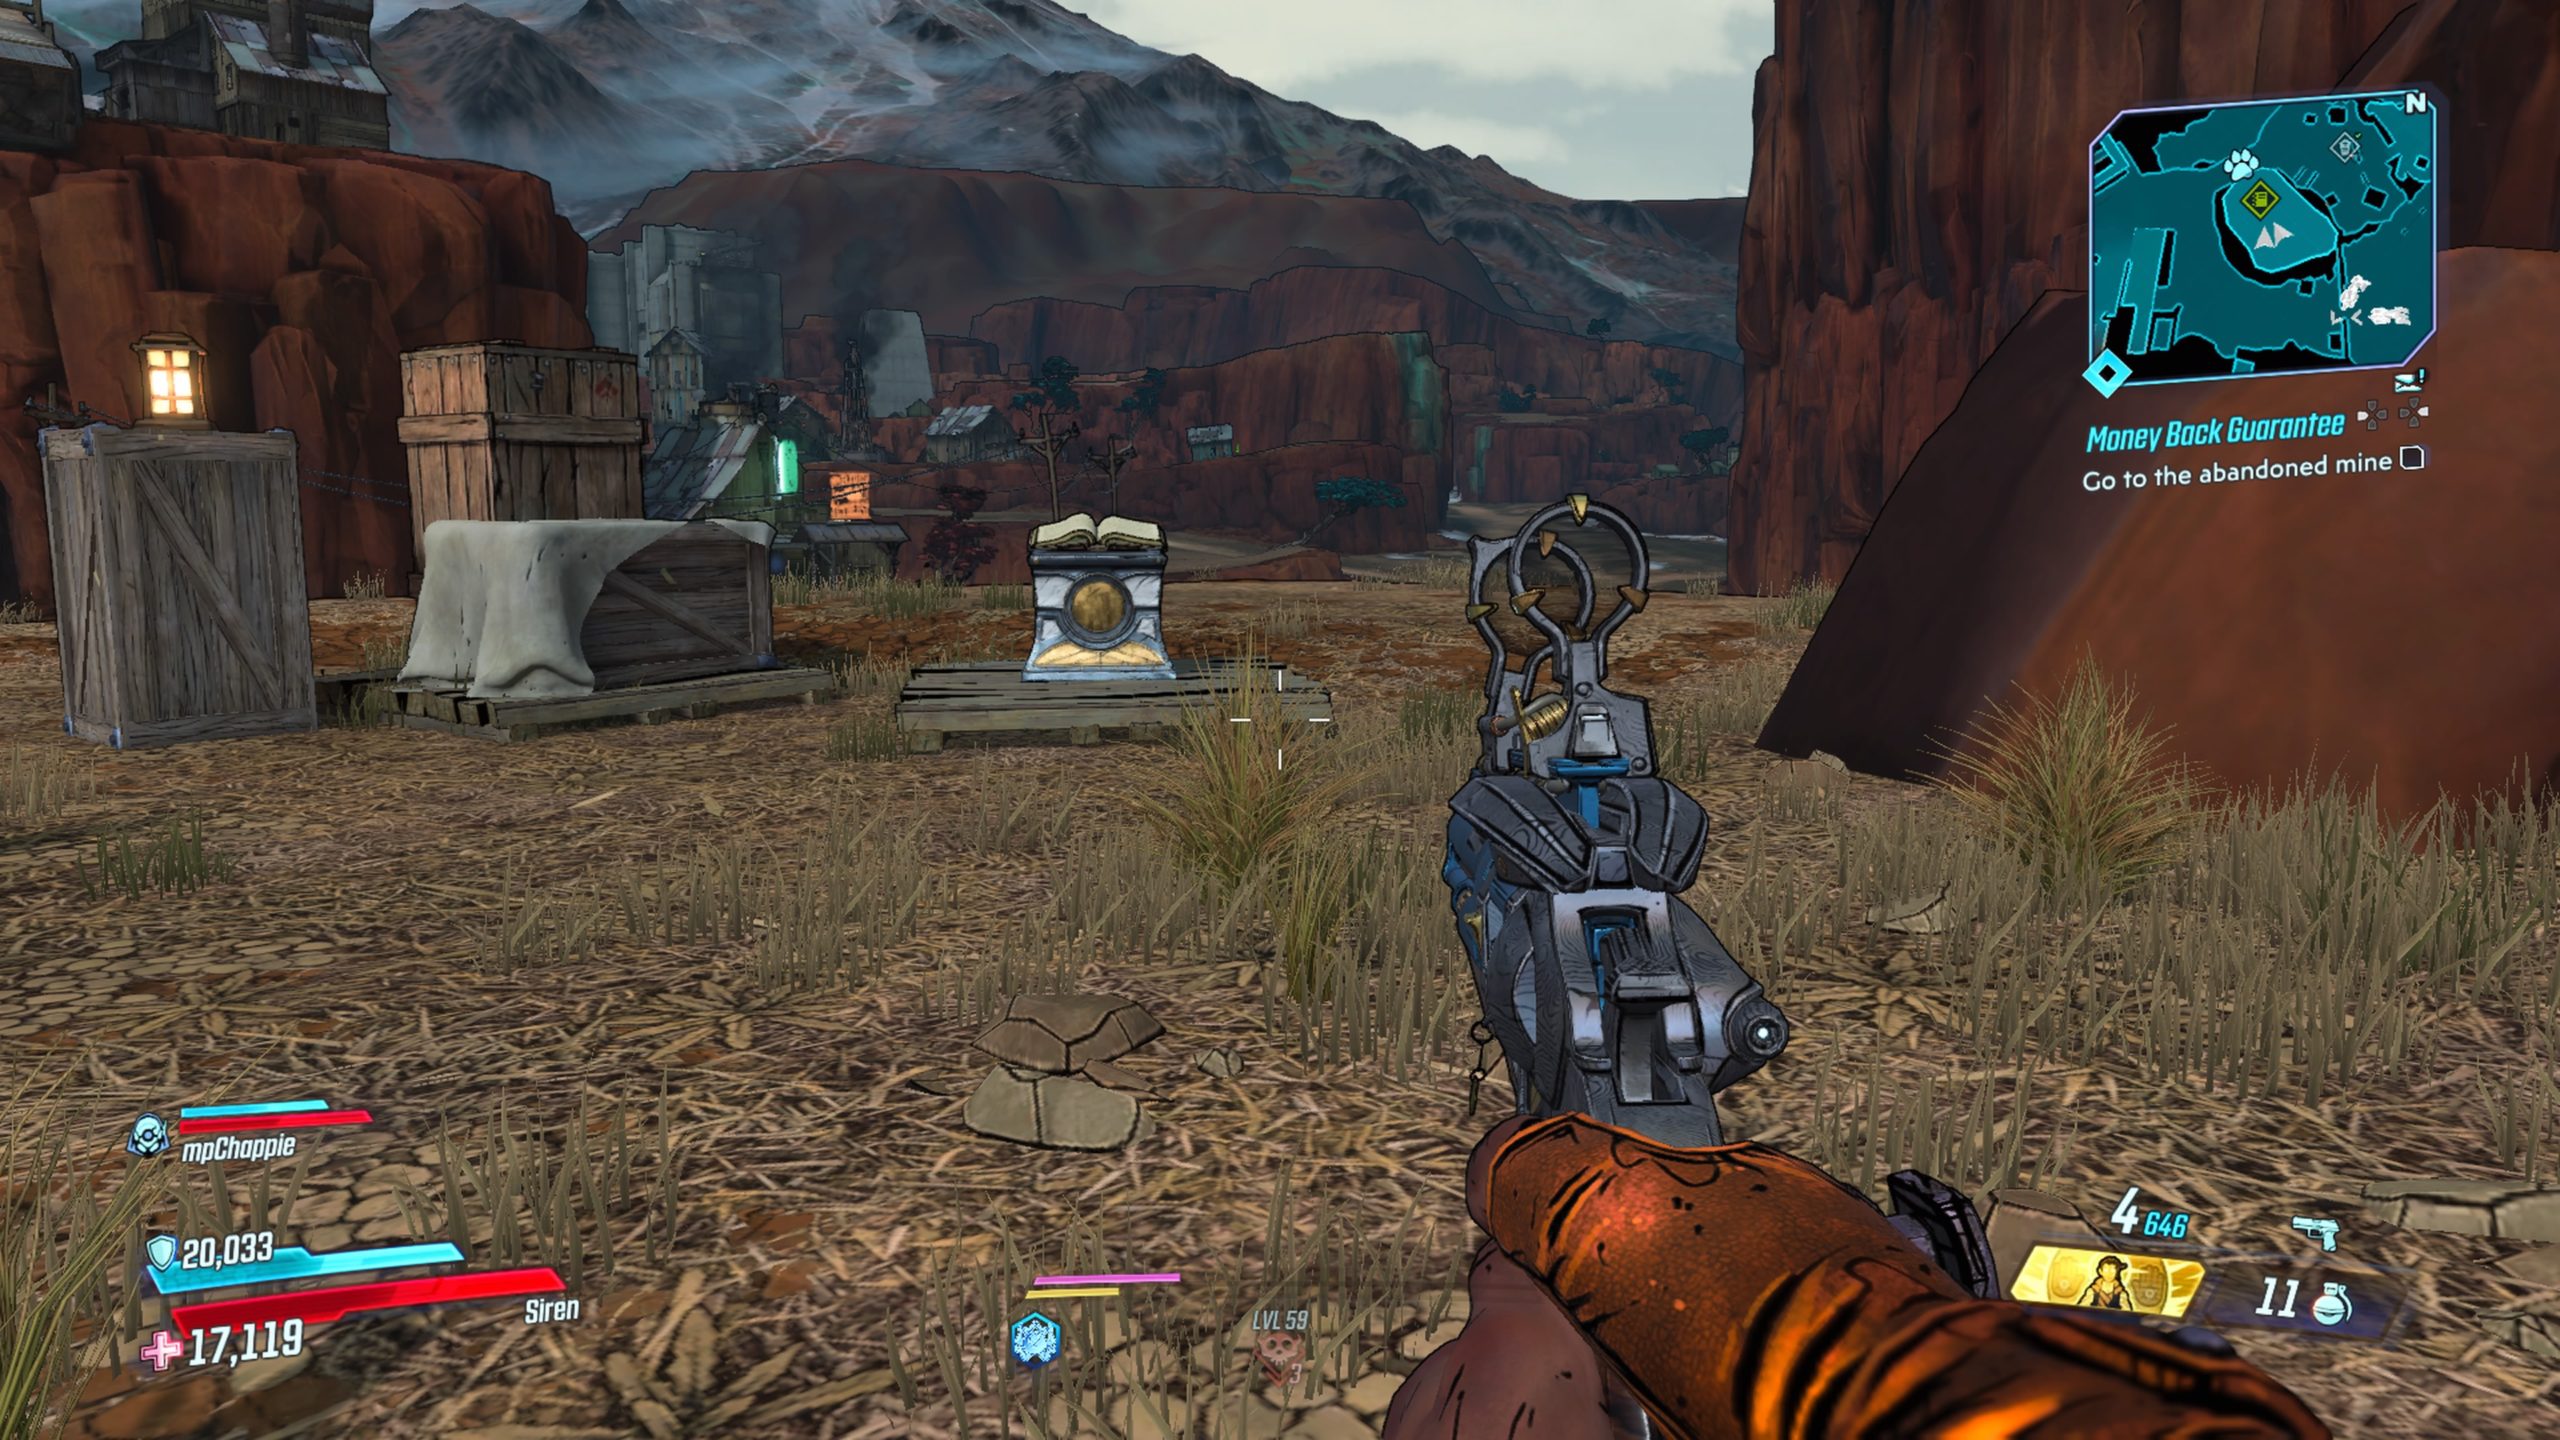
Wrendon Esk

Wrendon Esk can be found at Amplecore Veins during the Money Back Guarantee side quest.
Bronsons
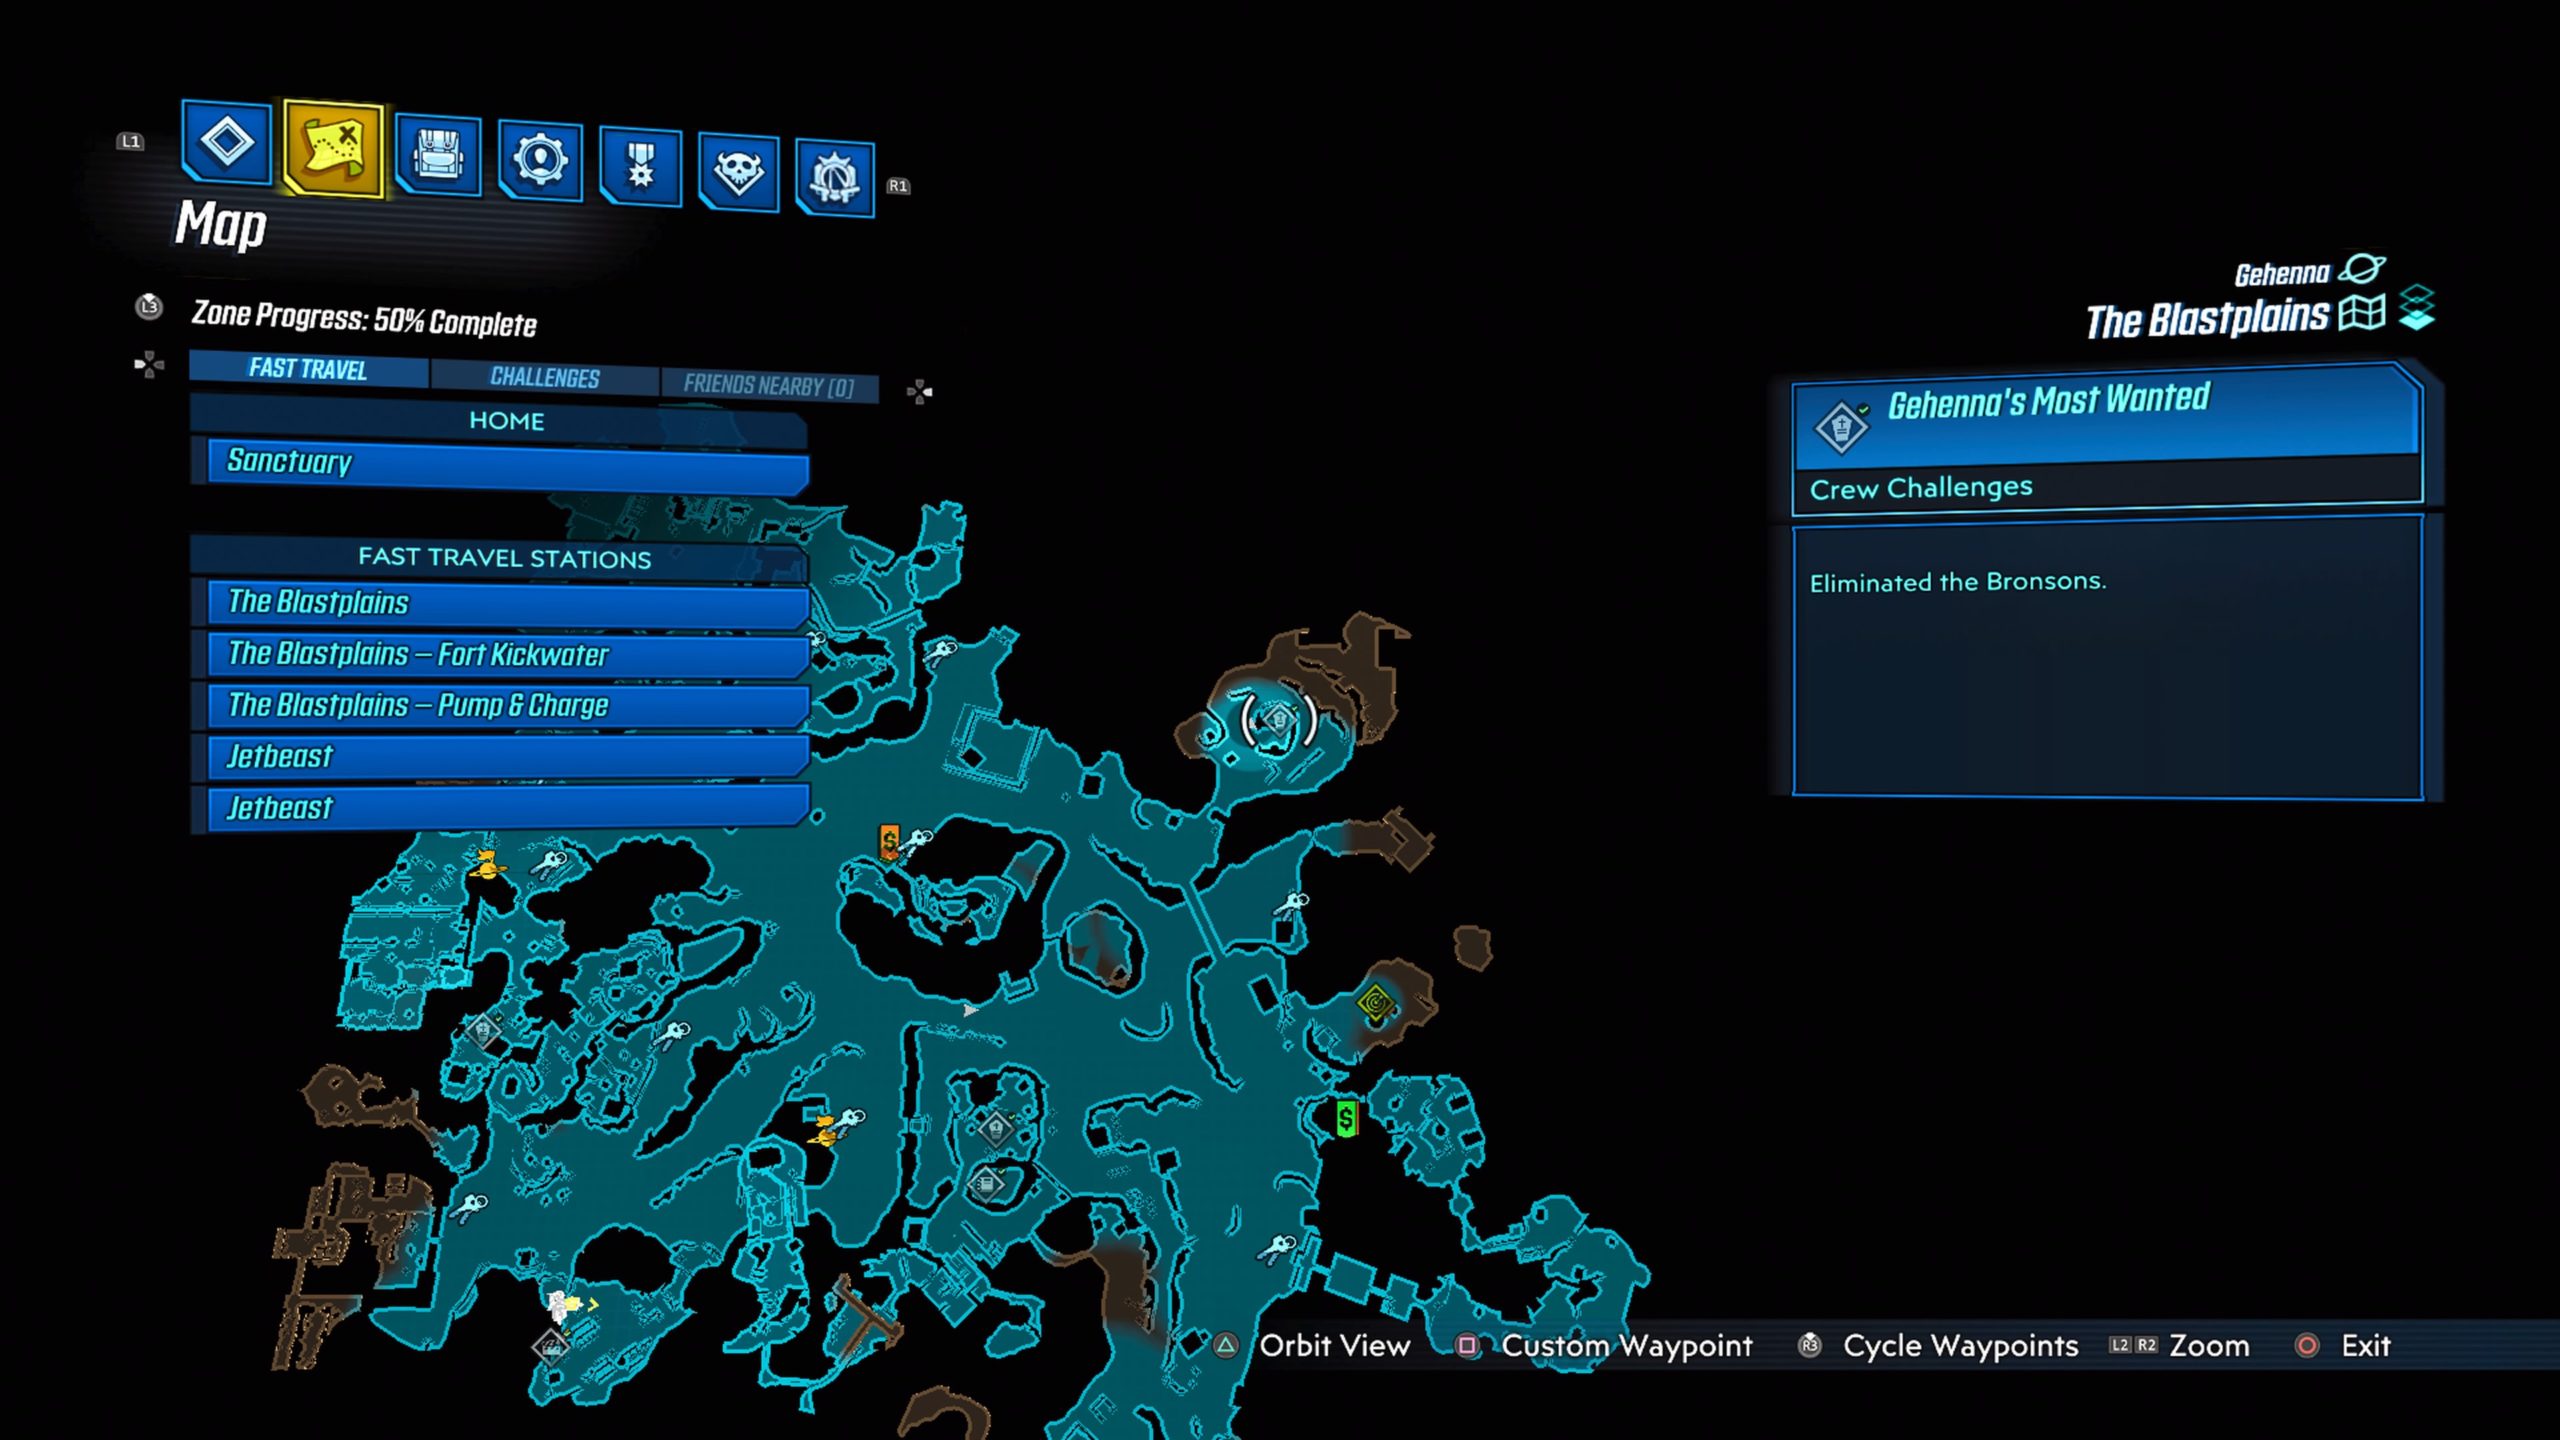
Kender and Adelai Bronson can be found in the northeastern part of the Blastplains.
Lani Dixon

Lani Dixon can be found in central Ashfall Peaks.
Garriden Loch

Garriden Loch can be found in Pilfertown.
Haddon Marr
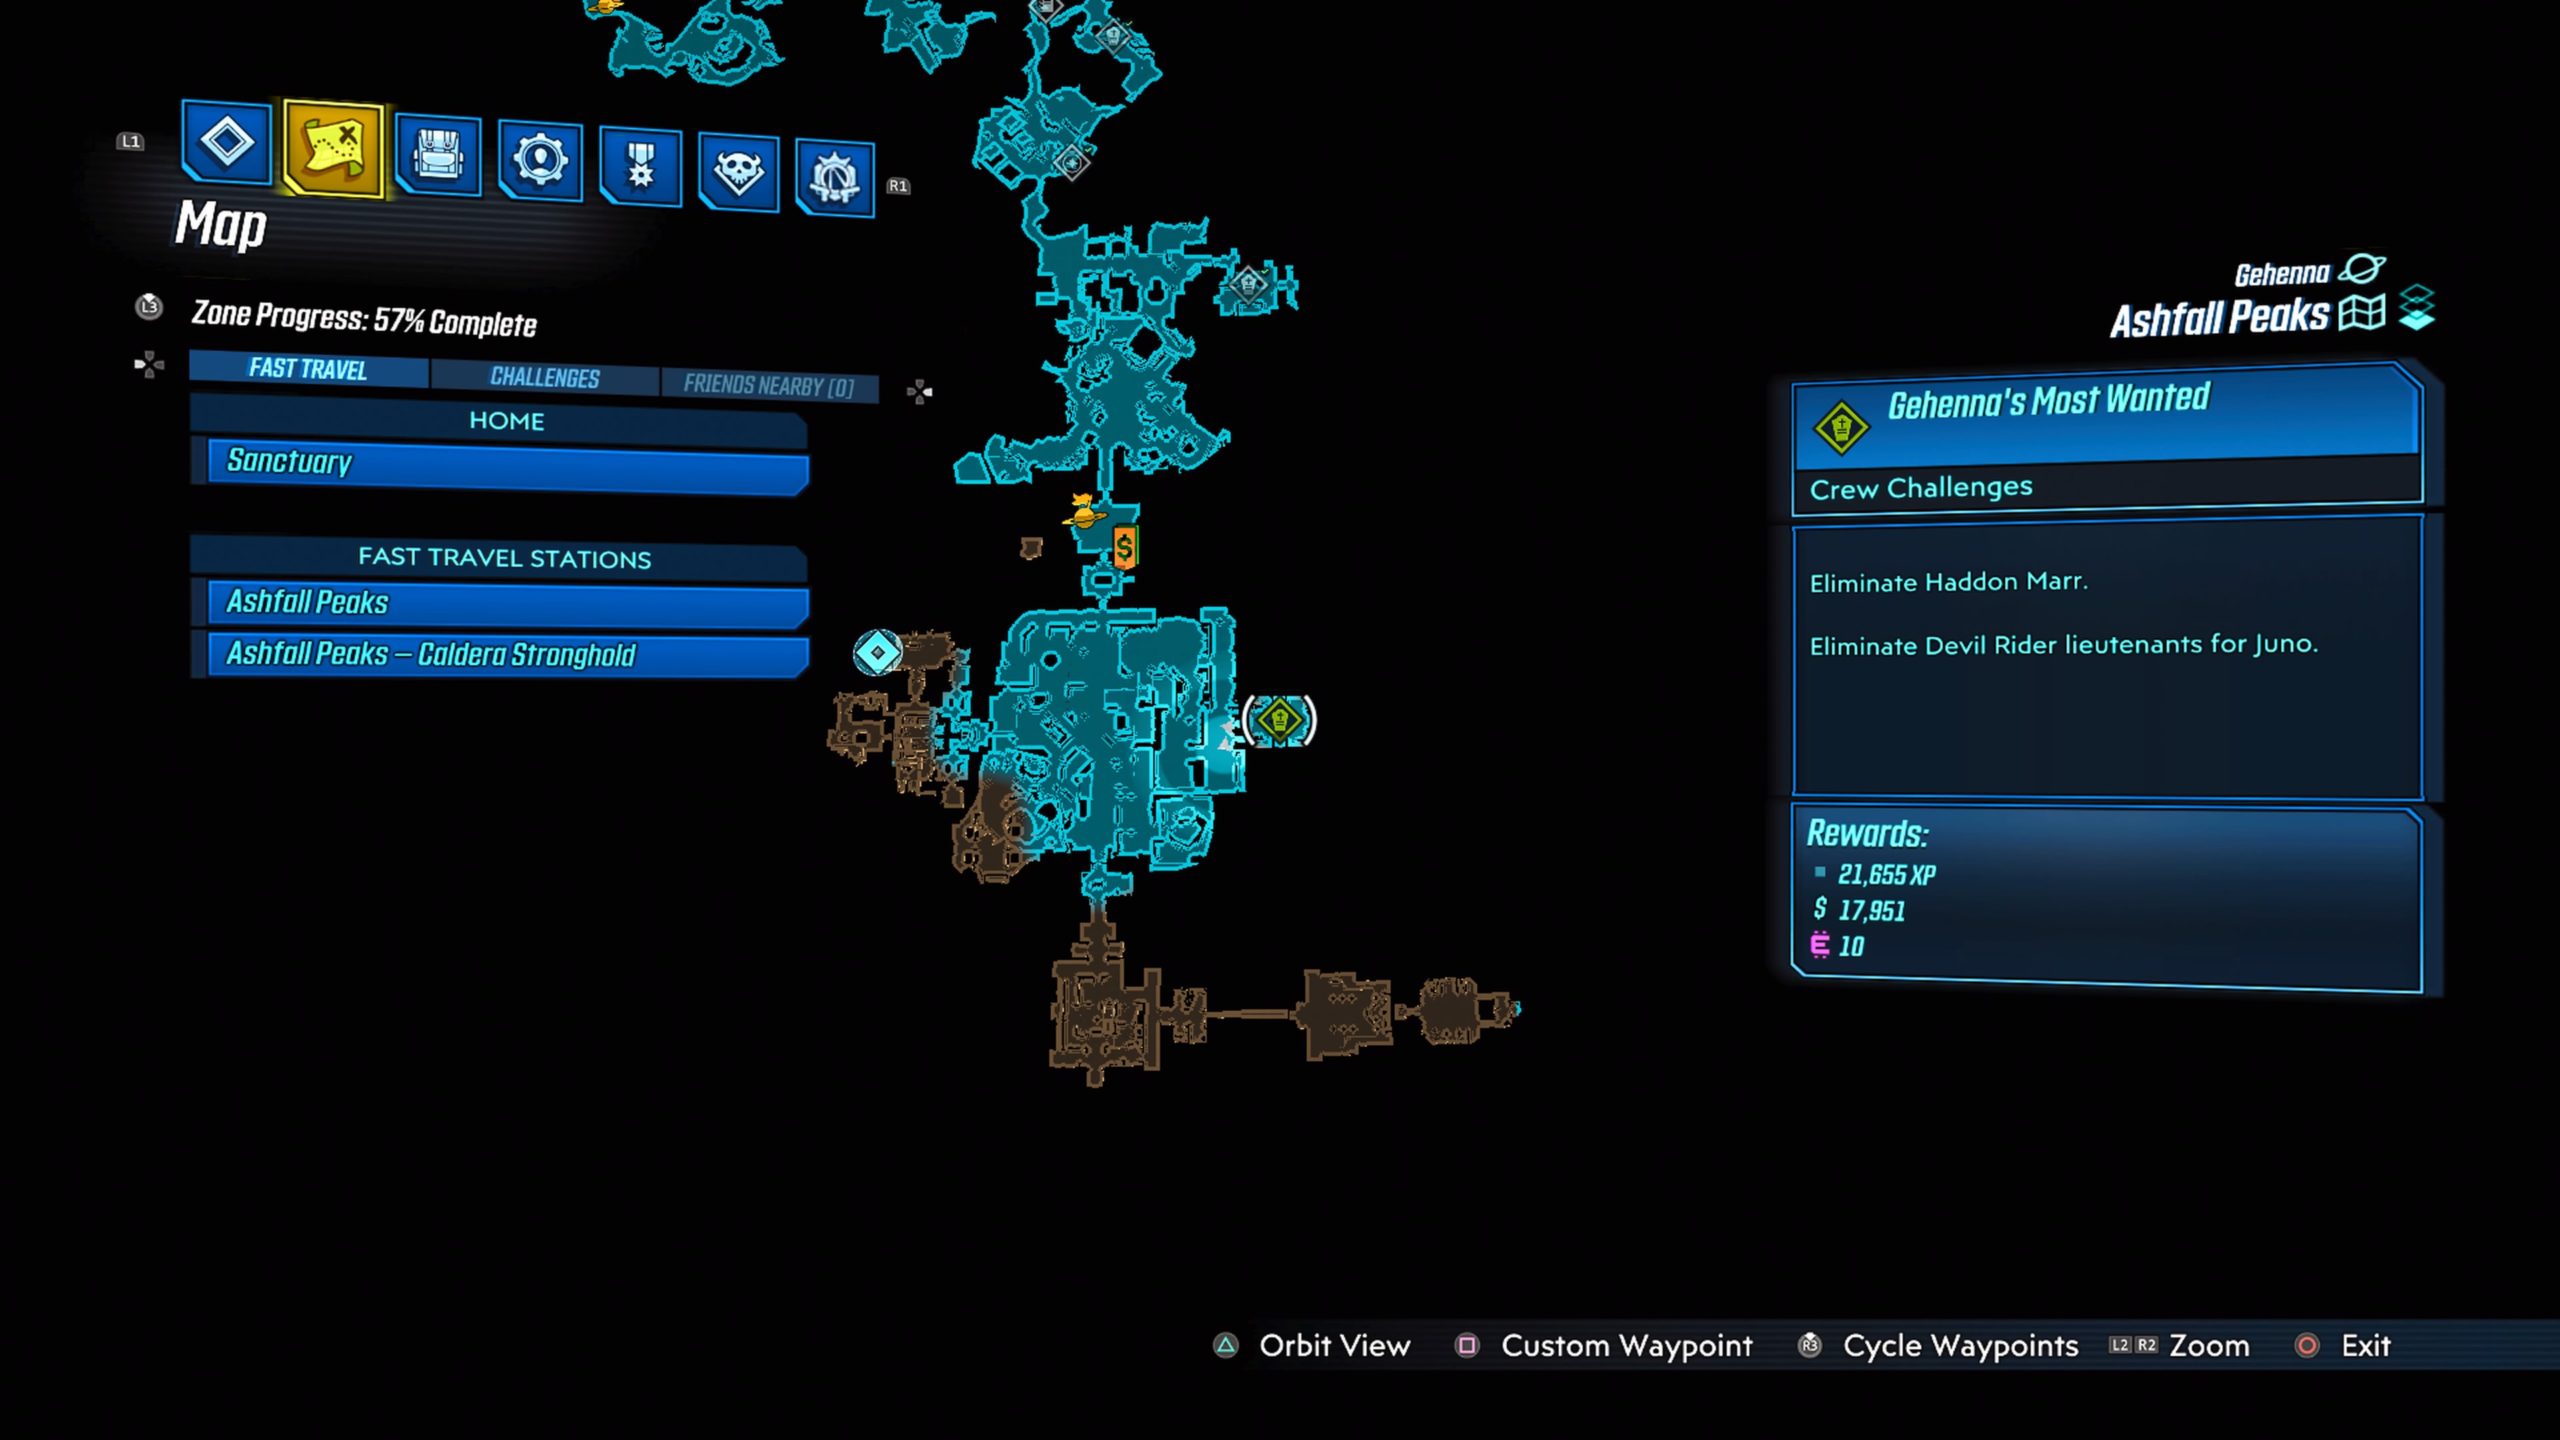
Haddon Marr can be found in Ashfall Peaks in Caldera Stronghold.
Waylon Hurd
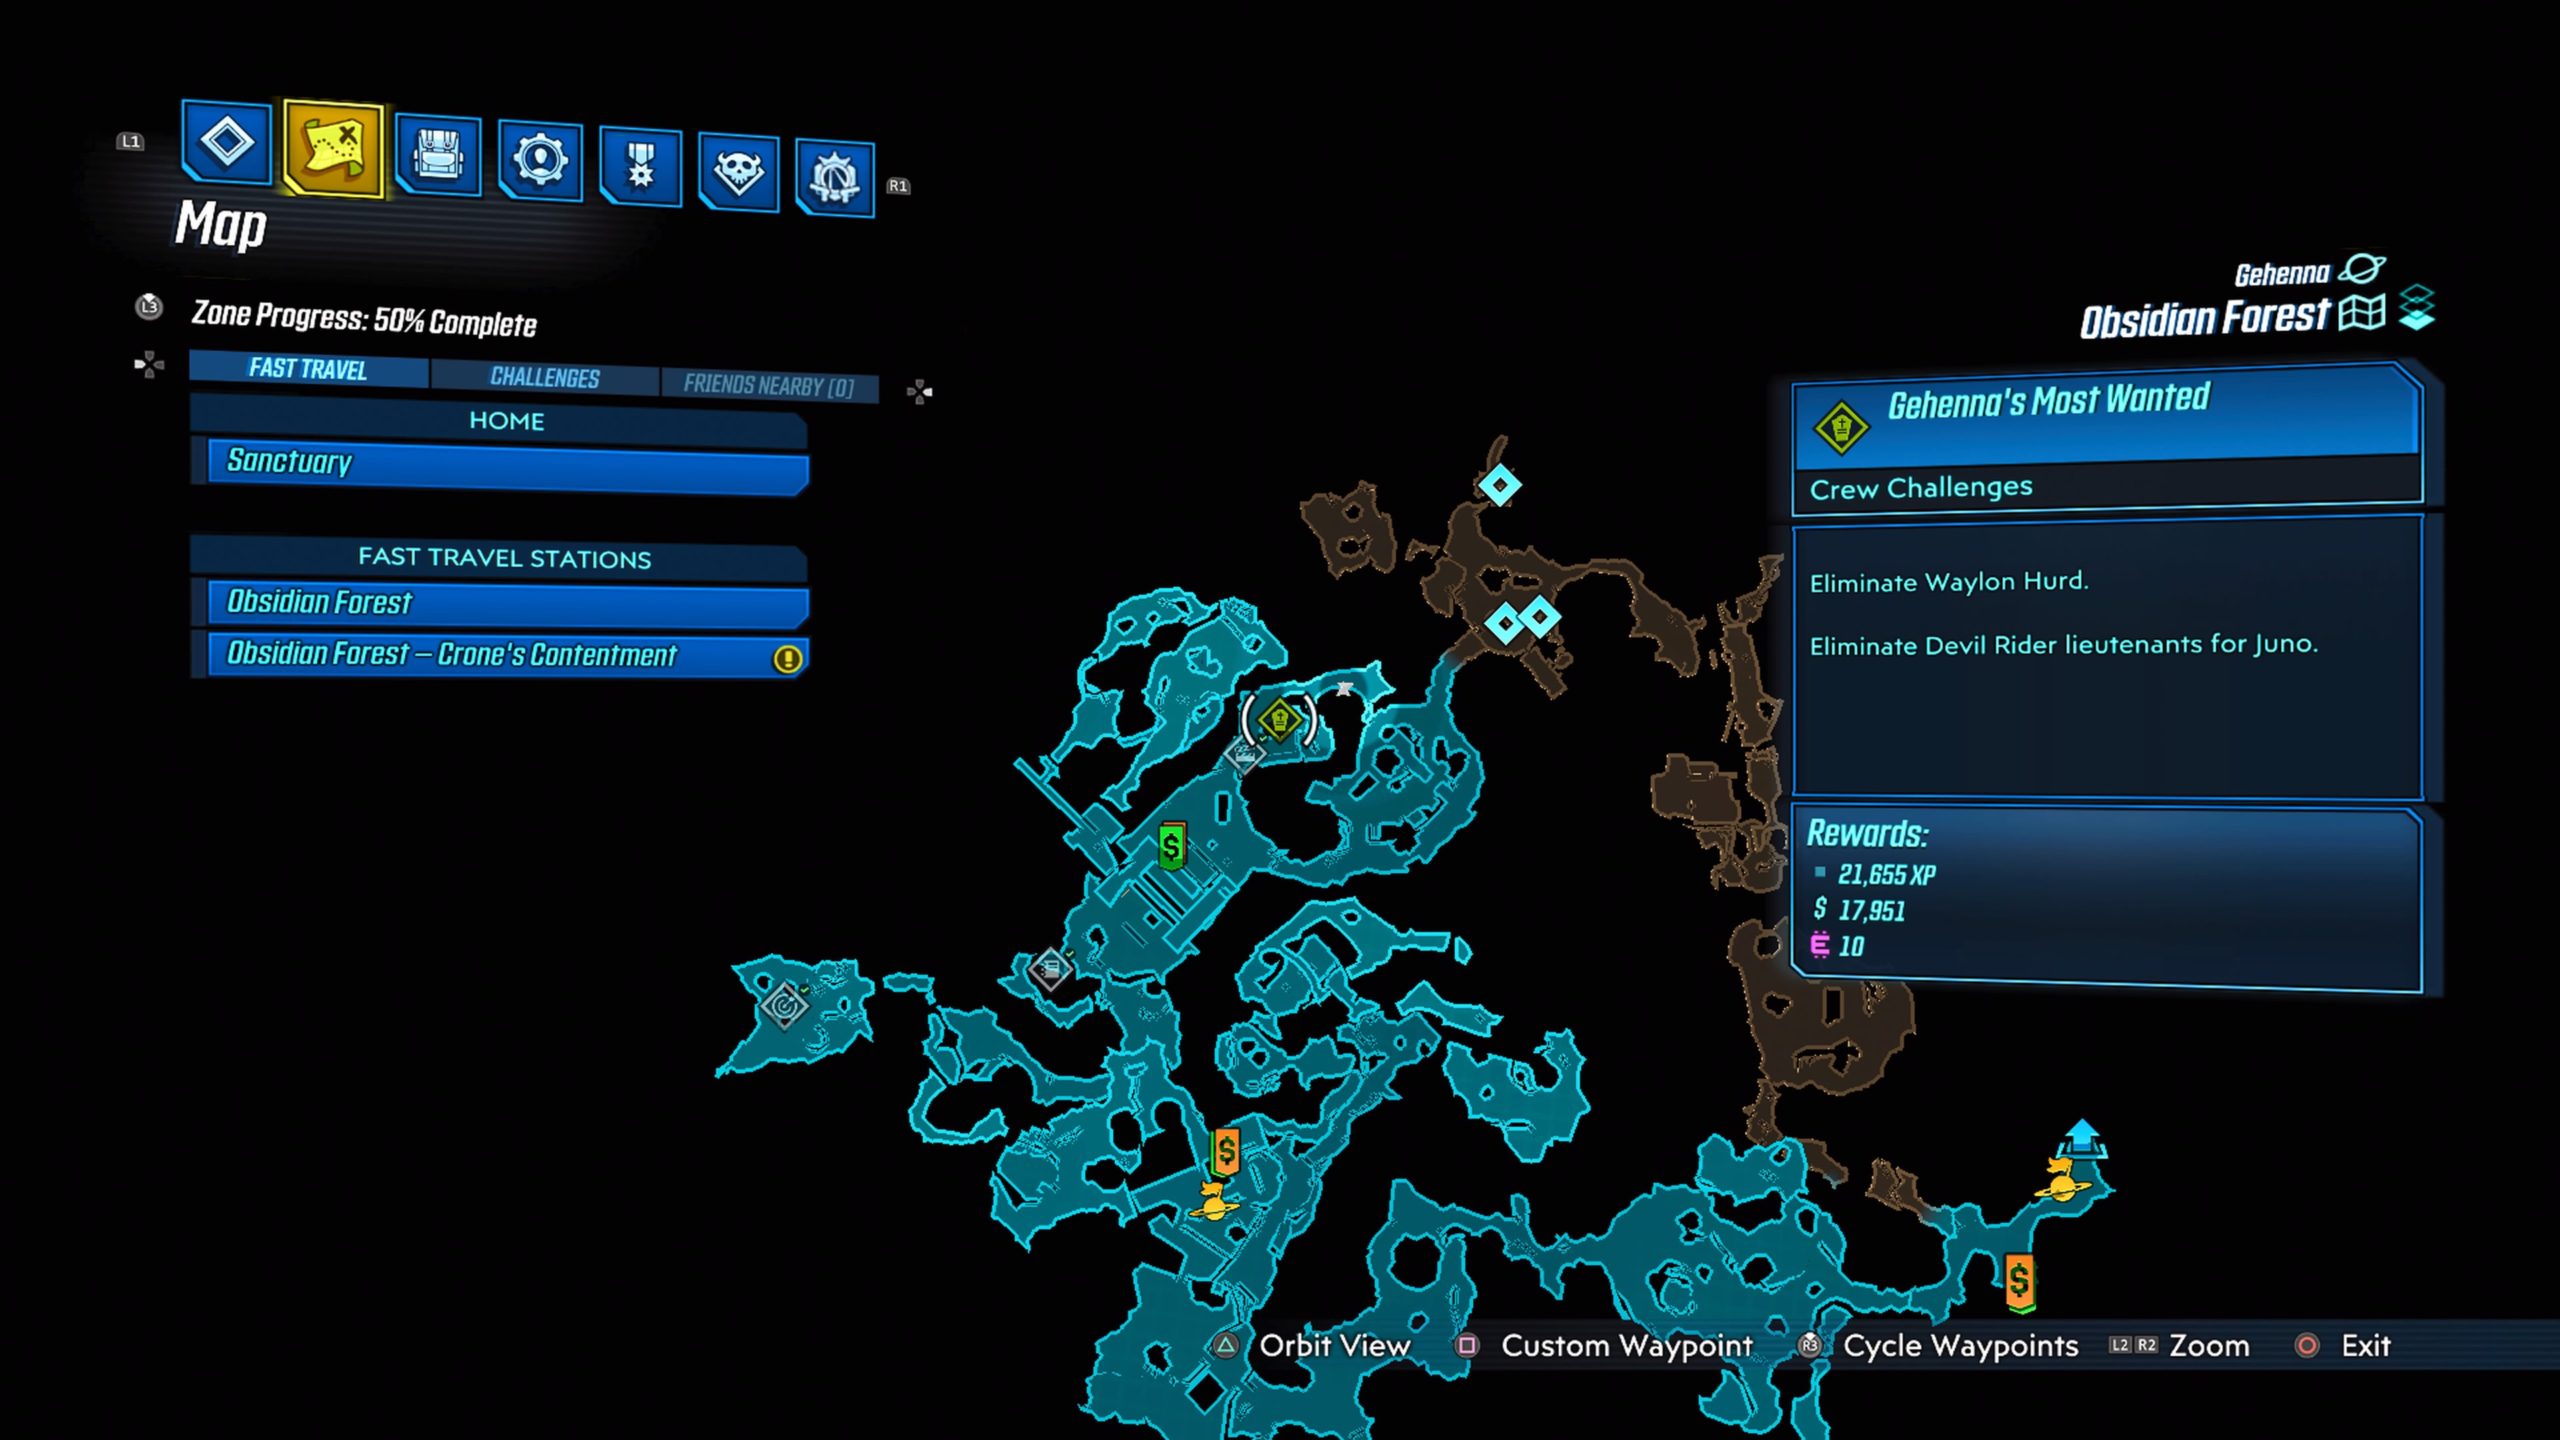
Waylon Hurd can be found in The Last Dig.
Jerrick Logan
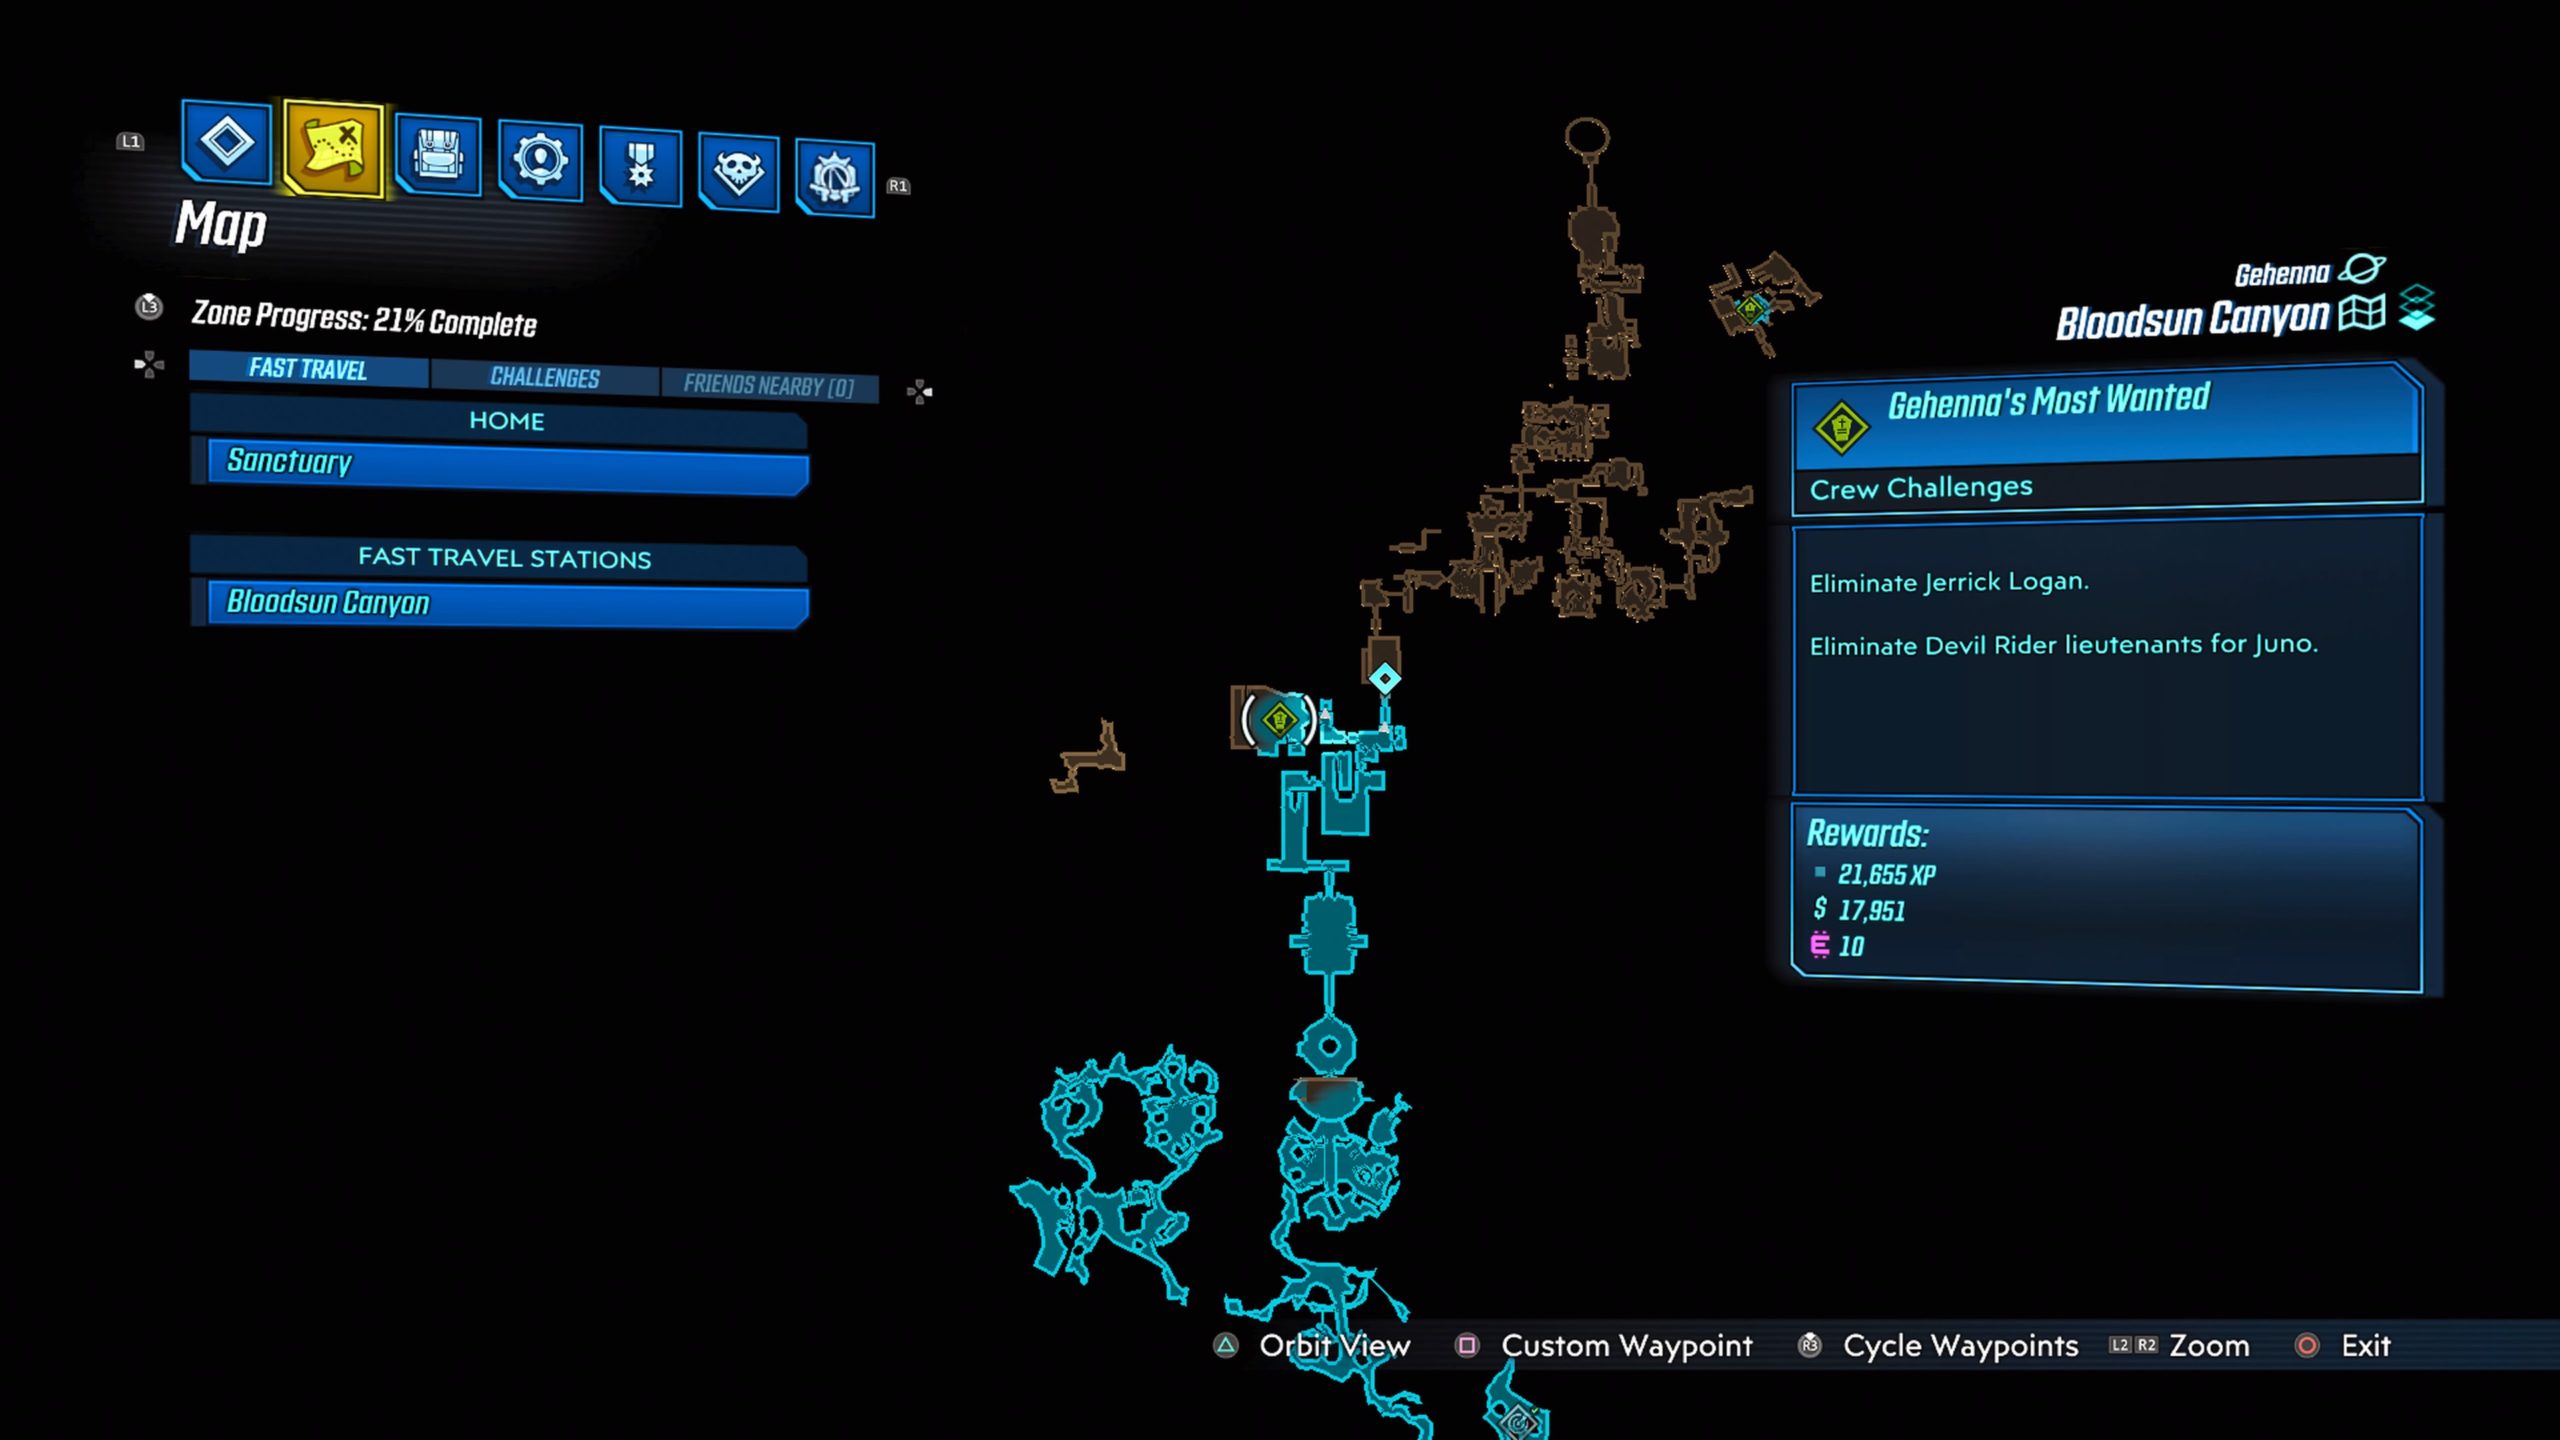
Jerrick Logan can be found in Accounts Unpayable.
Caber Dowd
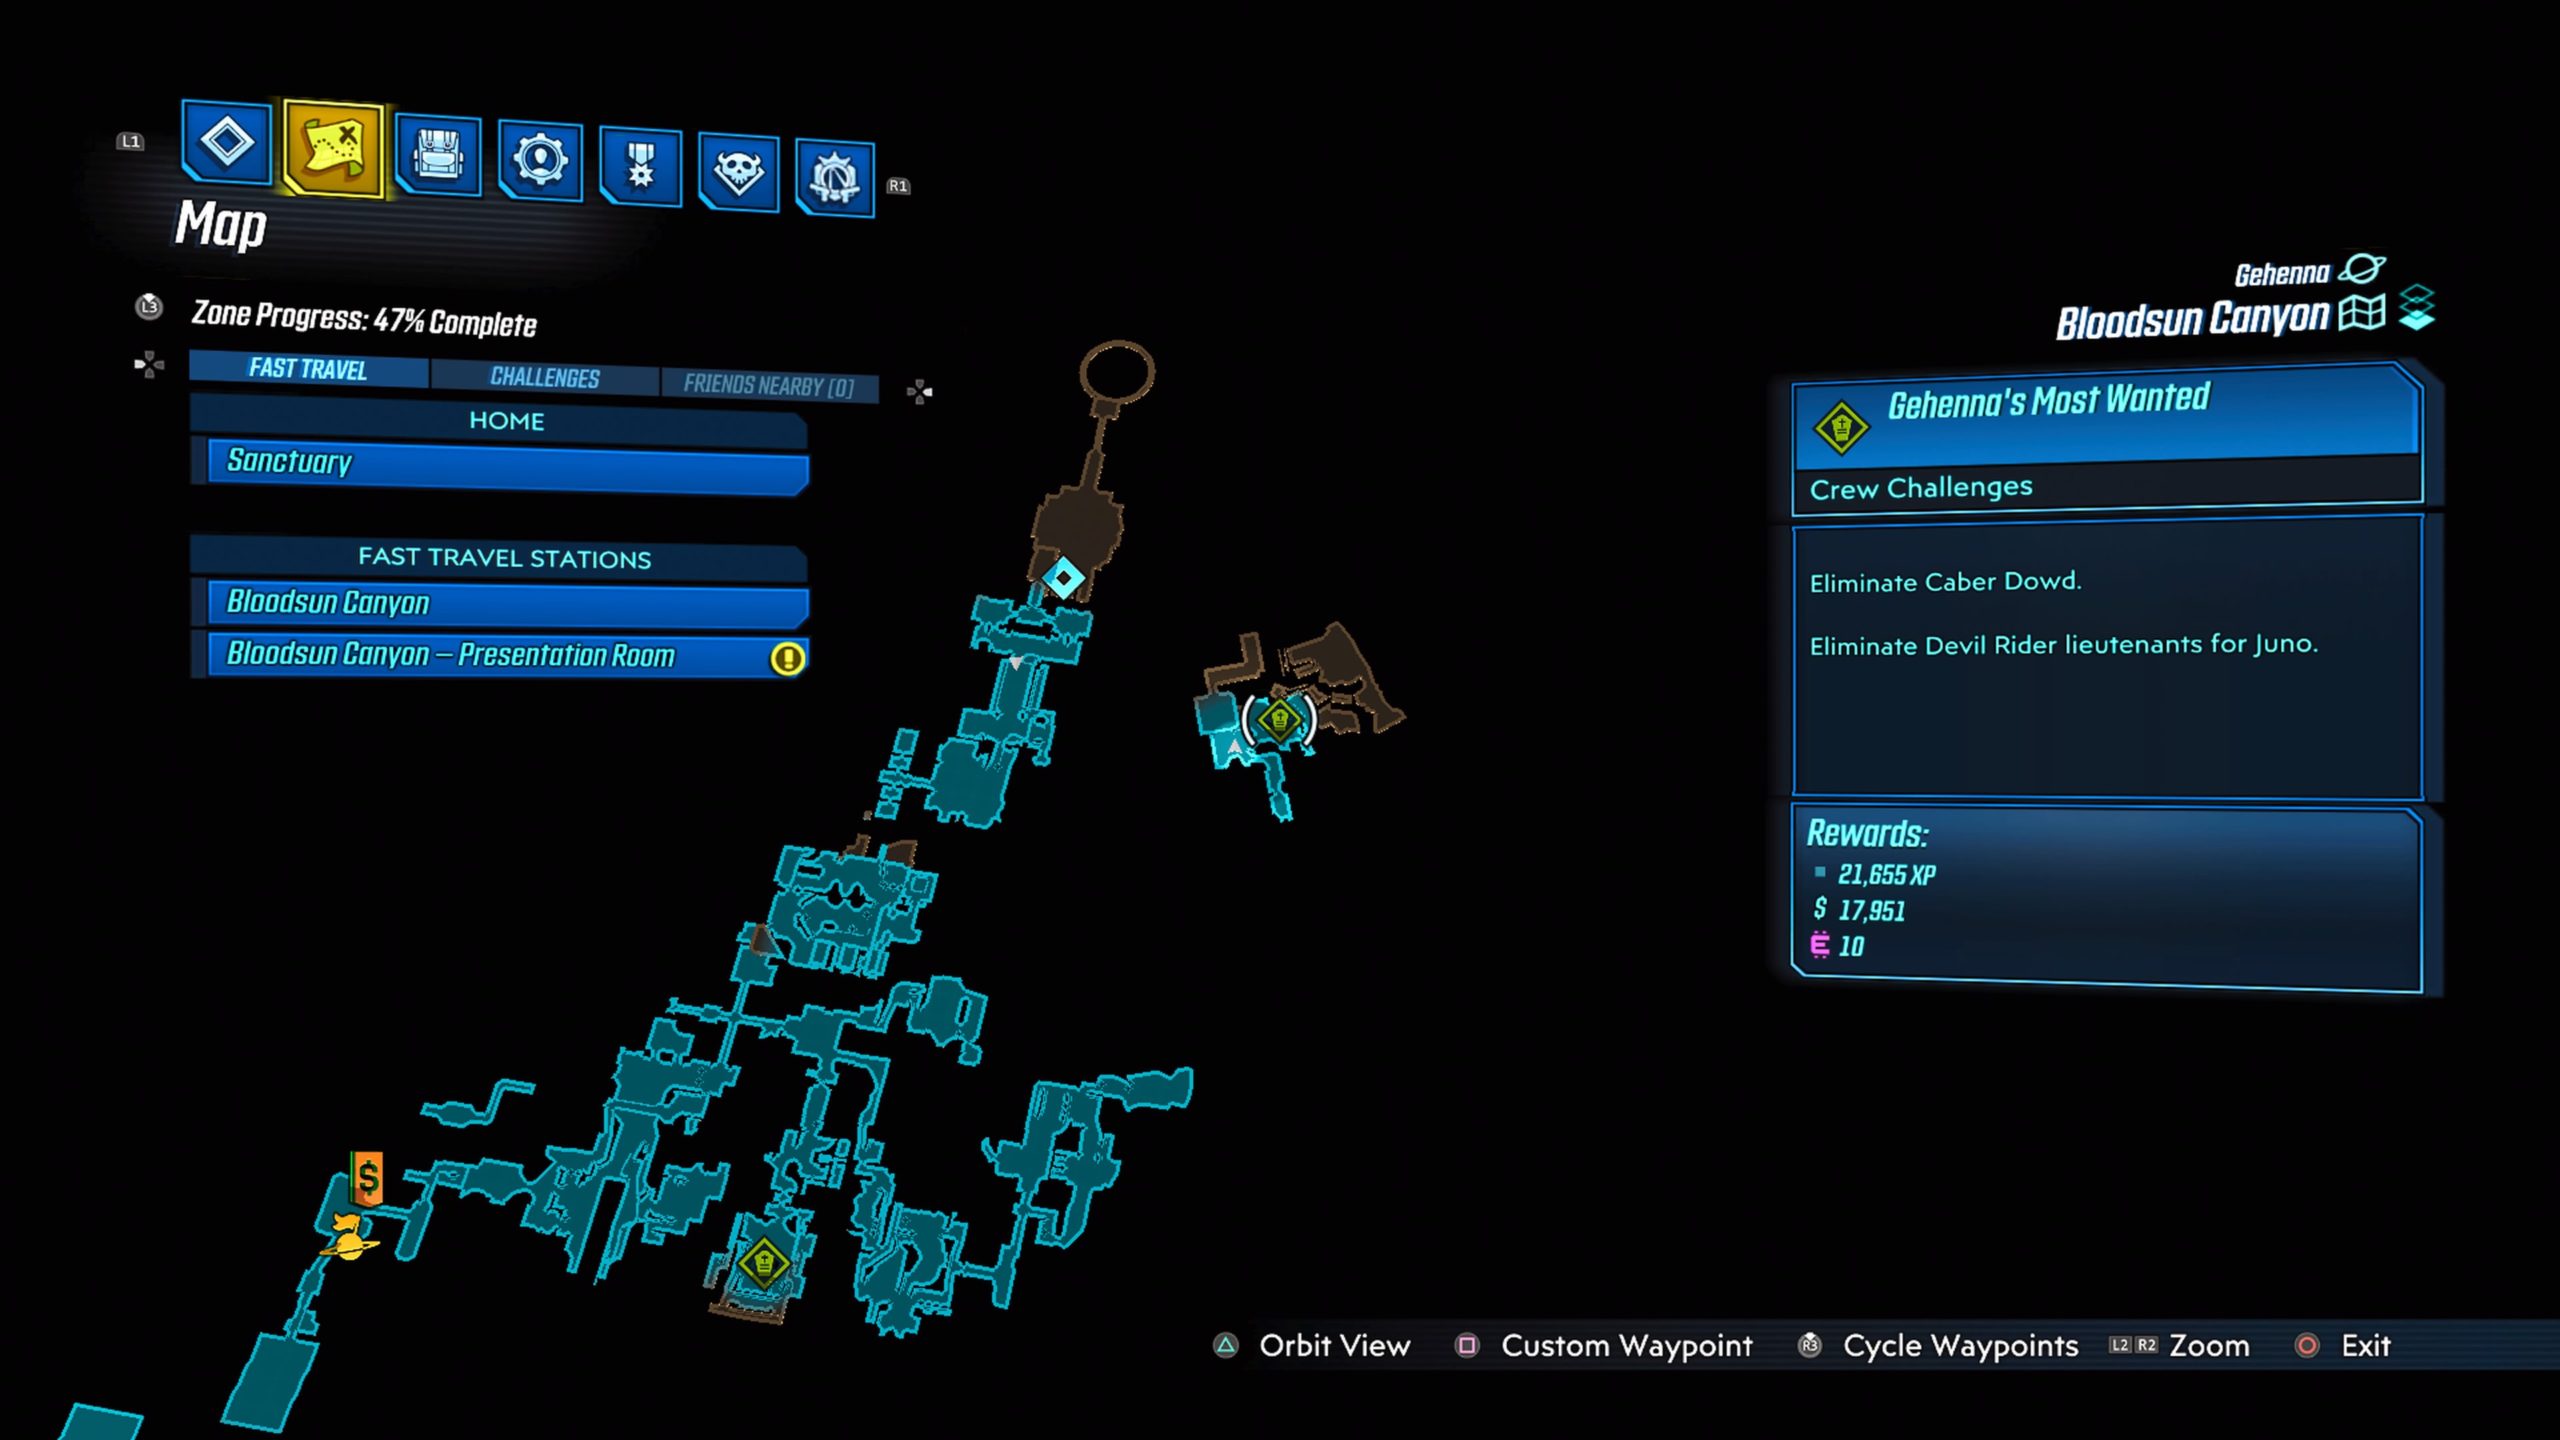
Caber Dowd can be found in a hidden area accessible via a portal in the Project Endless Horizons area. This portal can be found down the stairs in the room before the bosses room. You will need to punch the crystals to make the room accessible.
Below is a guide on the Skin to Win Crew Challenge in Borderlands 3 Bounty of Blood DLC!!
Vorducken
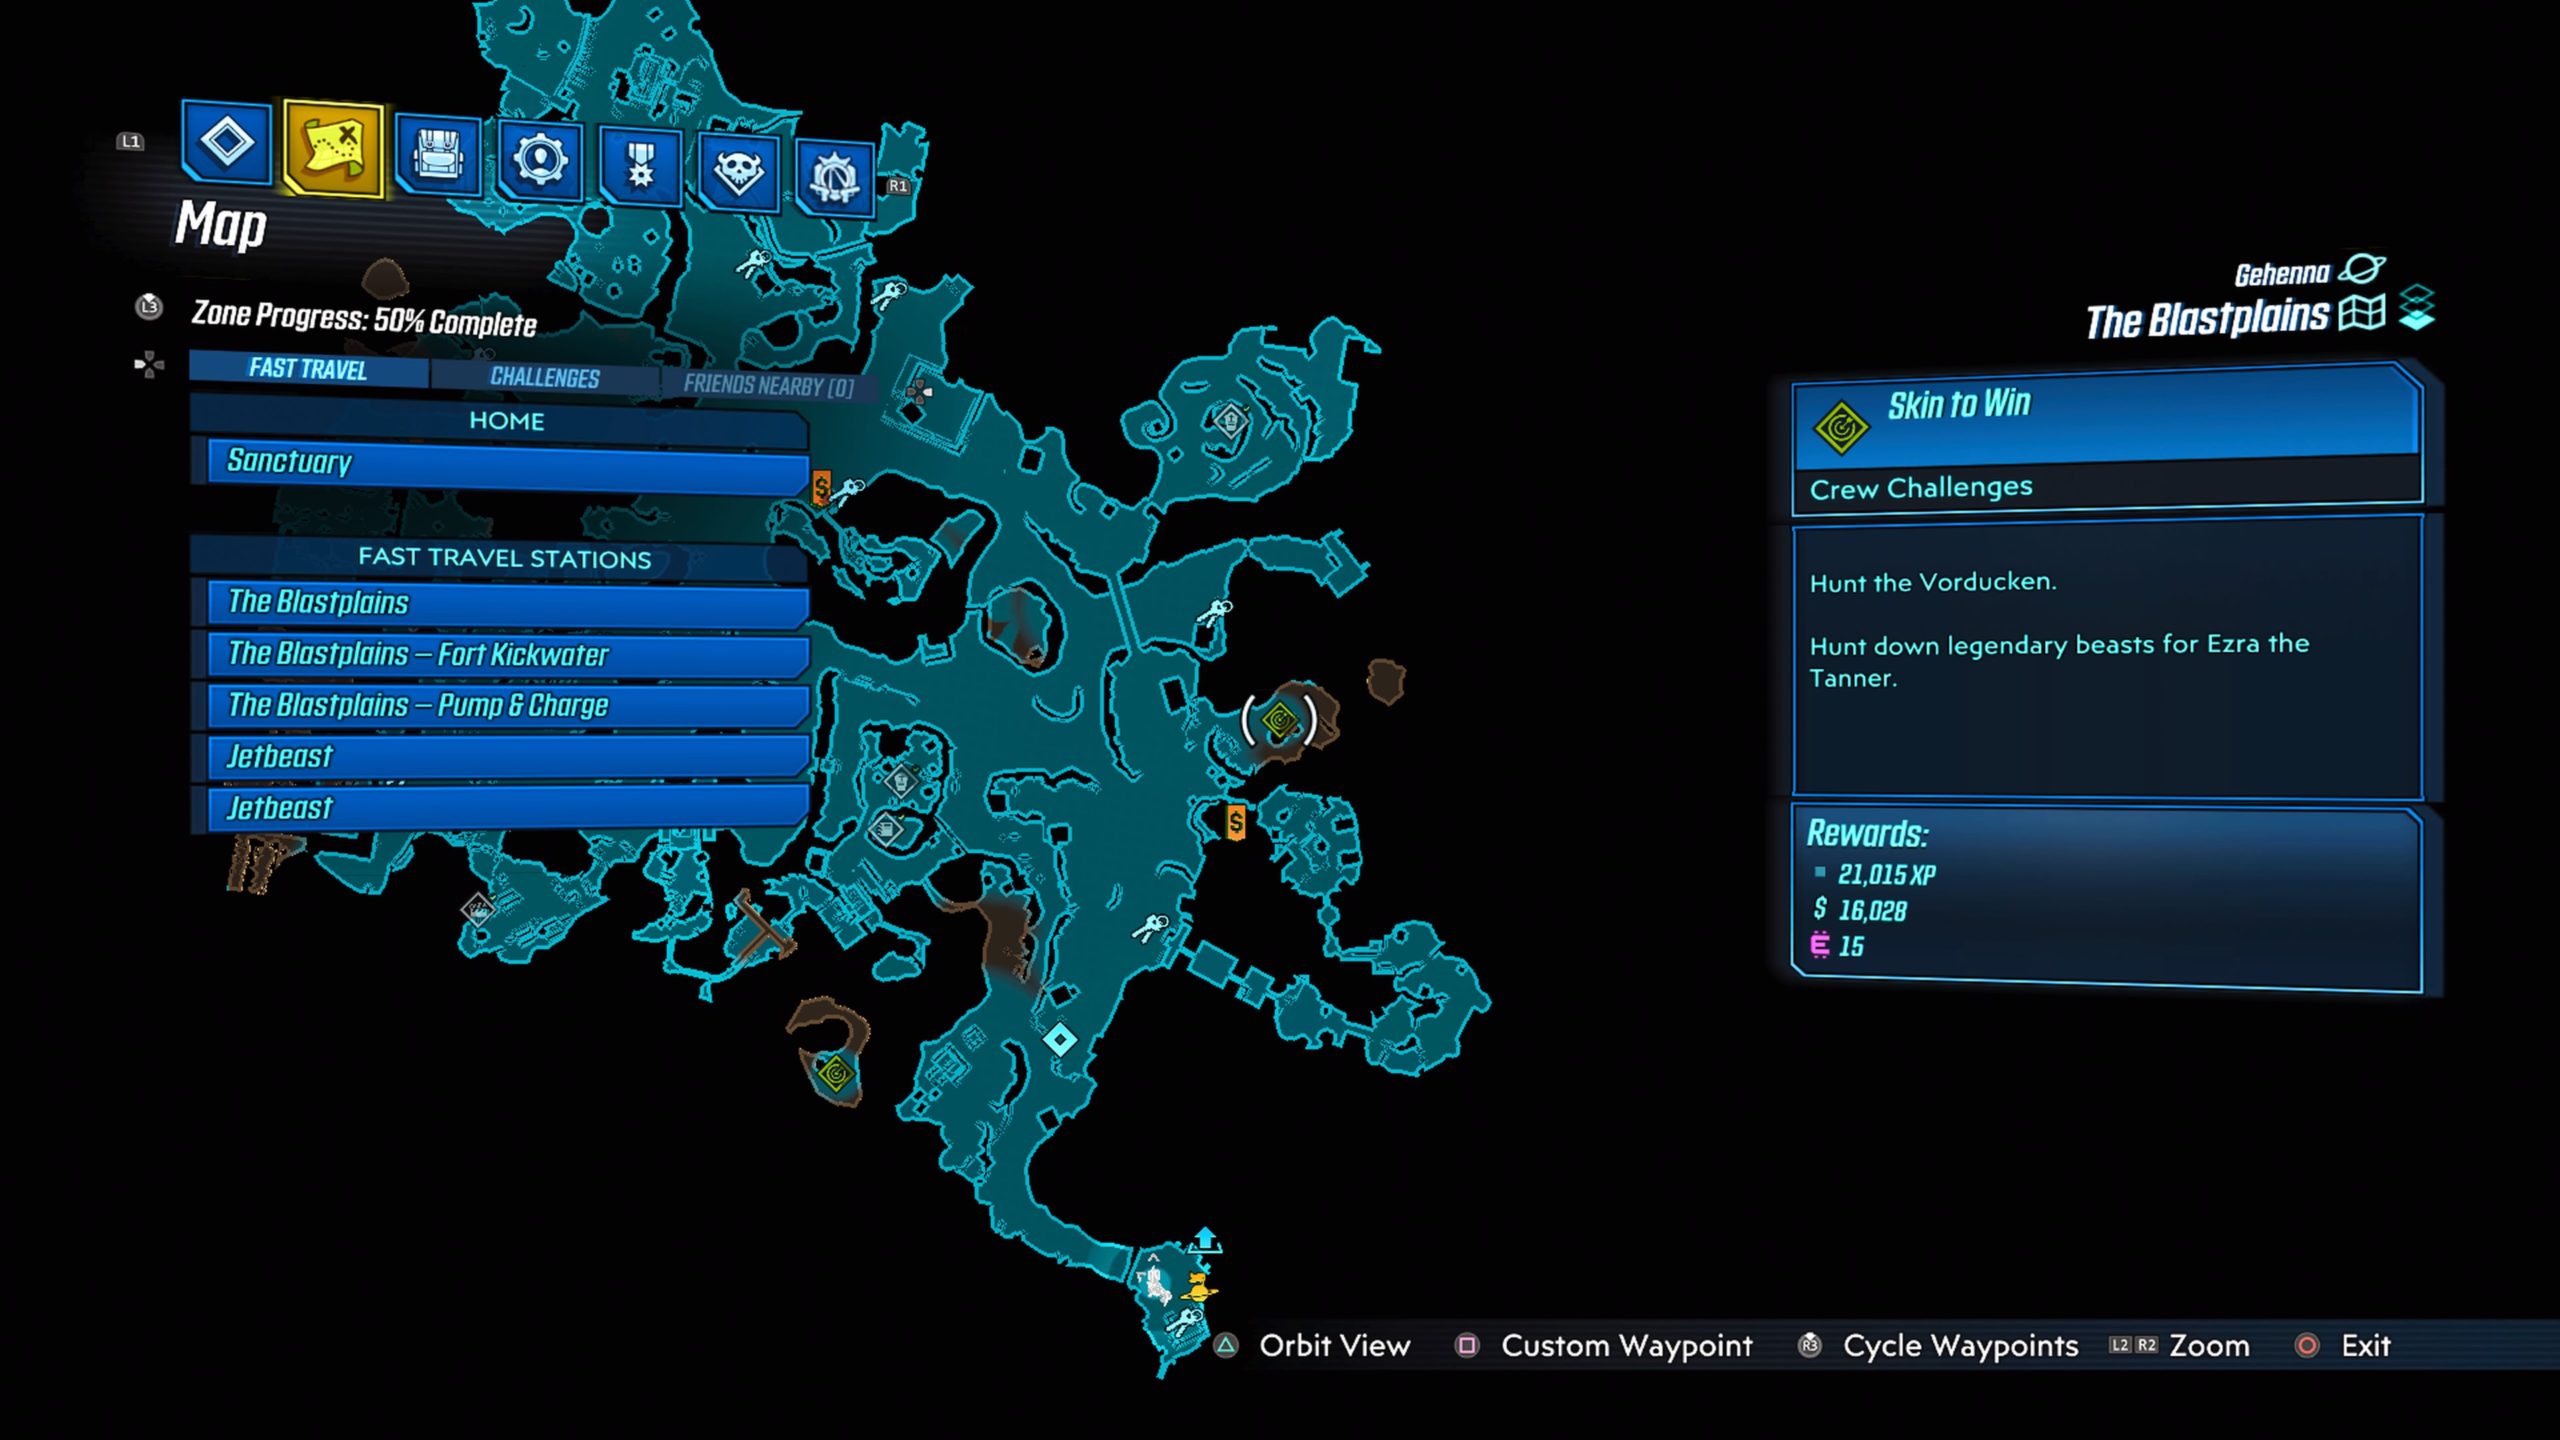
Vorducken can be found in eastern Blastplains.
Pterodomini


Pterodomini can be found in southern Blastplains in the Amplecore Veins. To reach the area where it awaits, you will need to use the portal.
Slithermaw
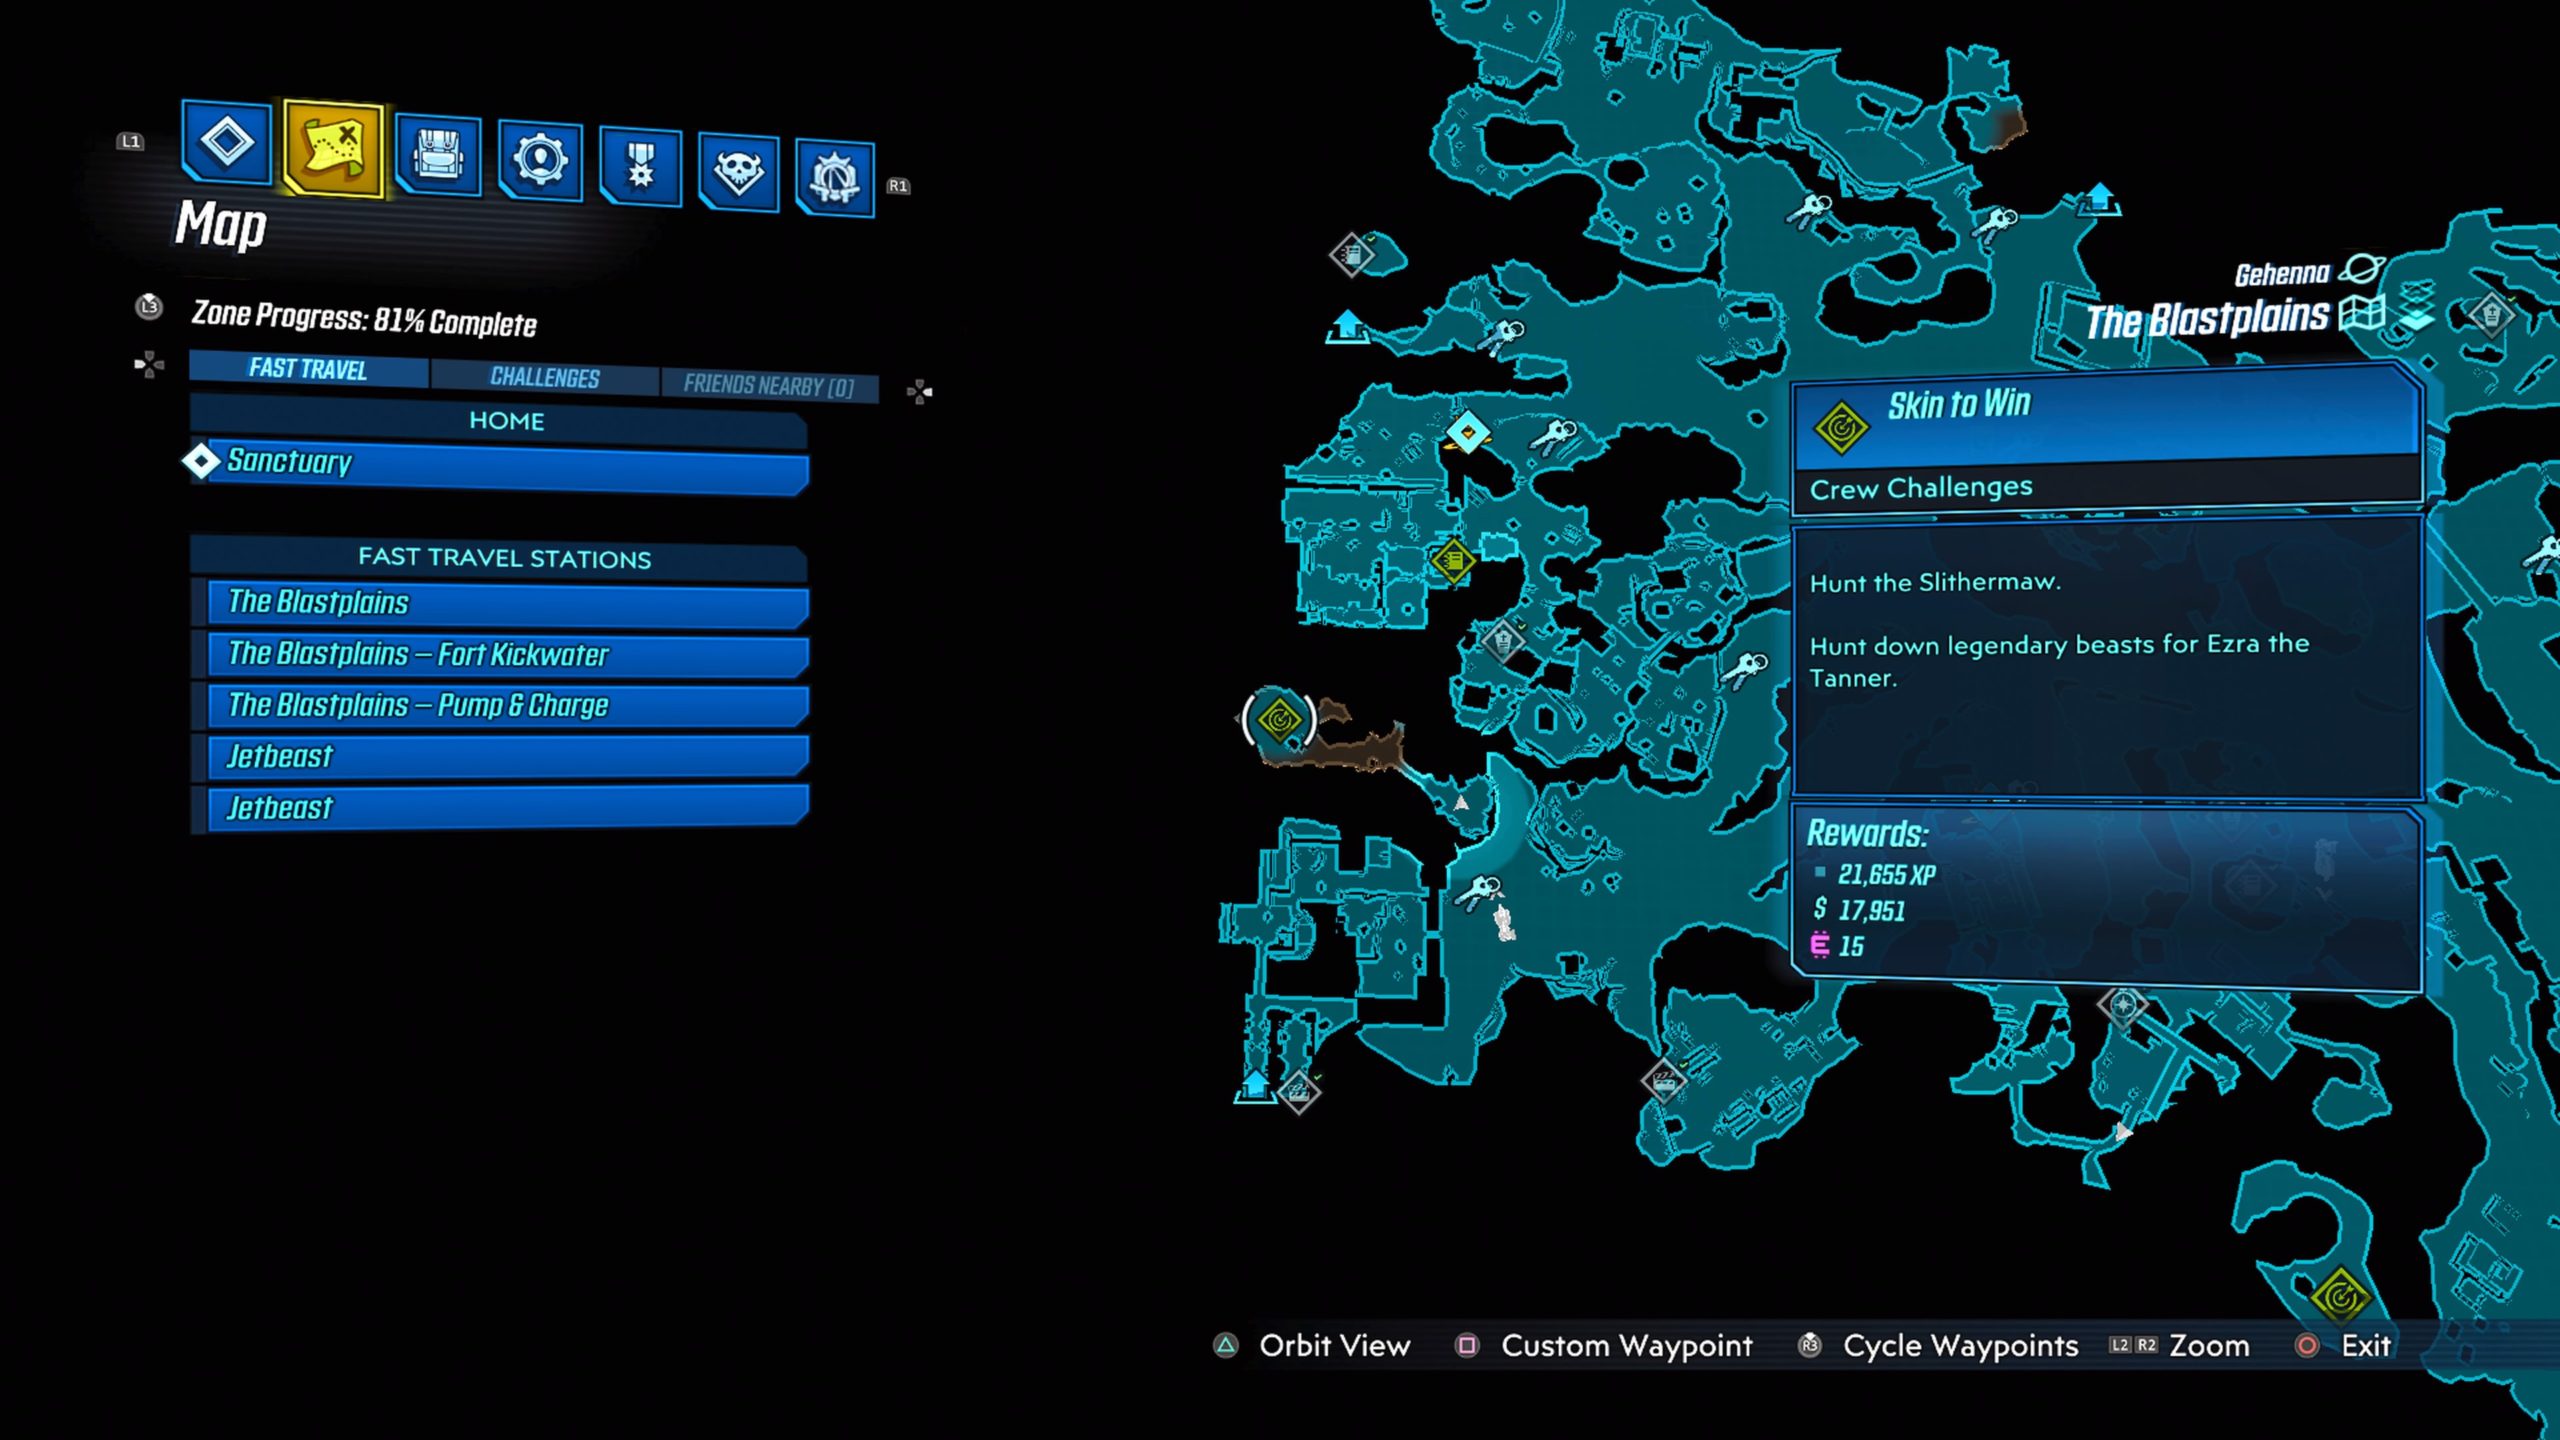

Slithermaw can be found in western Blastplains in King’s Teeth. To reach this area, you will need to use a portal located on top of a large rock with tents north of the southwestern Catch-a-Ride.
Abbadoxis

This enemy can be found in Babel Brook.
Lasodactyl
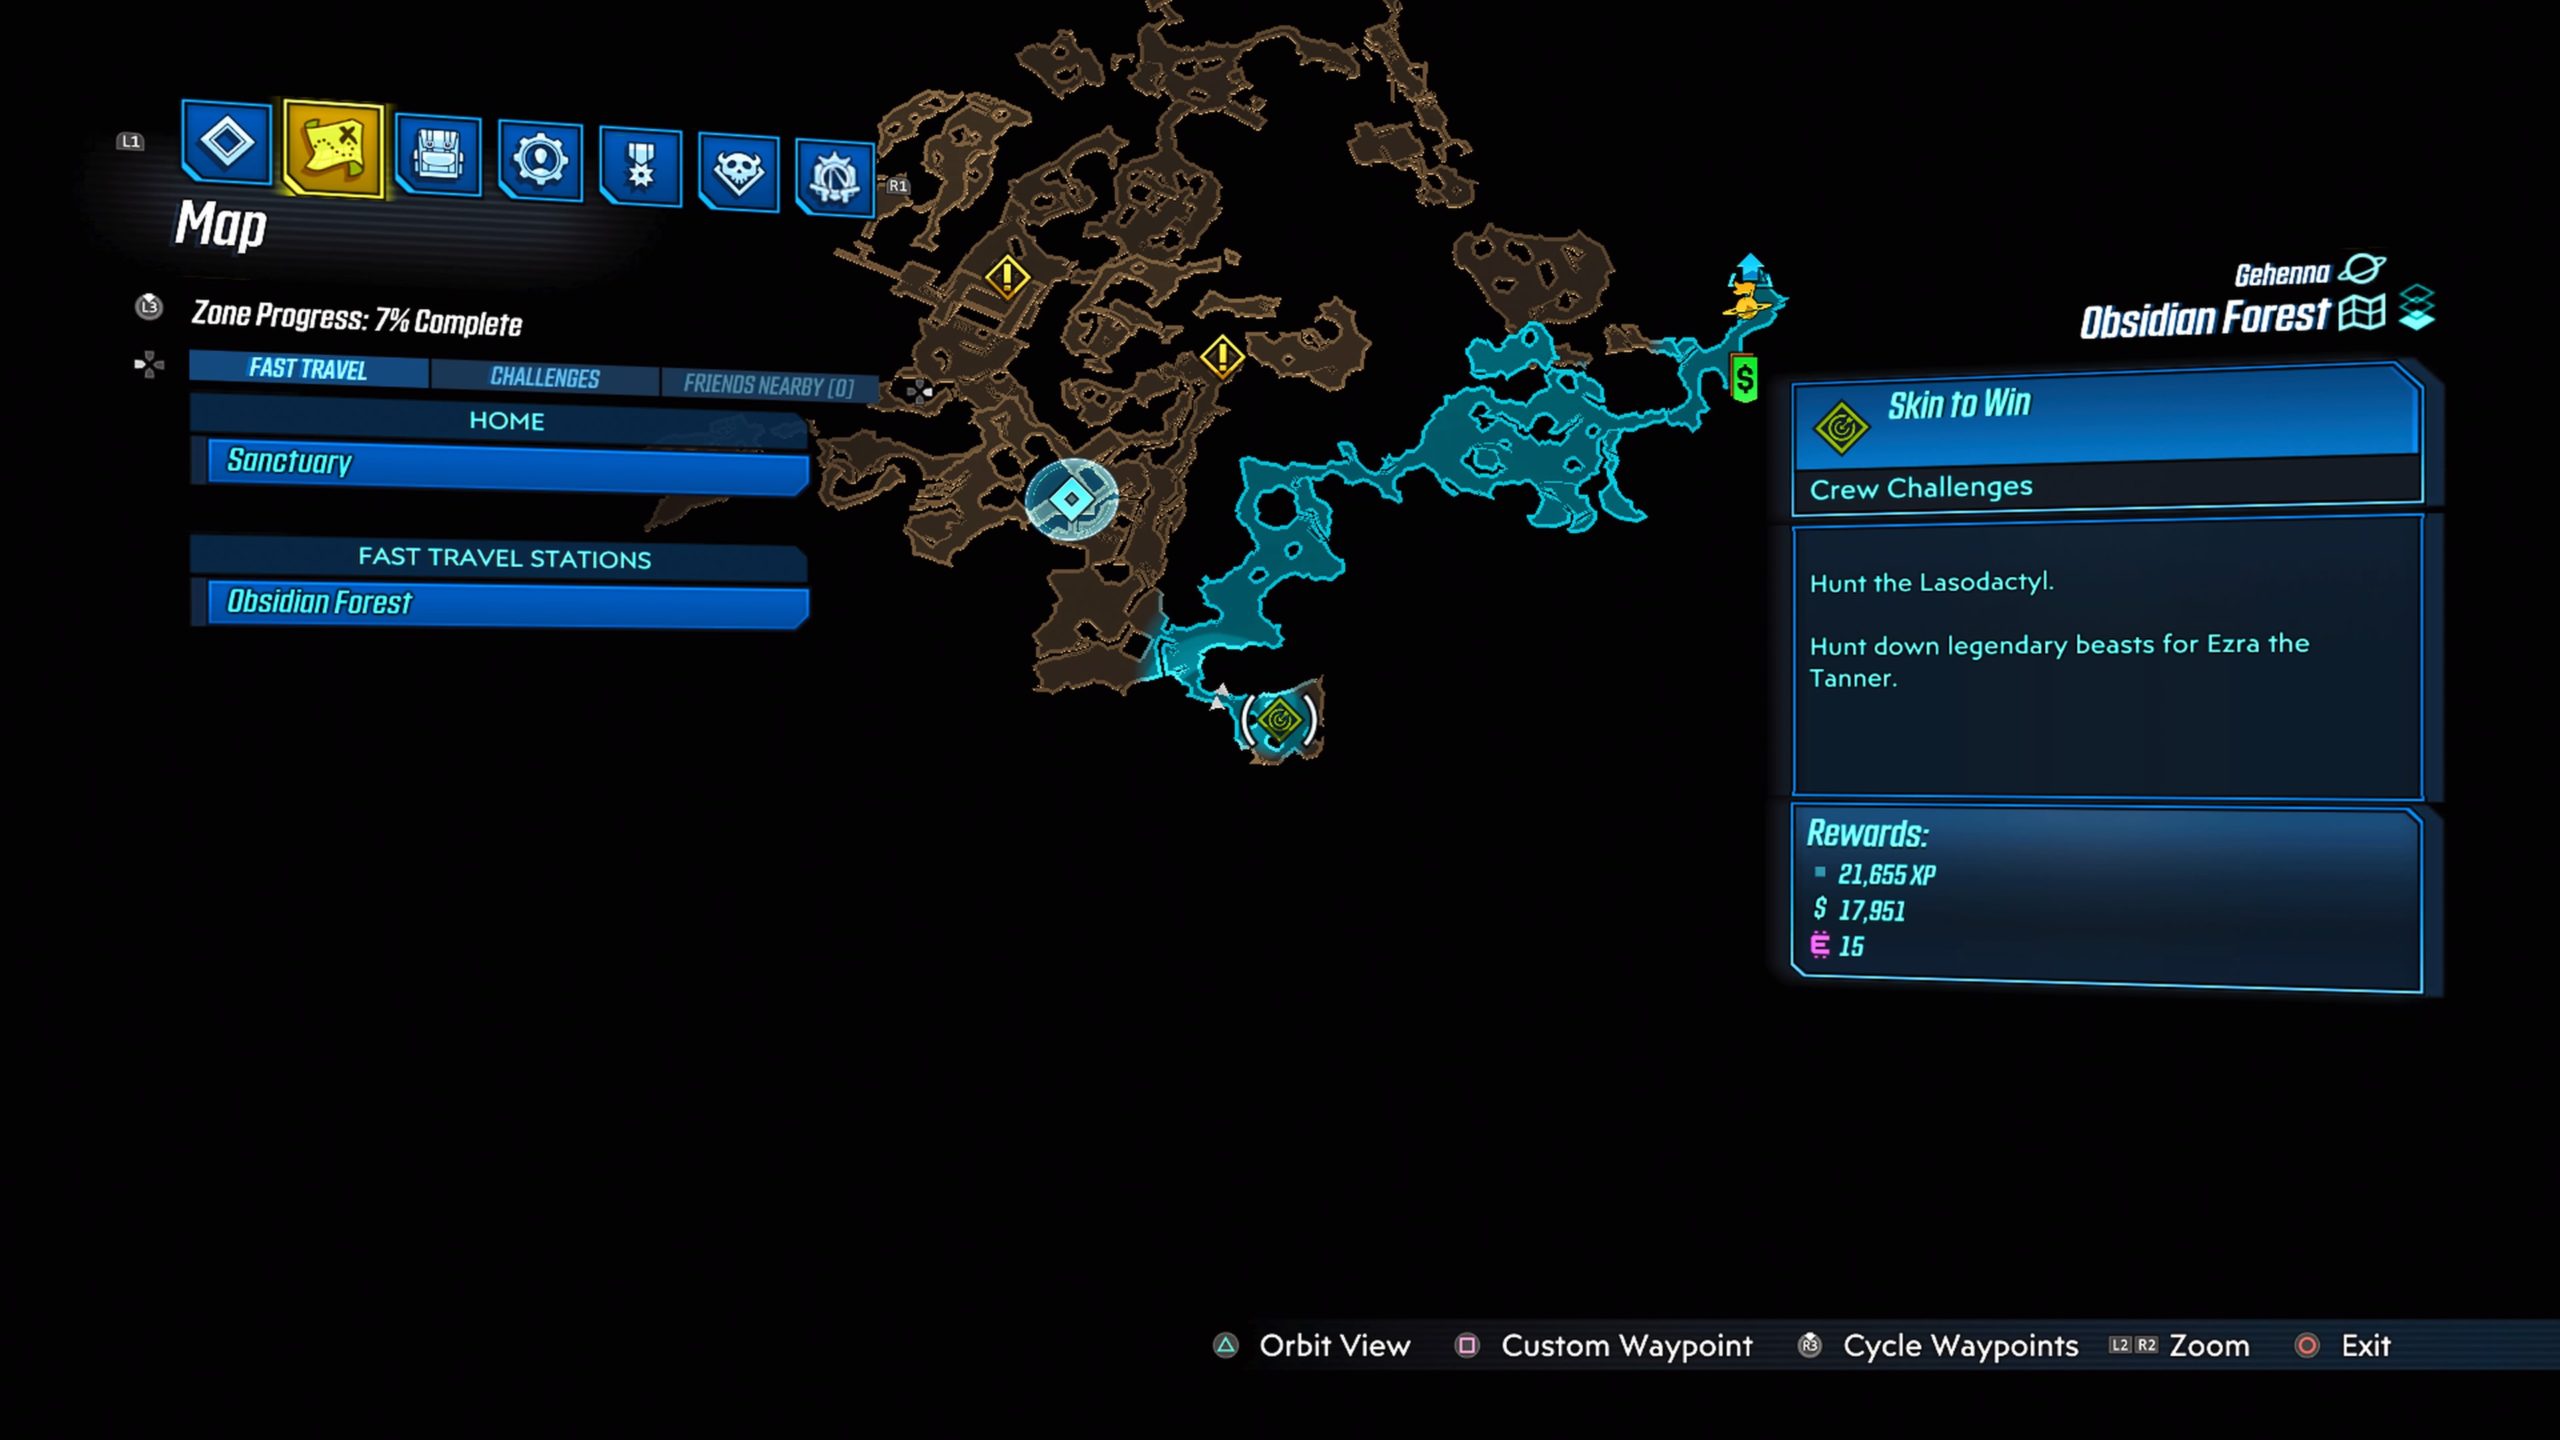
The Lasodactyl can be found in Crone’s Contentment in the most southern central region of the map.
Hydragoian

The Hydragoian can be found in eastern Obsidian Forest in Crone’s Contentment.
Lectrikor

Lectrikor can be found in The Last Dig.
Minosaur
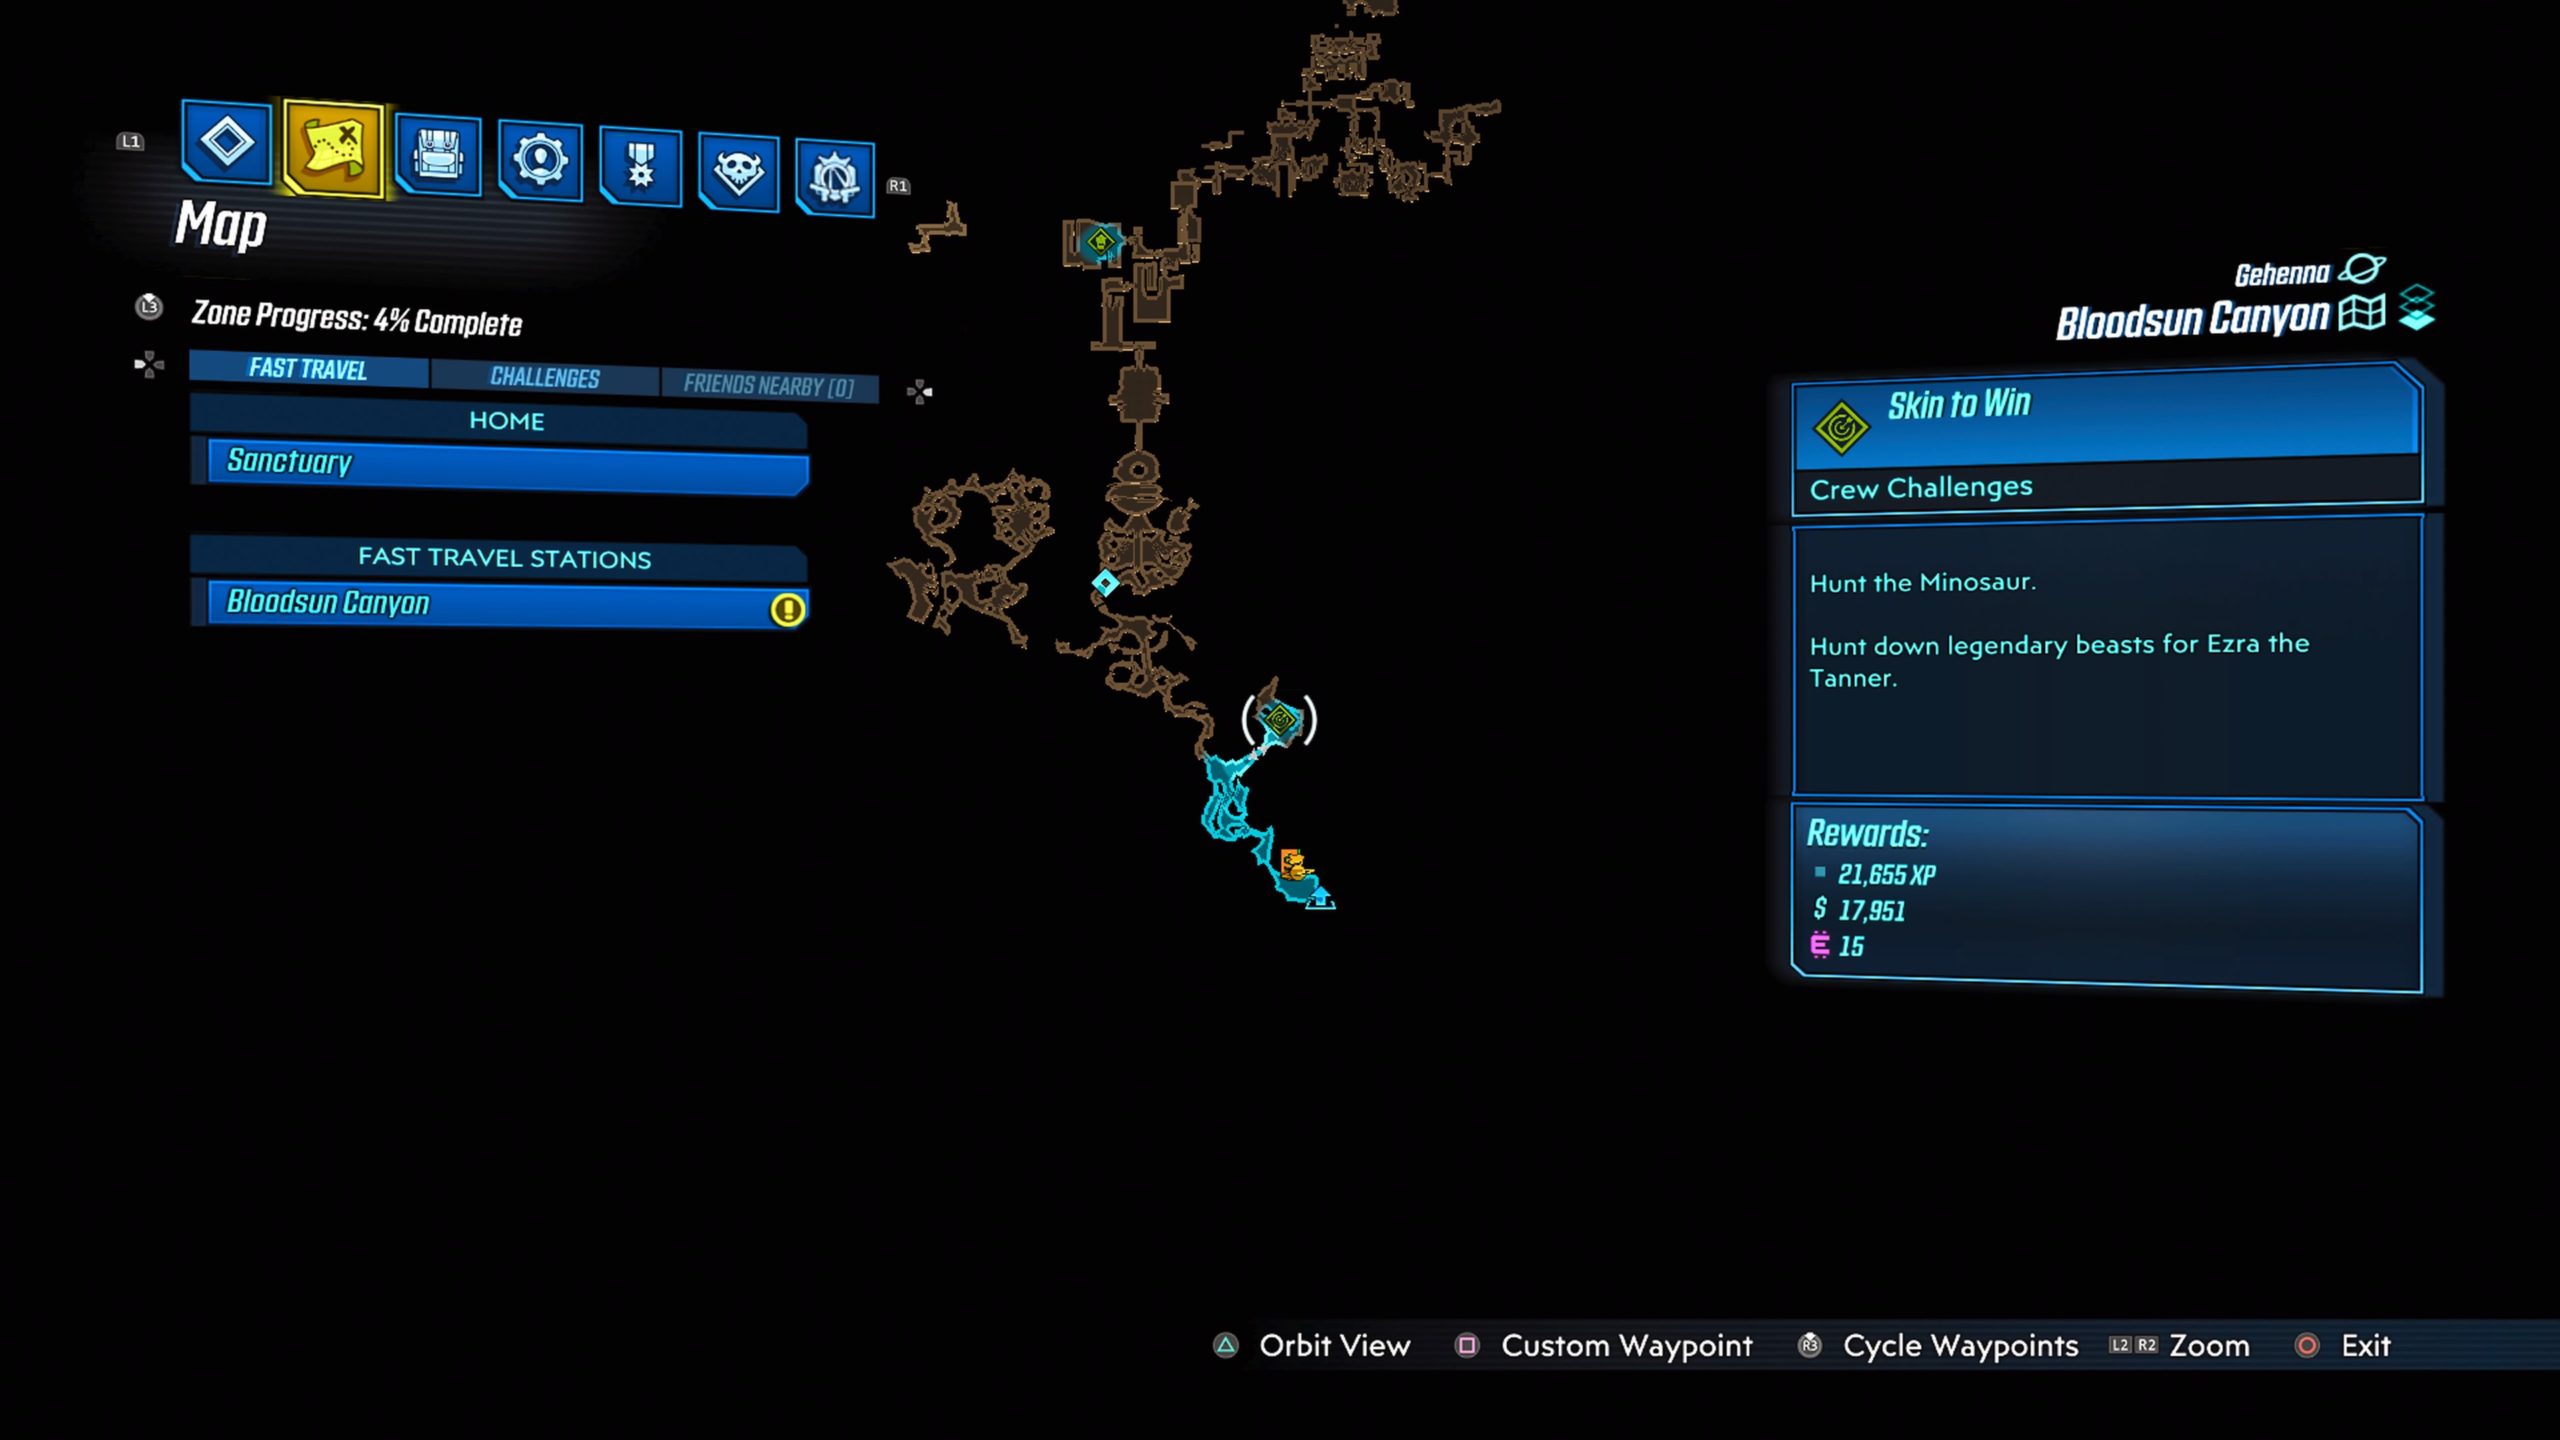
Minosaur can be found directly north of the Bloodsun Canyon fast travel station in Talbot’s Footsteps.
Below is a guide on the Creature Feature Crew Challenge in Borderlands 3 Bounty of Blood DLC!!
Vestige #1
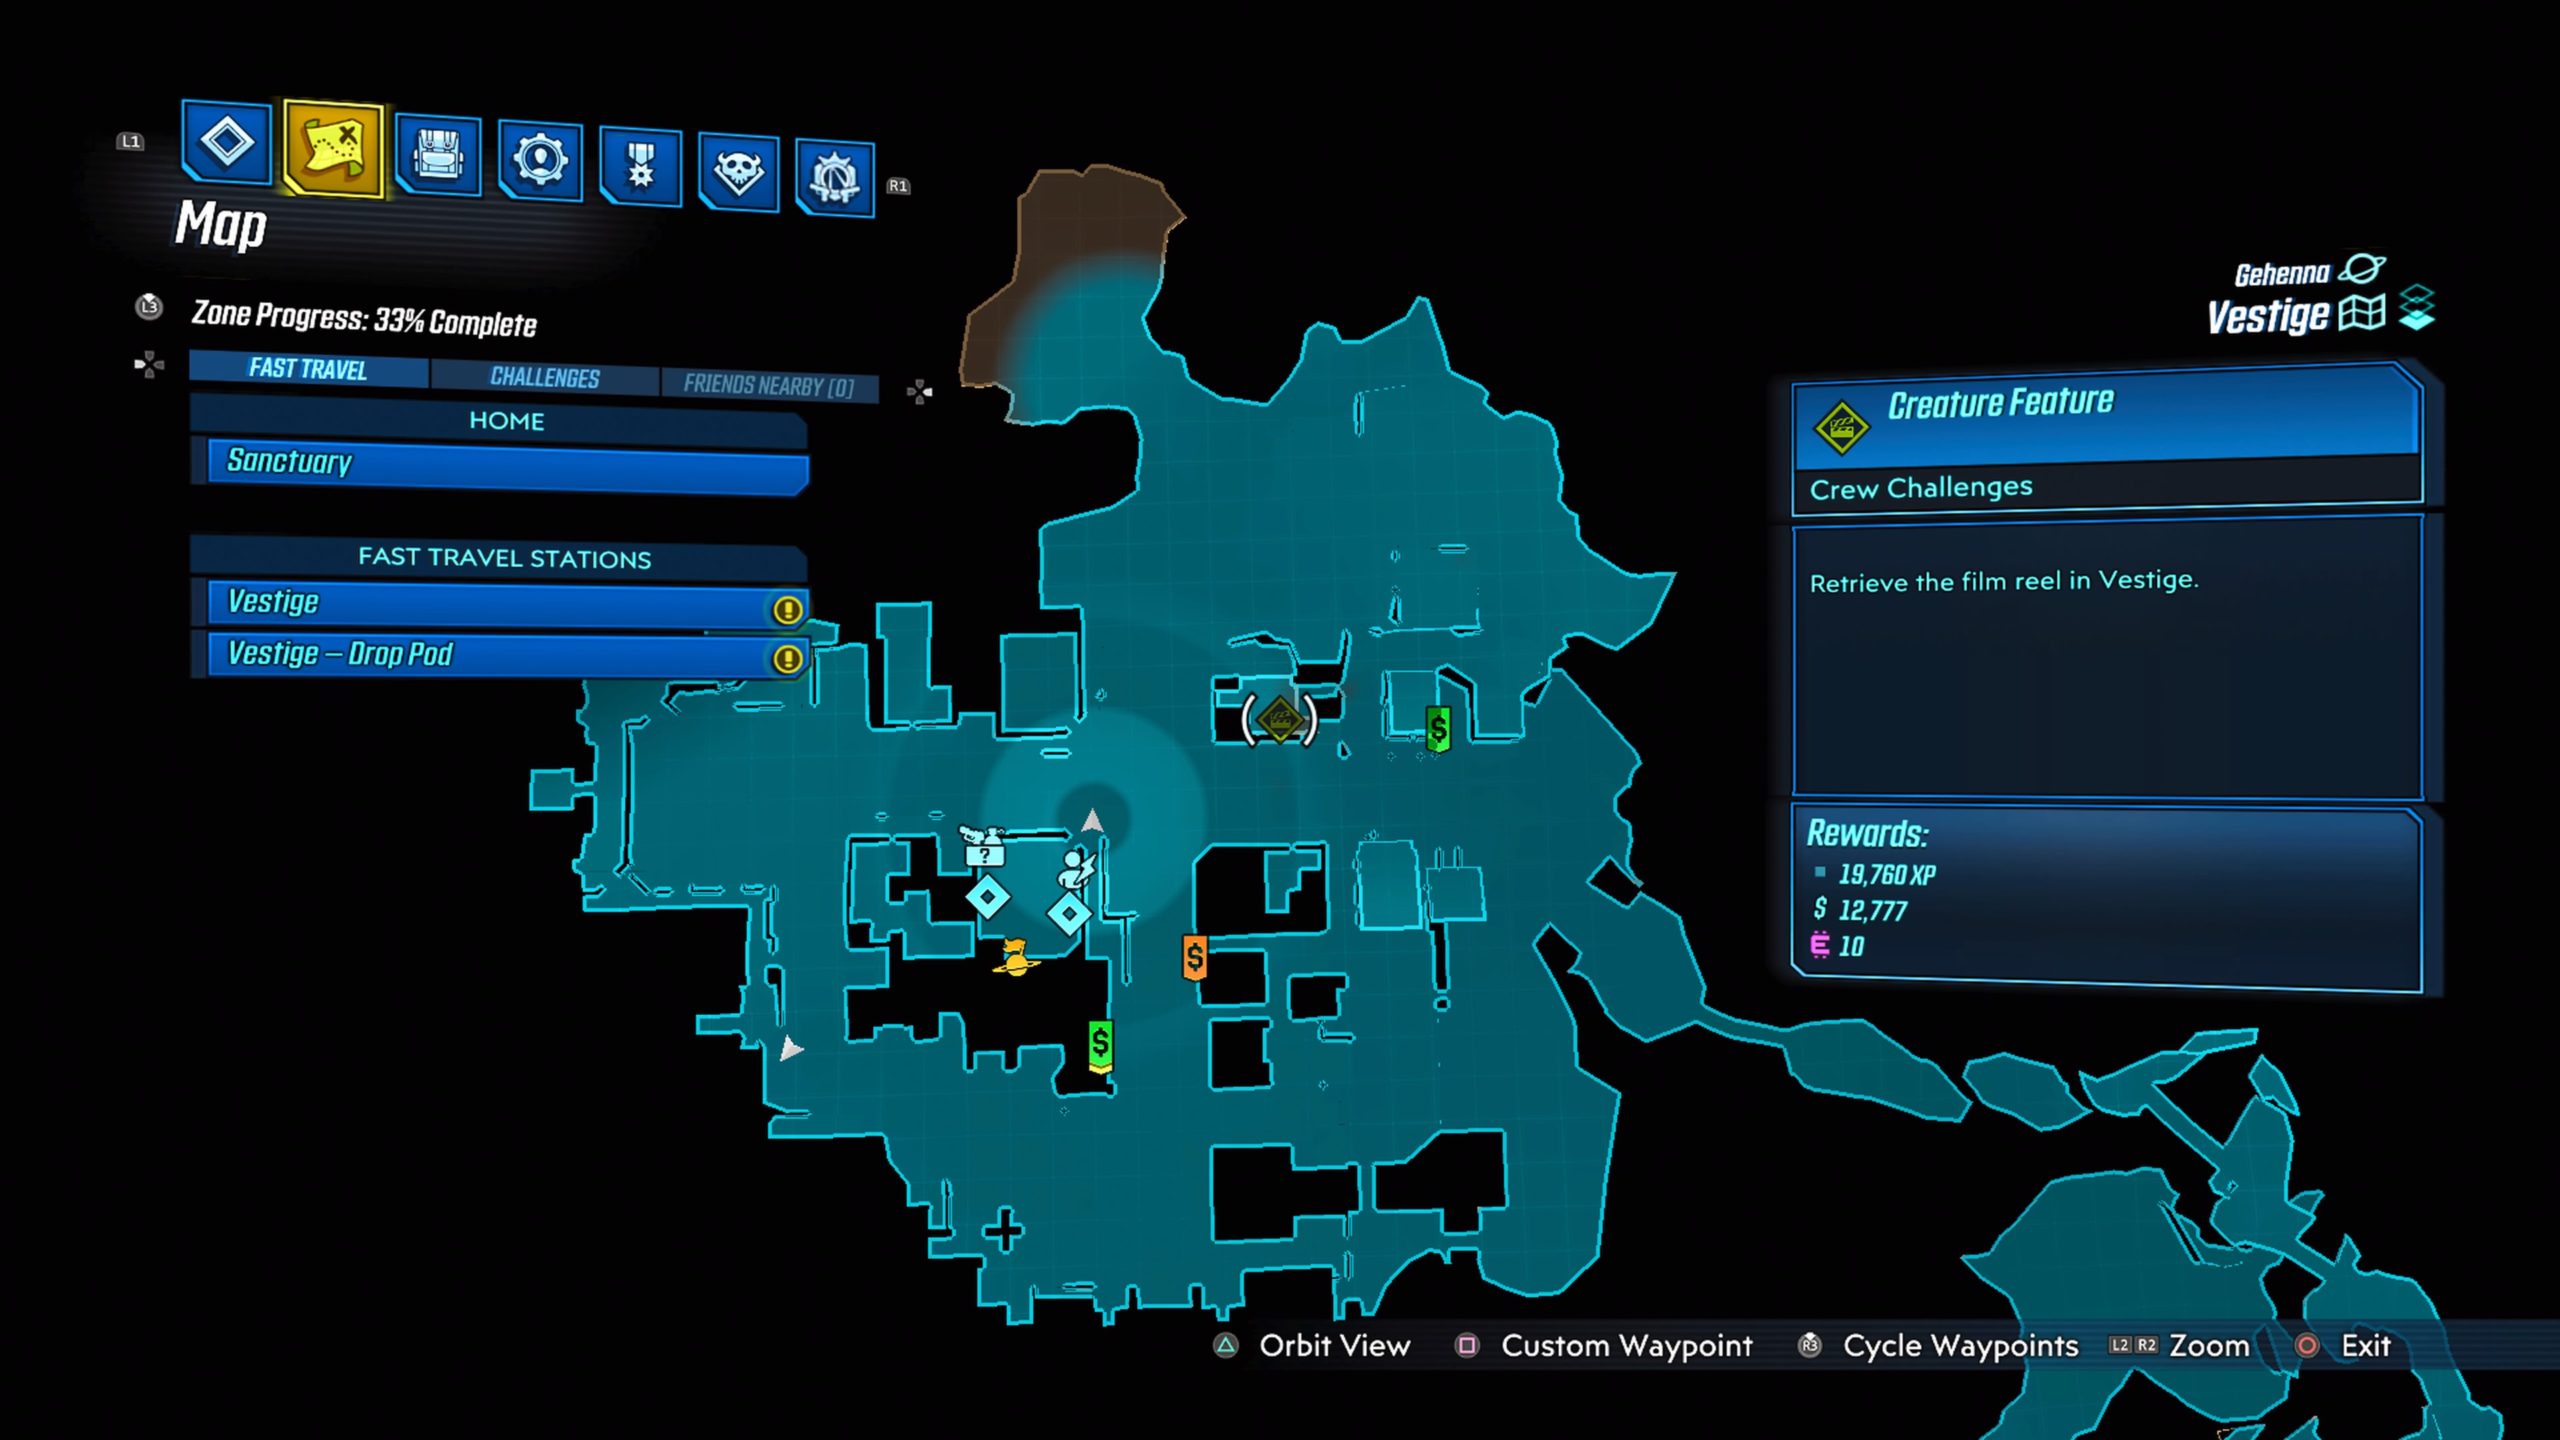

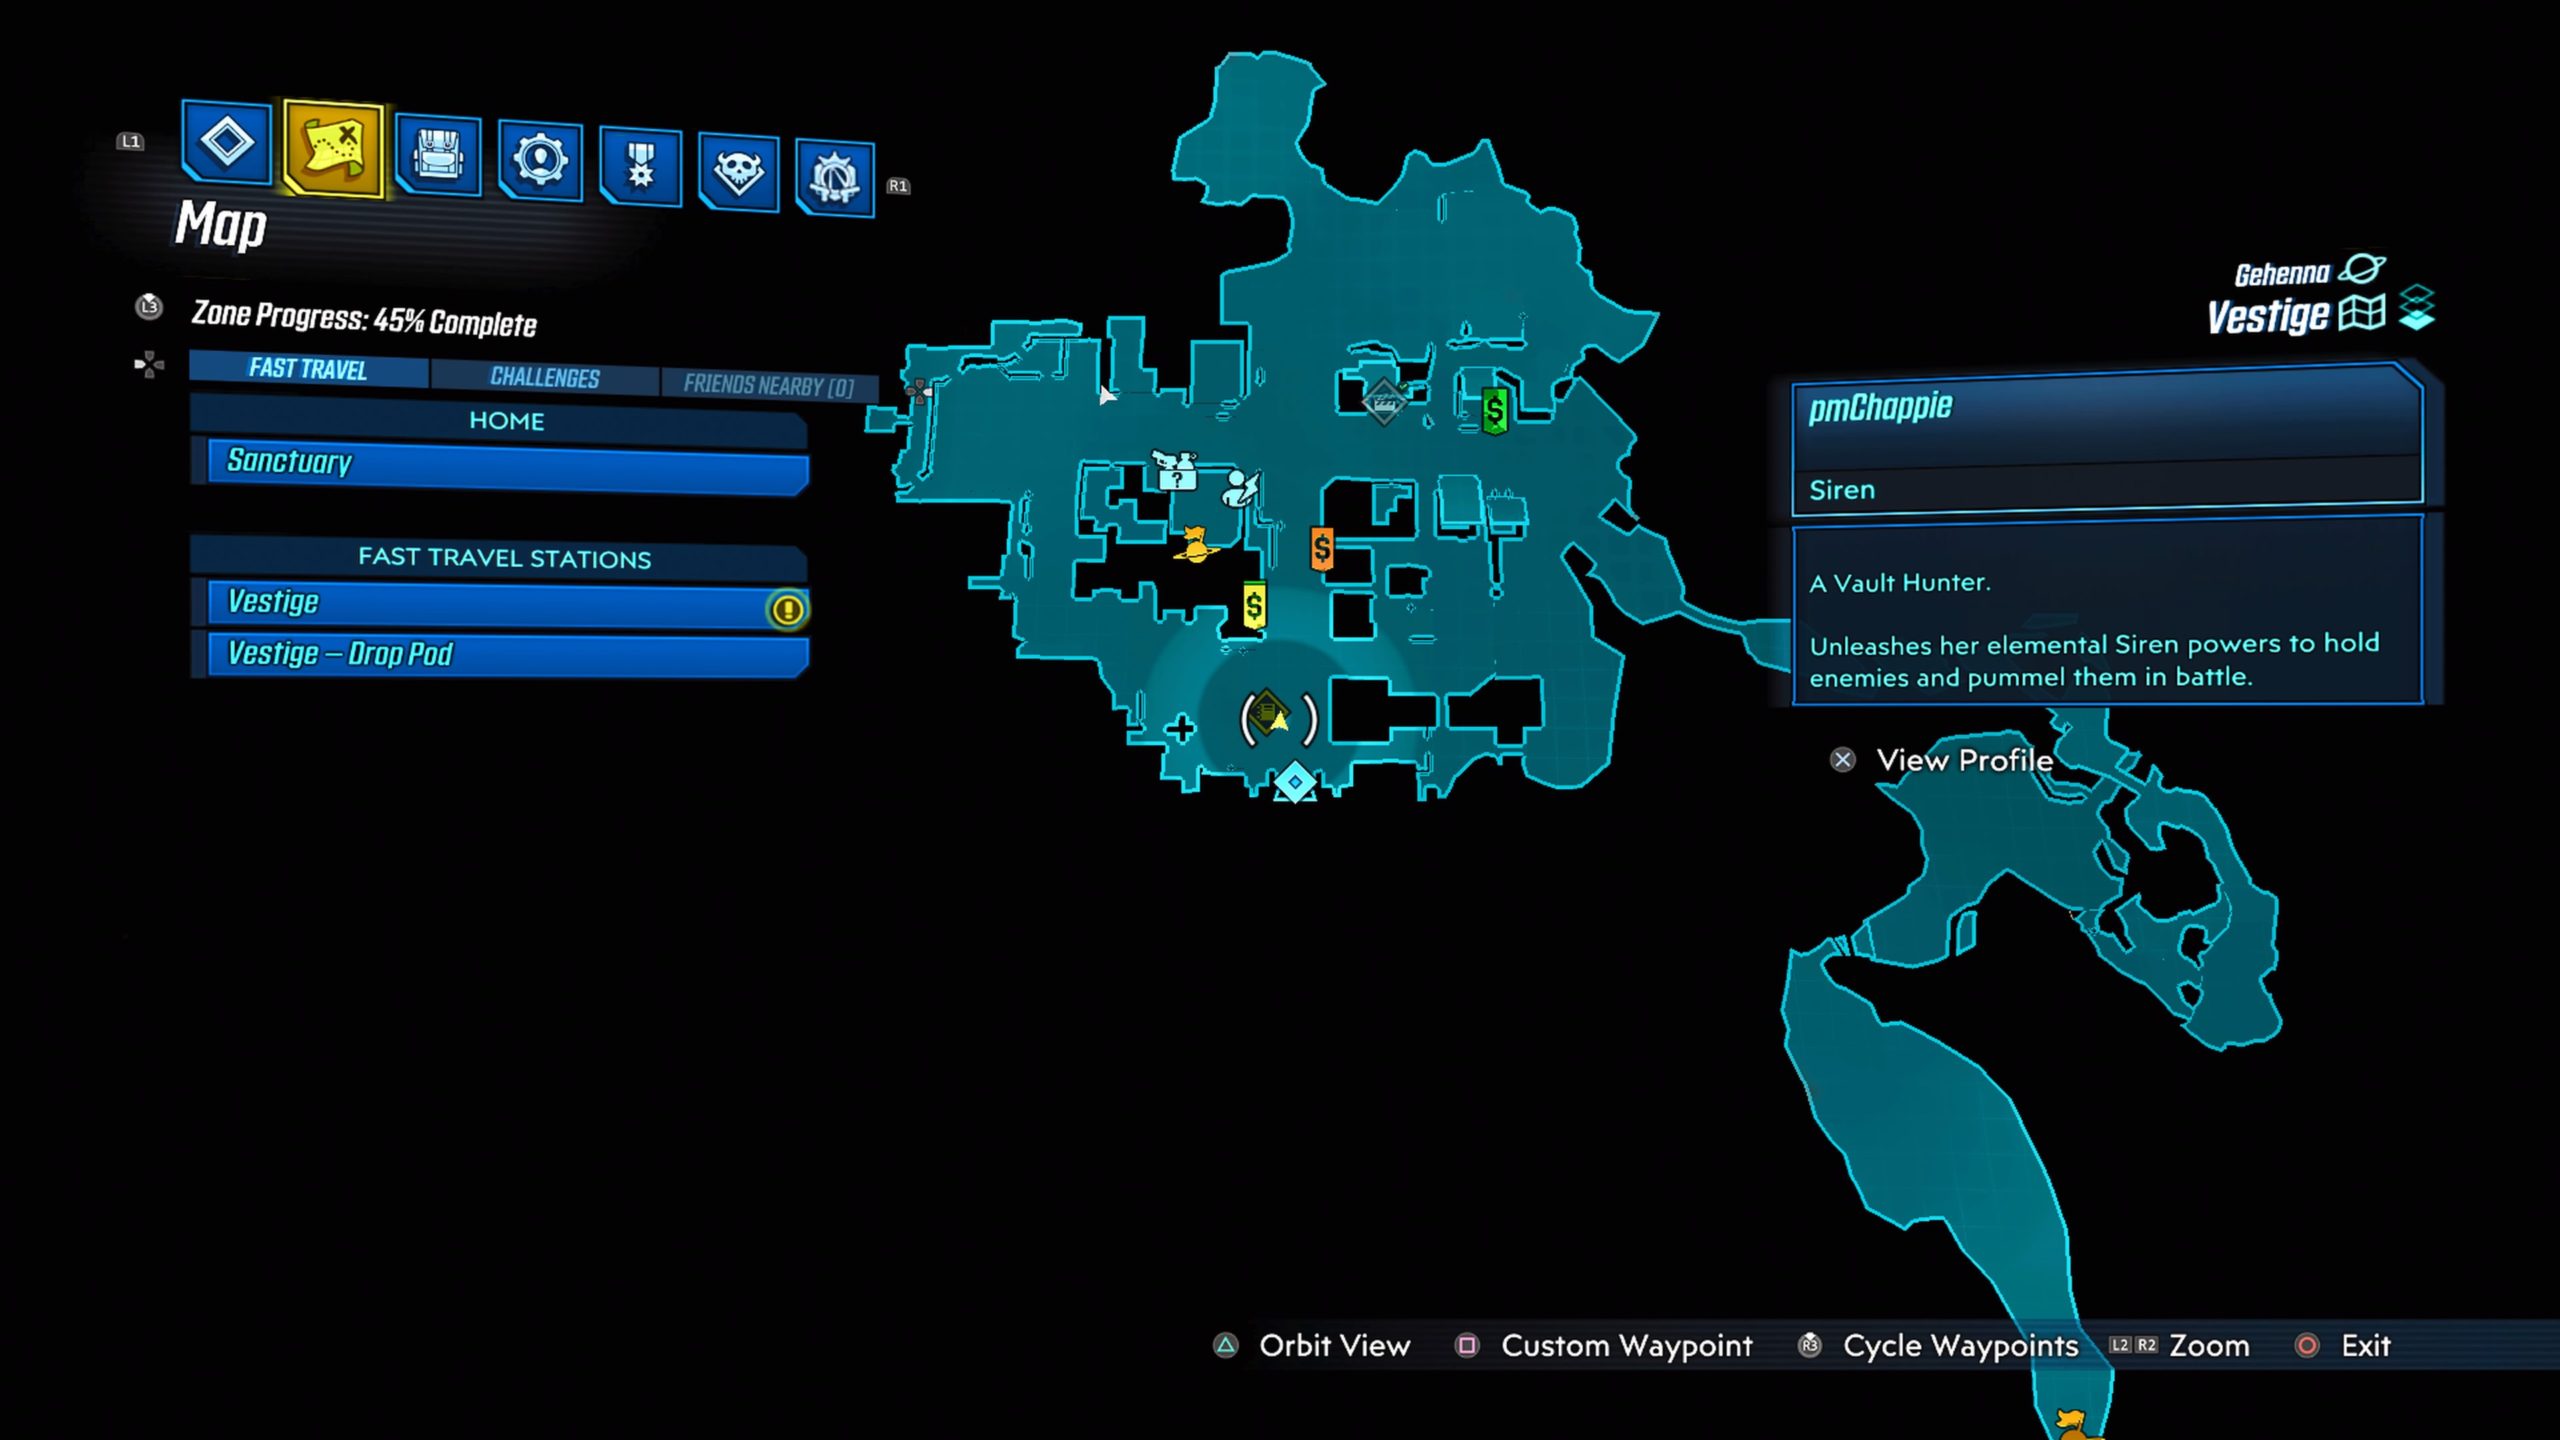
The film reel can be found in the town of Vestige in a building that has a giant stuffed creature in it.
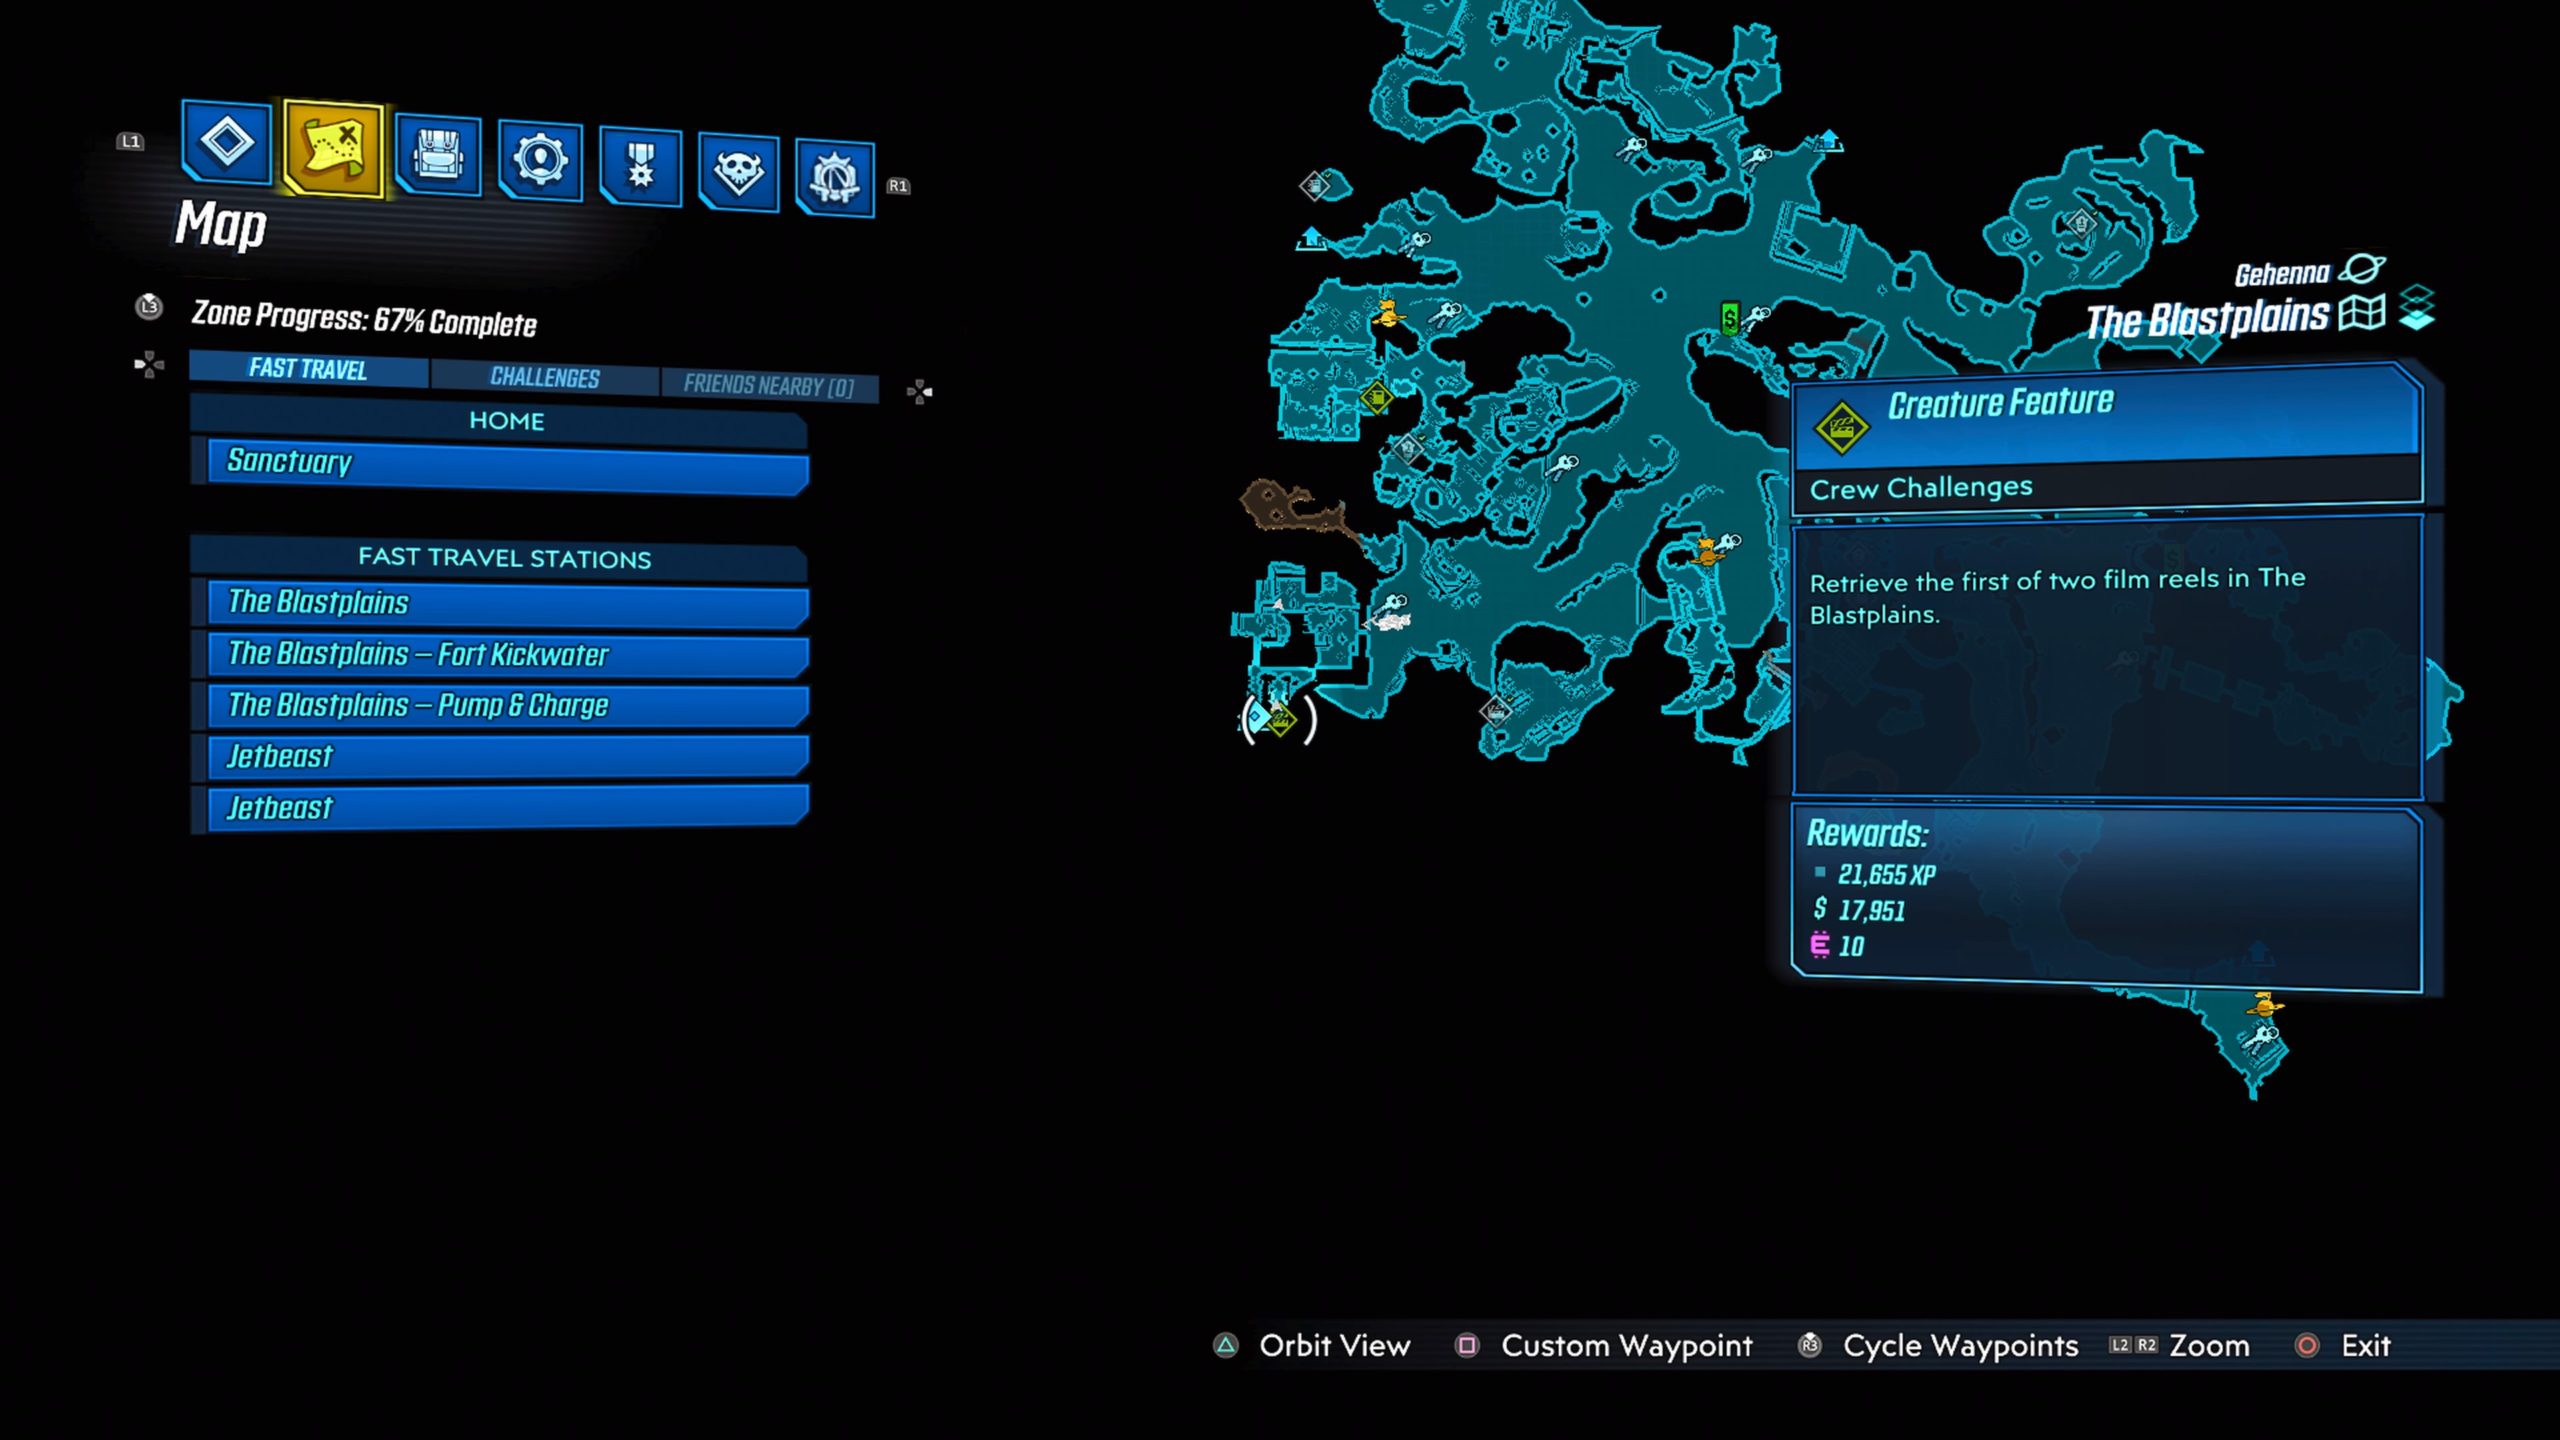
Blastplains #1

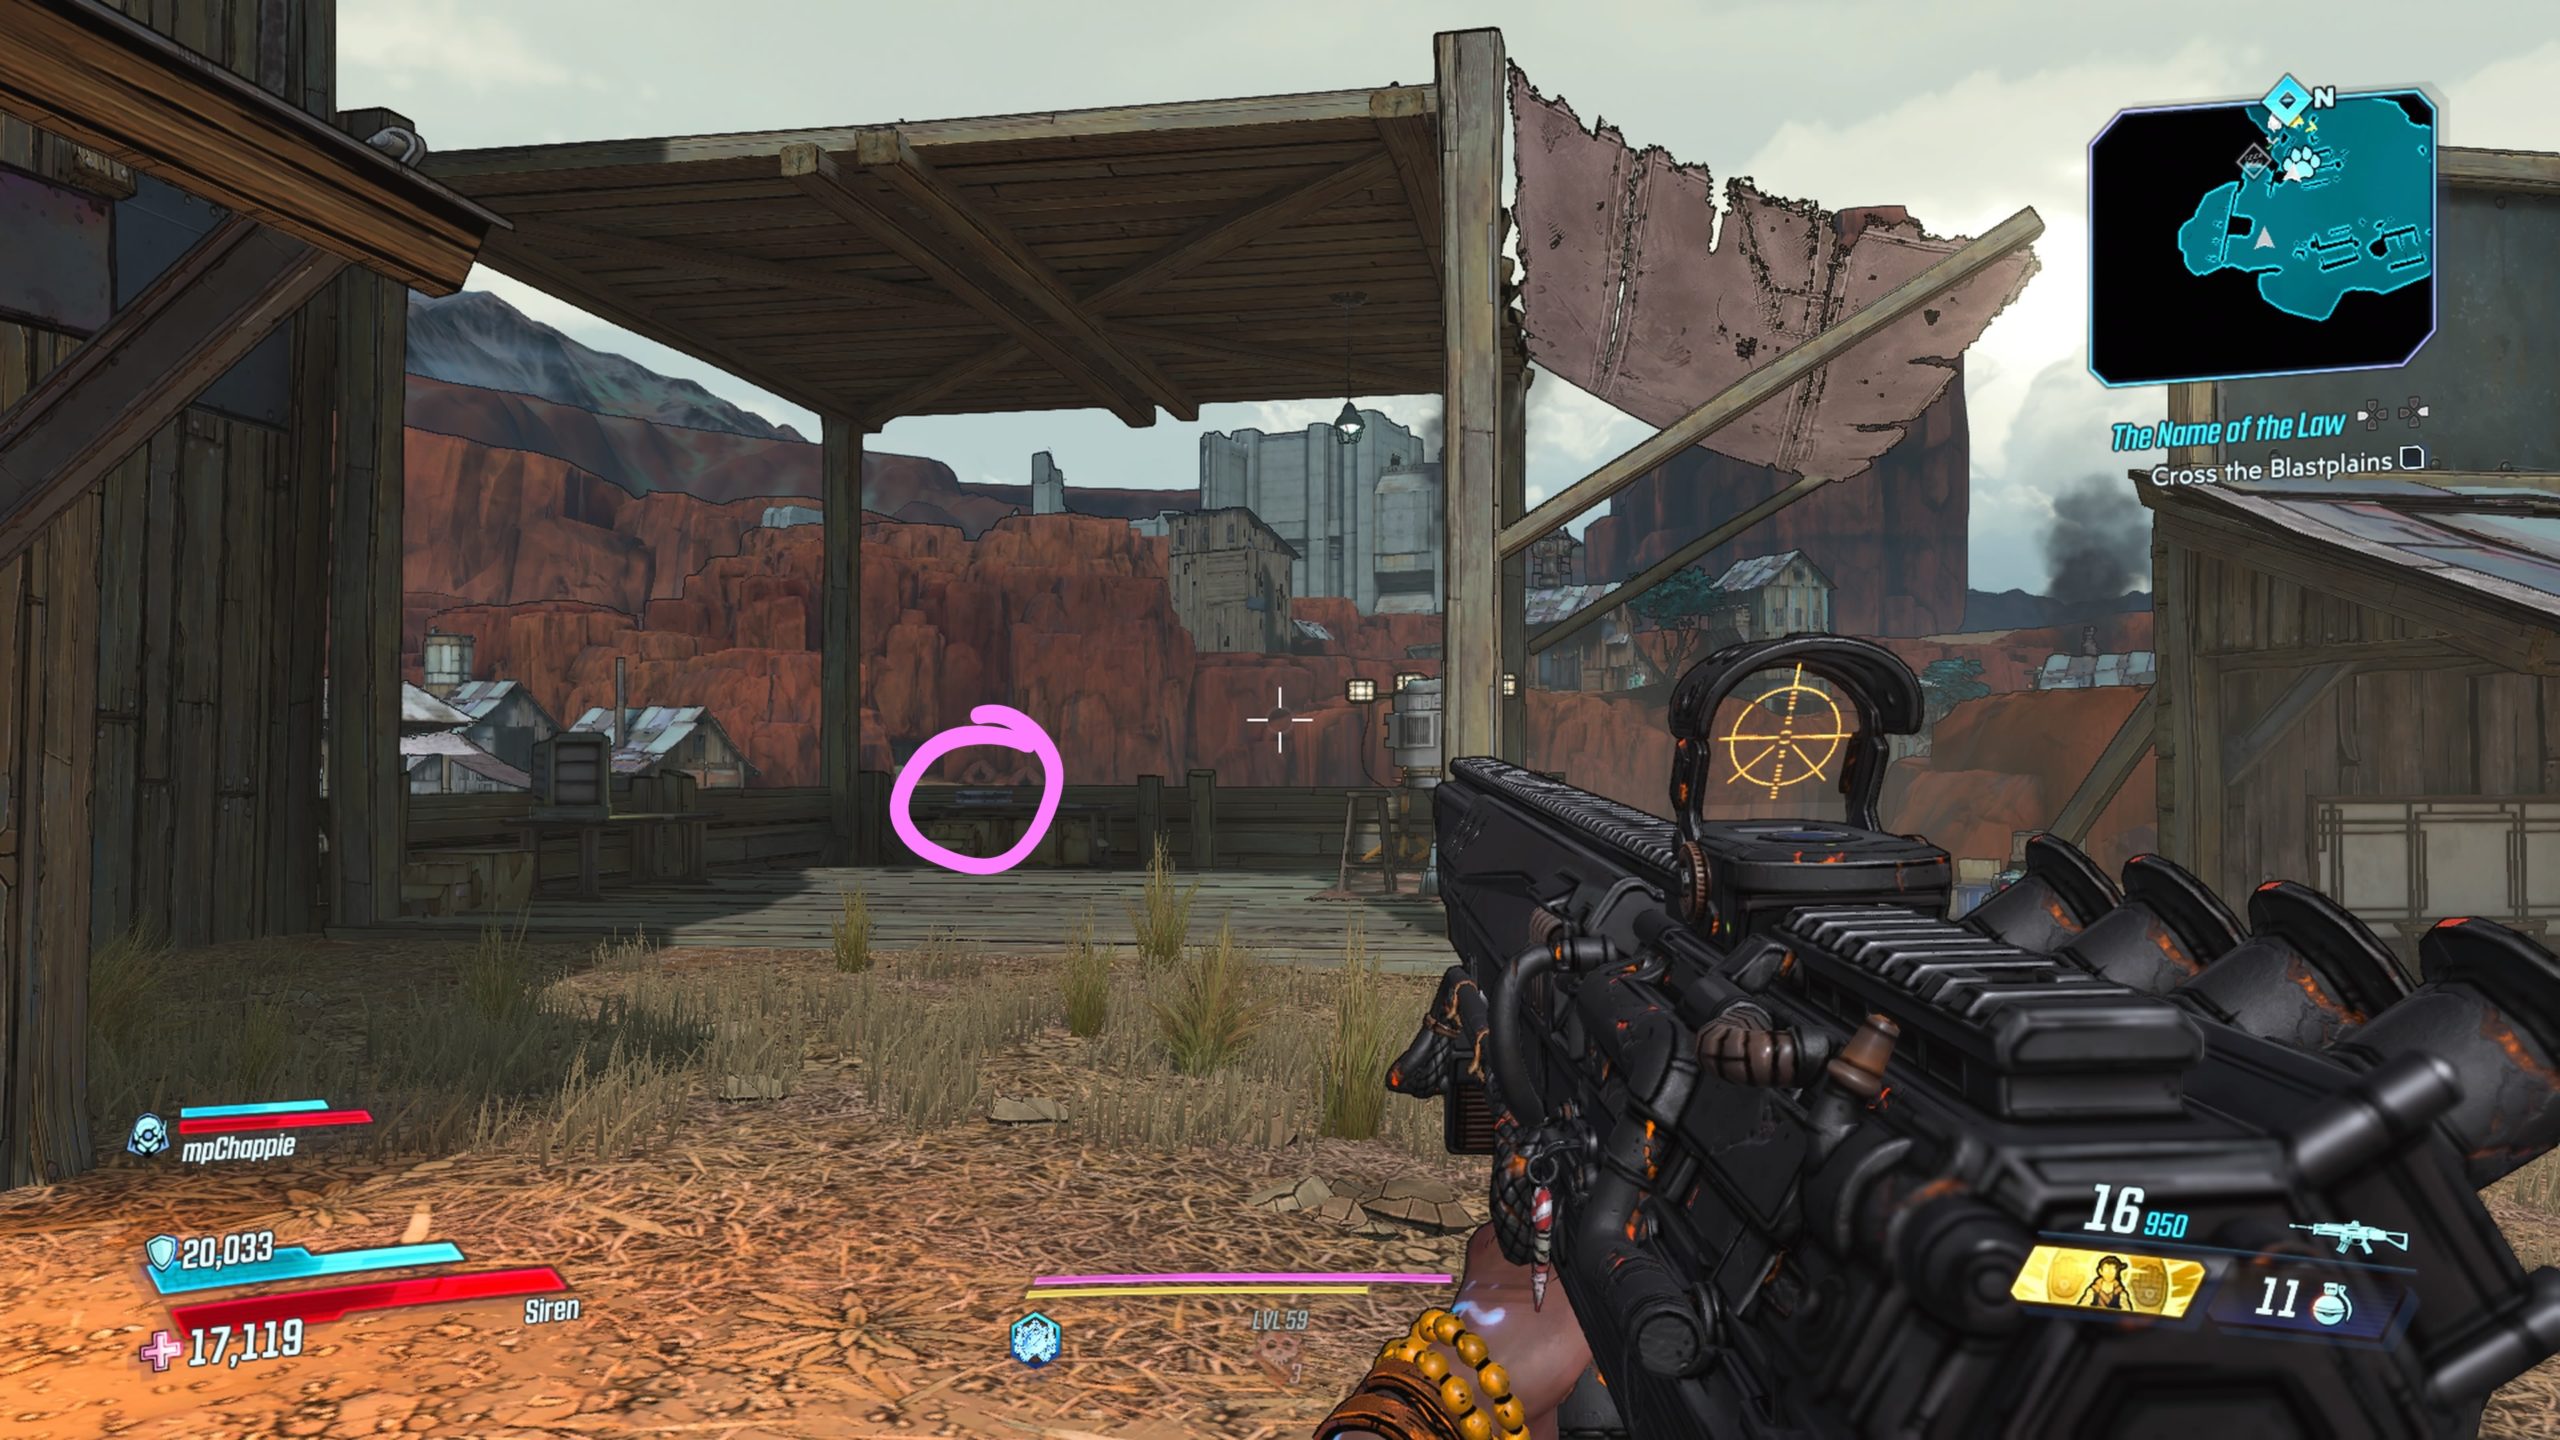
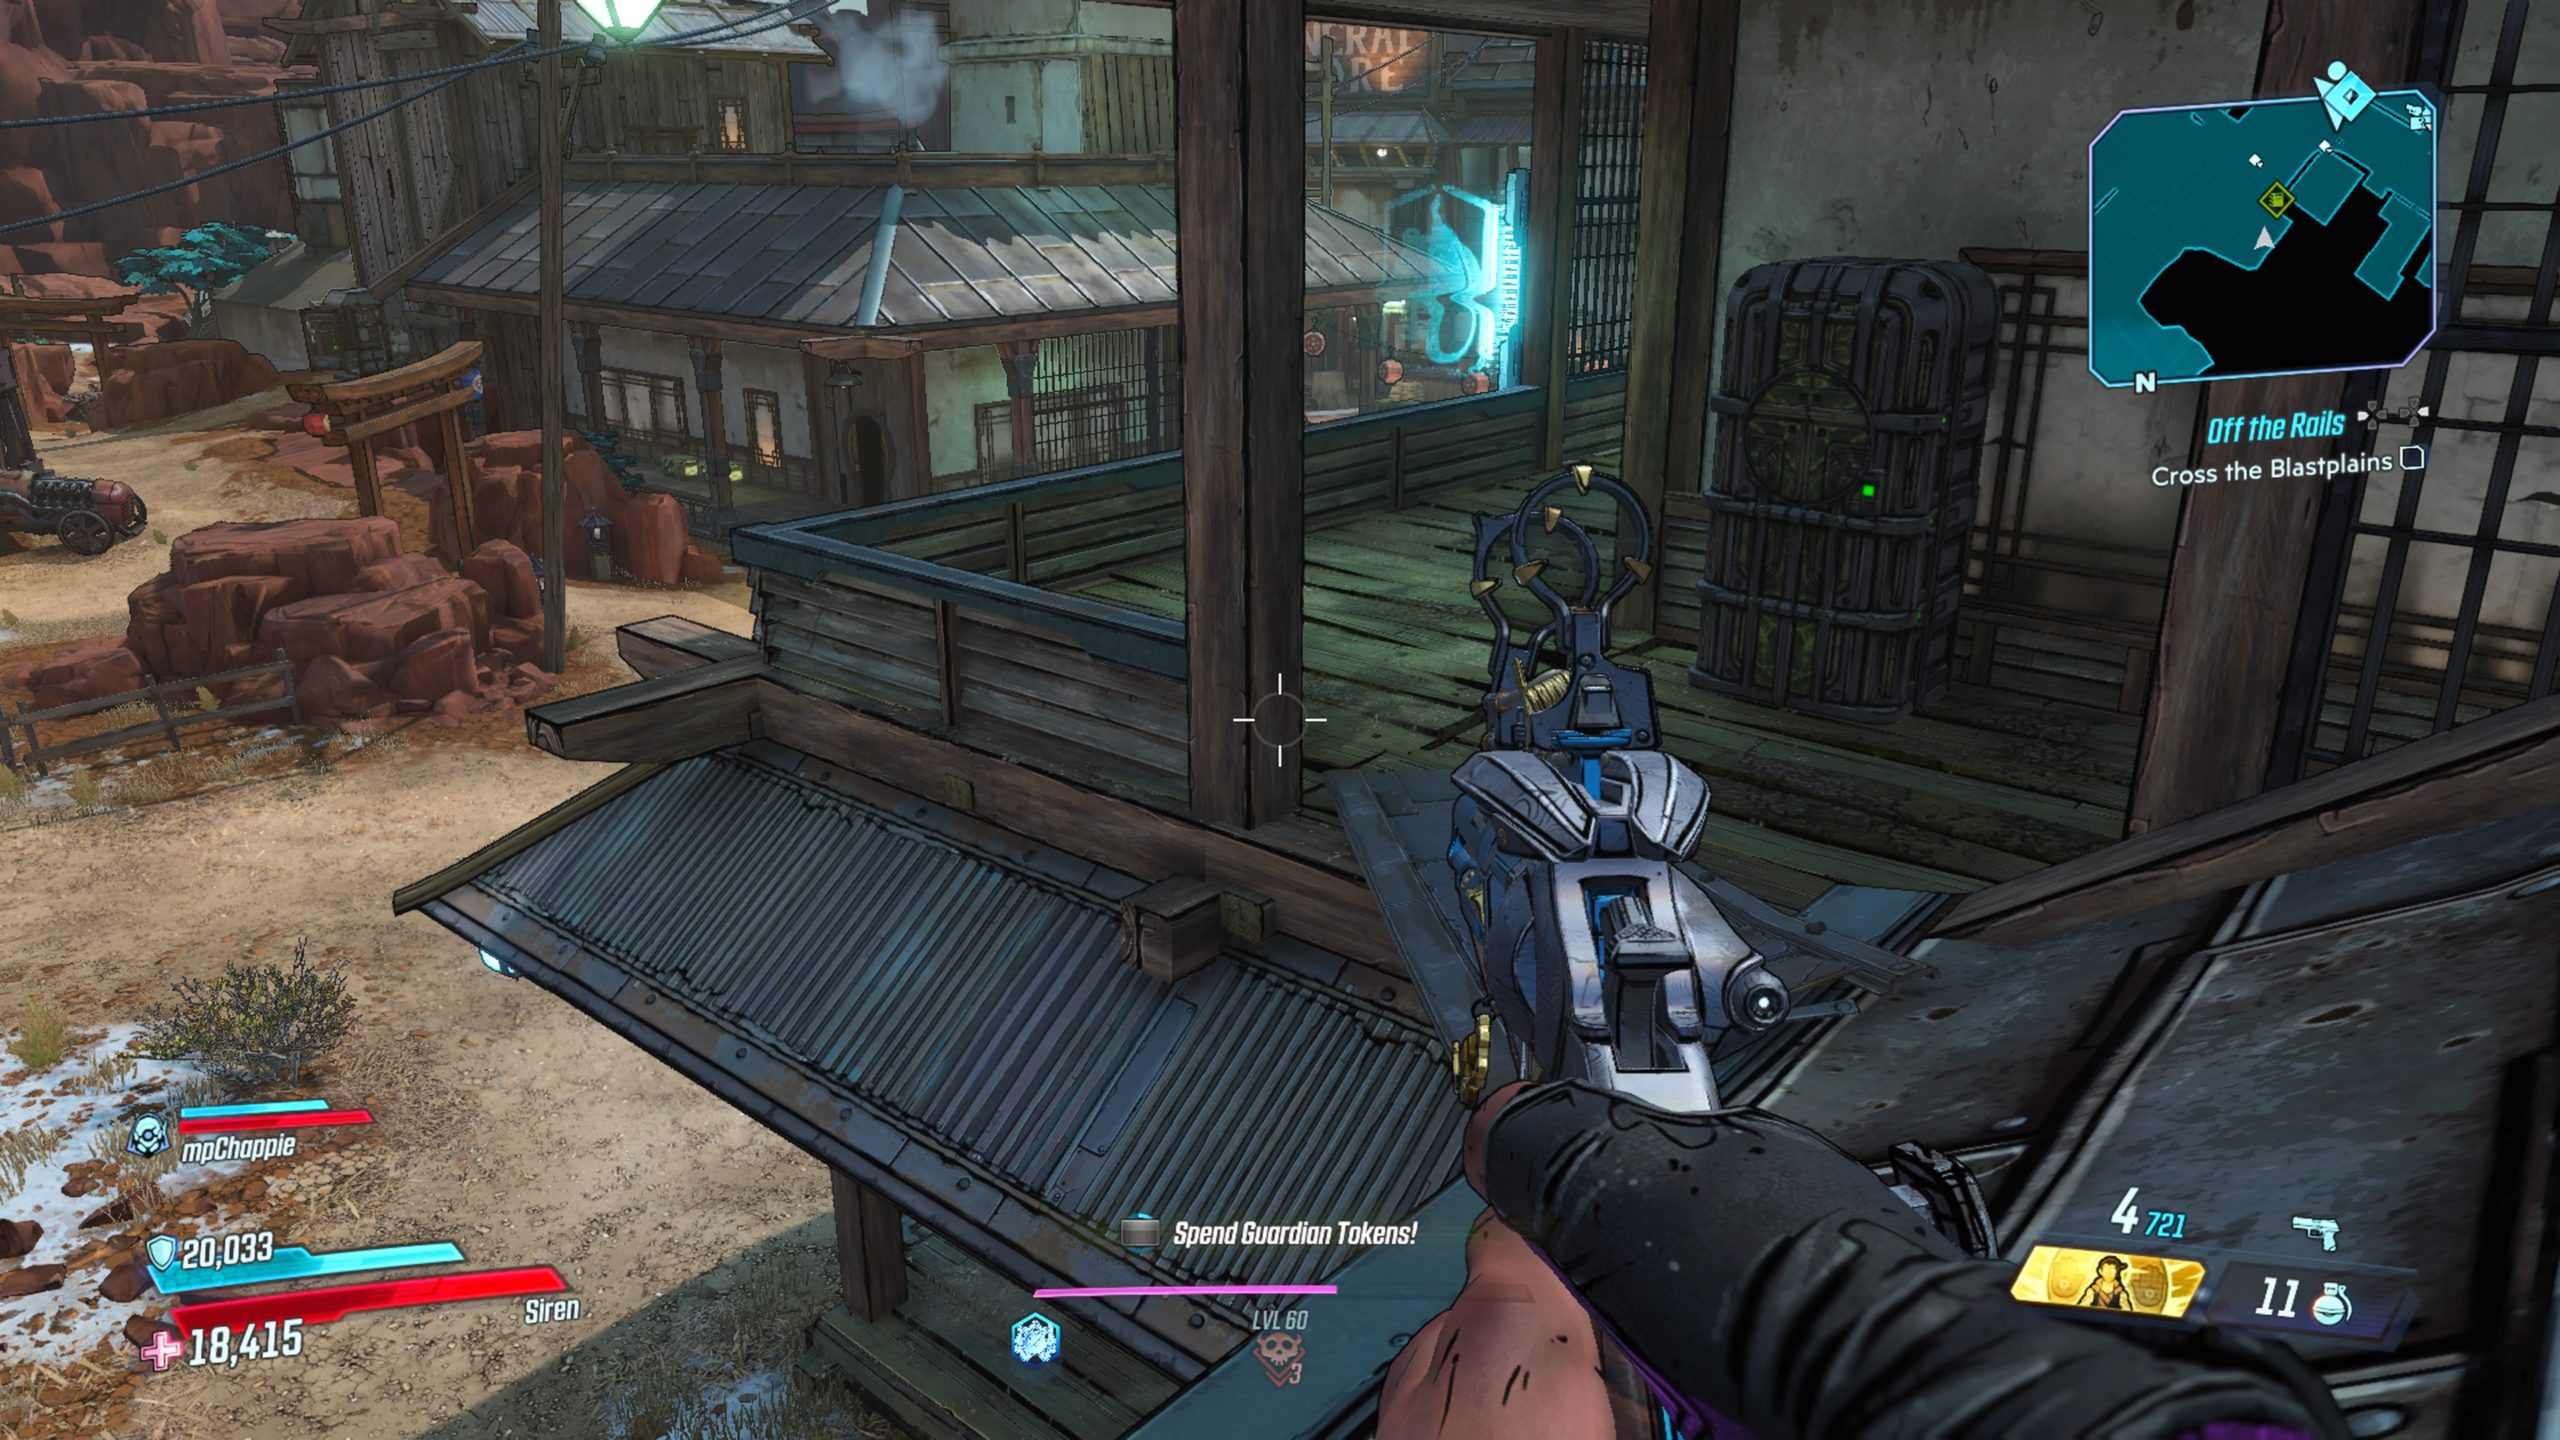
This film reel can be found on the eastern side of the Blastplains on a table.
Blastplains #2

The film reel is located next to the Crater’s Edge map transition.
Ashfall Peaks #1


This reel can be found in Pilfertown on the second level of a building. To reach it, you will need to head inside the building and take the portal. Once you emerge from the portal, the reel will be straight in front of you.
Obsidian Forest #1
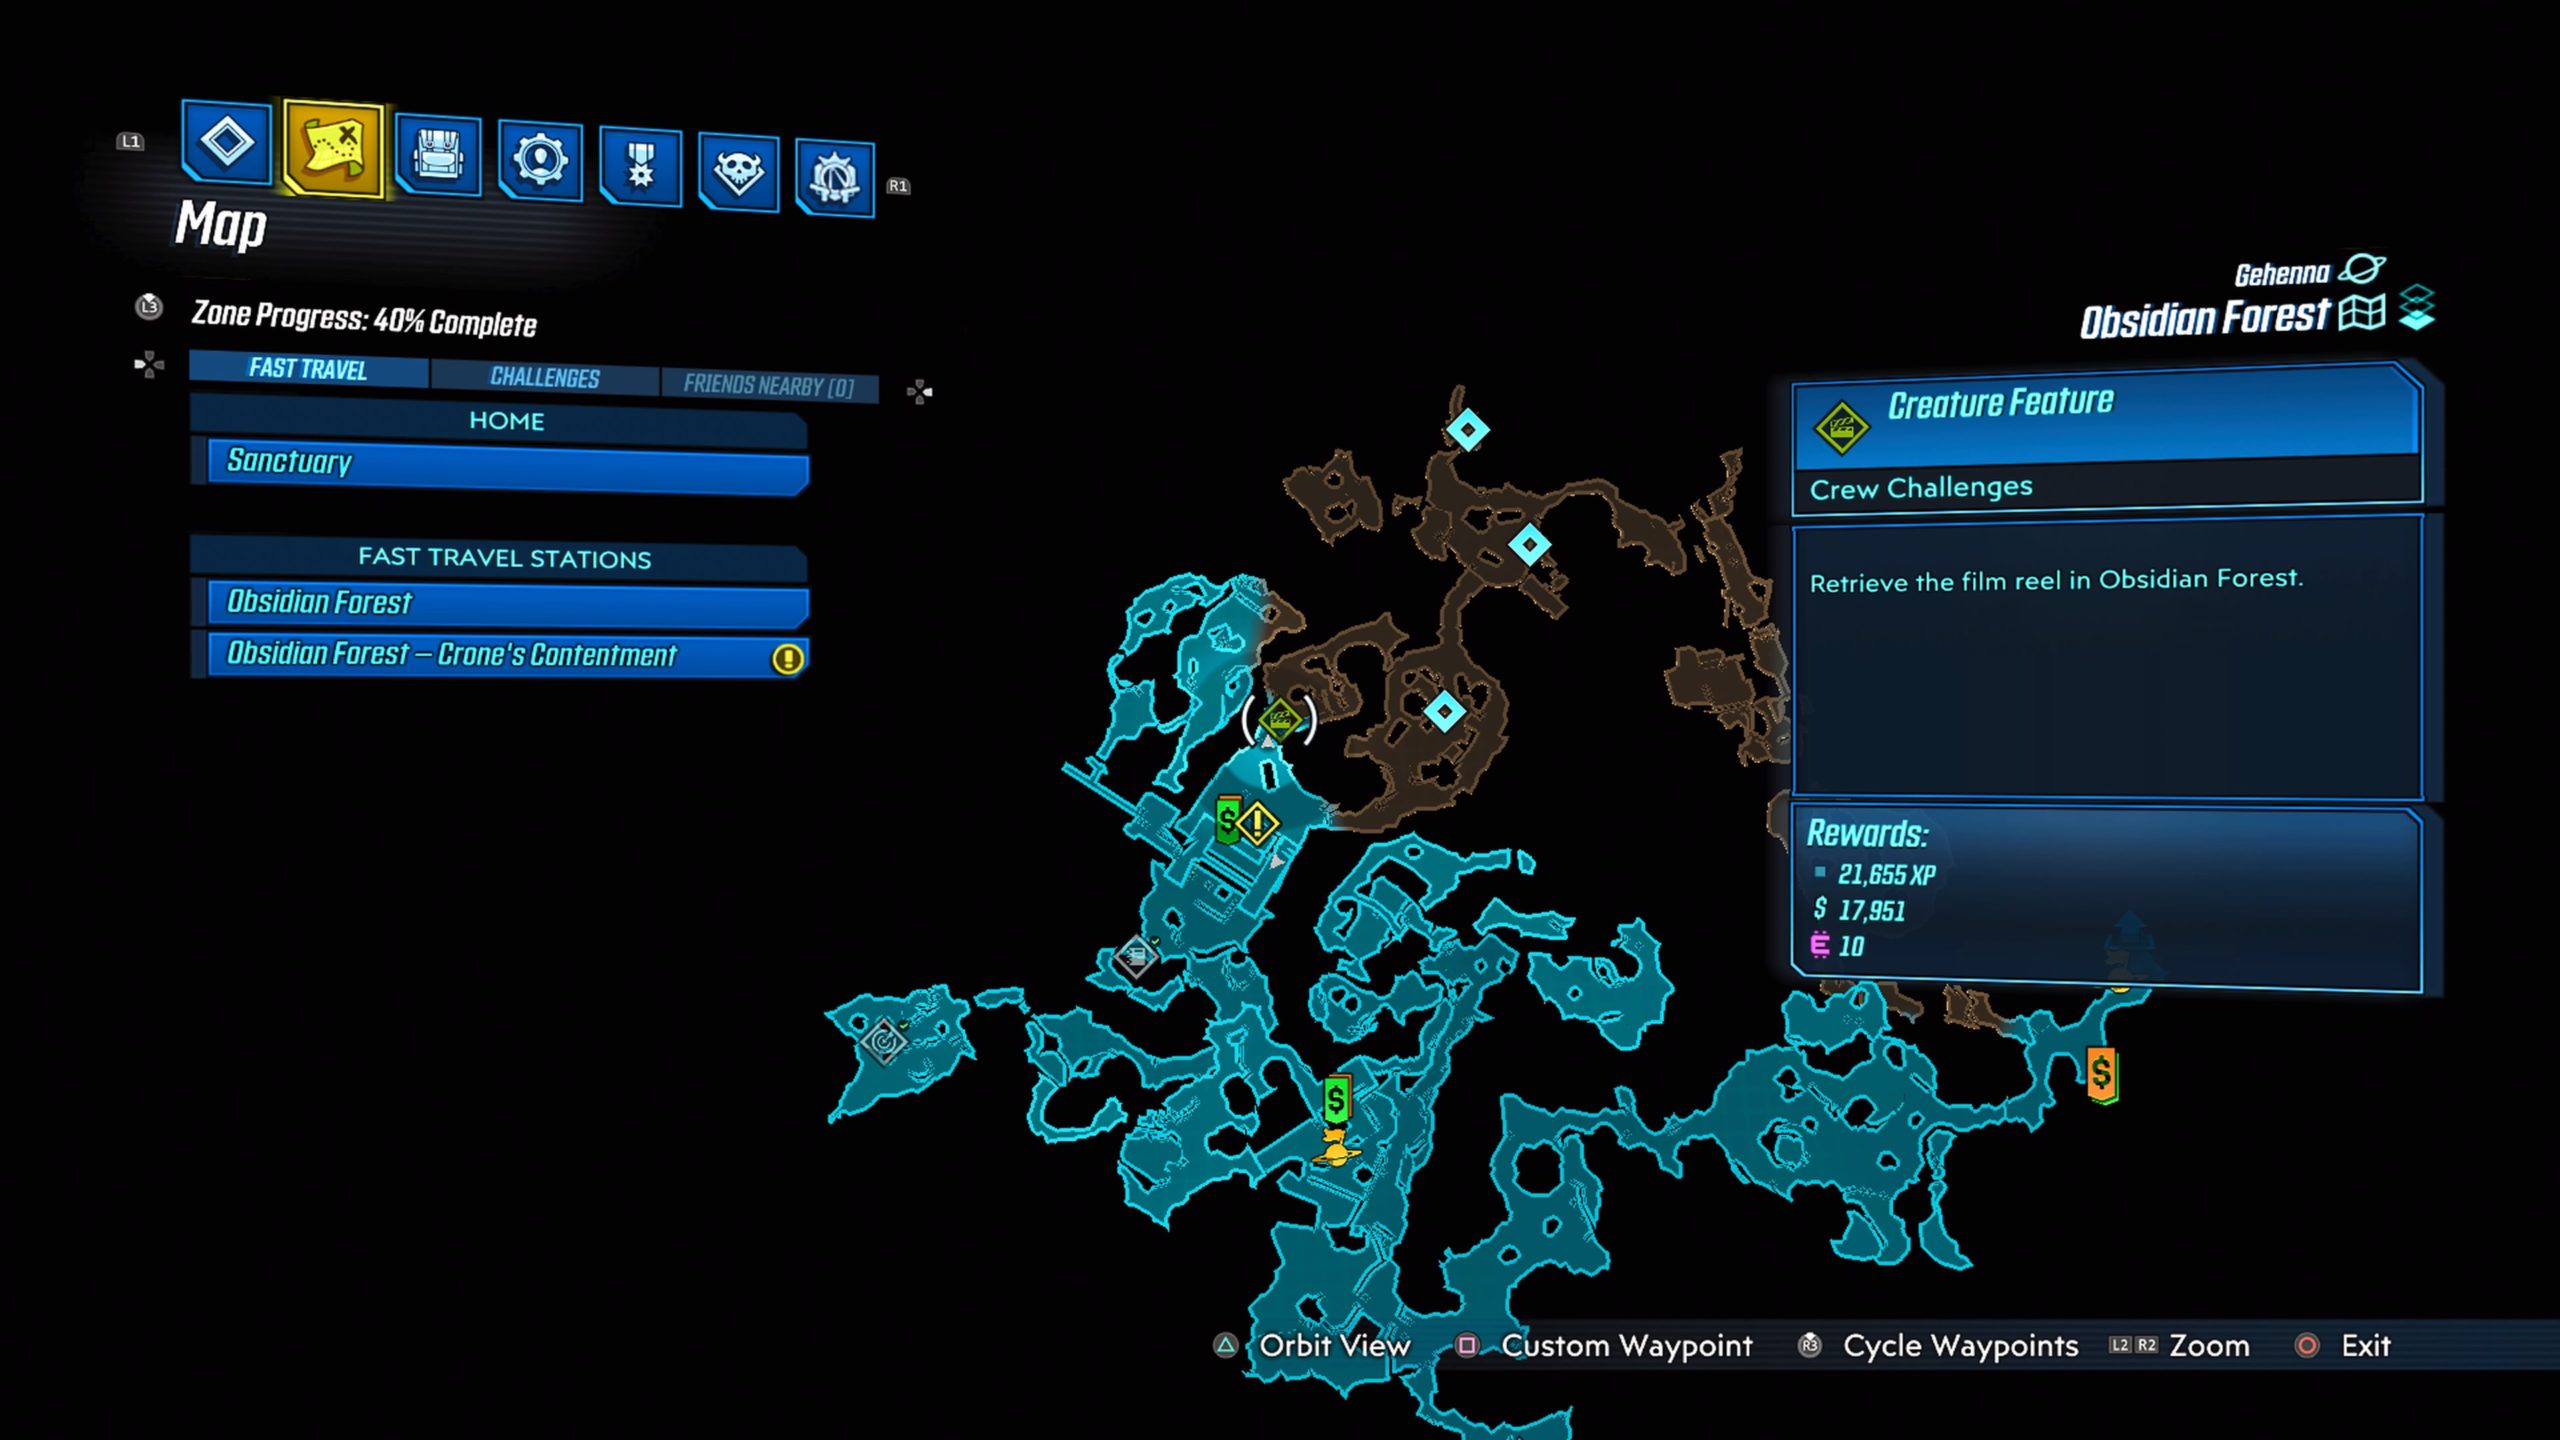
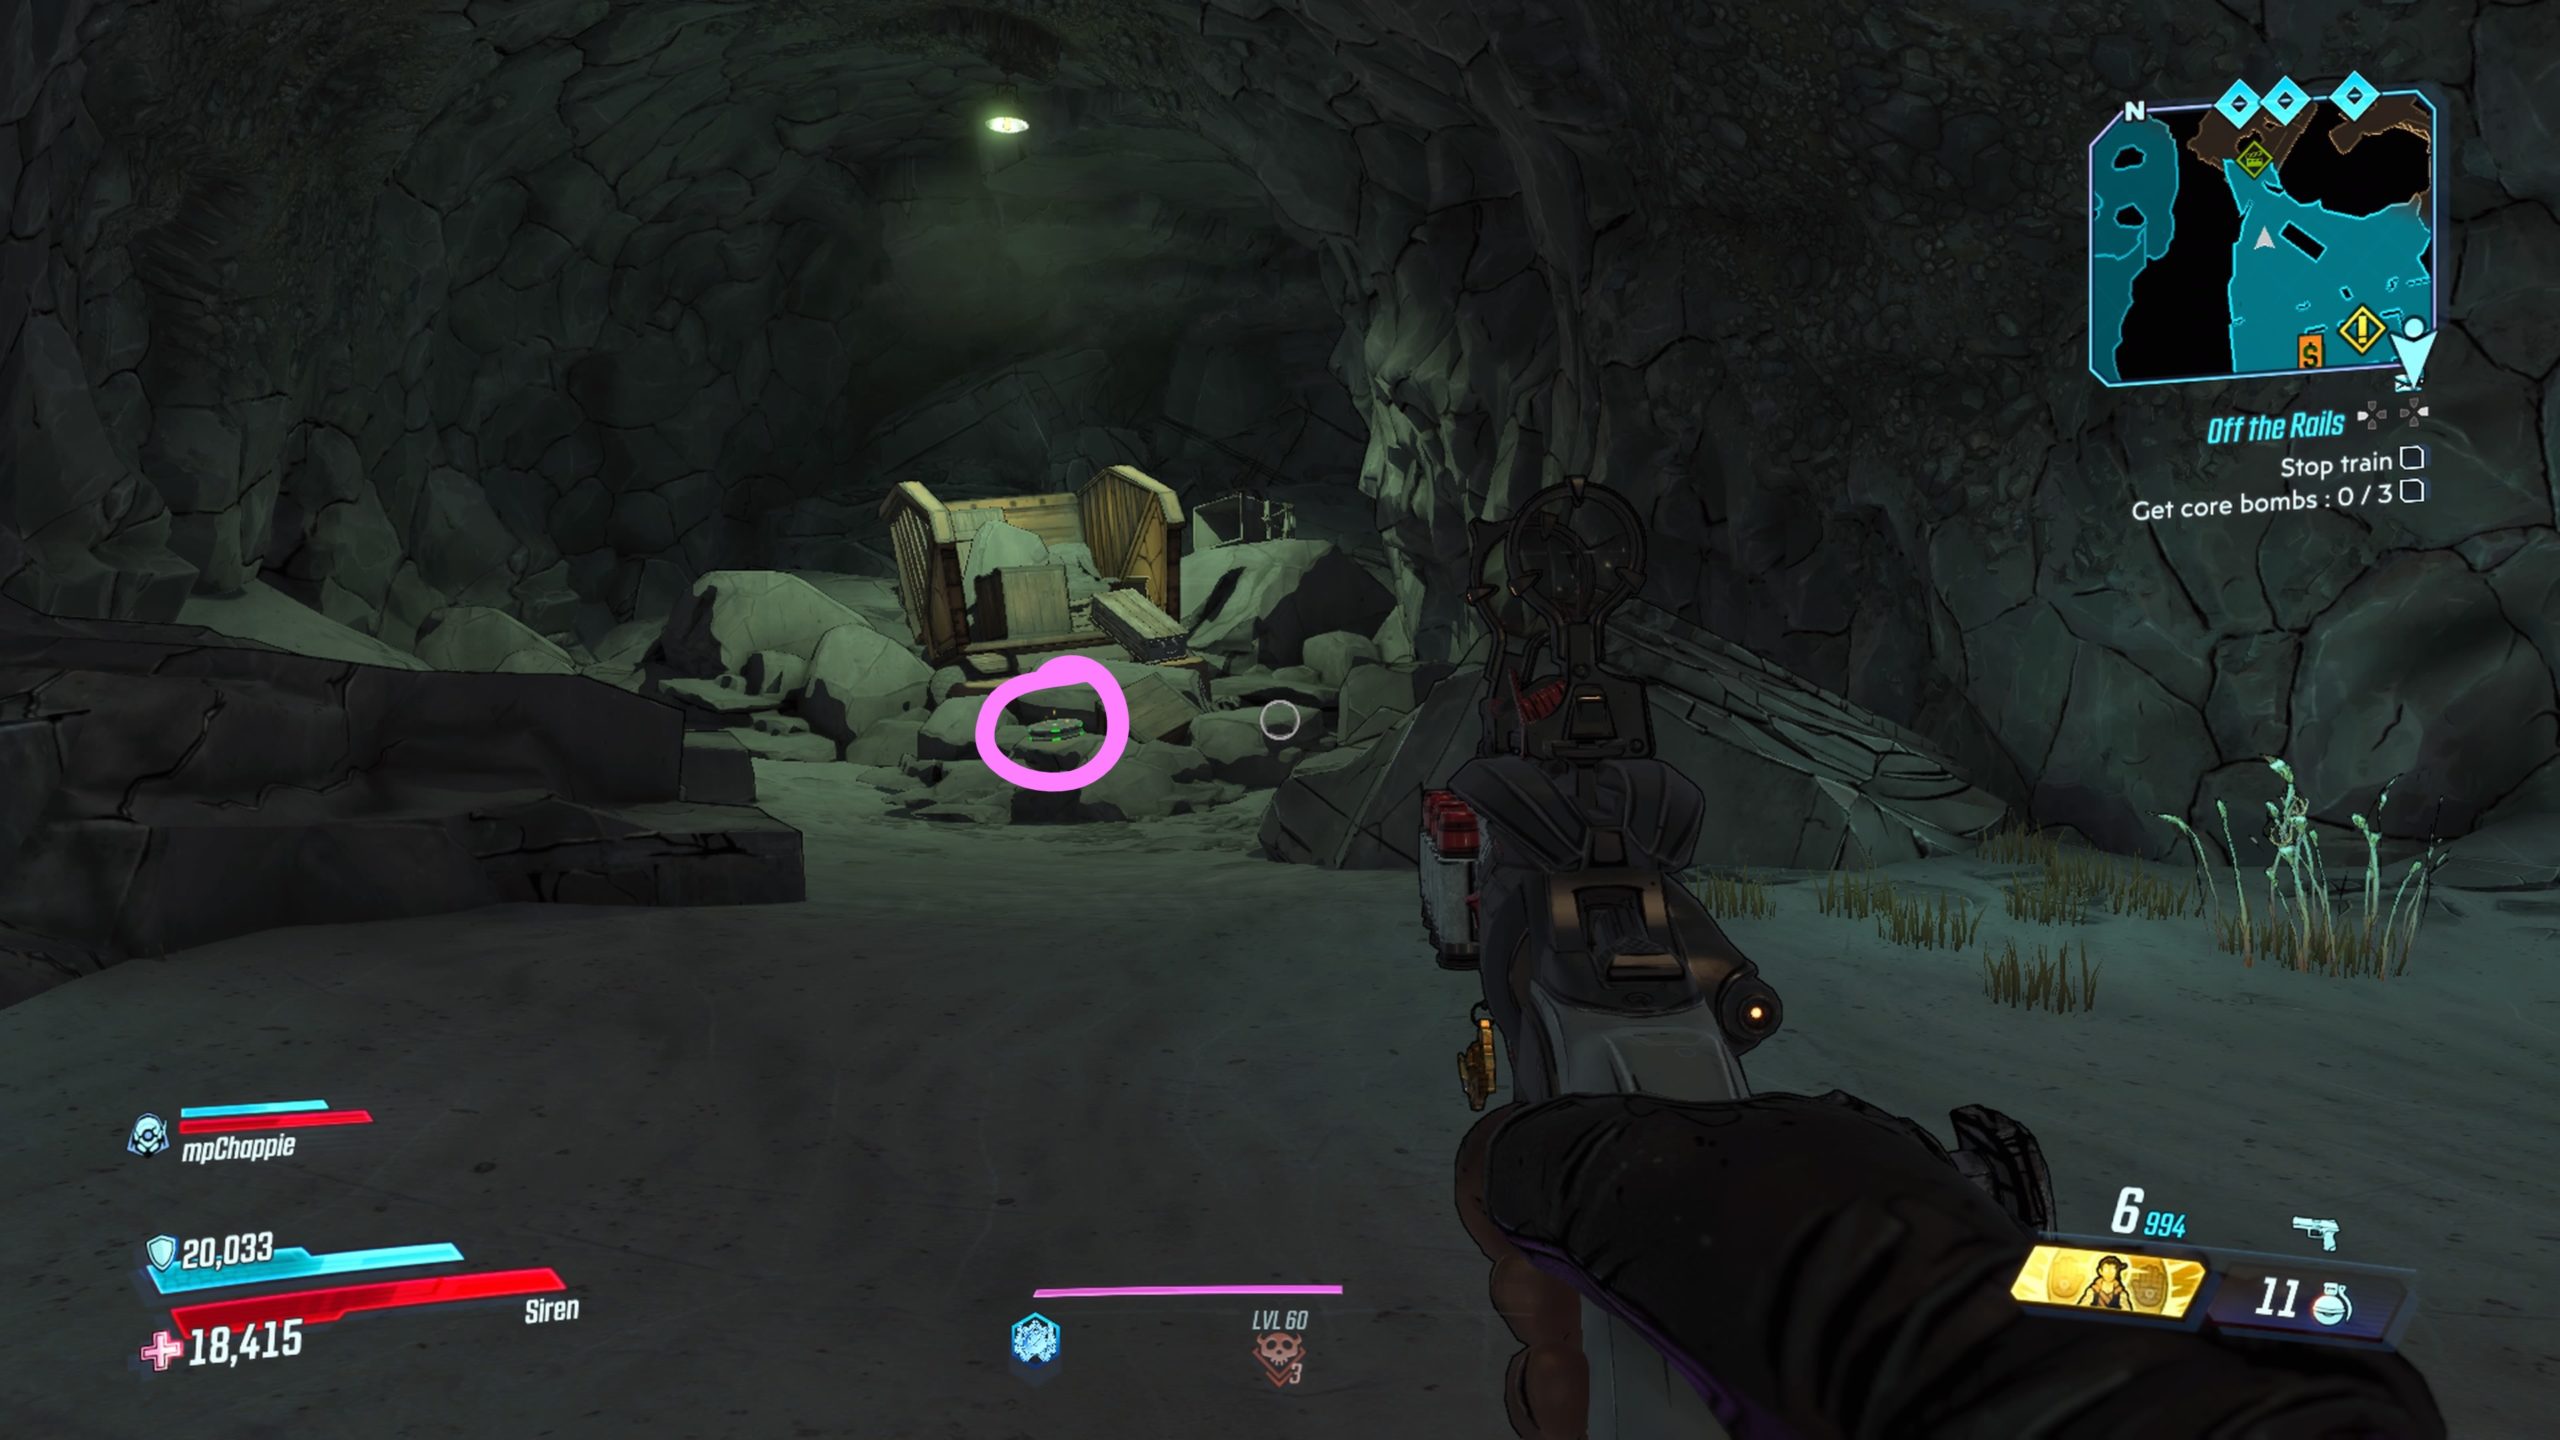
This film reel can be found spilling out of a dump truck in Tallyway Station.
Bloodsun Canyon #1
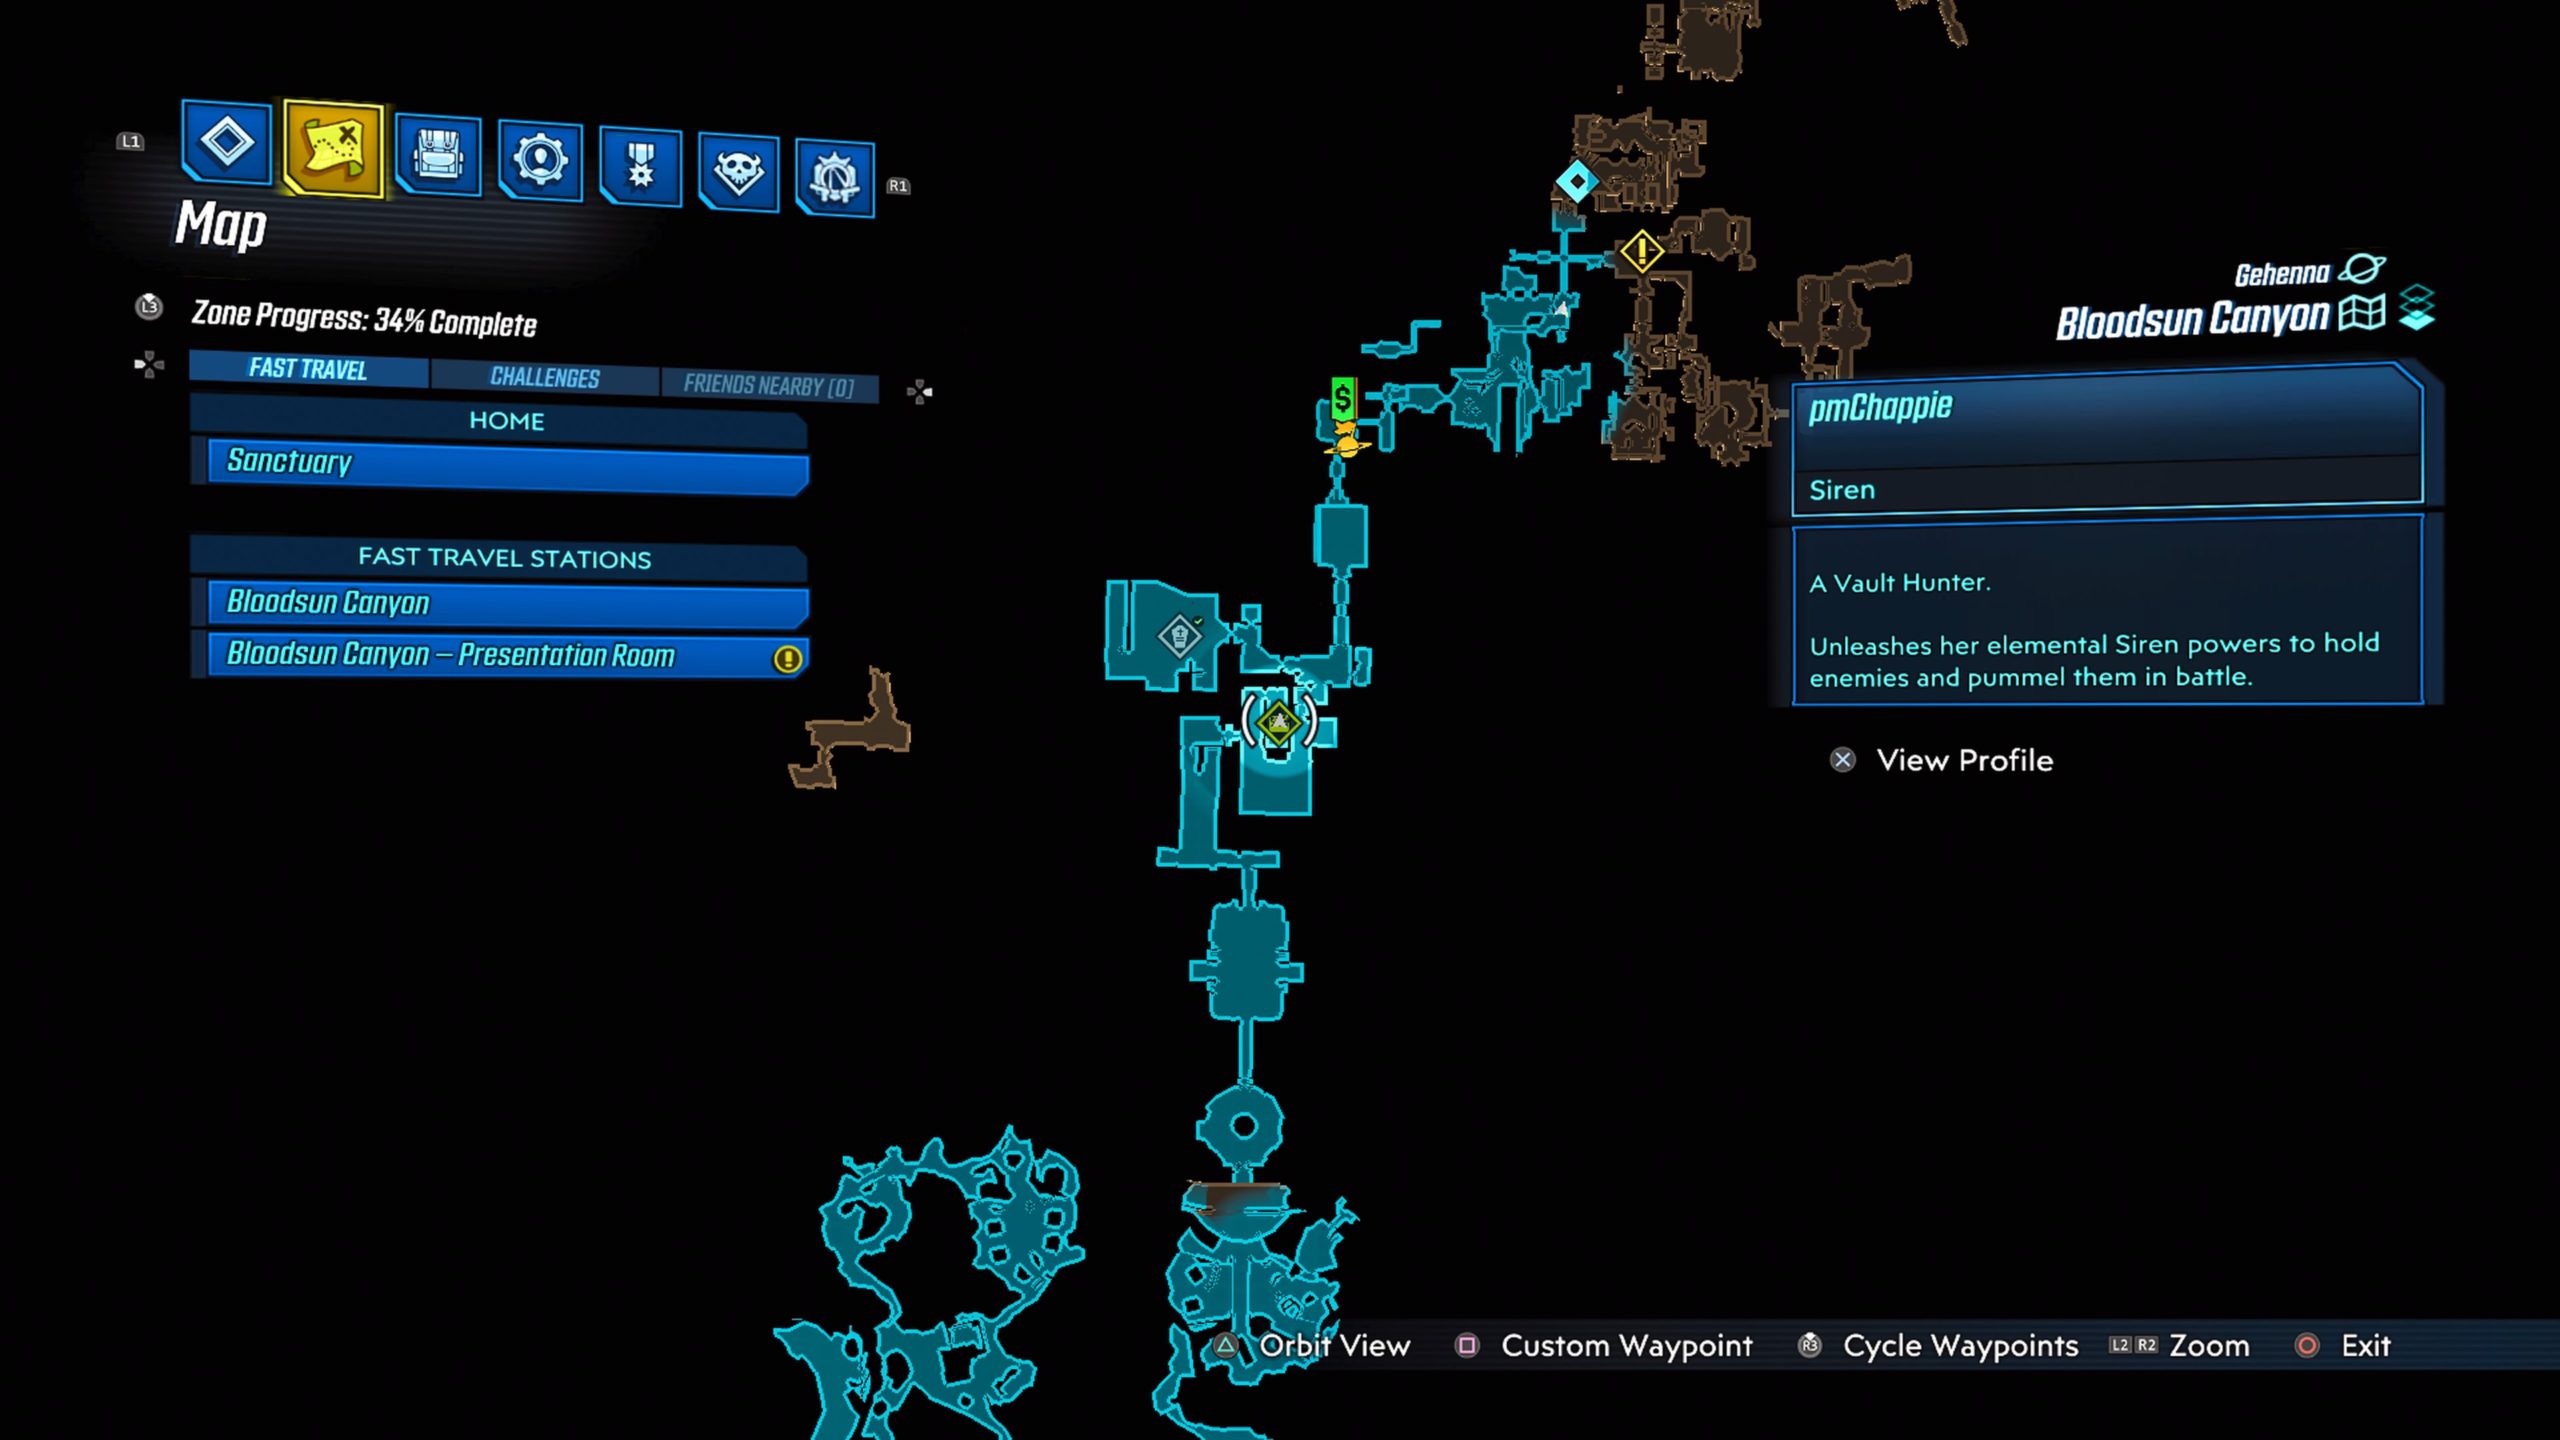

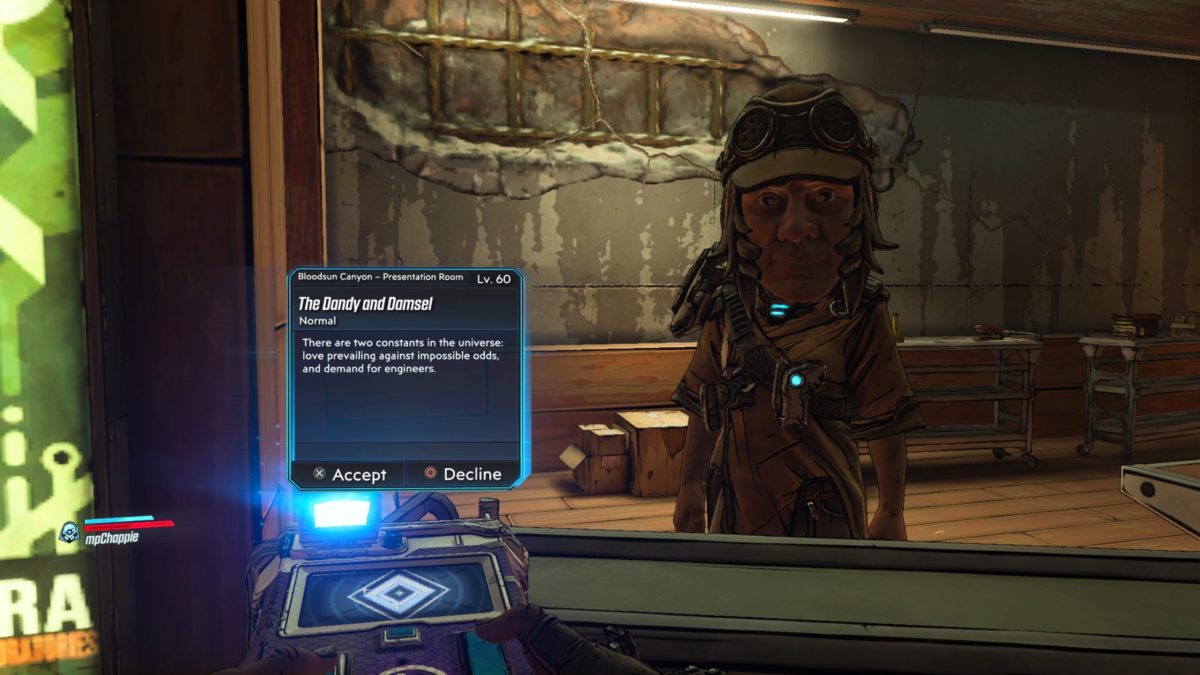
The film reel can be found in the Presentation Room area. It is reachable via a portal. From the area where you get The Dandy and Damsel side quest, exit the room and head straight down the walkway towards the forklift blocking a narrow path. Jump over the forklift and enter the portal behind it to reach the reel.
Location: Bloodsun Canyon
Obtained: Speak with Gustav
Kill Bandits
Follow the objective into a room where bandits are lying in wait. Kill them all!
Interrogate Weasel
Speak with Weasel who appears after all the bandits are dead.
Locate Lab 422
Enter the portal in this room to find the lab.
Defend Yourself
Defeat all the enemies.
Break into Lab
Punch the crystal to break the wall, allowing you entry.
Get to Lab
Keep following the path forward to reach the lab.
Clear the Lab
Defeat all the enemies that spawn.
Talk to Boss Keem
Speak with the boss after she emerges.
Take Ring or Convince Carolina
You get to decide her fate. We chose to convince Carolina to return to her husband.
Follow Carolina
Follow her back to Gustav.
Return to Gustav
Speak with Gustav to complete the quest.
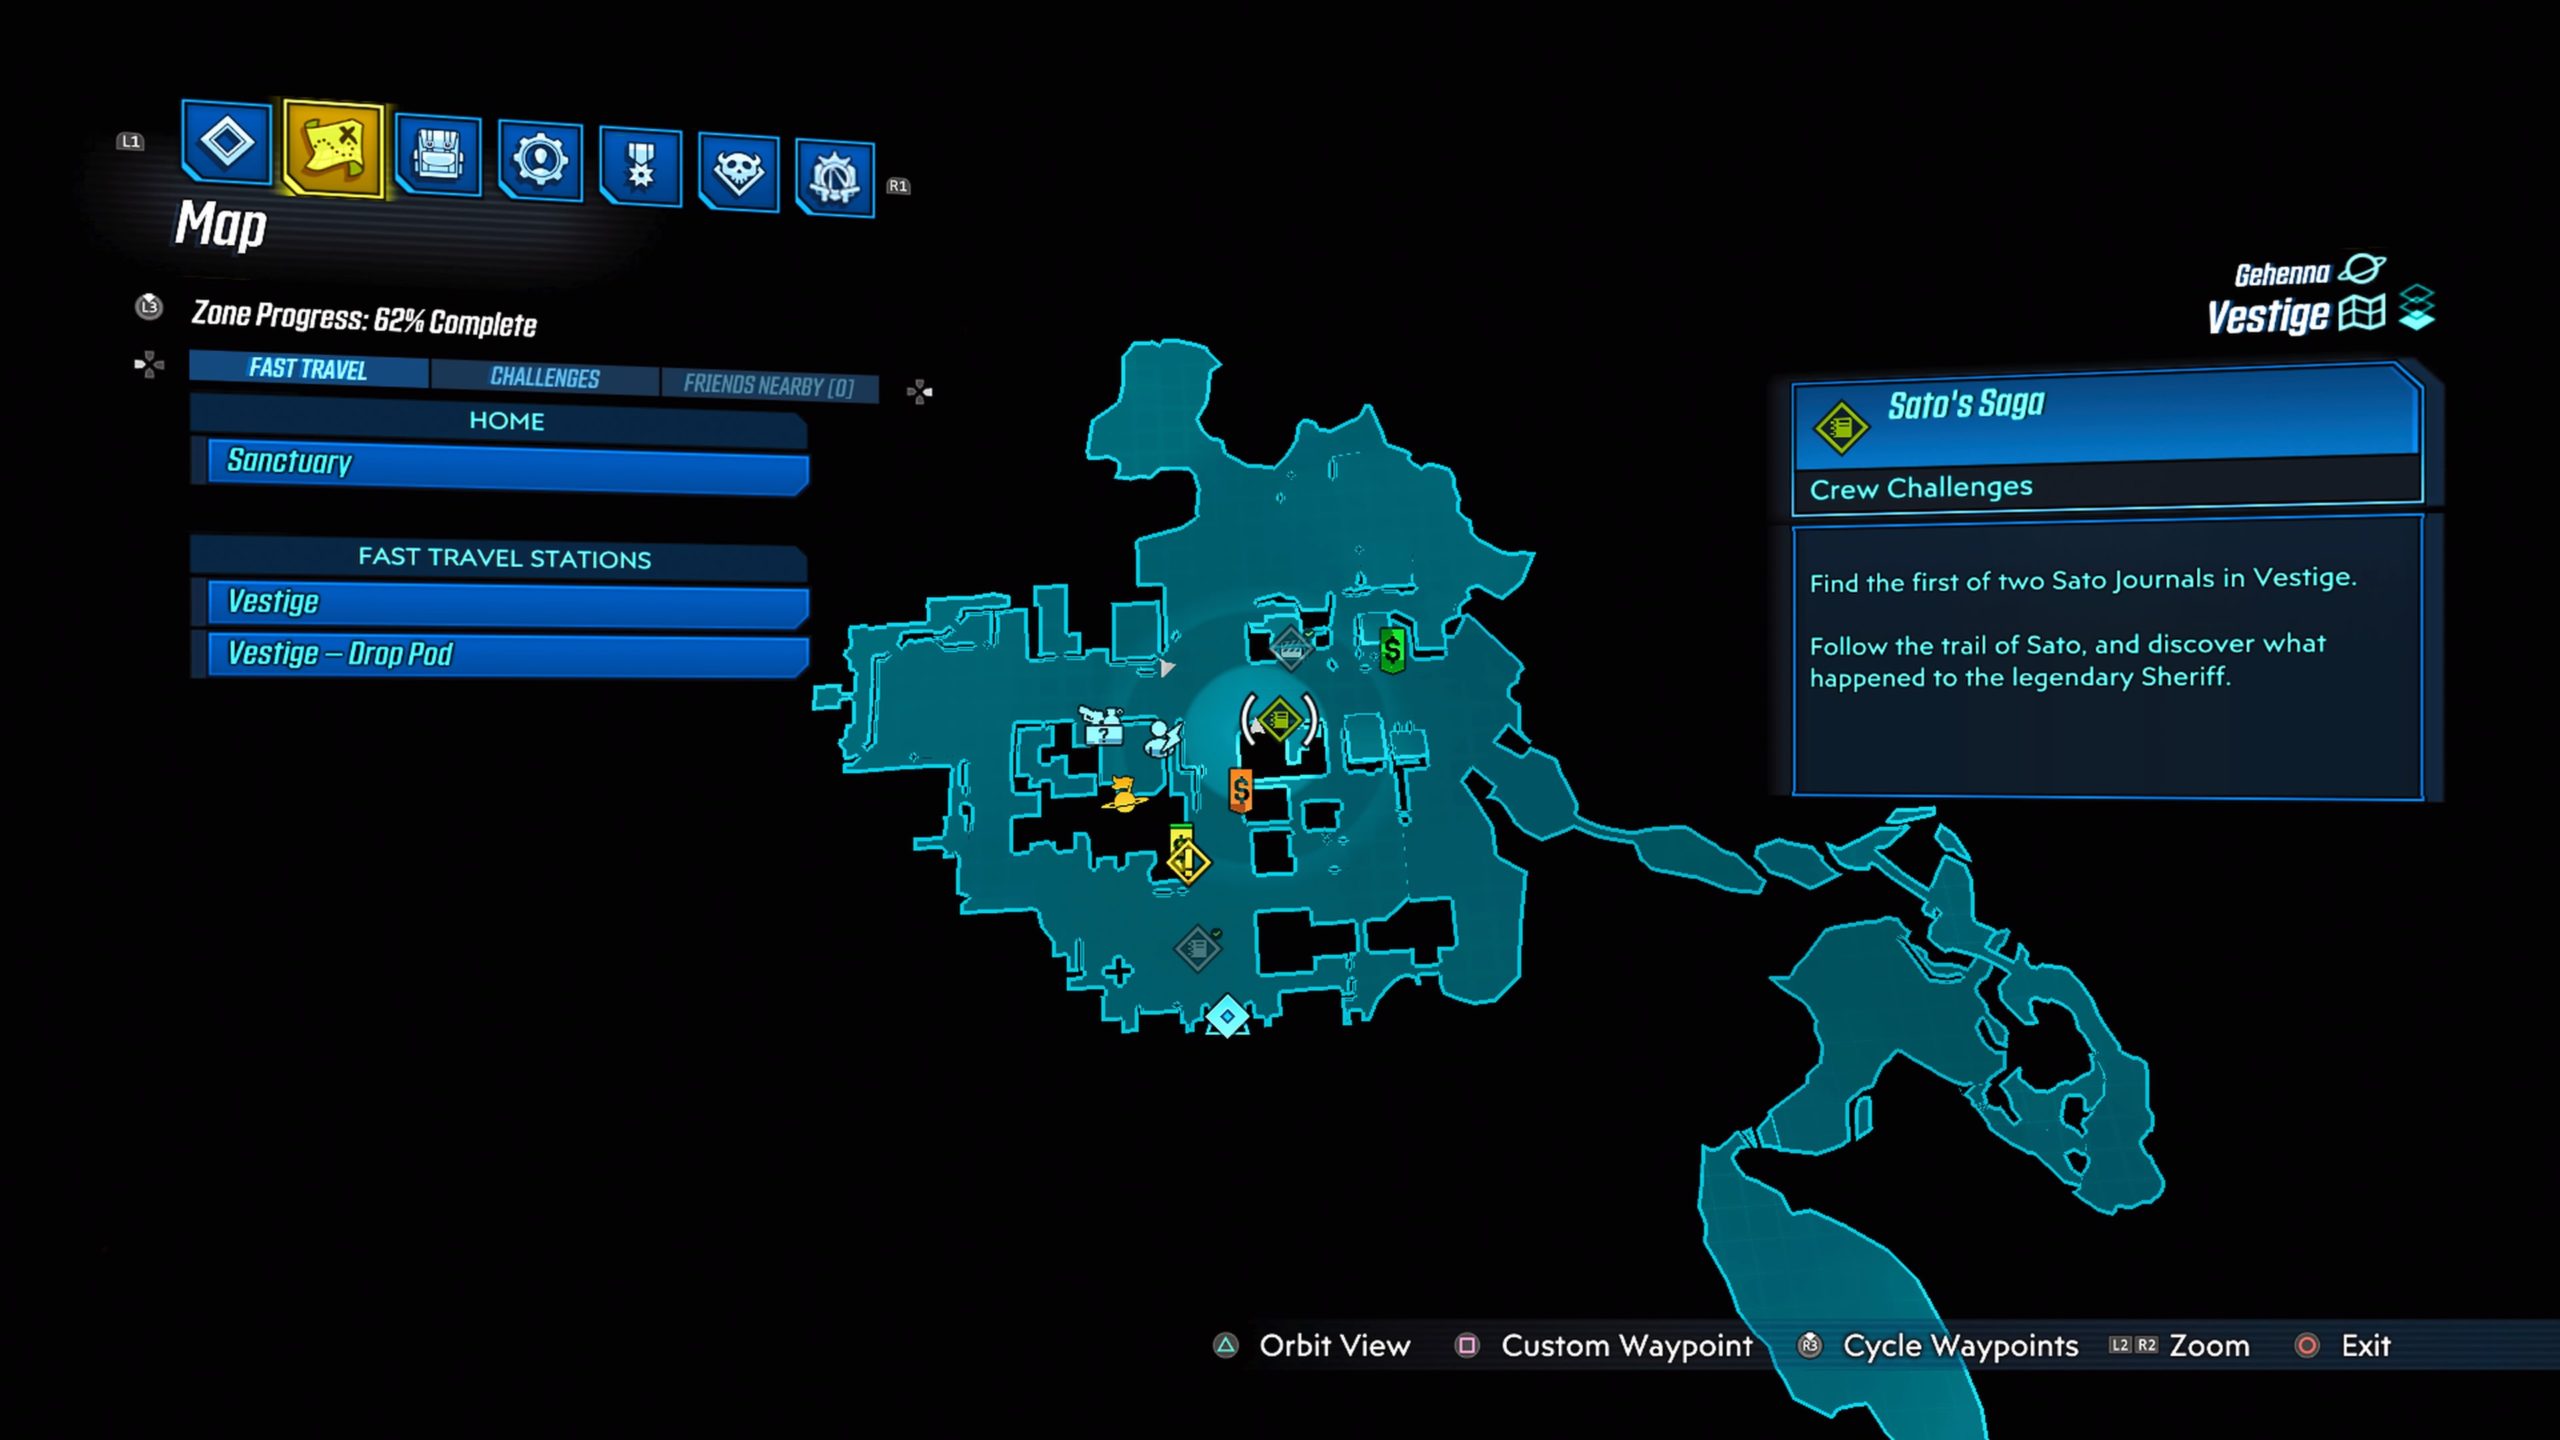
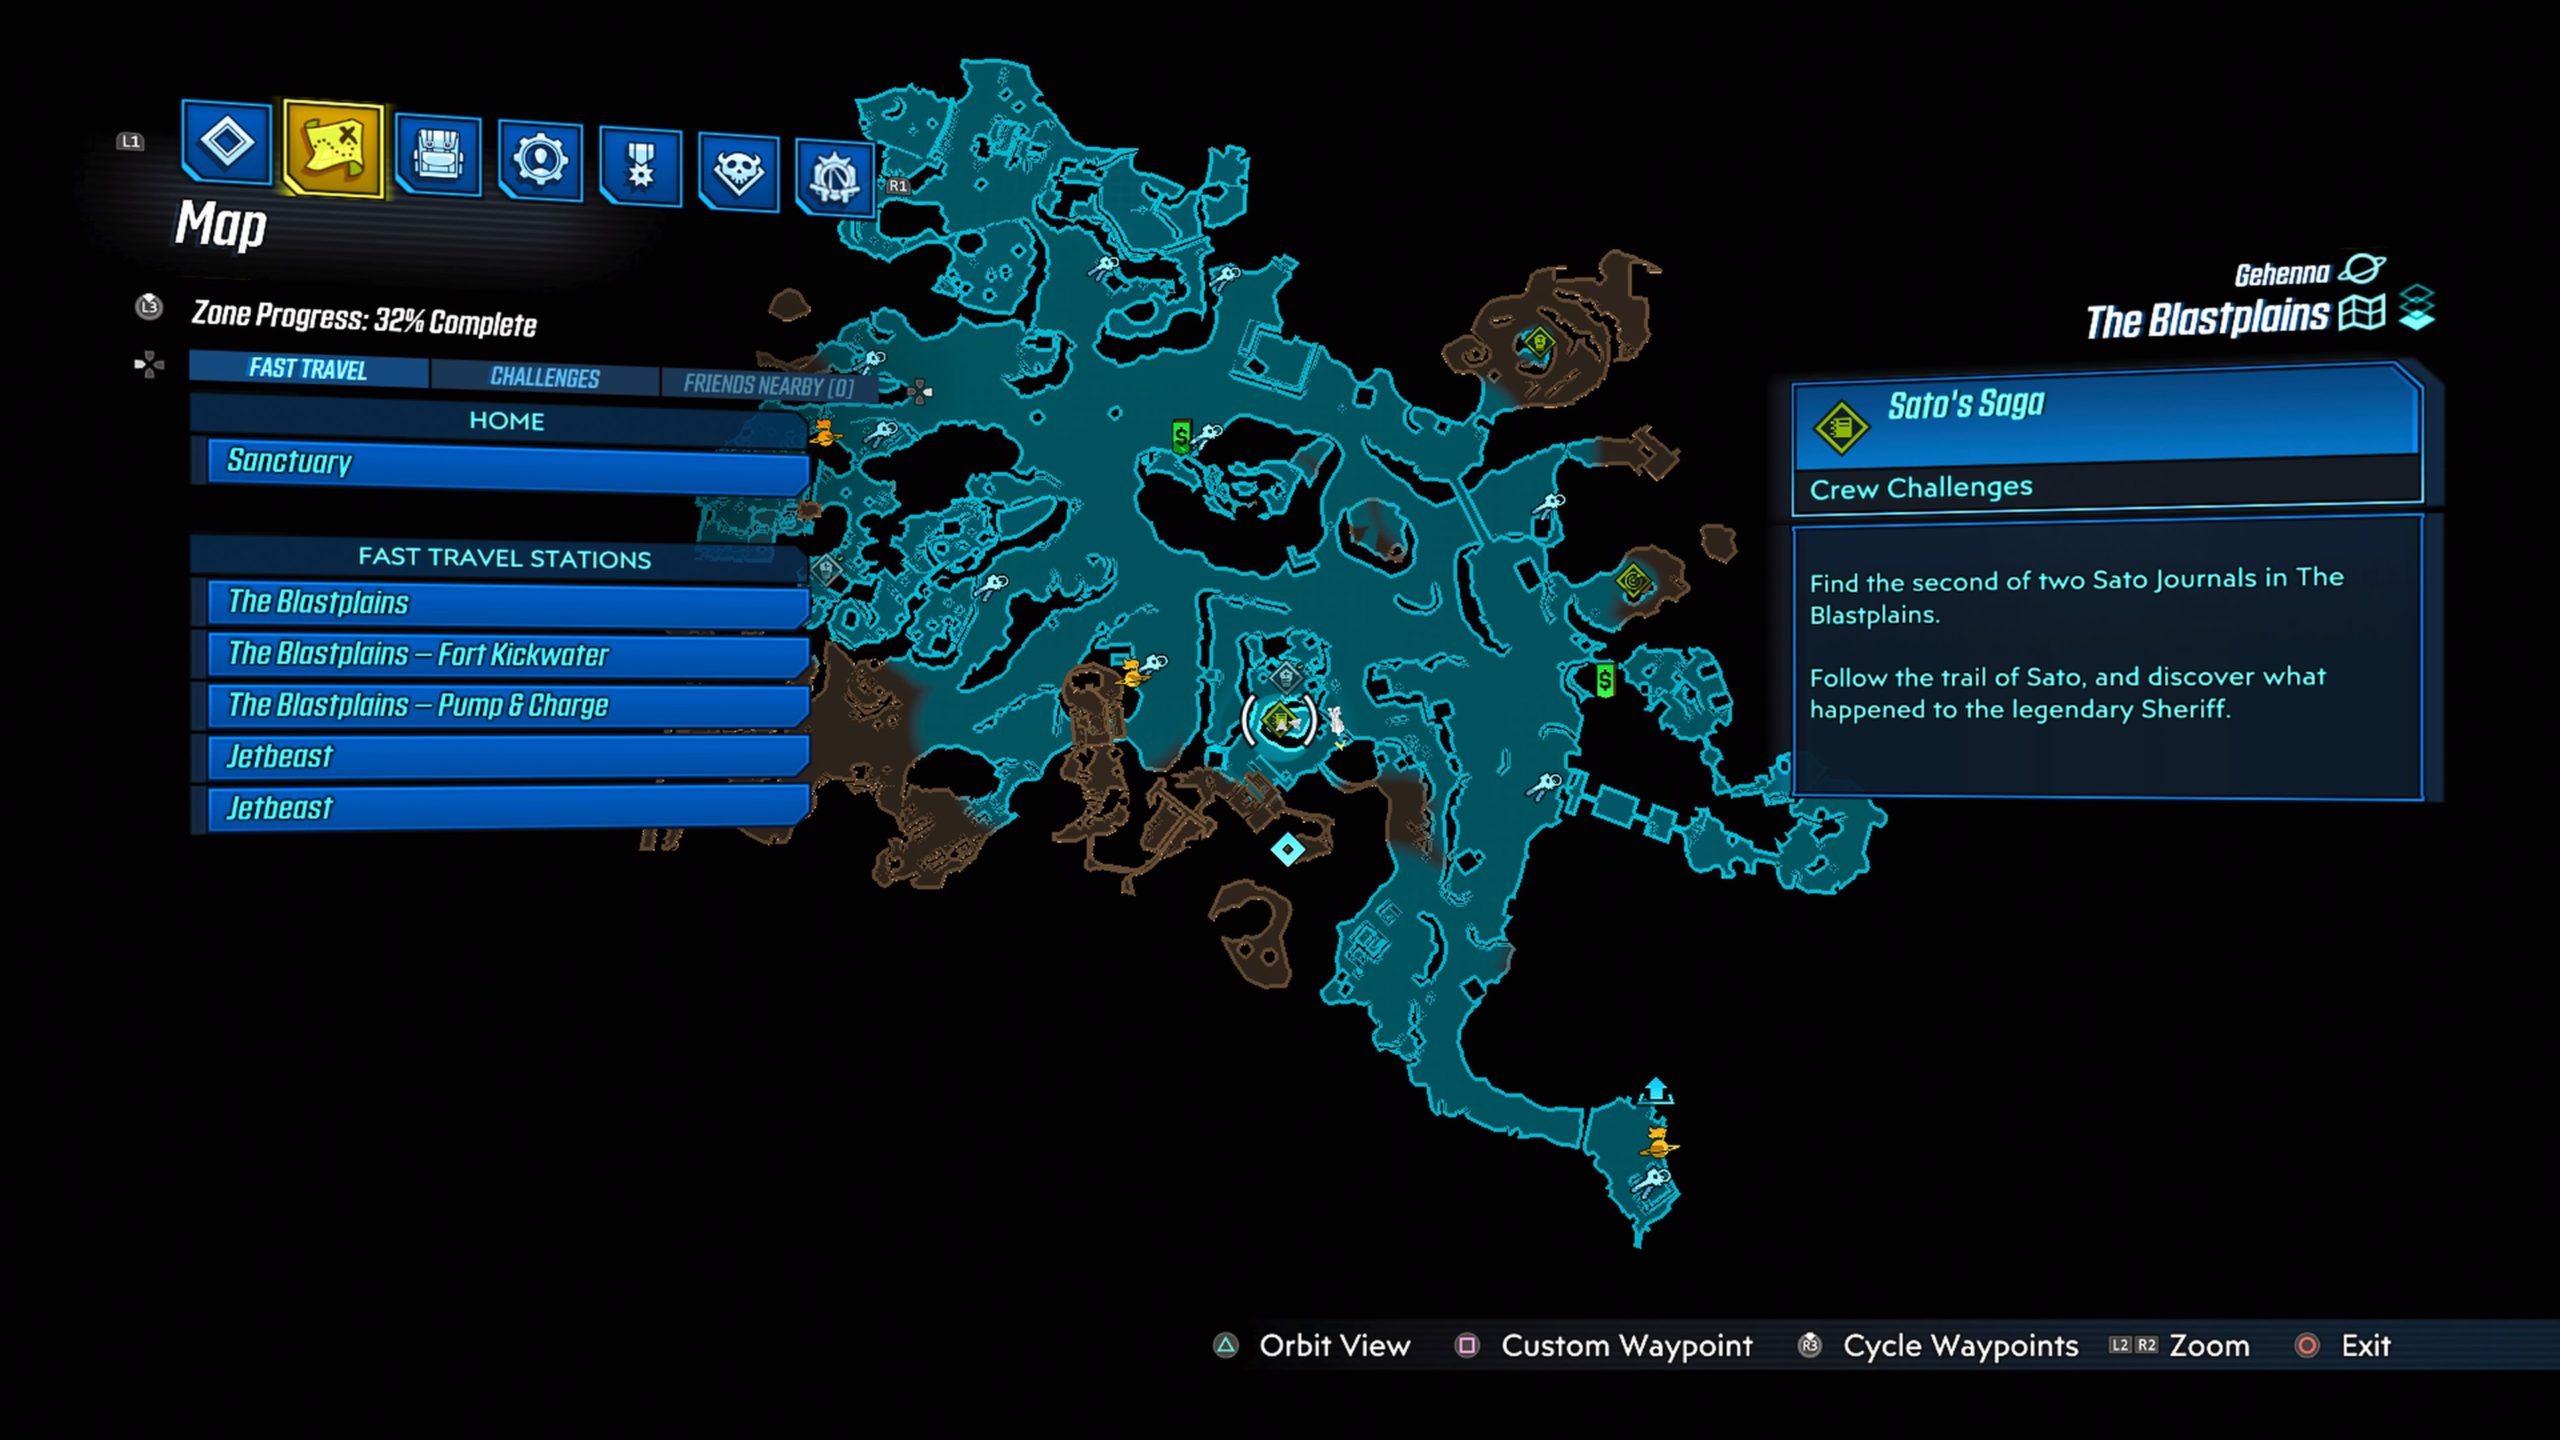
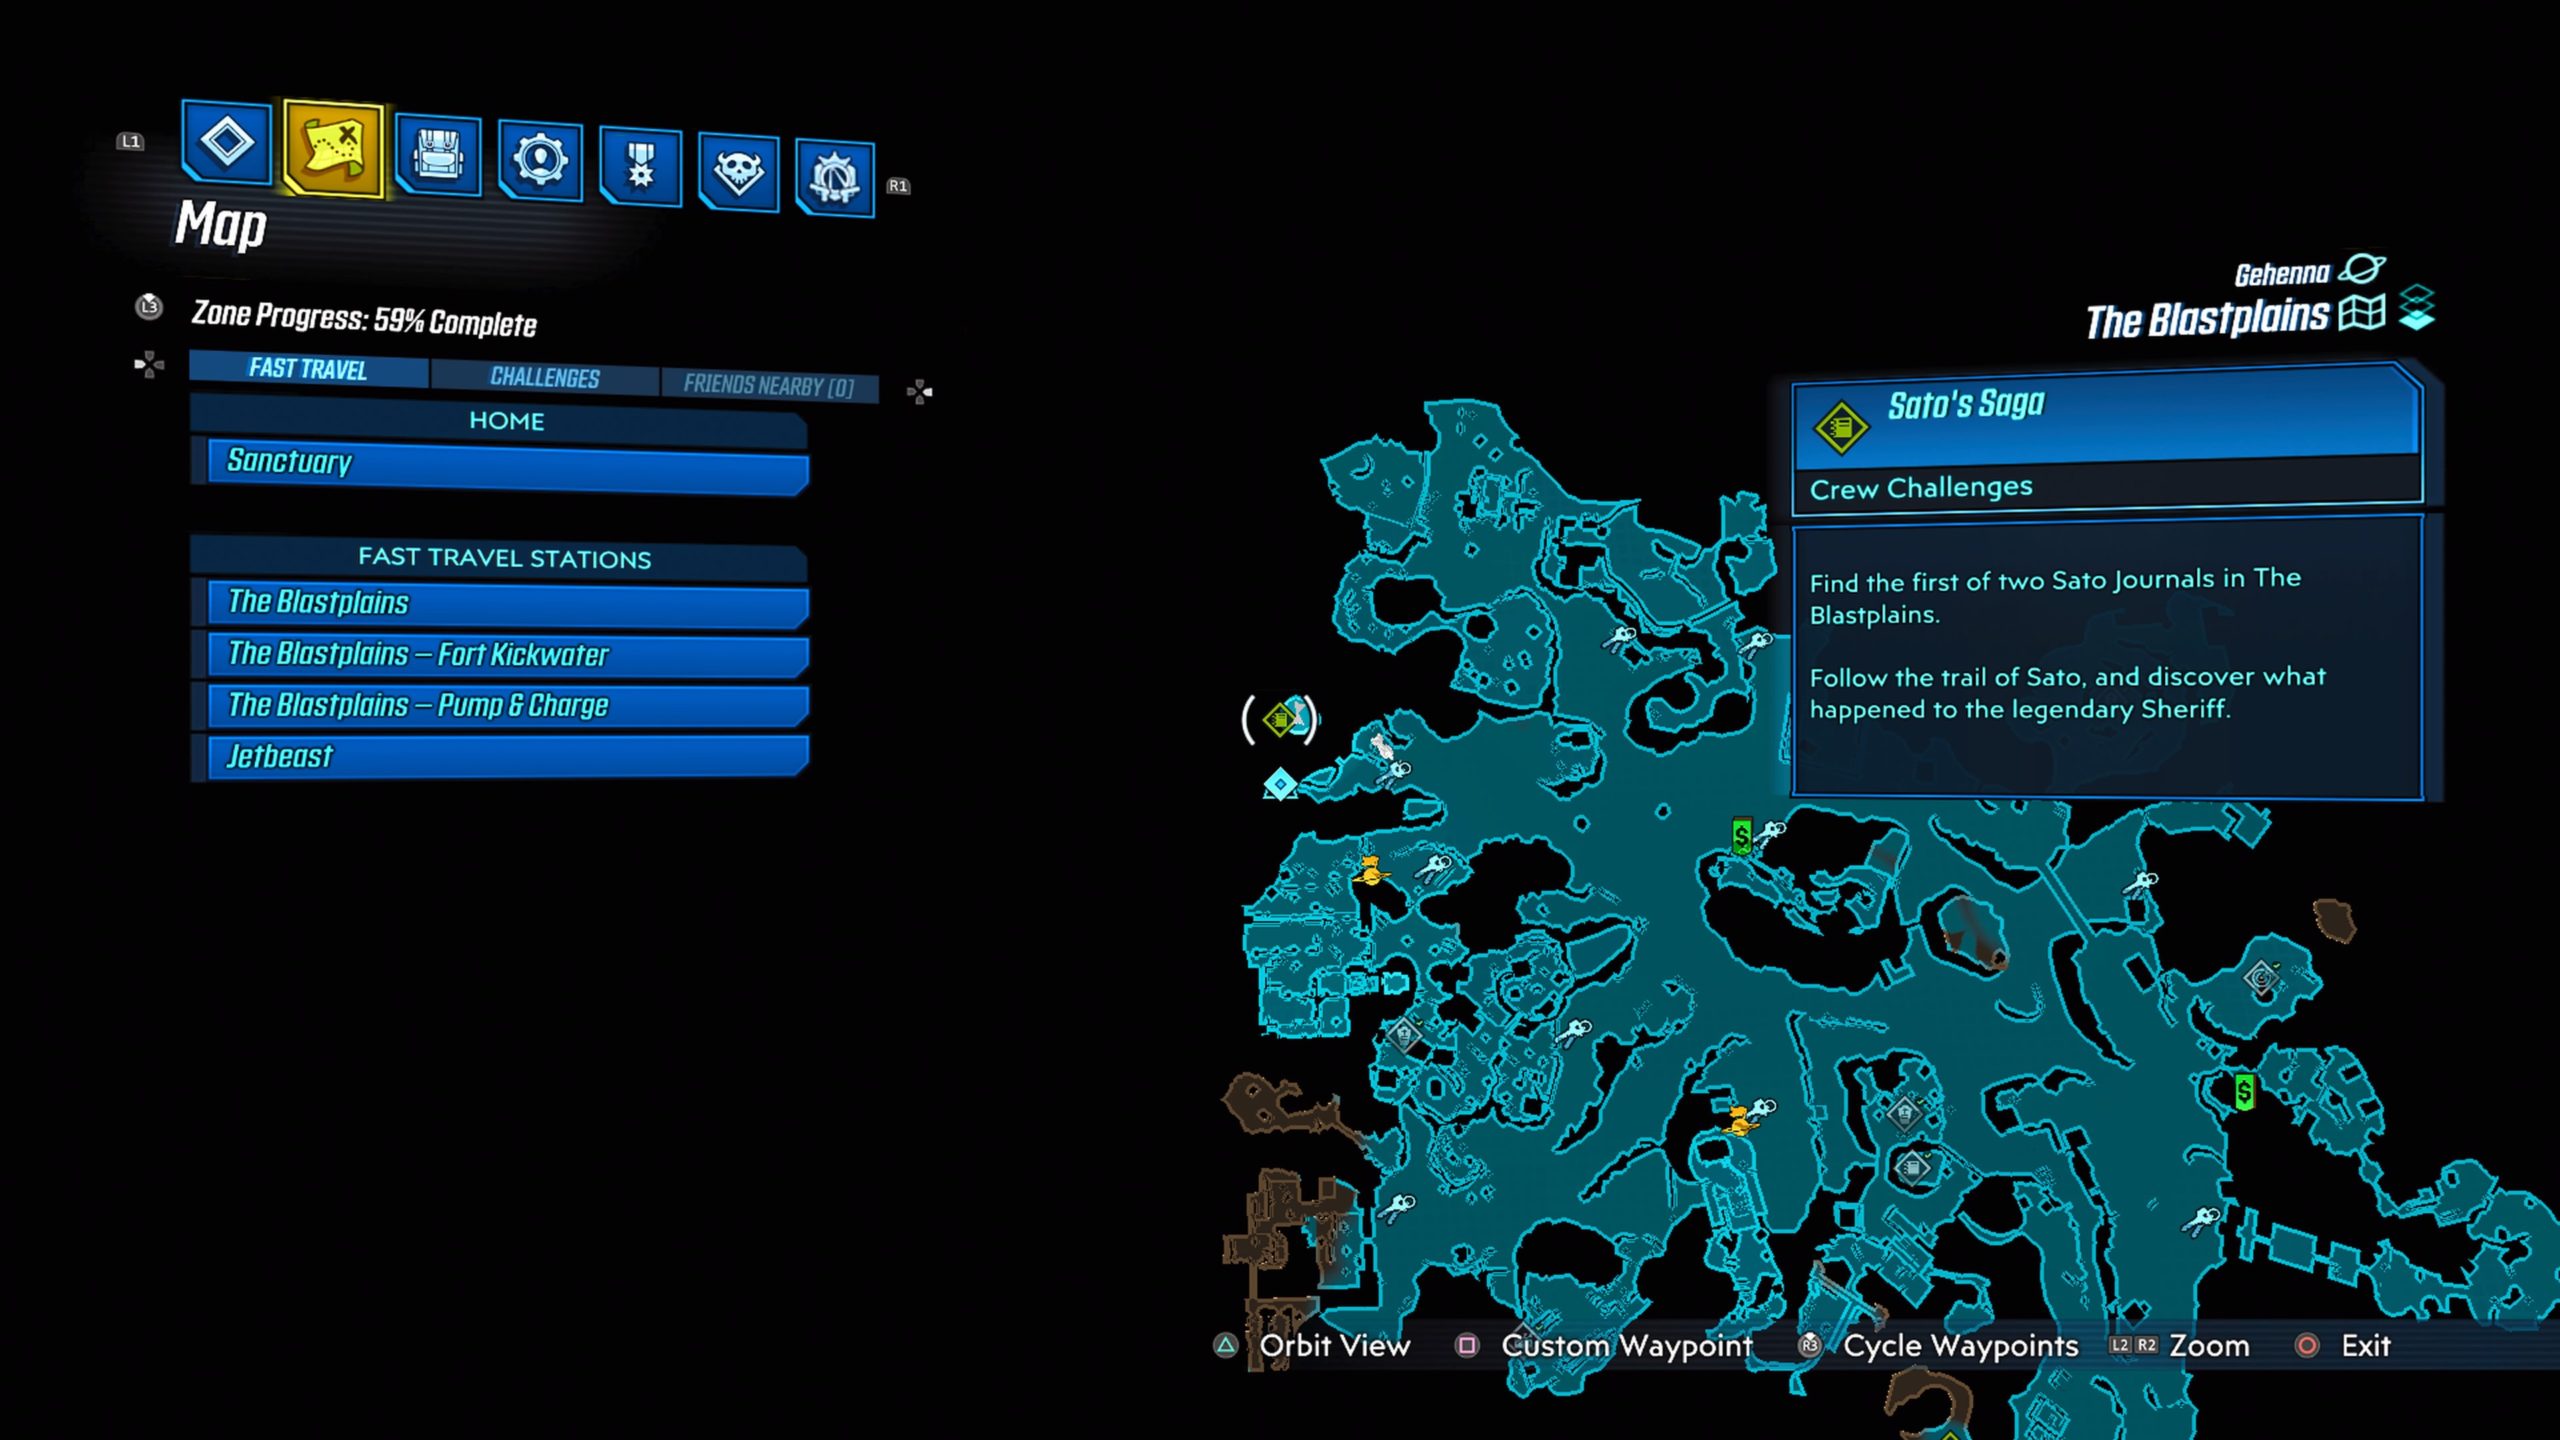
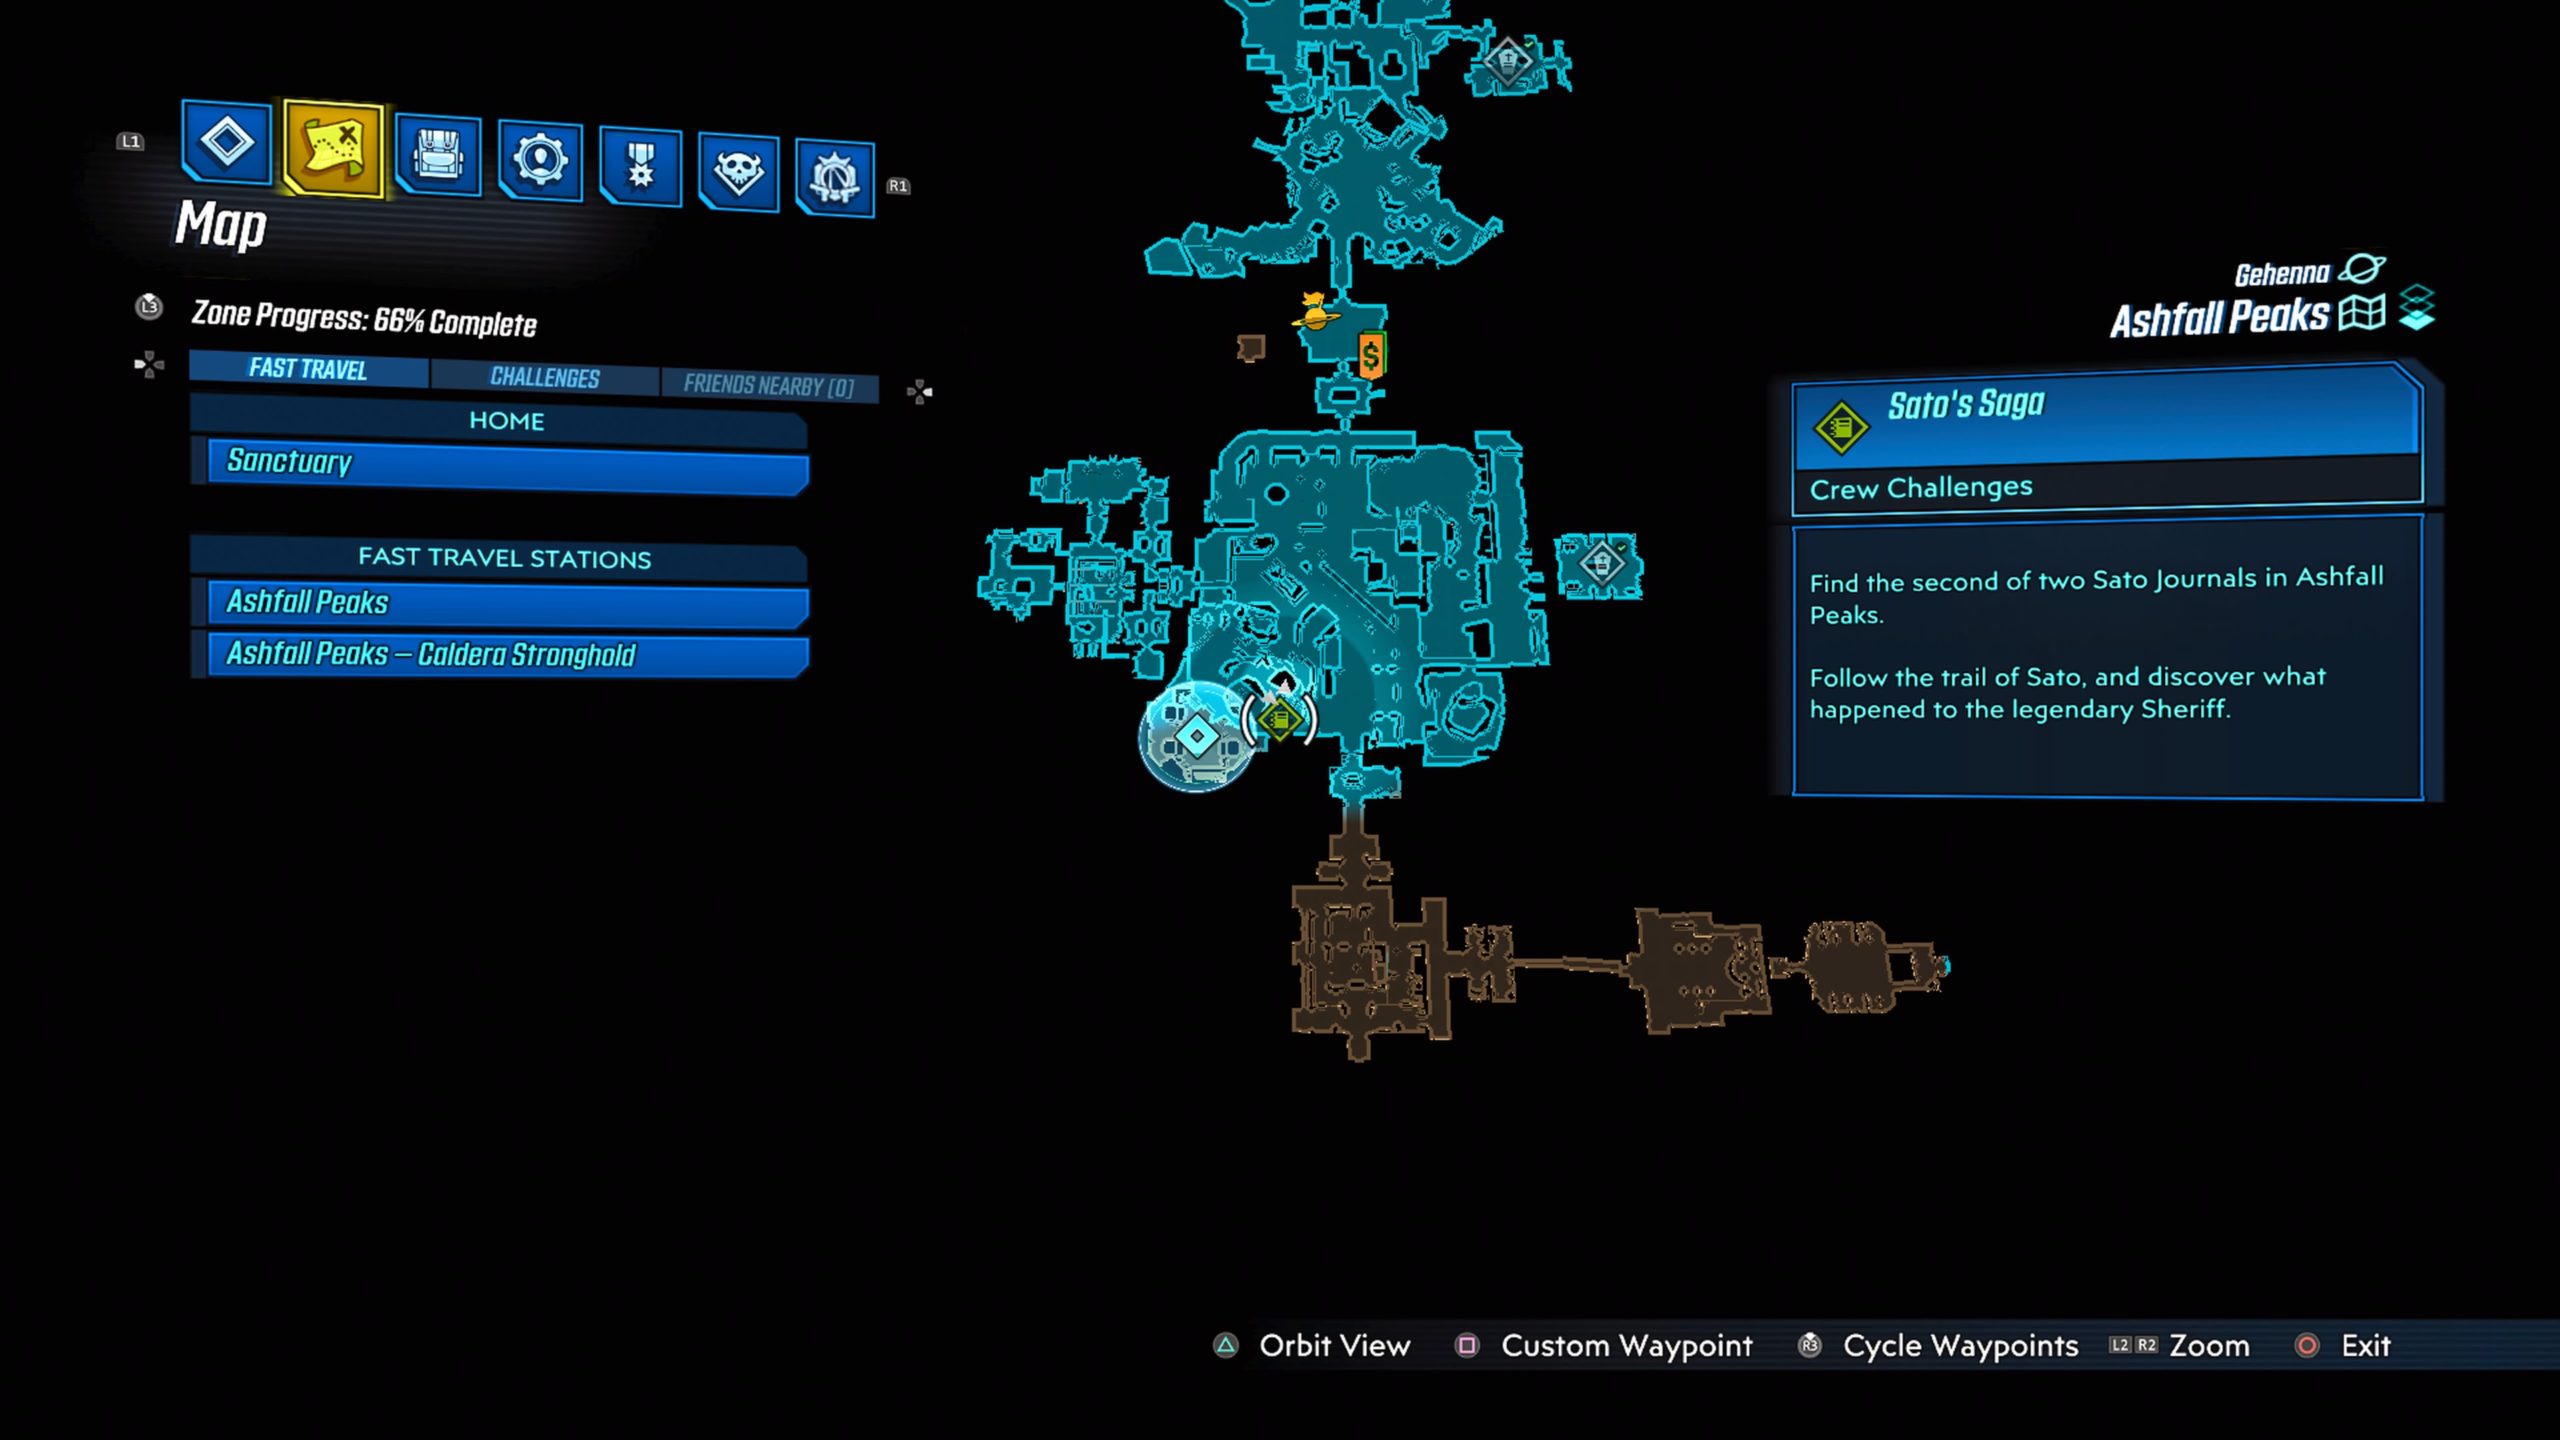
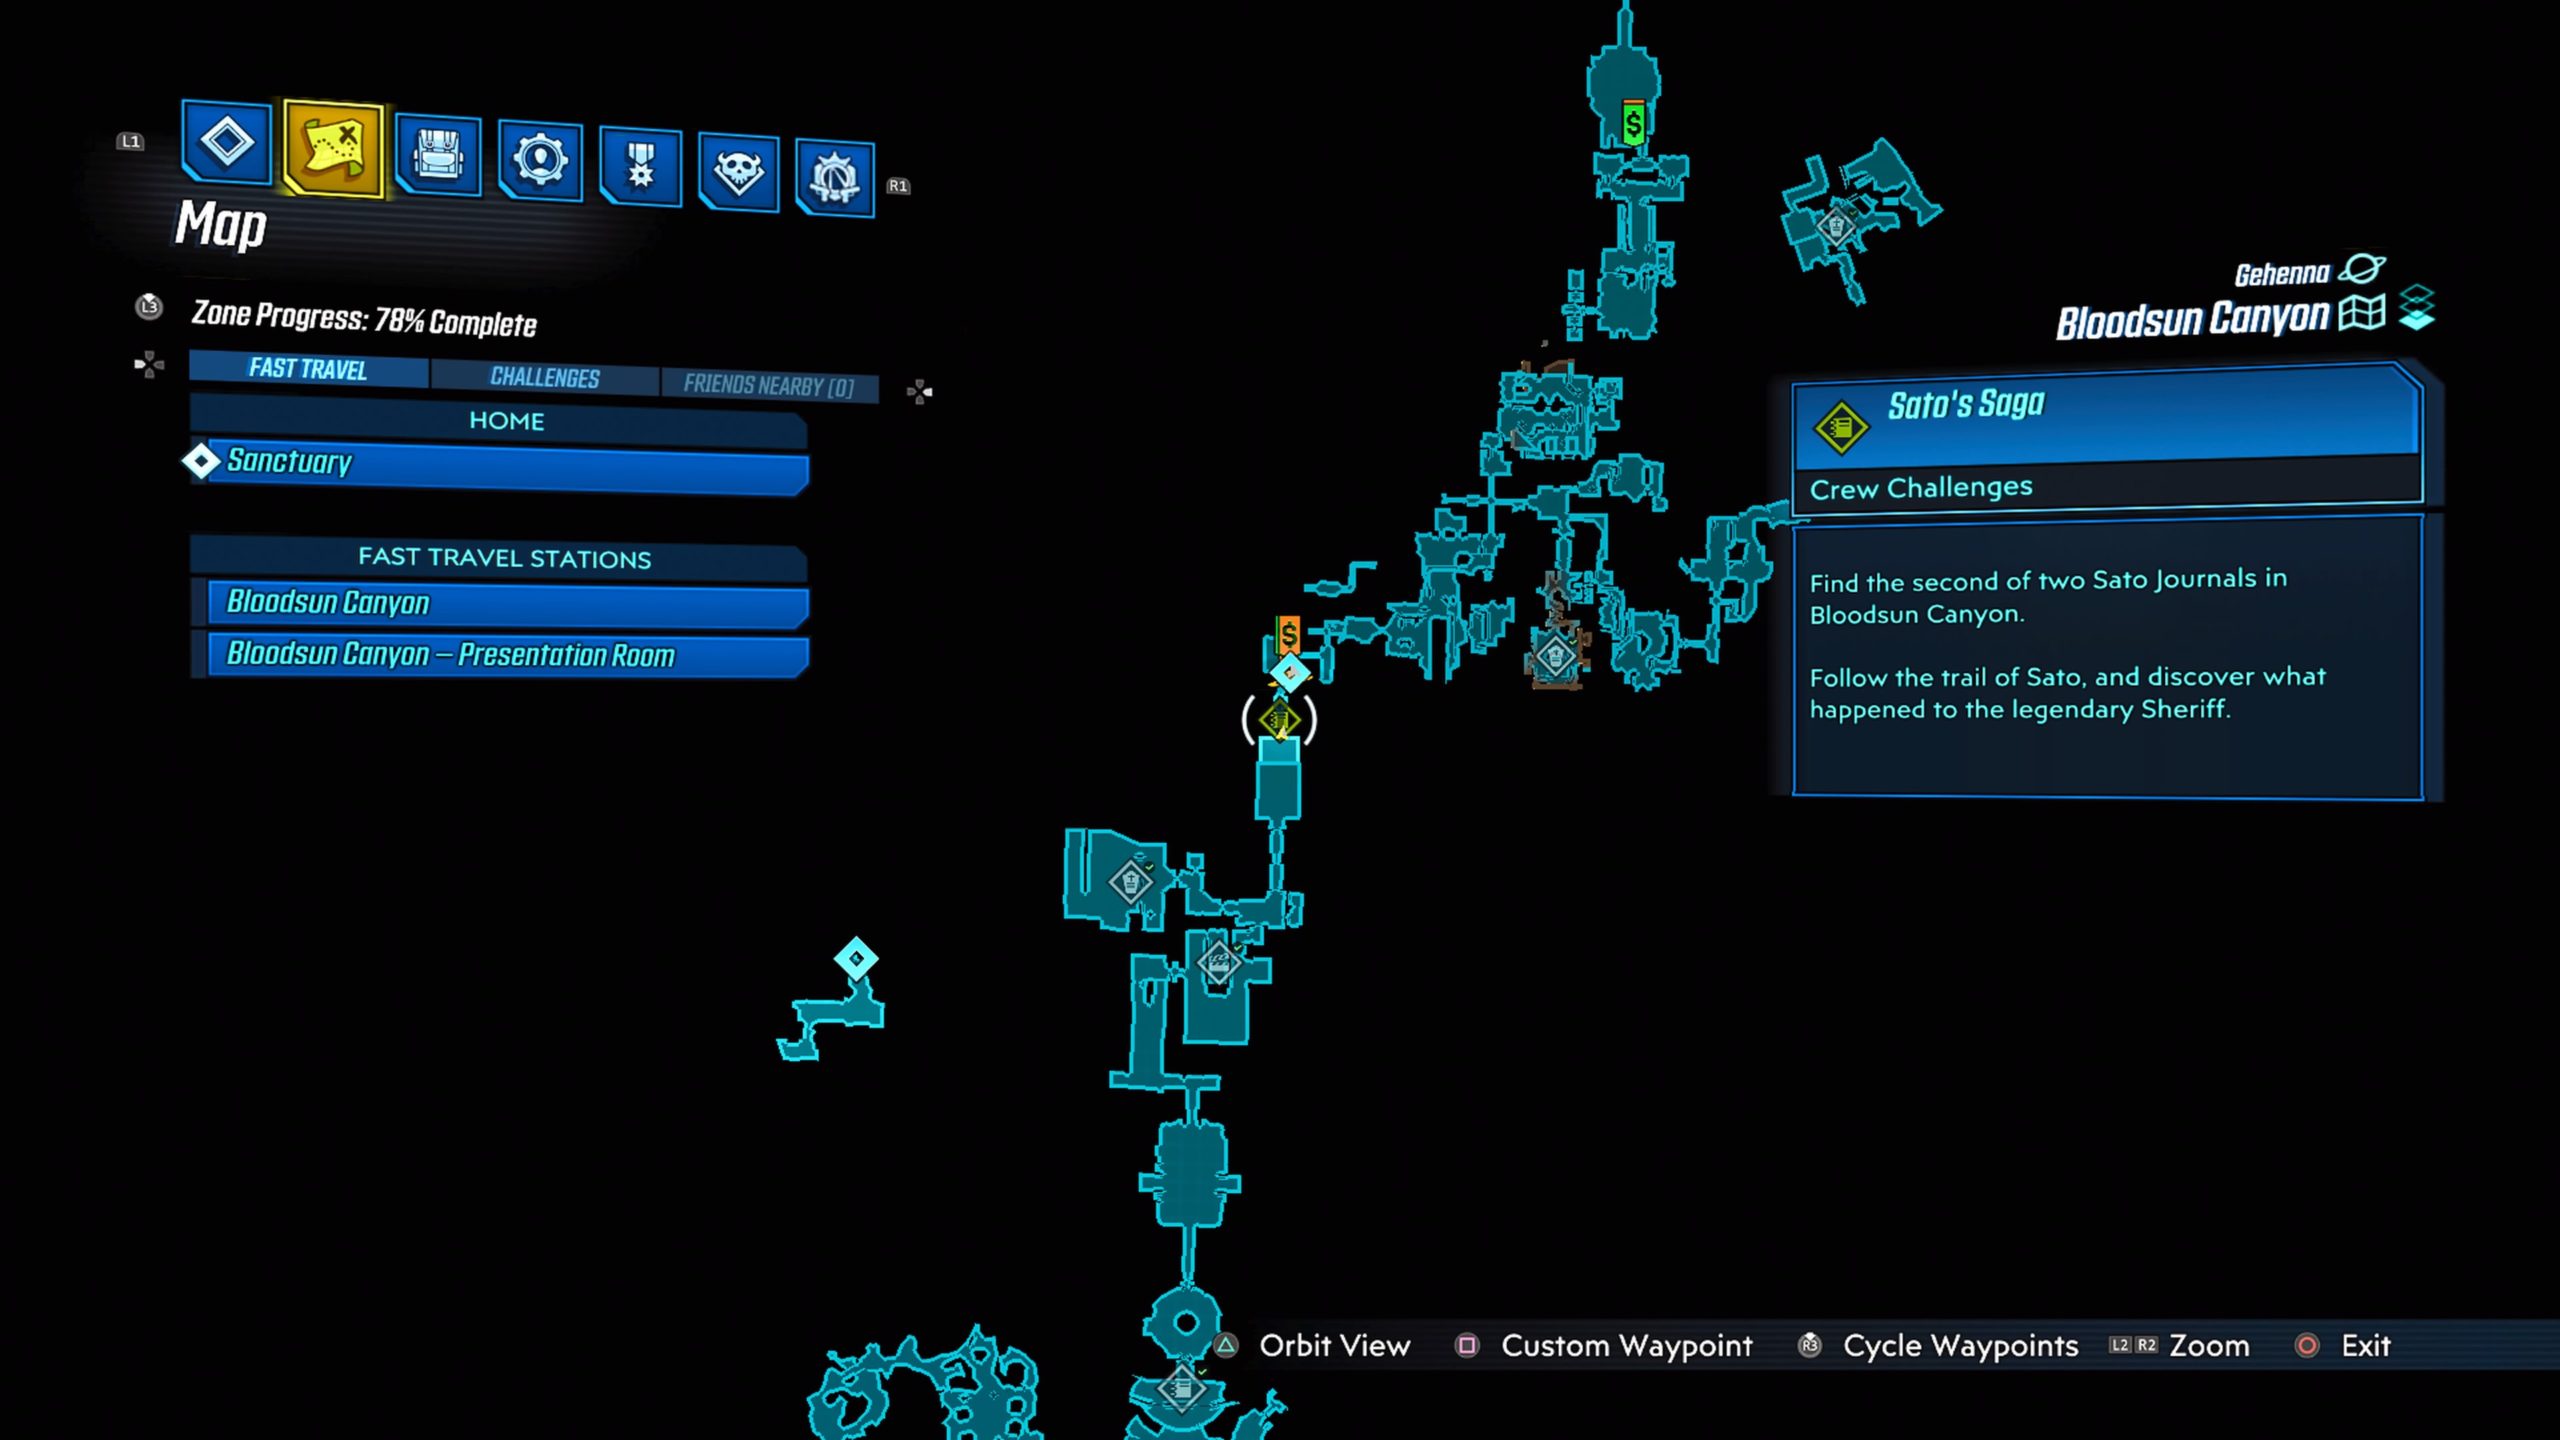
Below is a guide on the Sato’s Saga Crew Challenge in Borderlands 3 Bounty of Blood DLC!!
Vestige #1
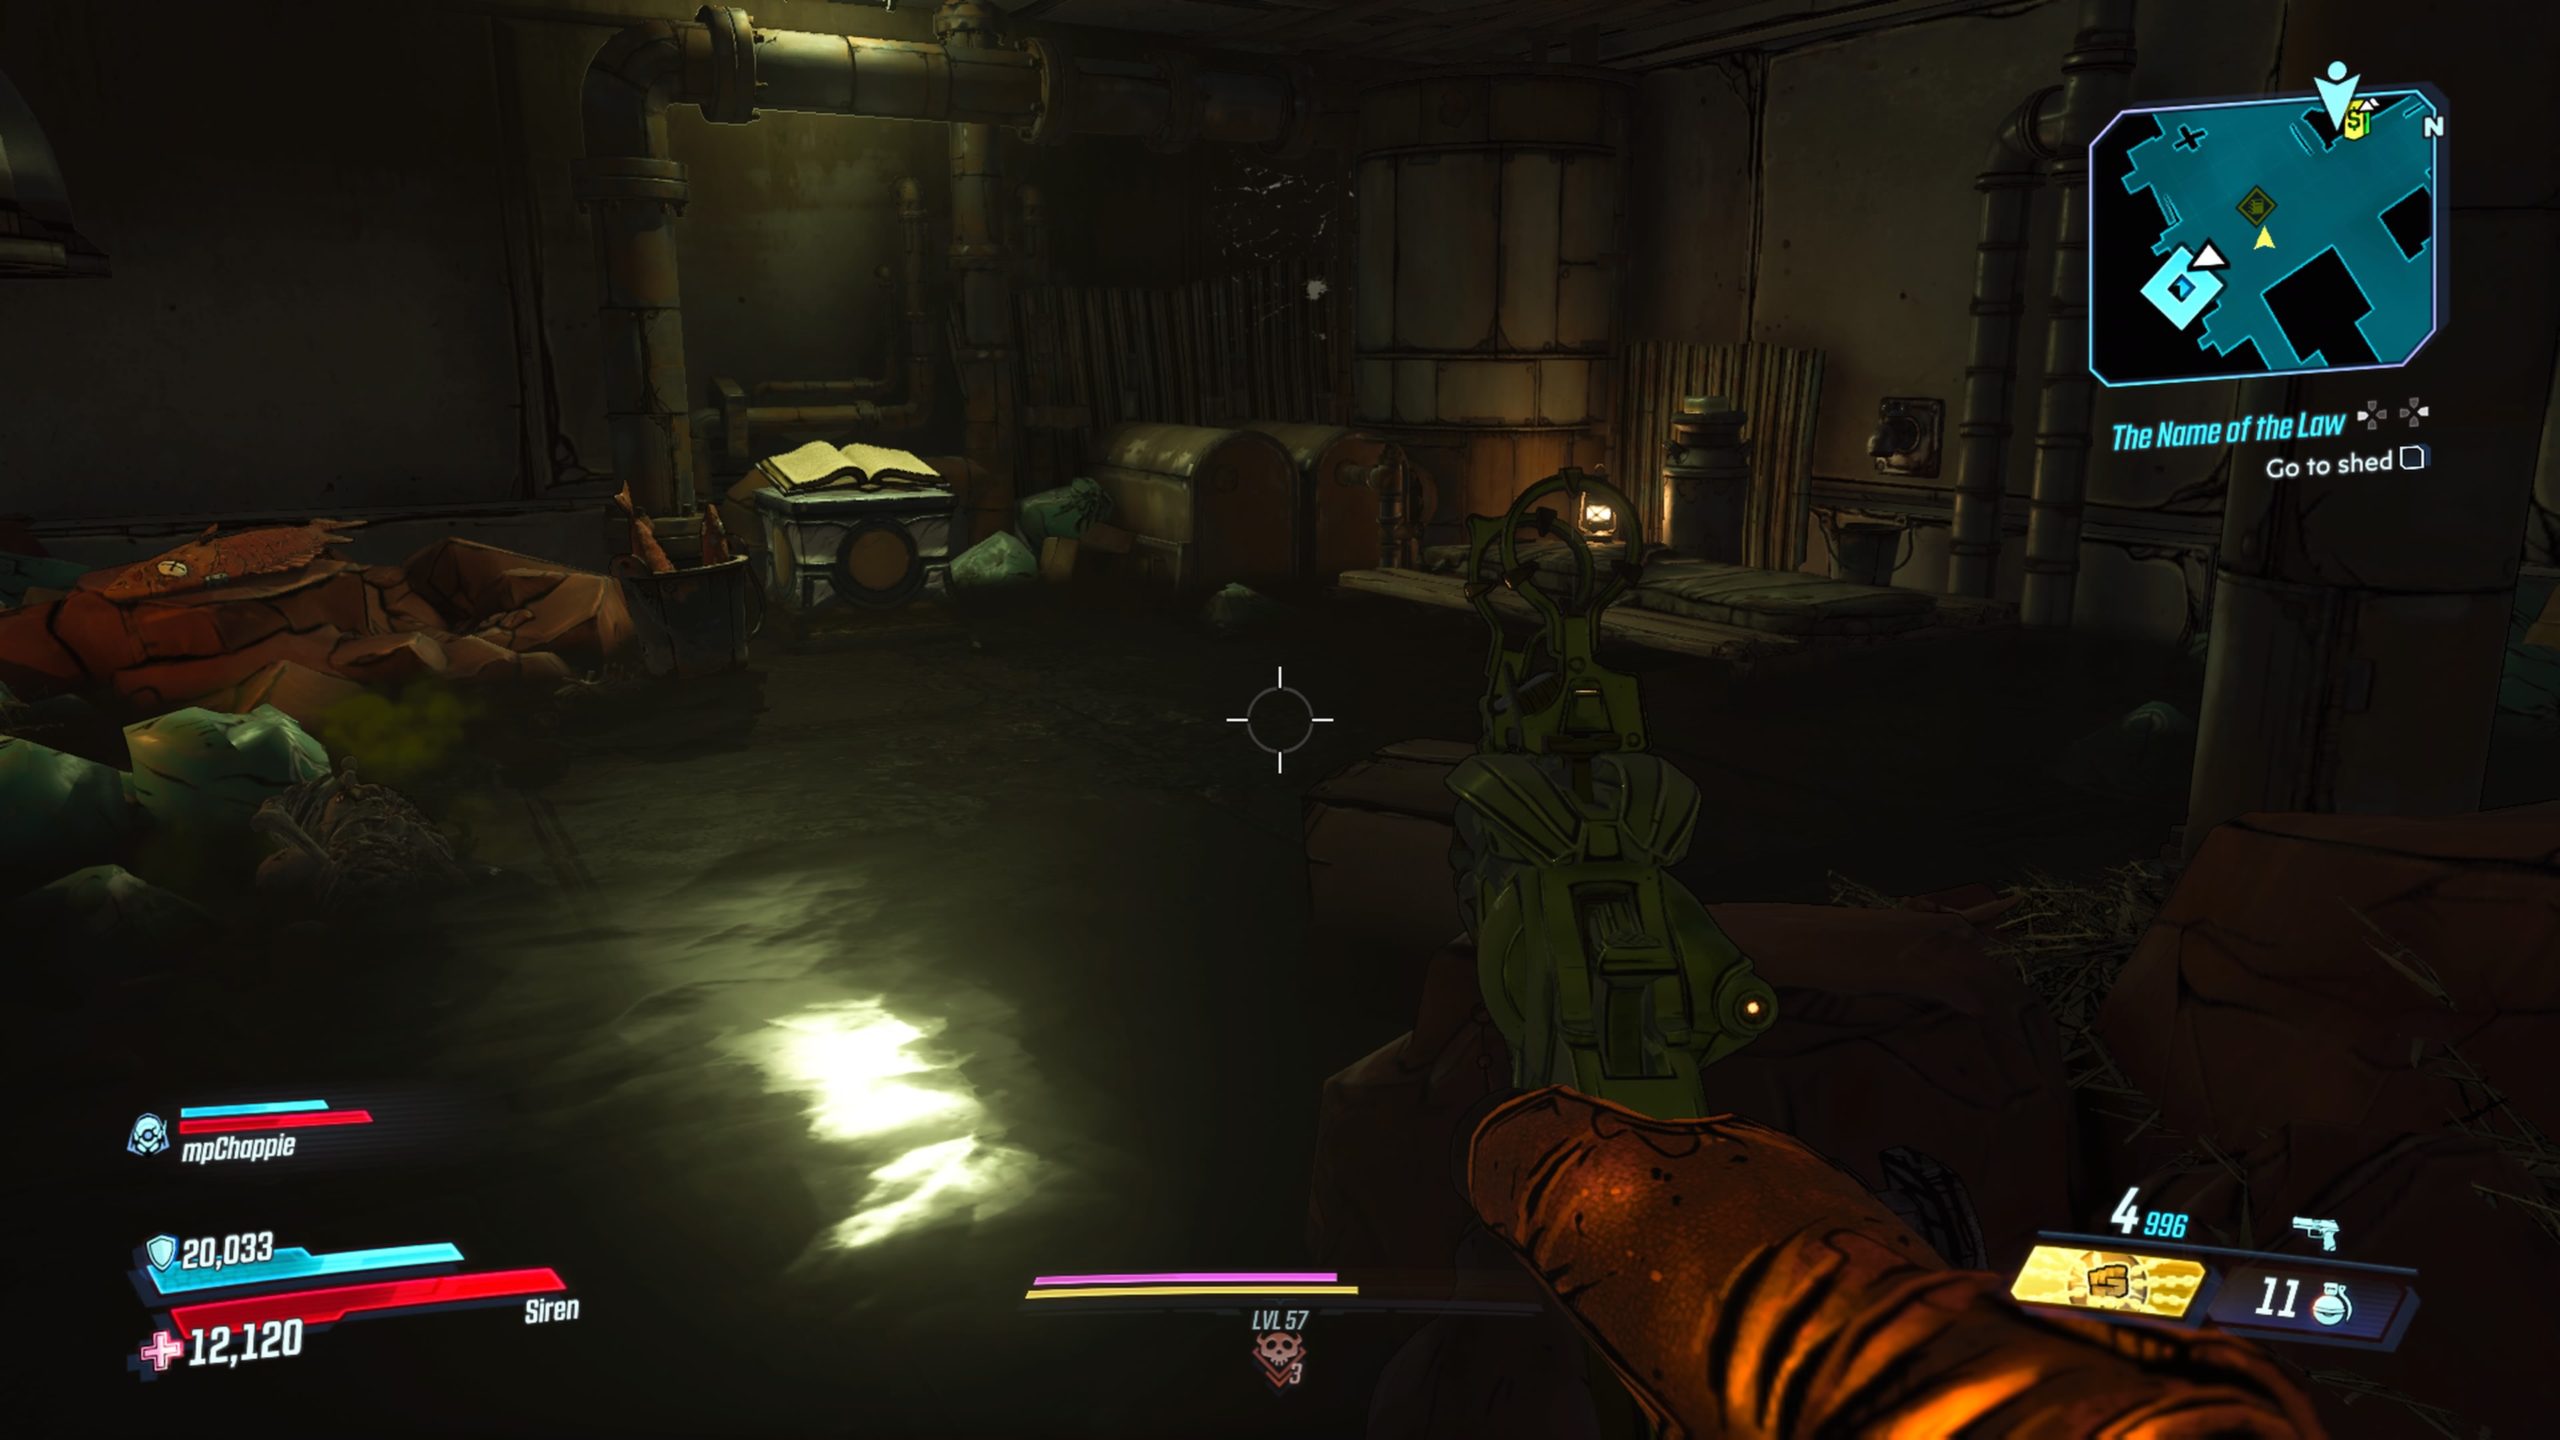
This Sato journal can be found in the southern part of town near the Blastplains map transition. To reach it, jump into the water then head under the bridge to find a hidden room.
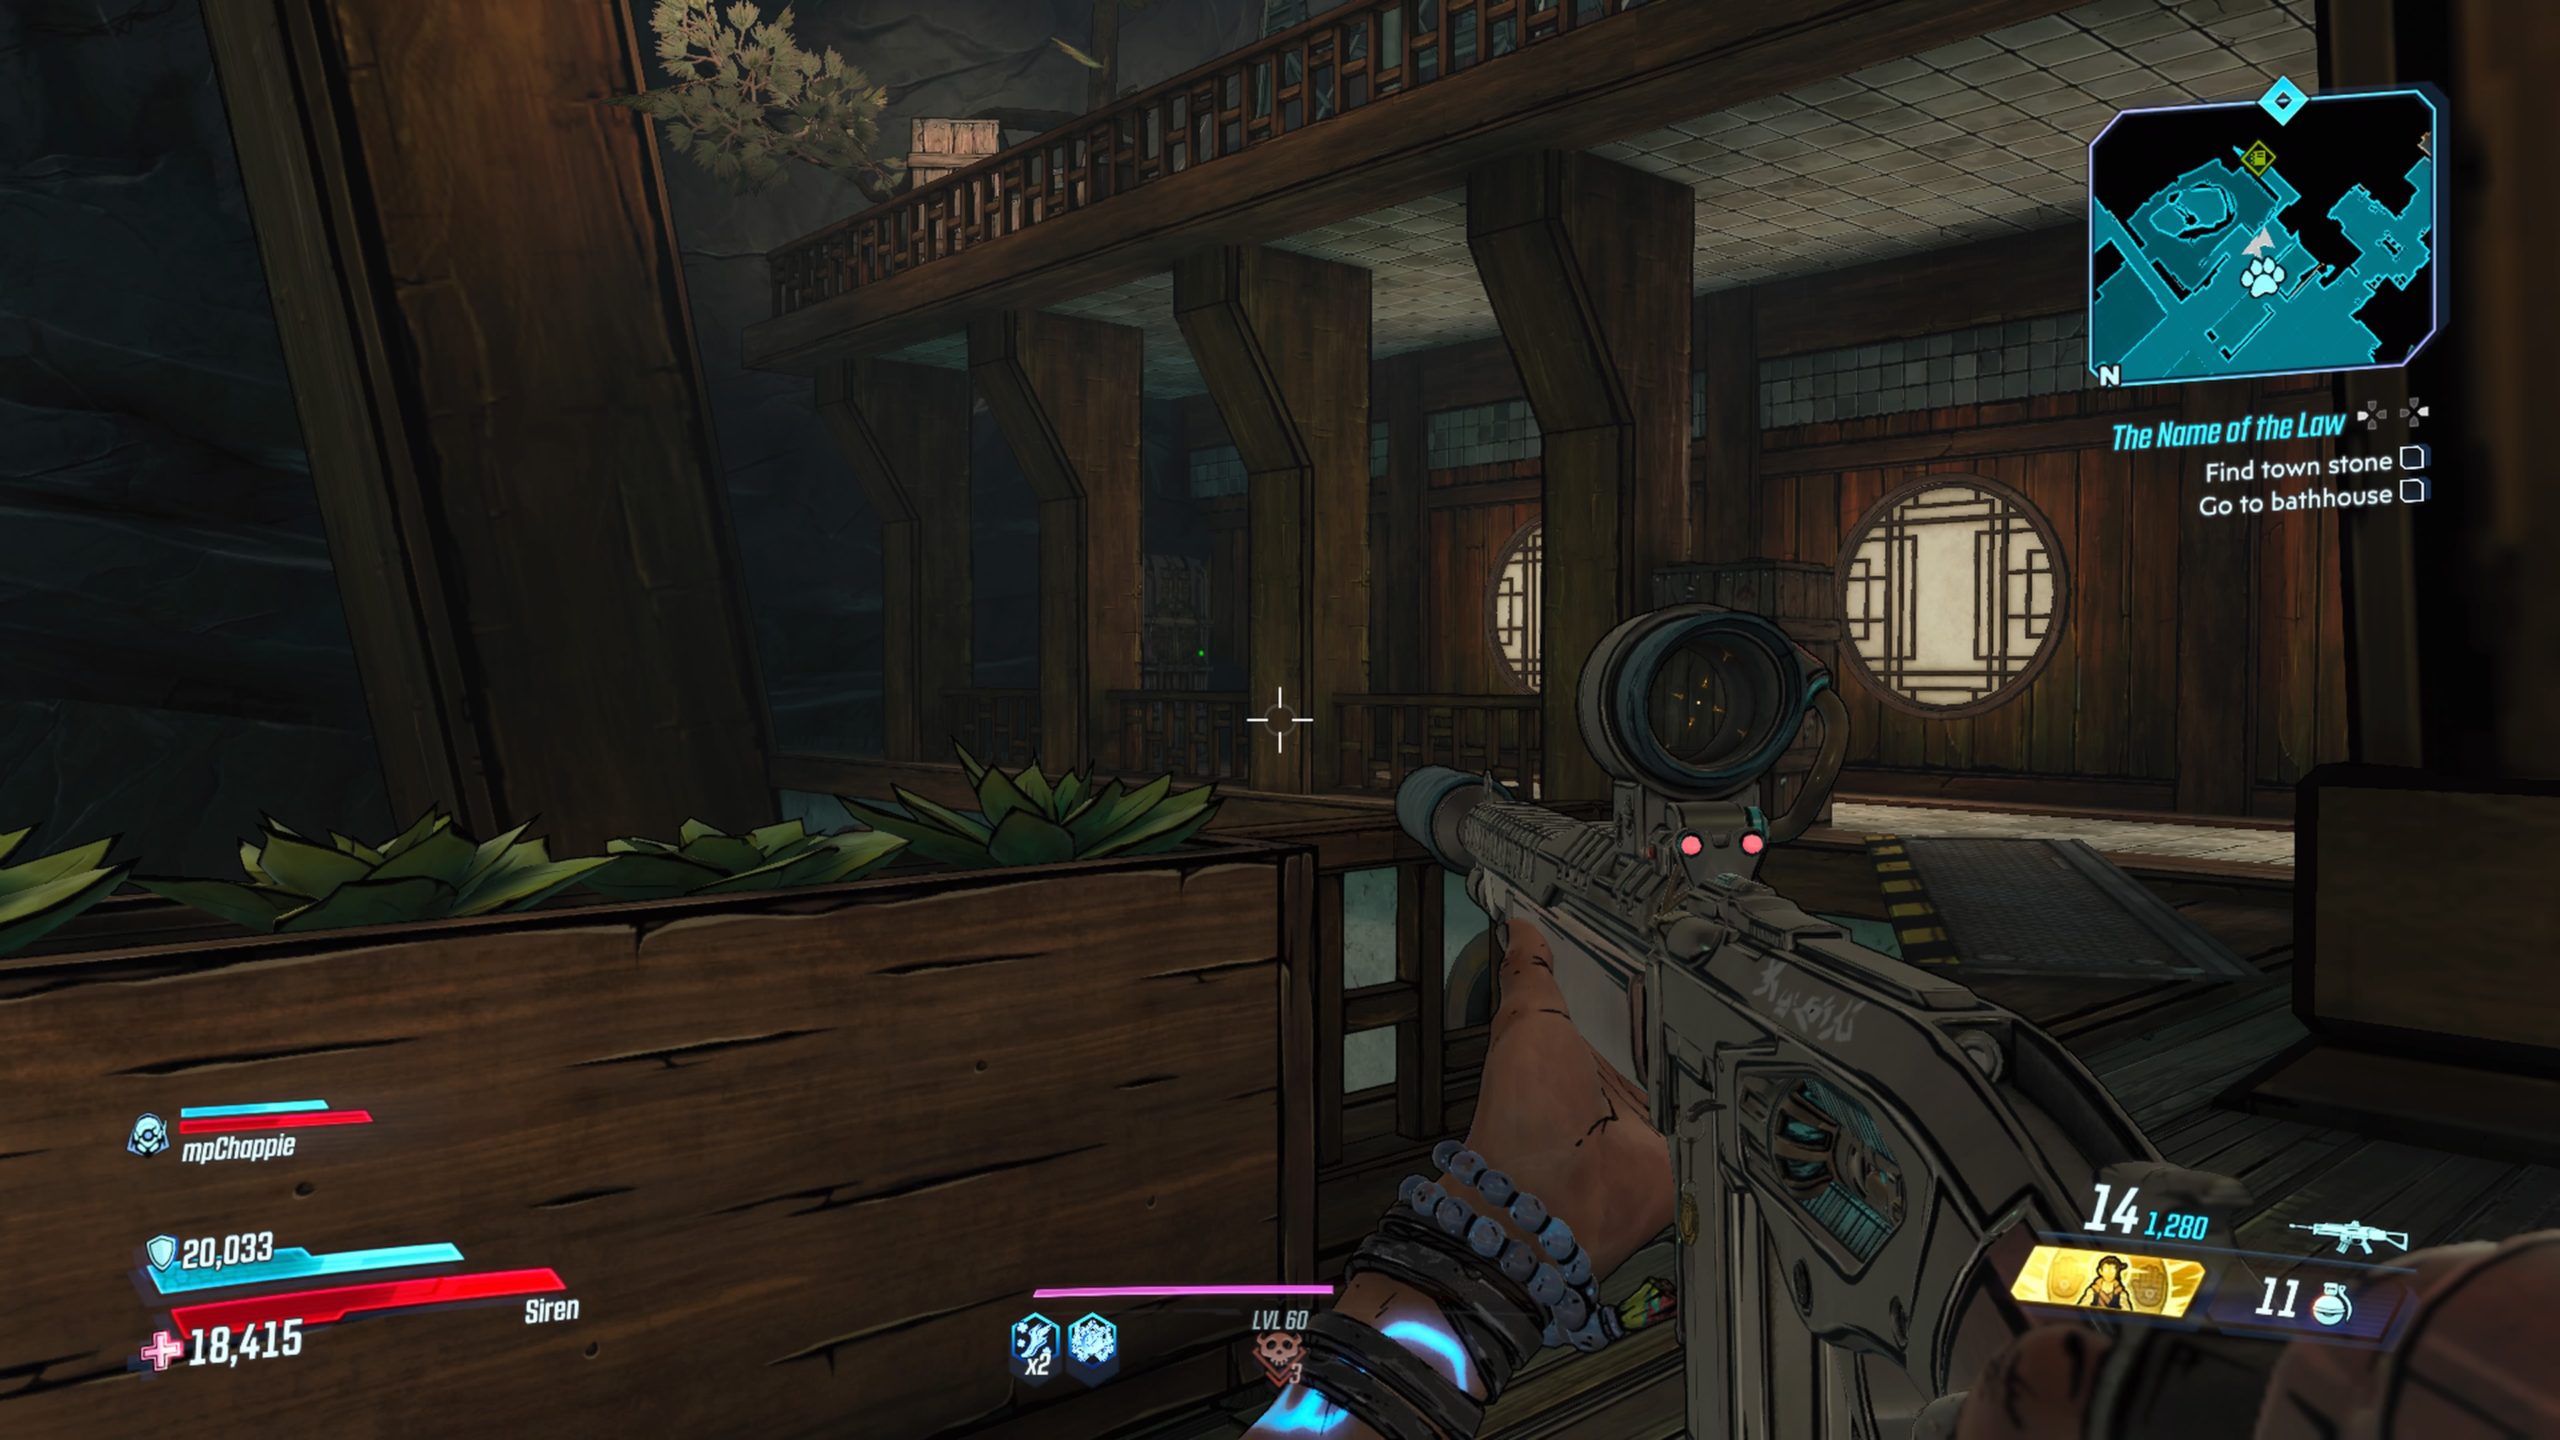
Vestige #2
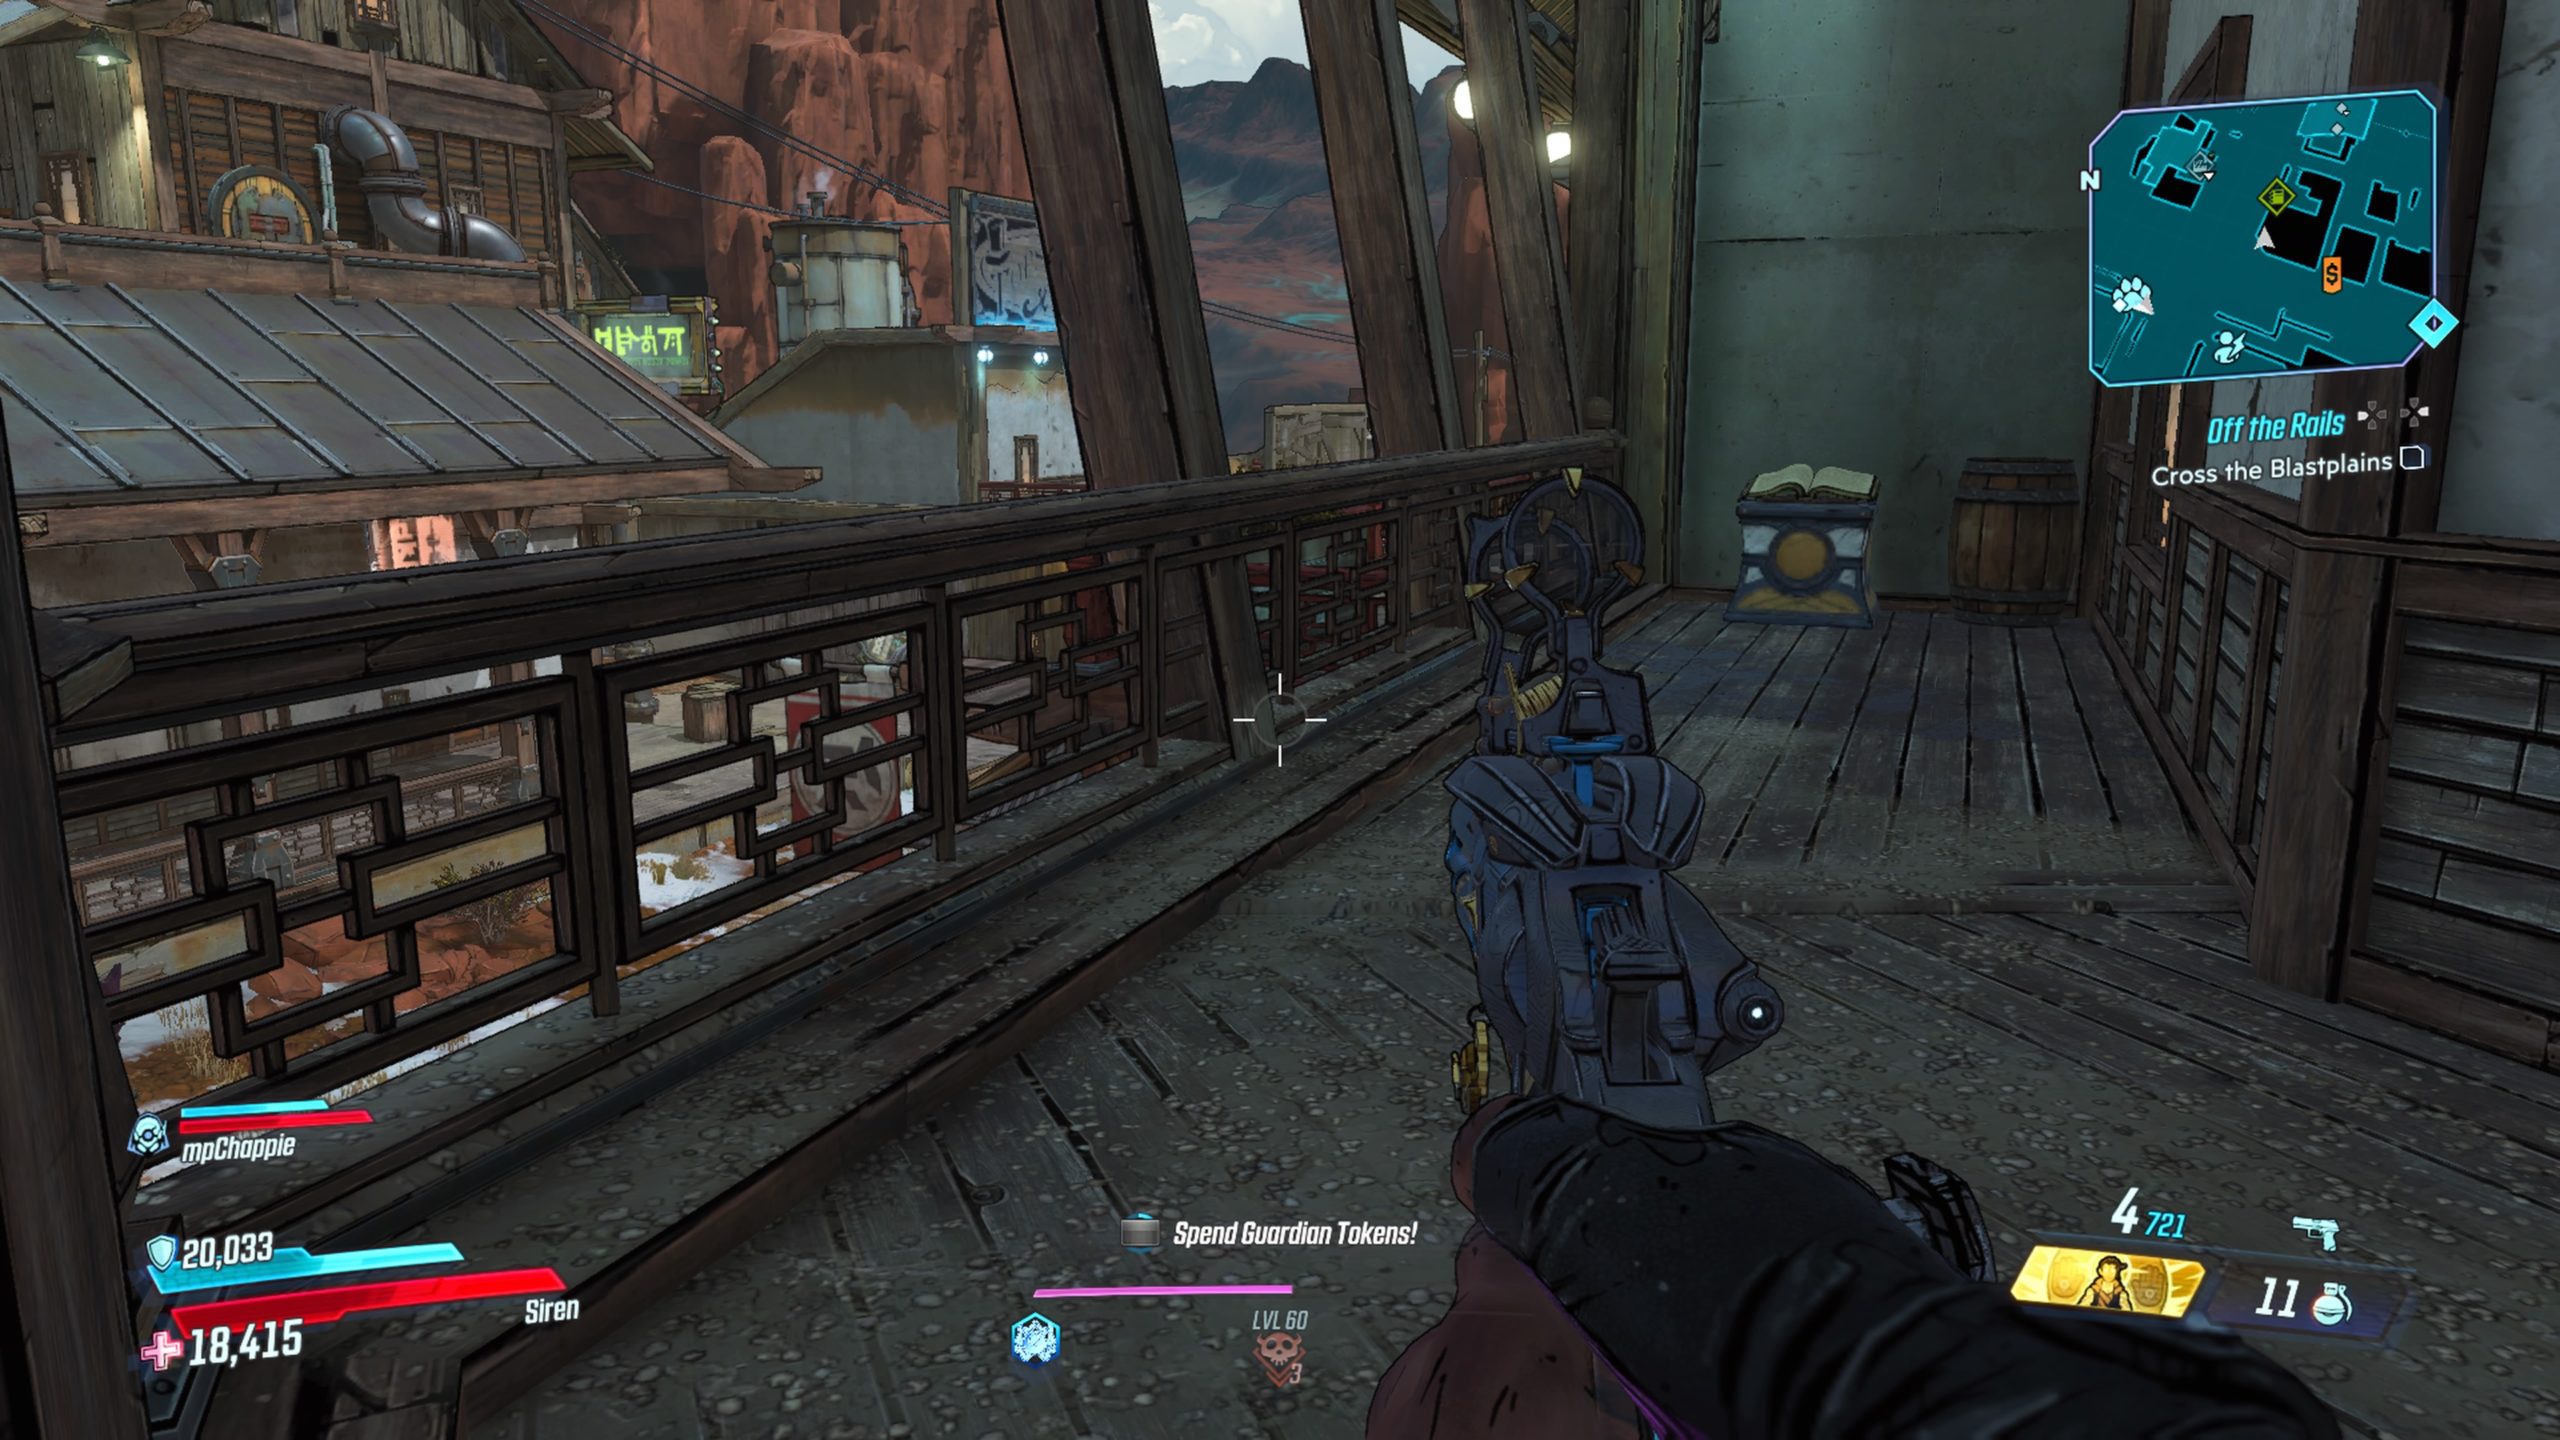
This journal can be found on a balcony. To reach it, head behind the building and use the wooden fence to reach the back of the roof. Head up the roof towards the front and use 2 wooden crates to reach the top of the General Store sign. Drop down onto the overhang then follow it left (right of the General Store) to find a gap exposing the balcony that you can jump down onto to reach the journal.
Vestige Cache
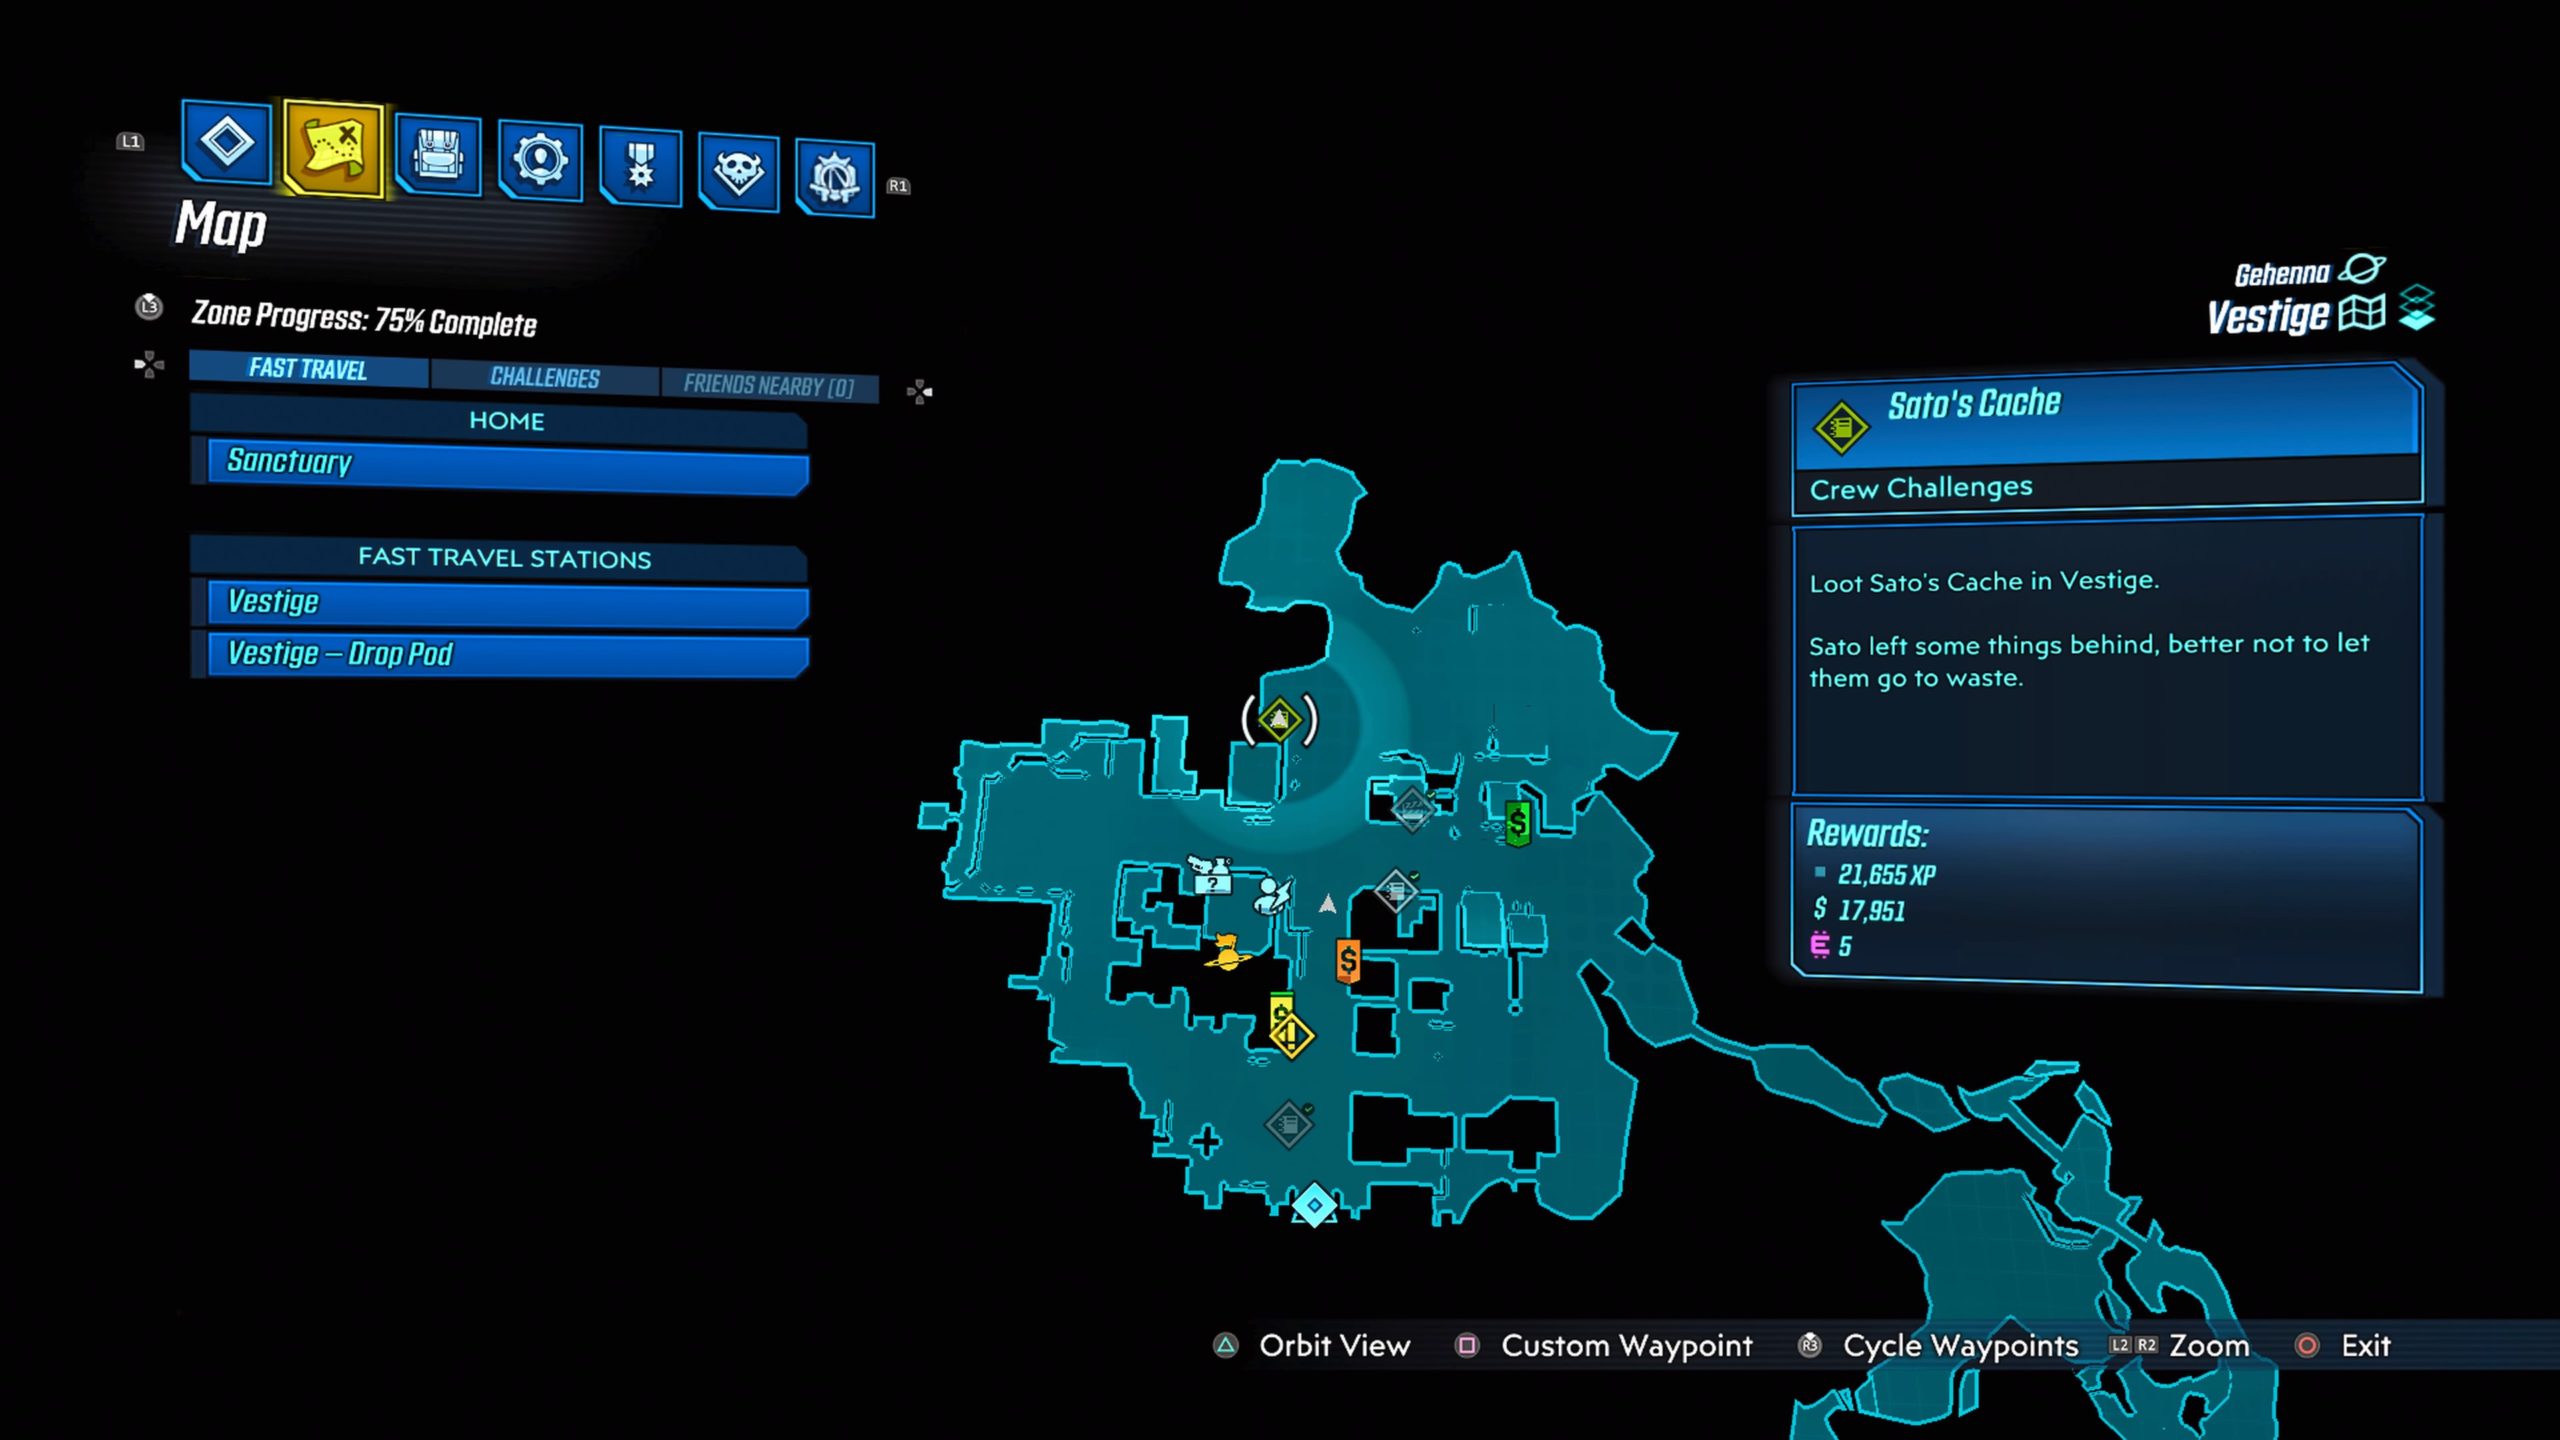
The cache can be found on the balcony of the saloon. To reach it, face the entrance of the saloon and take the path left up the stairs then climb to the top of the crates. From the crates, jump up to a balcony and follow it until you reach a gap. Run and jump to reach the next section of the balcony. Follow it along to reach the cache.
Blastplains #1
This journal is located in Amplecore Veins, which is east of the Pump & Charge fast travel station, on top of a giant rock. You will need to climb up the rock to reach the very top.
Blastplains #2
This journal is located near the Ashfall Peaks transition, which is north of the Fort Kickwater fast travel station.
Blastplains Cache
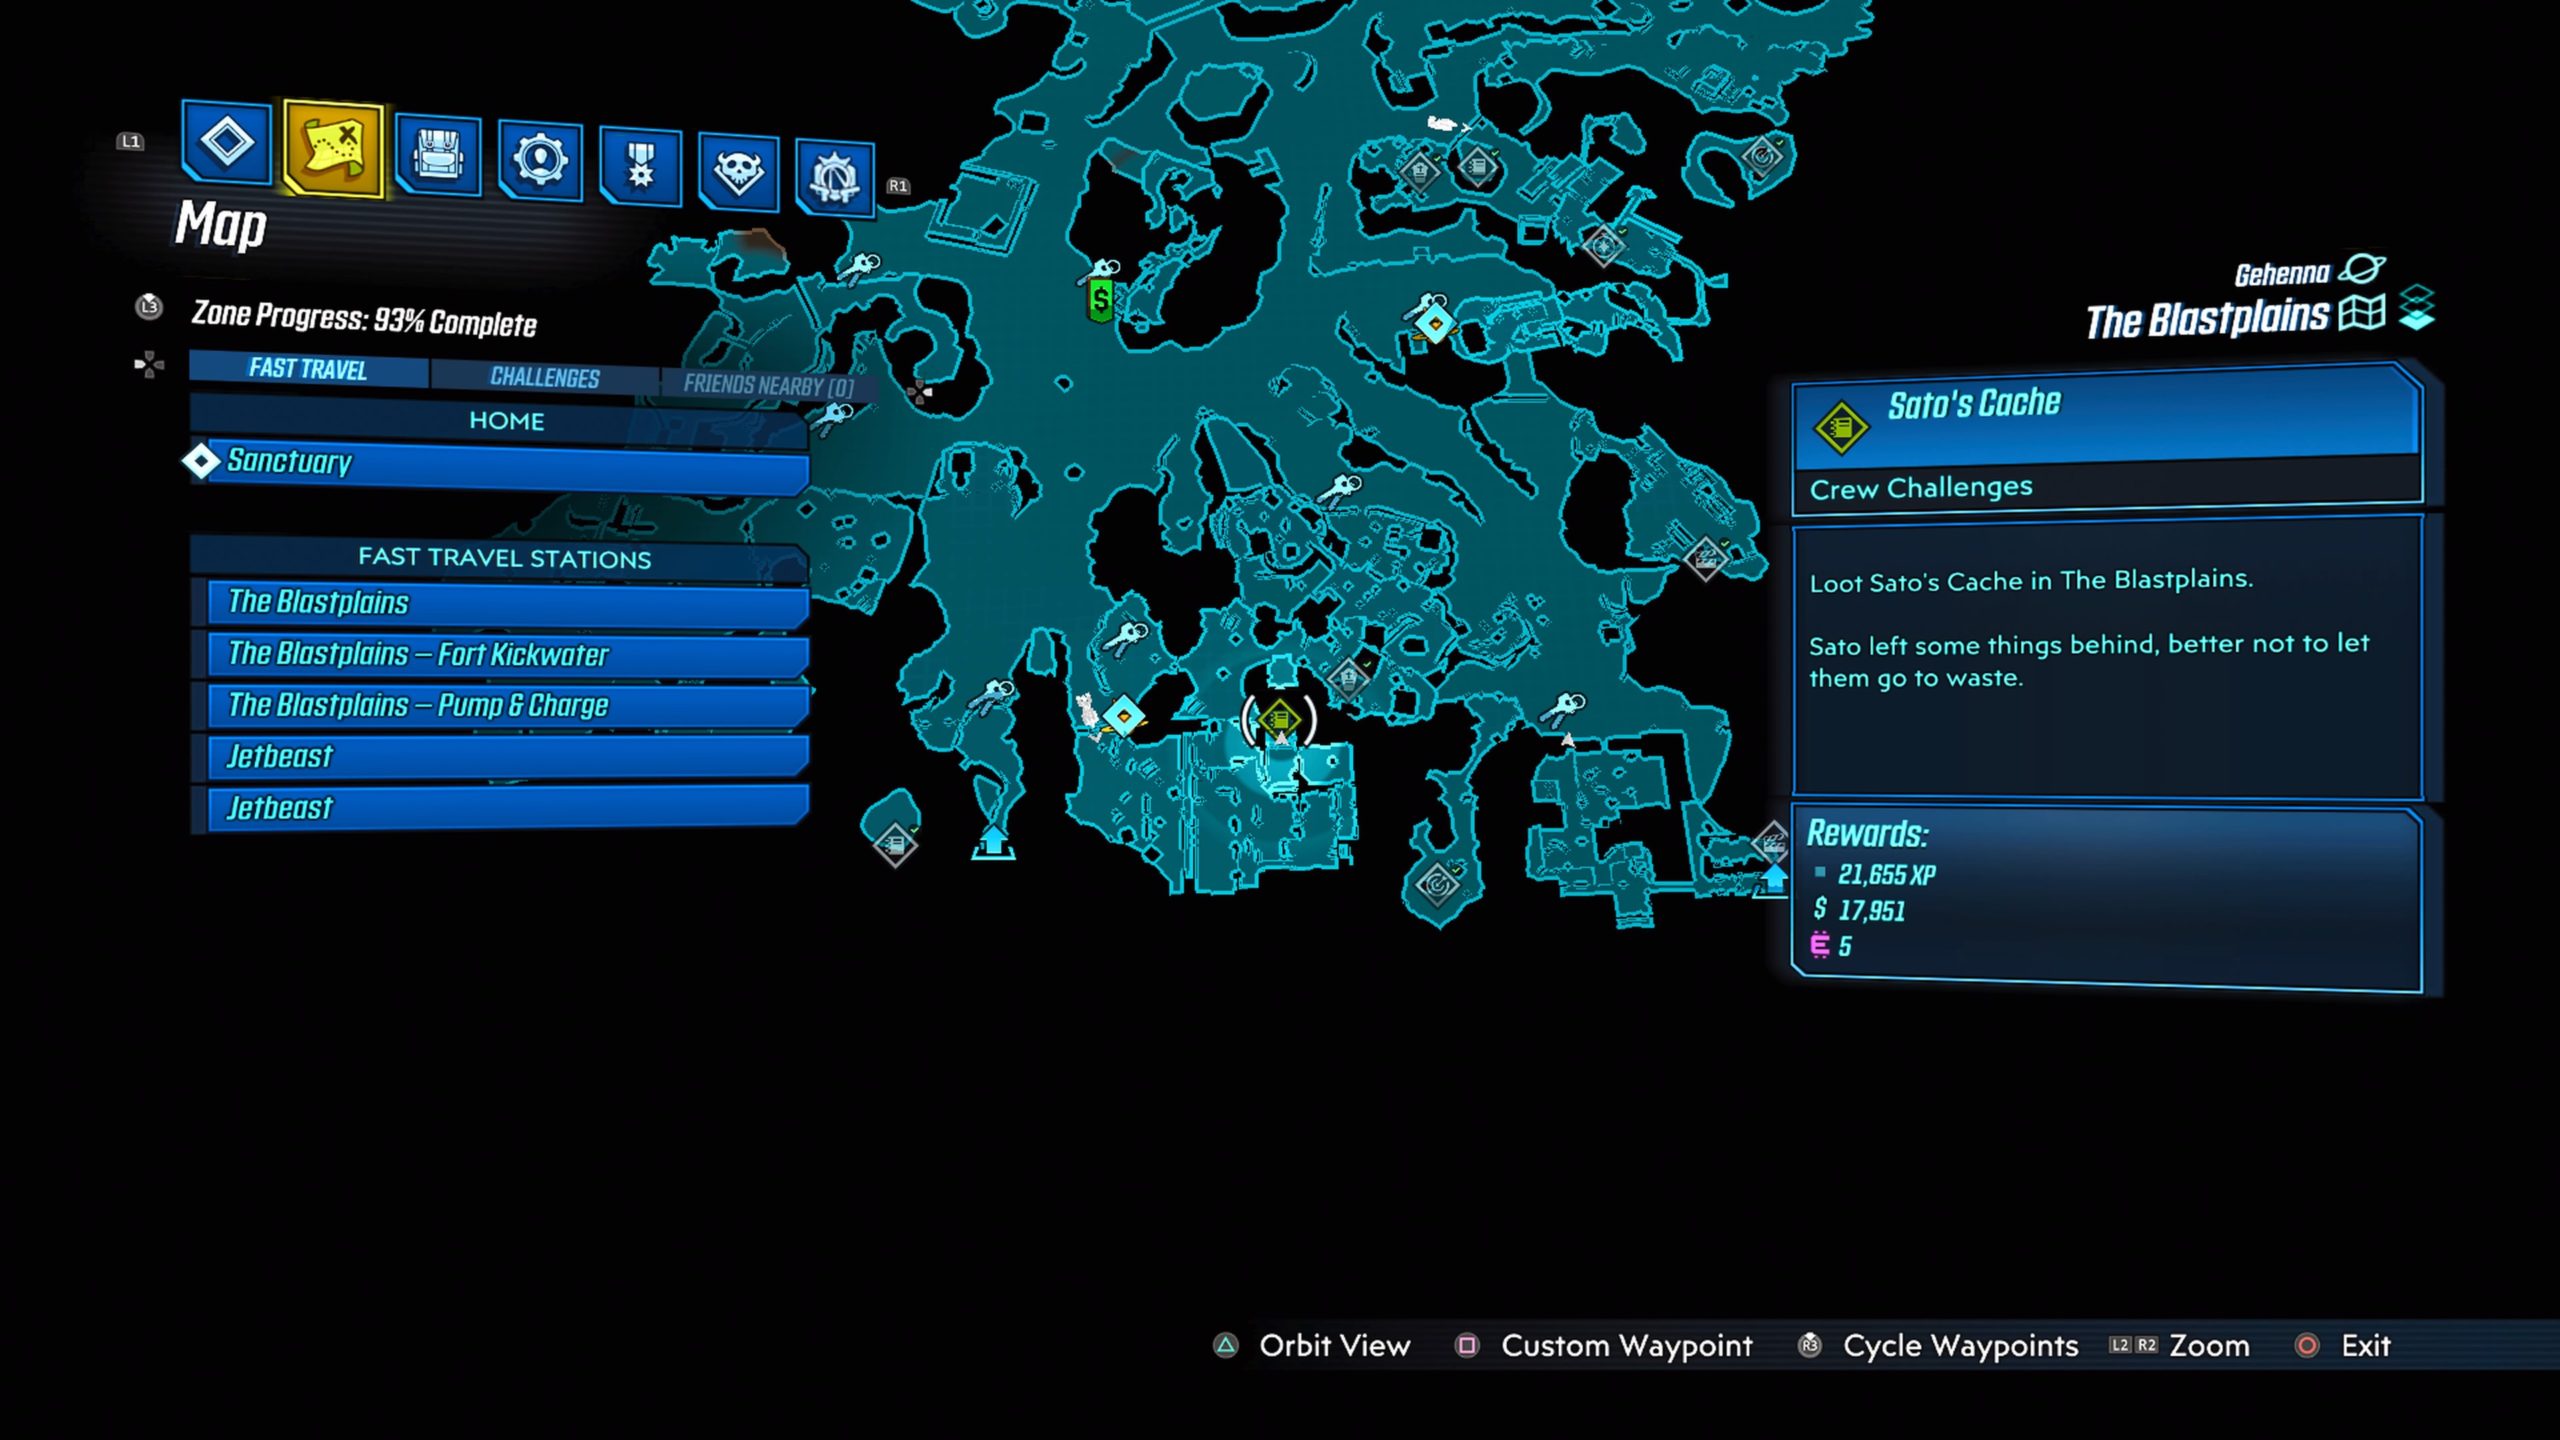
This cache can be found in Fort Kickwater. To reach it, you will need to climb up some wooden crates and a wall marked with yellow paint. Once at the top, turn left and head through the doorway. Take an immediate right and crawl underneath the partially opened gate on the door to find the cache.
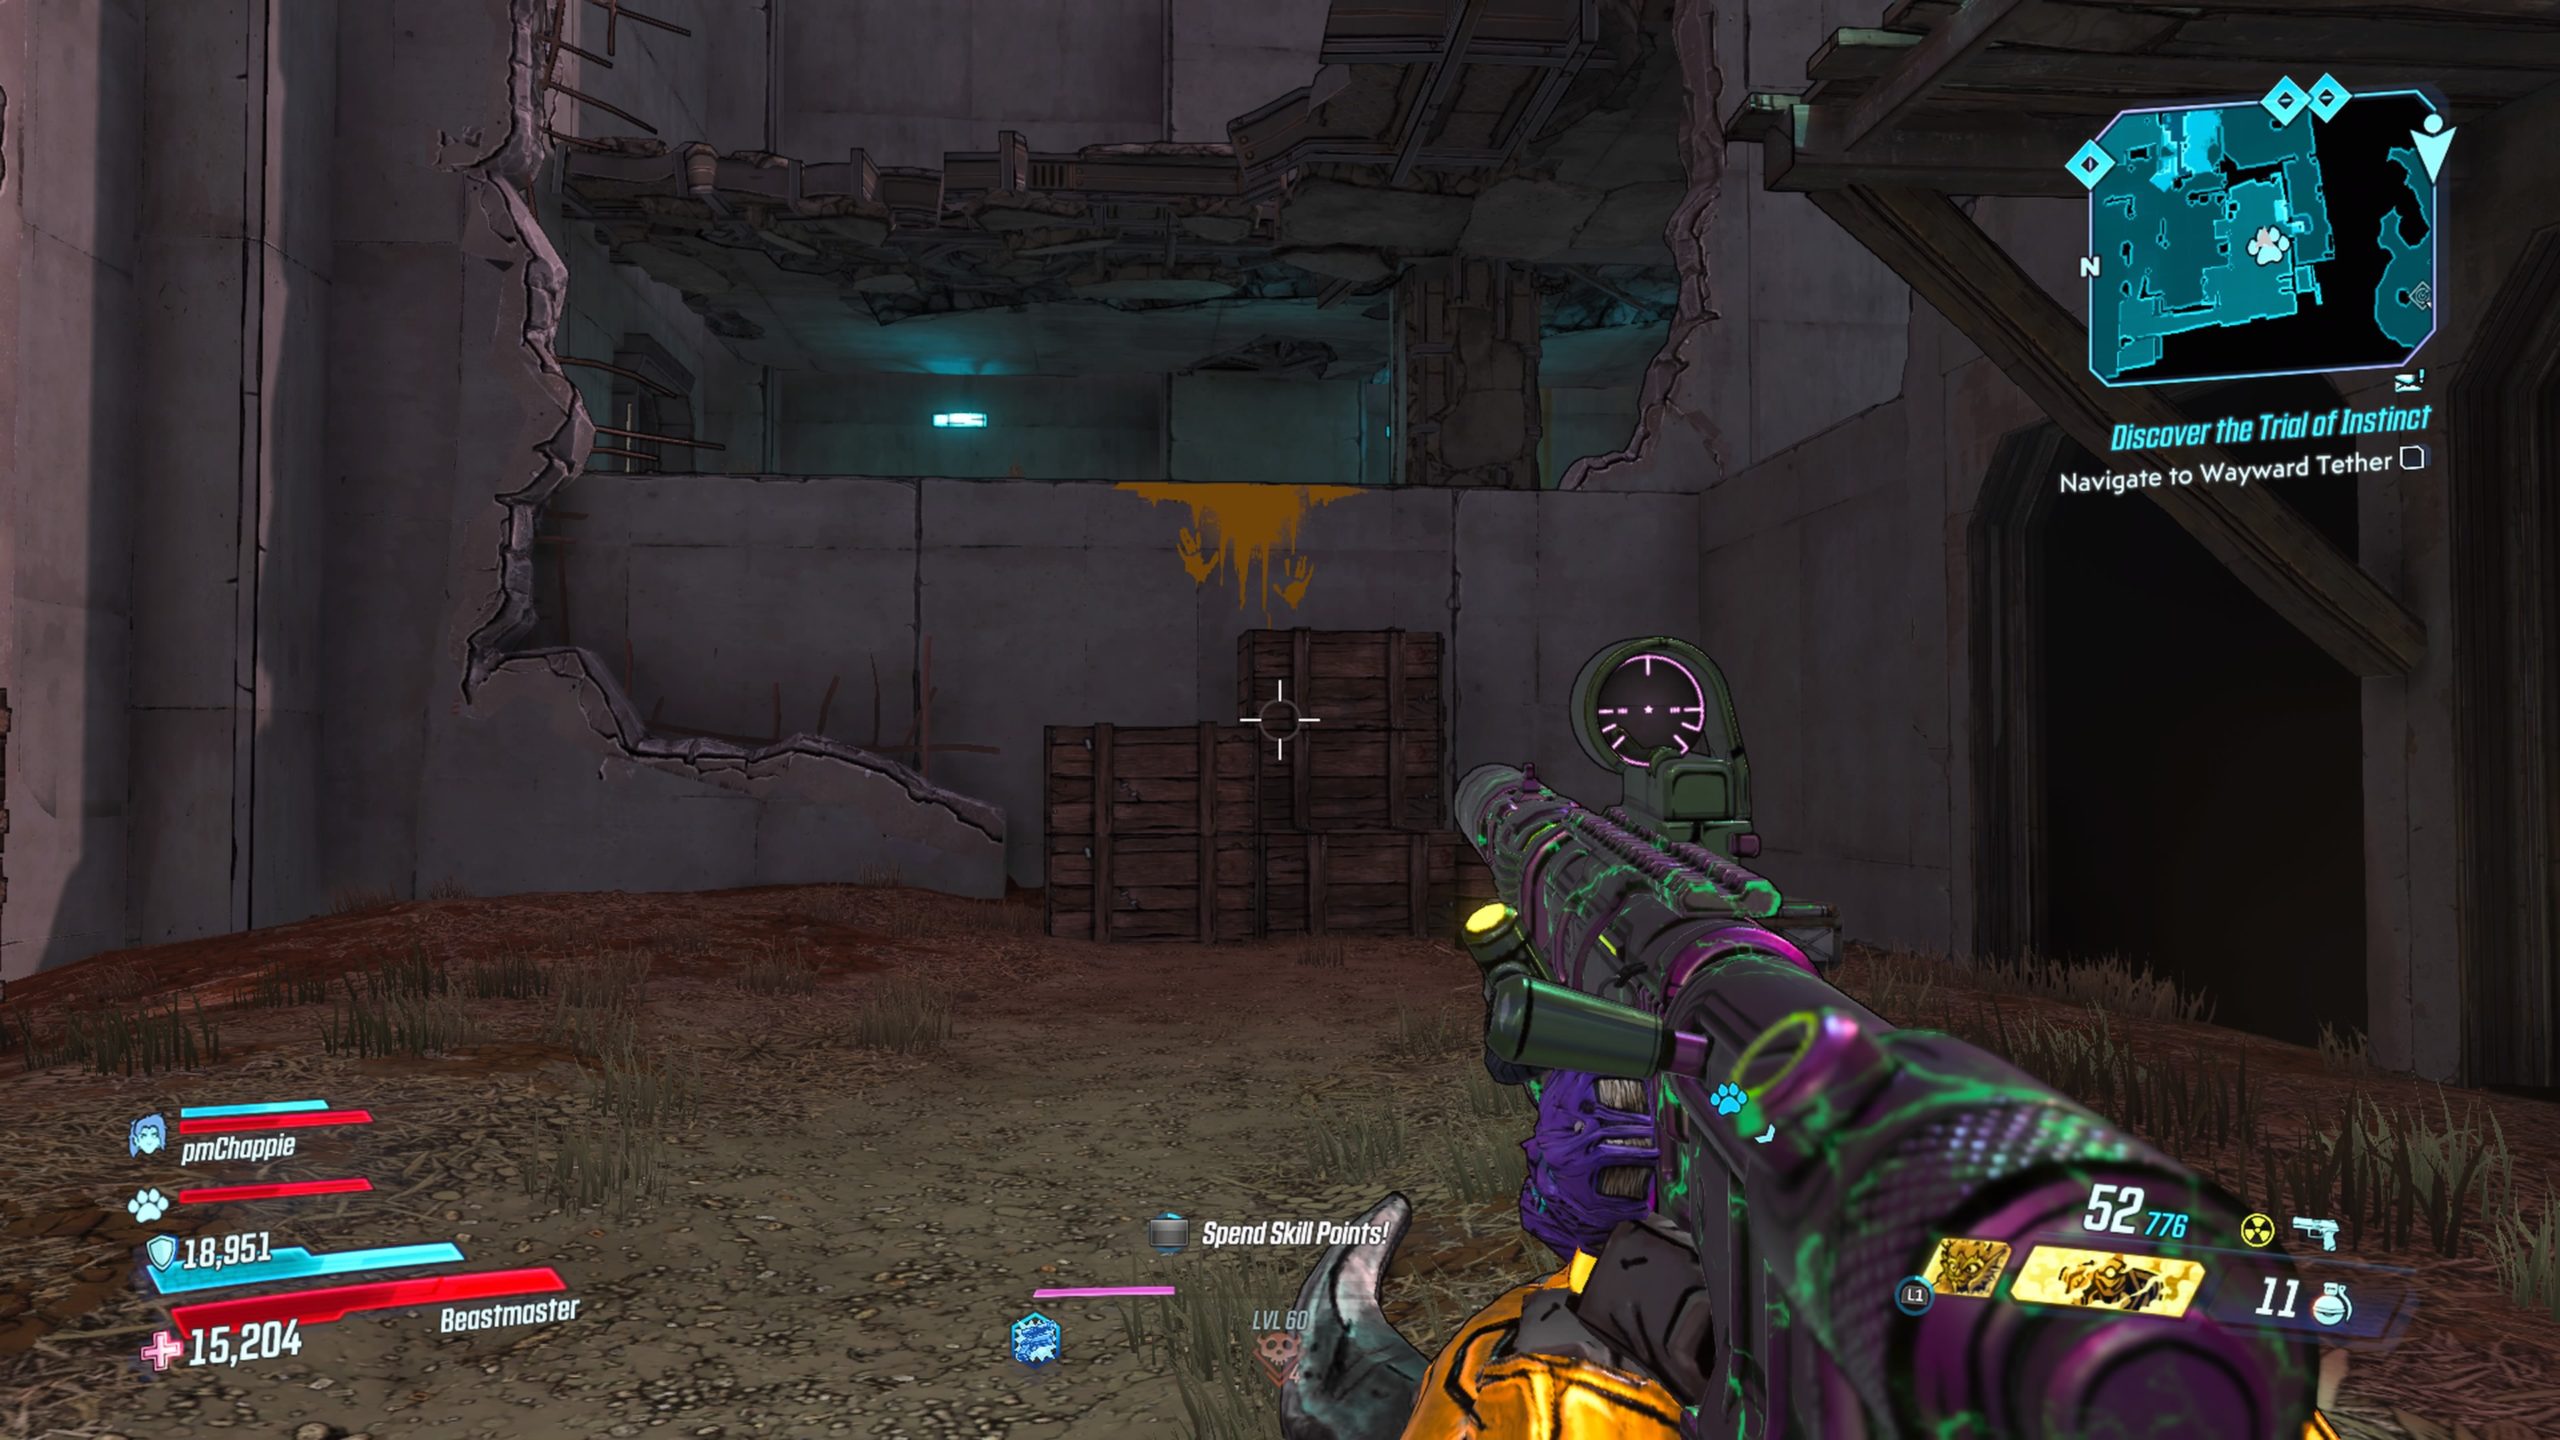
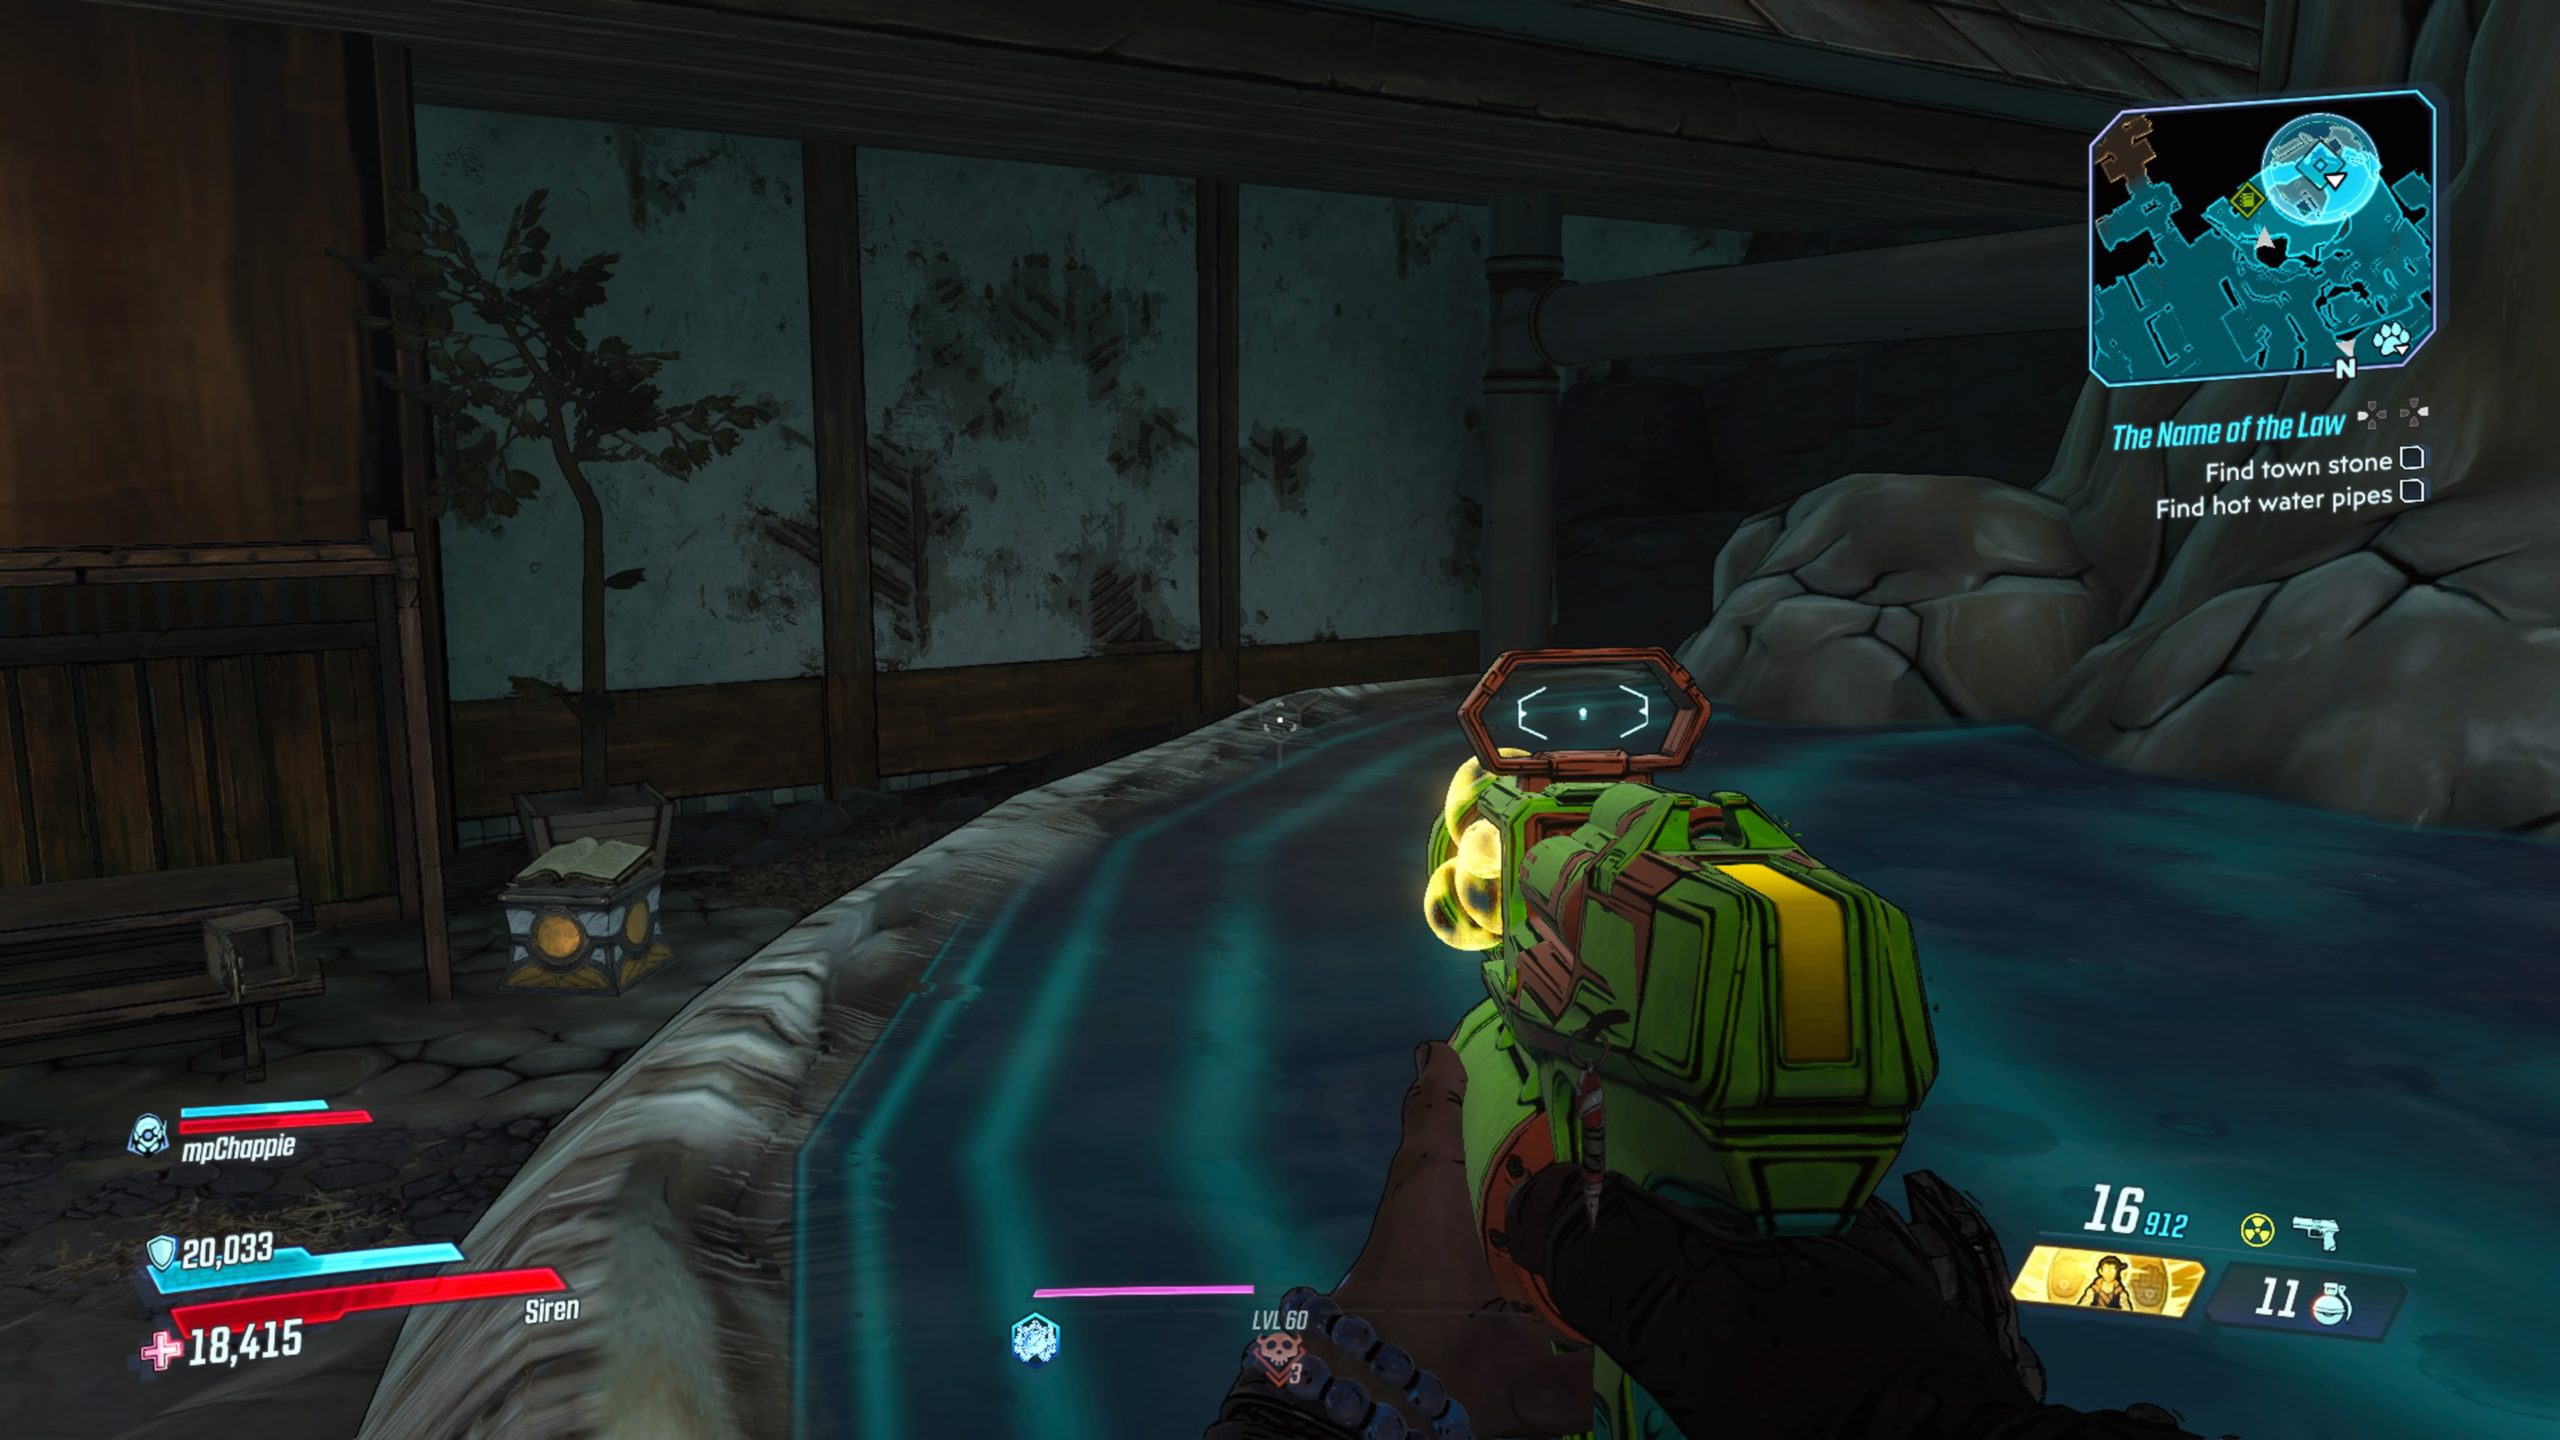
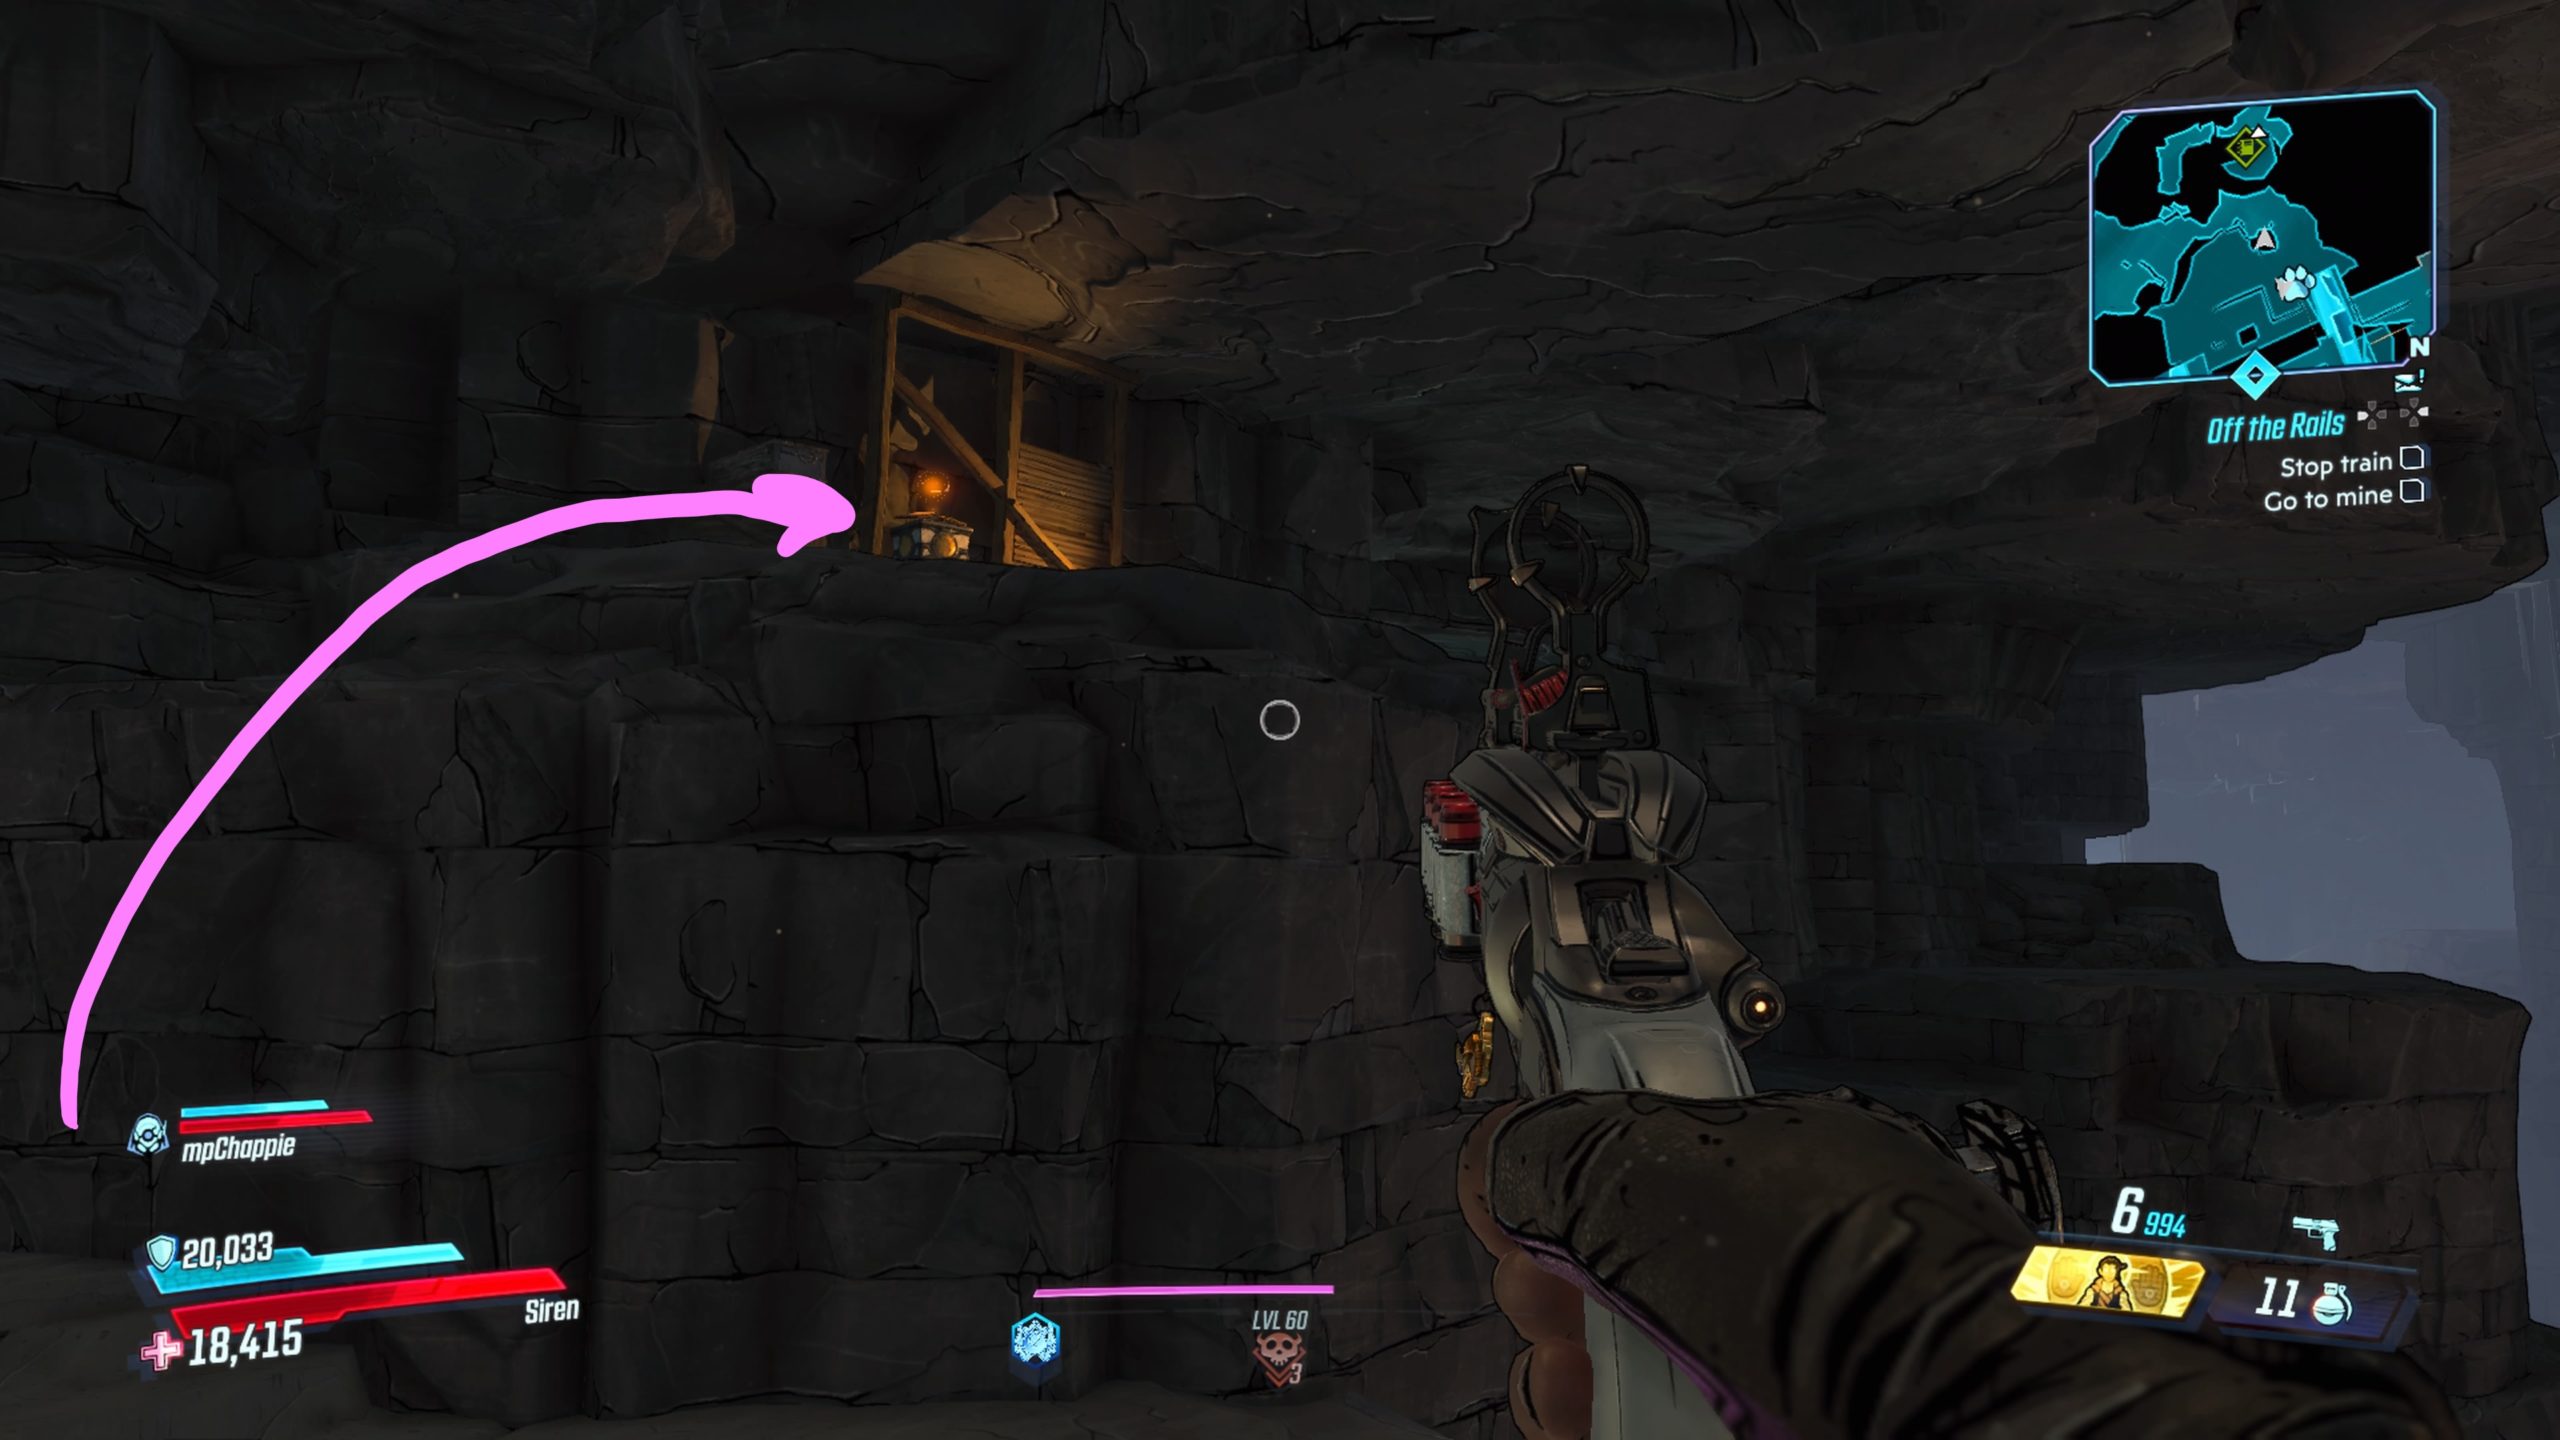
Ashfall Peaks #1
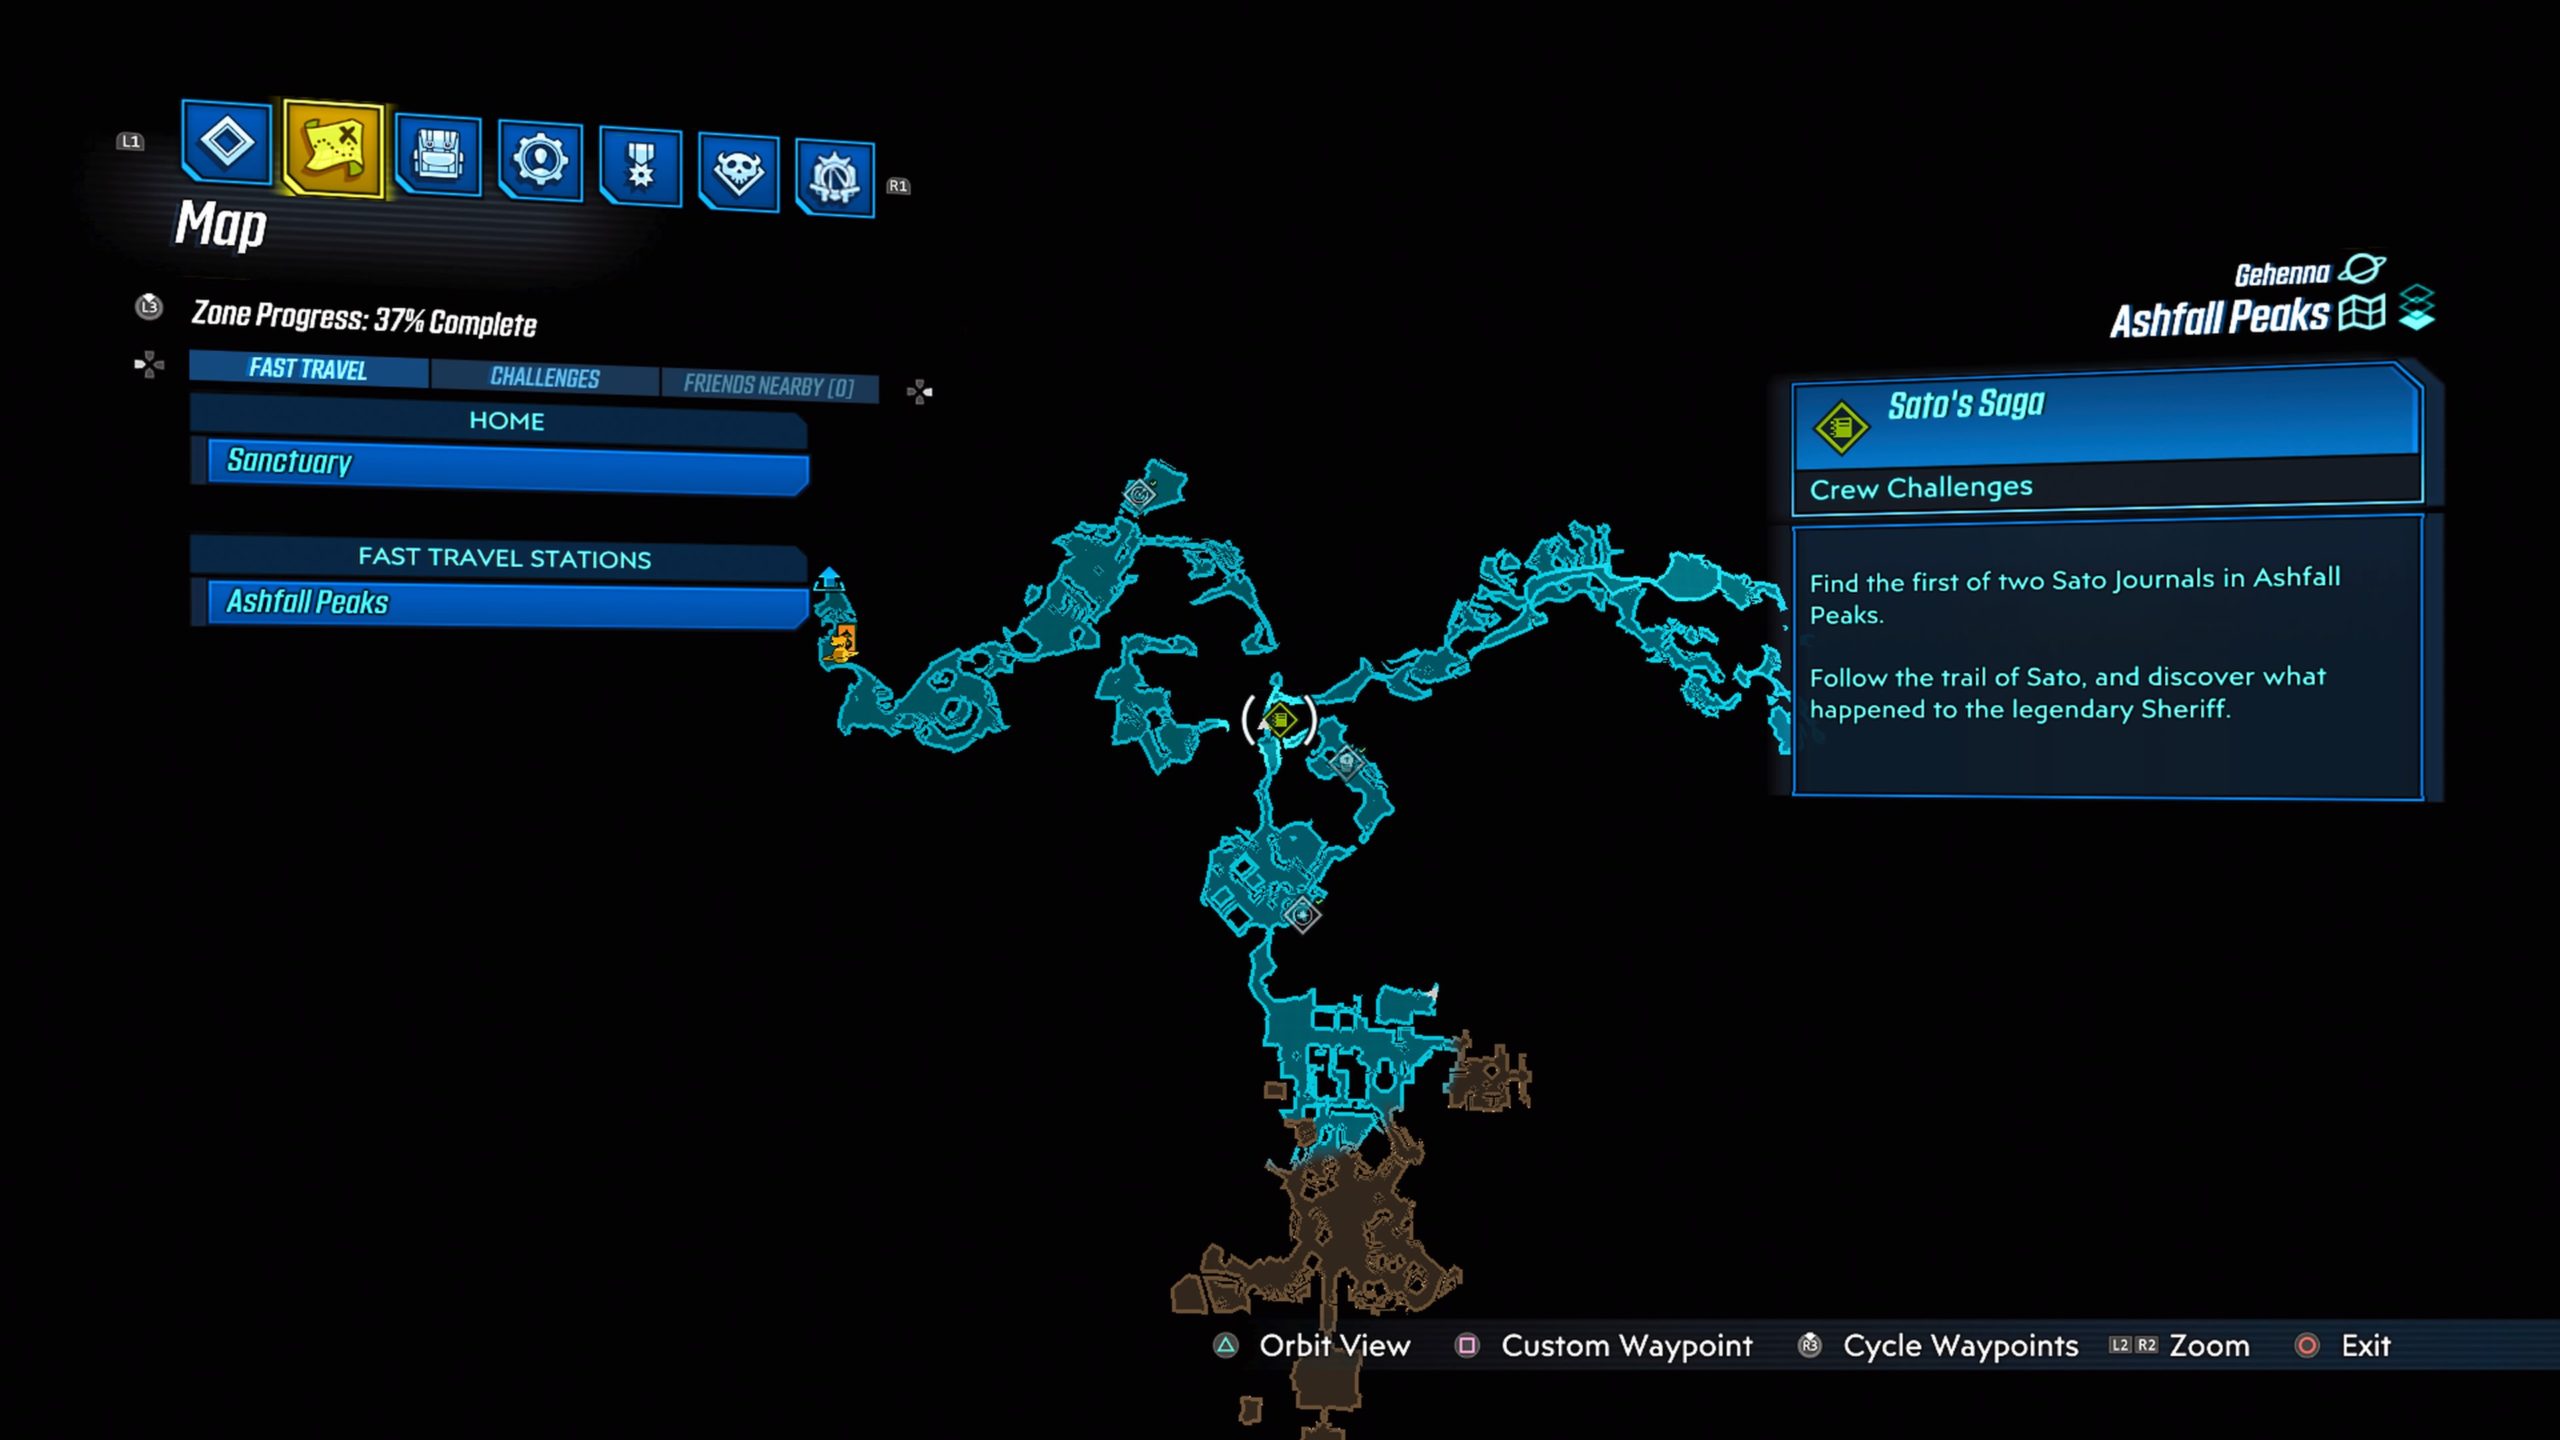
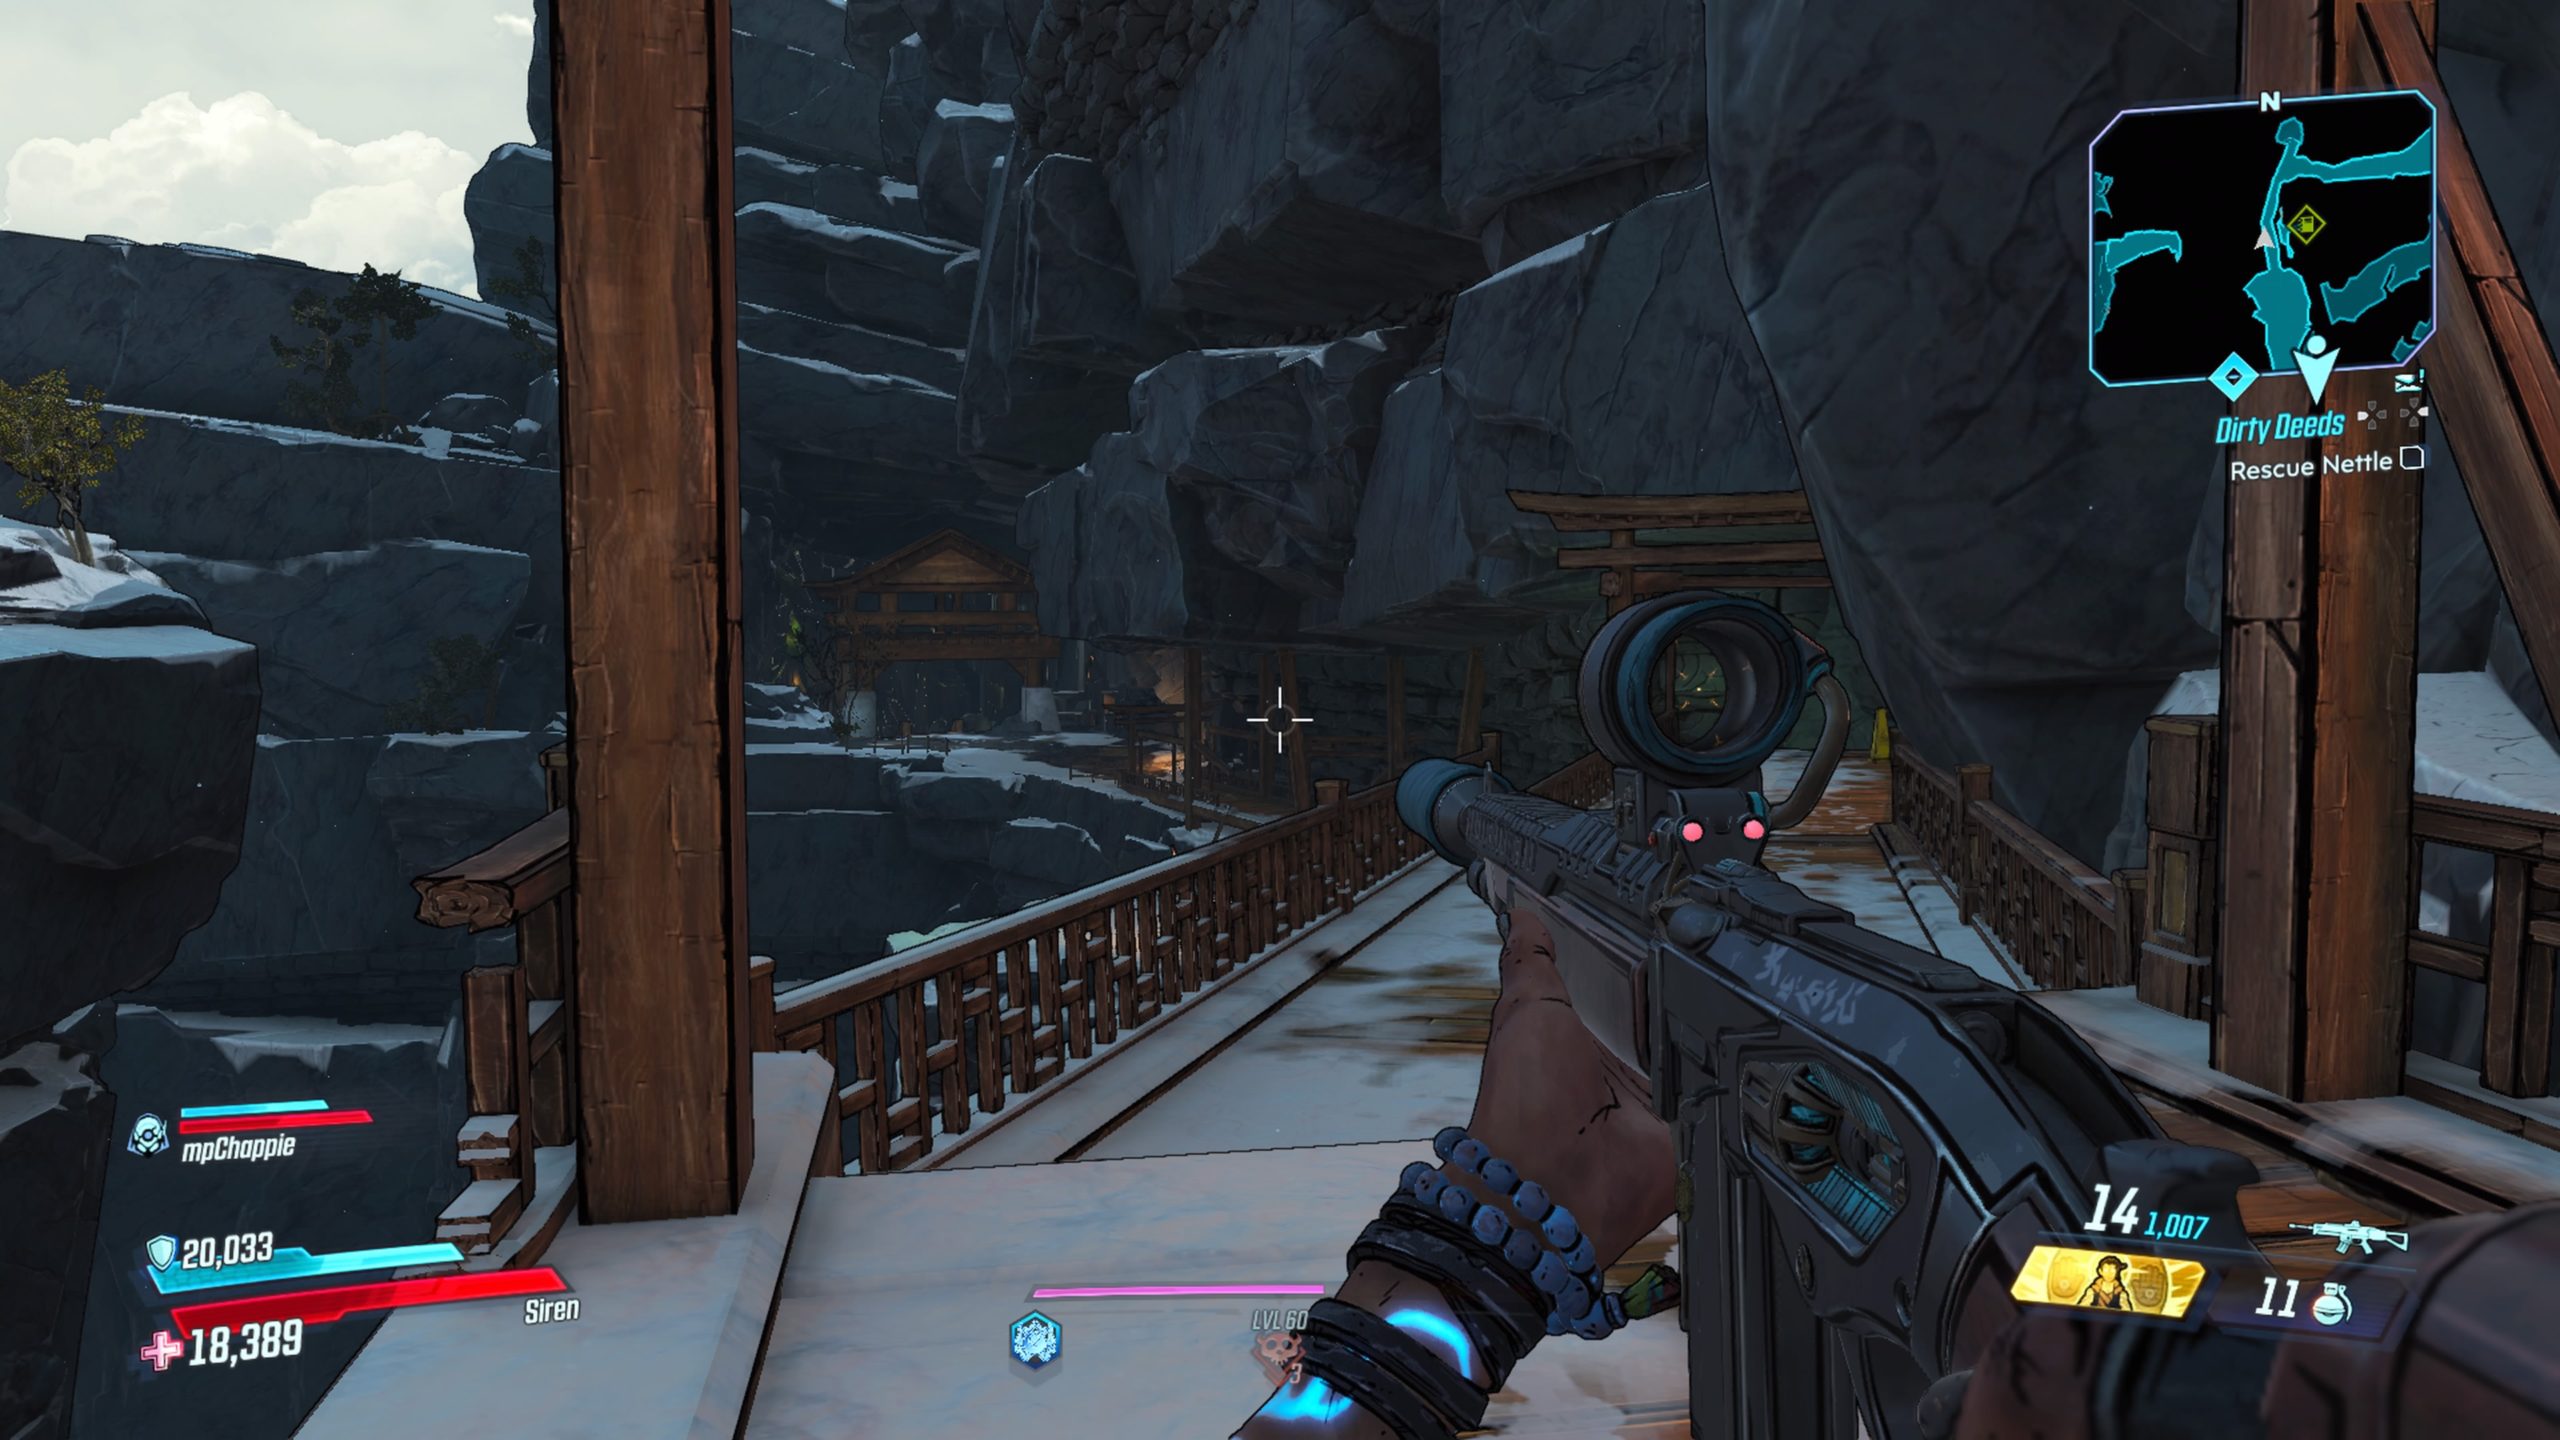
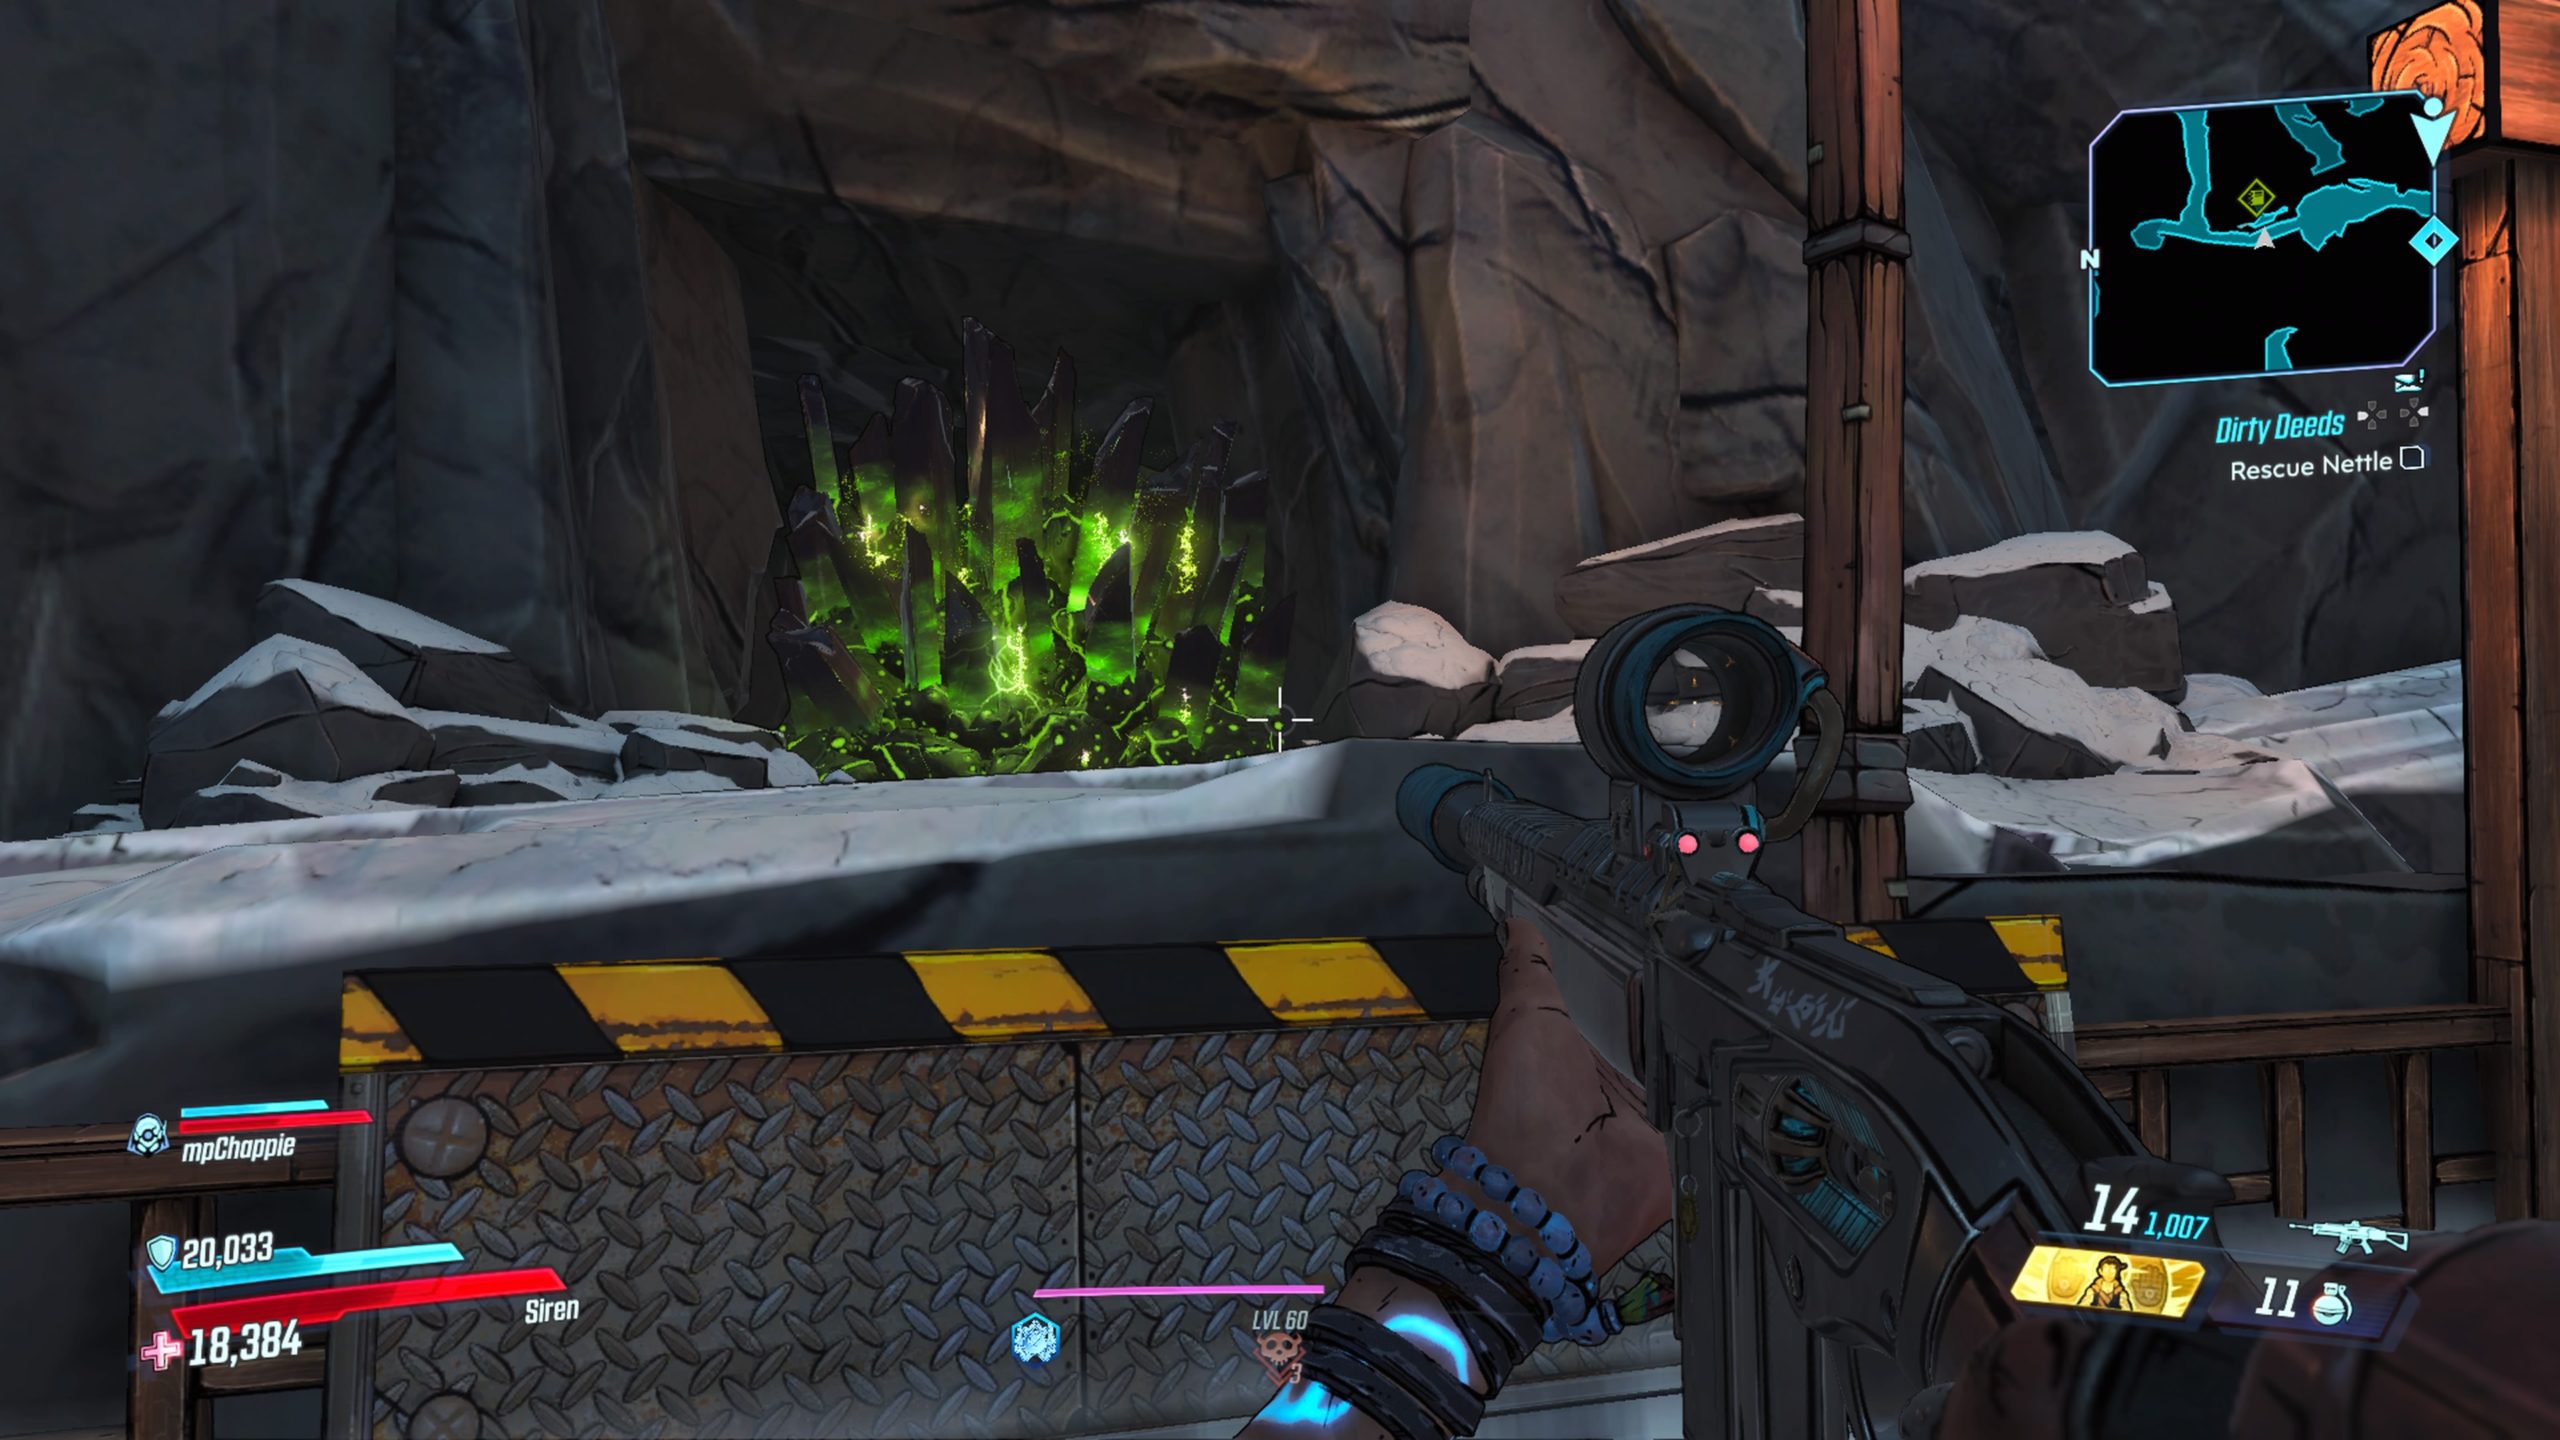
To reach this journal, you will need to progress far enough into the story to receive the punching crystals ability. Once you do, return to this journal in the mountain. Punch the crystal to reveal the nook containing the journal.
Ashfall Peaks #2
This journal can be found in the Devil’s Greatroom in Caldera’s Stronghold.
Ashfall Peaks Cache
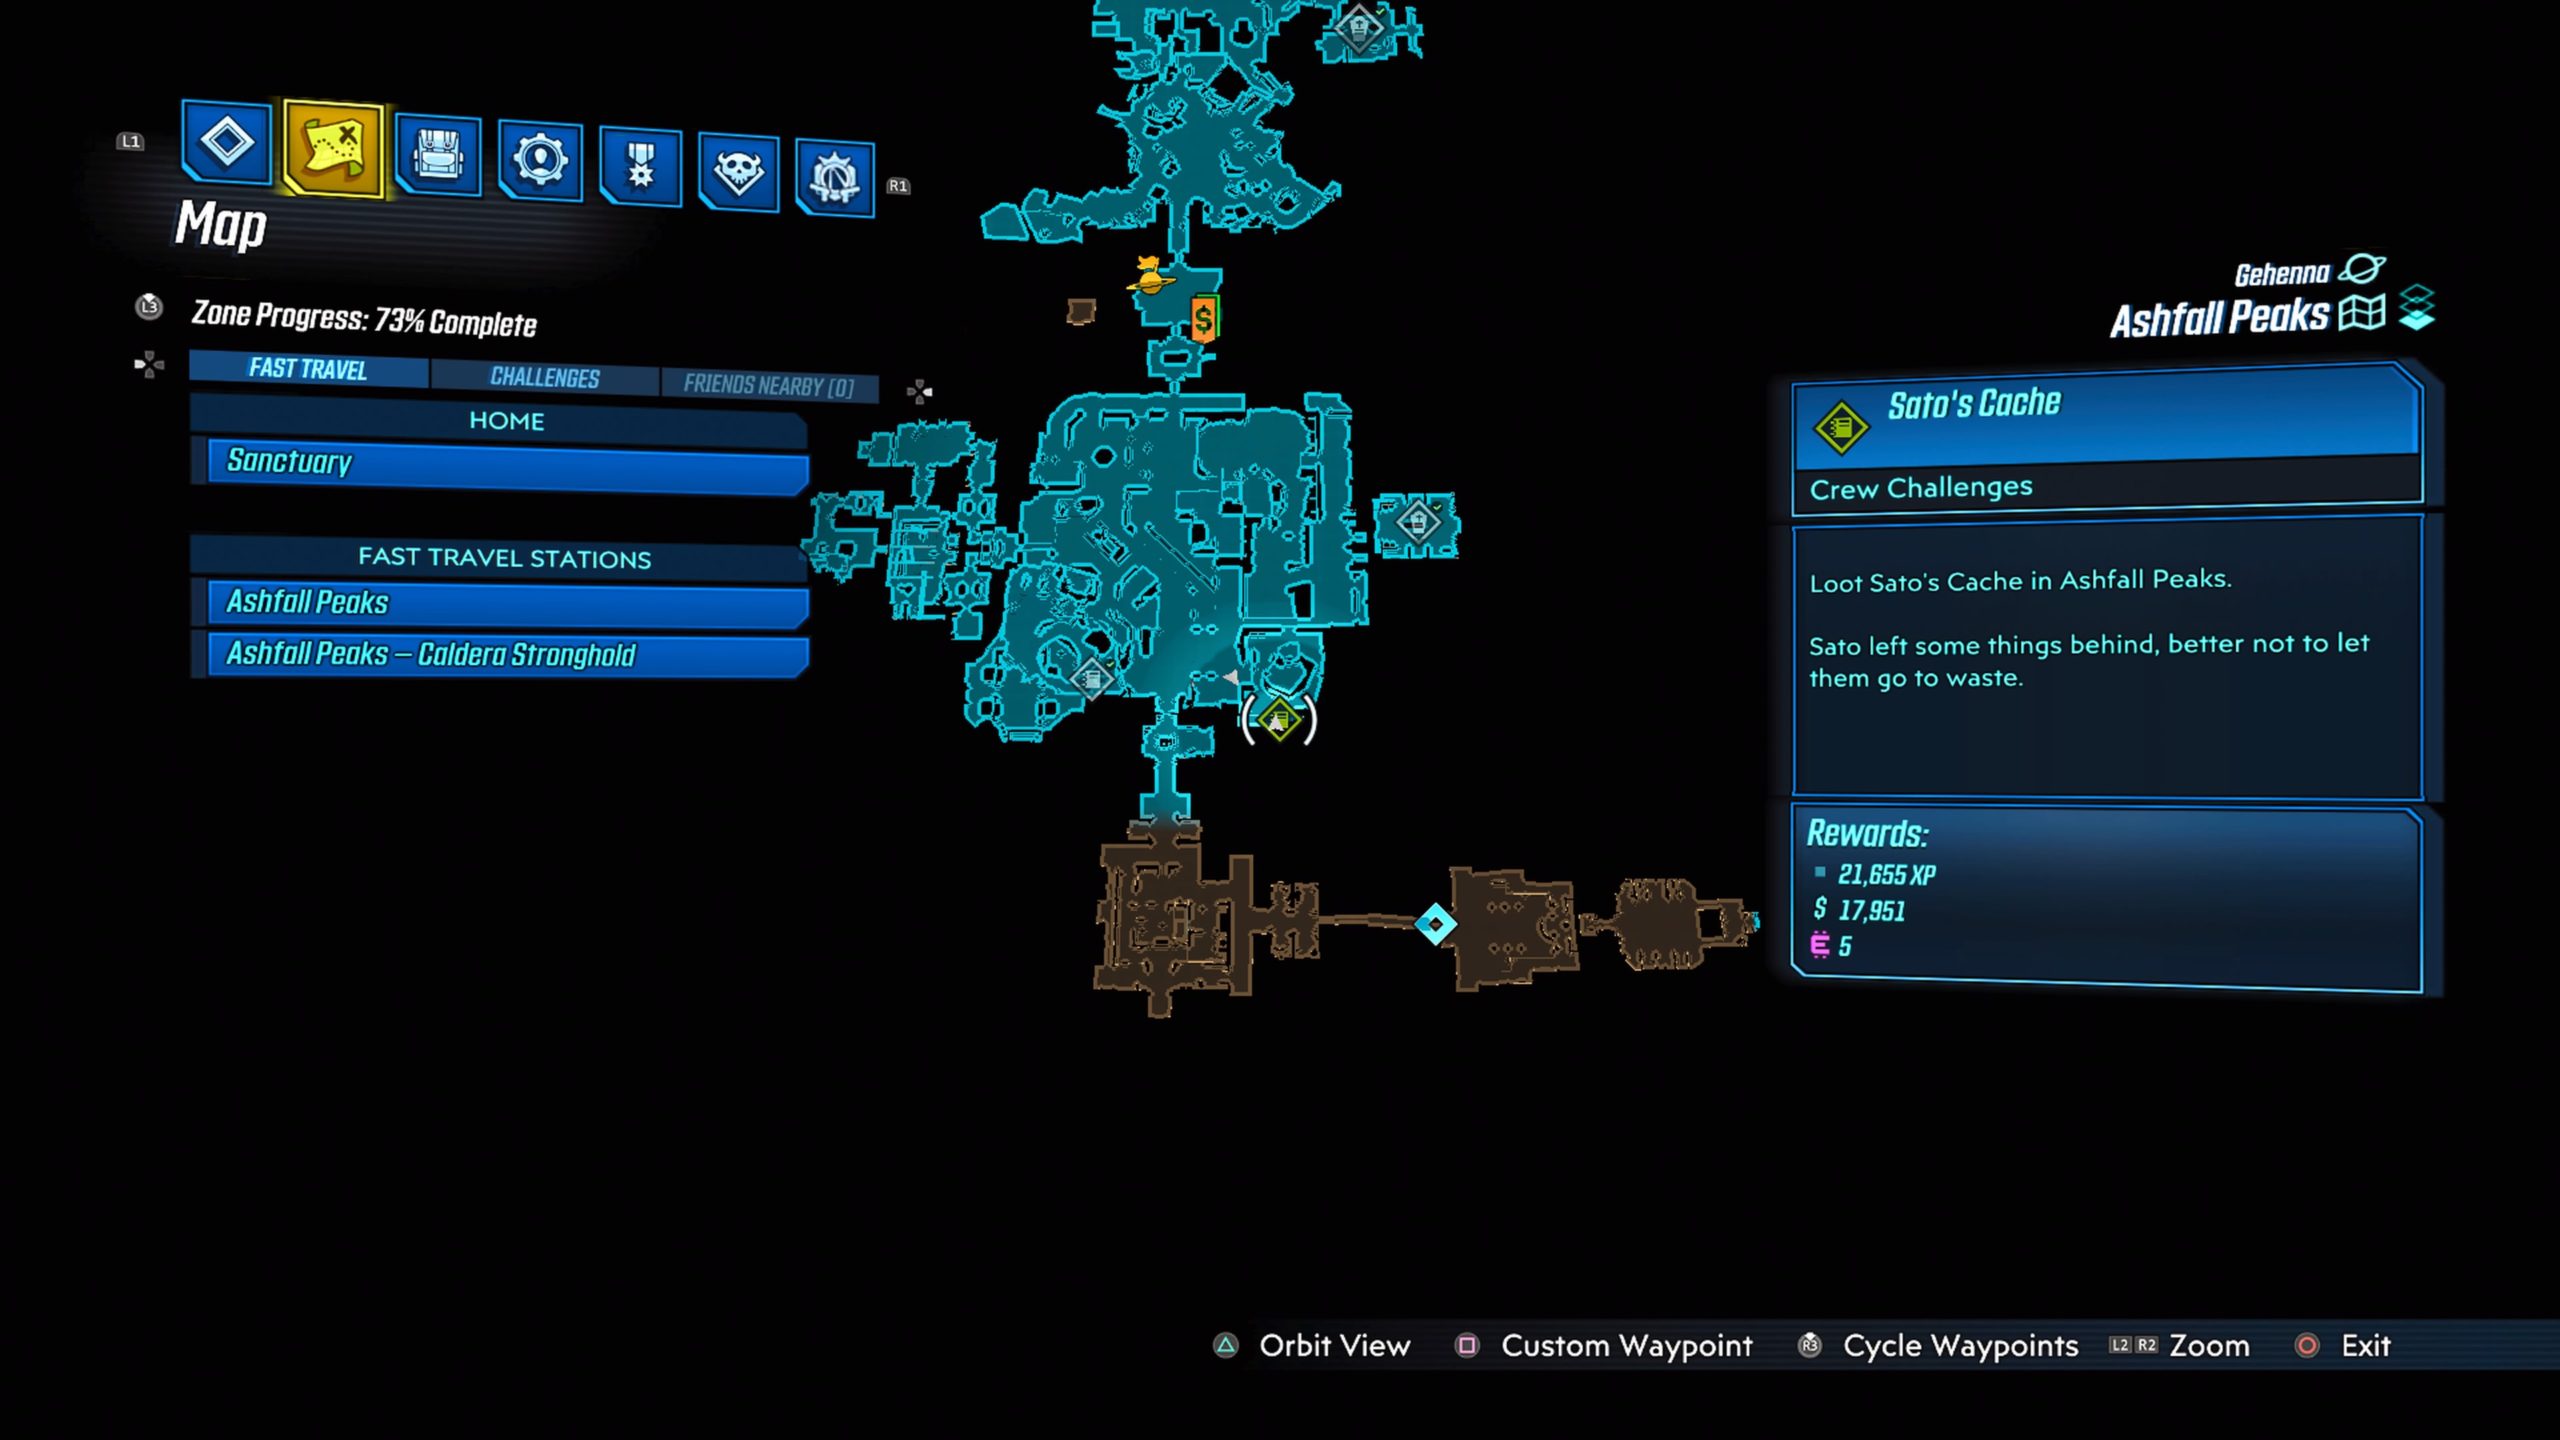
The cache can be found in the Devil’s Greatroom.
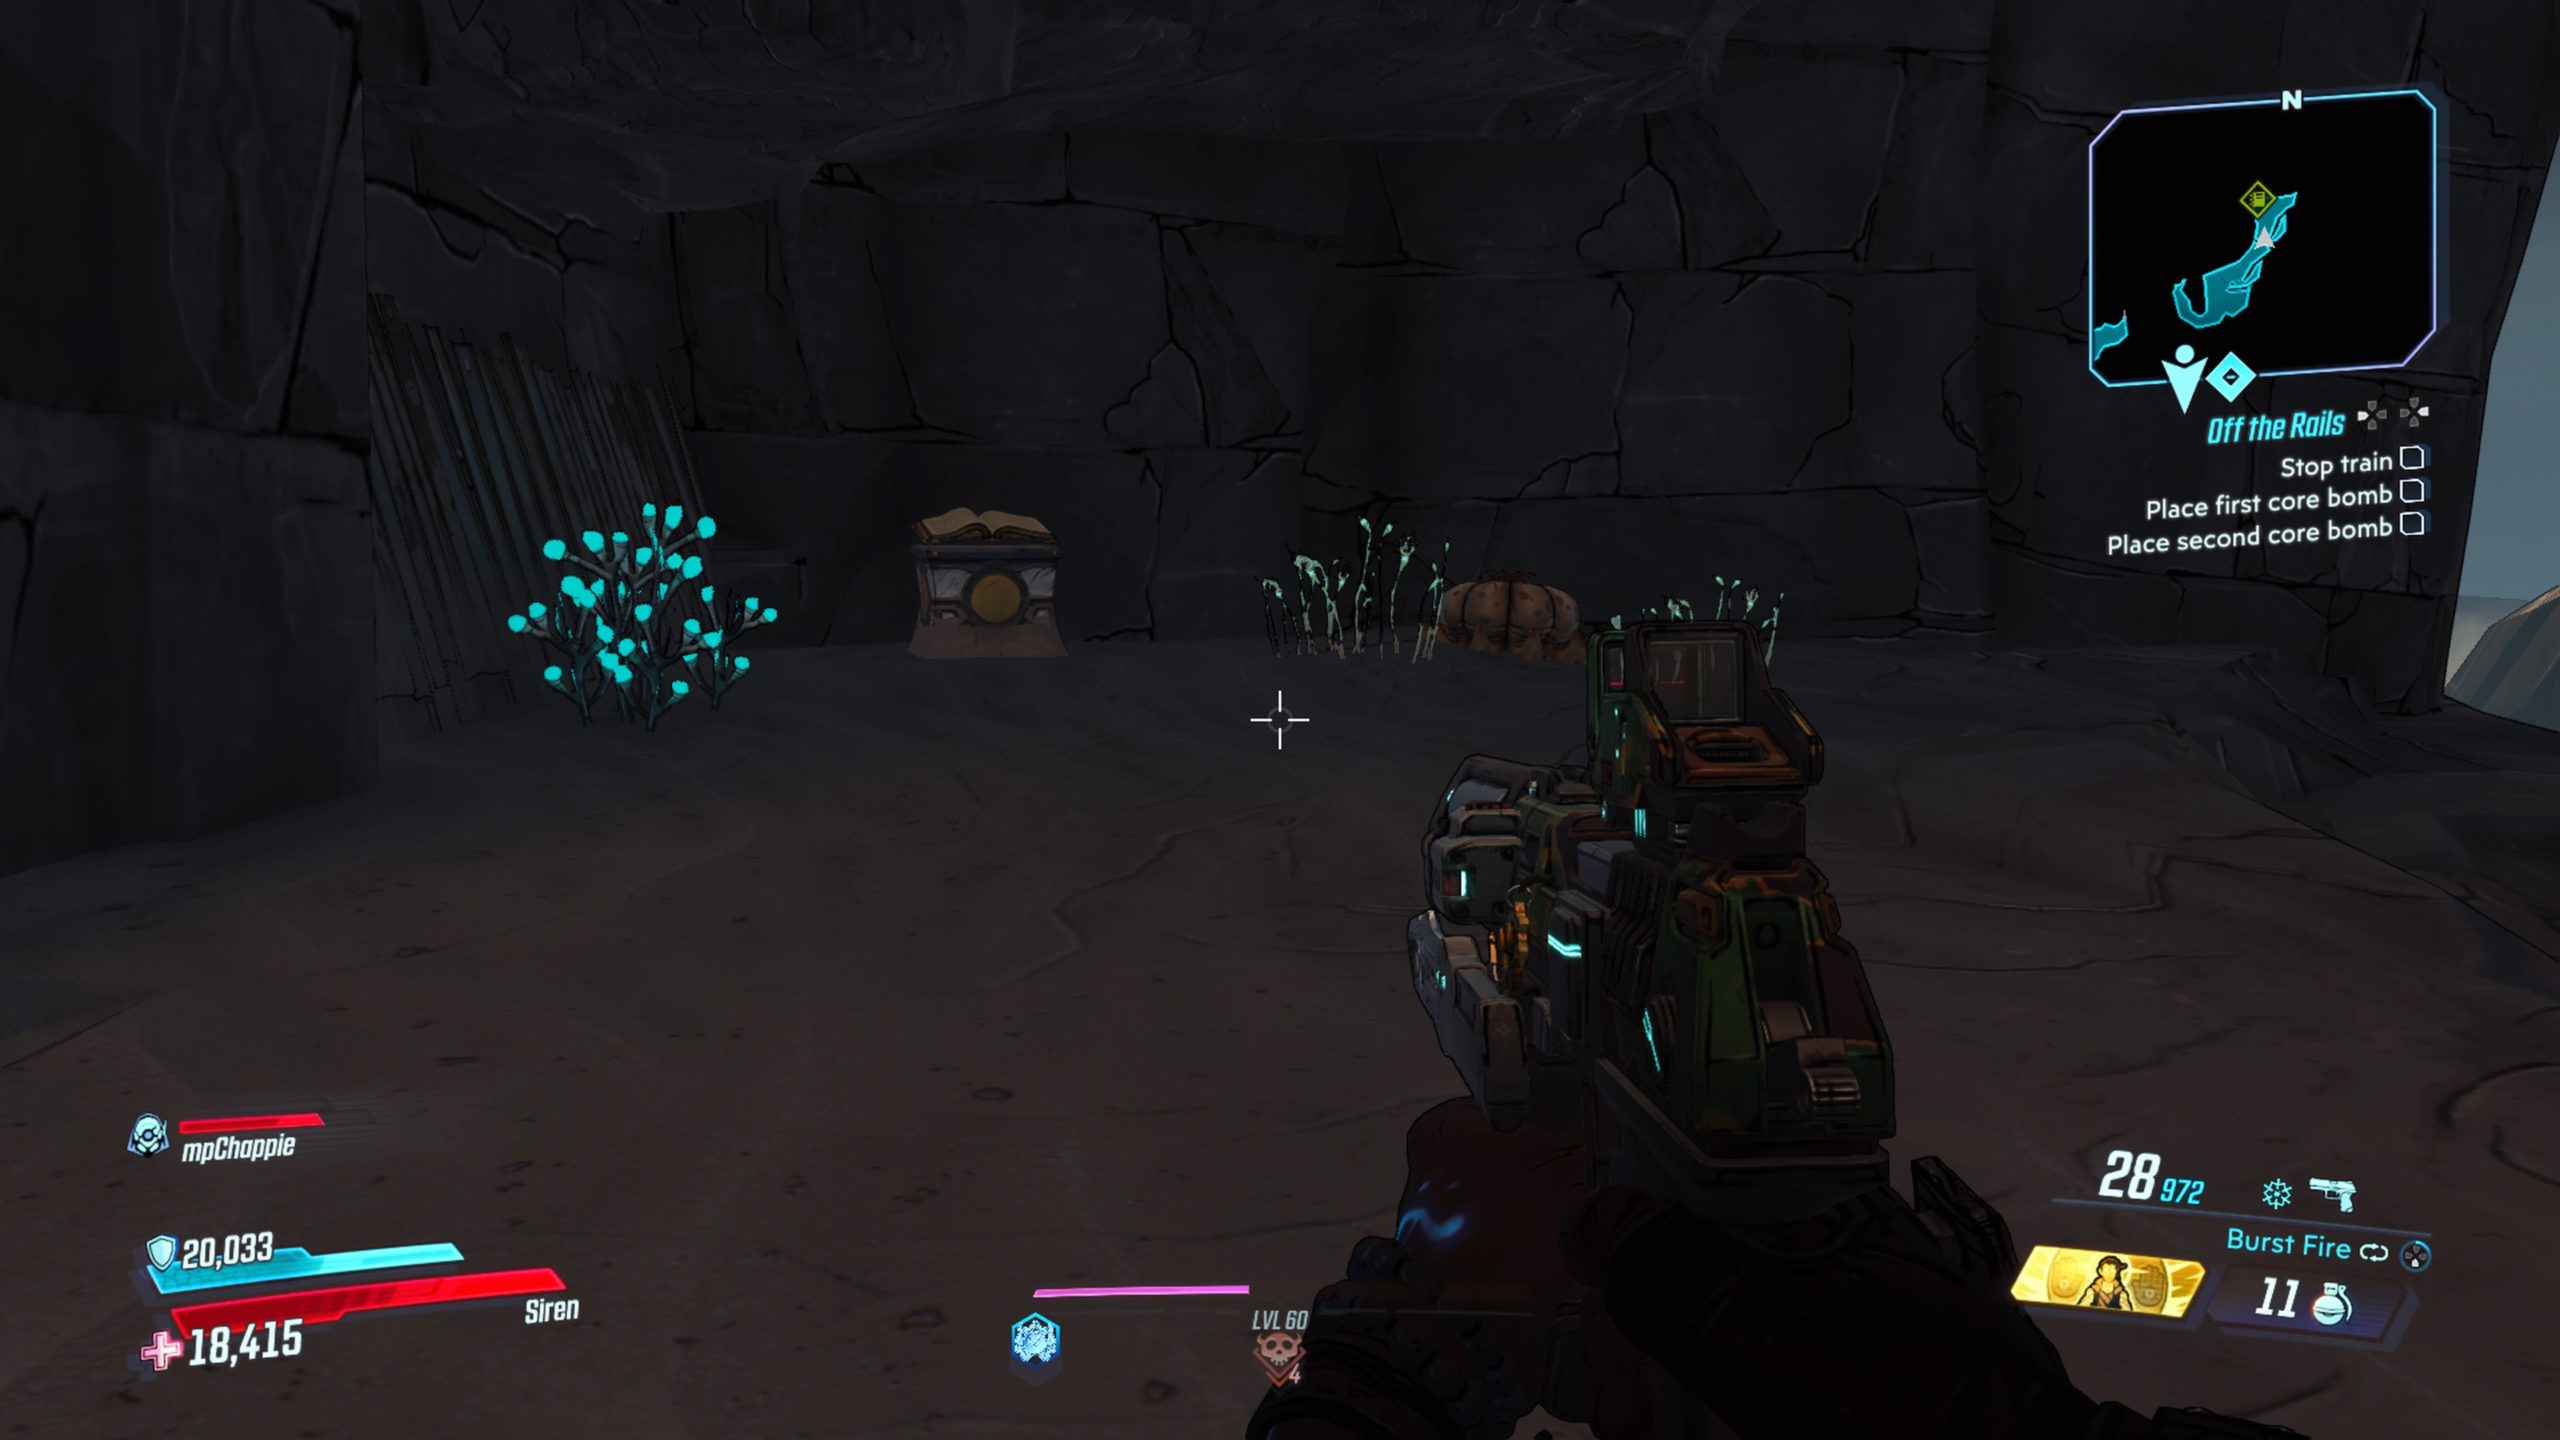
Obsidian Forest #1
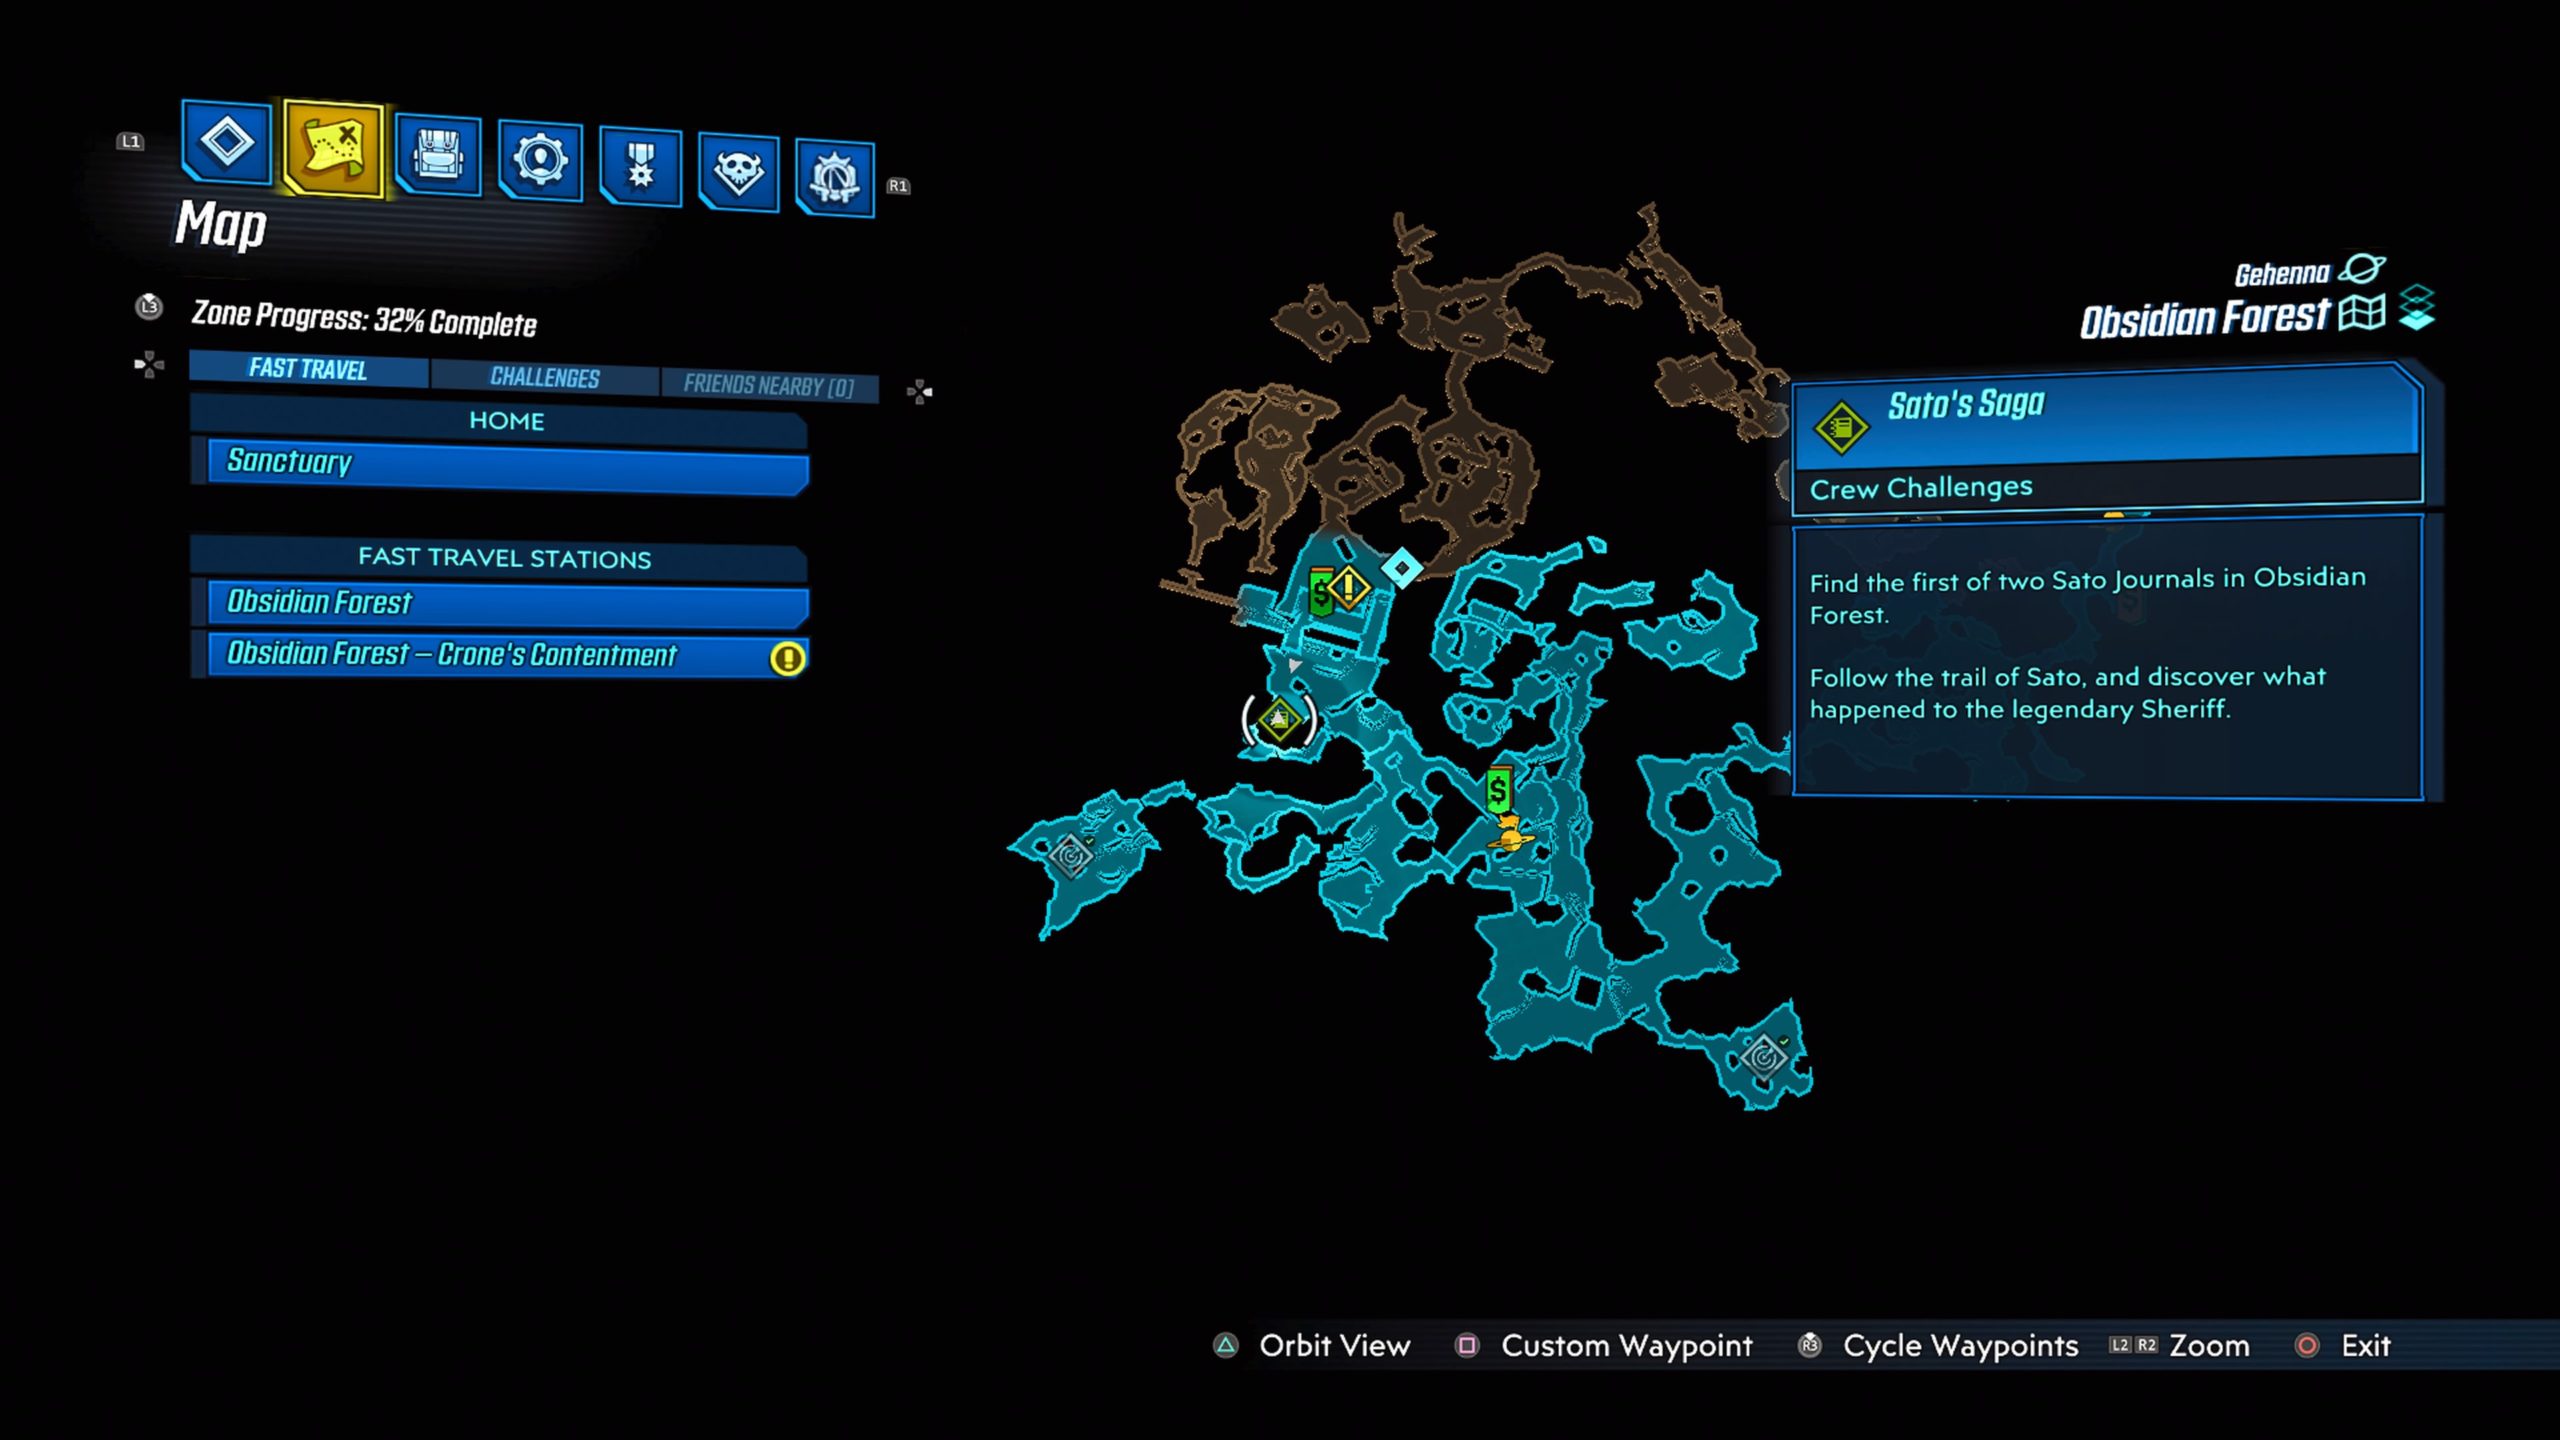
This journal can be found on a high ledge in Tallyway Station, which is northwest of the Crone’s Contentment fast travel station.
Obsidian Forest #2

This journal can be found in The Last Dig in the northeastern part of the map.
Obsidian Forest Cache
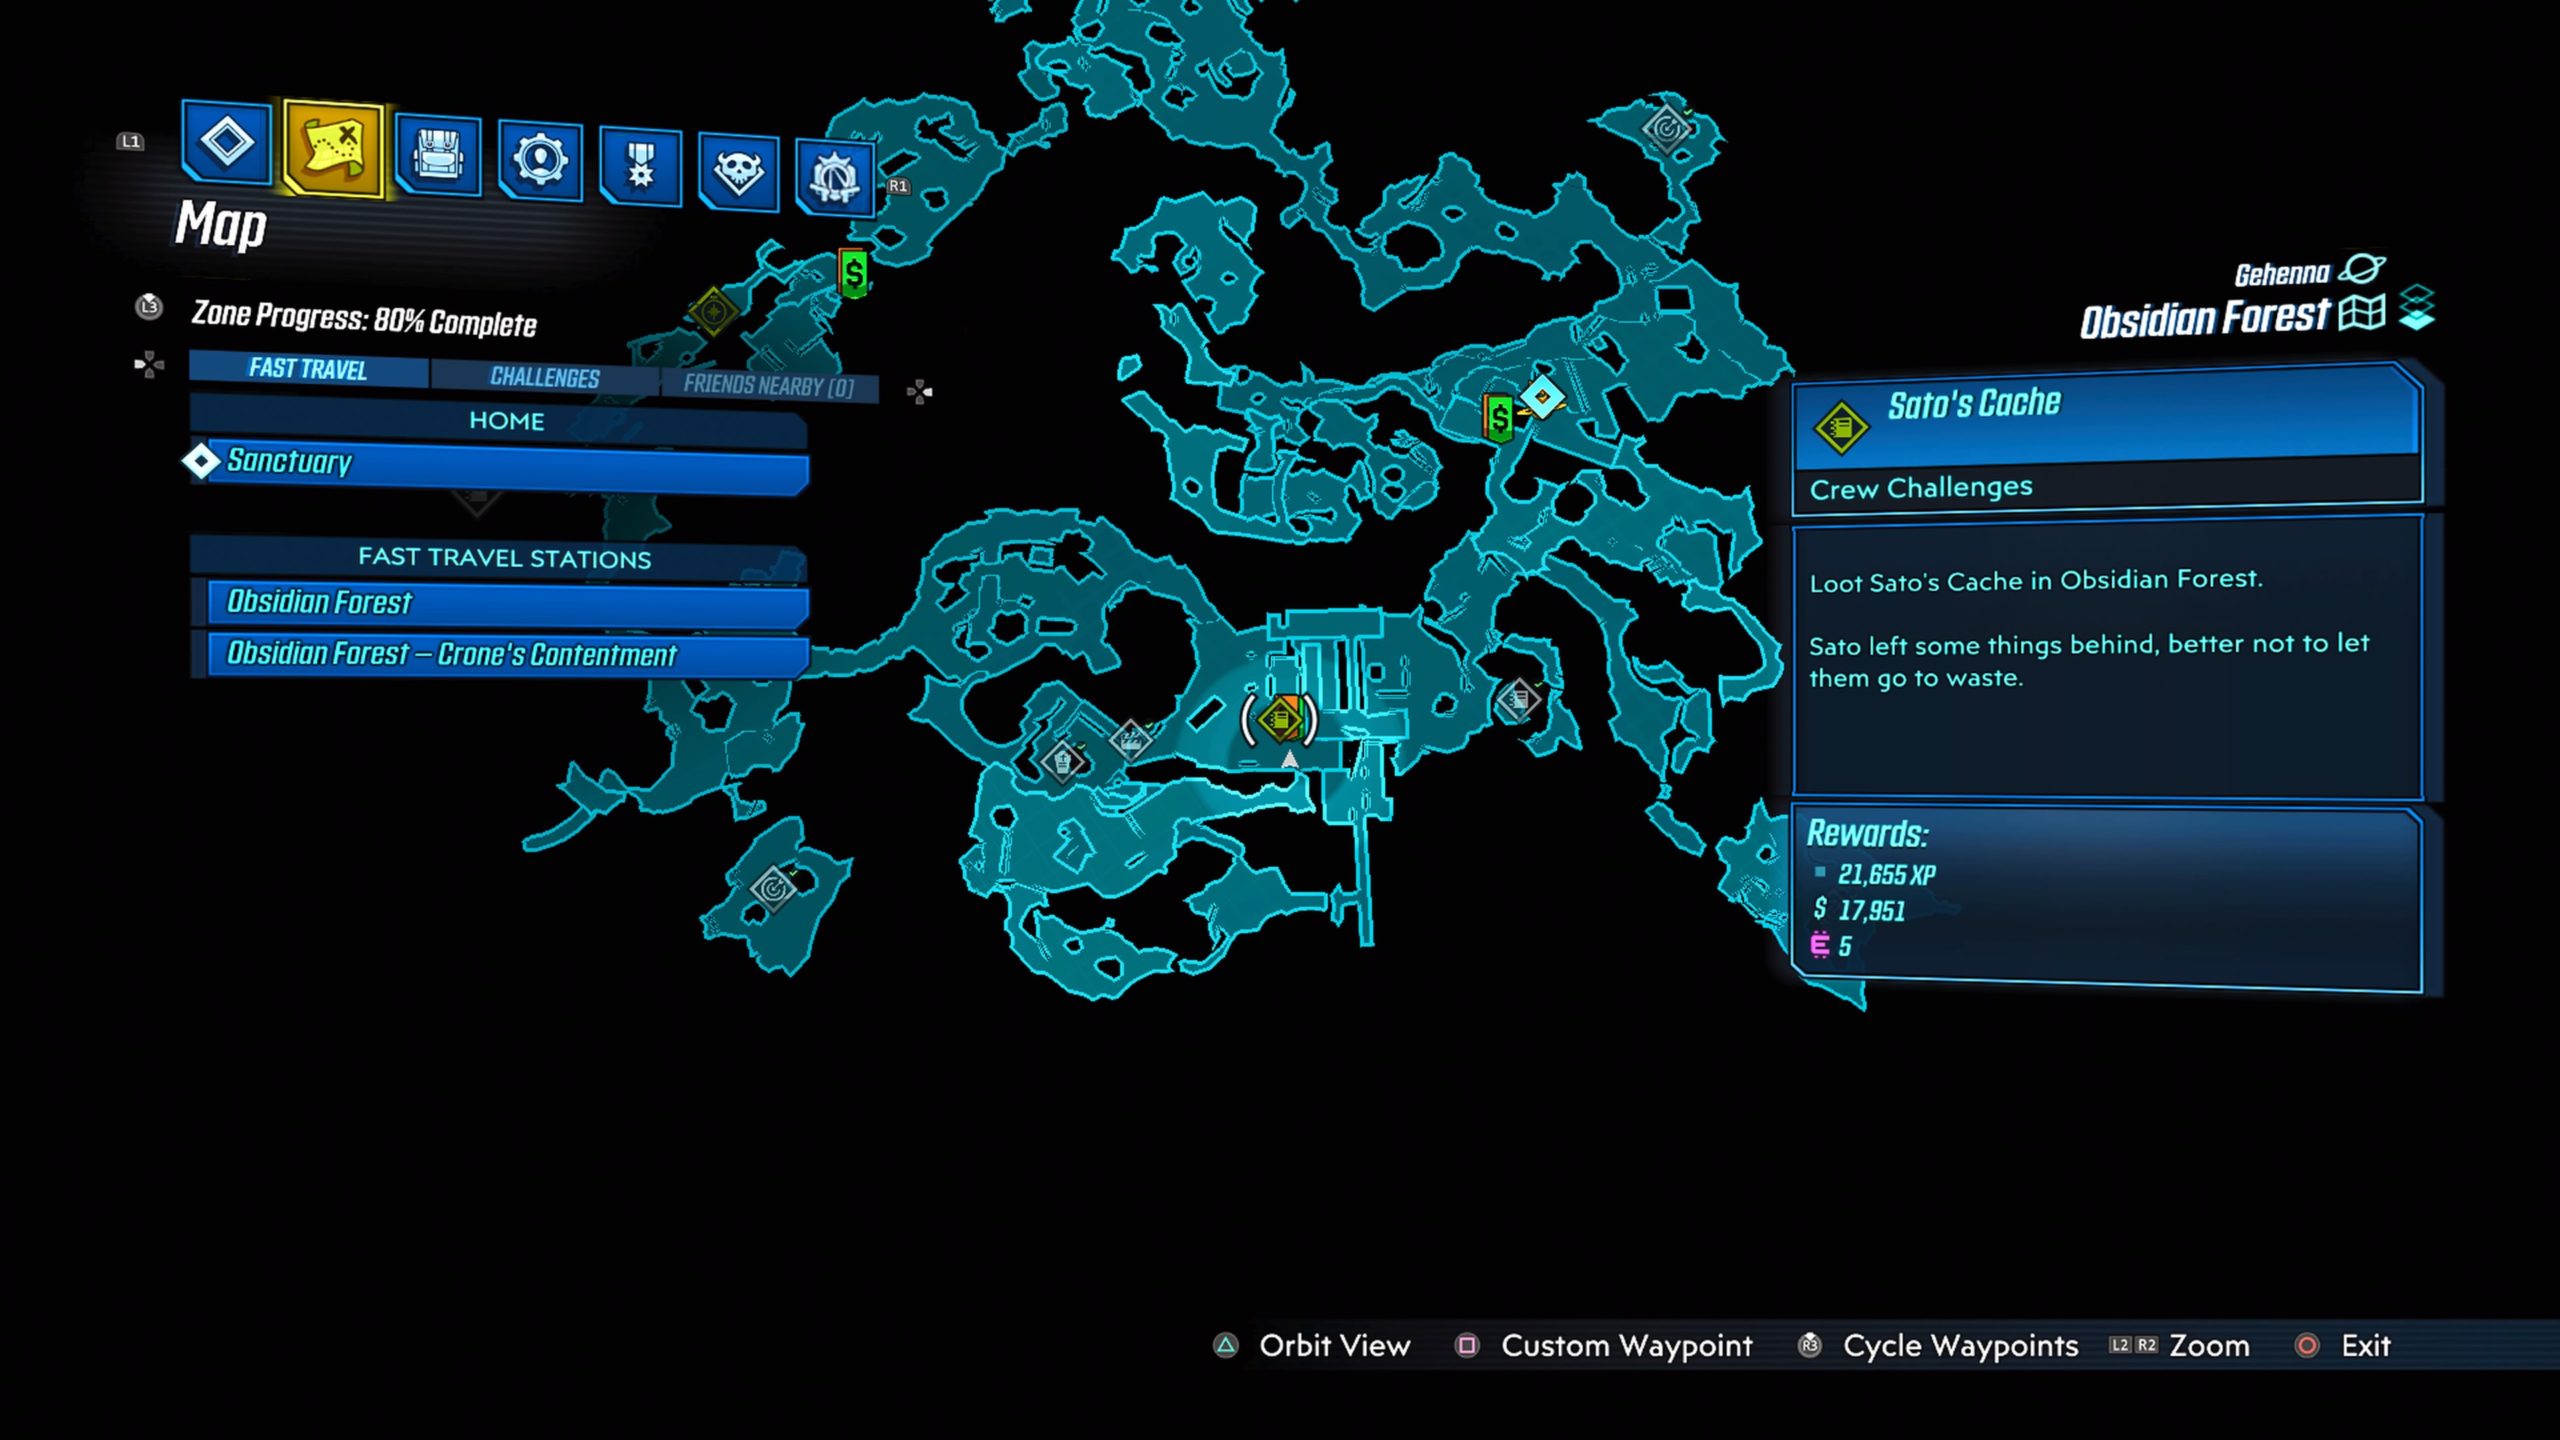
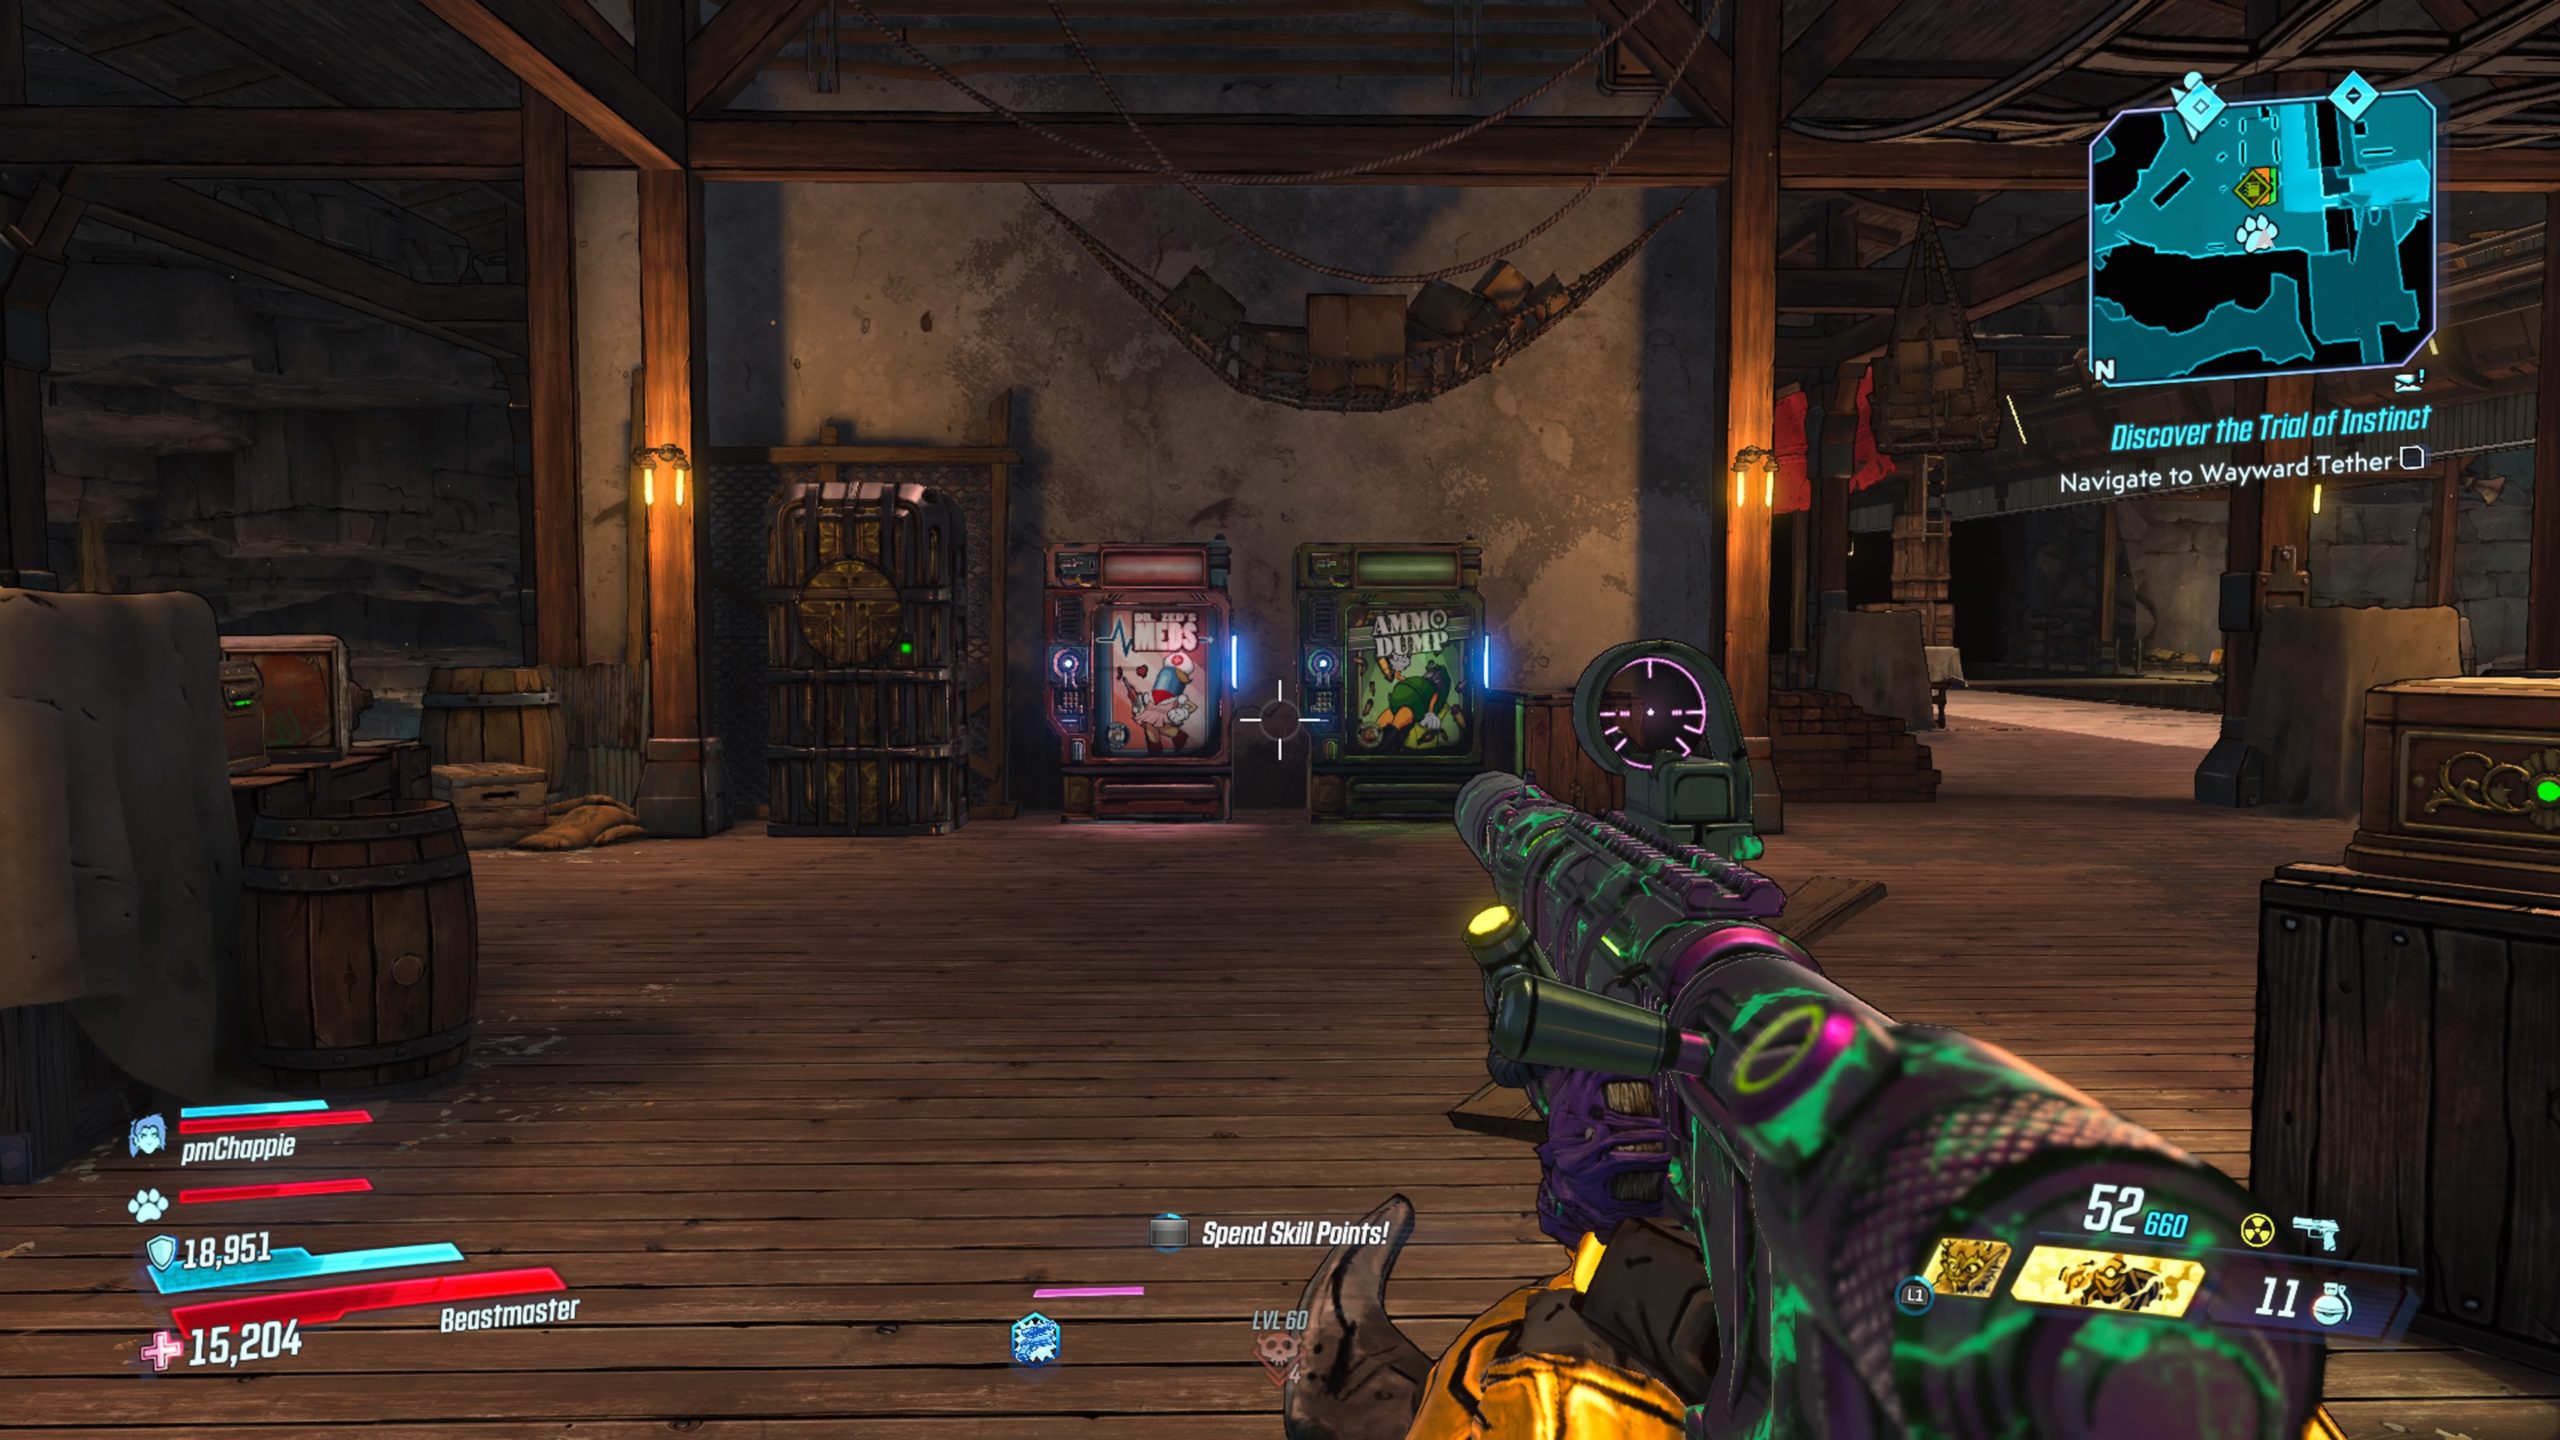
The cache can be found next to the vending machines at Tallyway Station.
Bloodsun Canyon #1
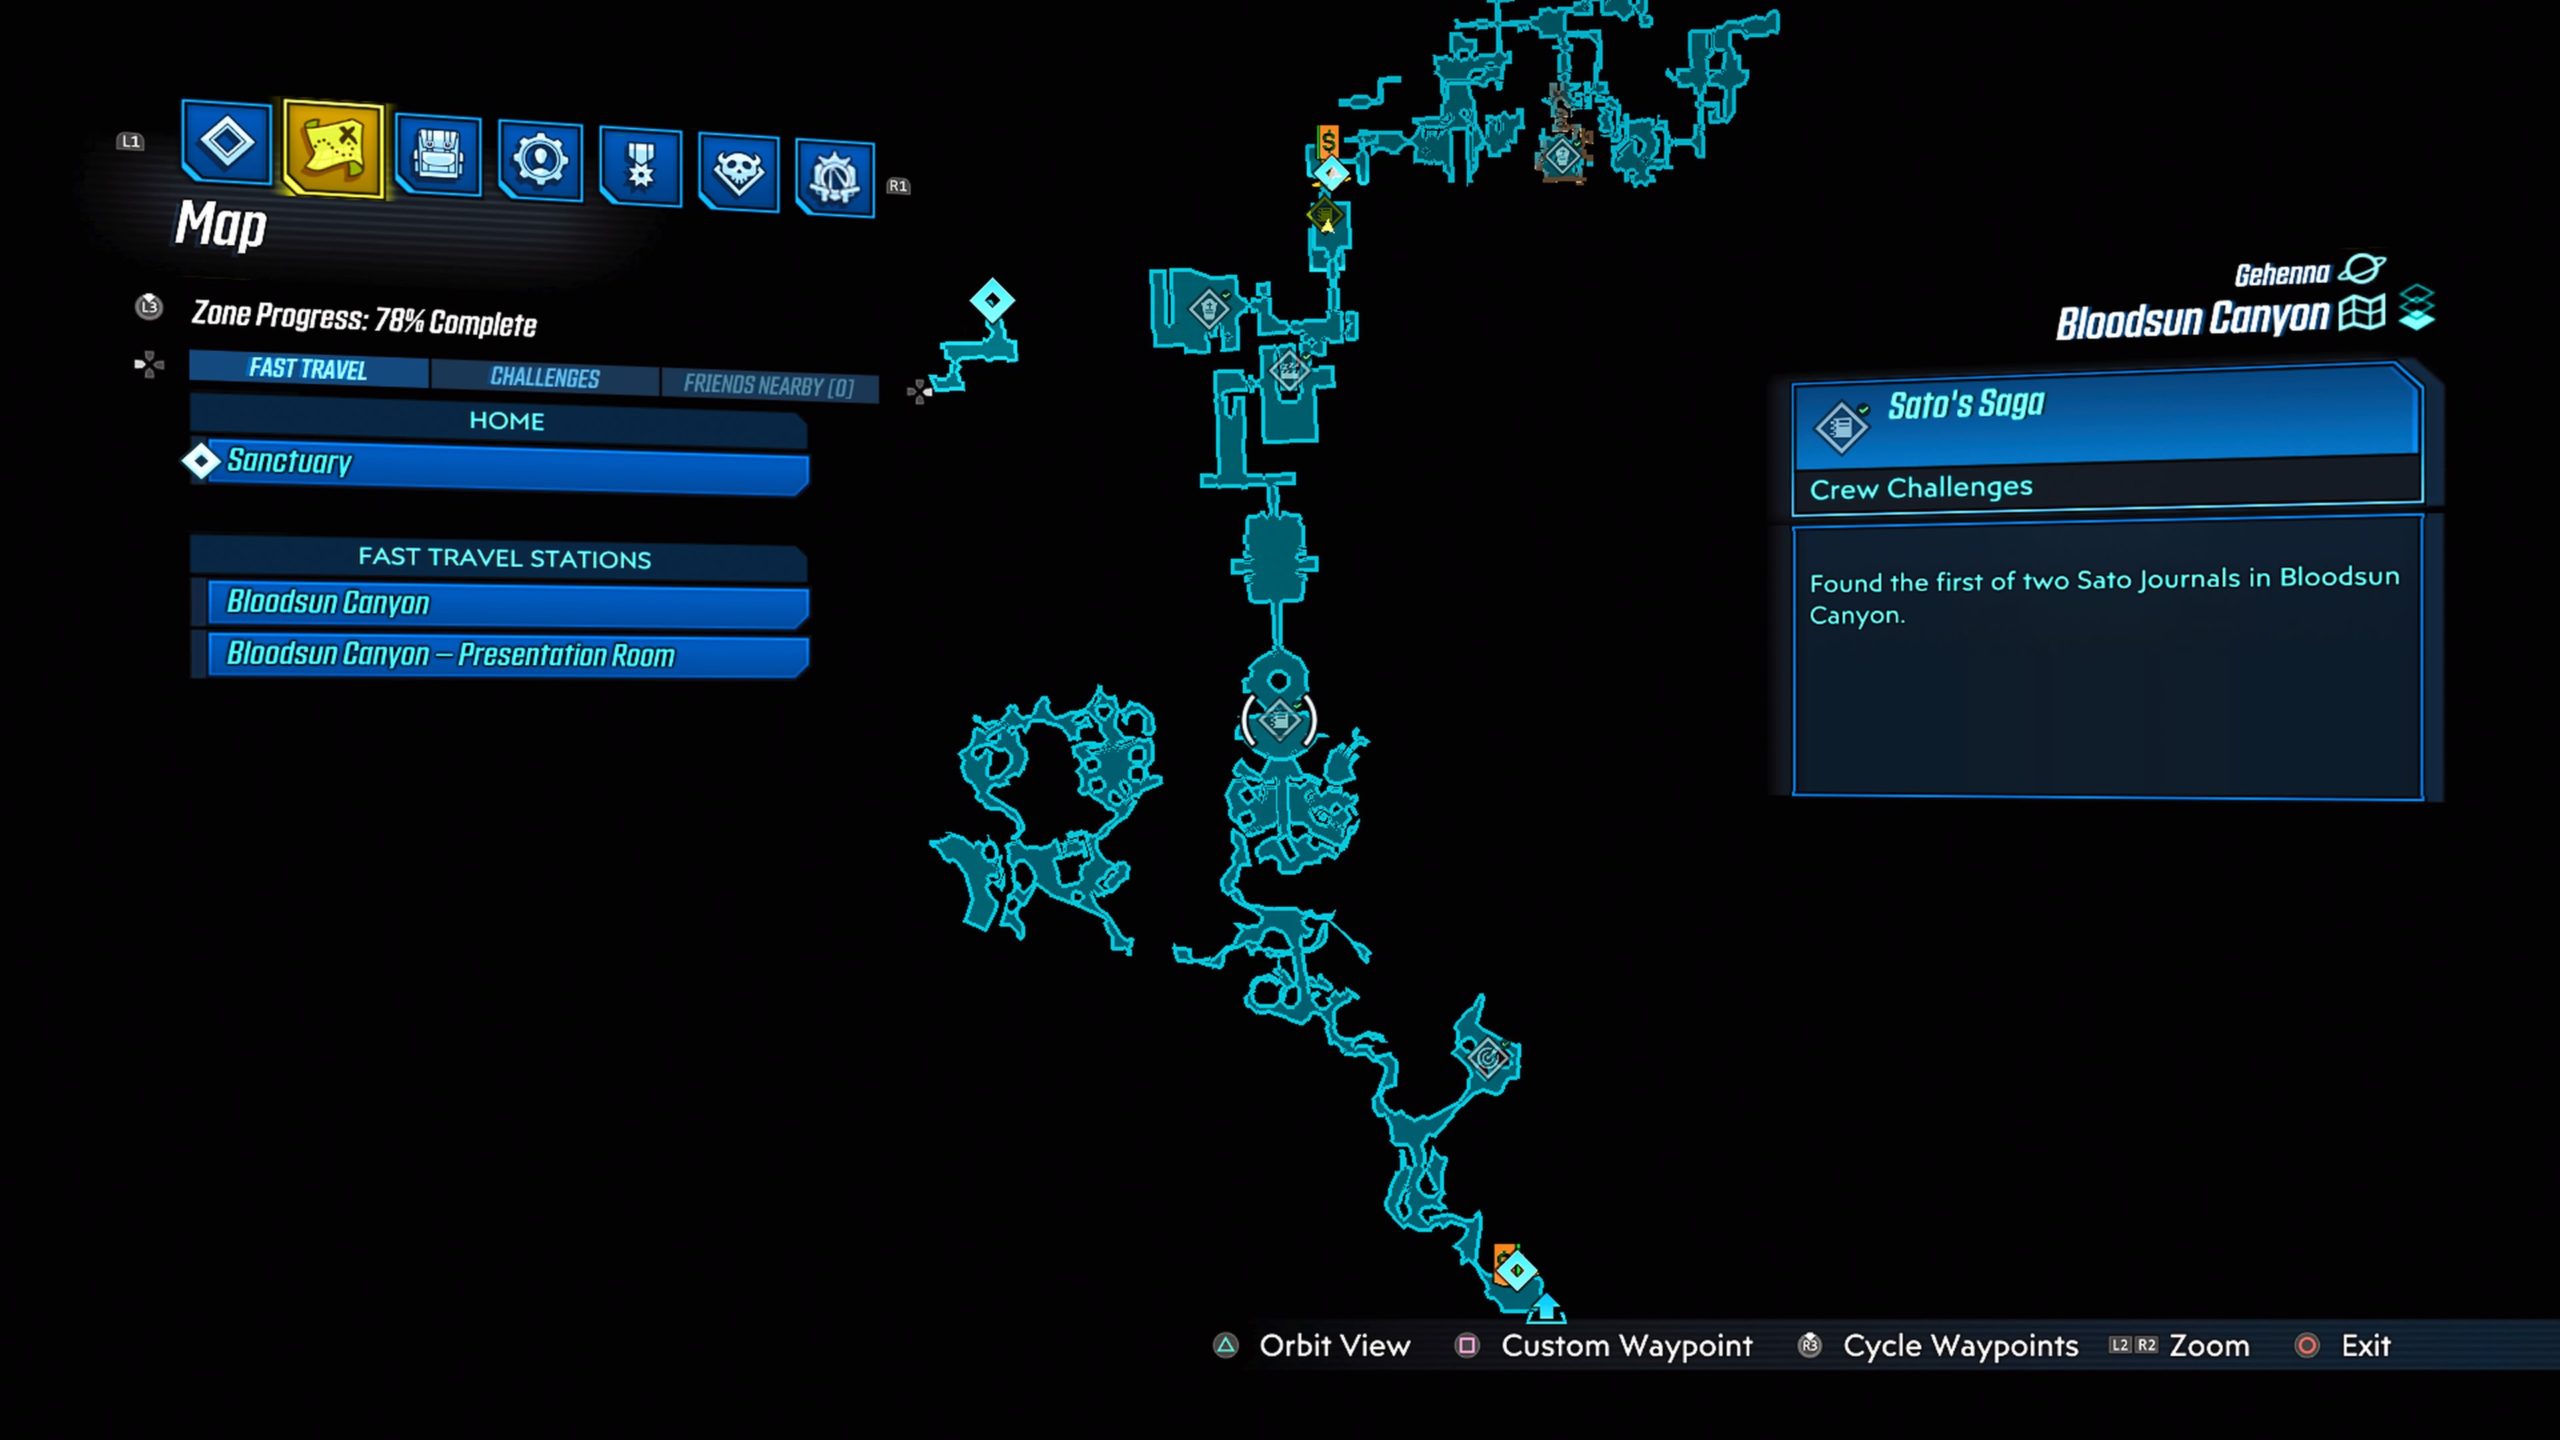
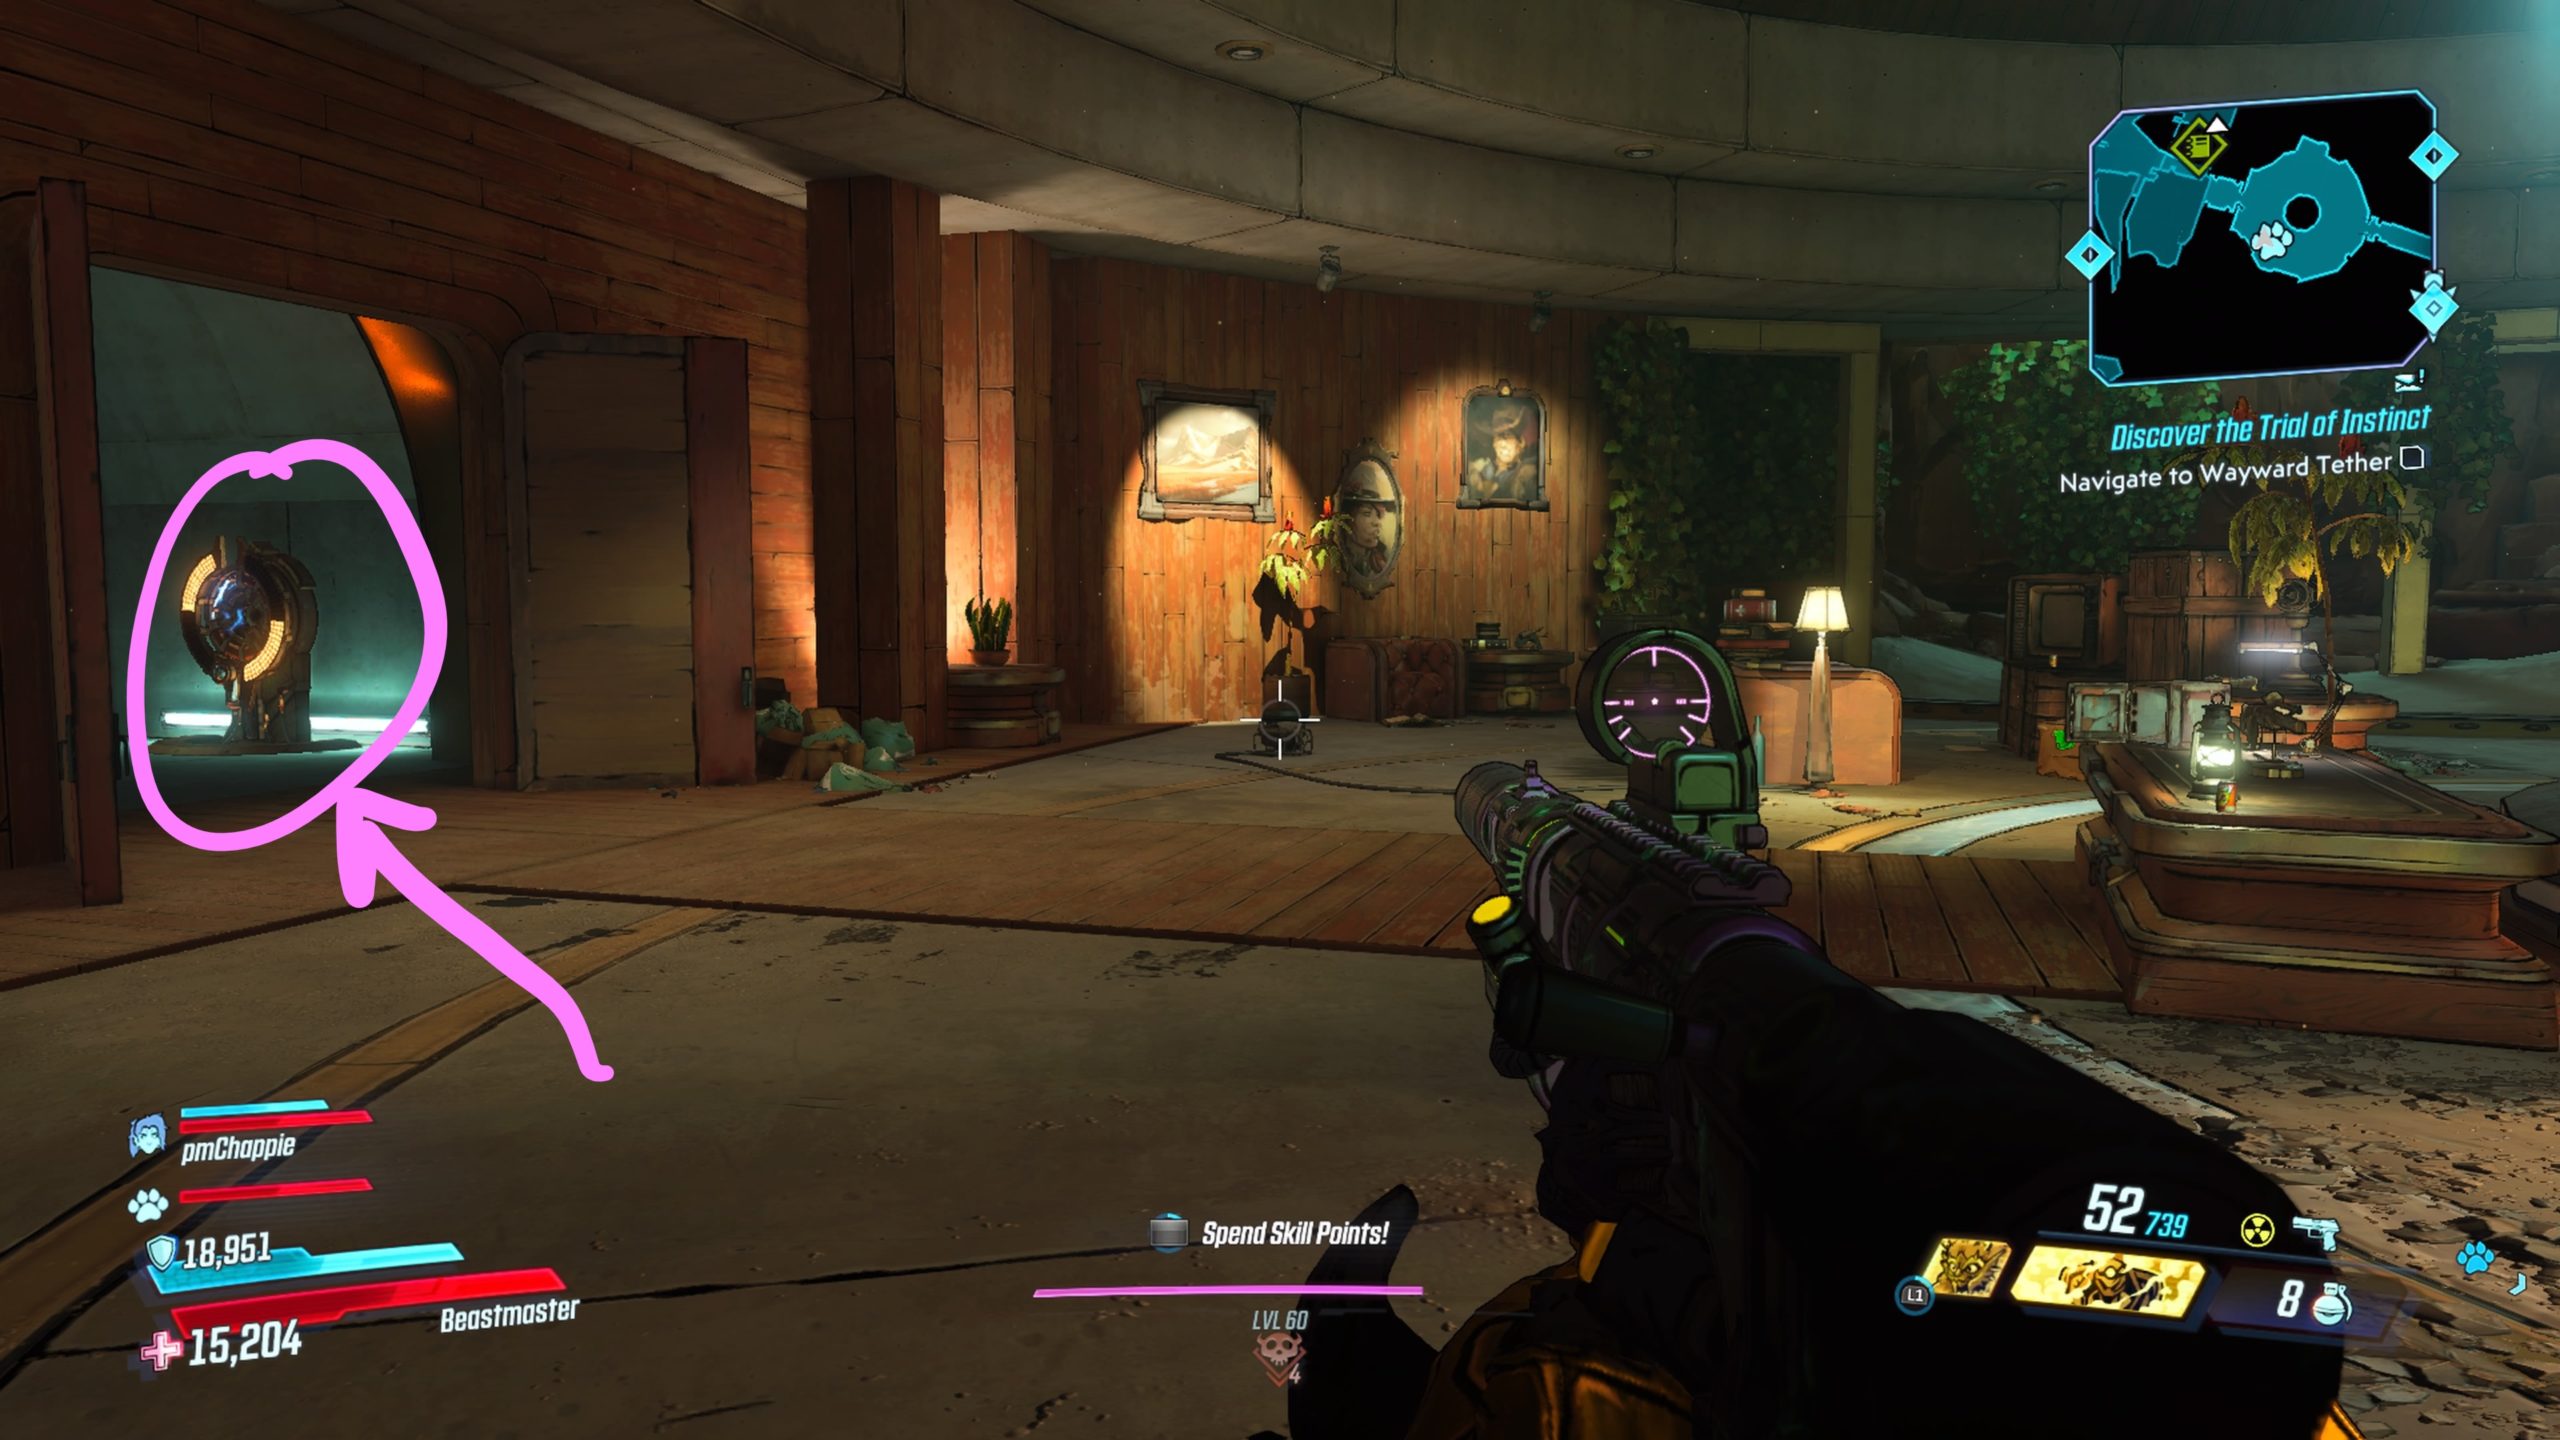
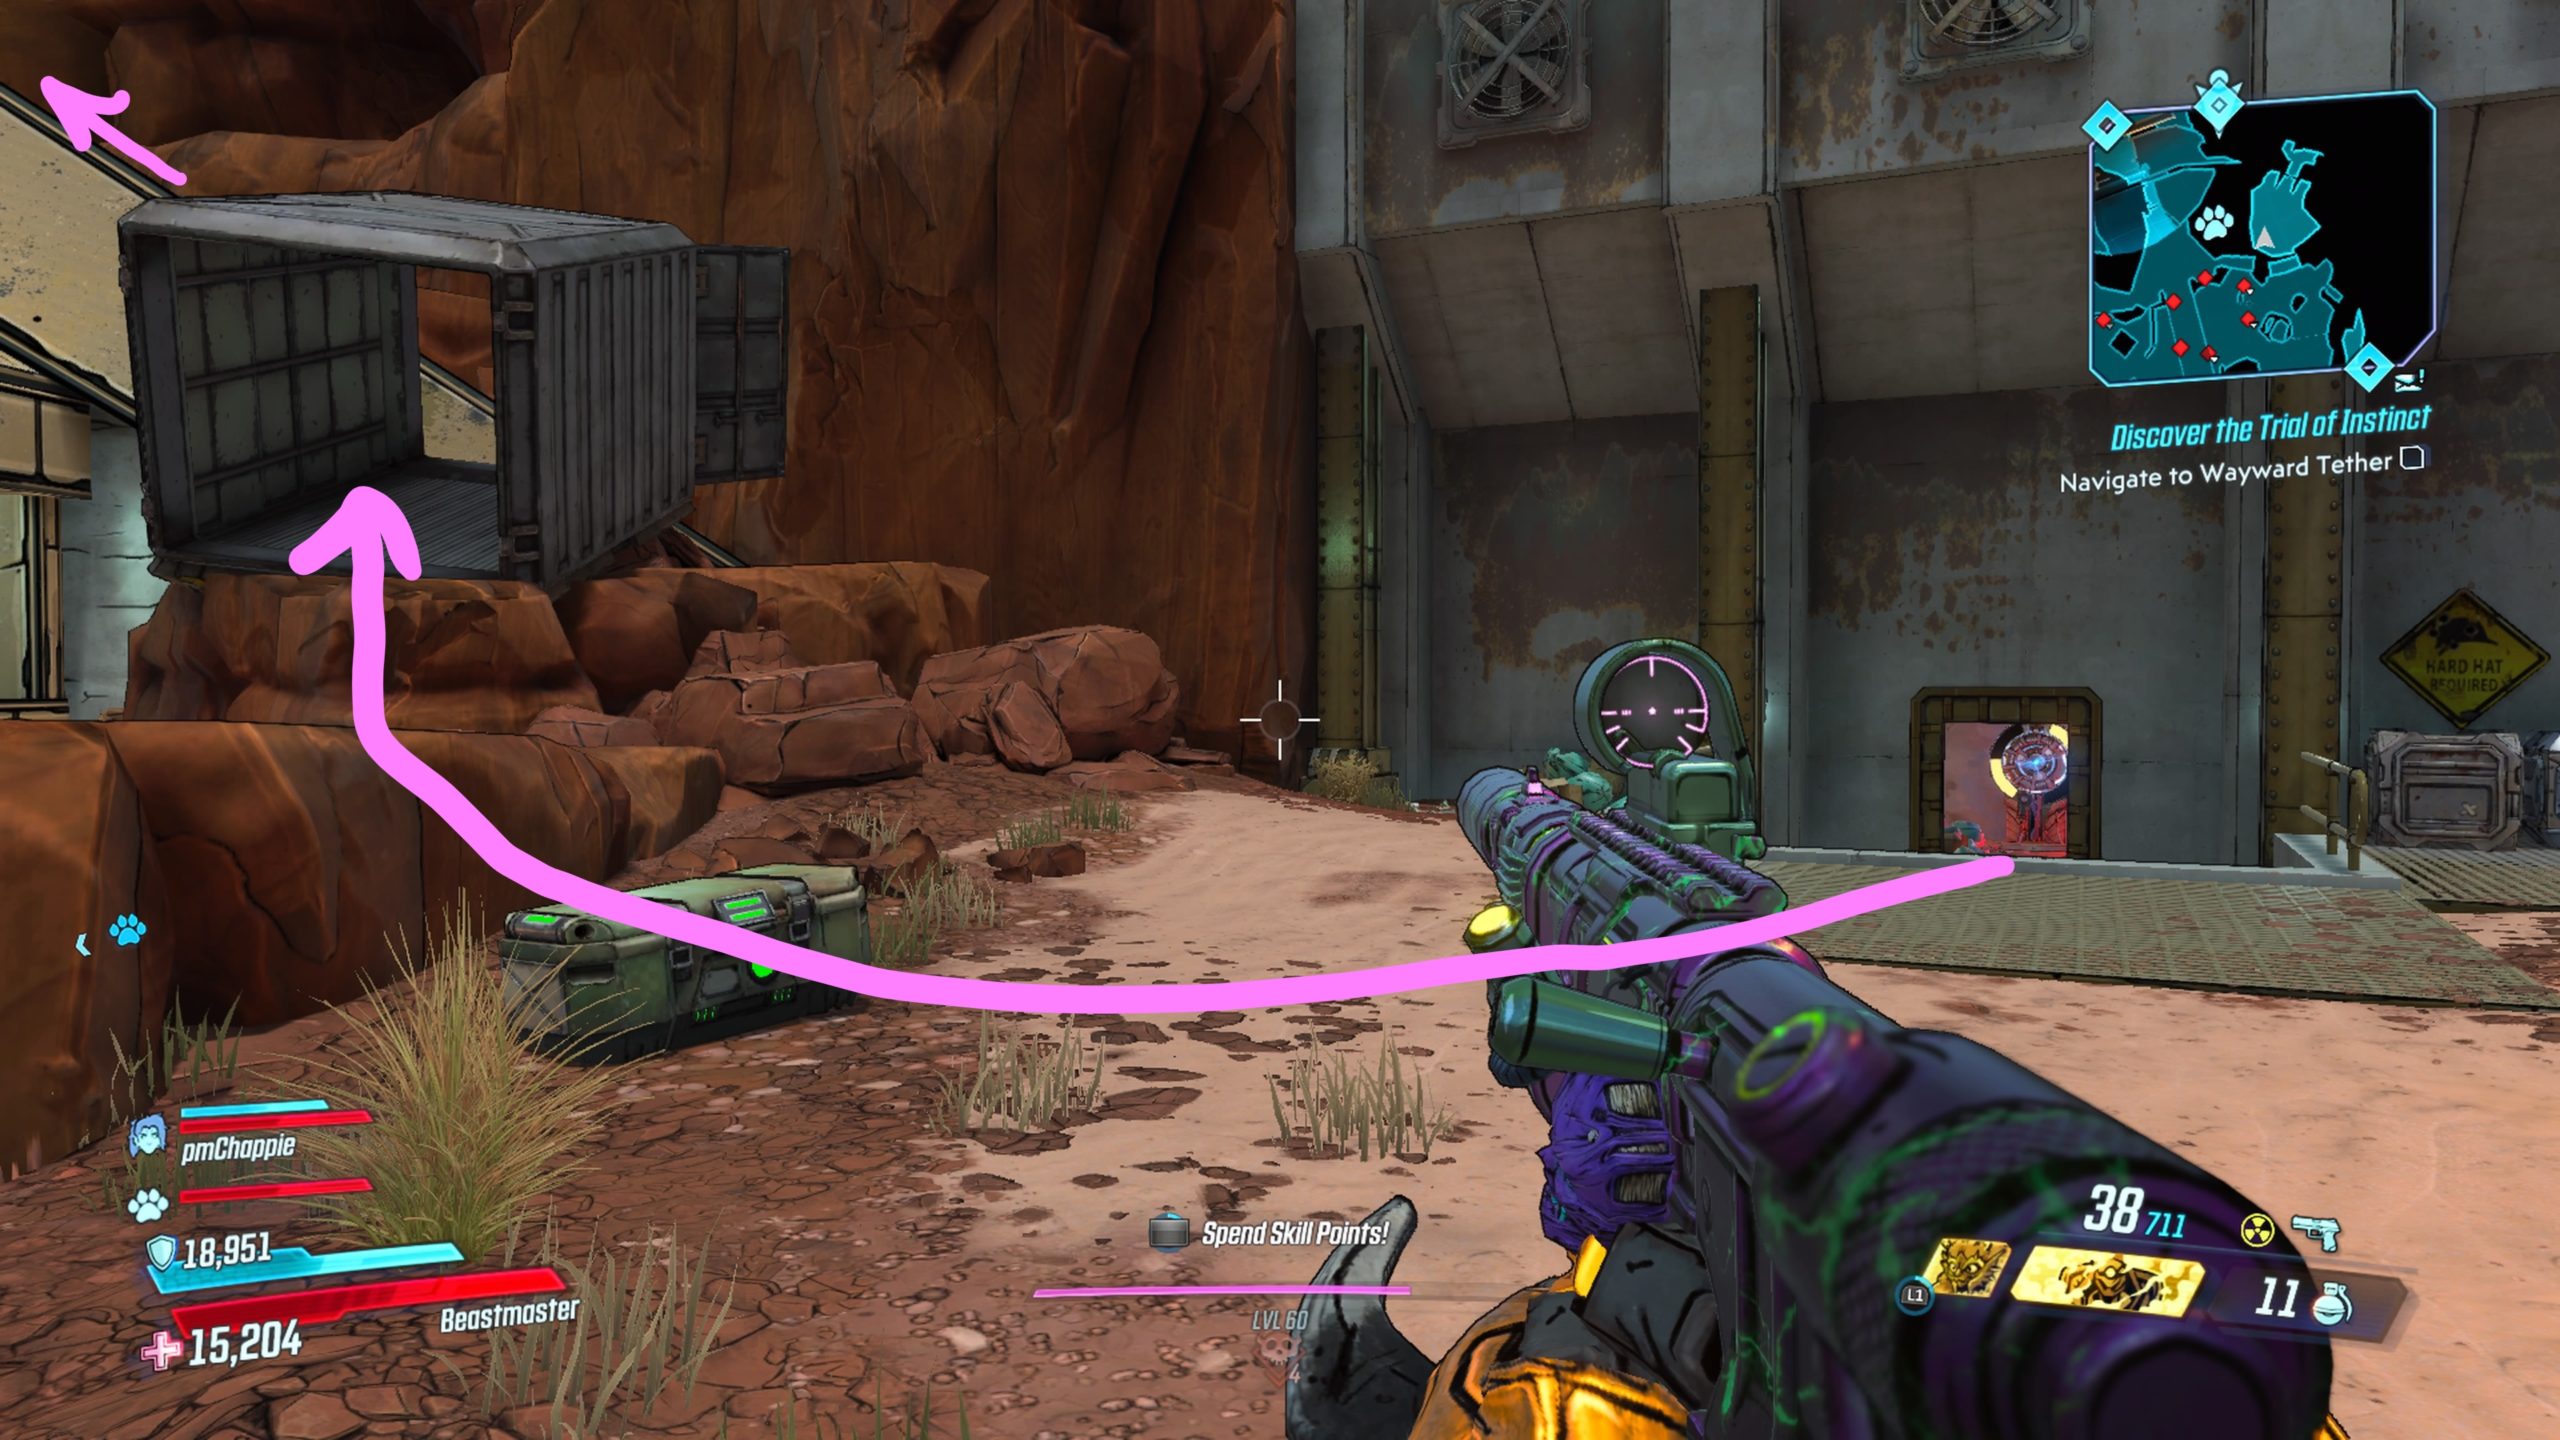
Use the portal near the reception desk in The Facility then head straight ahead through a doorway. Take an immediate right and go through a shipping container. Walk up the thin metal path to reach the roof containing the journal.
Bloodsun Canyon #2
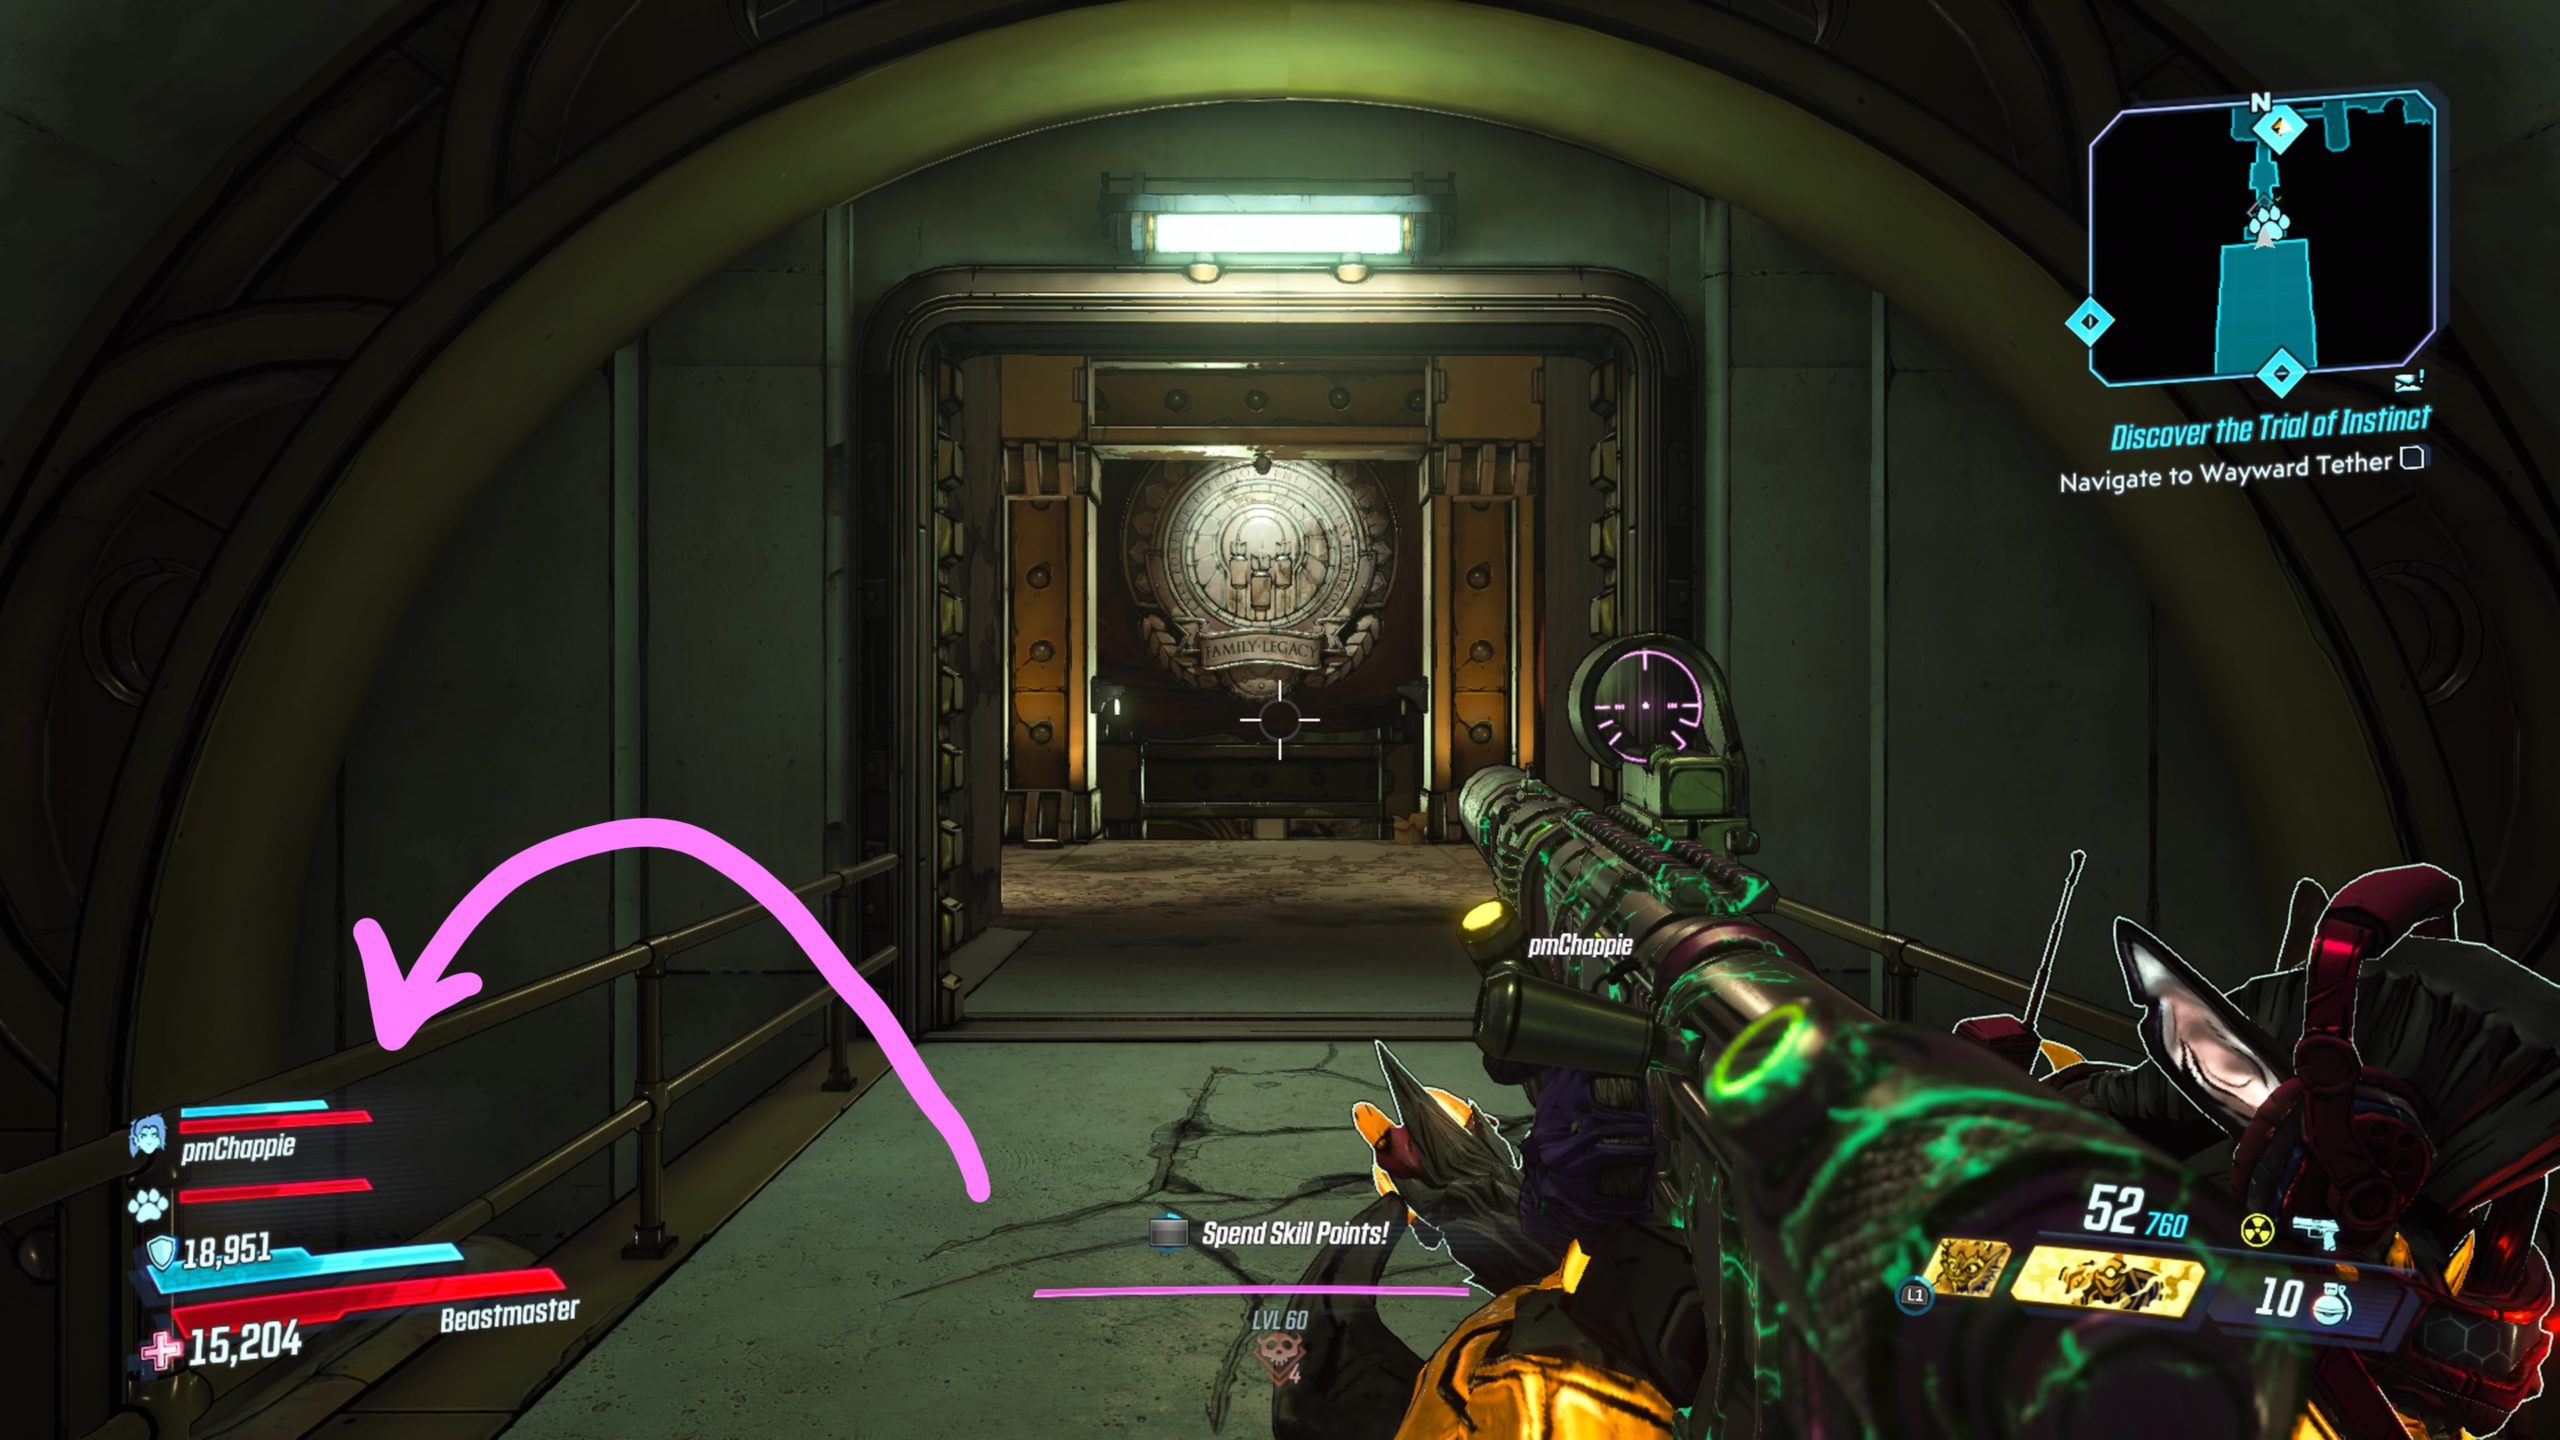
This journal is located south of the Presentation Room fast travel point. After coming down the elevator, jump over either side of the rail to find the journal underneath the walkway.
Bloodsun Canyon Cache
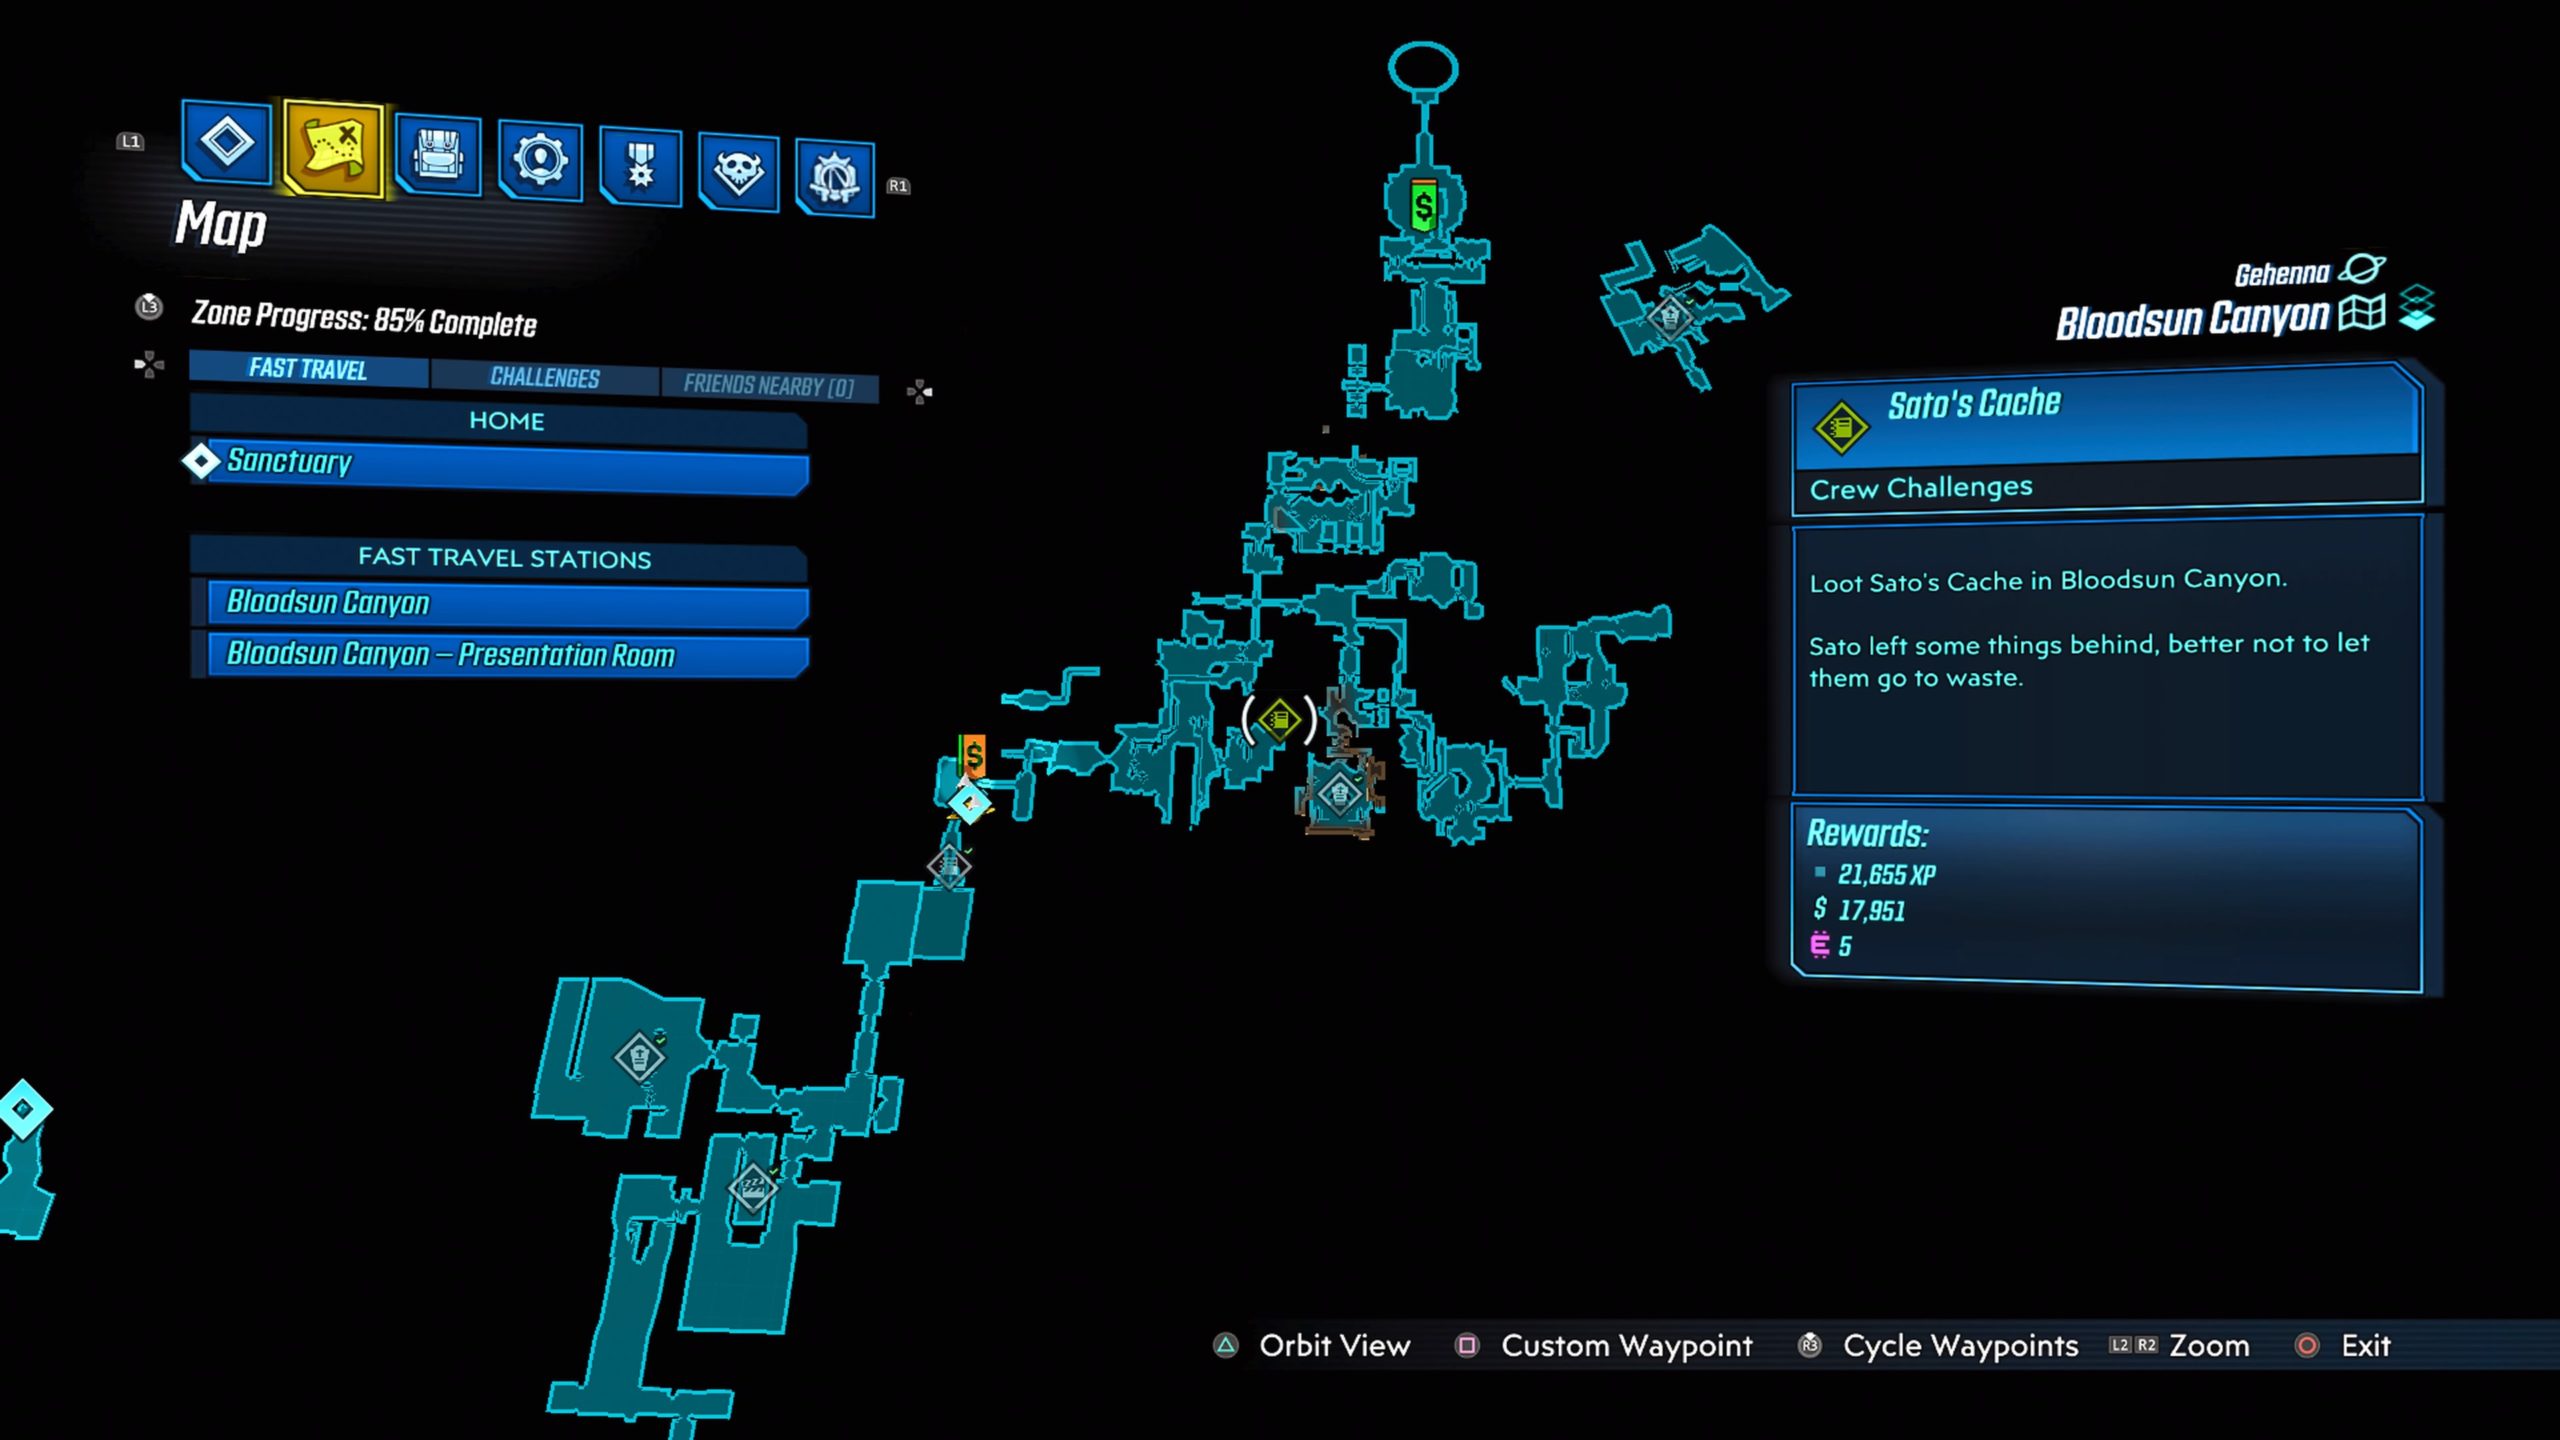
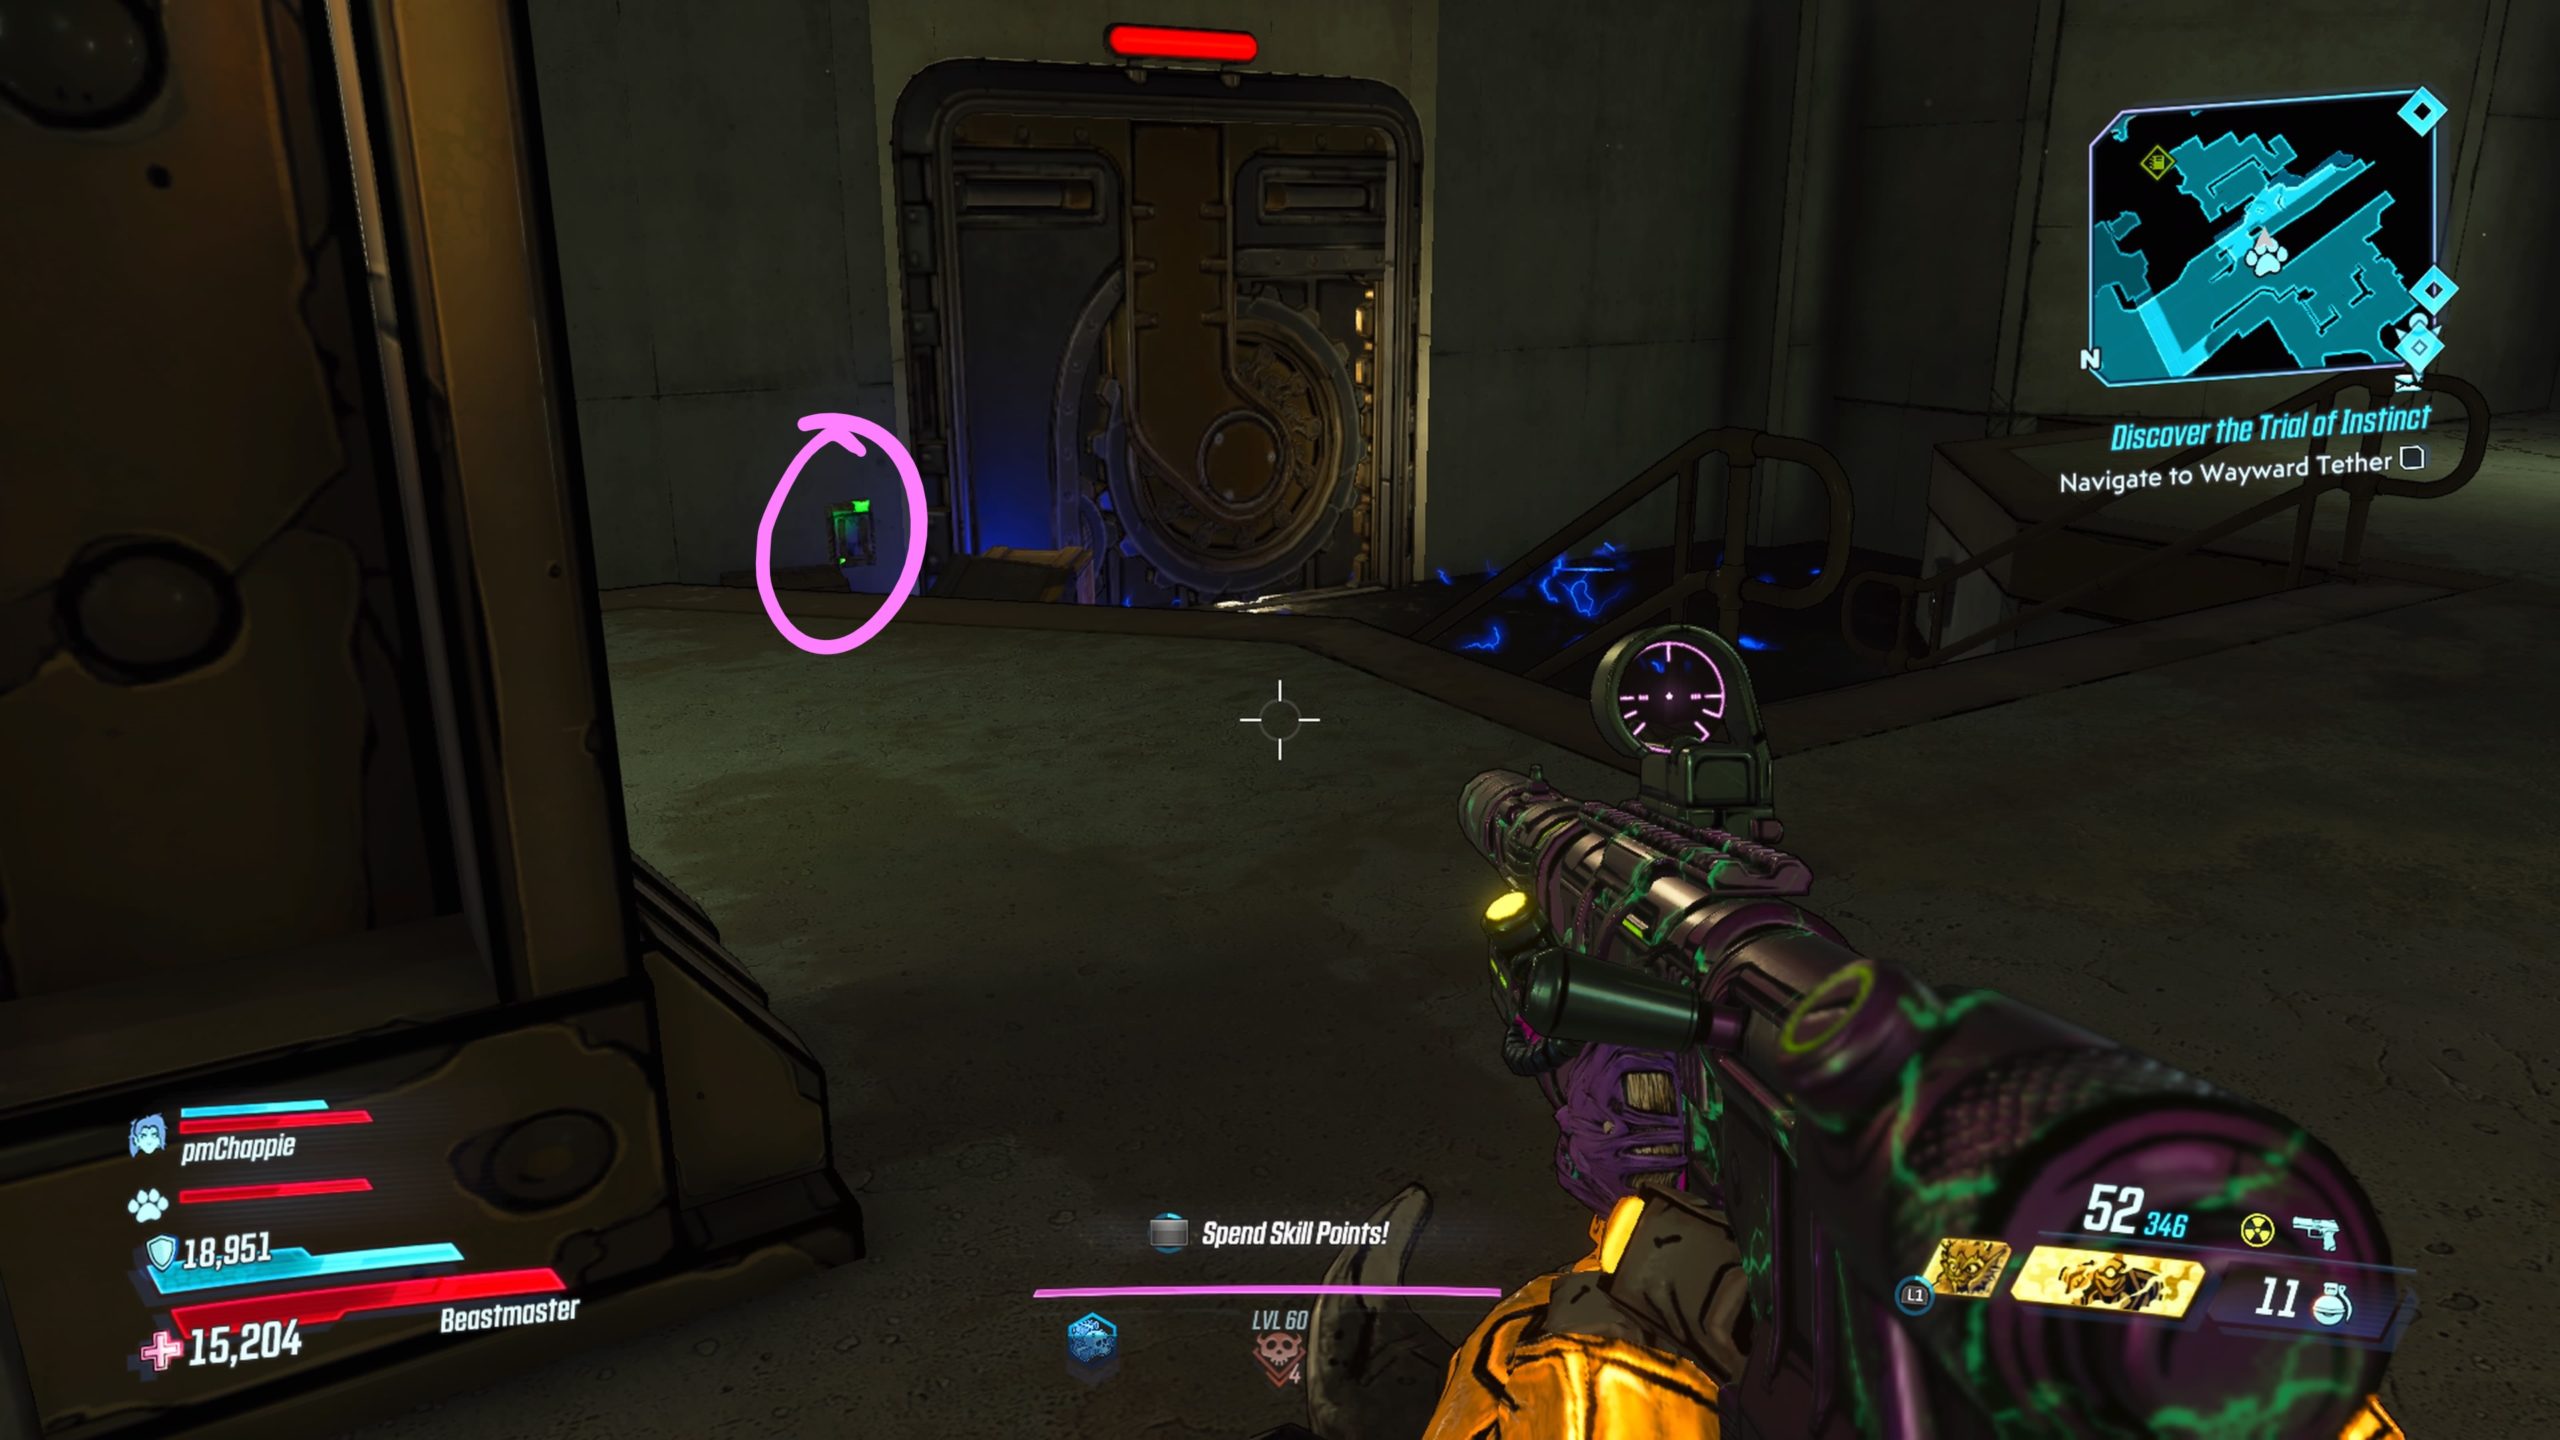
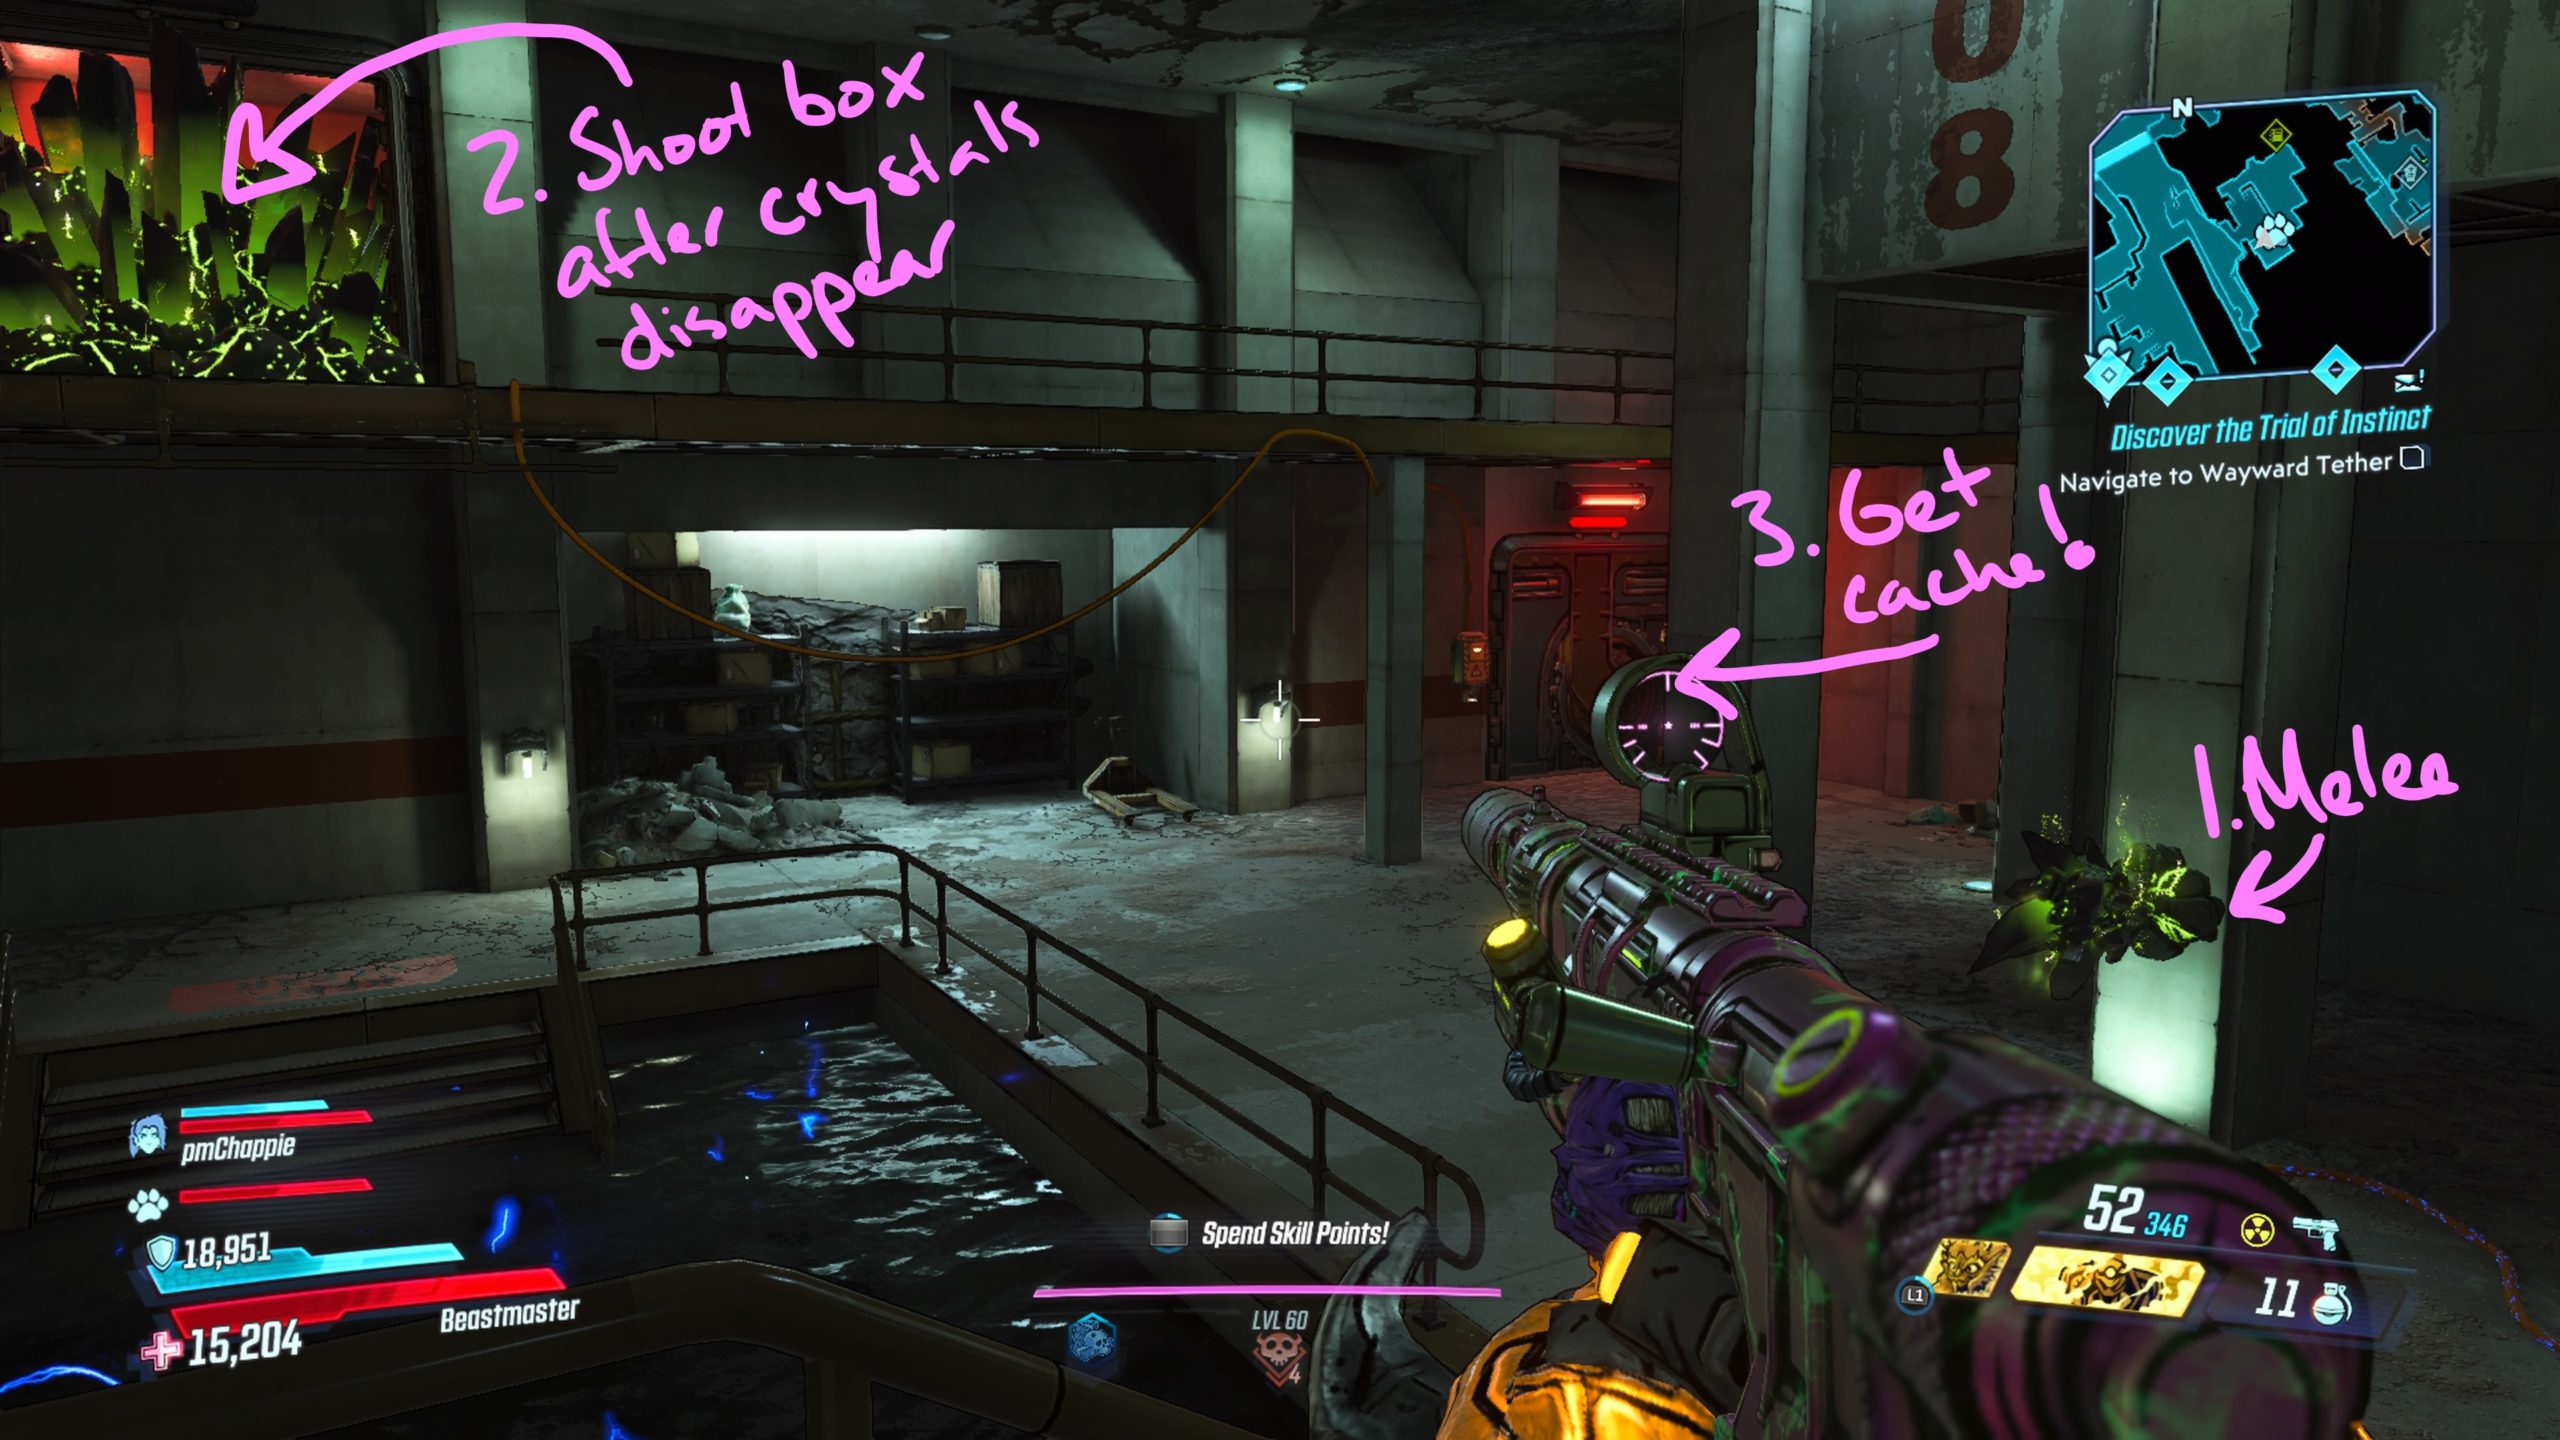
The cache can be found east of the Presentation Room fast travel station. Look for a door with a green button to the left that has an electrified puddle in front of it. Walk on the plank to use the button then jump through the doorway to reach the interior room. The cache is located behind the sealed door. You will need to use the crystal on the column to break the crystals on the second level that are blocking a small room. Climb up the stairs across from the small room to shoot the power box, which will cause the sealed door to open.