In like a Dragon: Ishin, you can form bonds with the people and animals in the towns. You’ll need to complete all Bonds for the Everybody Loves Ryoma trophy. This is a guide on who has bonds, where to find them, how to unlock them and how to complete them! Happy bonding!
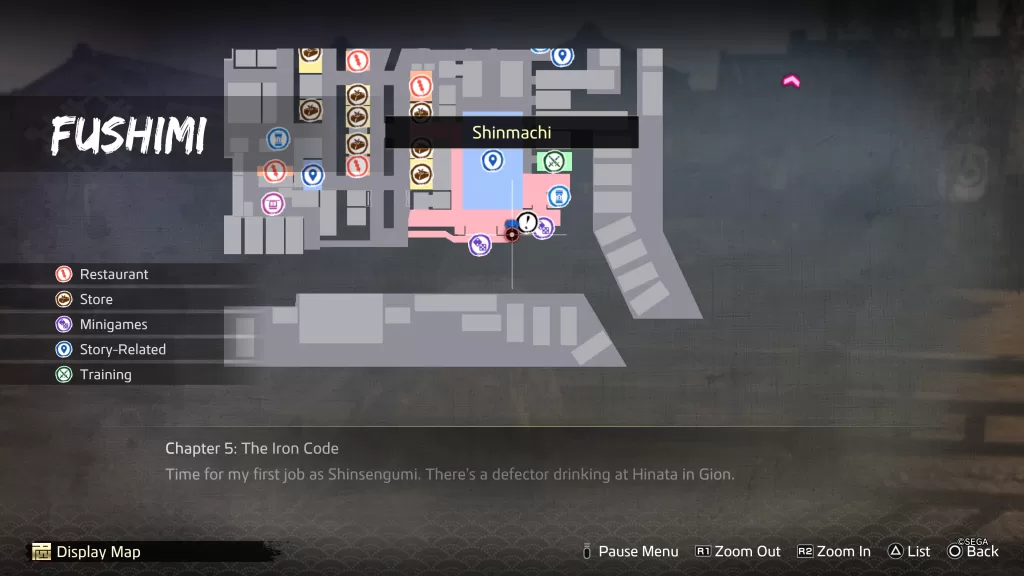
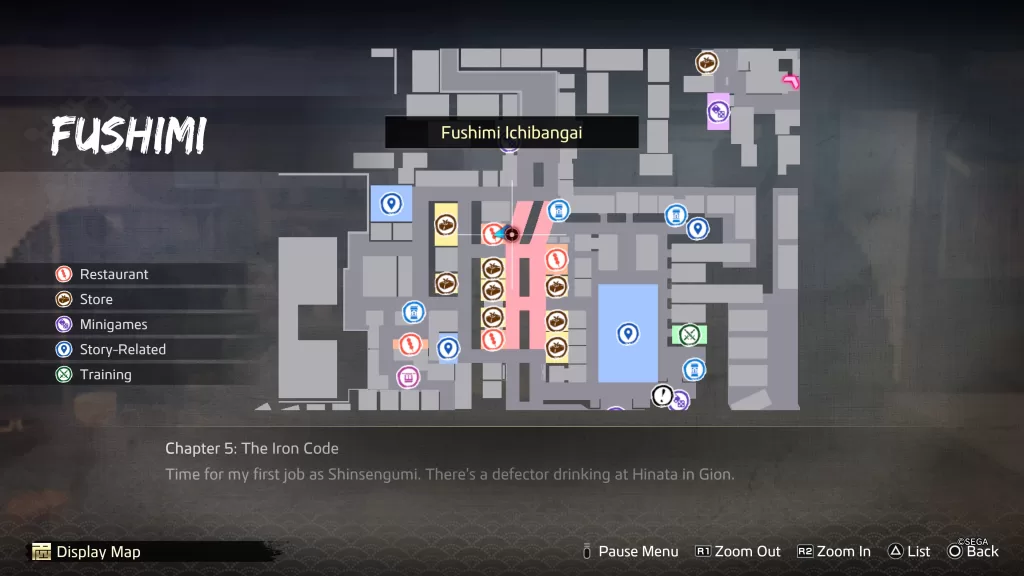
Fushimi
Desperate Fisherman
Location: Shinmachi – Along the river just south of Teradaya
To bond with the Desperate Fisherman, complete The Desperate Fisherman substory. Once the bond has been formed, visit the fisherman regularly and hand over a fish you’ve caught. When you max out his bond, you will not receive any items.
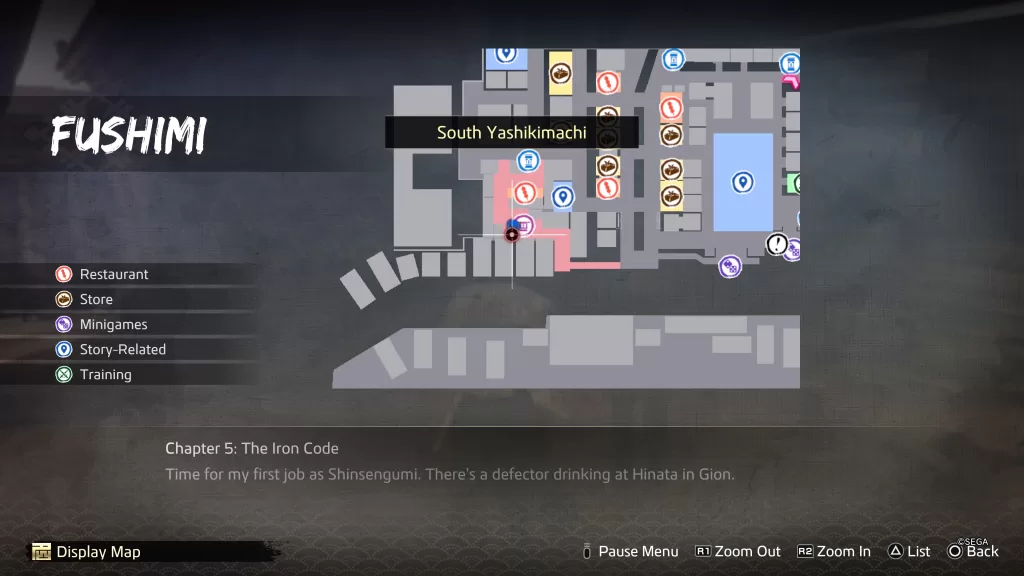
Filthy Cat
Location: South Yashikimachi – On the dock next to the boatman who takes you to Ryoma’s villa on the southwestern side of Fushimi

To bond with the Filthy Cat, you’ll need to complete The Filthy Cat substory. Once the bond has been formed, you’ll need to visit the cat regularly, giving it baths. When you max out your bond, you’ll get to name the cat and take it home with you!
Frequently Lost Courier
Location: Shinmachi – Along the river in the southeastern corner of Fushimi near a jizo statue

To bond with the Frequently Lost Courier, you’ll need to complete The Frequently Lost Courier substory. Once the bond has been formed, check in on the courier regularly and help him make his deliveries. Check out The Frequently Lost Courier substory guide for the locations of the deliveries.
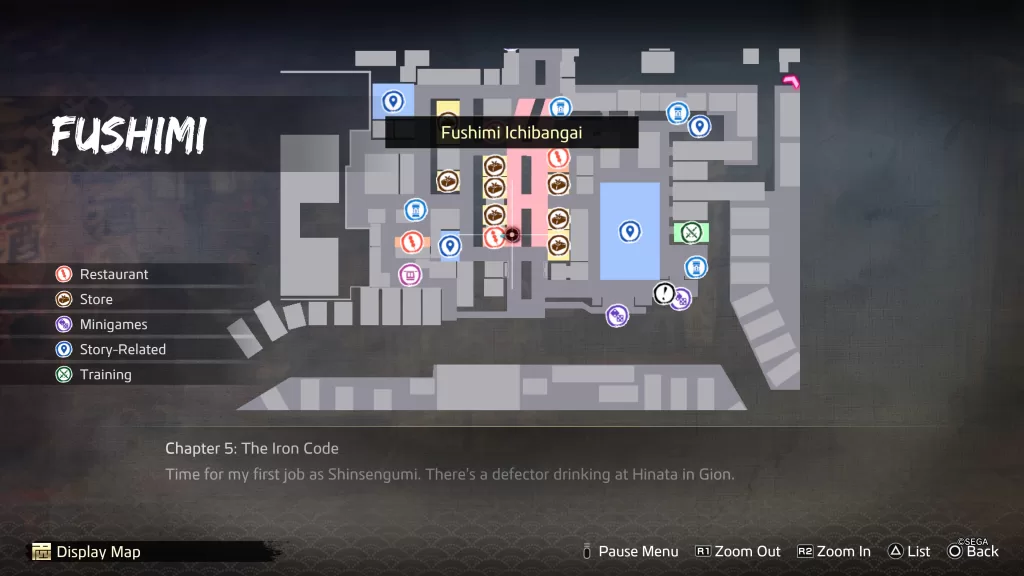
Fukufuku Pub Owner
Location: Fushimi Ichibangai – At Fukufuku Pub
To bond with the Fukufuku Pub Owner, purchase something from his restaurant. Once the bond has been formed, return regularly and purchase a dish. About halfway through, a cutscene will trigger during which you’ll invite the owner to drink with you. After the scene is through, wait some time then return to the restaurant. As you approach, a cutscene will trigger. Afterwards, speak with the owner sitting at a table. As a reward for maxing out his bond, you’ll receive Nada Refined Sake
Greengrocer
Location: Fushimi Ichibangai – At Greengrocer

To bond with the Greengrocer, purchase something from his shop. Once the bond has been formed, return regularly and purchase items. When you get close to maxing out his bond, he’ll ask you for 10 carrots. Grow them at Ryoma’s villa then deliver them to the Greengrocer. As a reward, you’ll receive a Sturdy Lumber.
Ichikura Owner
Location: Fushimi Ichibangai – At Ichikura General Goods
To bond with the Ichikura Owner, purchase something from his shop. Once the bond has been formed, return regularly and purchase items. When it comes time to max out this bond, you’ll have to engage in a chase. Capture the shoplifter. As a reward, you’ll receive a Crystal.
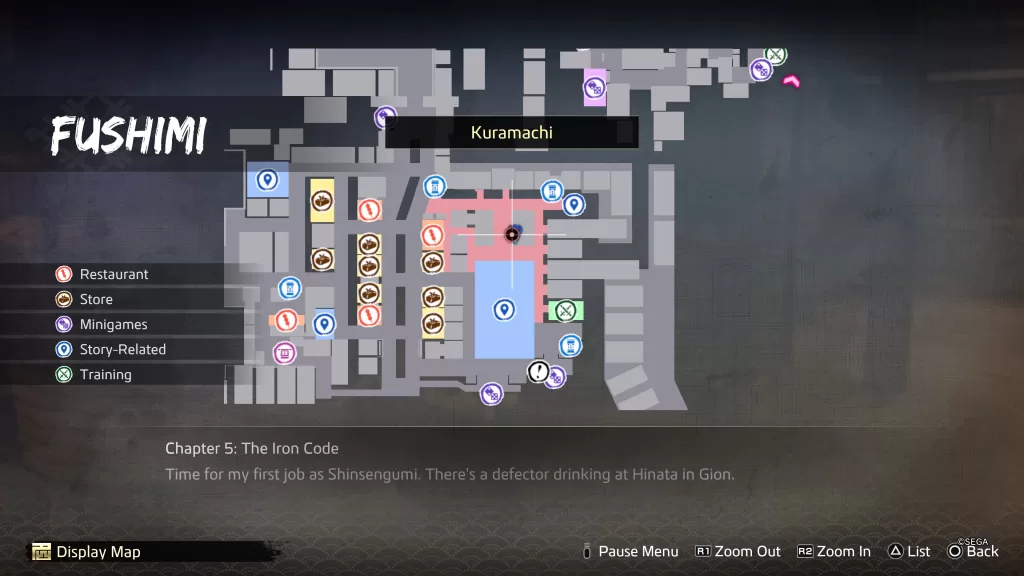
Junk Boy
Location: Kuramachi – In alley just north of Teradaya
To bond with the Junk Boy, you’ll need to complete The Junk Boy substory. Once the bond has been formed, visit the boy regularly and hand him something. When you max out his bond, you will not receive any items.
Palanquin Bearer
Location: Any Palanquin Bearer
To bond with the Palanquin Bearer, use their services. Once the bond has been formed, continue using their services! About halfway through, cutscene will trigger during which the Palanquin Bearer will mention that bandits have been attacking Palanquin Bearers recently. Take another ride to trigger a cutscene where scary men will show up. This will lead to a fight against them. Afterwards, their bond will max out and the Rakugai on Kamo River becomes a location that the Palanquin Bearers can now take you to!
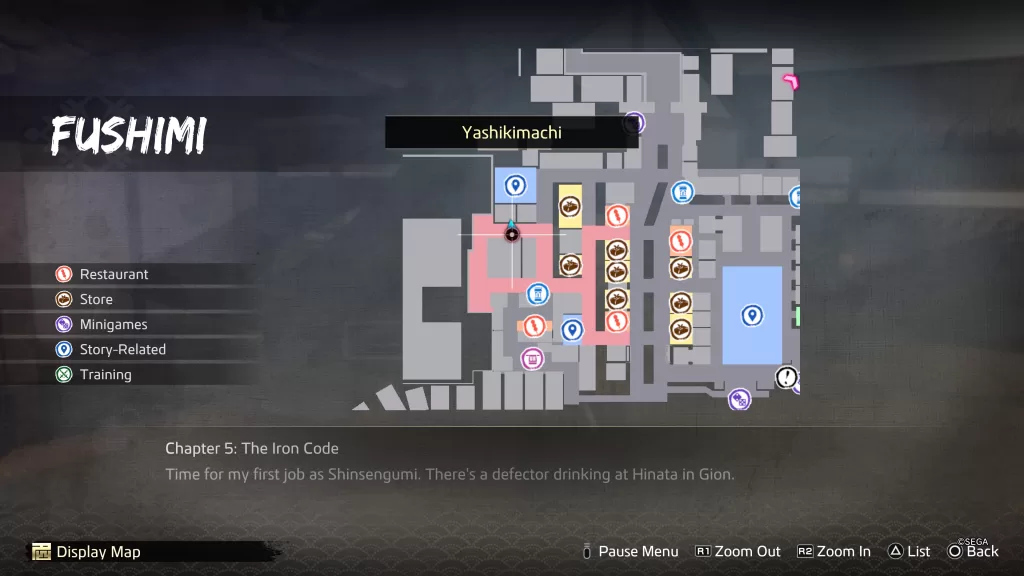
Patient Dog
Location: Yashikimachi – Just south of Dojo
To bond with the Patient Dog, you’ll need to complete The Patient Dog substory. Once the bond has been formed, return regularly to the dog and feed it a meal. When you max out its bond, you’ll get to name the dog and bring it home with you.
Udon Shop Owner
Location: Fushimi Ichibangai – At Umai Udon
To bond with the Udon Shop Owner, order a meal at Umai Udon. Once the bond has been formed, you’ll be able to complete the All in the Hips substory. Doing so unlocks the cooking minigame. Return regularly to pitch in at the shop! When you max out the bond, you will not receive any items.
Wood Cutter
Location: South Yashikimachi – Next to the Palanquin Bearers just south of Hanako
To bond with the Wood Cutter, you’ll need to complete The Wood Cutter substory. Once the bond has been formed, you’ll need to visit the man regularly and help him chop wood.
Gion
Anna
Location: At Yamabuki
To bond with Anna, visit Yamabuki and pay 1 ryo to enter. Afterwards, play the drinking minigame. Once the bond has been formed, return regularly to the brothel and play. You won’t receive anything but Virtue for maxing out her bond. No items or special cutscenes.
Kasuga Okami
Location: At Kasuga restaurant
To bond with Kasuga Okami, eat a meal at Kasuga. Once the bond has been formed, return regularly to eat here. When it’s time to max out her bond, you’ll need to fight a drunk customer. Deal with him to receive a Fine Silk Fabric.
Kitchen Aoba Chef
Location: At Kitchen Aoba
To bond with the Kitchen Aoba Chef, eat a meal at his restaurant. Once the bond has been formed, return regularly to eat here. About halfway through, he’ll ask you what your favorite kind of food is. You’ll be able to choose from the following:
- Food that warms me up inside.
- Food with lots of ingredients.
- Food that’s simple to eat.
We chose “Food that’s simple to eat.” Return to the restaurant and speak with the chef. You won’t receive any items for maxing out his bond!
Revolutionary Chef
Location: West of Kasuga
To bond with the Revolutionary Chef, complete The Revolutionary Chef substory. Once the bond has been formed, visit him regularly bringing him home cooked meals. When you max out his bond, you’ll learn how to cook the Revolutionary Croquettes.
Sexy Madam
Location: In front of Kitchen Aoba
To bond with the Sexy Madam, complete The Sexy Madam substory. Once the bond has been formed, wait awhile then return to where she was. She’ll want the below vegetables. You can either grow them on your farm or purchase them.
- Carrot – Reward: Passion Pill
- Eggplant – Reward: All-Purpose Medicine
- Daikon – Reward: Deluxe Vitality Pill
- Pumpkin – Reward: Gold Plate
When it comes time to maxing her bond out, you will not receive any additional items.
Mibu
Veggie-Loving Boy
Location: Far eastern side of Mibu near the map transition

To bond with the Veggie-Loving Boy, complete The Boy Who Loves Veggies substory. Once the bond has been formed, you’ll need to visit him regularly and give him vegetables that you either grow at Ryoma’s villa or purchase. To max out his bond, you’ll be asked to make a Refreshing Vegetable Salad. Head to Ryoma’s Villa to make it! You’ll need Turnip x2, Eggplant x2, Onion x2, Carrot x2 and Spinace x2. Return to the boy once you have it and hand over the salad. Speak with him once more to fully max him out. You will not receive any items for doing this.
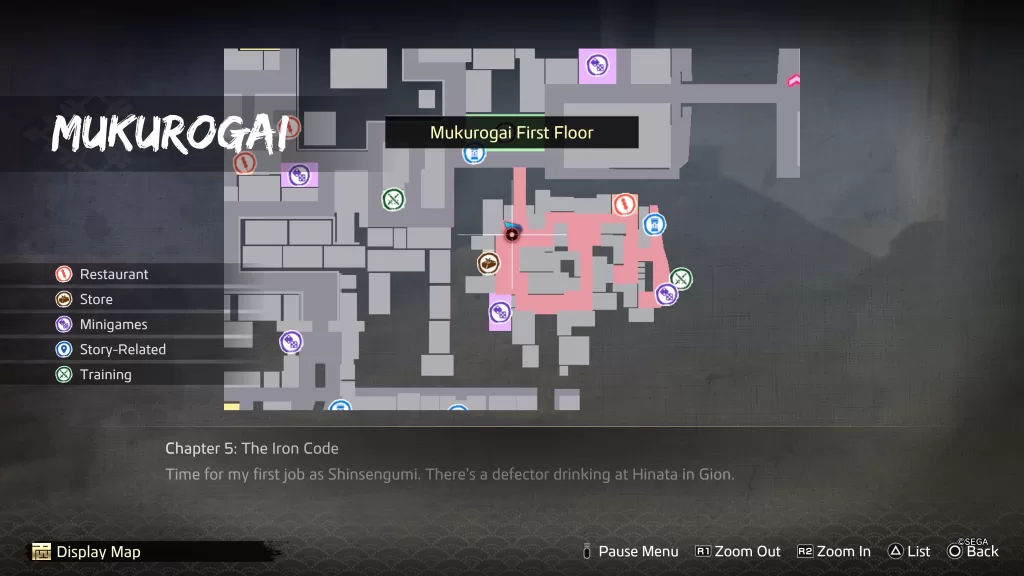
Mukurogai
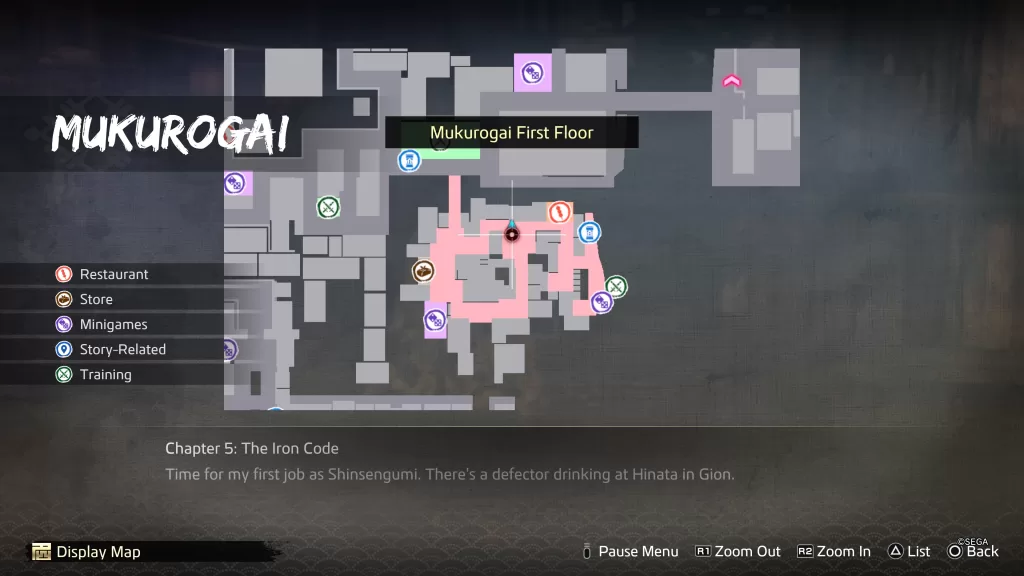
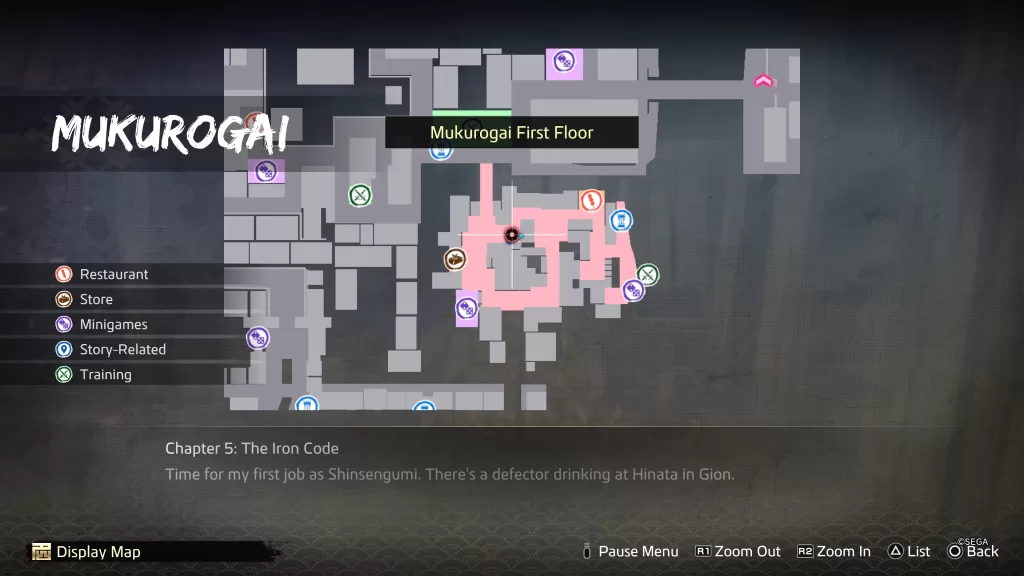
Injured Dog
Location: Mukurogai First Floor – Just west of Paradise
To bond with the Injured Dog, complete The Injured Dog substory. Once the bond has been formed, visit the pup regularly and give it medicine (All-Purpose Medicine, Ointment, etc.). When you max out its bond, you’ll get to name it and bring it home.
Servile Beggar
Location: Mukurogai First Floor – Near the entrance/exit
To bond with the Servile Beggar, complete The Servile Beggar substory. Once the bond has been formed, return regularly and feed him food. To max out his bond, meet him on the northwestern side of the Scarecrow Chateau in Rakugai. He’ll thank you and hand over the Precise Machinery as a reward.
Trash Dealer
Location: Mukurogai First Floor – Standing next to the entrance/exit
To bond with the Trash Dealer, complete The Trash Dealer substory. Once the bond has been formed, visit him regularly and give him something. When it comes time to max out his bond, you will not receive any items.
Path to ?
(Reachable via bridge East of Rakugai)
Amnesiac
Location: Found lying on the ground
To bond with the Amnesiac, interact with him lying on the ground. Once the bond has been formed, give him some medicine (Ointment, All-Purpose Medicine, etc.). Once you’ve fully healed him, he’ll wake up. As a reward, you’ll receive a Solid Wood.
Check back in with him later. Again, he’ll be out cold and you’ll need to keep giving him medicine. Do so until he is fully healed to receive a Sturdy Lumber.
Once again, wait awhile then check back with him. You’ll need to fork over some more medicine to fully heal him. When you do, you’ll receive a Thousand-Year Tree Branch.
Once more you’ll need to wait awhile then return to him. You’ll finally found out the cause of his falls. For maxing out his bond, you’ll receive a Sacred Wood.
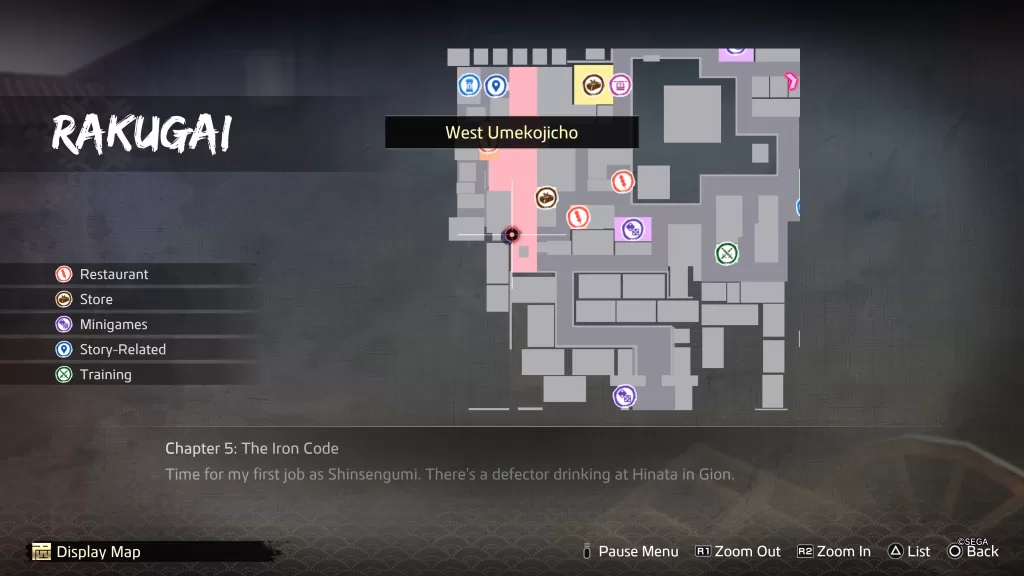
Rakugai
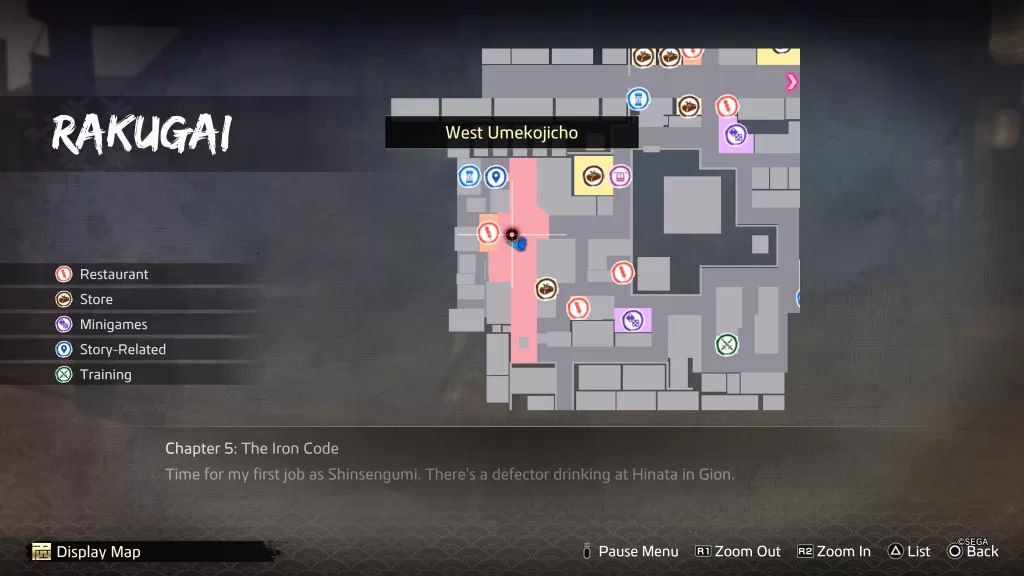
Arms Dealer
Location: West Umekojicho – At Rakugai Arms Dealer
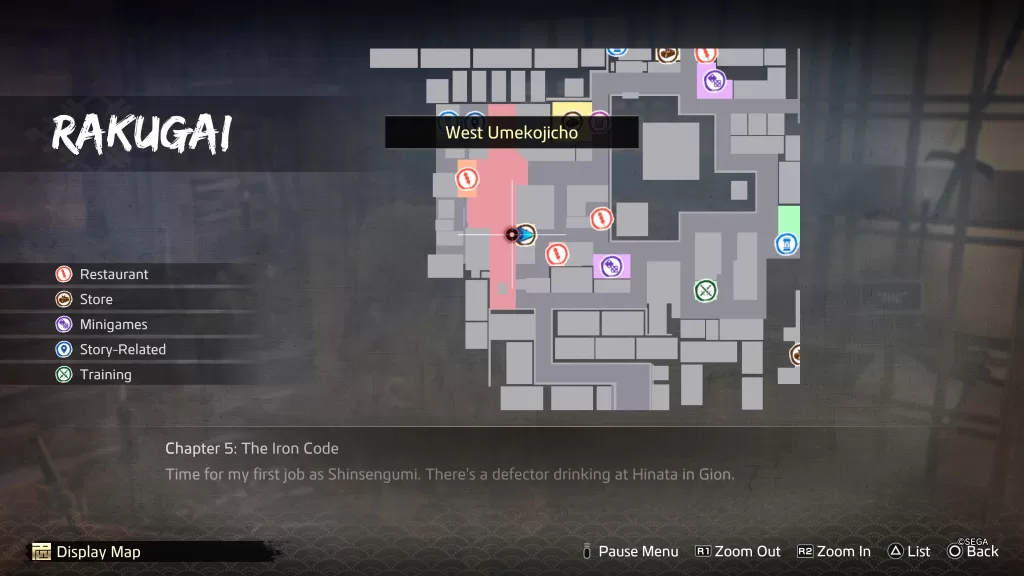
To bond with the Arms Dealer, purchase something from his shop. Once the bond has been formed, you’ll need to return regularly and purchase something. About halfway through with the bonding, a cutscene will trigger during which he’ll ask you what living means. Choose “We live so that we can die.” Purchase some more items. He’ll eventually ask you what your greatest weapon is. Choose “Honor and chivalry.” As a reward for maxing out his bond, you’ll receive a Dragon Fang and he’ll open up his special stock to you! You’ll now be able to purchase a Worn Sword.
Battered Defender
Location: South Umekojicho – On street northeast of Utamaruya
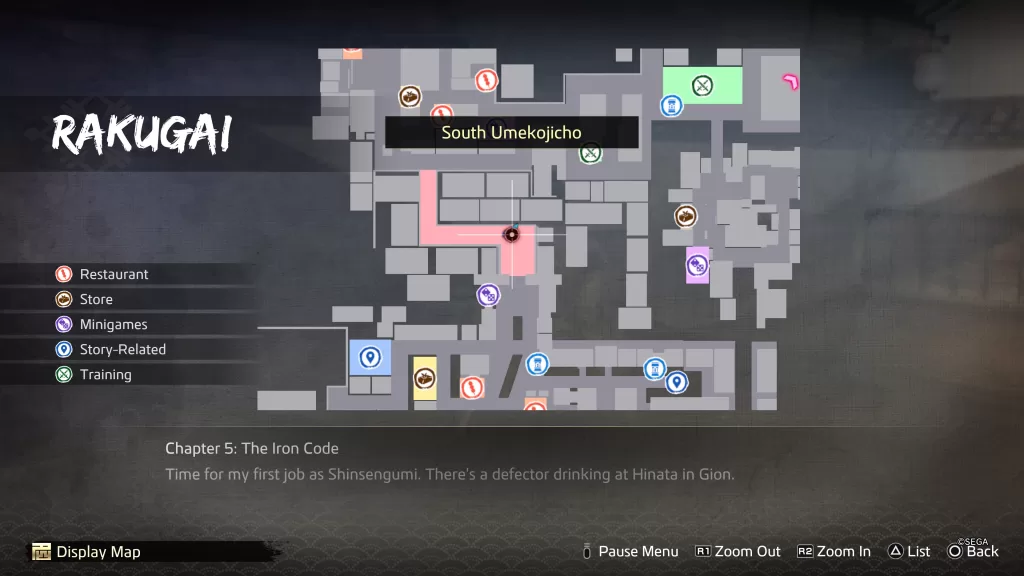
To bond with the Battered Defender, complete The Battered Defender substory. Once the bond has been formed, visit him regularly and give him medicine (All-Purpose Medicine, Ointment, etc.). You will not receive any items from maxing out his bond.
Chicken Race Receptionist
Location: Umekojicho – At Chicken Racing
To bond with the Chicken Race Receptionist, complete your first chicken race. Once the bond has been formed, visit him regularly and play the minigame. Win or lose you’ll still earn bond points! When it’s time to max out his bond, you’ll have to select a chicken for him. It’s either Wondercrest or Tosan Pride. We chose Wondercrest and he won! As a reward, you’ll receive a Broken Compass.
Hungry Cat
Location: East Umekojicho – On the northeastern side of Unyuan
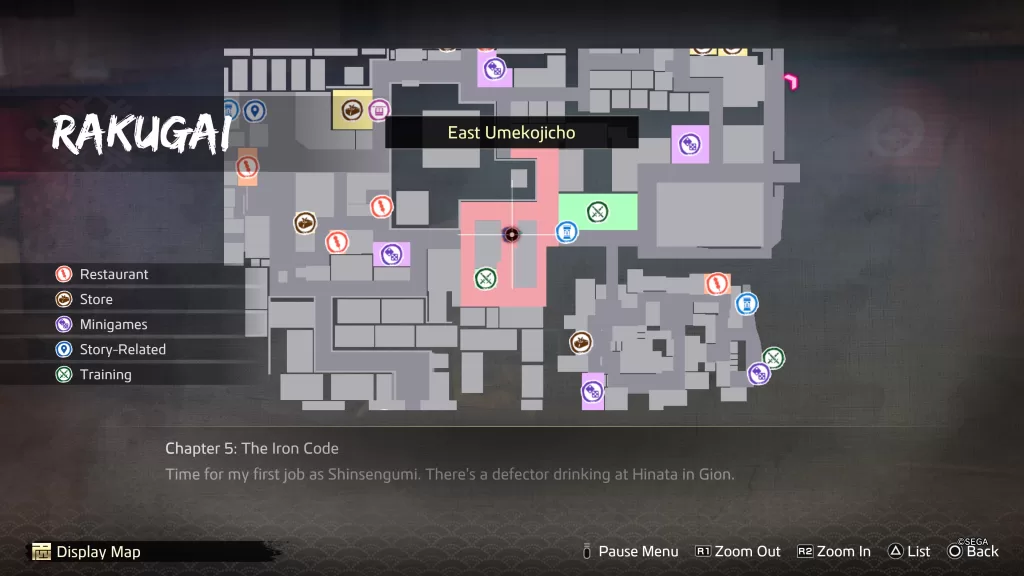
To bond with the Hungry Cat, complete The Hungry Cat substory. Once the bond has been formed, visit the cat regularly and feed it fish. About halfway through, the cat will start to become picky about what fish it wants.
- Sea Bream – Purchase from Uorin Fish Market in Fushimi for 2200 mon or catch yourself while fishing (Take Sea Fishing boat south of Teradaya in Fushimi to Fishing Banks. We caught several using Peerless Pole.)
- Tuna – Fish for it. Take Sea Fishing boat south of Teradaya in Fushimi to East Coast. The Bluefin Tuna is a large shadow. (Not as big as the Great White Shark…next size down!) We caught it using the Peerless Pole.
Once the bond has been maxed out, you’ll get to name the cat and bring it home with you!
Mysterious Merchant
Location: West Umekojicho – Southwest of Rakugai Arms Dealer
To bond with the Mysterious Merchant, you’ll need to complete The Mysterious Merchant substory. Once the bond has been formed, you’ll need to visit the man regularly and give him what he requires.
- Loincloth – You can purchase a Loincloth from the Rakuagai Arms Dealer for 1000 mon. As a reward for handing it over, you’ll receive 2 ryo.
- Scrap Paper – You can get Scrap Paper by turning in Prize Tickets to the prize place in Fushimi. As a reward, you’ll receive 1 ryo.
- Natto – Purchase at Fermented Goods or Rice Shop in Rakunai for 100 mon. As a reward, you’ll receive 3 ryo.
- Ginseng – Purchase at General Goods in Rakunai for 1 ryo or grow it at Ryoma’s villa.
After you max out his bond, he’ll set up a shop there where you can purchase items!
Sword Nut
Location: Sannocho – On the southeastern side of Scarecrow Chateau
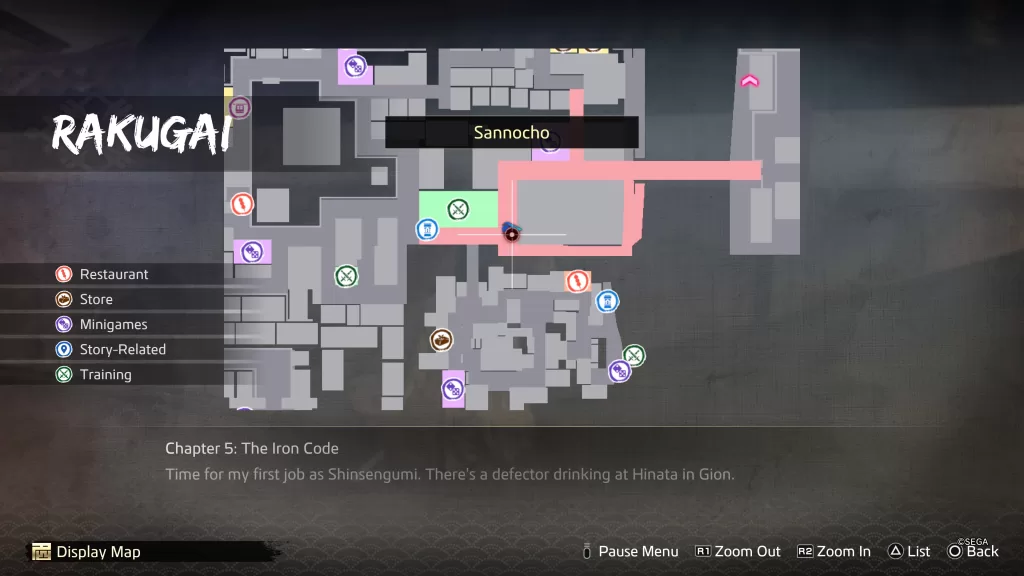
To bond with the Sword Nut, complete The Sword Nut substory. Once the bond has been formed, he’ll want you to bring him the below swords. You can craft these swords at Kurogane Smithing. For where to find the items needed to craft these swords, click here!
- Ebony Sword
- Yaksha Blade
- Vulpecula
- King of Beasts
Once you show him all the swords, you’ll receive the Tunasmith (sword) as a reward.
Uji Tea Parlor Girl
Location: West Umekojicho – At Uji Tea Parlor
To bond with the Uji Tea Parlor Girl, purchase an item from Uji Tea Parlor. Once the bond has been formed, you’ll need to visit her regularly and purchase something. About three fourths of the way through, a cutscene will trigger during which she’ll tell you of troubles she’s been having with her scamming boyfriend. Wait awhile then return to her to see how it played out. As you approach, a cutscene will trigger followed by a fight. Defeat Shinsuke to max out her bond! You won’t receive any additional items for doing so.
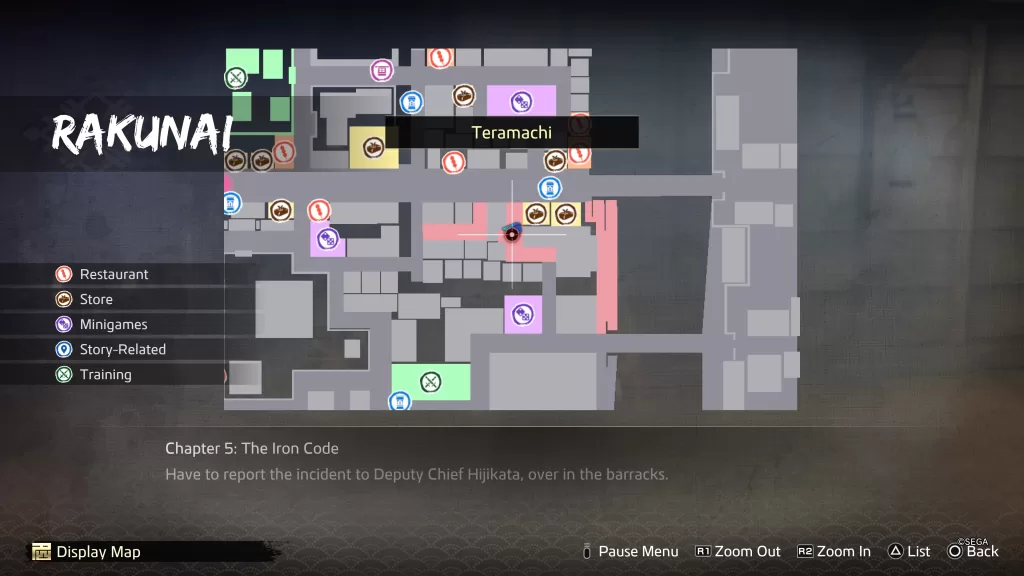
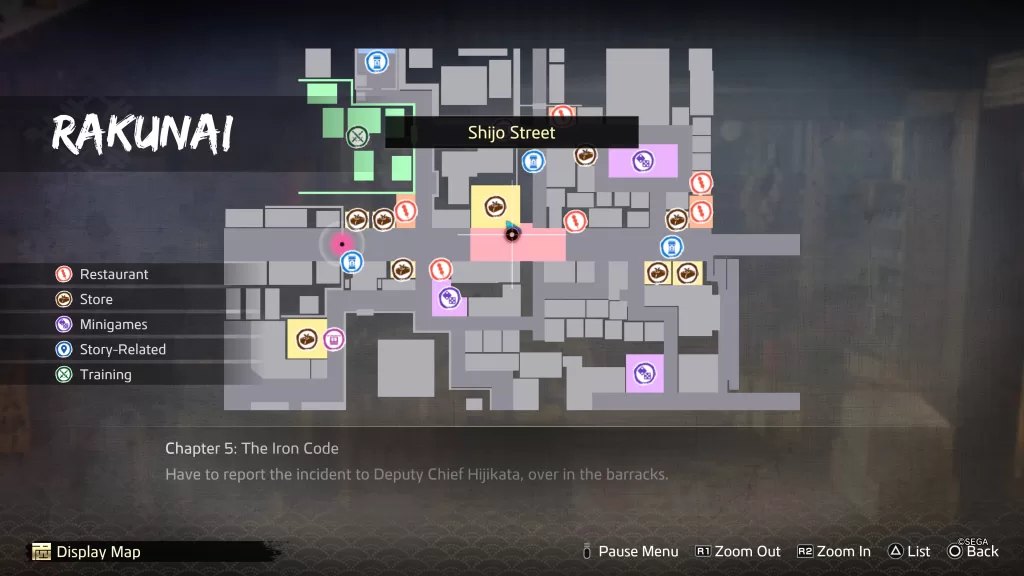
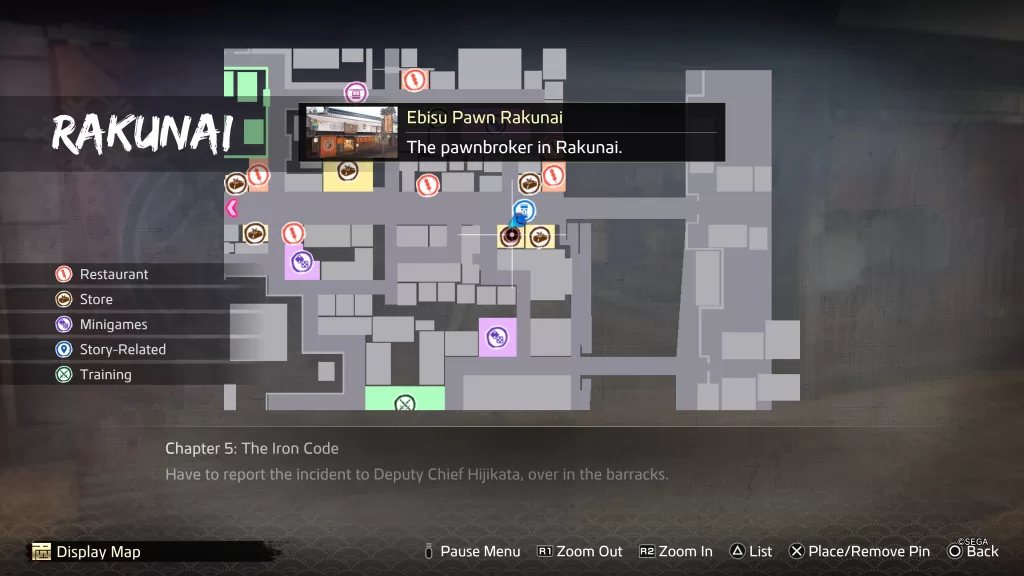
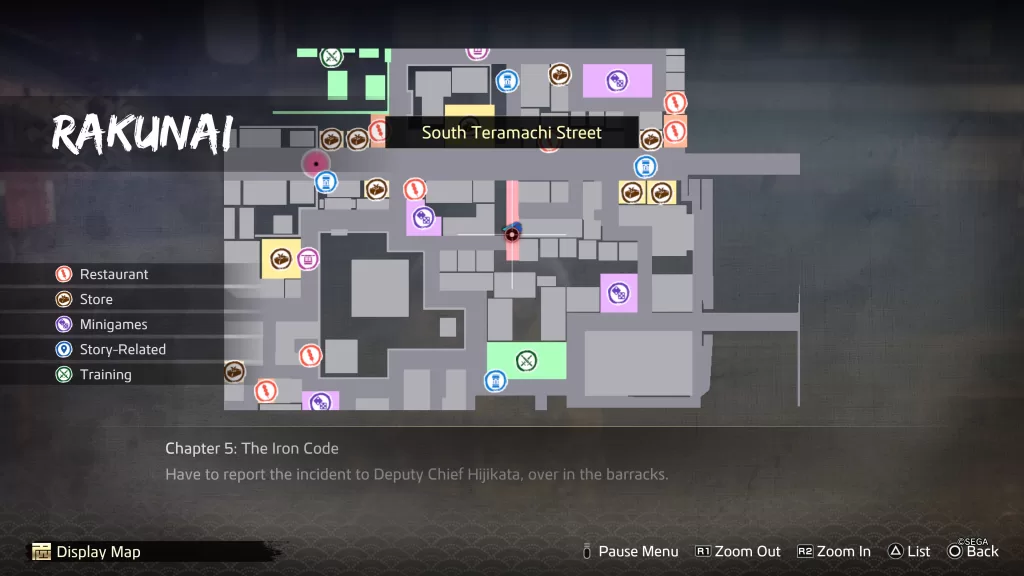
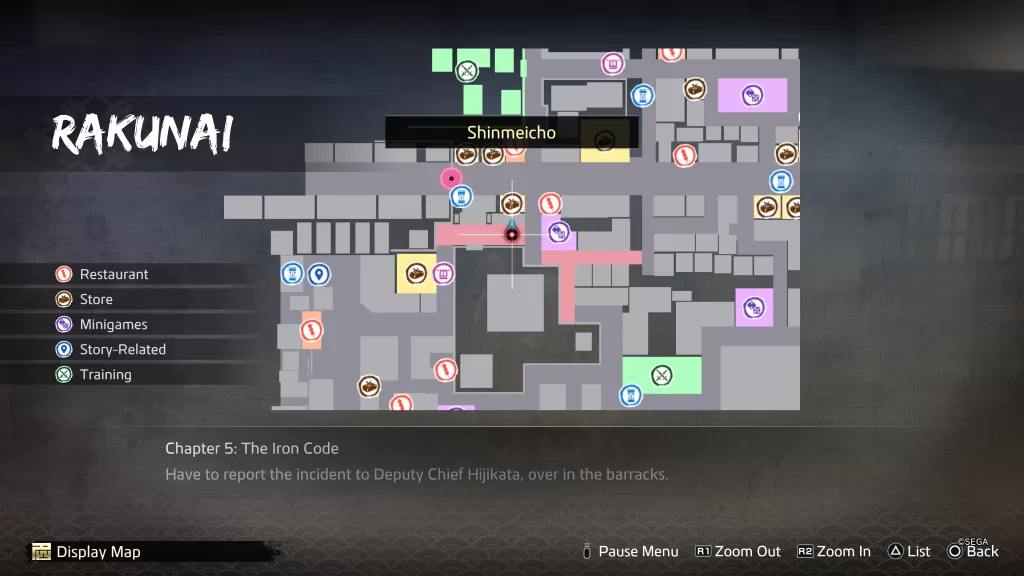
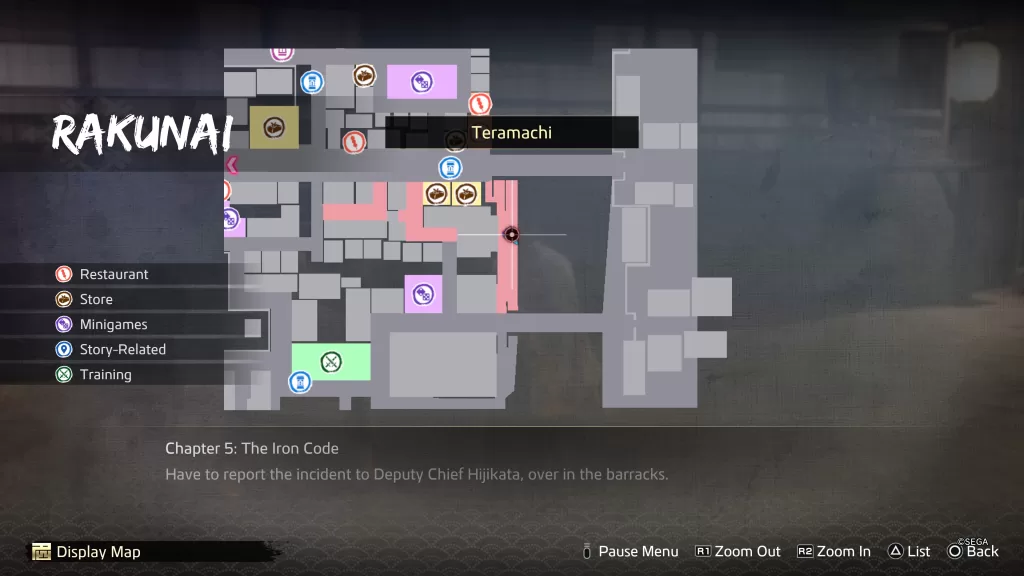
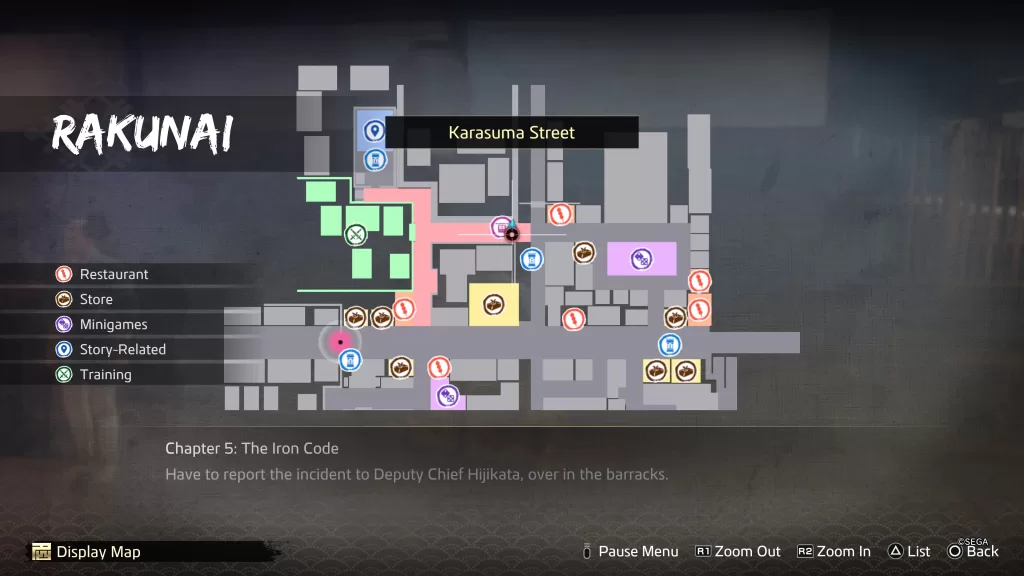
Rakunai
Akari
Location: Karasuma Street – At shrine north of Ginryu Dojo
To bond with Akari, speak with her at the shrine. Once the bond has been formed, return to the shrine maiden regularly and speak with her. Eventually, she’ll need some medicine. Hand over the All-Purpose Medicine. When you max out her bond, you’ll receive Akari’s Omusubi.
Barking Dog
Location: Teramachi – On the southwestern side of Ebisu Pawn Rakunai
To bond with the Barking Dog, complete The Barking Dog substory. Once the bond has been formed, return regularly to give the dog a bone. When you max out its bond, you’ll get to name the dog and bring it home!
Don Quijote Employee
Location: Shijo Street – At Don Quijote
To bond with the Don Quijote Employee, purchase something from Don Quijote. Once the bond has been formed, return regularly and purchase something. About 3/4ths of the way through, he’ll tell you that he’s out of change. Attempt to exit the shop to trigger a cutscene. Exit the store then take a right and approach the side to find the rice bales. Head back inside and speak with the employee. For maxing out his bond, you’ll receive a Gold Plate.
Ebisu Pawn Employee
Location: East Shijo Street – At Ebisu Pawn Rakunai
To bond with the Ebisu Pawn Employee, purchase something from Ebisu Pawn Rakunai. Once the bond has been formed, return regularly and purchase something from the Pawnbroker. About halfway through you’ll need to find someone for him. Speak with the Worn-Out Man on the west side of the Shogi Parlor in Rakunai. Return to the Pawnbroker to receive a Platinum Chunk.
Ecchudo Apothecary
Location: Kawaramachi – At Ecchudo Pharmarcy
To bond with the Ecchudo Apothecary, purchase something from the store. You’ll agree to test out his medicine. Speak with him and select the option to test out his medicine. Keep returning regularly and agree to test out his medicine. When you max out his bond, you’ll receive a Longevity Pill. He’ll also start selling them at his store!
Hanamaru Udon Employee
Location: East Shijo Street – At Hanamaru Udon

To bond with the Hanamaru Udon Employee, purchase a meal at Hanamaru Udon. Once the bond has been formed, you’ll need to visit this restaurant regularly and purchase something. When you max out his bond, a new item of Beef Udon will be added to his menu. You can purchase it for 500 mon.
Hungry Sumo Wrestler
Location: South Teramachi Street – East of the Shogi Parlor
To bond with the Hungry Sumo Wrestler, complete The Hungry Sumo Wrestler substory. Once the bond has been formed, return regularly to feed him. When you max out his bond, you won’t receive any items.
Injured Grandma
Location: Shinmeicho – Just south of Fermented Goods
To bond with the Injured Grandma, complete The Injured Grandma substory. Once the bond has been formed, you’ll need to visit her regularly and complete her tasks.
- Yokan – She’ll give you 1,000 mon and ask you to pick some up for her. Purchase it from Don Quijote in Rakunai for 500 mon.
You will not receive any items for maxing out her bond.
Love-Starved Husband
Location: Teramachi – Along the river southeast of the General Goods store
To bond with the Love-Starved Husband, complete The Love-Starved Husband substory. Once the bond has been formed, visit him regularly and bring him dishes to eat. When you max out the bond, you won’t receive any items.
Lucky Cat
Location: Karasuma Street – On the northeastern side of Ginryu Dojo

To bond with the Lucky Cat, complete The Lucky Cat substory. Once the bond has been formed, return regularly to the cat and give it money. In return it will give you items!
- 2000 mon – Sober Capsule
- 3000 mon – Shunga
- 5000 mon – 4000 mon
- 1 ryo – You’ll follow the cat then fight the scammers. Afterwards, you’ll receive 5 ryo!
When its bond maxes out, you’ll be able to name the cat and take it home!
Maijo-sensei
Location: Kawaramachi – At Nichibuza
To bond with Maijo-Sensei, head into the school and play the dancing minigame! Once the bond has been formed, return regularly and dance your heart out! When you max out her bond, you’ll receive a Solid Wood.
Momokawa Brothers
Location: East Shijo Street – At Shippoku Momokawa

To bond with the Momokawa Brothers, purchase a dish from Shippoku Momokawa. Once the bond has been formed, return regularly and purchase a dish. A little over halfway through, they’ll ask you to judge their cooking competition. Keep eating at the restaurant until they have finished preparing for the competition. You’ll have to make a choice between the Japanese, Chinese or Western dish. No matter your choice the other brother will speak up about his dish and you’ll need to reconsider, choosing one of the two remaining options. Again make your selection for the third brother to speak up. You’ll need to pick the remaining dish. Continue with the dialog prompts. As a reward for maxing out their bond, you’ll receive a Broken Compass.
Oblivious Woman
Location: Karasuma Street – Next to the Palanquin Bearers just west of Sushi Zanmai
To bond with the Obvious Woman, complete The Oblivious Woman substory. Once the bond has been formed, visit her regularly and give her some vegetables. When you max out her bond, you’ll receive 3 ryo!
Shinto Priest
Location: Karasuma Street – At shrine north of Ginryu Dojo
To bond with the Shinto Priest interact with him at the shrine. Once the bond has been formed, visit him regularly to purchase his items. When it comes time to max out his bond, you’ll have to perform a chase. During this chase the man will hide in a barrel and you’ll need to find him before time runs out! For us, he was in the barrel by the udon shop. You won’t receive any items for maxing out his bond.
Sushi Zanmai Chef
Location: Kawaramachi – At Sushi Zanmai

To bond with the Sushi Zanmai Chef, purchase a dish from Sushi Zanmai. Once the bond has been formed, return regularly and purchase an item. When you max out his bond, you will not receive any additional items.