Below is a walkthrough for the Prison Break Chapter 1 quest in Eastward.
Blow this joint
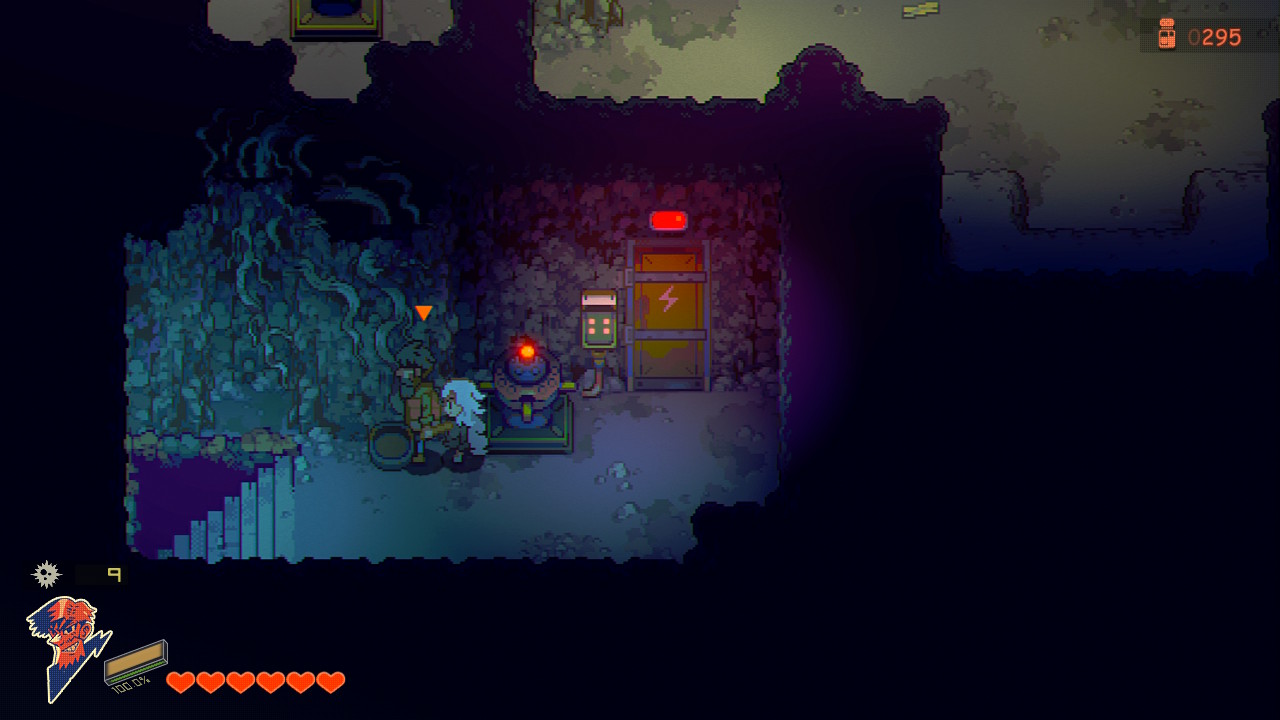
When you gain control of Sam, interact with the poster at the back of the cell to trigger a dialog event. When it completes, keep pulling pieces of the poster until the hole in the wall is accessible. Climb through to find a rest area complete with a stove and fridge. Head down the stairs to reach the next area then follow along the tunnel. Along the path, you’ll come across three machines shooting out steam. Dodge the steam and flip the switch on the power controls to turn them off. Follow the path south of the power control to reach another area with two steam jets and a moveable pillar. Use the pillar to block the first steam jet then head around to the other side, grab the pillar and use it to block the second steam jet to clear the path forward.

In the next area, you’ll be able to switch between Sam and John. Use Sam to clear the plants out of the way and John to fight off the enemies. You should now be in an area with a steam jet blocking a set of stairs leading down and a locked door beyond that. Follow the southern path to reach a valve. Interact with it turn off the steam blocking your path. Next, climb up the nearby stairs and push the giant crate in front of the steam hole using John. Interact with the valve again then keep following the path west. Defeat the three fly enemies along the way to find a closet containing a key. Backtrack to the locked door you passed before and use the key to open it. Head inside and move the pillar in front of the steam. You can now head down the stairs to reach the next area.

Work your way through the area until you reach two machines shooting out three spinning jets of steam. Take the northern path to reach an area with a sealed door and spinning lever. On the left side of the area, there will be two bush snakes. Defeat them then walk past them to find a chest with 50 salt. Head back to the locked door and keep hitting the spinning lever with your frying pan to open the door. Quickly head through before it closes. Use Sam to clear the plants blocking the way then switch to John to take out the lone enemy. For this next part, you’ll need to be quick. On the right side of the room, there will be another sealed door and on the left flowers leading to a gap in the floor. Use Sam to clear the flowers then switch to John. Hit a bomb over to the lever causing it to open the door when it explodes. You’ll then need to switch back to Sam, clear the pants and run through the door before it closes. Inside you’ll find a cabinet with a key. Return to the area with the two spinning steam machines and follow the southern path. Use the key to unlock the door, then head down the stairs.

In the next area, there will be two steam machines blocking the path forward. Head north along the right side to reach a switch. Press it to cause the steam machines to spin. Then cross over to the other side of the room and press the switch there. Follow this up by heading back to the first switch and press the button twice. This should allow you to reach the southwestern part the room. Follow the path south using your frying pan to remove the decayed plants blocking your path. Now you should see two valves, one at the northern part of the room and another at the southern. Activate them in this order: south, north, south, north. Doing so will allow you to head to the western side of the area where you’ll find a chest containing a key guarded by two enemies. Defeat them, grab the key, then backtrack to the room with the two steam machines. Press the switch on the right side then head west to reach a locked door. Open the door using your key and proceed to the next area.

In the next area, switch to Sam and use her ability on the mushrooms to light the way forward. Be prepared to alternate between Sam and John as enemies will spawn out of the eggs on the floor Aliens style and attack you. On the northwestern side of the room, you’ll find a chest containing 3 potatoes just before the exit to the next area.
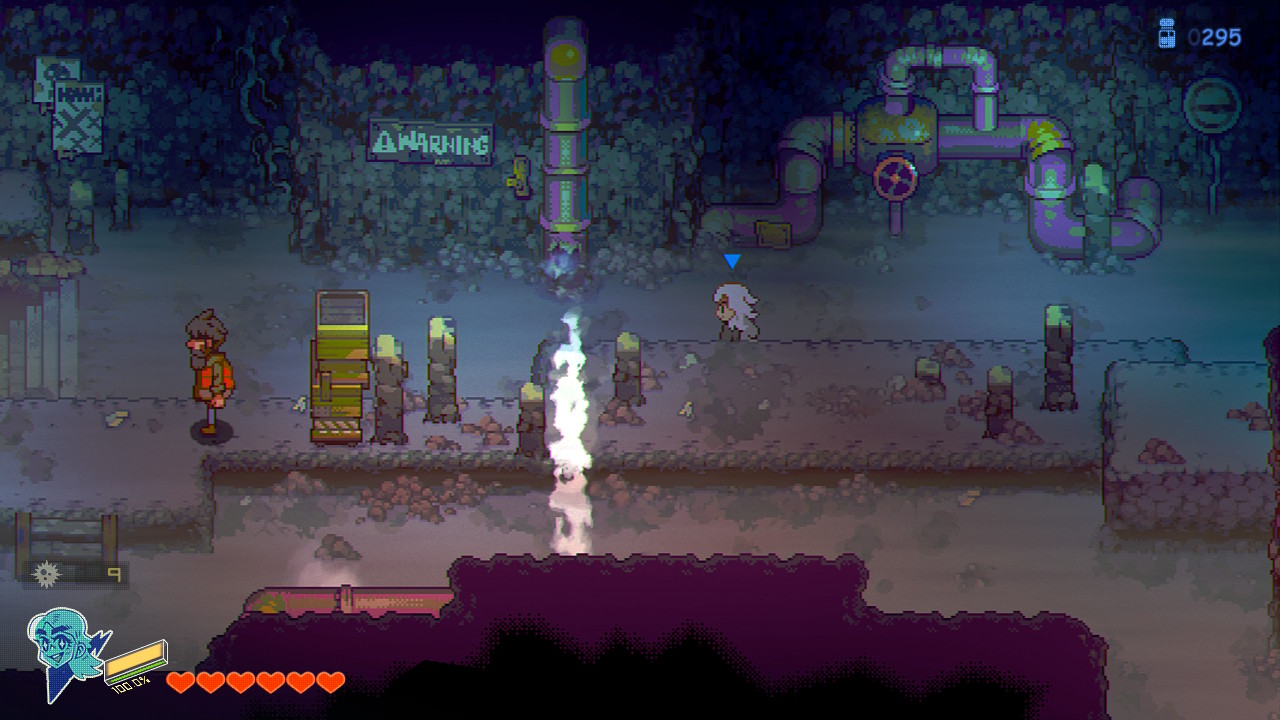
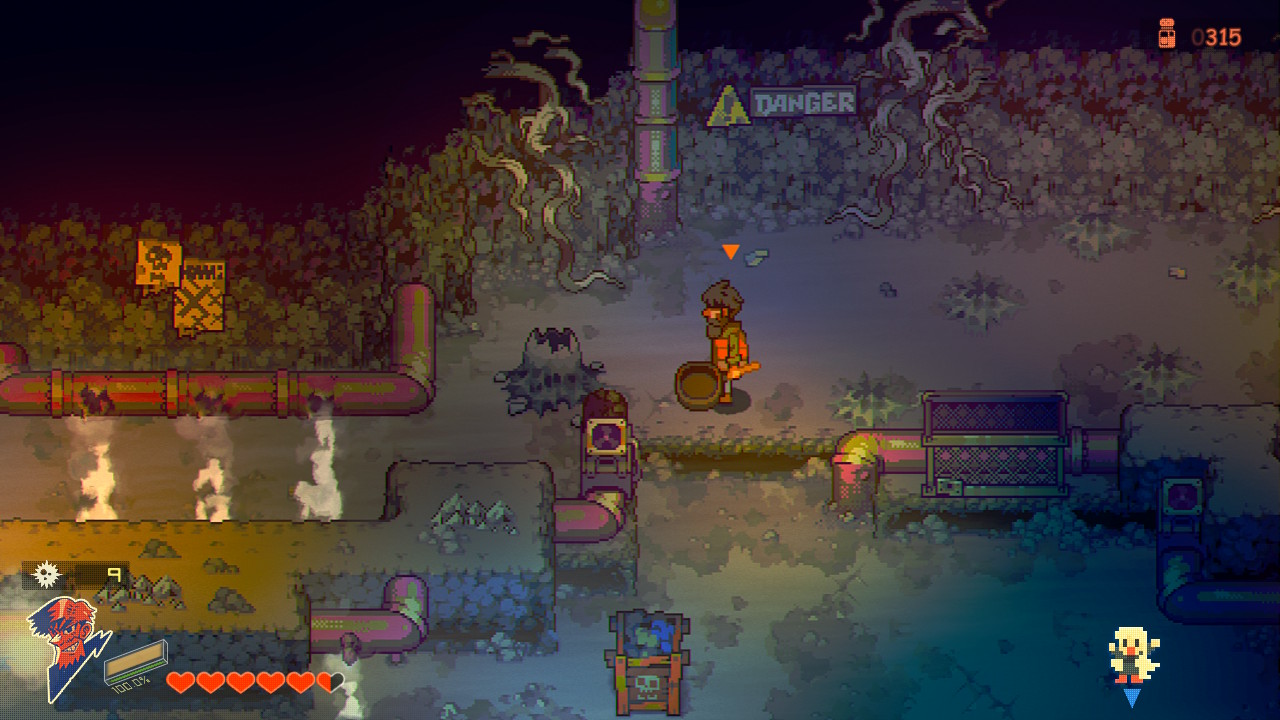
Follow the path in this area until you reach the warning sign. From there take the southern path to reach a chest containing a Heart Orb then head back up to the warning sign and take a left. Destroy the crates blocking your way with a bomb. Drop a bomb near the spinning switch then run back to the middle path and through the door. Head down the stairs to reach the next area triggering a dialog event.
After the event, head to the next area. For this section, you’ll have to switch between John and Sam to progress through the area. Switch to Sam heading farther down the path. You’ll come across three switches. Pres the switches on the left and right. Change to John then head past the three steam machines. Switch back to Sam and hit the left switch. You can then use John to head south past the leftmost switch where you’ll find a chest with a gear part. Continue heading forward until you reach the steam jet. Switch over to Sam then turn the valve. Go back to John stopping the next steam jet. Again use Sam to turn the value then move forward with John. Now as John, move the pillar all the way to the right to block the second steam jet for Sam. Then turn the valve with Sam and head down the stairs and proceed to the next area.
Controlling Sam, use her ability to get past the flowers, then step on the platform opening the door for John. As John, head forward until you are stopped by the steam jets. Drop a bomb and lob it near the explosible barrels blocking Sam’s way to create a path for her. Next use Sam to turn off the steam valve and head to the next area. Head forward with Sam stopping at the sealed door. Use John to hit the lever opening the door for Sam. Switch over to her and head through this door stopping on the floor switch. Change back over to John following the path and heading through the door that Sam opened. Step on the nearby platform, then switch to Sam and head through the door by her. You’ll then need to clear the flowers out on John’s side using Sam’s ability while switching to John to move him along. When you get to the northwestern part of the area as John, use your bombs in a dark area to blow up some creates. You’ll find a chest there with a gear part. Head down the southern path to reach the next area.
In the next area, head through the tunnel with Sam stopping on the floor platform on the other side. This will open the door for John allowing him to move through. Keep heading south switching between Sam and John to get past the bush snakes. Once at the end hit this switch a couple of times with John to open the door with Sam. This will allow her to step on a floor switch opening the door for John to unite the pair. Head south to reach the next area.
Start by heading down the southeastern path. You’ll then need to lob a bomb into the water below near the X. This will cause the water to rise. Do this two more times for the other X’s to raise the bridge on the west side of the room so you can press on. Climb up the ladder at the end of the path to reach the next area. Follow along the path to reach a room at the end with a ladder for you to climb. Make sure to stop in the room before this for a chest with a Heart Orb. A chest near the ladder also contains 3 mushrooms.

Climb up the ladder to enter the Mayor’s Estate then climb up another ladder and pull the lever on the wall to the left of the Mayor’s portrait unveil a hidden room. Quickly run behind the bookshelf and drag it back so you can head inside. Head up to stairs in the Mayor’s house to reach his office and inspect the desk. You’ll have the option to switch out his speech with either the Earth Born Manga or Wild Love Magazine if you have either of them. Head back down to the first floor and inspect the Mayor’s portrait on the east side of the room to find another secret door. Head through.
Follow the path forward past the weird device to reach the Secret Path with a Save Point and shop. You know that means… Stock up on healing items and save, then head through the door. This time you’ll be facing a giant crab boss in s square room. In the center of the room is a pit with four switches at the corners. You’ll want to hit all for switches to cause steam to shoot the crab out of its hidey-hole stunning it in the process. Use this opportunity to wail on it for some good damage. As the fight goes on, smaller crabs will spawn in the area so watch out for them. The boss should go down after four rounds of damage. Head back to the strange device just before the Secret Path to reunite with Sam.
Click here for the Greenberg quest guide!