Below is a walkthrough for the Testaments Training support request in The Legend of Heroes: Trails from Zero. You can pick up this request from the terminal in Chapter 2.
Client: Abbas
Salary: 2000 mira
Head on over to the Downtown District then make your way to Trinity. Speak with Abbas who is behind the counter to accept his request. A fight will then trigger against 4 Testaments (make sure to scan each one!). After you defeat them, you’ll then take on 4 members of the Saber Vipers (make sure to scan each one!). Once you defeat this lot, you’ll then have to defeat all 8 of the bickering clans! Defeat them all to complete the request!
Below is a walkthrough for the Fishing for Ingredients! support request in The Legend of Heroes: Trails from Zero. You can pick up this request from the terminal in Chapter 2.
Client: Long Lao Tavern & Inn – Shanshan
Salary: 1500 mira
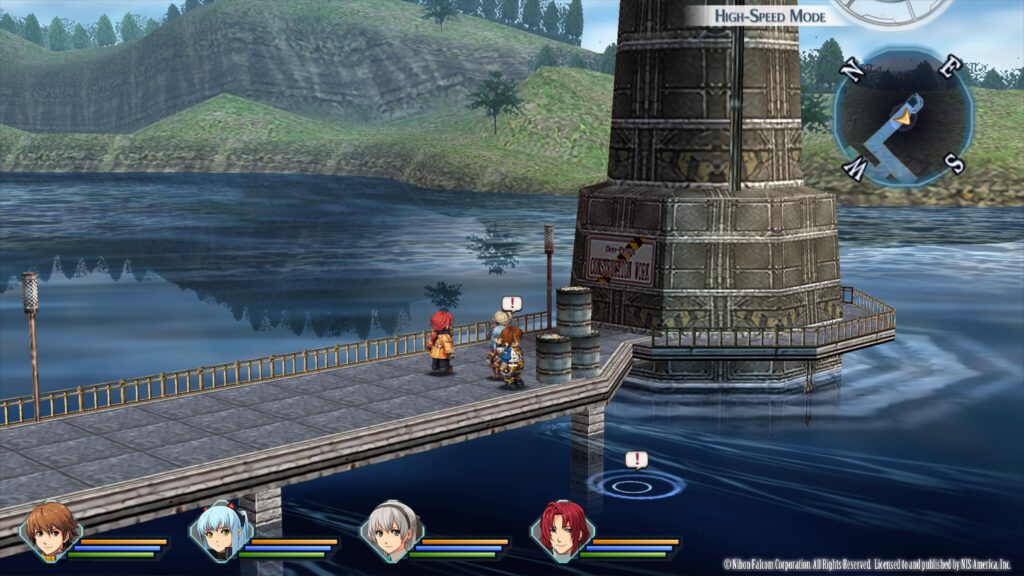
Speak with Shanshan (waitress walking around) at the Long Lao Tavern & Inn on East Street. The fish she is looking for is an eel! You can fish for the eels in Crossbell at the dock near the lighthouse in the Harbor District.
When fishing, make sure to use the Novice Rod and an Earthworm! After you’ve gotten 5, return to Shanshan and speak with her to complete the quest. As a reward, you’ll receive Teara Balm x2 and the recipe for Fierce Tiger Fried Rice!
Complete the Old Road Property Monster Extermination, Enigma Combat Test and Guardian Force Drill Participation support requests to get them out of the way. You won’t be able to do the W. Crossbell Highway Monster Extermination support request just quite yet as we don’t have access to that area yet! When you return to Crossbell after leaving, a cutscene will trigger and you’ll be instructed to return to the SSS. Do so to trigger another cutscene.
After you report the requests at the terminal, make sure you head up to the roof of the SSS and feed the cat!
Explore Crossbell to find the below.
Books
Crossbell Times – Issue 3 – Central Square – Department Store – Southwark General Store
Recipes
Homemade Egg Pudding – Administrative District – Library – Examine bookshelf behind the guy sitting at a table on the first floor
Thick Expresso – West Street – Morges – Speak with Morges in the room behind the counter
Make sure to stop in at the CPD in the Administrative District and show Receptionist Rebecca your Combat Notebook. If you’ve scanned all the enemies so far, you’ll receive 500 mira and U-Material.
Moon Temple
Leave Crossbell via the exit in the Residential District to enter Mainz Mountain Path. Interact with the bus stop and take the bus to Bus Stop (Doll Studio). Next, head northwest toward the Mainz Mining Village exit. In the tunnel, take the first left and head through the exit. Explore the Moon Temple to find the below.
Treasure Chests
Teara Balm
Bulletproof Jacket
Enemies
Abyss Worm
Fall Eagle
Pom
The way forward will be blocked off so this is all you can explore for now!
W. Crossbell Highway
Now is a good time to complete the W. Crossbell Highway Monster Extermination support request, which can be found in the 4th area of W. Crossbell Highway next to the bus stop. While on your way there, explore the area to find the below.
Once you reach Bellguard Gate, head inside the main building then head through the first door on the right. Go up the stairs then follow the path all the way around (passing the commander’s room) then go through the doorway at the end. Continue following the path to reach the below chest on a balcony.
Treasure Chest
Iron Leggings
Next, head back down to the first level and enter the doorway at the bottom of the stairs to reach the cafeteria. Speak with Stella behind the counter twice to learn the following recipe.
Recipe
Hearty Hotpot
Crossbell
When you’re ready to proceed with the main story, enter the Entertainment District and approach Arc en Ciel to trigger a cutscene. When it concludes, head up the stairs to trigger another cutscene. Once the cutscene ends, exit the building to trigger yet another one. Afterwards, enter the Back Alley then head into Revache & Co (down the alley to the left of Imelda’s. During the cutscene, you’ll be asked the below question.
What did Garcia react to?
The sender’s name
Next, head to West Street and enter Grimwood Law Office to trigger a cutscene. Afterwards, head to Harbor District and interact with the red building closest to the lighthouse. When prompted, knock. Head inside then go up the stairs. At the top of the stairs, enter the room next to the guard to trigger a cutscene. Once the cutscene ends, return to Arc en Ciel. As you approach, a cutscene will trigger. After it ends, head inside Arc en Ciel and go up the stairs, entering through the door at the top. With nothing left to do, make your way to the SSS. When the cutscene ends, head up to the next floor and interact with room 301. Afterwards, head up to the roof to trigger a cutscene.
Below is a walkthrough for the collectibles found during Chapter VIII: A Sea of Promises in A Plague Tale: Requiem. In this chapter, you’ll find a feather for Hugo’s Collection and souvenirs. Make sure to always pick up a knife if you see one so you can open the secret chests!
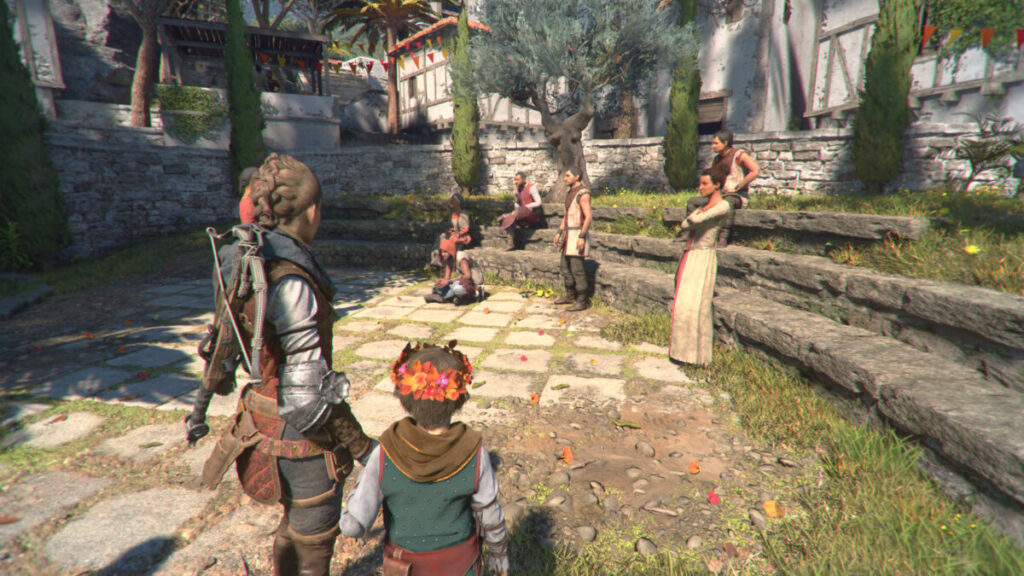
Hugo’s Collection: Black Kite
After exiting the boat, follow the path forward to reach the market. Head to the back left side to reach a grassy area. There will be a lady addressing a group of people.
Head behind the people to find the feather on the ground next to a tree.
Souvenir: Silent Lucinda
From the above collectible, head across the other side of the market to find a small archway. Head through it to reach a petting zoo.
Interact with Hugo to acquire the souvenir.
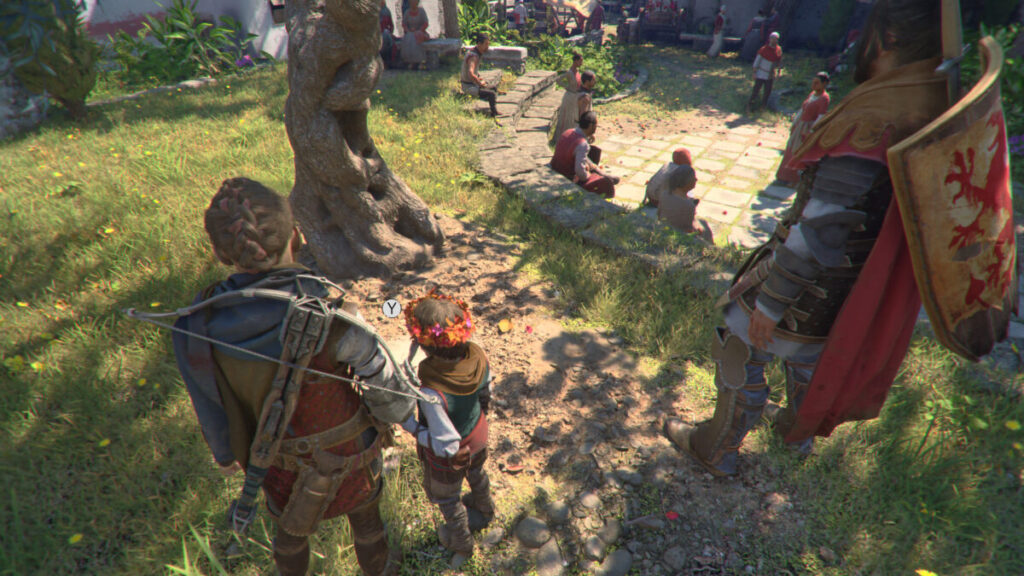
Souvenir: Flower Crown
Exit the market then take the first left down a flight of stairs to reach an enclosed area with a triangular table in the middle. Just past the table there will be a stand with wreaths.
Play the mini game to receive the souvenir. If you get all the pots accurately through the wreaths, you’ll receive the Perfect Throw achievement/trophy.
Below is a walkthrough for the collectibles found during Chapter VII: Felons in A Plague Tale: Requiem. In this chapter, you’ll find a feather for Hugo’s Collection, souvenirs and a secret chest. Make sure to always pick up a knife if you see one so you can open the secret chests!
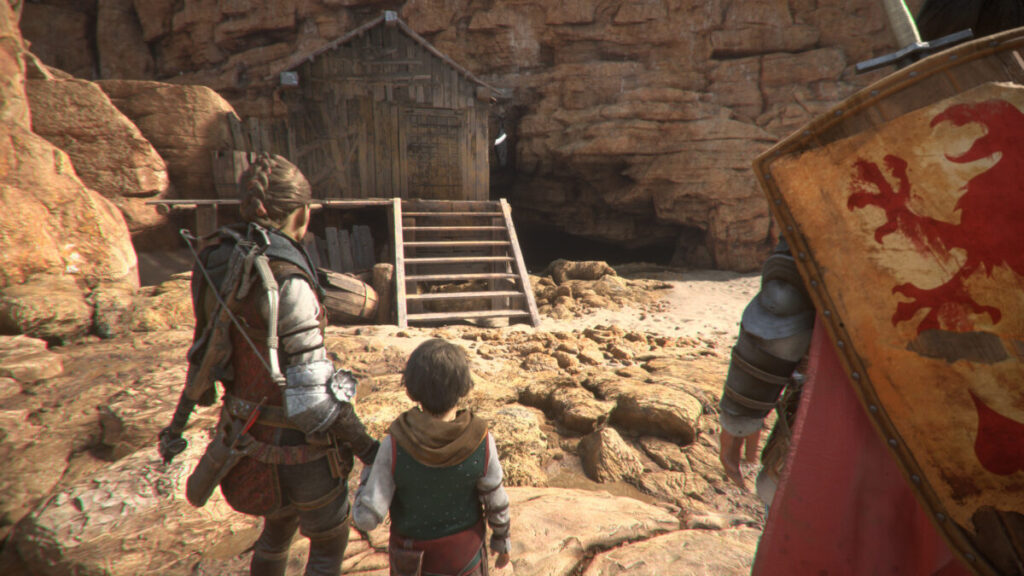
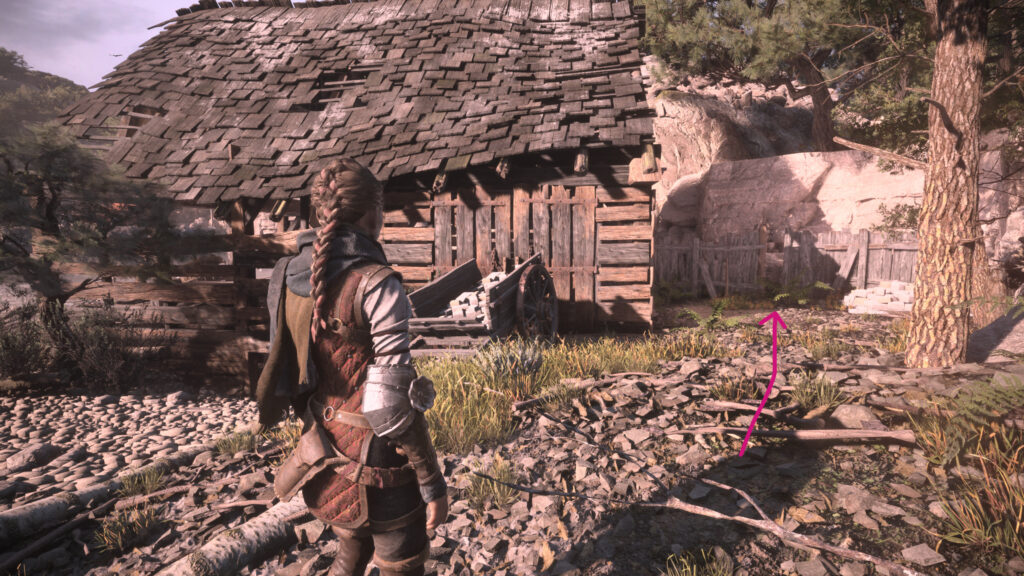
Hugo’s Collection: Black Headed Gull
Work your way through the level until you reach the beach. Just past the group of seagulls Hugo scares away there will be a wooden shack along the cliffs to the left.
Enter the shack then climb through the window on the left and follow the path to the dead end to find the feather on the ground.
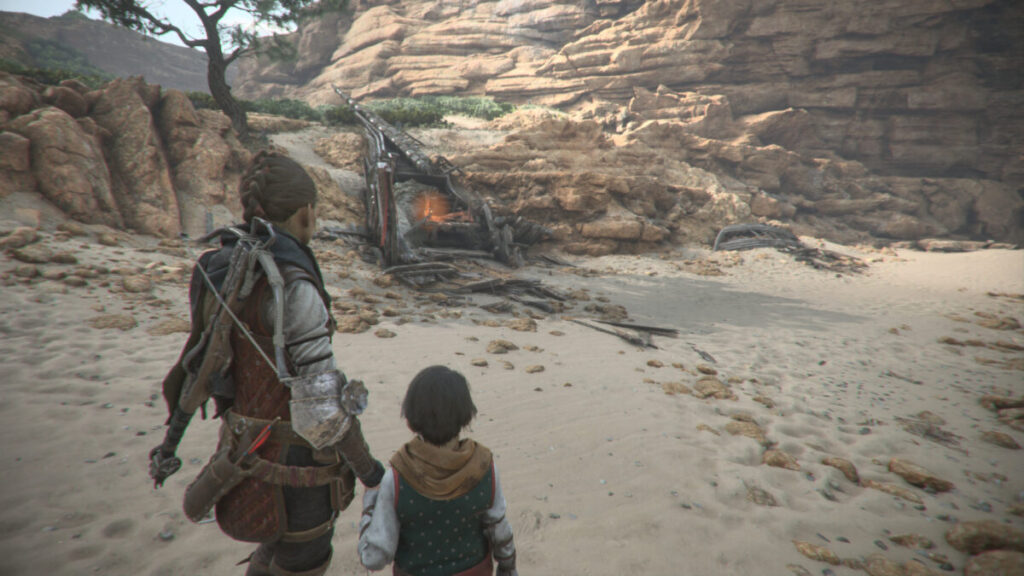
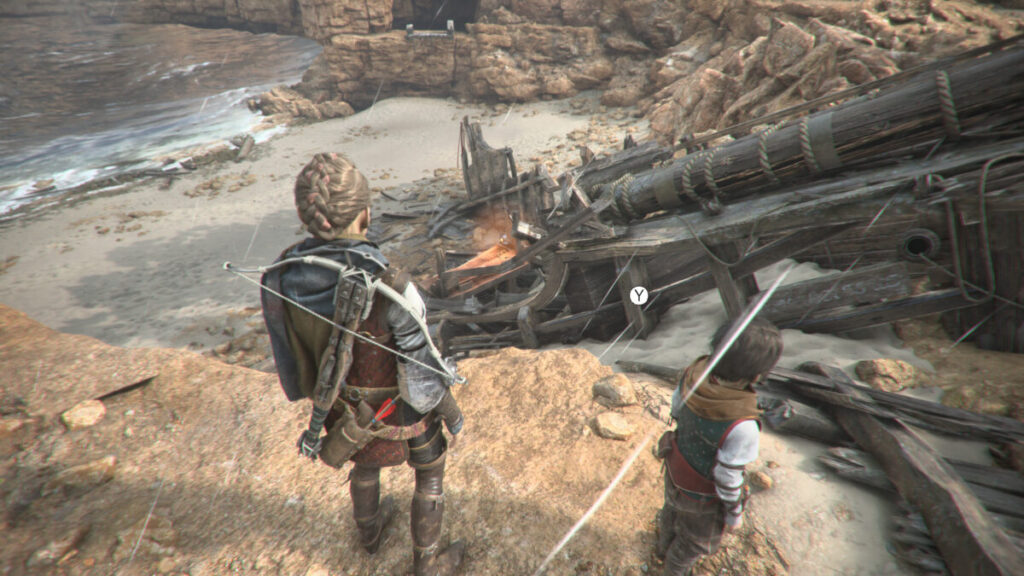
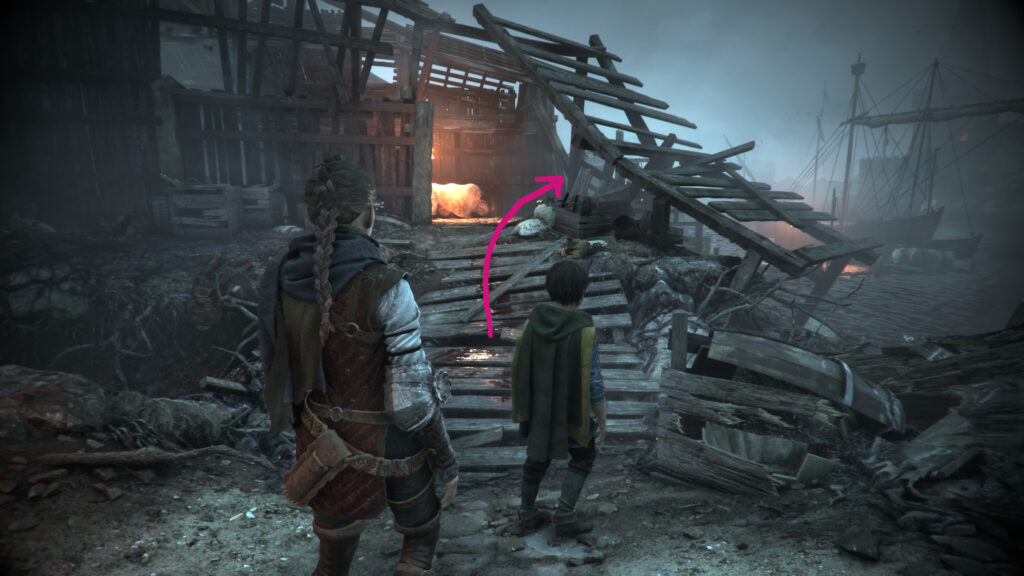
Souvenir: The Survivor
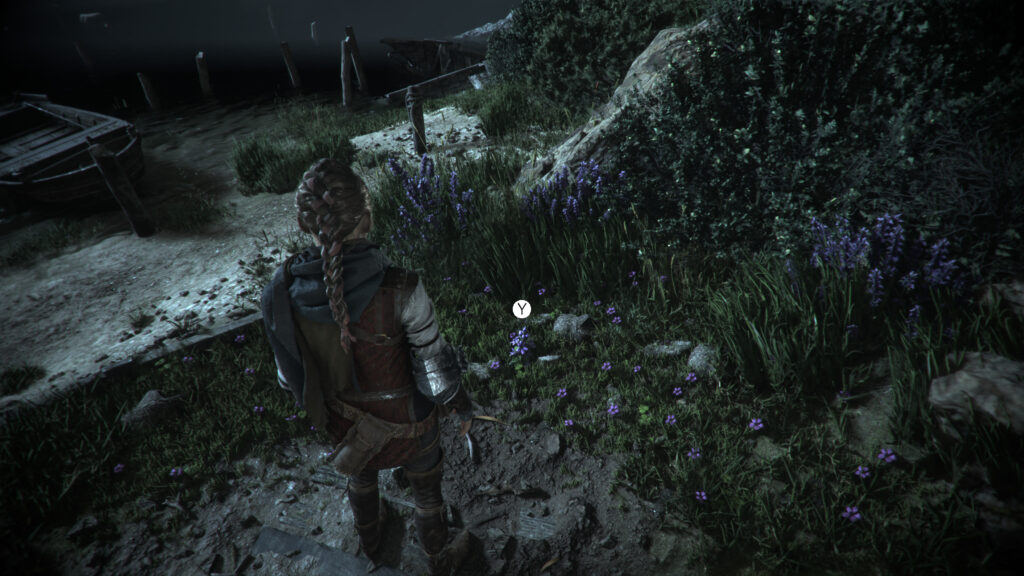
After emerging from the cave filled with rats, you’ll wind up back on the beach. On the left side you’ll find the remains of a ship.
Climb up on the rock ledge to the right of the ship and interact with the point to unlock the souvenir.
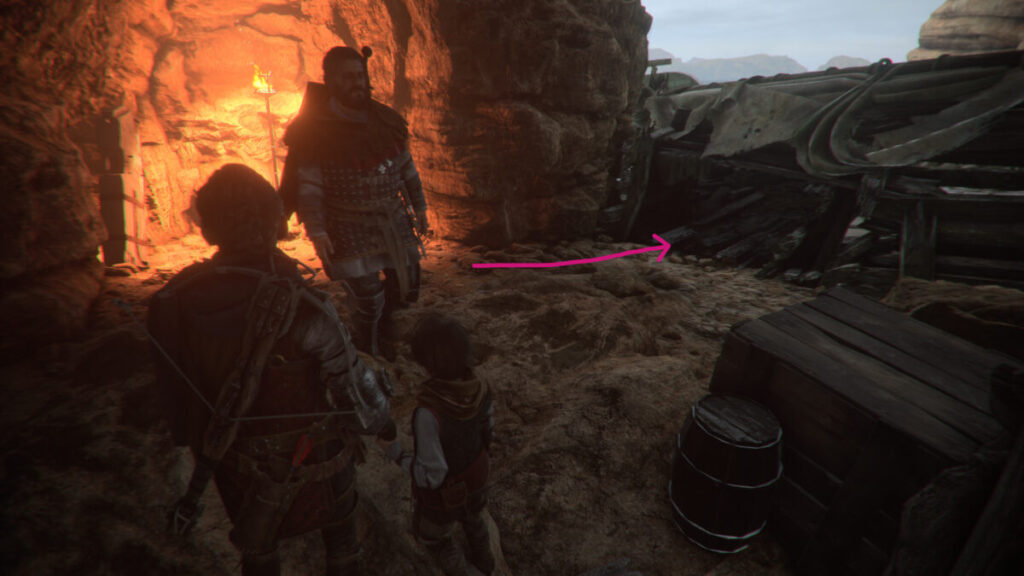
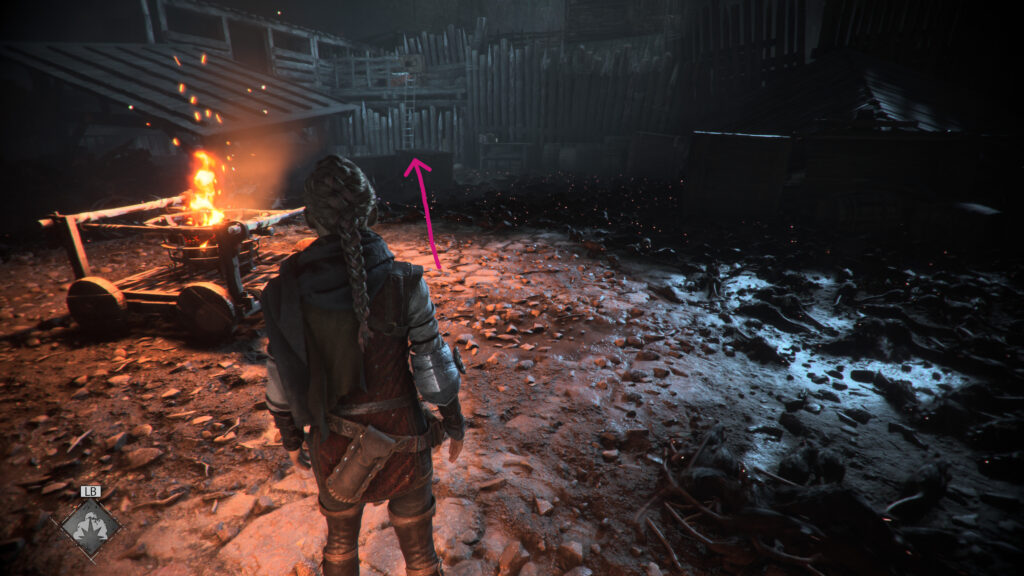
Secret Chest / Tool
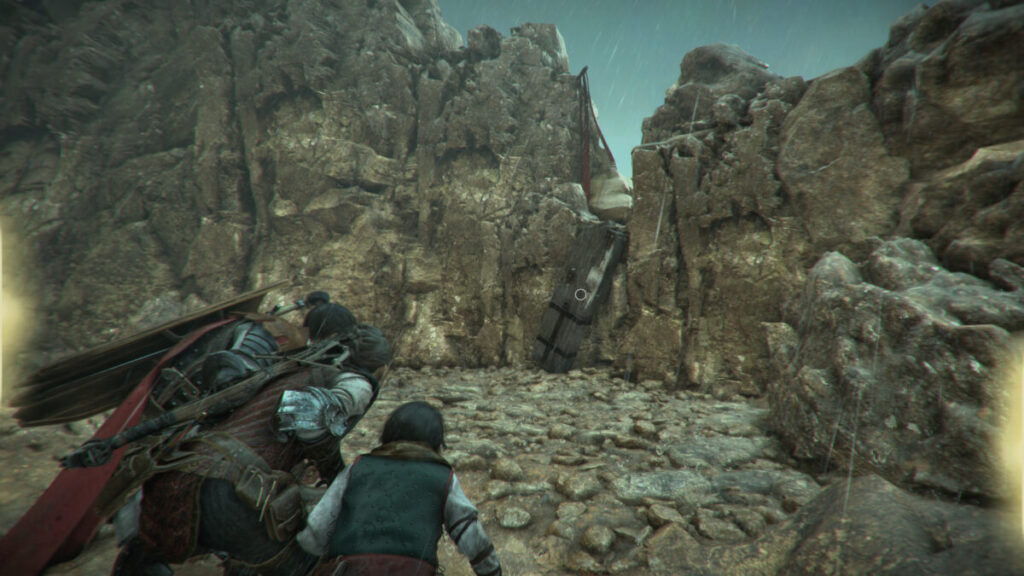
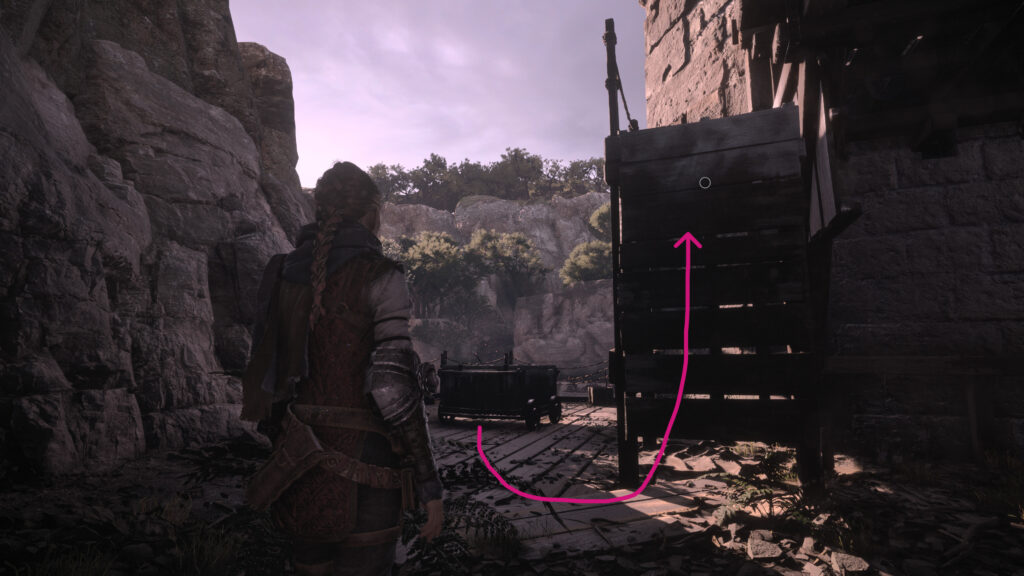
After working your way through the cave with the rats and soldiers, you’ll jump down onto a broken wooden bridge. Head forward a short way to find a wooden board blocking the way forward next to a brazier.
Instead of moving the board, take a right and head through a ruined boat to find the chest. Open it to find a tool!
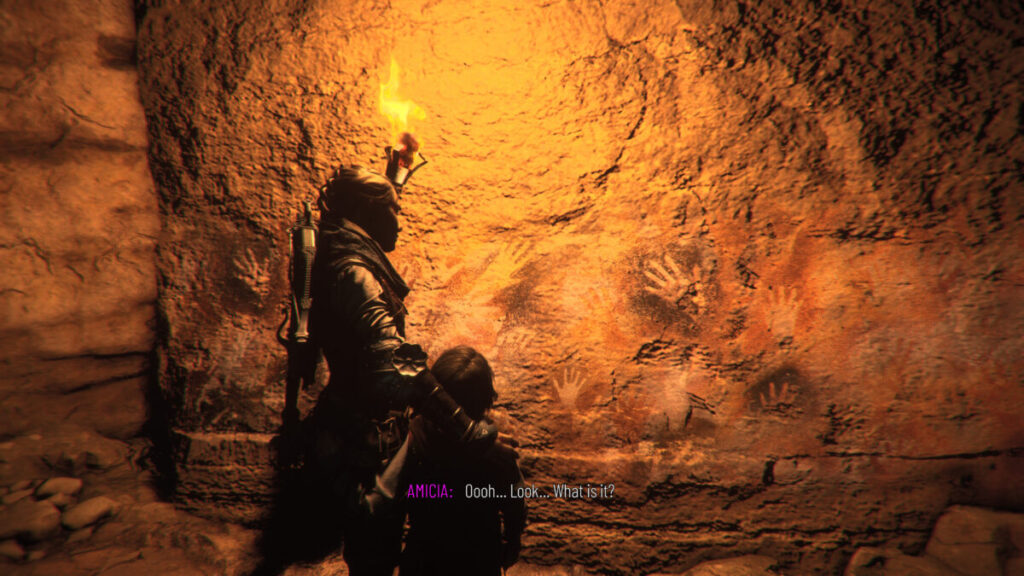
Souvenir: The First Men
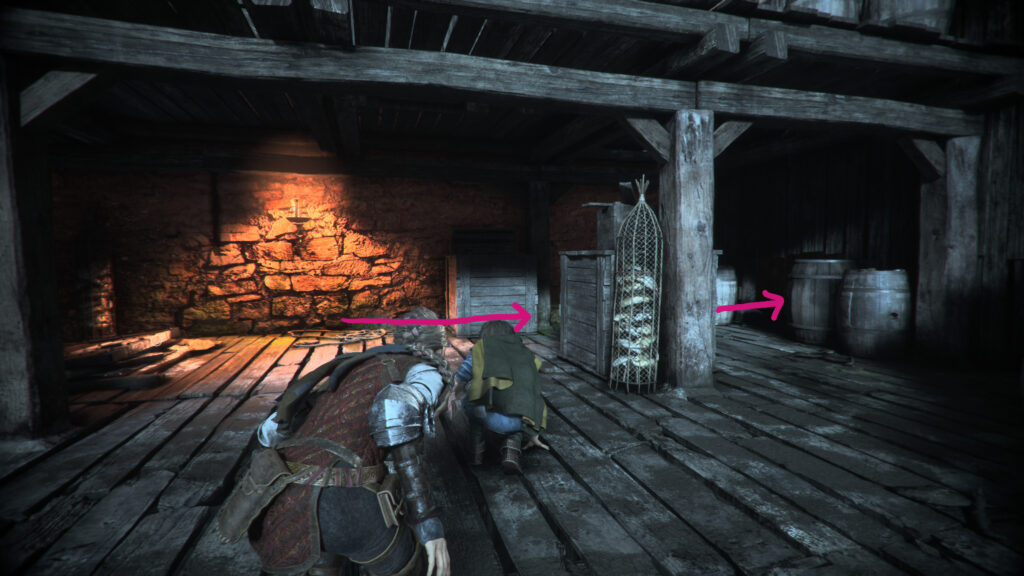
After meeting Sophia, you’ll have to sneak past all the soldiers on the beach heading for her boat. Eventually, you’ll have to move a board and squeeze between two rocks.
Climb up on the ledge to your left and follow the cave to the end.
Interact with the handprints on the wall to receive the souvenir.
Below is a walkthrough for the collectibles found during Chapter VI: Leaving all Behind in A Plague Tale: Requiem. Make sure to always pick up a knife if you see one so you can open the secret chests!
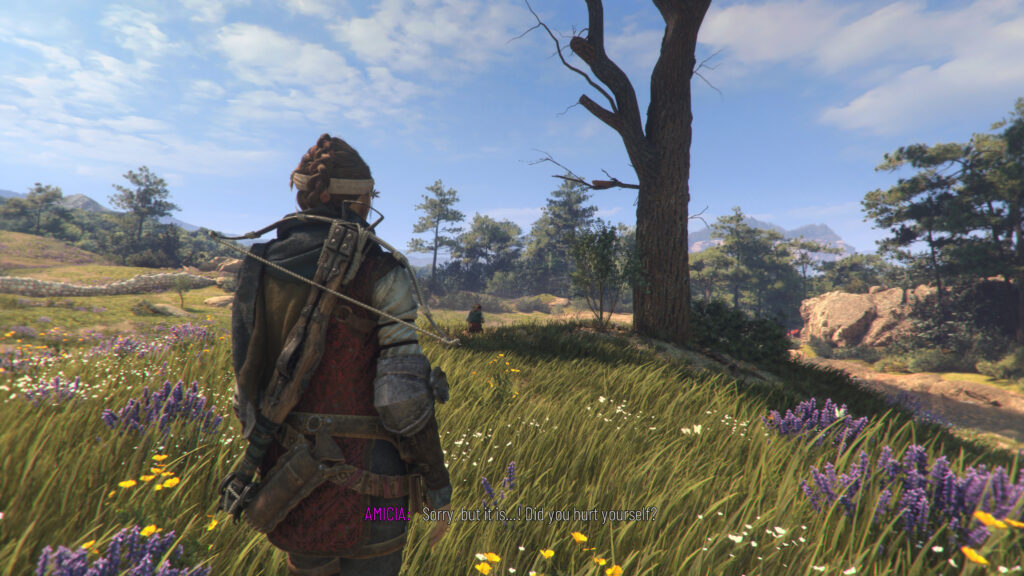
Hugo’s Collection: Jay
When you reach the flowery meadow at the start of the chapter, you’ll race to a tree with Hugo. Approach the tree and interact with Hugo to receive the feather.
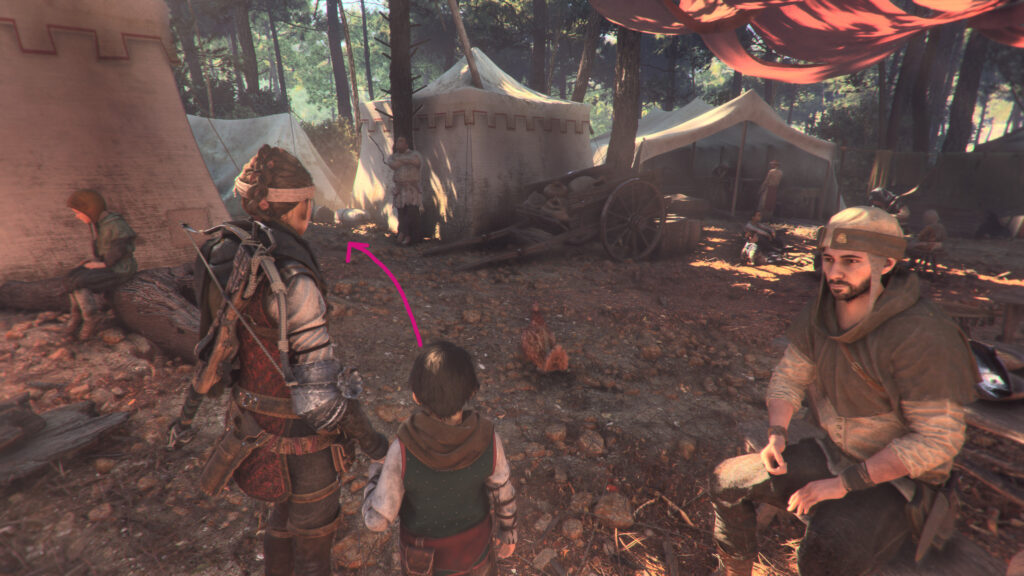
Souvenir: Imagine You’re Flying!
Head to the central area in the camp. Follow the path left just past the campfire then take a left just before the man leaning against a tree.
This will bring you to a trail that you’ll need to follow to the end. Interact with the swing to receive the souvenir.
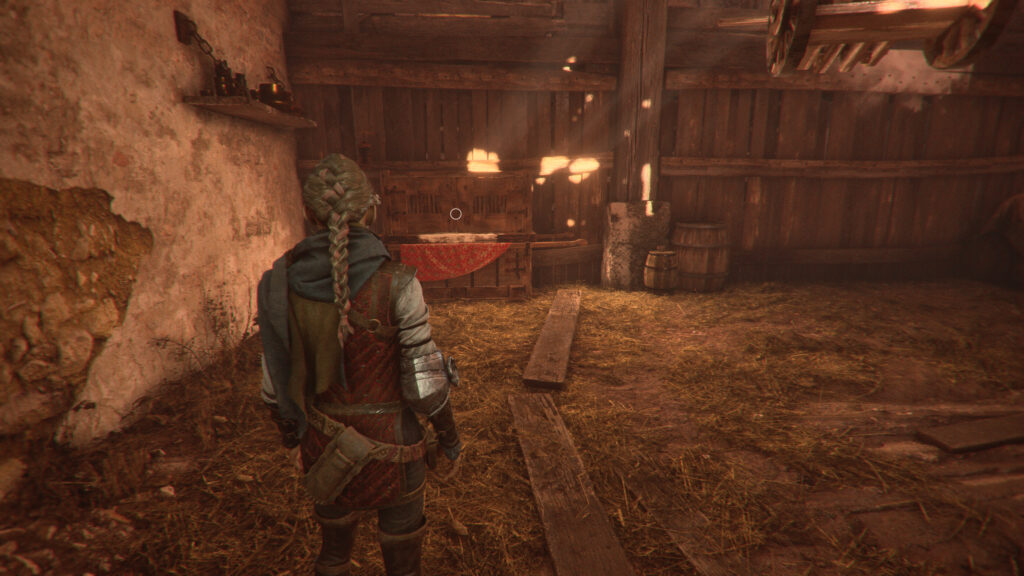
Secret Chest
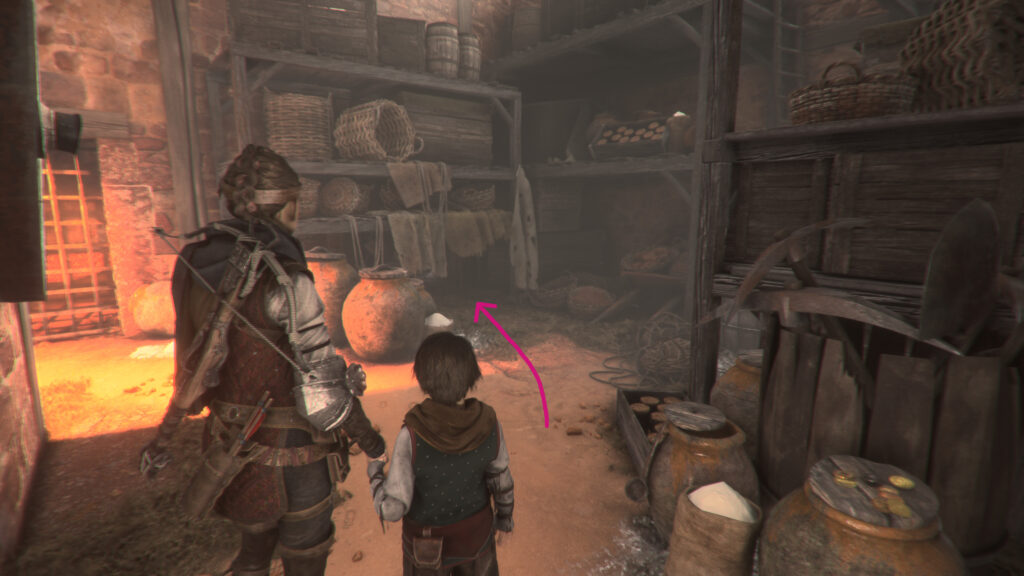
Once you’re inside the church/building, look for a shelf with cloth hanging over the edge then crawl under it to find the secret room containing the chest.
Souvenir: Which colour do you want?
Continue through this building from the above chest. You’ll eventually reach a workbench. Climb up the ladder to find a bunch of fabric.
Jump down the ledge then interact with Hugo to trigger an event where he’ll change your bandage. Afterwards, the souvenir will trigger.
Below is a walkthrough for the collectibles found during Chapter V: In Our Wake in A Plague Tale: Requiem. Make sure to always pick up a knife if you see one so you can open the secret chests!
Souvenir: The Stag’s Roar
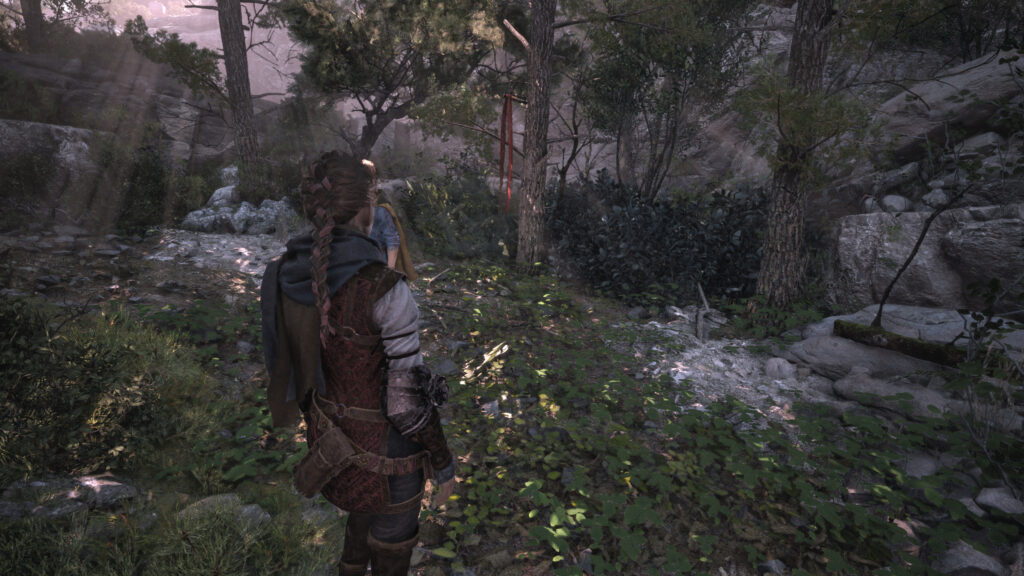
After pushing the boat free from the debris, follow the path into the forest. When you come to the fork in the path, head right.
Follow the path until you find a red ribbon in the tree.
After the event, you’ll automatically receive the souvenir.
Tool
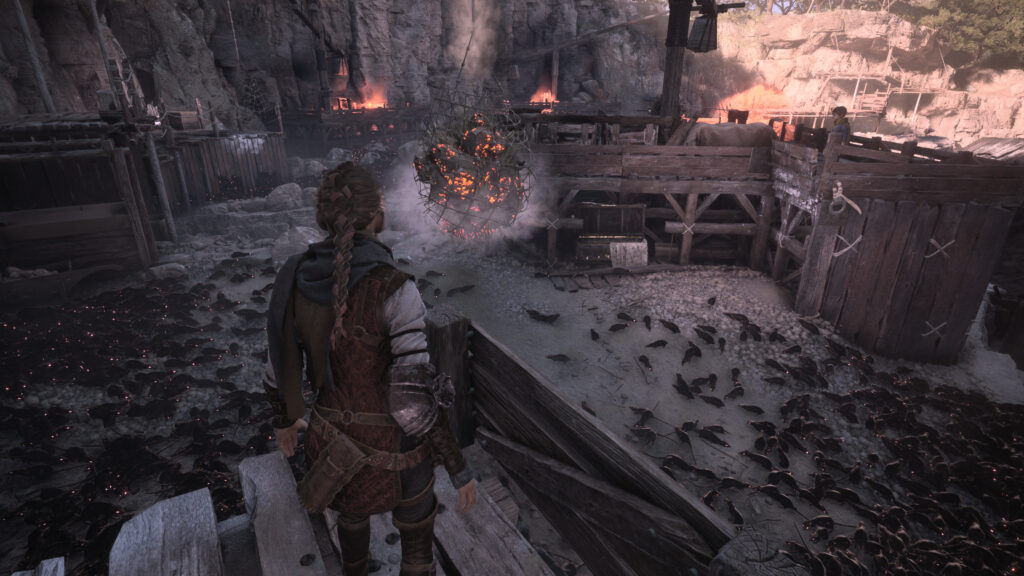
As you try to make your way to the ship, you’ll come to an area surrounded by rats where you’ll have to use multiple cranes to maneuver. The tool can be found in a chest under the central platform with the crane that spins all the way around it.
Souvenir: Huuugooo!
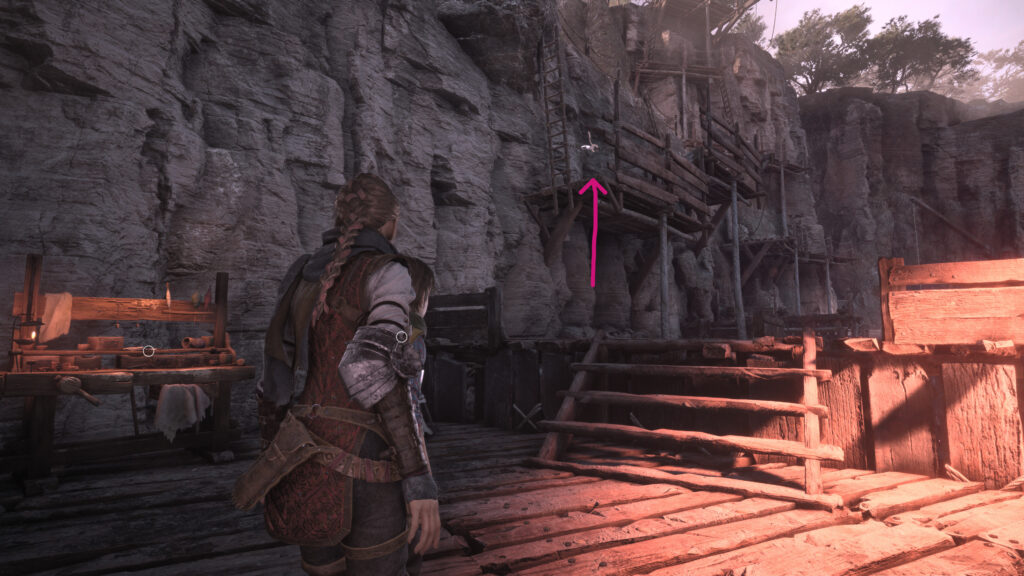
After working your way through the crane puzzle, you’ll come to a workbench just before the path leading to the dock. Look up to find a ladder behind held by a chain.
Hit the chain with your slingshot, causing it to fall. Climb on up and interact with Lucas to automatically receive the souvenir.
Secret Chest / Tool
After you cross the water using a wooden raft and destroy the counterweight in the building, the chain will snap and you’ll have to look for another way to return to the ship. Exit this building then swing around the back to find a fence you can squeeze between.
Do so then climb up the ladder to find this secret chest! Open it to find a tool!
Hugo’s Collection: Anemone
After finding the above chest, continue forward a short way to reach a bridge. Under it you’ll find a cart. Move the cart under the ledge behind the cart then use the cart to climb up.
Use your slingshot to knock down a board held by a chain.
Follow the path climbing up the slide of a cliff to find the flower.
Below is a walkthrough for the collectibles found during Chapter IV: Protector’s Duty in A Plague Tale: Requiem. Make sure to always pick up a knife if you see one so you can open the secret chests!
Hugo’s Collection – Gentian
When you reach the docks with all the boats, the path will fork. Head right to find the flower on the ground.
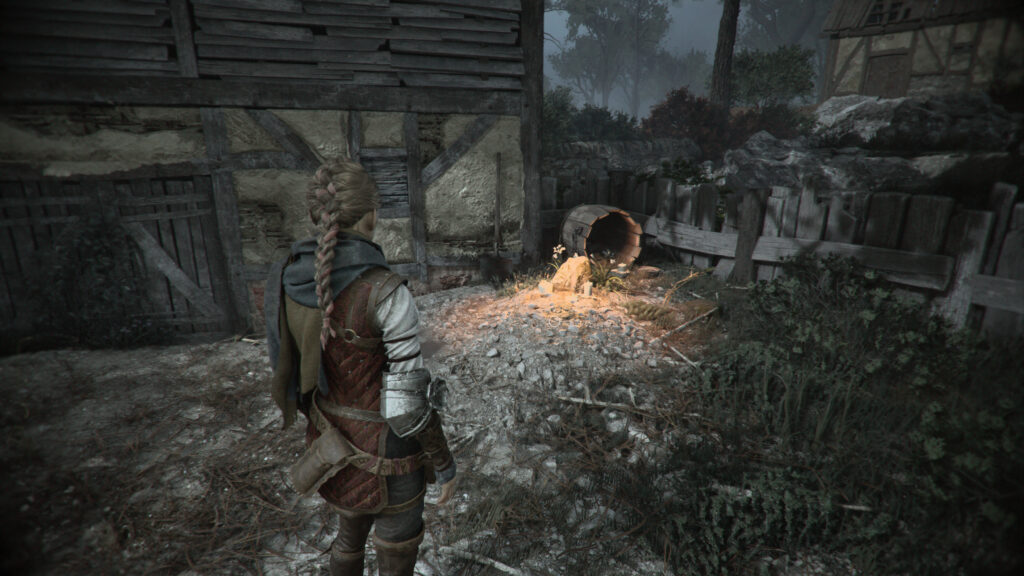
Souvenir: Silk Treasure
As you sneak through the docks, you’ll slip between 2 crates and climb up a ladder. Keep following the path until you reach a hatch in the floor near a lit scone. DO NOT go through this door. Instead, head right and through the opening between two barrels to reach a secret room.
Use the cart in this room to reach a higher ledge. Climb up to the ledge to find a souvenir on the ground.
Secret Chest / Tool
When you have to push the brazier on the cart, push it towards the ladder leading against a wall.
Climb up the ladder to reach a secret chest! Open it to receive a tool.
Tool
In the tar workshop, before exiting the building, head up the ladder where Lucas was at. Follow the path to the other side of the moving platform with the alcohol barrel. On the other side, loot the chest to receive the tool.
Souvenir: A Grain of Sand
After you exit the tar workshop, cross the wooden boards.
This will bring you to a doorway on the left with a brazier next to it. Look to the right to find a wooden board held up with a chain.
Hit the chain with your slingshot causing it to break. Follow the path along the dock to find the souvenir at the end.
Below is a walkthrough for the collectibles found during Chapter III: A Burden of Blood in A Plague Tale: Requiem.
Tool
Before raising the gate to leave the city, loot this tool from a chest up the stairs near the crank.
Souvenir: A Grave
After you exit the city, follow the path down to reach a forge. Across from the forge will be a small fenced in area. Follow along the fence to the right of the gate.
This will give you access to hit the lock on the gate with your slingshot. Head inside and interact with the grave next to the house to collect the souvenir.
Hugo’s Collection: Chamomile
When you reach the Herbalist’s garden, head to the back left and look for the tree with a wooden ladder leaning against it.
The flower can be found hanging from the branch to the left of the ladder. You’ll need to hit the lock holding the container the flower is in to cause it to drop.
Secret Chest / Tool
This secret chest is obtained in the depot where you retrieve your sling. It is directly across from where you found your sling and requires 1 knife to open.
This chest will contain a tool!
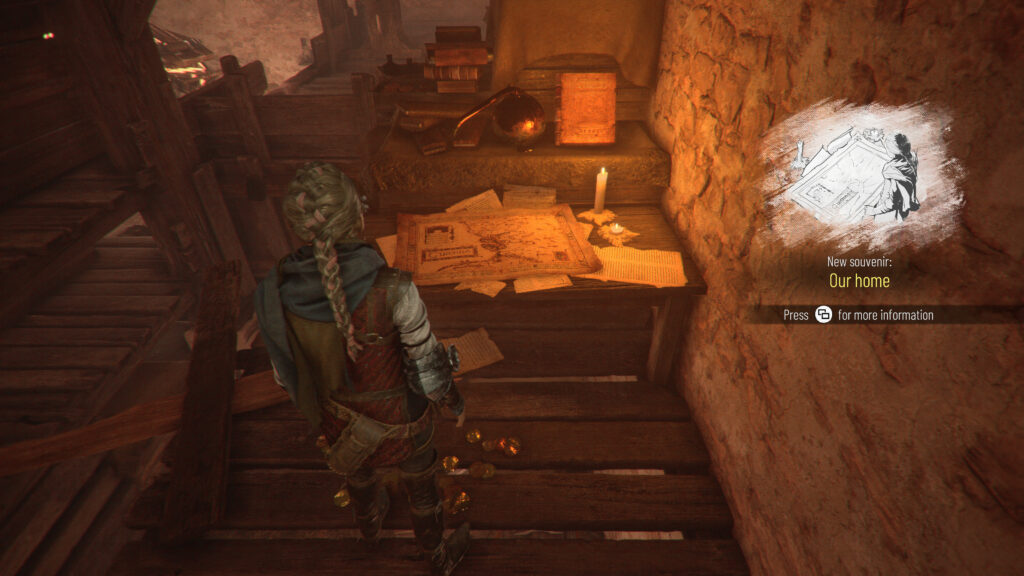
Souvenir: Our Home
After getting the slingshot, climb up the ladder in the depot to reach the second level. Follow the walkway left to come across a board you can knock down with your slingshot. Cross it then examine the table to find the souvenir.
Below is a walkthrough for the collectibles found during Chapter II: Newcomer in A Plague Tale: Requiem.
Souvenir: Best Player
During the Walk to the House objective, head through the town, passing the crier, to make it to the market. After exiting the pavilion crowded with merchants, Hugo will run up to a flower stall. Down the path to the left of the flower stall you’ll see a fish stall. At the fish stall, take a right and follow the path to the end to find a game stall. Win the game to find the Souvenir: Best Player
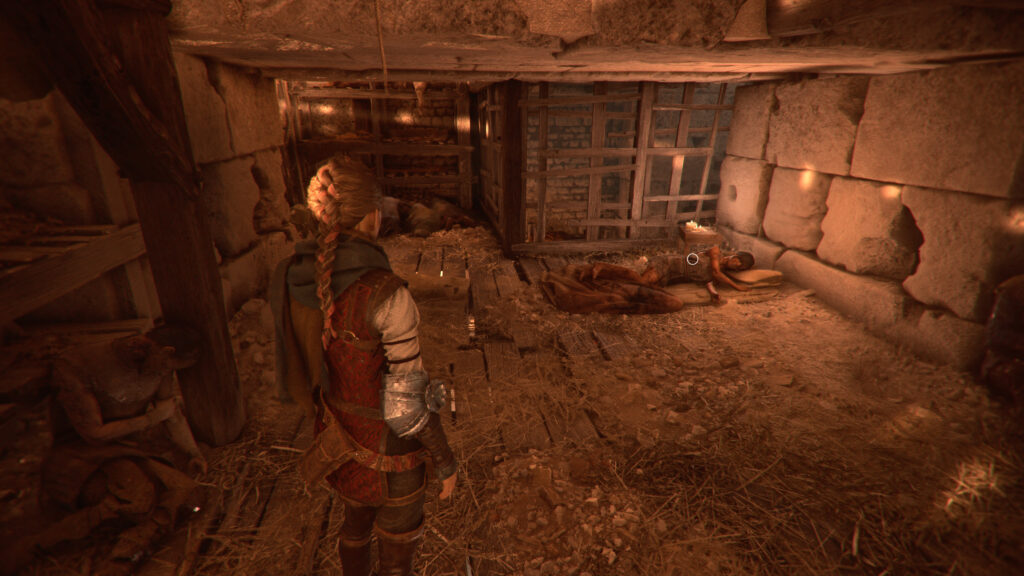
Souvenir: Be at Peace
During the Follow the Order’s symbols objective, you’ll reach a large open outdoor area. A quick event where an archer shoots a dead body and another guard comments about it will trigger. You’ll need to sneak through this area and enter a doorway with a symbol above it just past the archer. Head through the building until you reach a set of stairs. Head up the stairs and take the right path.
Follow it to the end to find a woman still alive laying on a bed on the ground.
Interact with her to receive the Souvenir: Be at Peace.
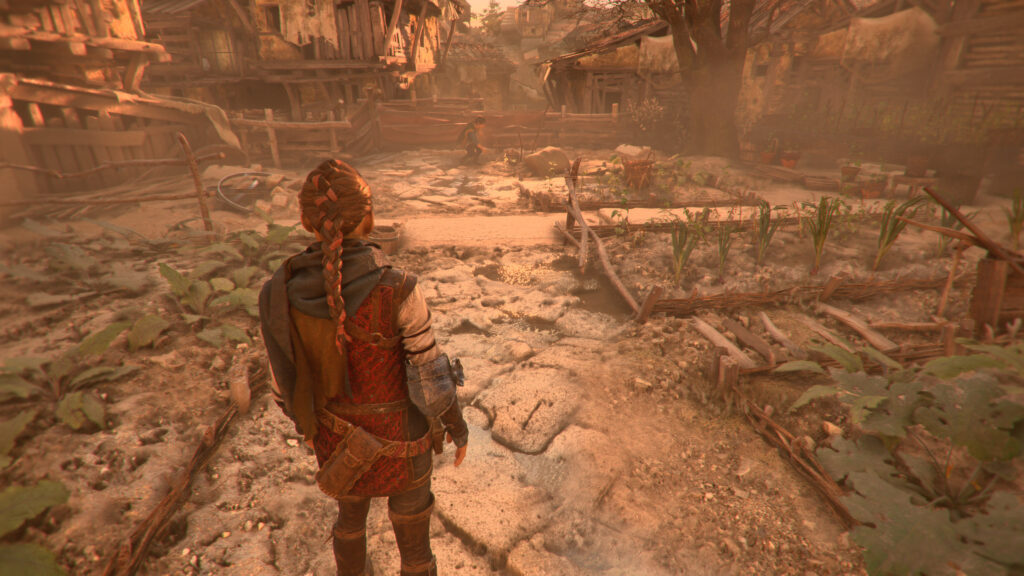
Hugo’s Collection: Arrowhead
After exiting the underground arena, your objective will update to Reach the South Tower. Follow the path a short way to reach a vegetable garden. The garden will be under the tree. Lucas will bend down and point it out.
This site uses cookies. By continuing to use this website, you are giving consent to cookies being used. For more information on cookies, view our Privacy Policy.OkPrivacy Policy