Xenoblade Chronicles 3 Walkthroughs Guides
Guides

XC3 Future Redeemed – Bobobi’s Bad Bad Day

by NightlyGamingBinge in

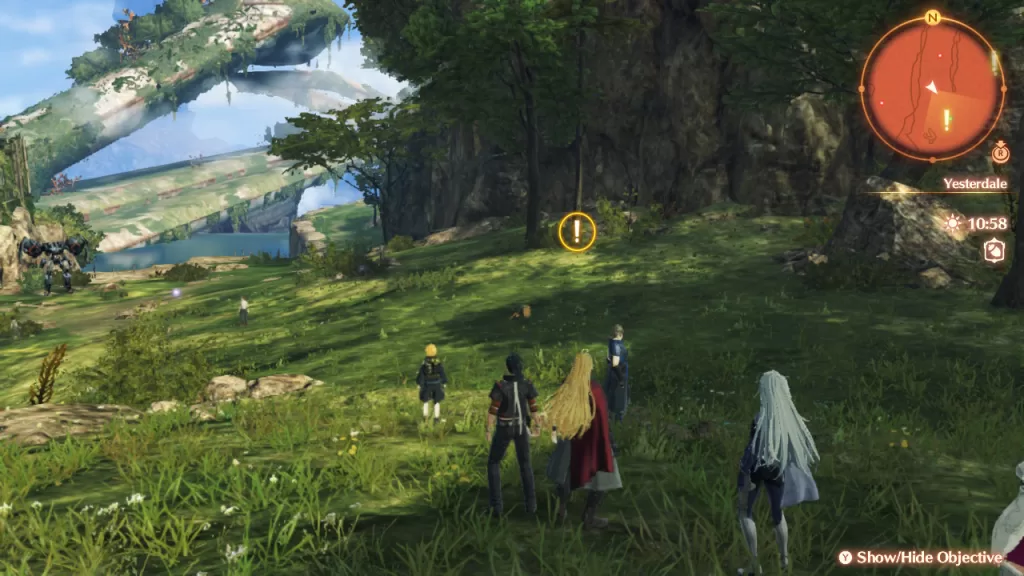
To obtain the Bobobi’s Bad, Bad Day standard quest in Xenoblade Chronicles 3 Future Redeemed, approach Bobobi in the southern part of Tephra Hill in Yesterdale just west of the Colony 9, Main Entrance landmark. For this quest, Bobobi will need your help searching for his lifesavings.

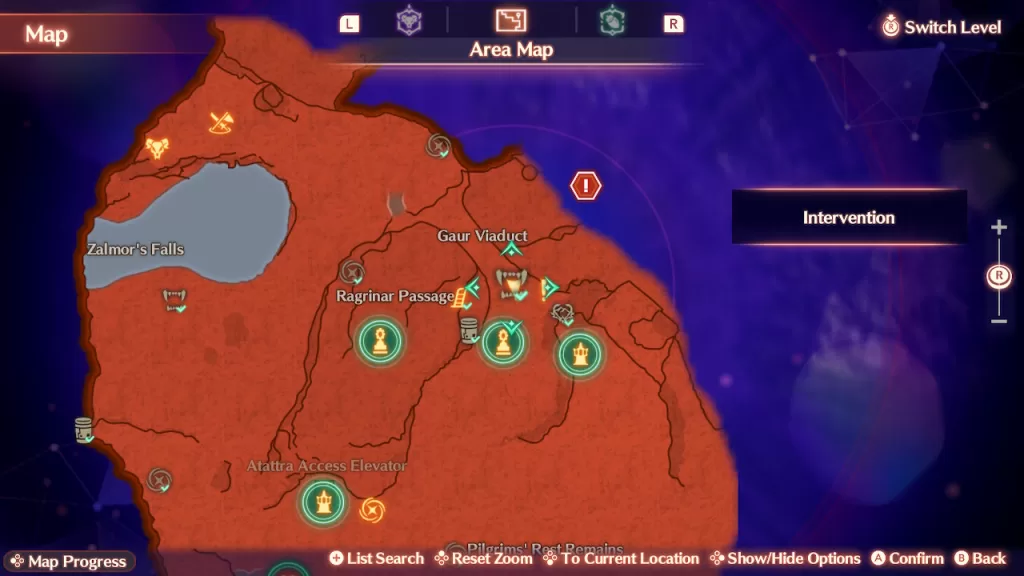
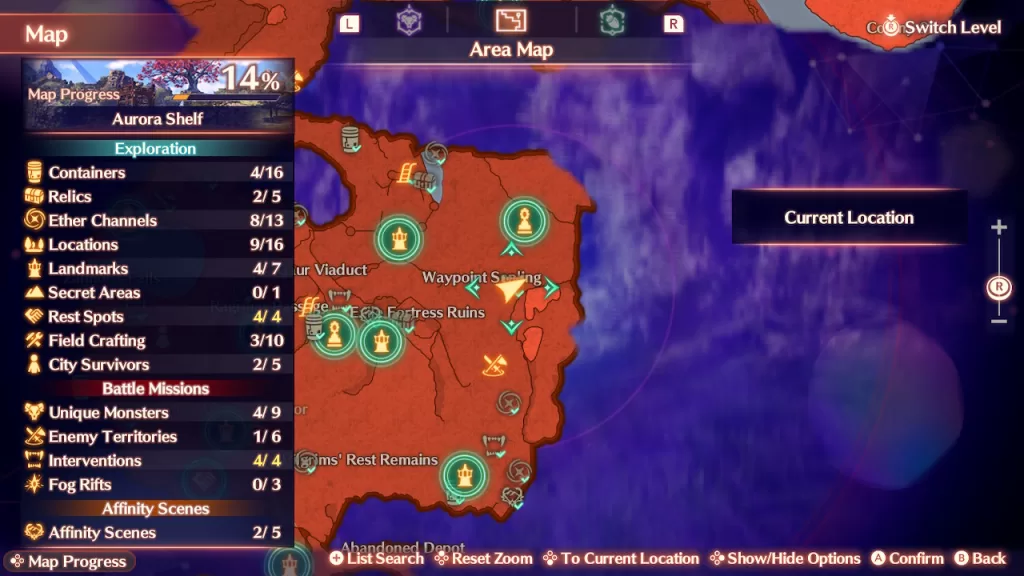
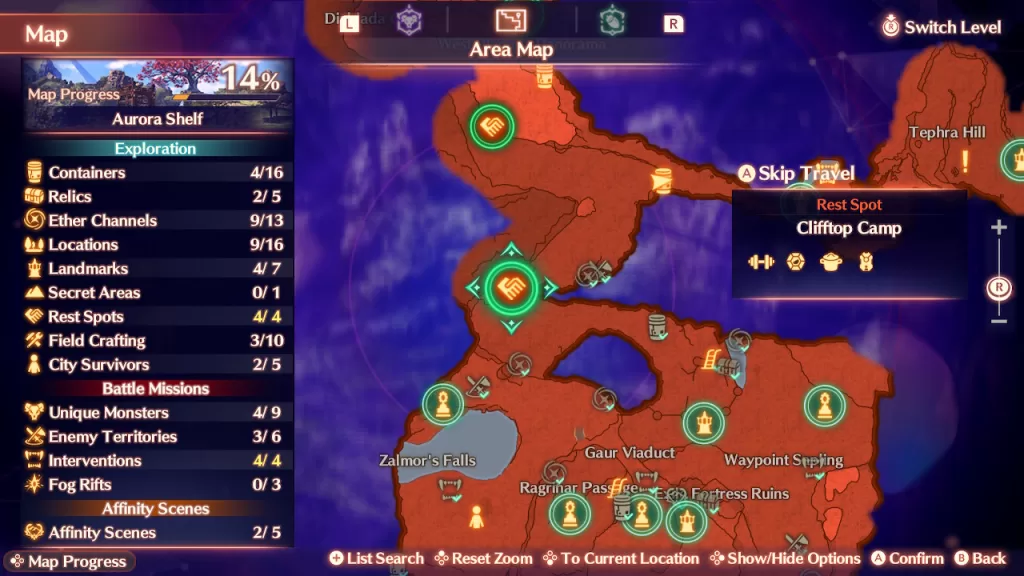
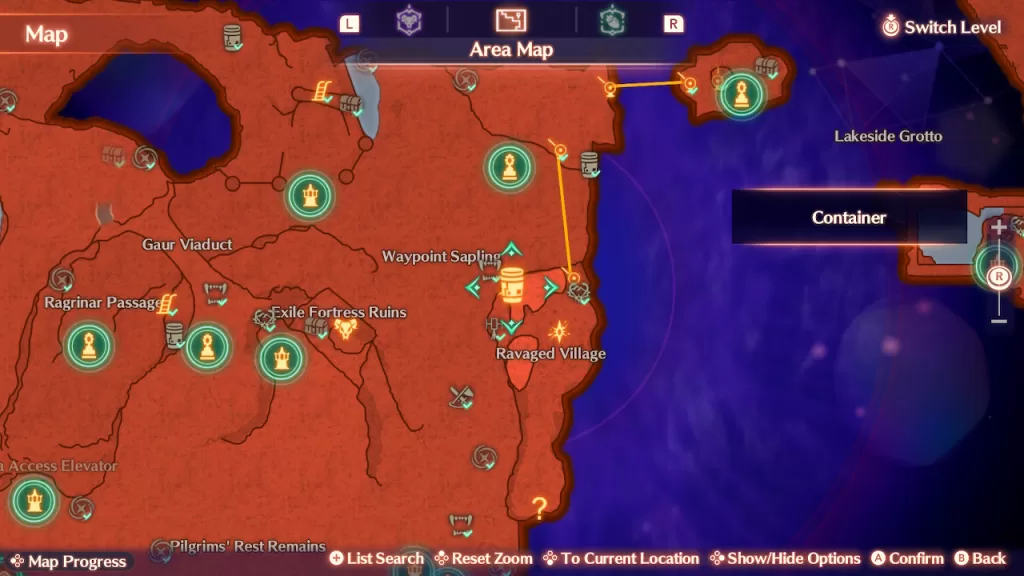
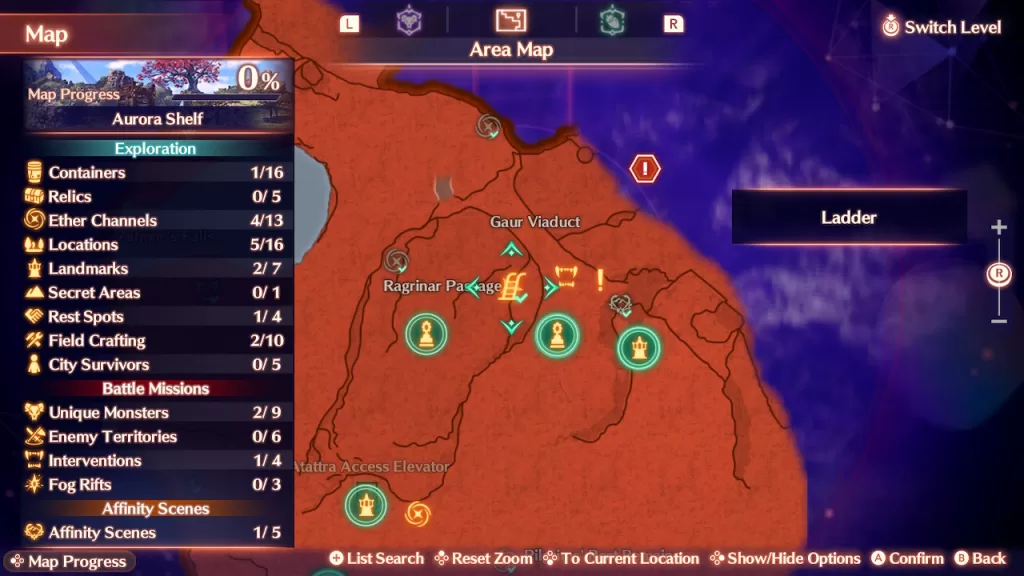
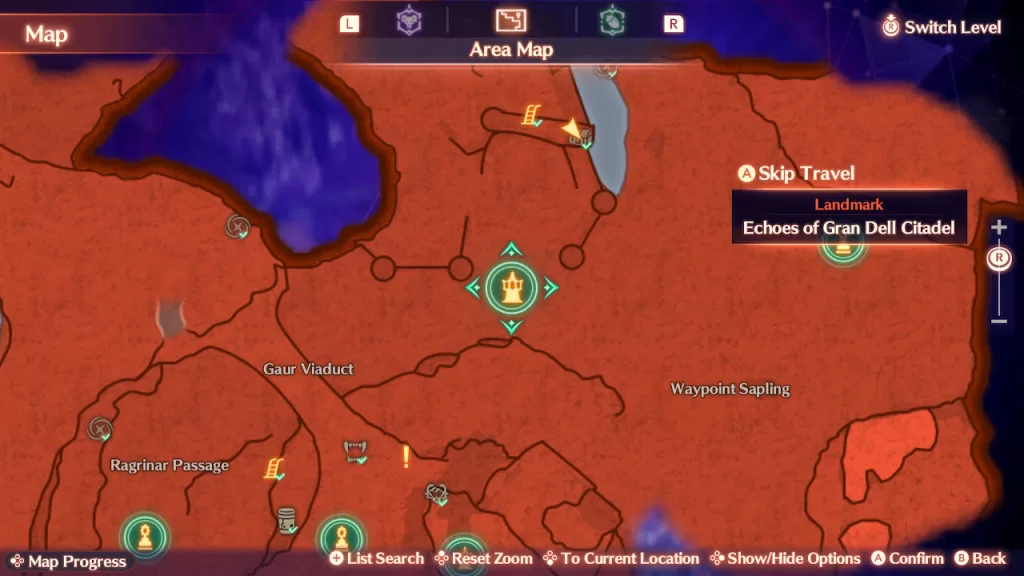
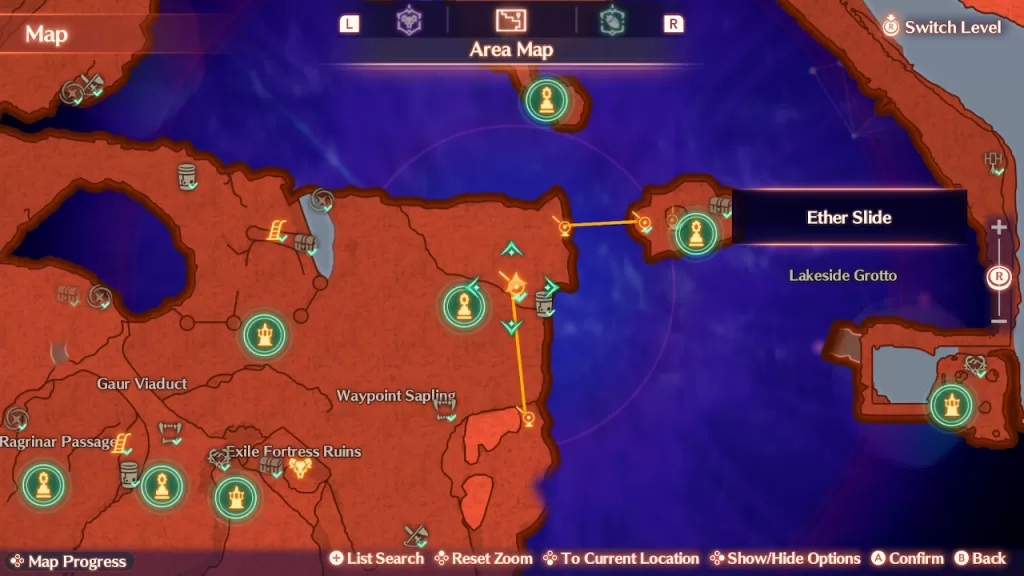
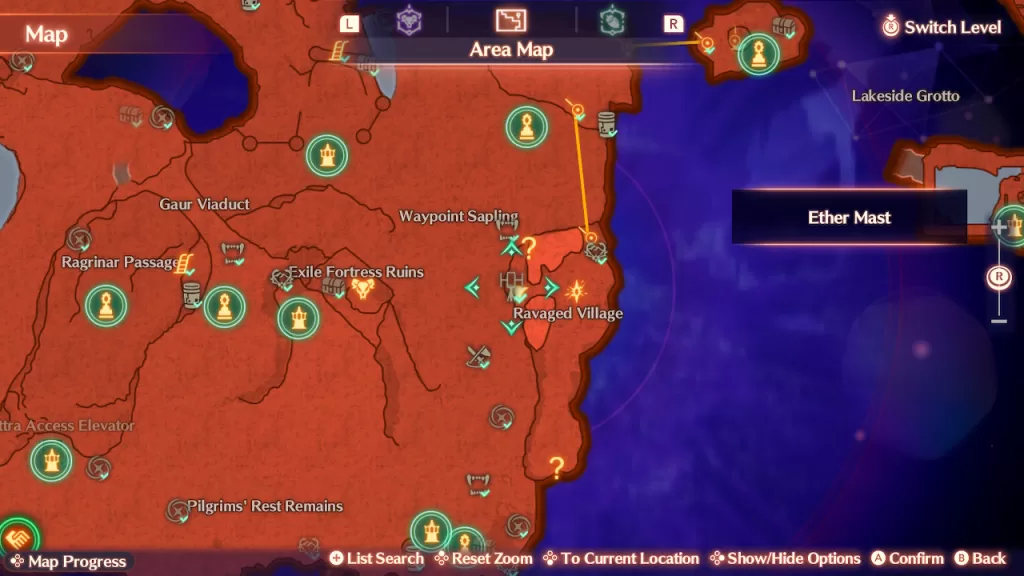
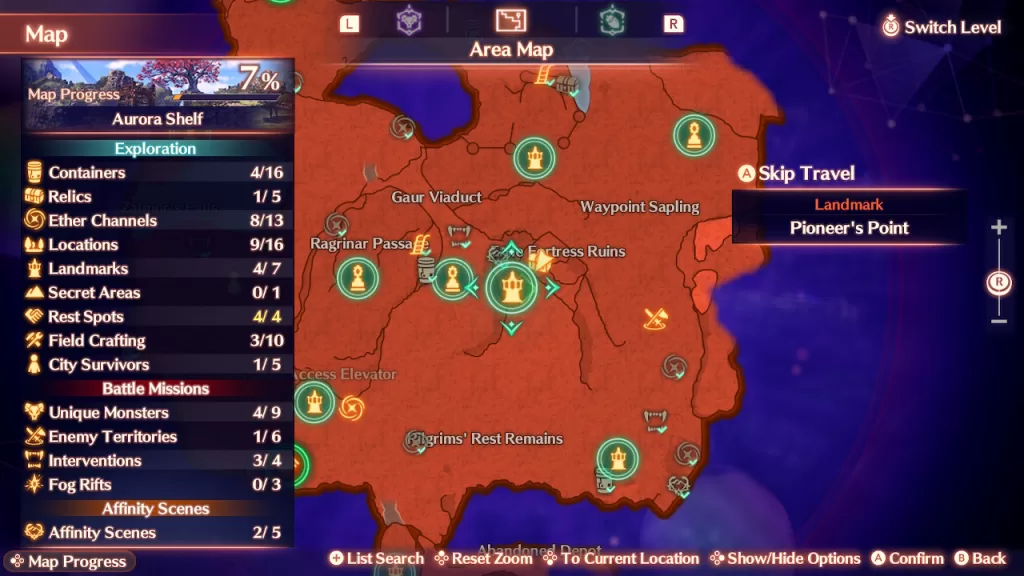
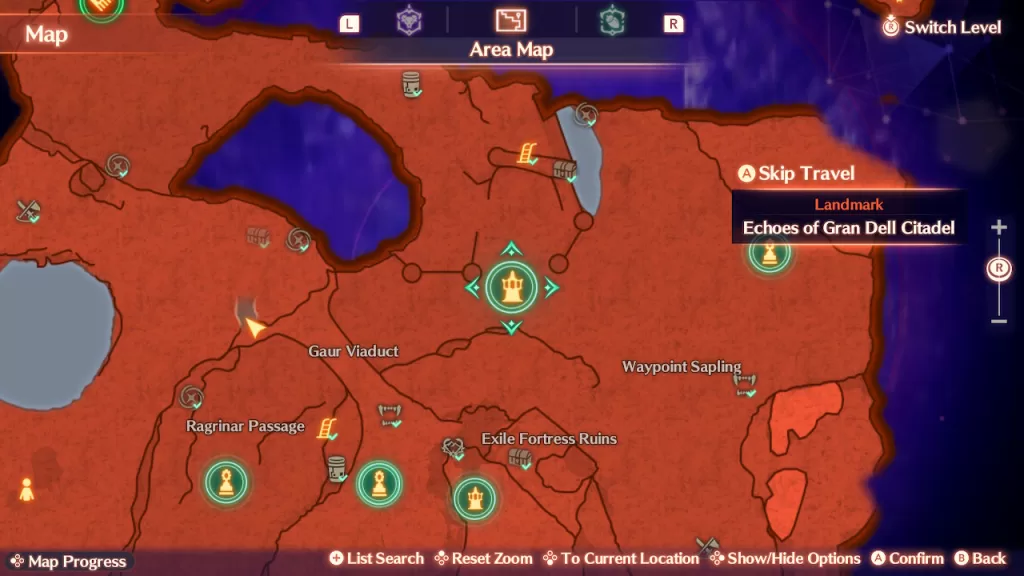
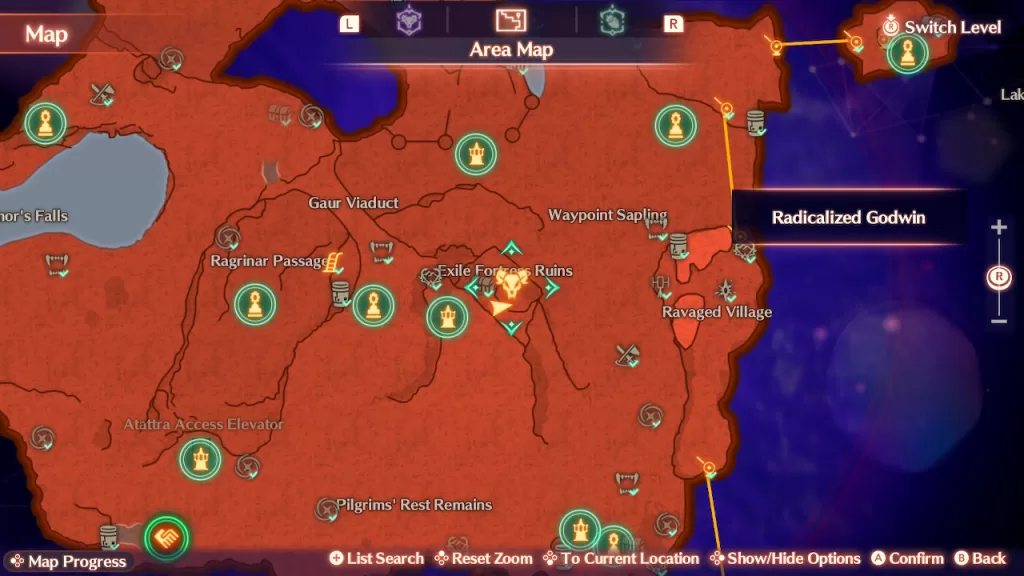
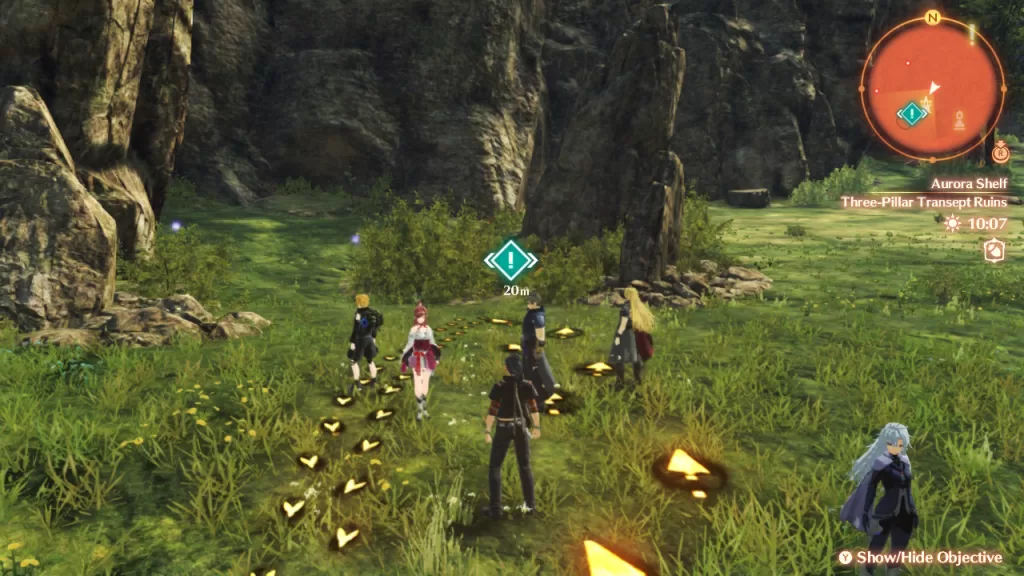
To begin, make your way to the central part of Waypoint Sapling in Aurora Shelf.

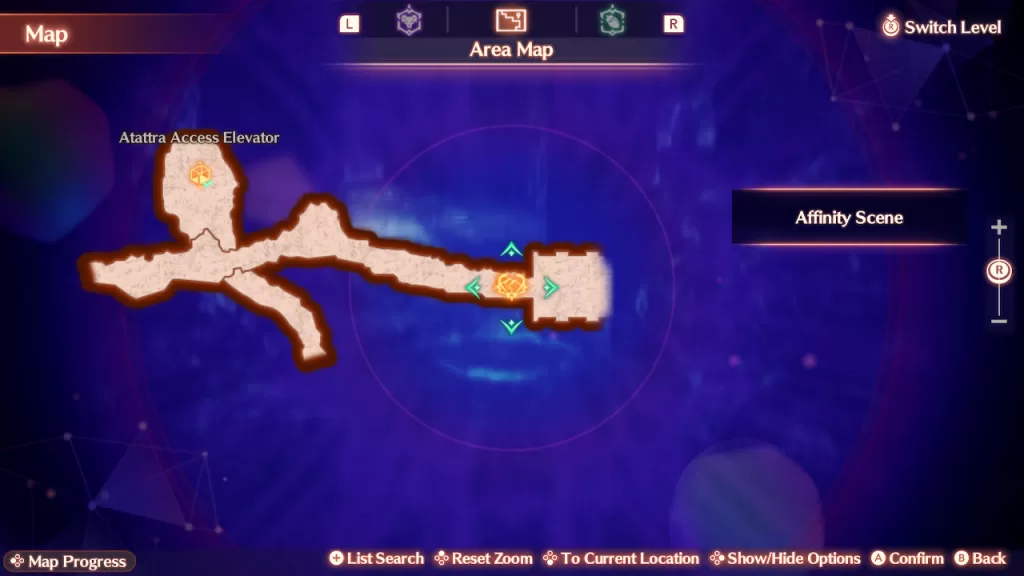
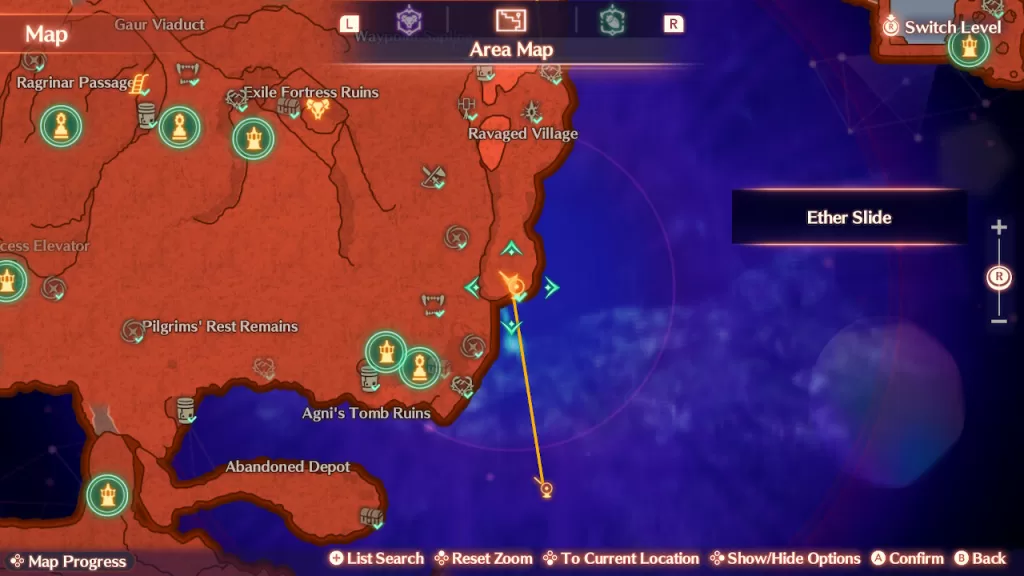
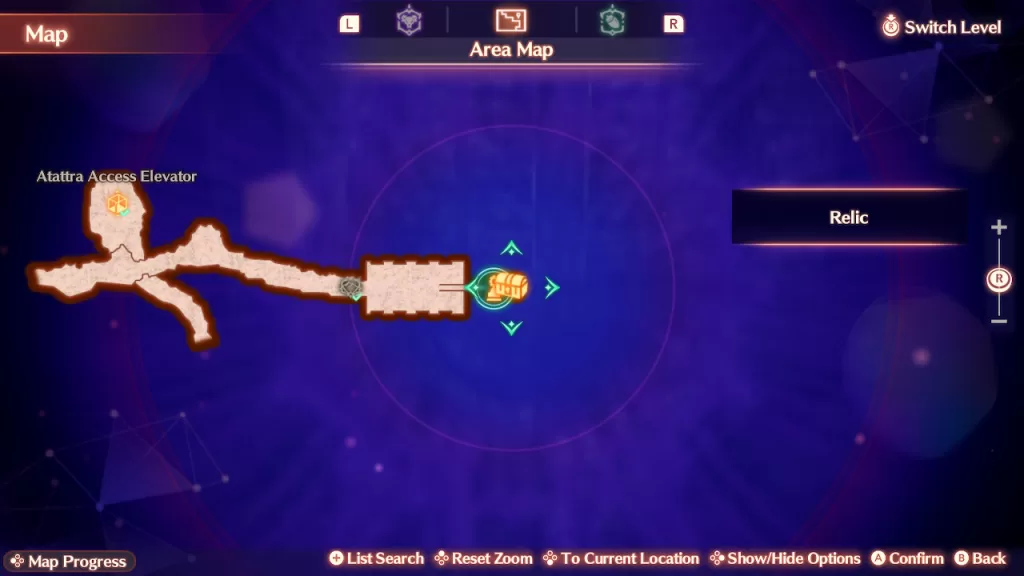
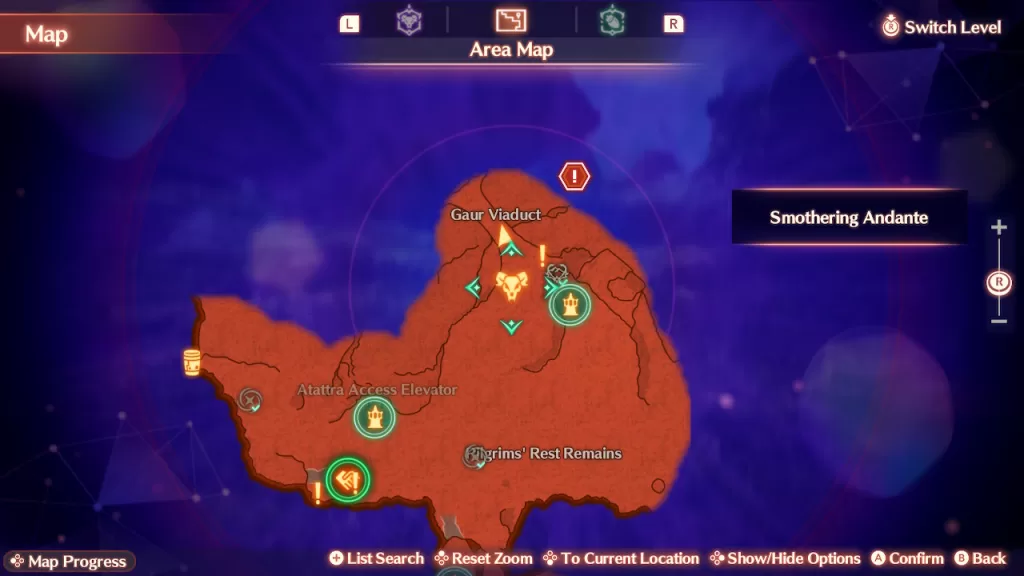
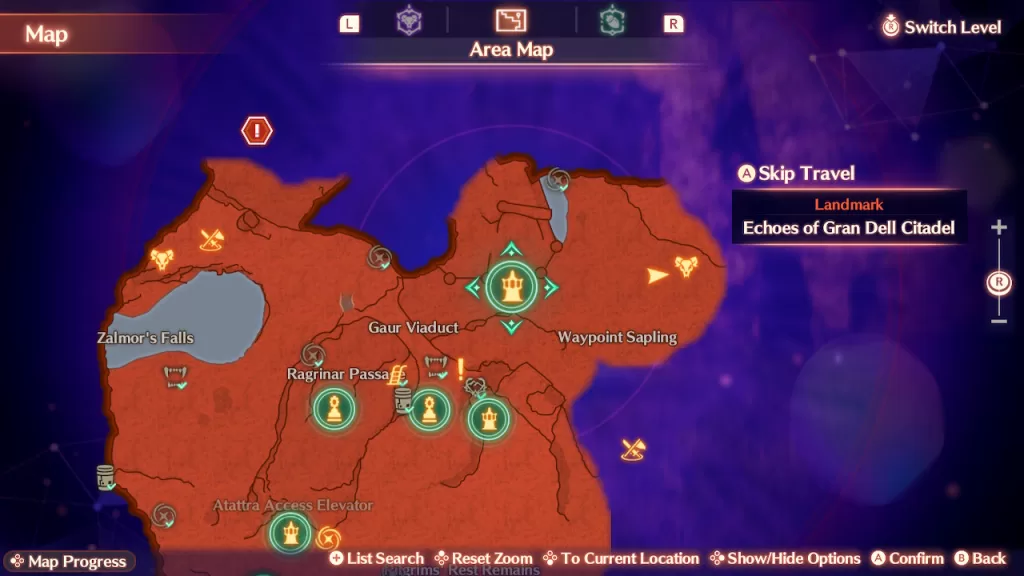
As you approach the objective marker, a cutscene will trigger where Bobobi finds the spot he was attacked. While looking around, we’ll spot some tracks. Follow them to a hole in the ground and hop in!

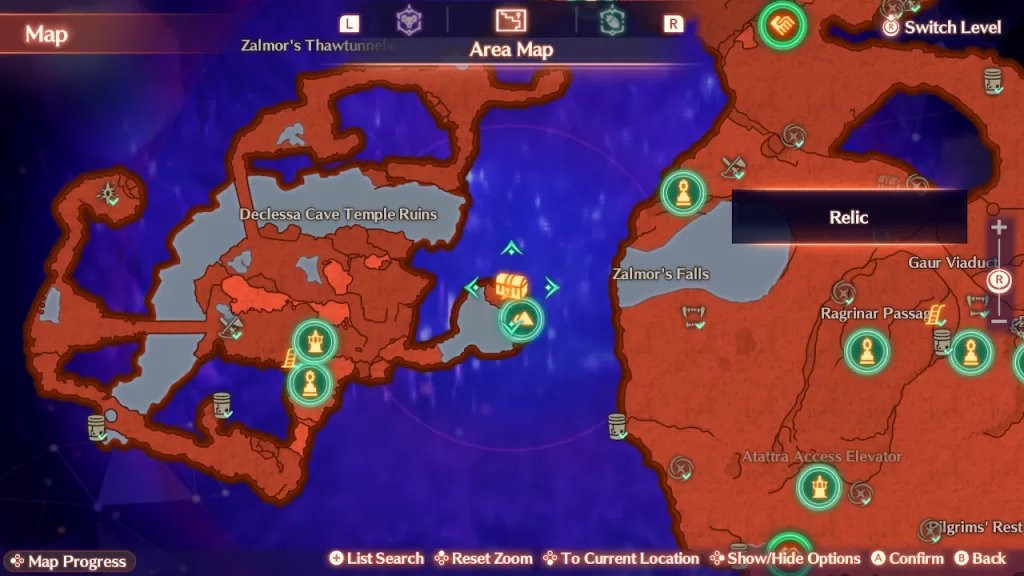
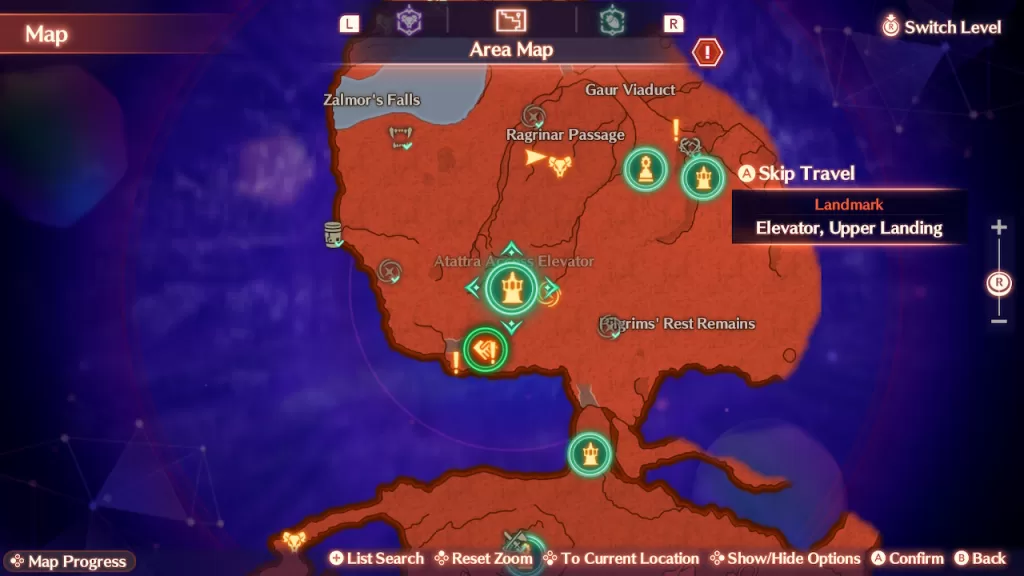
You’ll be in the Agni’s Tomb Ruins! Head forward a short way to encounter the troublemakers. Take the 4 Tirkins down! Afterwards, interact with the Broken-down Levnis to have Nikol take a look at it to see what needs repairing. You’ll need the following materials to get you up to 100% progress:

  • Blossom Belt (+17%)
  • Fluid Cranker (+25%)
  • Magnet Clay (+21%)
  • Twin Generators (+12%)
  • Flake Crystal (+9%)
  • Wool Rock (+5%)
  • Rabbit Diode (+13%)
  • Simmertree (+9%)

If you need help finding any of these materials, click here for our materials guide! Once you’ve gathered enough materials, interact with the machine to fix it.

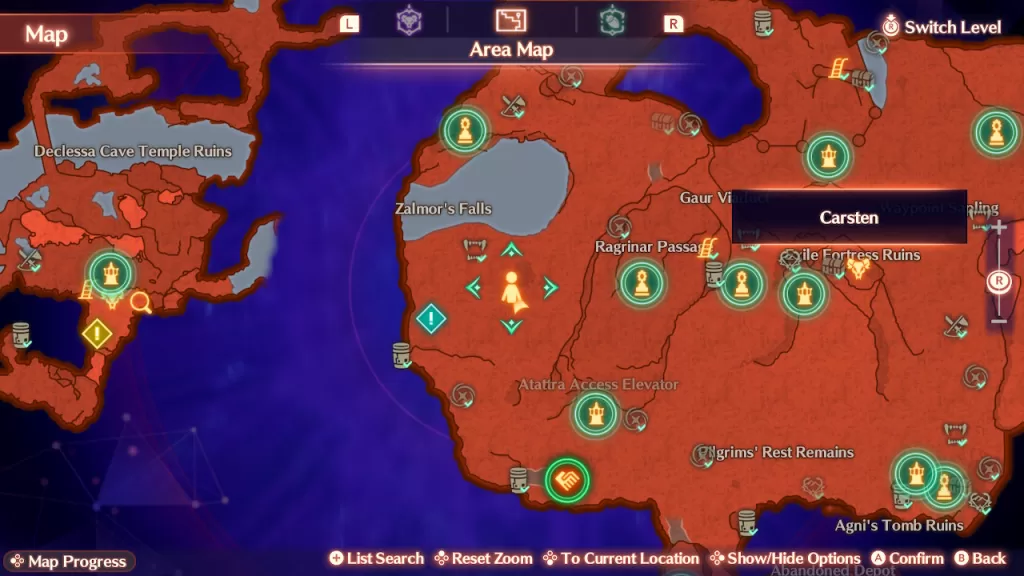
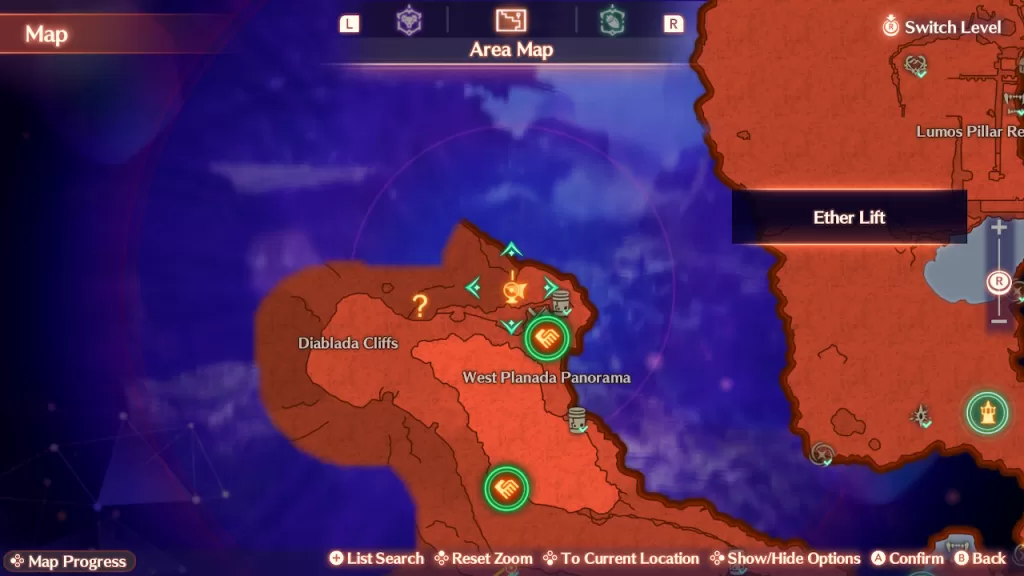
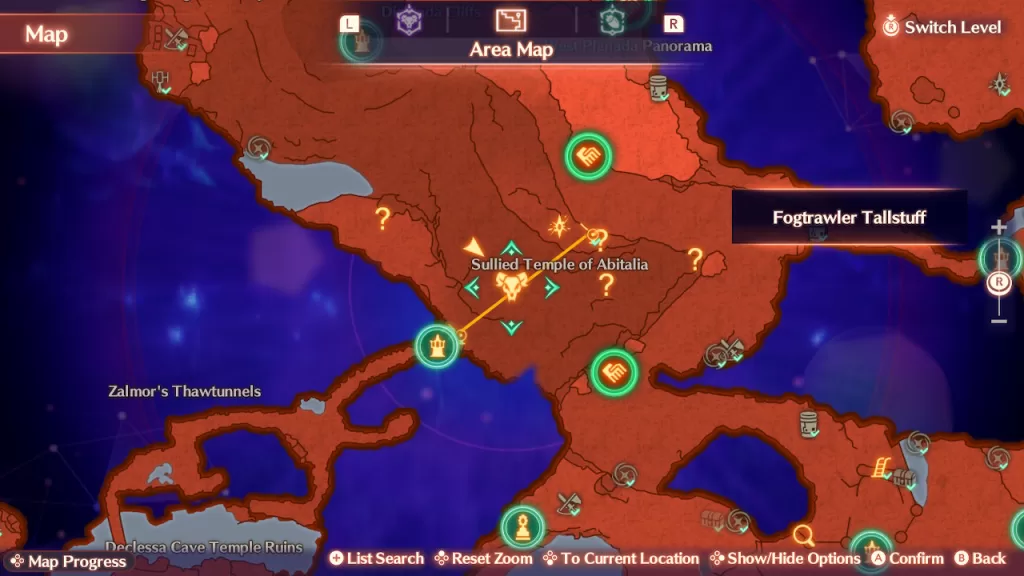
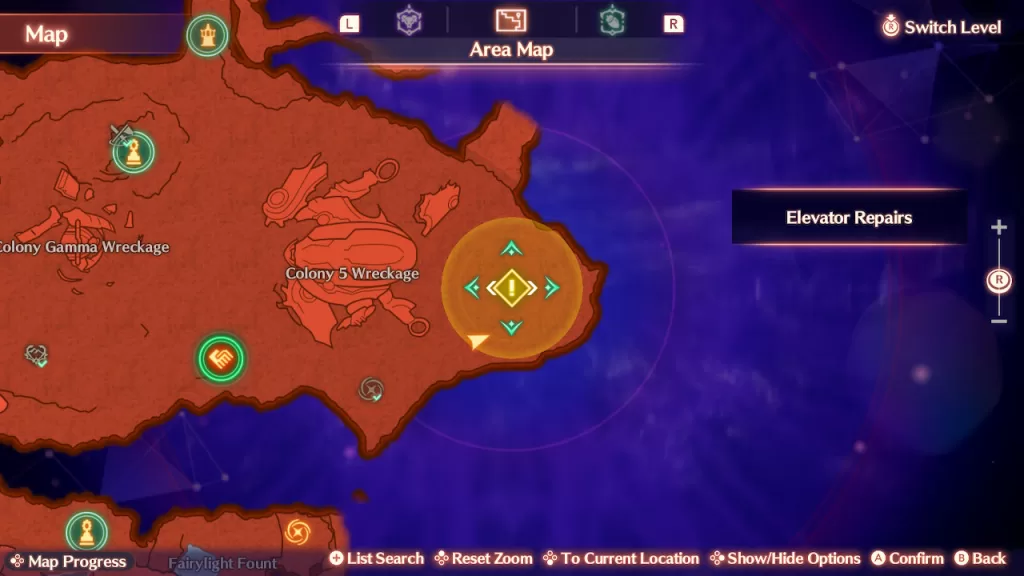
Next, you’ll need to travel to the Storage Area in the northwestern corner of Colony 9. As you approach the area, a cutscene will trigger and Bobobi’s Shoppe will open! You’ll try to offer him money, however, Bobobi explains that he only trades in Nopon Medal. If you exchange your Nopon Medals, Bobobi will give you extravagant prizes!

Also, you’ll automatically accept the Nopon Medals Needed standard quest and Bobobi’s Bad, Bad Day quest will complete. As a reward, you’ll receive 1540 EXP, 1210 Gold, Unicorn Scarf and Black Belt. For more guides on Xenoblade Chronicles 3 Future Redeemed, click here!

Xenoblade Chronicles 3 Walkthroughs Guides
Guides

XC3 Future Redeemed – Instructor Panacea

by NightlyGamingBinge in

To obtain the Instructor Panacea standard quest in Xenoblade Chronicles 3 Future Redeemed, approach Panacea who is on the northern side of the Command Center in Colony 9. For this quest, speak with Janus in the Command Center near the request board. You’ll then need to begin the quiz.

QuestionAnswer
What is affected by Dexterity?Attack accuracy
What initiates a Unity Combo?Use Special on a launched foe
Two hits with 50% Crit. Rate gives…?75% chance for at least one crit
Which isn’t an enemy type?Tirkin
Who can stop a foe’s intiative Art?Knockback

Once you’ve finished the quiz, make your way south of Colony 9 to the Outlook Park landmark.

Upon your arrival, a cutscene will trigger followed by a battle. Defeat the 6 members of the training squad to complete the quest. As a reward, you’ll receive 770 EXP, 910 Gold, 2 Bladestones and 1 Sapphire. For more guides on Xenoblade Chronicles 3 Future Redeemed, click here!

Xenoblade Chronicles 3 Walkthroughs Guides
Guides

XC3 Future Redeemed – Dungeon Mapping

by NightlyGamingBinge in

To obtain the Dungeon Mapping standard quest in Xenoblade Chronicles 3 Future Redeemed, speak with Burrburr near the Elevator Landing Camp rest spot. For this quest, you’ll need to gather stones from 3 separate rock faces.

Follow the objectives to each location then retrieve the item there. One can be found west of the Atattra Access Elevator, another can be found north of Zalmor’s Falls (is guarded by unique enemy Lv. 13 Hilltop Chegwin) and the last is north of Pilgrims’ Rest Remains.

Once you’ve gathered all the stones, return to Burrburr so they can find the perfect location for the dungeon. Apparently, it’s going to take 100 years before the dungeon is finished! Since early access doesn’t look like it’s in store for us, our only rewards are 410 EXP, 650 Gold and 2 Bladestones.

Xenoblade Chronicles 3 Walkthroughs Guides
Guides

XC3 Future Redeemed – Aurora Shelf

by NightlyGamingBinge in

As you explore Aurora Shelf in Xenoblade Chronicles 3 Future Redeemed, you can find Affinity Scenes, Containers, Relics, Field Crafting, City Survivors, Unique Monsters, etc. There locations can be found below!

Affinity Scenes

1. Behind the tree at Pioneer’s Point

2. Underground tunnel

3. After taking the ether lift in the Lakeside Grotto (southwestern side surrounding Colony 9) then using the ether slides

4. Ferronis Crater

City Survivors

Ragrinar Passage – In the area at the top of the ladder

Waypoint Sapling

South of Zalmor’s Falls

Amryn

Searle

Container

1. West of the Elevator, Upper Landing landmark

2. Up the ladder in Ragrinar Passage

3. Echoes of Gran Dell Citadel

4. Eastern side of Pilgrims’ Rest Remains

5. Northeast of the Clifftop Camp rest spot

6. South of Panorama Camp up the vines

7. North of Panorama Camp

8. Southern Pilgrims’ Rest Remains

9. On the ledge directly west of the Elevator Landing Camp

10. On the ledge in the northeastern part of Waypoint Sapling

11. Zalmor’s Thawtunnels – You’ll come here during the Ether Lift Research Scenario Quest

12. After taking the ether lift in the Lakeside Grotto (southwestern side surrounding Colony 9) then using the ether slides

13. North of Diablada Cliffs

14. Sullied Temple of Abitalia

15. Sullied Temple of Abitalia

Field Crafting

Ladder – Ragrinar Passage

For this ladder you’ll need, Blossom Belt x1, Noise Bite x1 and Ether Cylinder x1.

Ladder – Echoes of Gran Dell Citadel

For this ladder, you’ll need Blossom Belt x2, Noise Bite x2 and Ether Cylinder x2.

Ether Slide – Constructed as part of the story during the Ether Lift Research Scenario Quest

Ladder – Declessa Altar

You’ll come here during the Ether Lift Research Scenario Quest. For this ladder you’ll need Blossom Belt x2, Noise Bite x2 and Ether Cylinder x2.

Ether Slide – After taking the ether lift in the Lakeside Grotto (southwestern side surrounding Colony 9) then using the ether slide

Ether mast – After taking the ether lift in the Lakeside Grotto (southwestern side surrounding Colony 9) then using the ether slides

Ether Slide – South of Ravaged Village

Ether Lift

Ether Mast

Materials

For a listing of what materials can be found in the Aurora Shelf, click here!

Relic

Echoes of Gran Dell Citadel – Up the ladder

Exile Fortress Ruins

Agni’s Tomb Ruins

On a ledge overlooking the area

In the Sacred Water Cavern secret area

Secret Areas

Sacred Water Cavern

You’ll come here during the Ether Lift Research Scenario Quest. To reach it, head to the Declessa Altar landmark. From there skirt the narrow ledge to the east to find this secret area!

Unique Monsters / Named Graves

Cavalier MacBright (Lv. 23)

Fograptor D’nari (Lv. 37) – You’ll come her during the Ether Lift Research Scenario Quest

Fogtrawler Tallstuff (Lv. 55)

Gotthard, the Ethereal (Lv. 60)

Hilltop Chegwin (Lv. 13)

Radicalized Godwin (Lv. 43)

Smothering Andante (Lv.11) – On the land bridge in Gaur Viaduct

Treehugger Gerald (Lv. 14)

Watchful Valencia (Lv. 10)

For more guides on Xenoblade Chronicles 3 Future Redeemed, click here!

Xenoblade Chronicles 3 Walkthroughs Guides
Guides

XC3 Future Redeemed – Tinkering with the X-Reader

by NightlyGamingBinge in

To obtain the Tinkering with the X-Reader standard quest in Xenoblade Chronicles 3 Future Redeemed, speak with Tiny Timtim at the Elevator Landing Camp rest spot. For this quest, you’ll need to improve the X-Reader’s functions.

To do this, interact with the campfire and select to upgrade the X-Reader. Select whichever features you’d like to upgrade. Please note that you’ll need materials to do this. For help on finding said materials, click here for our guide on where to find materials/items!

Once you’ve upgraded a feature, speak with Tiny Timtim to complete the quest. As a reward, you’ll receive 200 EXP and 500 Gold.

Xenoblade Chronicles 3 Walkthroughs Guides
Guides

XC3 Future Redeemed – The Running Automaton

by NightlyGamingBinge in

To obtain The Running Automaton standard quest in Xenoblade Chronicles 3, approach Hamill and Lucille in Colony 9 at the Ruined Town Square. They’ll need your help performing a test against their newly developed Automaton. To begin the fight, head to the Ruined Anti-Air Battery 3 in Yesterdale, which is to the southeast of Colony 9.

You’ll need to swim in the water to get there! Once you arrive, approach the group to begin the fight against the Lv. 22 Prototype Automaton. After you beat it up, Hamill and Lucille get the data they needed and the quest will complete. As a reward, you’ll receive 1160 EXP, 910 Gold, Affinity Growth Unlock Kit and Work Belt.

Xenoblade Chronicles 3 Walkthroughs Guides
Guides

XC3 Future Redeemed – The Very Lost Nopon

by NightlyGamingBinge in

To obtain The Very Lost Nopon standard quest in Xenoblade Chronicles 3 Future Redeemed, speak with Guguru near the southern side of the land bridge in the Gaur Viaduct of the Aurora Shelf. For this quest, you’ll need to find Babalulu who went missing while foraging for dinner. To begin your search, make your way north of Waypoint Sapling to find Babalulu along a cliffside.

Babalulu completely lost track of time while hunting for mushrooms and needs your help to gather the remaining ingredients for dinner. Make your way to Zalmor’s Falls on the western side of the area. Once there, approach the lake to locate a school of Piranhaxes. Defeat the 3 Lv. 13 Zalmor Piranhaxes. With all the meat gathered, return to Babalulu to send him back to Guguru. For the final task, return to Guguru to report back your success with the mission. As a reward, you’ll receive Funbowl Recipe, 500 EXP, 530 Gold and a Vibrant Armring.

Xenoblade Chronicles 3 Walkthroughs Guides
Guides

XC3 Future Redeemed – Vermilion Woods

by NightlyGamingBinge in

As you explore Vermilion Woods in Xenoblade Chronicles 3 Future Redeemed, you can find Affinity Scenes, Containers, Relics, Field Crafting, City Survivors, Unique Monsters, etc. There locations can be found below!

Affinity Scenes

1. Leaf-Strewn Clearing

2. Southern Colony Gamma Wreckage

City Survivors

Ruben in Inconspicuous Cave

Containers

1. Southeast of Springside Camp

2. Far northwest of Springside Camp

3. At the top of the repaired ladder in Parvus Airspring

4. Inconspicuous Cave

5. Under the Colony Gamma Wreckage

6. Under Colony 5 Wreckage

7. After taking the ether lift in the Lakeside Grotto (southwestern side surrounding Colony 9), use the ether slides and work your way south to find this container next to the ether mast.

Field Crafting

To repair items in the field, you’ll need to use materials. If you’re missing a material and need to know where it is, check out our materials guide below!

Repair Ladder

To repair this ladder, you’ll need Warning Lamp x1, Flake Crystal x1 and Ether Cylinder x1.

Ether Slide – After taking the ether lift in the Lakeside Grotto (southwestern side surrounding Colony 9), use the ether slides and work your way south

Ether Mast – After taking the above ether slide you’ll find this ether mast.

Materials

For a listing of what materials can be found in the Vermilion Woods, click here!

Relics

Abandoned Depot

After taking the ether slide on the eastern side of the area

Palace of Bal Attas (Secret Area)

Secret Areas

Palace of Bal Attas – After taking the ether lift in the Lakeside Grotto (southwestern side surrounding Colony 9), use the ether slides and work your way south.

Unique Monsters / Named Graves

Advent Wolf Marduk (Lv. 9)

Bombastic Rotbart Jr. (Lv. 10)

Head into the cave standing in the spot we are below to find the unique enemy.

Fogstalker Naiara (Lv. 45)

Prohibitor Giuseppe (Lv. 23)

The Slow ‘n’ Steadies (Peacebringer Divalos) (Both Lv. 90)

For more guides on Xenoblade Chronicles 3 Future Redeemed, click here!

Xenoblade Chronicles 3 Walkthroughs Guides
Guides

XC3 Future Redeemed – Elevator Repairs

by NightlyGamingBinge in

The Elevator Repairs scenario quest in Xenoblade Chronicles 3 Future Redeemed is obtained automatically as part of the story during Chapter 2. For this quest, you’ll need to gather a Ferronis Circuit Board and 6 Warning Lamps. Turn around and exit the cave to Vermilion Woods. Once there, head to the Colony Gamma Wreckage to loot the Broken-down Ferronis. Doing so will give you the Ferronis Circuit Board!

For the Warning Lamps, make your way east to the Colony 5 Wreckage area. East of the wreckage you’ll find Warning Lamps that can be picked up from the ground!

Once you’ve collected all the materials, return to the broken elevator to trigger a cutscene where you’ll be introduced to Field Crafting. Afterwards, interact with the elevator to repair it. When it’s repaired, start the elevator to complete the Elevator Repairs scenario quest.

As a reward, you’ll receive 330 EXP, 430 G, Bunnit Choker, Happy Camper Gear, Veggie Soup Recipe and Skewers Recipe. For more guides on Xenoblade Chronicles 3, click here!

Xenoblade Chronicles 3 Walkthroughs Guides
Guides

Xenoblade Chronicles 3 – Lapidarist Extraordinaire

by NightlyGamingBinge in

As part of the Xenoblade Chronicles 3 expansion pass, you’ll be able to recruit Masha as part of the Vol. 3 DLC drop. This guide will cover how to start the quest and what you’ll need to do in order to complete it.

How to Start the Quest

This quest can be received from the Expansion Pass tab in the menu. Once there, scroll over to the Vol. 3 section then select it. From there press Y to receive the content and choose Lapidarist Extraordinaire from the list to add it to the quest menu. You’ll then need to travel to Serene Square in the City Interior, which becomes available during Chapter 5.

Recruiting Marsha

Travel to Serene Square in the City Interior to kick off a cutscene where you’ll be introduced to Miss Masha who is trying to convince an Armory Pilot to stand aside while she leaves the city. After their conversation, head over to Masha and introduce yourself. This will result in her joining you as a temporary party member.

To progress with the quest, travel to Zem’s Crossway landmark in the Fornis Region. Once there, head over to the objective maker on the map to reach her destination where you kick off an event. Masha will tell the team that she is looking for an annihilation zone. After a quick work from Taion, they decided to travel to one called “Piento Basin” which can be found in the Fornis Region slightly north of Colony 4, west of Galghour’s Menhir.

When you reach the basin, walk down into the giant crater and interact with the glowing orb in the middle of it. Marsha will then tell the group what she was looking for and request to head back to the city. You’ll also receive 4 Enigmatter.

Back at the City Interior, travel to the City Camp rest spot. Masha will finally reveal who she really is and you’ll unlock the ability to craft accessories. Interact with the camp and follow the prompts to craft and enhance an accessory. This will complete the quest and you’ll receive Masha officially as a hero. Mio will also inherit her Lapidarist class.

Rewards

  • 3850 EXP
  • 3820 G
  • 10 SP