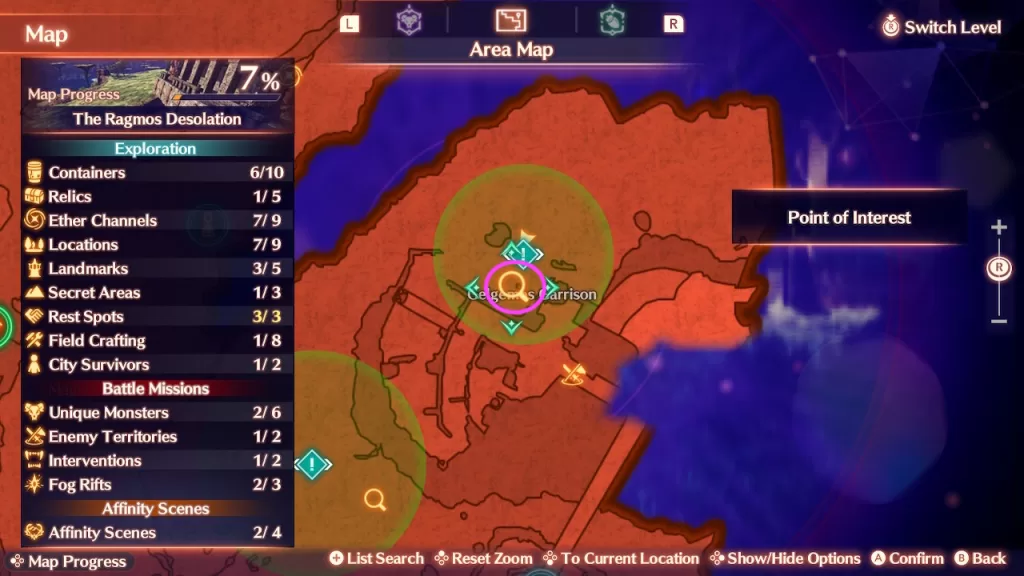
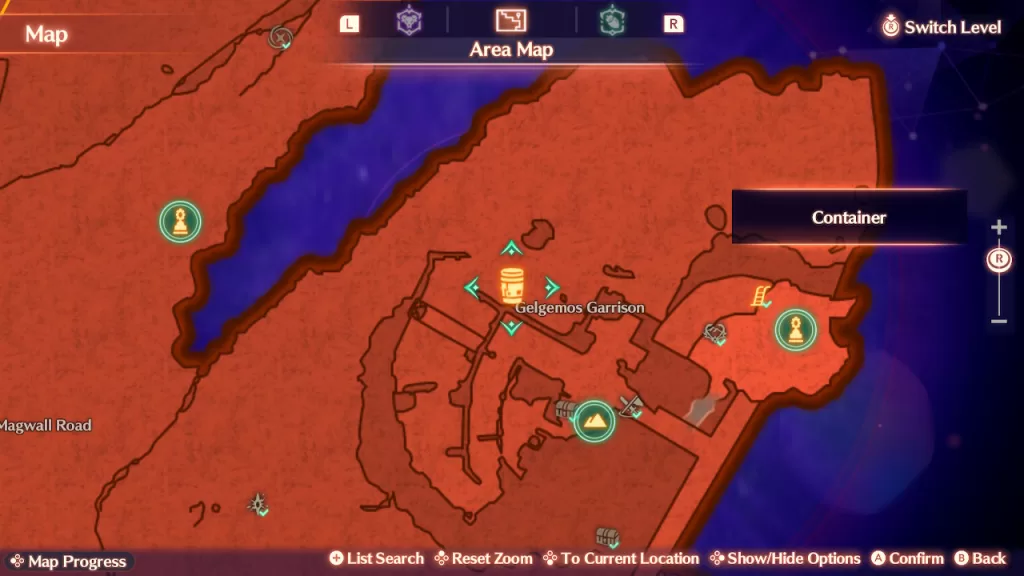
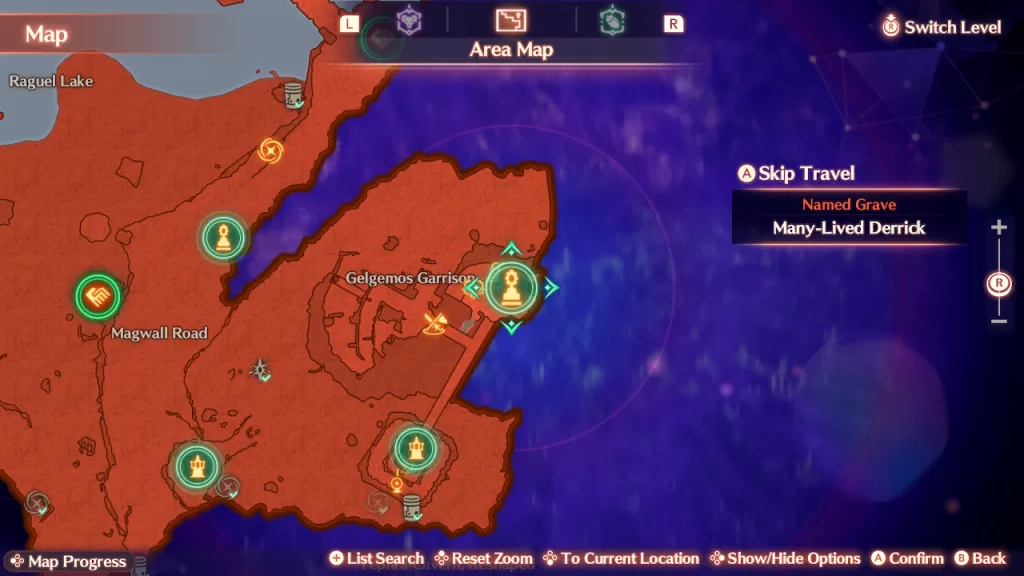
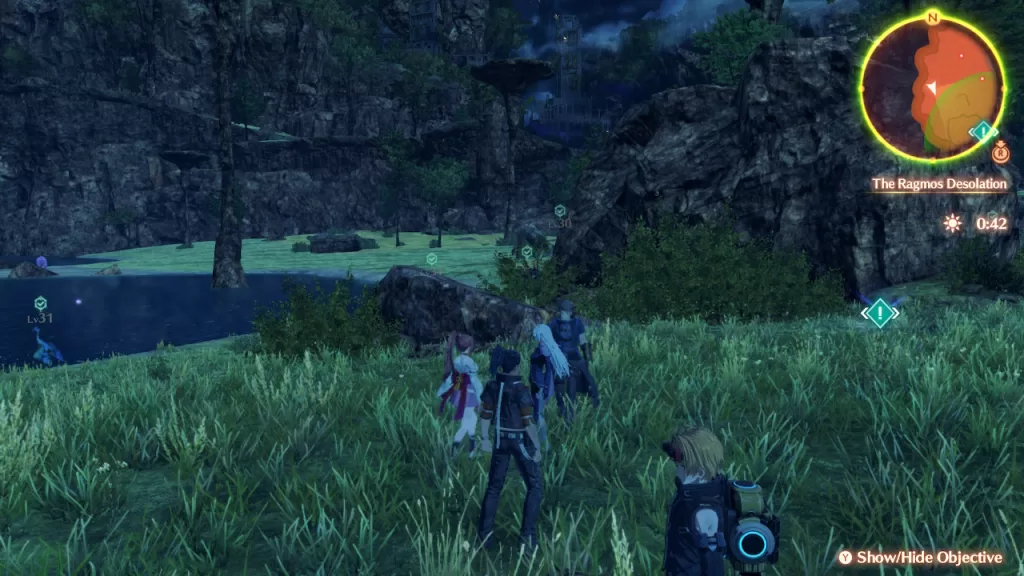
To obtain the Regret and Resolve standard quest in Xenoblade Chronicles 3 Future Redeemed, speak with Jethro just north of the Gelgemos Garrison in The Ragmos Desolation. For this quest, you’ll need to retrieve the keepsakes around the area.
Brass Locket
Tarnished Ring
Bloodied Bandana
Once you’ve retrieved the keepsakes, return to Jethro to hand them over. A Keves Patrol Squad will show up. Defeat the 6 of them to complete the quest. As a reward, you’ll receive 3270 EXP, 2240 Gold, Detector Headgear and Engineer Gloves.
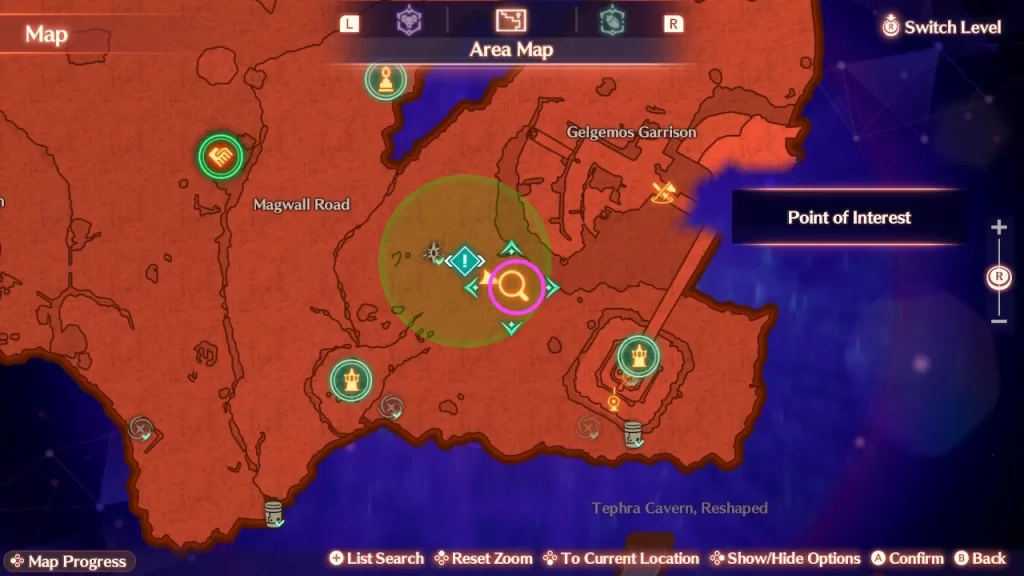
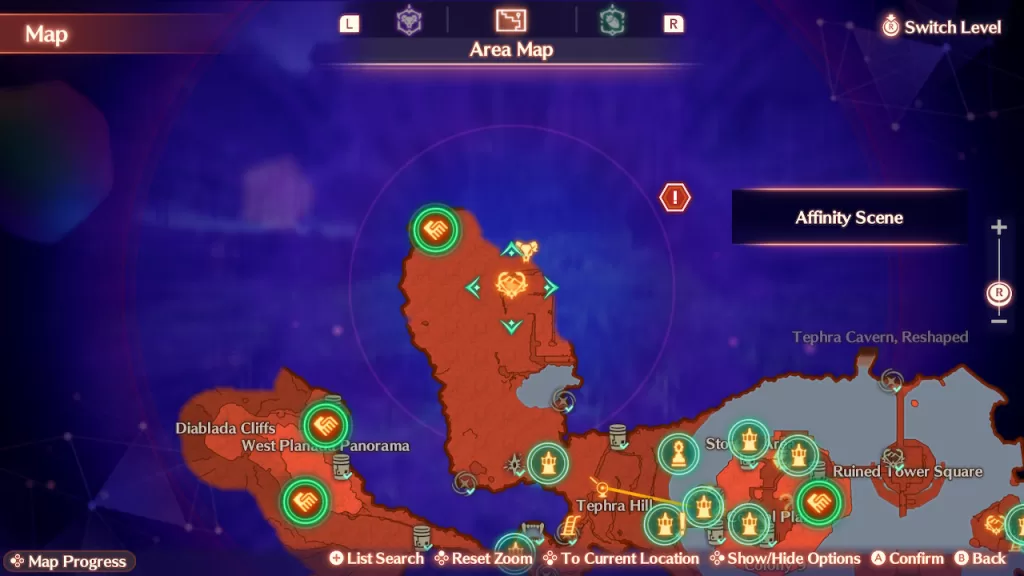
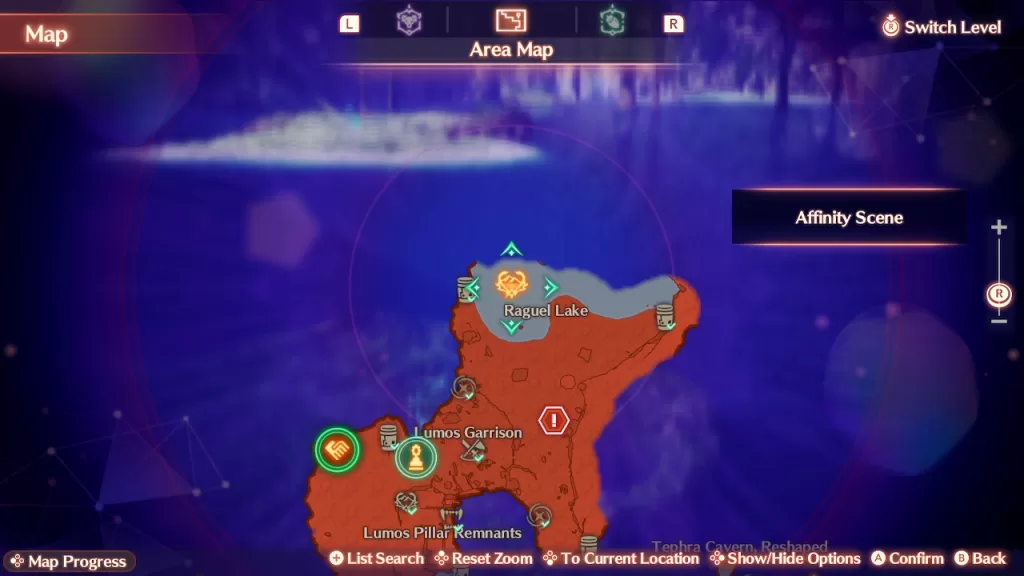
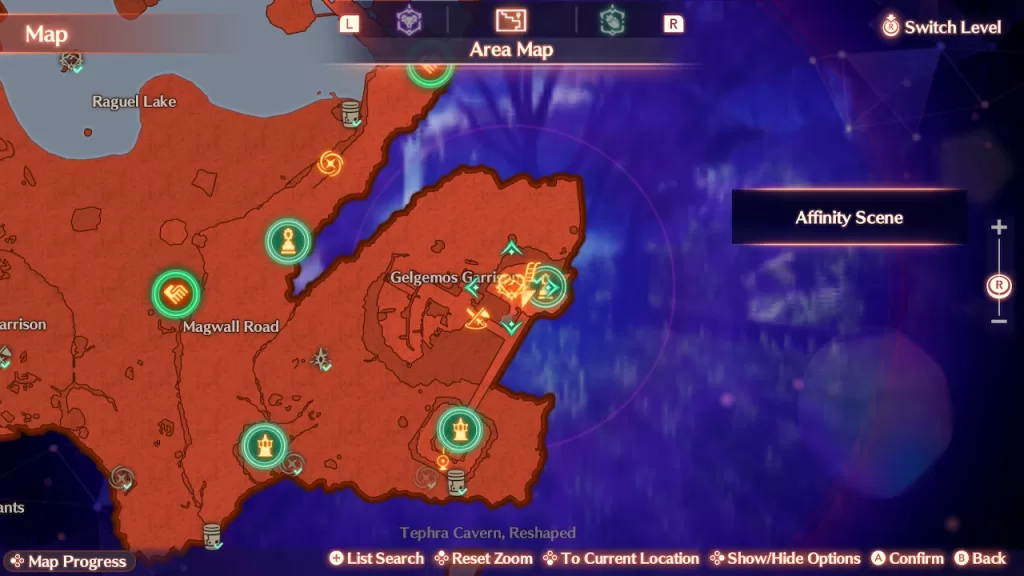
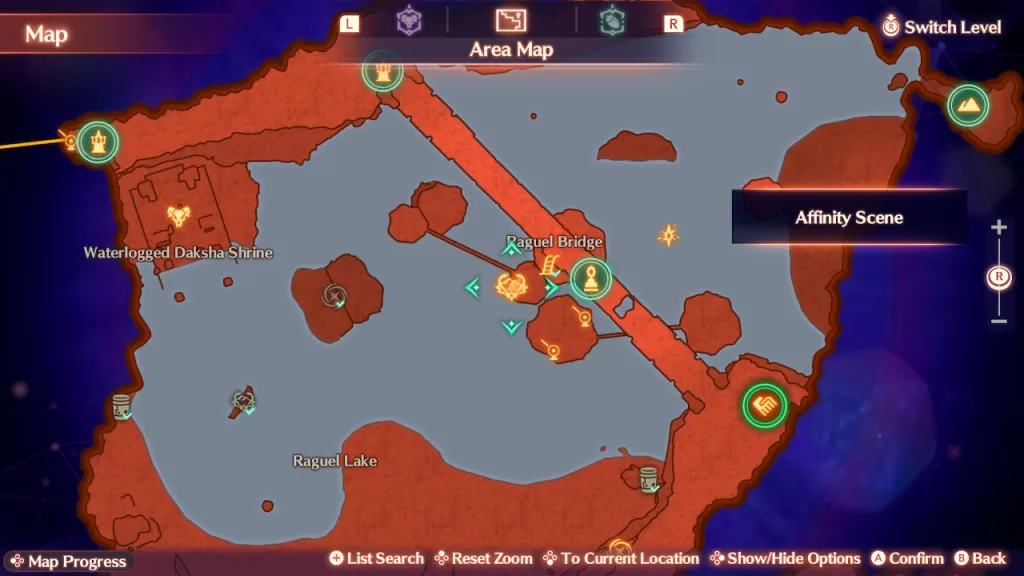
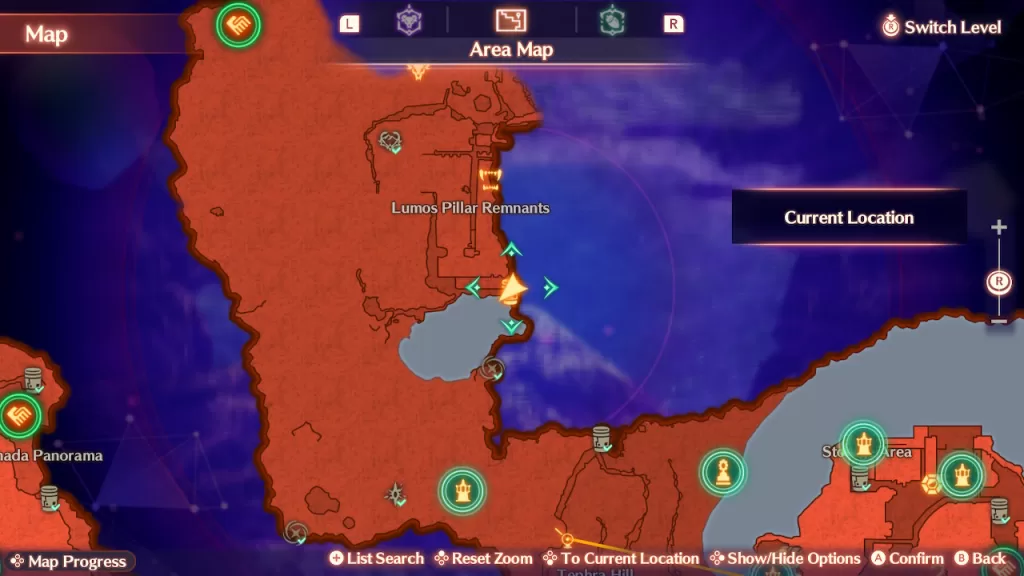
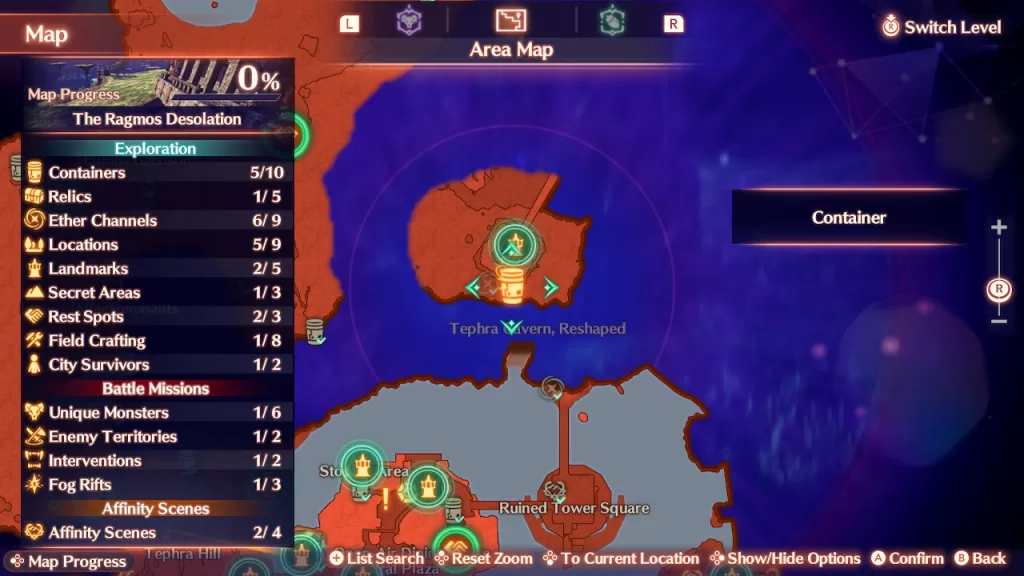
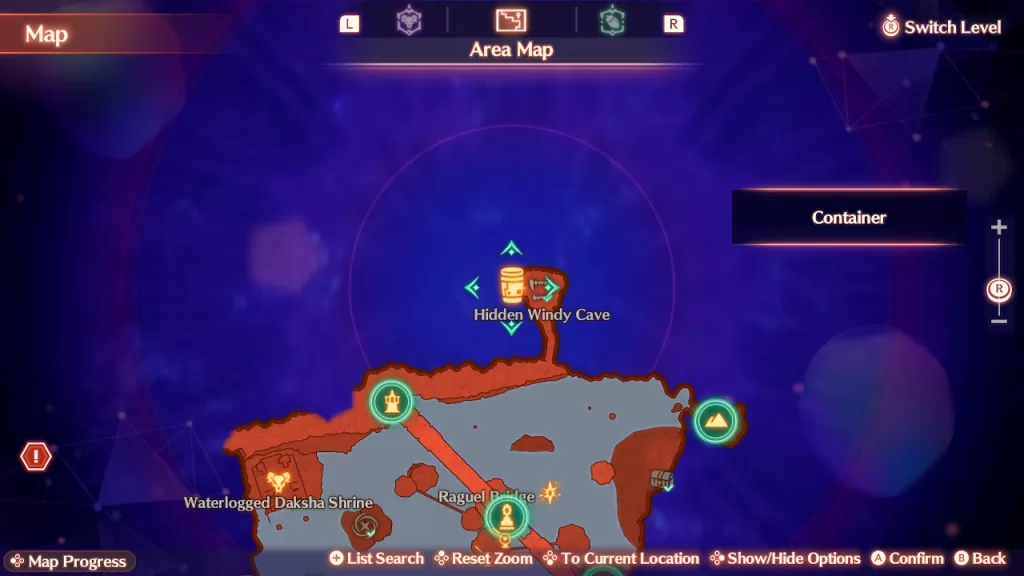
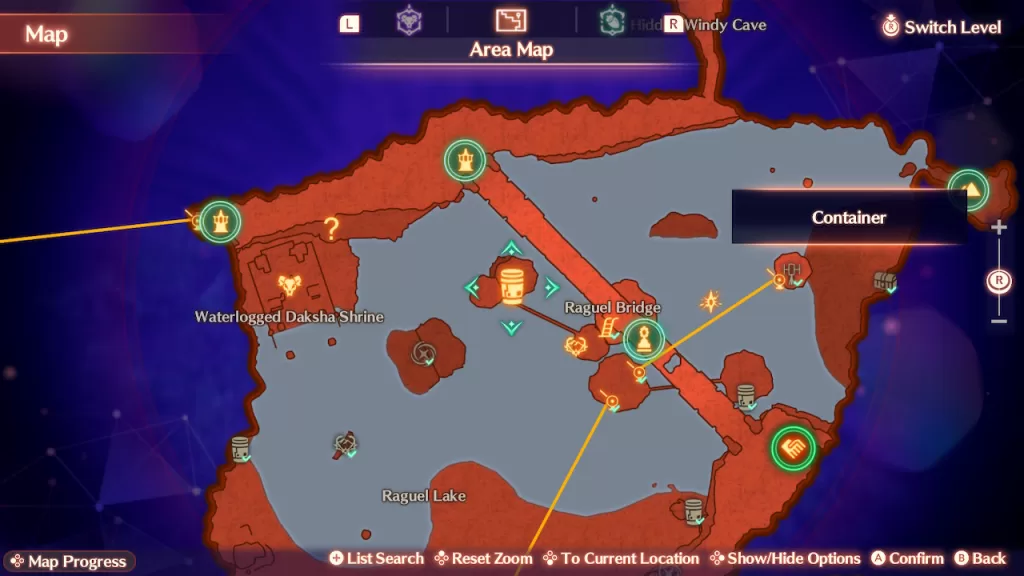
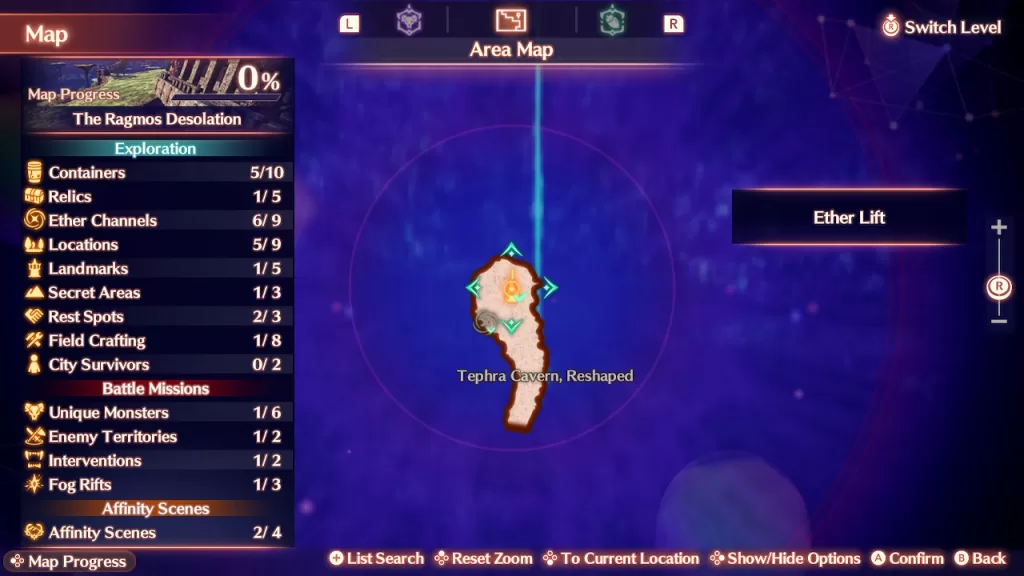
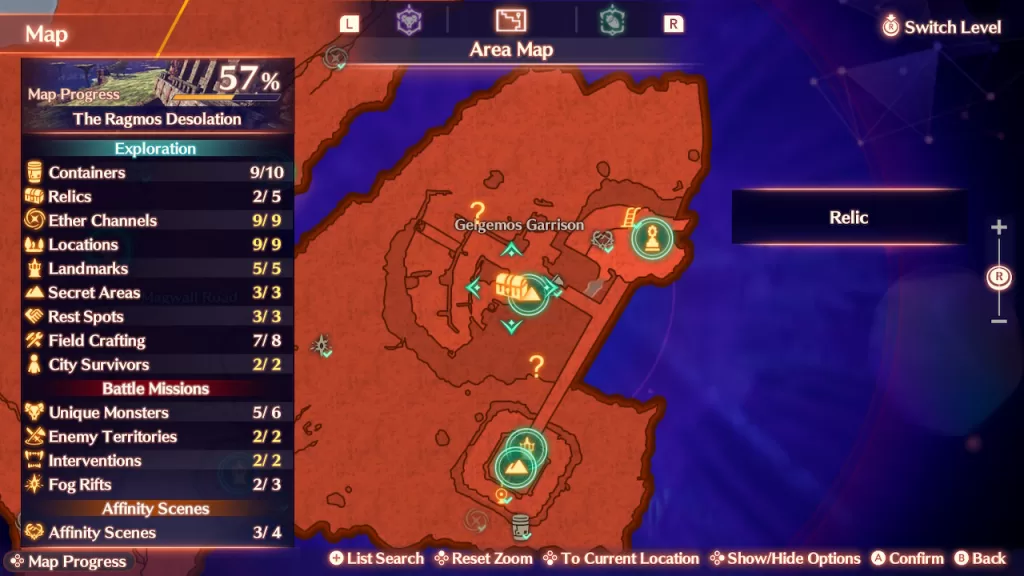
As you explore The Ragmos Desolation in Xenoblade Chronicles 3 Future Redeemed, you can find Affinity Scenes, City Survivors, Containers, Field Crafting, Relics, Secret Areas, Unique Monsters, etc. There locations can be found below!
Affinity Scenes
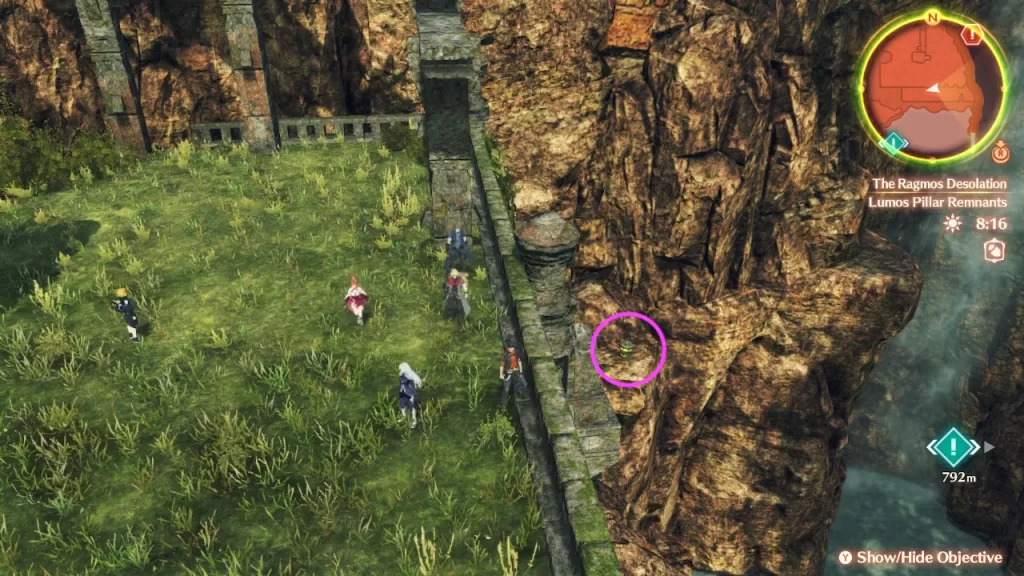
1. Lumos Pillar Remnants
2. On an island in Raguel Lake
3. Up the ladder you’ll need to repair in the Gelgemos Garrison
4. On a land formation sticking up out of Raguel Lake just west of the Raguel Bridge – Must reach the Black Mountains before you can view this scene.
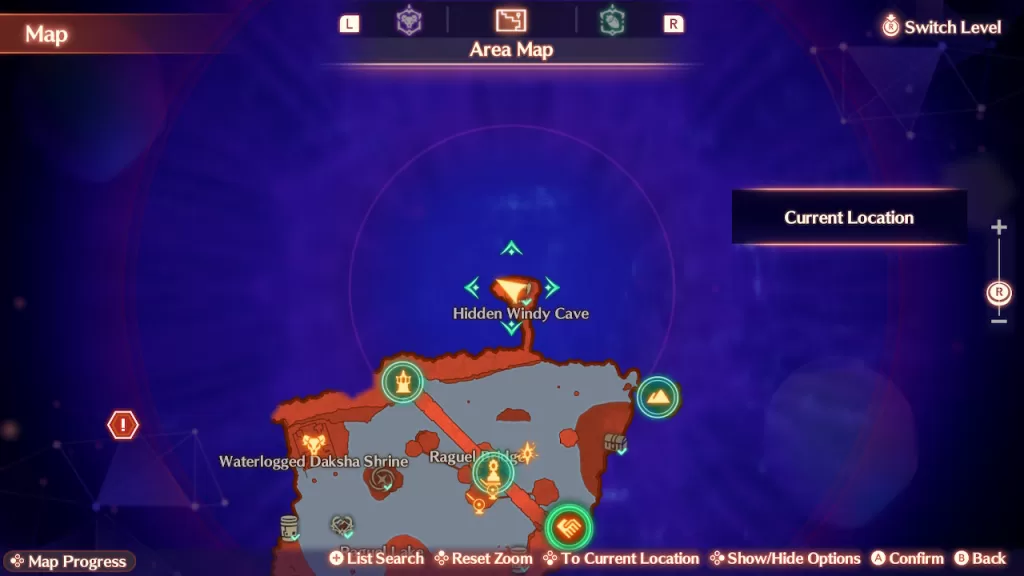
City Survivors
Under the bridge at the Oracle Spire landmark
In the Hidden Windy Cave
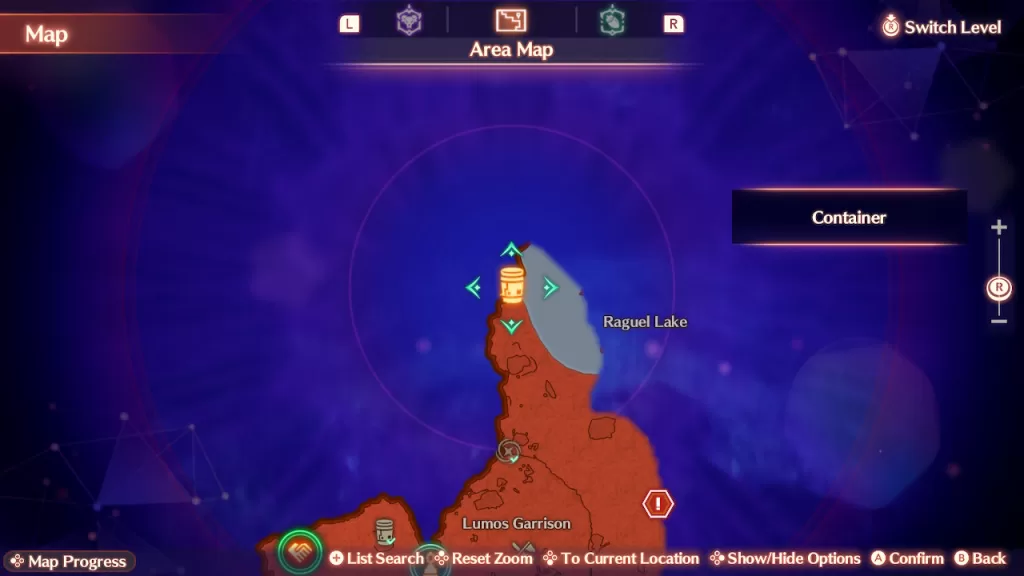
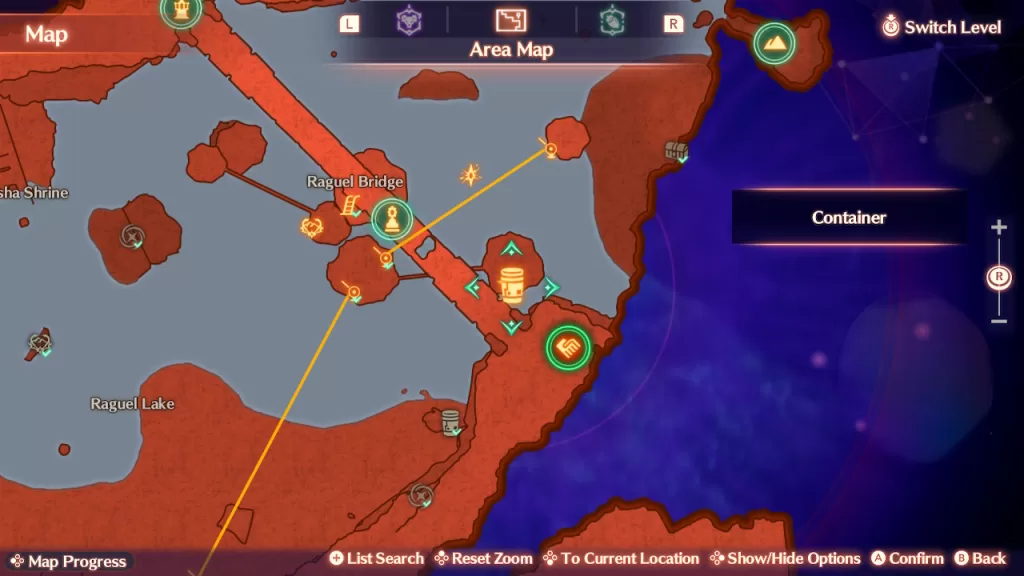
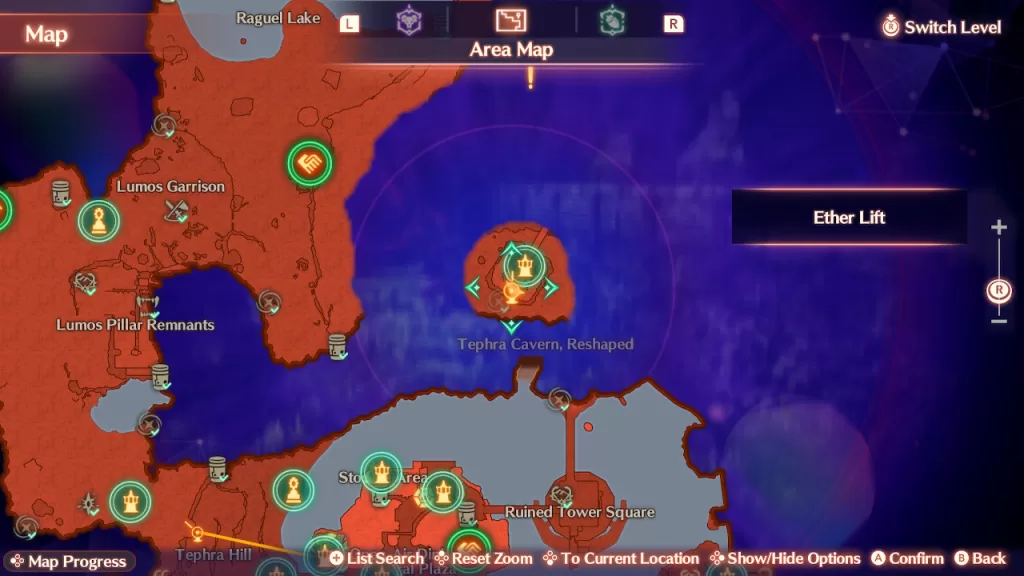
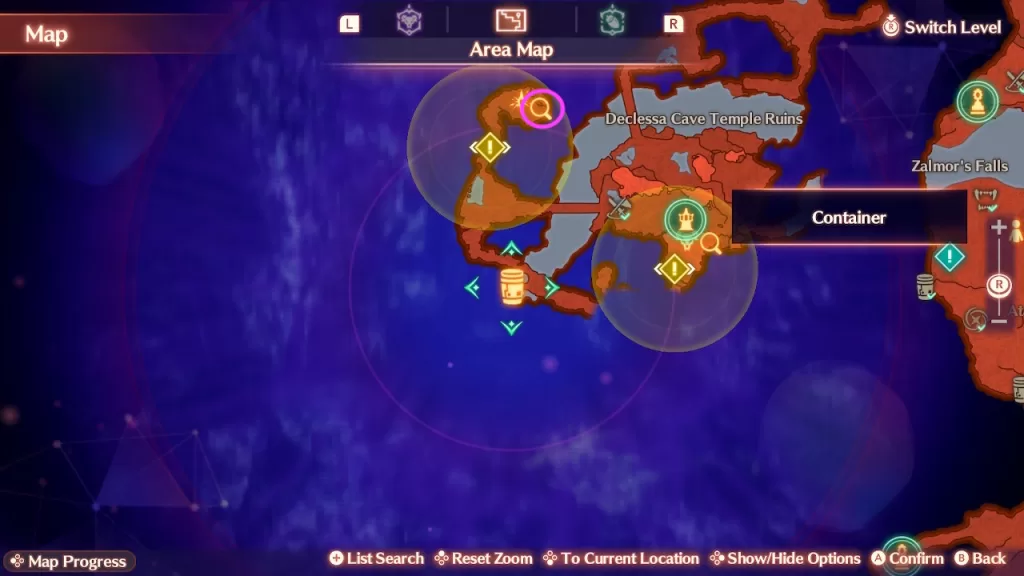
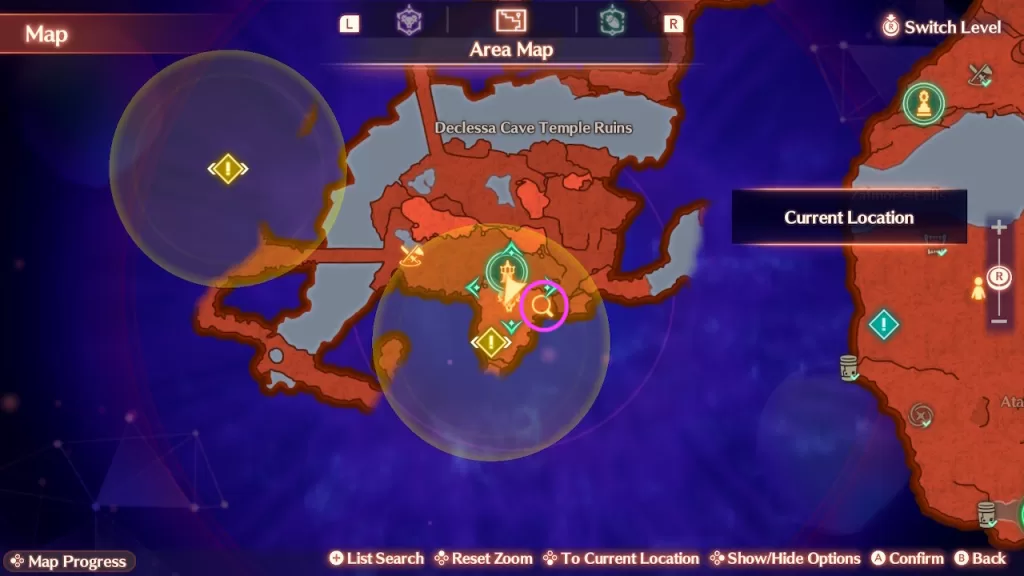
Containers
1. On the side of the mountain
2. East of Lumos Garrison behind a large rock with a Candela Taos on it
3. Along Raguel Lake
4. Southeast of Lumos Garrison
5. Along the southeastern shoreline of Raguel Lake
6. South of the Oracle Spire landmark
7. In the Hidden Windy Cave
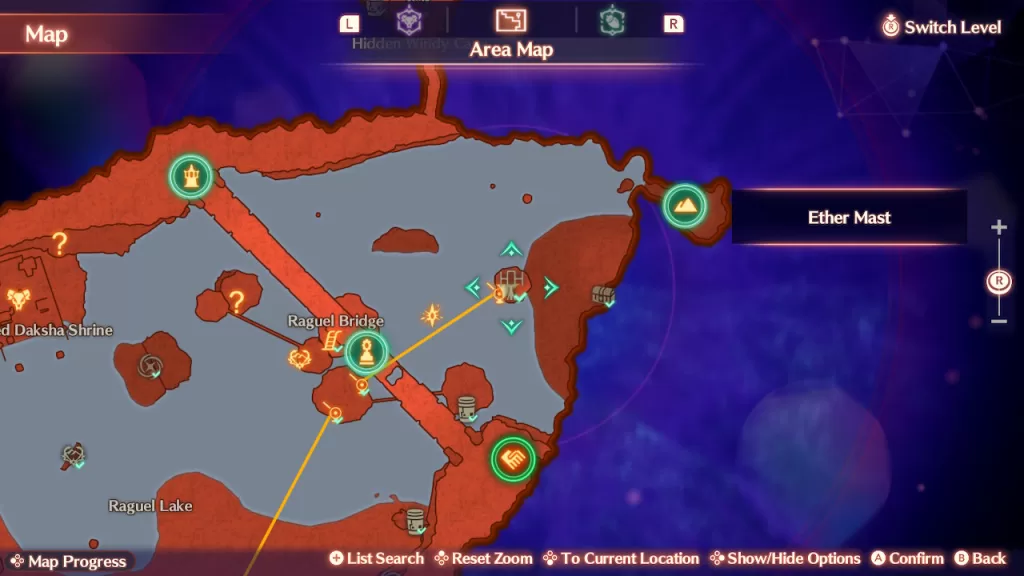
8. From the center of Raguel Bridge, take the ladder down then head south. Cross the bridge to find this container.
9. From the center of Raguel Bridge, take the ladder down then head north crossing a bridge. When you reach the land mass, jump off it to the east to find this chest on a lower land mass.
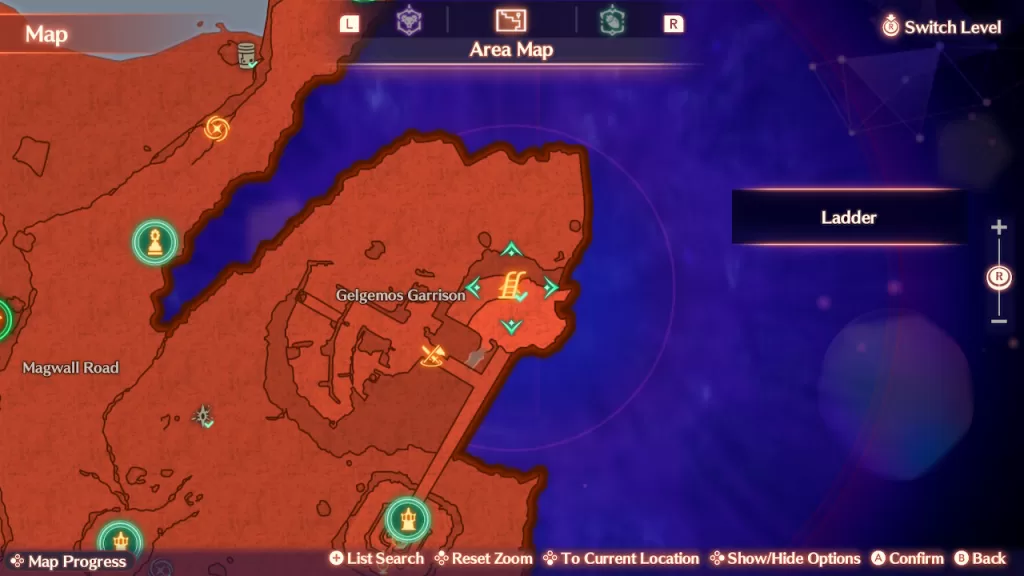
10. Gelgemos Garrison – Atop a metal tower that you’ll need to jump onto
Field Crafting
Ether Lift – Constructed as part of the main story
Ether Lift – South of the Oracle Spire landmark
For this lift, you’ll need Monochromagnetite x2, Black Crystal x1, Photonium x1 and Ether Cylinder x2.
Ether Mast – Jump to this ledge against the mountain from the Lumos Pillar Remnant
Ladder
For this ladder you’ll need Rusty Bolt x1, Monochromagnetite x1 and Ether Cylinder x1.
Ladder
For this ladder you’ll need Rusty Bolt x2, Monochromagnetite x2 and Ether Cylinder x2.
Ether Slide x2 – Western side of Raguel Bridge
Ether Mast – From the center of Raguel Bridge, take the ladder down then head south. Take the northern ether slide to reach this ether mast.
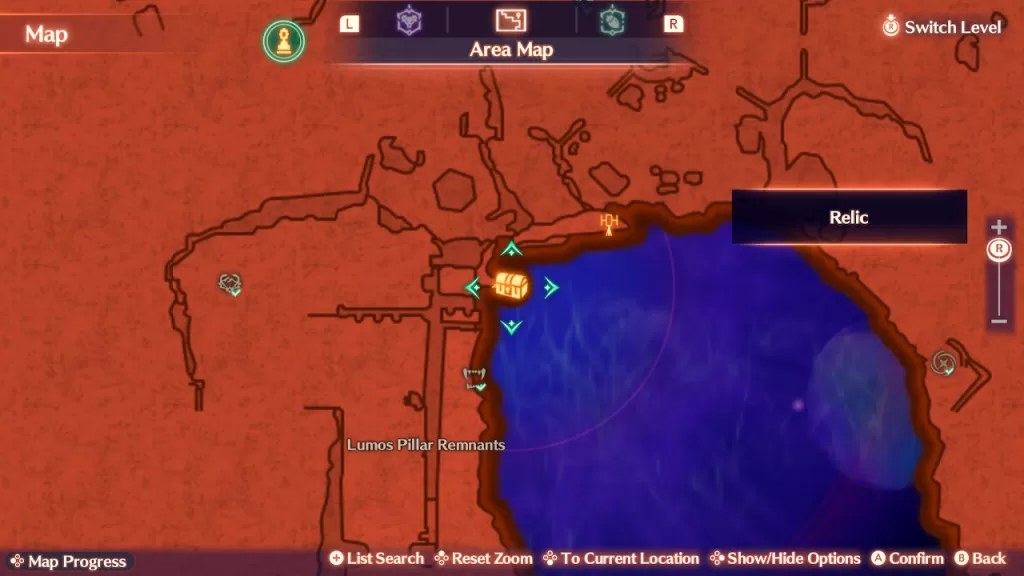
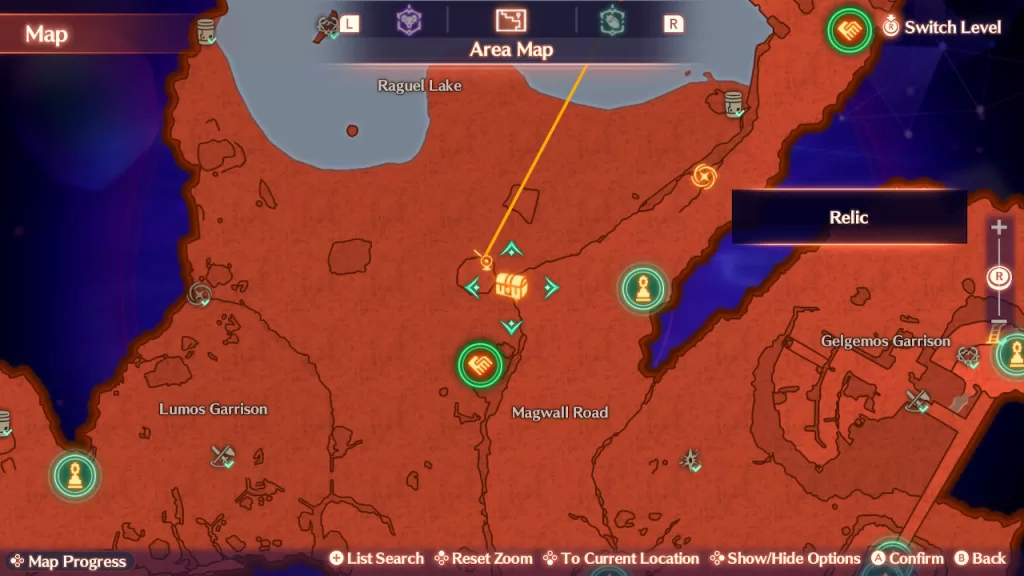
Relics
1. Jump to this ledge against the mountain from the Lumos Pillar Remnant
2. On the eastern side of Raguel Lake
3. On a higher ledge along Magwall Road. To reach it, take the ether slide just west of Raguel Bridge.
4. Royal Green (Secret Area)
5. From the Royal Green secret area, jump down over the edge to reach the roof below. From there walk across the plank then make your way straight to reach the chest.
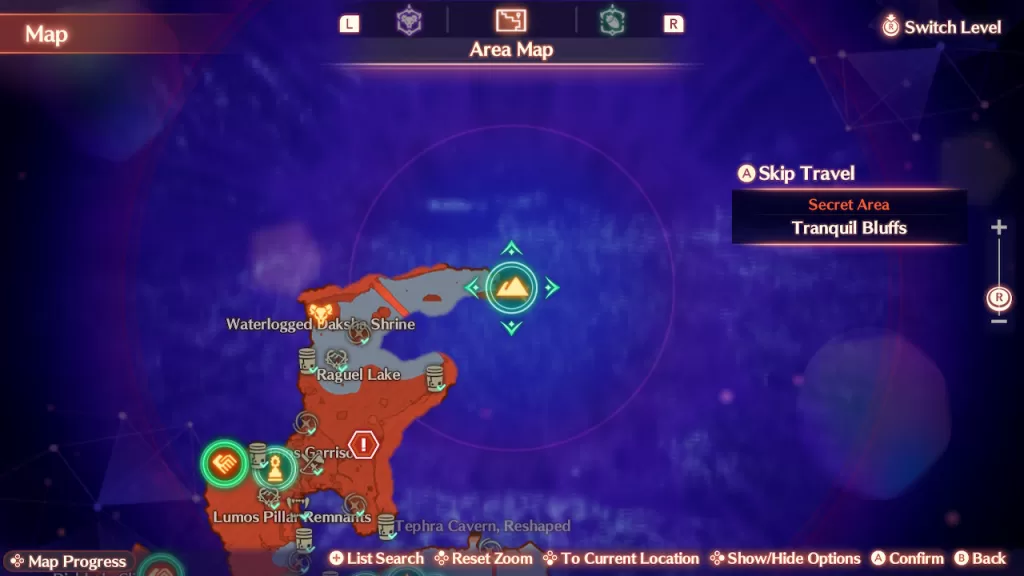
Secret Areas
Godreading Altar
To reach this secret area, construct the ether lift just south of the Oracle Spire landmark.
Royal Green – From the Many-Lived Derrick unique monster, head southwest to find a cave. Head through the tunnel to reach the secret area.
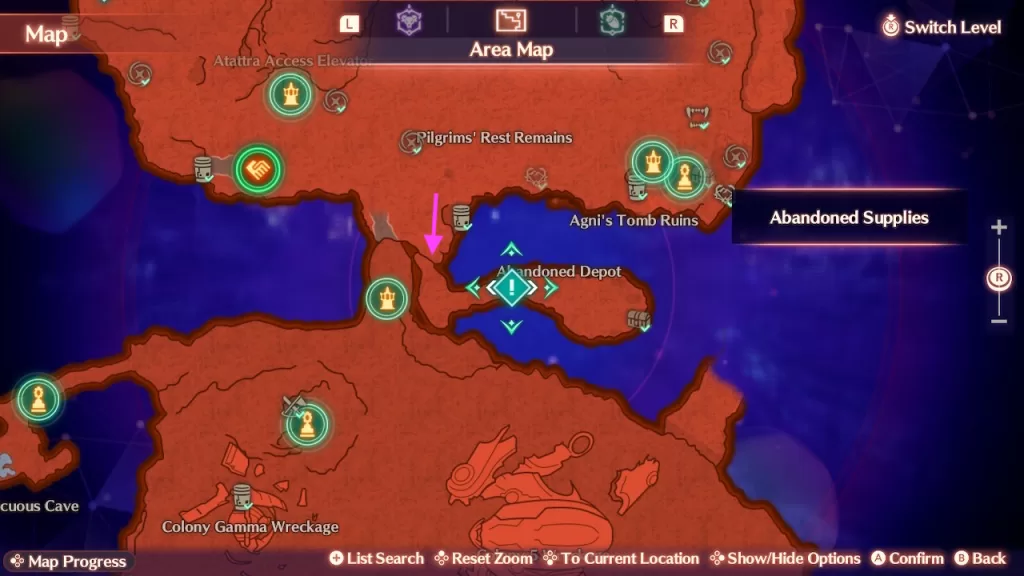
To obtain the Abandoned Supplies standard quest in Xenoblade Chronicles 3 Future Redeemed, speak with Eow in Colony 9 during Chapter 4. For this quest, you’ll need to travel to the Abandoned Depot which is just south of Pilgrims’ Rest Remains. To reach this area, fast travel to the Three-Pillar Transept Ruins landmark in Aurora Shelf then head west, hugging the cliffs. You’ll come to a gap in the cliffs where you’ll find a ladder.
Take it down then head inside the cave inhibited by 4 Omeg Ropls and an Alif Aspar. Once you take them out, return to Colony 9’s Central Plaza and approach the Supply Office to complete the quest. As a reward, you’ll receive 2700 EXP, 2110 Gold, Crystal Earrings and Scout’s Kneeguard.
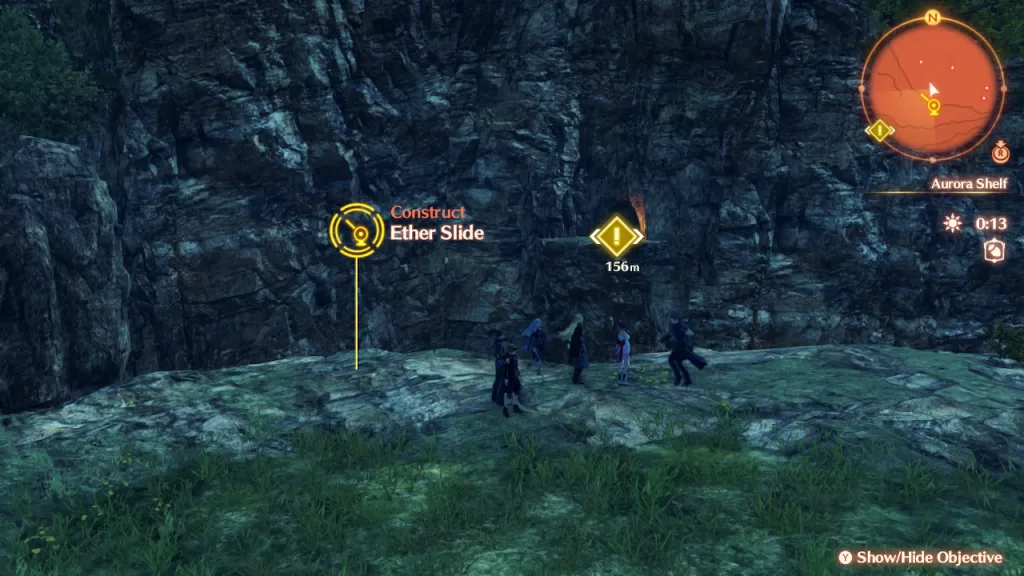
You’ll automatically receive the Ether Lift Research scenario quest in Xenoblade Chronicles 3 Future Redeemed during Chapter 4. For this quest, head into Riku’s workshop to trigger a cutscene. Afterwards, make your way over to the Pioneer’s Camp rest spot in the Aurora Shelf. Once there, construct the Ether Slide to reach the cave across the way.
You’ll need Noise Bite x2, Black Shard x1 and Ether Cylinder x2 to construct the slide. After it’s been constructed, go ahead and slide on across. Once on the other side, a cutscene will trigger during which Rex will clear the entrance to the Sealed Cave. Make your way through this cave in search of the Photonium. One can be found down a ladder near a bunch of Igna.
The second one can be found on the far western side of the cave just past a Fog Rift.
The last Photonium can be found protected by the Level 37 Fograptor D’nari unique enemy.
Once you collect all the Photonium, the quest will complete. As a reward, you’ll receive 1880 EXP, 2980 Gold, Quantum Scarf and Platinum Belt.
You’ll automatically receive The Ouroboros Power scenario quest in Xenoblade Chronicles 3 Future Redeemed during Chapter 4. For this quest, approach the Colony 9 Camp rest spot to trigger a cutscene. When it concludes, enter Riku’s workshop to trigger another cutscene. Afterwards, make your way to the Gotrock Oracle Ruins, which is a small island to the east of Colony 9.
Once you arrive, you’ll encounter the Level 37 Heidel Taos. Take it down! You’ll then have to take on Rex and Shulk only using Glimmer and Nikol. When you’ve accomplished this task, return to Riku’s workshop in Colony 9. The quest will then complete! As a reward, you’ll receive 2930 EXP, 1860 Gold, Lessons in Unity, vol. 10, 11 and 14.
To obtain The Junior Workforce standard quest in Xenoblade Chronicles 3 Future Redeemed, approach Finley and Axel in Colony 9. For this quest, make your way over to the Command Center and speak with Carrom by the request board. You’ll then need to work your way to the Colony 9 Supply Office (New) in Central Plaza and speak with the Liberator Soldier. You’ll then need to sort the items into categories.
Item
category
Kelp Mushroom
Mushrooms
Walnut Grape
Fruit
Jalapenoki
Mushrooms
Varicini
Mushrooms
Lucky Spice
Seeds
Filling Onion
Vegetables
Bizarrenacle
Shells
Humming Plum
Fruit
If you get them wrong, you’ll need to keep practicing until you’ve gotten them all right. The Col. 9 Supply Office (New) will officially be set up now and offers new products. Afterwards the quest will complete and you’ll receive 3540 eXP, 1960 Gold, Art Unlock Kit and Dragonfang Necklace.
To obtain the Cooking with Rex Part 2 standard quest in Xenoblade Chronicles 3 Future Redeemed, interact with Colony 9’s Canteen. For this quest, you’ll need to find ingredients so Rex can show us how to cook another dish. If you need help finding any ingredients, check out our Material Guide! Once you have all the ingredients, interact with the Canteen again to complete the quest. As a reward, you’ll receive the Boiled Lobster Recipe, 680 EXP and 3500 Gold.
To obtain the Linka’s Birthday standard quest in Xenoblade Chronicles 3 Future Redeemed, approach the ! in the central part of Colony 9 just north of the Open-Air Dining Space. For this quest, you’ll need to travel to the northeastern part of Raguel Lake in The Ragmos Desolation to encounter a giant blue water creature and defeat it. Now that you have your special ingredient, return to Colony 9 and approach the canteen in Central Plaza. After a cutscene, the quest will complete and you’ll receive the Fried Octomayo Recipe, 2930 EXP, 3100 Gold, Affinity Growth Unlock Kit and Diamond.
To obtain the Big Game: Rumo Kapiba standard quest in XC3 Future Redeemed, interact with the Request Board in Colony 9’s Command Center during Chapter 4. Afterwards, travel directly north of the Lakeside Camp rest spot in The Ragmos Desolation. Just before the Raguel Lake’s waterline you’ll find the Level 35 Rumo Kapiba. Once you defeat it, you’ll complete the quest and receive 1760 EXP and 3720 Gold.
To obtain the Lost & Found: Unread Book standard quest in XC3 Future Redeemed, interact with the Request Board in Colony 9’s Command Center during Chapter 4. For this quest, travel to the Lakeside Camp rest spot in The Ragmos Desolation. Once there, head northwest. You’ll find the Unread Book behind the giant rock along the lake.
Once you find the item, the quest will complete and you’ll receive 1640 EXP and 3480 Gold.
Search
This site uses cookies. By continuing to use this website, you are giving consent to cookies being used. For more information on cookies, view our Privacy Policy.OkPrivacy Policy