Below is a guide on the Sato’s Saga Crew Challenge in Borderlands 3 Bounty of Blood DLC!!
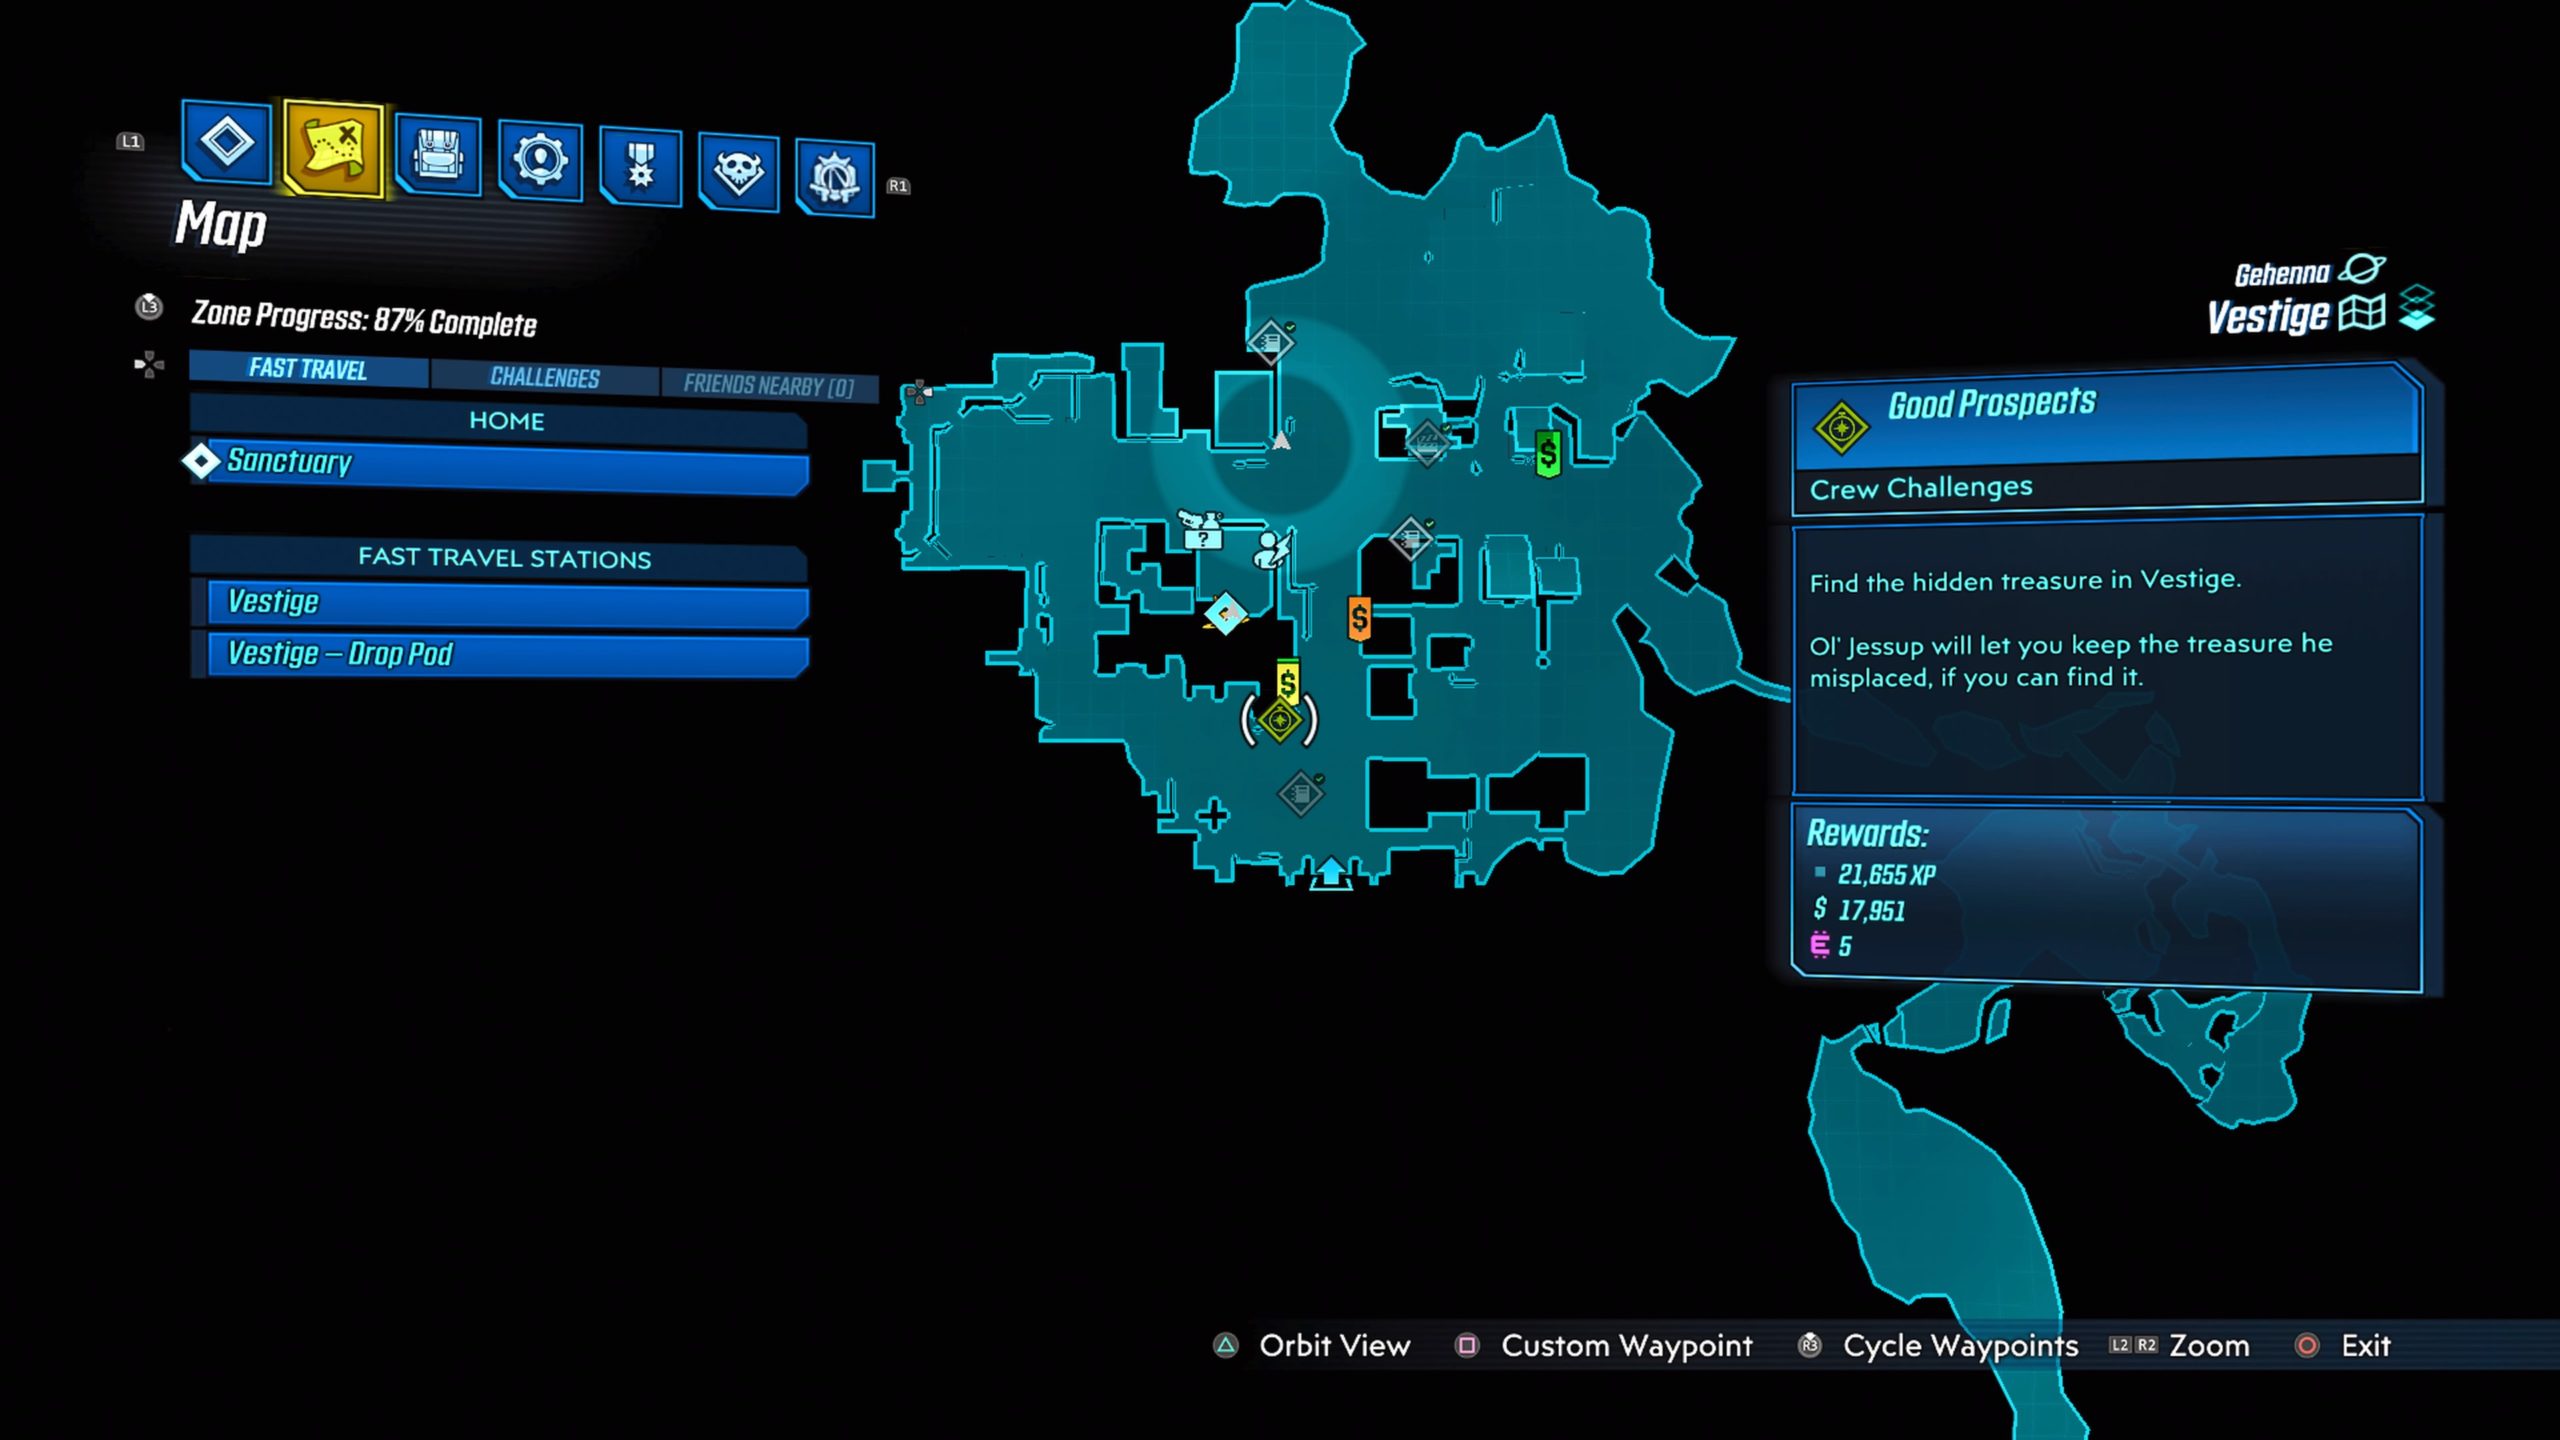
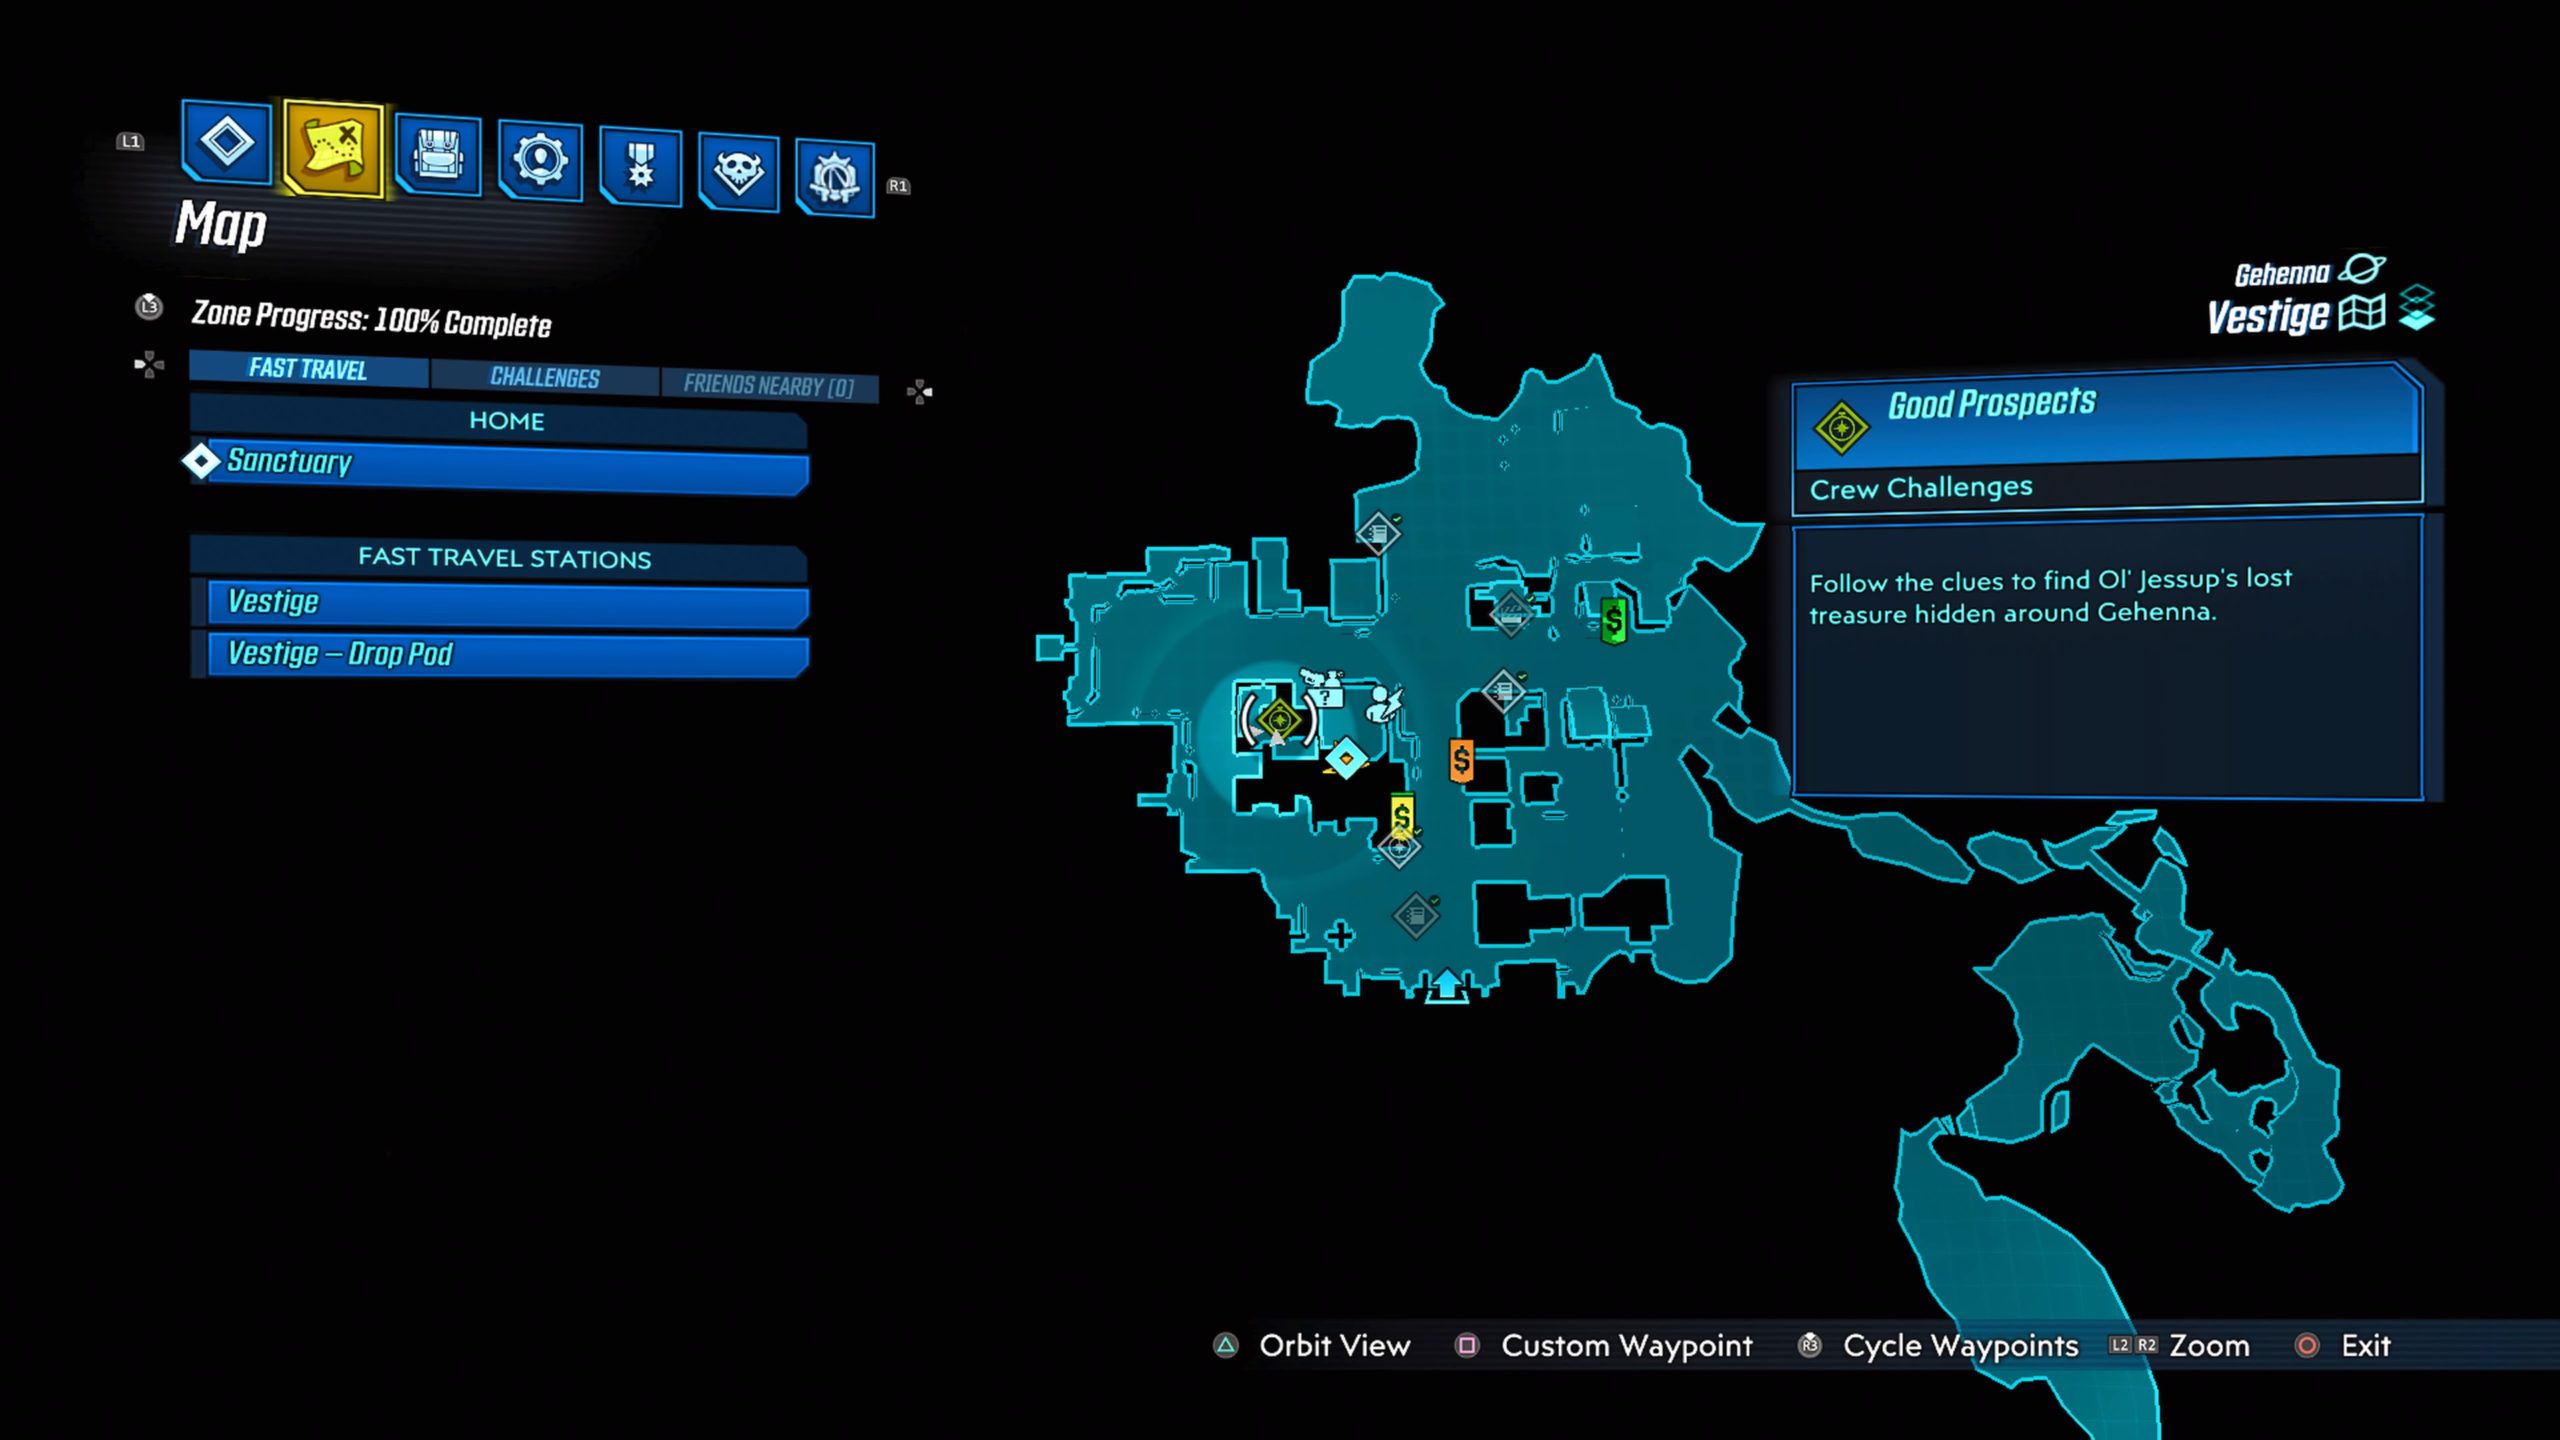
Vestige
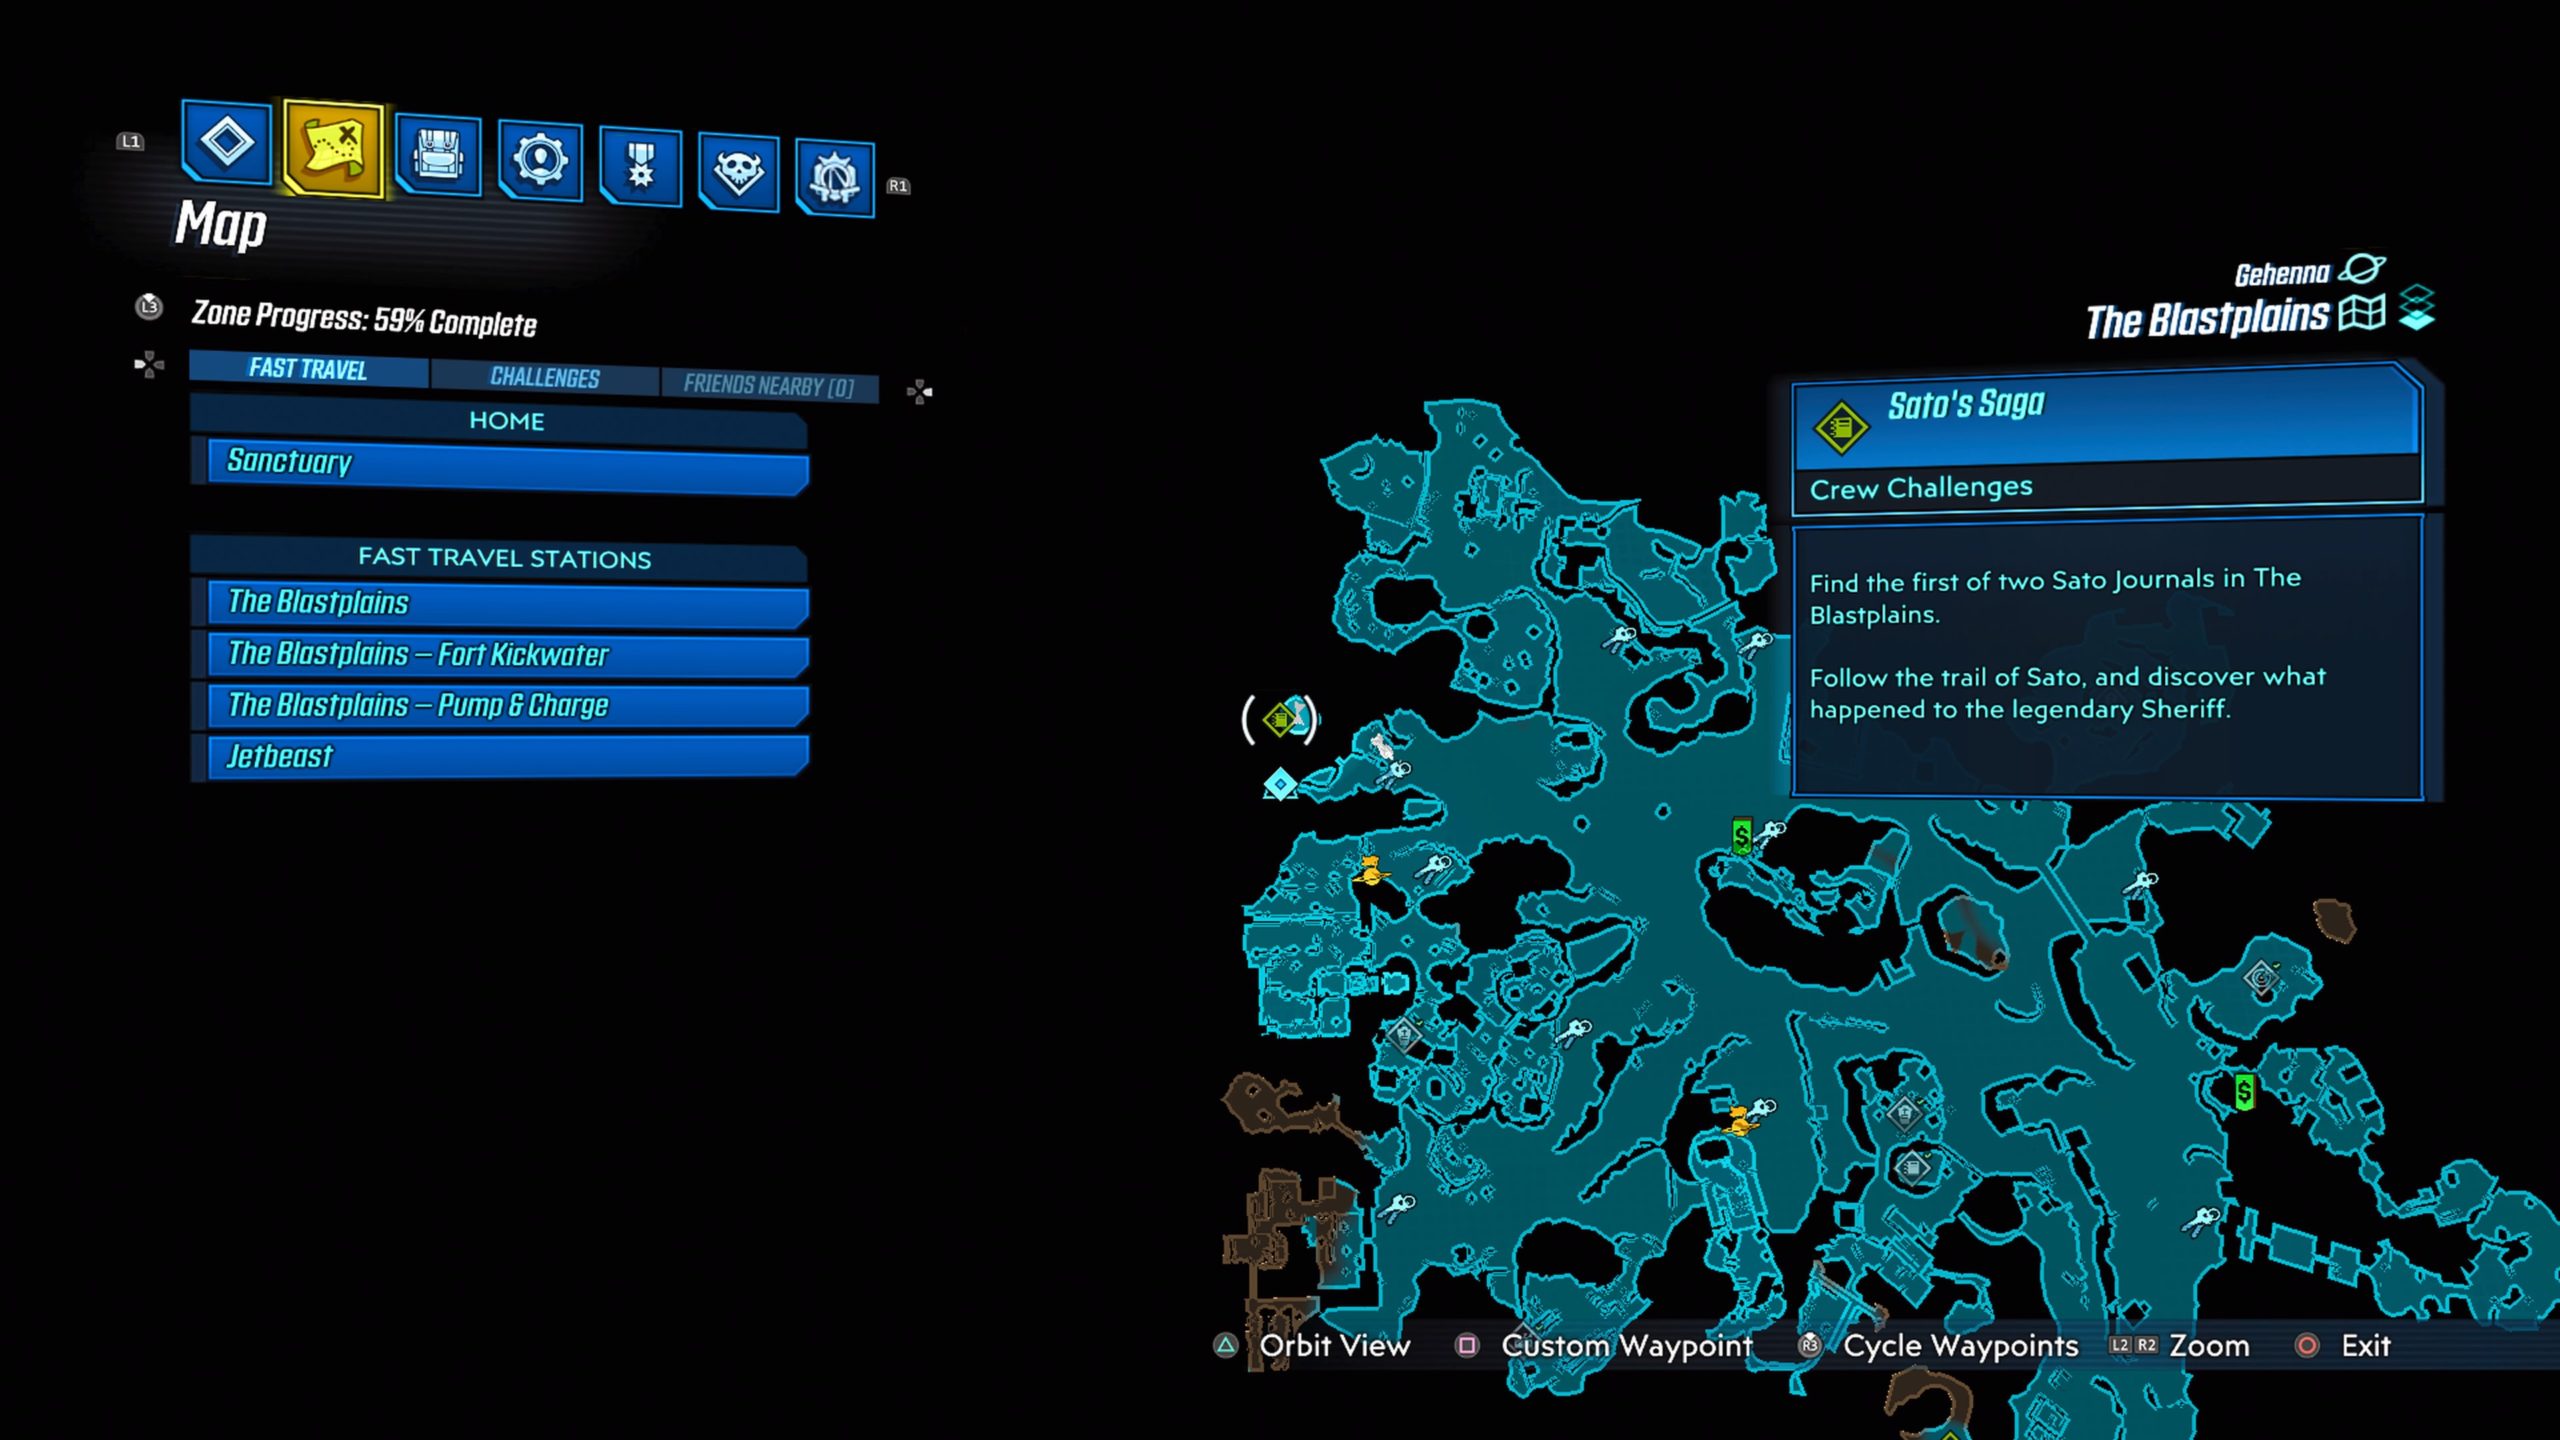
Vestige #1
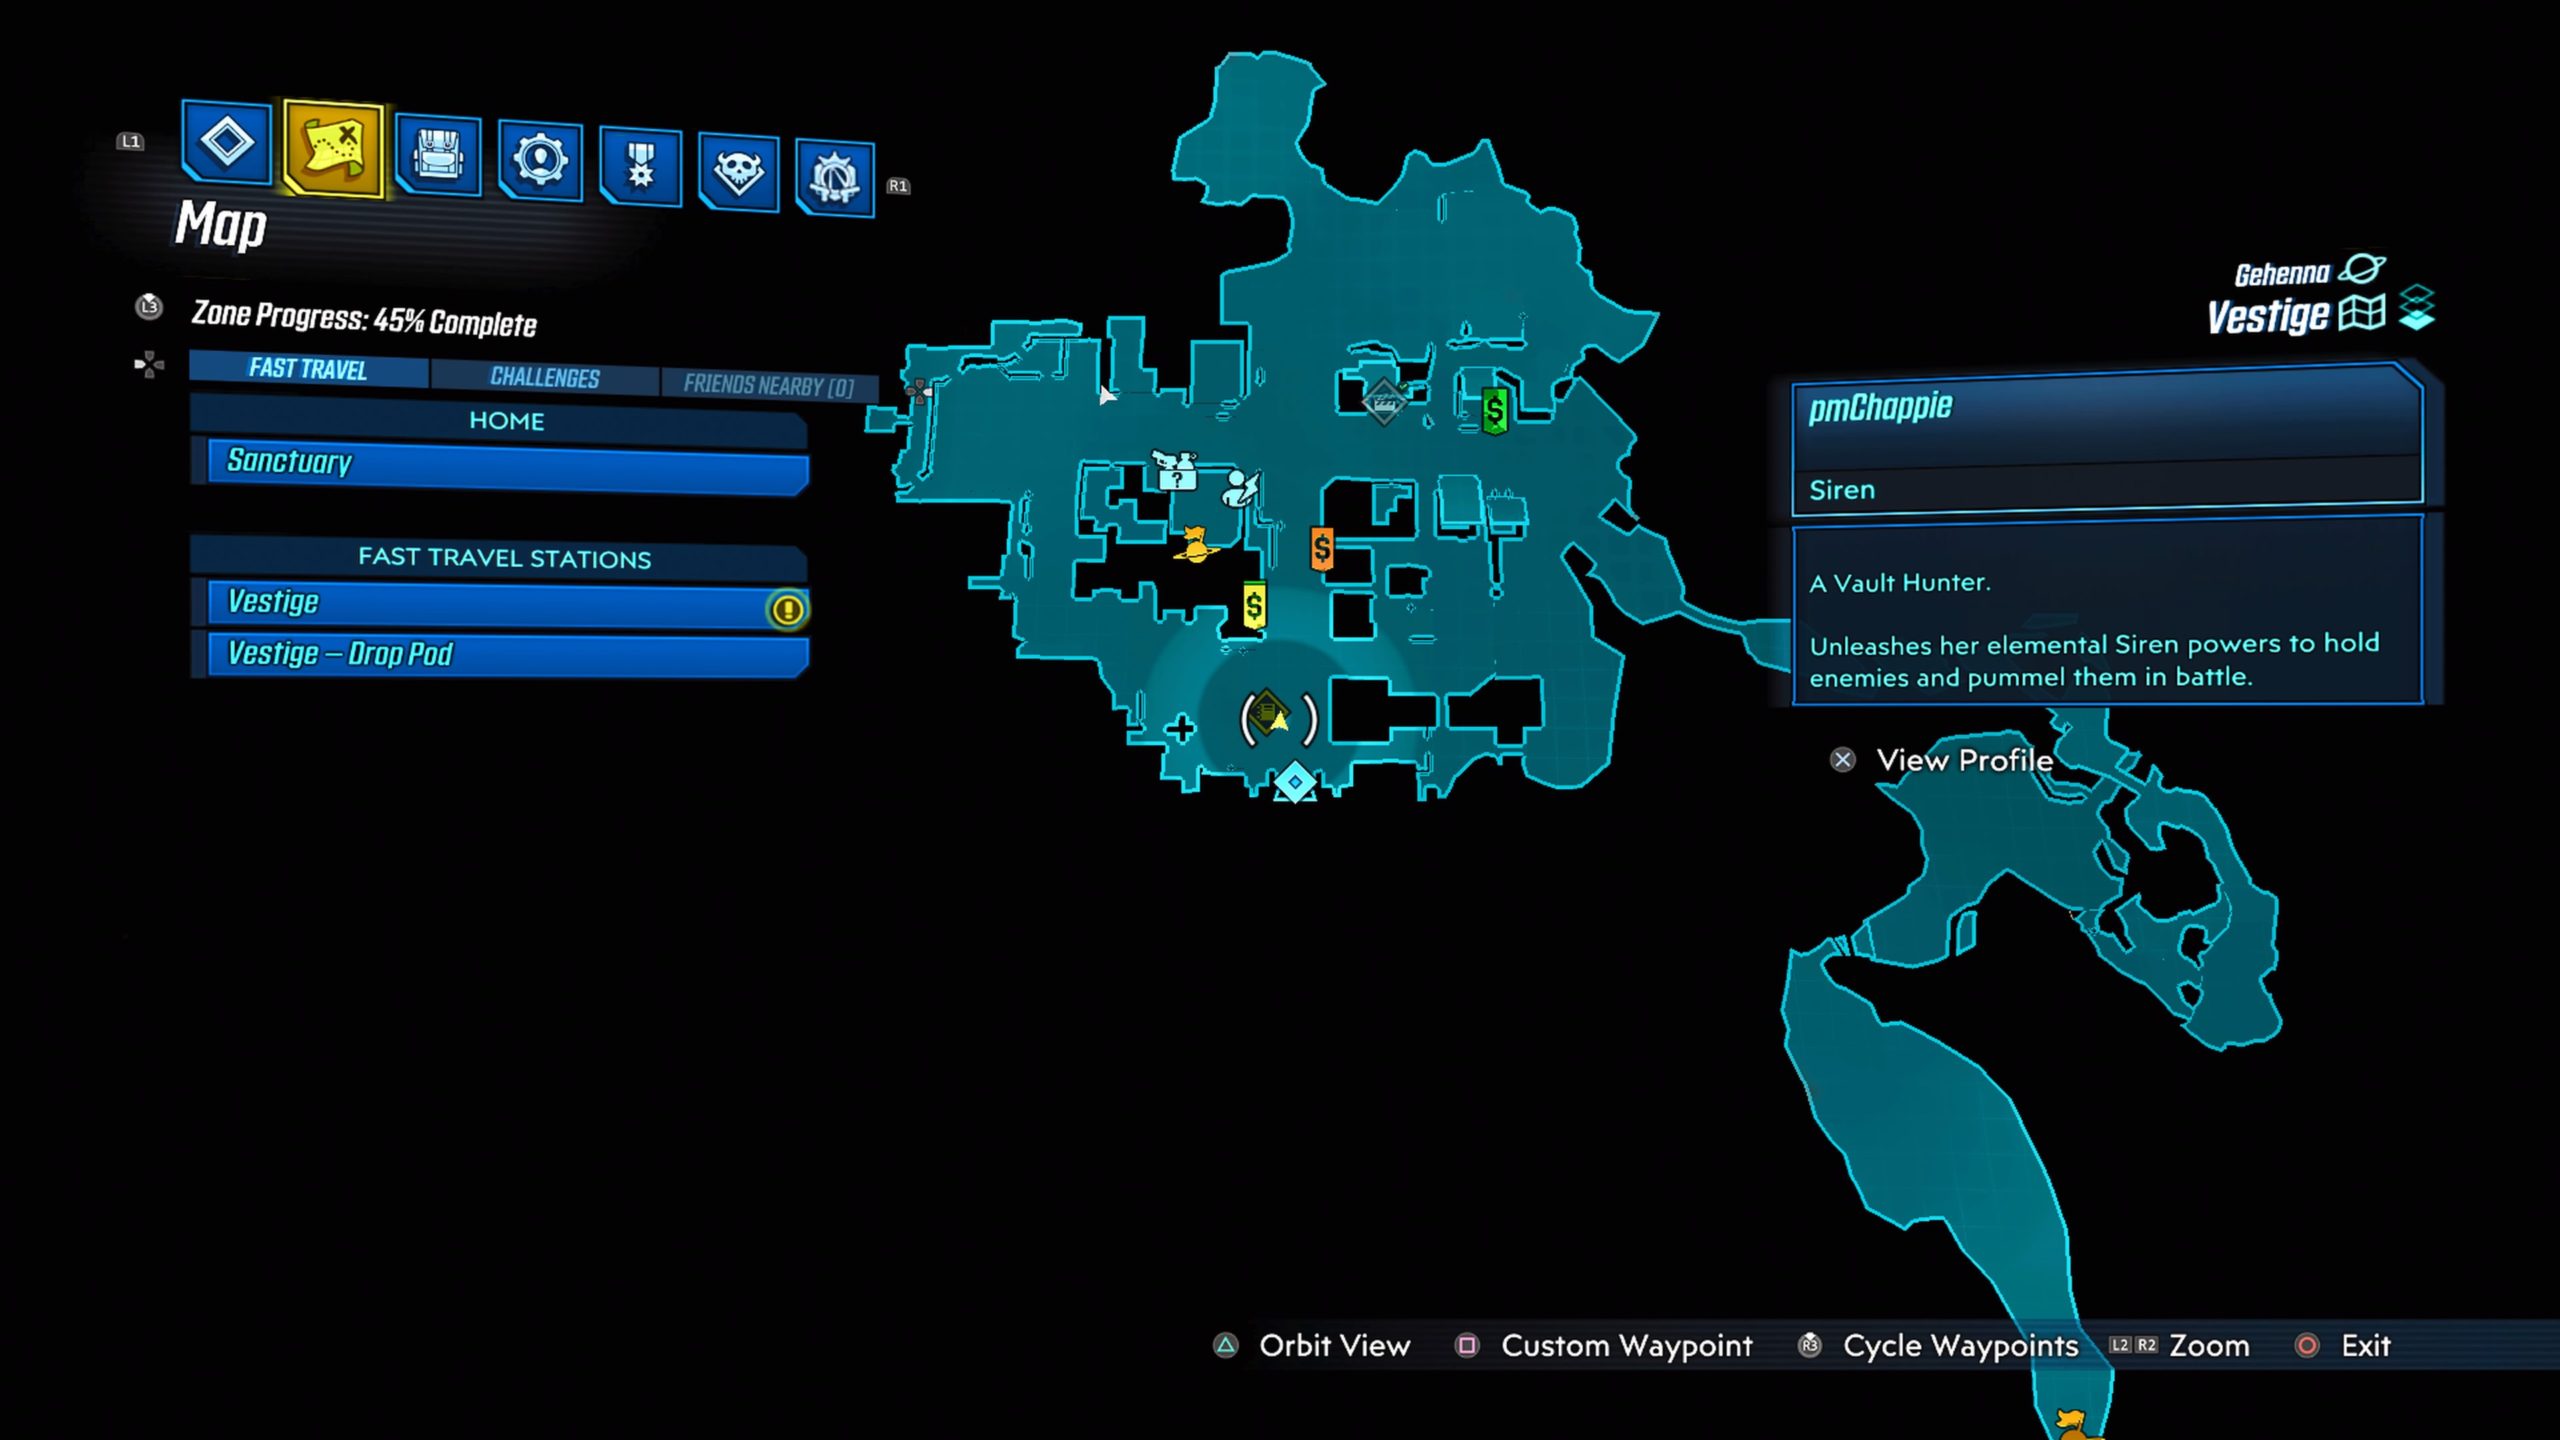
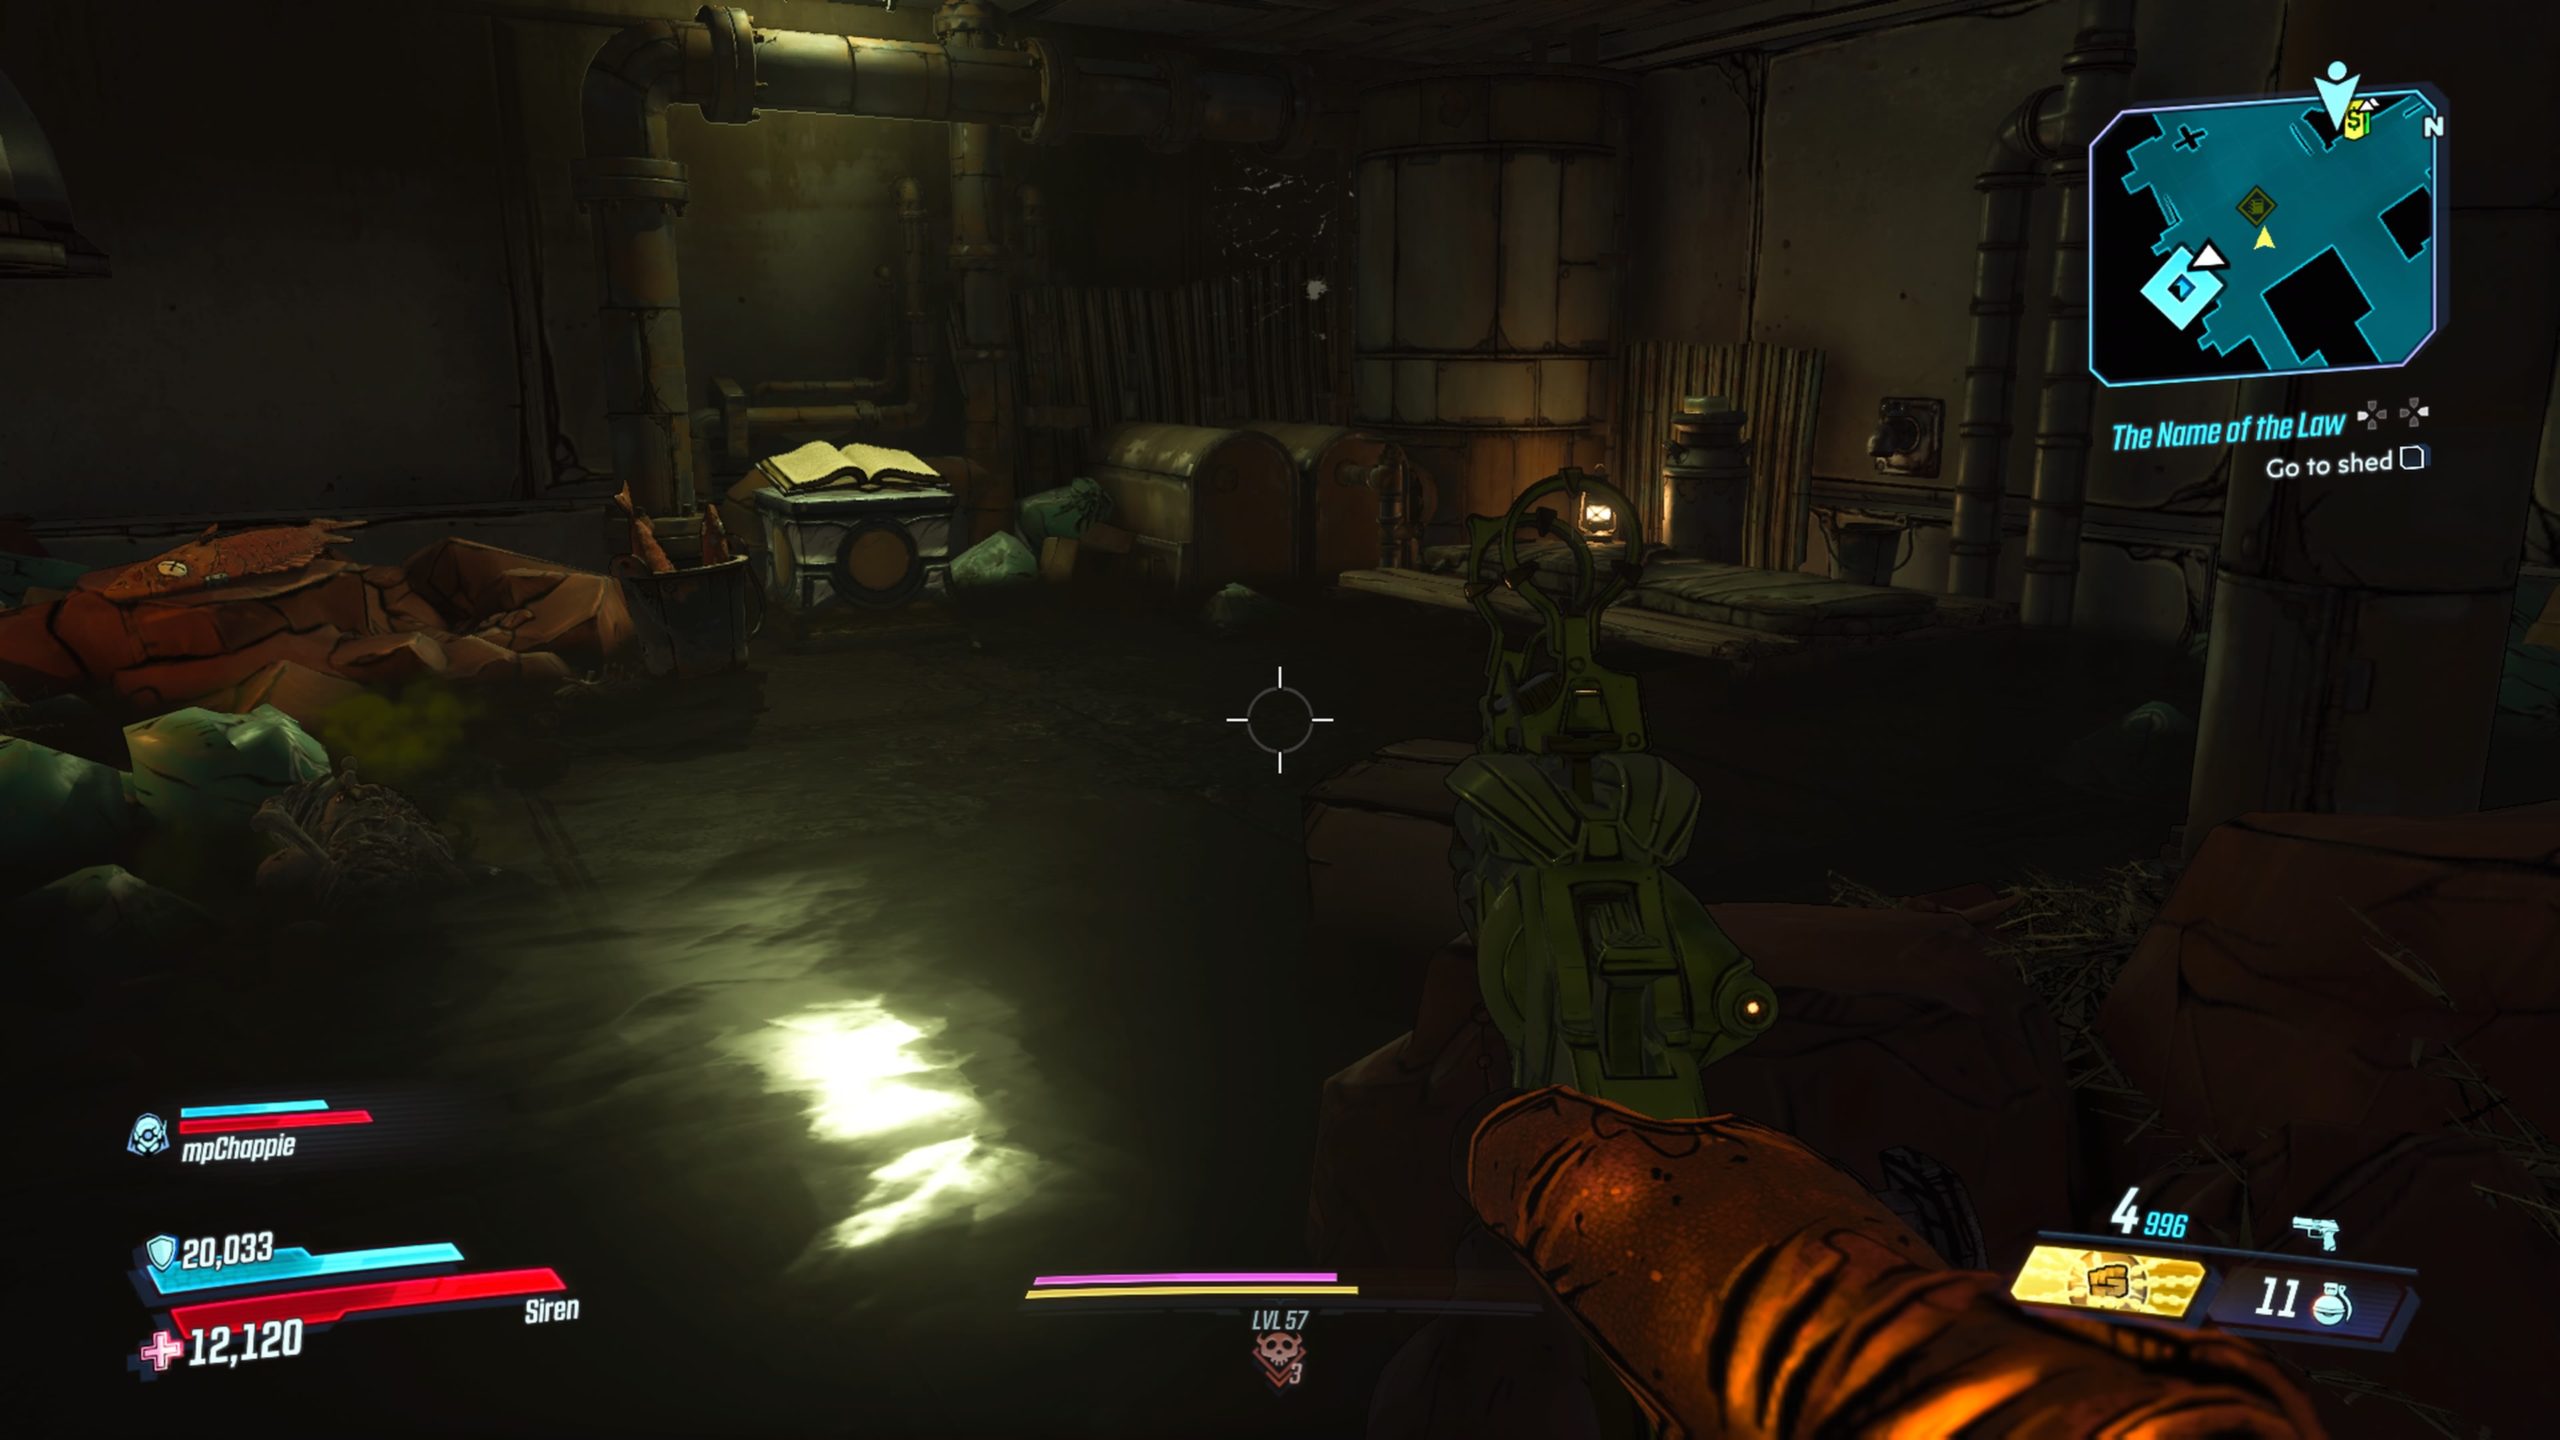
This Sato journal can be found in the southern part of town near the Blastplains map transition. To reach it, jump into the water then head under the bridge to find a hidden room.
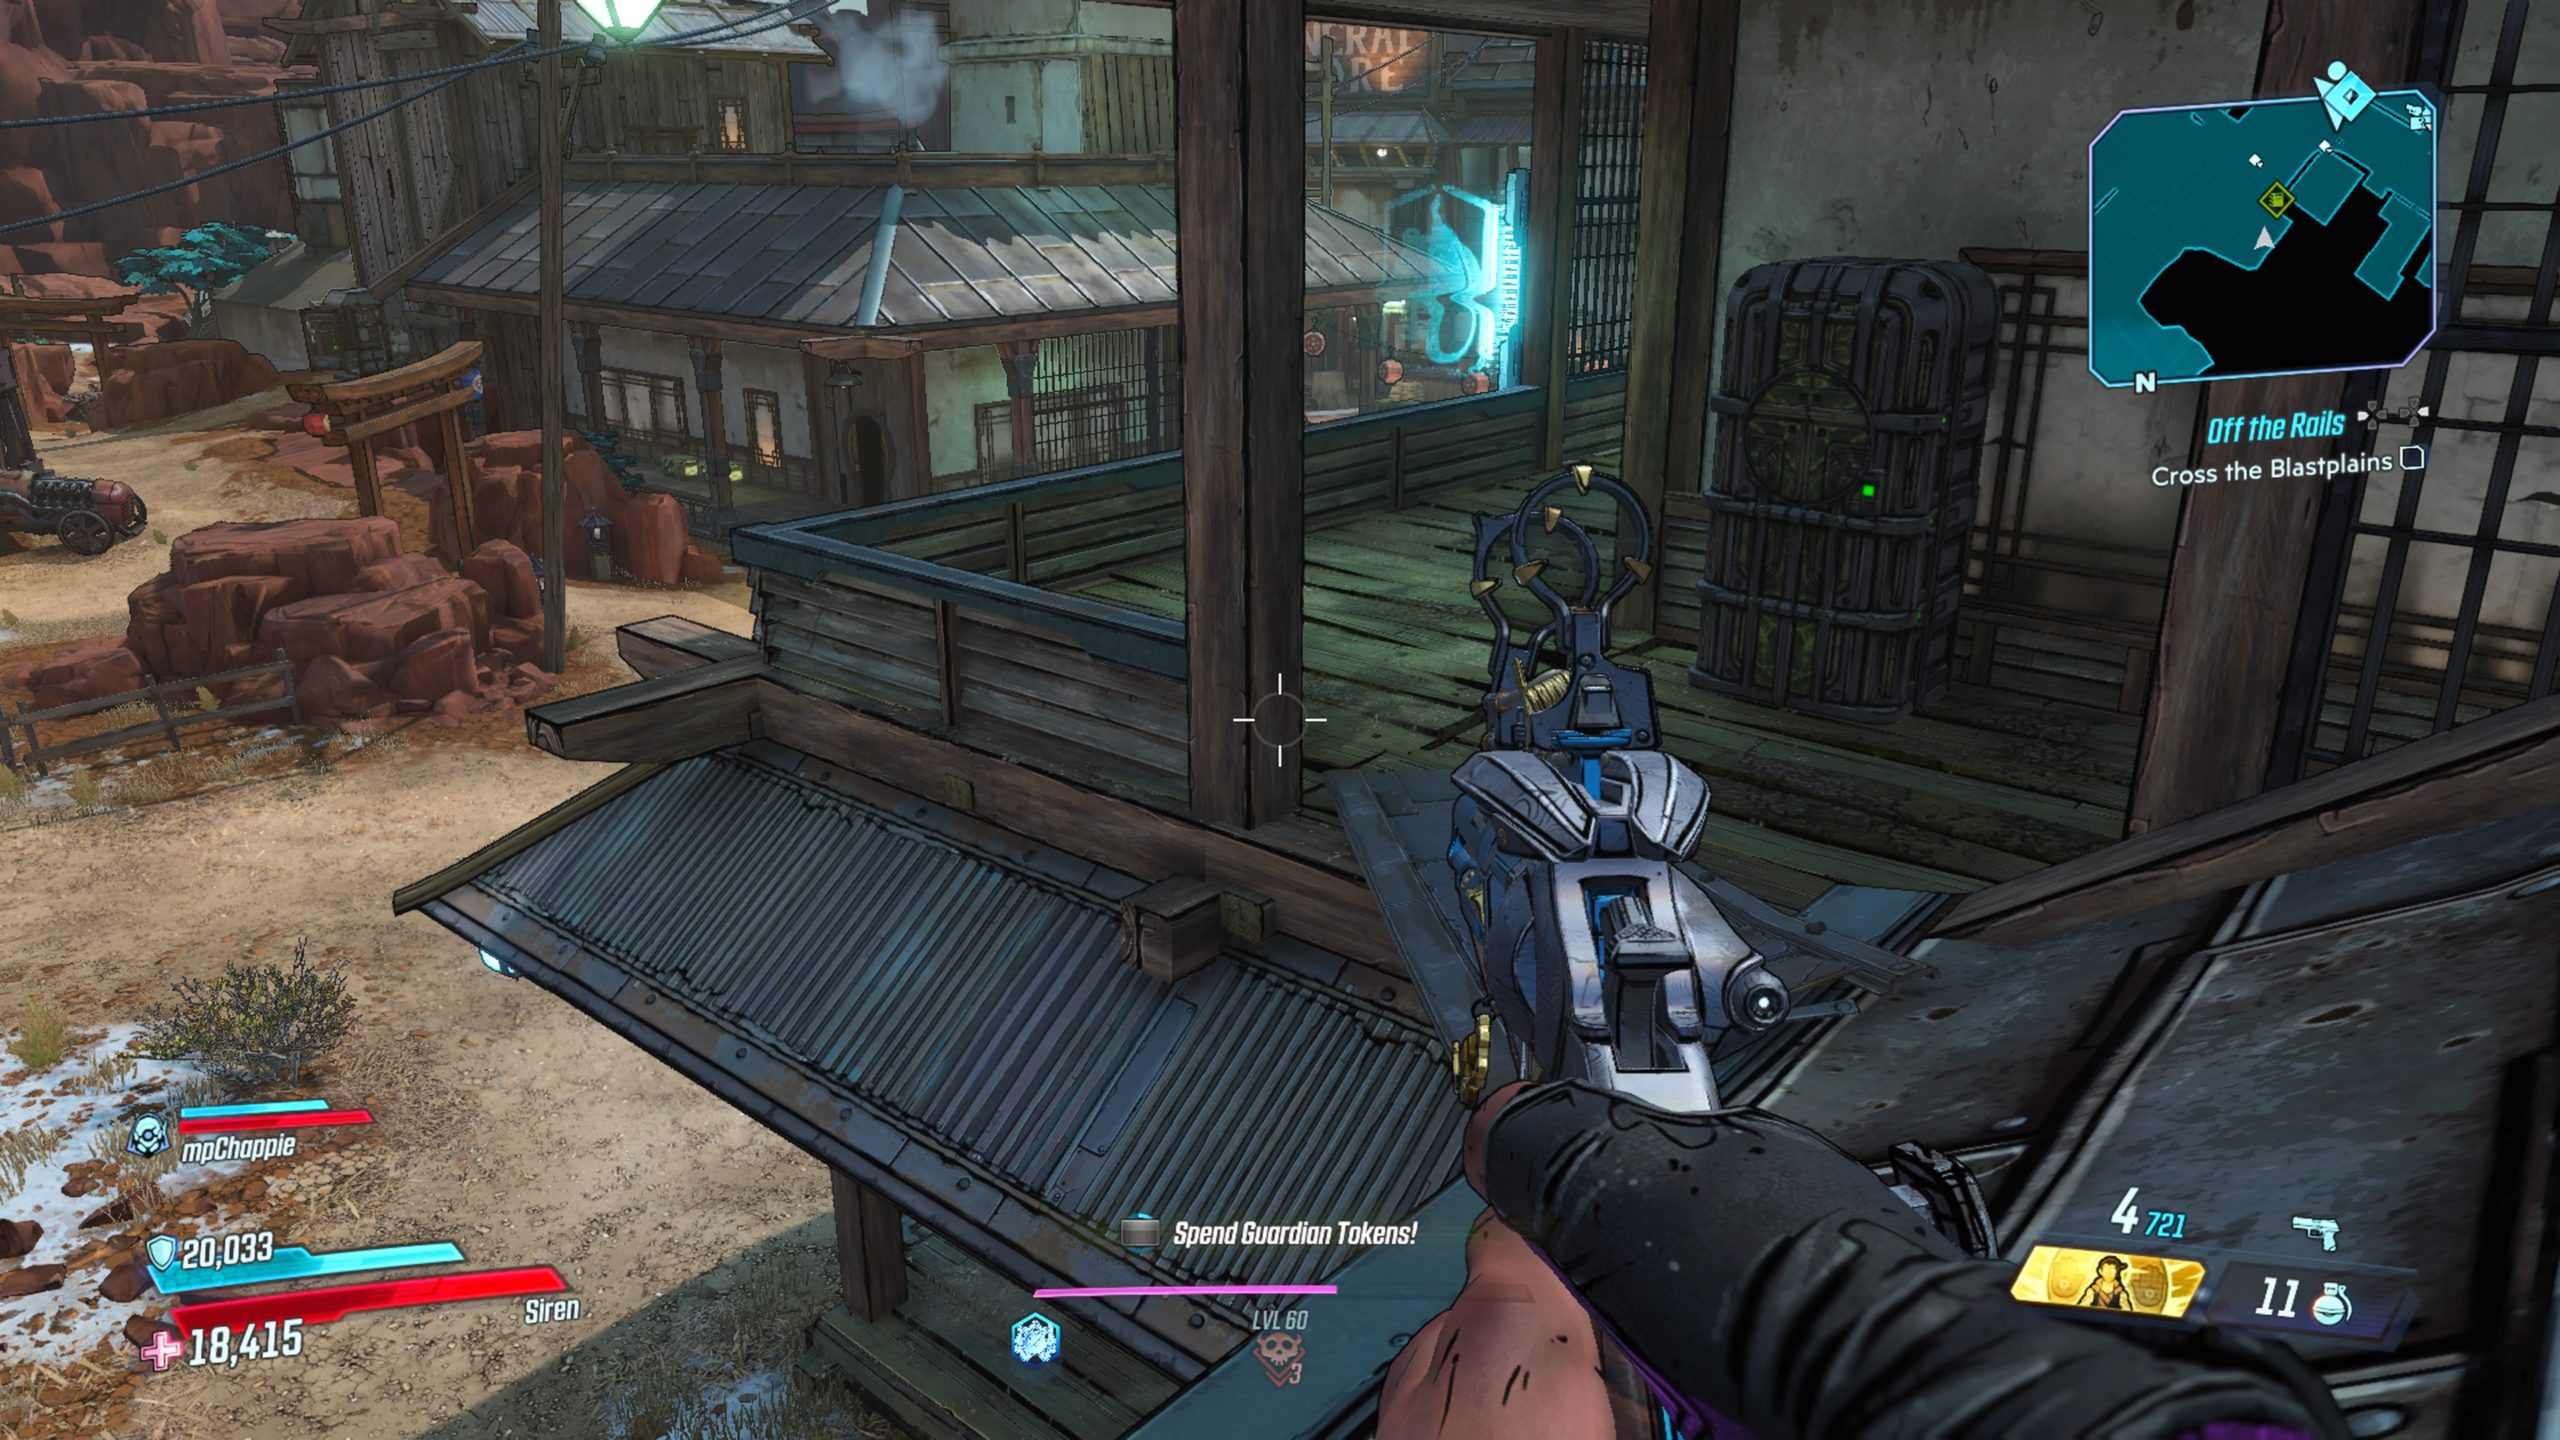
Vestige #2
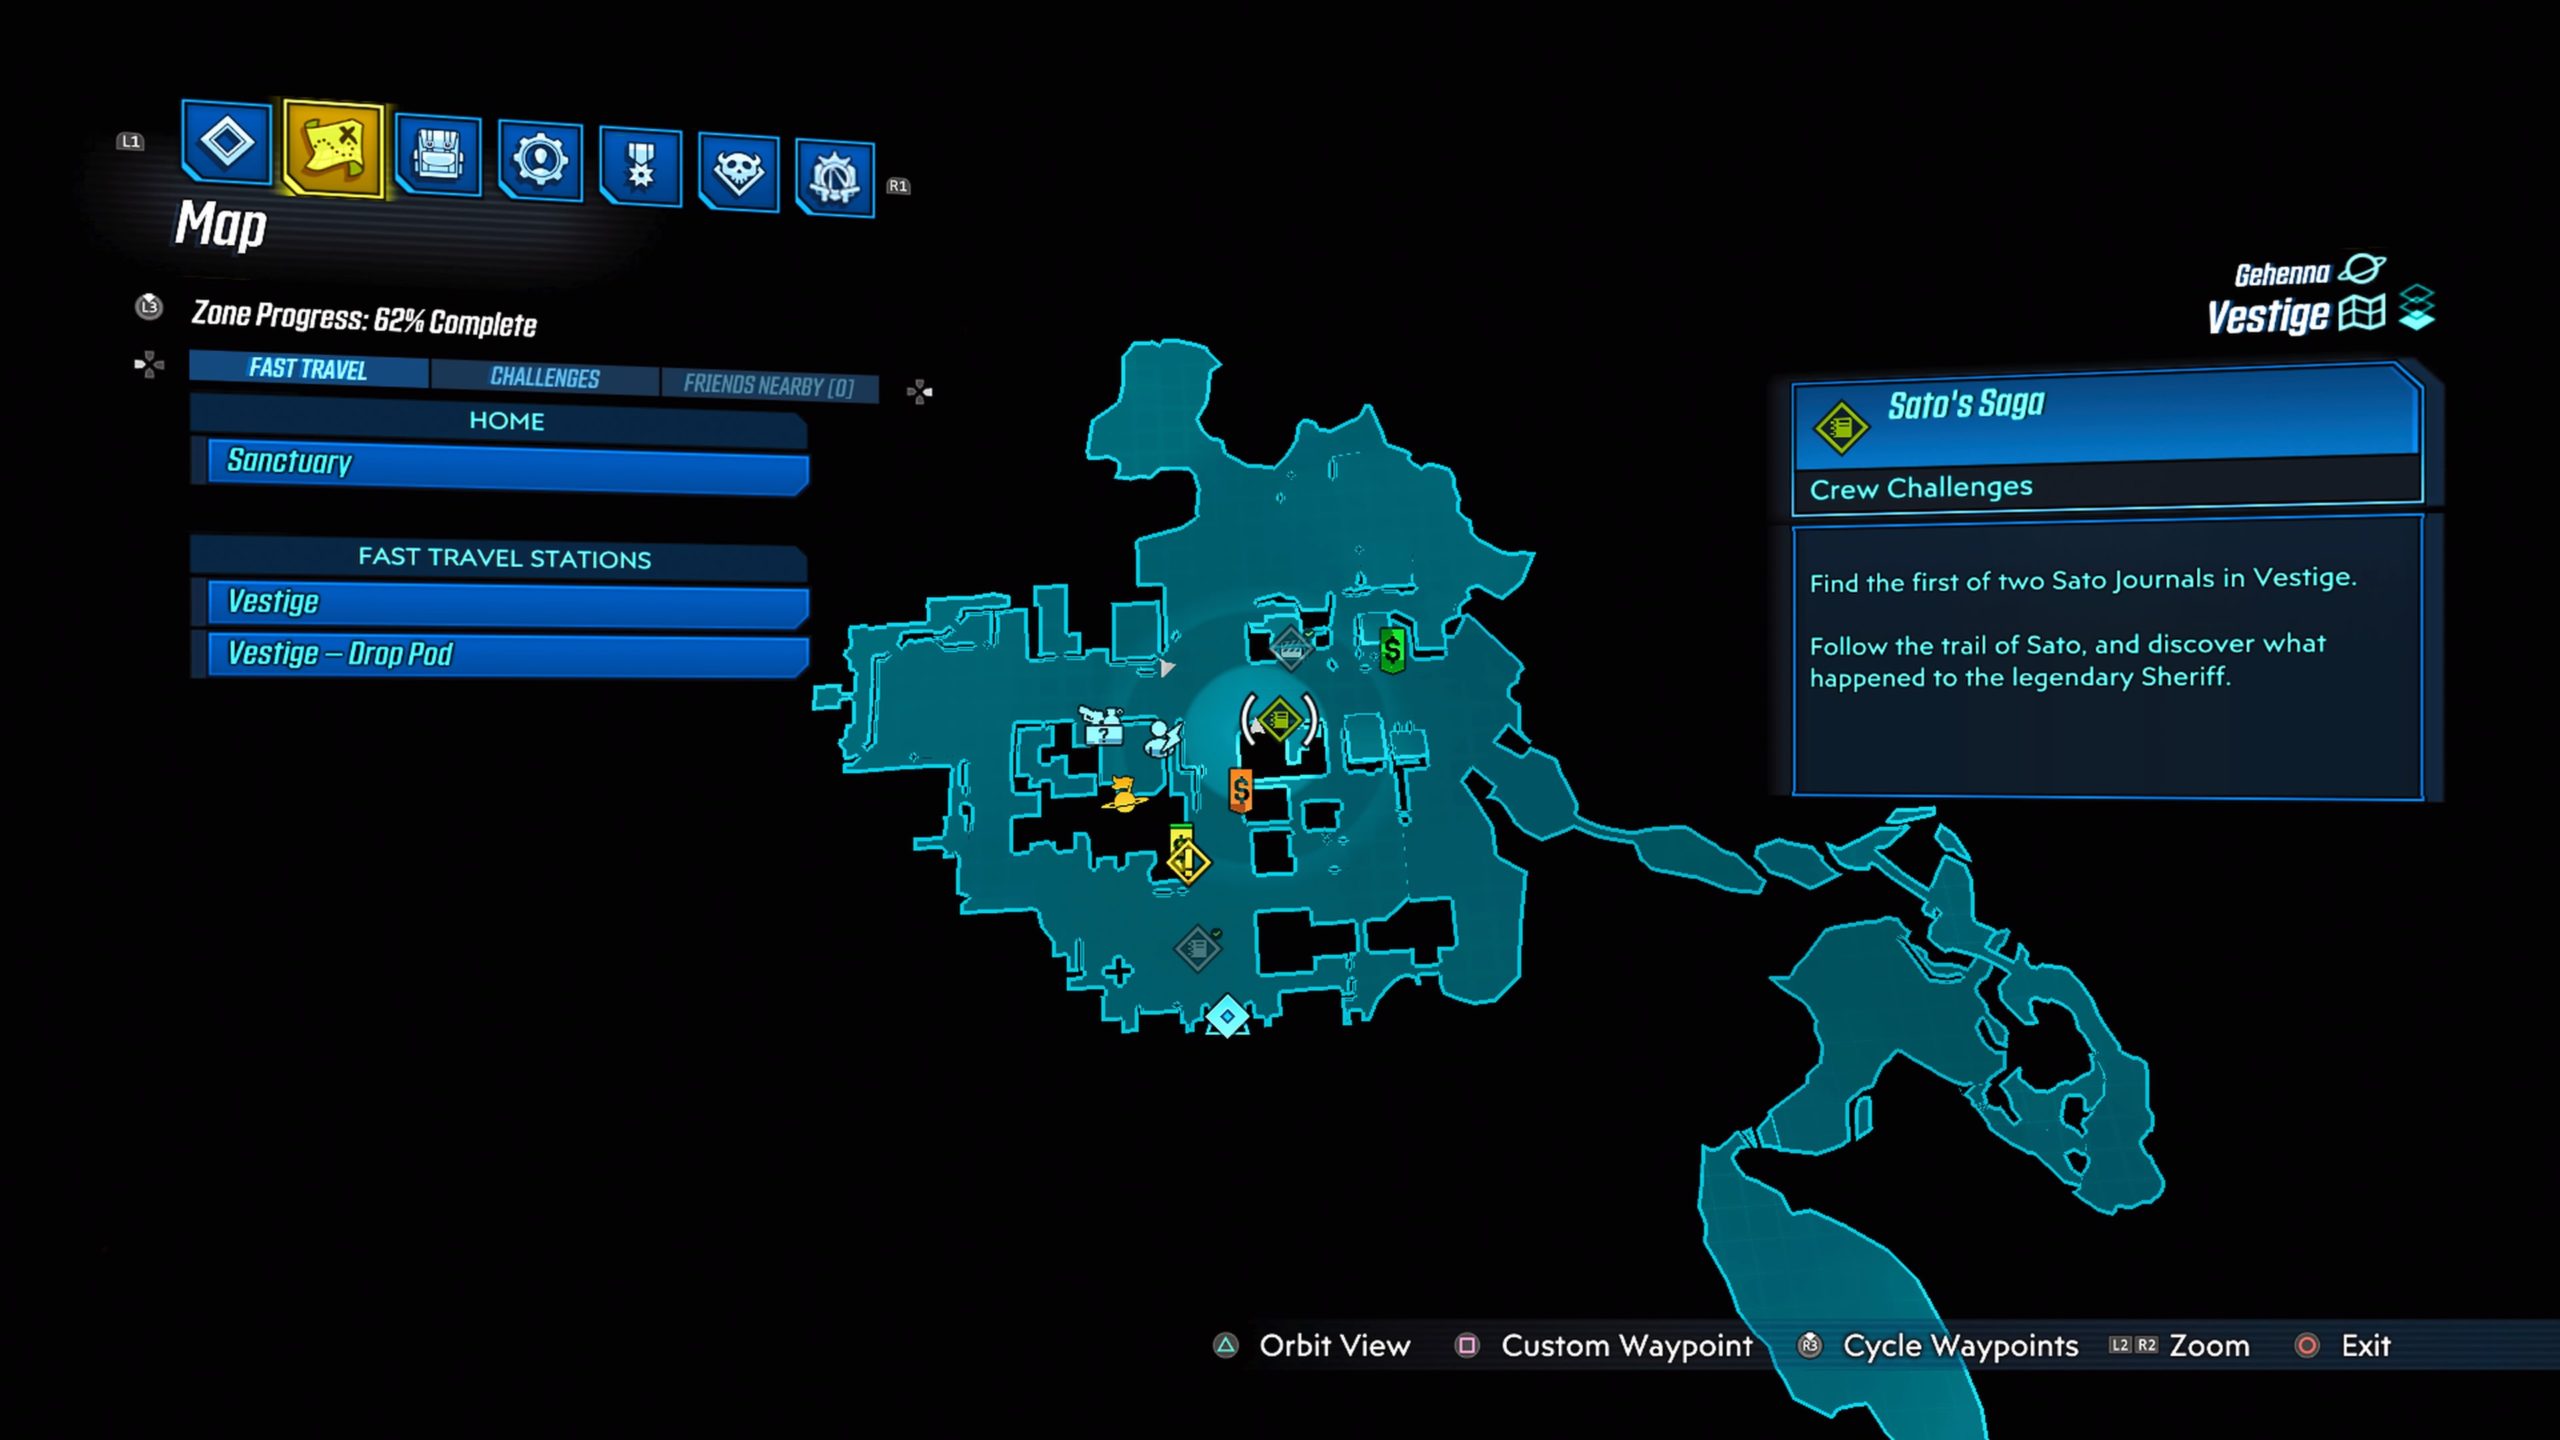
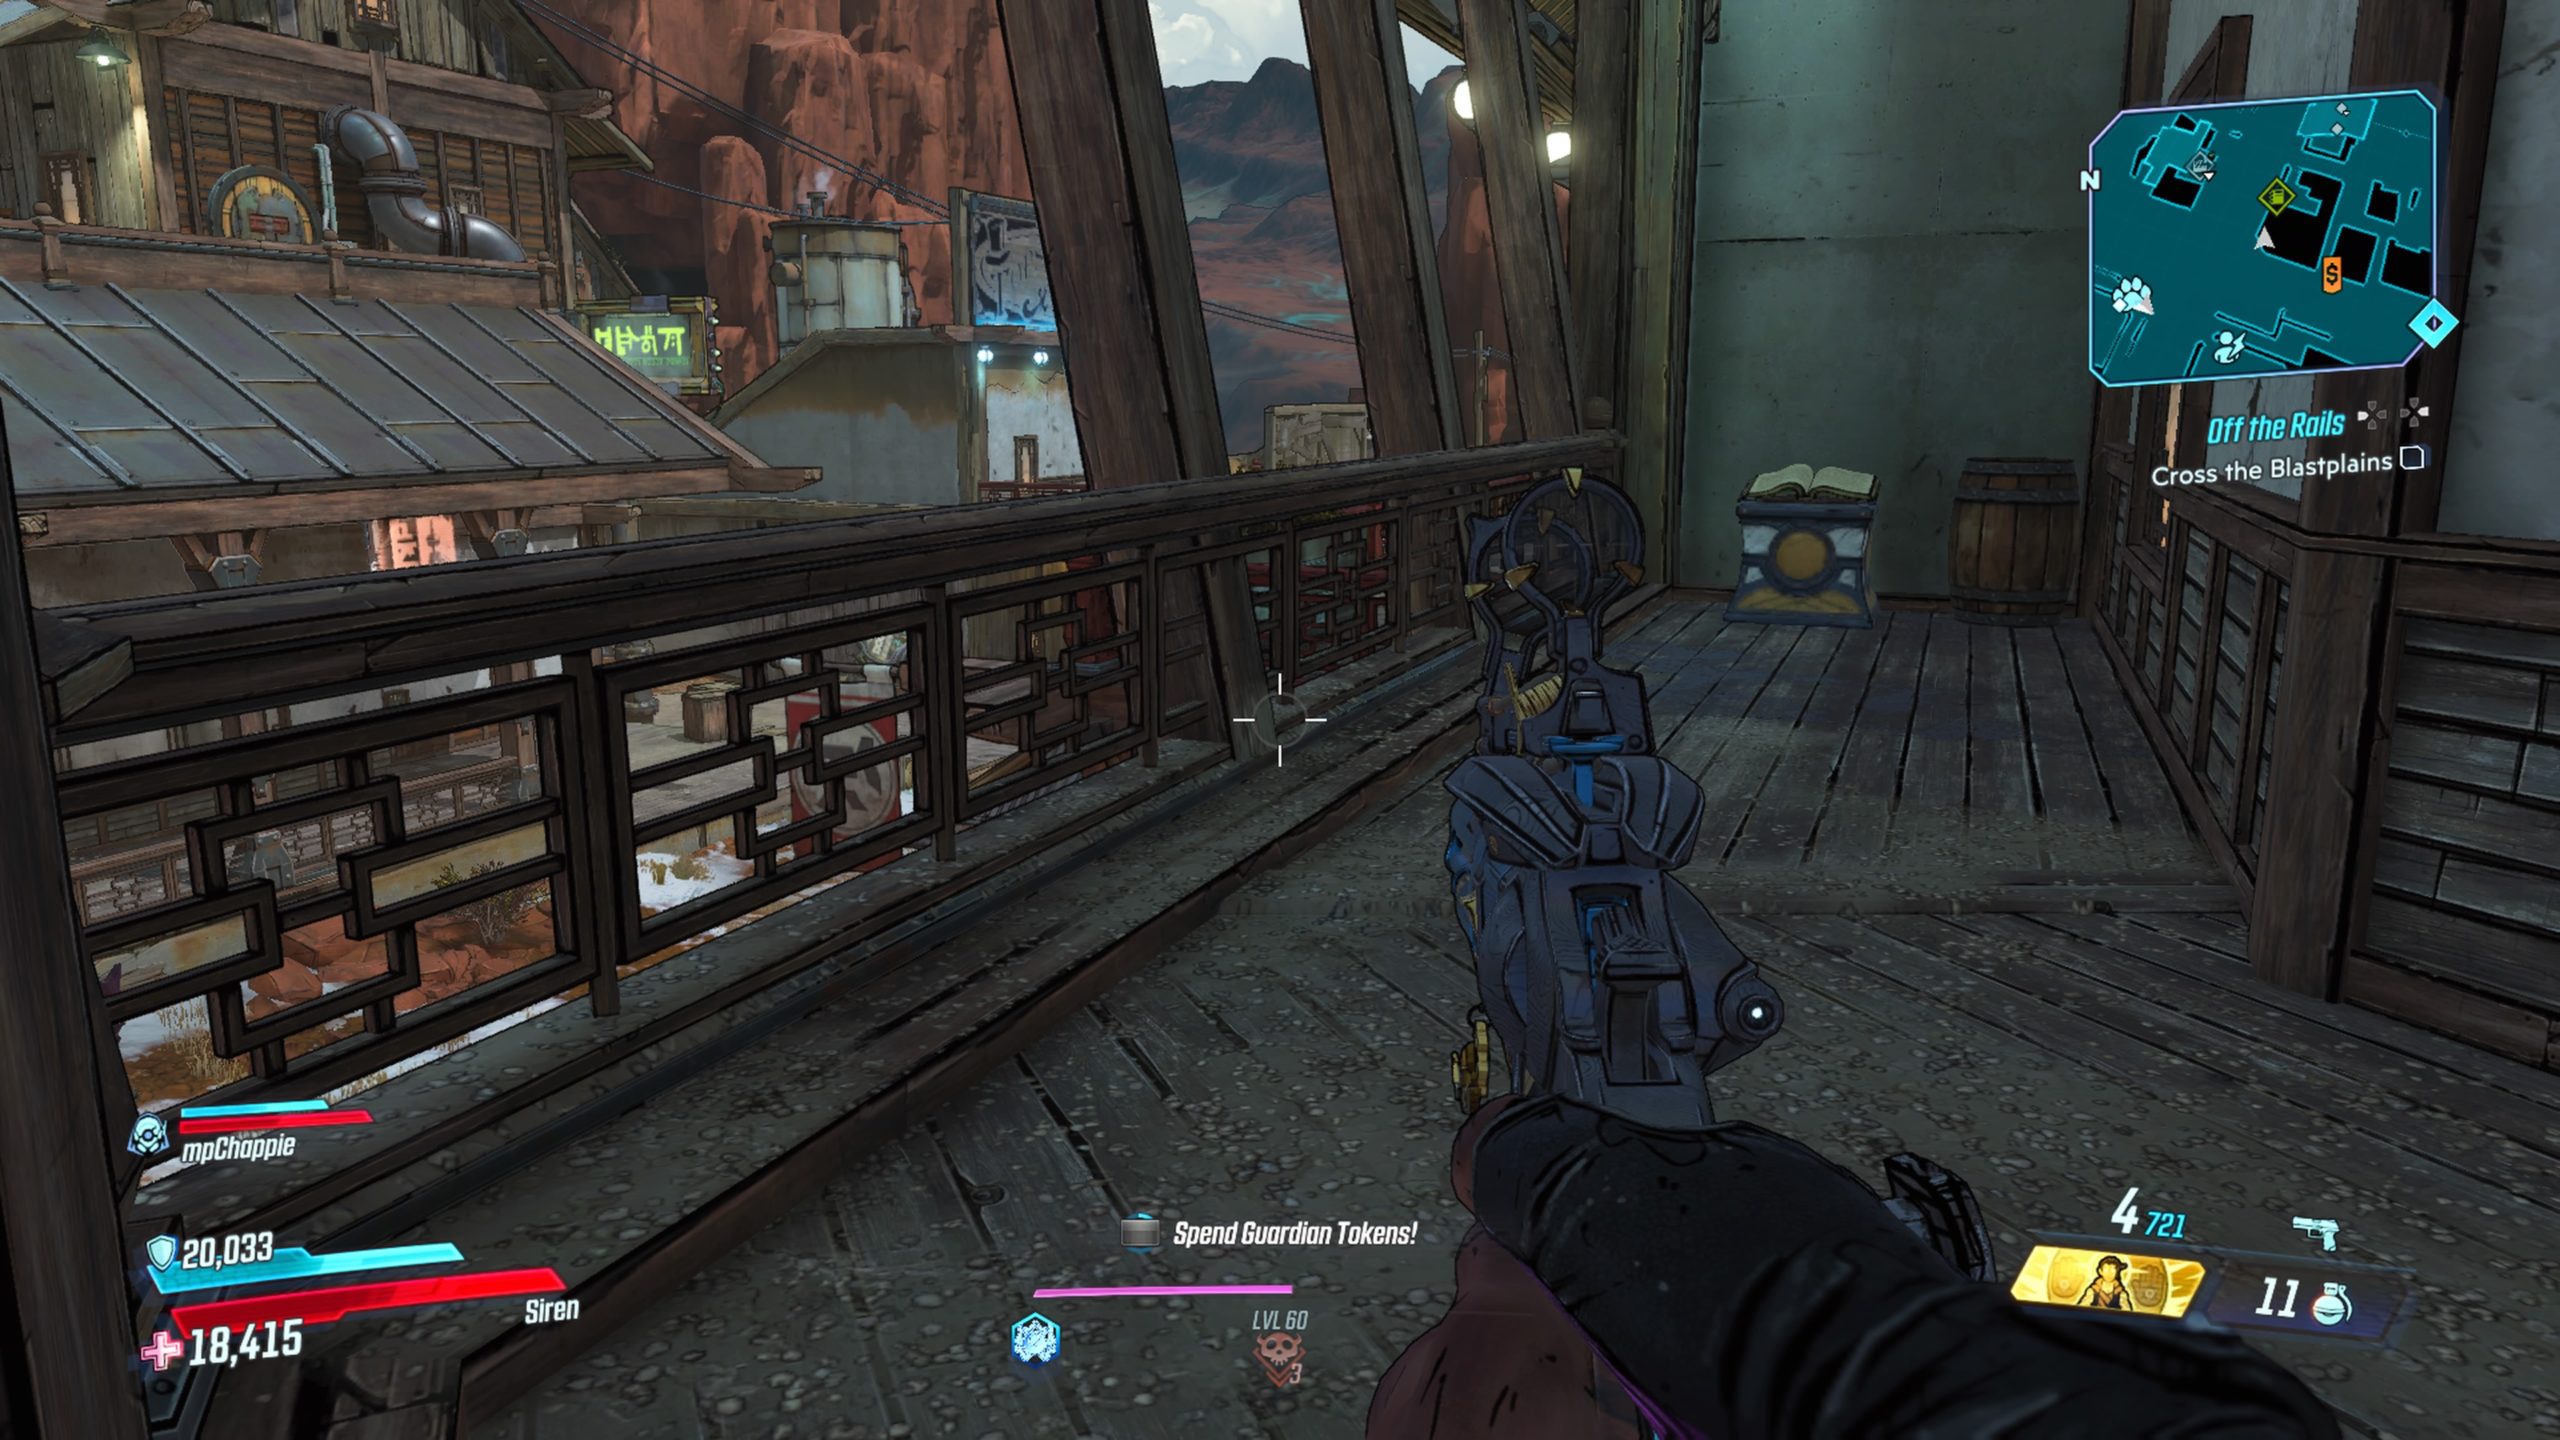
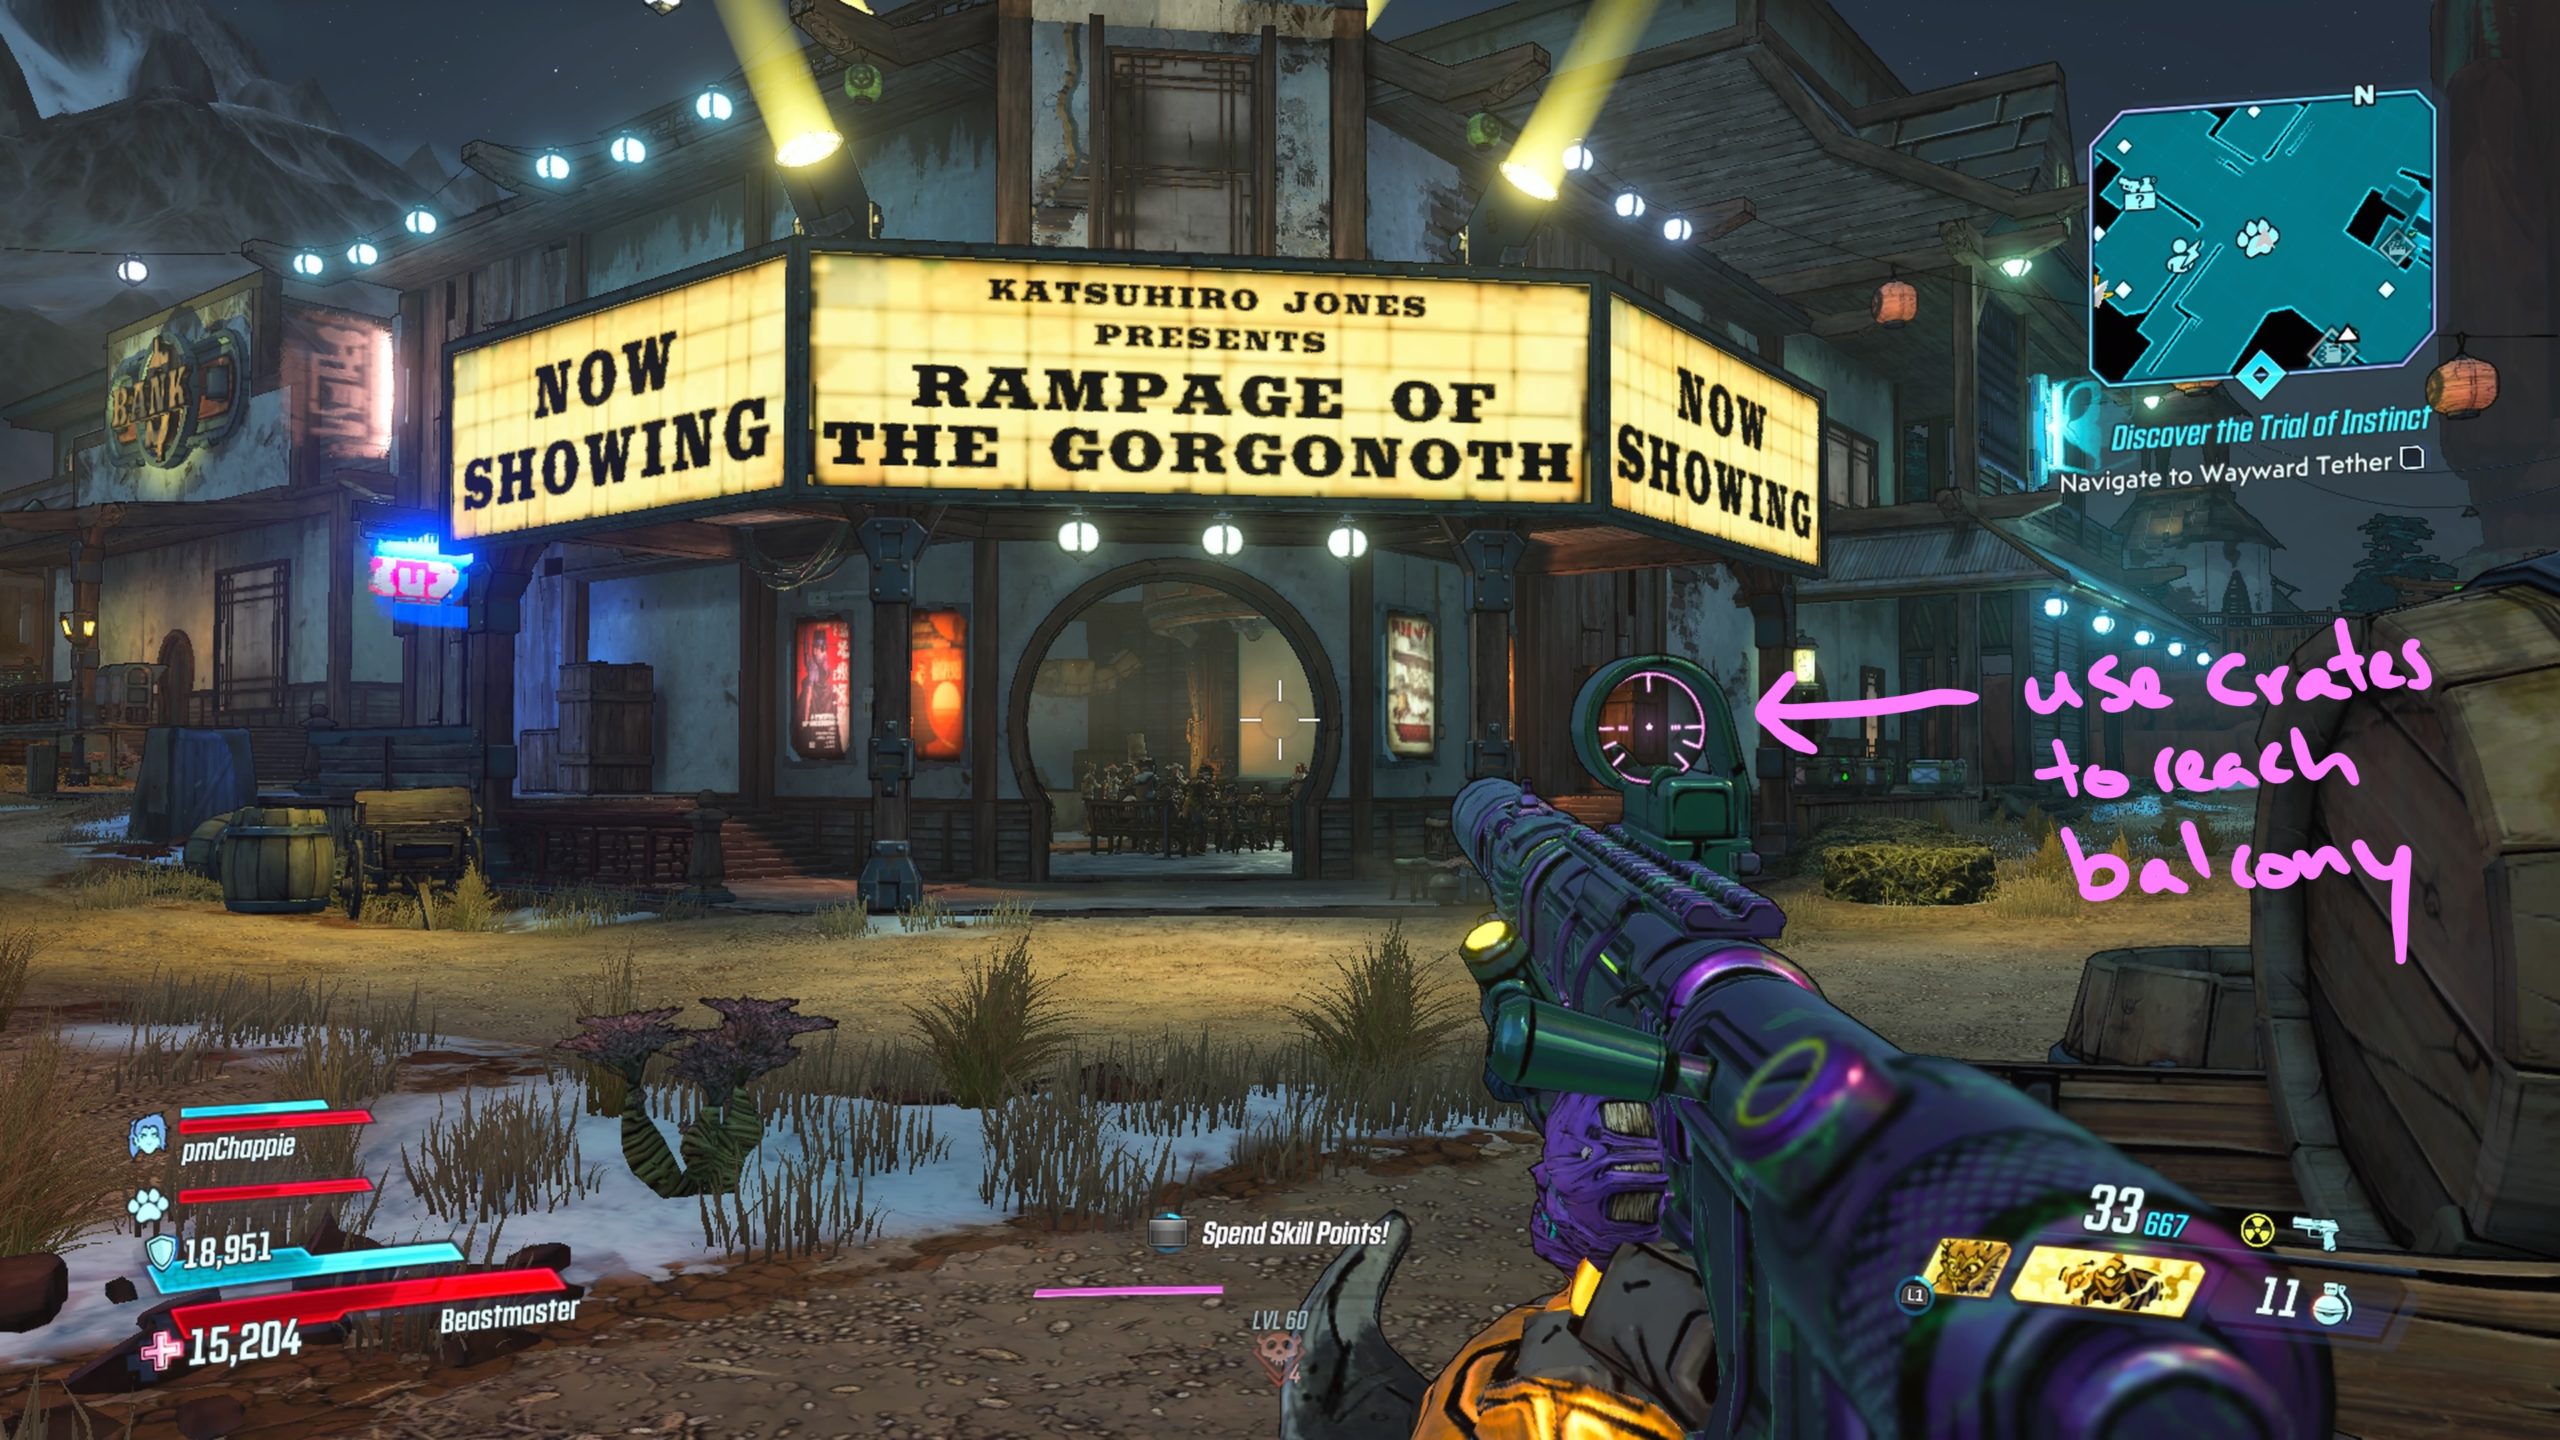
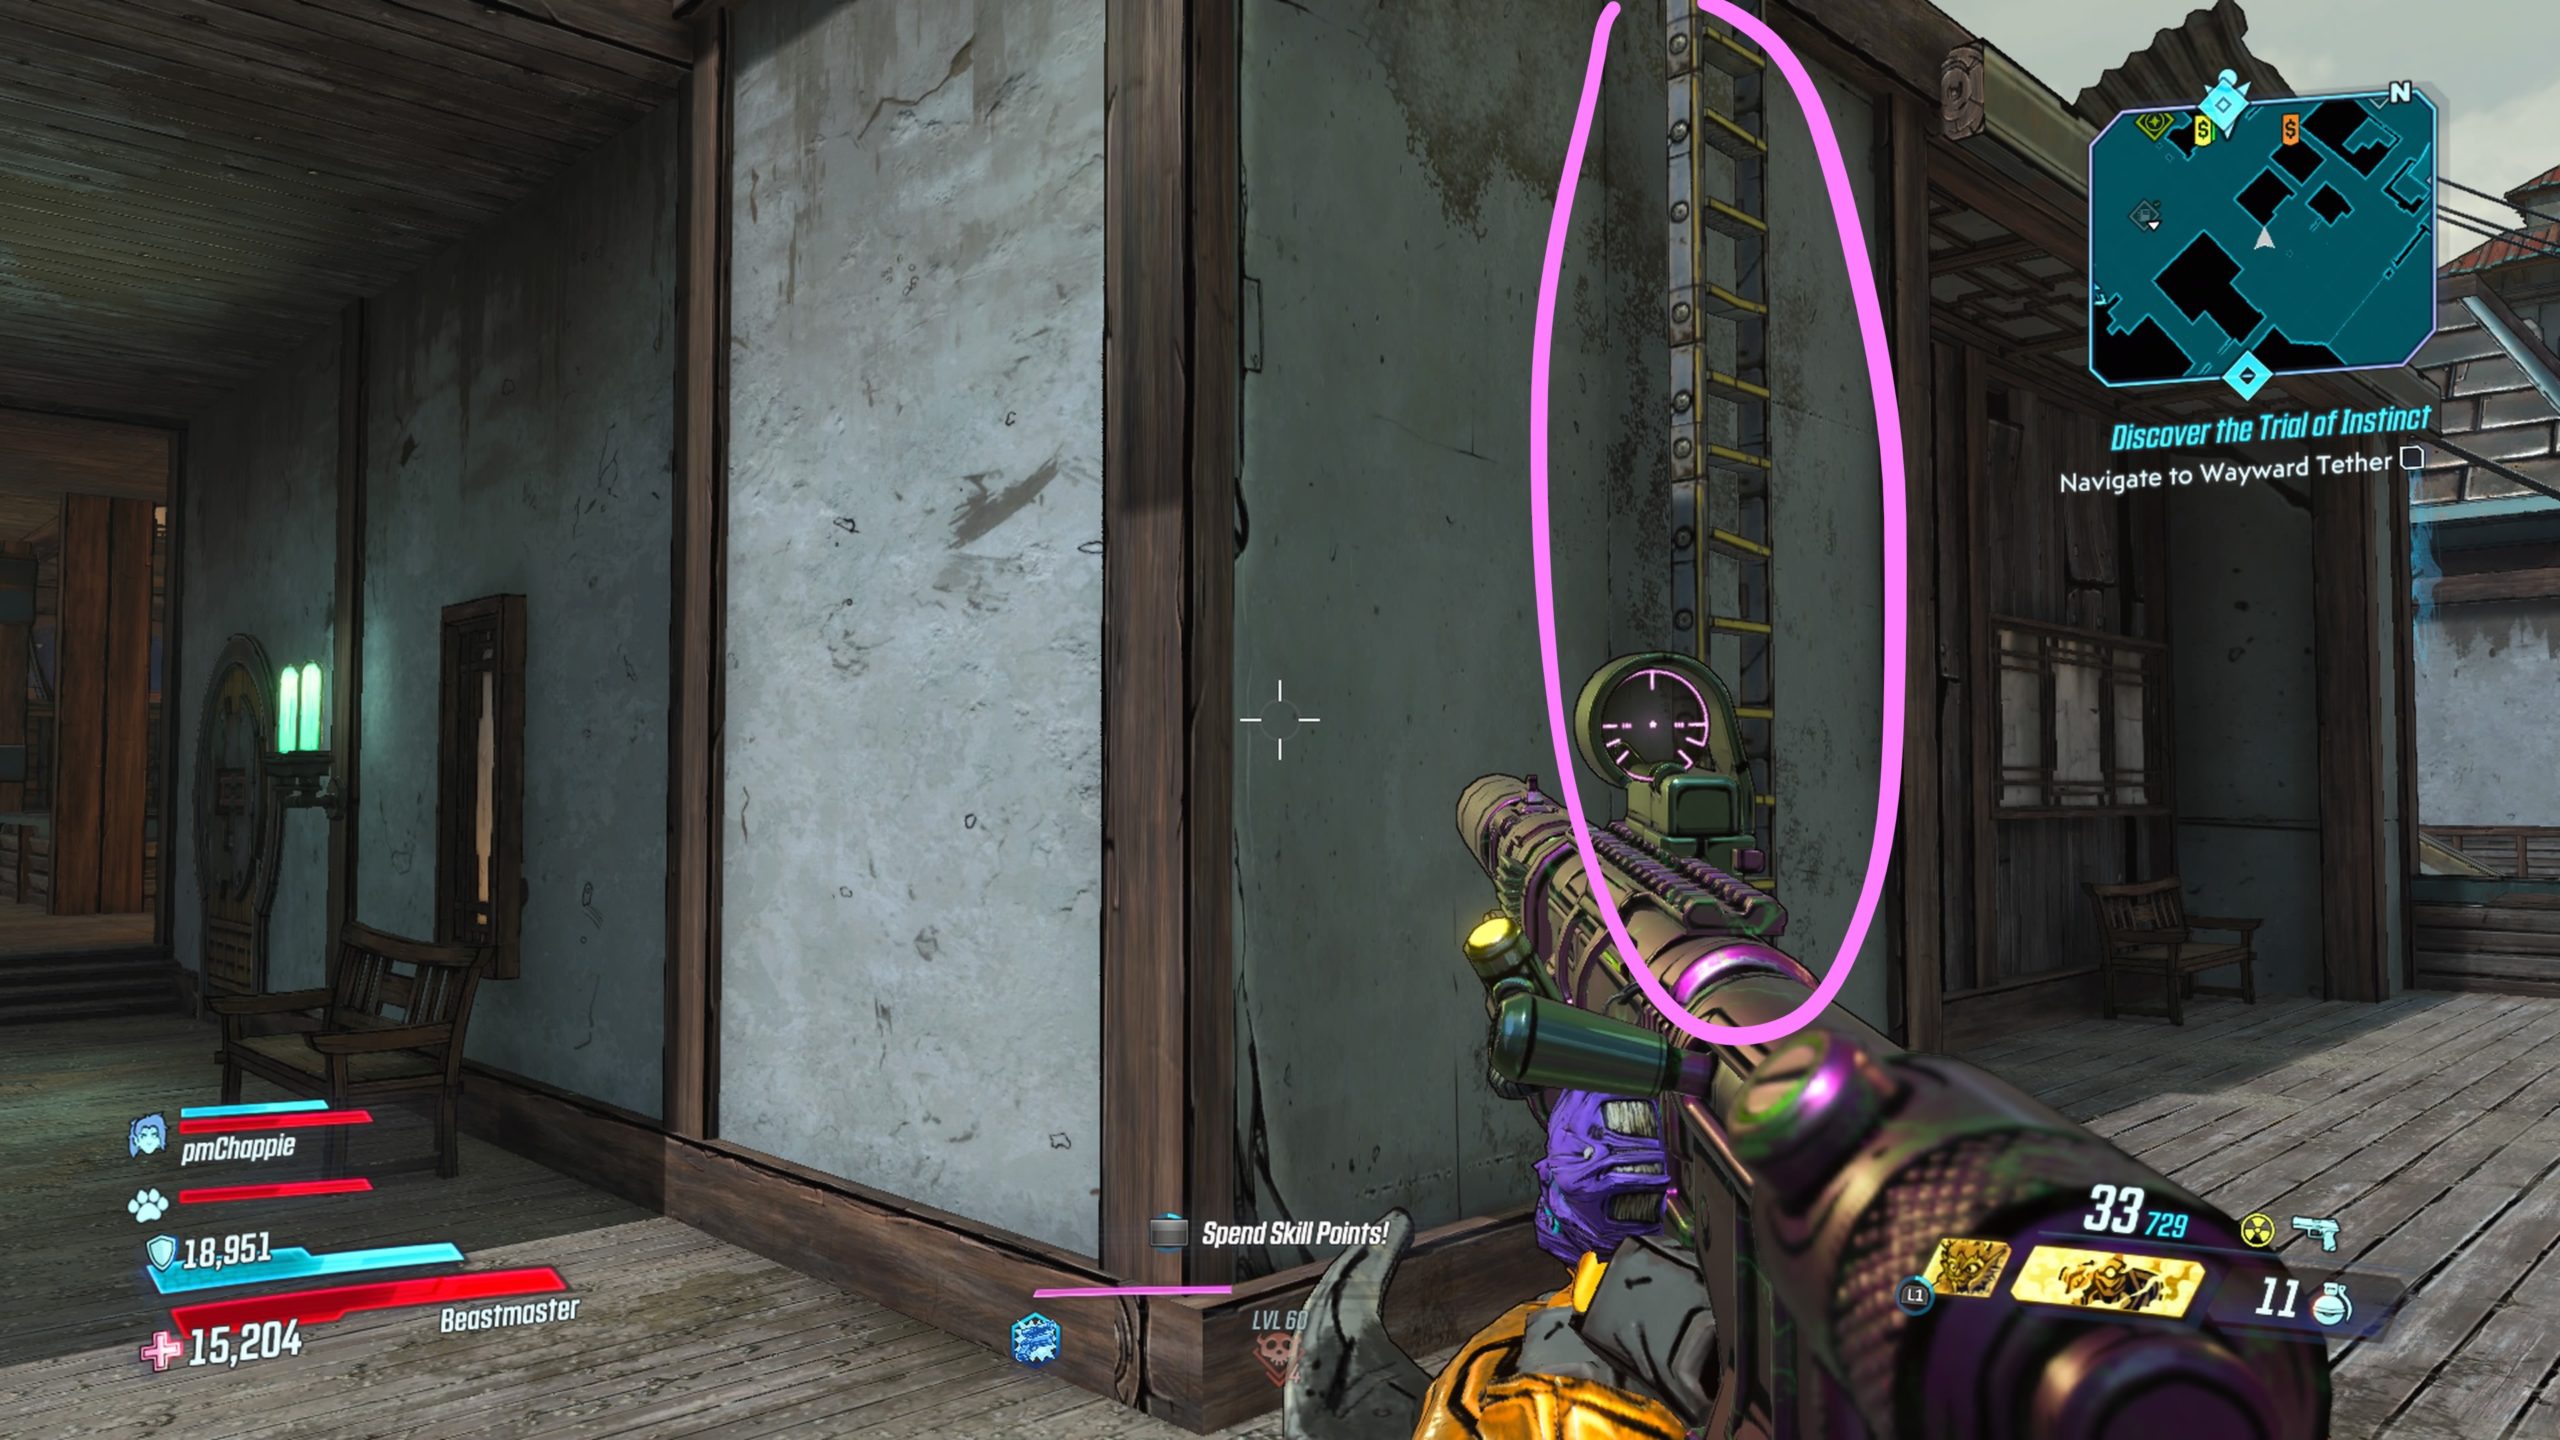
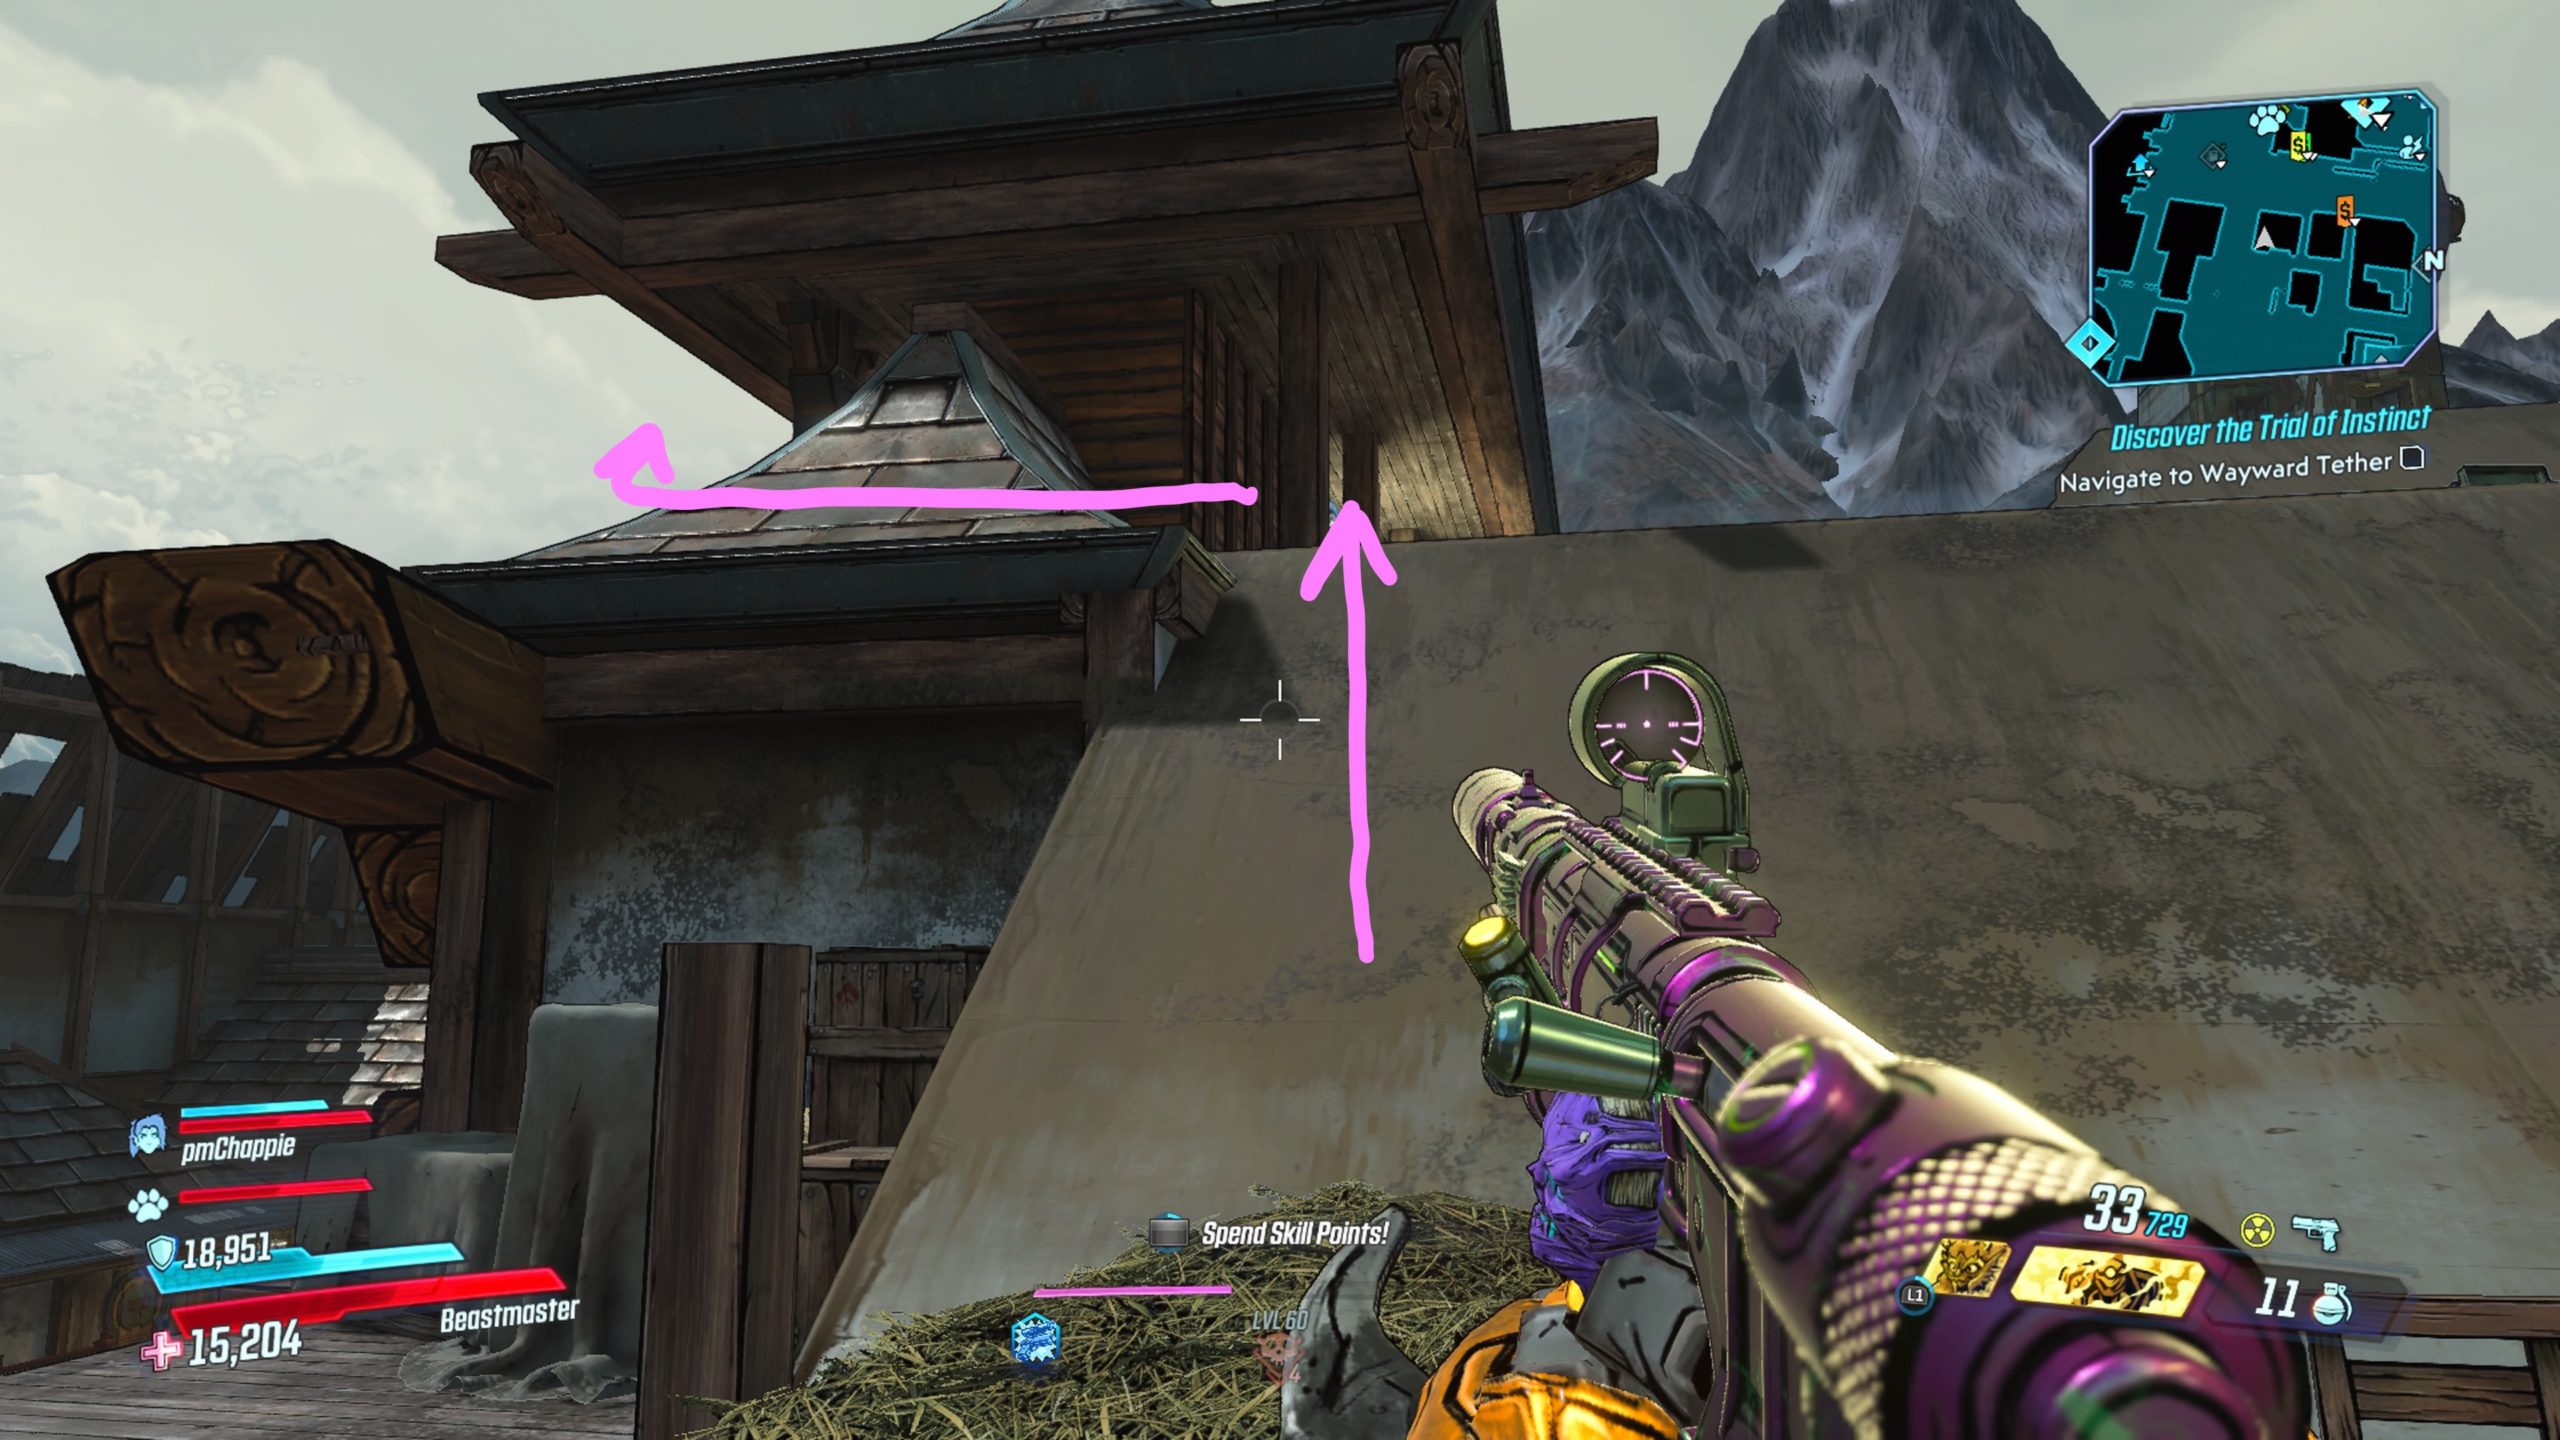
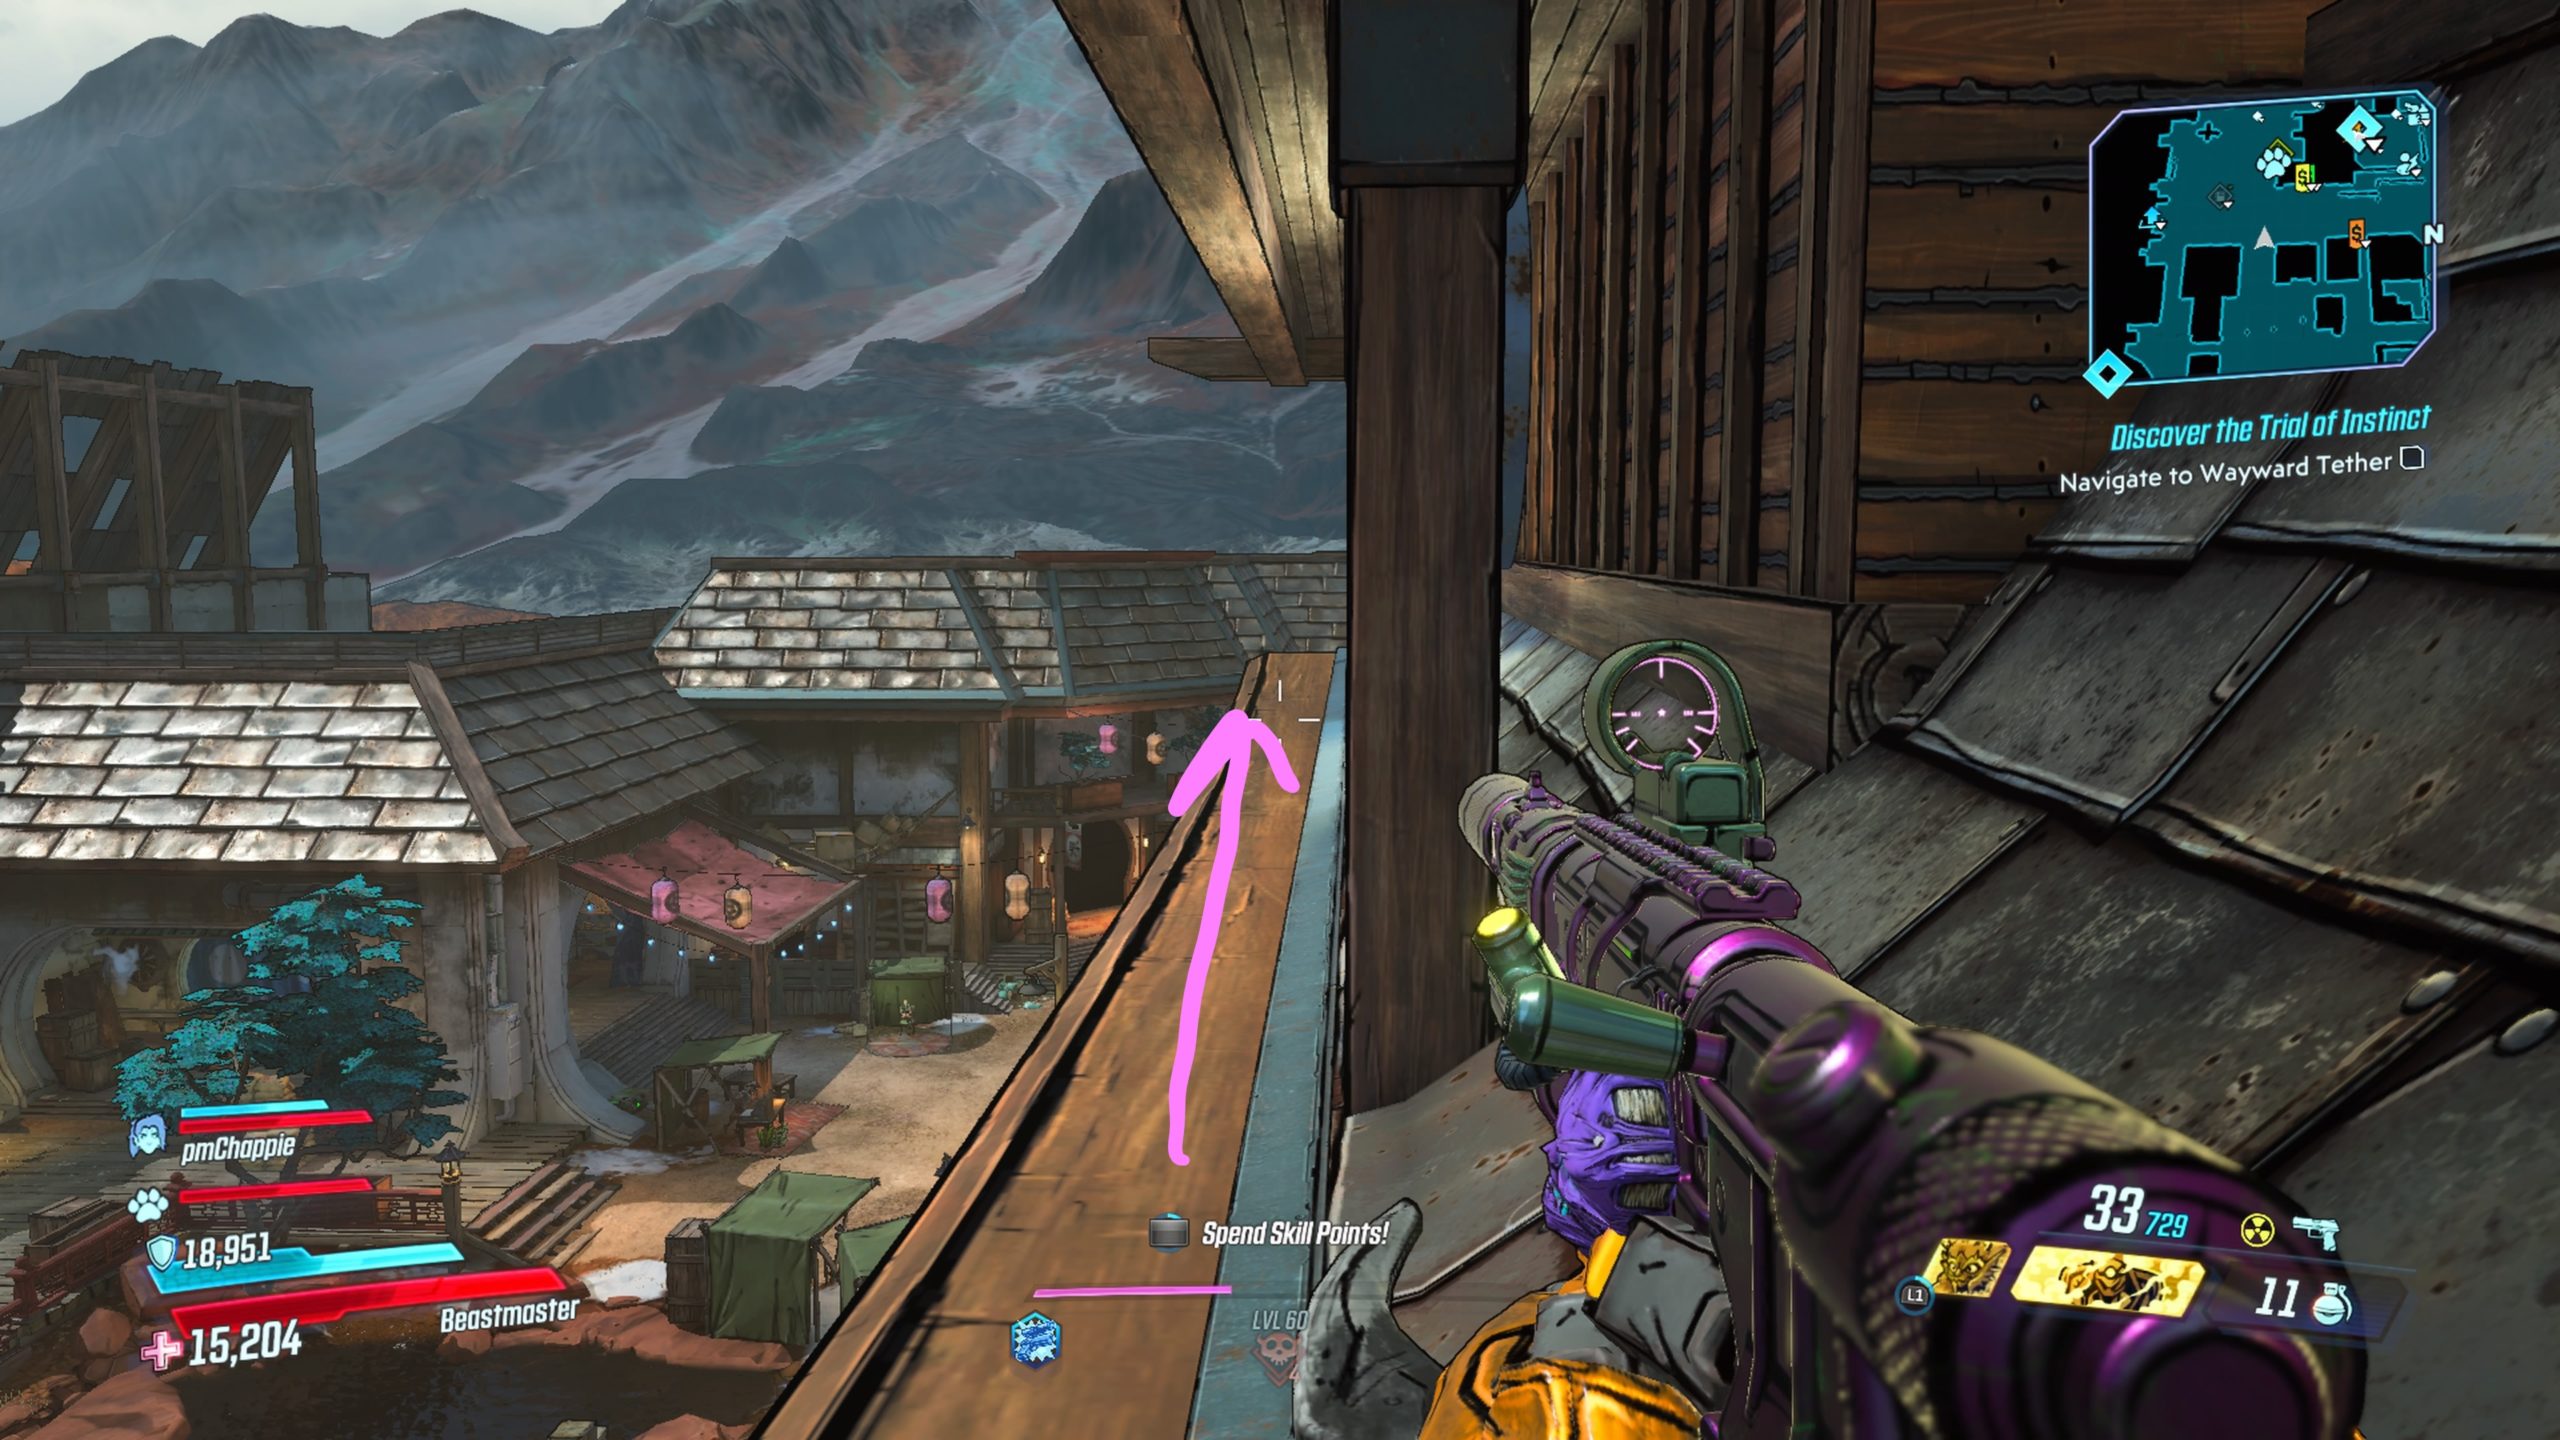
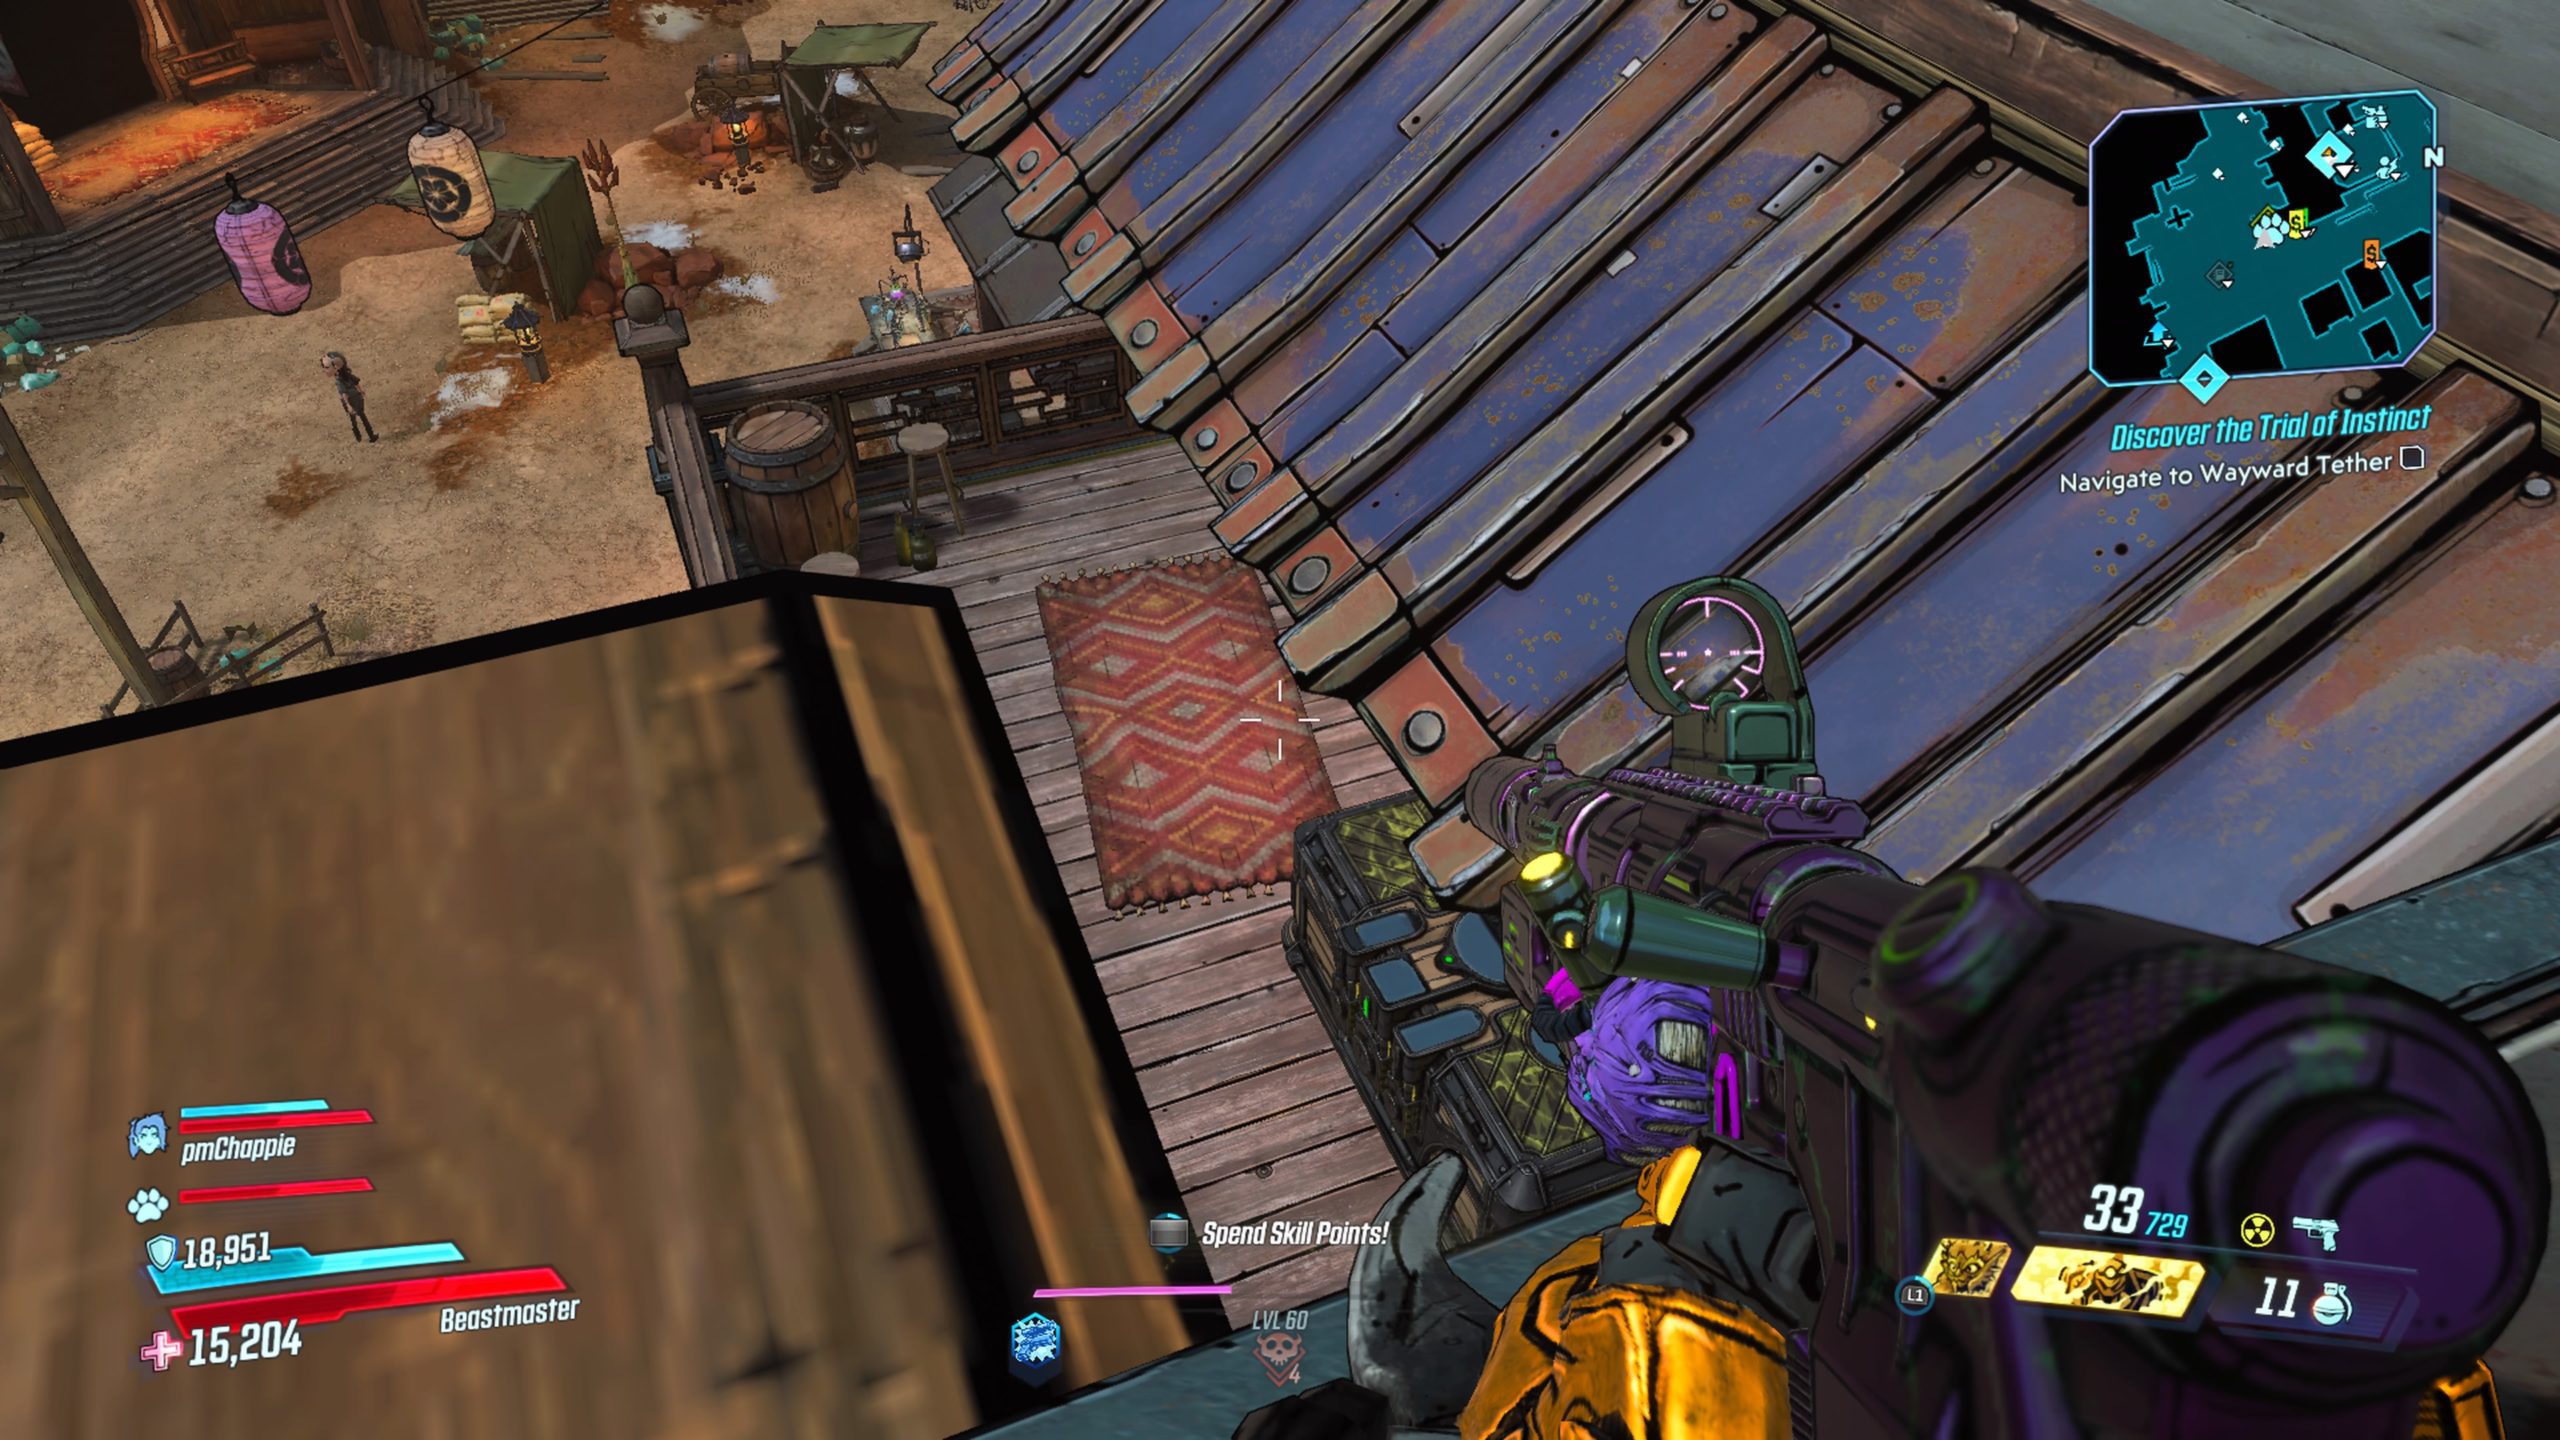
This journal can be found on a balcony. To reach it, head behind the building and use the wooden fence to reach the back of the roof. Head up the roof towards the front and use 2 wooden crates to reach the top of the General Store sign. Drop down onto the overhang then follow it left (right of the General Store) to find a gap exposing the balcony that you can jump down onto to reach the journal.
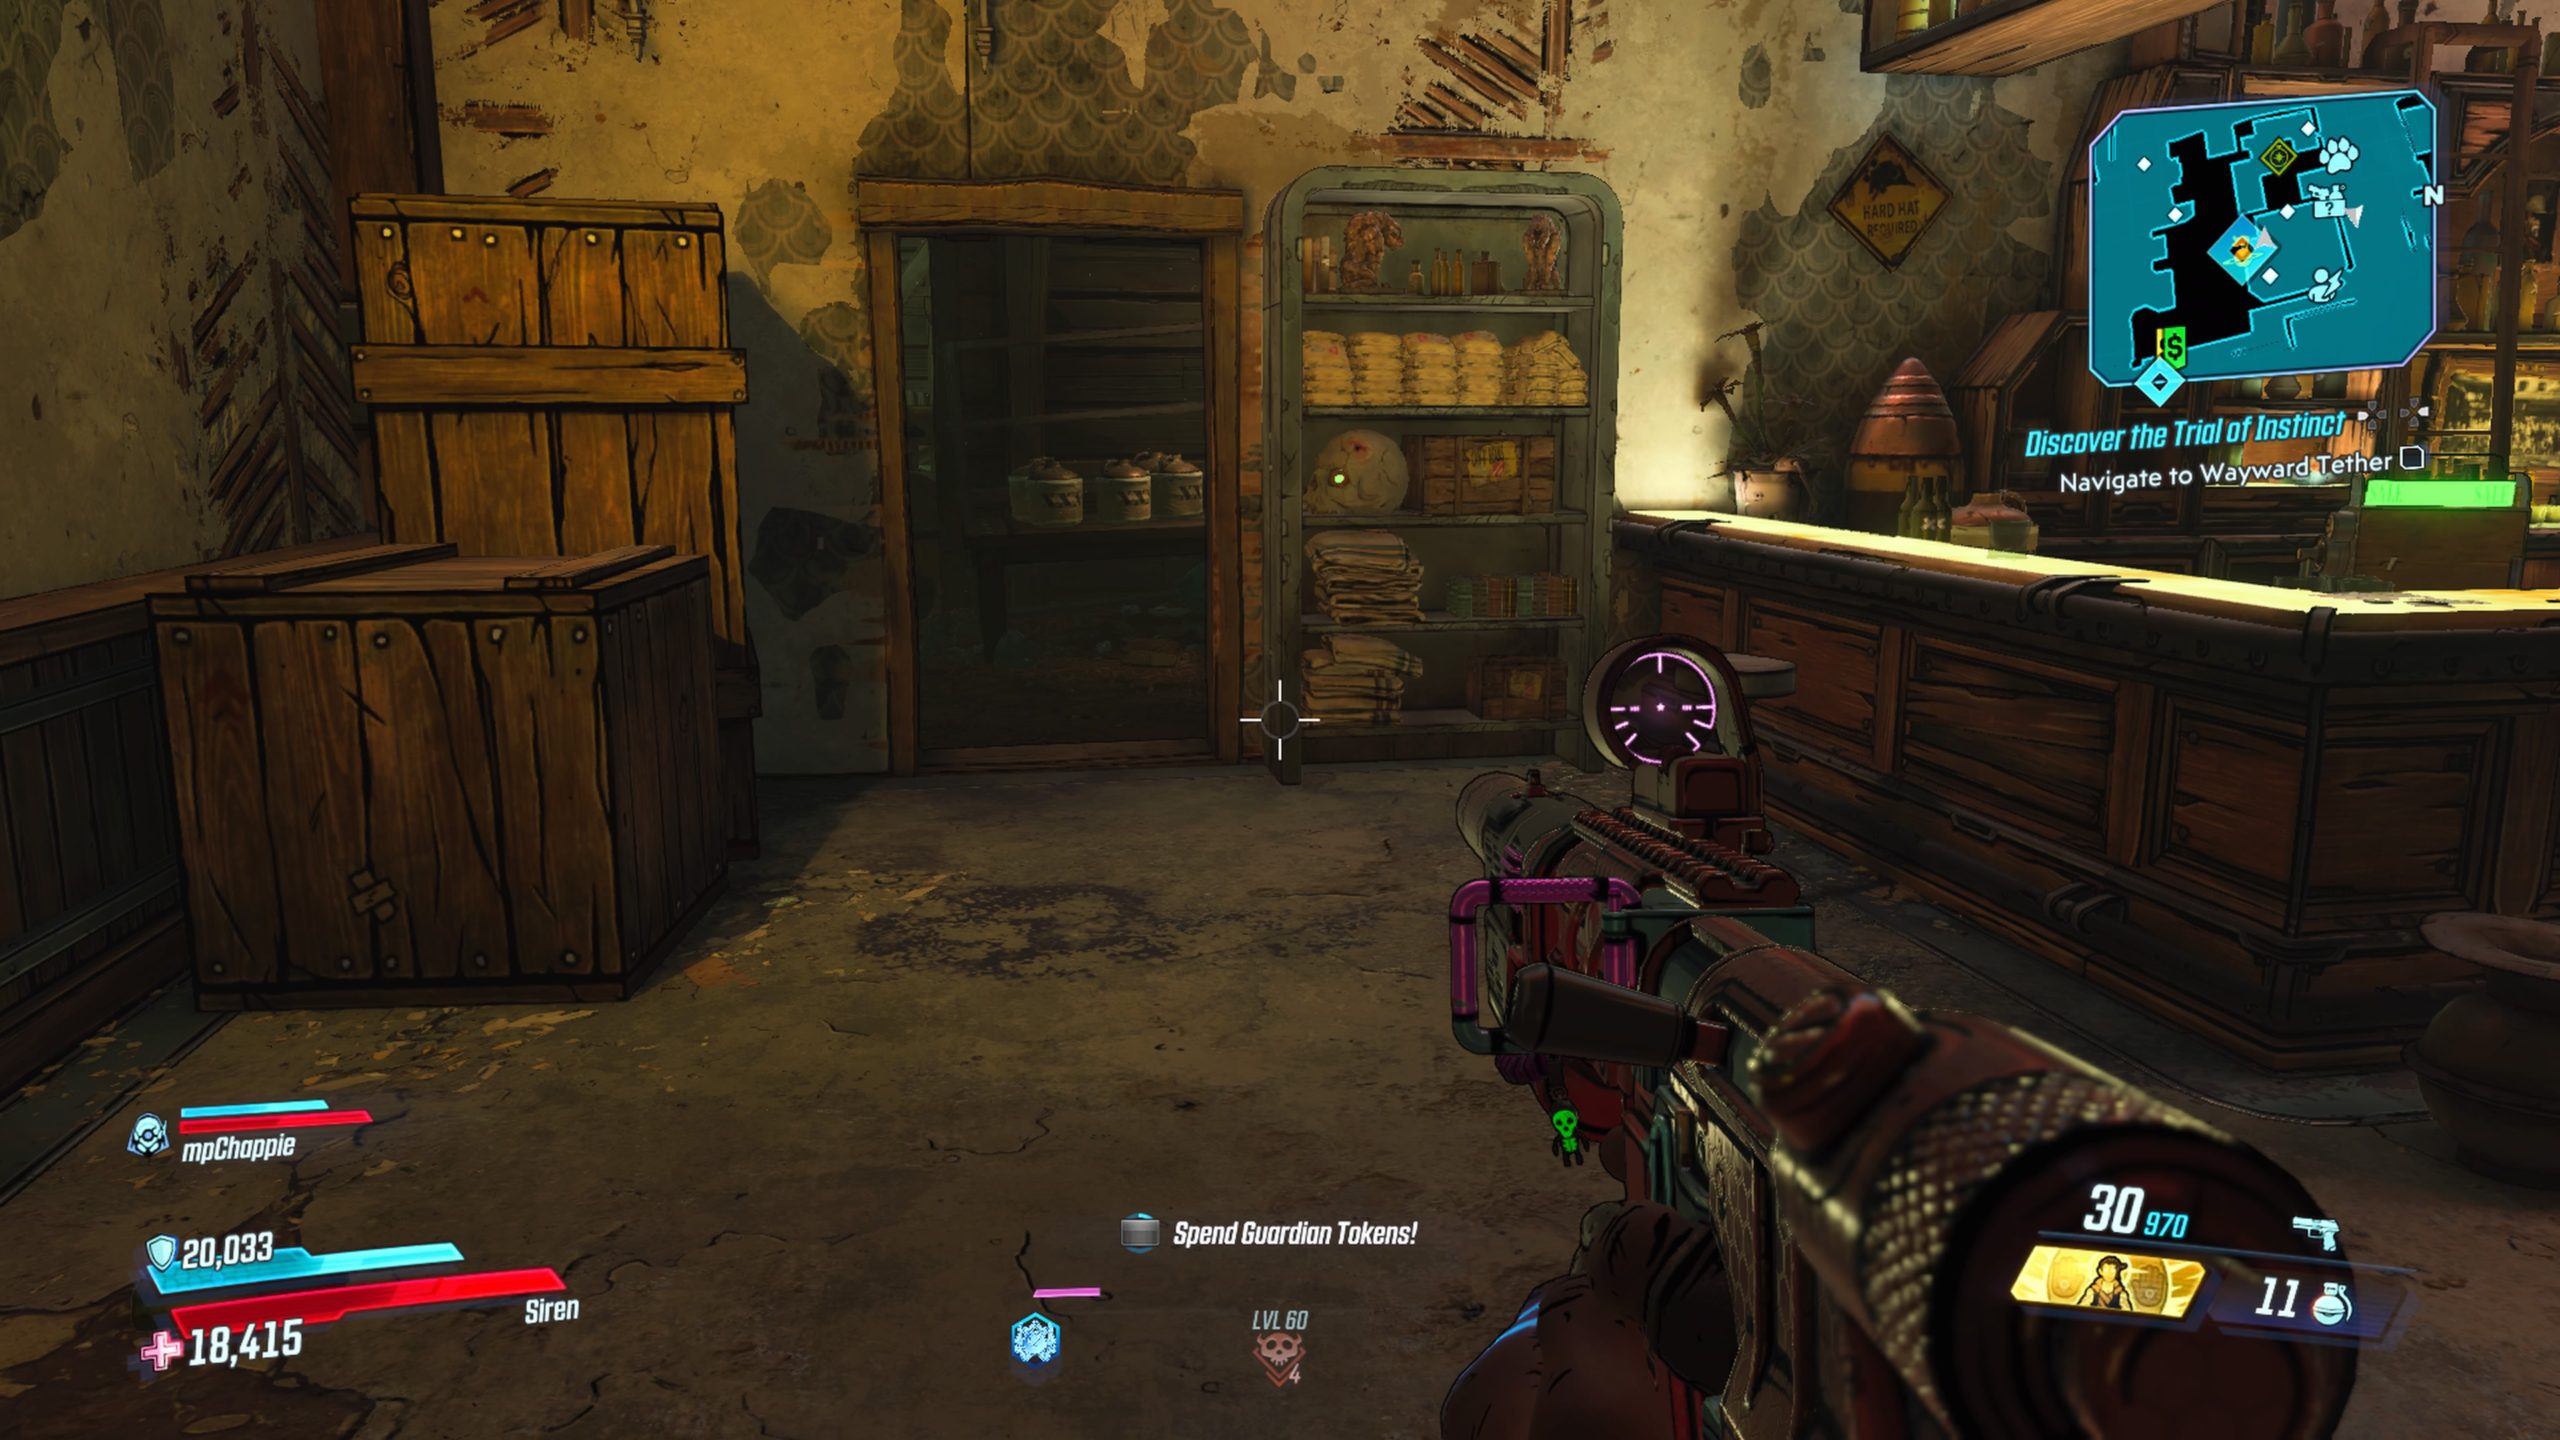
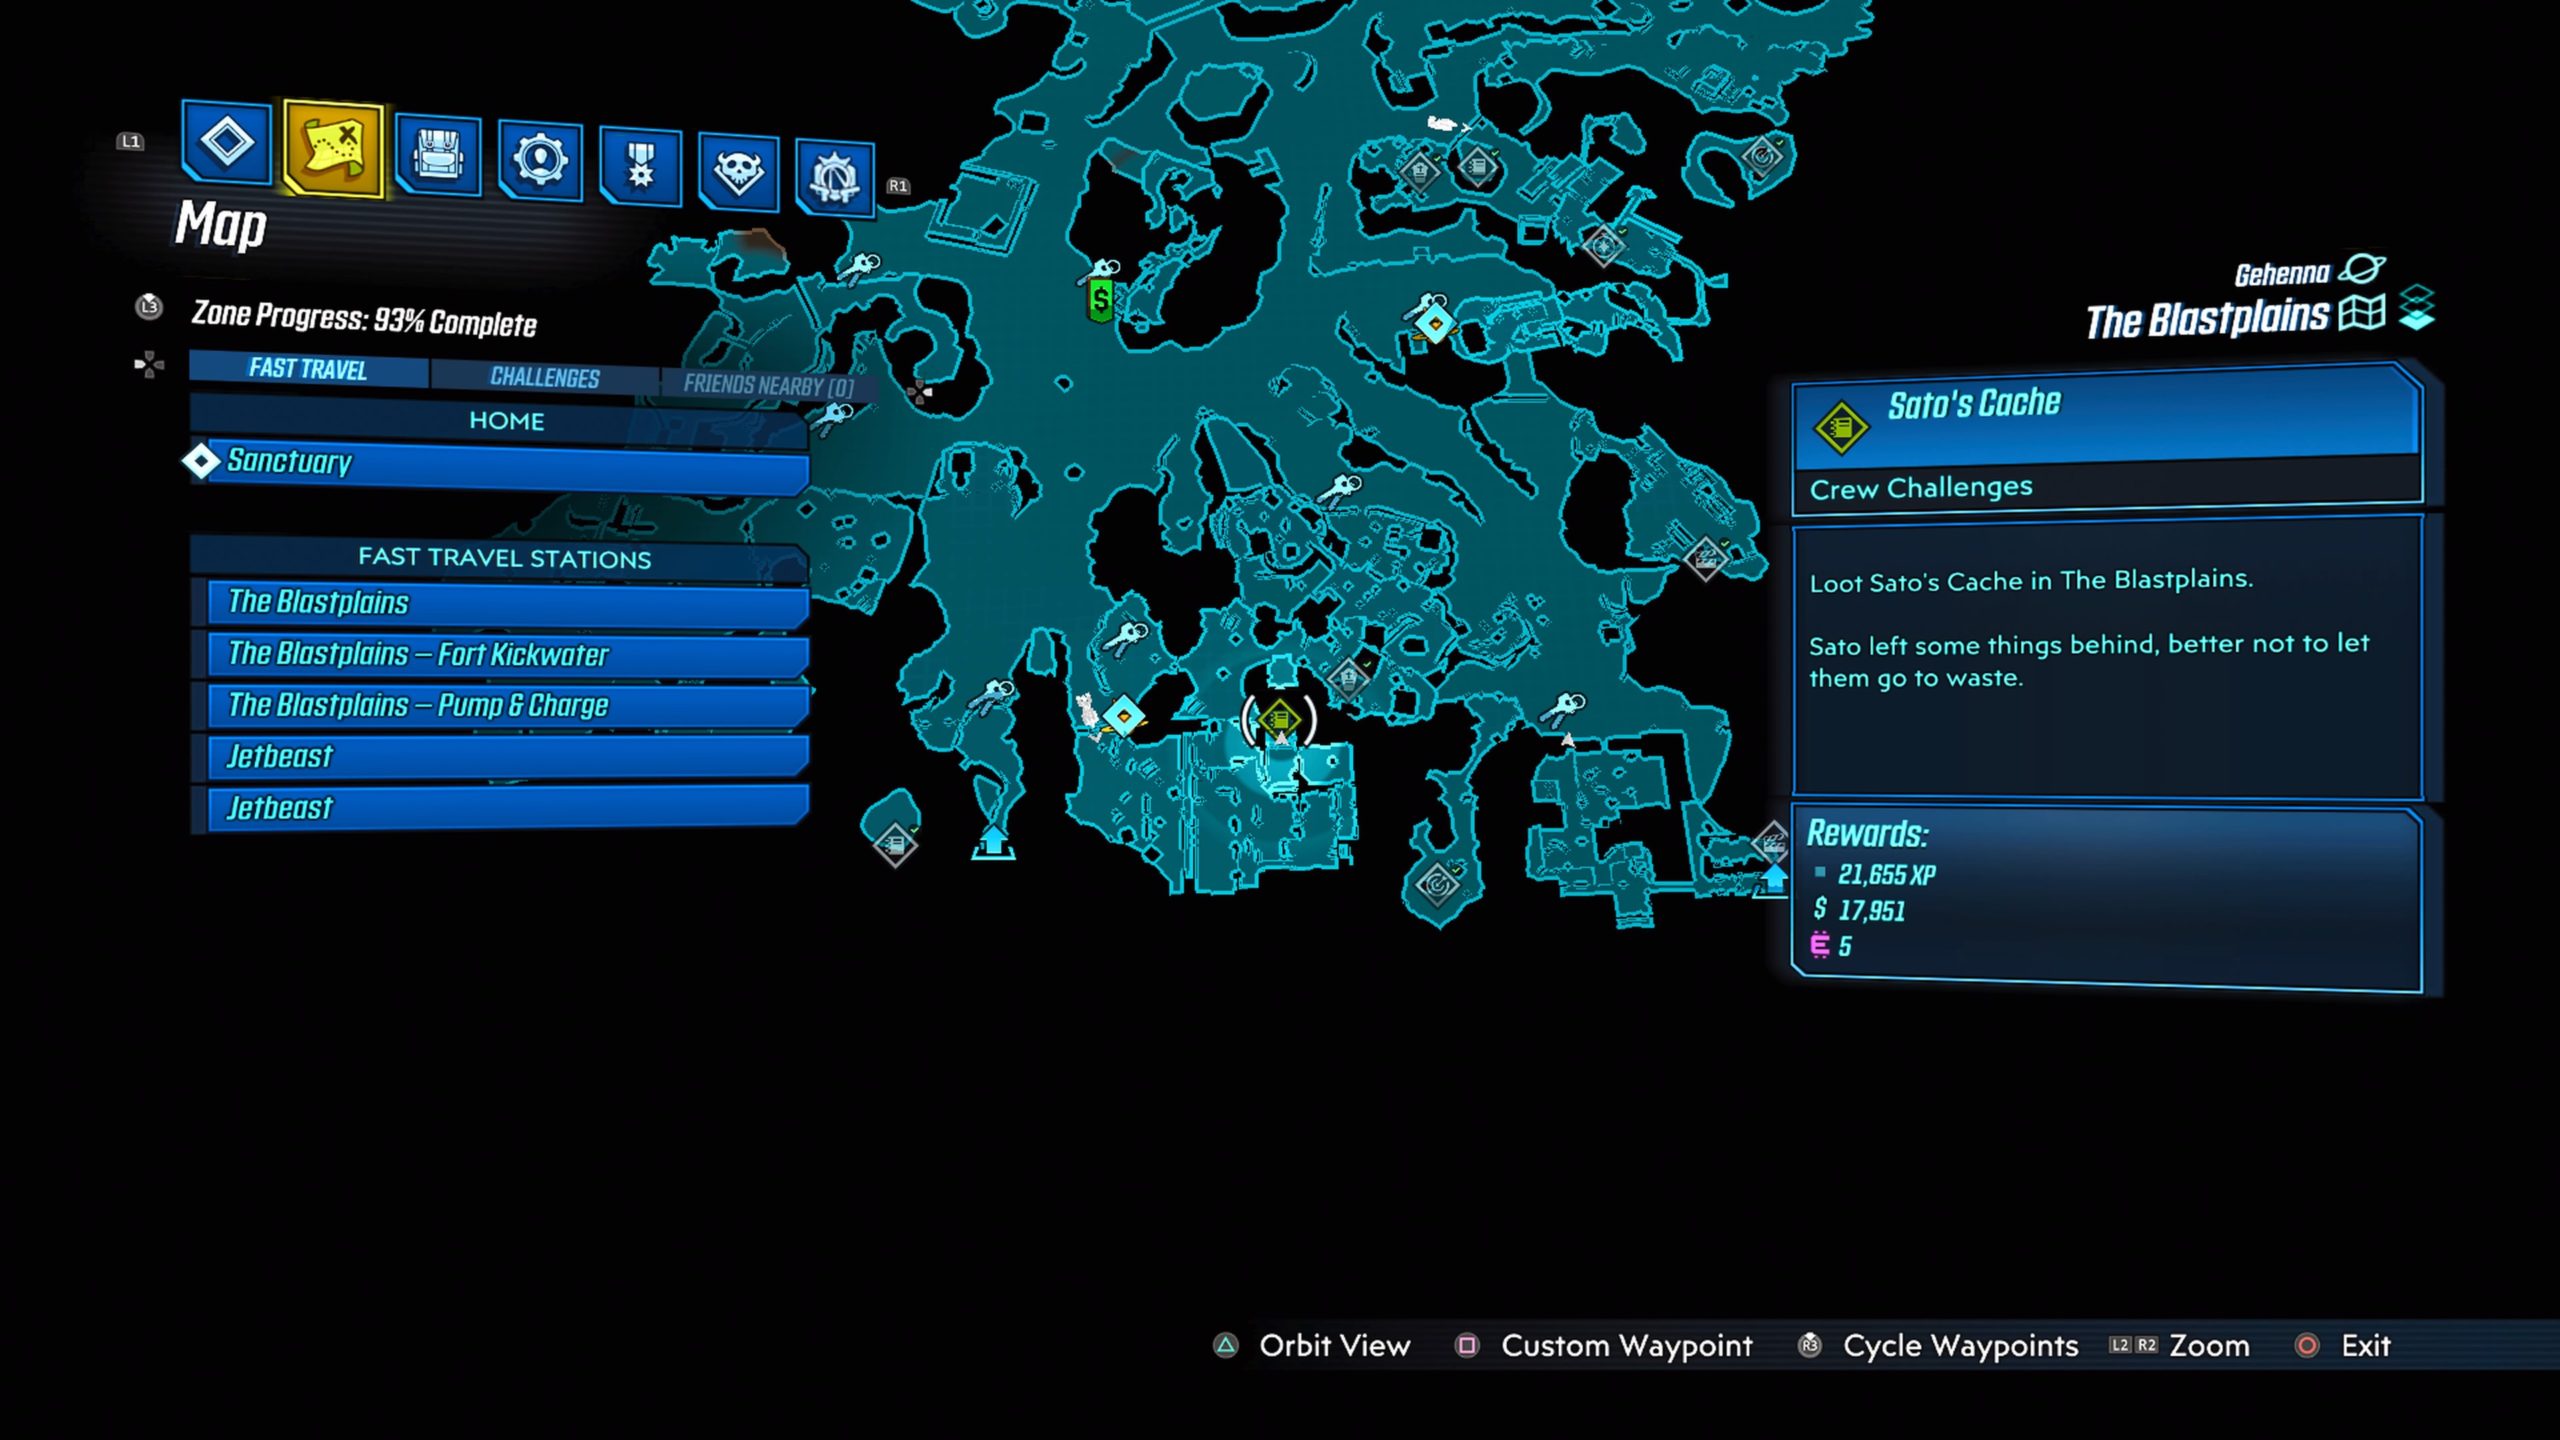
Vestige Cache
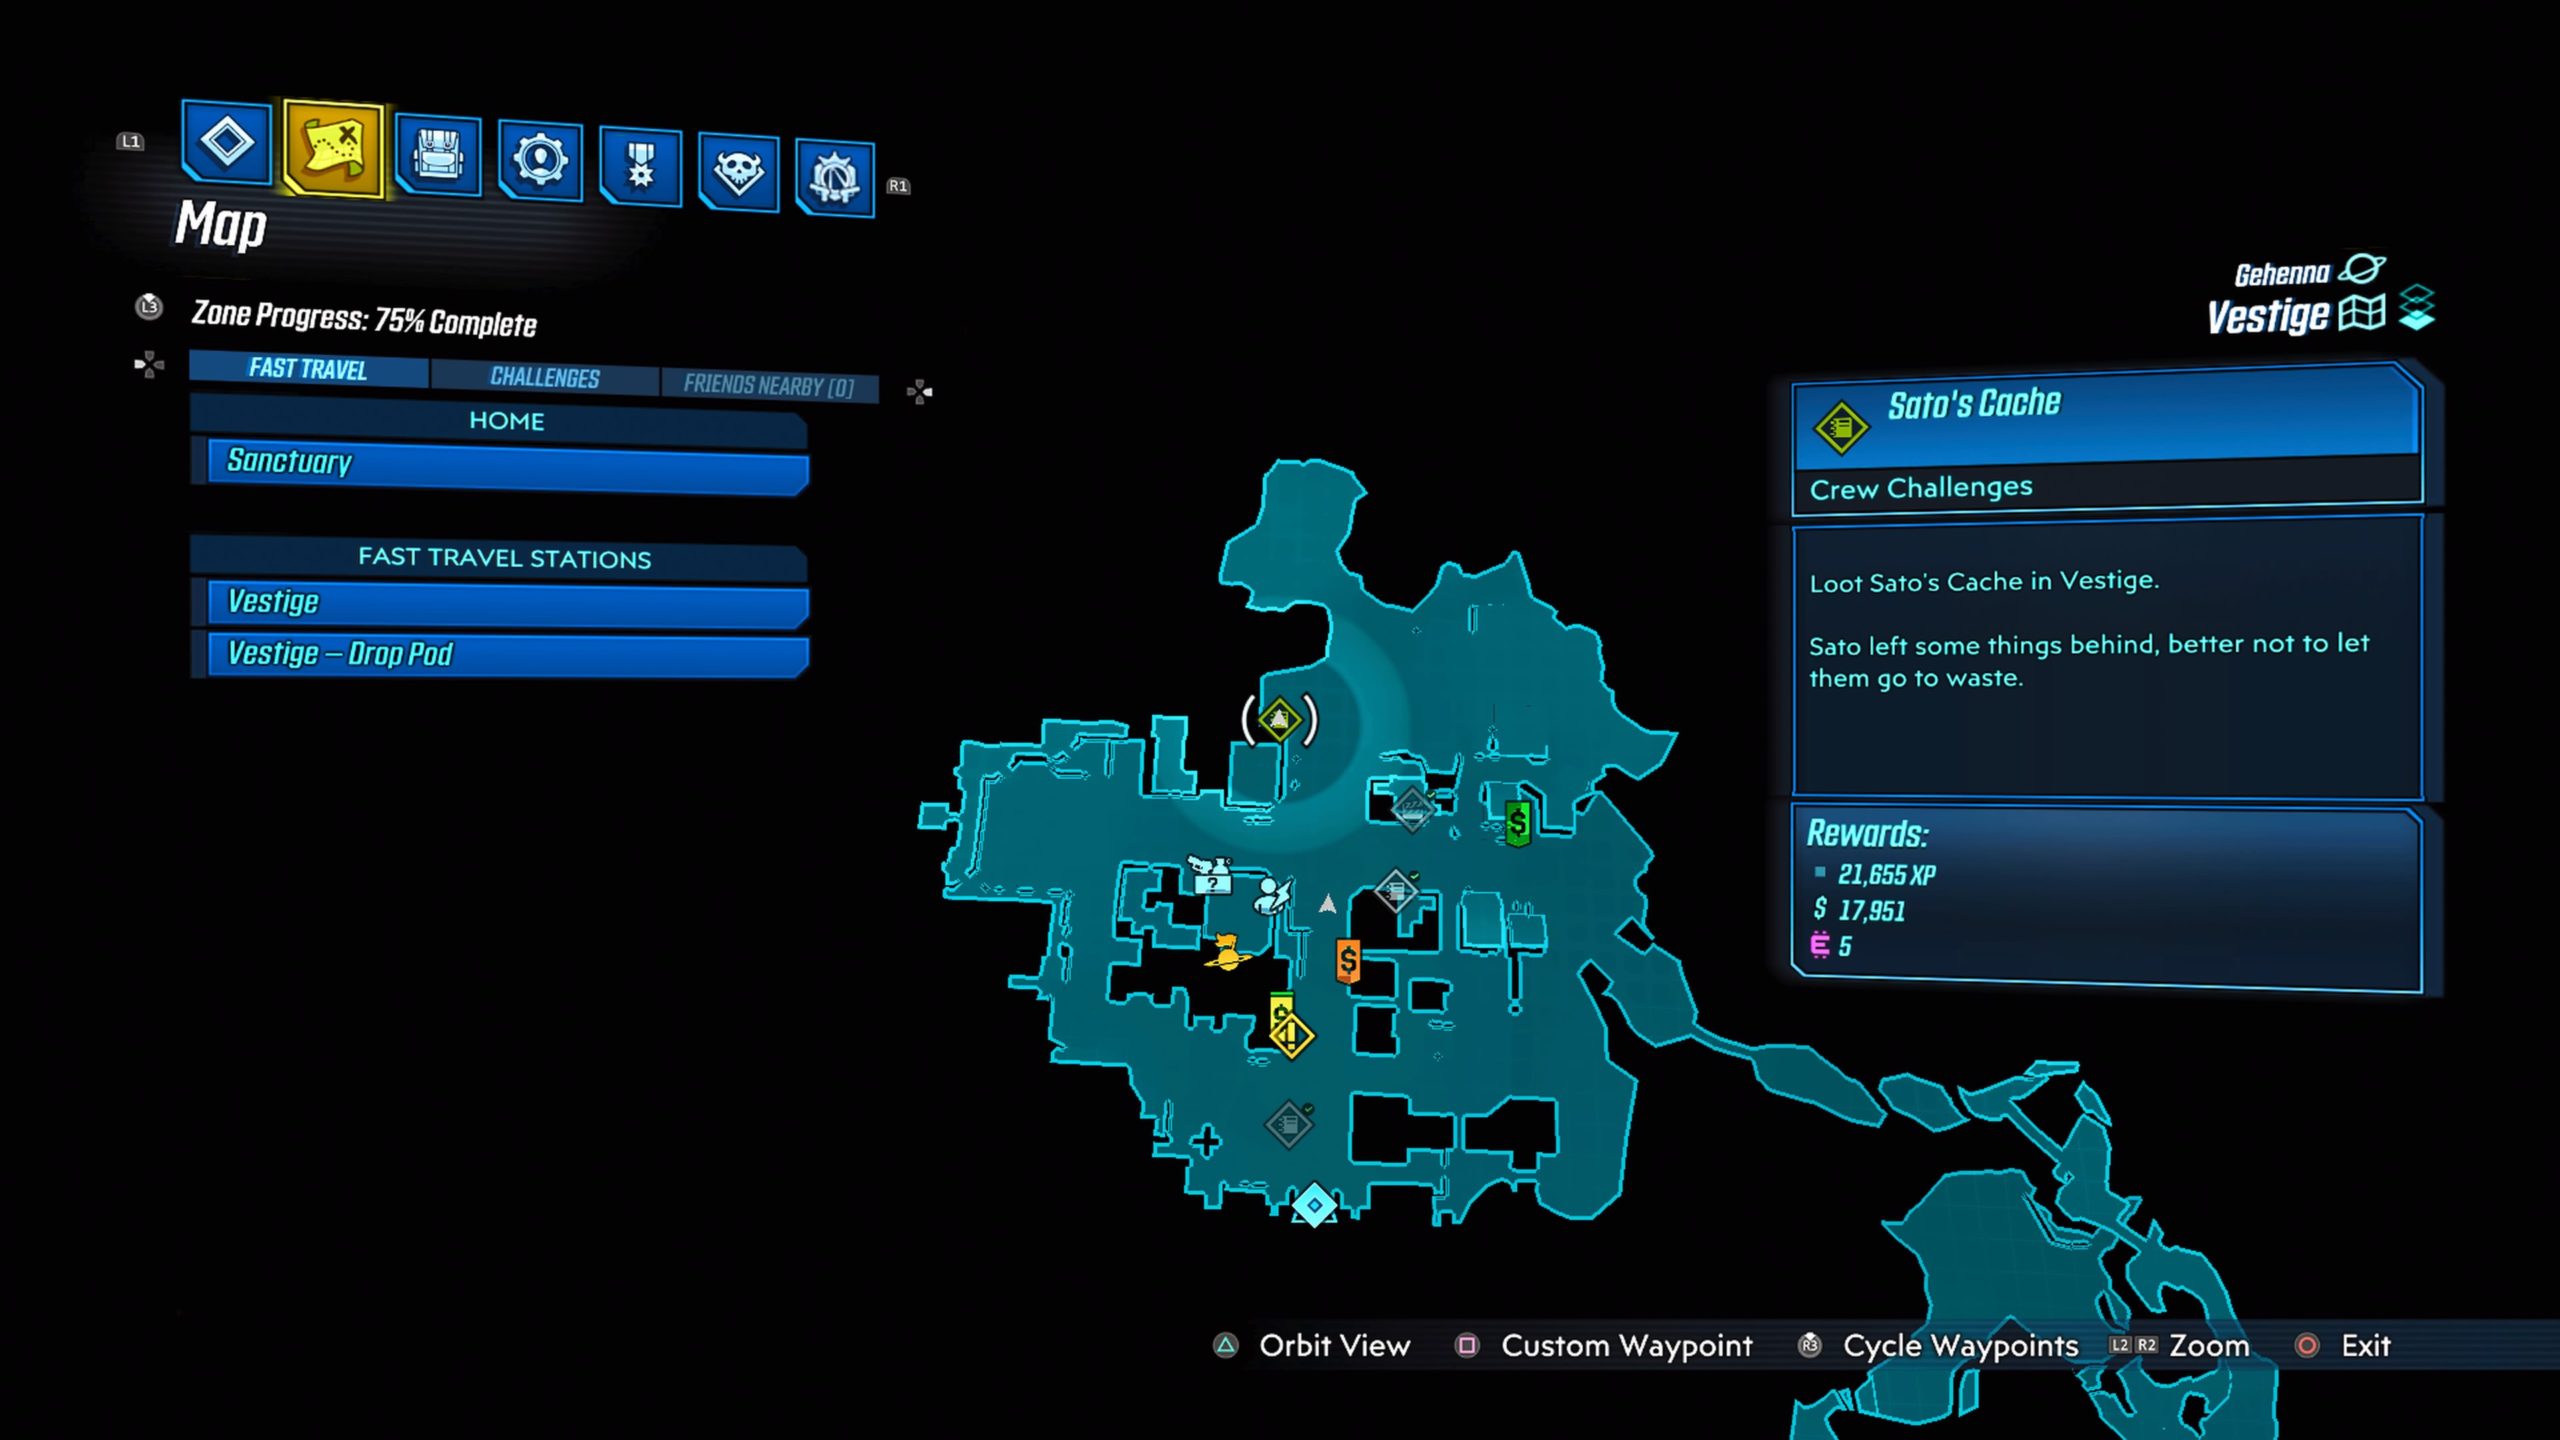
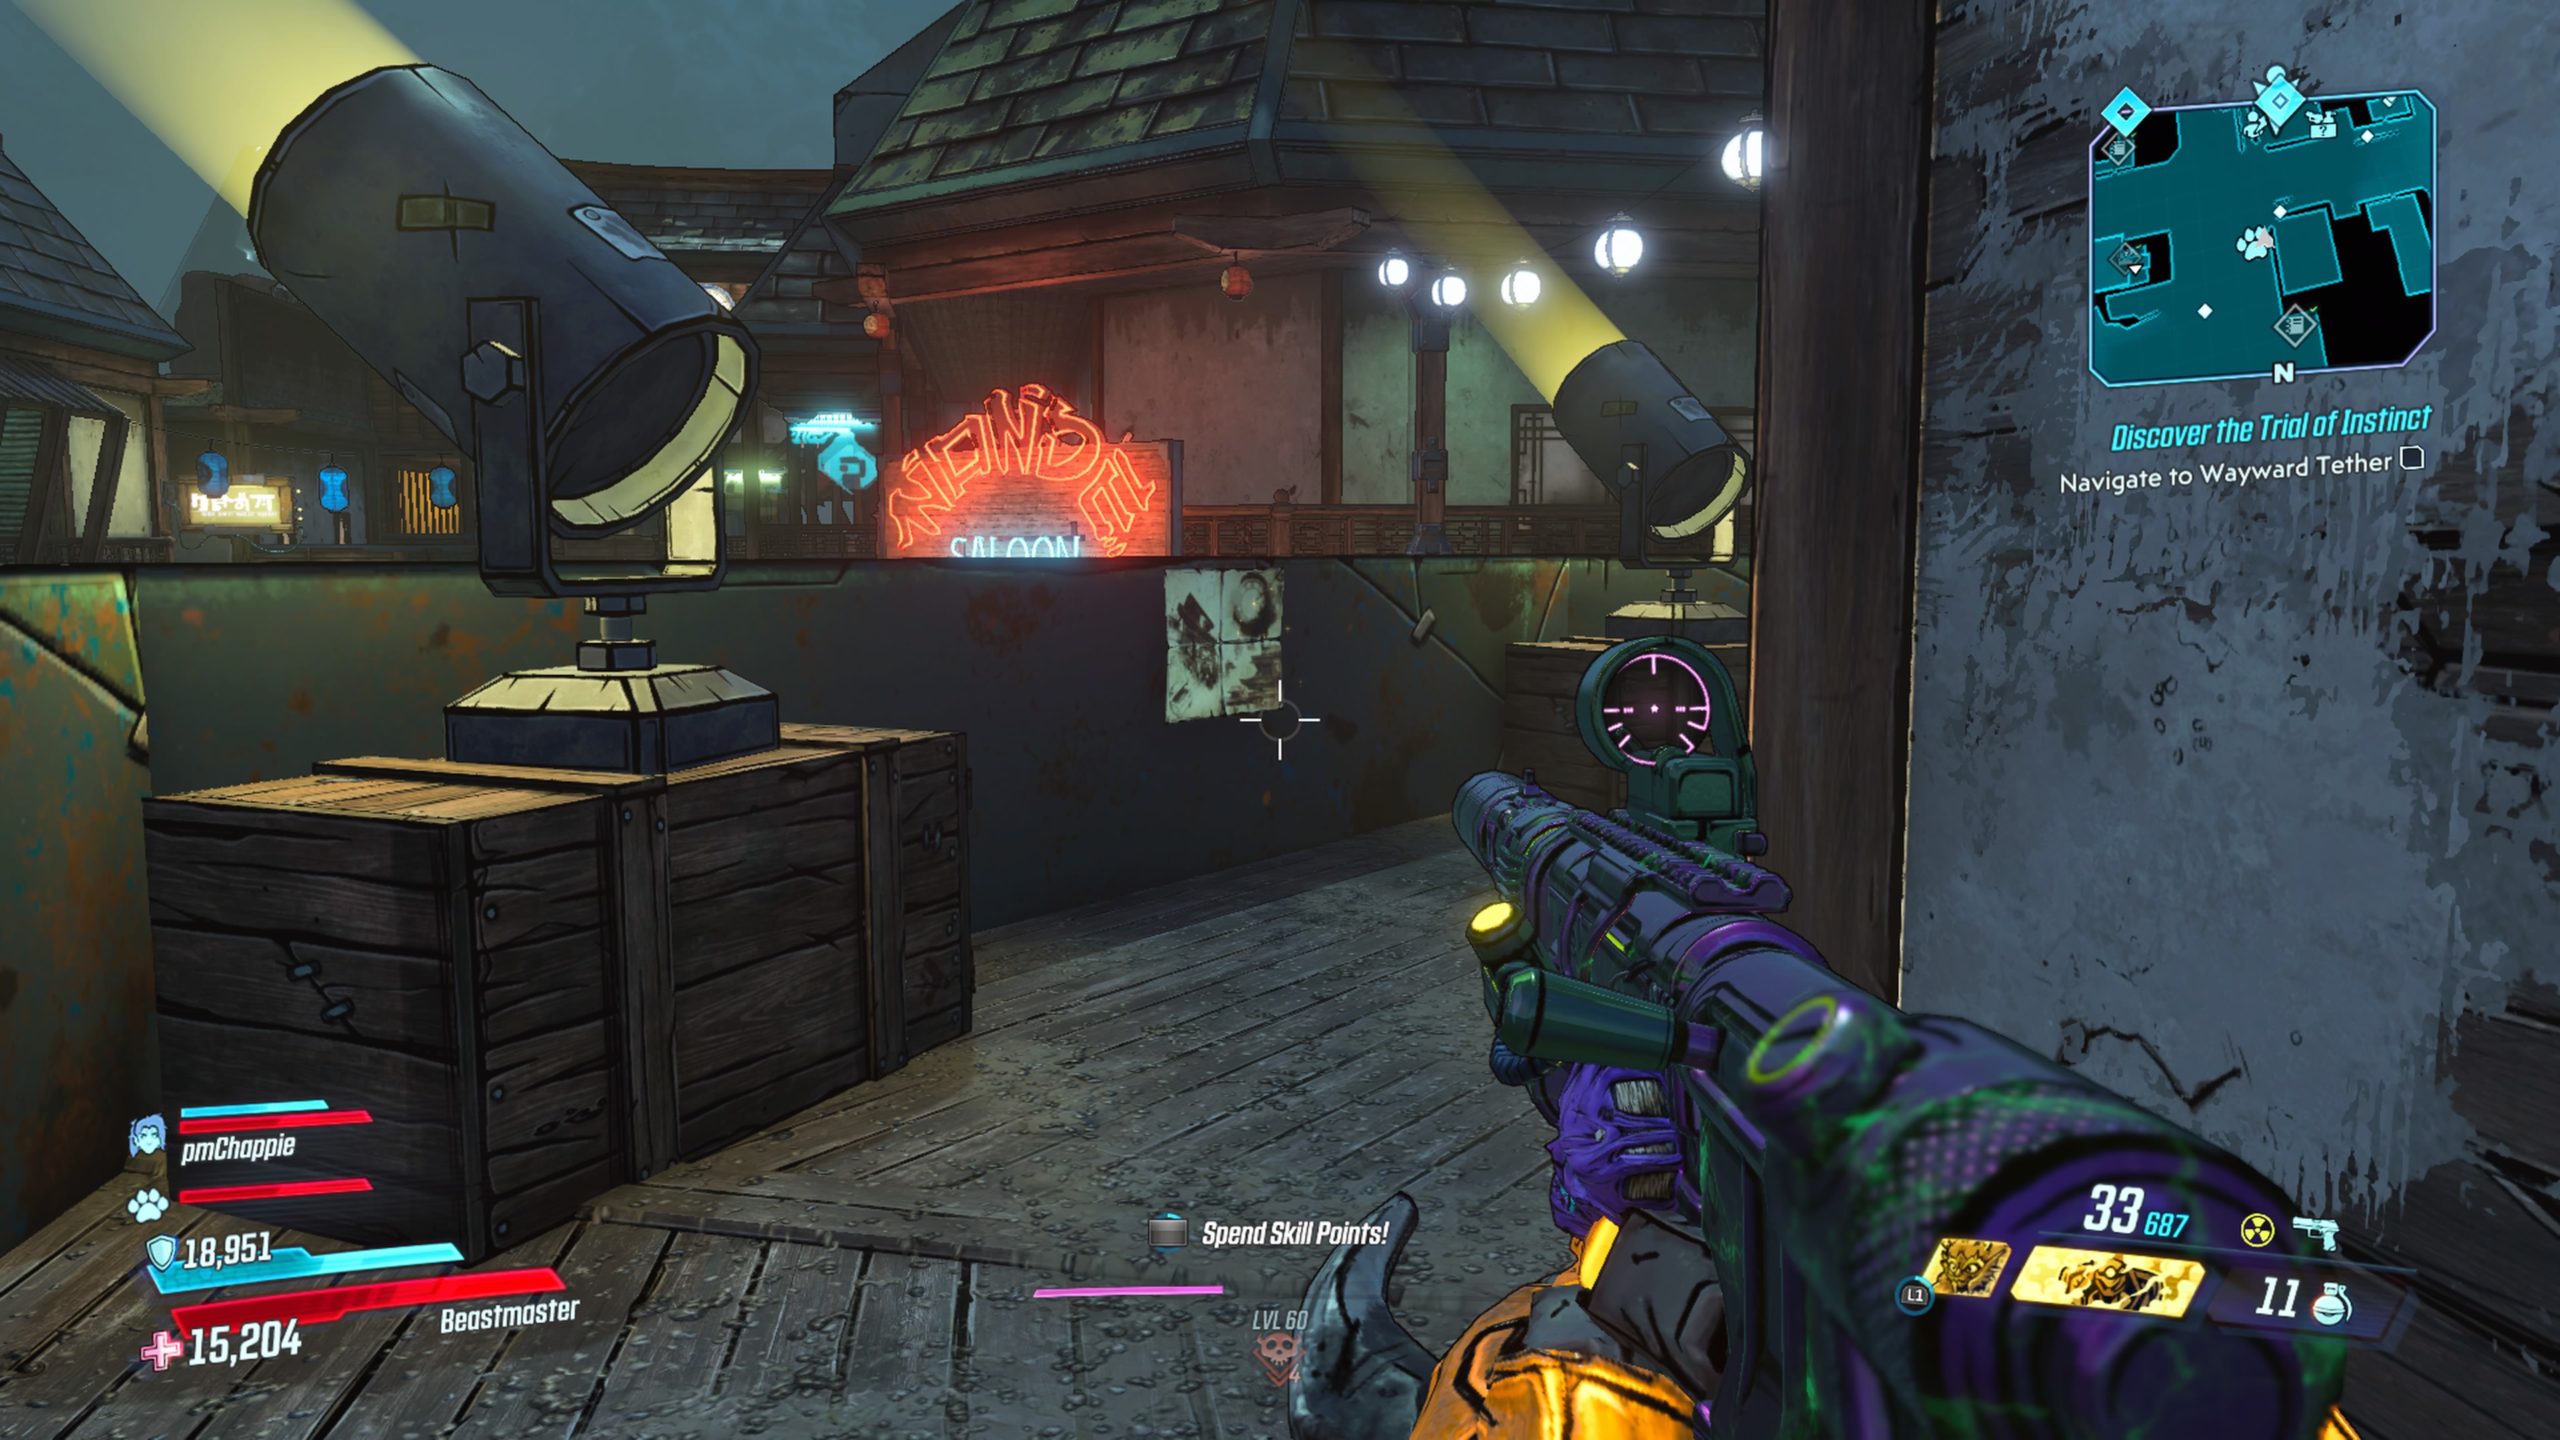
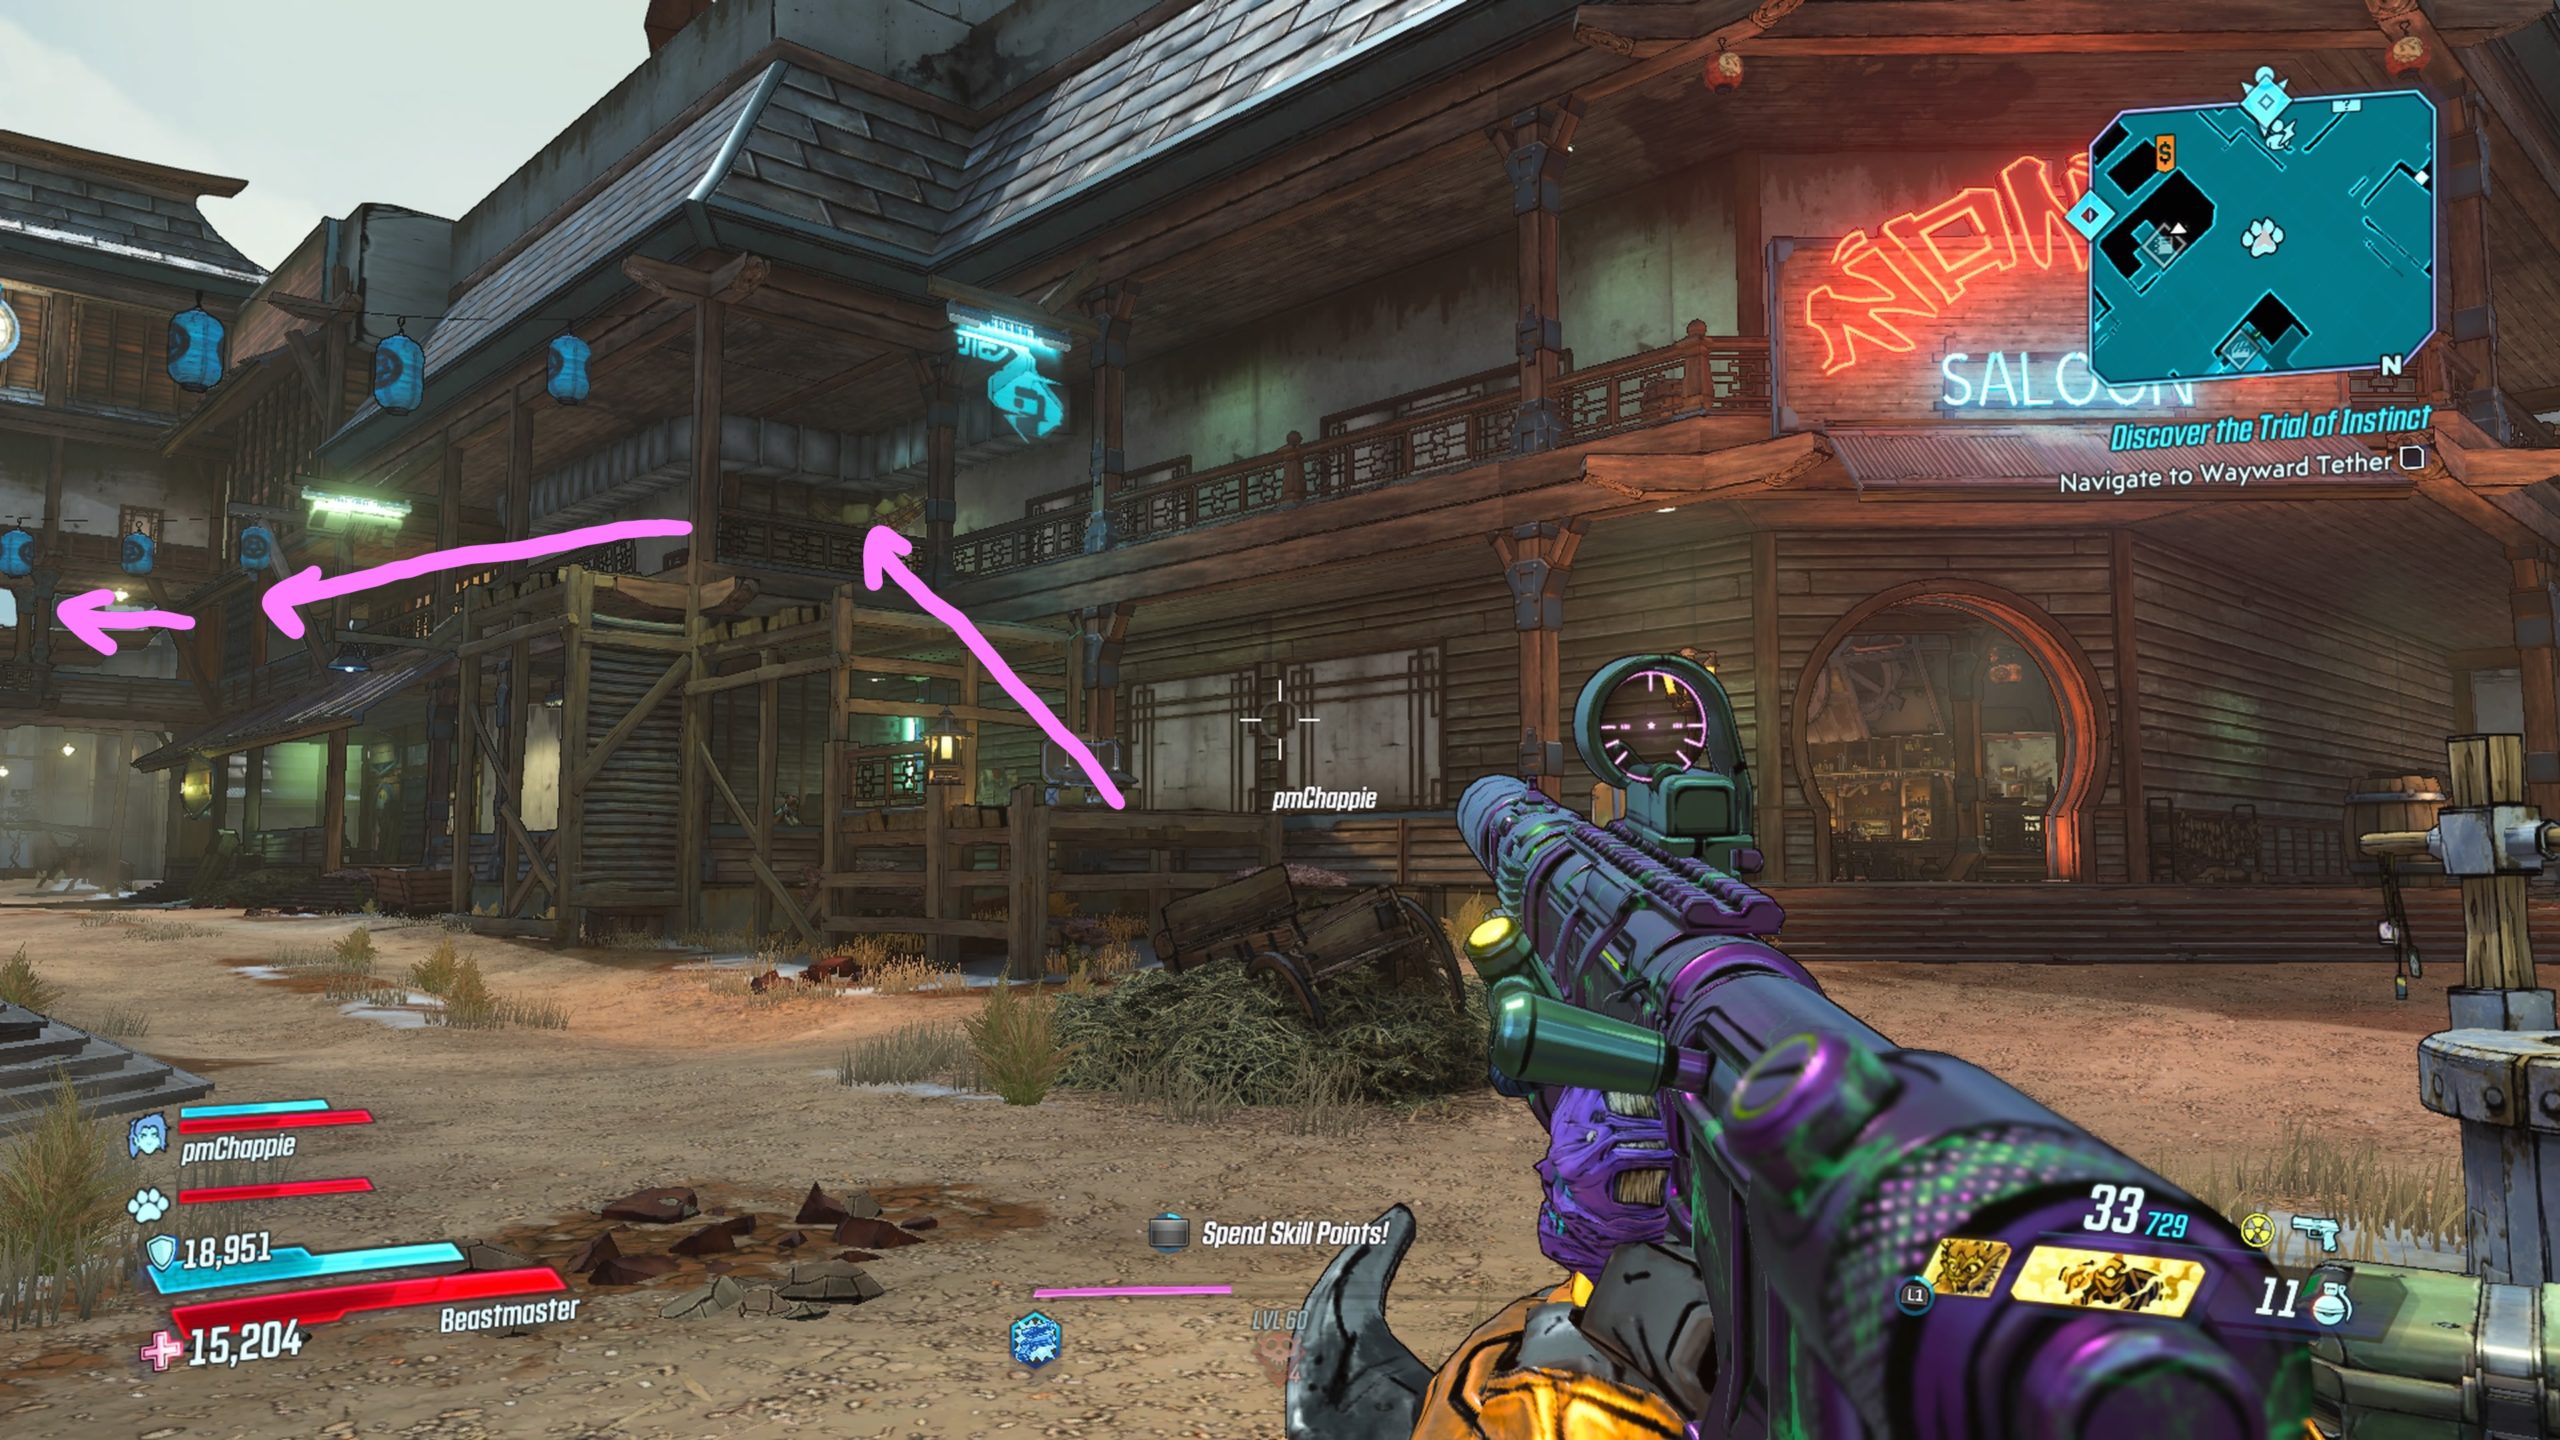
The cache can be found on the balcony of the saloon. To reach it, face the entrance of the saloon and take the path left up the stairs then climb to the top of the crates. From the crates, jump up to a balcony and follow it until you reach a gap. Run and jump to reach the next section of the balcony. Follow it along to reach the cache.
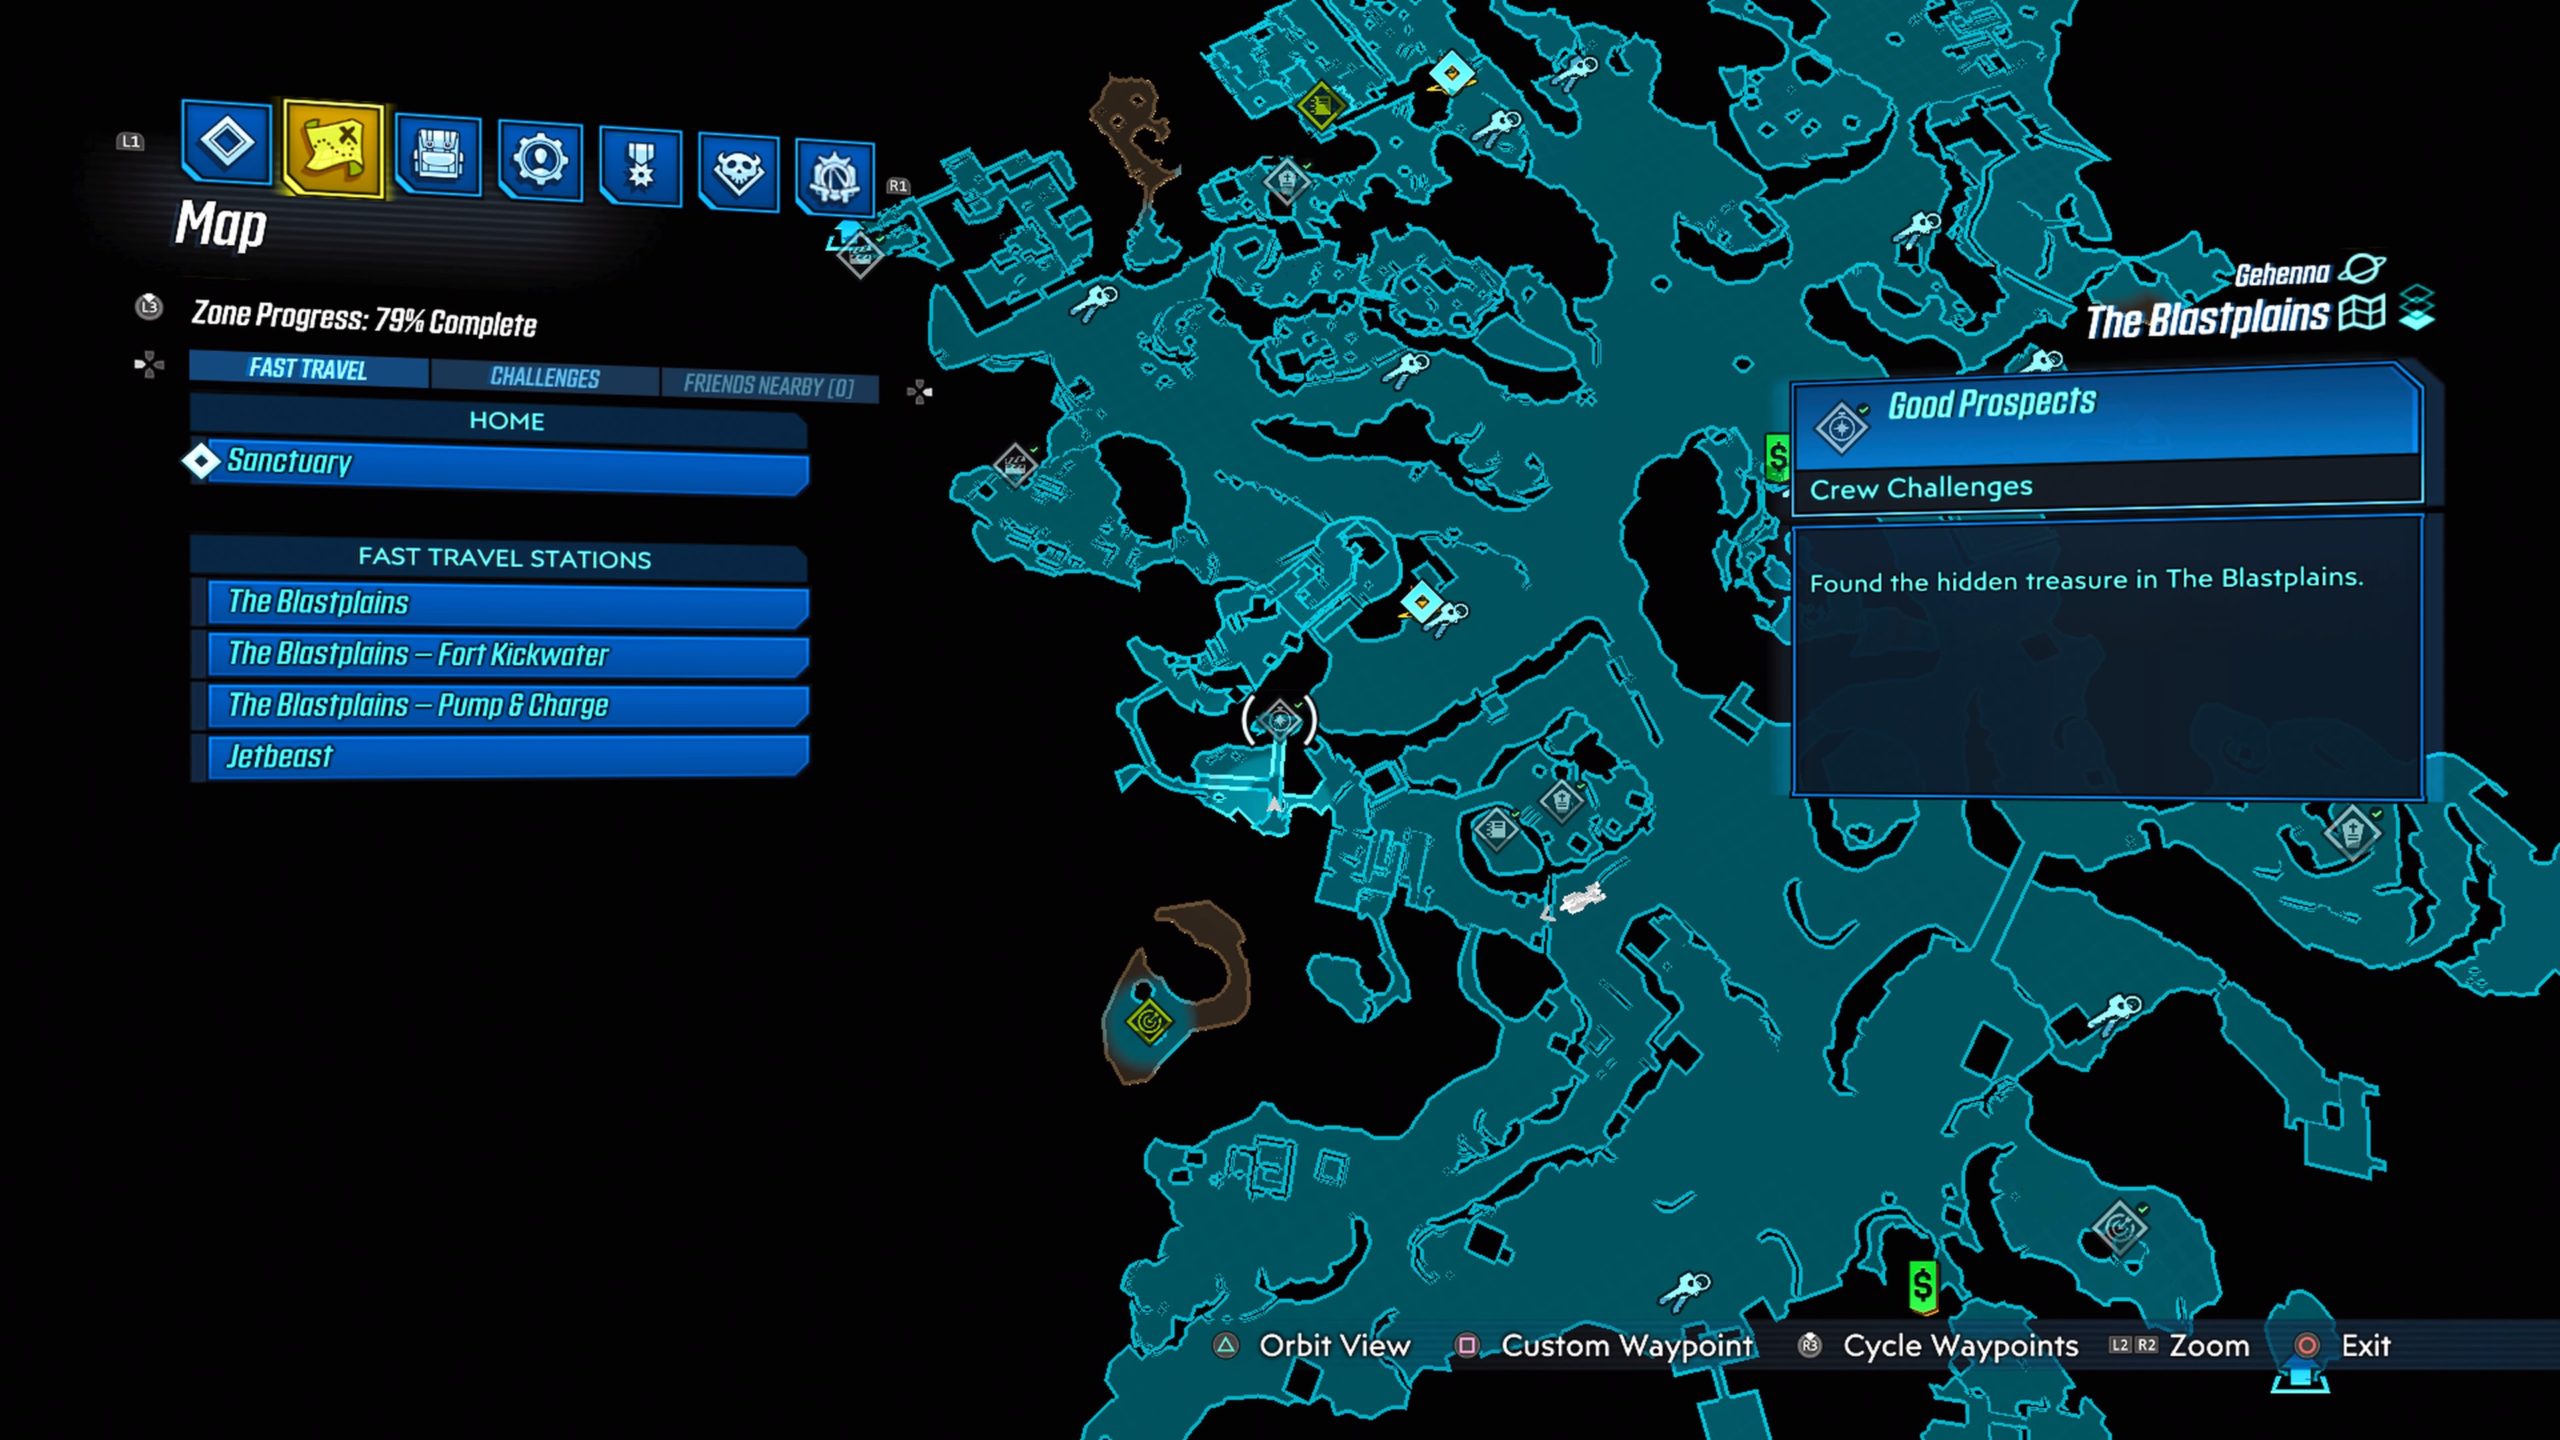
The Blastplains
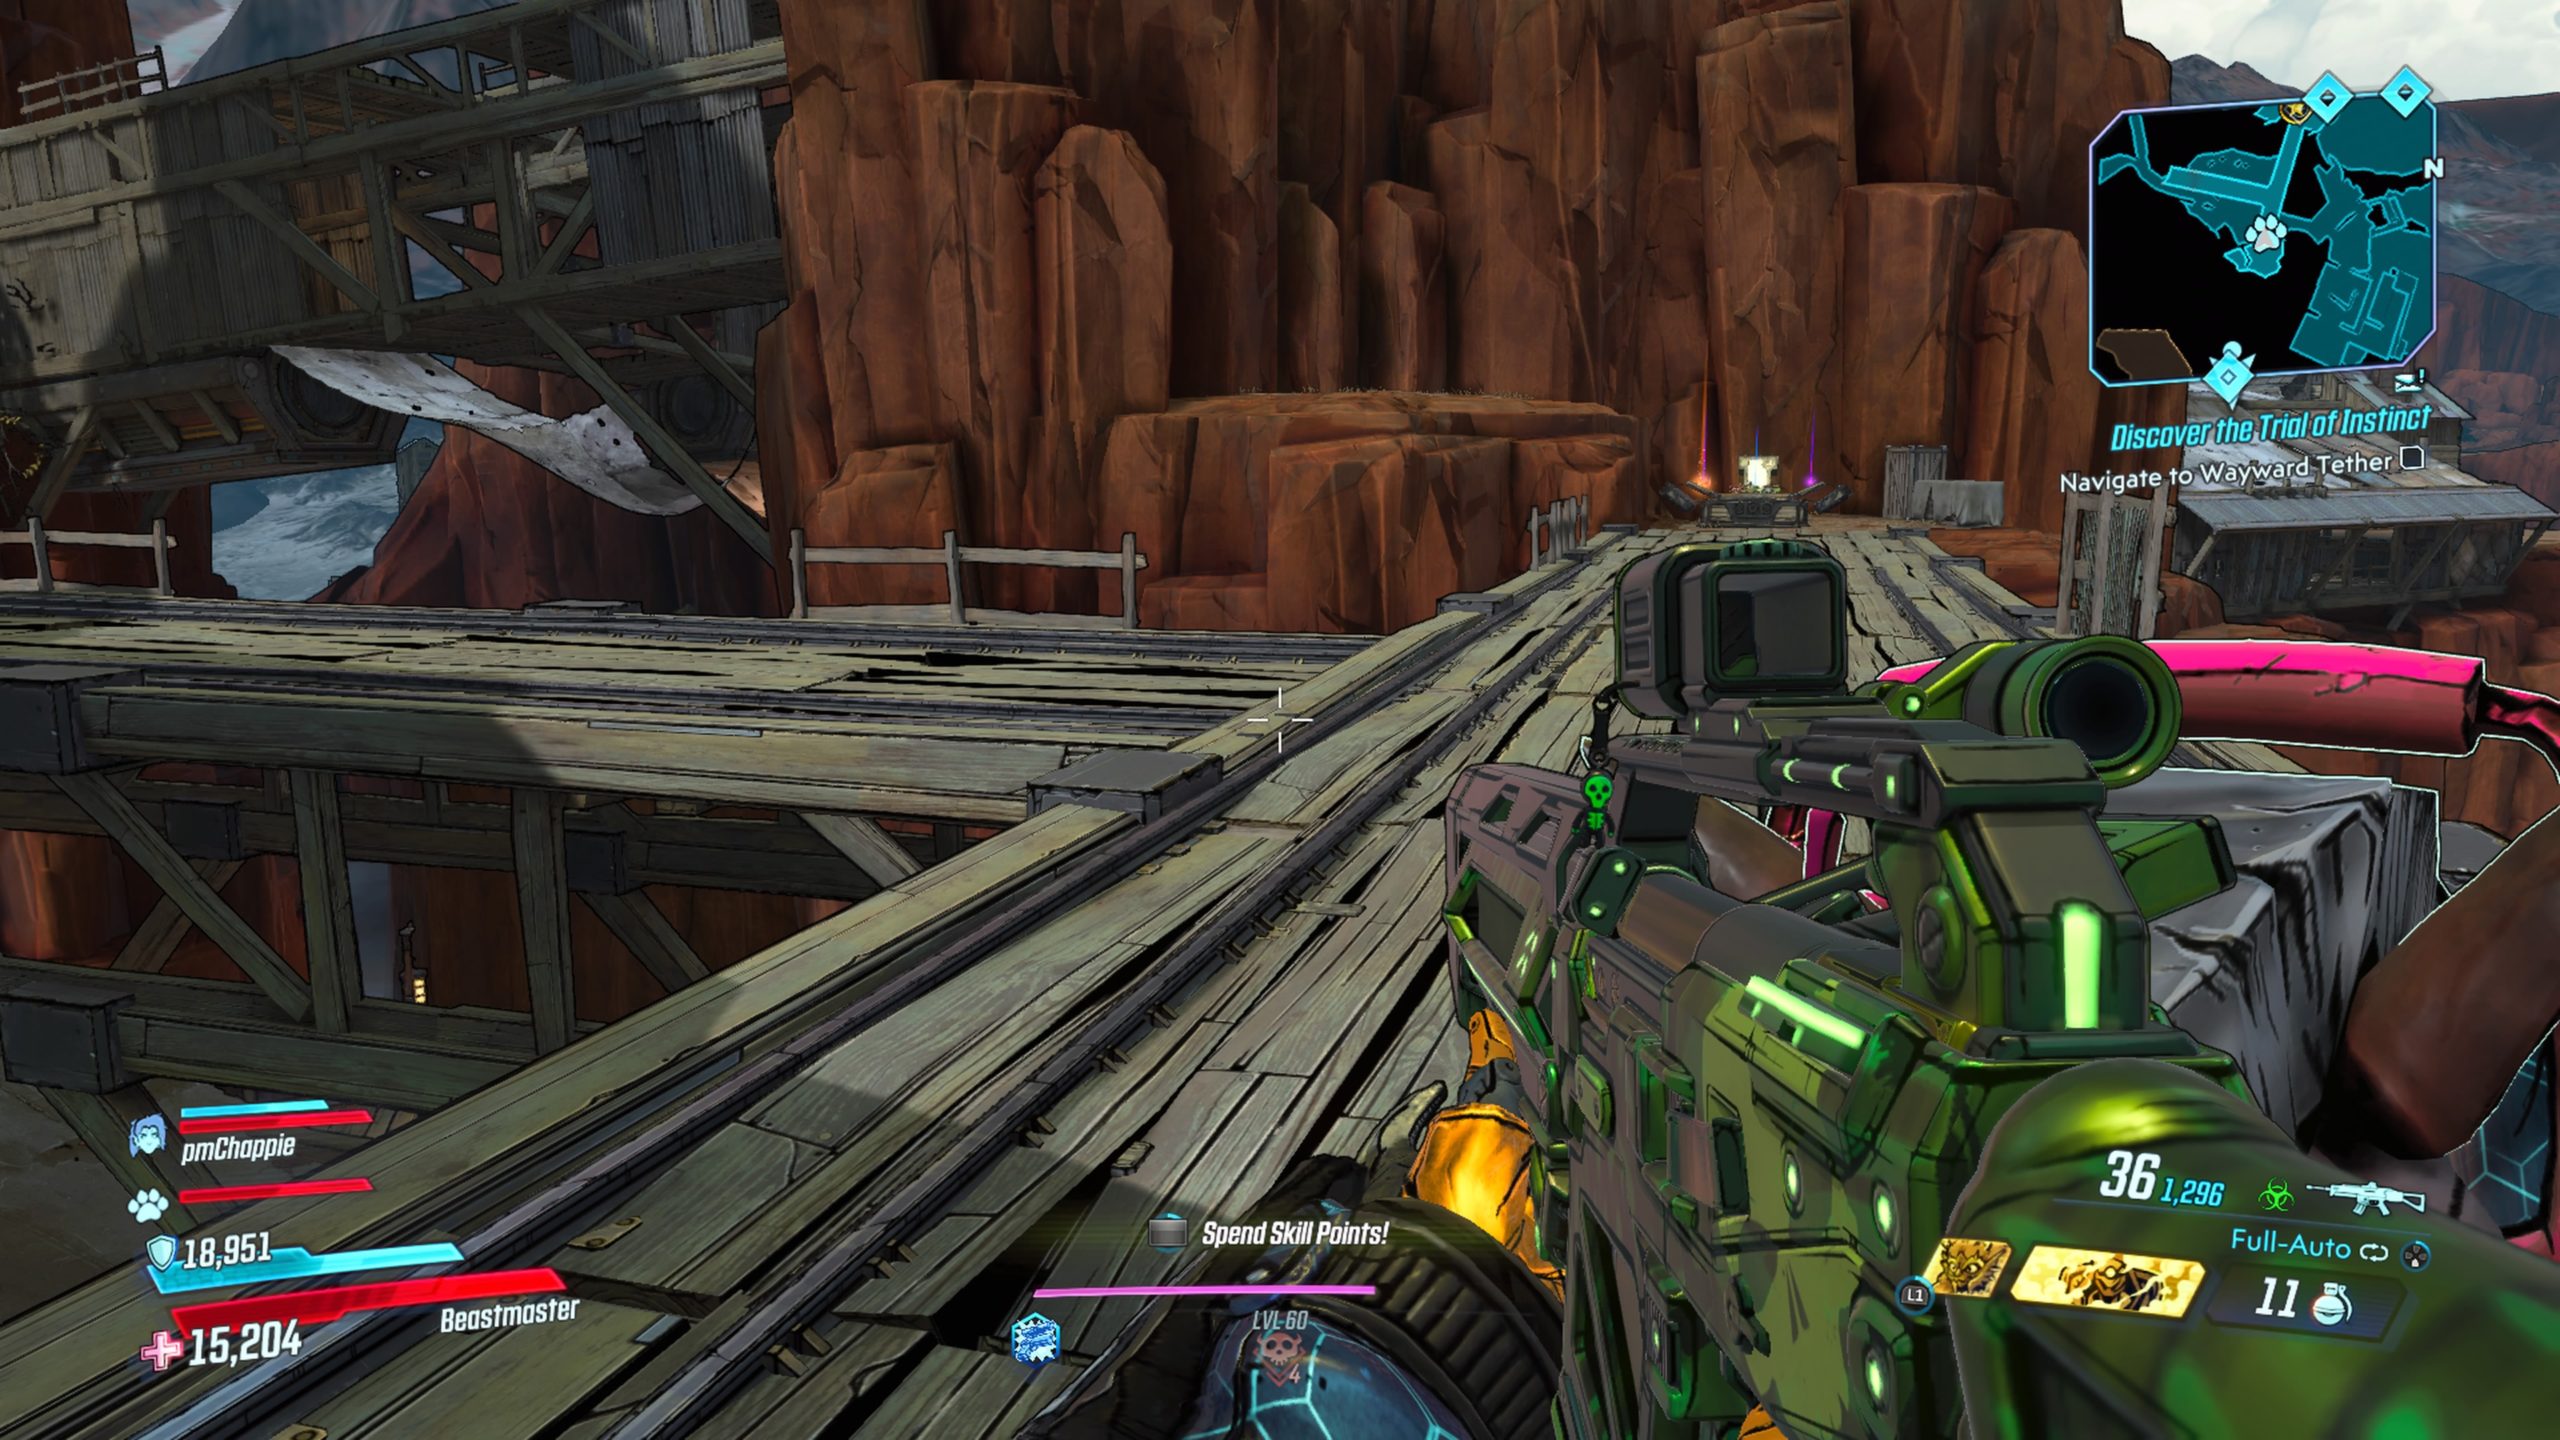
Blastplains #1
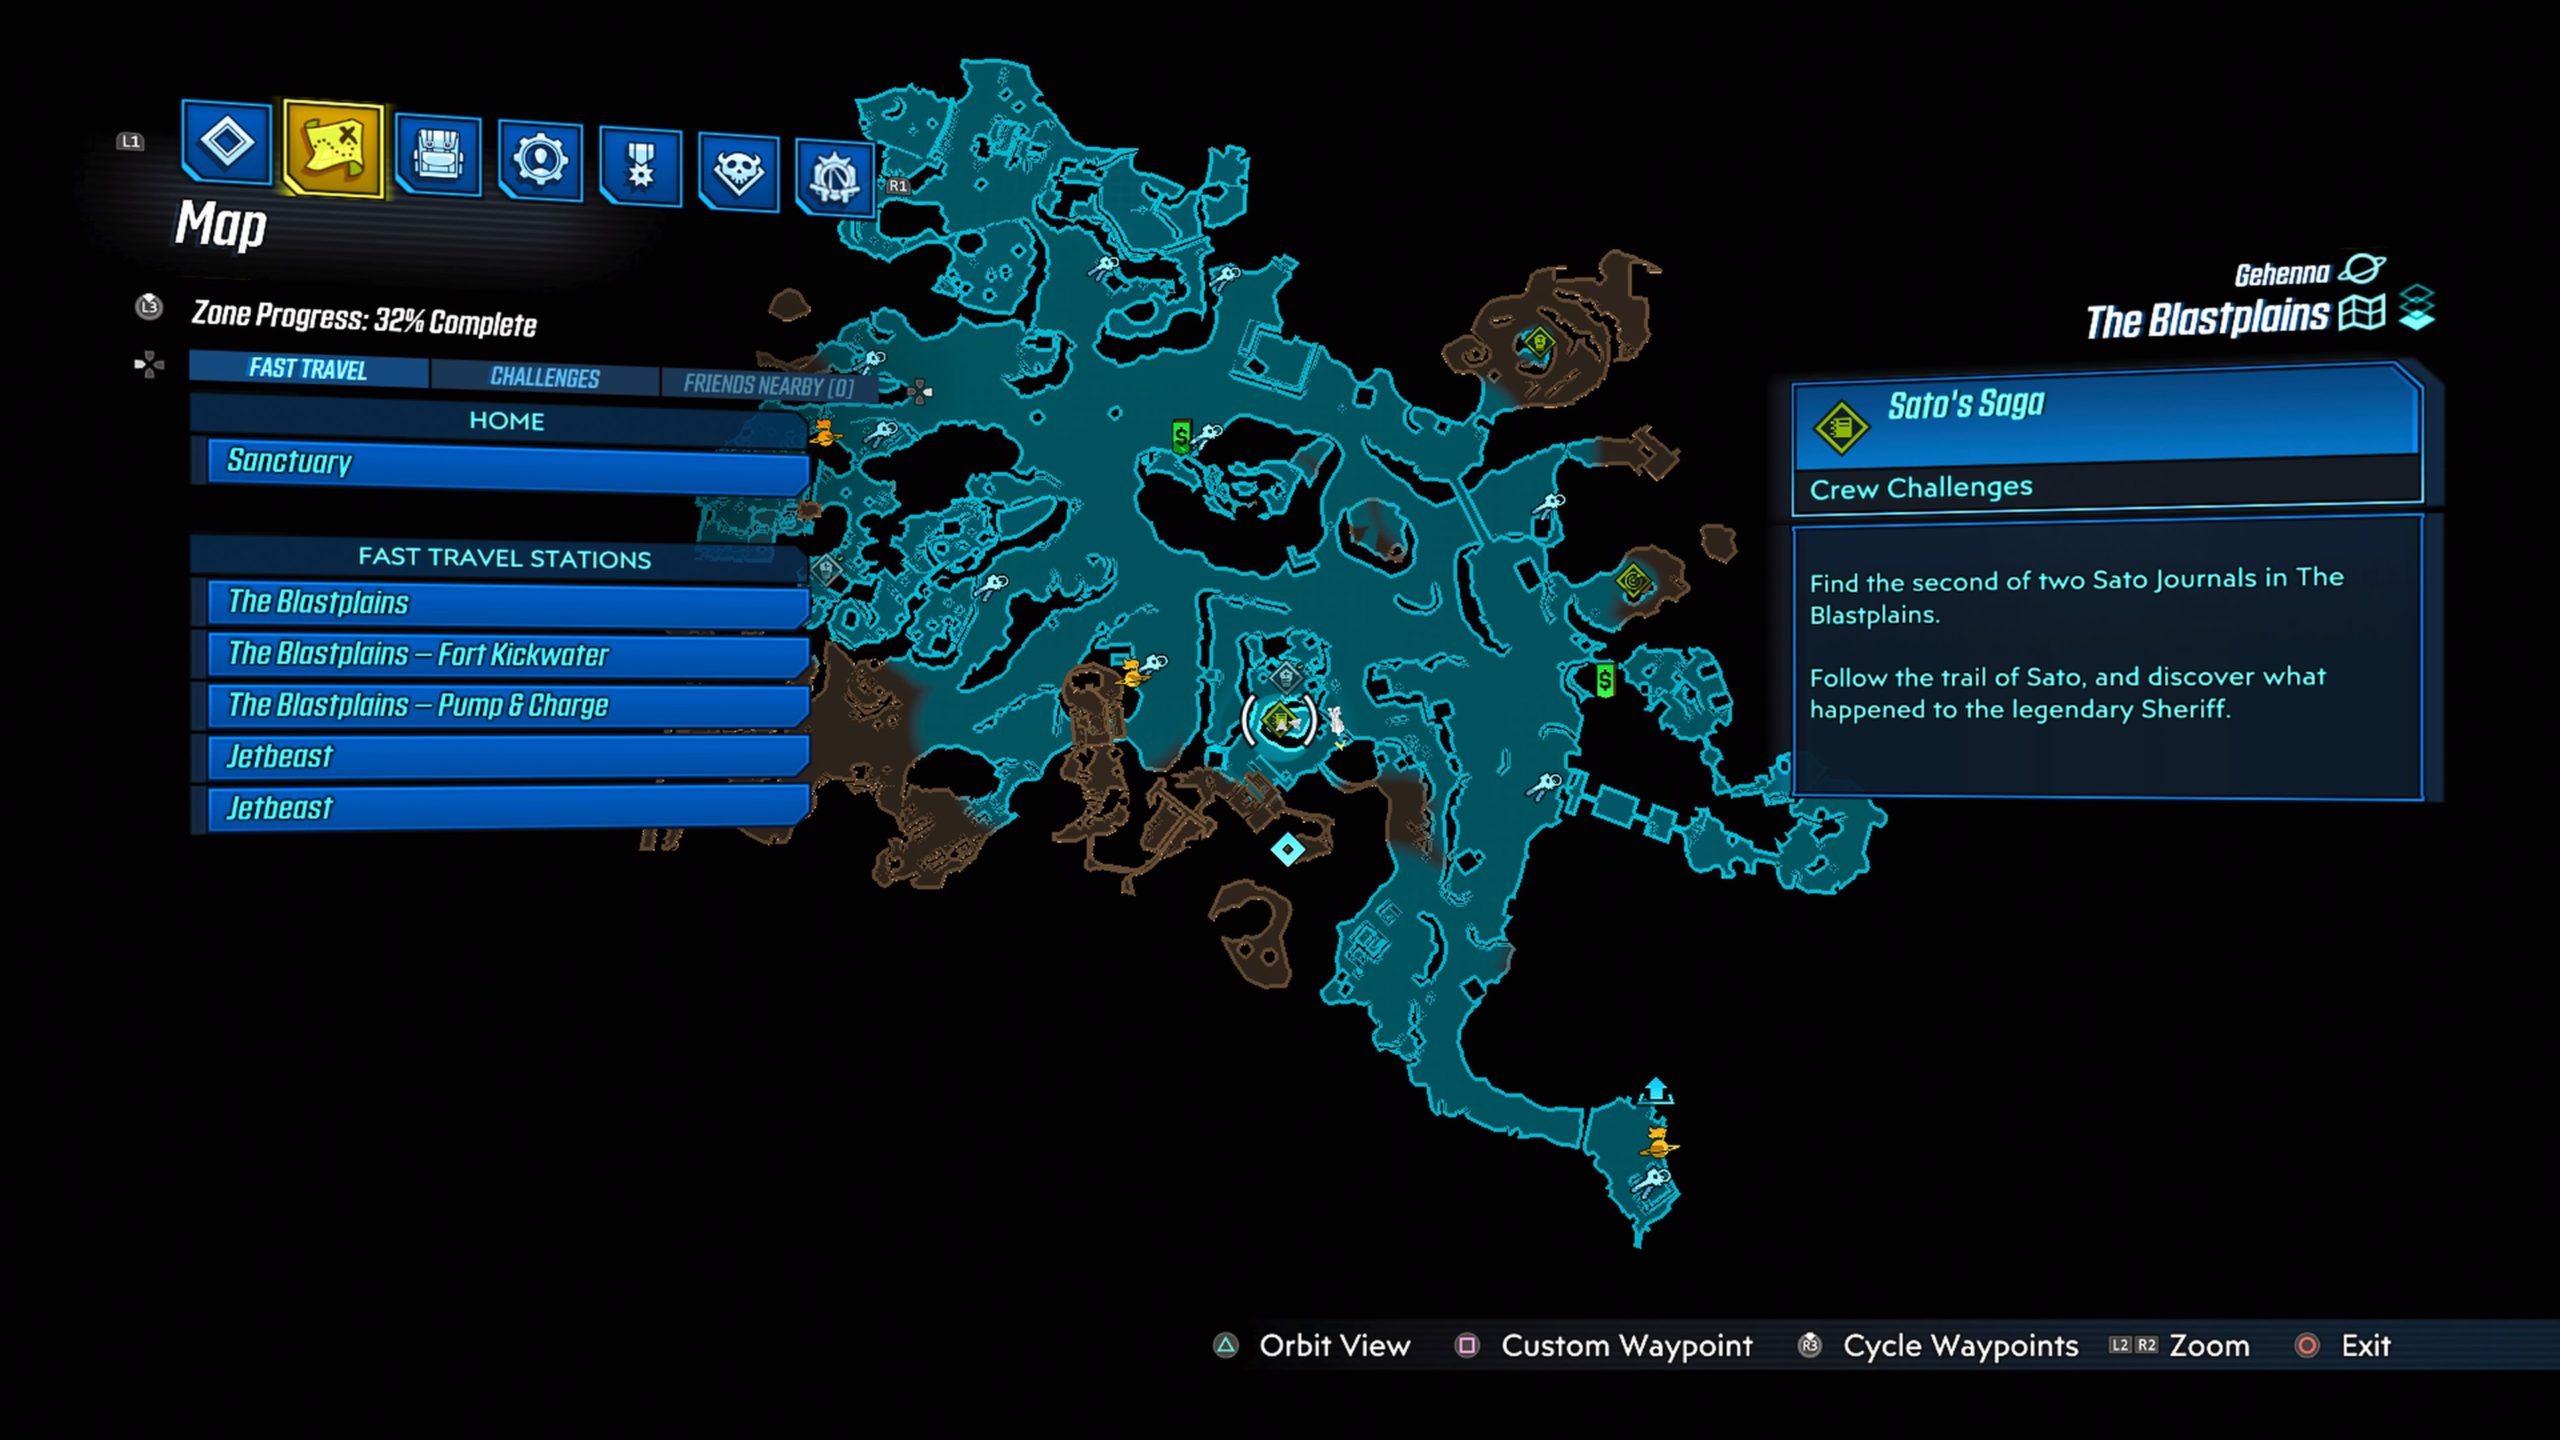
This journal is located in Amplecore Veins, which is east of the Pump & Charge fast travel station, on top of a giant rock. You will need to climb up the rock to reach the very top.
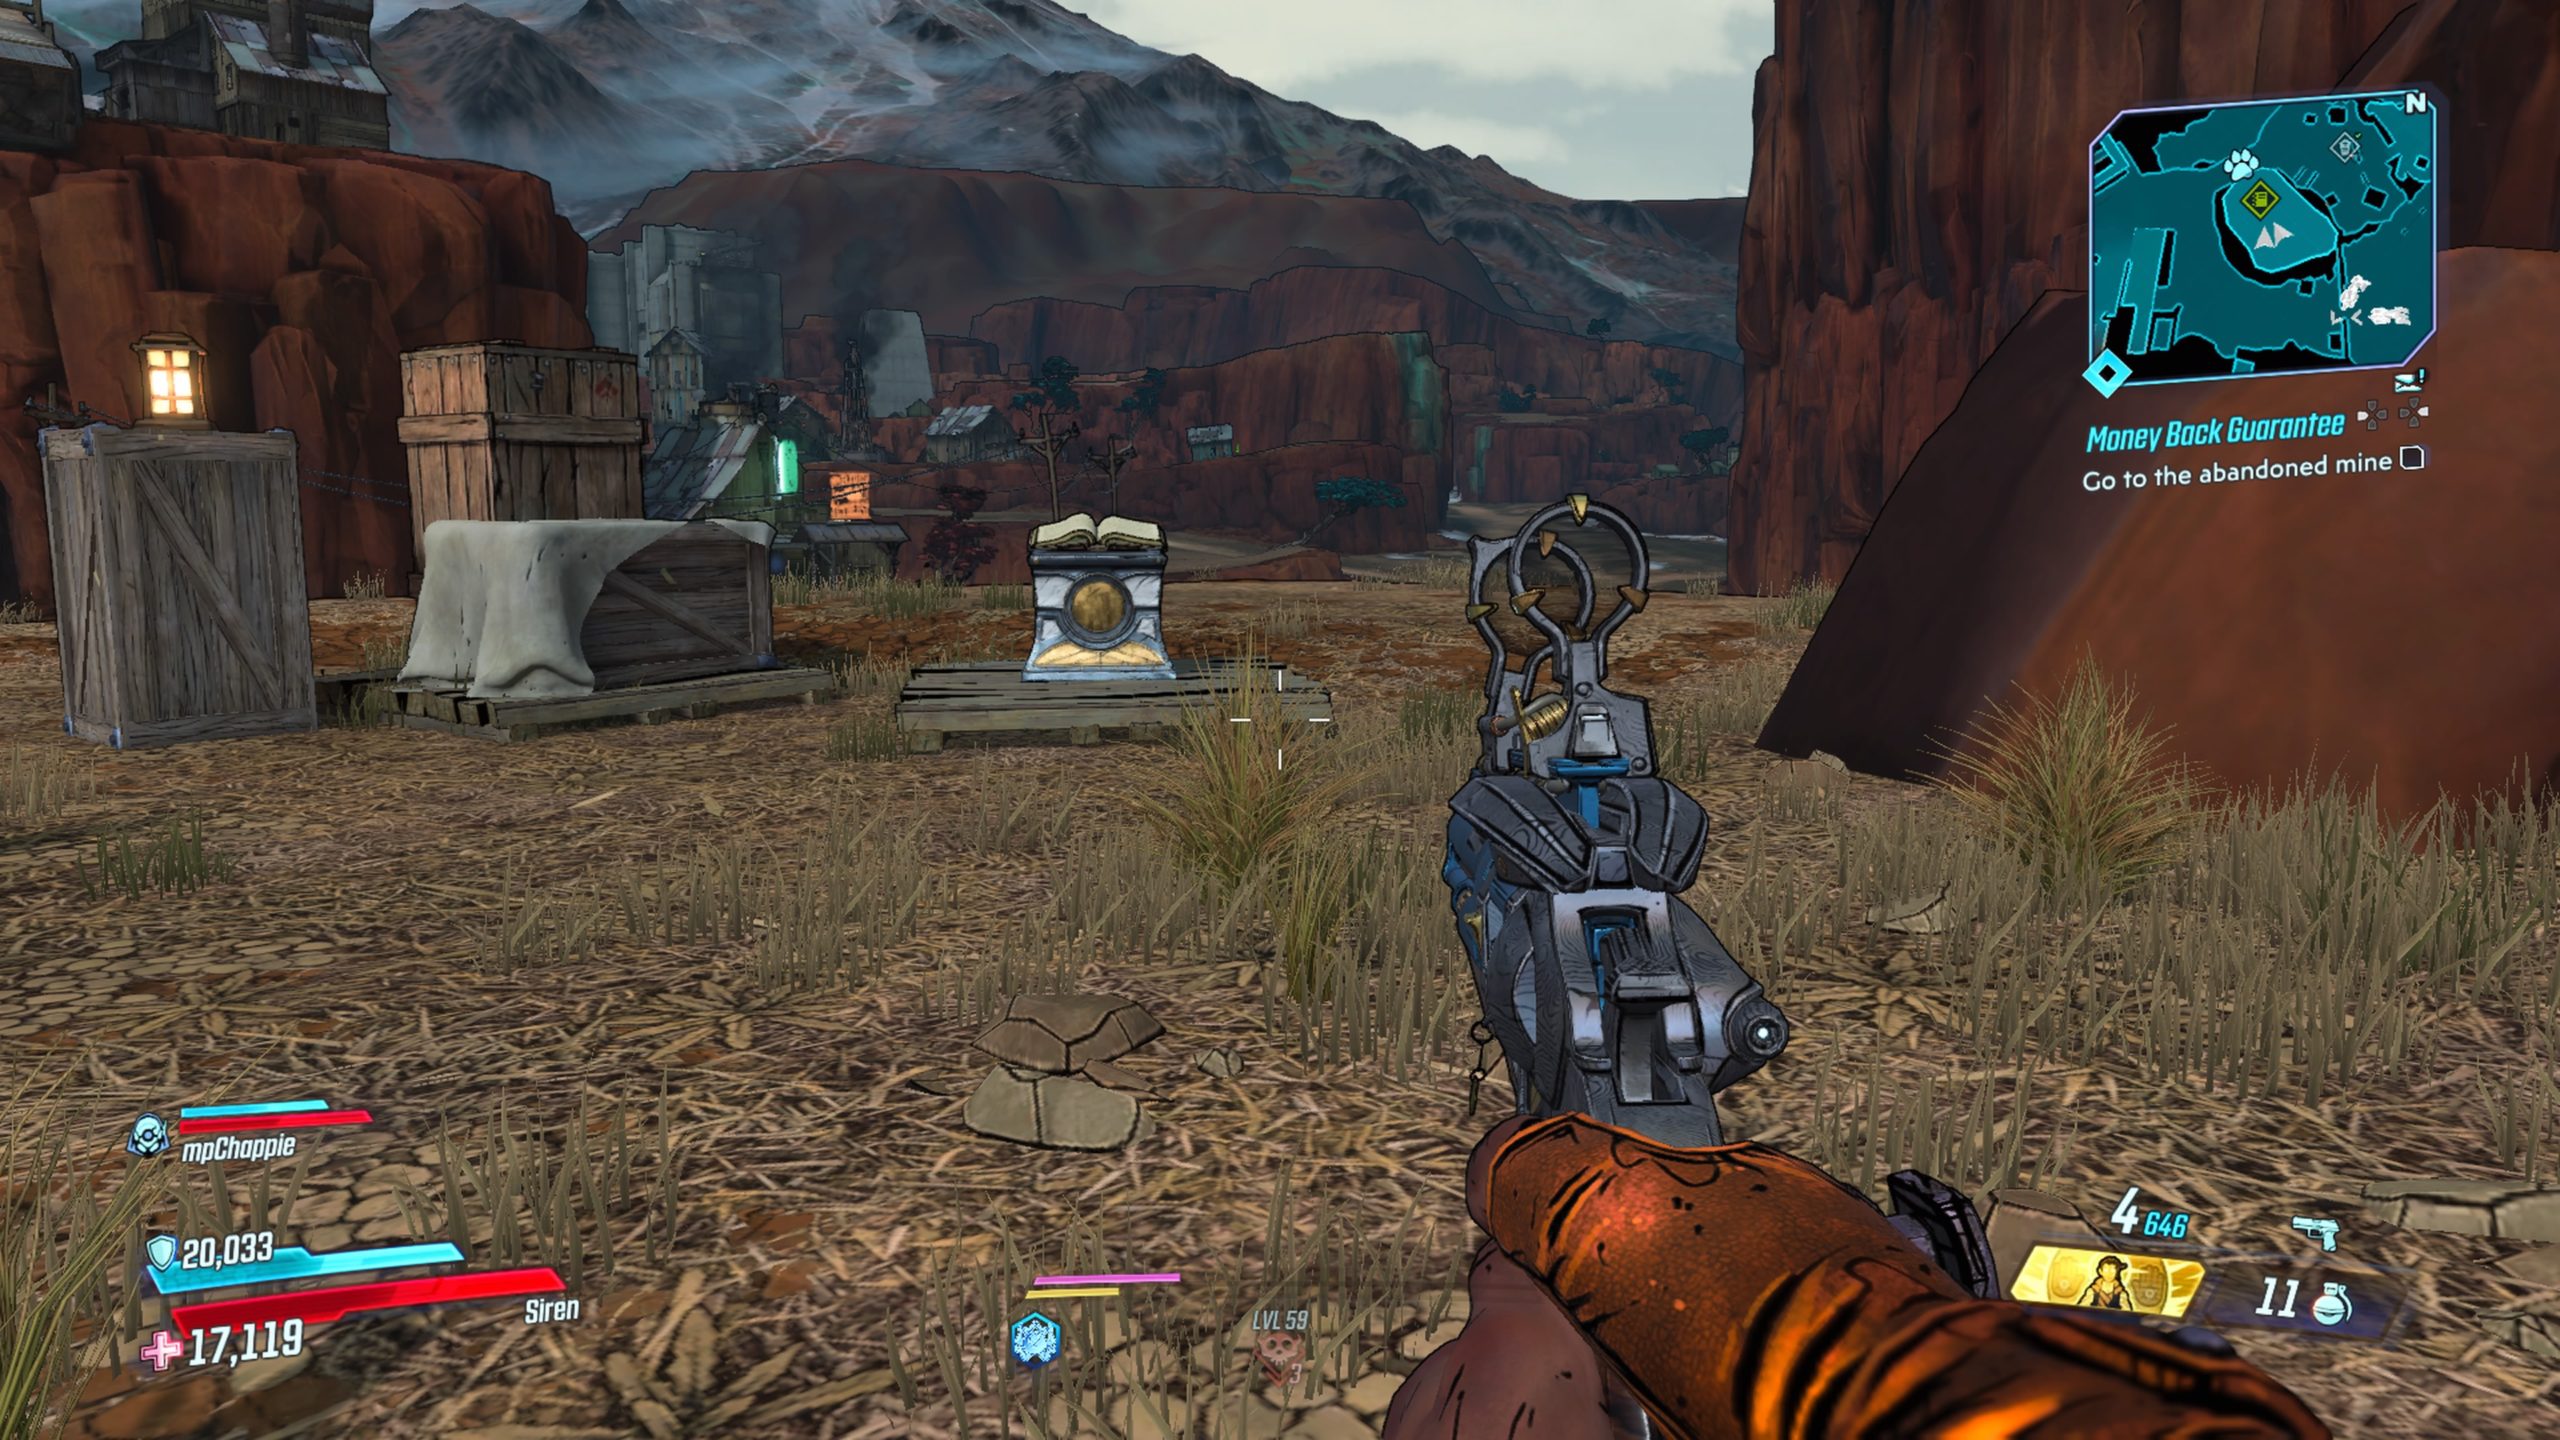
Blastplains #2
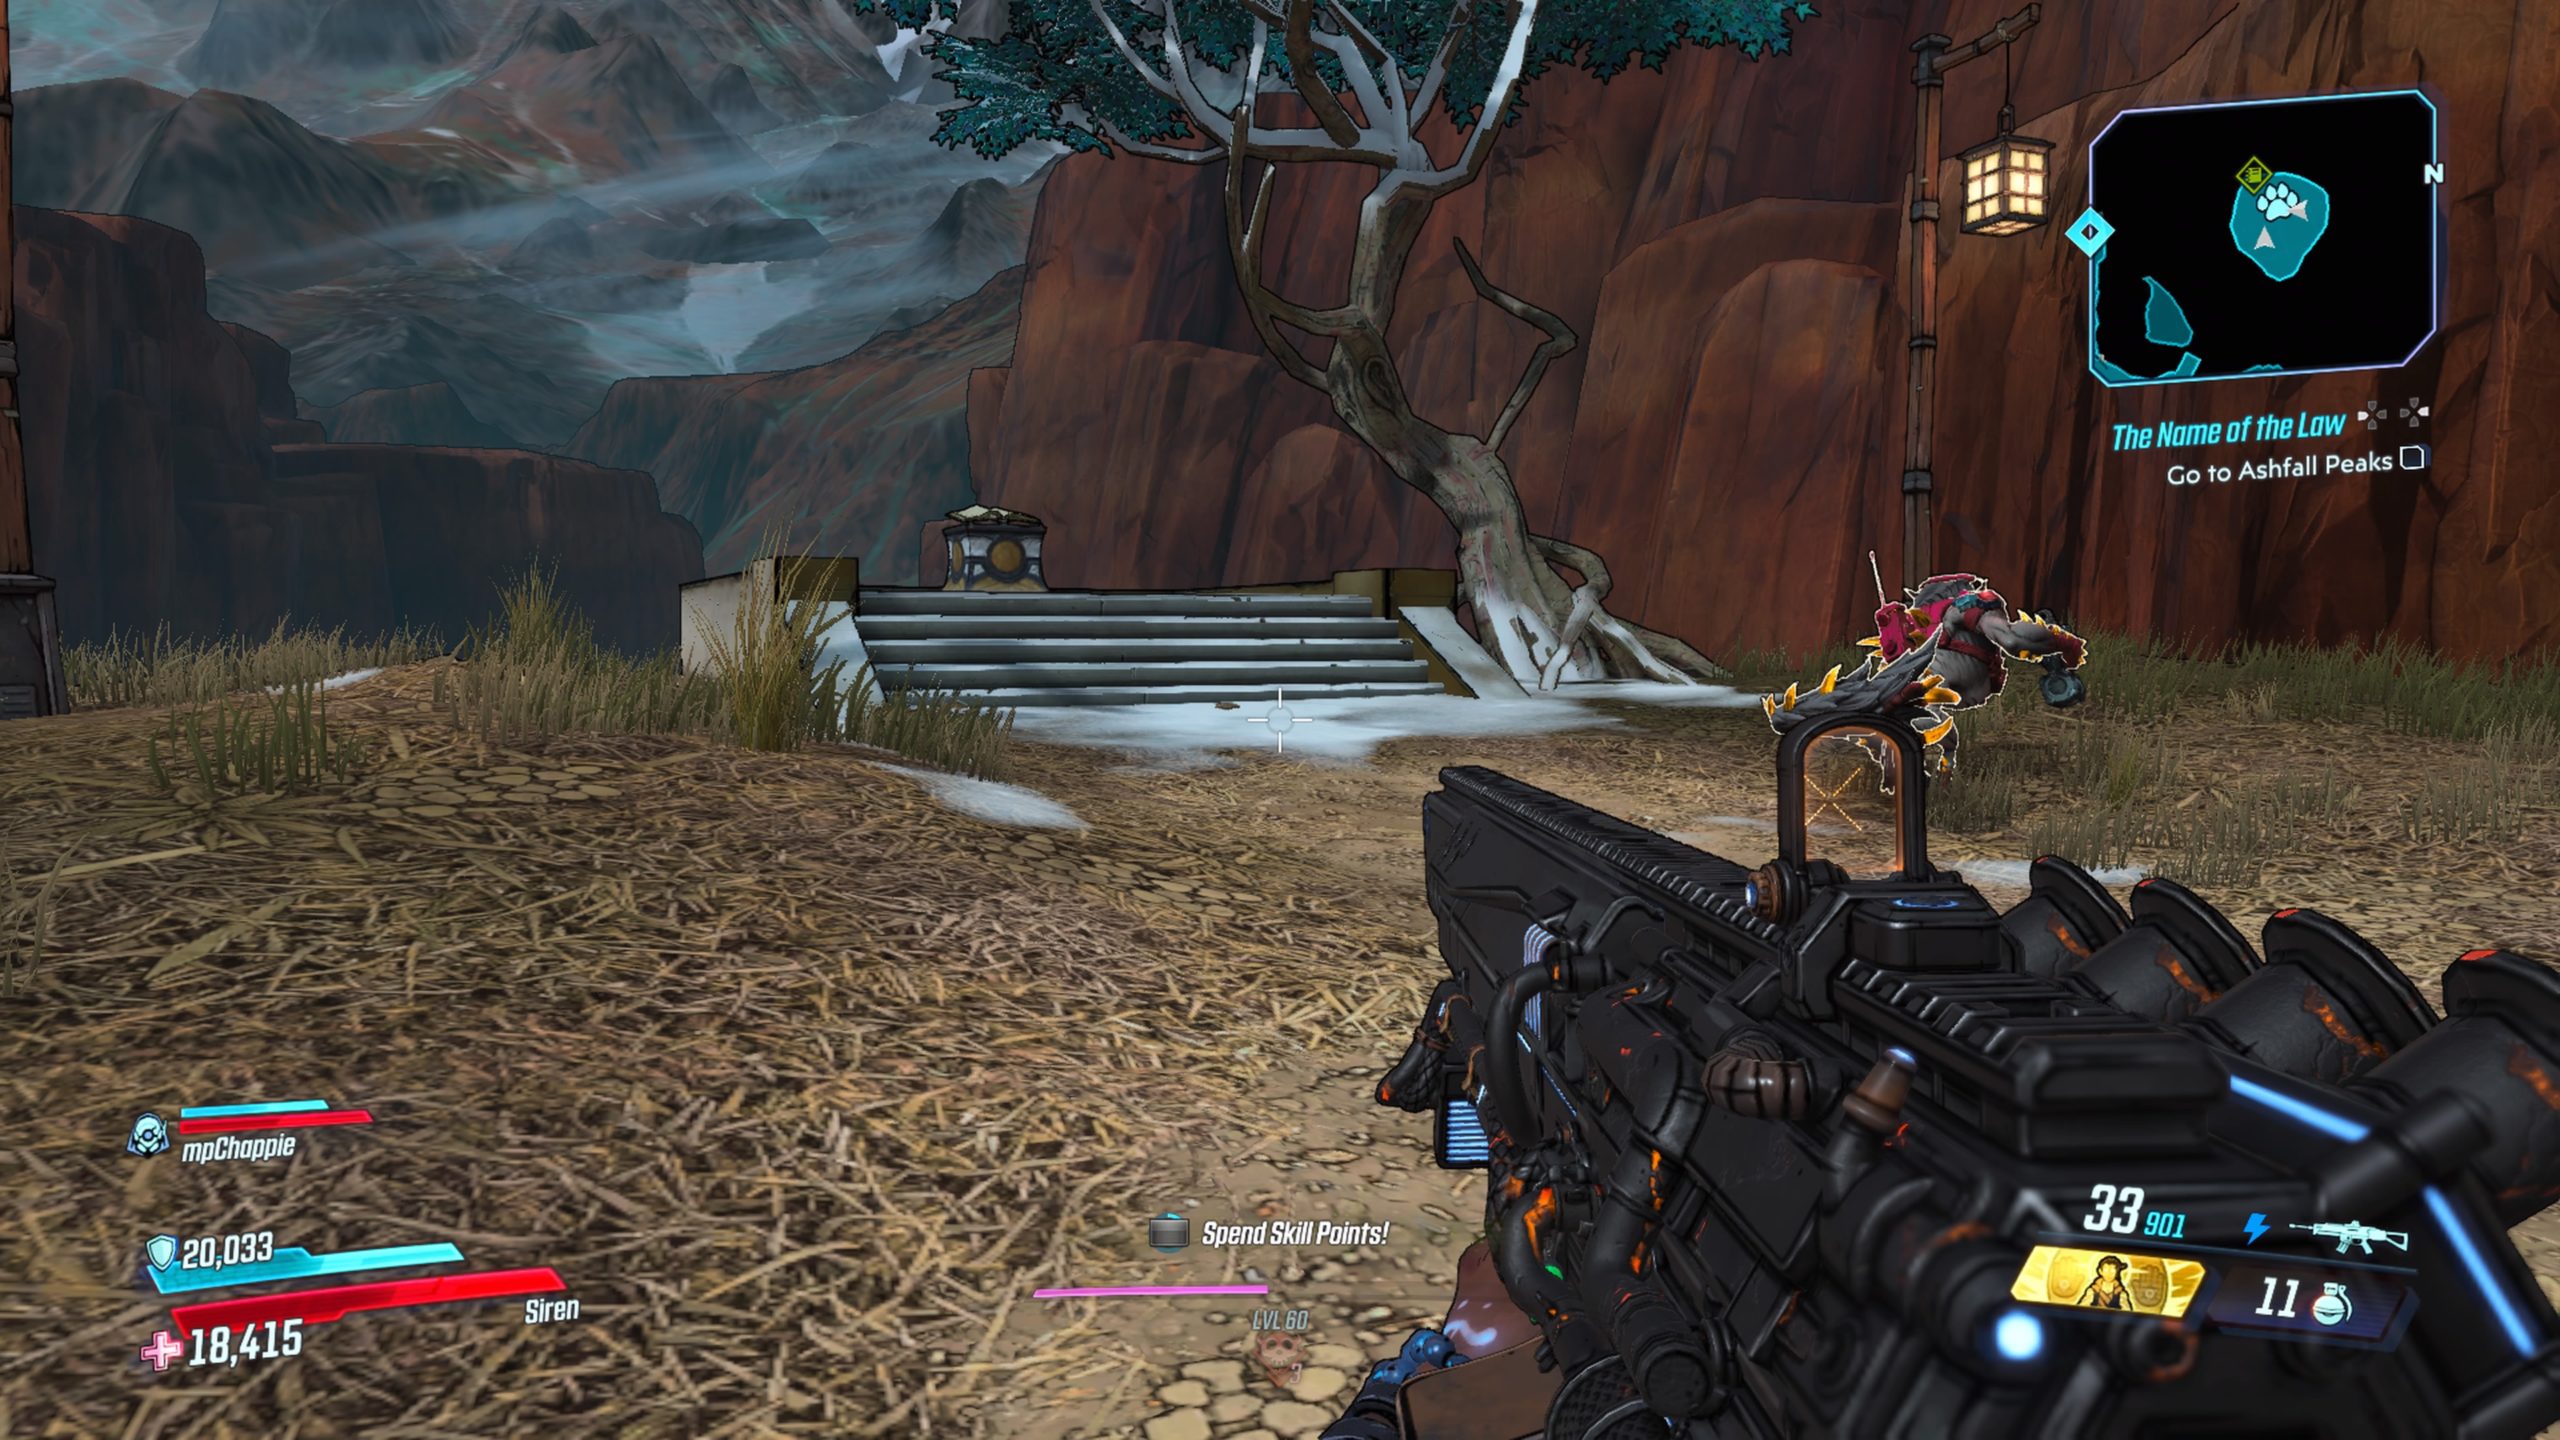
This journal is located near the Ashfall Peaks transition, which is north of the Fort Kickwater fast travel station.
Blastplains Cache
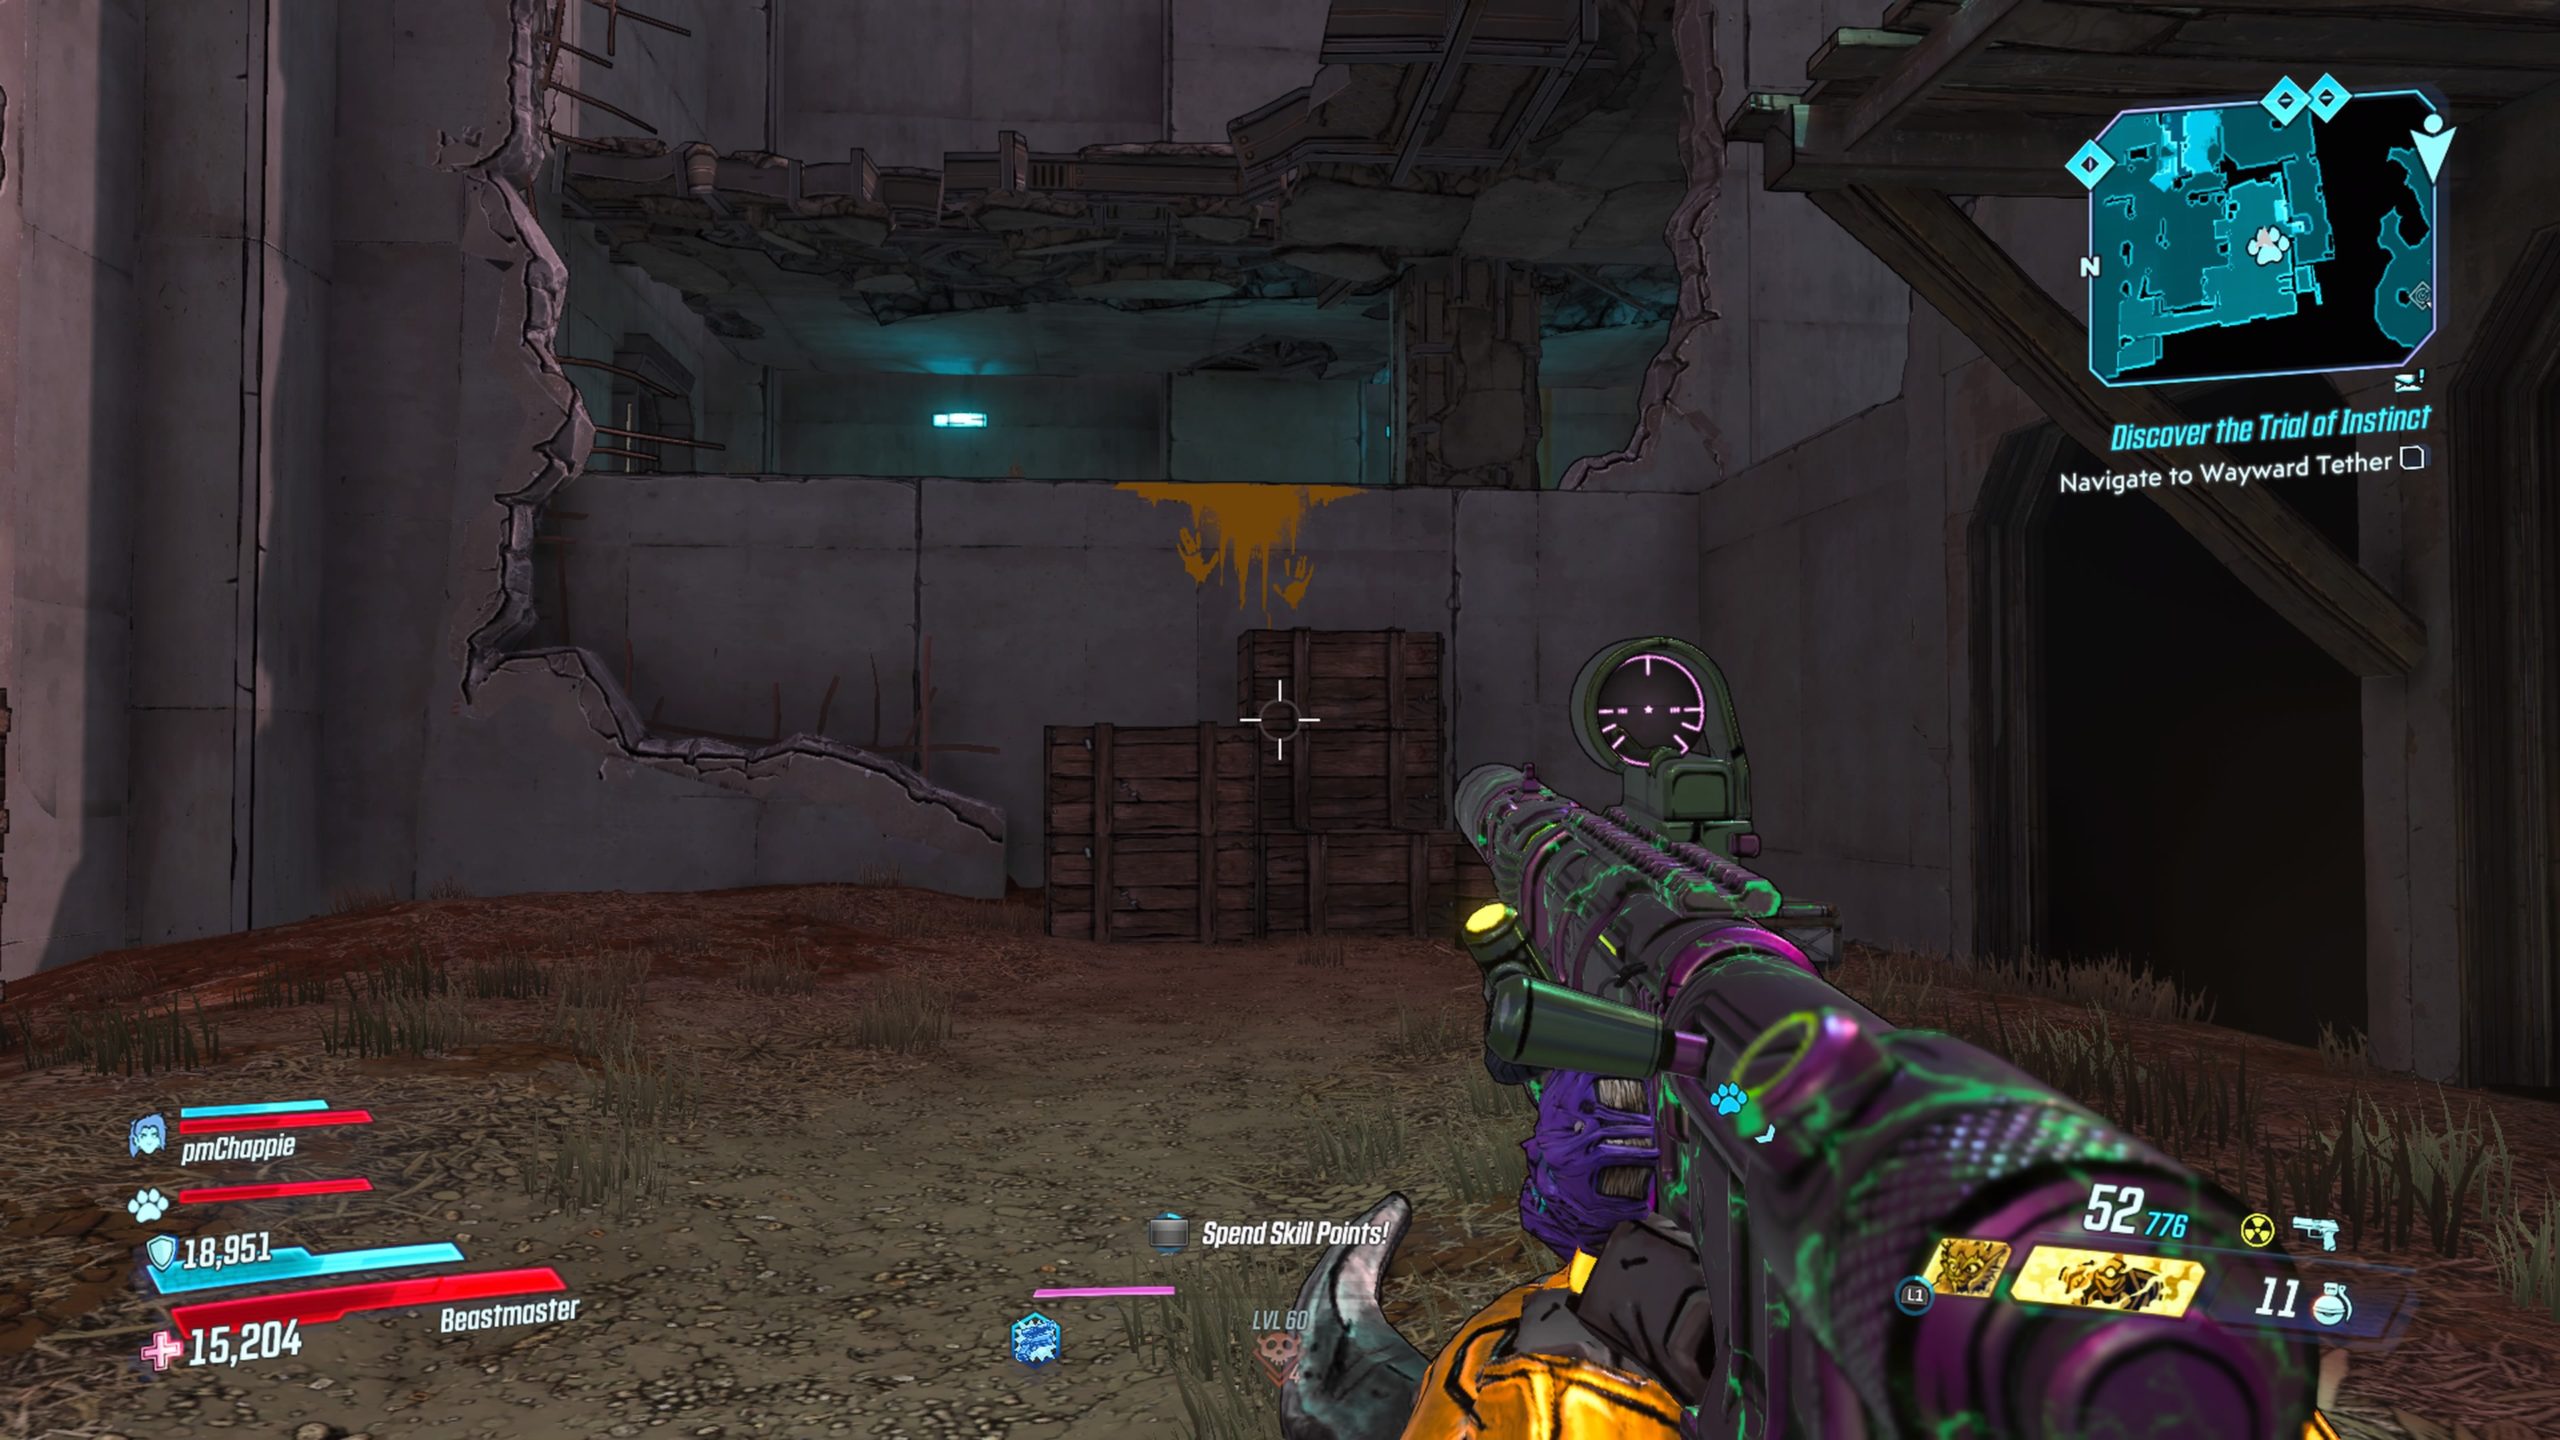
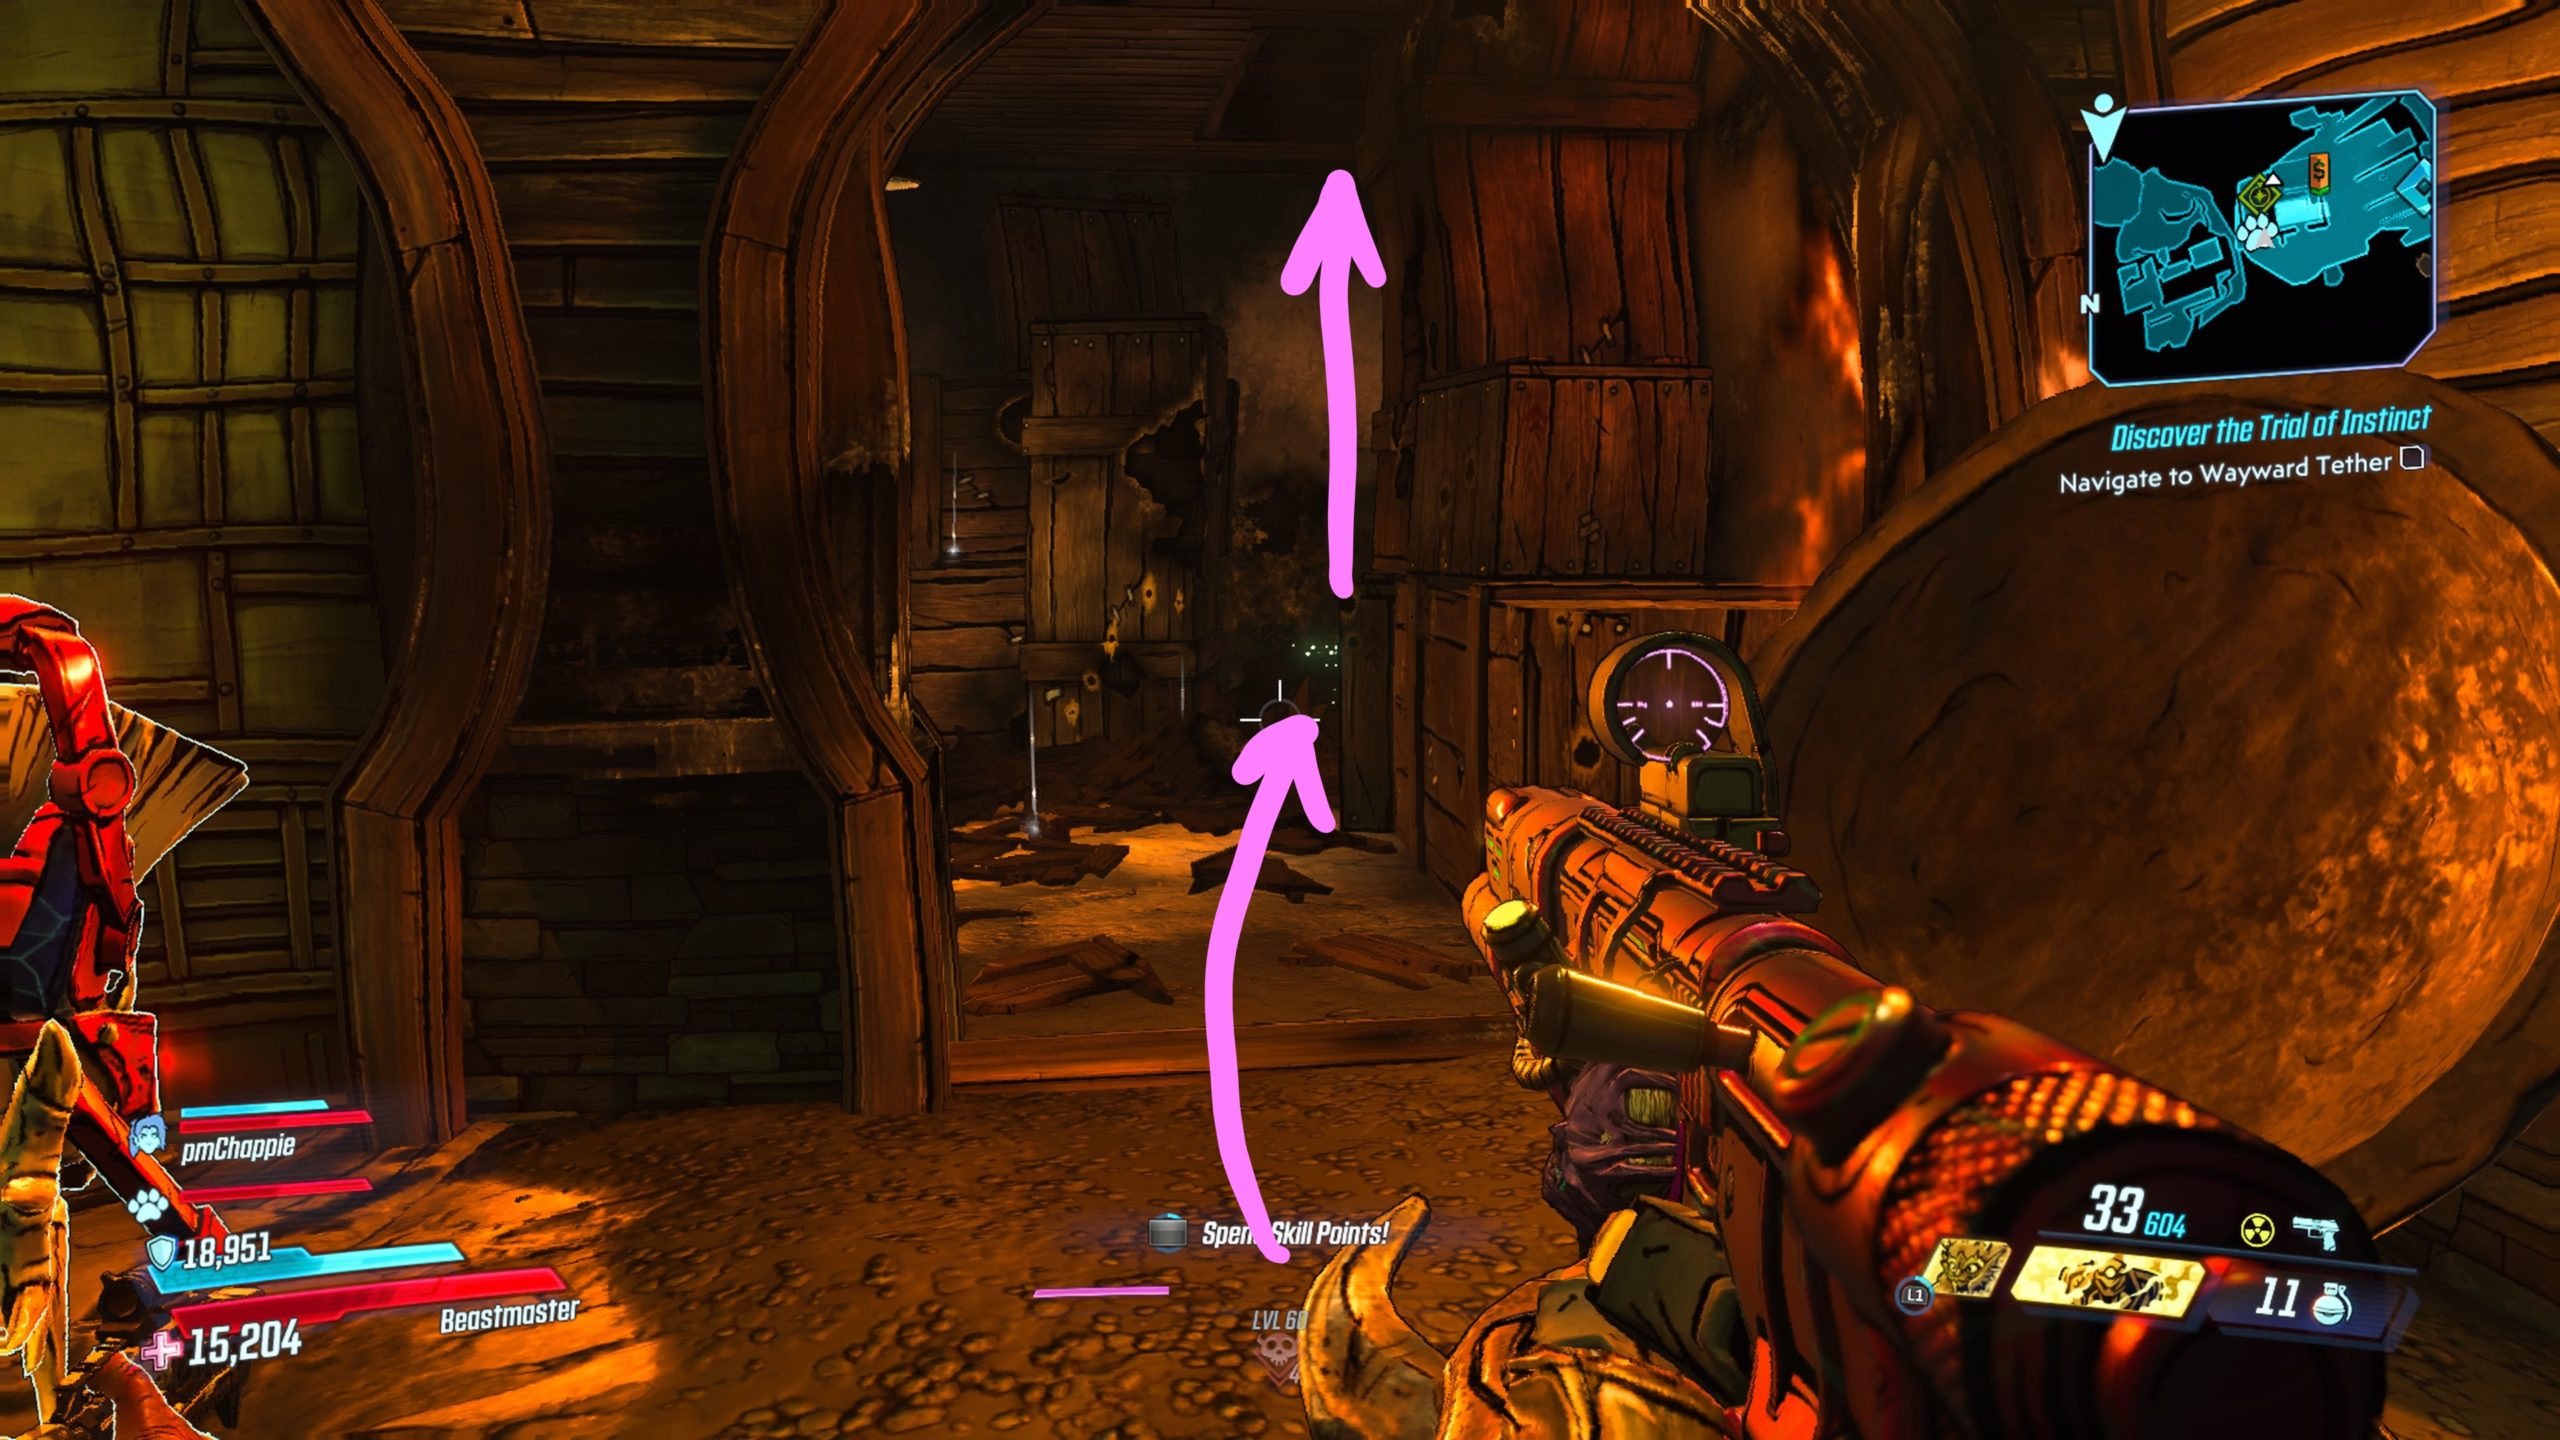
This cache can be found in Fort Kickwater. To reach it, you will need to climb up some wooden crates and a wall marked with yellow paint. Once at the top, turn left and head through the doorway. Take an immediate right and crawl underneath the partially opened gate on the door to find the cache.
Ashfall Peaks
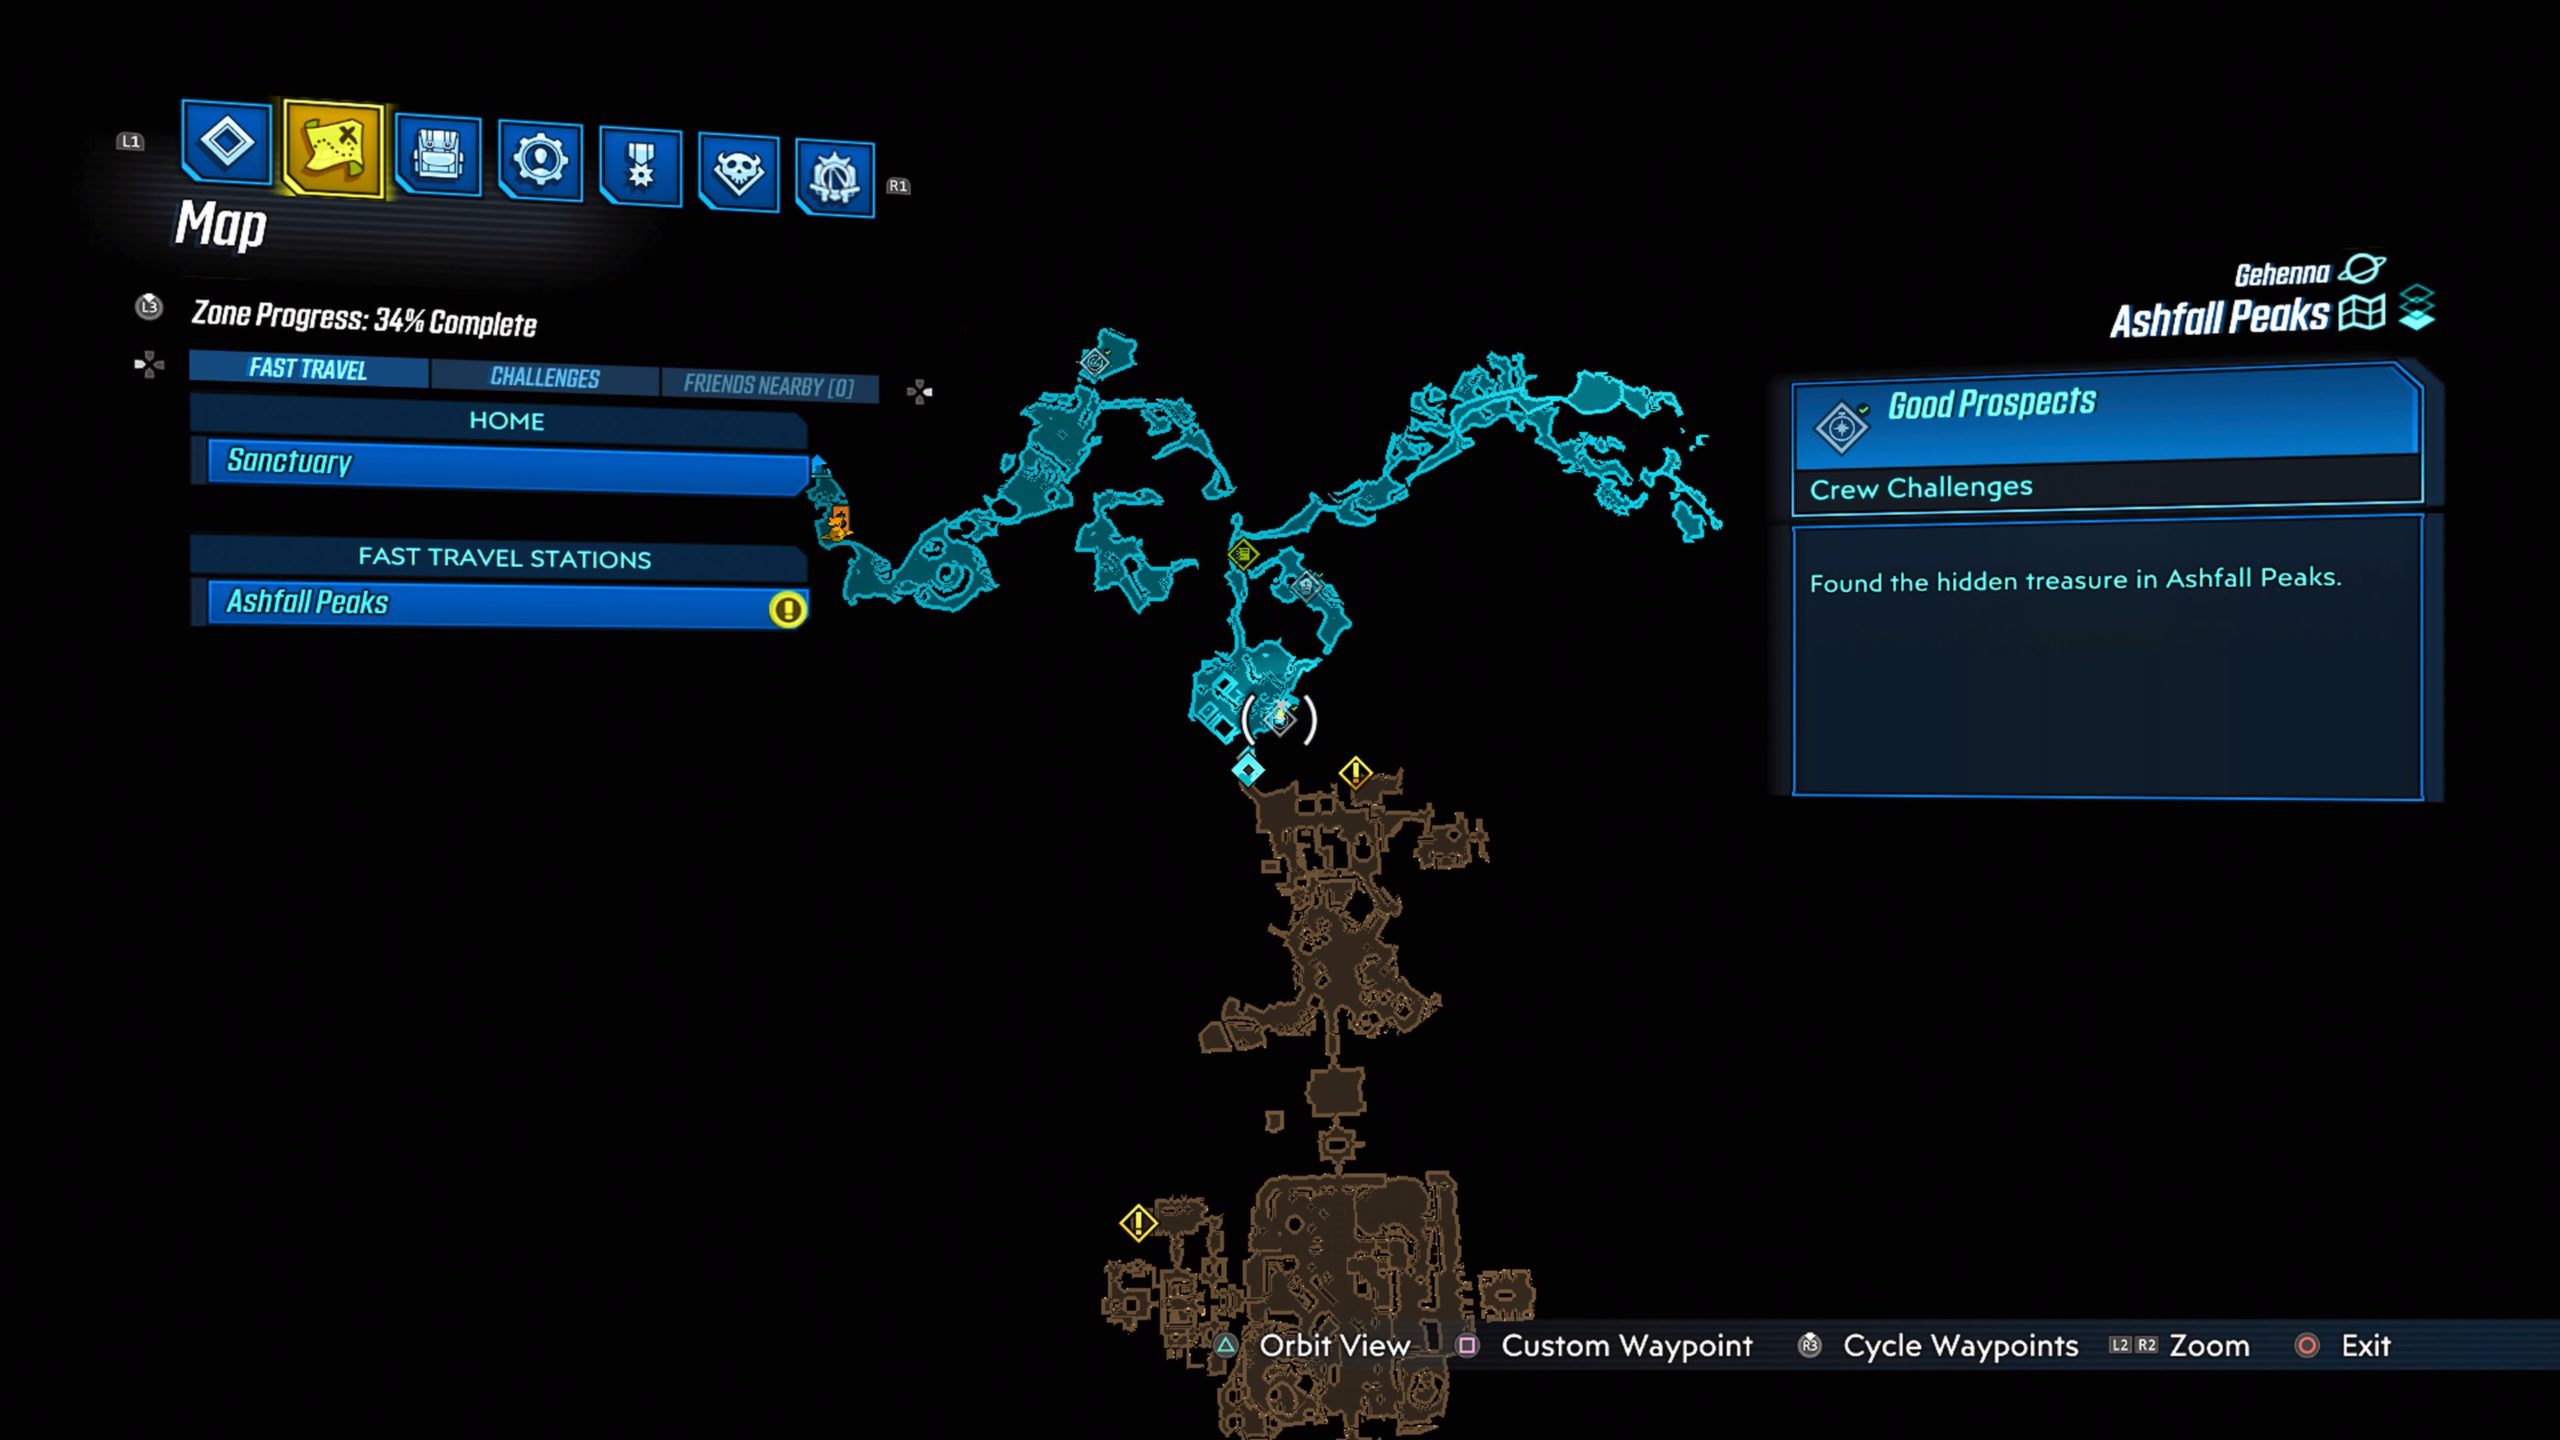
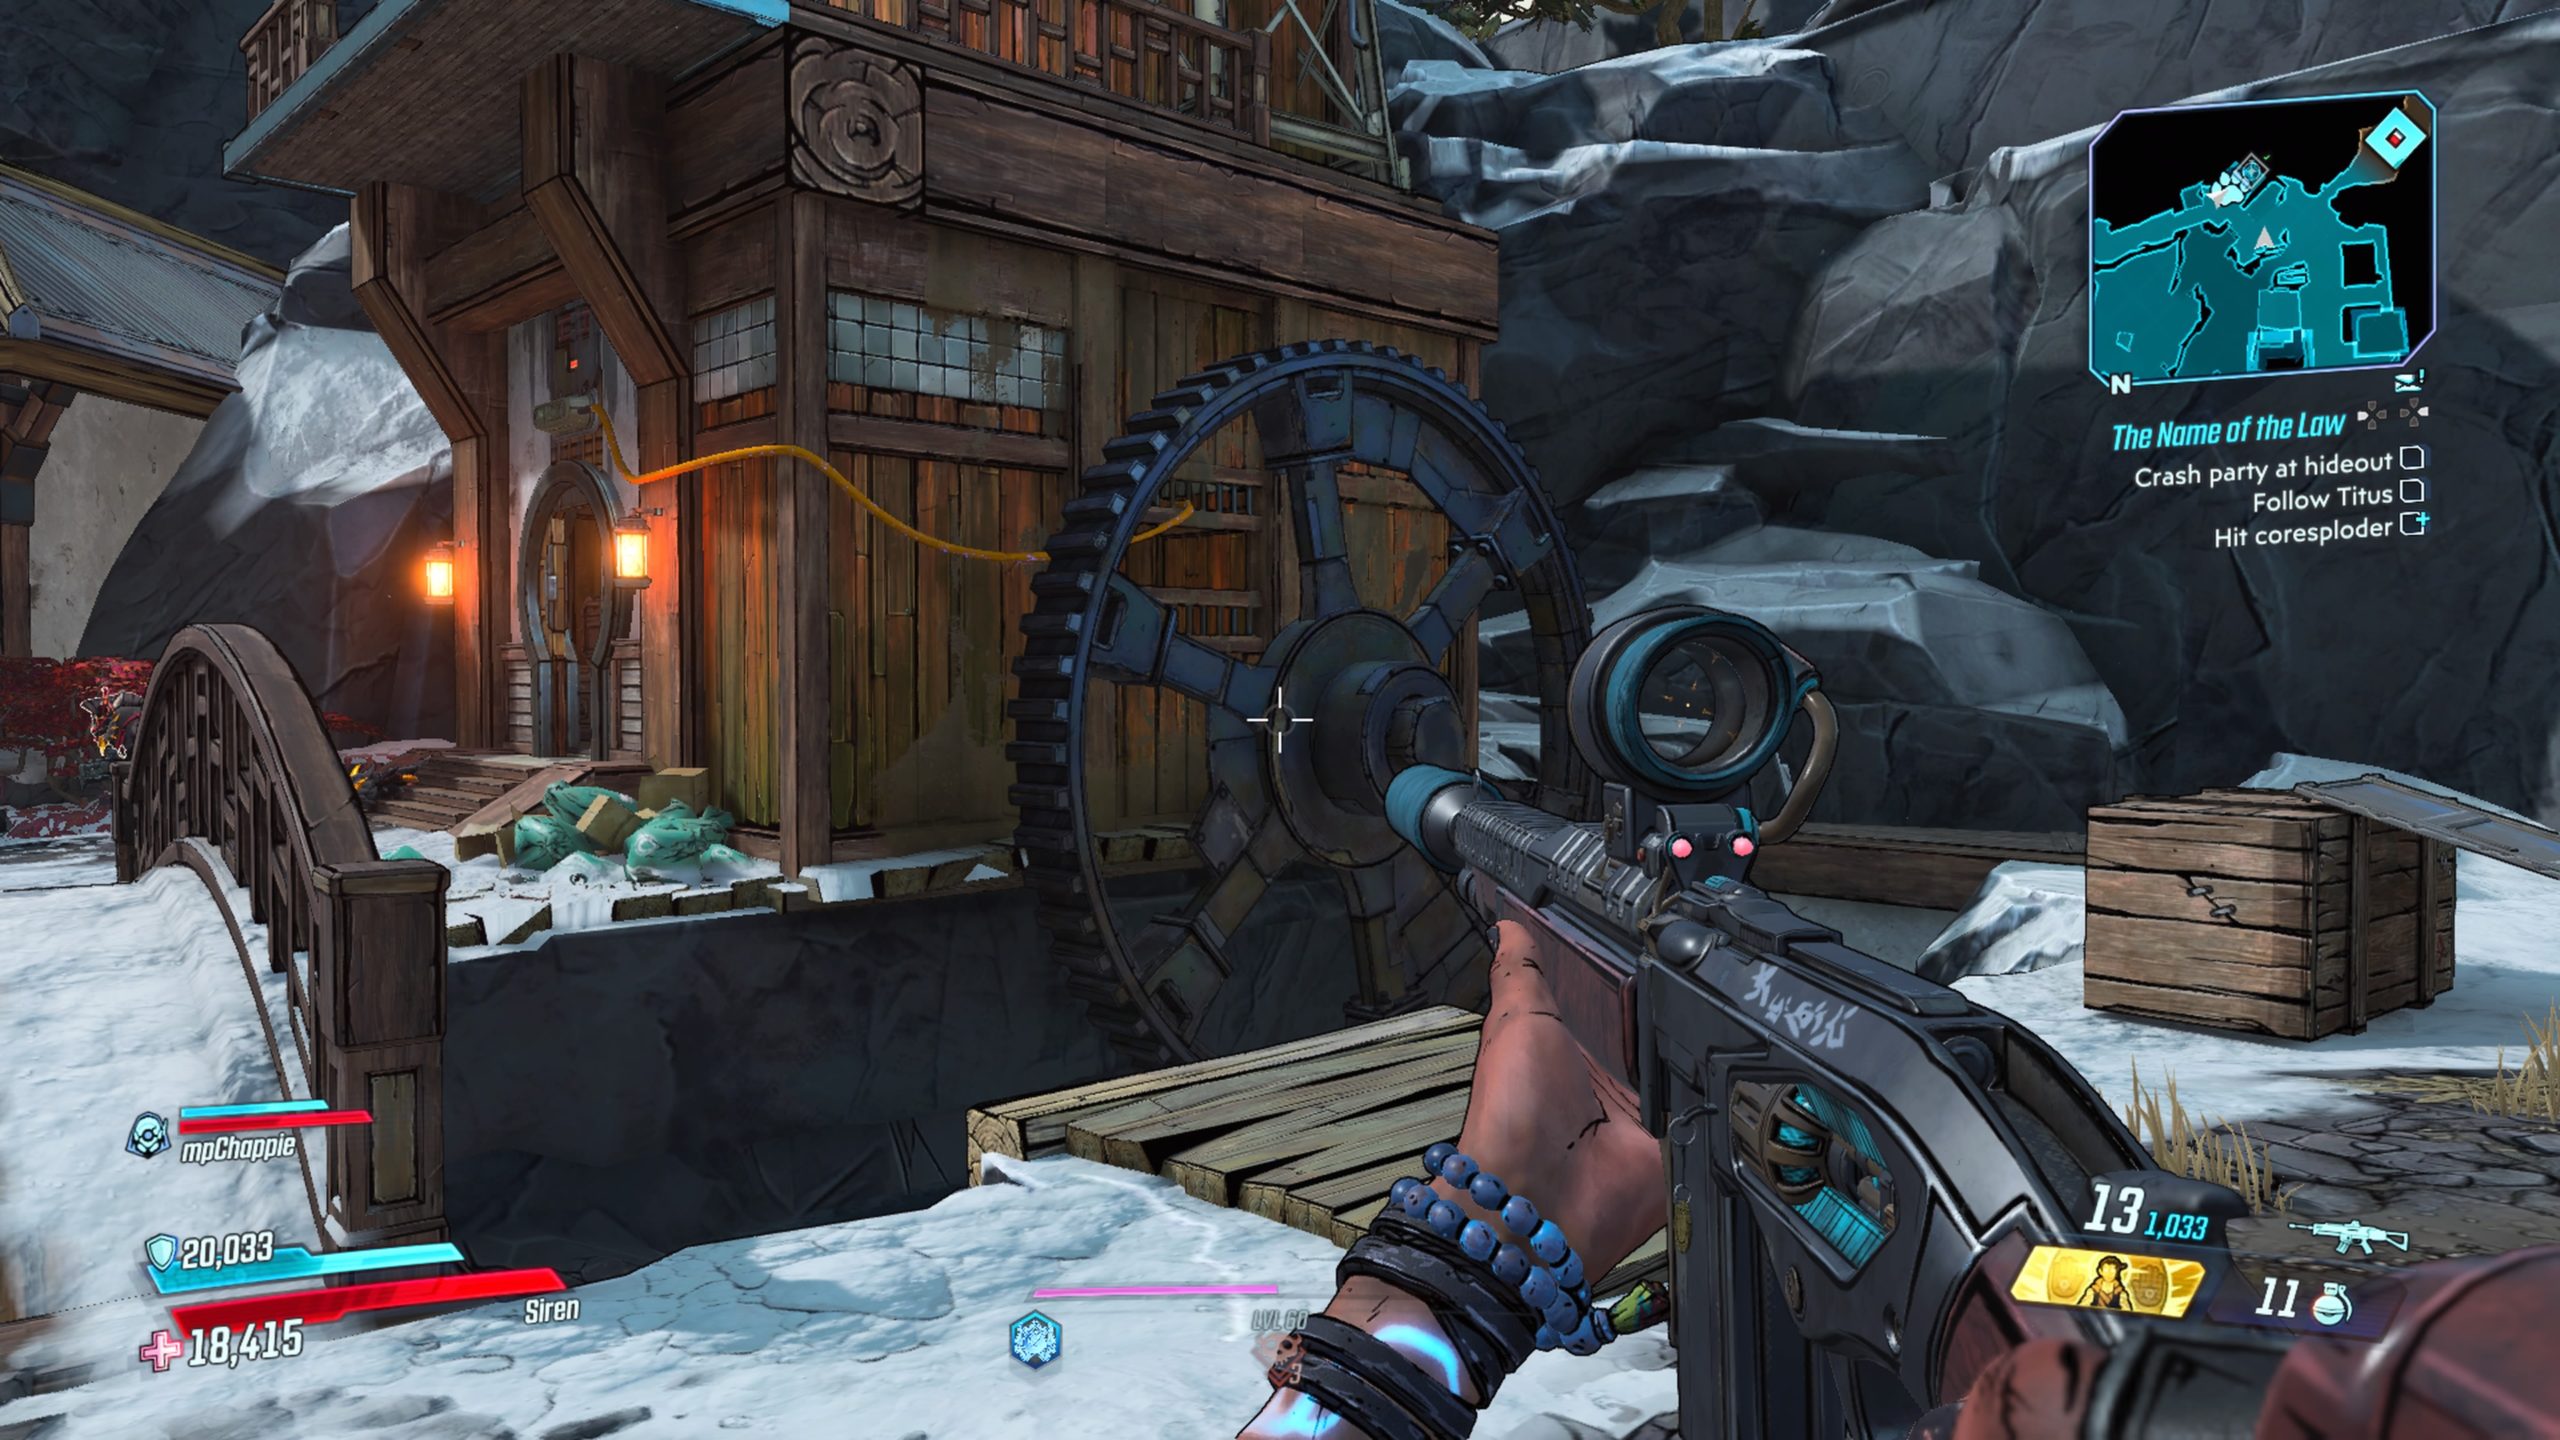
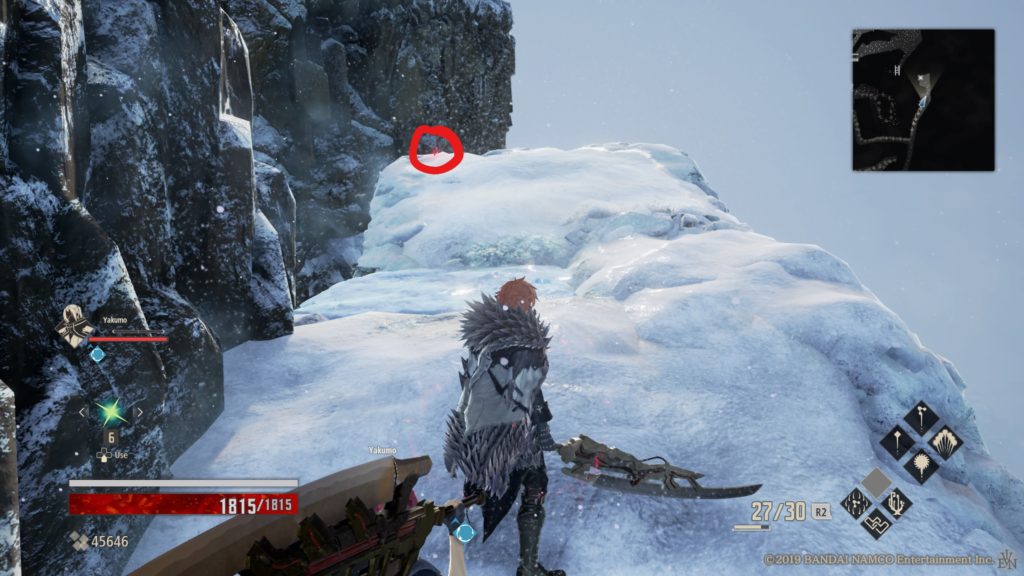
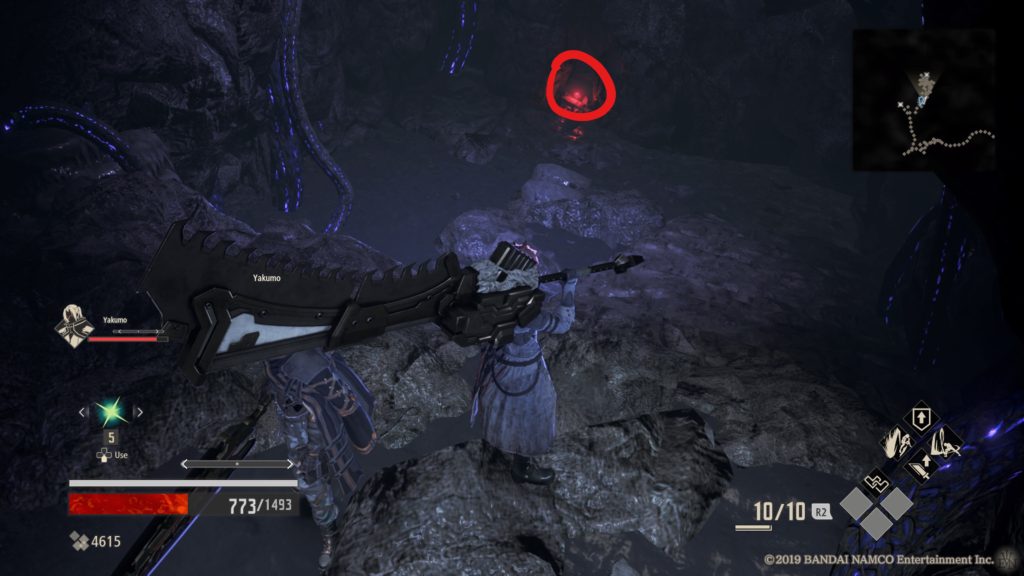
Ashfall Peaks #1
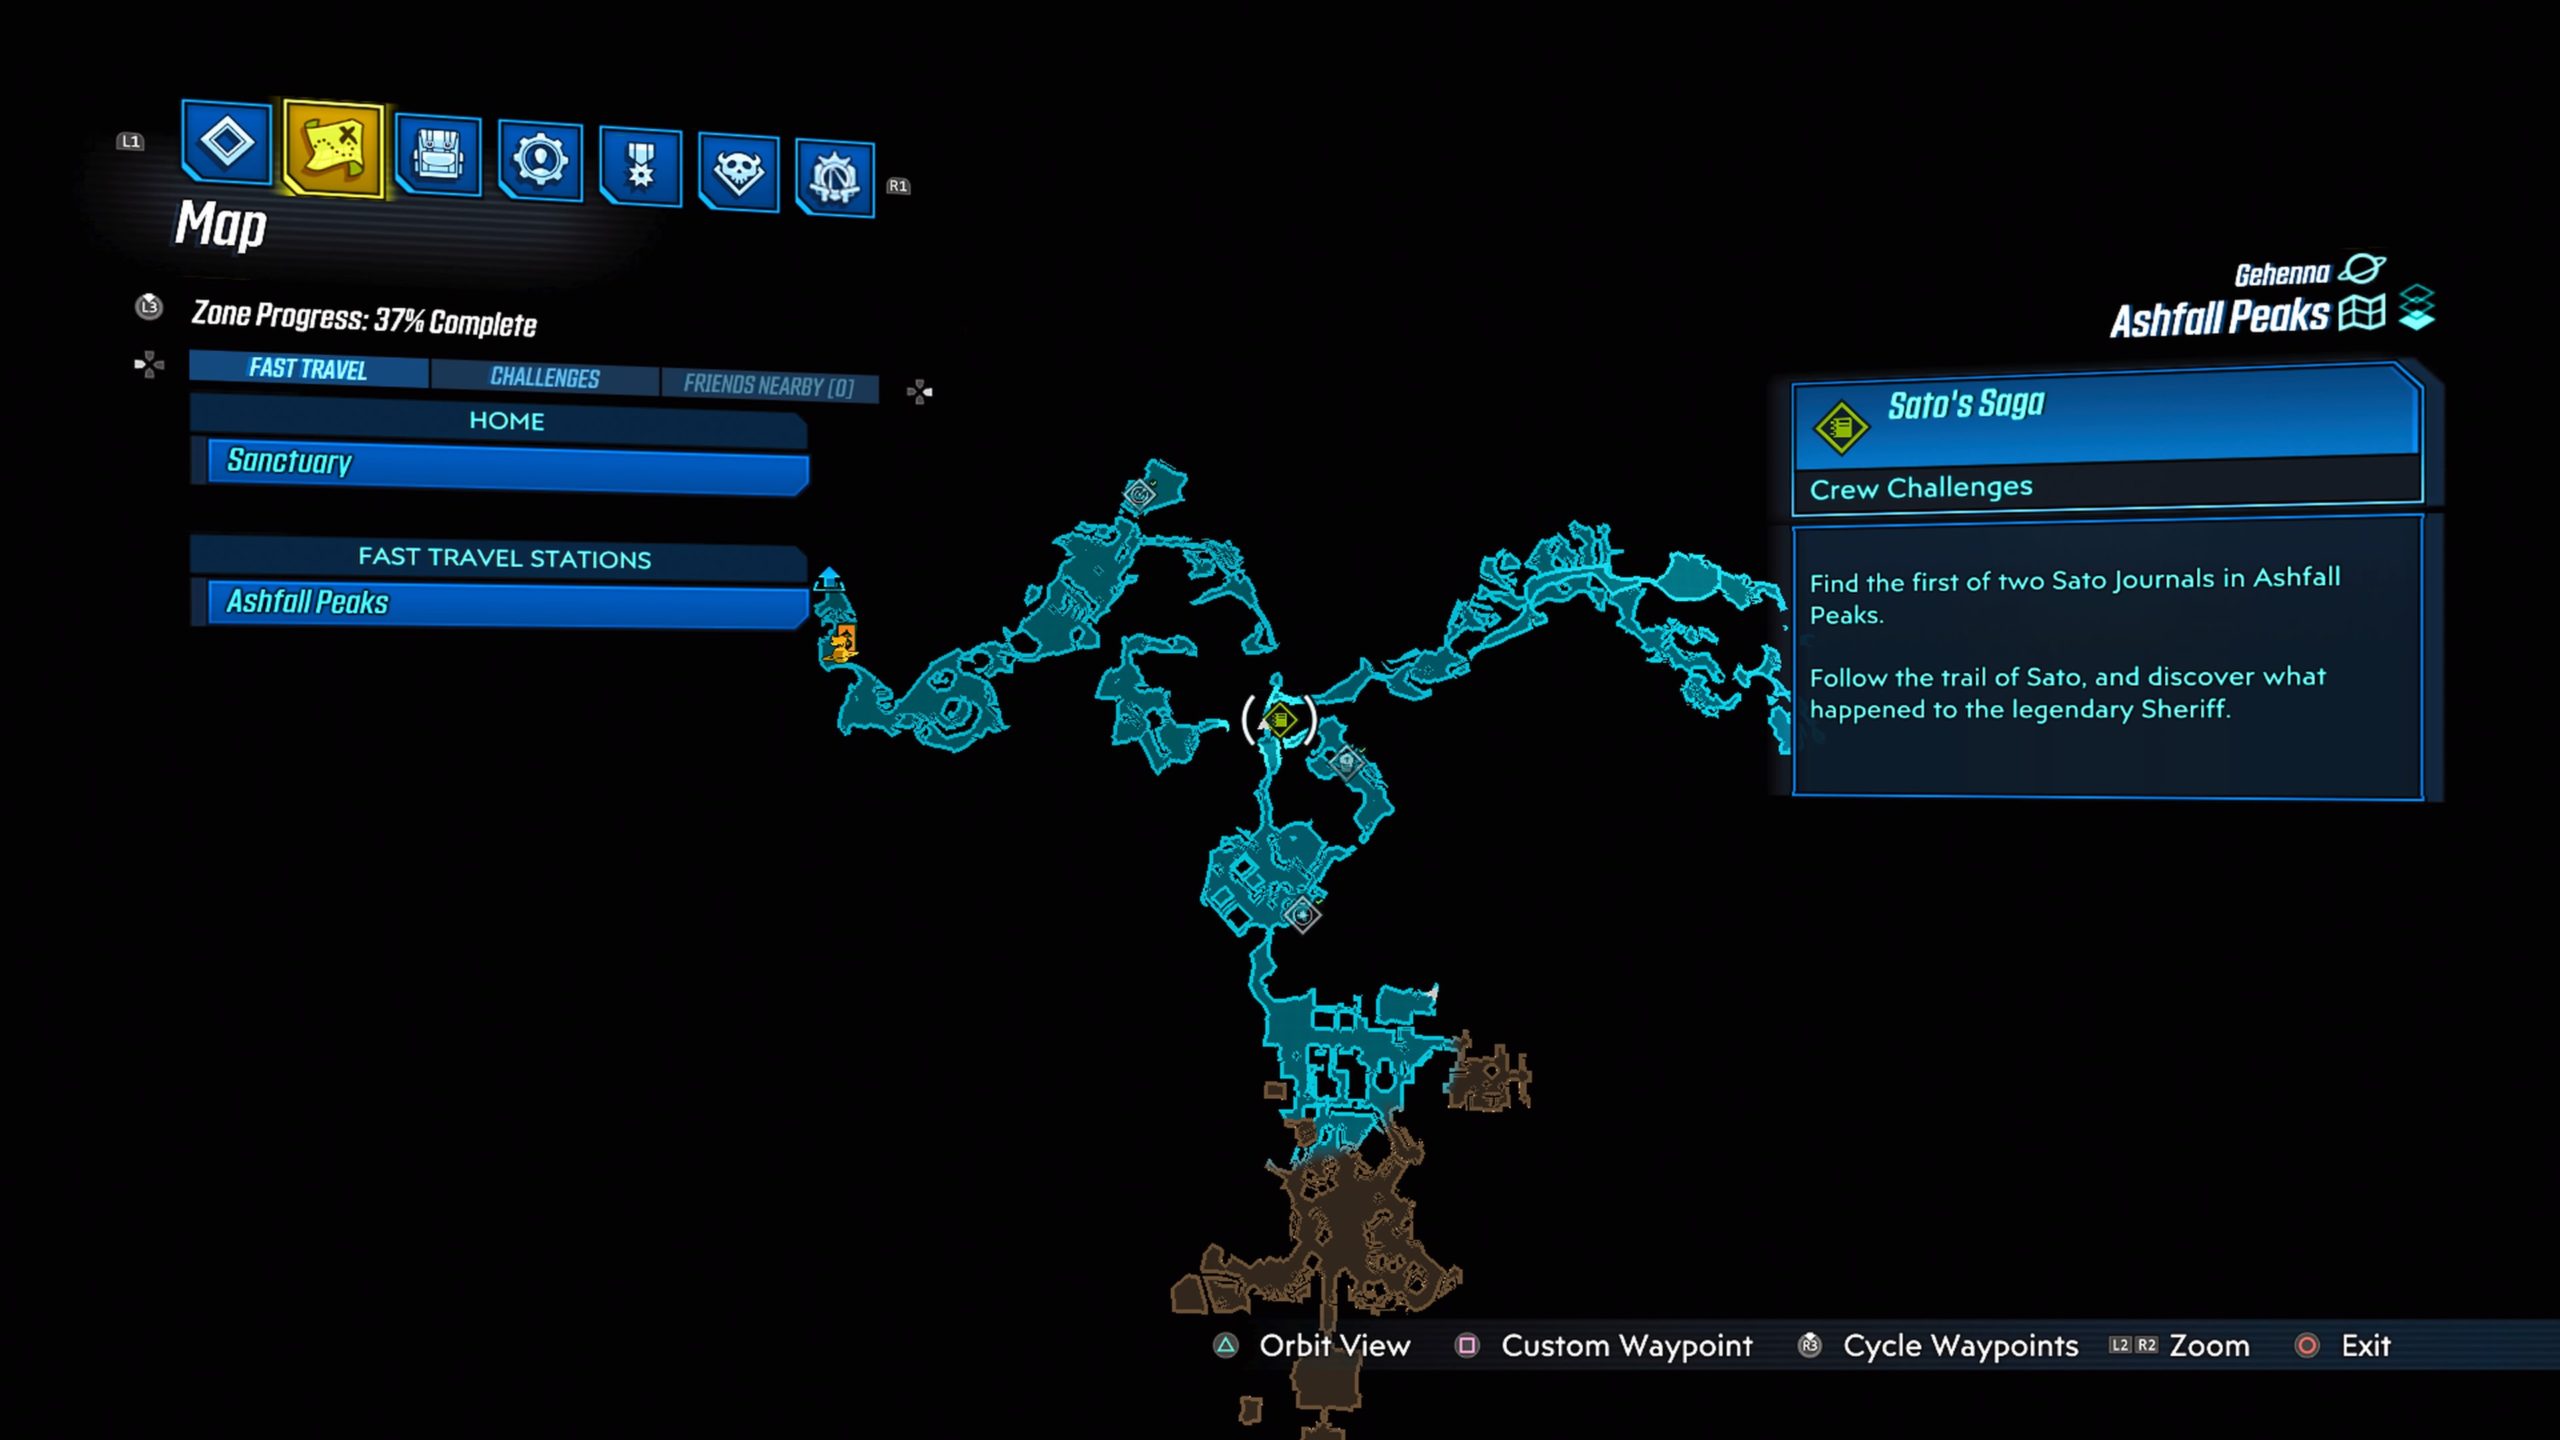
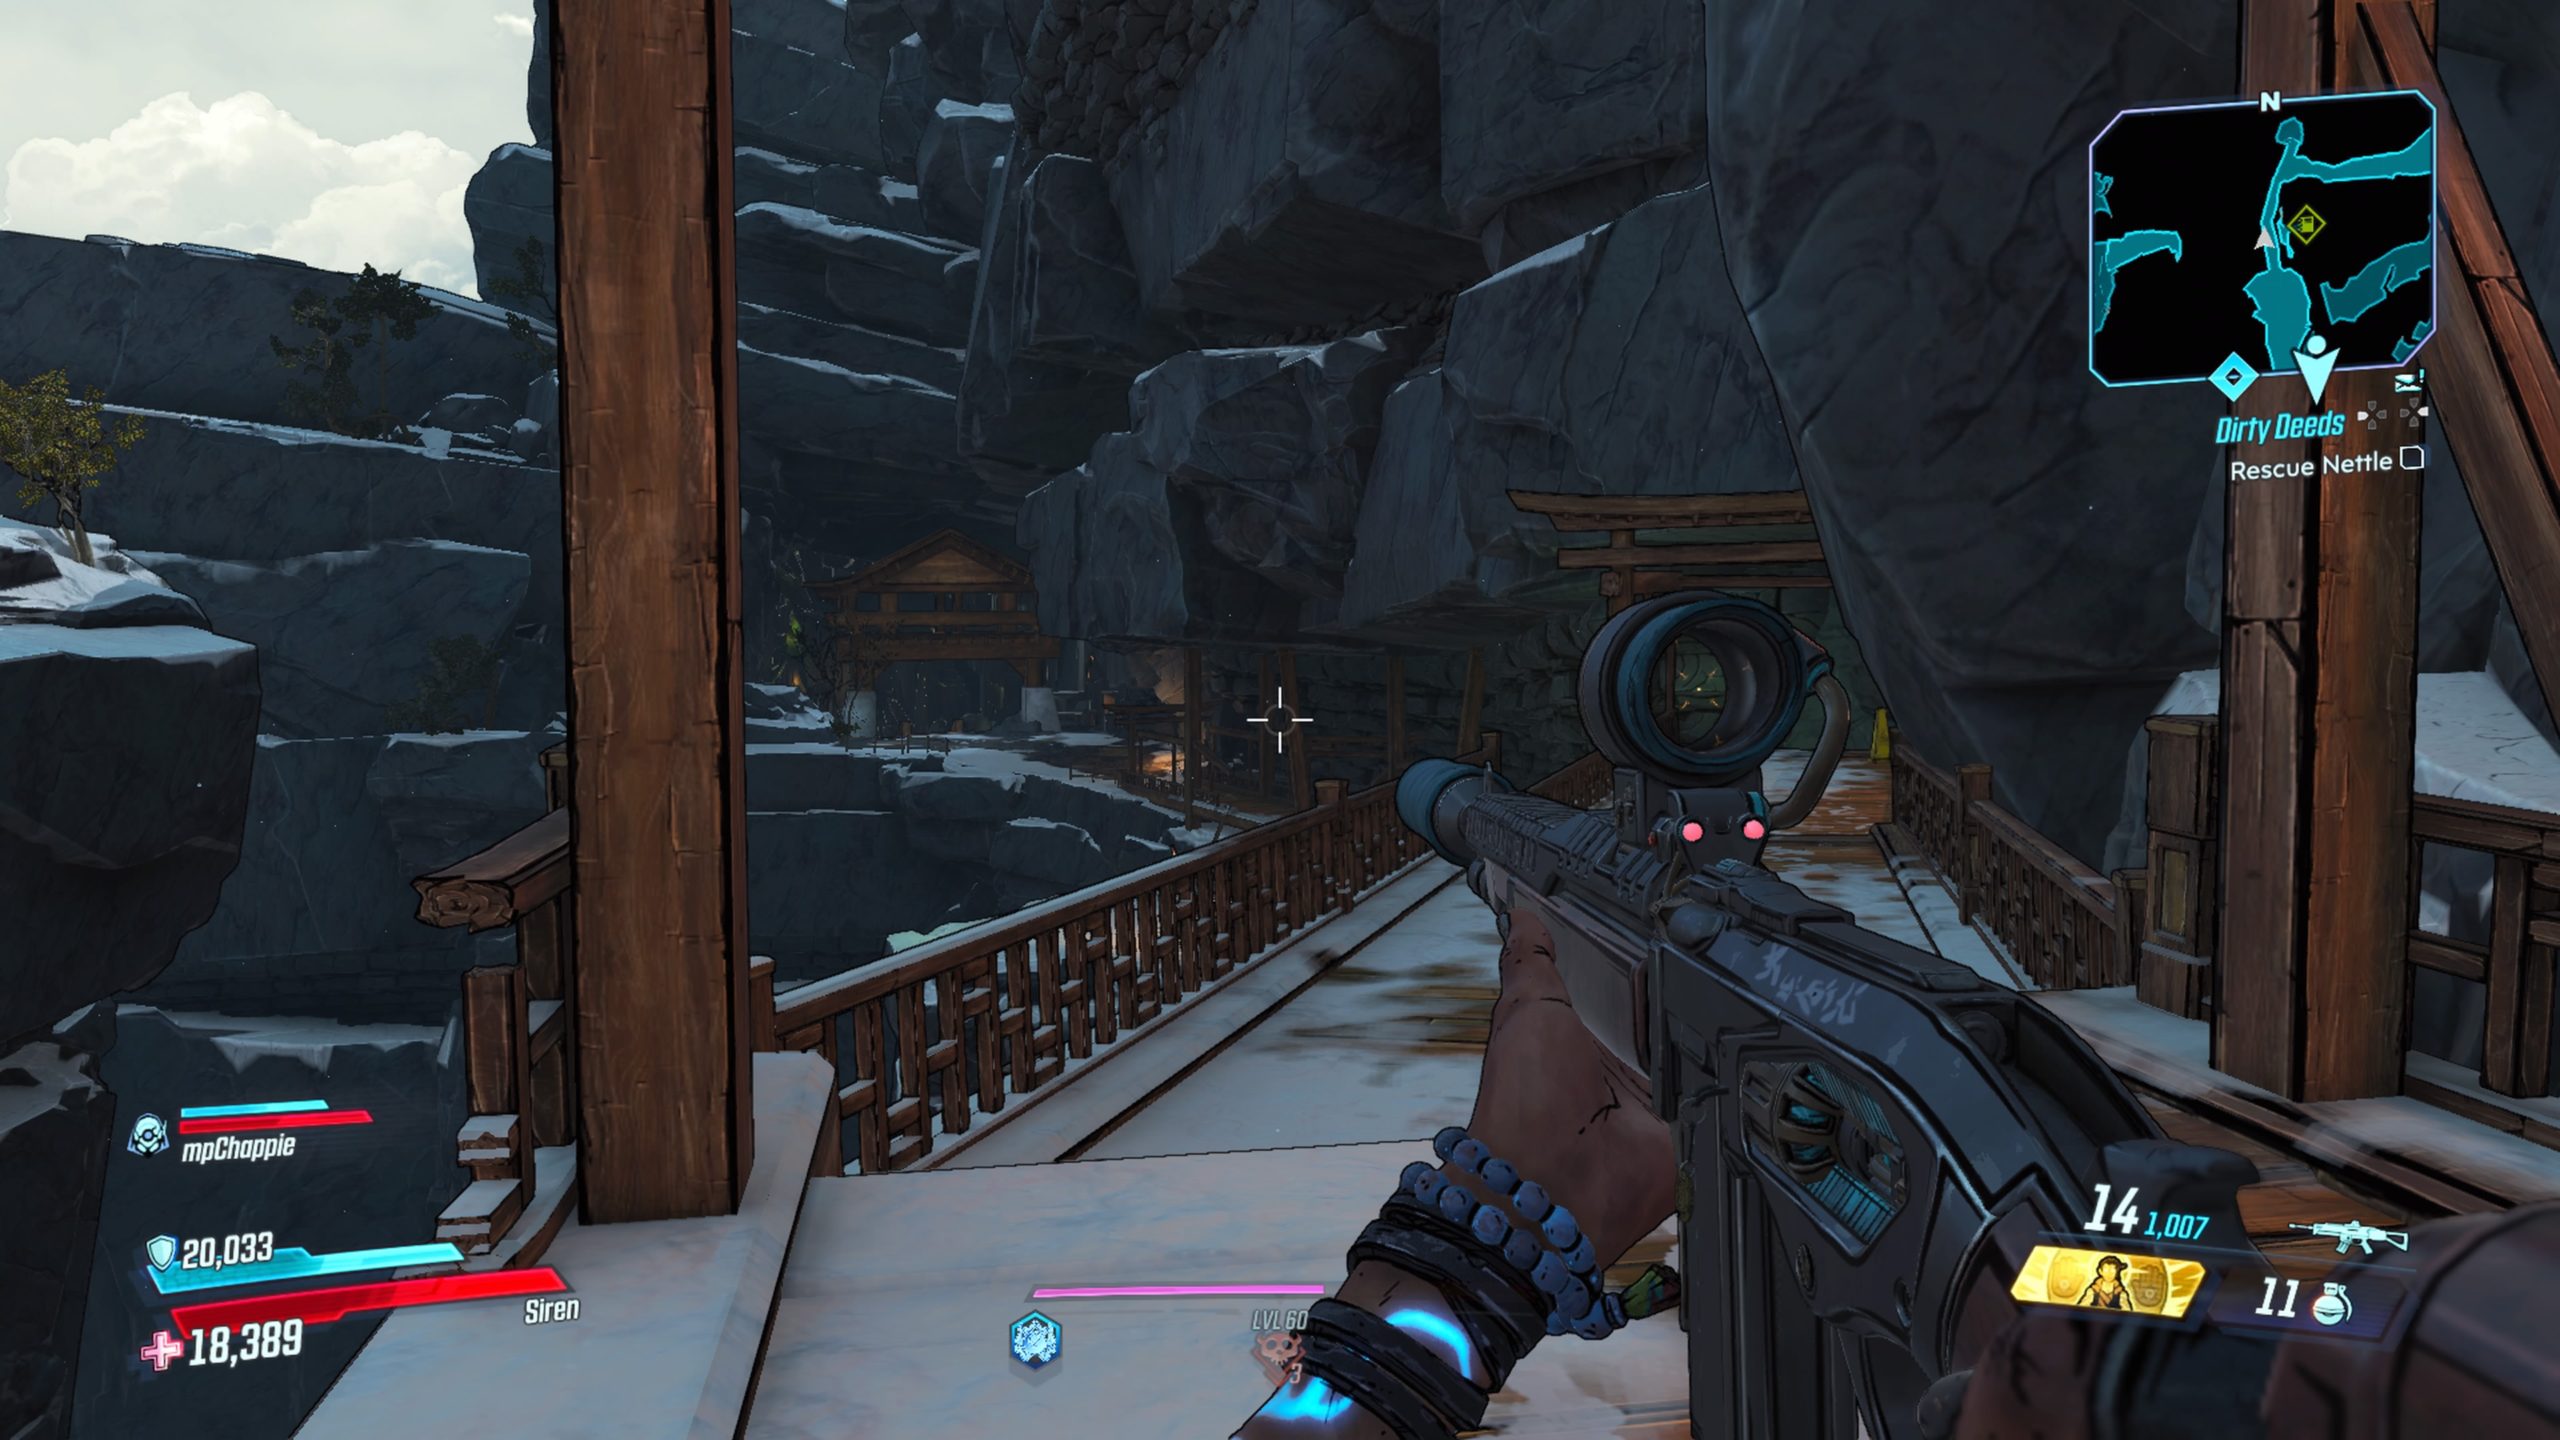
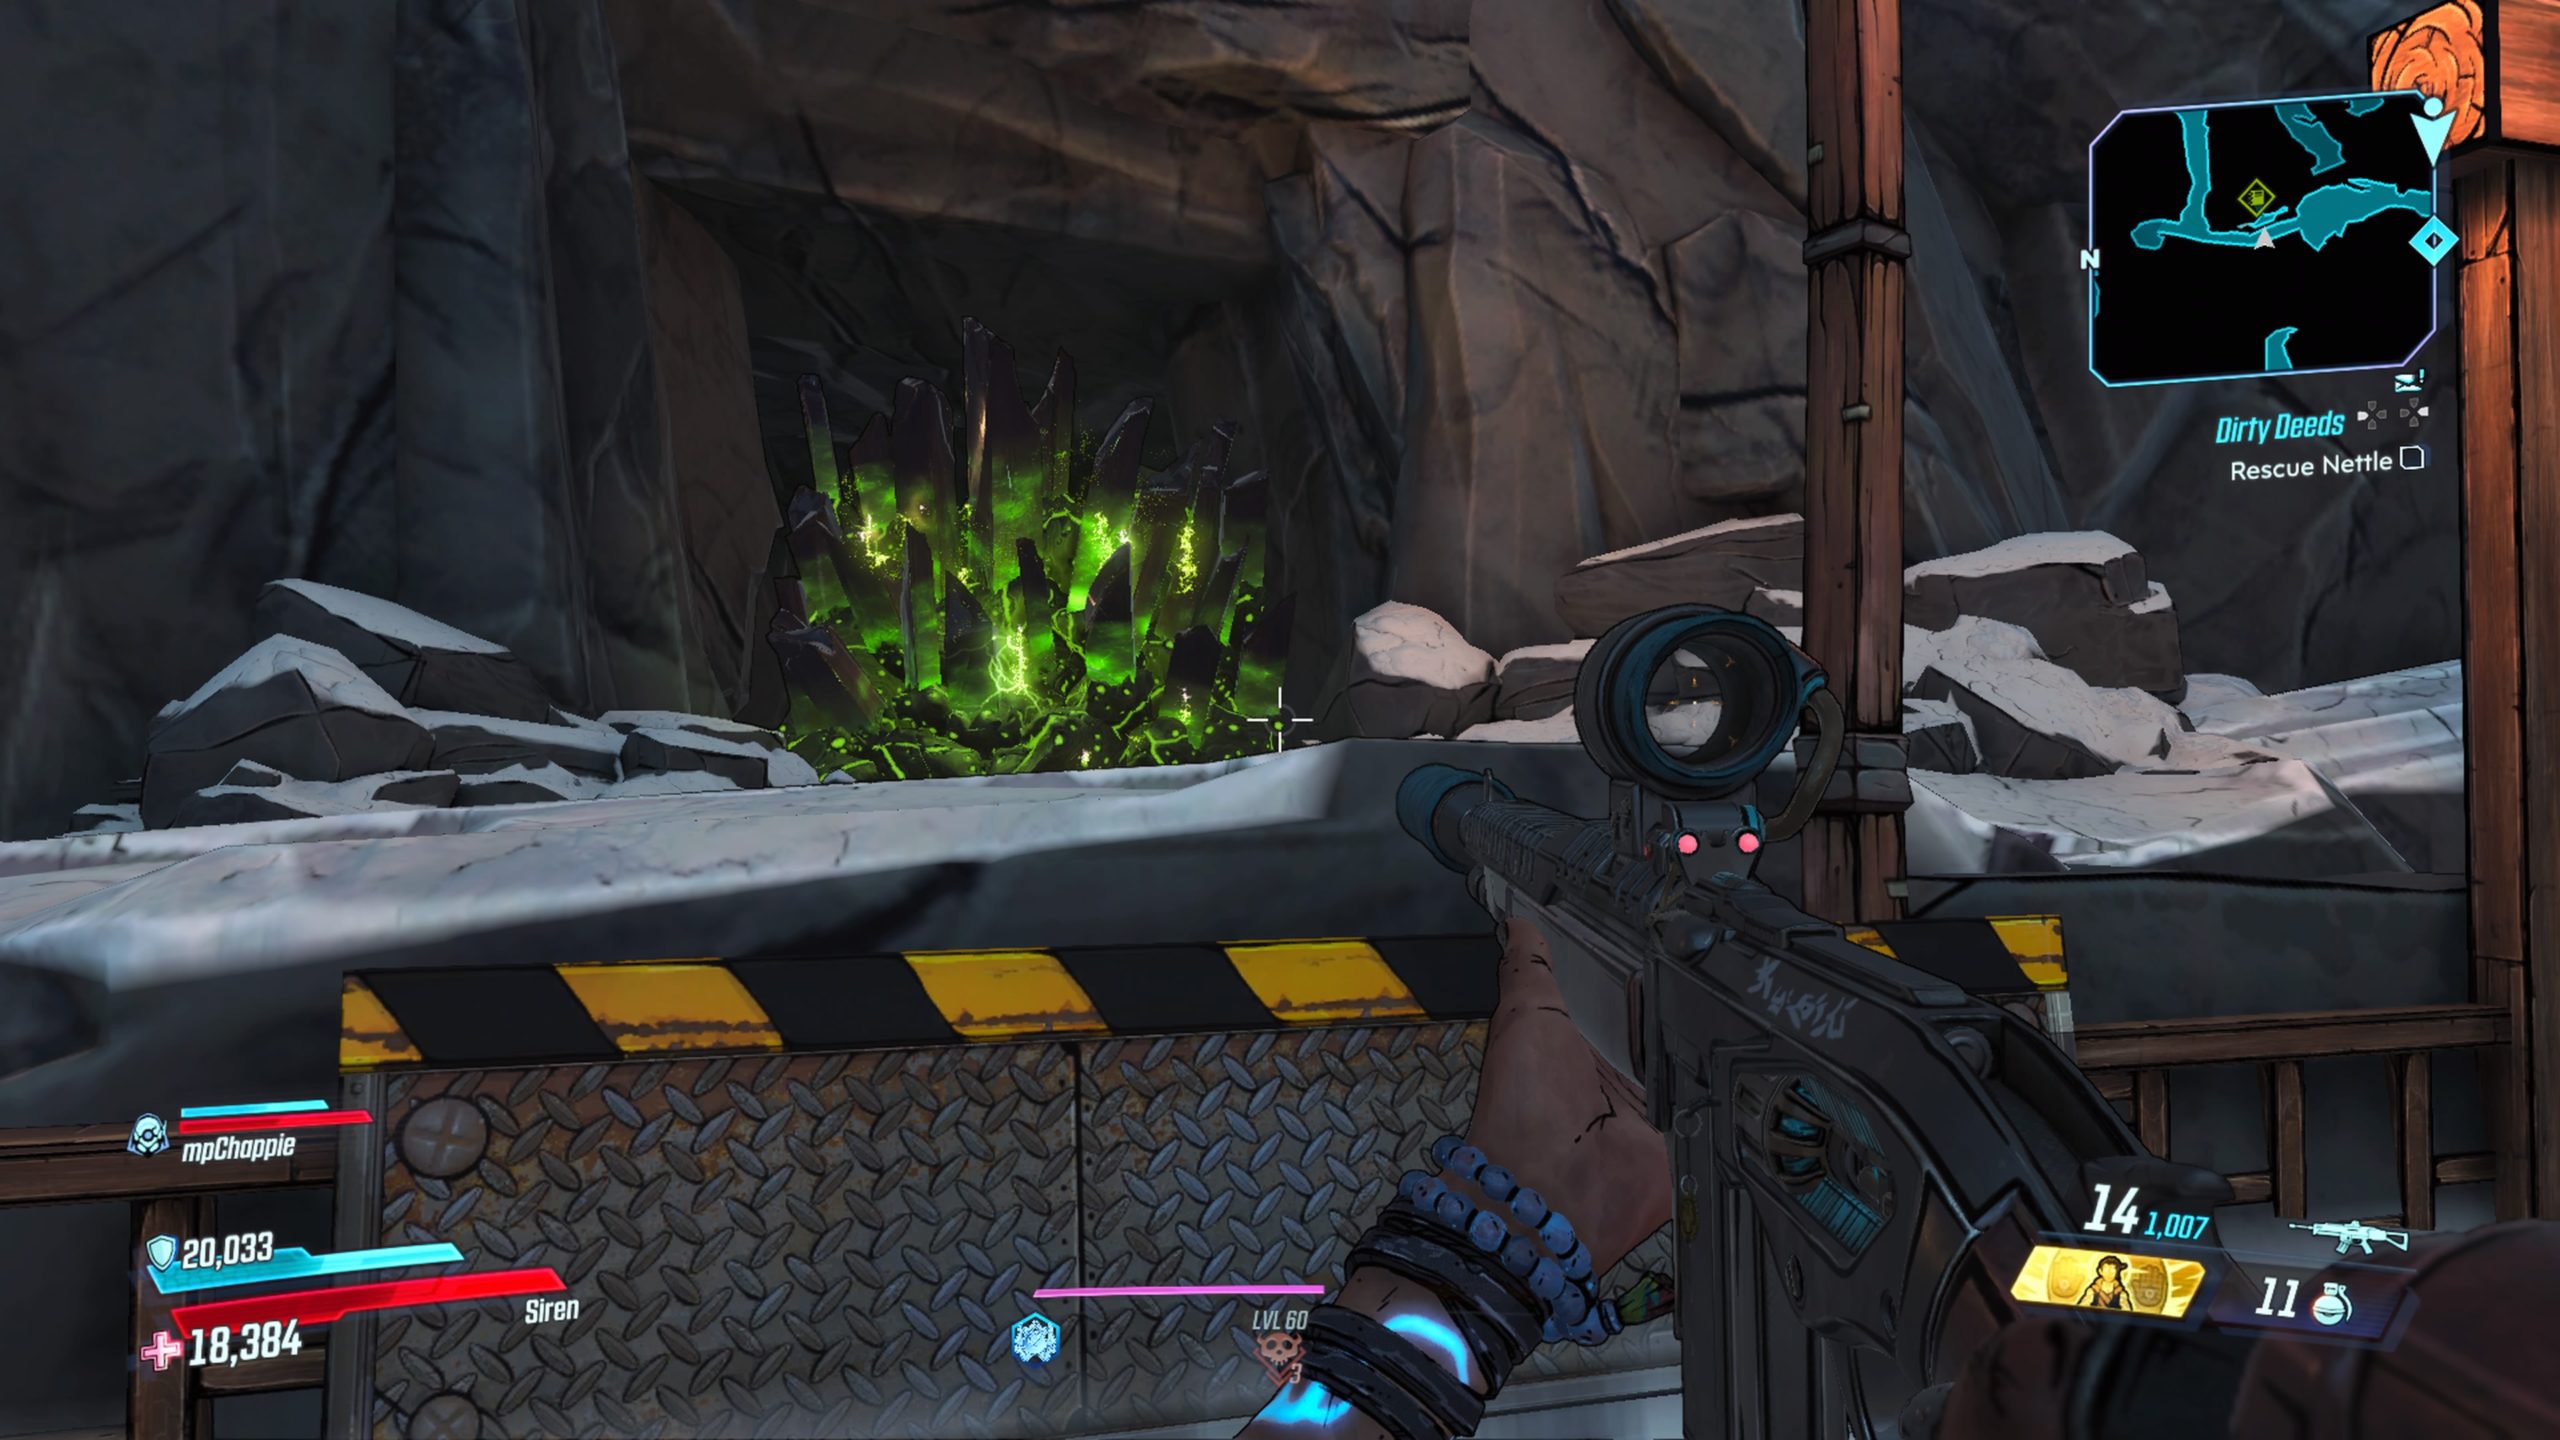
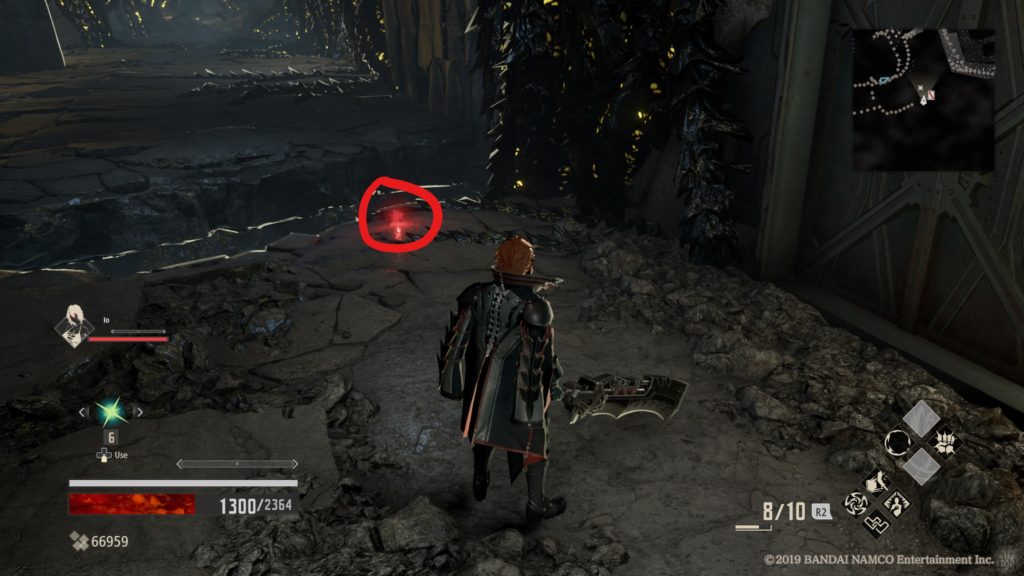
To reach this journal, you will need to progress far enough into the story to receive the punching crystals ability. Once you do, return to this journal in the mountain. Punch the crystal to reveal the nook containing the journal.
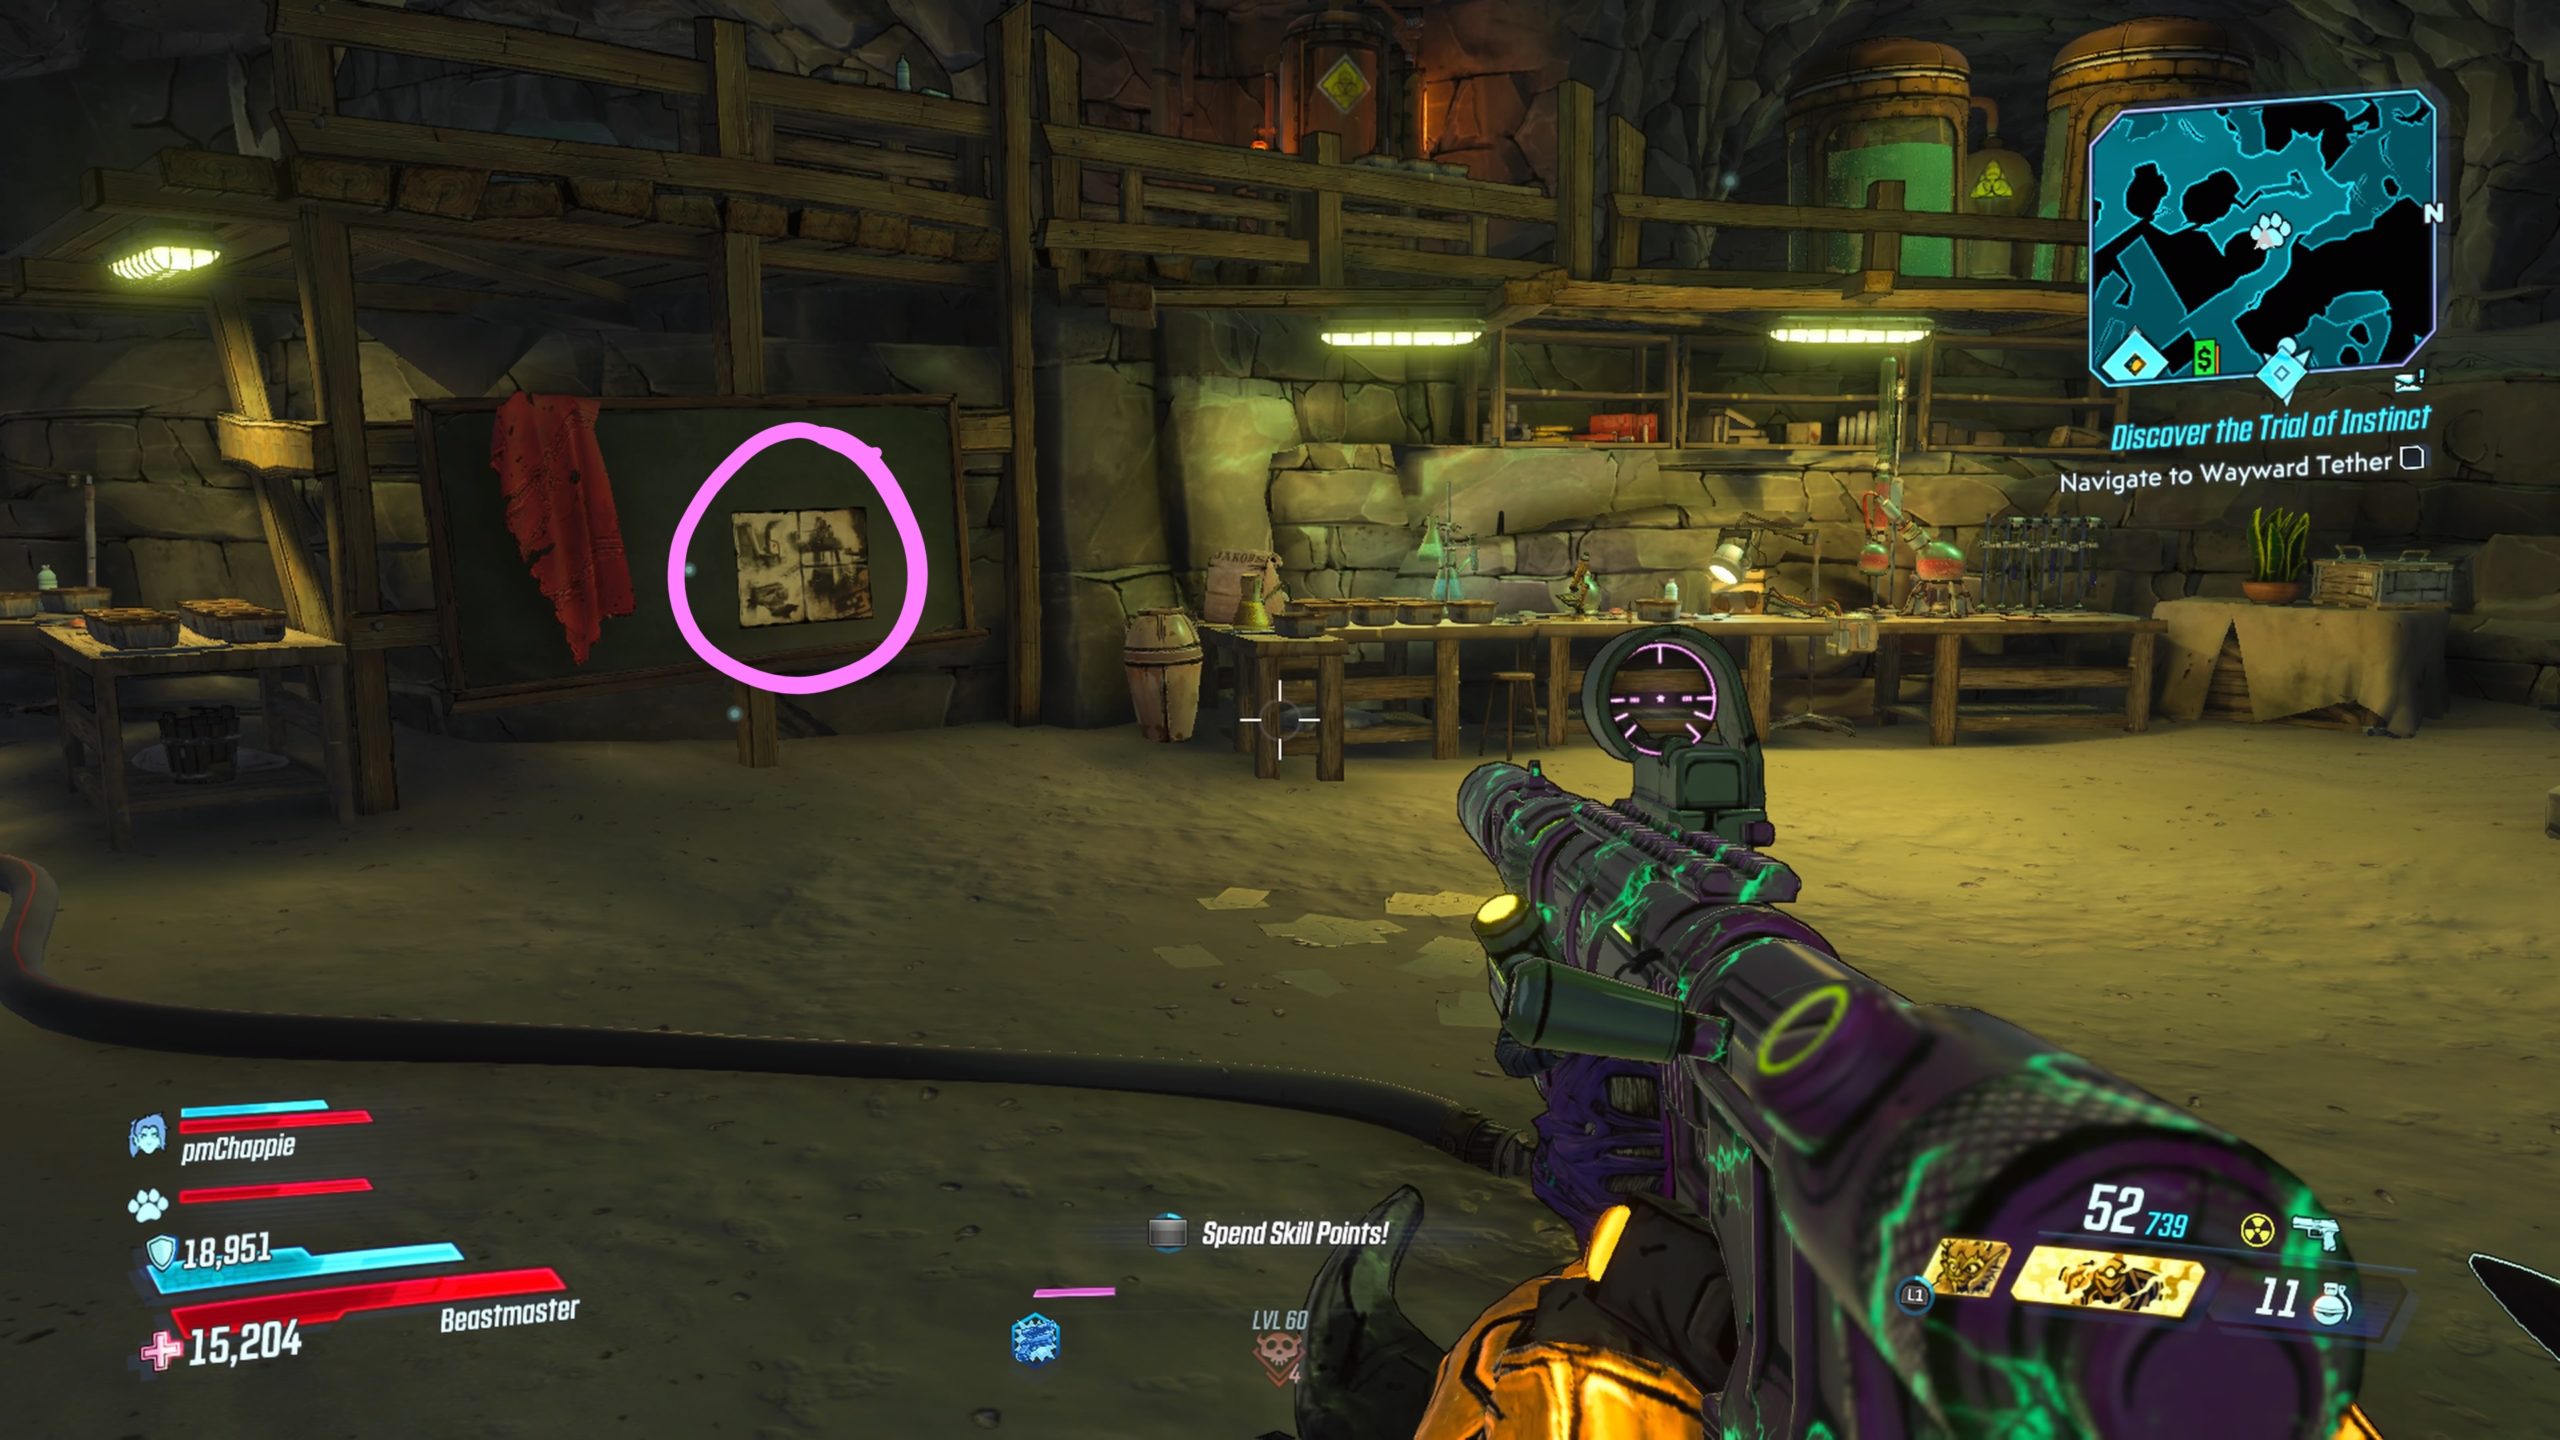
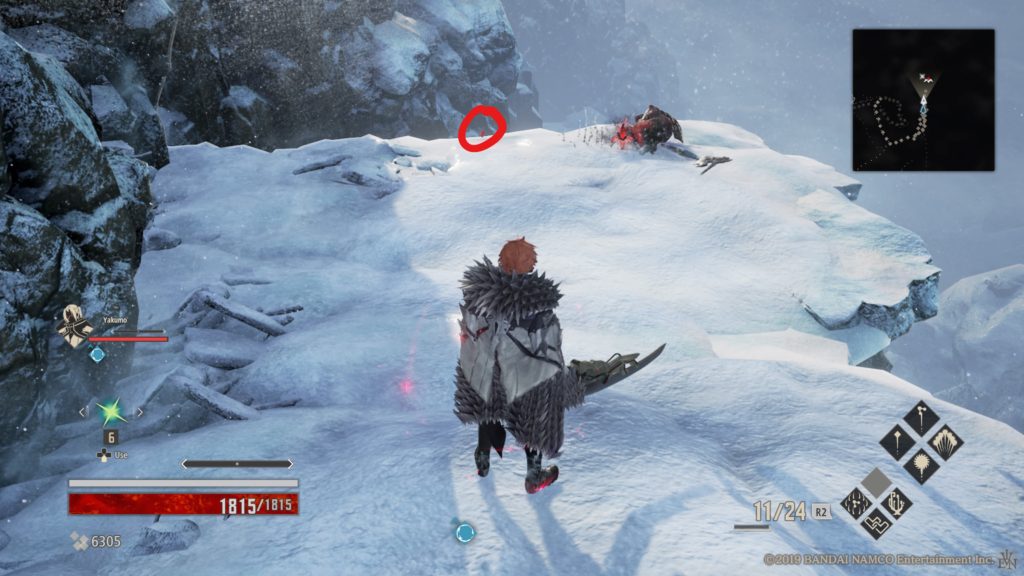
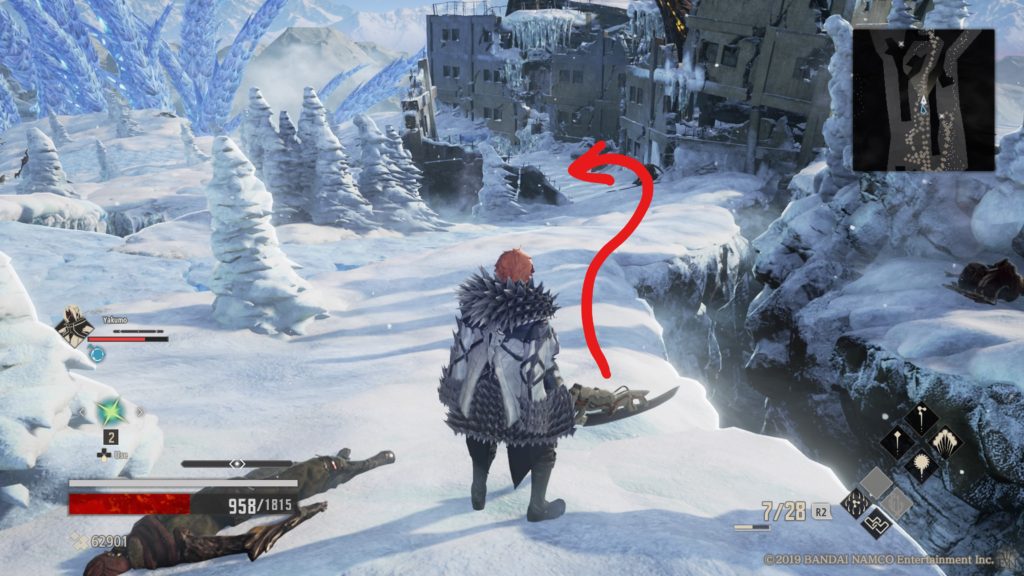
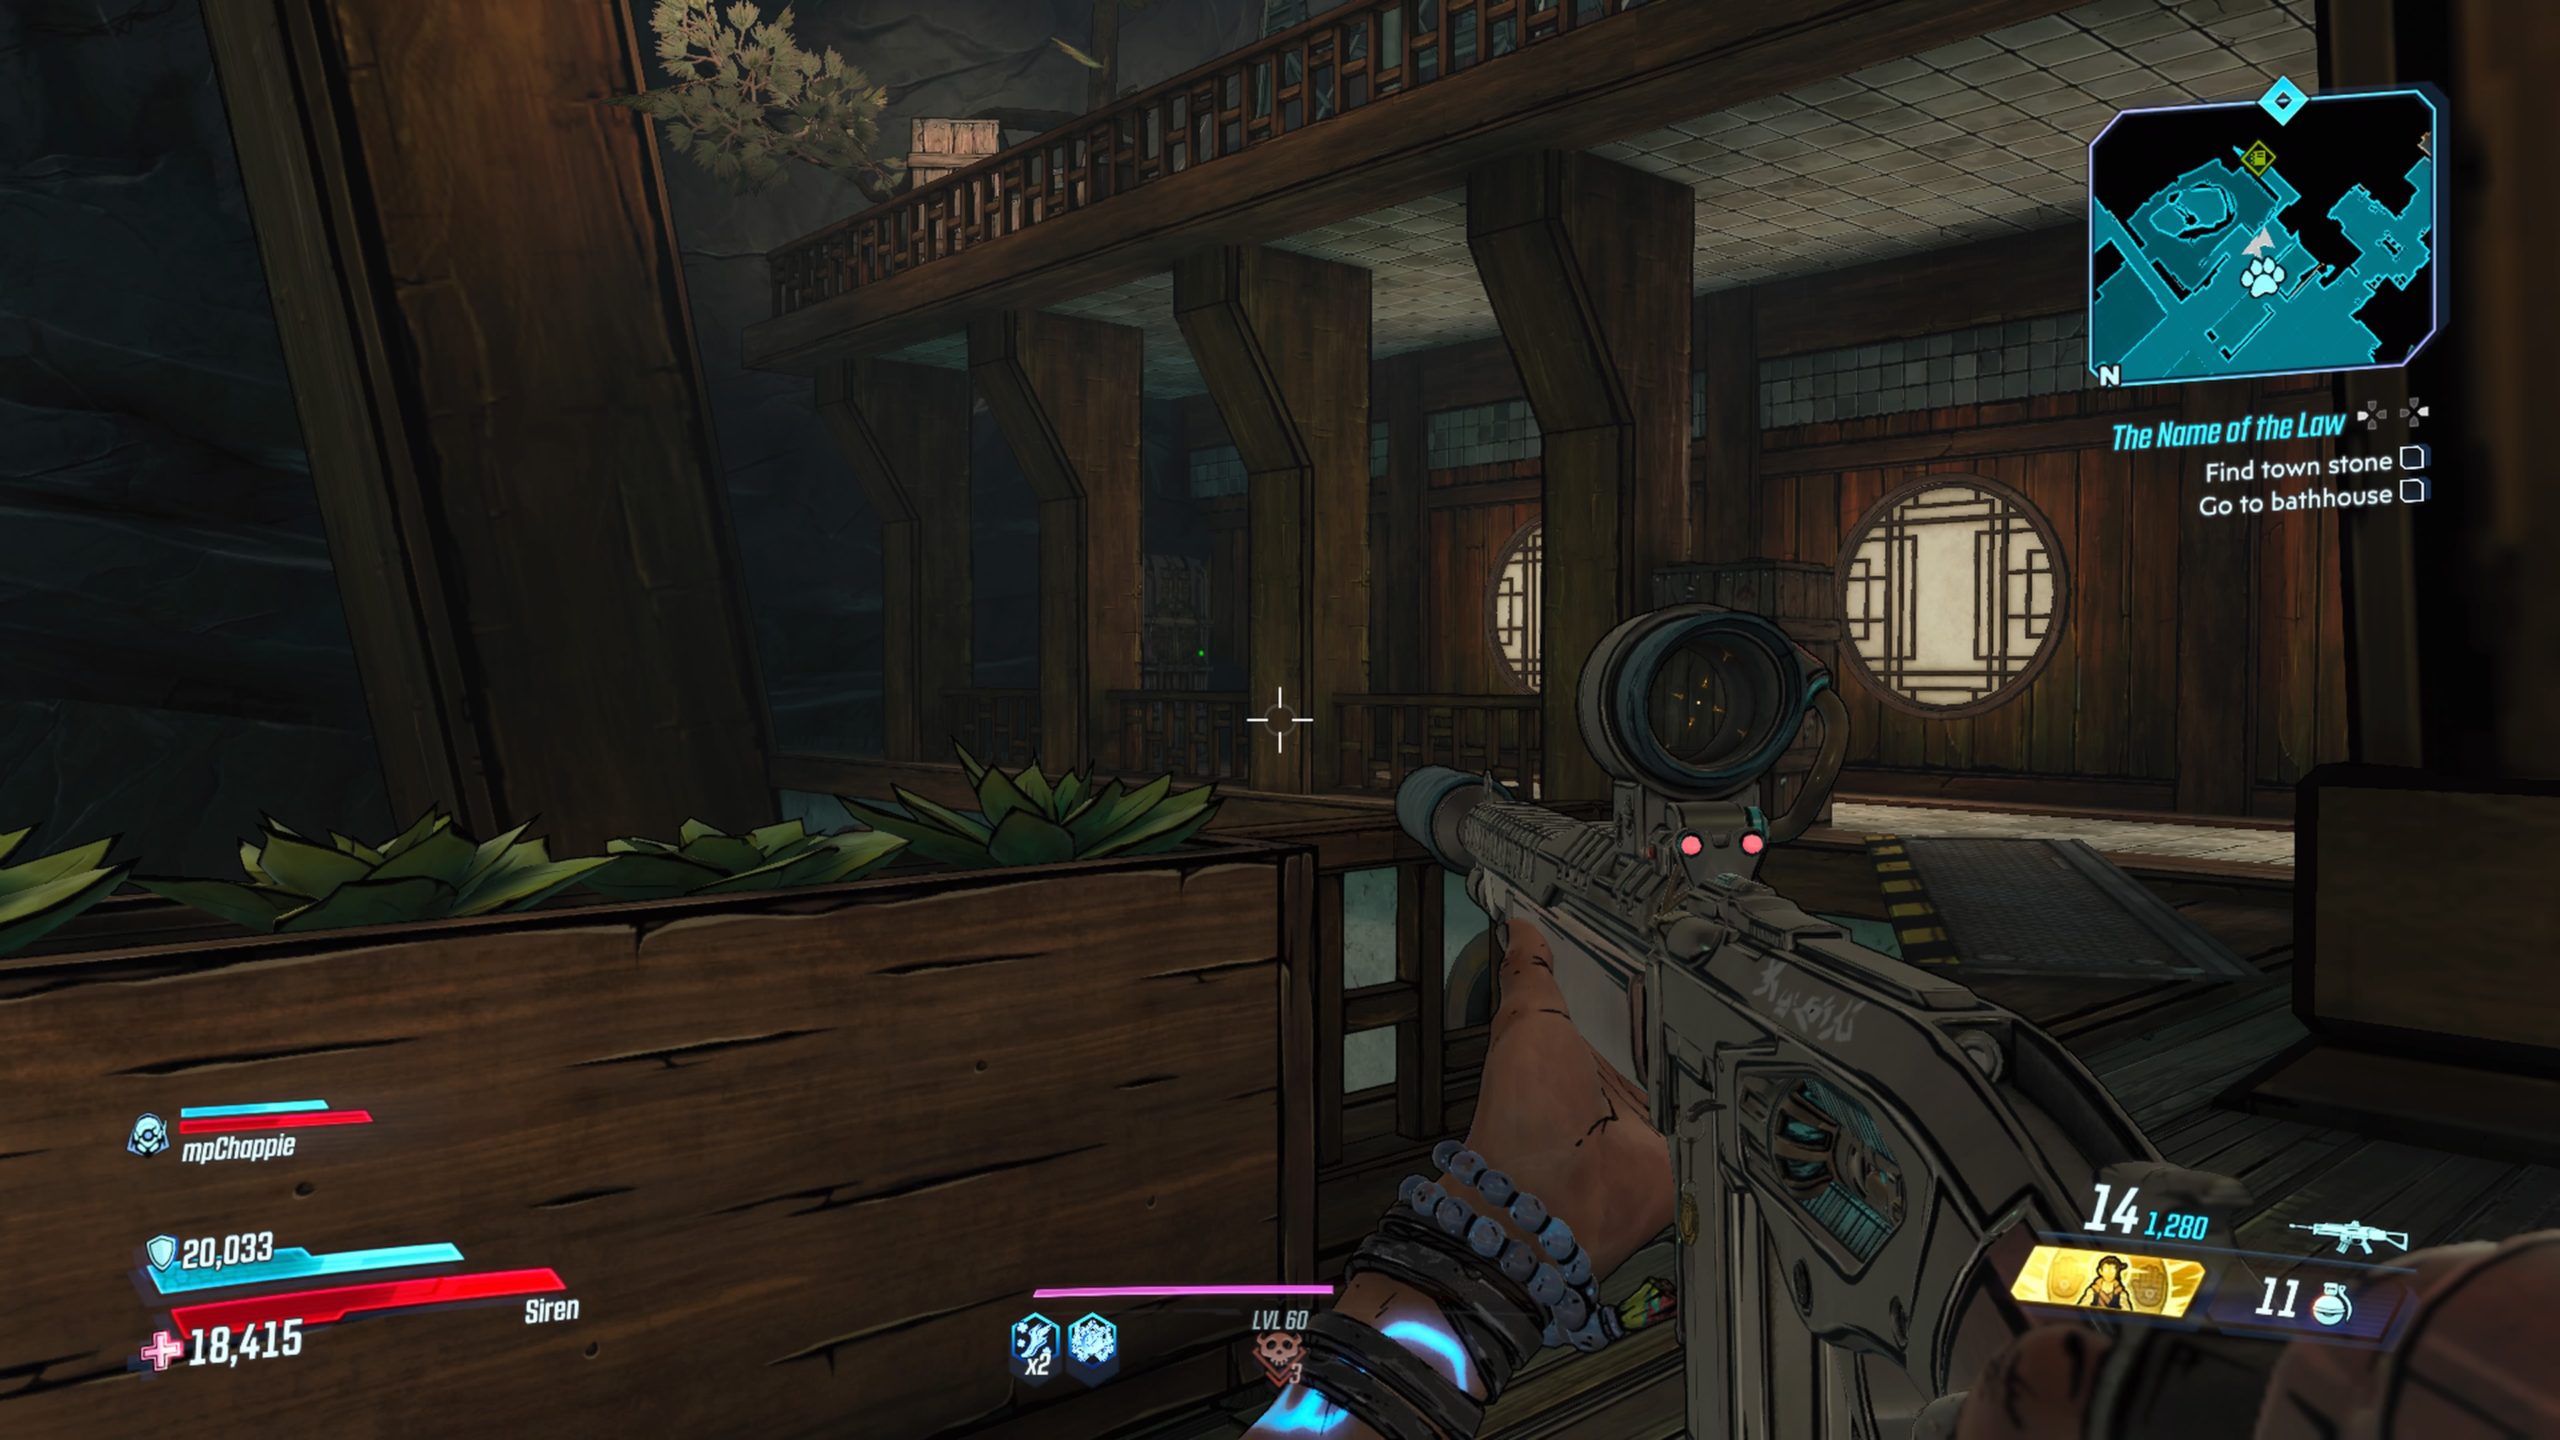
Ashfall Peaks #2
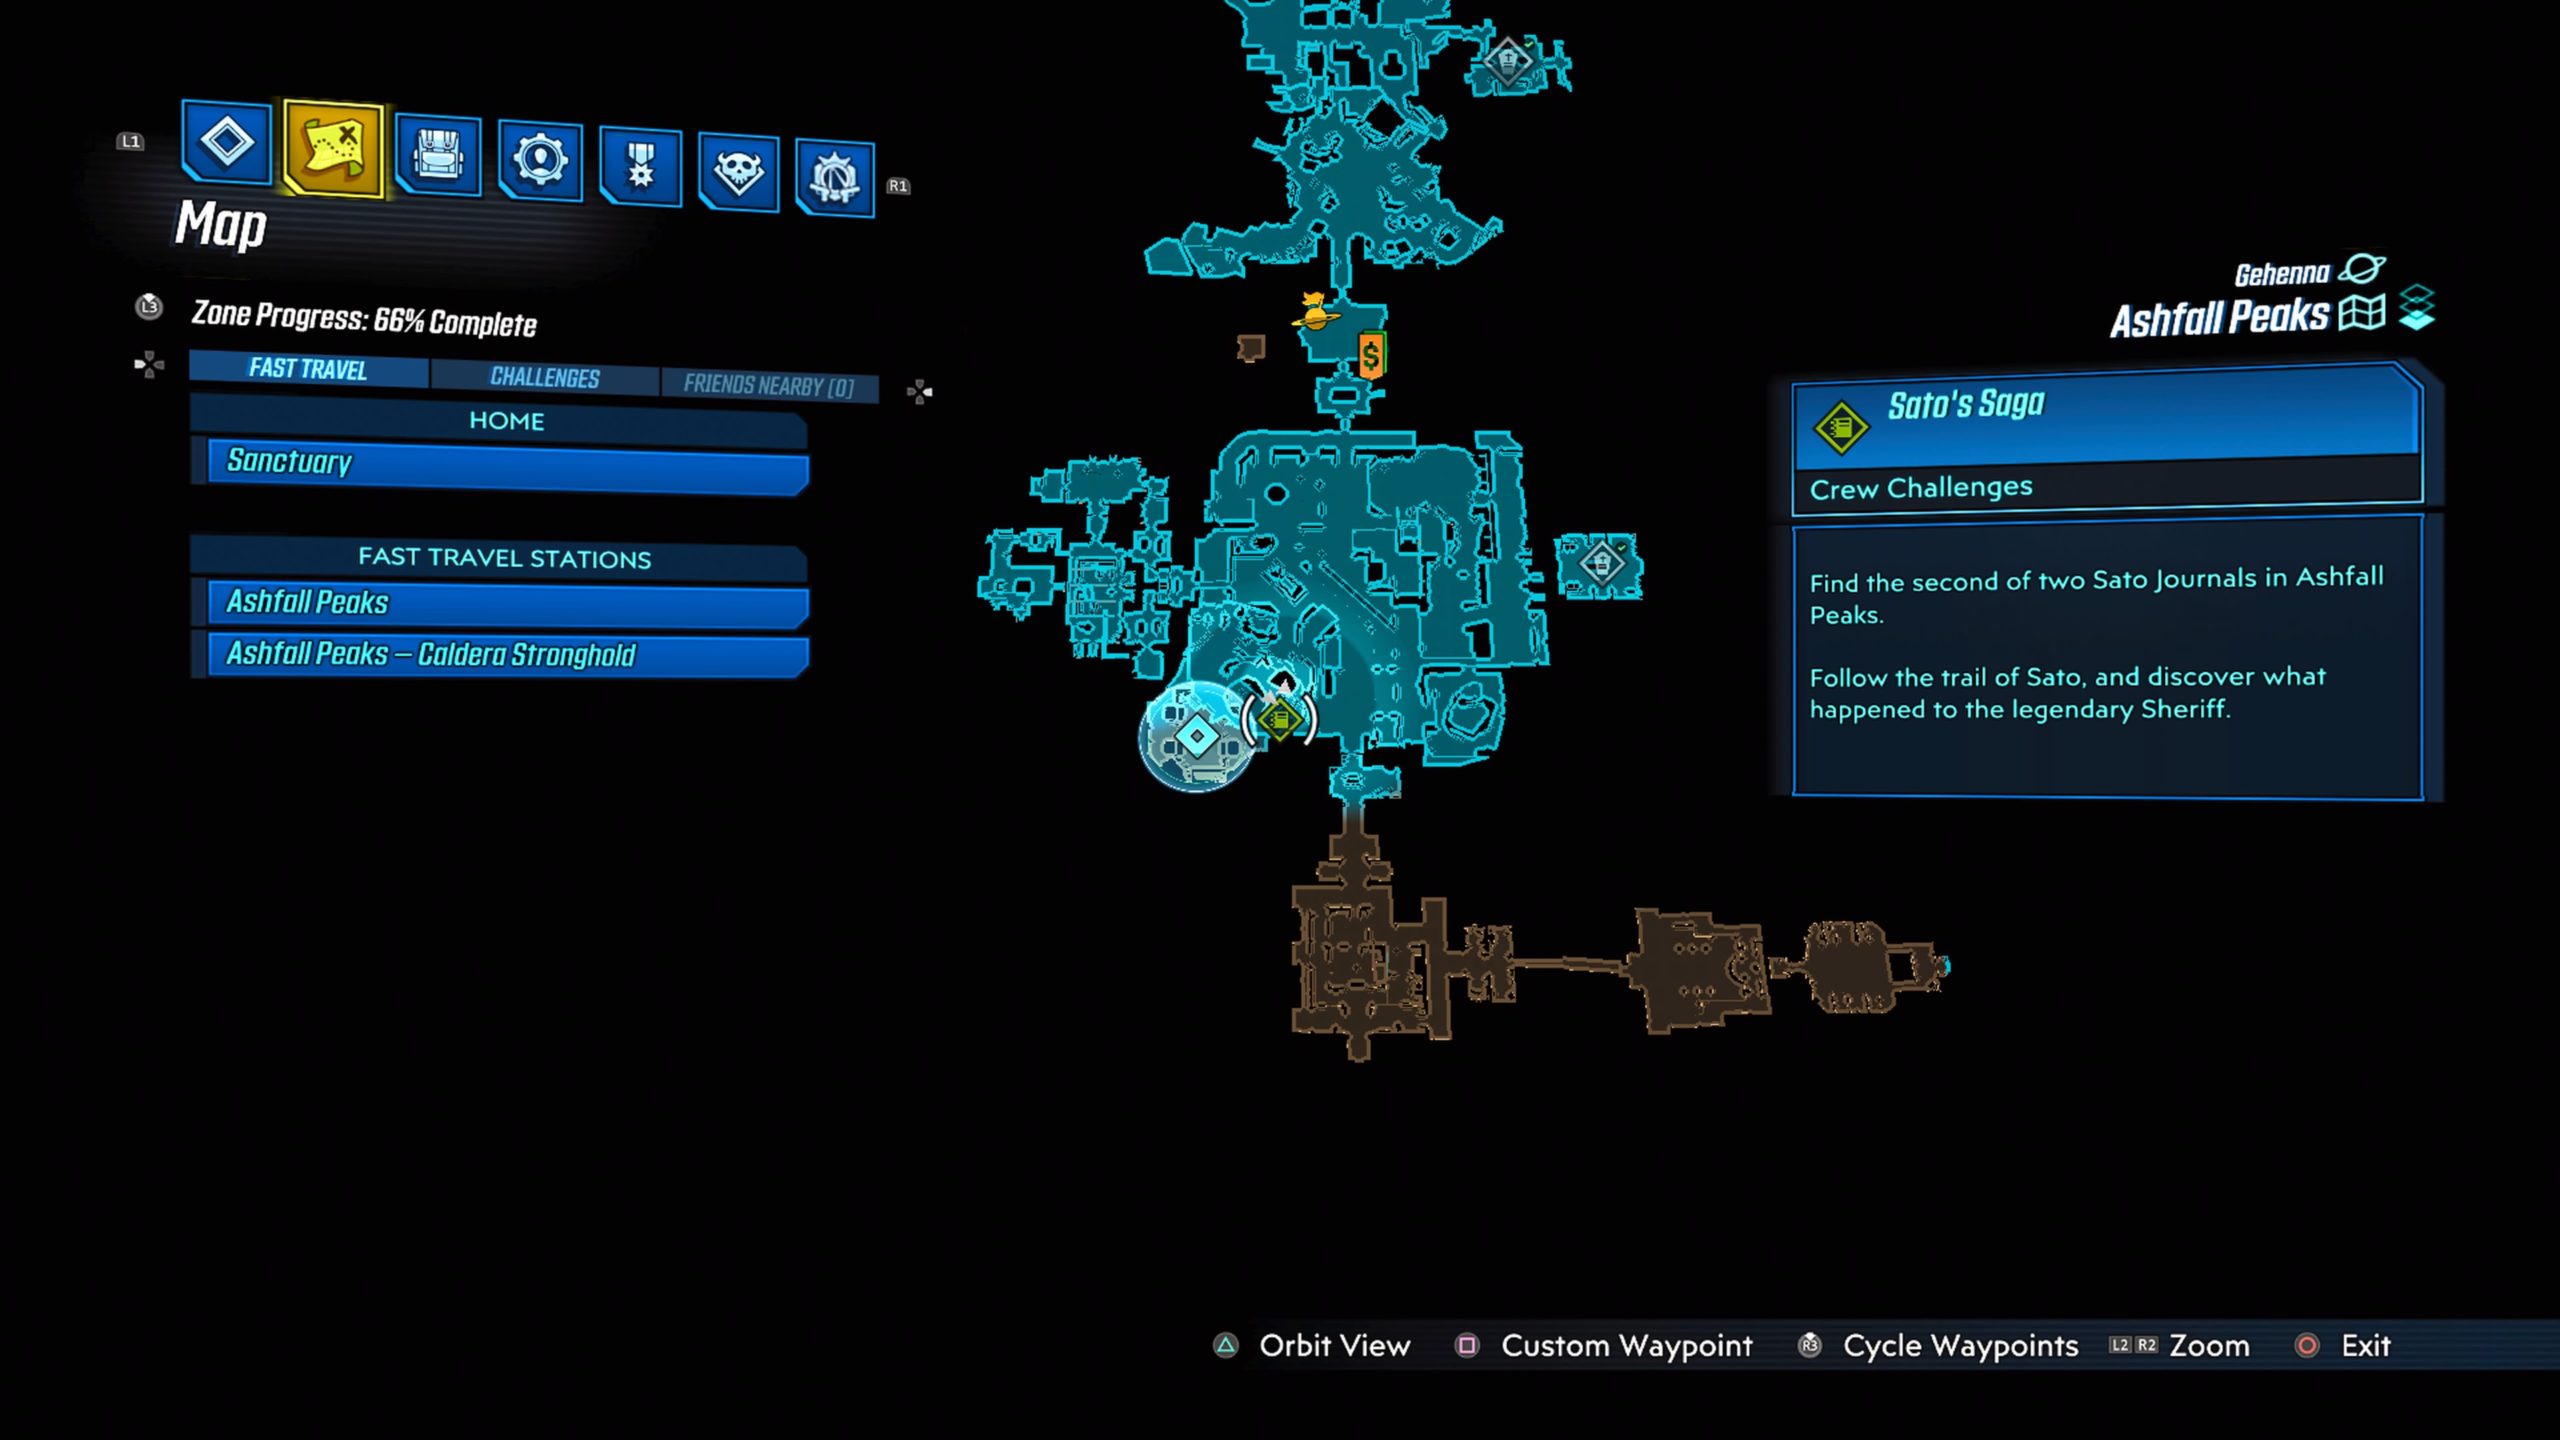
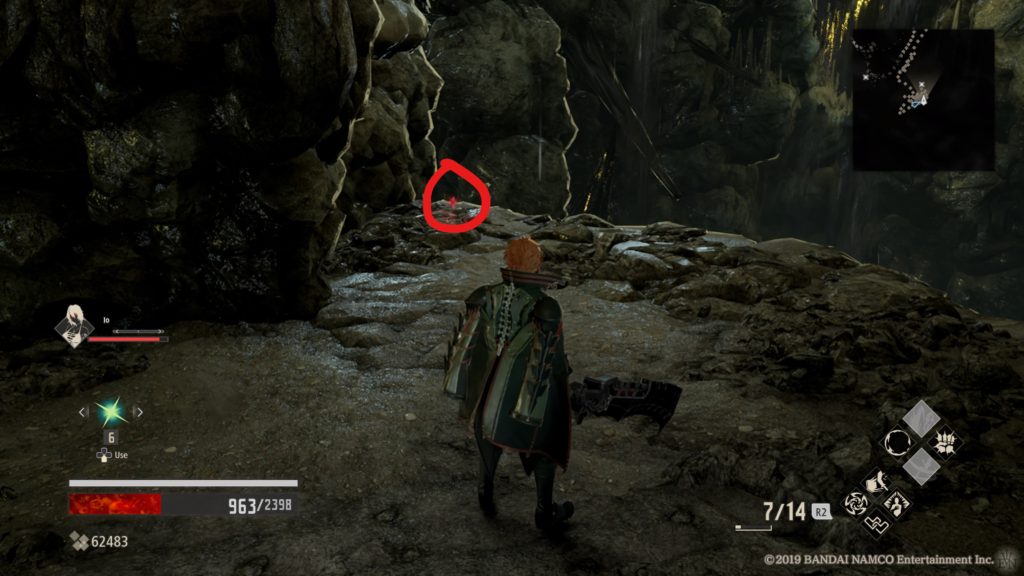
This journal can be found in the Devil’s Greatroom in Caldera’s Stronghold.
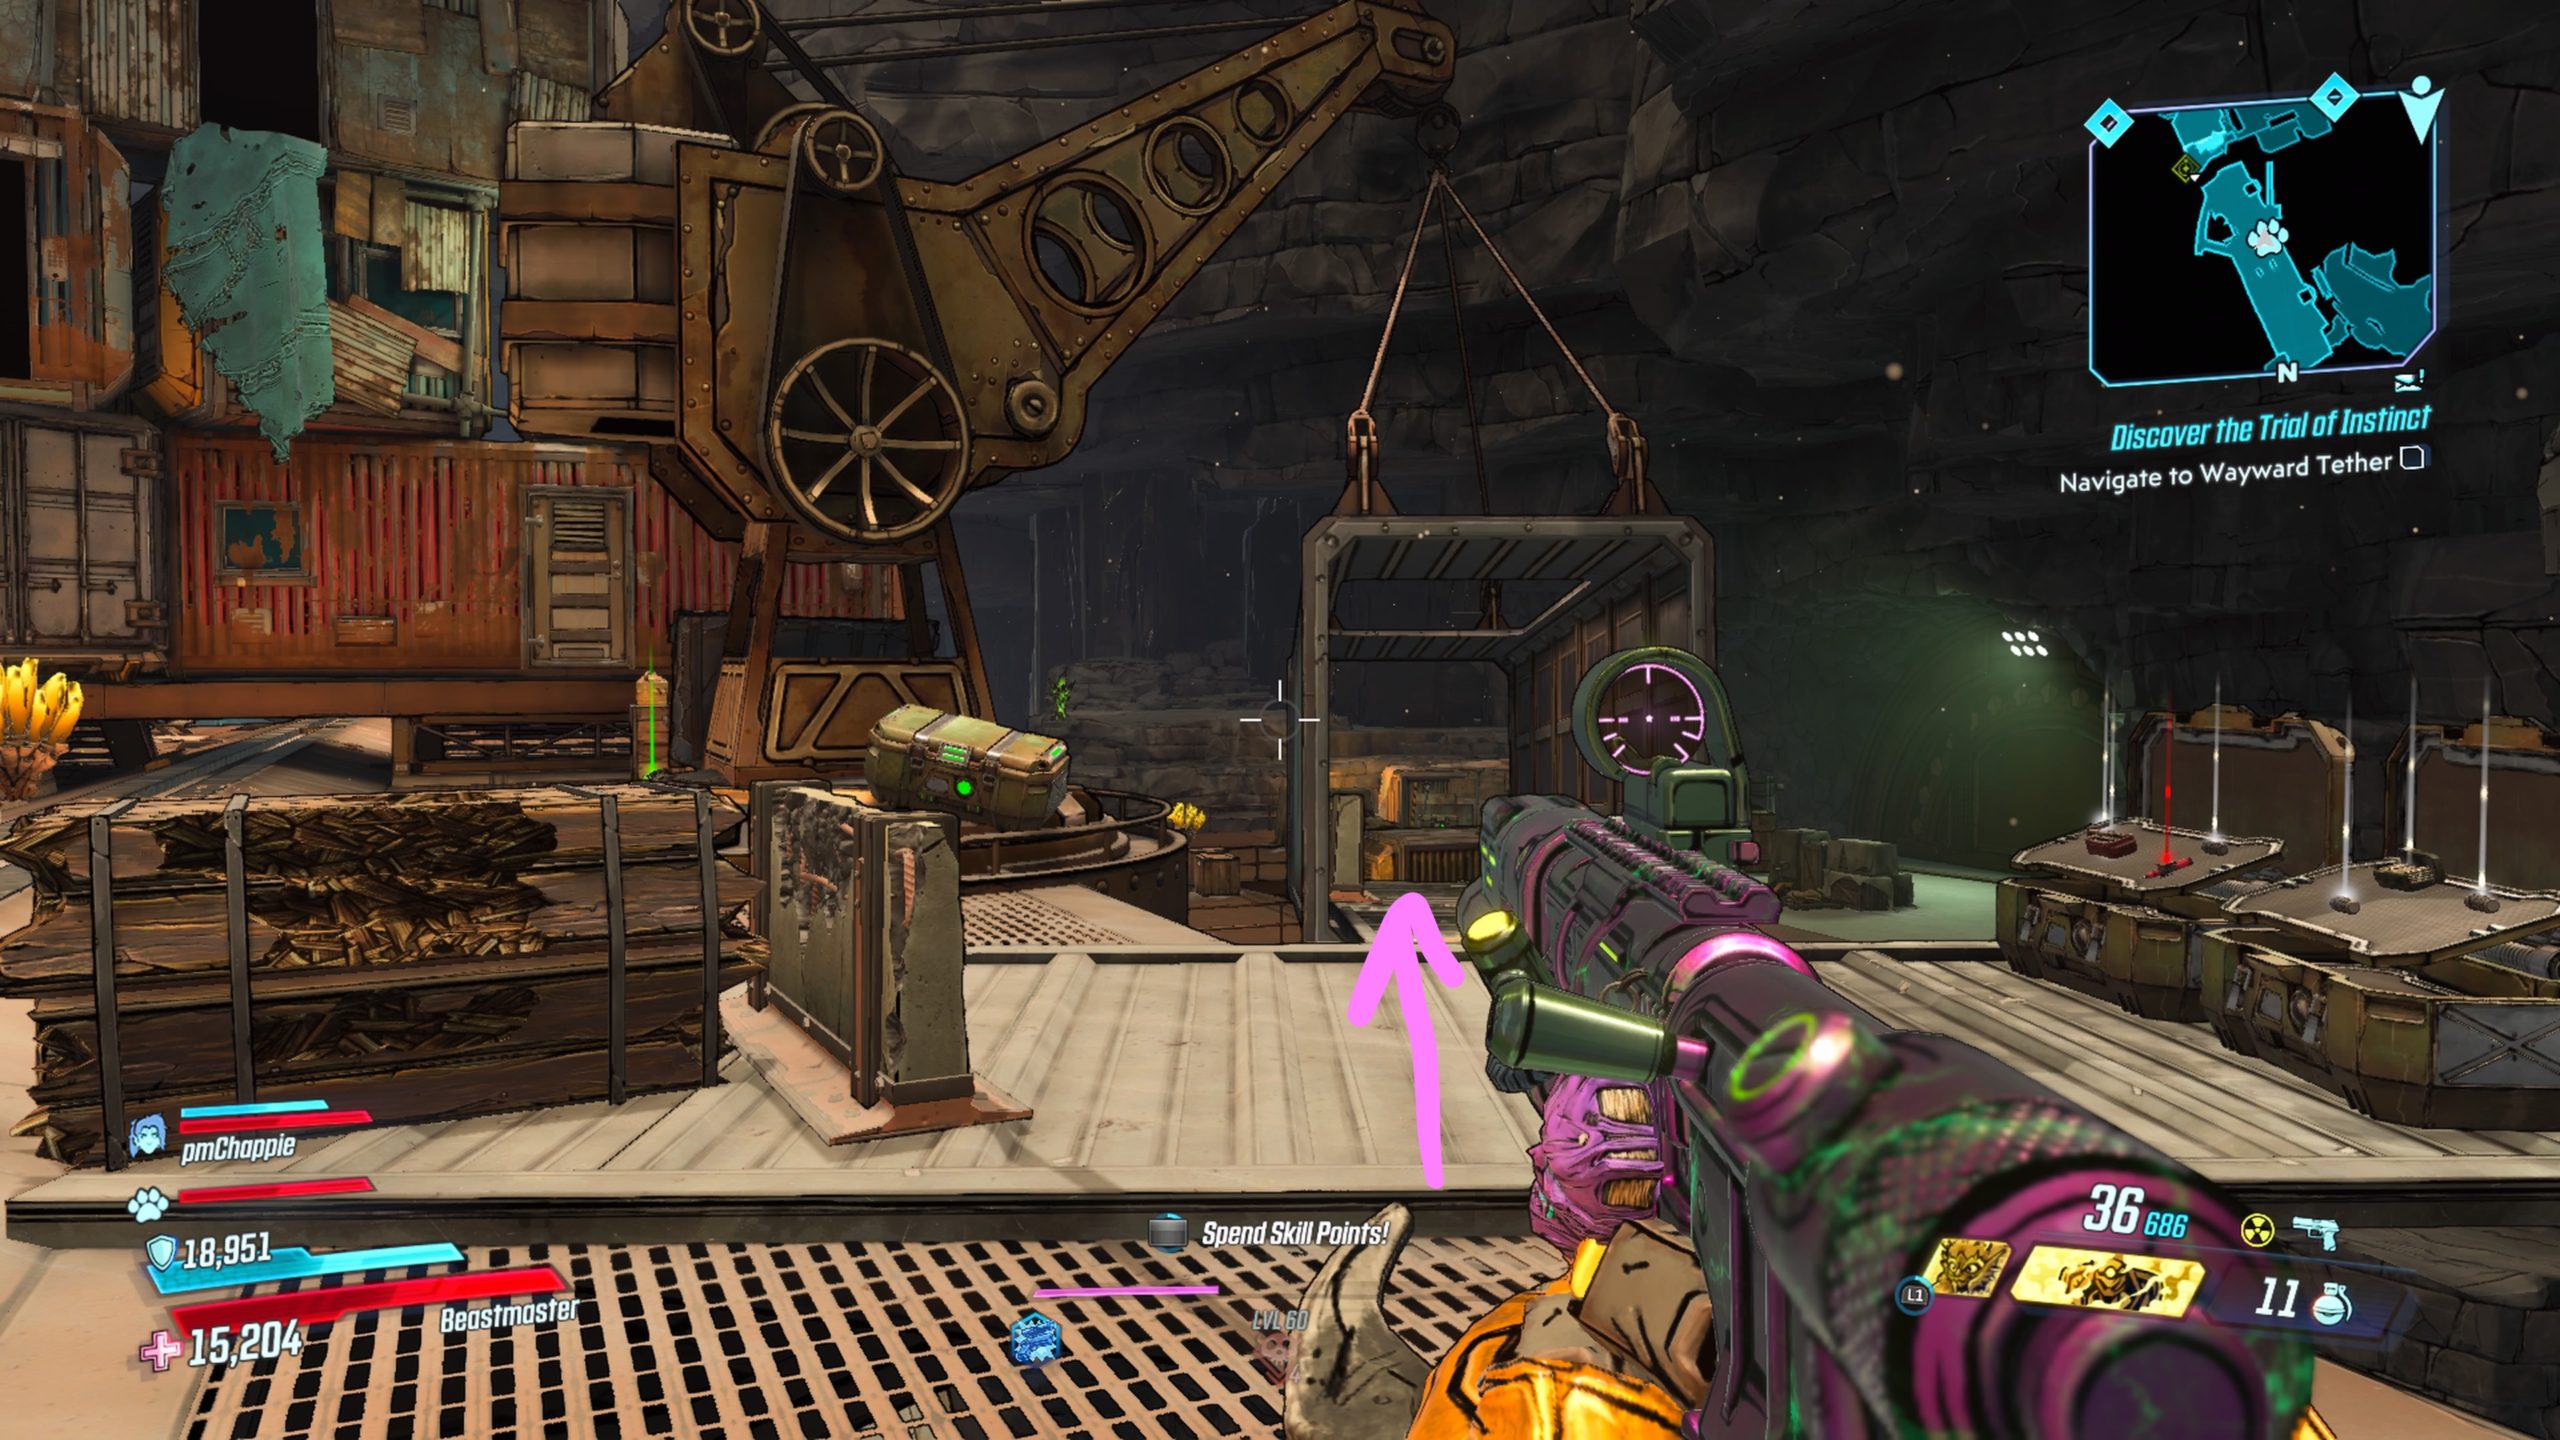
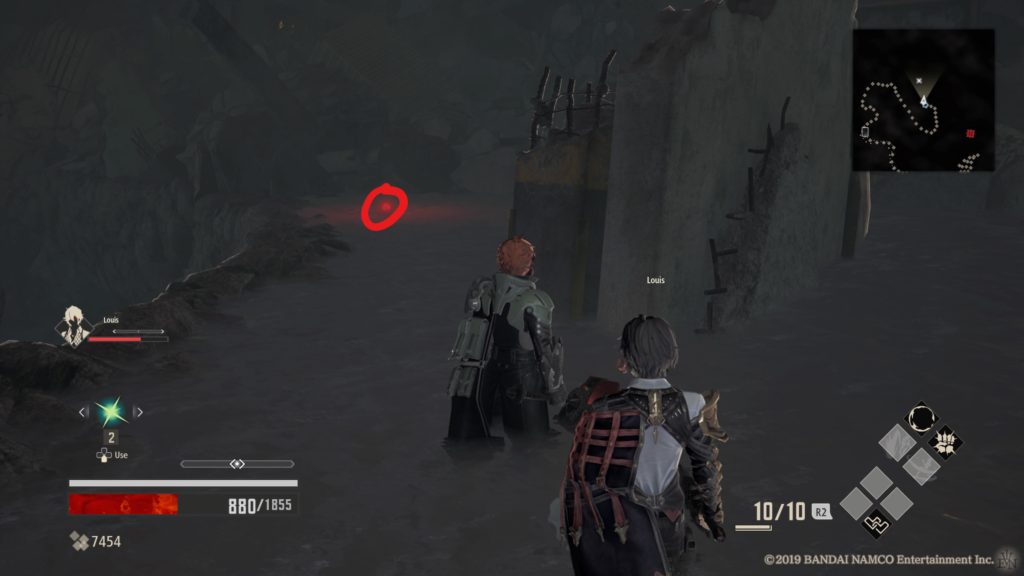
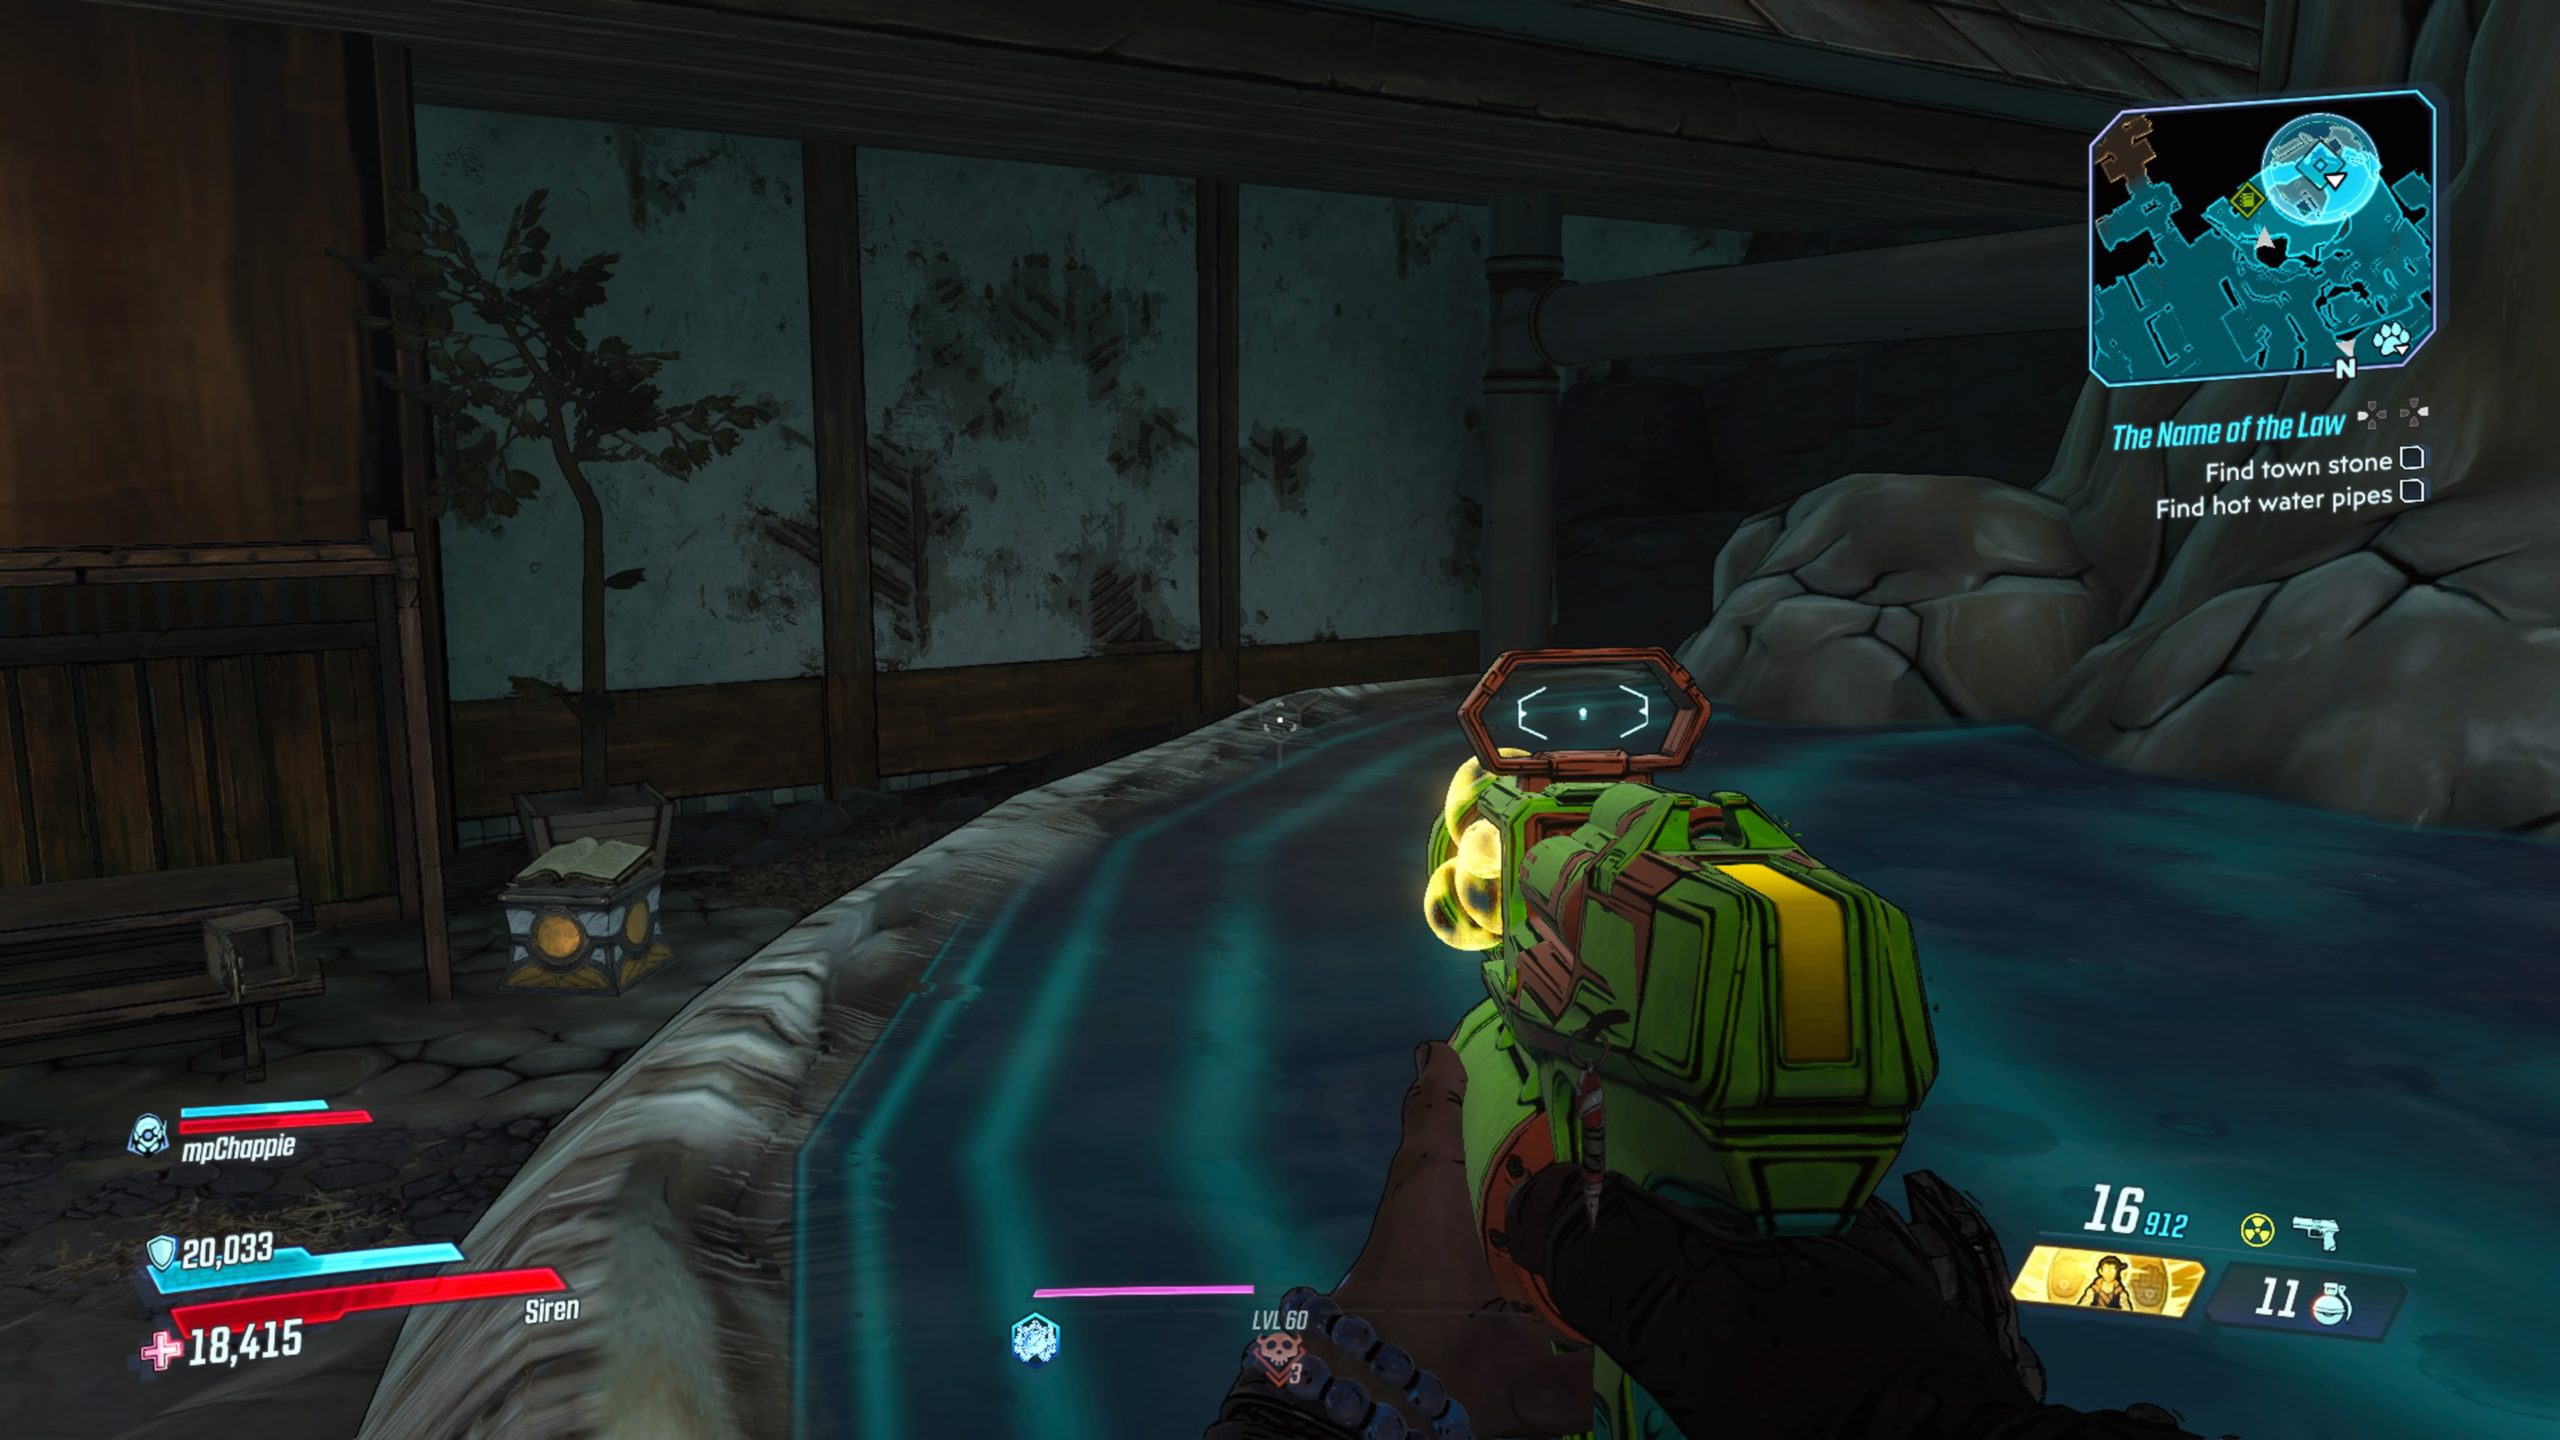
Ashfall Peaks Cache
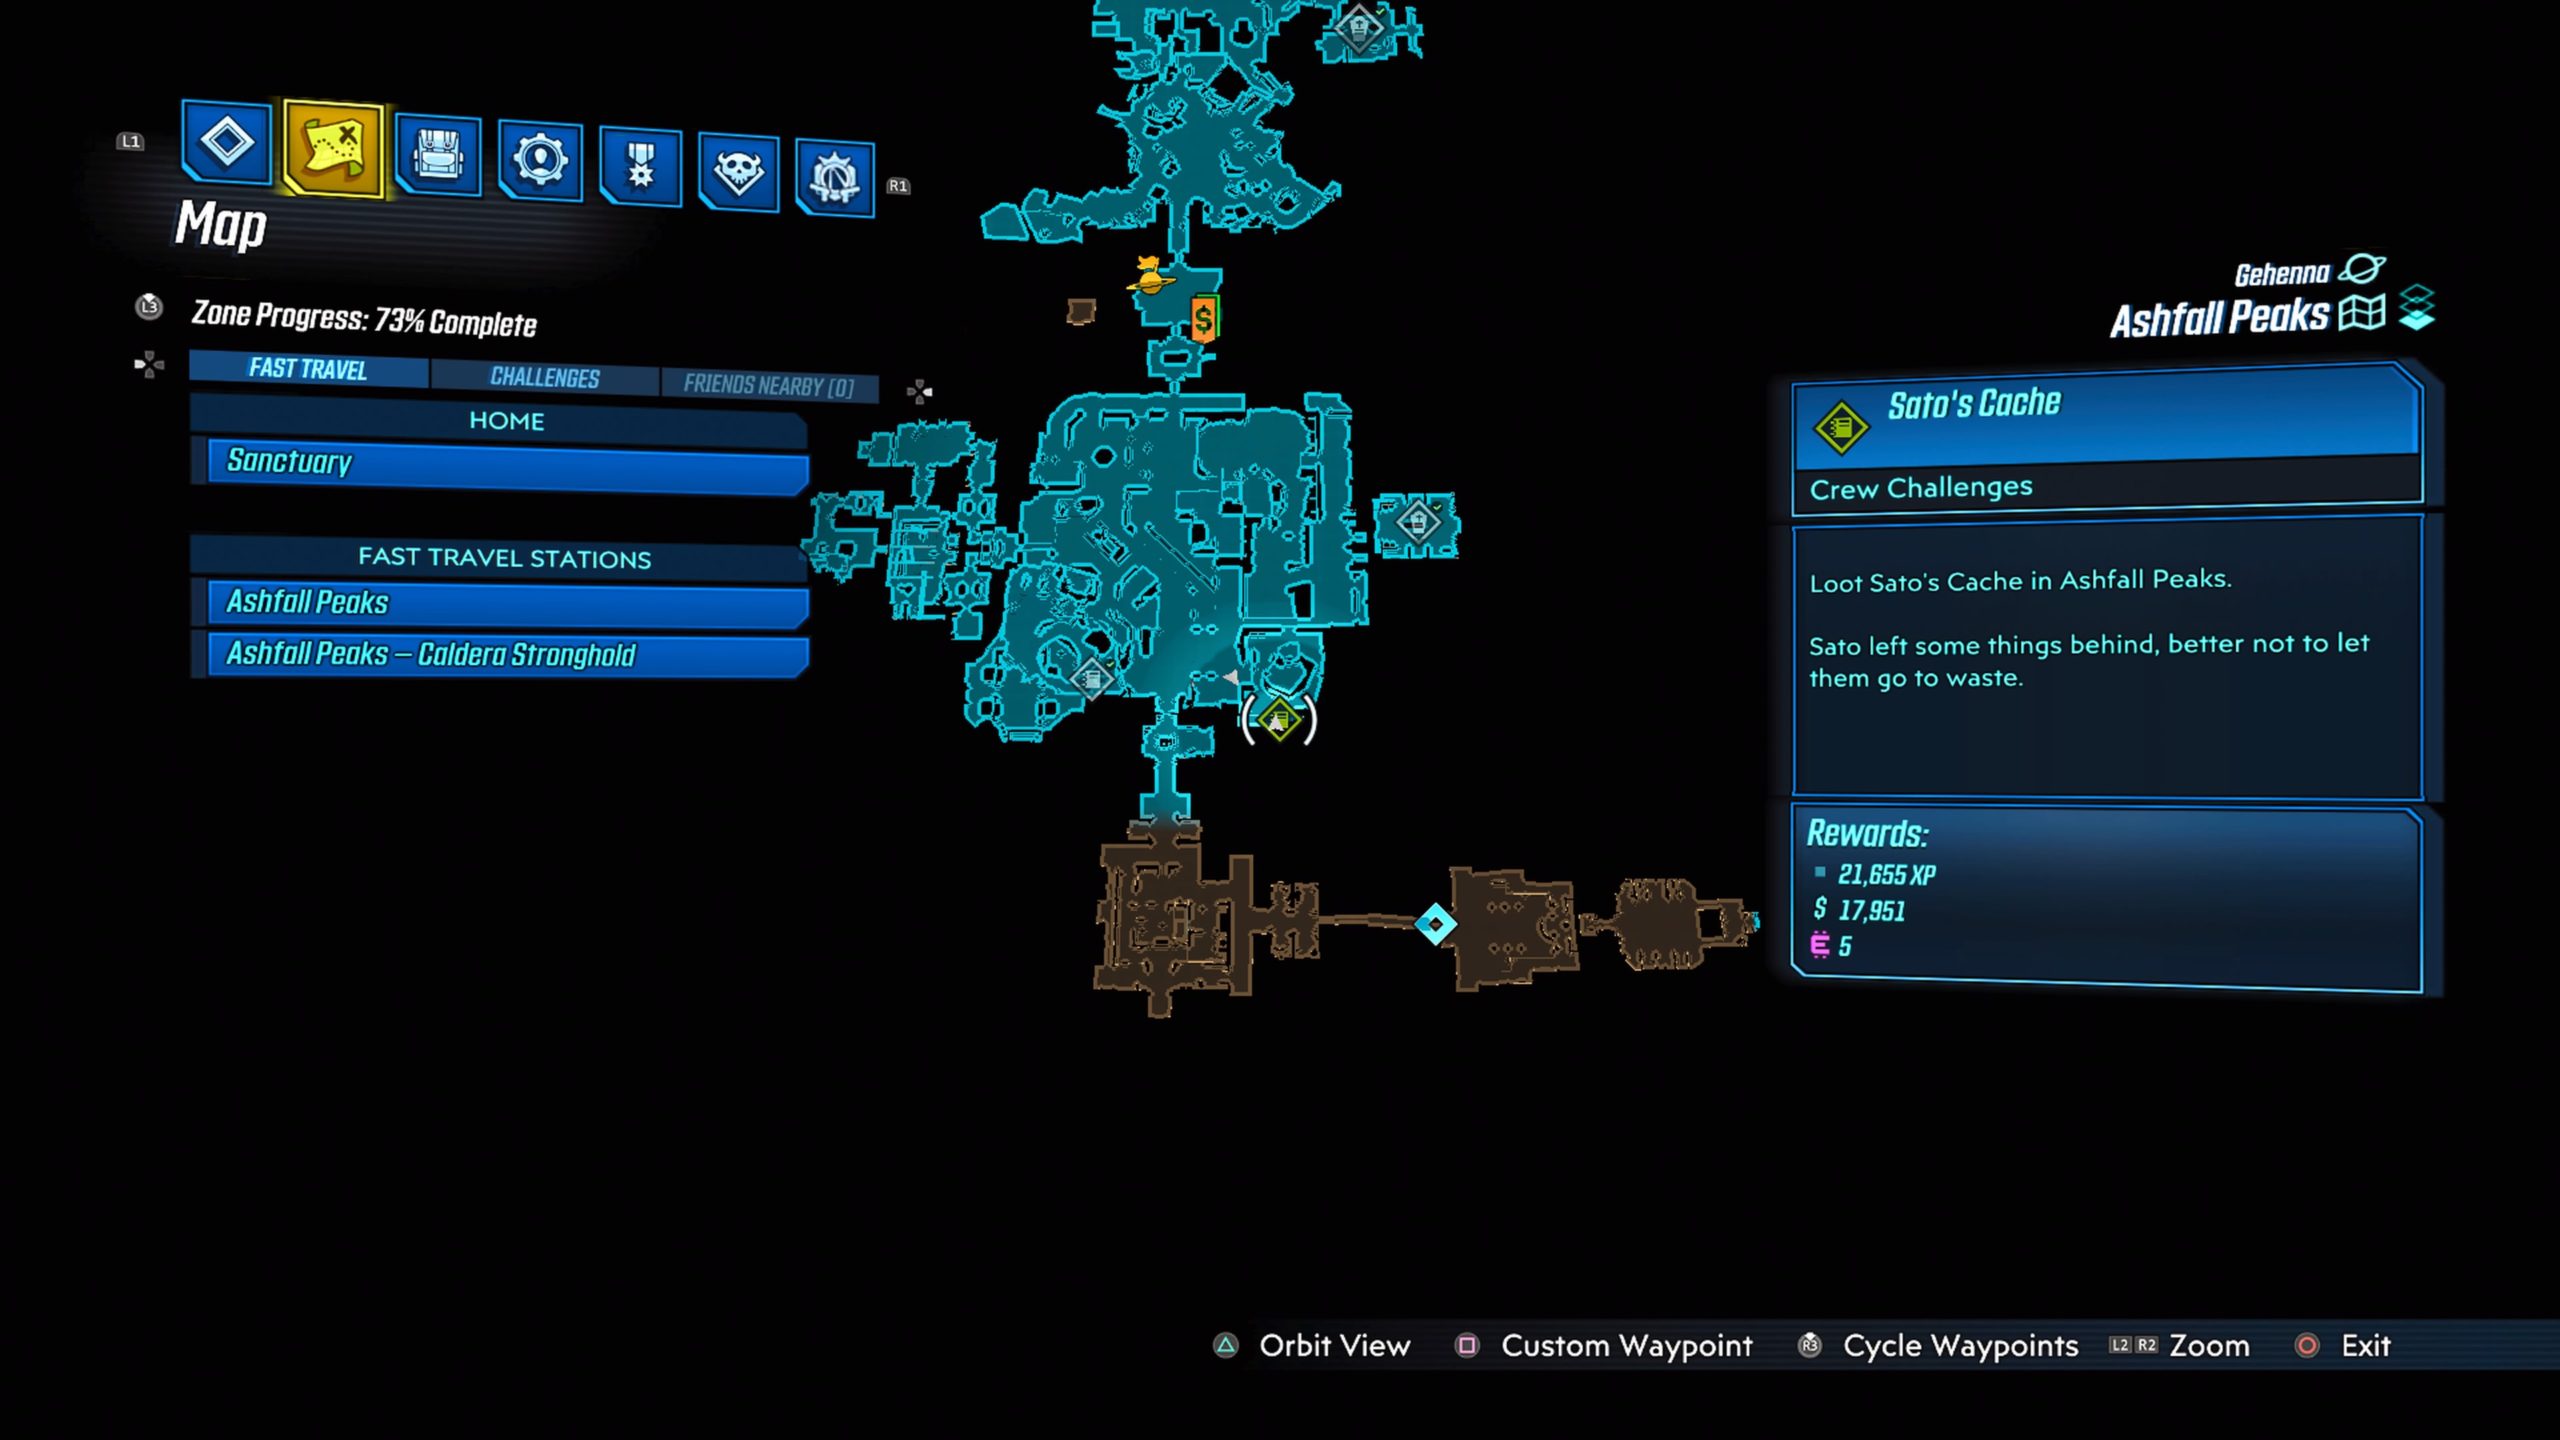
The cache can be found in the Devil’s Greatroom.
Obsidian Forest
Obsidian Forest #1
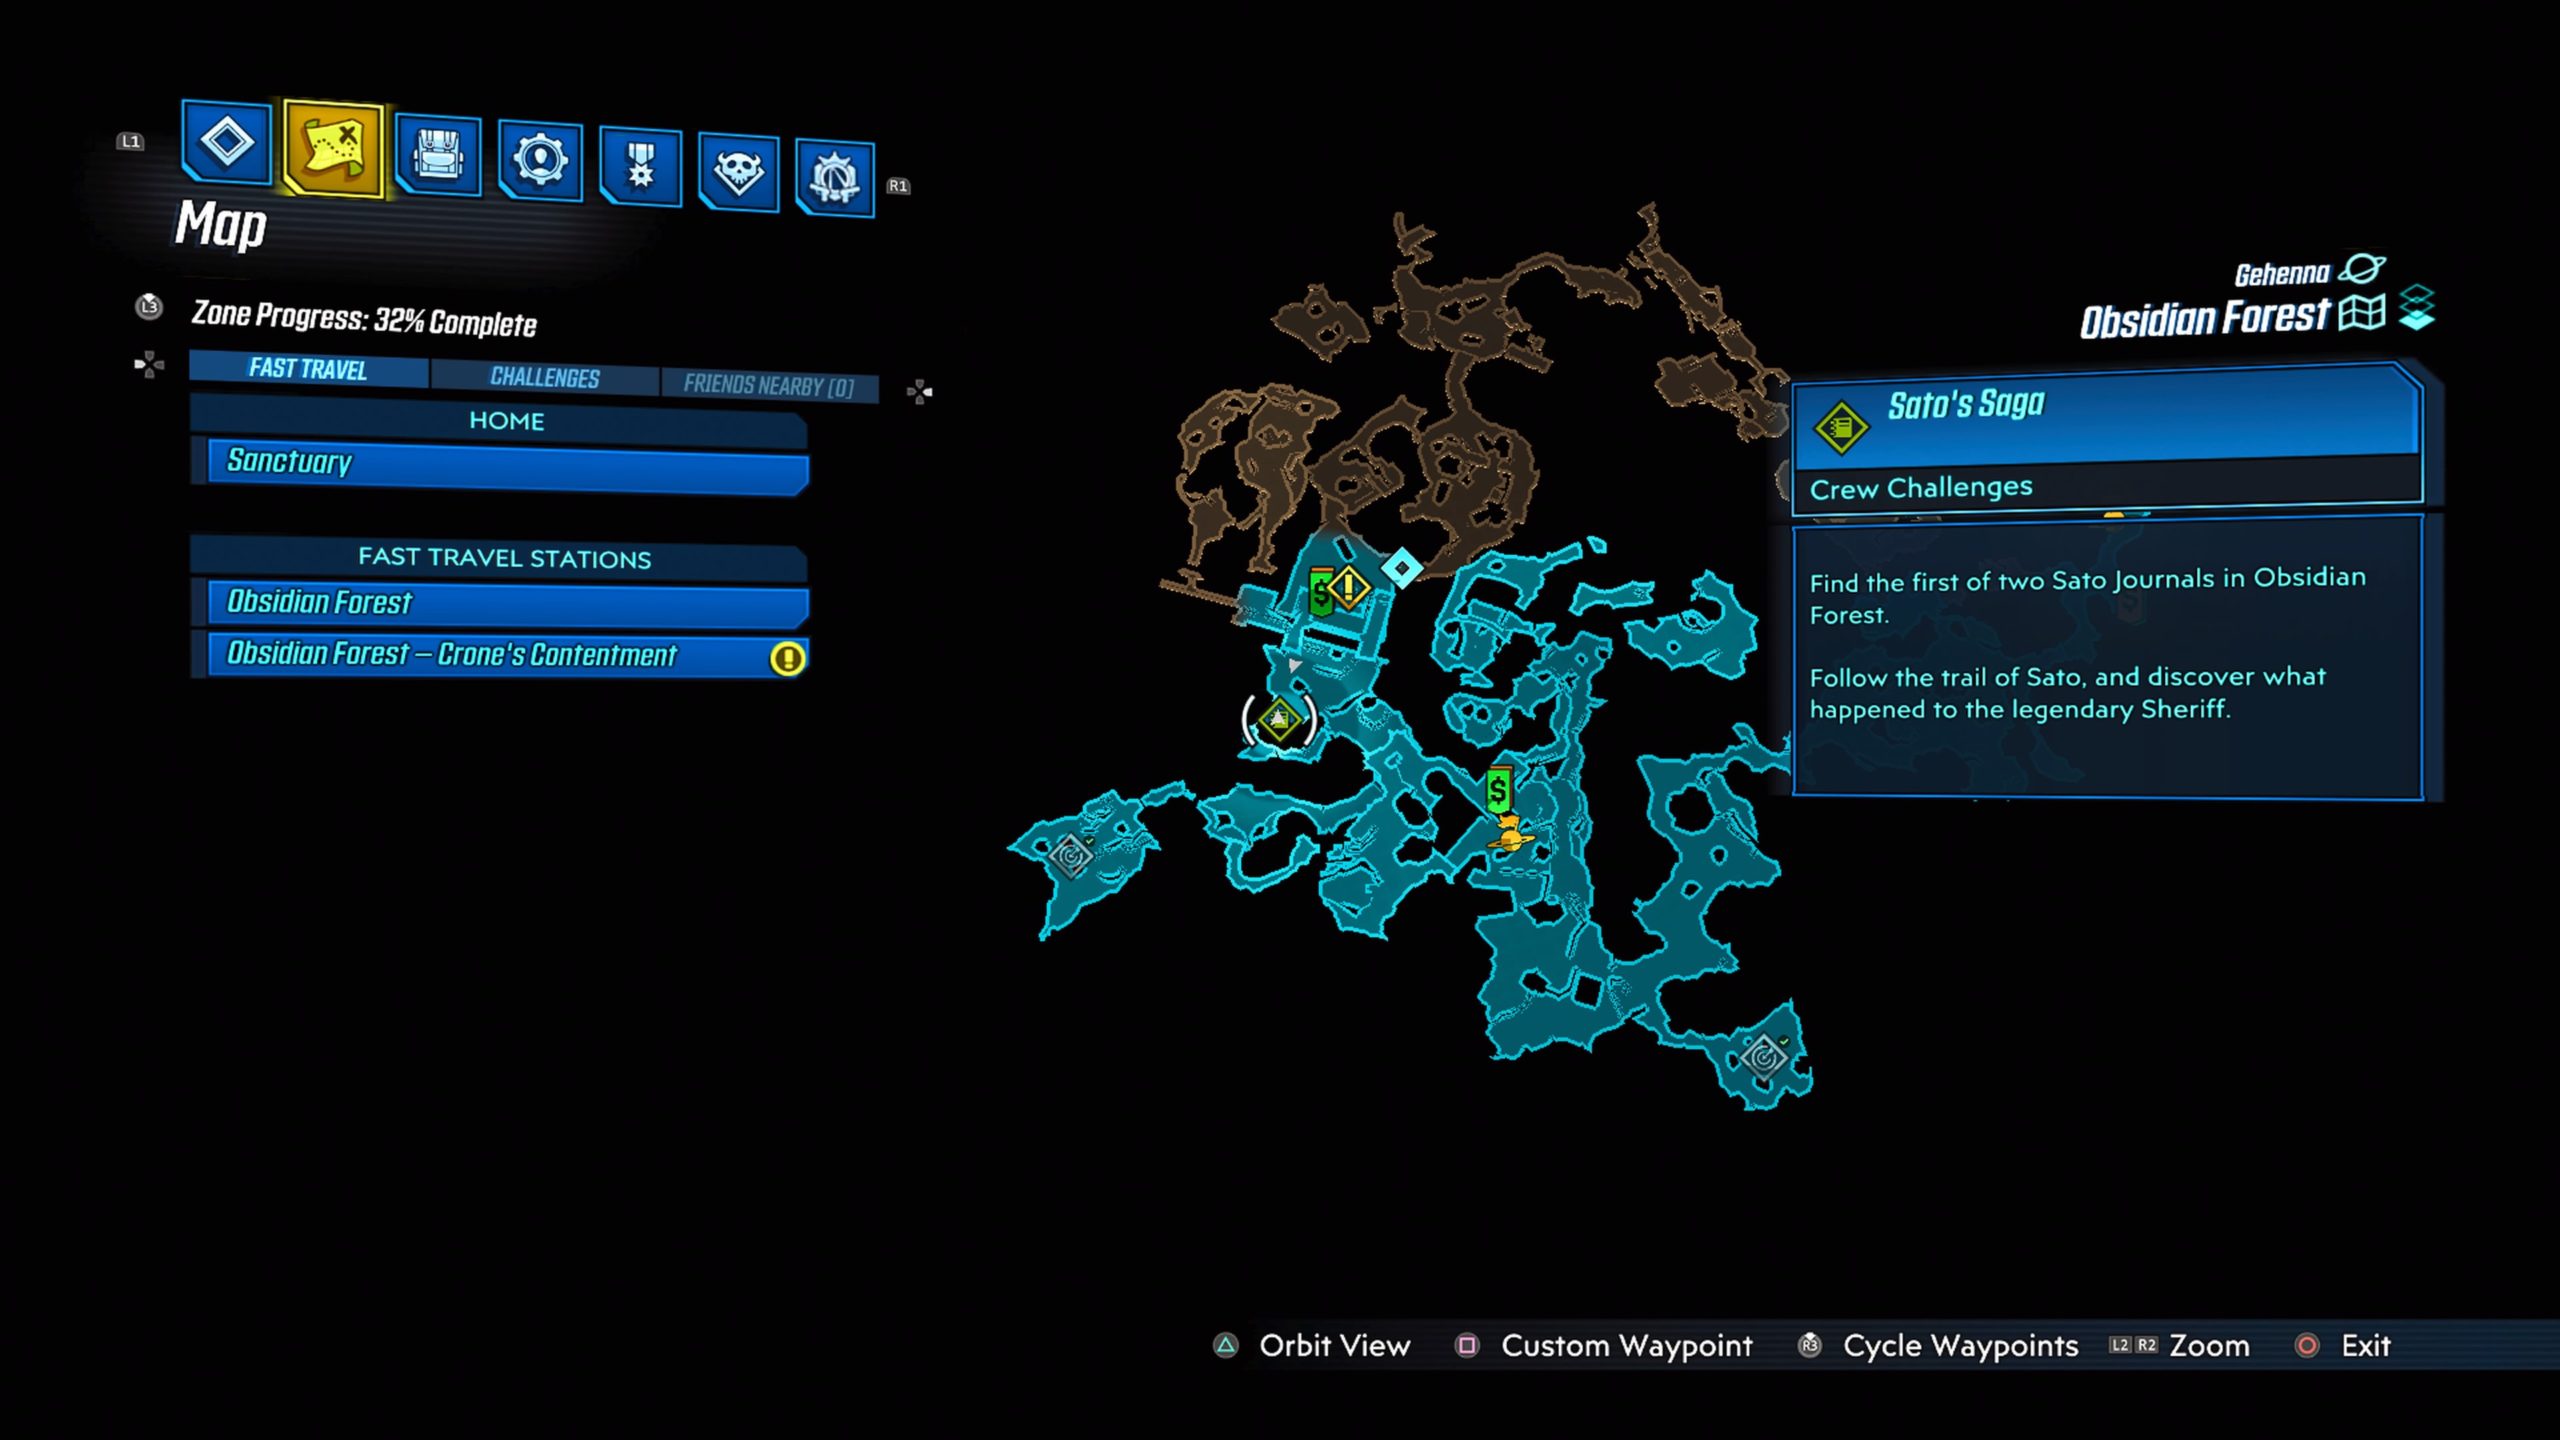
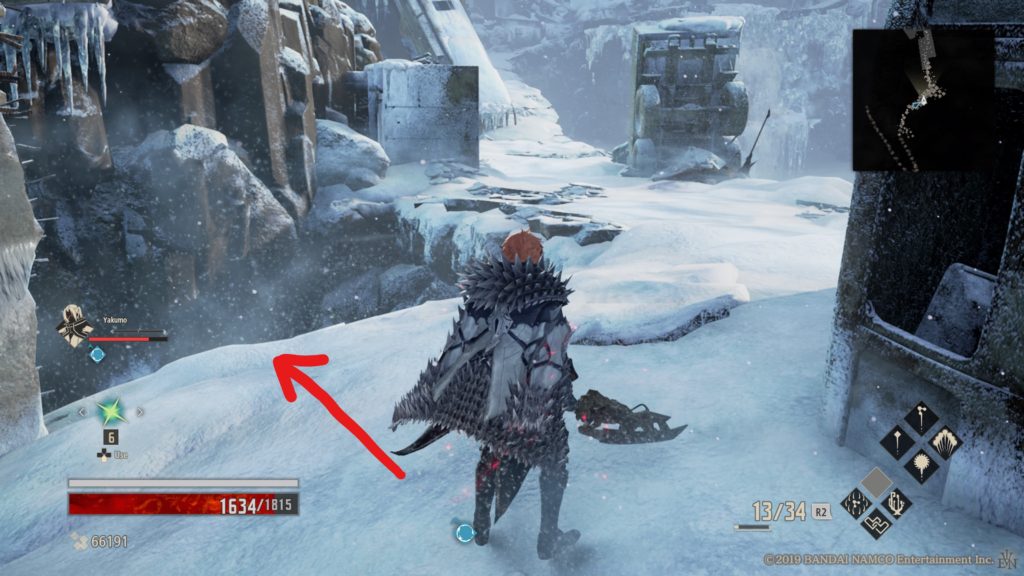
This journal can be found on a high ledge in Tallyway Station, which is northwest of the Crone’s Contentment fast travel station.
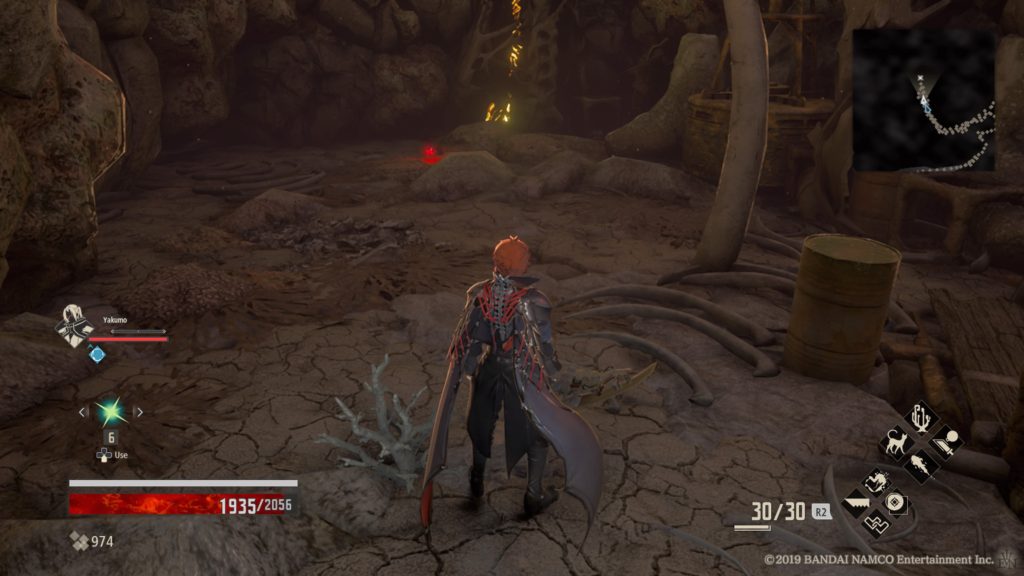
Obsidian Forest #2

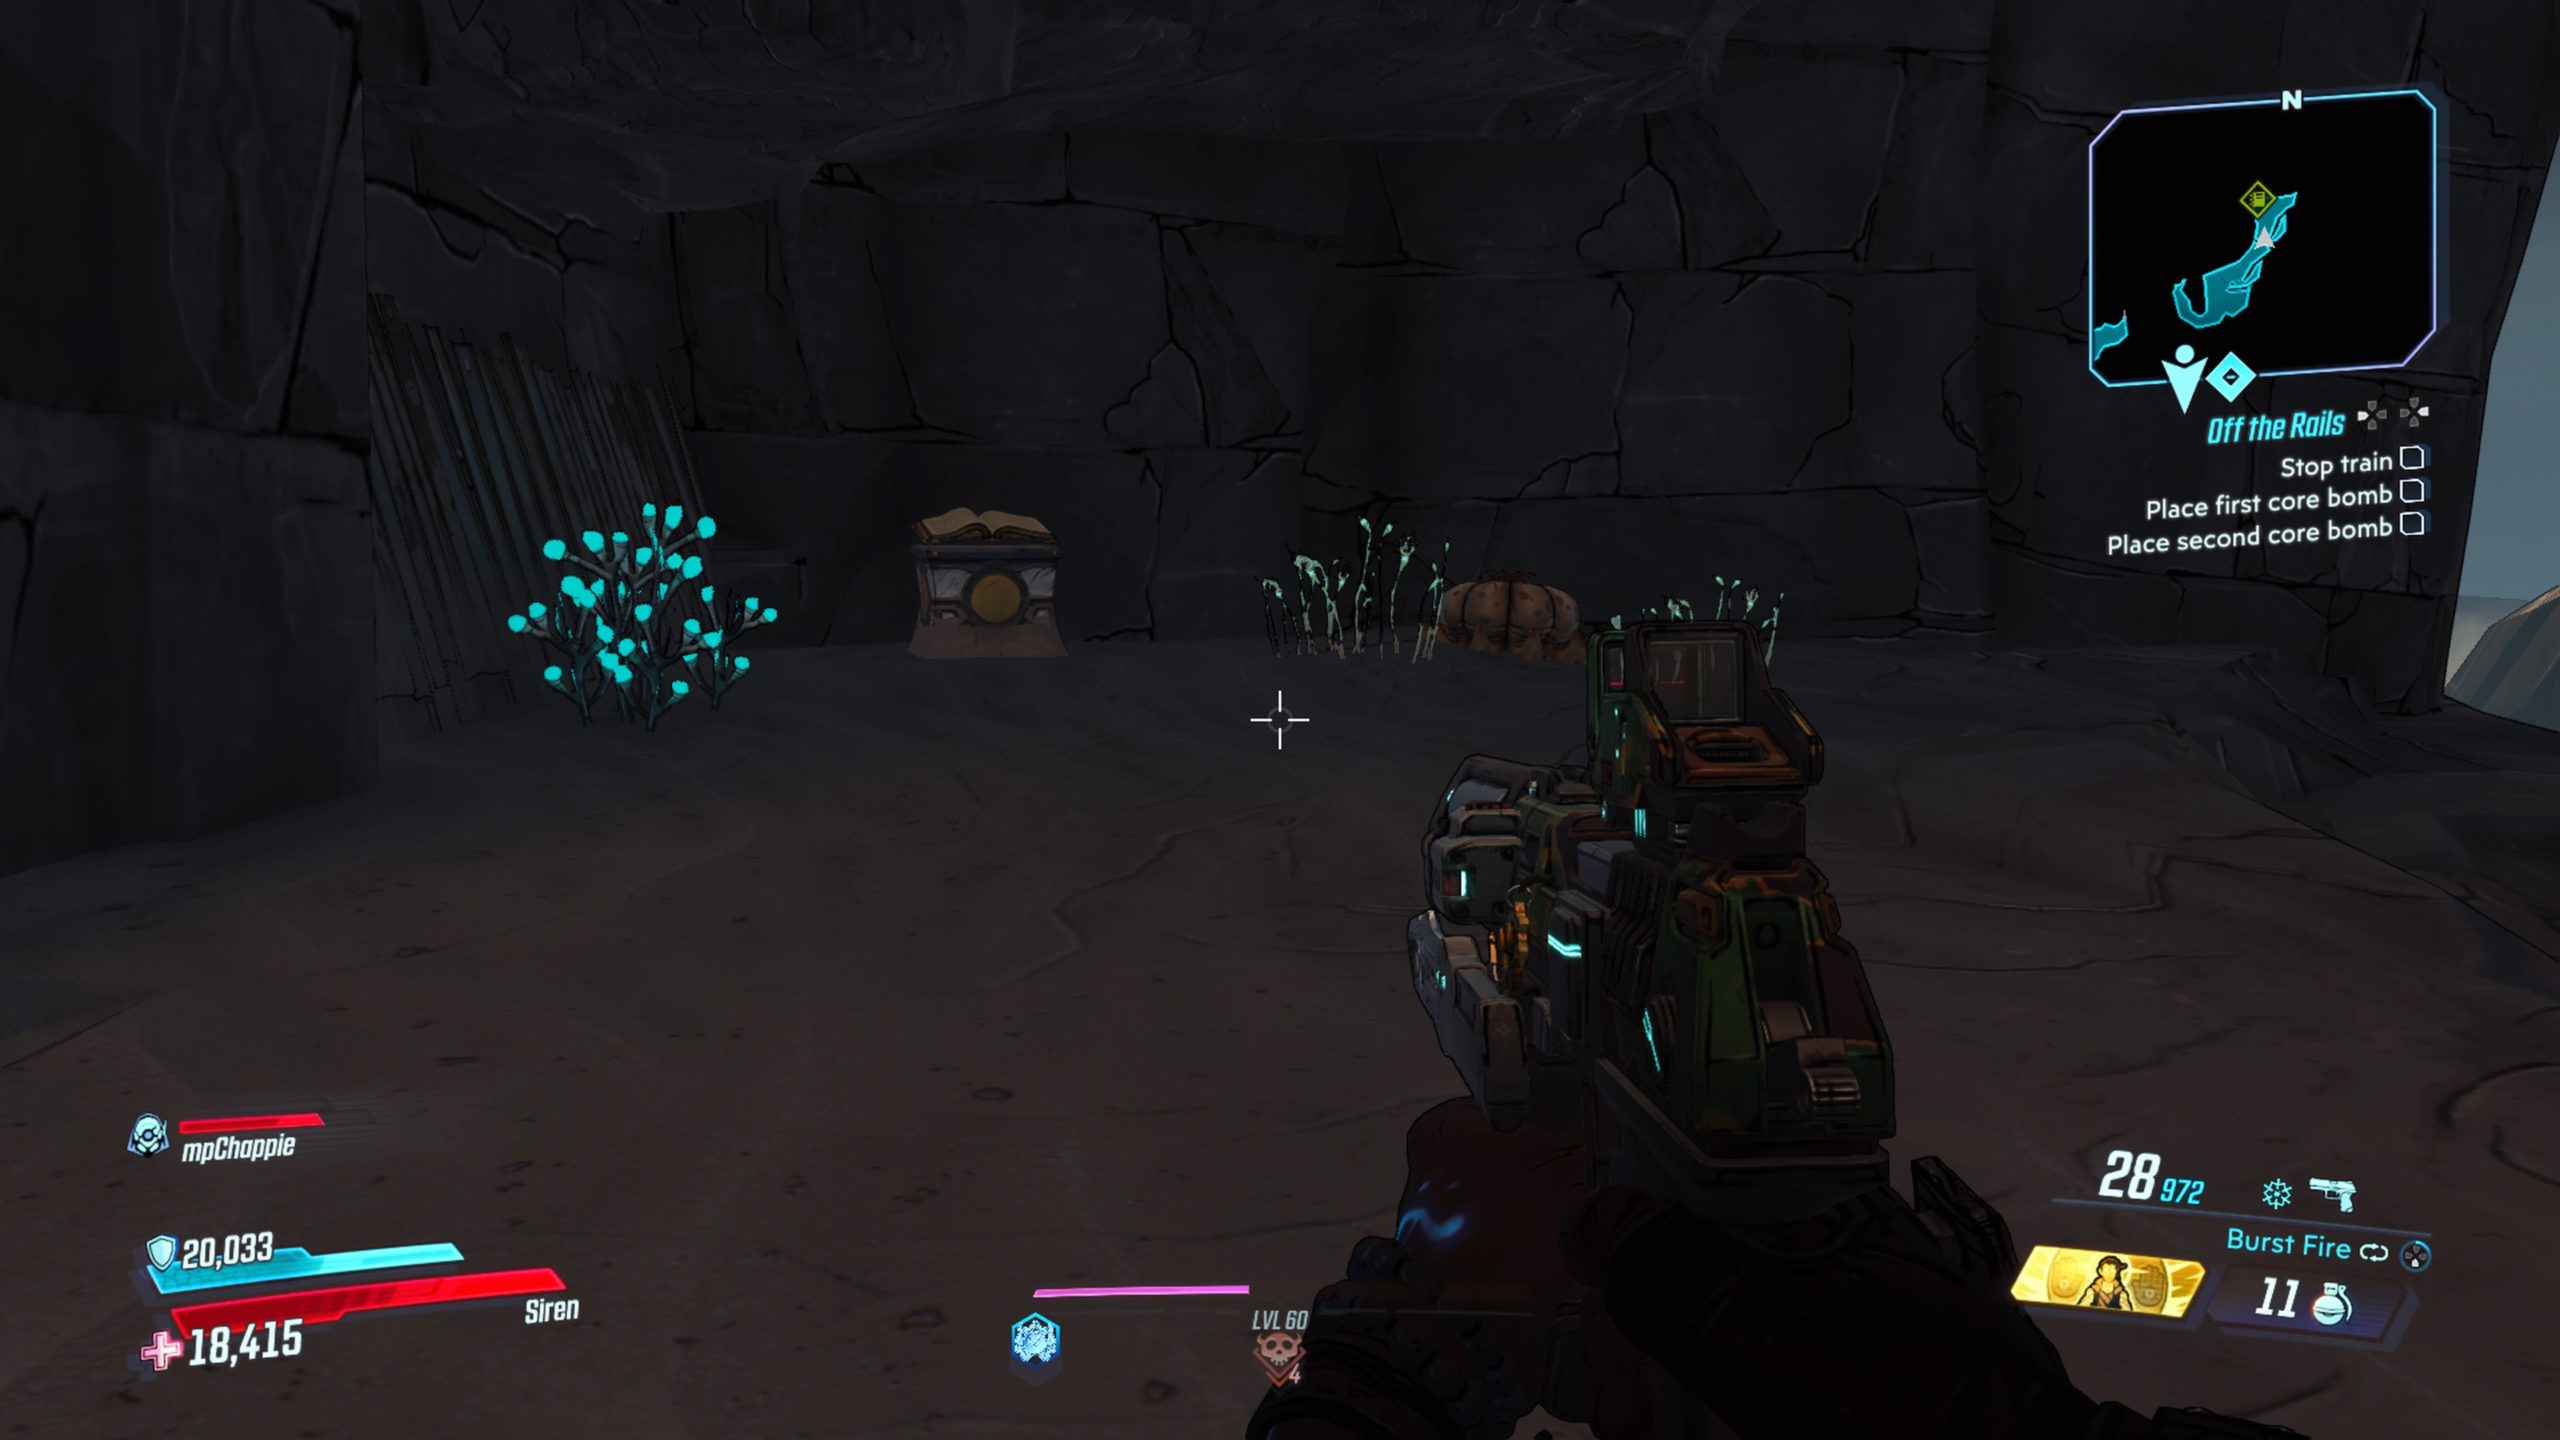
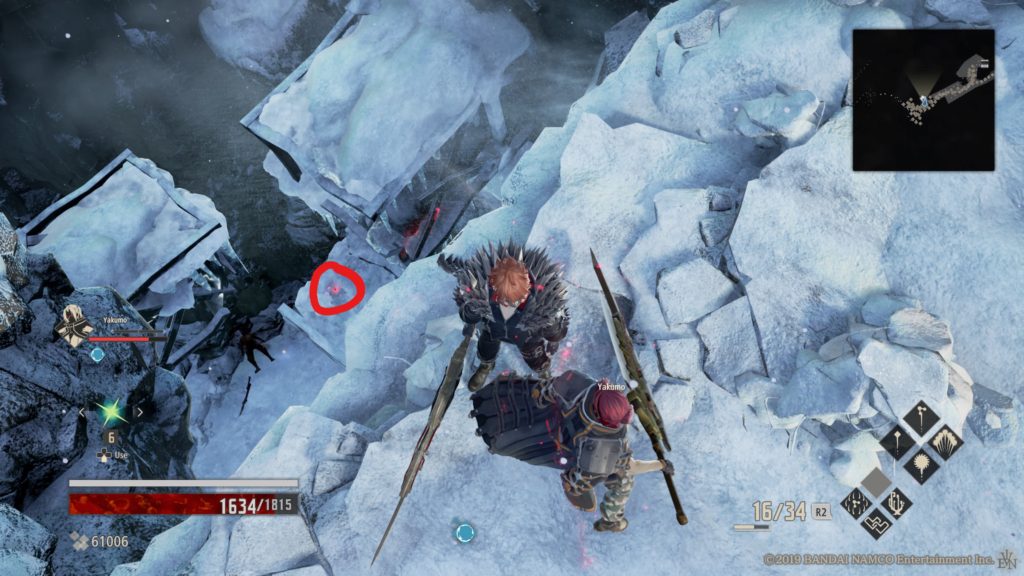
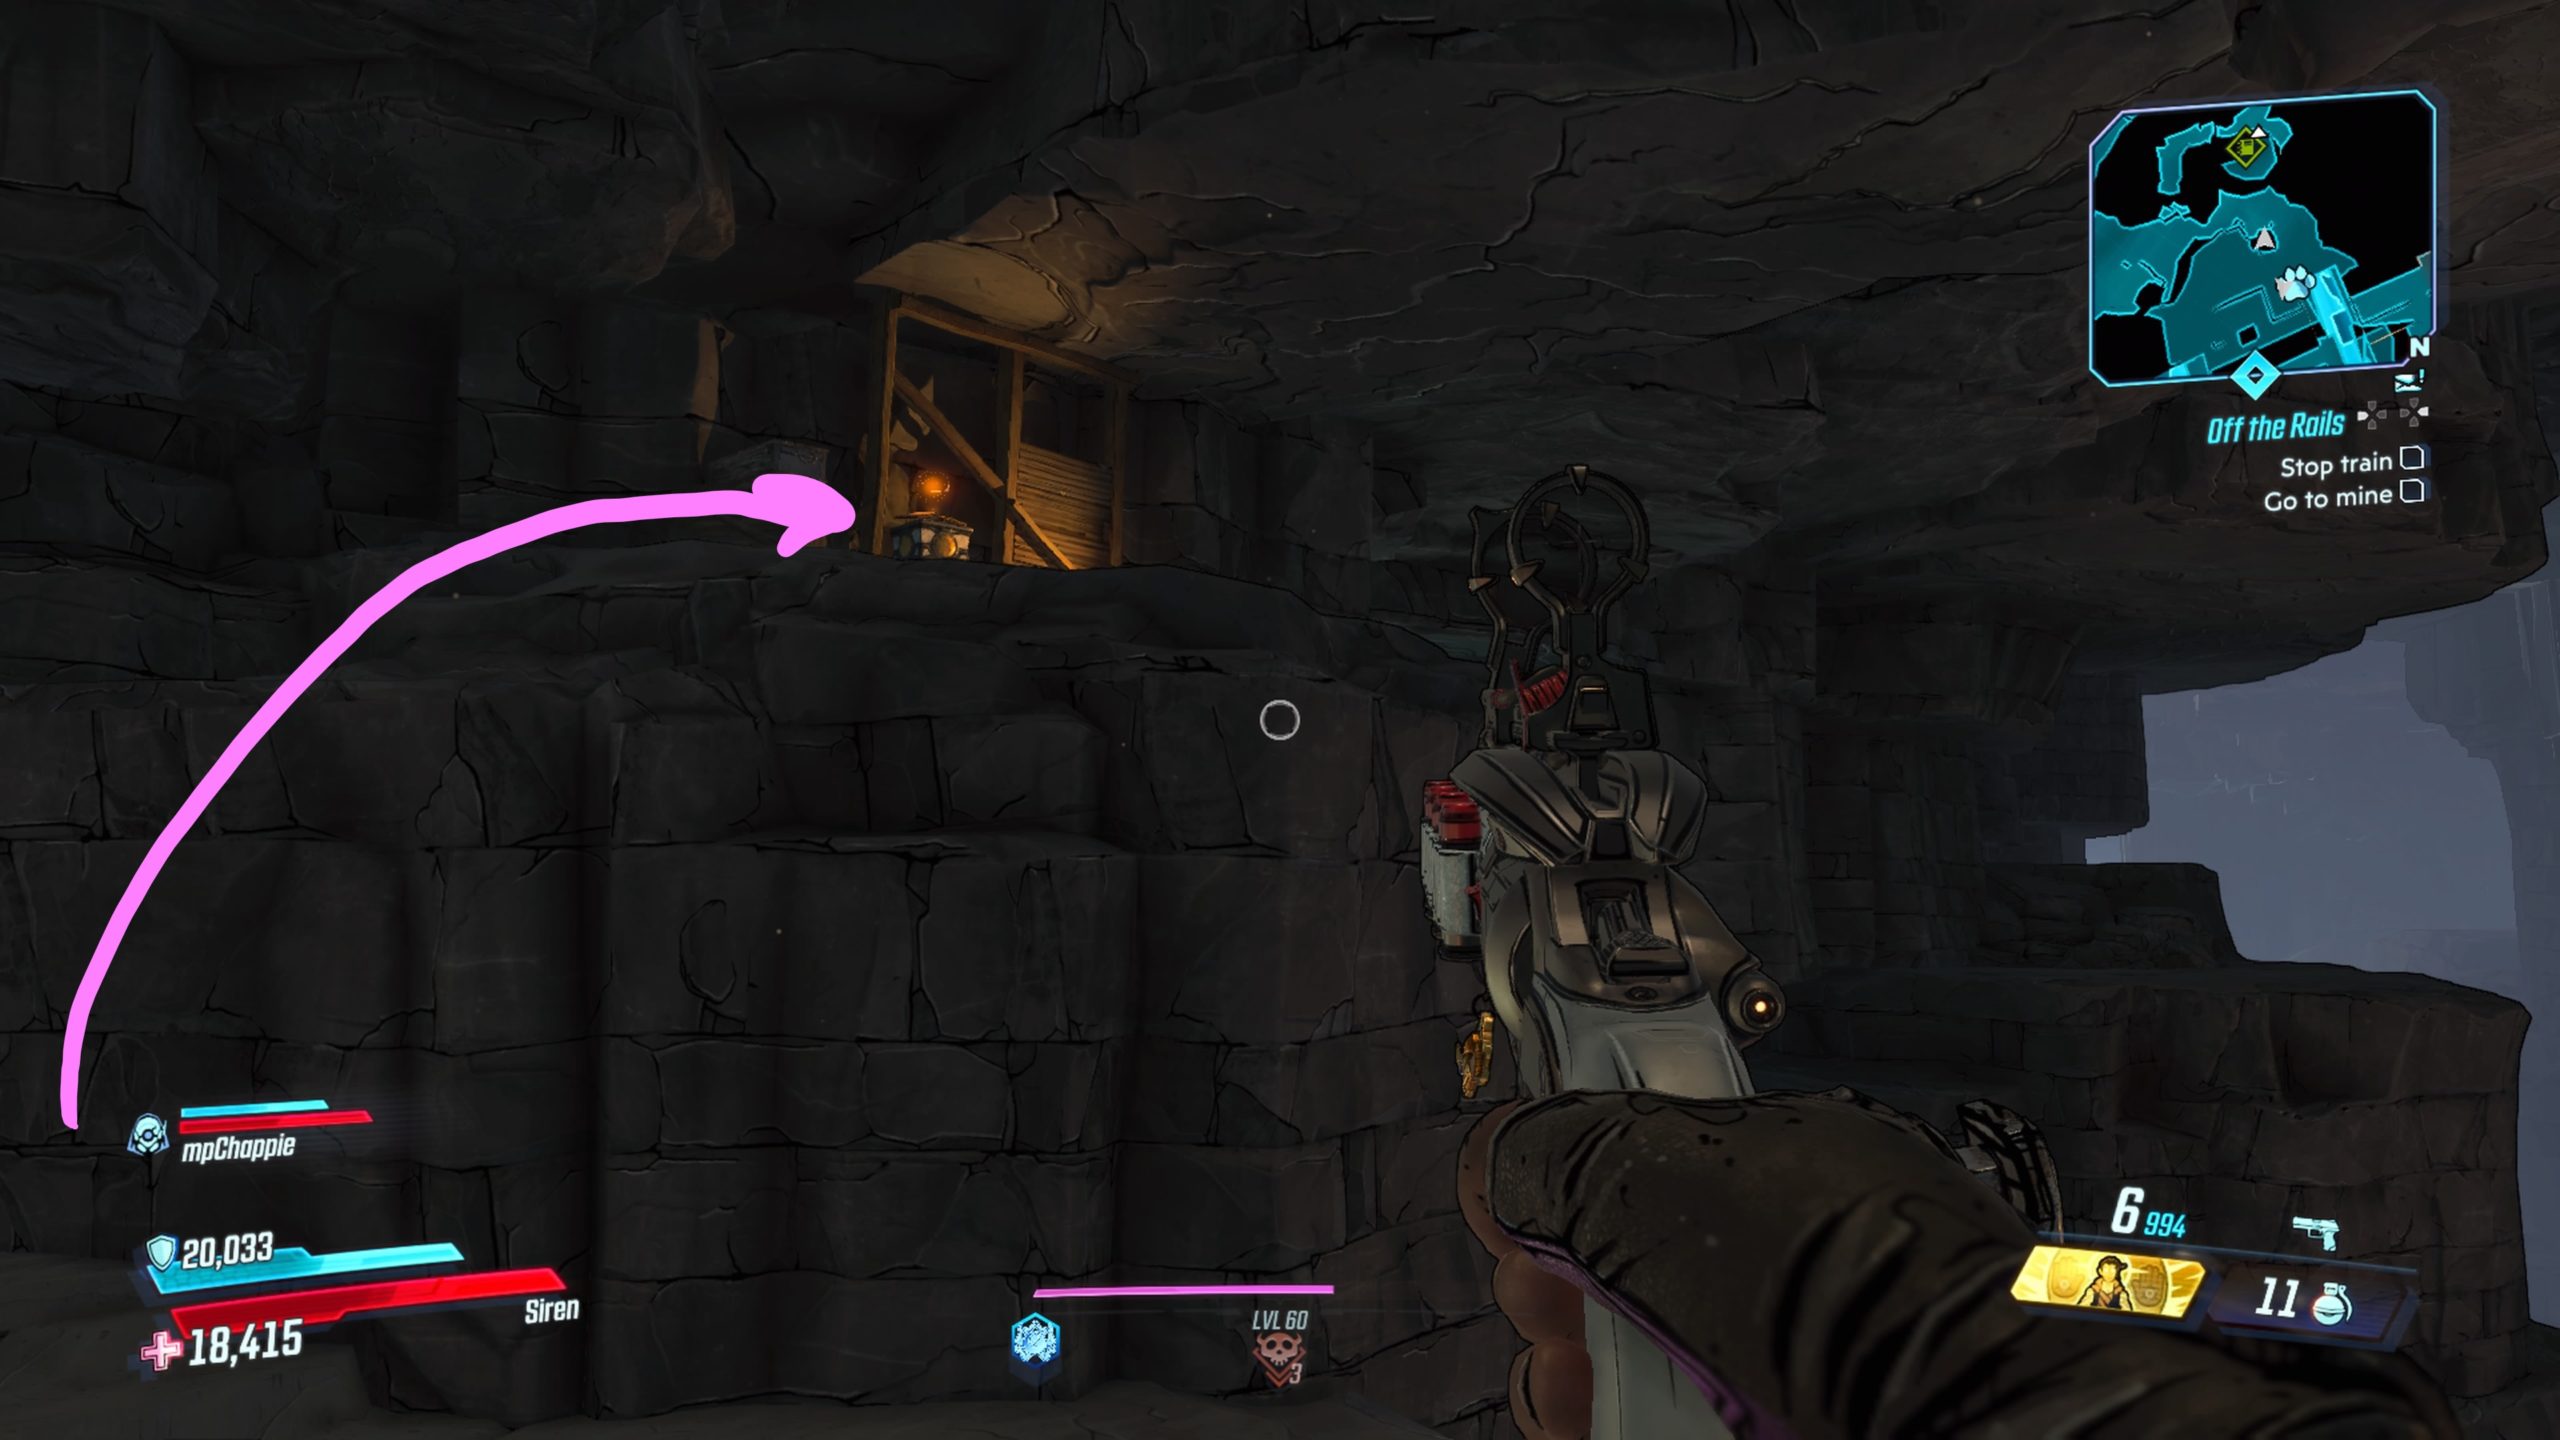
This journal can be found in The Last Dig in the northeastern part of the map.
Obsidian Forest Cache
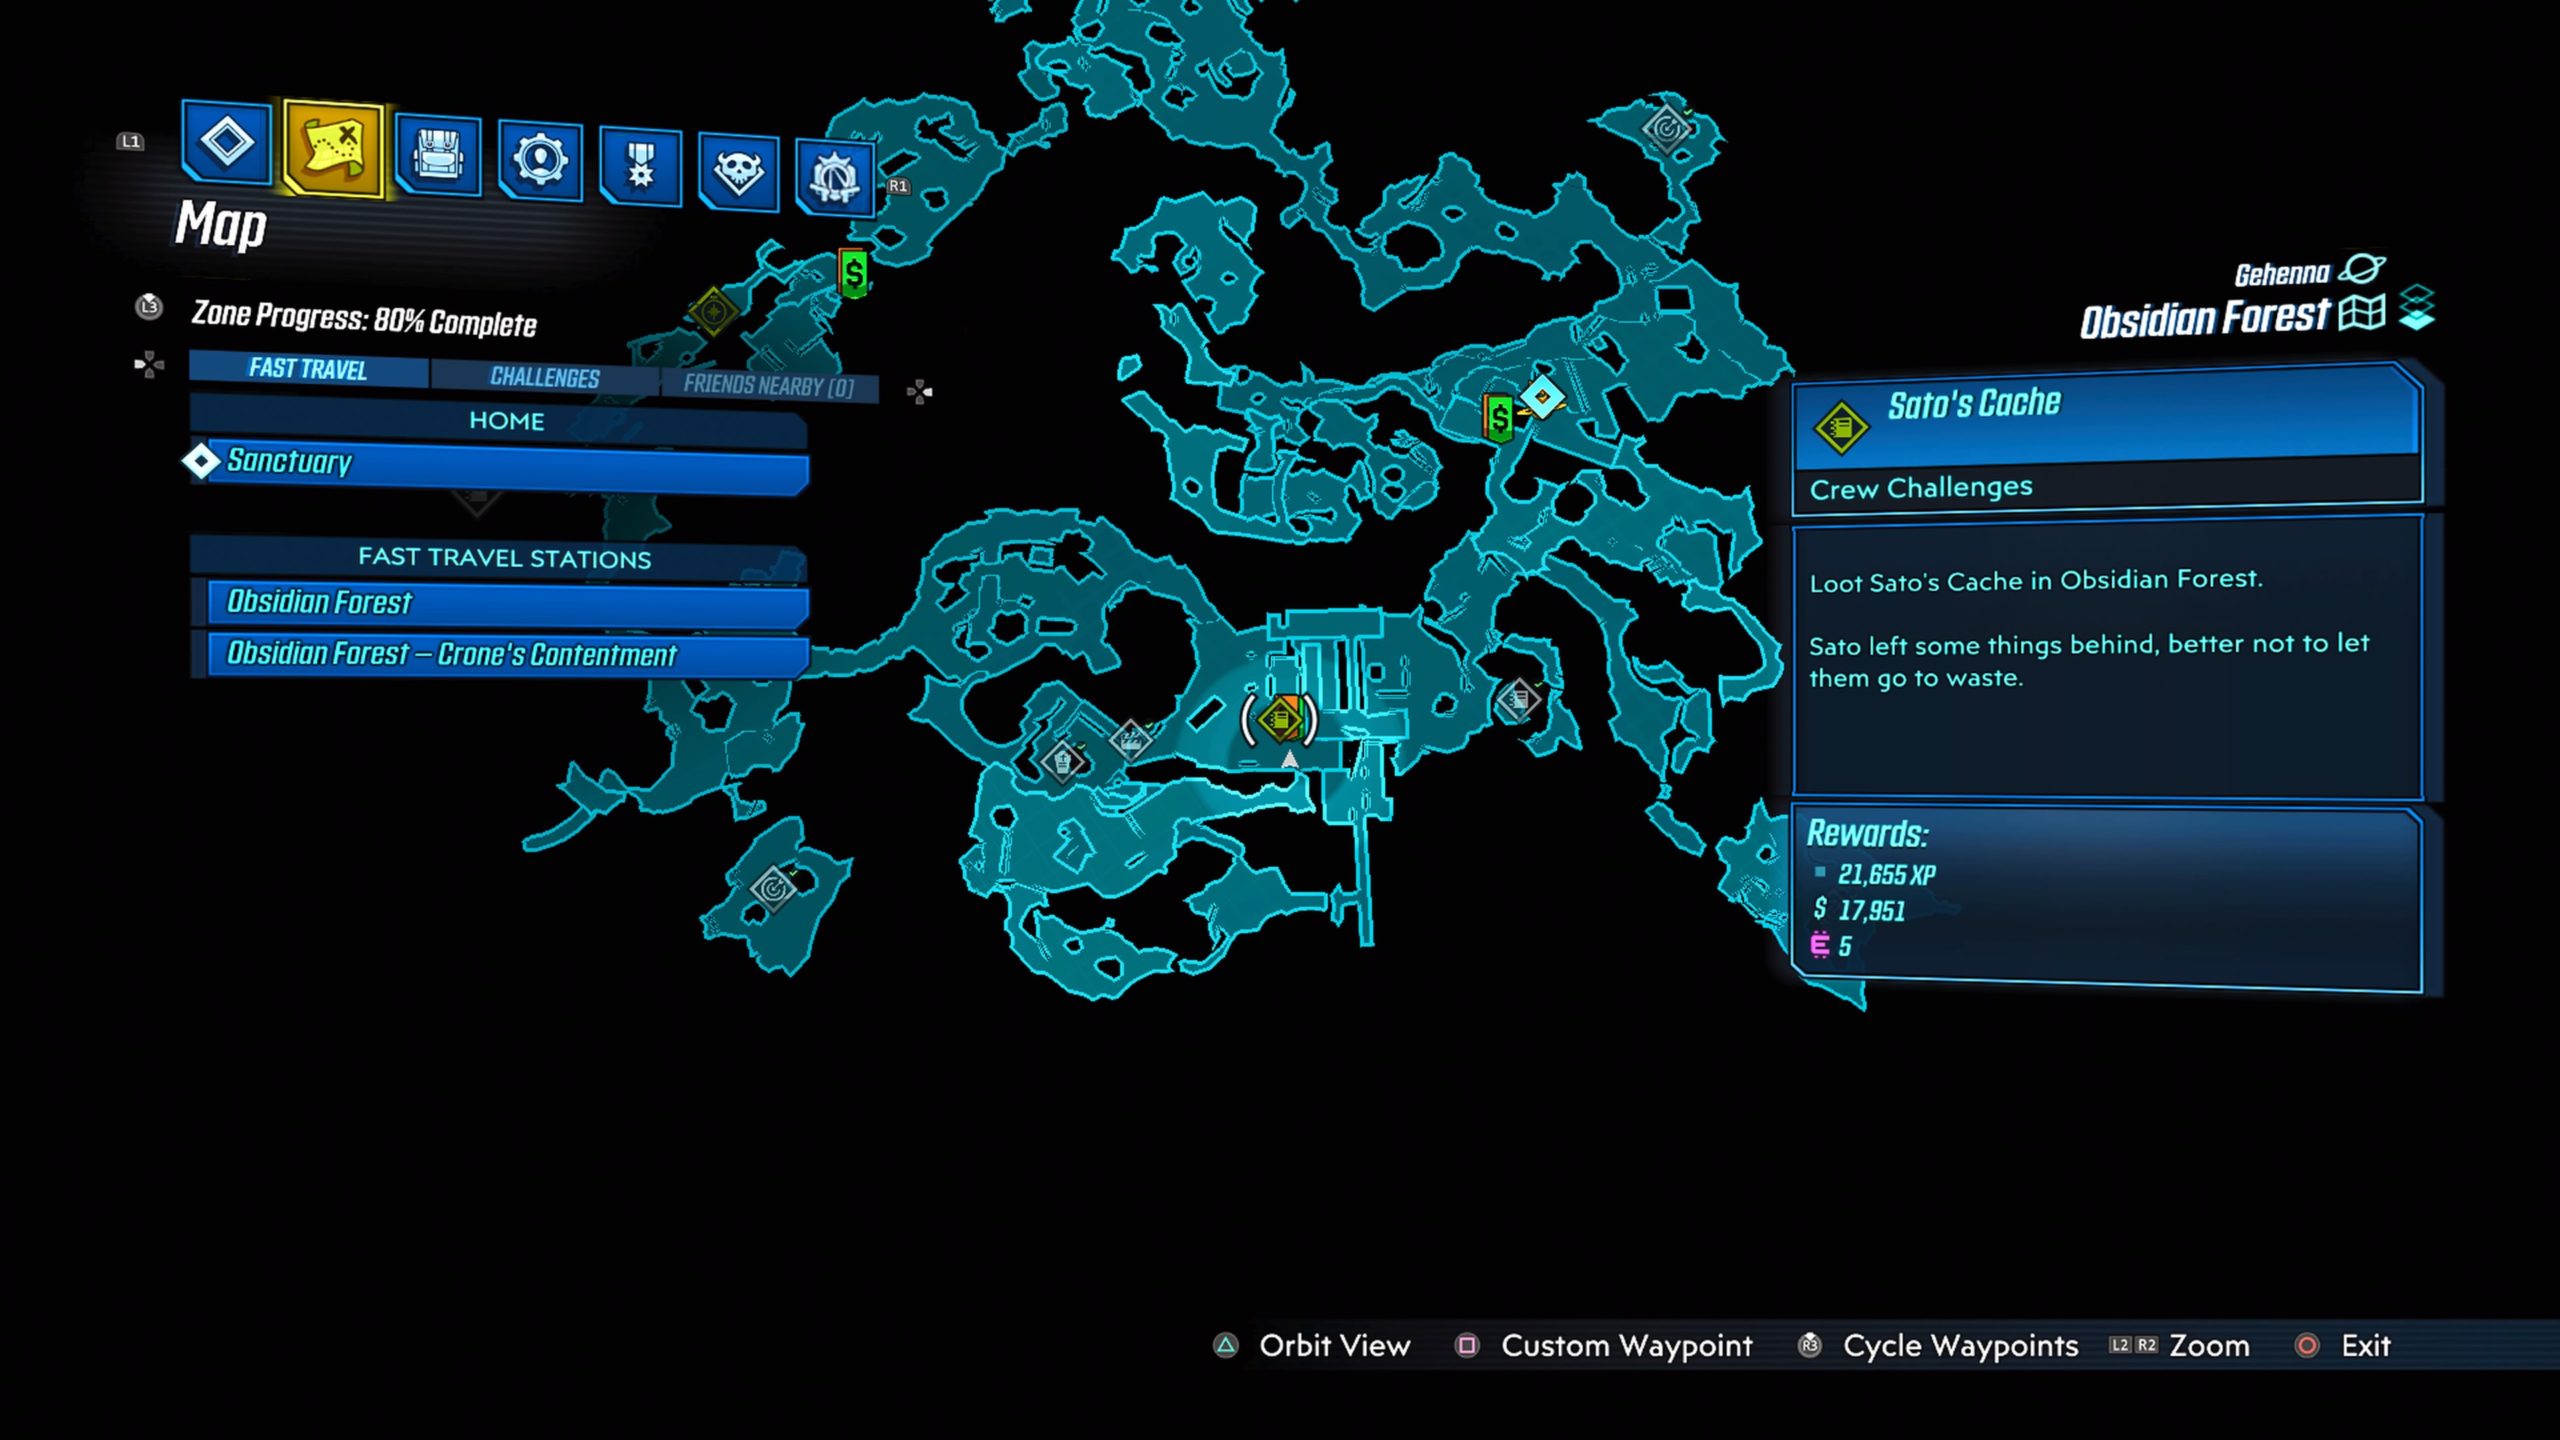
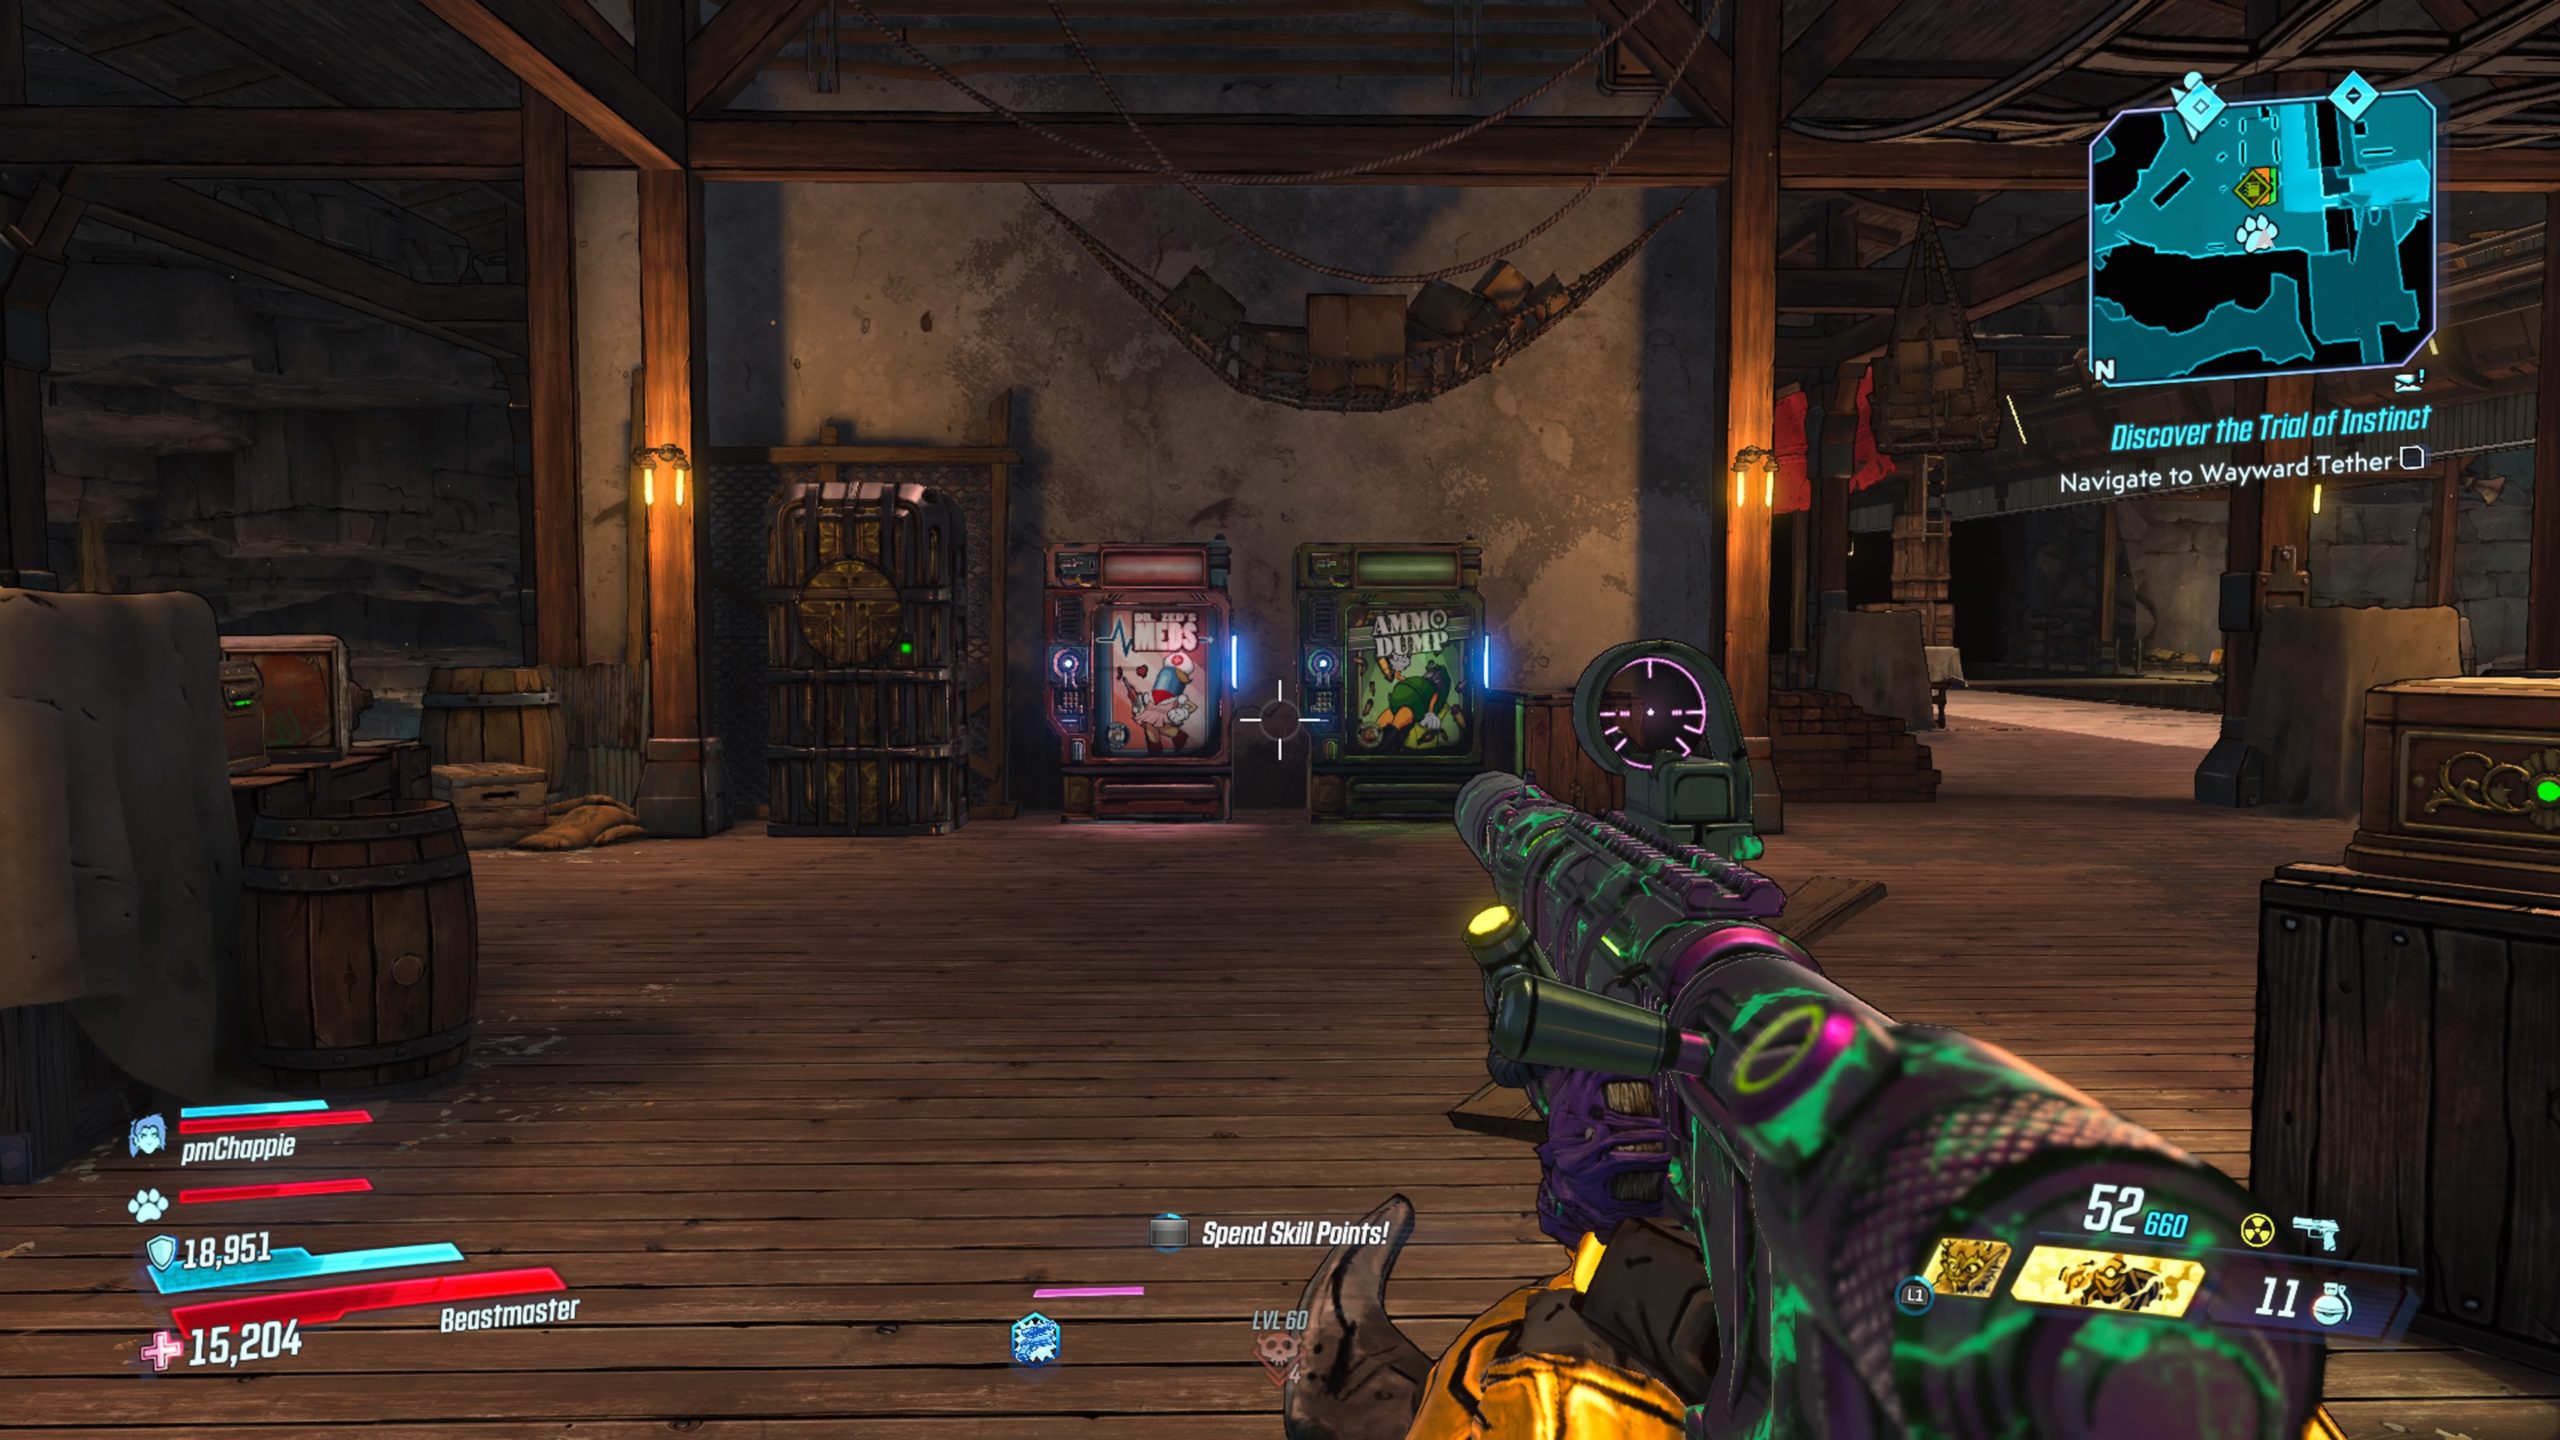
The cache can be found next to the vending machines at Tallyway Station.
Bloodsun Canyon
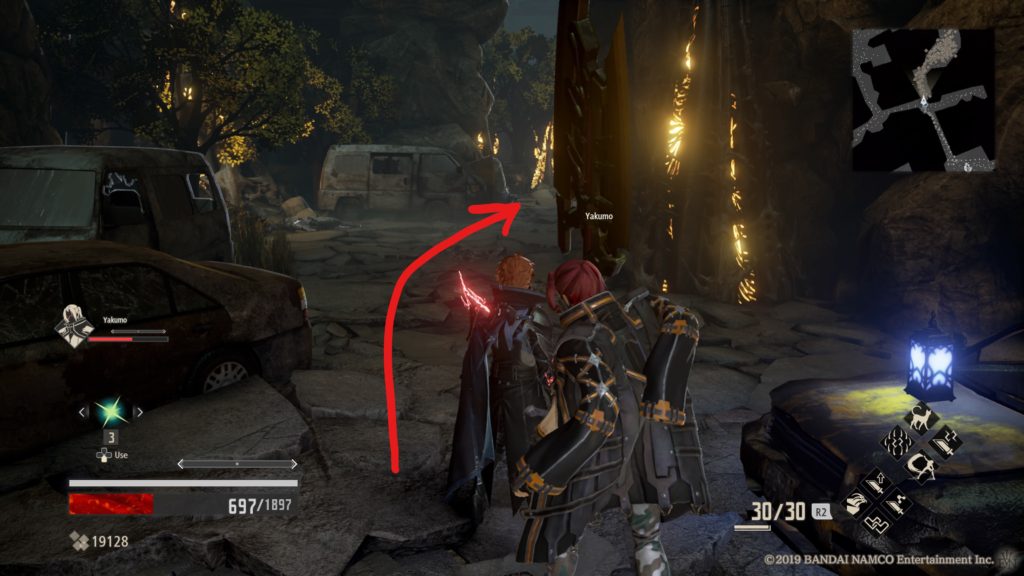
Bloodsun Canyon #1
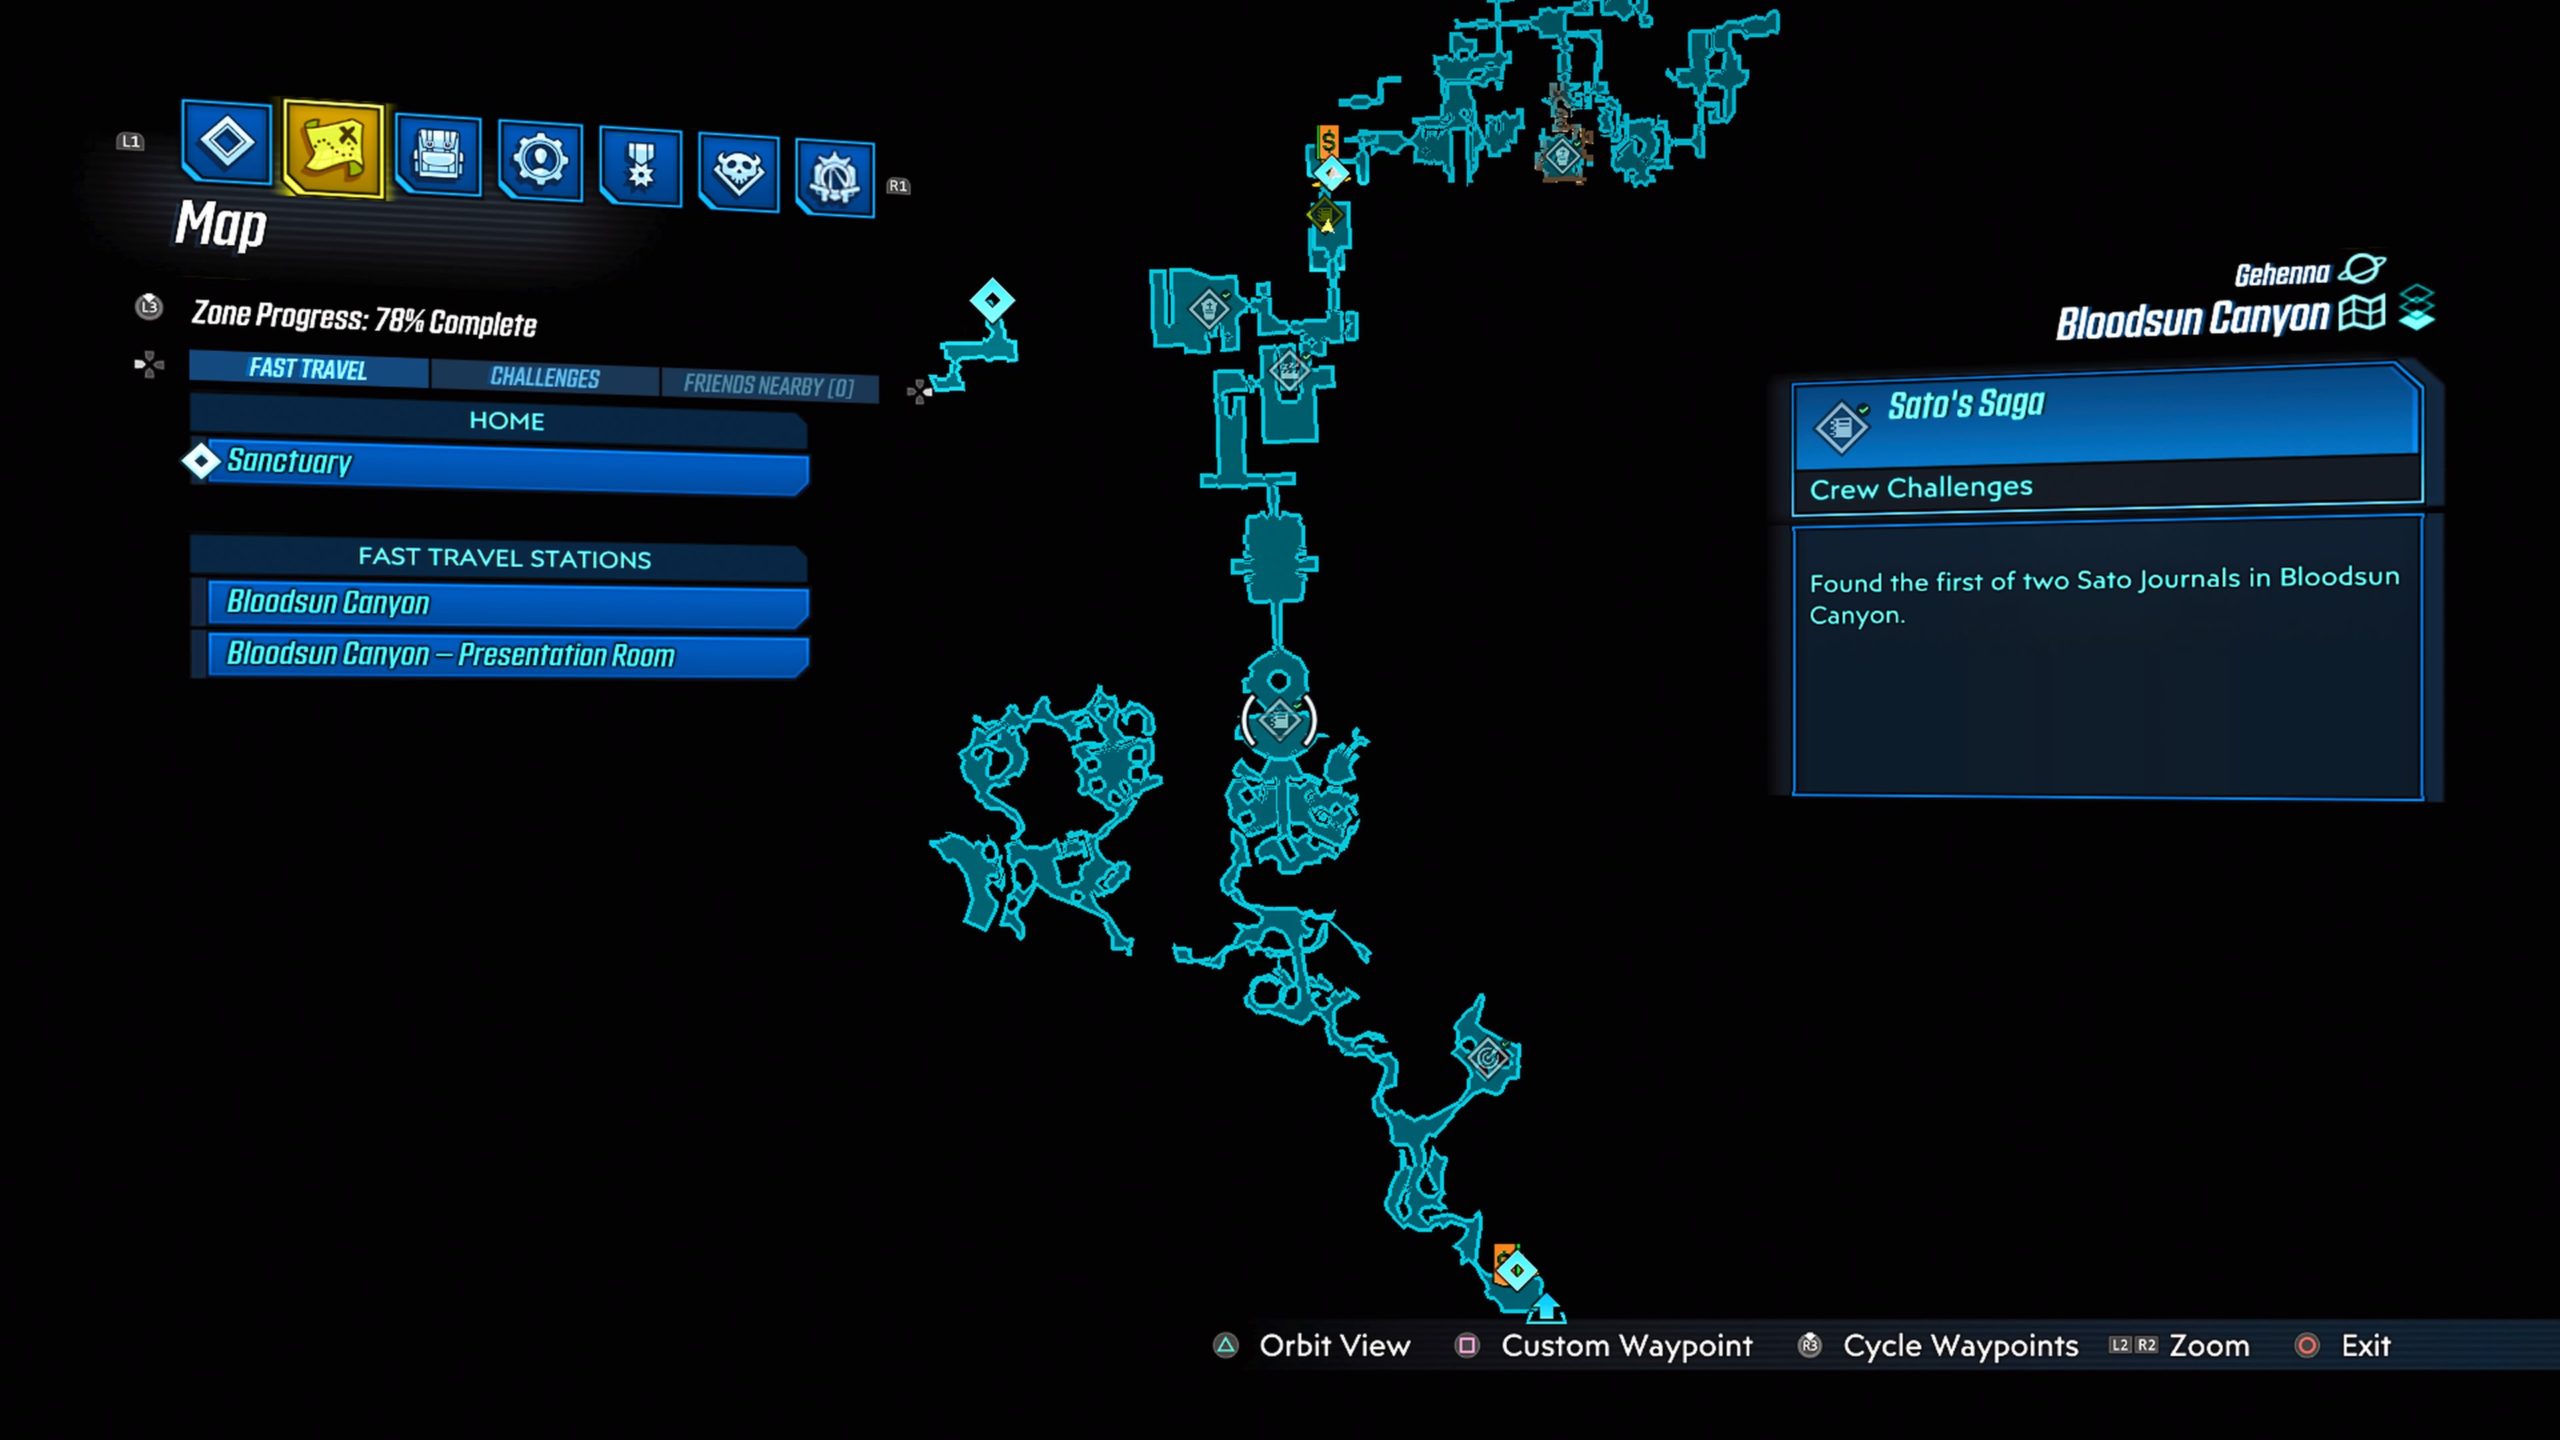
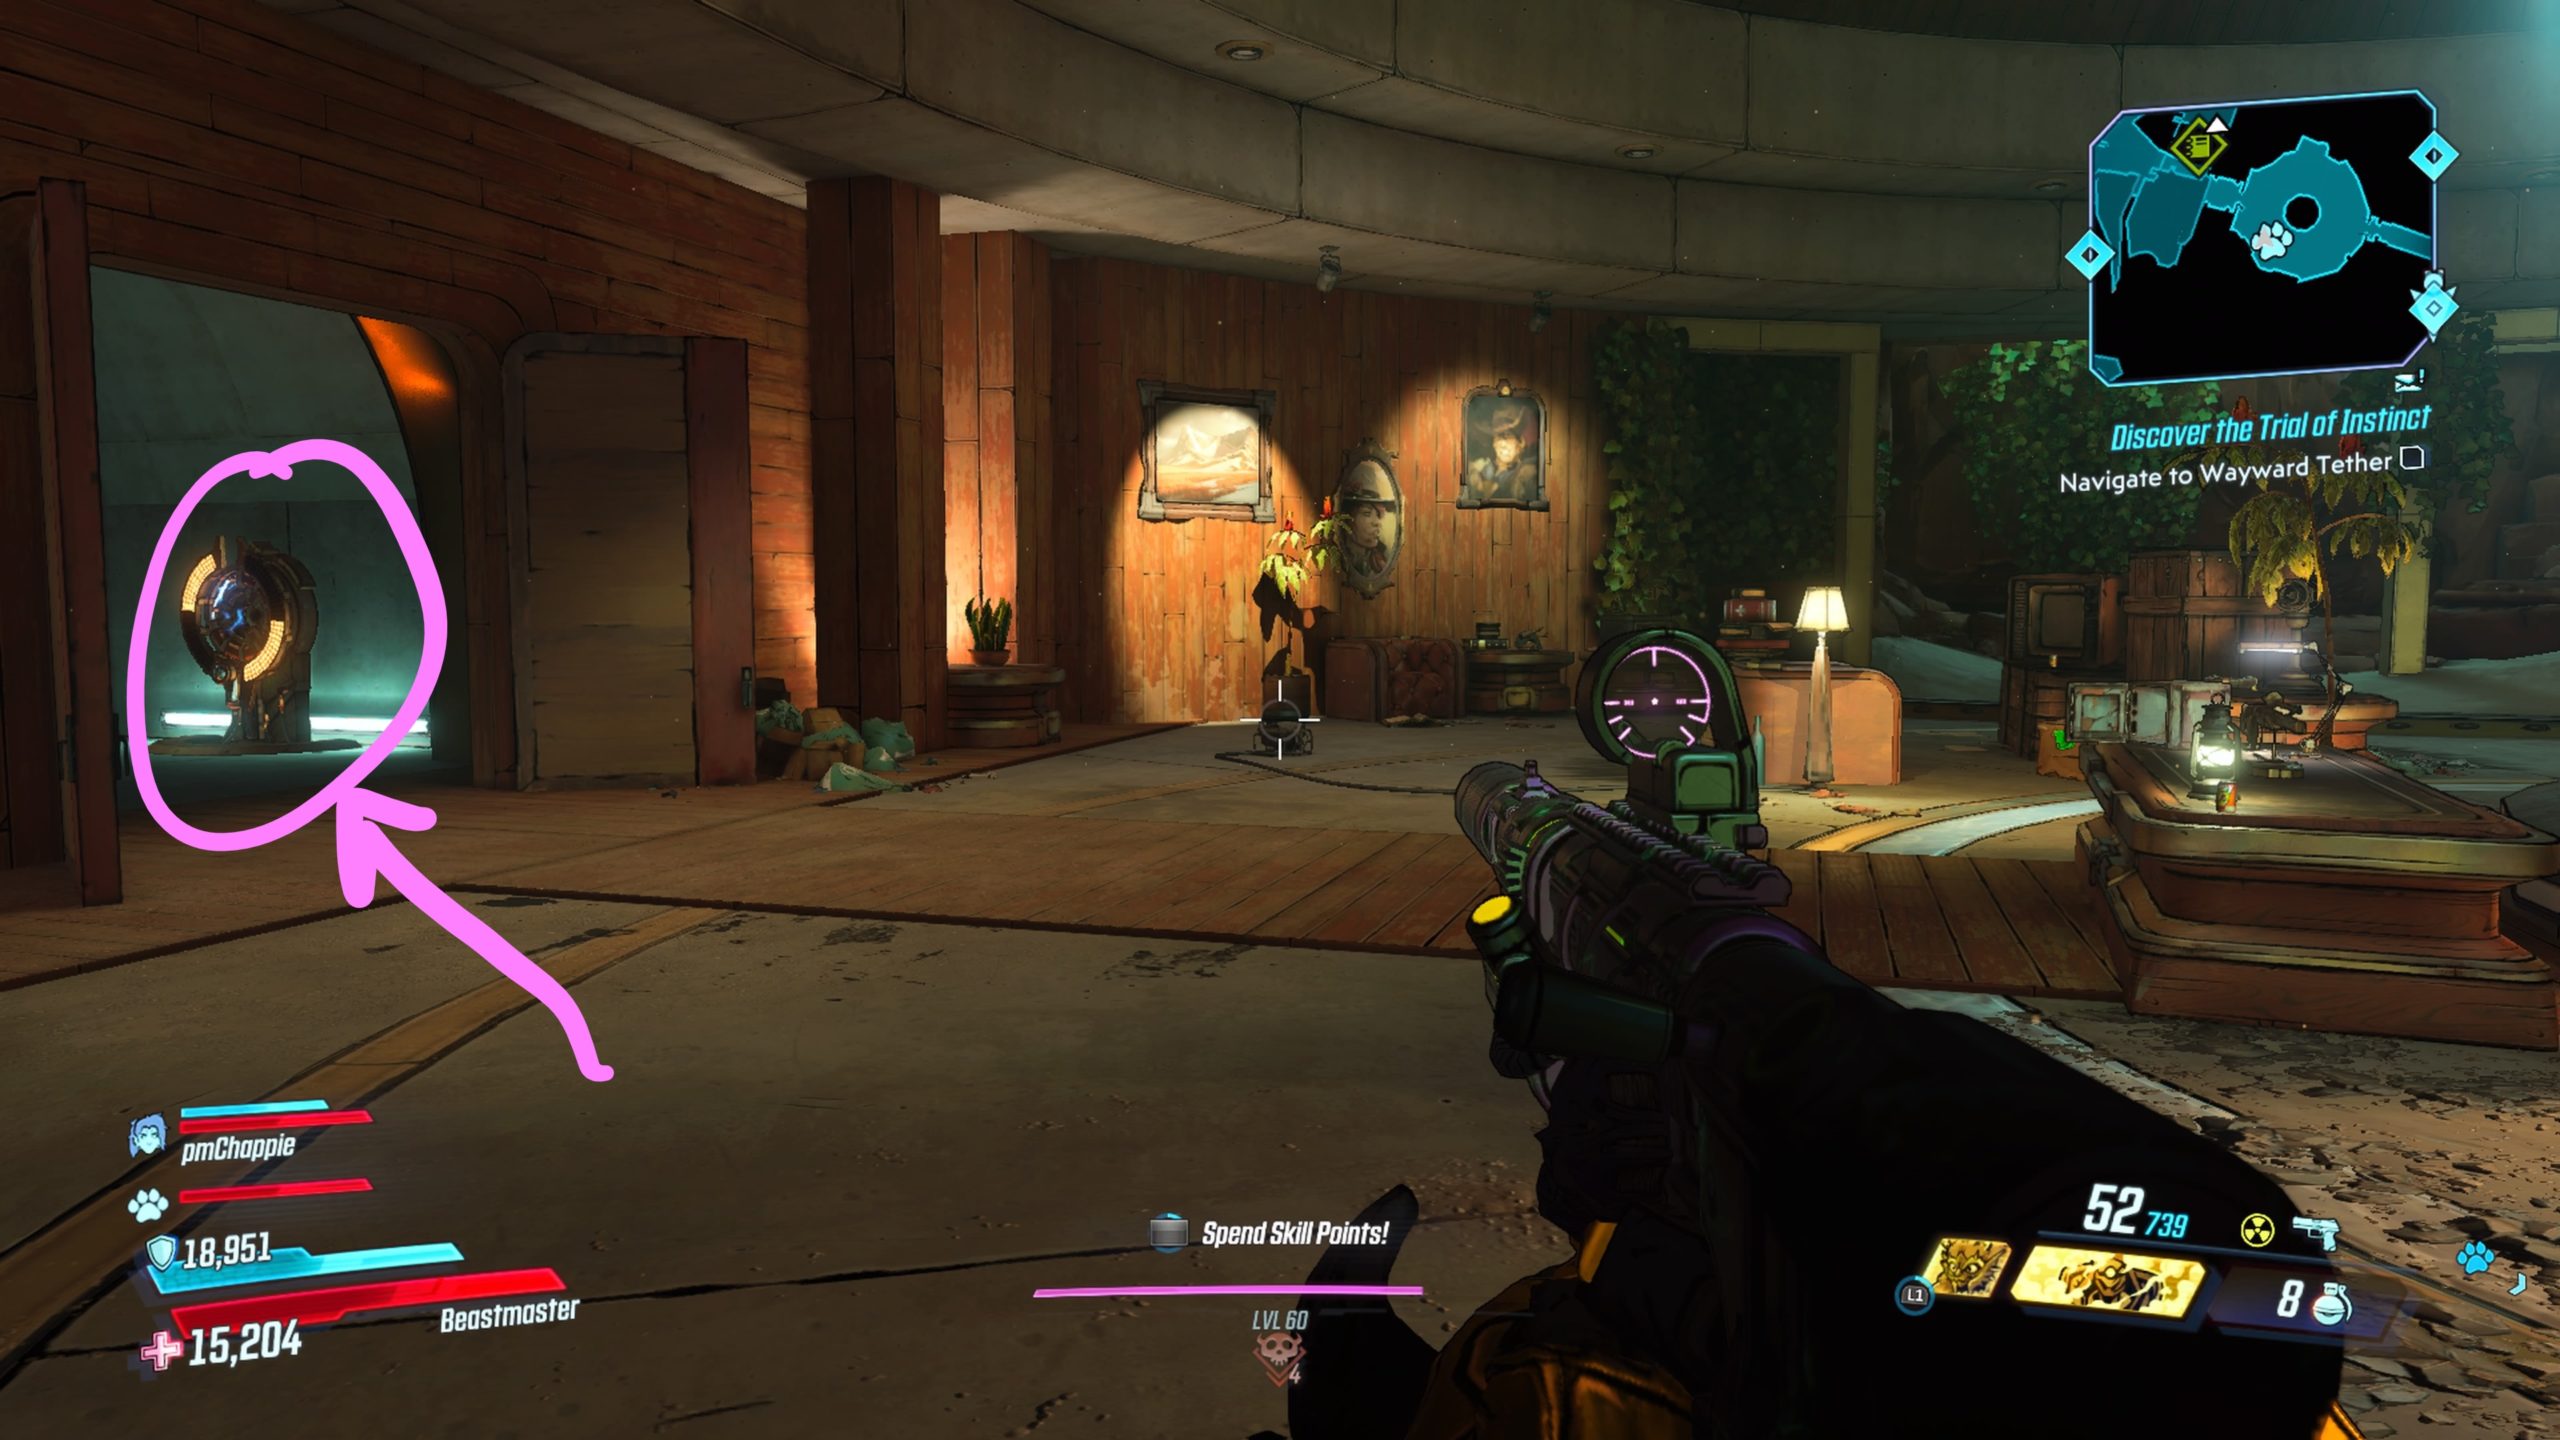
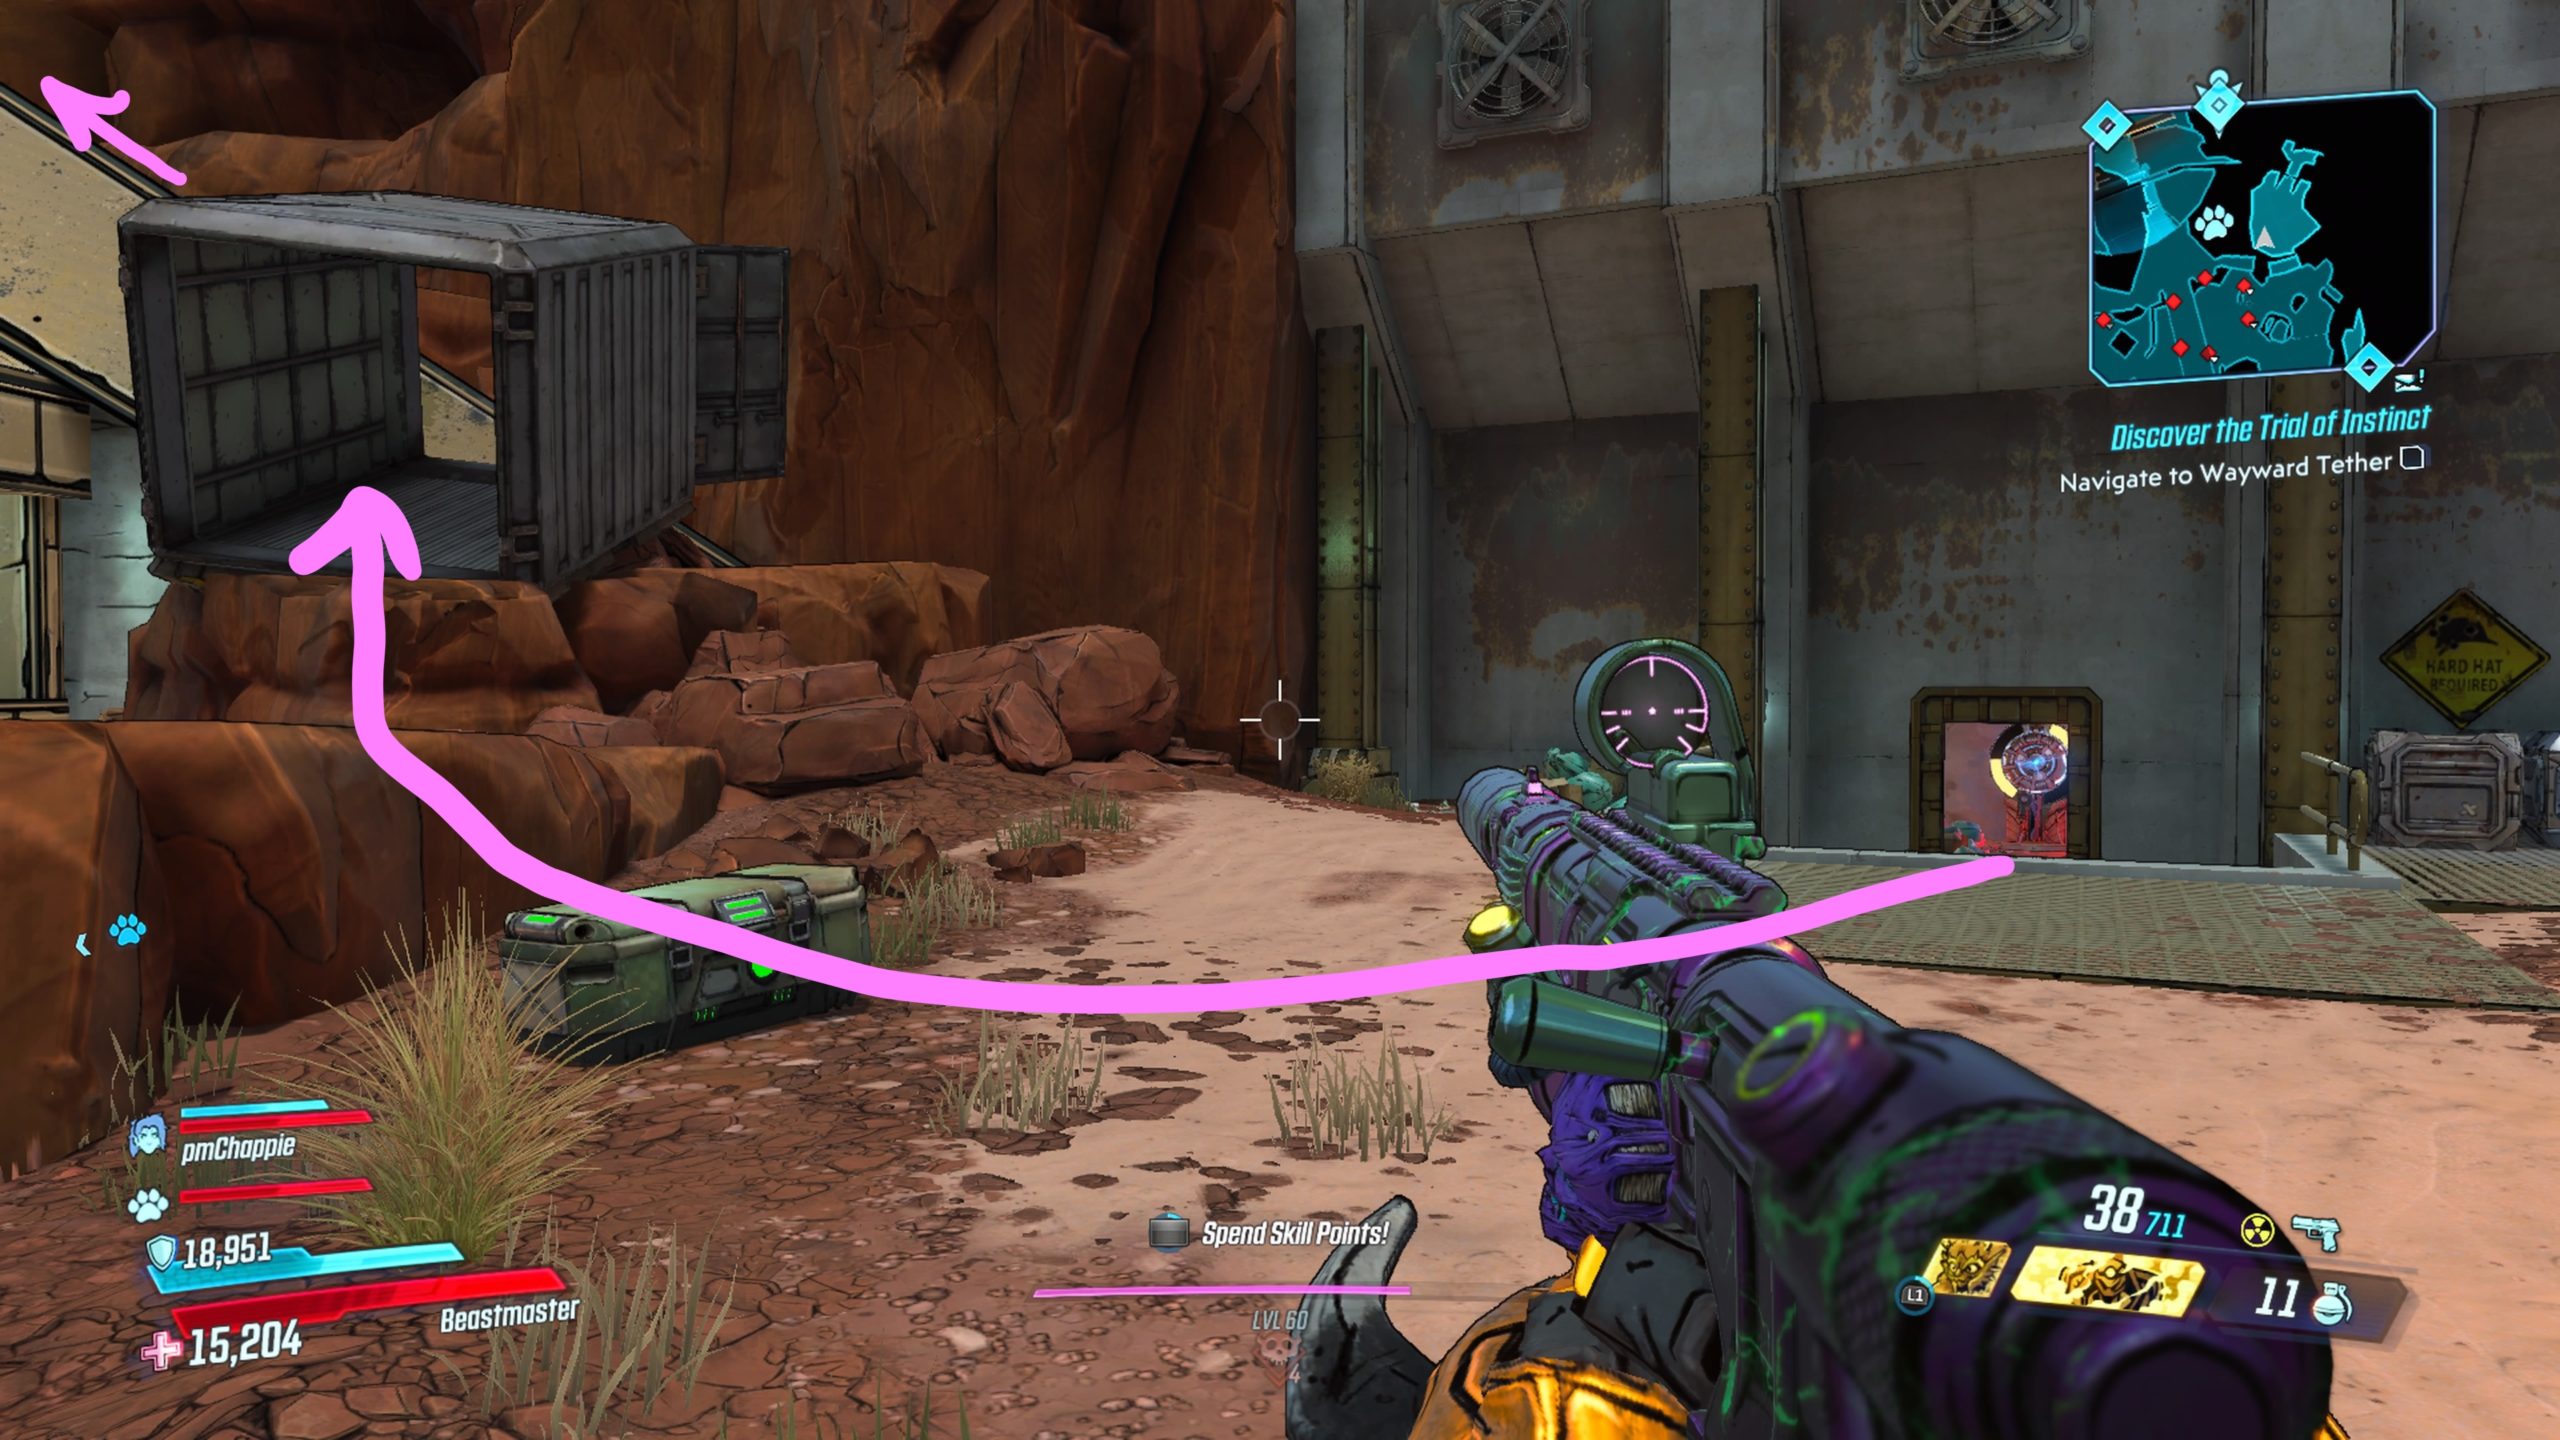
Use the portal near the reception desk in The Facility then head straight ahead through a doorway. Take an immediate right and go through a shipping container. Walk up the thin metal path to reach the roof containing the journal.
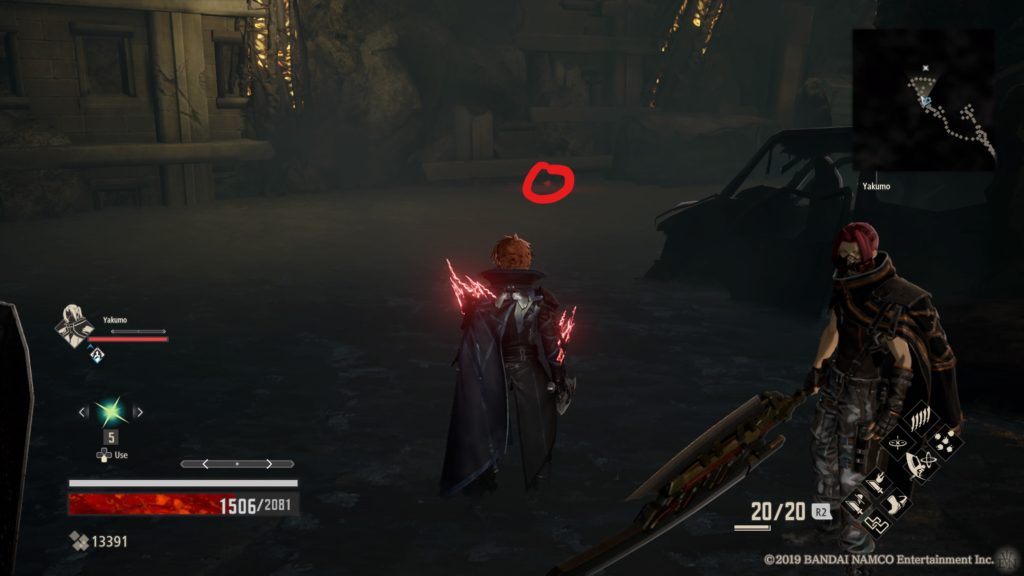
Bloodsun Canyon #2
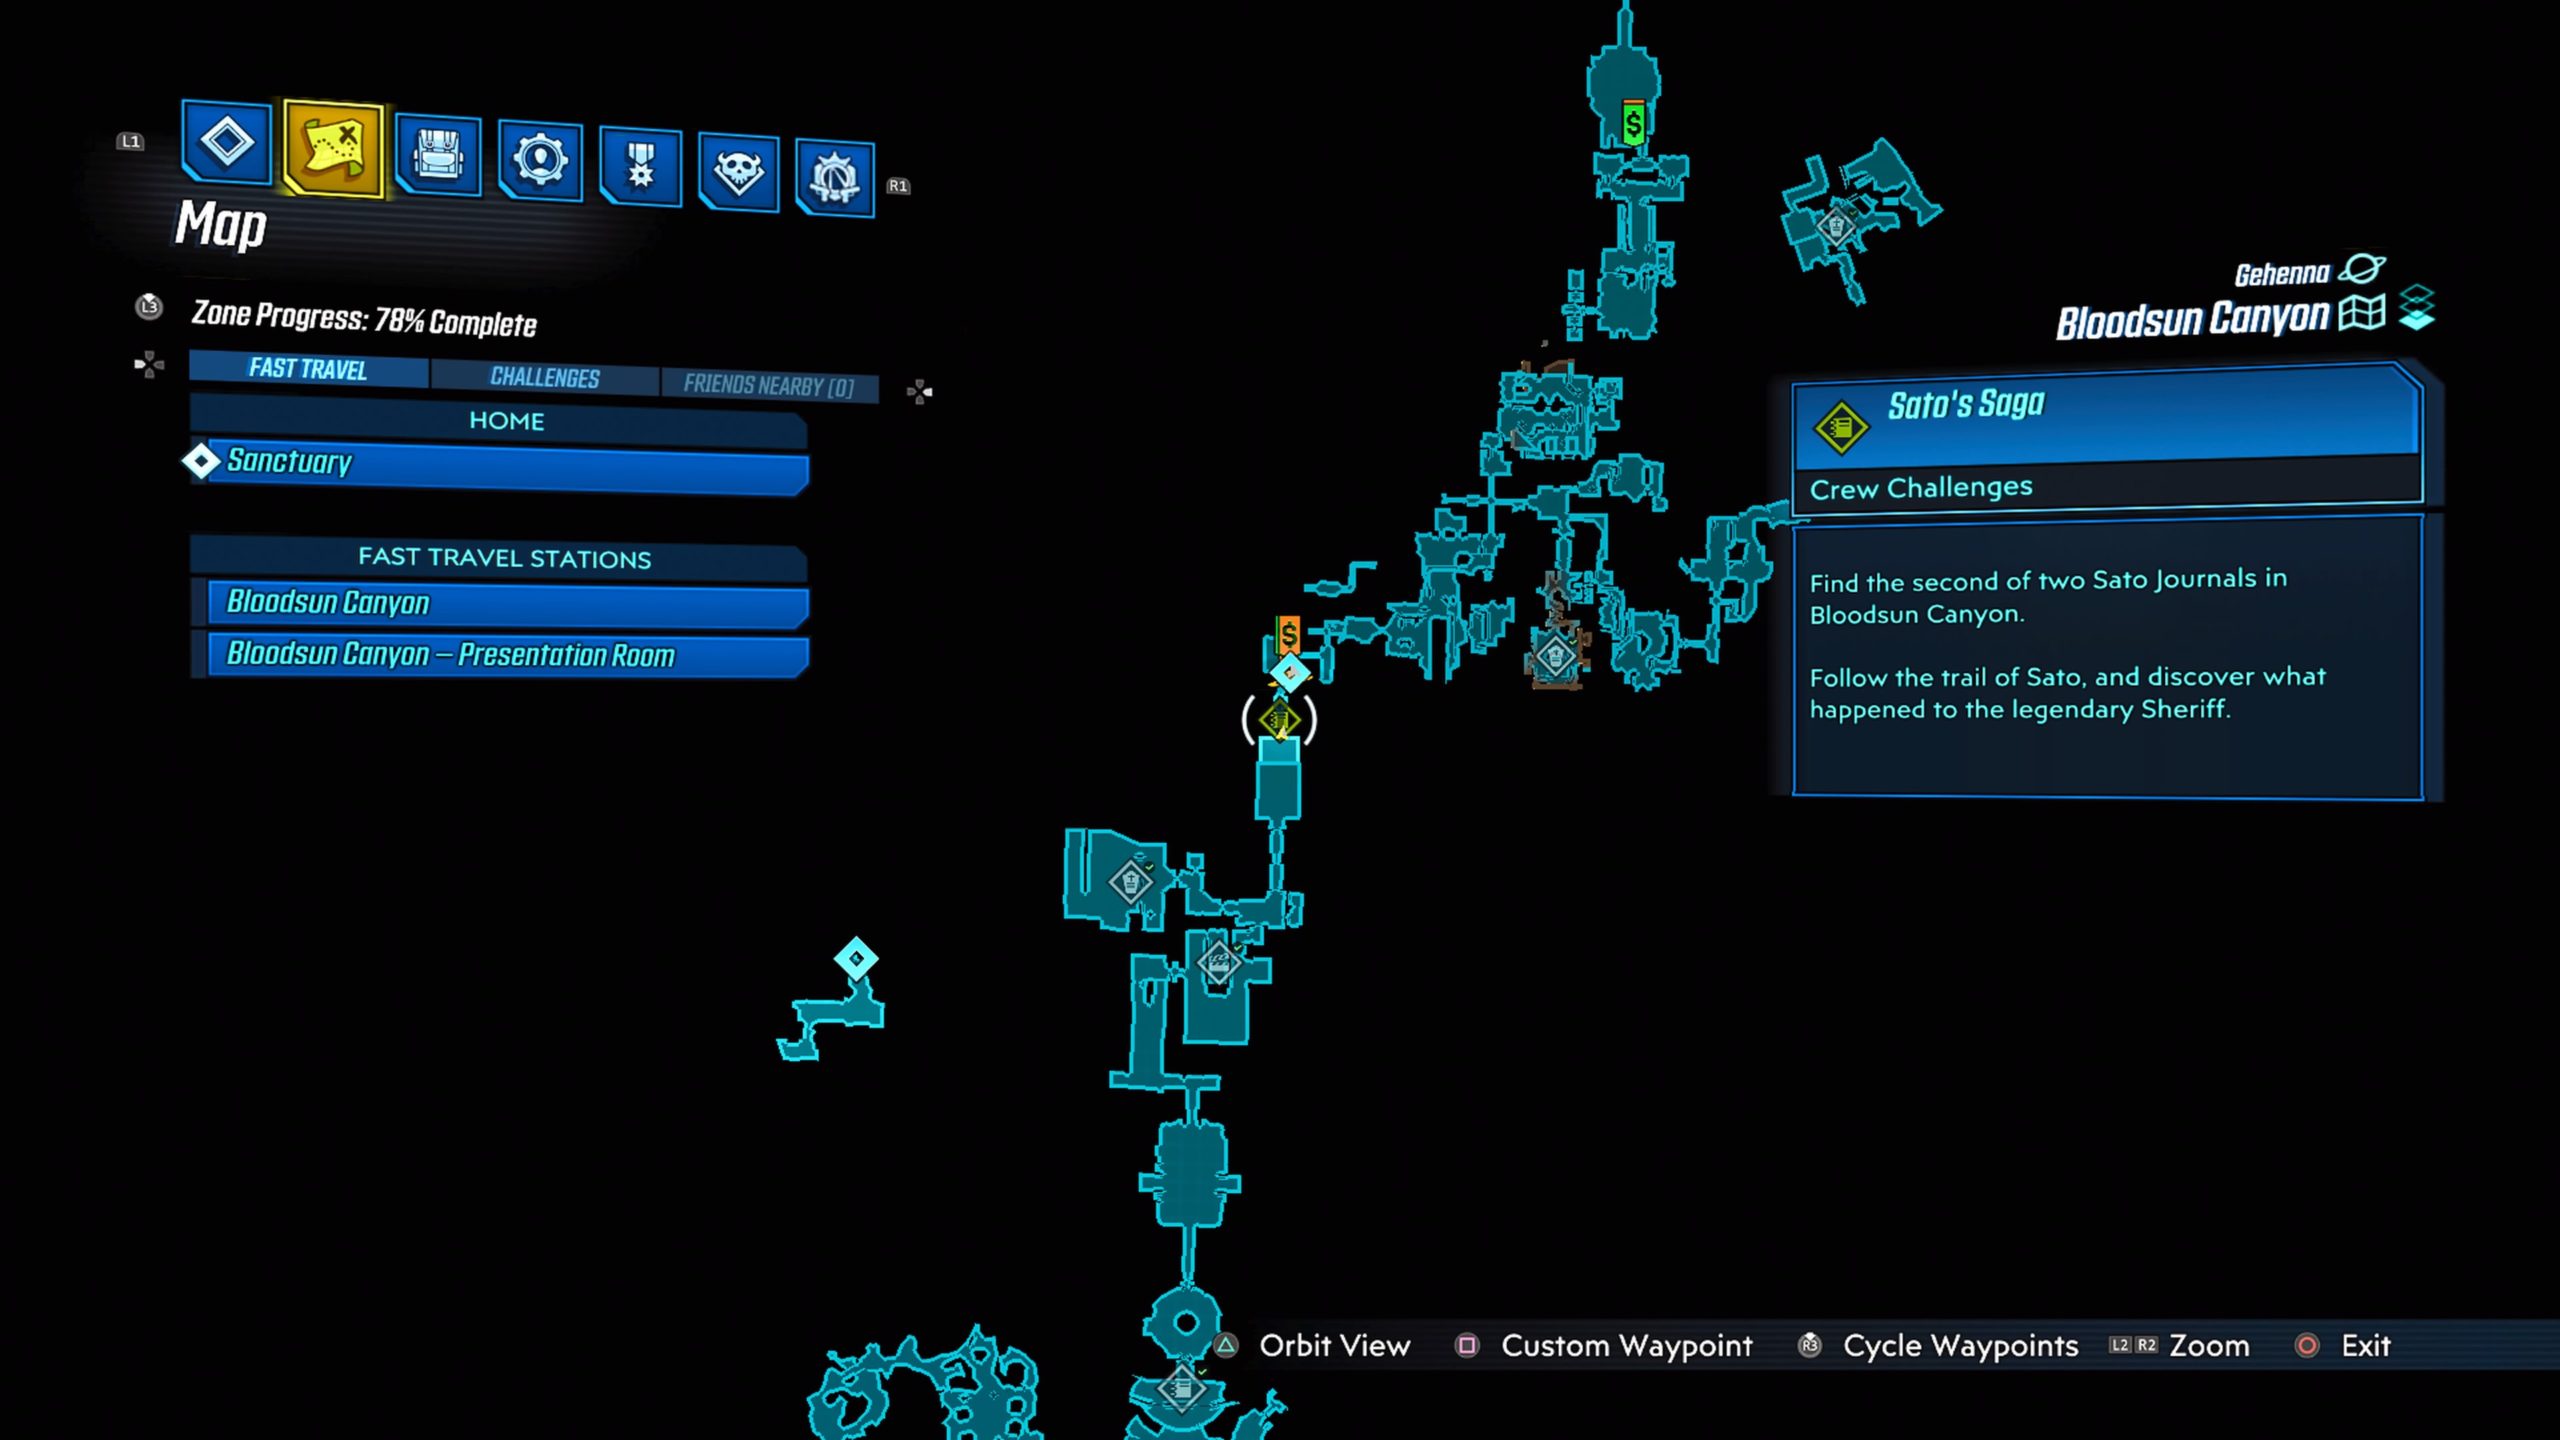
This journal is located south of the Presentation Room fast travel point. After coming down the elevator, jump over either side of the rail to find the journal underneath the walkway.
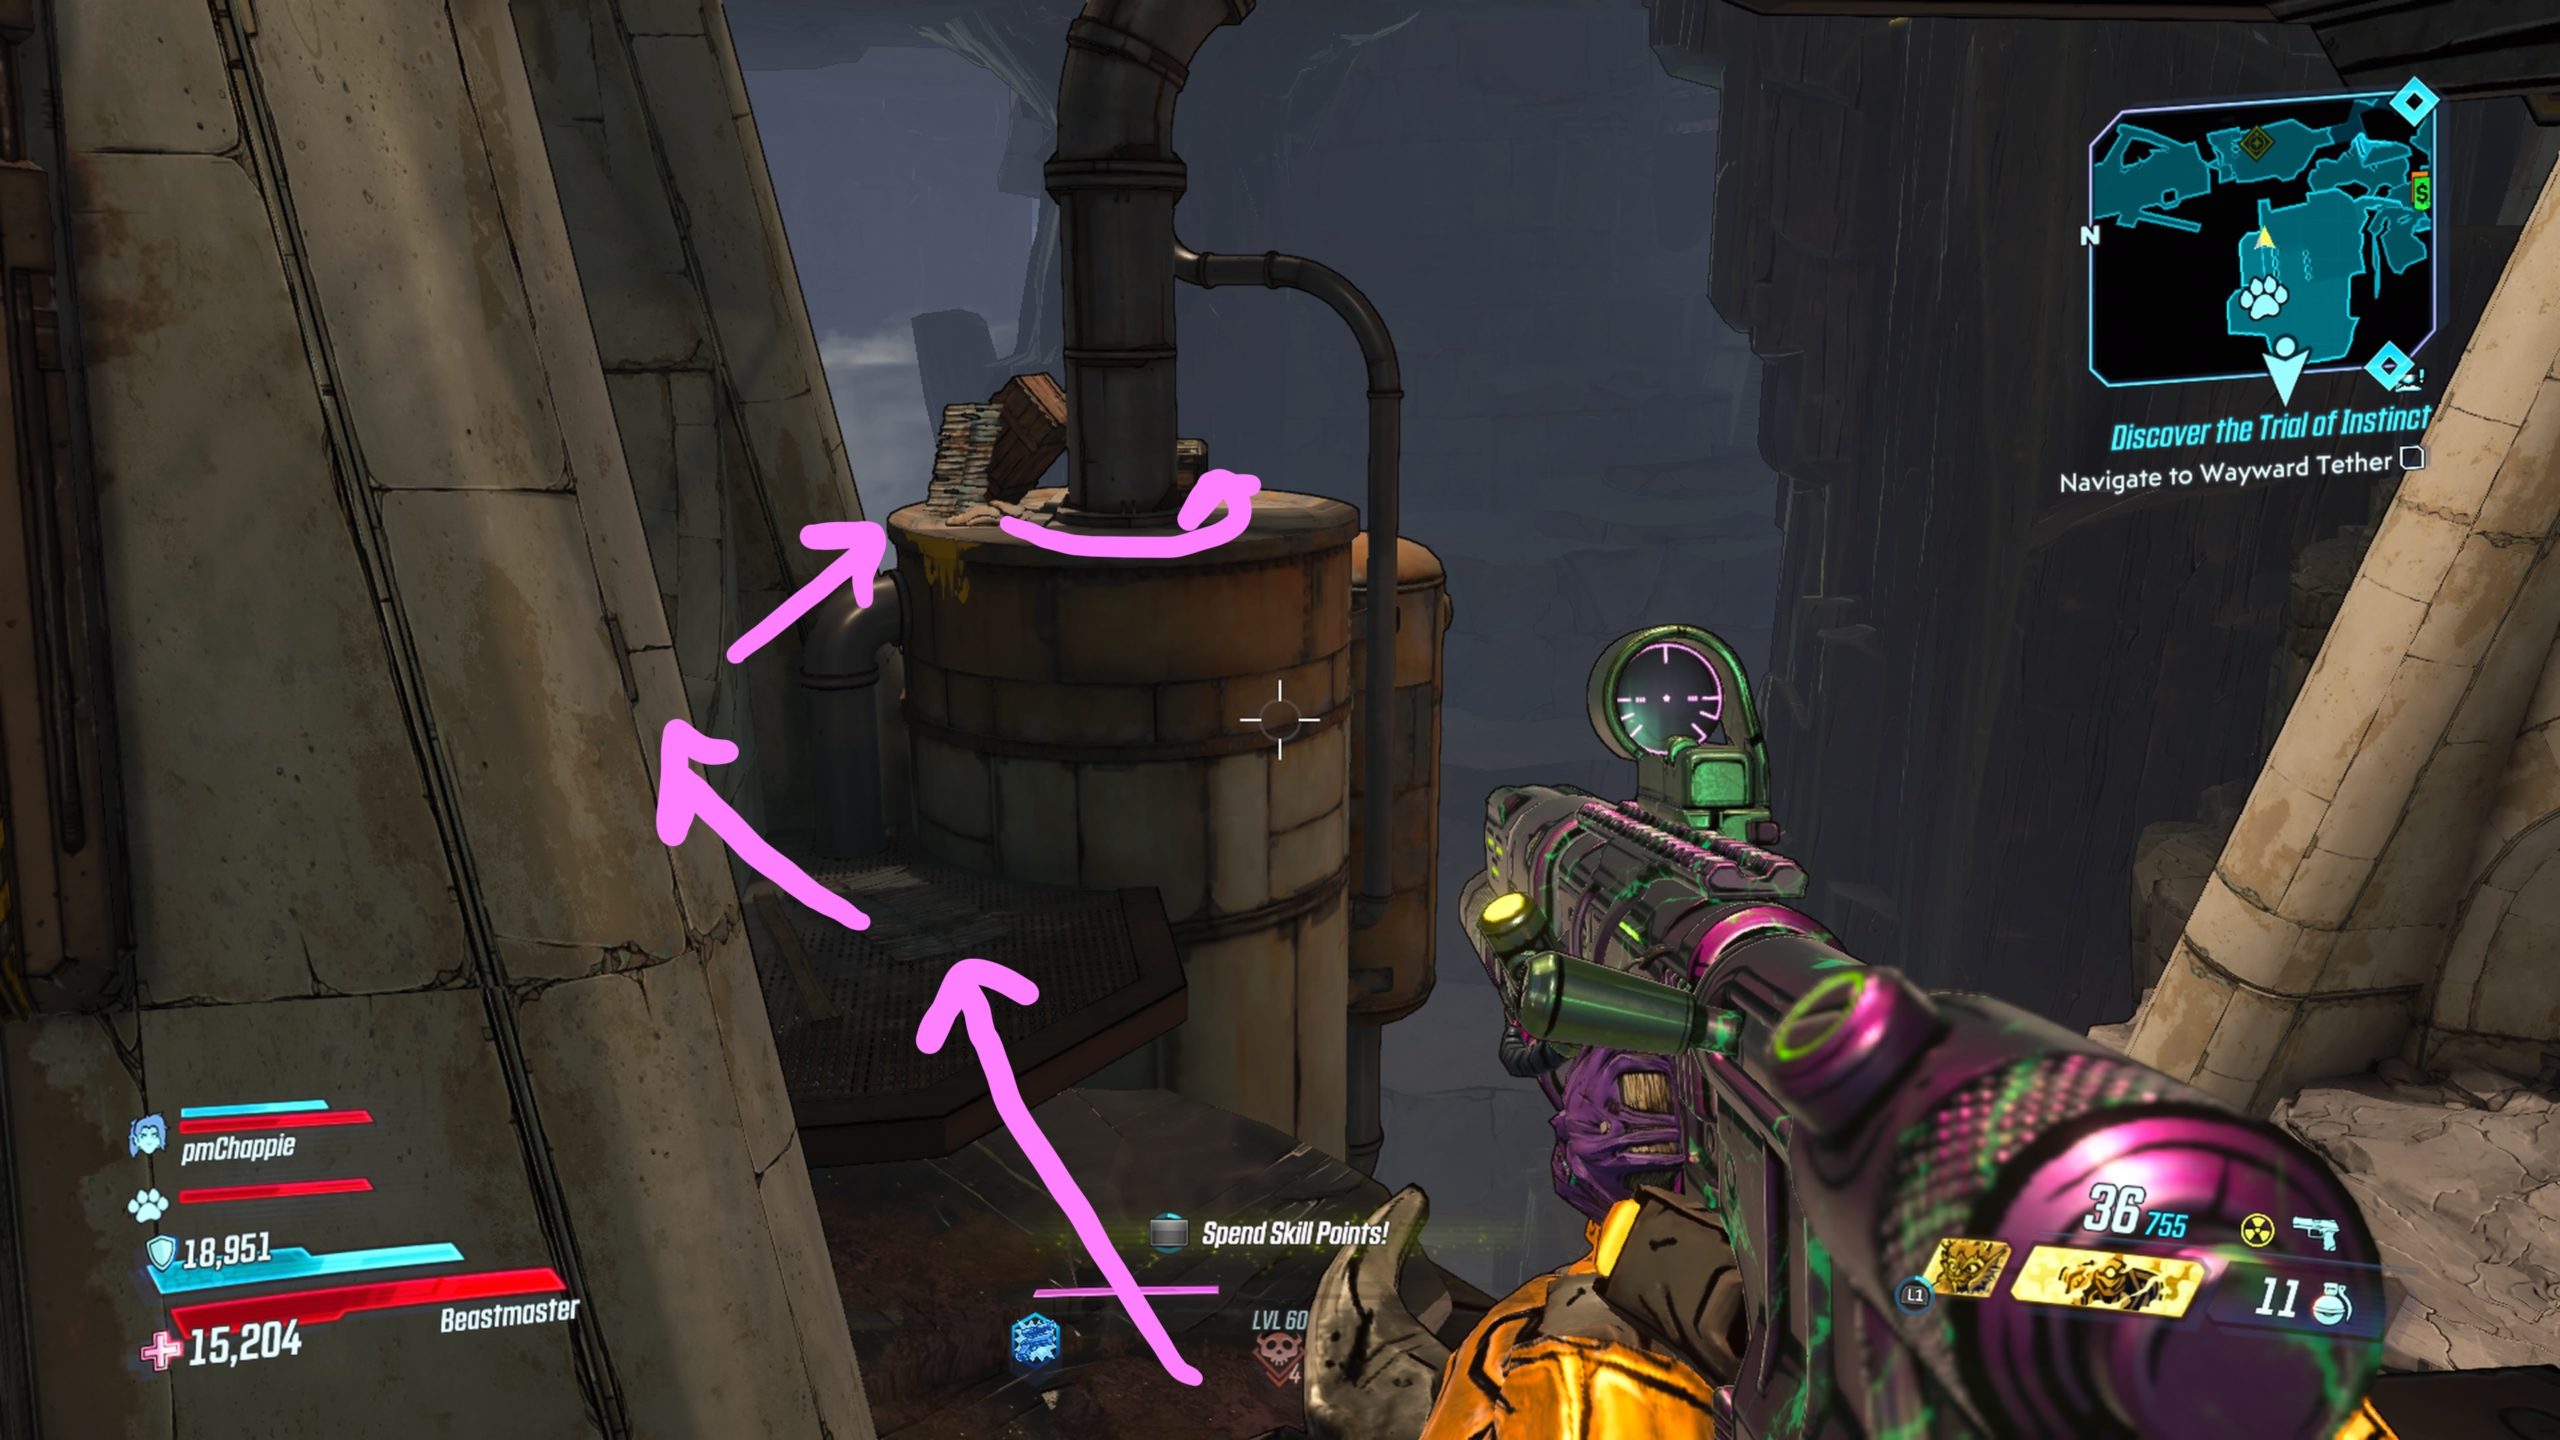
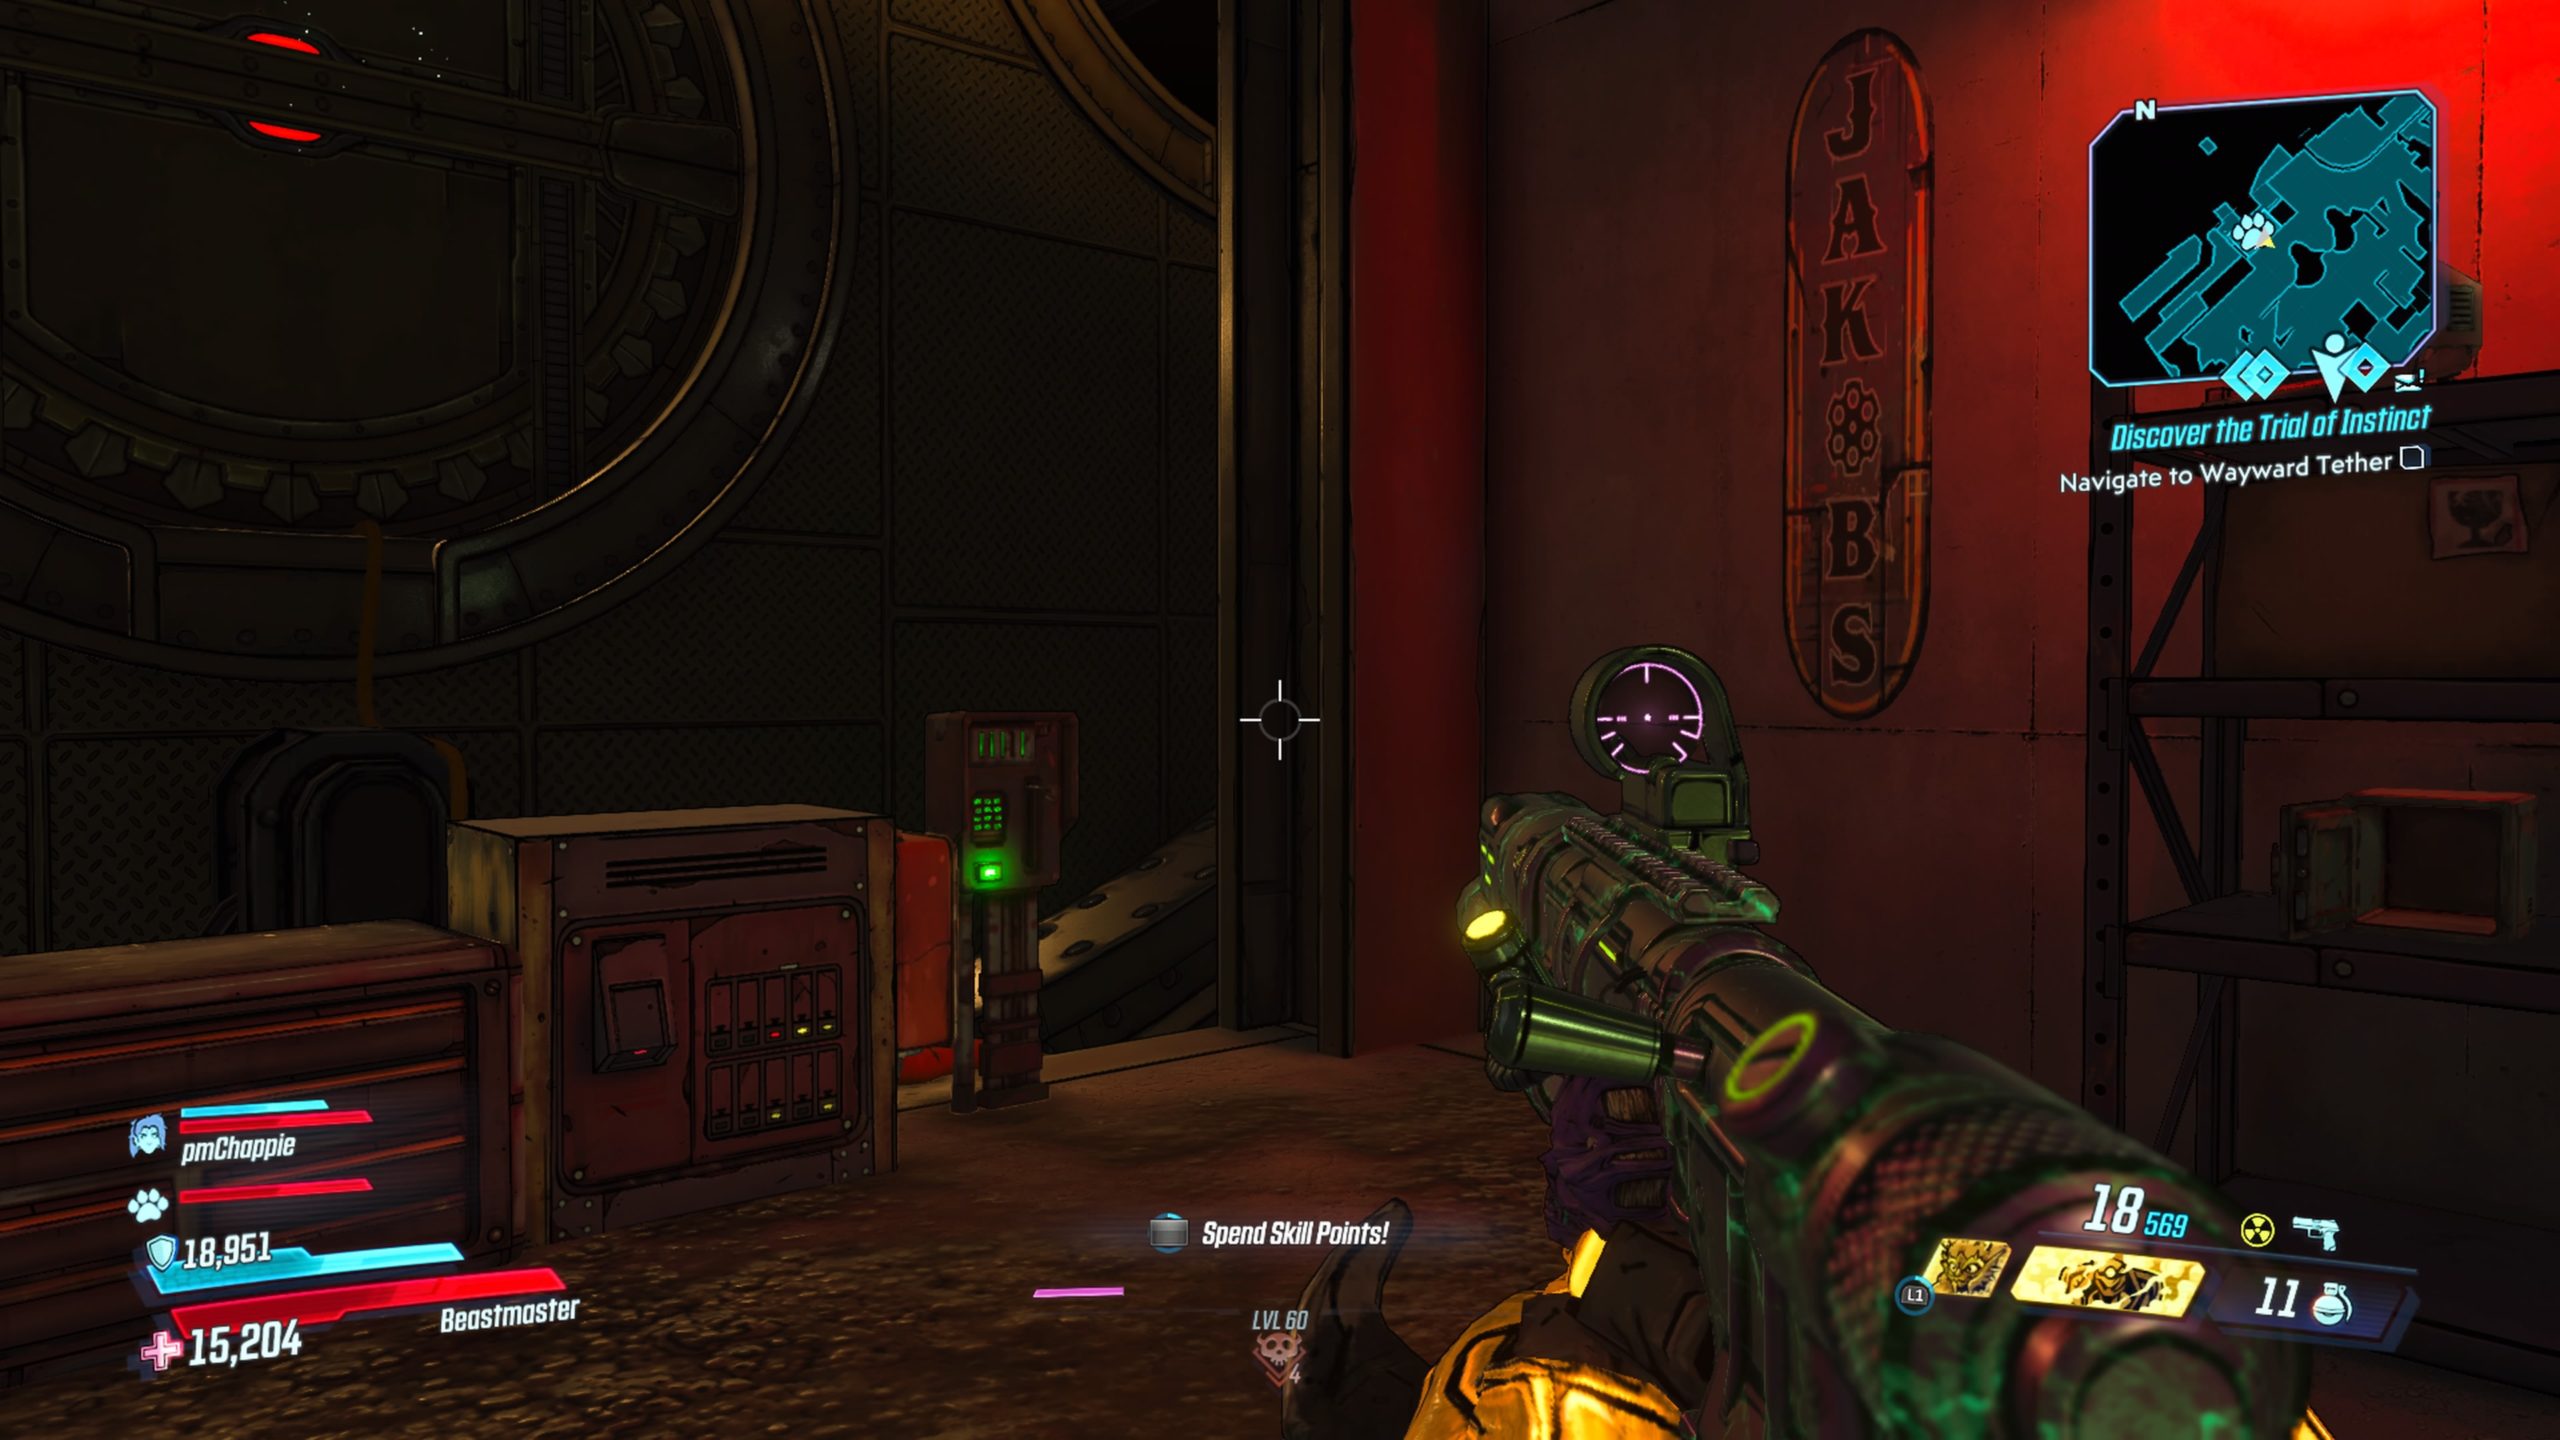
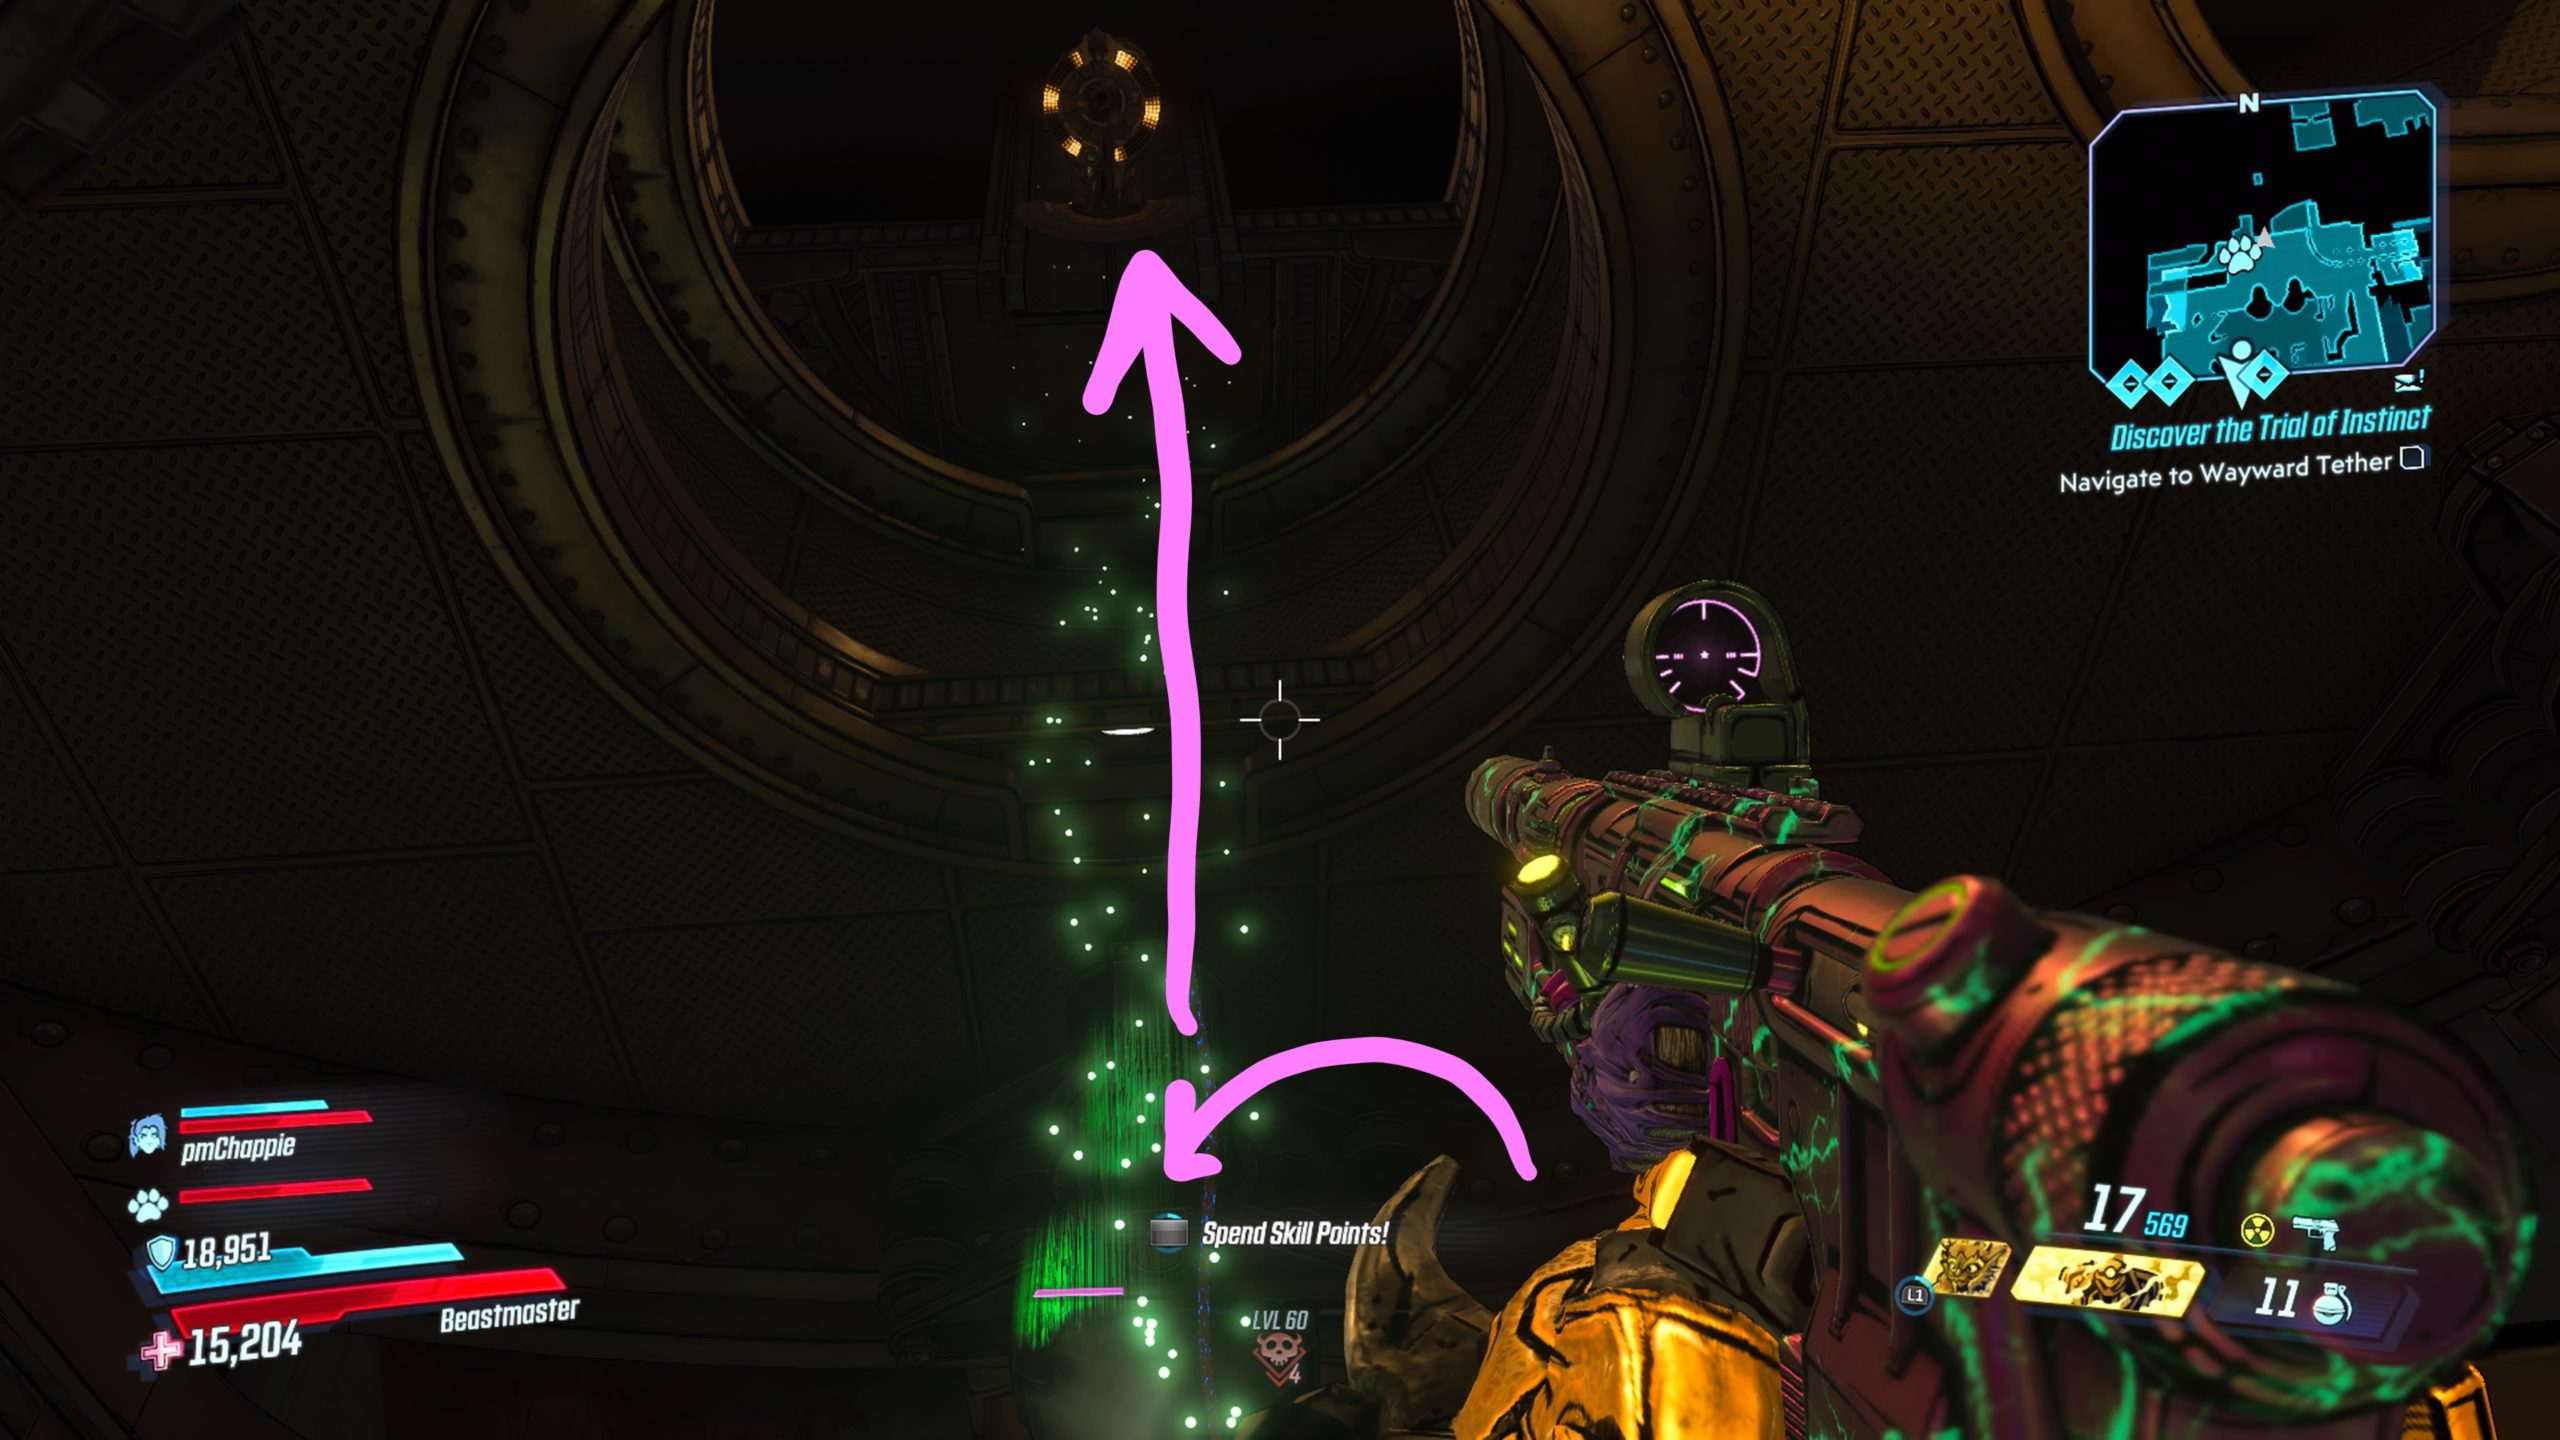
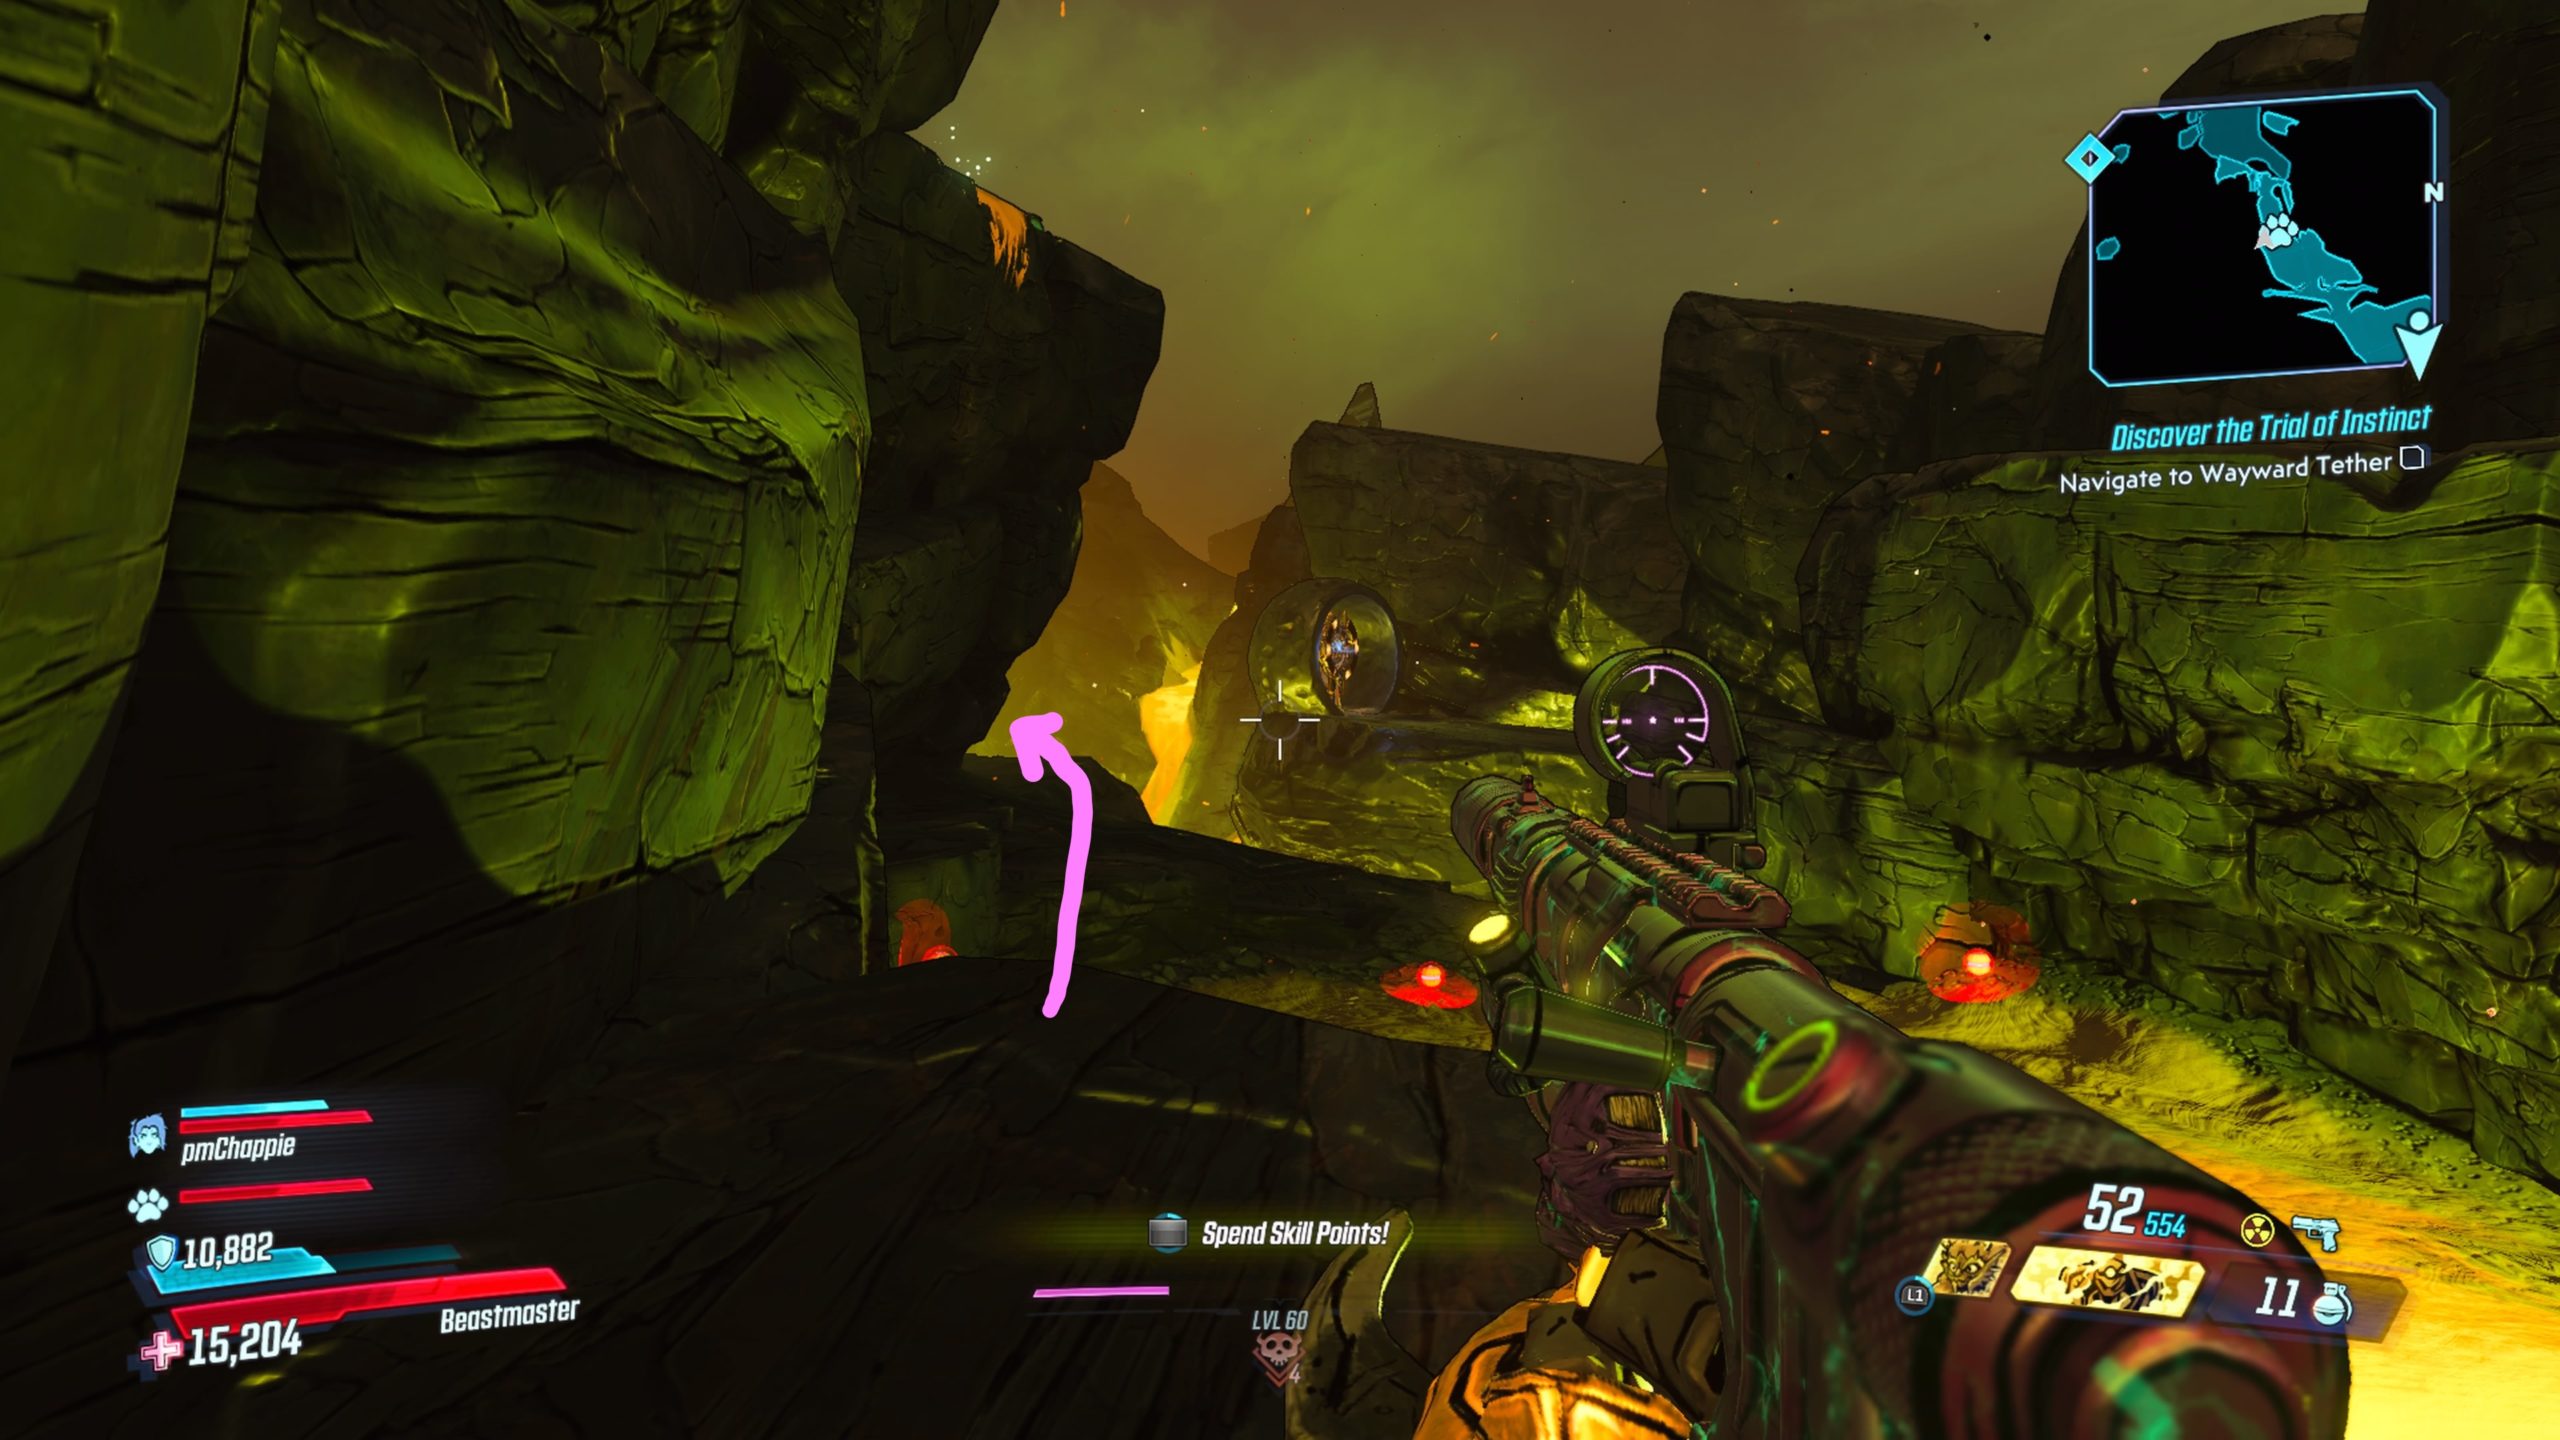
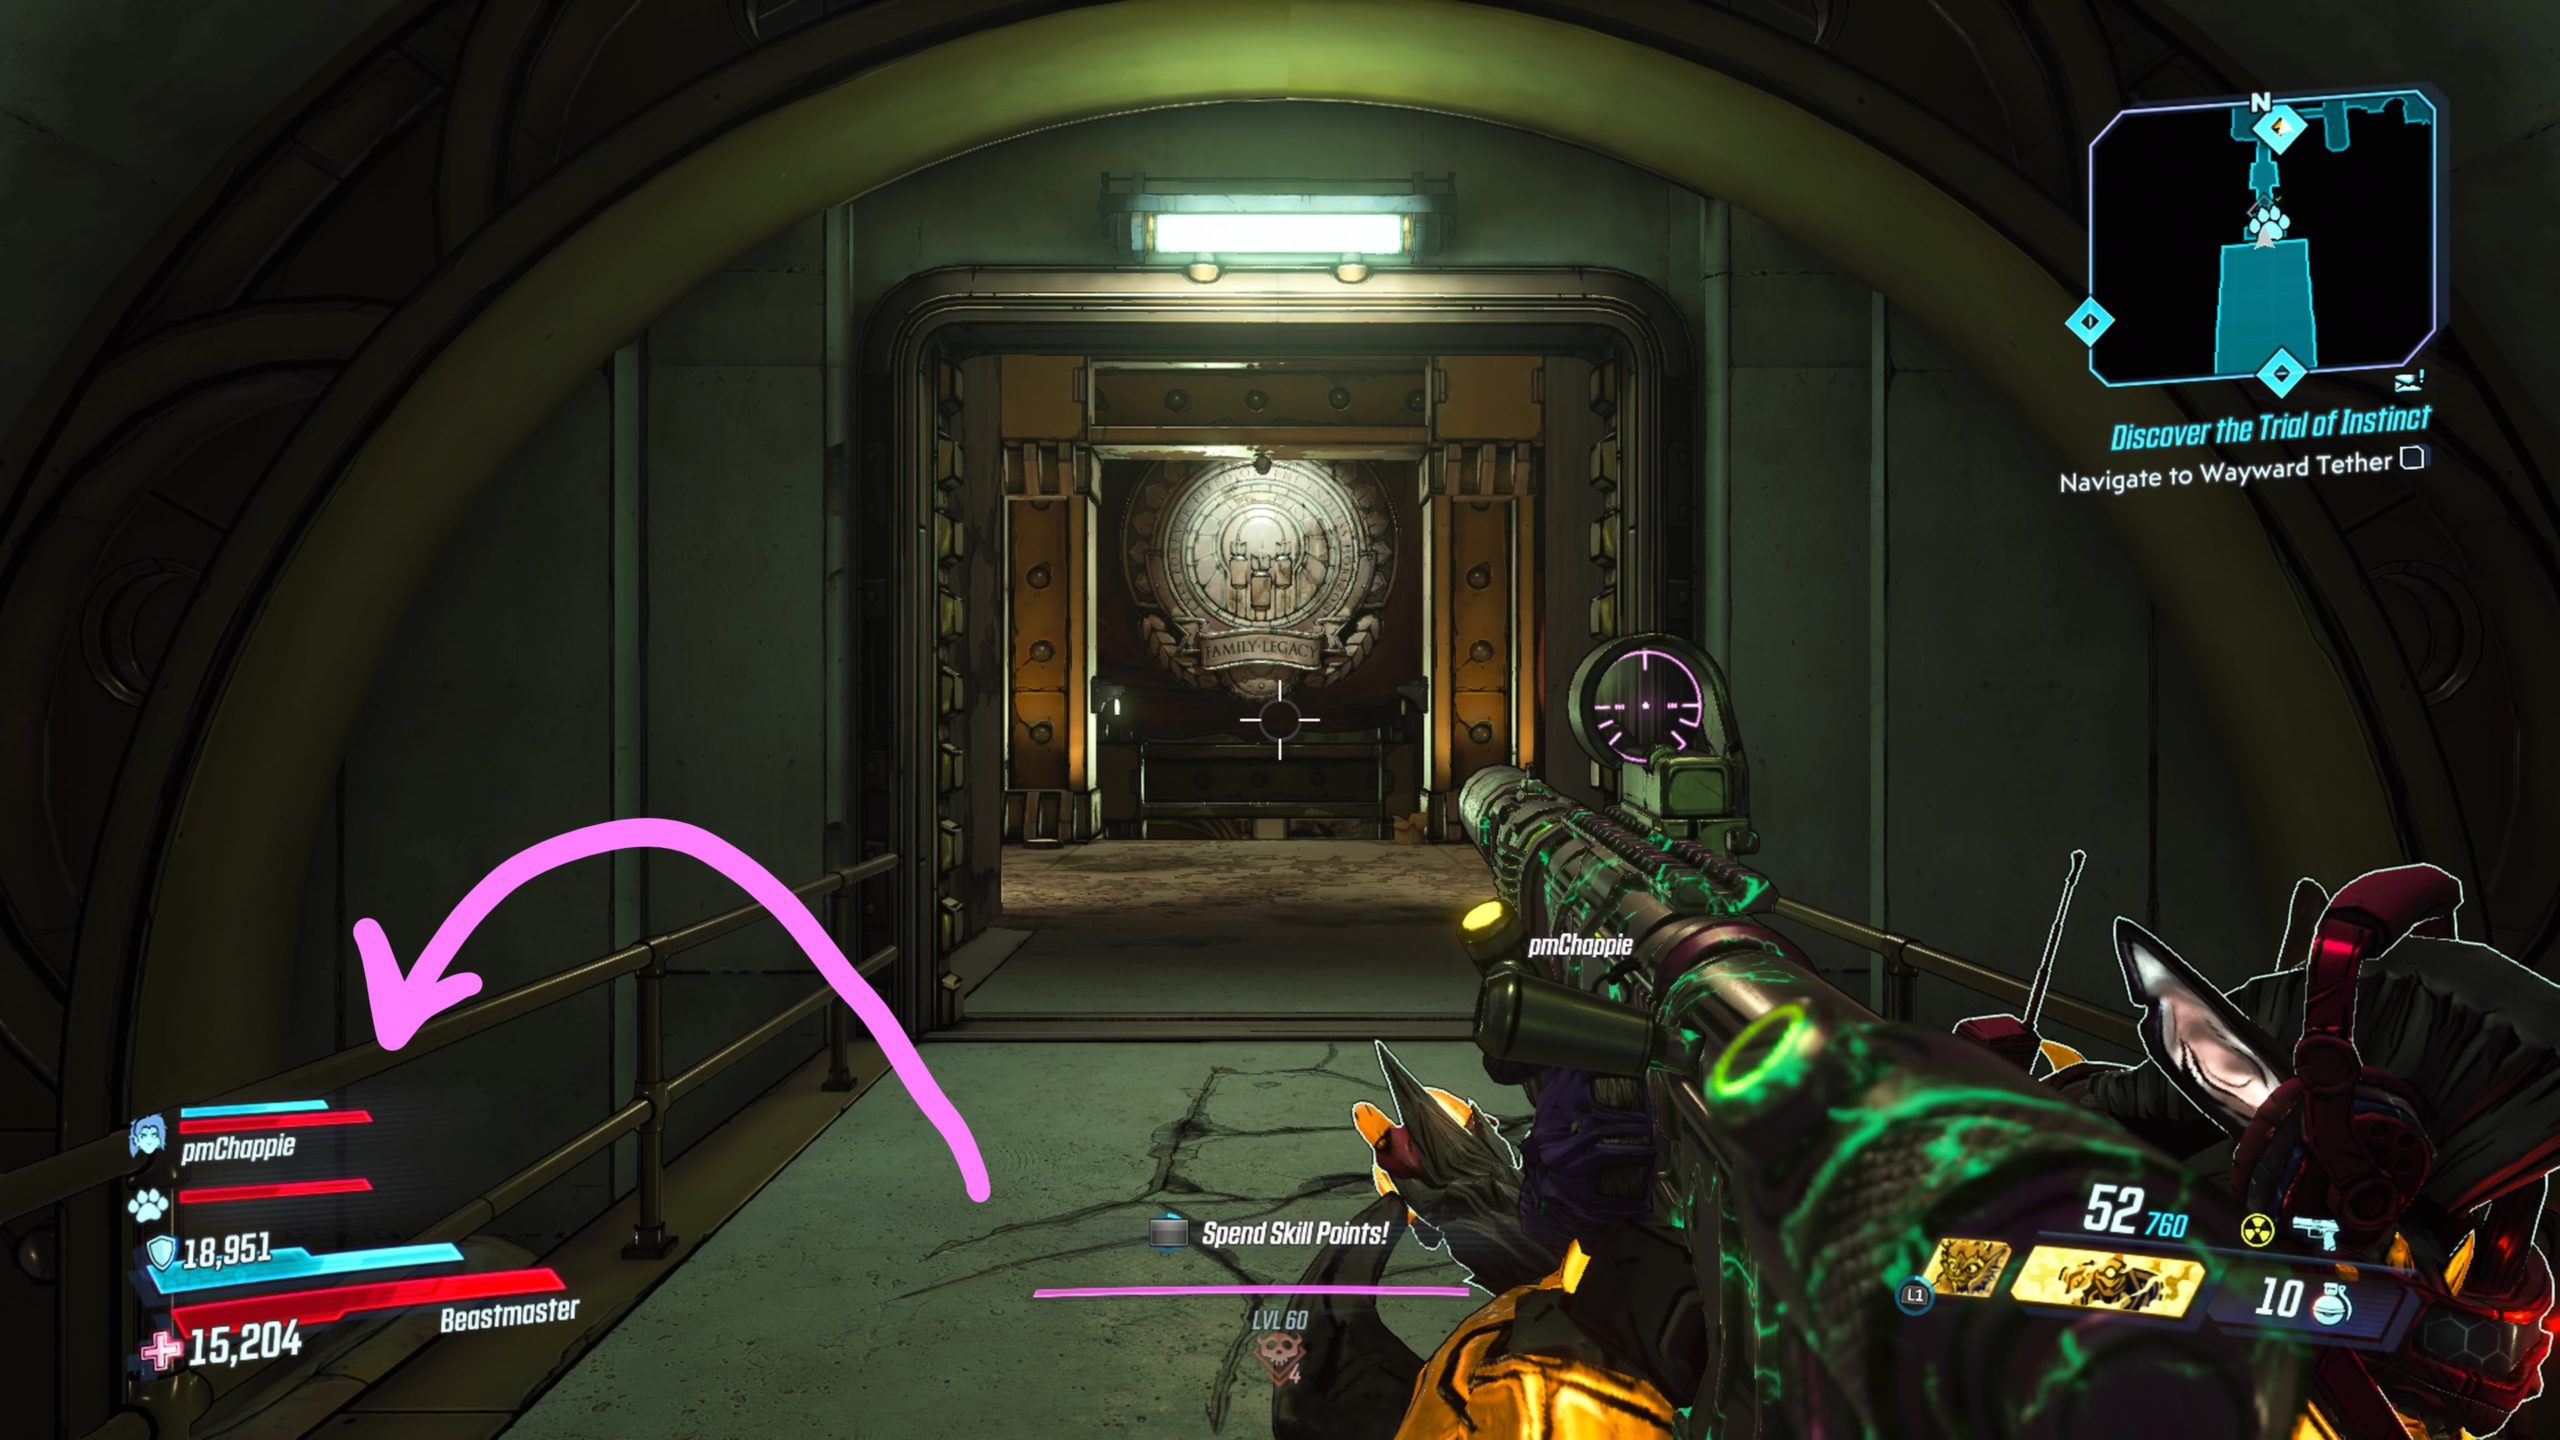
Bloodsun Canyon Cache
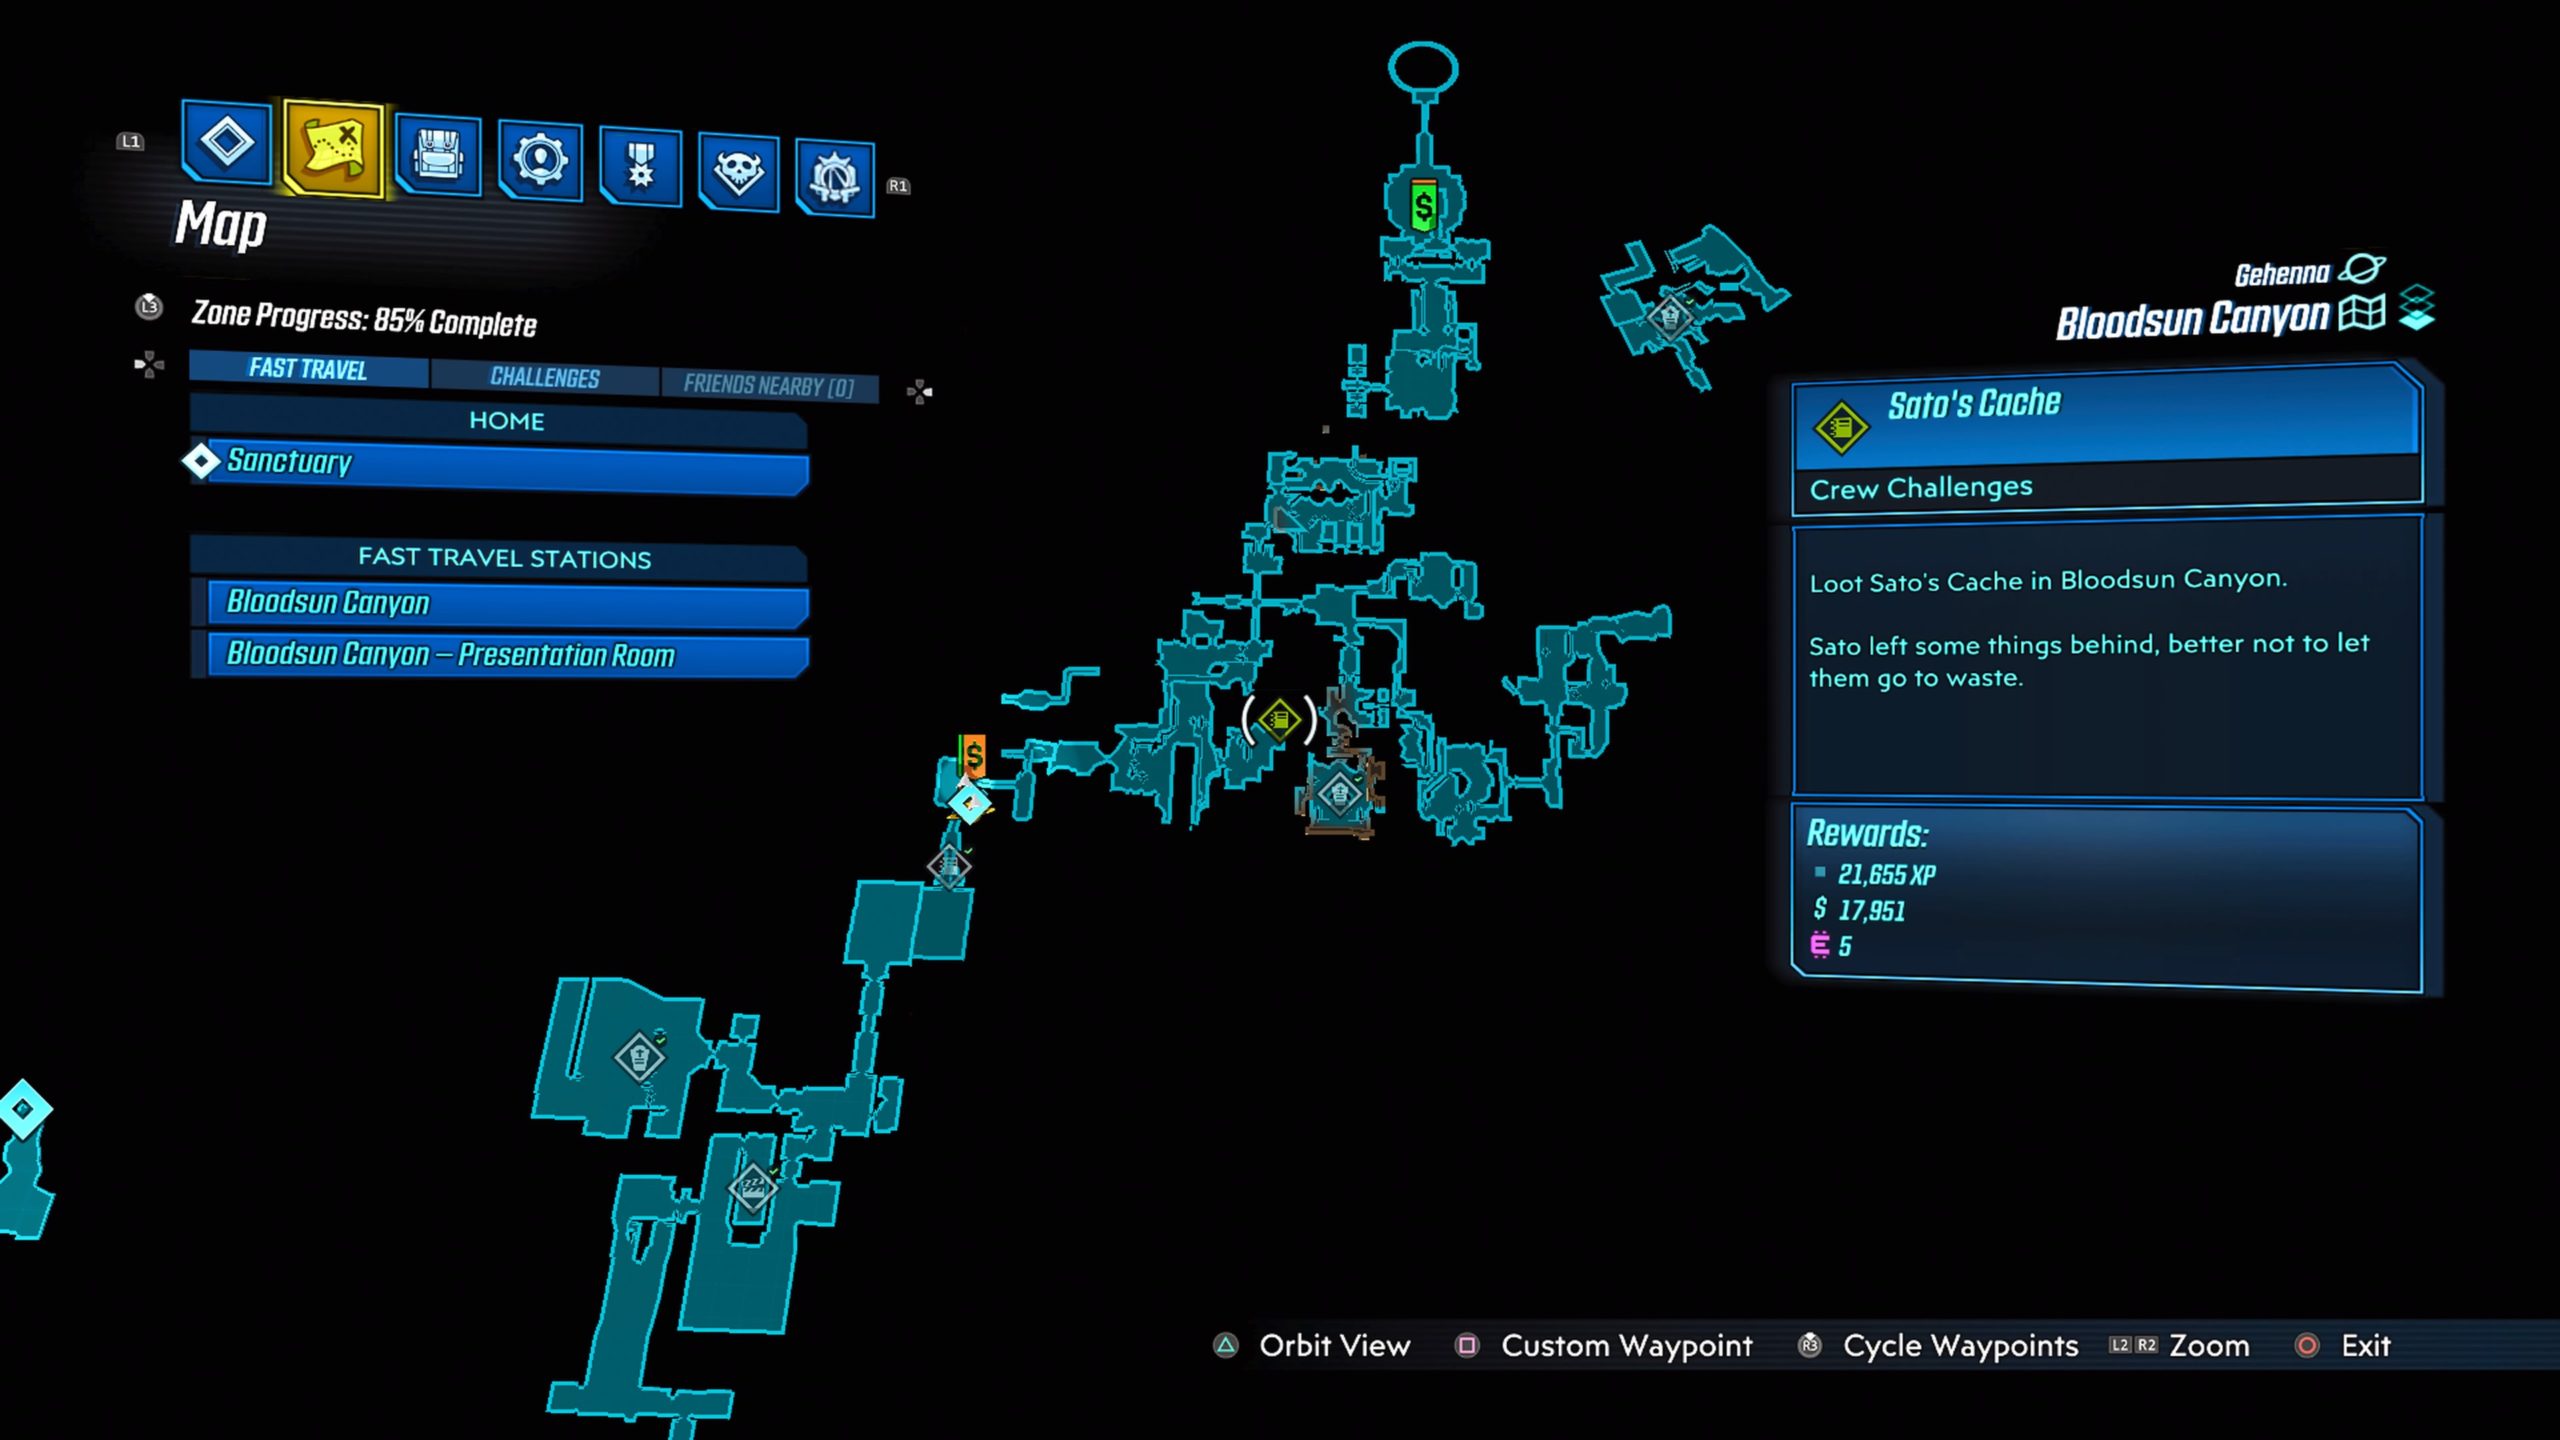
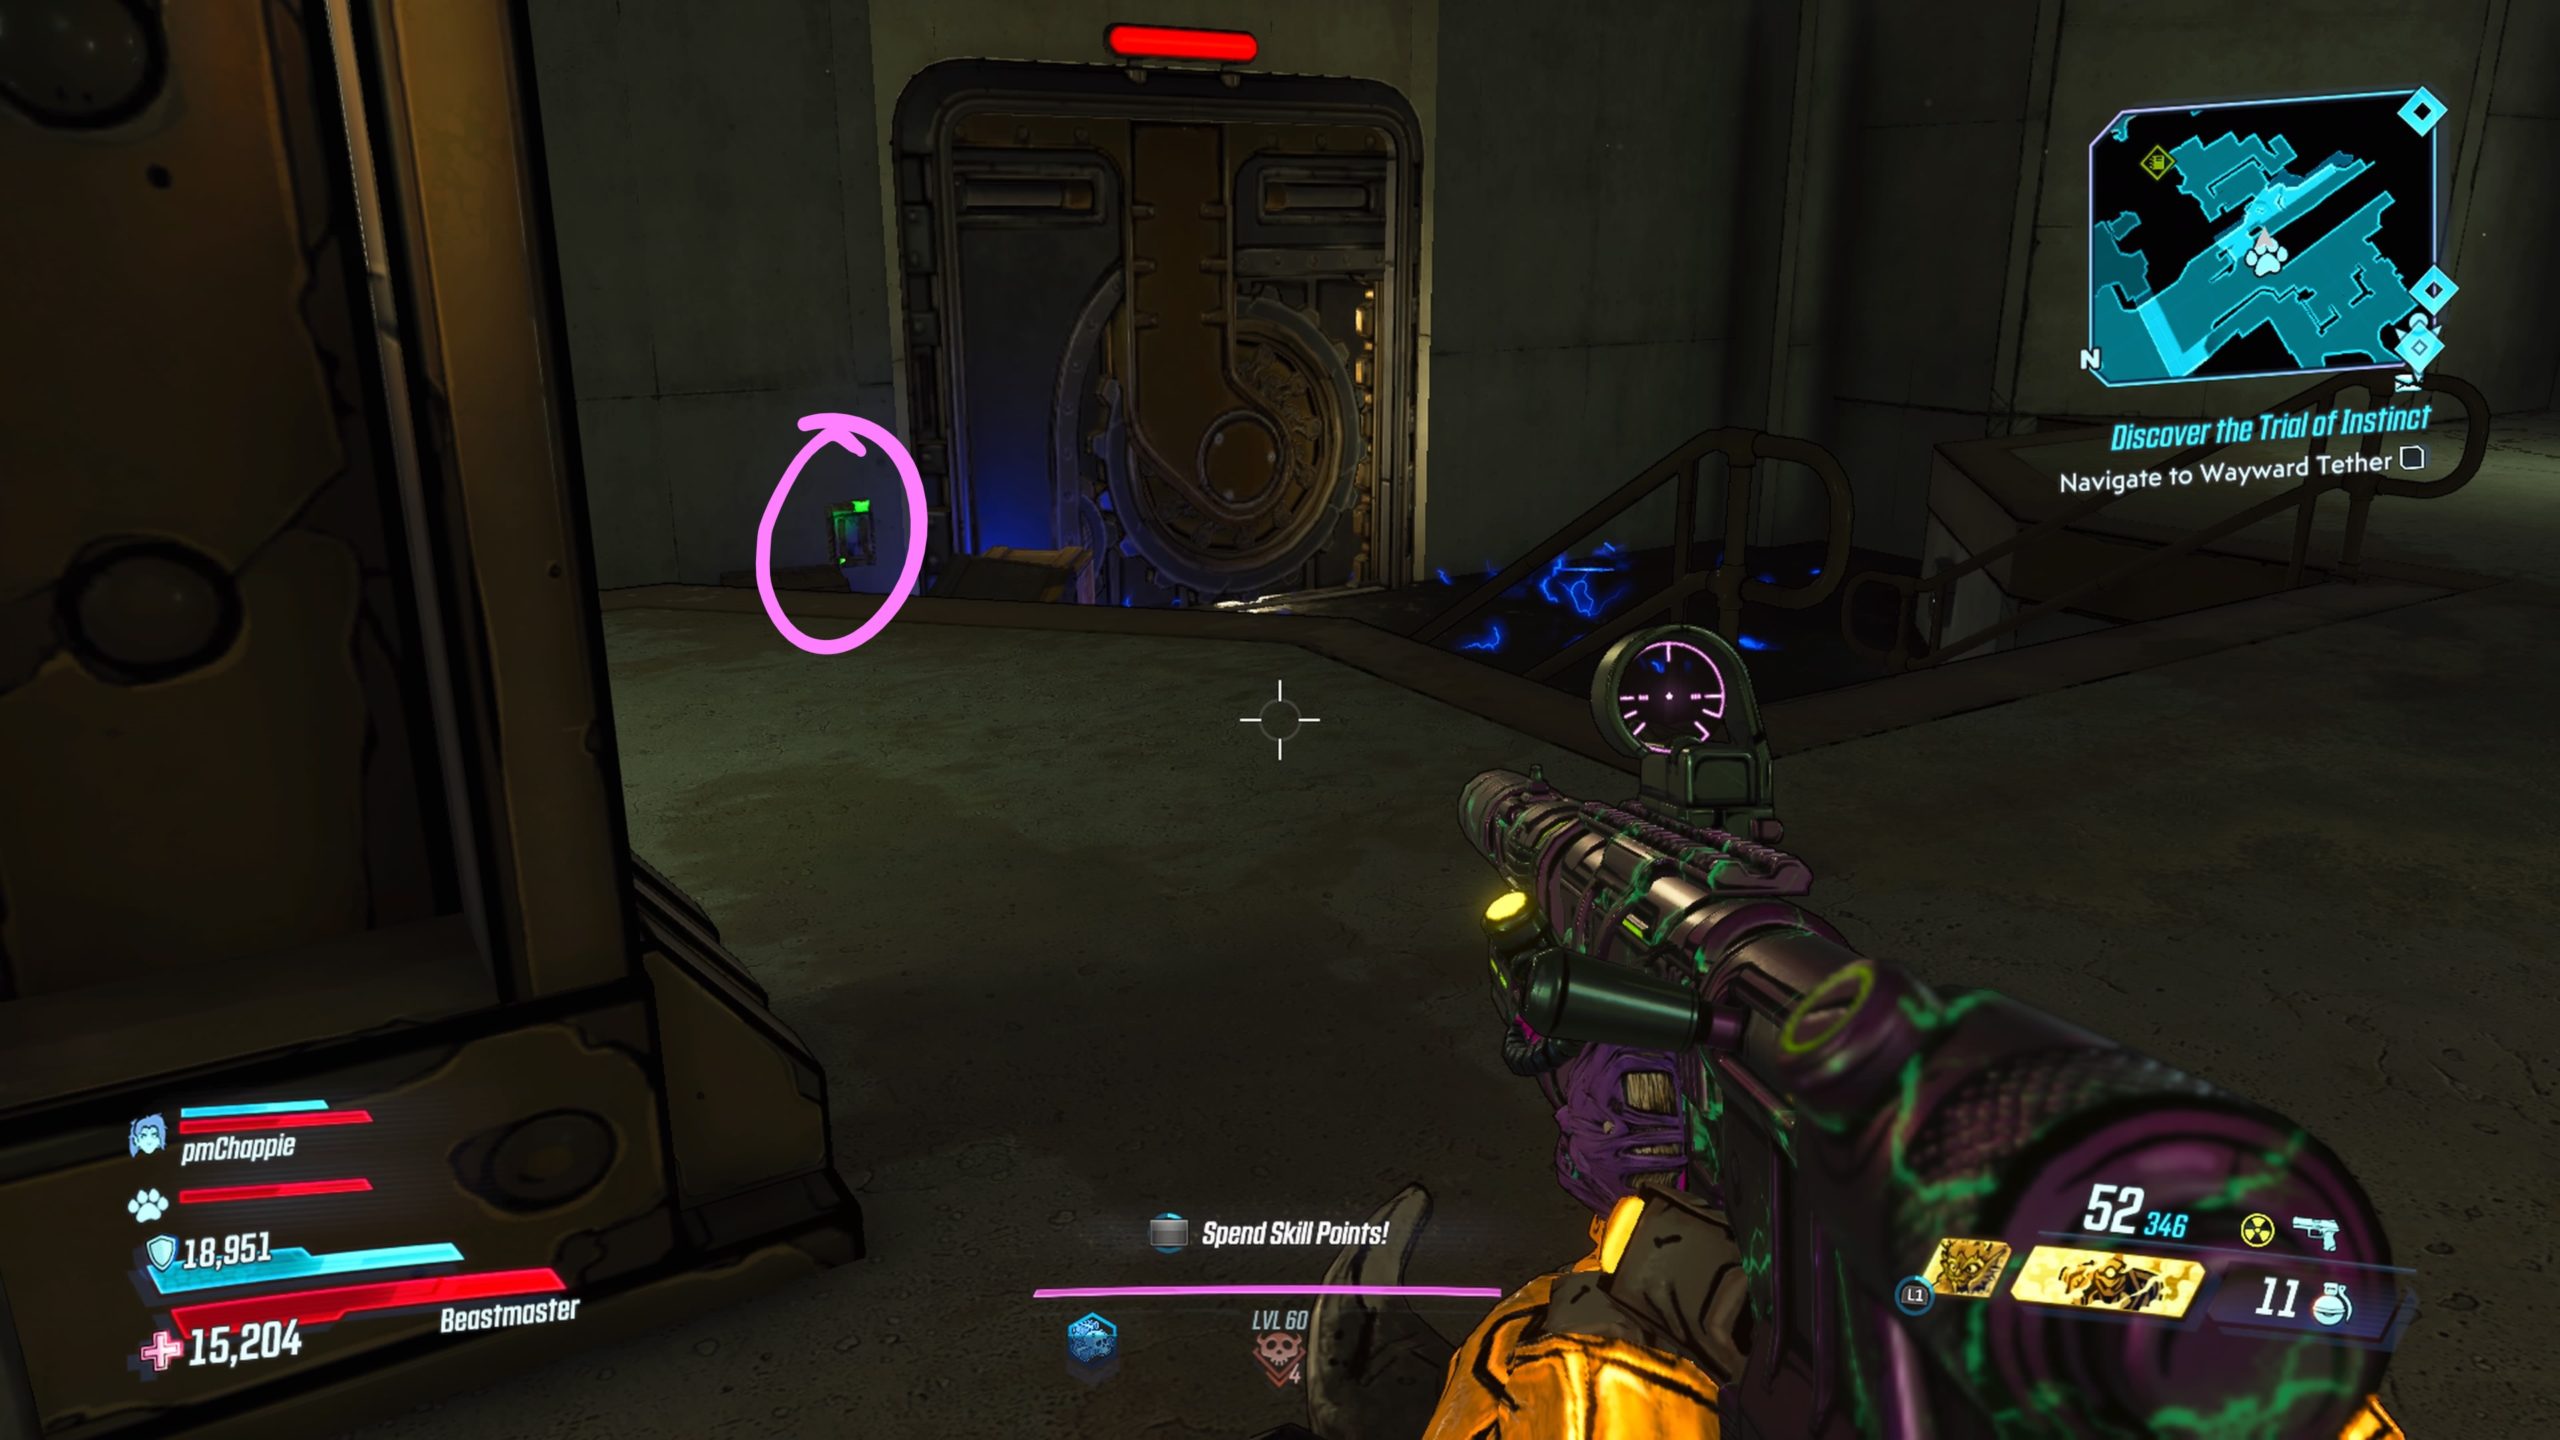
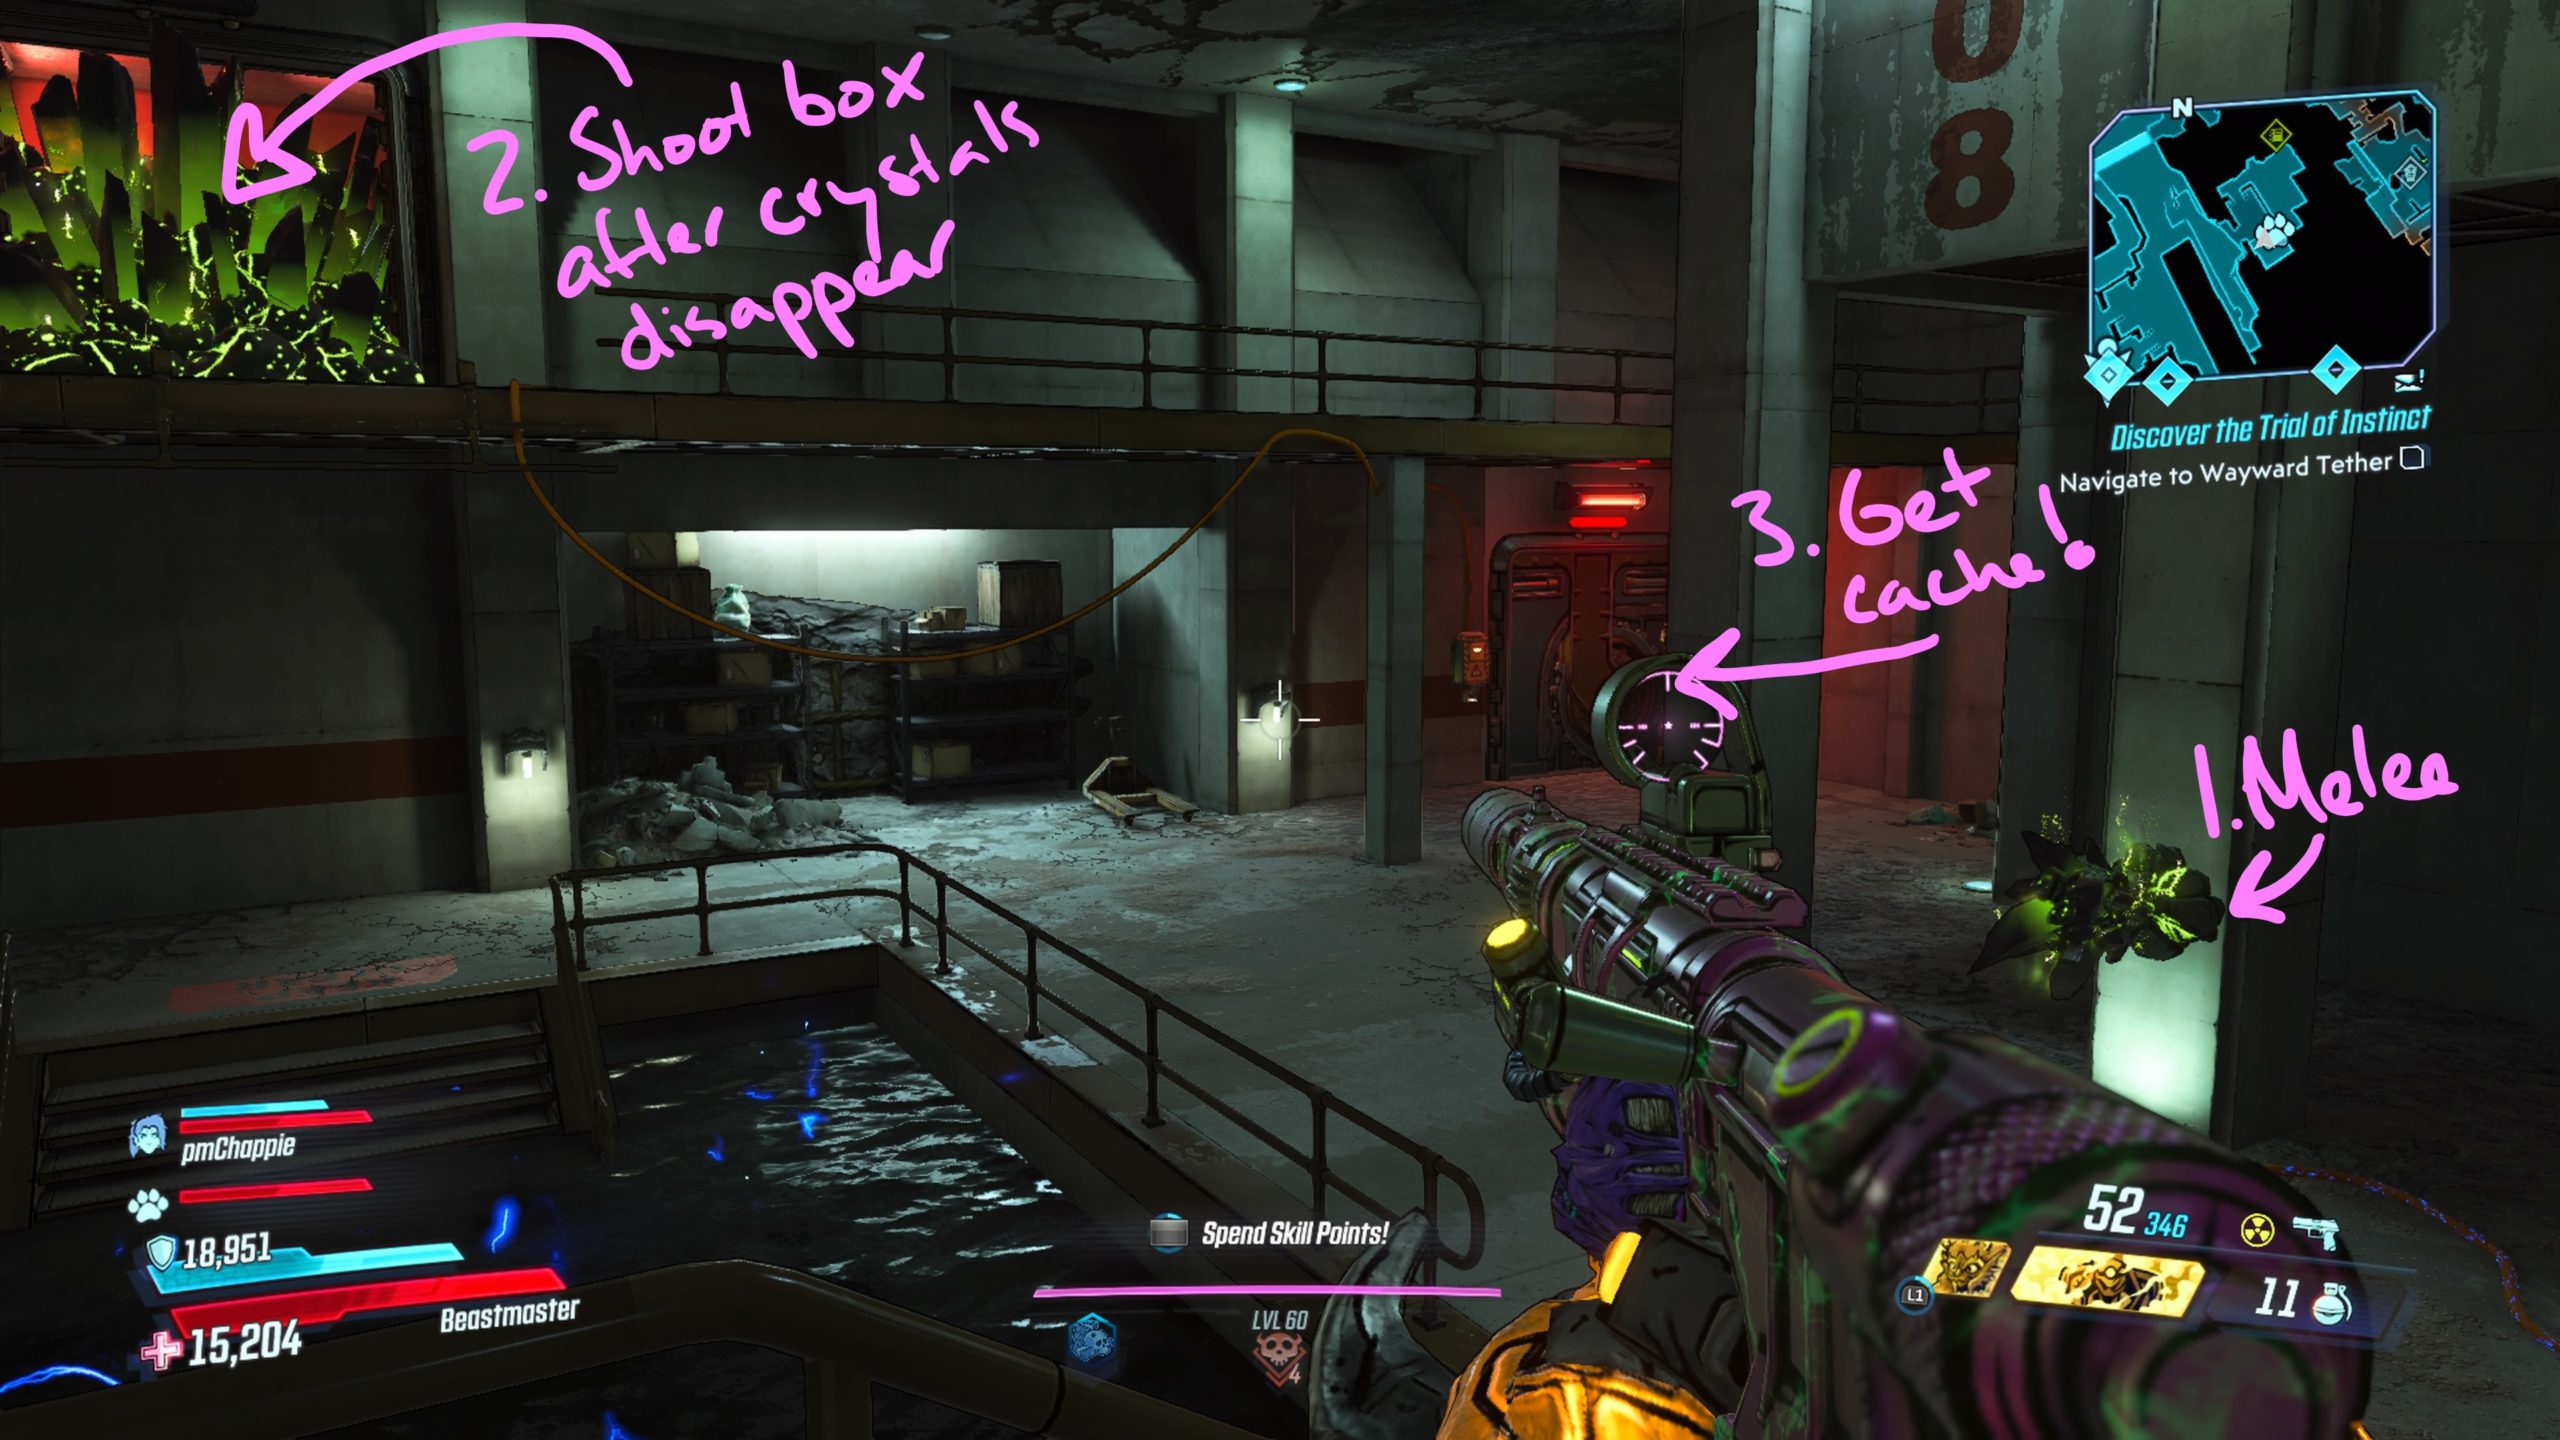
The cache can be found east of the Presentation Room fast travel station. Look for a door with a green button to the left that has an electrified puddle in front of it. Walk on the plank to use the button then jump through the doorway to reach the interior room. The cache is located behind the sealed door. You will need to use the crystal on the column to break the crystals on the second level that are blocking a small room. Climb up the stairs across from the small room to shoot the power box, which will cause the sealed door to open.