Welcome to our guide for the Commitment Sam Coe Starfield mission! Commitment Sam Coe is a companion mission. In order to start it, you’ll need to have completed his Matters of Hart mission. In addition to that, you’ll also need to have spoken to Cora then and committed to him when he brought up the subject. By actively increasing his affection for you by making choices that he likes. After committing to Sam and leveling his affection some more, he’ll tell you he’s ready to get married!
Go to Akila City
For the commitment ceremony, travel to Akila City on Akila in the Cheyenne System. Once there, make your way over to the Coe Estate and speak with Jacob.
Gather Guests for Ceremony
Head on over to grab the flower girl, Cora, from the Bookstore in Akila City! It’ll then be time to gather Lillian, your fiancé’s ex (not awkward at all!!), from the spaceport.
Proceed to the Ceremony
With everyone gathered, it’s time to return to the Coe Estate for the commitment ceremony! Speak with Sam inside to begin. Once the ceremony ends, the Commitment Sam Coe Starfield mission will complete!
Welcome to our guide for the Absolute Power Starfield mission!
PLEASE NOTE: Some of the planets referenced in our guides and walkthroughs may not match up with yours due to how Starfield was created. In these situations, what you do and the places you visit on those planets should still be the same.
Starting Absolute Power
Absolute Power is one of the faction missions for the Crimson Fleet. You’ll start it automatically after completing The Best There Is mission.
For the Absolute Power Starfield mission, travel to Neon in the Volii System on planet Volii Alpha. Once you’re there, stroll over to Madame Savage’s Place by heading through the door to the left of Mining League. Inside, go to the second level to find Estelle and speak with her. She’ll tell you what you need to do then send you on your merry way.
Locate Evidence to Extort Ayumi Komiko (Optional)
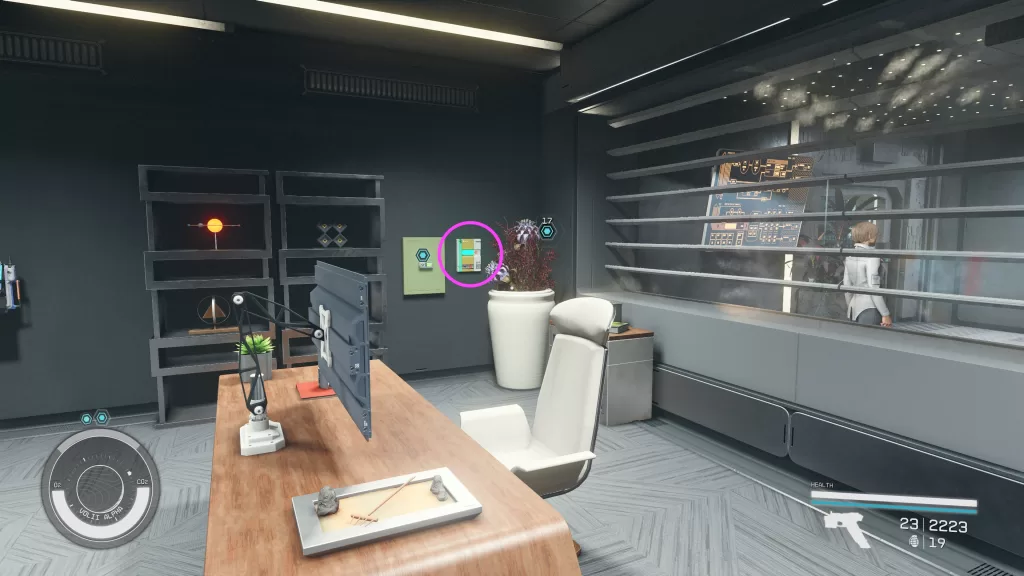
To find evidence, travel to the Trade Tower and use the elevator to reach Generdyne Industries. Speak with Ji Nashida behind the desk asking about his boss and persuading him to help you out. This will grant you access to her office where you’ll be able to loot the Meeting with Bayu (Evidence) slate from her safe (which Ji unlocked). Before grabbing the slate, make sure to activate the switch to the right of it closing the blinds. That way the nearby security guard won’t catch you stealing the evidence.
Ask Myka About Ayumi Komiko’s Whereabouts
At the Neon Core, head through the EBBSIDE door to the right of the Emporium to reach Euphorika. Head inside and speak with Myka behind the bar asking her about Ayumi. She’ll be defensive and tell you to shove off which you can counter by saying you’re with the Crimson Fleet. She’ll cave and tell you that Ayumi can be found in the Members’ Lounge then say if you want to there, you’ll need to buy a membership for 5000 credits. Enter the lounge via using the pass on the door across from Myka. Walk up the stairs to find Ayumi in the back. You can kill her and take the pass from her or use the evidence you found to make her hand it over willingly.
Enter Genedyne Through the Storage Entrance
With the pass in your possession, travel to the Underbelly and head to Generdyne Industries. Go around the right side of the building to find a locked door. Use your pass to gain entry to the building.
Obtain the Conduction Grid Data
Use the nearby vent to sneak into the main area of the facility then continue sneaking following the objective. Make sure to go slowly and keep an eye out for the guards and robots patrolling the area. When you reach the Conduit Control Room, head through the doorway and hug the left wall to reach the maintenance tunnel. Follow that to reach a room with a guard standing nearby. You’ll need to hug the left wall sneaking past the guard. Behind the computer the employees are working on, you’ll find a vent that will take you to just outside the Master Control Room. To the left of the Master Control Room is another vent you’ll want to enter.
Follow along the duct then drop down at the end and head through the doorway on the left. Follow the hallway to the end then take a left to reach Power Storage. Use the elevator there to reach the Power Core Computer terminal where you’ll want to download the Conduction Grid Plans.
Locate Breyson Bayu
Head west through the room and up the stairs. Cross the room and pass through the doorway on the other side. Take a right and enter the vent straight ahead. Follow along the shaft and you should come out facing the Research Director’s Office. Head into this office. There will be another vent behind the desk. Use it to reach Breyson Bayu’s office then head inside.
Speak with Breyson who will happily hand over his password. Access his terminal and download the Decryption Routine. While you’re there, also make sure to upload Estelle’s virus. You’ll then be able to use the elevator in the office to reach Trade Tower outside of the Astral Lounge.
Return to Estelle
Enter the Astral Lounge and use the VIP Elevator to reach the balcony. Enter Booth 2 to speak with… Benjamin Bayu!! He will want to know who is profiting from the virus that Estelle had us upload. In doing so, Bayu will let you leave the city. You’ll then be presented with a choice. You rat out Estelle, tell him it was Breyson or say it’s you. If you give up Estelle or tell him it was Breyson, they will be dealt with. As Delgado asked you not to ruin the relationship with Estelle, then going you’ll want to go with Beryson if you choose this route. Otherwise, telling him it was you will result in a bounty getting put on your head (we went with that option).
Locate Estelle at Madame Sauvage’s Place
Leave the Astral Lounge and head back to Madame Sauvage’s Place. Head through the door to the left of the bar to find Estelle. Speak with her.
Return to the Key
With the job in Neon done, make your way back to the Key and speak with Naeva. This will complete the mission and you’ll be rewarded with 350 EXP and some credits.
Welcome to our walkthrough for The Best There Is Starfield mission!
PLEASE NOTE: Some of the planets referenced in our guides and walkthroughs may not match up with yours due to how Starfield was created. In these situations, what you do and the places you visit on those planets should still be the same.
Starting The Best There Is
The Best There Is is one of the faction missions for the Crimson Fleet. You’ll start it automatically after completing the Breaking the Bank mission.
For The Best There Is Starfield mission, you’ll need to travel to the Key in the Kryx System. Once you arrive, head to Ship Services and speak with Naeva.
Meet Huan Daiyu in New Atlantis
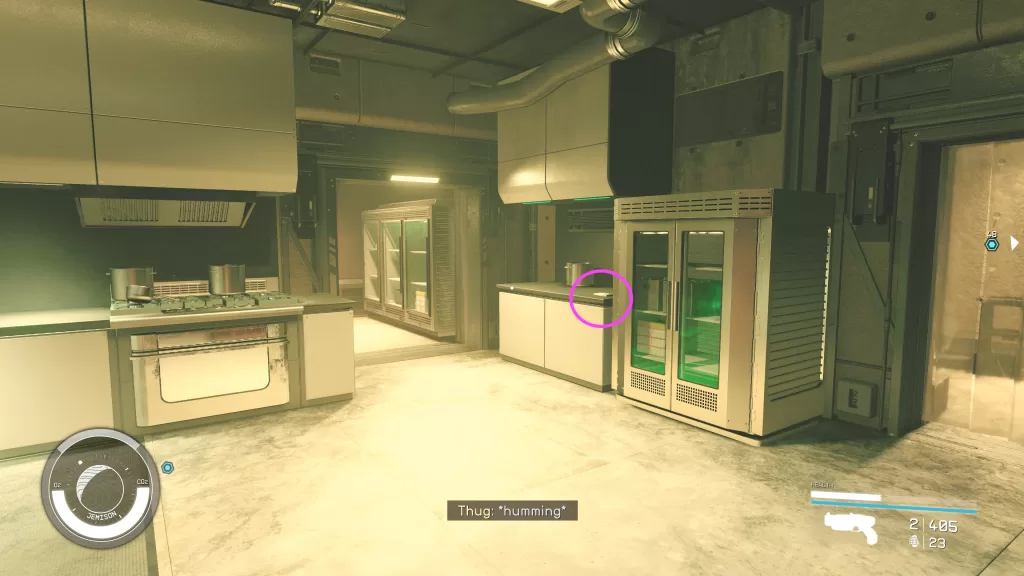
Travel to New Atlantis then head to the Well. Make your way to the eating area above Kay’s House to find Huan. Speak with the smuggler then head downstairs to Kay’s kitchen to find the Huan’s Talk (Evidence) on a counter in the kitchen.
Return to the spaceport and board her ship, the Jade Swan. Cimb up to the cockpit and speak with Huna there. She’ll give you the low down then tell you once you leave, you can’t come back until the mission is done. Tell her when you’re ready to go.
Board SY-920
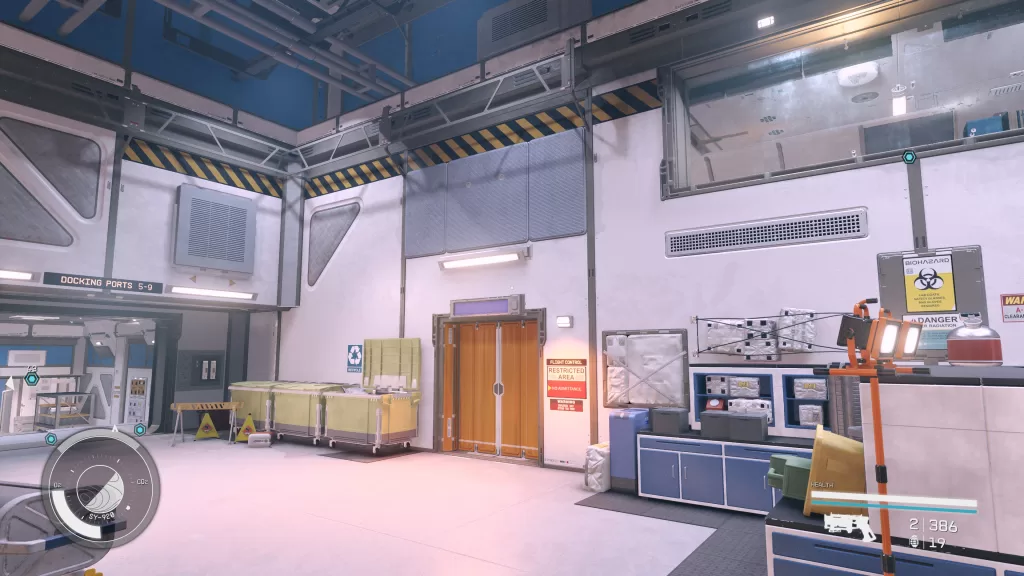
After the ship docks at the station, speak with Huan to learn some more about it then board SY-920.
Gain Access to Barracks to Find a Uniform
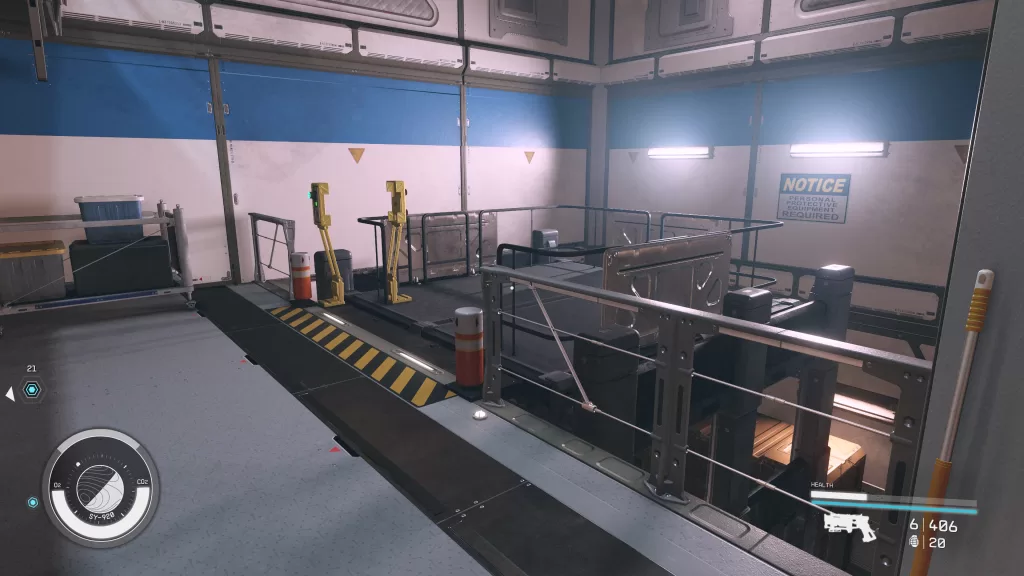
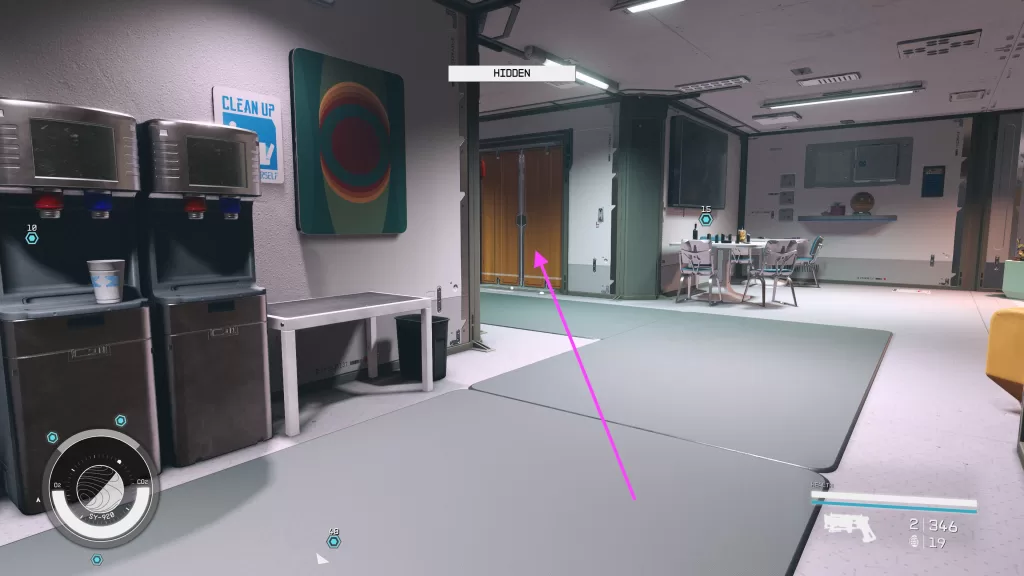
Once on SY-920, head to the northeastern part of the cargo bay. Take the elevator there down.
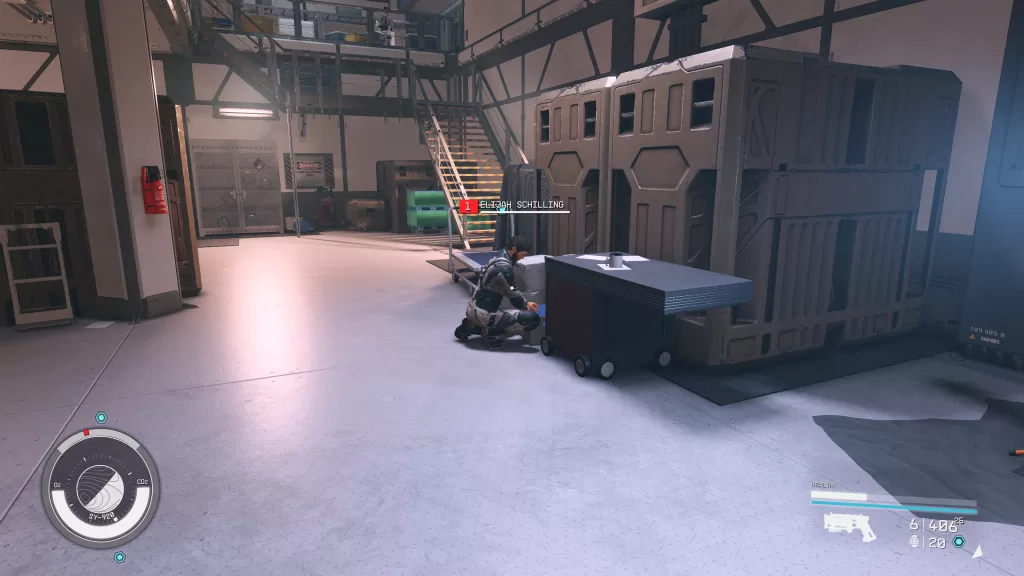
Head straight and look to the right to spot an orange door at the top of some stairs with an intercom nearby. Interact with the intercom to call the captain then listen to the UC Cargo Haulers to learn that Elijah dropped his key.
Speak with him on the southwestern part of the building then head to the forklift to spot the SY-920 Maintenance Keycard next to a guard. You’ll need to speak with him to make him move then you can collect the keycard. Go back to the orange door near the intercom and use the keycard to open it.
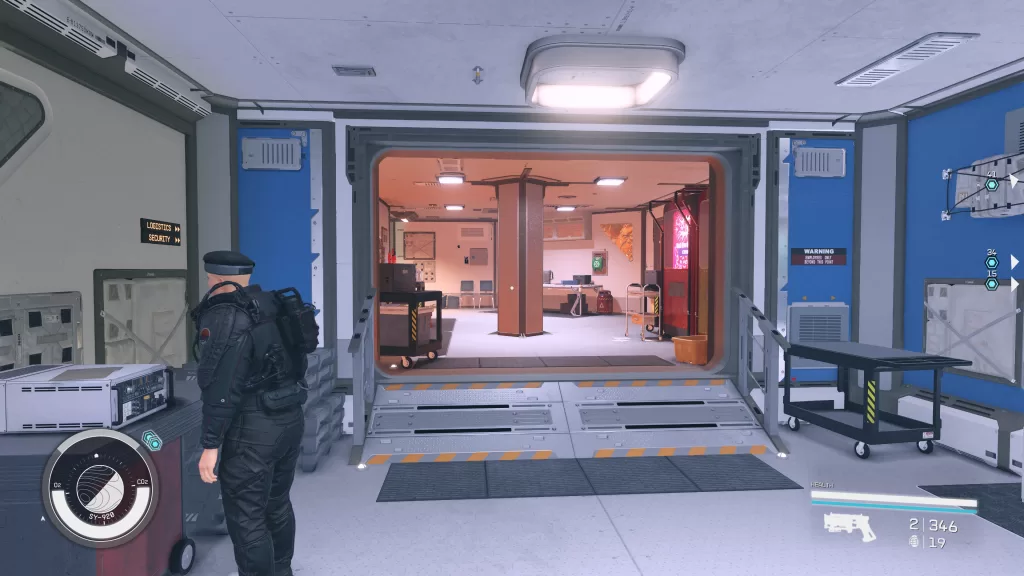
Remember for this part you must be sneaky! Save often in case you get caught! Head down the hallway and enter the storage room. From there you can access the vents following them up a ramp to reach a bathroom. Exit the bathroom then take a right down the hall followed by a left. Enter the first room on the right to find the uniform on a desk.
Make sure to equip it so you no longer have to be stealthy. Exit the room taking a right then follow the hallway around. You should reach a set of stairs leading to the Lounge and Mess Hall. Head down the stairs then follow the path until you reach the split. With the Mess Hall on your right, go left to the Secure Access door past the Cargo Bay. When stopped by the guard, tell him you are reporting for duty. He will let you through.
Head over to the Command Bay elevator and interact with the card reader. Ride the elevator then use the nearby intercom to call Huan. There are two ways to do this next part. You can use a clearance code to reach the Archives by passing through the Operations Center or you can sneak to the Archives using the vents.
Access Code Route
Head for the Security Room. If you get stopped by a guard, you’ll need to persuade them to let you go.
Once you’re in Security, hack the novice lock on the Clearance Code Computer. You’ll need to grab the code based on the last name of the uniform you’re wearing. Ours was Ensign Ziremi’s Uniform so the code is ZX321D. Use that code to access the Operations Center. Cross the room to reach the Archives and head inside.
Vent Route
Look for the Utility Room next to the Operations Center then head inside.
Climb up the stairs in the back of the room to find the vent. Follow the shaft to reach the rafters over the operation room. You can then follow the rafters to reach another vent that will end up in the Archives.
Locate the ComSpike
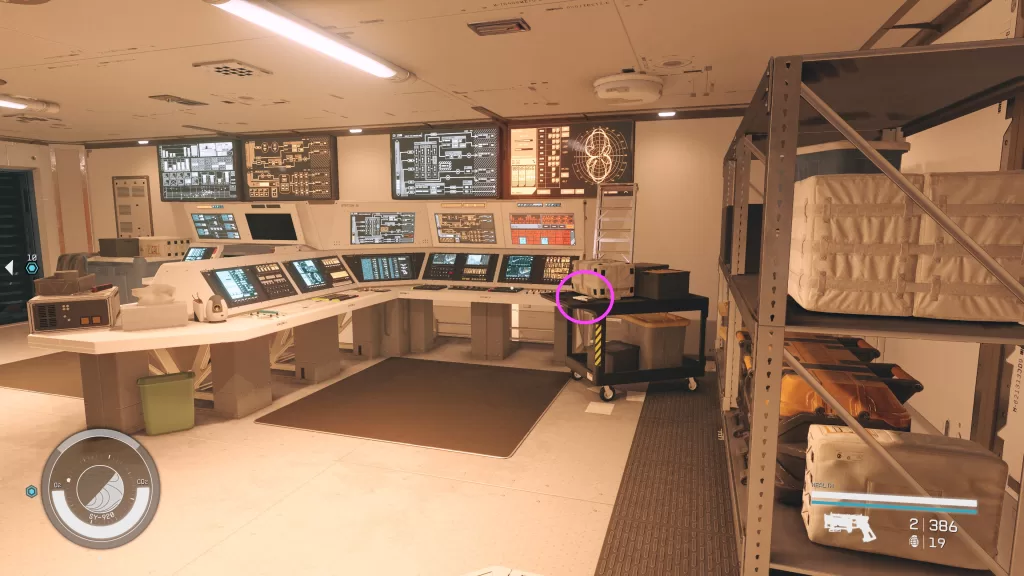
Once in the Archives, use the Data Access Computer in the back of the room and select UCE-86 ComSpike. Make sure to go through all of the options so you can upgrade your clearance level. You’ll then need to return to the elevators and take the one to Engineering Bay 4. You can use the intercom there to speak with Huan once more.
Afterwards, head down to Room 04. Make sure to grab the Eubanks & Woods (Evidence) on a crate in the back of the room then speak with Dr. Gabriel Vogel.
He’ll tell you that the ComSpike is actually a ship. You’ll then be able to persuade him to let you test pilot it or you can betray Huan and use that as a chance to sneak out with it.
Betray Huan
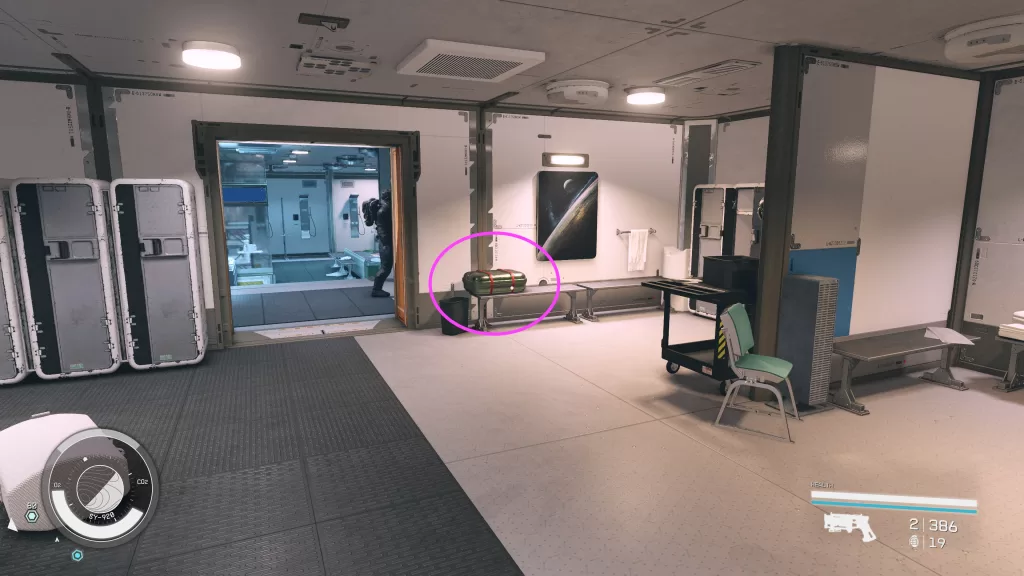
Doctor Vogel will alert the Commander to find and detain Huan. In the back room where you located the Eubanks & Wood (Evidence), enter the vent to find a locker room on the other side. Retrieve the SY-920 Pilot’s Space Suit from the bench and equip it.
Make your way to the docking port and enter the Prototype Ship parked at Docking Port 8. Afterwards, return to the Key! Surprise!!! Huan is waiting in the Operations Center and boy will you get an earful! She of course won’t trust you anymore. With your tail between your legs, head upstairs and speak with Del. He on the other hand doesn’t seem to care that you ratted Huan out to Dr. Vogel.
Persuade
If you persuade him, he’ll give you a password. Make sure to collect and equip the SY-920 Pilot’s Space Suit from the location shown above. When stopped by security, tell them your flight has been approved. Head across the room to the Flight Control room.
Go up the stairs and use the terminal to add the ComSpike to the test flight list. You’ll then be free to head to Docking Port 8 and board the Prototype Ship. Jump in the pilot’s seat, undock from the station and deliver it to the Key. Once on the Key, head to the Last Nova and locate Huan by the bar. Speak with her to get that drink then head to the Operations Center and speak with Delgado. Huan apparently sung nothing but praises about us to them and Del congratulates us on a job well done.
Proceed to the UC Vigilance
After your conversation with Del, return to the UC Vigilance to update the commander. This will complete the Best There Is Starfield mission and you’ll be rewarded with 250 EXP and some credits.
Welcome to our guide for the Starfield Divided Loyalties mission!
PLEASE NOTE: Some of the planets referenced in our guides and walkthroughs may not match up with yours due to how Starfield was created. In these situations, what you do and the places you visit on those planets should still be the same.
Starting Divided Loyalties
Divided Loyalties is a companion mission you’ll receive from Andreja after raising her affinity high enough by making choices she likes.
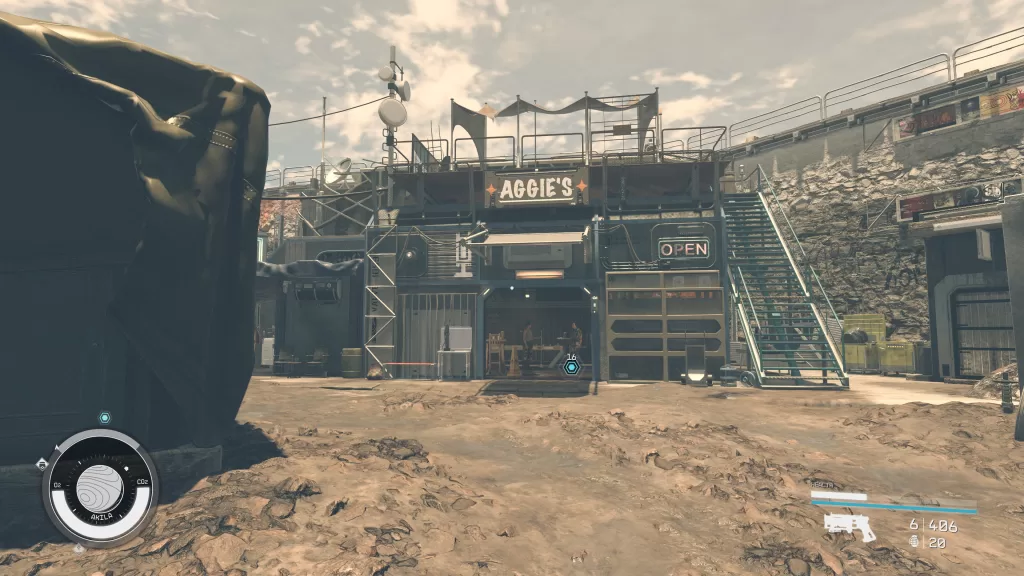
For the Divided Loyalties mission, you’ll first need to travel to Akila City on Akila in the Cheyenne System. Enter the city then head for Aggie’s which can be found on the north side of town.
Inside a conversation will start with Andreja. When it concludes, speak with Aggie and ask about Eren then follow up with Andreja afterward.
Travel to Hyla II
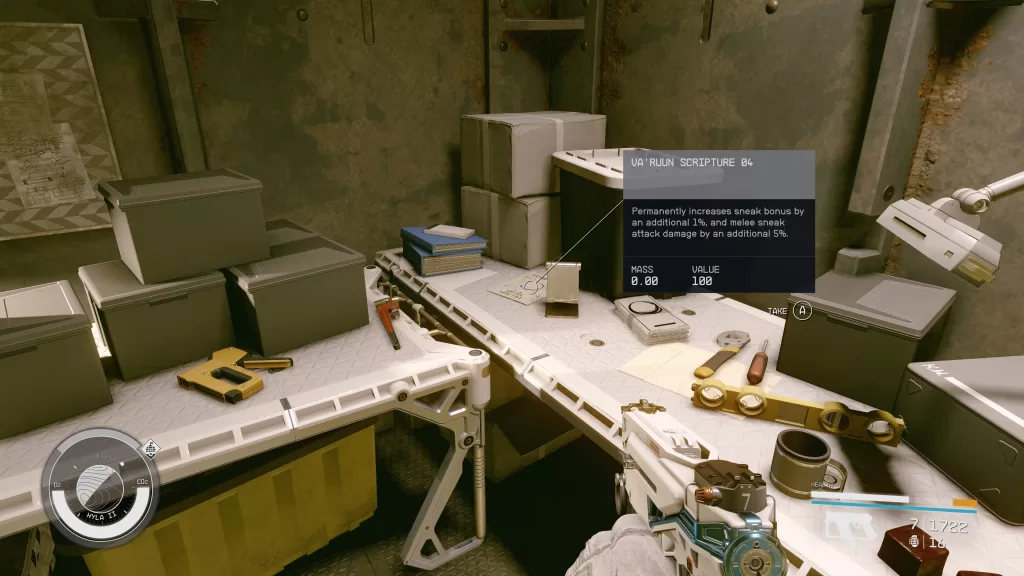
Now that we have Eren’s last known location, travel to Hyla II in the Hyla System east (and slightly south) of Cheyenne. Land at the Eren’s Camp marker then speak with Andreja. Use your scanner to locate Eren’s Camp making your way there. You’ll need to deal with a group of Zealots currently occupying the camp. When everything is clear, follow Andreja. After she gets done talking, enter the main building and head up to the third floor. Read Eren’s Slate on the desk then have a word with Andreja once more. Behind the slate, make sure to pick up the Va’Ruun Scripture 04 magazine!
Travel to The Den
Set a course for The Den orbiting Chthonia in the Wolf System. Board the Den then speak with Rayna Marquest on the top level asking about Jaeda. She knows where she is, but you’ll have to persuade her to tell you. You can also speak with Orval about her in the bar down below. He will provide Jaeda’s location for 1,000 credits. Either way, once you get Jaeda’s location set out after her.
Reach Jaeda’s Last Known Location
Plot a course for Groombridge (or a different system if yours is different). Once you reach the orbit, you’ll be hailed by a Raptor. During the conversation, a few Zealot ships will join you. Take them out and you’ll be hailed by Raptor again afterwards. Board her ship to have a confrintation with Jadea. When it ends, return to your ship to fight and take down the Zealot Captain. Speak with Andreja after the battle to get your next heading.
We’d recommend making a save before heading to the Derelict Station. During that portion of the quest, Andreja dissapeared and we were unable to get her back. The only thing that worked (on console) was to go back to an old save before the station.
Travel to the Derelict Station
Make your way to the Muphrid System head to Starstation UCN-48 orbiting Muphrid IV. Dock at the station then follow Andreja doing as she says. She will lead you to Tomisar for a confrontion. You’ll then have a couple options. Angreja will want to kill Tomiasr, you can offer to do it for her or tell her to send the evidence to the council. If you pick the first or second option, then Andreja will never be able to return home. Picking the last option, leaves Tomisar alive with the hope that he will be punished by the council.
Accompany Andreja to the Lodge
Speak with Andreja after making your choice then take her back to the Lodge. Head back to her room (near yours) and speak with her again. During this conversatoin you’ll get the choice to keep her a friend or start a relationship with her. The Divided Loyalties mission will complete after you make your choice. You’ll be rewared with 250 EXP and some credits.
Welcome to our guide/walkthrough for the Starfield Breaking the Bank mission!
PLEASE NOTE: Some of the planets referenced in our guides and walkthroughs may not match up with yours due to how Starfield was created. In these situations, what you do and the places you visit on those planets should still be the same.
Starting Breaking the Bank
Breaking the Bank is one of the faction missions for the Crimson Fleet. You’ll start it automatically after completing the Echoes of the Past mission.
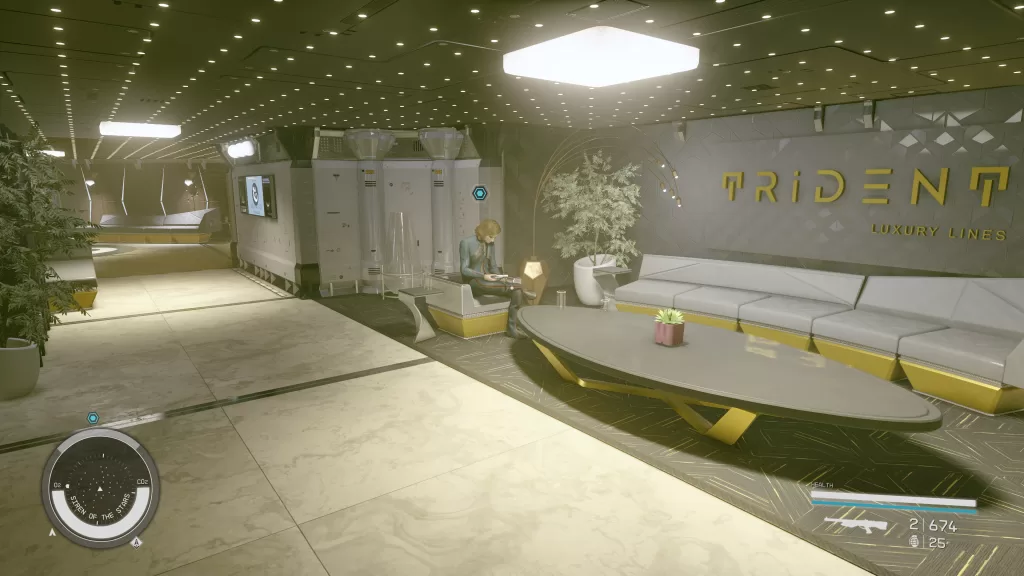
For the Starfield Breaking the Bank mission, you’ll first need to travel to the Olympus System and then head to the ship orbiting Aranae IV. Dock at and board the Siren.
Speak with Evgeny Rokov
Follow along the hallway and head up the stairs to find Evgeny. Approach him to begin a conversation where you’ll get more information about the score. He’ll ask about the job and if you were asked to do anything else (like steal the award). We choose not to, but it’s your call. To play ball, Evgeny will then say as payment he wants back into the Crimson Fleet. You can use the Crimson Fleet choice or say you’ll put in a good word with the boss.
Obtain the ES Award
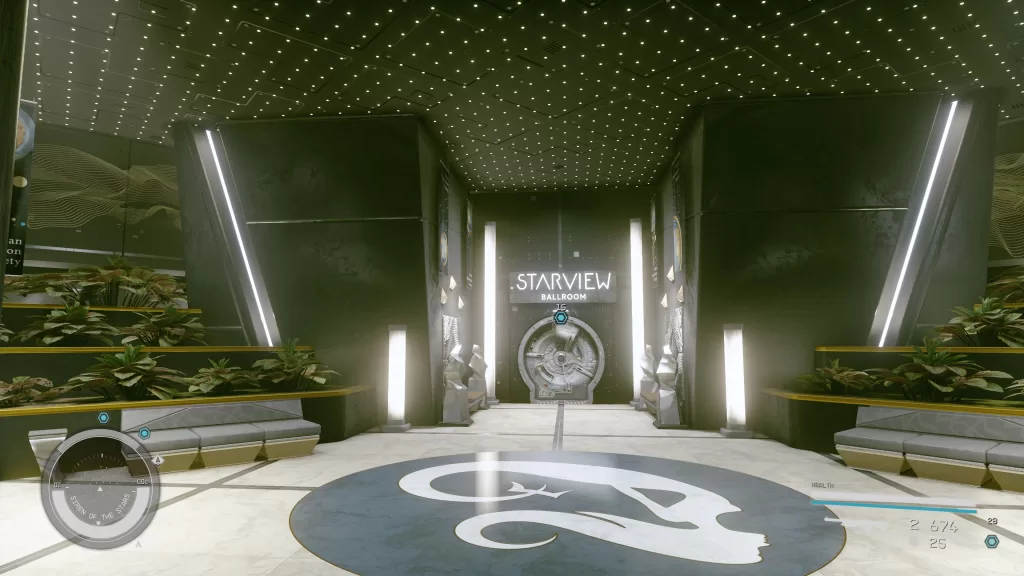
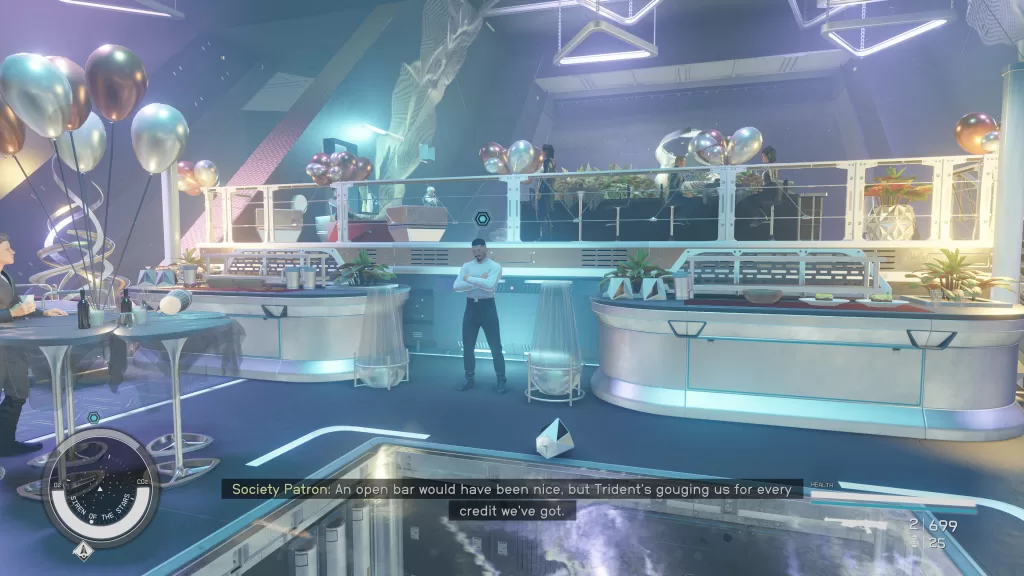
Make your way to the upper levels of the ship and enter the Starview Ballroom.
Head down to the lower level and speak with the Society Patrons exhausting their dialog options. Eventually one of them will tell you that Sheila is the chairman this year and is in charge of handing out the award. After learning this, head back up to the top level of the ballroom to find her standing near the entrance. Talk with her asking about the award to learn that it’s locked away safely in the Purser’s Safe. Exit the ballroom then head north down the stairs and take the path going right at the desk.
The next door on the right should be the Purser which you’ll want to enter (it says restricted, but you can go in). Speak with Chief Purser Murata in there asking about the award. After she tells you about the ES Award Claim ID, you’ll be able to ask her what her opinion about the captain is. If you pass a persuasion check, you’ll learn about a slate in his quarters linking him to the Crimson Fleet. See Burden of Proof Evidence below.
Return to the ballroom and speak with Sheila to ask for her claim ID. You’ll need to persuade her to hand over the ID. Take it back to the Purser and use it on the terminal to the left of the vault to open it. You can then use it to unlock the safe and take the award.
Burden of Proof Evidence
Thanks to Chief Purder Murata, we know that there is some evidence for the Burden of Proof faction mission in the Captain’s Quarters. You can find it at the lower levels of the ship, to the right of the door leading to the ship’s cockpit. Once you’re in the Captain’s Quarters, head to the bedroom and look at the self to the left of the bed. You’ll find the Request Denied (Evidence) there. Make sure to grab it.
Ask Society Patrons About Larry Dumbrosky
As you explore the ship, you’ll need to speak with the Society Patrons in the ballroom and ask them about Larry. Eventually one of them will tell you he’s been spending a lot of time with Klaudia Swist.
Leave the ballroom and head to the Guest Suites. Go forward down the stairs then take a left at the desk. When you reach the end of the hallway, turn right to find her.
Speak with Klaudia and tell her you know about the affair. You’ll then need to either persuade or bribe her with 2500 credits to give you some incriminating evidence on Dumbrosky. She’ll then tell you that she has nothing but mentions Gabriel Vera might.
Head back to the ballroom where you’ll find Gabriel by the buffet tables. Speak with him saying that Klaudia sent you. He’ll basically tell you to bugger off and that if you report anything it’s your word against his and he’s part of UC Security. After getting nowhere, head upstairs in the ballroom to find Evgeny and speak with him. He’ll come up with the plan and you’ll have to execute it. Travel to the Engineering Deck which you can reach from the lower level of the ballroom.
Follow the path to reach the Chief Engineer then speak with him, asking for access to life support. In order to gain access, you’ll need to either bribe him with 1000 credits or tell him that the captain will forgive his gambling debt. He’ll then step away giving you time to access his terminal. Go to the Life Support Access folder and use it to open the door leading to the life support system. Head inside and reset all 3 switches to trigger the emergency lockdown.
Confront Gabriel Vera in His Cabin
Make your way to the Guest Suites then go forward down the stairs taking a right at the desk. Follow the hallway looking for room 02 and head inside. Speak with Gabriel to be presented with a couple of options. No matter what option you pick, you’ll either have to pay 2500 credits for the evidence or attack Gabriel and take it off his corpse.
Confront Larry Dumbrosky
With the evidence finally in your hands, head to the upper level of Guest Suites to find Larry’s room. Go inside and speak with the man. He’ll deduce that you are after his credentials and request a trade. You hand over the evidence from Gabriel and he’ll give you the credentials. You can also attack him and take his credentials. Once you have them return to Evgeny in the Guest Services lobby. Speak with the captain then return to your ship.
Proceed to New Atlantis
Set a course for the New Atlantis Commercial District then head to GalBank on the north side of the area. Once there head inside taking the elevator to the Archives. Speak with the guard and show him your credentials. If you have the Bounty Hunter background, then you’ll be able to call out that this is a trap. Head into the Archives and deal with the Ecliptic mercs that ambush you. When they are taken care of, head up to the second level and use the GalBank Archives terminal to view the Lost Ship Registry. You’ll specifically want to check out the Legacy.
Proceed to the Key
Make your way back to your ship then set a course for the Key. Once you’re back, head to the Operations Center and speak with Del to hand over the data you retrieved. After the conversation follow Naeva to Ship Services. When you get there, she’ll ask you straight up if you got the ES Award. You can lie and say you didn’t get it or hand it over and be rewarded with 150 EXP and some credits.
Report Mission Progress on the UC Vigilance
Travel to the UC Vigilance in the Aranae System orbiting the moon Aranae II-a of Aranae II. Board the ship then speak with Commander Ikande to debrief him on your last mission. Once you’re done, the Breaking the Bank mission will be completed and you’ll be rewarded with 350 EXP.
Welcome to our guide for the Doctor’s Orders Starfield mission!
PLEASE NOTE: Some of the planets referenced in our guides and walkthroughs may not match up with yours due to how Starfield was created. In these situations, what you do and the places you visit on those planets should still be the same.
Starting Doctor’s Orders
Doctor’s Orders is one of the faction missions you can pick up for the Crimson Fleet. To start this mission, speak with Samina Mizrah at her clinic on The Key and ask her about the supply issue.
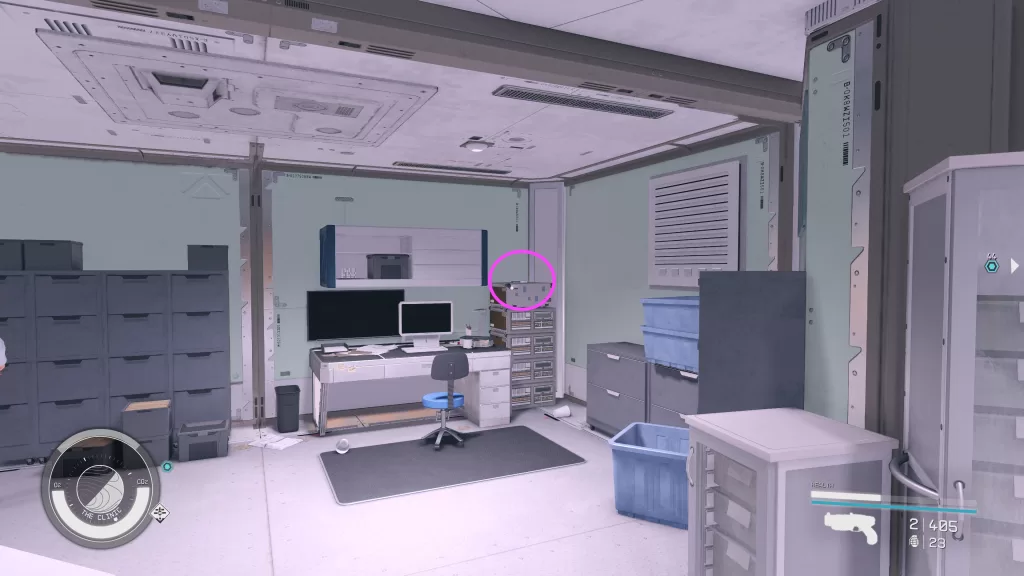
For the Doctor’s Orders mission, travel to the Narion System and head to the Clinic orbiting Deepala. Dock with the station then head through reception to the office to find Gennady (he’ll be wandering around nearby if he’s not there). Talk with him and ask about the supplies to which he’ll respond that he wants to stop the deal. In order to get the supplies you’ll need to persuade him to follow through. After doing so, he’ll tell you where the supplies are and hand you some keys. Before you leave, make sure to grab the Gennady Ayton (Evidence) from a stack next to a computer desk in the corner of the Office area.
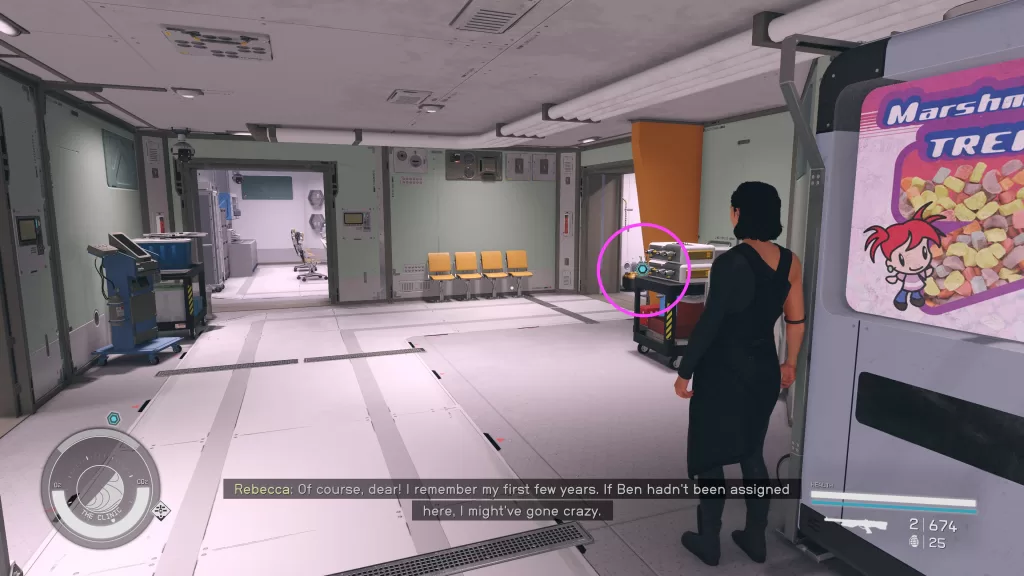
Get the Medical Supplies
Exit the office and head right down the hall following it right. When you reach the end, there should be a group of four chairs against a wall. The chest with the supplies can be found just past the doorway to their right.
Return to Samina at the Key
Return to the Key in the Kryx System and return to Samina then speak with her to hand over the supplies. This will complete the Doctor’s Orders Starfield mission and you’ll be rewarded with 100 EXP and some credits.
Welcome to our guide for the Starfield Echoes of the Past mission!
PLEASE NOTE: Some of the planets referenced in our guides and walkthroughs may not match up with yours due to how Starfield was created. In these situations, what you do and the places you visit on those planets should still be the same.
Starting Echoes of the Past
Echoes of the Past is one of the missions for the Crimson Fleet faction. You’ll start it automatically after completing the Rook Meets King mission.
For the Echoes of the Past Starfield mission, you’ll need to travel down to planet Survorov and land at the Lock. Approach Delgado to get things started. Follow along the ice path to reach the Lock taking out the enemies that spawn along the way. When you reach the outer door, speak with Delgado. He’ll open the door allowing you to enter, but your companion will have to wait outside.
Continue Exploring the Lock
Follow the group through the Lock. When you reach the big open room, you’ll be ambushed by the same creatures from outside. Deal with them then speak with Del. Take Mathis and head for the control room to the south. Speak with him after the roof caves in. him who will want to team up to take out Delgado. Answer however you like then head through the nearby loose panel. Follow the linear path through a couple of rooms to reach the control room where Del we’ll be trying to reach you through the intercom. Interact with it to get your order then examine the Transfer Area Control Workstation nearby. Access the Security Controls and use them to override the lockdown.
Head through the newly opened Secure Access door and down the stairs into the intake room. Interact with the Prisoner Intake Workstation. Access the Power System Controls and activate the auxiliary power for D-Block. Continue heading forward to reach the guard tower overlooking the cell block. In the tower, your new buddy will ask you again about his proposal. Again, answer how you like then interact with the D-Block Post Workstation. Make sure to check out all of the files so you can pick up some of the optional objectives along with the cell block that Kryx was placed in.
Locate the Cache in Cell D-02-106
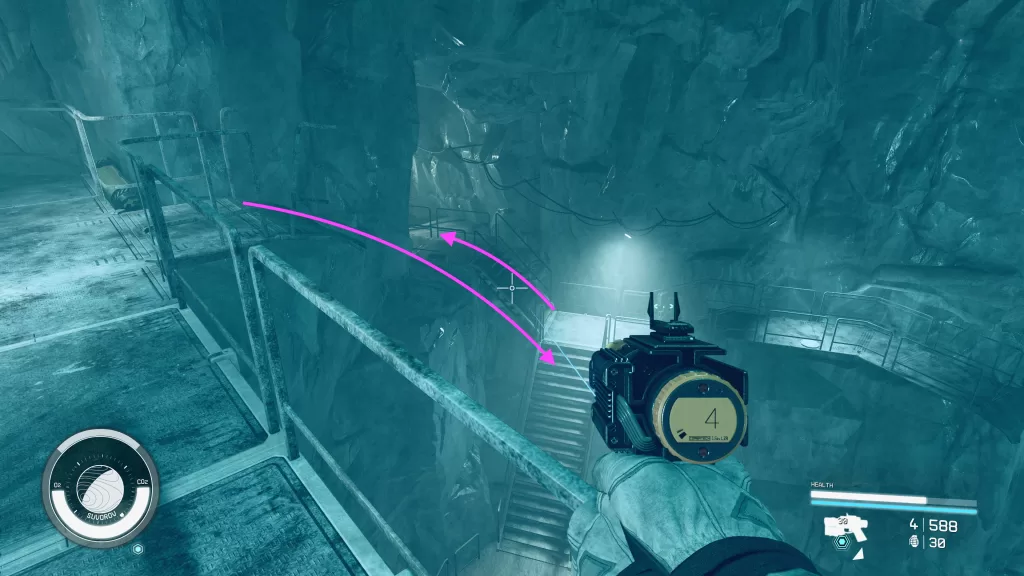
You’ll need to backtrack a little bit to reach cell D-02-106. Head back along the path you took to reach the guard tower looking for the broken section of stairs in the image below.
Jump off that section to the stairs below and follow the stairs up. Take a left going up another set of stairs brining you to a split.
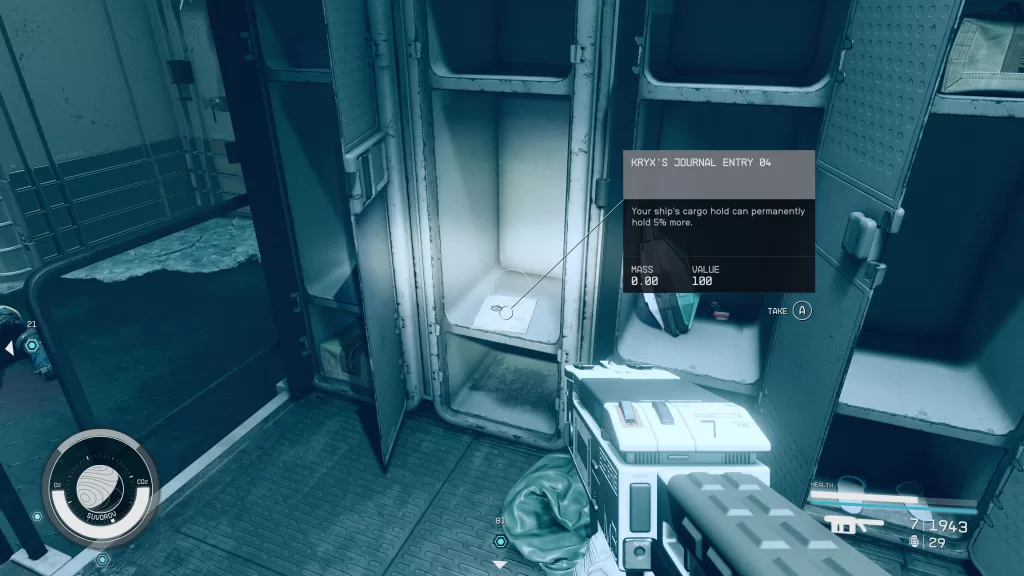
The right has another set of stairs leading down and the left leads to Cell D-02-106. Take the right set of stairs down then take a right at the bottom to spot the kitchen. Across from the Kitchen, you’ll find the Showers. In one of the lockers, you’ll find the Kryx’s Journal Entry 04 magazine.
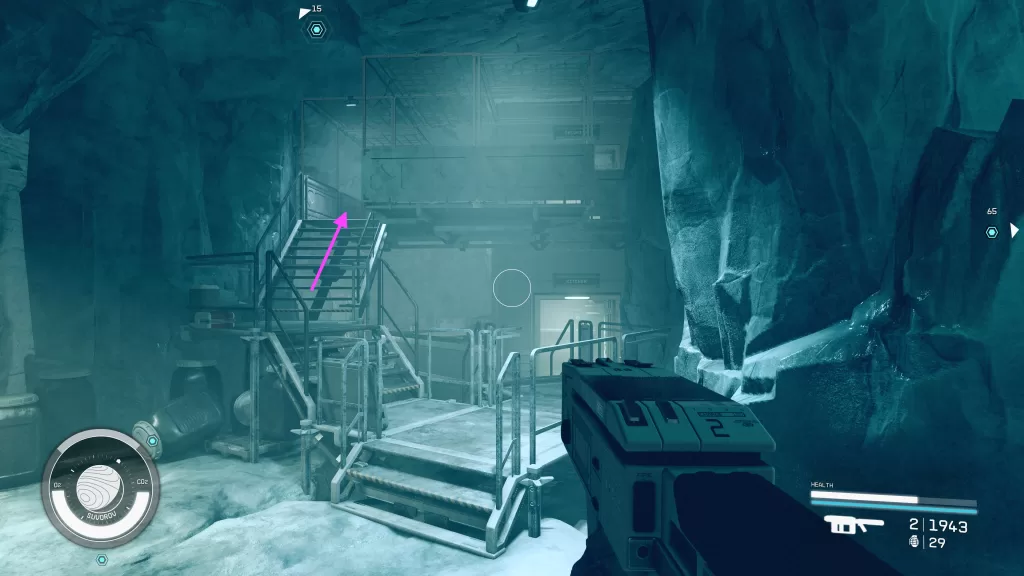
Exit this room and face the Kitchen. You’ll want to take the stairs on the left just before the Kitchen to reach the Security Room.
Inside you’ll find a switch on the wall that unlocks cell D-02-106. You can then return to the split and head to the cell to access the cache.
Open Cells in D-Block Section 3
Head back up to the guard tower and jump across the broken walkway. Head down the stairs, take a right then follow that with another right to reach the D-Block Section 03 Cell Release Switch. Interact with it to open Kryx’s cell then make your way there and head inside (it should be the next cell on the left). Activate the lamp then choose the first option to pry open the base. Listen to the Best Laid Plans slate that you find there.
Search Carter’s Locker
Head back to the Kitchen near block D section 2 to find the showers. This is where you previously found the Kryx’s Journal Entry 04 magazine. Use the code you got for Carter’s Locker to open it. Grab the Carter’s Gig slate to listen to it. Exit the showers and head left passing through the kitchen.
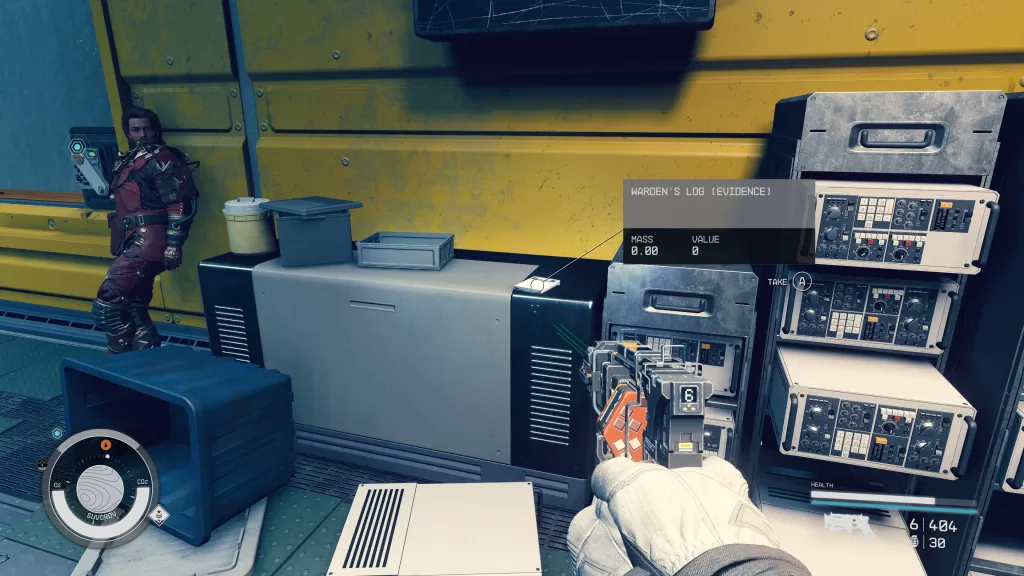
You’ll then need to cross over to the north side of the area to reach Ventilation. Enter the room interacting with the Maintenance Access Computer on the other side. Use it to open the door to the closet on your left. Head inside and interact with the loose panel then follow the tunnel to eventually end up in the Warden’s Office. Delgado will be in an adjacent room trying to hail you on the intercom. Interact with it to speak with him to tell the bossman what you found. He’ll then open the way to the shuttle bay for you. Before leaving, make sure to grab the Warden’s Log evidence.
You’ll also need to speak with Mathis. Head to the Shuttle Bay and be prepared for a fight. You’ll need to secure the area before you can enter the ship. This time the bugs will be accompanied by their ridiculously high level queen.
Travel to the Key
Once the pests have been exterminated, fly back up to the Key and speak with Delgado in the Operations Center. Hand over the slate and he’ll reward you with a legendary pistol. You’ll then be given your next task. Make your way to the Last Nova (under the Operations Center) and speak with Mathis there. When you’re done, locate Naeva in the same place and chat her up.
Report Mission Progress on the UC Vigilance
Leave the Key and head back to the UC Vigilance in the Sol System. Dock with the ship then head to Commander Ikande to update him on your progress. The mission will be completed afterwards and you’ll be rewarded with 350 EXP and some credits.
Welcome to our guide for the Rook Meets King Starfield mission!
PLEASE NOTE: Some of the planets referenced in our guides and walkthroughs may not match up with yours due to how Starfield was created. In these situations, what you do and the places you visit on those planets should still be the same.
Starting Rook Meets King
Rook Meets King is one of the faction missions for the Crimson Fleet. You’ll start this mission automatically after completing the Deep Cover mission.
For the Rook Meets King Starfield mission, you’ll first need to travel to the Astraea orbiting Jupiter’s moon, Europa. Hail the ship to begin conversing with Naeva Mora. She’ll tell you that in order you join THE Crimson Fleet, you’ll need to complete a task for her.
Find the Ragana Near Enceladus
Plot a course for Saturn’s moon Enceladus to find the Ragana. You’ll receive a hail asking why you are there. If you are trying to minimize casualties, you can pick the UC SysDef option. Otherwise, you can use the Crimson Fleet option or just attack the ship. If you board the ship, speak with Dimitri. This will give you the options to resolve this issue without violence, convince him to kill Austin or attack them all.
Return to Naeva in Europa’s Orbit
When the issue has been dealt with, return to the Astraea. As soon as you reach it, some Ecliptic Fighters will show up. Deal with them then hail the Astraea. Report that Rake was taken care of to be given the coordinates to the Crimson Fleet’s base.
Report to the Vigilance
Head back to the UC Vigilance orbiting Mars’ moon Phobos and board it. Follow the recruit to the Operations Center and speak with Commander Ikande.
Travel to the Key
Return to your ship and set a course for the Key orbiting Suvorov in the Kryx system. Dock with the station then board it.
Speak to Naeva
Speak with Navea nearby after the two Crimson Fleet members finish their business. After the conversation, follow her for a tour of the Key ending at Shinya Voss.
Speak to Shinya Voss
After speaking with him, take the elevator behind him to reach the Operations Center. Locate and speak with Delgado to officially join the Crimson Fleet. He’ll then give you your first set of instructions. The Rook Meets King Starfield mission will complete and you’ll be rewarded with Pirate Swashbuckler Gear, Grey Leather Jumpsuit, 250 EXP and some credits.
Welcome to our guide for the Deep Cover Starfield mission! Deep Cover is one of the faction missions for the Crimson Fleet.
**PLEASE NOTE: Some of the planets referenced in our guides and walkthroughs won’t match up with yours due to how Starfield was created. In these situations, what you do and the places you visit on those planets should be the same. **
How to Start Deep Cover
Commit a Crime
To start the mission, commit a crime then let the UC escort you to the UC Vigilance. You’ll be taken to a cell and Commander Ikande will show up to interrogate you. Work your way through his dialog then accept the offer when presented. You’ll then need to follow the guard to the operations center. Speak with the commander there to get the details on the mission.
Finish Grunt Work
Alternatively, finish the Grunt Work faction quest then Commander Tuala will just give you this quest and have you report to the UC Vigilance. Once you board, speak with Sysdef Guard who welcomes you aboard the ship then follow him to the command center. Take the elevator up then speak with Commander Ikande.
Speak to Lt. Toft
No matter how you started the Deep Cover Starfield mission, you’ll need to speak with Lt. Toft after being briefed by Commander Ikande.
Proceed to Cydonia
Head to your ship and set a course for Cydonia on Mars in the Sol System. Once you land, make your way to the Trade Authority and speak with Saoirse Bowden. She’ll tell you that the stuff is too hot to handle but for a small fee of 1,000 credits, she’ll set up a buyer for you.
Speak to Adler Kemp at the Broken Spear
Make your way over to the Broken Spear bar to locate and speak with Adler Kemp. Choose to give him the sample when prompted. Before agreeing to move the product, you’ll need to settle a matter for Adler. Make sure to pick up the Naeva Meetup (Evidence) on the table behind him for the Burden of Proof mission.
Recover Karl Fielding’s Debt
Make sure this quest is active so you can track down Karl Fielding (for us he was near the Luxe Condos in the residential area). Speak with Karl about his debt. After you remind him who Adler is, you’ll have a couple of options. You can pay the debt for him, persuade him to pay up or attack him and take it afterward. How you do it doesn’t matter, just make sure to deliver the credits to Adler. He’ll then invite you to join the fleet. After you accept, the Deep Cover Starfield mission will complete. You’ll be rewarded with 250 EXP and some credits.
Welcome to our walkthrough for the Apex Predator Starfield mission!
PLEASE NOTE: Some of the planets referenced in our guides and walkthroughs may not match up with yours due to how Starfield was created. In these situations, what you do and the places you visit on those planets should still be the same.
Starting Apex Predator
Apex Predator is a faction mission for the United Colonies that you can begin by speaking with Percival at the TMD Headquarters on Mars in the Sol System after competing the A Legacy Forged mission.
For the Apex Predator Starfield mission, you’ll first need to travel to the Stone Pillars on Groombridge VIII-a, a moon of Groombridge VIII in the Groombridge system. Once there, mark your mission as active then follow the objective markers to the specific beasts you need to gather the samples from. If you use a non lethal gun you can retrieve the samples without killing the creatures!
Return the Samples
Return to the TMD HQ on Mars in the Sol system then hand the samples over to the United Colonies Xenobiologist, which will complete the mission!
Post Mission
Please note this mission is repeatable! Just speak with Percival to get the location for more samples. You’ll go collect the samples then return them for rewards!
This site uses cookies. By continuing to use this website, you are giving consent to cookies being used. For more information on cookies, view our Privacy Policy.OkPrivacy Policy