Blog

Gamer’s Log 005

by Chappie in


BLOG

Hey everyone! Chappie here with another gamer’s log. I want to start this off by talking about some changes I will be making to the blog. First, I am going to stop writing reviews in the traditional sense for the foreseeable future. In lieu of that, I will be talking about the games I’m playing and my opinions of them in my gamer’s logs going forward. This will allow me to focus more on what I am really passionate about, making guides. Another change that resulted from this decision is that I will be posting Gamer’s Logs once a week on Mondays starting today and yes, I know today is Wednesday . As always, guides will be posted as new games come out and I will be working on adding more content to the blog in the future. I also wanted to say thank you to everyone who’s been reading my guides and that your feedback has been appreciated. With the business out of the way, let’s jump into the games!


GAMES

I’ve played quite a few games since the last gamer’s log and man has it been a journey. I was able beat Shining Resonance and We Happy Few, both of which are pretty decent games. I also put a good 40 hours into Octopath Traveler and also started playing Cosmic Star Heroine on the side because why not!?!


Dragon Quest XI launched the other day and we still have Spider-Man launching at the end of the week. I went ahead and started Dragon Quest XI and will be playing that up to Thursday. On Friday, I will be switching gears to Spider-Man. I have been waiting for a long time to get my hands on this game, so it will be taking priority. When that is finished, we’ll switch back to finish up Dragon Quest XI.


Below are the games I’ve been playing broken out into sections. Under each section, I talk about how much progress I made and my feelings toward each game. This week is the first time following this format and it’s been awhile since my last Gamer’s Log so there will be quite a lot to talk about. Without further ado, let’s get started!


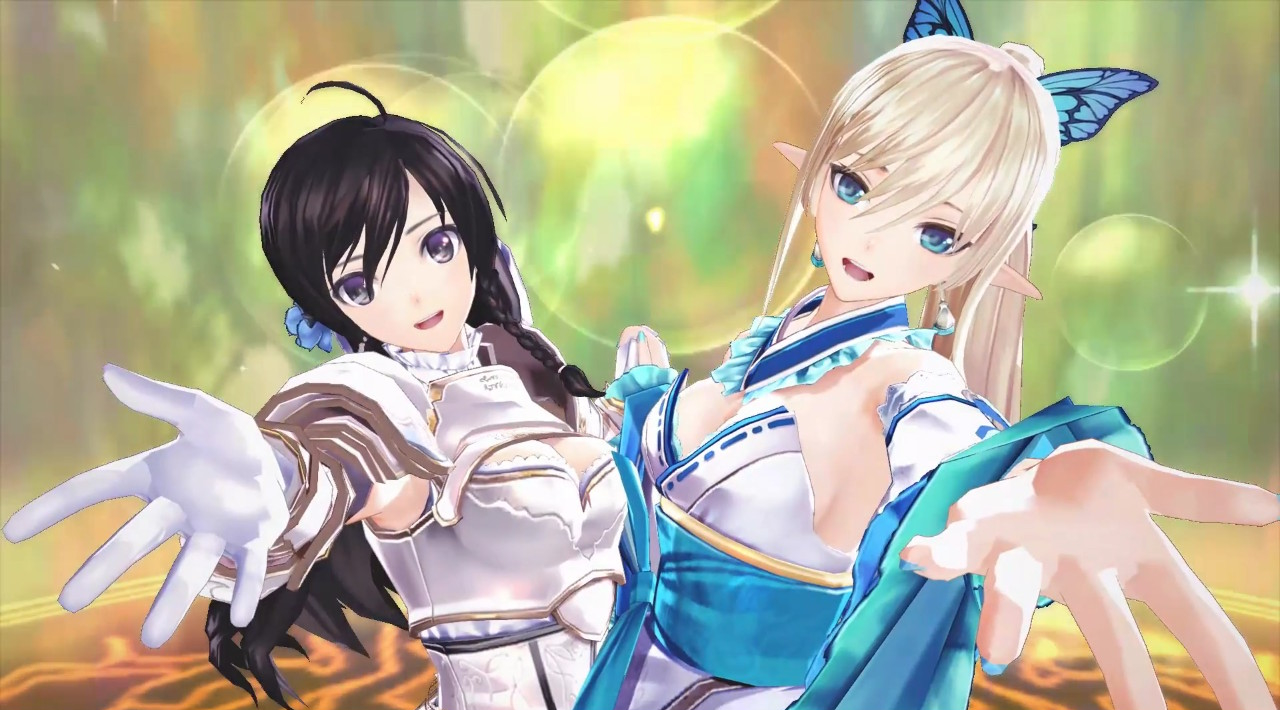
Shining Resonance Refrain – Played on SWITCH

After 65 hours of gametime, I finally found myself at the end of Shining Resonance Refrain (SRR). By the time I was done, I had completed what seemed like an infinite amount of side quests, spent some quality time grinding up character levels (it’s not a real RPG if there is no grinding involved), and defeated the final boss. Not to mention put some serious thought into who Yuma’s (the main character) waifu/husbando should be (the answer is obviously Kirika). Putting all of this together with combat similar to the Tales series, you get kind of what I was expecting…a low-key RPG with a decent story following the classic light versus darkness theme.


As mentioned above, combat in SRR is reminiscent of the Tales series in that enemies appear on the world map and you run into them to initiate combat. Combat also involves controlling one of four party members engaging enemies in real time using skills and items to defeat them. I bring this up because one of my favorite mechanics in the game is Yuma’s ability to utilize the power of the Shining Dragon to transform himself into a dragon. Doing this dramatically increases his attack and defense, giving you an edge in combat. As what is normally the case when wielding a strong power, there is a negative effect as well. Once Yuma’s MP decreases low enough, he goes berserk, damaging enemies and allies alike. This can be disastrous depending on the circumstance. Luckily there is another mechanic the game has called B.A.N.D. Sessions. When initiated, the Dragoneers (your party members) use their armonics (weapons that also happen to be musical instruments) to play a musical piece. The result is a buff for the whole party and it also has the side effect of calming a berserking Yuma dragon to his human form which comes in handy pretty early on when first introduced.


Outside of the previously mentioned combat mechanics, there really isn’t a whole lot to distinguish SRR from other RPGs. The main thing that bummed me out was that all of the side quests fell into two categories: fetch quests or extermination quests. This causes a lot of different quests to require the same items and some side quests were even repeatable. It didn’t take long for me to get burned out on side quests and start pushing through the story since there wasn’t much else to do. Taking all these factors into consideration, I feel that Shining Resonance Refrain is best suited for people new to RPGs/JRPGs who are looking for a good game to get introduced to the genre. I enjoyed it as a veteran of RPGs, but still found the game wanting.


Octopath Traveler – Played on SWITCH

‘My blade is unbending!’ has become my new catch phrase as of late. But playing Octopath Traveler for over 40 hours and hearing it all the time will do that to you. If you haven’t guessed already, I chose to start out with Olberic. At that much time played, I have completed chapters 1 and 2 for all eight party members and am happily grinding some more before tackling chapter 3. Thanks to some quick googling,  I found a lovely grinding spot just outside of Grandport where I have defeated over hundreds of Greater Kingfishers who award a whopping 500 EXP per battle. My plan going forward is to finish leveling up the whole party to level 45, then to set out and start chapter 3. The reason I want to get to level 45 is because that’s the recommended level for each character in chapter 4. This means I would be set to the end of the game.


For those who haven’t heard of Octopath Traveler (there may be some of you out there), it’s a traditional turn based RPG following eight adventurers who travel together. What makes it unique is that each character has their own story you play though over the course of the game and for each story, that character is the main focus. All of the stories and cutscenes play out with just the involved character. Your other party members do make an appearance in combat and there is some small banter between them, but that’s really all the interaction there is. At first, I didn’t know how I felt about the game devs going in that direction with the game, but after spending some time with it, I’m really enjoying myself. I feel invested in each character’s story and that keeps pushing me forward to see how each individual’s journey plays out in the end. I will talk about this more as I progress further in the game.


We Happy Few – Played on PS4

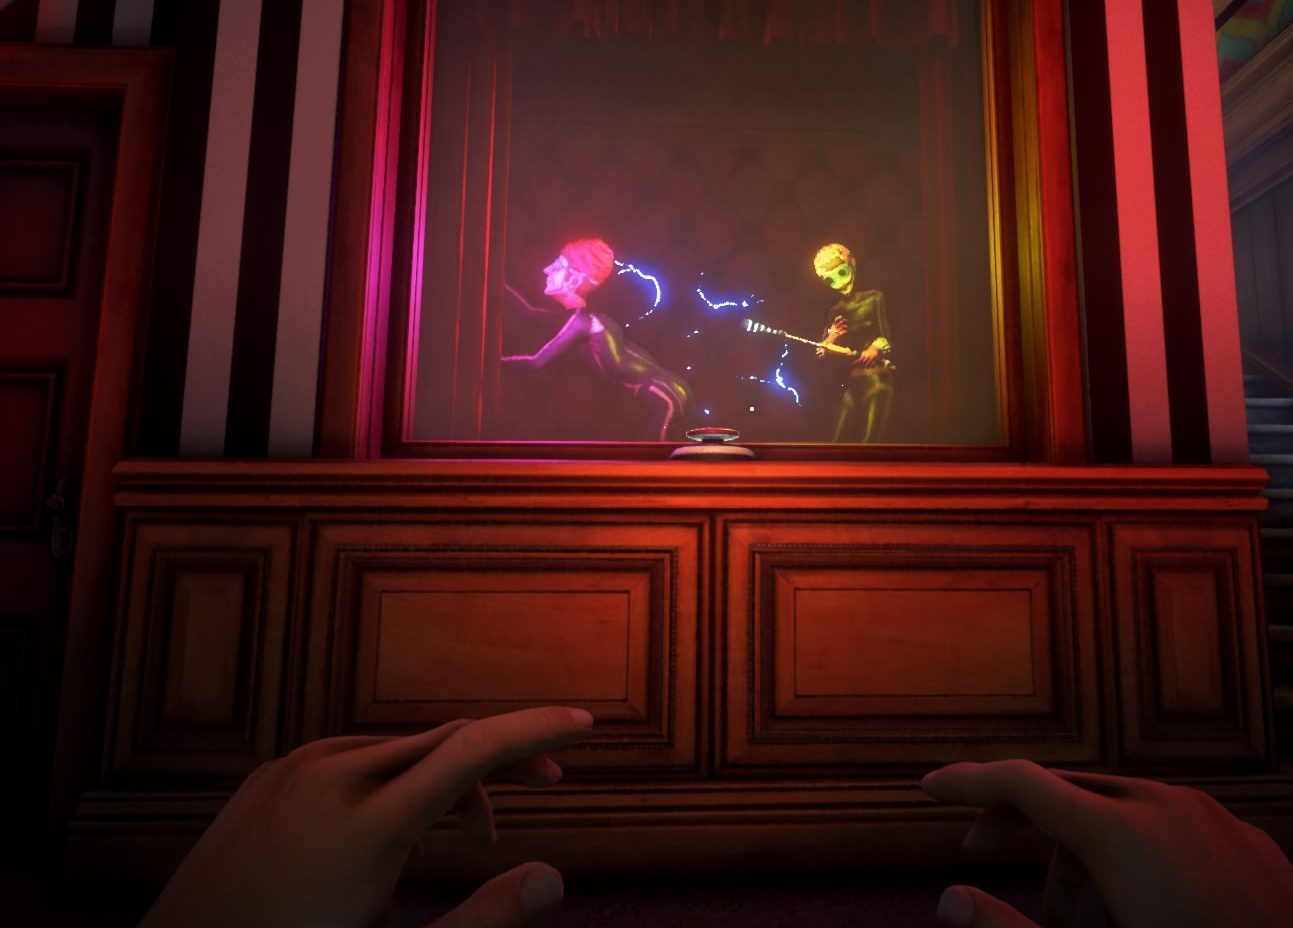
I would summarize my relationship with We Happy Few to be one full of love and hate. Over the course of 40 hours, I managed to complete every side quest I came across, fully explore the game world, and complete all three acts that make up the game’s story. We Happy Few is a survival based RPG set in an alternate history where Germany managed to invade England during the war. After sometime of occupation, England was given an out to end said occupation. The out was so bad, that a new hallucinogenic drug called Joy was developed to keep everyone happy and help them forget all of the bad things that happened. You get to play as Arthur, Sally, and Ollie over three acts as they each set out to escape this community that is on the brink of collapse.


One of the things I really loved about this game are the side quests. Most of them were well done and had a great side story that made them worth completing. Side quests are found by exploring the world which is procedural generated at the beginning of each playthrough. That basically means that each person will have a unique experience to them where monuments and locations spawn in different areas compared to someone else’s game. Side quests also trigger randomly so it’s likely that you won’t get to experience them all on one playthrough alone. The other thing about We Happy Few I enjoyed was just the world itself. Walking around on Joy makes everything colorful and full of life. When not on Joy, the illusion is gone leaving you to face reality. This can also also lead to being called a downer and getting chased by an angry mob of townsfolk wielding shovels, rolling pins, and cricket bats.


Some of the things that really put a damper on my experience were the frequent bugs, frame rate drops, and long loading times. The bugs I encountered ranged from preventing me from completing certain side quests to spending an eternity sitting on a bench. After waiting for time to progress, the option to get off the bench disappeared leaving me to watch the doped up citizens of Maidenholm wonder about. When I wasn’t experiencing bugs, the game would freeze for a couple of minutes as the framerate tanked. Most of the time it fixed itself, but occasionally the game would just crash. Then when loading the game up again, I would be waiting there for 120 seconds waiting for the game to load. If this was just a one time thing, no problem. The issue for me was that it took this long also when switching areas. Then while exploring, the game would randomly decide it was time to load again. When all is said and done, I’d still recommend giving We Happy Few a shot. The side content and world was more than enough to keep me coming back and I can’t wait for the future DLC content to release.


Cosmic Star Heroine – Played on PS4

I first came across Cosmic Star Heroine last year when it released in April and added it to my games to watch. Recently it was in a PSN sale so I figured I would bite the bullet and give it a shot. I was looking for a game where the story really grabbed me, but also where I could put it down and pick it up as needed and this seemed to really fit the bill. Set in a futuristic dystopian world, this turn based RPG follows the protagonist Alyssa L’Salle. She is an agent of the API (Agency of Peace and Intelligence), who discovers a couple of mysterious devices while on a secret mission. The devices have the ability to hack into a person’s brain and take it over via mind control. Fearing what the API may use the device for, Alyssa decides to steal back the devices and find a way to counteract them. This of course results in her being labeled a traitor and listed as a rogue agent.


I’m about 5 hours in putting me in chapter 5 and am really enjoying myself so far. The story is pretty linear with a couple side quests thrown in here and there. So far I managed to escape the API with the device, meet a kick ass rock singer, and battle a giant robot in the middle of a city. Being an indie game, it’s estimated to be a total of 15 hours long, so I will talk about the combat in a future Gamer’s Log.


Dragon Quest XI Echoes of an Elusive Age – Played on PS4

I’d like to start this section of by stating that this is the first Dragon Quest game that I have played. It’s a turn based JRPG following a silent protagonist who is the chosen one meant to defeat the darkness. I know, it’s the same thing for 80% of every RPG out there, but this one does have some charm to it. The world is colorful and vibrant, which makes it really easy to get lost exploring every nook and cranny. I feel as though I have become a barrell bandit…no barrell is safe from my quest to obtain loot! I have put around 5 hours into the game and am making some headway in the main story. My only complaint is that the first couple of hours started out really slow and took awhile to speed up. I will go more in depth with this one later on down the road.


This brings the fifth Gamer’s Log to a close. Go forth and game like you’ve never gamed before! MUUUHAHAHA (diabolical laugh) Chappie signing off!


Shining Resonance
Guides

Shining Resonance Refrain – Materials and Monsters Guide

by Chappie in

Marga, the Seaside Capital

  • Downtown
    • Items
      • Bull Balm
      • Cheer Carrot
      • Fishwort Mushroom
      • Spirit Seed
  • Castlefront Street
    • Items
      • Bull Balm
      • Cheer Carrot
      • Fishwort Mushroom


Windia Grasslands

  • Origin Plains
    • Monsters
      • Breedershell
      • Cassowary
      • Frogger (during the rain)
      • Masked Goblin/Hobgoblin/Goblin
    • Items
      • Bull Balm
      • Cheer Carrot
      • Happyberry
      • Heal Mint
      • Rosso Tomato
      • Windia Swallowtail
  • Fountain Valley
    • Monsters
      • Cassowary
      • Frogger
      • Masked Goblin/Hobgoblin
      • Sharpfin (during the rain)
    • Items
      • Bull Balm
      • Cheer Carrot
      • Fishwort Mushroom
      • Heal Mint
      • Muscle Pumpkin
      • Rosso Tomato
      • Spirit Seed
      • Windia Swallowtail
  • Breeze Field
    • Monster
      • Breedershell
      • Frogger (during the rain)
      • Marasmius (during the fog)
      • Masked Hobgoblin/Hobgoblin
      • Tempest (advanced enemy)
      • Twin Head
    • Items
      • Cheer Carrot
      • Happyberry
      • Heal Mint
      • Muscle Pumpkin
      • Rosso Tomato
      • Spirit Seed
      • Windia Swallowtail


Ladlum Caverns

  • Buried Ruins
    • Monsters
      • Dragonfly
      • Marasmius
      • Statue
      • Wraith
    • Items
      • Fishwort Mushroom
      • Heal Mint
      • Kaiser Shroom
      • Mana Fragment
      • Muscle Pumpkin
  • Howling Hole
    • Monsters
      • Green Paste
      • Marasmius
      • Orc (advanced enemy)
      • Statue
    • Items
      • Fishwort Mushroom
      • Heal Mint
      • Kaiser Shroom
      • Mana Fragment


Elmore Greatwood

  • Forest of Giants
    • Monsters
      • Crawler
      • Griffon (advacned enemy) / Stormbringer (during the rain)
      • Lantern
      • Psilocybe
      • Thunder Crawler (during the rain)
    • Items
      • Angelite (during the rain)
      • Dynamo Mushroom
      • Elmore Aloe
      • Heal Mint
      • Kaiser Shroom
      • Mana Fragment
  • Creek Path
    • Monsters
      • Crawler
      • Daisy
      • Lantern
      • Psilocybe
      • Thunder Crawler (during the rain)
      • Wyvern King (advanced enemy)
    • Items
      • Angelite (during the rain)
      • Elmore Aloe
      • Elmore Water
      • Heal Mint
      • Rosso Tomato
  • Elmore Springs
    • Monsters
      • Daisy
      • Forest Guardian (advanced enemy)
      • Lizard Man
      • Sharpfin
      • Thunder Crawler (during the rain)
    • Items
      • Angelite (during the rain)
      • Elmore Water
      • Tree Drop (during fog)
  • Glaucus Falls
    • Item
      • Armonics Tome


Djingharna Ruins

  • Daybreak Garden
    • Monsters
      • Floating Octo
      • Lizard Man
      • Sharpfin
      • Torch
    • Items
      • Elmore Water
      • Happyberry
      • Mana Fragment
  • Noontide Garden
    • Monsters
      • Elecmachina (advanced enemy)
      • Emerald Crystal
      • Floating Octo
      • Lizard Man
      • Masked Thief
    • Items
      • Mana Fragment
      • Windia Swallowtail
  • Twilight Garden
    • Monsters
      • Emerald Crystal
      • Life Reaper (advanced enemy)
      • Lizard Man
      • Sharpfin
      • Torch
    • Items
      • Elmore Water
      • Heal Mint
      • Mana Fragment
      • Windia Swallowtail


Sleepy Hollow

  • Church Ruins
    • Monsters
      • Archer Skeleton
      • Dark Crystal
      • Dark Spore
      • Empress Rose
      • Fighter Skeleton
      • Satan (enemy)
    • Items
      • Cure Basil
      • Mana Crystal
      • Shiny Moss
  • The Gloompath
    • Monsters
      • Archer Skeleton
      • Black Knight King (advanced enemy)
      • Chimera (advanced enemy)
      • Dark Knight (advanced enemy)
      • Dark Spore
      • Fighter Skeleton
      • Purple Paste
    • Items
      • Afterworld Dew (during the fog)
      • Cure Basil
      • Hollow Grass
      • Mana Crystal
      • Purivine


Gaelritz Prison

  • Gate of No Return
    • Monsters
      • Gargoyle
    • Items
      • Armonics Tome
  • Cell Block 1
    • Monsters
      • Golem (enemy)
      • Marksman
      • Masked Ranger
      • Masked Thief
      • Swordsman / Elite Swordsman
  • Cell Block 2
    • Monsters
      • Masked Brave
      • Masked Thief
      • Swordsman
      • Twin Head
      • Wraith
  • Top Floor
    • Prologue Boss
  • Underground Cell Block
    • Monsters
      • Elite Swordsman
      • Knightgear (advanced enemy)
      • Marksman
      • Masked Thief
      • Musketeer
      • Wraith
  • Library of Memories
    • Boss Fight


Clavalle Crags

  • Thirsting Wastes
    • Monsters
      • Dahlia
      • Manticore (enemy)
      • Sandripper (during sandstorm)
      • Topaz Crystal
      • Yellow Paste
    • Items
      • Bomb Core
      • Cure Basil
      • Emperor Cactus
      • Hihiitokane
      • Lavar Stone
      • Spirit Seed
  • Silent Badlands
    • Monsters
      • Ahsgrimm
      • Dahlia
      • Sandripper (during sandstorm)
      • Topaz Crystal
      • Withershell
    • Items
      • Armonics Tome
      • Bomb Cone (during sandstorm?)
      • Cure Basil
      • Emperor Cactus
      • Hihiirokane
      • Mana Fragment
      • Twilight Amber (during sandstorm?)
  • Lost Garden
    • Monsters
      • Masked Hobgoblin
      • Masked Goblin
      • Masked Brave
      • Masked Ranger
      • Burst Flare (advanced enemy)
      • Flare Dragon (advanced enemy)
    • Items
      • Hihiirokane
      • Lavar Stone
      • Mana Fragment
      • Spirit Seed


Sharion Coast

  • Moonlight Bay
    • Monsters
      • Buoyant Octo
      • Charcoal
      • Sharpfin/Goldenhead
      • Thunderbird
      • Tidal (advanced enemy)
    • Items
      • Cheer Carrot
      • Coral Reef
      • Mana Crystal
      • Muscle Pumpkin
      • Sharion Water
      • Soothe Sage
      • Star Sand
  • Starlight 
    • Monsters
      • Buoyant Octo
      • Charcoal
      • Dragon Apple
      • Grendel (enemy)
      • Sharpfin
      • Thunderbird
    • Items
      • Cheer Carrot
      • Dragon Fruit
      • Muscle Pumpkin
      • Sharion Water
      • Soothe Sage
      • Star Sand


Coral Caves

  • Downsy Reefs
    • Monsters
      • Blue Paste
      • Buoyant Octo
      • Cheer Carrot
      • Lizard Leader
      • Sapphire Crystal
    • Items
      • Dragon Fruit
      • Sharion Water
      • Armonics Tome
  • Seafoam Cavern
    • Monsters
      • Buoyant Octo
      • Cold Lantern
      • Lizard Leader
    • Items
      • Dragon Fruit
      • Mana Crystal
      • Star Sand
  • Tidal Cavern
    • Monsters
      • Cherub (advanced enemy)
      • Cold Lantern
      • Lizard Leader
    • Items
      • Soothe Sage
      • Star Sand


Ulde Desert

  • Ancient Graveyard
    • Monsters
      • Atlas (advanced enemy – during a sandstorm)
      • Grand Smasher (advanced enemy)
      • Hell Hounds
      • Ruby Crystal
    • Items
      • Burning Peppermint
      • Sea Remnant
      • Ulde Scorpion
  • Blessed Oasis
    • Monsters
      • Blaze Frogger
      • Conflictor
      • Red Paste
      • Salamander (advanced enemy)
    • Items
      • Malta Fruit
      • Ulde Water
  • Shattered Dam
    • Monsters
      • Blaze Frogger
      • Hell Hounds
      • Red Paste
      • Ruby Crystal
    • Items
      • Burning Peppermint
      • Sea Remnant
      • Ulde Scorpion


Mount Glanciel

  • Giant’s Ridge
    • Monsters
      • Blastershell
      • Chimera (advanced enemy)
      • Cold Lily
      • Pearl
      • Simurgh
    • Items
      • Frozemary
      • Hammer Banana
      • Logos Ice
      • Mountain Stone
      • Soothe Sage
  • Platina Peek
    • Monsters
      • Elite Swordsman
      • Fanged Sorcerer (advanced enemy)
      • Heavy Soldier
      • Silver Paste
      • Snow Griffon (advanced enemy)
    • Items
      • Soothe Sage
      • Frozemary
      • Melted Snow


Logos Tundra

  • Blue Cavern
    • Monster
      • Cave Gusoku
      • Gargoyle
      • Light Crystal
      • Simurgh
    • Item
      • Armonics Tome
      • Melted Snow
      • Mountain Stone
      • Soothe Sage
  • Gale Tunnel
    • Monsters
      • Gargoyle
      • Glacier Dragon (advanced enemy)
      • Light Crystal
    • Items
      • Hammer Banana
      • Melted Snow
      • Mountain Stone
  • Highwolf Shrine
    • Monsters
      • Cave GoGusoku
      • Cold Lily
      • Guard Skeletons
      • Invisible
    • Items
      • Frozemary
      • Hammer Banana
      • Mountain Stone
      • Soothe Sage
  • Dragon Shrine
    • Boss Fight


Fort Garahl, Stronghold of the Empire (during  the Op. 7 main story quest)

  • Fort: First Floor
    • Monsters
      • Crossbow Knight
      • Grand Knight
      • Hellhounds
      • Knight
      • Shadow Gear (advanced enemy)
  • Sentinel’s Gallery
    • Monsters
      • Crossbow Knight
      • Grand Knight
      • Knight
      • Musket Knight
  • Knight’s Gallery
    • Monsters
      • Crossbow Knight
      • Grand Knight
      • Knight
      • Musket Knight
  • Fort: Second Floor
    • Monsters
      • Grand Knight
      • Heavy Knight
      • Minotaur (advanced enemy)
      • Musket Knight


Fort Garahl, Stronghold of the Empire (after the Op. 7 main story quest)

  • Fort: First Floor
    • Monsters
      • Blaze Frogger
      • Conflictor
      • Shadowgear
      • Knight
      • Masked Thief
  • Sentinel’s Gallery
    • Monsters
      • Grand Knight
      • Grand Smasher (advanced enemy)
      • Shadowgear (advanced enemy)
      • Minotaur (advanced enemy)
  • Knight’s Gallery
    • Monsters
      • Grand Knight
      • Blaze Frogger
      • Conflictor
      • Chimera (advanced enemy)
      • Musket Knight
  • Fort: Second Floor
    • Monsters
      • Grand Knight
      • Conflictor
      • Heavy Knight
      • Minotaur (advanced enemy)
      • Musket Knight


Shining Resonance
Guides

Shining Resonance Refrain – Fetch Quests

by Chappie in


A Gift for Someone – Rapple (Downtown)

  • Objective: Collect 2 Spirit Mistletoe
    • Spirit Mistletoe are dropped by the Daisy enemy located in the Elmore Springs of the Elmore Greatwood.
  • Reward: 1000G


An Elf’s Concoction – Kirika (Downtown/Campfire)

  • Objectives: Collect 3 Happyberry
    • Happyberries can be found in the Windia Grasslands.
  • Reward: 1 Magic Arrow


Beloved Crawlers – Liselotte (Downtown)

  • Objective: Collect 8 Hard Exo
    • Crawlers can be found around the Windia Grasslands.
  • Reward: 2 Potions


Break Challenge – Fromage (Castlefront Street)

  • Objective: Perform 10 Breaks
    • Break 10 enemies during combat
  • Reward: 3 Heal Mists


Bring me a Drink! – Drunk Man (Castlefront Street)

  • Objective: 5 Elmore Water
    • You can buy the Elmore Water from Liselotte’s Shop or find it in the Creek Path and Elmore Springs of the Elmore Greatwood.
  • Reward: 1 Avian Talon


Butterfly Dream Cantata – Fernando (Fountain Valley – Windia Grasslands)

  • Objective: Collect a Spirit Mistletoe
    • Complete the side quest Dogs of the Empire to get a Spirit Mistletoe as a reward or defeat the Daisy enemies located in the Elmore Greatwood.
  • Reward: Fernando’s Score


Challenging Carrots – Kirika (Downtown/Campfire)

  • Objective: Collect 7 Cheer Carrots
    • Cheer Carrots can be found around Marga or the Windia Grasslands.
  • Reward: 1 Heal Power


Combo Rythm – Fromage (Castlefront Street)

  • Objective: Max Combo 30
    • Preform a 30 hit combo in battle.
  • Reward: 1 Hit Bonus


Cooking Practice – Primula (Downtown)

  • Objective: Collect 5 Rosso Tomatoes
    • You can get the 5 Rosso Tomatoes from the side quest Farming Conditions or collect them from the Windia Grasslands.
  • Reward: Primula’s Sandwich


Dangerous Treasure – Talkative Man (Castlefront Street)

  • Objective: Collect 30 Alchemic
    • Head to the Thirsting Wastes in the Clavalle Crags to find a group of elemental crystals. Defeat them to collect the 30 Alchemic.
  • Reward: Hihiirokane


Dog Days – Rush (Downtown)

  • Objective: Collect 3 Broken Bones
    • Broken Bones can be obtained by defeating the skeleton monsters in Sleepy Hollow.
  • Reward: 1 Potion


Dragonfly Extract – Liselotte (Downtown)

  • Objective: Collect 5 Insect Fluid
    • Defeat dragonfly enemies located in the Ladlum Caverns.
  • Reward: Detox Bottle


Eloquent Melody of History – Rinna (Downtown / Campfire)

  • Objective: Collect 5 Sea Remnants
    • Sea Remnants can be found in the Ancient Graveyard or the Shattered Dam in the Ulde Desert.
  • Reward: 1 Four-Leaf Clover


Emma’s Errand – Emma (Downtown)

  • Objective: Collect 8 Kaiser Shrooms
    • Kaiser Shrooms can be found in the Ladlum Caverns or in the Forest of Giants located in the Elmore Greatwood.
  • Reward: 1 Seagull Lunch


For the Neighbors – Rinna (Downtown/Campfire)

  • Objectives: Collect 5 Bull Balm
    • Bull Balm can be found in the Windia Highlands.
  • Rewards: 3 Fish Oil


For the People – Sonia (Downtown)

  • Objective: Complete 10 quests
  • Reward: Shield 1


Ghost Raid – Liselotte (Downtown)

  • Objective: Collect 5 Muting Cloths
    • Muting Cloths is dropped by the Wraith enemy that spawns in the Ladlum Caverns. It shows up during the Op.3 main quest, Investigating the Ladlum Caverns.
  • Reward: 2 Mana Potions


Girlish Hobby – Marion (Castlefront Street)

  • Objective: Collect 7 Star Sand
    • Star Sand can be found along the Sharion Coast
  • Reward: 1 Fairy Doll


Gold Rush – Liselotte (Downtown/Campsite)

  • Objective: Collect 3 Hihiiro Scales
    • Hihiiro Scales are dropped off of the Sharpfin monsters located in along the Sharion Coast.
  • Reward: 2 Mana Mists


Good Medicine: Mushroom – Rapple (Downtown)

  • Objective: Collect 5 Fishwort Mushroom
    • You can collect the Fishwork Mushrooms in the Ladlum Caverns.
  • Reward: 5 Detox Bottles


Good Medicine: Needles – Rappels (Downtown)

  • Objective: Collect 5 Emperor Cactus
    • Emperor Cactus can be found in the Thirsting Wastes and Silent Badlands of the Clavalle Crags.
  • Reward: 5 Excecider


Good Medicine: Unexpected – Rapple (Downtown)

  • Objective: Collect 5 shiny moss
    • Shiny Moss can be collected in the Church Ruins of Sleepy Hollow.
  • Reward: 3 Elixir


Help Me! – Peasant Boy (Downtown)

  • Objective: Collect 3 Heal Mints
    • Heal Mints can be found in the Windia Grasslands.
  • Reward: 2 Light Rock


Heroic Anthem March – Fernando (Castlefront Street)

  • Objective: Collect 1 Giant Fist
    • Complete the mission Lion’s Den for Burroughs in Op.4.
  • Reward: 1 Fernando’s Score


I Can Fly – Dreaming Man (Downtown)

  • Objective: Collect 8 Red Bird Feathers
    • Red Bird Feathers are dropped by the Cassowary monster located in the Windia Grasslands.
  • Reward: 1 Crest of Darkness


Jiggly Pillows – Liselotte (Downtown)

  • Objective: Collect 5 Green Jiggly
    • Green Jiggly is dropped by the Green Paste monsters located in the Howling Hole of the Ladlum Caverns.
  • Reward: Happy Drink


Like a Girl – Marion (Castlefront Street)

  • Objective: Talk to Marion
  • Reward: 1 Weak Shot


Lost Technology – Lyle (Downtown)

  • Objective: Collect 5 Armonic Tomes
    • Campsite in the Silent Badlands
    • Glaucus Falls on the ground near some rocks
    • Gate of No Return at Gaelritz Prison
    • North side of the Drowsy Reefs in the Coral Caves on the opposite side of the advanced enemy Death Legs
    • Blue Cavern in the Logos Tundra (Op.5)
  • Reward: 3 Shining Stones


Marga’s Trend – Rinna (Downtown/Campfire)

  • Objective: Collect 3 Elmore Aloe
    • Elmore Aloe can be found in the Forest of Giants and Creek Path of the Elmore Greatwoods.
  • Reward: 5 Fighting Charge


Misty Graveyard – Stella (Downtown)

  • Objective: Collect 1 Afterworld Dew
    • Afterworld Dew can be found on the Gloompath located in Sleepy Hollow during fog.
  • Reward: 2 Afterworld Dew


My Backpack… – Scholar (Castlefront Street)

  • Objective: Collect 4 Lizard Skin
    • Lizard Skin is dropped by the Lizard Men located in the Elmore Springs of the Elmore Greatwood.
  • Reward: 2 Mistletoe Seed


Natural Conservation – Lestin (Castlefront Street)

  • Objective: Collect 8 Windia Swallowtail
    • Windia Swallowtail can be collected in the Windia Grasslands.
  • Reward: 1 Healing Echo


Need All the Help I Can Get – Passionate Soldier (Downtown)

  • Objective: Defeat the Grand Smasher
    • The Grand Smasher can be found in the Ancient Graveyard of the Ulde Desert
  • Reward: 1 Protecting Talisman


New Cauldron – Rapple (Downtown)

  • Objective: Synthesize a Pressure Cauldron
    • Collect 1 statue fragment (statues), 2 paste cores (green paste), and a large shell (Breedershell) then talk to Rapple and choose Item Synthesis. Find the Pressure Cauldron in the list and select it. Talk to Rapple to hand over the cauldron and complete the quest.
  • Reward: New Alchemy recipes + 1000G


Not Enough to Drink! – Drunk Man (Castlefront Street)

  • Objective: Collect 10 Cactus Leafs
    • Cactus Leafs are dropped by the Dahlia monster in the Clavalle Crags.
  • Reward: 1 Spider Sickle


Please! – Peasant Boy (Downtown)

  • Objective: Collect 3 Soothe Sages
    • Soothe Sage can be found in the Sharion Coast
  • Reward: 1 Frigid Rock


Protecting Cacti – Lestin (Castlefront Street)

  • Objective: Collect 8 Emperor Cactus
    • Emperor Cactus can be collected in the Thirsting Wastes or Silent Badlands of the Clavalle Crags.
  • Reward: Diva’s Lost Item


Protecting Scorpions – Lestin (Castlefront Street)

  • Objective: Collect 3 Ulde Scorpions
    • Ulde Scorpions can be collected in the Ulde Desert
  • Reward: 1 Diva’s Lost Item


Relentless Curiosity – Liselotte (Downtown)

  • Objectives: Collect 8 Enduring Light
    • Enduring Light are dropped by the Floating Octo enemies located in the Djinharna Ruins.
  • Rewards: 2 Flash Bottles


Rock Symbol – Agnum (Downtown/Campfire)

  • Objective: Collect 5 Cracked Skulls
    • Cracked Skulls are dropped by the skeleton enemies located in the Church Ruins of Sleepy Hollow.
  • Reward: 1 Burning Cookbook


Skincare – Rinna (Downtown)

  • Objective: Collect 3 Hollow Grass
    • Hollow Grass can be found at the Gloompath located in Sleepy Hollow.
  • Reward: 1 Sweet Parfait


Someone, Help Me! – Peasant Girl (Downtown)

  • Objective: Collect 3 Cure Basil
    • Cure Basil can be found in the Clavalle Crags or Sleepy Hollow.
  • Reward: 2 Old Magic Sand


Splendid Sandy Weather – Stella (Downtown)

  • Objective: Collect 1 Twilight Amber
    • Twilight Amber can be found in the Clavalle Crags during a sandstorm.
  • Reward: 2 Twilight Amber


Strong Against Cold – Rinna (Downtown / Campfire)

  • Objective: Collect 3 Frozemary
    • Frozemary can be collected around Mount Glanciel
  • Reward: 1 Excecider


Swimming in Sand – Liselotte (Downtown)

  • Objective: Collet 5 Sand Fish Fins
    • The Sand Fish Fins are dropped by the Sandripper monsters located in the Clavalle Crags. They only appear during sandstorms.
  • Reward: 2 High Potions


Symphonica Challenge – Fromage (Castlefront Street)

  • Objective: Initiate 10 B.A.N.D. Sessions
    • Perform  10 B.A.N.D Sessions during combat.
  • Reward: 3 Mana Mist


Symptomatic Treatment – Agnum (Castlefront Street)

  • Objective: Collect 5 Logos Ice
    • Logos Ice can be found at Giant’s Ridge on Mount Glanciel or in the Logos Tundra.
  • Reward: 1 Burning Cookbook


Tasty Endeavor: Appetizers – Hungry Lady (Downtown)

  • Objective: Collect 3 Fungus Hypha
    • Fungus Hypha is dropped by the Marasmius monster located in the Ladlum Caverns.
  • Reward: Giant Weapon


Tasty Endeavor: Dessert – Hungry Lady (Downtown)

  • Objective: Collect 8 Purple Wiggly
    • Purple Wigglies are dropped by the Purple Paste monsters located in Sleepy Hollow.
  • Reward: 1 Angelite


Tasty Endeavor: Seafood – Hungry Lady (Downtown)

  • Objective: Collect 3 Flying Fish Fin
    • Flying Fish Fins are dropped by the Sharpfin monster that can be found in the Djingharna Ruins or the Elmore Springs located in the Elmore Greatwood.
  • Reward: 3 Luring Kandelaar


The Best Water – Rapple (Downtown)

  • Objective: Collect 5 Elmore Water
    • Elmore Water can be found in the Creek Path and Elmore Springs of the Elmore Greatwood or you can buy them at Liselotte’s shop.
  • Reward: 3 High Potions


The Imperial Plant – Rinna (Downtown/Campfire)

  • Objective: Collect 3 Emperor Cactus
    • Emperor Cactus can be collected at the Thirsting Wastes or in the Silent Badlands of the Clavalle Crags.
  • Reward: 3 Aroma Bottes


The Right Amount of Salt – Kirika (Downtown)

  • Objective: Collect 10 Sharion Waters
    • Sharion Water can be found along the Sharion Coast.
  • Reward: 1 Sweet Parfait


The Sands of Time – Rinna (Downtown)

  • Objective: Collect 5 Lavar Stones
    • Lavar Stones can be found in the Thirsting Wastes of the Clavalle Crags.
  • Reward: 1 Four-Leaf Clover


Thunder-proof Umbrella – Liselotte (Downtown/Campsite)

  • Objective: Collect 5 Insulated Exo
    • Insulated Exo is dropped from the Thunder Crawler enemy located in the Elmore Greatwood. They only spawn duing the rain.
  • Reward: 2 Melt Bottles


Thunderous Forest – Stella (Downtown)

  • Objective: Collect an Angelite
    • Angelite can be obtained by defeating the Topaz Crystal enemy located in the Silent Badlands of the Clavalle Crags.
  • Reward: 2 Angelites


Today’s Enemy is Tomorrow’s… – Kirika (Downtown/Campfire)

  • Objective: Collect 5 Cheer Carrots
    • Cheer Carrots can be found around Marga or the Windia Grasslands
  • Reward: 1 Sweet Parfait


Twin Head Tails – Liselotte (Downtown)

  • Objective: Collect 7 Hound Tails
    • The Twin Head are dropped by the Twin Head monster located in the Forest of Giants in the Windia Grasslands.
  • Reward: 2 Fighting Charge


Unique Ensemble – Fernando (Windia Grasslands – Fountain Valley)

  • Objective: Collect a Goblin Kukri
    • The Goblin Kukri is dropped by the Goblin enemies located in the Windia Grasslands.
  • Reward: Fernando’s Score


Vitality Secret – Energetic Lady (Downtown)

  • Objective: Collect 1 Cordyceps
    • Cordyceps are dropped from the Psilocybe enemy in the Forest of Giants located in the Elmore Greatwood.
  • Reward: 3 Life Soma


Shining Resonance
Guides

Shining Resonance Refrain – Extermination Quests

by Chappie in


A Good Night’s Rest – Happy-Go-Lucky Lady (Castlefront Street)

  • Objectives: Defeat 40 Demons
    • Battle and defeat Goblins and Lizard men as both are classified as demons. You can find their specific locations in the monster location guide.
  • Reward: 1 Courageous Rest


A Jiggly Incident – Mellow Old Lady (Downtown)

  • Objective: Defeat the Slime Horde
    • Exit the Downtown of Marga to the Windia Highlands to find a Green Paste nearby. Initiate combat with it to fight the horde of slimes.
  • Reward: 1 Egg Shell


Blast the Ghosts – Angum (Downtown/Campfire)

  • Objective: Defeat 20 undead
    • The undead Skeletons can be found in Sleepy Hollow.
  • Reward: 1 Adversity Power


Burrough’s Chivalry – Burrough (Castlefront Street)

  • Objective: Defeat the Black Knight King
    • The Black Knight King can be found on the Gloompath of Sleepy Hollow
  • Reward: 1 Warrior Union


Can’t Go Fishing – Fisherman (Downtown)

  • Objective: Defeat 10 Withershell
    • Withershells can be found in the Clavalle Crags.
  • Reward: 3 Coral Reef


Chicken Race – Sonia (Downtown)

  • Objective: Defeat 20 Nature monsters
    • Defeat Nature enemies like the Dahlia in the Clavalle Crags or the Psilocybe of the Elmore Greatwood
  • Reward: 1 Marga Kebab


Chimera Danger – Vibrant Soldier (Castlefront Street)

  • Objective: Defeat 1 Chimera
  • Reward: 1 Devilish Candle


Clavalle Crags Ambush – Burroughs (Castlefront Street)

  • Objective: Defeat 30 Humans
    • The Imperial Soldiers are located in the Clavalle Crags.
  • Reward: 1 Dragon Horn


Disposing the Collection – Antique Man (Downtown)

  • Objective: Defeat 10 statues
    • Statues can be found in the Ladlum Caverns in the Windia Grasslands.
  • Reward: 3 Mana Crystals


Dogs of the Empire – Bratty Boy (Castlefront Street)

  • Objective: Defeat 10 Twin Heads
    • Twin Heads can be located in the Breeze Field located in the Windia Highlands.
  • Reward: 2 Spirit Mistletoe


Ecology Survey: Lighting – Scholar (Castlefront Street)

  • Objective: Defeat 10 Thunder Crawlers
    • You can find the Thunder Crawlers in the Elmore Greatwood during rain.
  • Reward: 3 Frog Oil


Ecology Survey: Stranded – Scholar (Castlefront Street)

  • Objective: Defeat 5 Cold Lily
    • Cold Lily enemies bound be found in Giant’s Ridge on Mount Glanciel or the Highwolf Shrine of the Logos Tundra
  • Reward: 2 Rainbow Jiggly


Elmore’s Defense – (Castlefront Street)

  • Objective: Defeat 20 Humans
    • The enemy soldiers are located in the Forest of Giants.
  • Reward: 1 Fluffy Mane


Farming Conditions – Farmer Lady (Downtown)

  • Objective: Defeat 8 Hobgoblins
    • Hobgoblins can be found in the Breeze Field of the Windia Grasslands.
  • Reward: 5 Rosso Tomato


Gang of Beasts – Sonia (Downtown / Campfire)

  • Objective: Defeat 20 Beasts
    • Defeat Hell Hounds and Cassowaries as they are classified as beasts. You can find their specific locations in the monster location guide.
  • Reward: 1 Marga Kebab


Gang of Three – Gossipy Lady (Downtown)

  • Objectives: Defeat the Manticore
    • Head to the Thirsting Wastes in the Clavalle Crags to locate and defeat the Manticore.
  • Objective 2: Defeat the Ahsgrimm
    • Head to the Silent Badlands in the Clavalle Crag to locate and defeat Ahsgrimm.
  • Objective 3: Defeat the Flare Dragon
    • Head to the Lost Garden in the Clavalle Crag to locate and defeat the Flare Dragon.
  • Rewards: 3 Jiggly Flans


Good Fortune 1 – Unlucky Lady (Downtown)

  • Objective: Defeat 20 Charcoal enemies
    • The Charcoal enemies are located along the Sharion Coast.
  • Reward: 2 Rotting Cross


Good Fortune 2 – Unlucky Lady (Downtown)

  • Objective: Defeat 10 Guard Skeletons
    • Guard Skeletons can be found at the Church Ruins or the Gloompath of Sleepy Hollow.
  • Reward: 1 Skullcum


Grandma Forgot – Mellow Old Lady (Downtown)

  • Objective: ???
    • Head to the Forest of Giants in the Elmore Greatwood and interact with the point of interest near the entryway to the Creek Path. This will initiate combat with a level 40 Ozone Dragon. Defeat it and return to the Mellow Old Lady.
  • Reward: 2 Egg Pouch


Hunt the Illusive Shadow – Rare Lover (Castlefront Street)

  • Objective: Defeat 5 Rare Monsters
    • Rare Monsters are enemies that randomly spawn during combat and look like eggs.
  • Reward: 1 Shining Stone


Inhumanly Helpful – Sonia (Downtown/Campfire)

  • Objective: Defeat 20 Demons
    • Battle and defeat Goblins and Lizard men as both are classified as demons. You can find their specific locations in the monster location guide.
  • Reward: 1 Marga Kebab


Knight’s Trail – Refined Girl (Castlefront Street)

  • Objective: Defeat 15 Dragons
    • Almost every region has a  dragon, so it should be easy to find one to farm. Check out this monster location guide to get the specific areas.
  • Reward: 1 Brave Mask


Lion’s Den – Burroughs (Castlefront Street)

  • Objective: Defeat 40 Imperial soldiers
    • Head to the Gloompath in the Sleepy Hollow and defeat the imperial soldiers there.
  • Reward: 1 Giant Fist


Maylm Mile – Stella (Downtown)

  • Objective: Defeat 99 Natures monsters
    • Defeat Nature monsters like the Dahlia in the Clavalle Crags or the Psilocybe of the Elmore Greatwood
  • Reward: ???


Mushroom Phobia – Talkative Lady (Castlefront Street)

  • Objective: Defeat 30 Nature enemies
    • Head to the Forest of Giants in the Elmore Greatwood to battle waves of mushroom-based enemies to complete this quest.
  • Reward: 1 Cordyceps


My Quill Pen… – Scholar (Castlefront Street)

  • Objective: Defeat 8 Cassowary
    • The Cassowary enemies are located in the Windia Highlands.
  • Reward: 3 Refresh Bottles


Need Even More Help – Earnest Soldier (Downtown)

  • Objective: Defeat 1 Sturm
    • Strum can be found in the Breeze Fields of the Windia Grasslands.
  • Reward: 2 Cordyceps


Need Help – Earnest Soldier (Downtown)

  • Objective: Defeat an Orc
    • The orc can be found at the Howling Hole of the Ladlum Caverns in the Windia Grasslands.
  • Reward: Warding Talisman


Need More Help – Passionate Soldier (Downtown)

  • Objective: Defeat the Life Reaper
    • The Life Reaper can be found in the Twilight Garden of the Djingharna Ruins.
  • Reward: 1 Brave Heart


No Such Thing as Ghosts – Bratty Boy (Castlefront Street)

  • Objective: Defeat the Dark Knight
    • The Dark Knight is located on the Gloompath in Sleepy Hollow.
  • Reward: 1 Brave Mask


Poison Frog Choir – Fruit Lady (Downtown)

  • Objective: Defeat 15 Poison Frogger
    • The Poison Frogger show up in the Elmore Forest during the fog. In my playthrough, the Windia Grasslands had fog while the Elmore Forest had rain, causing the Poison Frogger to show up.
  • Reward: 3 Spirit Seeds


Pollen Season – Happy-Go-Lucky Lady (Castlefront Street)

  • Objective: Defeat 5 Breedershell
    • The Breedershell enemies are located at the Breeze Field in the Windia Highlands.
  • Reward: 5 Heal Mint


Preparing for Winter – Fruit Lady (Downtown)

  • Objective: Defeat 1 Snow Griffon
    • The Snow Griffon can be found at Platina Peak located on Mount Glanciel.
  • Reward: 3 Dragon Apples


Second Battle of Fort Garahl – Burroughs (Castlefront Street)

  • Objective: Defeat 50 Humans
    • Head back to Fort Garahl and fight the Knight enemies there.
  • Reward: 1 Aura Blade


Stress Reliever – Energetic Lady (Downtown)

  • Objective: 30 Alchemic
    • Defeat 30 slime enemies to complete this objective. This is best done during the side quest A Jiggly Incident. If you don’t have the quest, you can find Green Paste enemies in the Howling Hole of the Ladlum Caverns.
  • Reward: 2 Luring Kandelaar


Tip of the Snow Mountain – Rinna (Downtown/Campfire)

  • Objective: Head to Dragon Shine in Logos Tundra
    • Defeat the 2 Elecmachina
  • Reward: 1 Heart Stealer


Guides

Shining Resonance Refrain – Character Bonds Guide

by Chappie in

Sonia

  • Op.2 Etude of the Dragoneers
    • I don’t feel comfortable here yet…
      • Increases Bond + Flash Bottle
    • Yea! I feel comfortable here now!
      • Nothing
    • I don’t really know.
      • Decreases Bond
  • Op.3 Ricordanza of Souls
    • I think I saw him around the castle…
      • Nothing
    • C-Captain Burrough!?
      • Decreases Bond
    • Do you want me to go look for him?
      • Bond Increase + Spirit Seedling
  • Op.4 Golden Sonata
    • I was totally about to train.
      • Nothing
    • You train every day, Sonia?
      • Decreases Bond
    • I train every day.
      • Increases Bond + Mana Blessing
  • Op. 5 Oratorio of Betrayal
    • We have to stay strong.
      • Increases Bond + Sky Score
    • A lot of people were injured.
      • Decreases Bond
    • He’ll get better in no time.
      • Nothing
  • Op. 6 Capriccio of the Strong
    • Only if we can understand each other…
      • Decreases Bond
    • But that doesn’t change what they’ve done.
      • Increases Bond + Jiggly Flan
    • You don’t have to worry about that.
      • Nothing
  • Op. 7 Fairy Elegy
    • Yeah, I think so, too.
      • Decreases Bond
    • I still have a lot to learn.
      • Increases Bond + Spirit Tonic
    • That’s not true. I’m just happy.
      • Nothing
  • Op. 8 Shining Concerto
    • It’s not a matter of can or can’t. We HAVE to.
      • Nothing
    • I’m worried, but we have to do it.
      • Decreases Bond
    • We can stop him.
      • Increases Bond + Healing Incense
  • Campfire
    • I usually take it easy.
      • Bond Decreases
    • I go for a walk around the city…
      • Nothing
    • I actually train too…
      • Bond Increases
  • Campfire
    • We’ll fight them together.
      • Increases Bond
    • I can protect you, too.
      • Nothing
    • You’re so dependable…
      • Decreases Bond


Kirika

  • Op.2 Etude of the Dragoneers
    • I wanted to say thanks for saving me.
      • Nothing
    • …Could you speak normally?
      • Decreases bond
    • Nothing, really. I just wanted to talk to you.
      • Increases Bond + jiggly flan
  • Op.3 Ricordanza of Souls
    • I’m not angry.
      • Increases Bond + Shining Score
    • Your brother is scary…
      • Decreases Bond
    • He must be hard on you, too.
      • Nothing
  • Op.4 Golden Sonata
    • You can call me “Your Radiance” if you want.
      • Nothing
    • You’ll get used to it eventually.
      • Increases Bond + Magic Nectar
    • Just remember next time.
      • Decreases Bond
  • Op. 5 Oratorio of Betrayal
    • I still don’t really know.
      • Increases Bond + Panacea Charm
    • I don’t think she’s a bad person.
      • Nothing
    • I think she’s a bad person.
      • Decreases Bond
  • Op. 6 Capriccio of the Strong
    • I don’t know…
      • Nothing
    • You actually believed that joke?
      • Decreases Bond
    • Uh, apparently, it’s true…
      • Increases Bond + Heal Blessing
  • Op. 7 Fairy Elegy
    • It hasn’t really sunk in yet…
      • Increases Bond + Elixir
    • It wouldn’t be possible without the Shining Dragon.
      • Decreases Bond
    • It’s all thanks to you, Kirika.
      • Nothing
  • Op. 8 Shining Concerto
    • I feel the same.
      • Nothing
    • It’s okay. I’m here for you.
      • Increases Bond + Spirit Seedling
    • You’re overthinking it.
      • Decreases Bond
  • Campfire
    • Don’t mind if I do.
      • Nothing
    • No thanks…
      • Decreases Bond
    • Do you like cats, Kirika?
      • Increases Bond
  • Campfire
    • A biography sounds good.
      • Decreases Bond
    • How about horror?
      • Nothing
    • Do you have um… romance?
      • Bond Increases
  • Campfire
    • It was for world peace.
      • Increases Bond
    • I couldn’t even think of one.
      • Decreases Bond
    • I wished to get a girlfriend.
      • Nothing
  • Campfire
    • Spring
      • Increases Bond
    • Summer
      • Nothing
    • Winter
      • Decreases Bond


Rinna

  • Op.2 Etude of the Dragoneers
    • You don’t need to thank me.
      • Increases Bond + Spirit Tonic
    • Hamburger steaks!
      • Decrease Bond
    • I want your heart.
      • Nothing
  • Op.3 Ricordanza of Souls
    • I want you to like me.
      • Increases Bond + Mana Mist
    • I-I’m not happy about it.
      • Decreases Bond
    • I am happy, but…
      • Nothing
  • Op.4 Golden Sonata
    • I feel exactly the same way.
      • Bond Increases + Sky Score
    • Calm Down.
      • Nothing
    • Not really…
      • Decreases Bond
  • Op. 5 Oratorio of Betrayal
    • That’s what I thought.
      • Increases Bond + Magic Nectar
    • Oh, really?
      • Nothing
    • That’s hard to believe… Are you joking?
      • Decreases Bond
  • Op.6 Capriccio of the Strong
    • He’s taking a nap.
      • Nothing
    • Can’t you go yourself?
      • Decreases Bond
    • Do you want me to go?
      • Increases Bond + Elixir
  • Op. 7 Fairy Elegy
    • I’m not that reliable.
      • Decreases Bond
    • I have my friends to thank for that.
      • Nothing
    • It’s thanks to you, Rinna.
      • Increases Bond + Dark Score
  • Op. 8 Shining Concerto
    • I always want you to be smiling.
      • Nothing
    • It’s normal to be afraid.
      • Decreases Bond
    • I’m scared, too…
      • Increases Bond + Spirit Tonic
  • Campfire
    • Yeah.
      • Nothing
    • If you eat late, you’ll gain weight.
      • Decreases Bond
    • We don’t have a knife.
      • Increases Bond

Agnum

  • Op.2 Etude of the Dragoneers
    • That’s what’s bothering you?
      • Decreases Bond
    • I’m feeling like fish today…
      • Increases Bond + Fighting Charge
    • It’s gotta be meat!
      • Nothing
  • Op.3 Ricordanza of Souls
    • Maybe Lestin’s…
      • Decreases Bond
    • You of course, Agnum.
      • Increases Bond + Earth Score
    • I won’t know until the time comes.
      • Nothing
  • Op.4 Golden Sonata
    • Yeah, ghosts don’t exist!
      • Increases Bond + Tough Buff
    • I can’t say for sure.
      • Nothing
    • Huh? Behind you…
      • Decreases Bond
  • Op. 5 Oratorio of Betrayal
    • This is suspicious…
      • Decreases Bond
    • Okay, thanks.
      • Increases Bond + Heal Blessing
    • I’m not hungry right now.
      • Nothing
  • Op. 6 Capriccio of the Strong
    • I like that heat.
      • Increases Bond + Panacea Charm
    • I don’t like either.
      • Decreases Bond
    • I think I prefer the cold.
      • Nothing
  • Op. 7 Fairy Elegy
    • I think the Blazing Pyromaestro is fine…
      • Decreases Bond
    • Does Red-Hot Noble sound good?
      • Increases Bond + Excecider
    • How about the Fiery Chef?
      • Nothing
  • Op. 8 Shining Concerto
    • But, I’m not hungry…
      • Decreases Bond
    • Skewers for good luck!
      • Increases Bond + Life Soma
    • I’ll go with roasted chicken.
      • Nothing


Marion

  • Op.4 Golden Sonata
    • I’ve been comfortable from the beginning.
      • Decreases Bond
    • I’m still not used to it.
      • Nothing
    • You’ll get used to it in no time.
      • Increases Bond + Mana Potion
  • Op. 5 Oratorio of Betrayal
    • It means you eat a lot, like a baby.
      • Decreases Bond
    • Cute like a baby… I think.
      • Nothing
    • She meant you don’t like hot things.
      • Increases Bond + Happy Drink
  • Op. 6 Capriccio of the Strong
    • I don’t think this is what he meant.
      • Increases Bond + Dark Score
    • That’s really unnecessary.
      • Decreases Bond
    • You’re allowed to rest, too.
      • Nothing
  • Op. 7 Fairy Elegy
    • It’s nothing. I’m all right.
      • Increases Bond + Panacea Charm
    • I want to be alone for awhile…
      • Decreases Bond
    • I feel crushed by my responsibilities.
      • Nothing
  • Op. 8 Shining Concerto
    • You don’t need to thank me.
      • Nothing
    • Why did you say that, all of a sudden?
      • Decreases Bond
    • I should be thanking you.
      • Increases Bond +  


Lestin

  • Op. 5 Oratorio of Betrayal
    • Resting
      • Increases Bond + Sea Score
    • Having fun
      • Nothing
    • Training
      • Decreases Bond
  • Op. 6 Capriccio of the Strong
    • The Seagull Inn
      • Increases Bond + Mana Blessing
    • The city entrance
      • Decreases Bond
    • The castle
      • Nothing
  • Op. 7 Fairy Elegy
    • Yeah, I think so.
      • Increases Bond + Fighting Charge
    • Honestly, I don’t know.
      • Nothing
    • The title is a bit much for me…
      • Decreases Bond
  • Op. 8 Shining Concerto
    • My Friends.
      • Increases Bond + Earth Score
    • All my hard work.
      • Decreases Bond
    • You, Lestin.
      • Nothing


Jinas

  • Op.2 Etude of the Dragoneers
      • I’m all rested up now. Sorry for worrying you.
        • Nothing
      • You look worse than me, Jinas.
        • Increases Bond + Tough Buff
      • We have more important things to worry about!
        • Decreases Bond
  • Op.3 Ricordanza of Souls
      • He does seem cheerful and reliable.
        • Increases Bond + Happy Drink
      • He might be too cheerful to me…
        • Decreases Bond
      • Say, you two are kind of similar.
        • Nothing
  • Op.4 Golden Sonata
      • How’d you know I’d be able to control it?
        • Increases Bond + Panacea Charm
      • I’d do the same thing again if I had to.
        • Nothing
      • I felt like I had no choice.
        • Decreases Bond
  • Op. 5 Oratorio of Betrayal
    • What do you mean?
      • Nothing
    • Okay. I’ll remember.
      • Increases Bond + Fighting Charge
    • I’ll be fine! I’ve got you all!
      • Decreases Bond
  • Op. 6 Capriccio of the Strong
    • You’re not weak. You’re here by my side.
      • Increases Bond + Life Soma
    • The past made you who you are now.
      • Nothing
    • Sorry… I don’t know what to say…
      • Decreases Bond
  • Op. 7 Fairy Elegy
    • I don’t see myself as that…
      • Nothing
    • Don’t say your role is coming to an end!
      • Increases Bond + Shining Score
    • It’s thanks to the Shining Dragon’s power.
      • Decreases Bond
  • Op. 8 Shining Concerto
    • I say the exact same to you, Jinas.
      • Increases Bond + Excecider
    • If we can save the world… then…
      • Decreases Bond
    • Yeah… I won’t ever forget them…!
      • Nothing


Excella

  • Op.2 Etude of the Dragoneers
    • I’m okay. Are you sure you’re fine?
      • Increase Bond + Mana Potion
    • Y-Yeah… I’m fine.
      • Nothing
    • Everything’s all so sudden…
      • Decrease Bond
  • Op.3 Ricordanza of Souls
    • Thanks for worrying about me, Excella.
      • Nothing
    • I want to get Stronger.
      • Increases Bond + Mana Blessing
    • Yea… but Lesting has a point.
      • Decreases Bond
  • Op.4 Golden Sonata
    • I thought I hear your voice, Excella.
      • Nothing
    • I feel better after seeing you.
      • Increases Bond + Heal Blessing
    • I can’t control the Shining Dragon…
      • Decreases Bond
  • Op. 5 Oratorio of Betrayal
    • Can you stay by her side?
      • Nothing
    • Sorry, I can’t think of anything…
      • Decreases Bond
    • Why don’t we think of something together?
      • Increases Bond + Elixir
  • Op. 6 Capriccio of the Strong
    • You’d never get captured so easily.
      • Decreases Bond
    • I’ll never let that happen to you!
      • Nothing
    • I’d rescue you, of course!
      • Increases Bond + Spirit Tonic
  • Op. 7 Fairy Elegy
    • I’m afraid I don’t measure up to it.
      • Decreases Bond
    • I don’t want to dishonor it.
      • Nothing
    • I finally can stand next to you.
      • Increases Bond + Magic Nectar
  • Op. 8 Shining Concerto
    • Tell me the rest after this is over.
      • Nothing
    • When it’s over, let’s have fun together.
      • Increases Bond + Dark Score
    • Let’s focus on the battle for now.
      • Decreases Bond