Persona 5 Tactica Logo
Guides

How to Complete Persona 5 Tactica Quest 14

by NightlyGamingBinge in

Welcome to NGB and our guide for Persona 5 Tactica Quest 14 Lavenza’s Second Trial. This quest becomes available during the 4th kingdom. In this guide we’ll cover the party requirements, victory conditions, any prep work that you many need to do along with how to complete the quest and the rewards you’ll receive at the end.

Persona 5 Tactica Quest 14 Details

The party requirements for this quest require you to use Ryuji, Yusuke and Ann. To successfully complete the quest, you’ll need to bring the trial gear to the target area.

Walkthrough

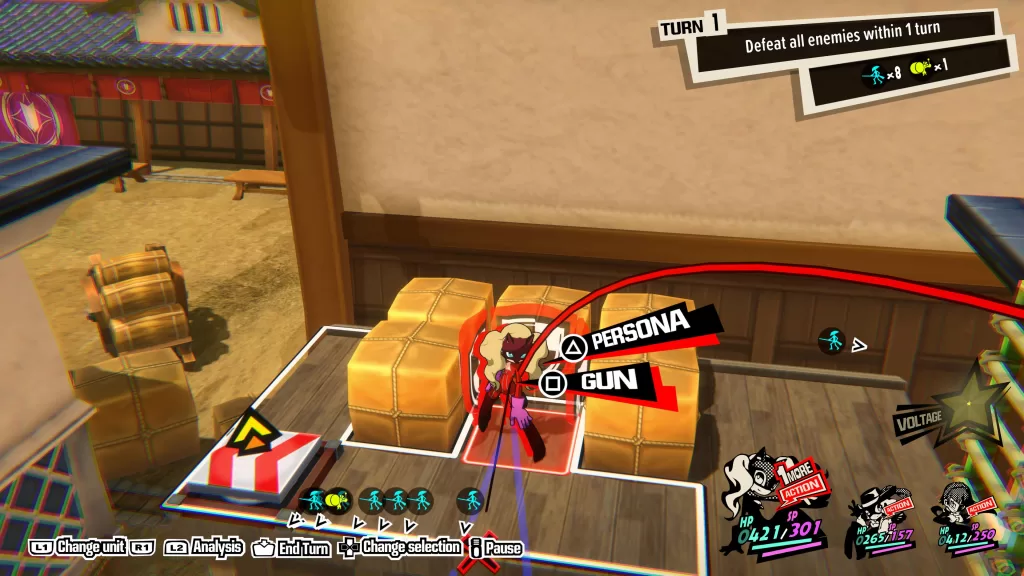
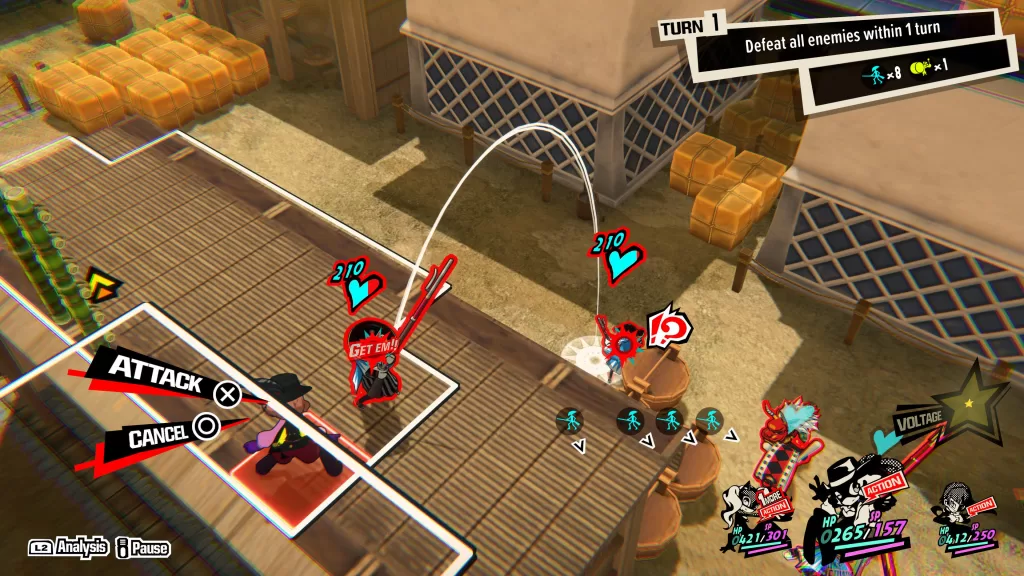
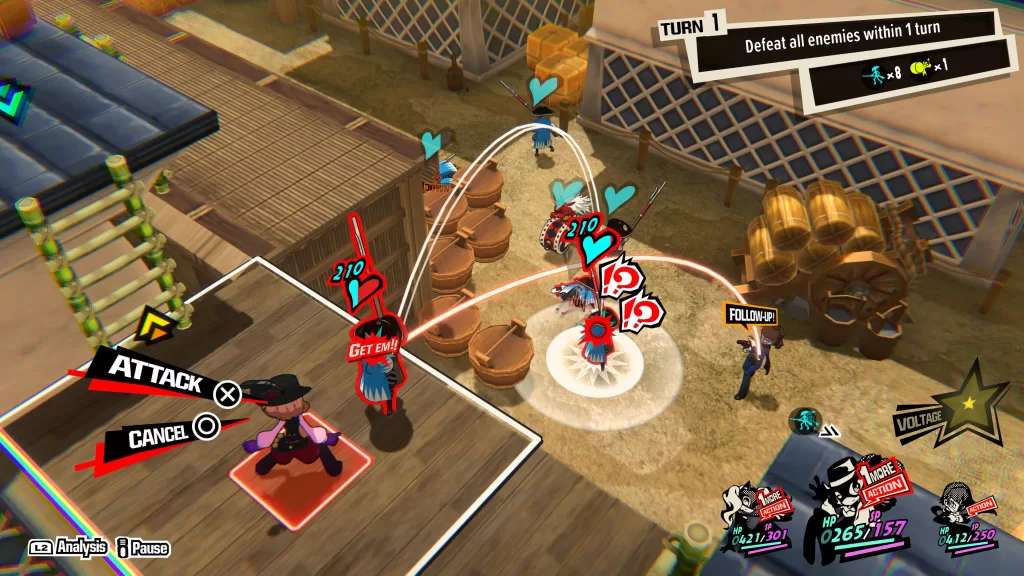
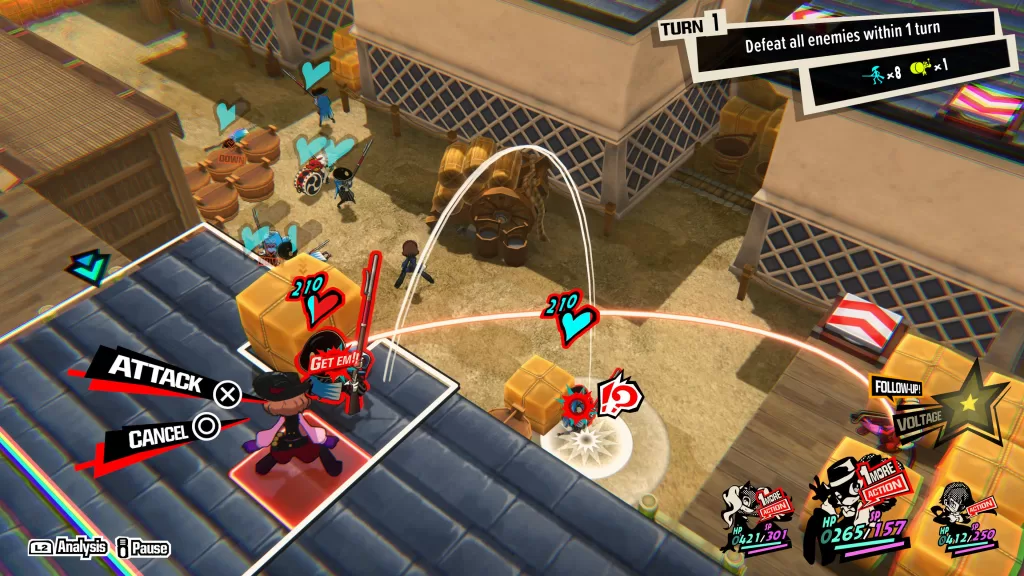
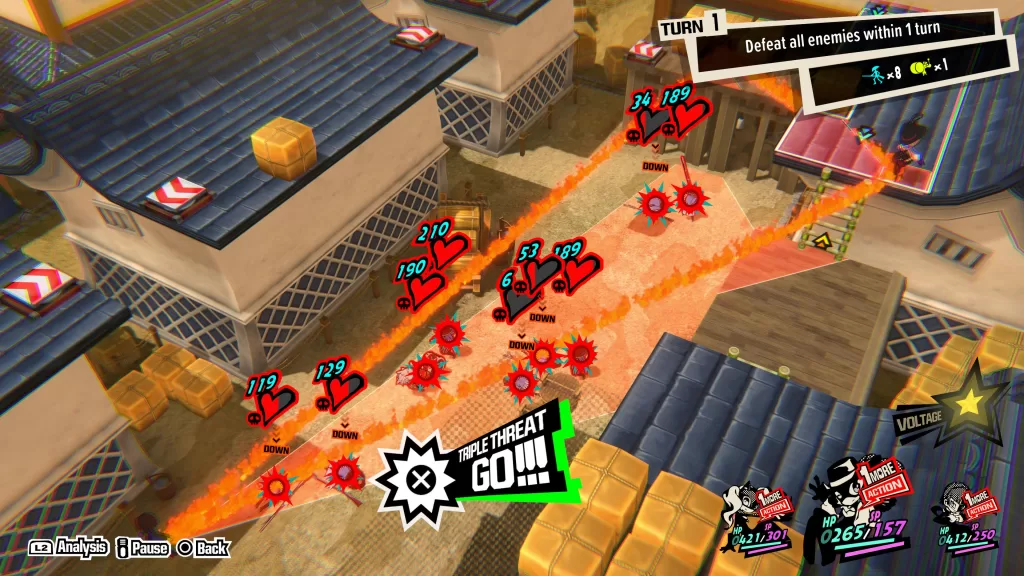
After starting this quest, you’ll need escort the trial gear to the target area. This is done by hitting it in the direction you want it to go. You’ll also want to watch the health of the gear. If it gets reduced to 0, then it will be destroyed causing you to fail the quest. The enemies on the map will also target the gear and if you to a Triple Threat attack, the gear will take damage from that if it’s in the attack area.

Persona 5 Tactica Quest 14 Hitting the Trial Gear

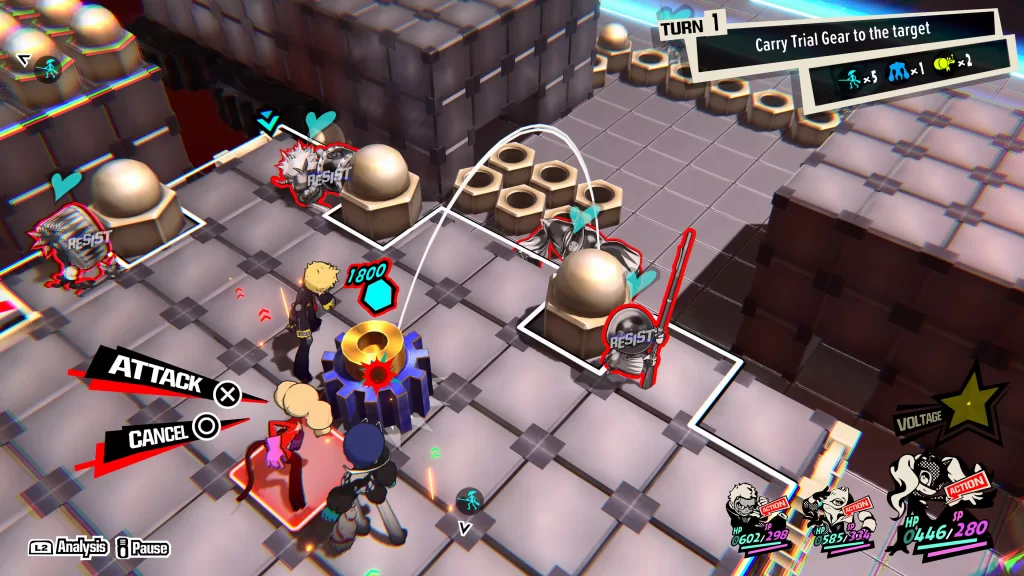
We started by sending the gear towards the target area then dealing with groups of enemies utilizing Triple Threat attacks then picking off any stragglers or outliers. There is not turn limit, so you can take your time with this one. The quest will end once the trial gear enters the target area.

Rewards

  • Unlocks the strongest skill for Ryuji, Yusuke and Ann

To find more content on Persona 5 Tactica, check our main guide and walkthrough page here!

Persona 5 Tactica Logo
Guides

How to Complete Persona 5 Tactica Quest 9

by NightlyGamingBinge in

Welcome to NGB and our guide on Persona 5 Tactica Quest 9 Recovering a Lost Treasure. This quest becomes available during the 2nd kingdom. In this guide we’ll cover the party requirements, victory conditions, any prep work that you may need to do along with how to complete the quest and the rewards you’ll receive at the end.

Persona 5 Tactica Quest 9 Details

The party requirements for this quest requires you to use any 3 female characters. To successfully complete this quest, you’ll need to defeat all enemies in 1 turn utilizing the 1more mechanic.

Before You Start

For this quest, we chose to use Ann, Haru and Makoto. The below images show the skills we had on them for this mission!

Persona 5 Tactica Quest 9 Recovering a Lost Treasure Ann Skills
Persona 5 Tactica Quest 9 Recovering a Lost Treasure Haru Skills
Persona 5 Tactica Quest 9 Recovering a Lost Treasure Makoto Skills

Walkthrough

After starting the quest, move the starting party member to the spring tile and use it to reach the adjacent roof. Attack the enemy on that roof behind the cube knocking them off. This should trigger a follow-up attack with your ground character giving the roof team member a 1more.

Persona 5 Tactica Quest 9 Recovering a Lost Treasure Party Member 1 Position 1

Continue using the spring tiles to reach the brown shack with 5 cubes on the top. Position this party member in the middle of them.

Persona 5 Tactica Quest 9 Recovering a Lost Treasure Party Member 1 Position 2

Swap to the party member on the other roof then climb down the bamboo ladder. Attack the nearby enemy sending them off the roof into another enemy behind a bucket below triggering a 1more.

Persona 5 Tactica Quest 9 Recovering a Lost Treasure Party Member 2 Position 1

Climb up the next bamboo ladder then climb down another one on the side of the building there. Attack him so that he falls to the ground below triggering a second 1more.

Persona 5 Tactica Quest 9 Recovering a Lost Treasure Party Member 2 Position 2

Climb up the next bamboo ladder and attack the enemy behind the cube. This will trigger a follow-up attack from the first character you have positioned on the shack.

Persona 5 Tactica Quest 9 Recovering a Lost Treasure Party Member 3 Position 3

Change to the ground character and move them towards where the other two started. Shoot/Attack enemies as needed to activate 1more allowing you to continue moving. At this point, you should have all three characters spread out and each one still being able to move. Position them so that you can take out all remaining enemies with a Tripple Threat attack. This will complete the quest.

Persona 5 Tactica Quest 9 Recovering a Lost Treasure Ground Party Member  Position

Persona 5 Tactica Quest 9 Rewards

  • Decarabia Persona
    • If you already have the Decarabia, you won’t be will not receive another as a reward.

To find more content on Persona 5 Tactica, check our main guide and walkthrough page here!

Guides

Trails of Cold Steel IV – 8/9 Walkthrough

by Chappie in


Below is a guide on the collectibles that can be obtained on 8/9 during Act 1: The Trials of Class VII in Trails of Cold Steel IV.


Eryn

Card (Vantage Masters)

  • Requ x3
    • Win against Elliot at Rose’s Atelier


Quest

  • Moonlight Mandrake Special
    • Obtained: Speak with Liese at Lux Lunae Inn
    • Objective: Collect Mandrakes
      • Travel to Saint-Gral – Phase 2 and defeat the Blood Monad enemy to acquire a Mandrake.  Afterwards, hand it over to Liese.
    • Reward: 2,500 mira


Saint-Gral – Phase 2

Battle (Monsters)

  • Blood Monad
  • Vampire Bat
  • Grimblade
  • Gargoylorus


Treasure Chests

  • Power Potion / Shield Potion / Mind Potion
  • U-Material x5
  • Curia Balm x5 / S-Tablet x5
  • Yellow Pendulum
  • 50 of each Sepith
  • Fortuna R


Click here for the next guide on 8/10!


Guides

Days Gone – I’m Not A Ripper

by Chappie in


Objective(s):

  • Head To Iron Mike’s


Head To Iron Mike’s

Make you way to the east gate at Iron Mike’s Camp in Lost Lake to trigger a cutscene. The Mission will complete when it’s over.


Guides

Days Gone – A Hell Of A Fight

by Chappie in


Objective(s):

  • Locate Gomez
  • Find And Rescue Gomez


Locate Gomez

Follow the objective to the west of Wizard Island and east of the Aspen Butte Ambush Camp.  Be mindful of the clothesline and two enemies waiting to attack.  Inspect the bike on the left side of the house to pick up tracks.  Follow the tracks north to a body.  Inspect the body to receive a new pair of tracks.  Follow the tracks to the wooden structure that happens to be a Marauder Camp.  Enter the camp.


Find And Rescue Gomez

Take out the Marauders around camp and head up the lookout tower to find Gomez at the top.


Guides

Days Gone – For The Benefit Of Others

by Chappie in


Objective(s):

  • Meet Rikki At The Lost Lake Encampment Cemetery


Meet Rikki At The Lost Lake Encampment Cemetery

Head to the west side of Lost Lake Camp to find Rikki at the cemetery, triggering a cutscene.


Days Gone
Guides

Days Gone – Sarah’s Lab Notes

by Chappie in

NOTE:  All note collectibles are automatically acquired as you progress through the story and cannot be missed.


1. Deacon’s Alive???

2. Yeast

3. Silicate

4. Riding With Deacon

5. The Cloverdale Virus

6. Teensy Tabby


Guides

Days Gone – For An Outlaw Biker

by Chappie in


Objective(s):

  • Save Weaver
  • Clear All Militia
  • Kill Skizzo
  • Get To The Colonel’s Chamber


Save Weaver

Shoot at Skizzo, causing him to flee the area.


Clear All Militia

Defeat the enemies.


Kill Skizzo

Follow the objective to the other side of the nursery towards the Colonel’s Chamber.  A trap will go off, taking you down to barely any health.  Roll forward towards Skizzo and follow the prompts during the knife fight.  Once you get him, a cutscene will trigger.


Get To The Colonel’s Chamber

Follow the tunnel down to the Colonel’s Chamber for a cutscene to trigger.


Guides

Days Gone – You Can’t Do This Alone

by Chappie in


Objective(s):

  • Drive To Location
  • Fight Your Way Into The Ark
  • Clear All Militia
  • Fight Your Way Into The Ark
  • Clear All Militia
  • Fight Your Way Into The Ark
  • Disarm The Explosives
  • Get To The Colonel’s Chamber


Drive To Location

Head to the objective outside of Lost Lake to trigger a cutscene.


Fight Your Way Into The Ark

Head forward and crouch under the fallen fence.


Clear All Militia

Defeat all the enemies.


Fight Your Way Into The Ark

Run up to the entrance of the ark to trigger a cutscene.  After the cutscene, follow the path to the top of the cone, defeating enemies as you go.  Part of the way up, you will come across a sniper tower.  Take out the sniper if you can.  Otherwise, make a break towards the sniper tower, avoiding shots at the explosive barrels.


Clear All Militia

When you get to the peak, there will be a flamethrower, machinegunner and sniper.  Take them out and clear out the rest of the enemies.


Fight Your Way Into The Ark

Head forward towards the entrance at the top of the peak, triggering a cutscene.


Disarm The Explosives

Follow the objective into the ark, disarming the three explosives as you go.


Get To The Colonel’s Chamber

Head down to the base of the ark.  When you reach the nursery, a cutscene will trigger.