Head to the top of the Sin-A-Plex to find the projector.
Attach Echo Drive
Attach the echo drive to the projector.
Kill Rohner
Head back to the ground level and deal with Rohner and his goons.
Find Replacement Bulb
Head to the northeastern side of the Sin-A-Plex to locate a giant metal door. Use the wheel on the right side of the door to open it. Head in and grab the bulb.
Replace Projector Bulb
Head back to the projector room and replace the bulb.
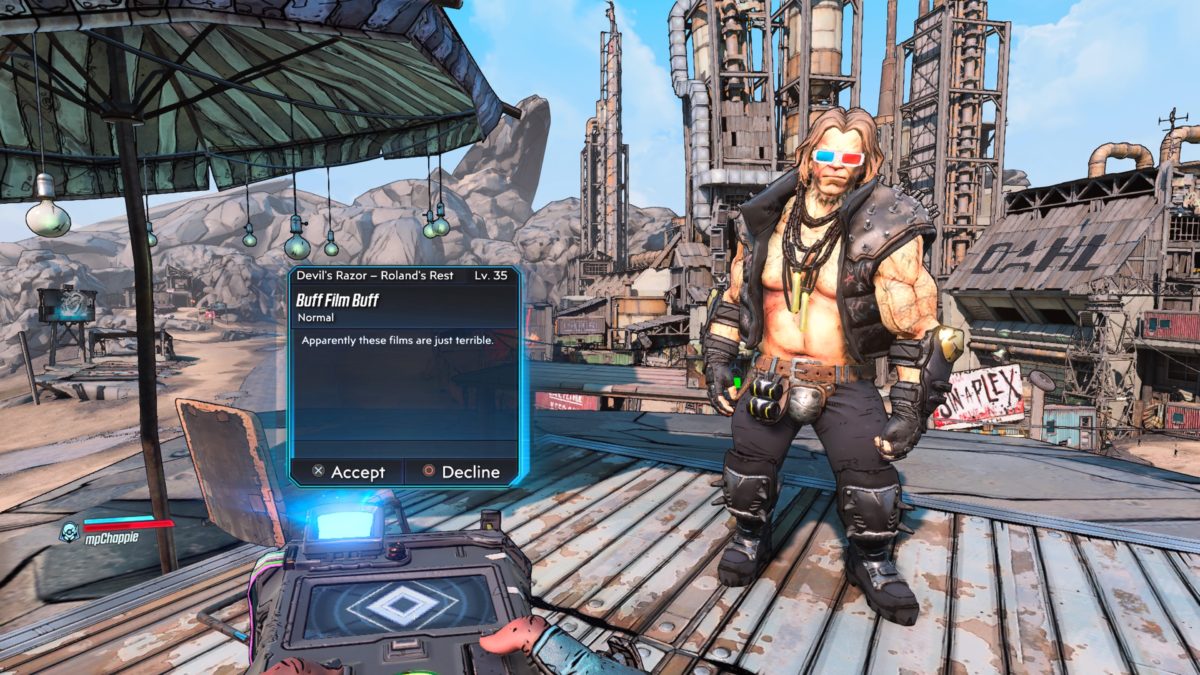
Talk to Buff Film Buff
Return to Buff and talk with him to complete the mission.
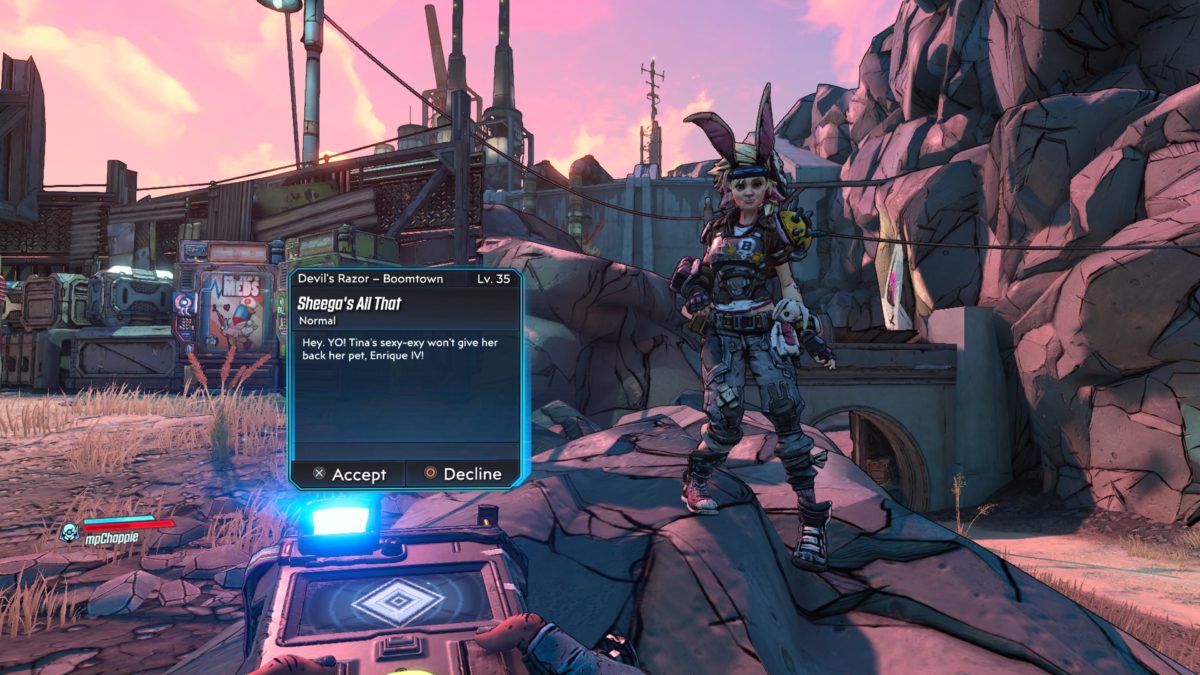
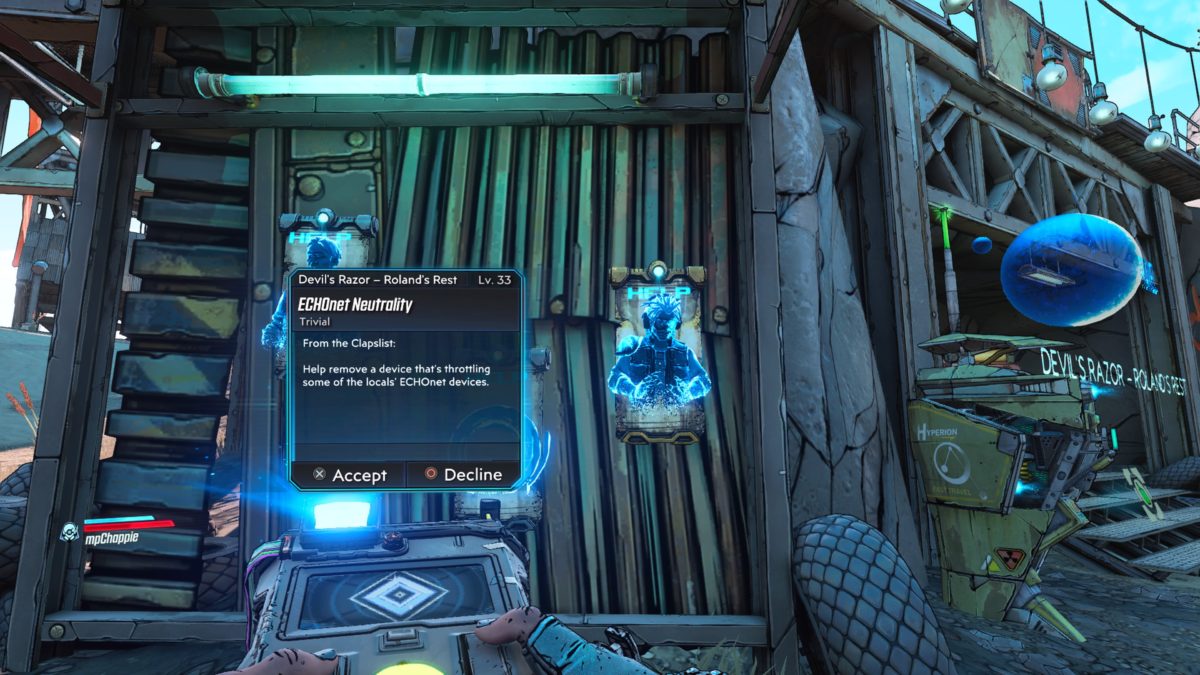
Obtained: Interact with the bounty board at Roland’s Rest
Objective(s):
Talk to Edgren
Go to ECHO Repeater Center
Locate UG-THAK
Destroy UG-THAK
Kill COV
Open Tubes
Destroy UG-THAK
Talk to Edgren
Talk to Edgren
Head to Roland’s Rest and talk to Edgren who is inside a shipping container.
Go to ECHO Repeater Center
Follow the objective along the cliff north of Roland’s Rest to reach the large satellite dishes in ECHOnet 37.
Locate UG-THAK
The UG-THAK is located in the tower in the middle of the area with small satellite dishes on top. Head to the back of the building near where the pipe is sticking out of the ground to find some wooden boards to shoot. Melee the boards and then enter the building to find the terminal straight ahead.
Destroy UG-THAK
Head to the right of the terminal and shoot the machine in the middle of it.
Kill COV
Defeat all the enemies.
Open Tubes
Follow the objectives to interact with the wheels to open all five tubes.
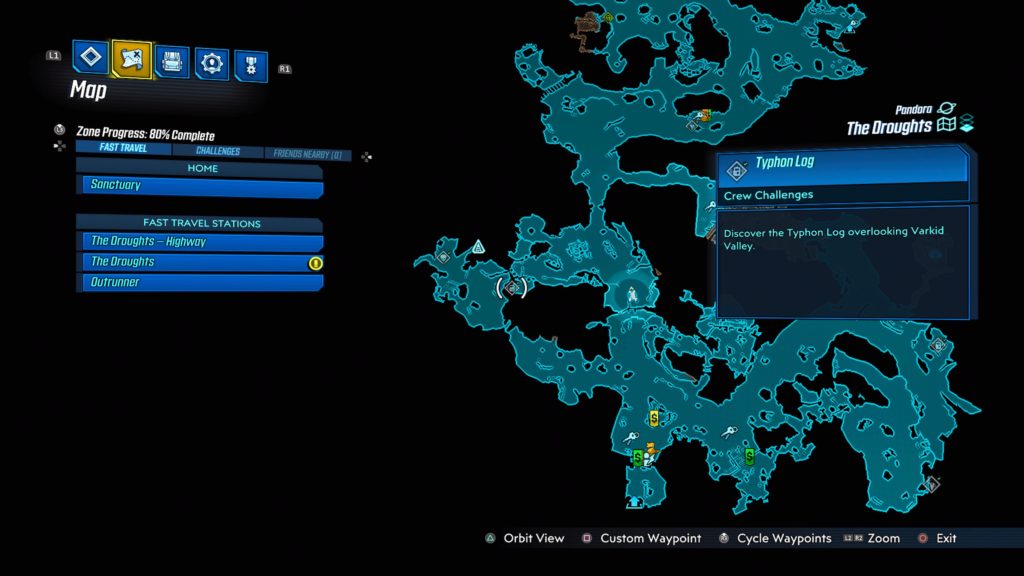
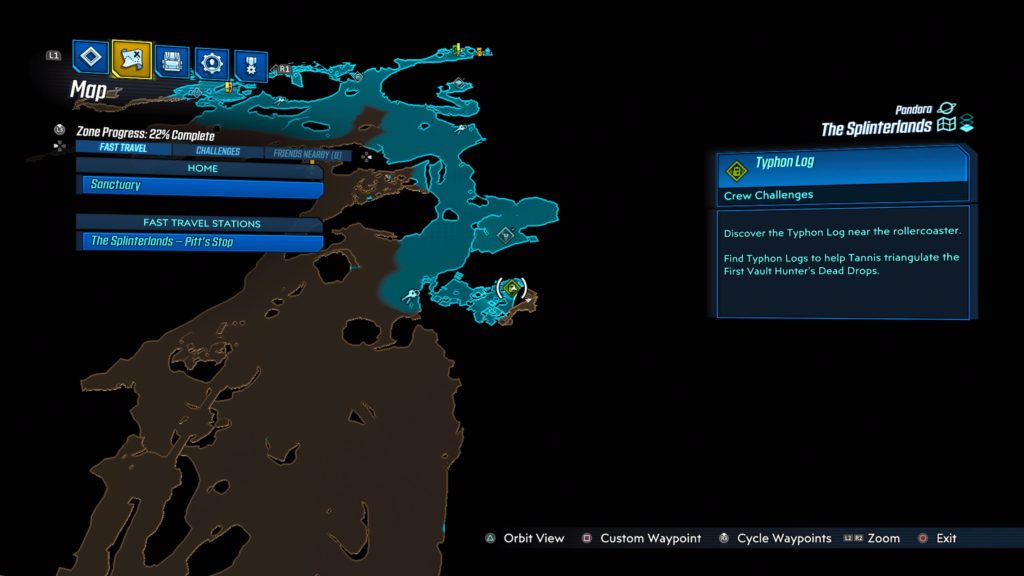
This Typhon log is located on Pandora in the Droughts. See the map below for the exact location. To reach it, head past the Sun Smasher’s camp and over the broken bridge. Then take a left and follow that road until you reach a fence with a shack behind it (you should be surrounded by a giant rib cage). Facing the fence, follow a path on the left near one of the ribs to come to a bus hanging off a cliff. The log will be next to it at the edge of the cliff.
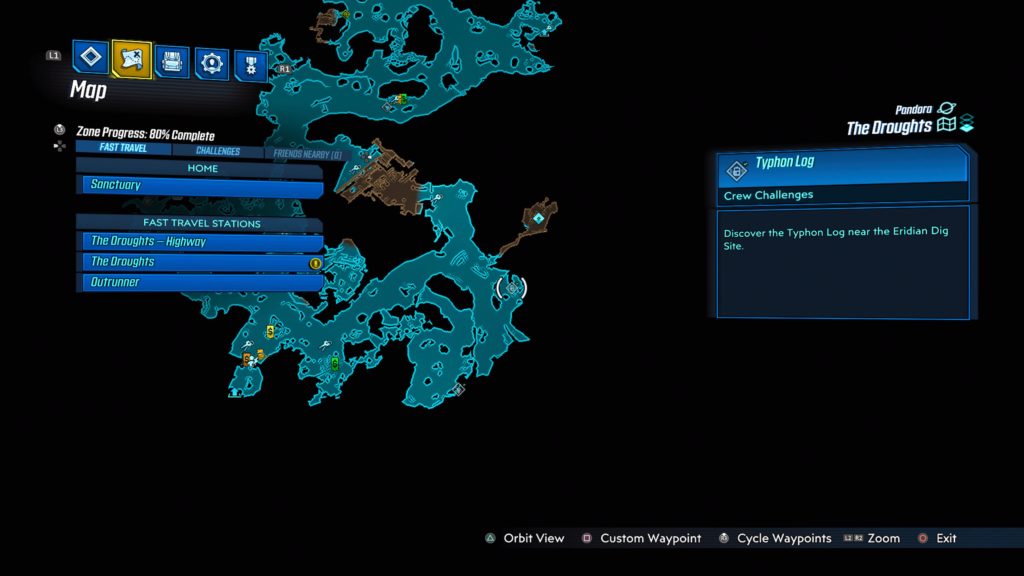
Near the Eridian Dig Site
This Typhon log is located on Pandora in the eastern area of the Droughts. See the map below for the exact location. To reach it head to the Catch-A-Ride near Ellie’s Garage and follow it northeast until the road splits. Take a right to find the log in the middle of a skag den (far east of the map, south of the Eridian Dig Site).
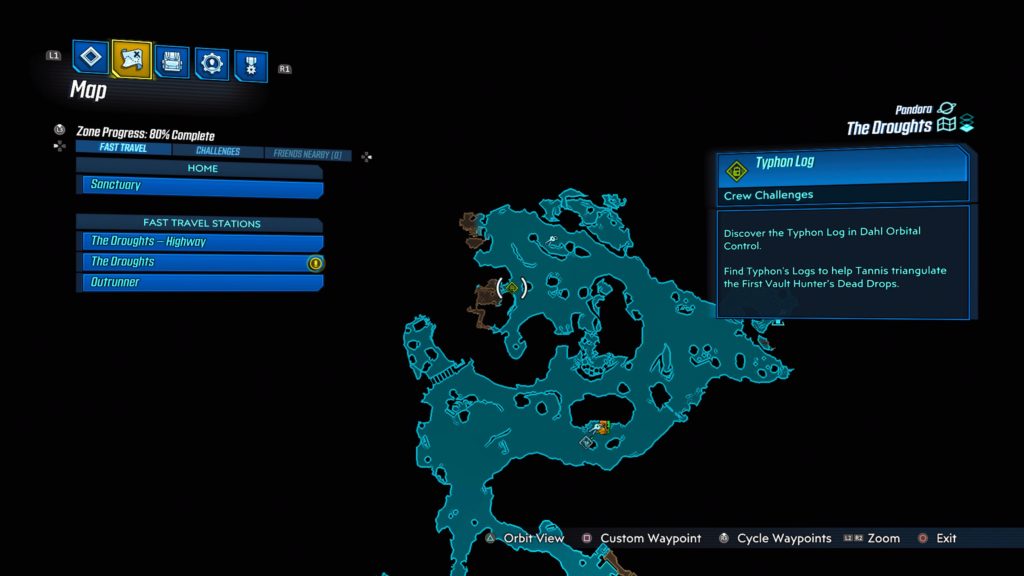
Dahl Orbital Control
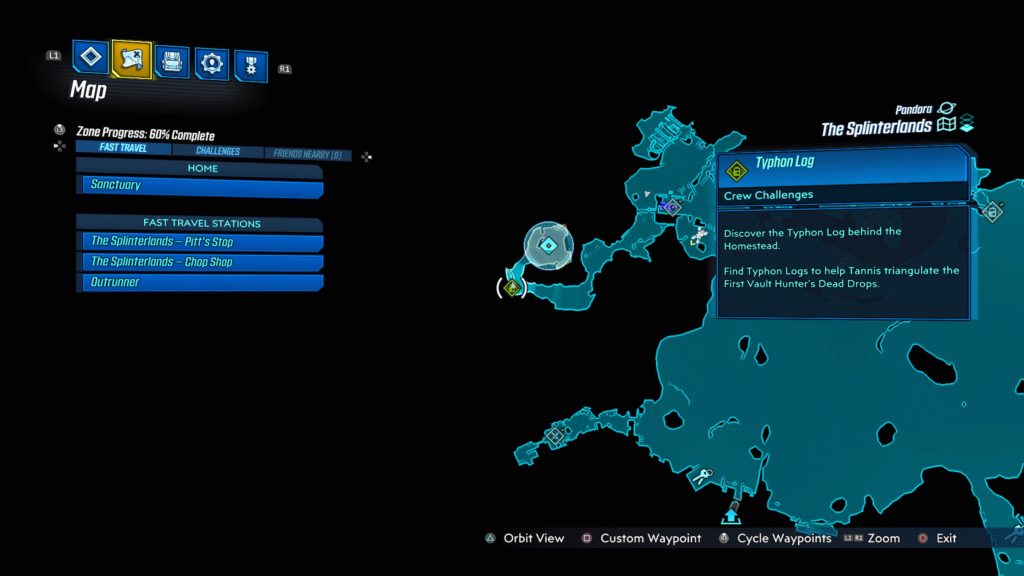
This Typhon log is in the Dahl Orbital Control Center located in the northeastern part of the Droughts. See the map below for the exact location. You can’t access it until the Taking Flight main mission.
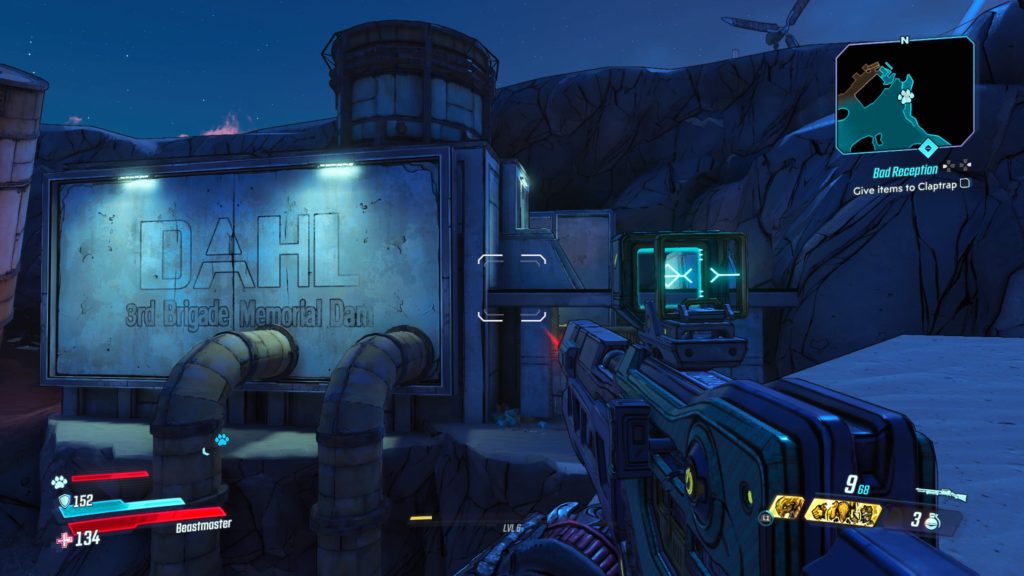
Droughts Dead Drop Cache
This dead drop is located in the Dahl 3rd Brigade Memorial Dam. You can find it in the building at the back of the dam.
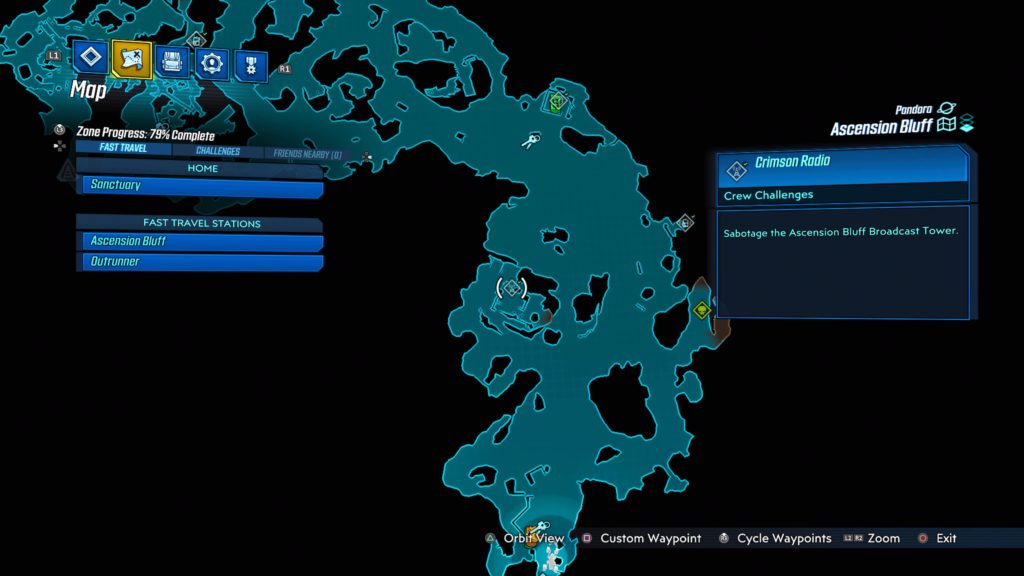
Ascension Bluff
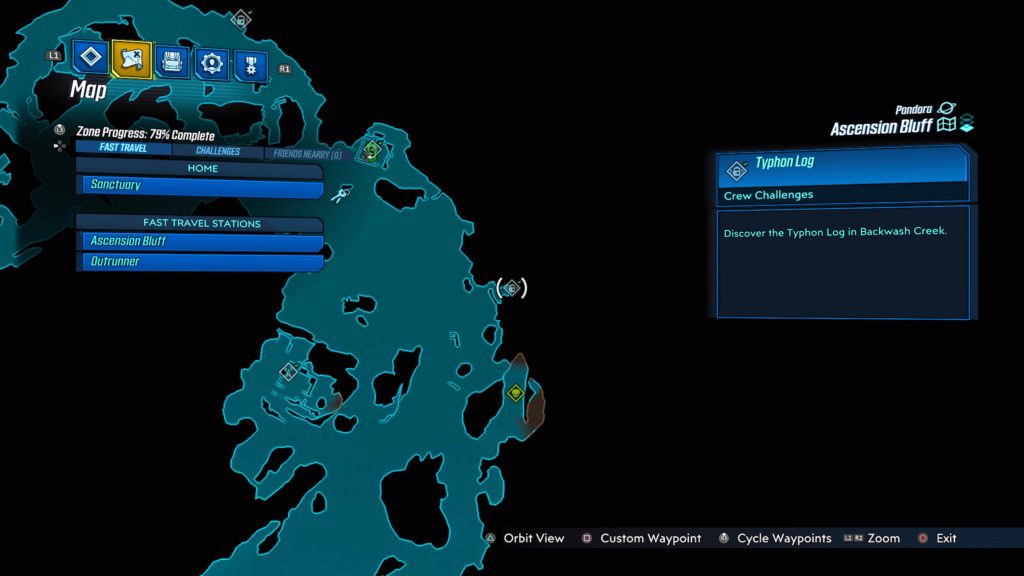
Backwash Creek
This Typhon log is located directly south of the Ascension Bluff fast travel station overlooking a canyon with some old satellite dishes. See the map below for the exact location.
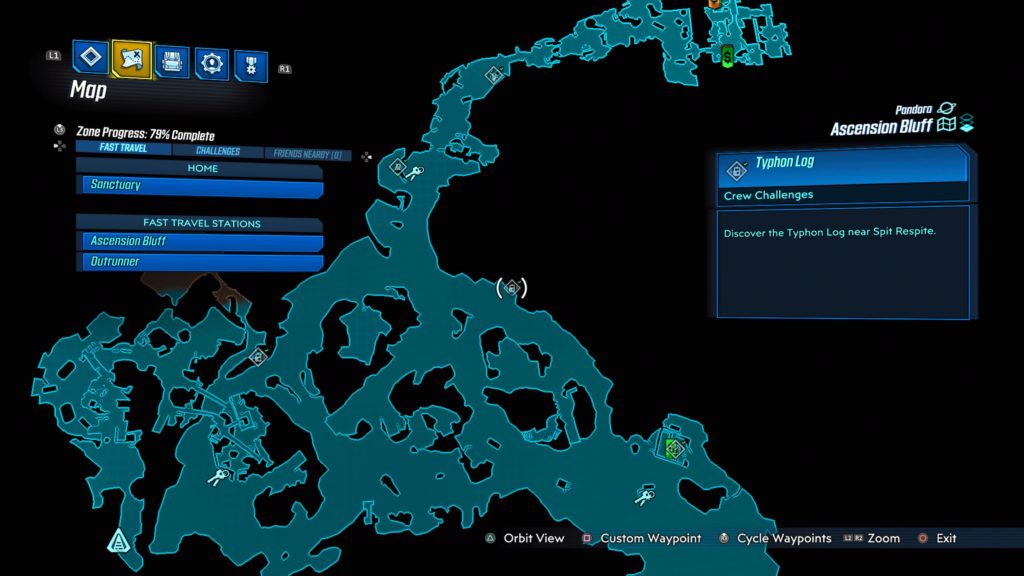
Near Spit Respite
This Typhon log is located on the southeastern side of Ascension Bluff east of the Heavy Outrunner vehicle area. It will be overlooking a rock bridge leading to a giant structure. See the map below for the exact location.
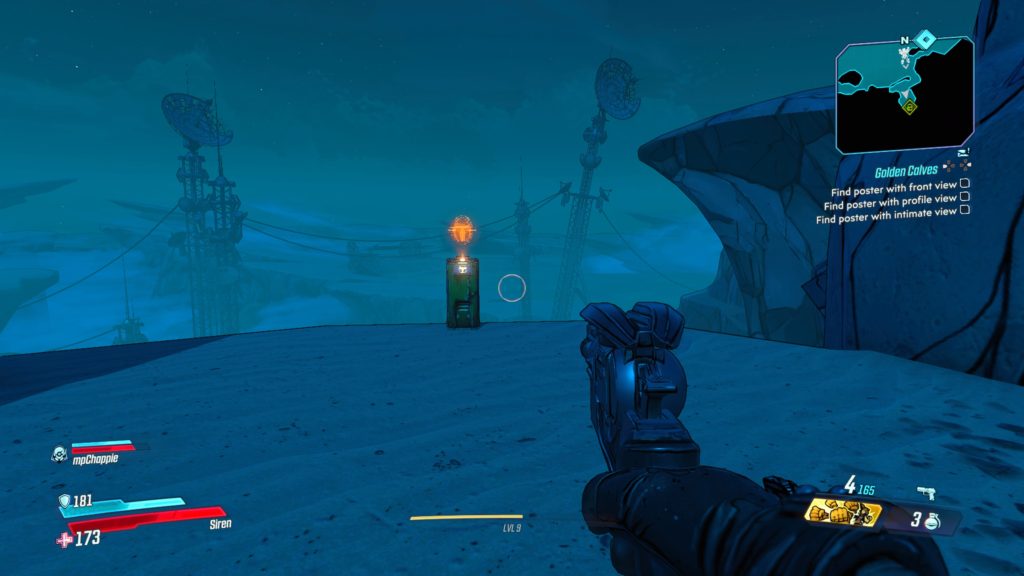
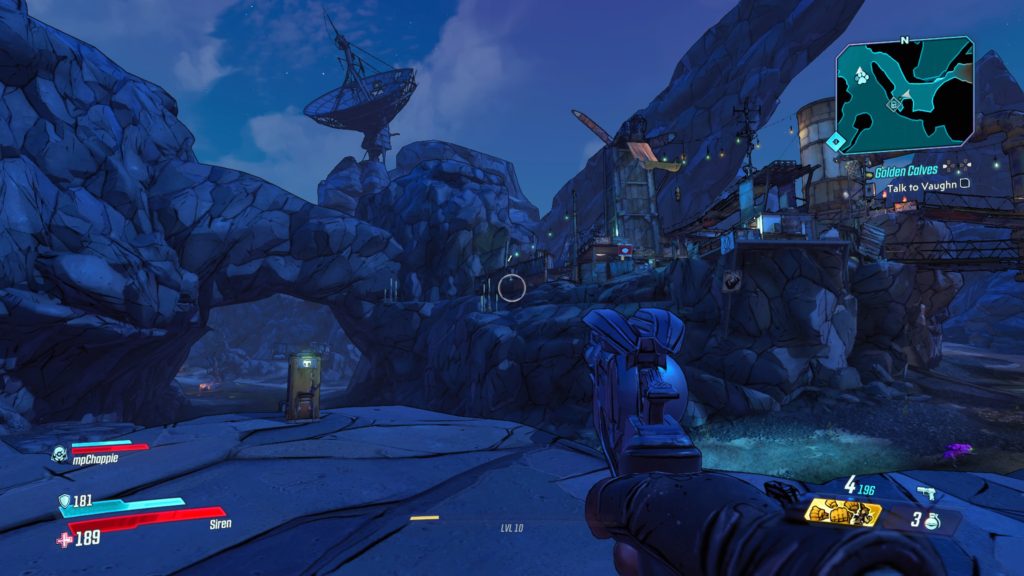
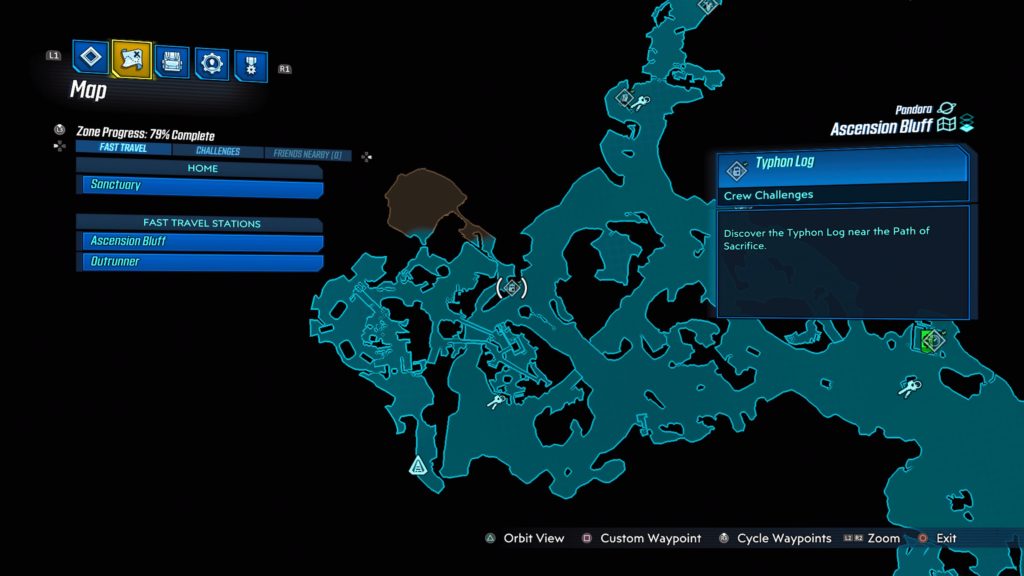
Near Path of Sacrifice
This Typhon log is located in the eastern region of Ascension Bluff near a bandit settlement you visit as part of the Gold Calves side mission. See the below map for the exact location.
Ascension Buff Dead Drop Cache
This dead drop is located on Ascension Bluff near the Holy Broadcast Center in a storage unit near the Catch-A-Ride.
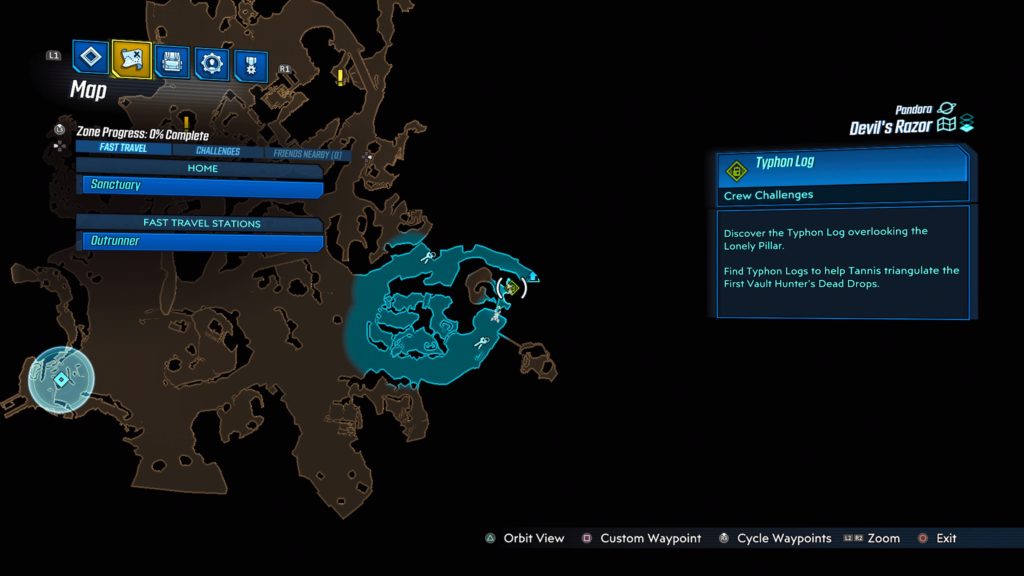
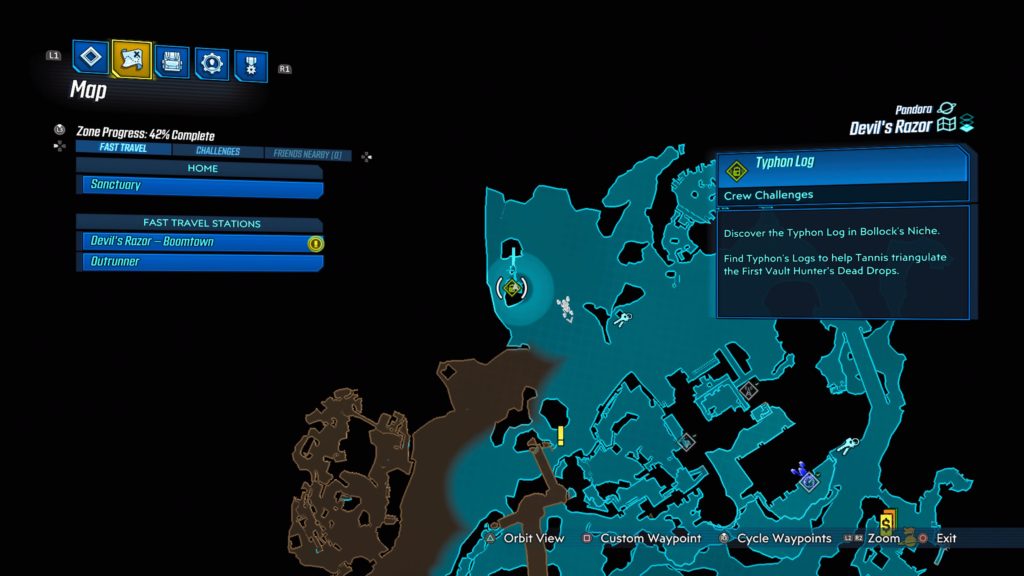
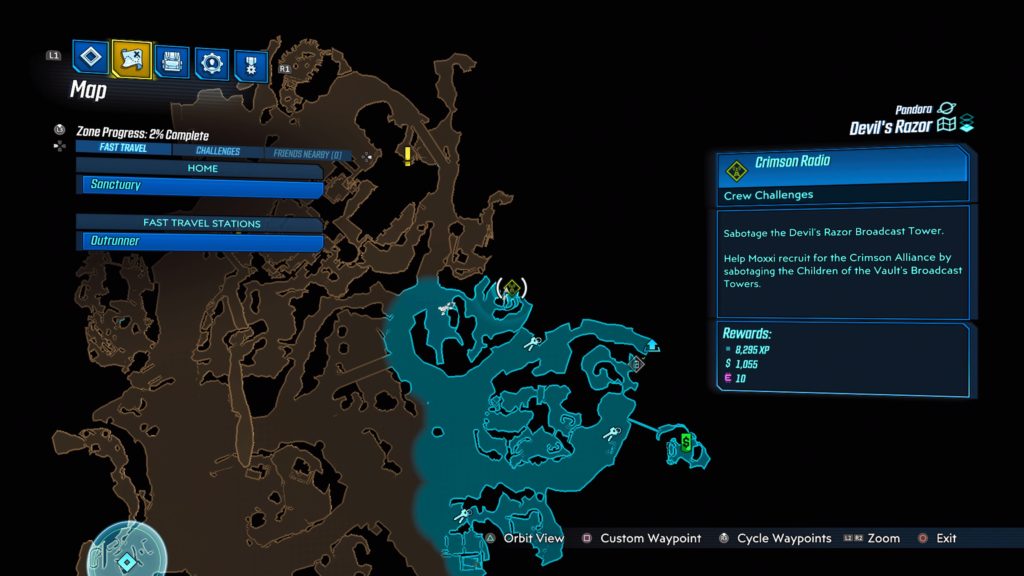
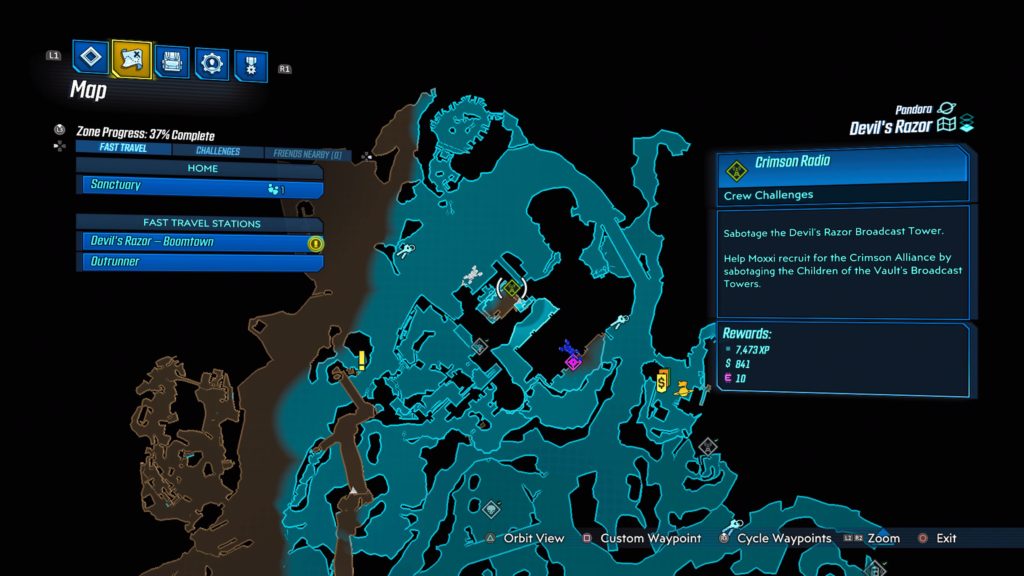
Devil’s Razor
Lonely Pillar
This log is located in the southeastern region of the map near the map transition to The Droughts. See the map below for the exact location.
Bollock’s Niche
This log is located on the northern part of the map on top of a checkpoint near the defense turrets. See the map below for the exact location.
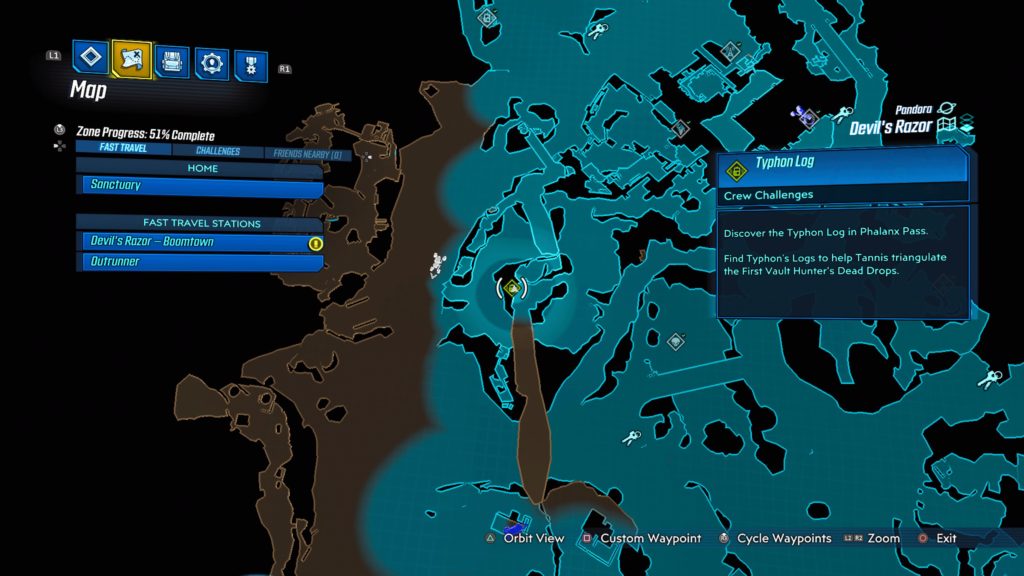
Phalanx Pass
This log is located on the top of a rock overlooking the pass. You can reach it by climbing up a crate with a car on top at Buff’s Bluff. You will then need to crouch under the pipes and follow the rock path forward until you can drop down to the rock below with the log. See the map below for the exact location.
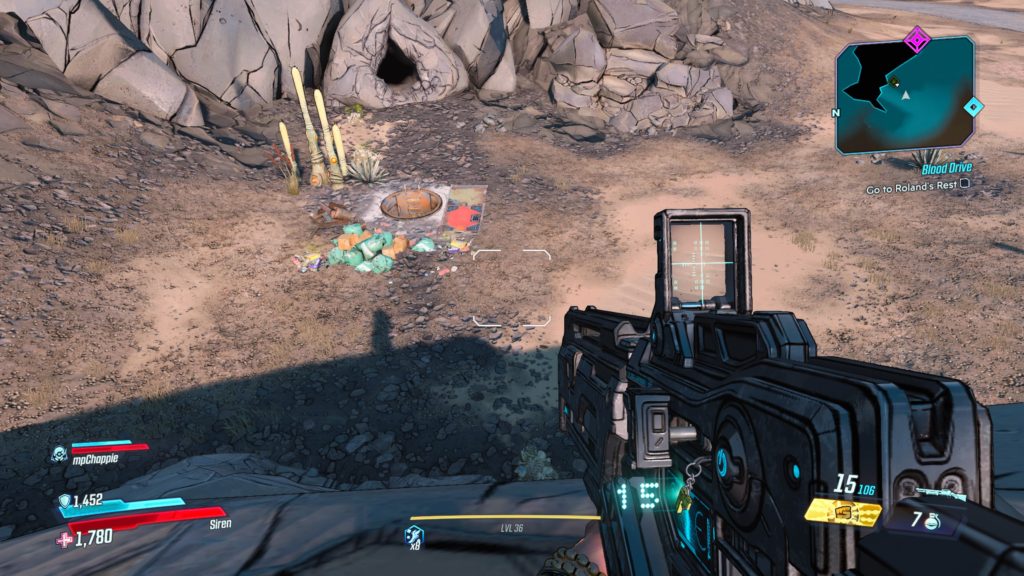
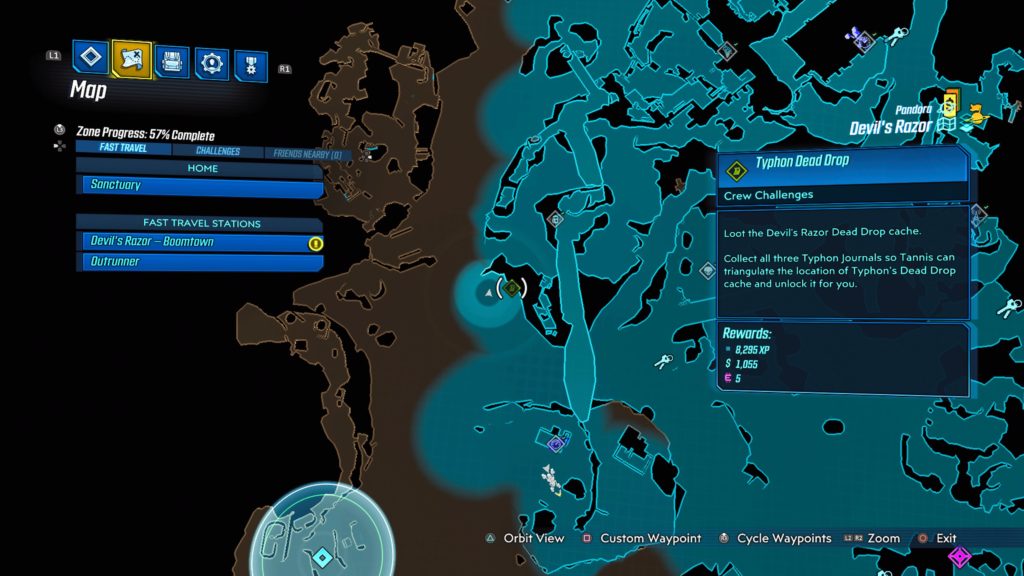
Devil’s Razor Dead Drop
The cache is located directly south of the Phalanx Pass Typhon Log at ground level. To reach the cache, climb down the ladder in a small metal hole surrounded by trash. Once inside, the cache will be next to a couch and bed. See the map below for the exact location.
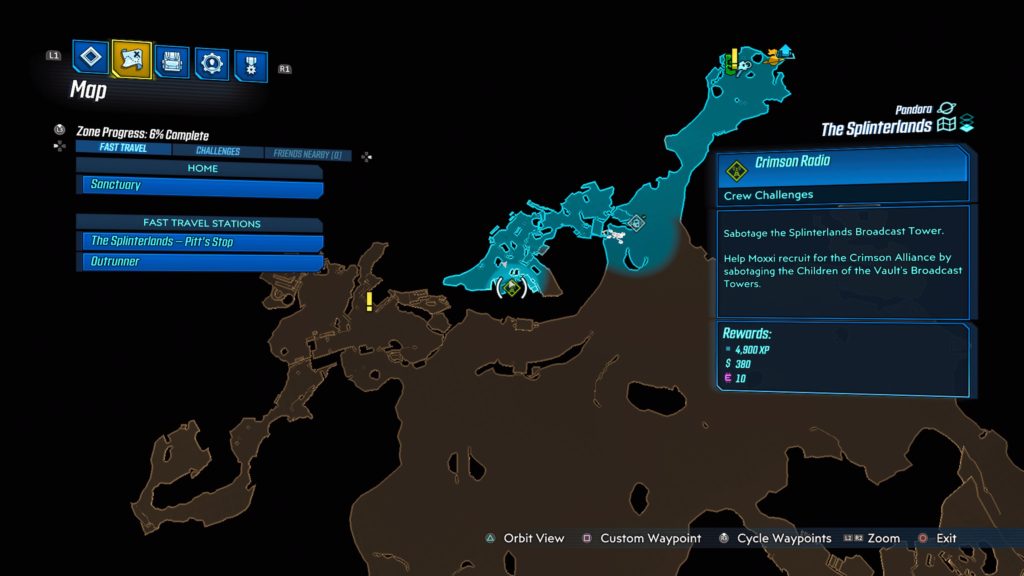
The Splinterlands
Logan’s Spar
The log is located south of The Splinterlands – Pitt’s Stop travel station right off the main road on a rock next to a chair. See the map below for the exact location.
Roller Coaster
This log is located in the southeastern part of the map right next to the giant roller coaster (which you can totally ride by the way!!). See the map below for the exact location.
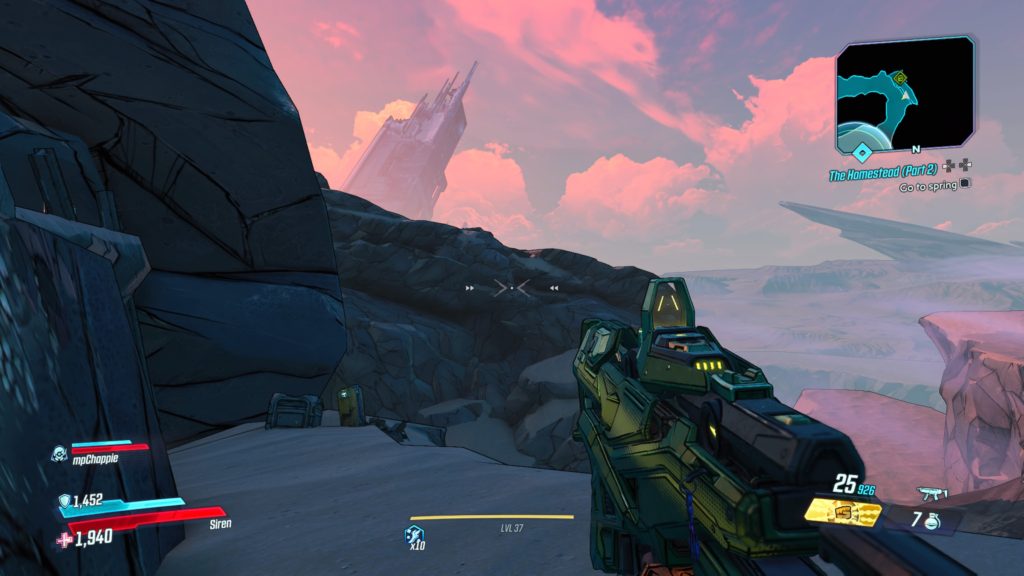
The Homestead
This log is located overlooking a canyon on the path to the spring during The Homestead (Part 2) side mission. See the map below for the exact location.
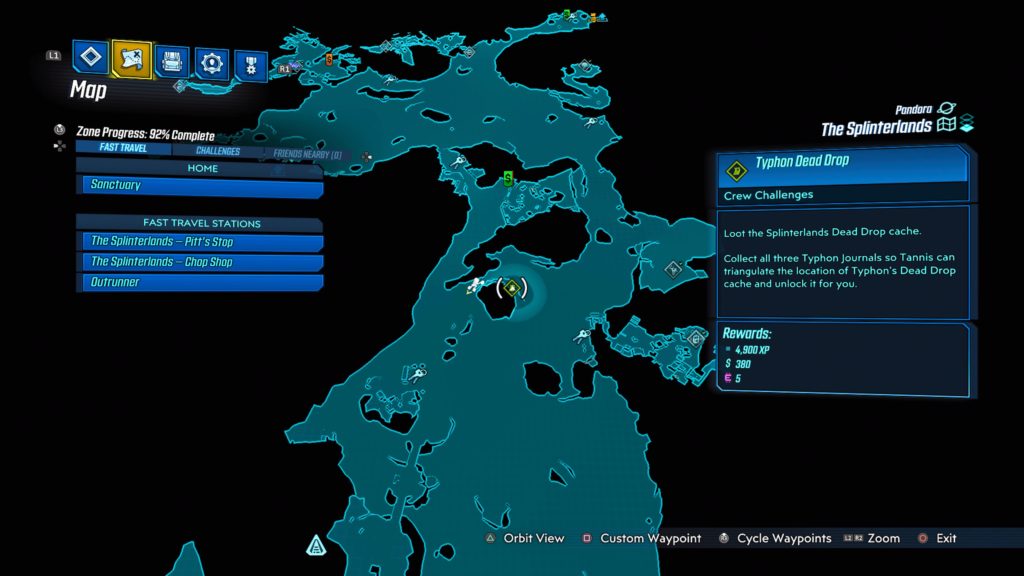
The Splinterlands Dead Drop Cache
The cache is located in the center of the map south of the vending machines near the Rakk nests. See the map below for the exact location.
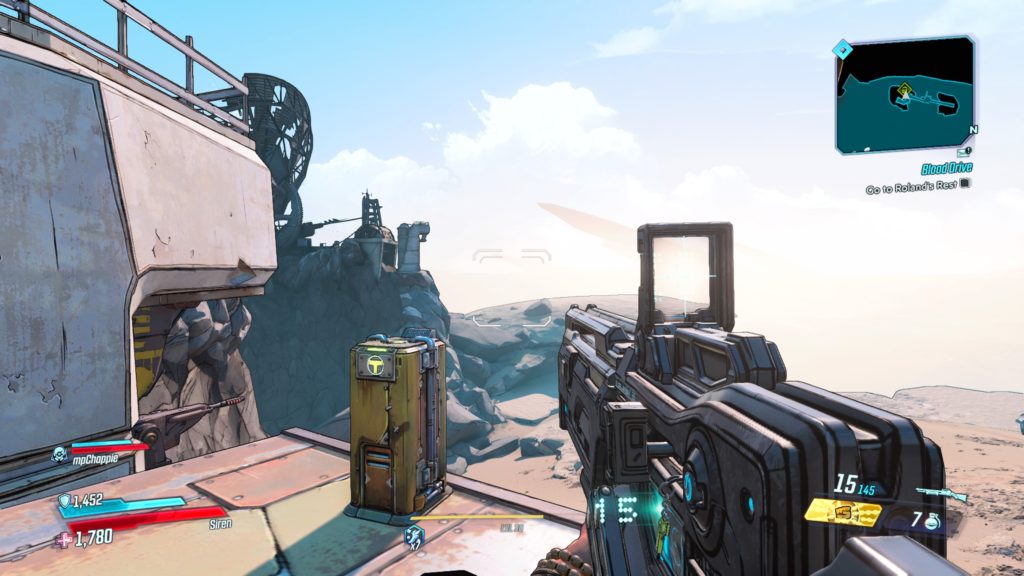
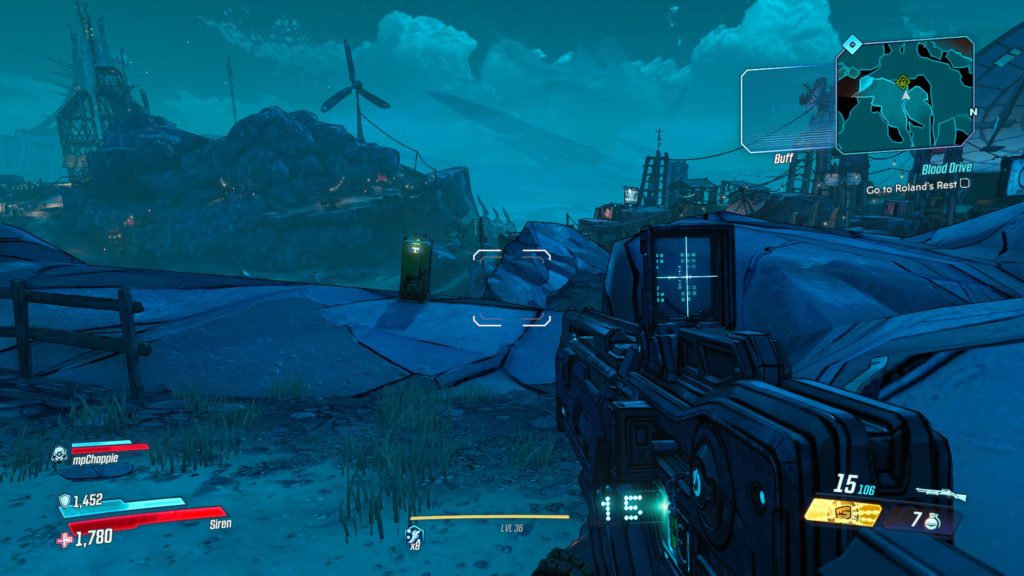
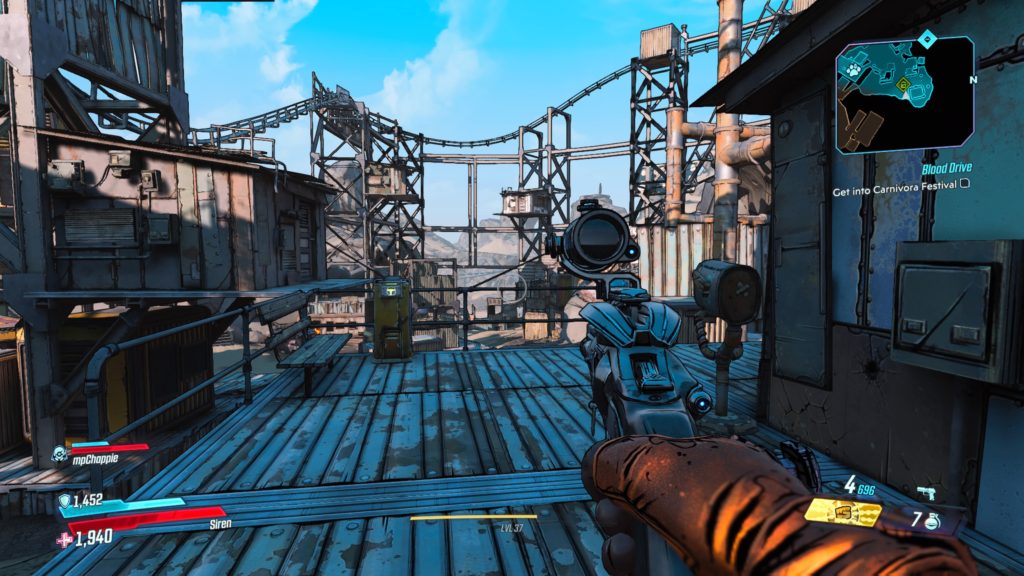
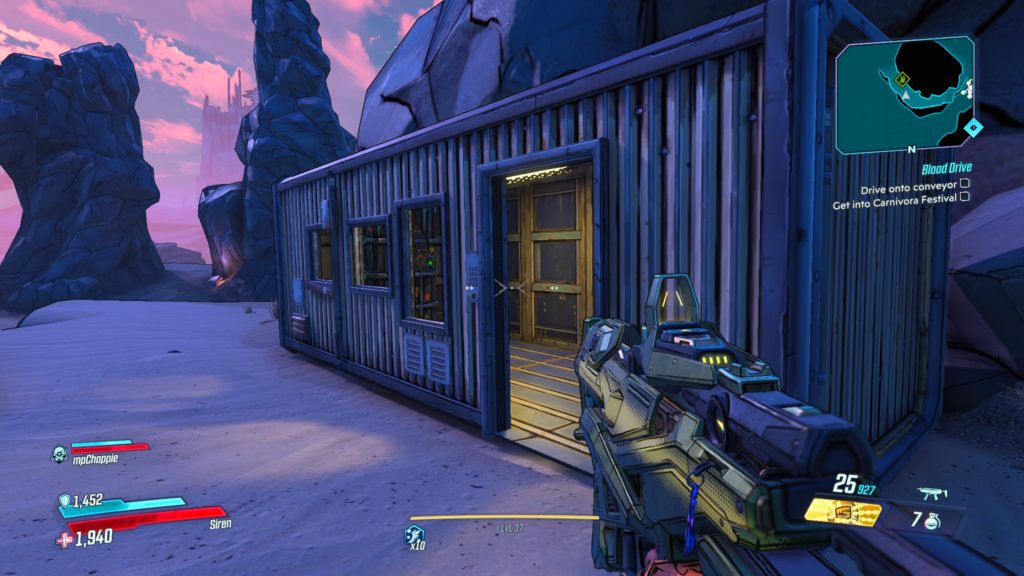
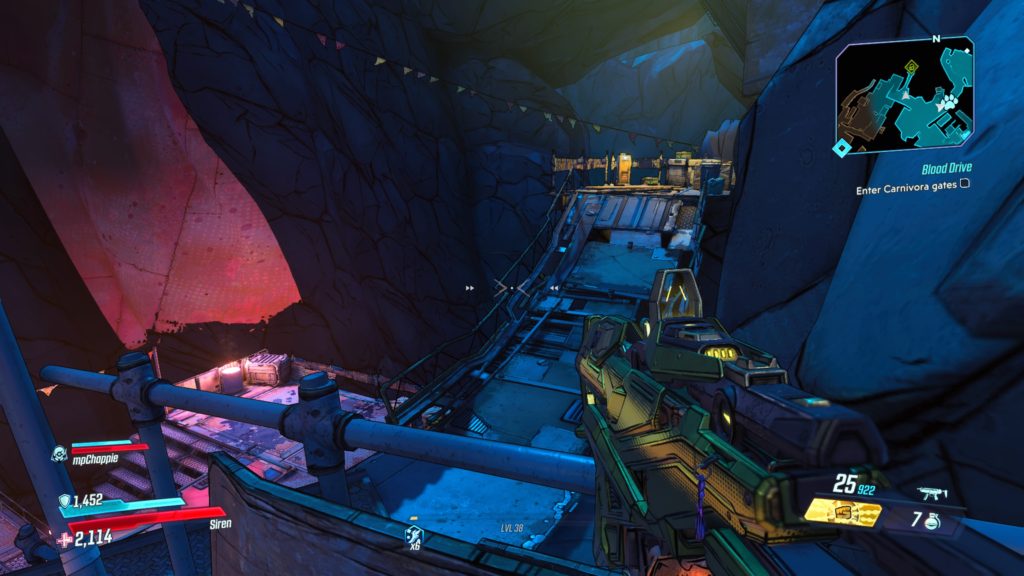
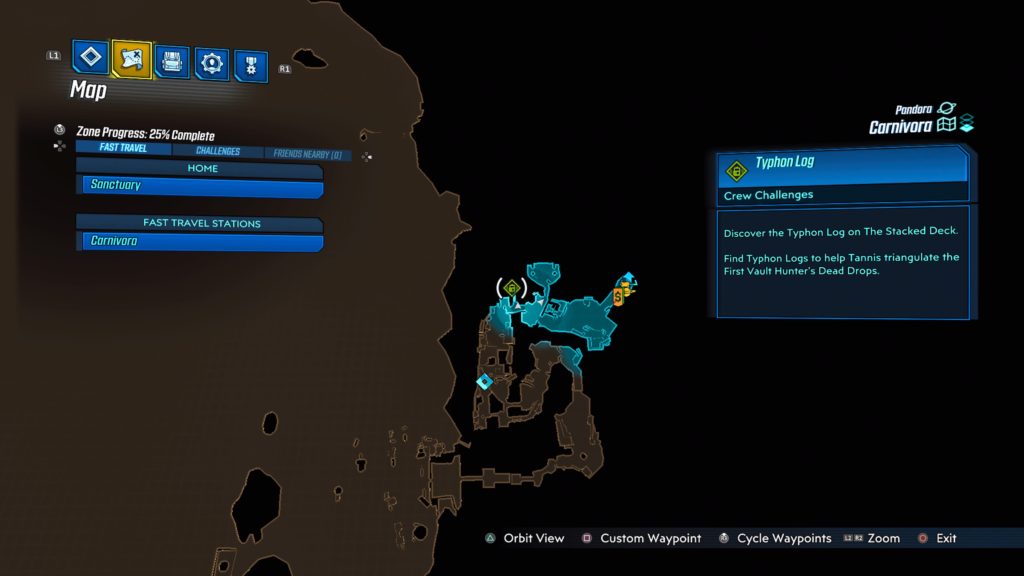
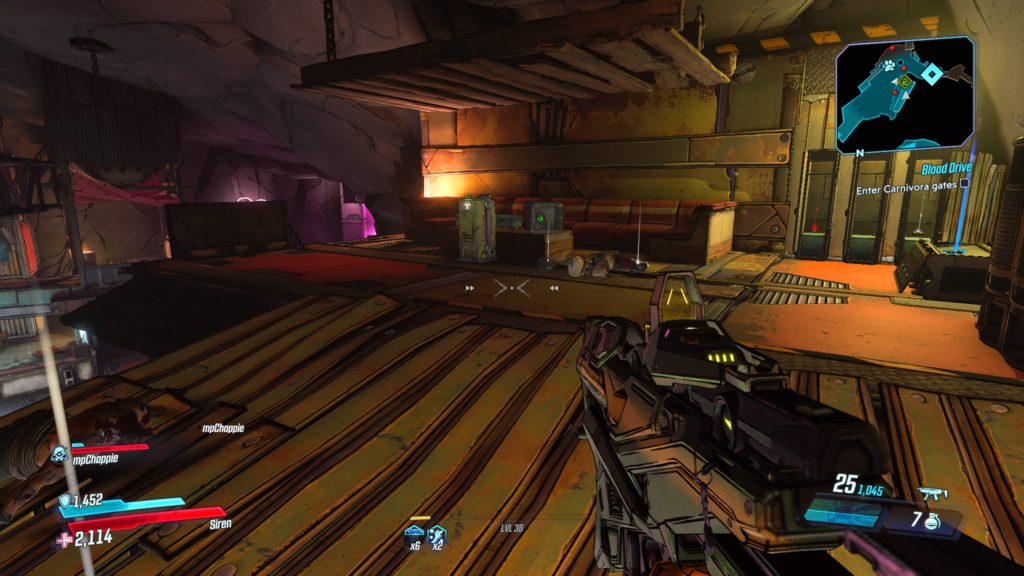
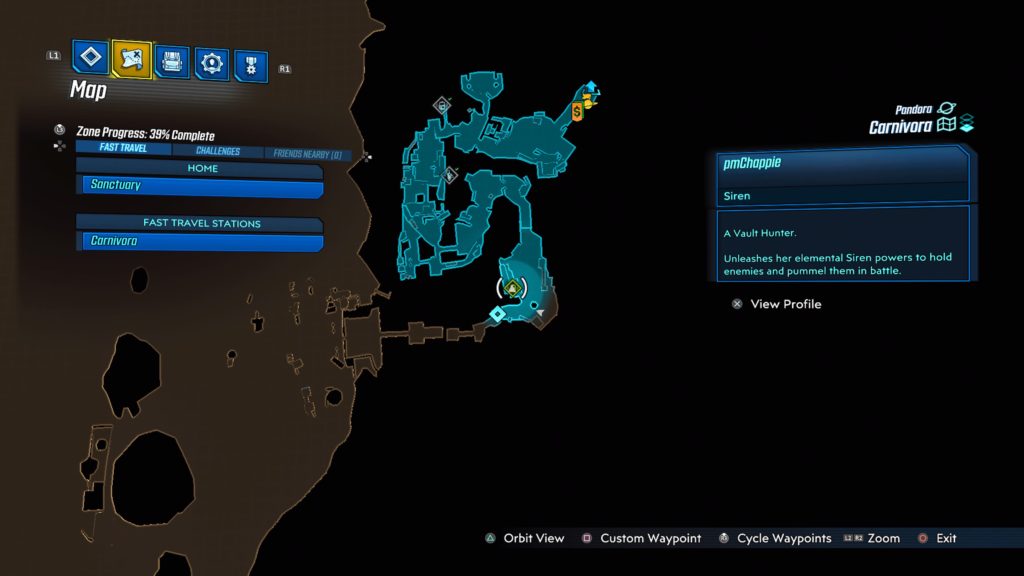
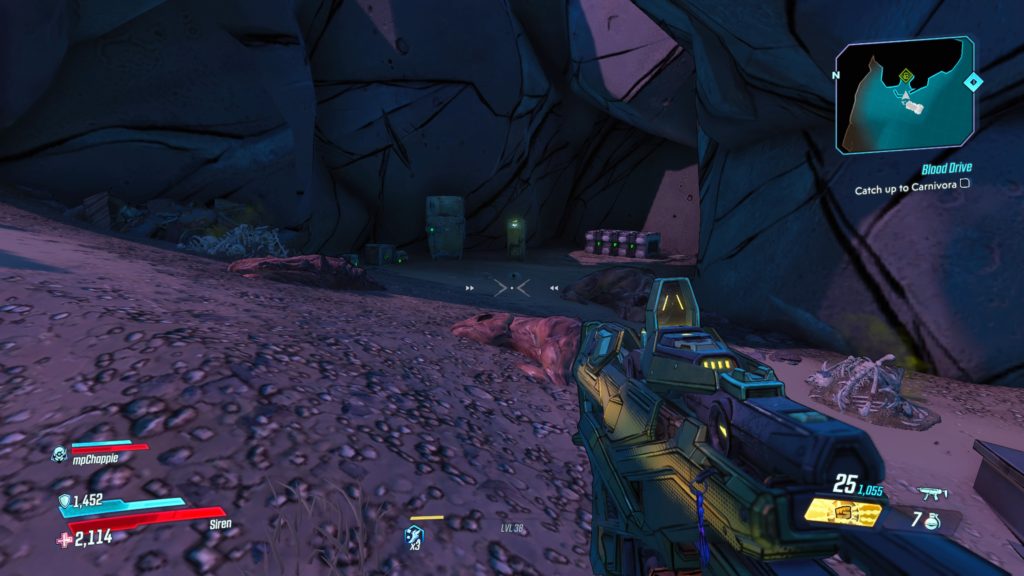
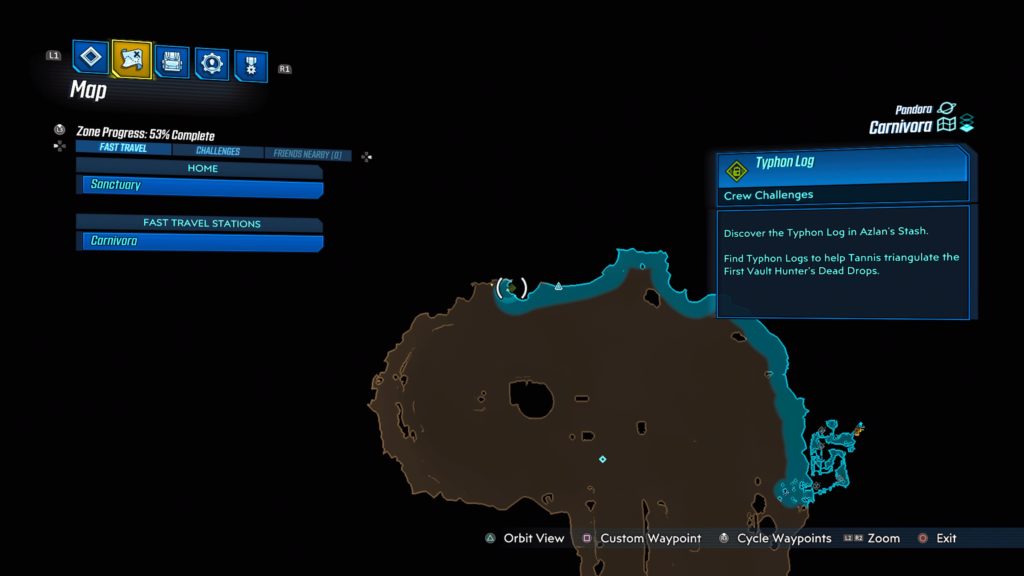
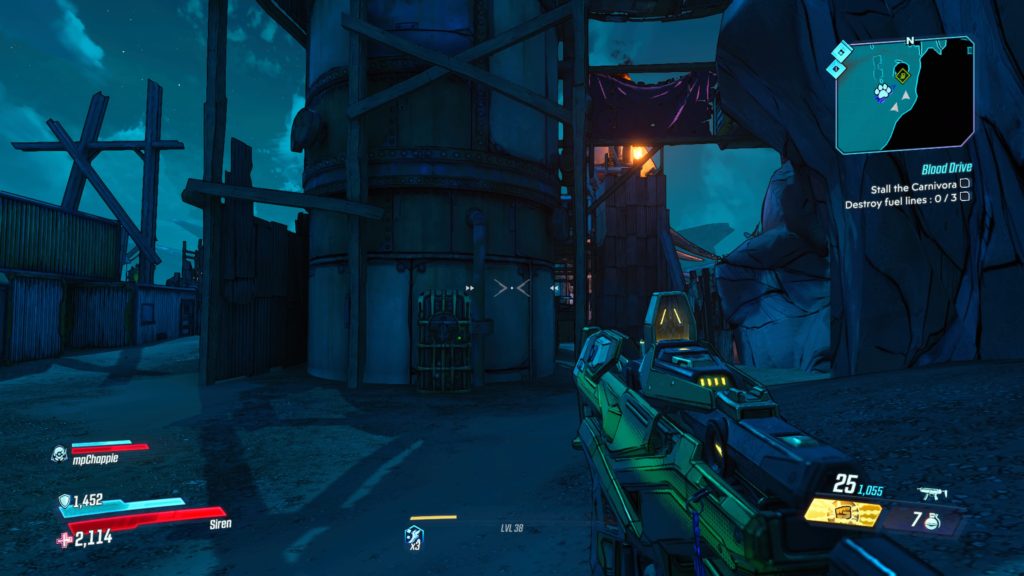
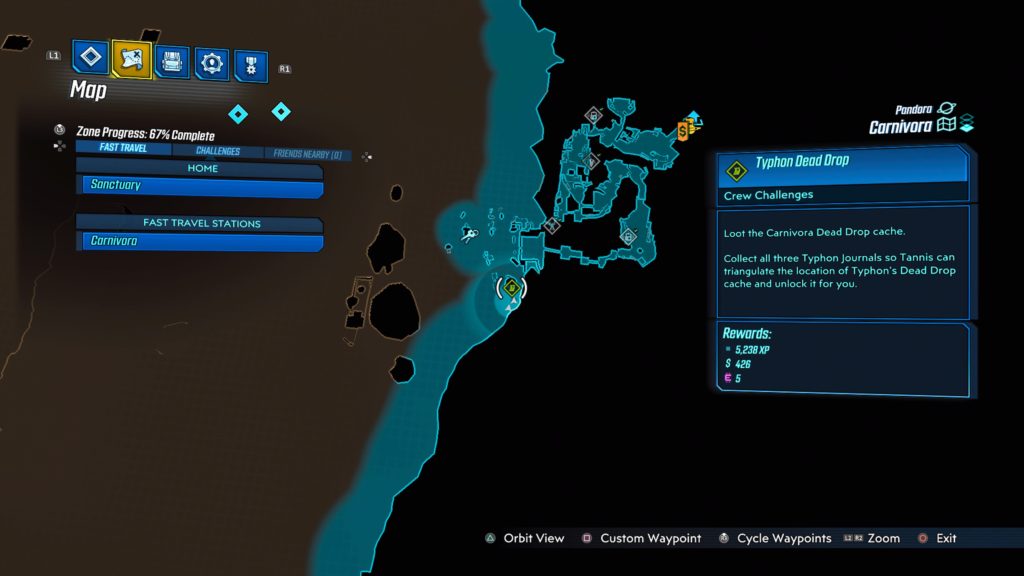
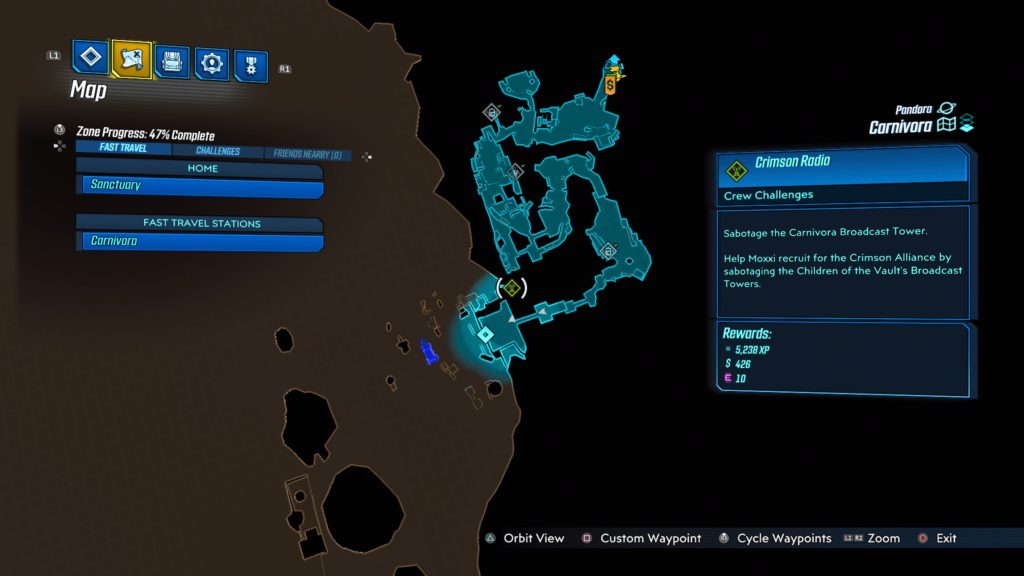
Carnivora
The Stacked Deck
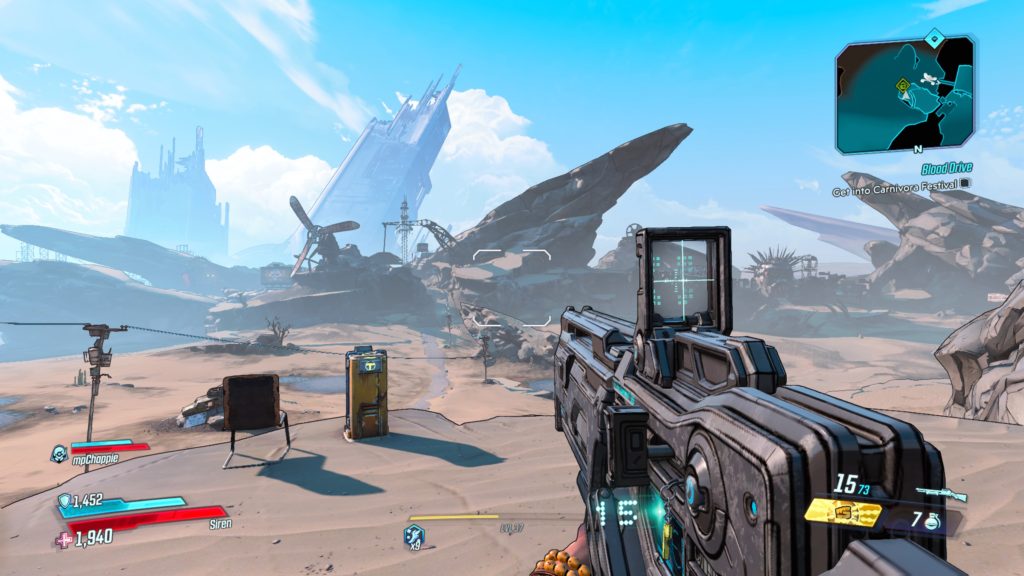
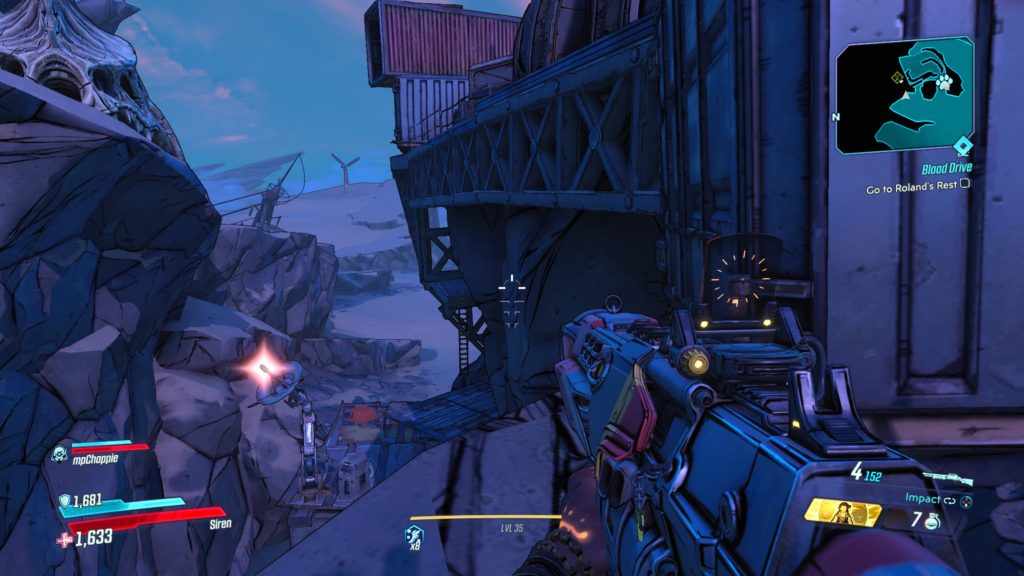
This log is located in the very northeastern part of the map, west of the fast travel station. You will walk past it on your way to save Tannis during the Blood Drive main mission. See the map below for the exact location.
La Cage O’Tinks
This log is located on the third level of La Cage O’Tinks in a private booth area. See the map below for the exact location.
Azlan’s Stash
This log is located in Azlan Stash, which is a cave-like area that can be found in the northern part of the large open area. See the map below for the exact location.
Carnivora Dead Drop
This cache is located on the backside of a giant cylinder near the entrance to the big open area. See the map below for the exact location.
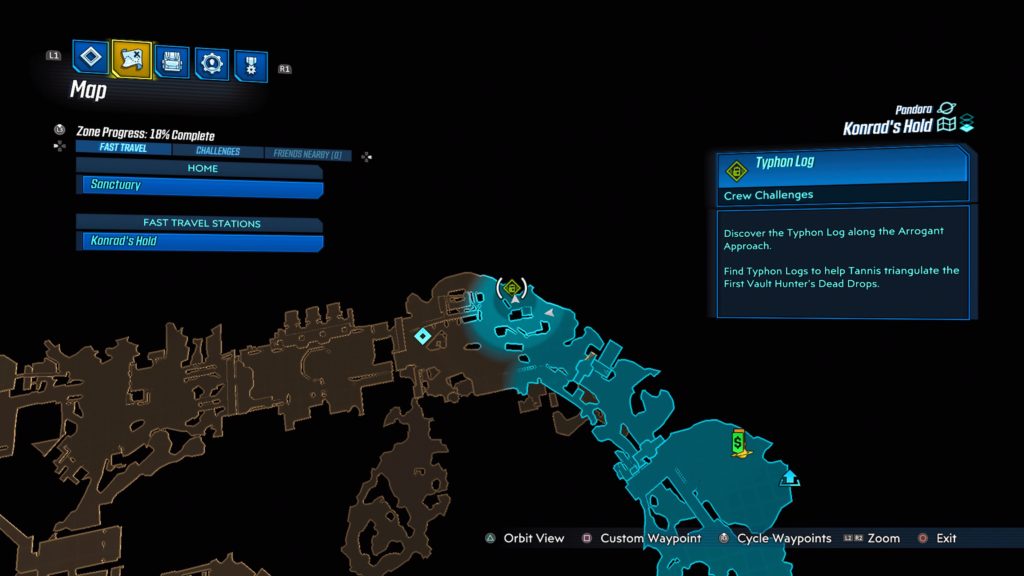
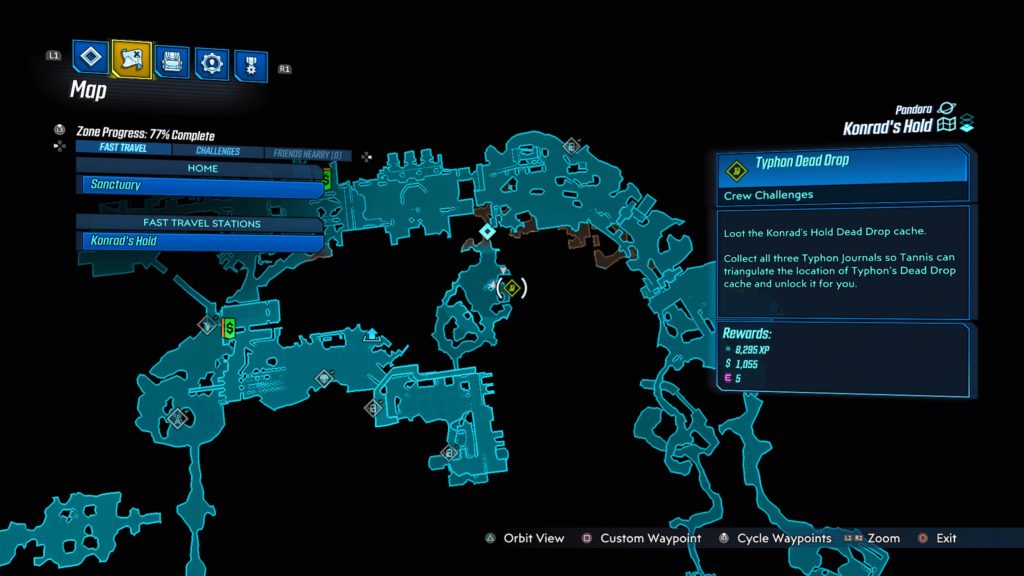
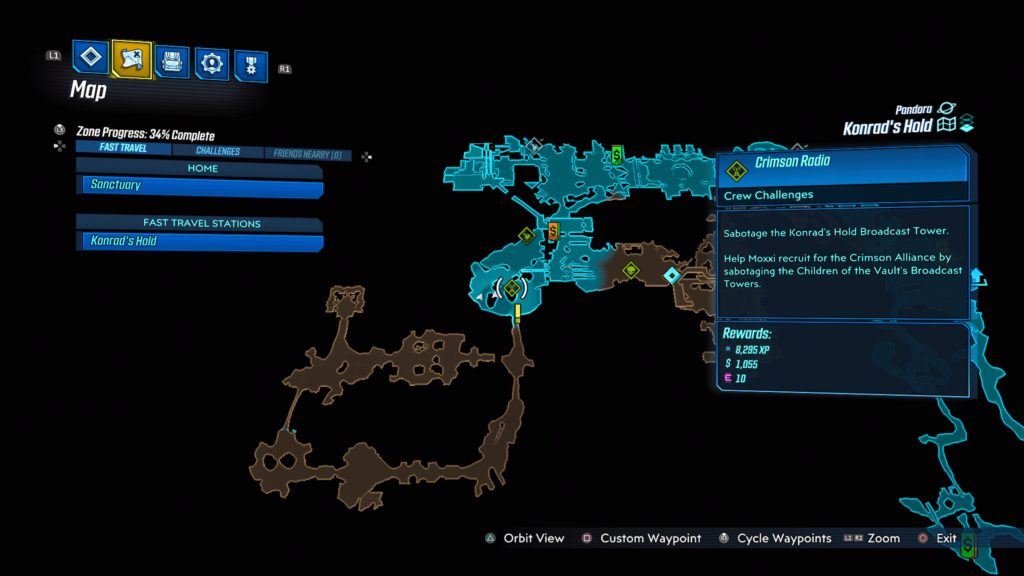
Konrad’s Hold
The Arrogant Approach
The log is located on the northeastern part of the map, northwest of the fast travel station. See the map below for the exact location.
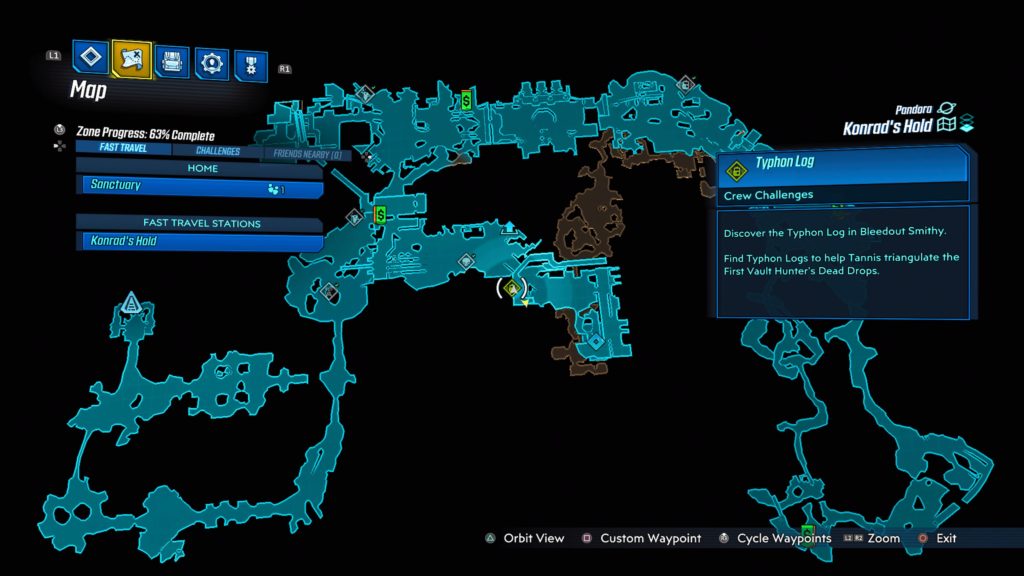
Bleedout Smithy
This log is located on the third level of Bleedout Smithy. To reach the log, start from the entrance to the smithy. When you come to the mine car sitting on the track, take a right and head towards the silver ventilation duct. Climb on top of the duct and turn right. Crouch walk along the duct until you reach the middle under the platform above you. You will need to jump around the outside of the platform and grab the ledge to reach the top. This is tricky and may take you a couple of tries. The log will be located on that platform near a window. See the map below for the exact location.
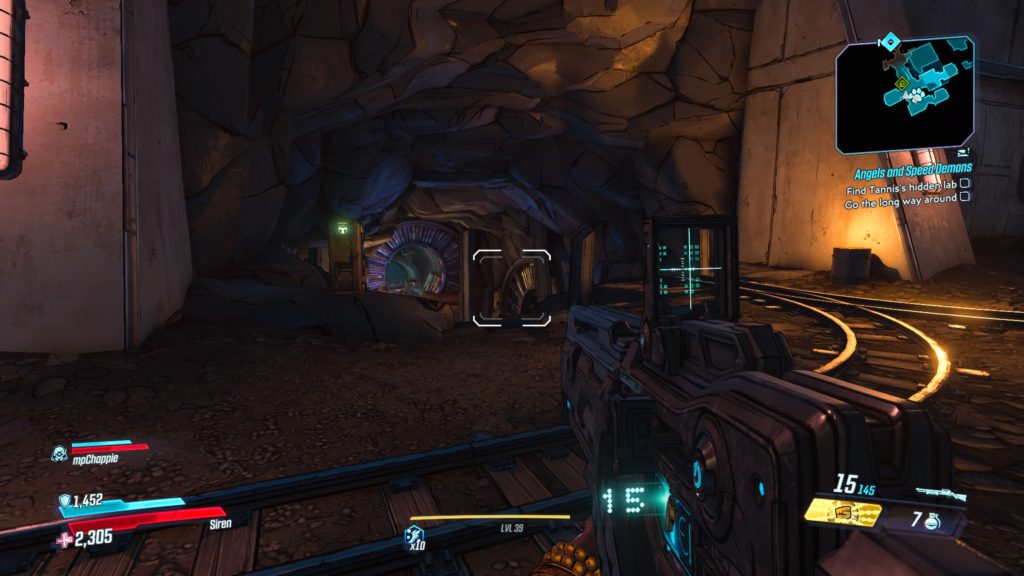
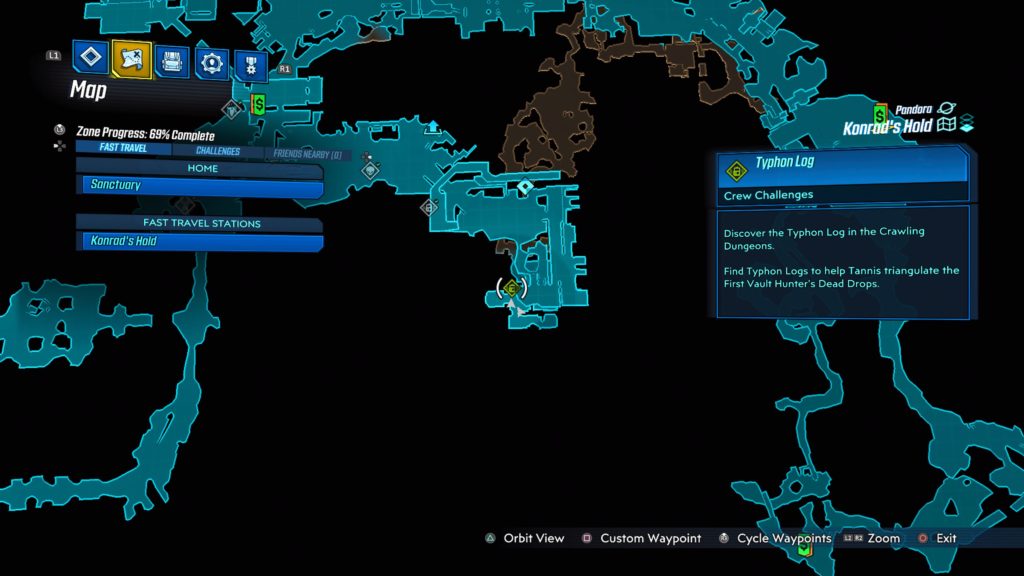
Crawling Dungeons
This log is located in the Crawling Dungeons. After you drop down the elevator shaft, take the first right and the log will be straight ahead next to the tracks. See the map below for the exact location.
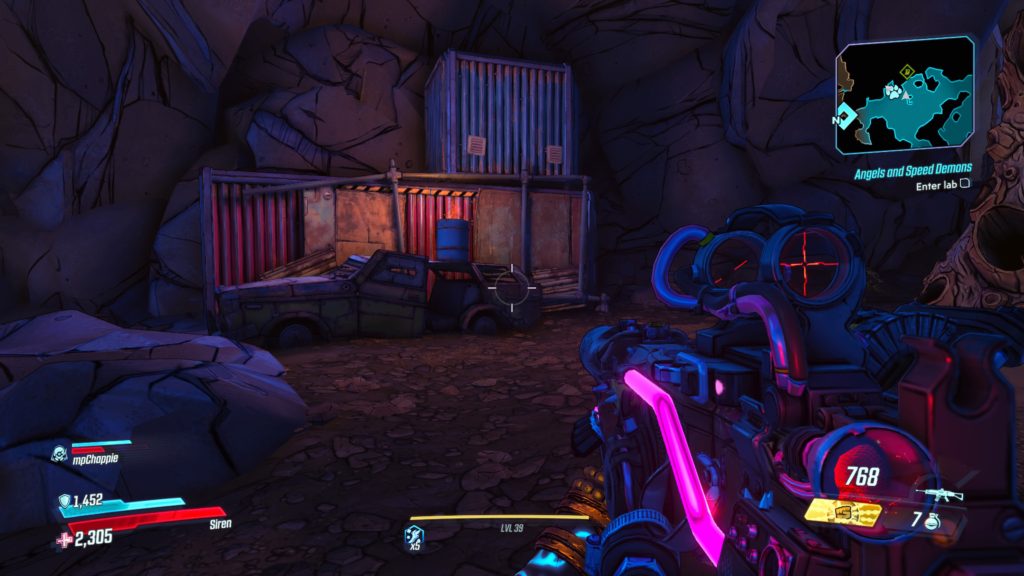
Konrad’s Hold Dead Drop
The cache is located in a stack of shipping containers in the Crawling Dungeons near the entrance to Tannis’ lab. See the map below for the exact location.
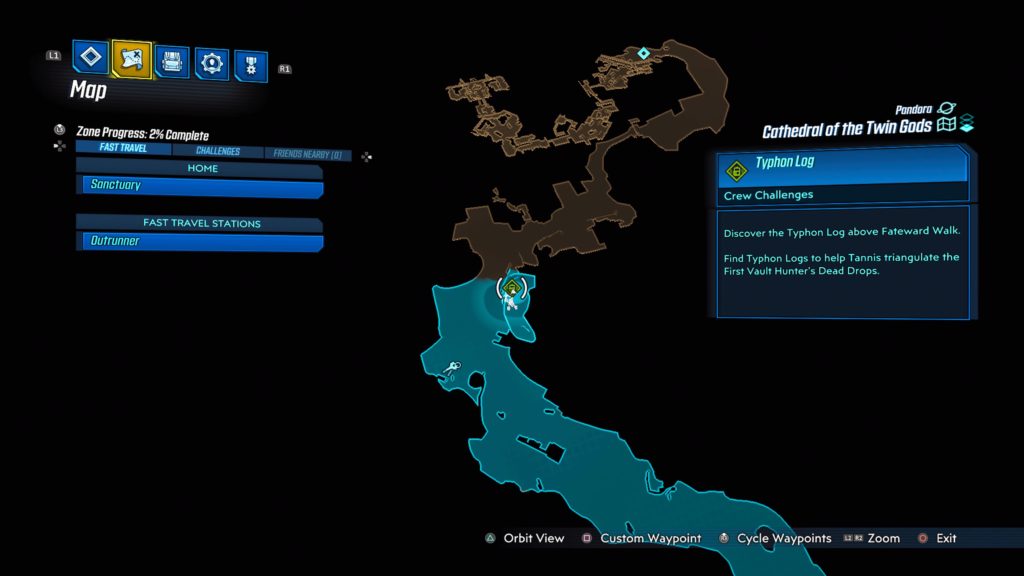
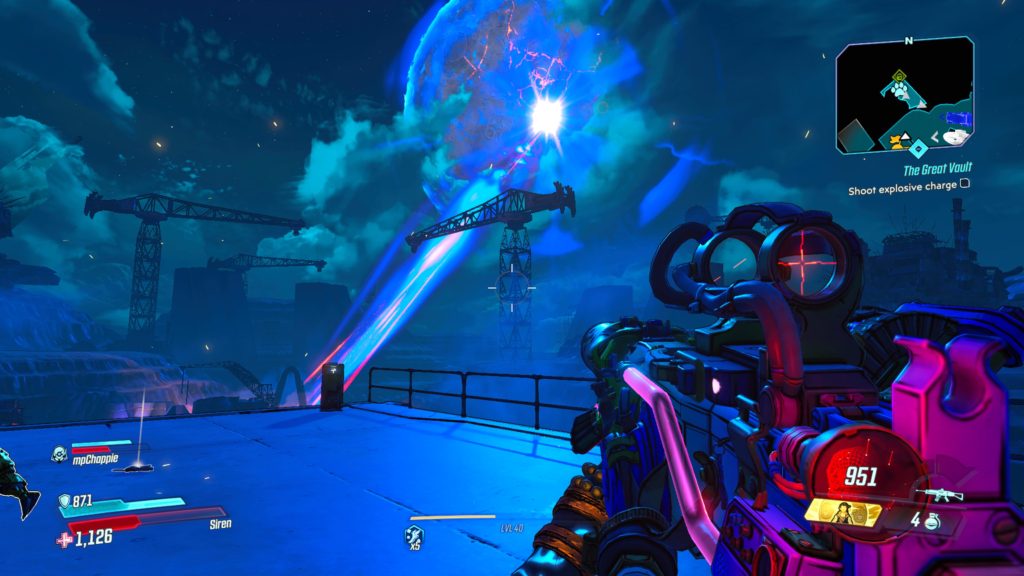
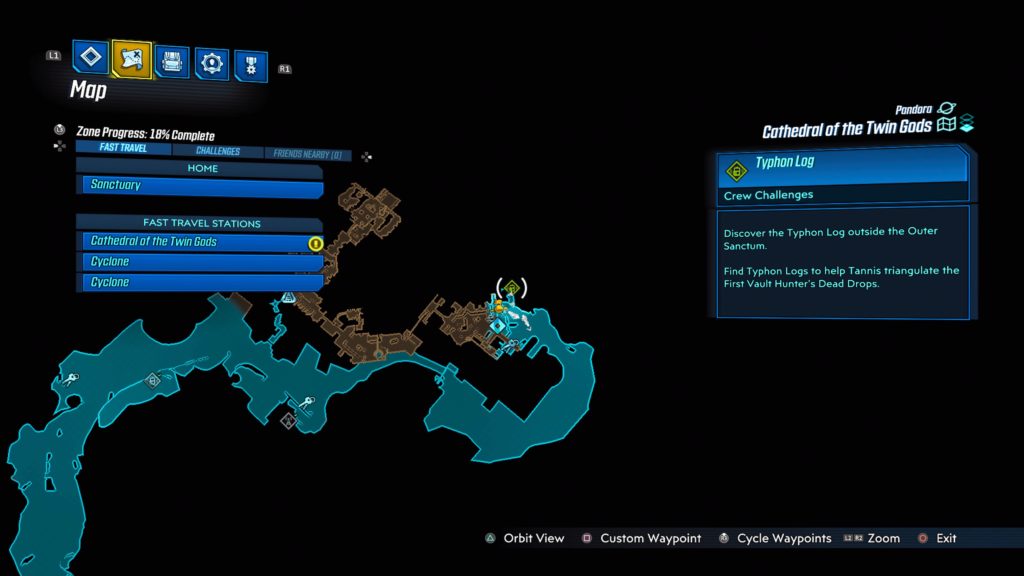
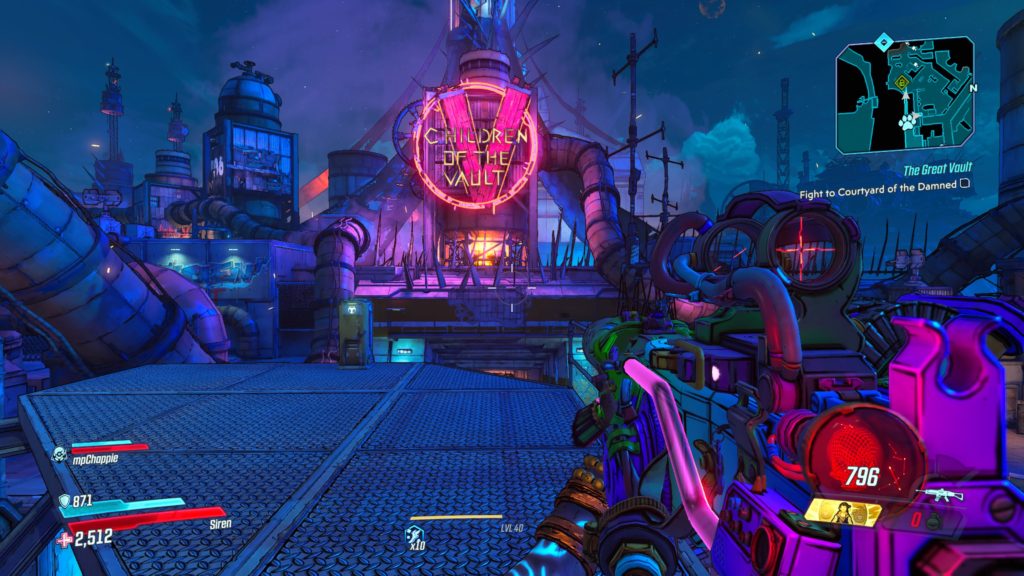
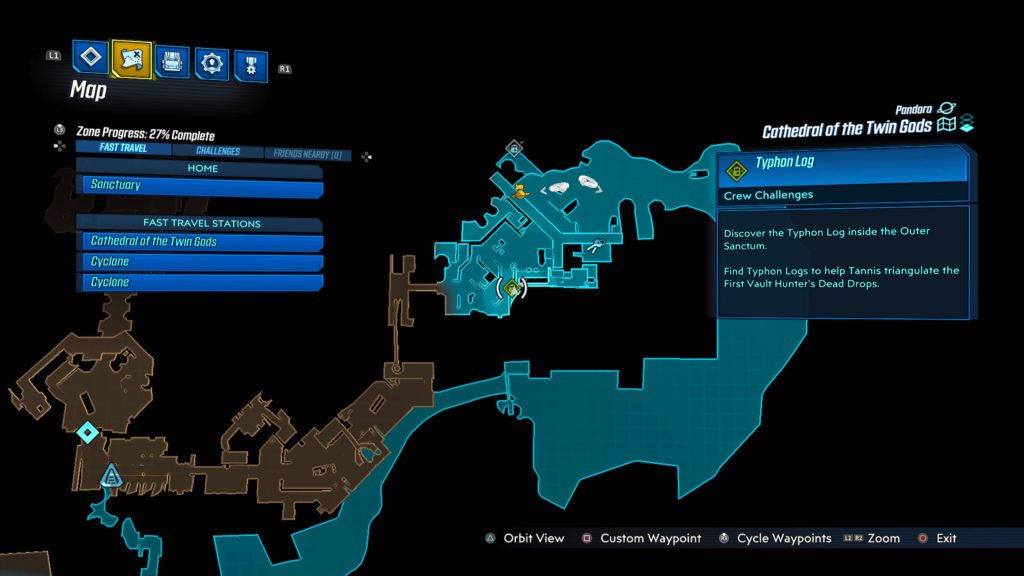
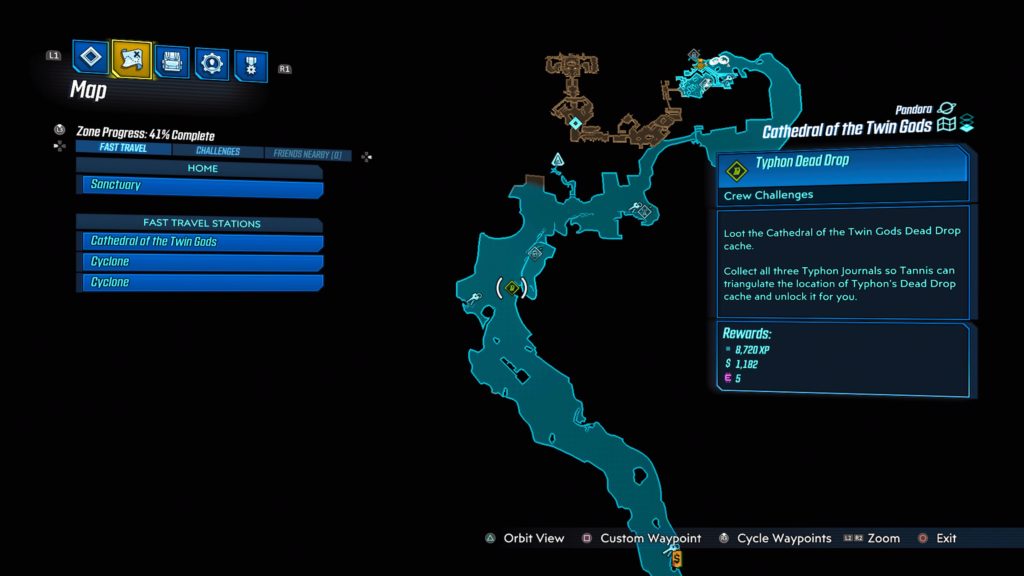
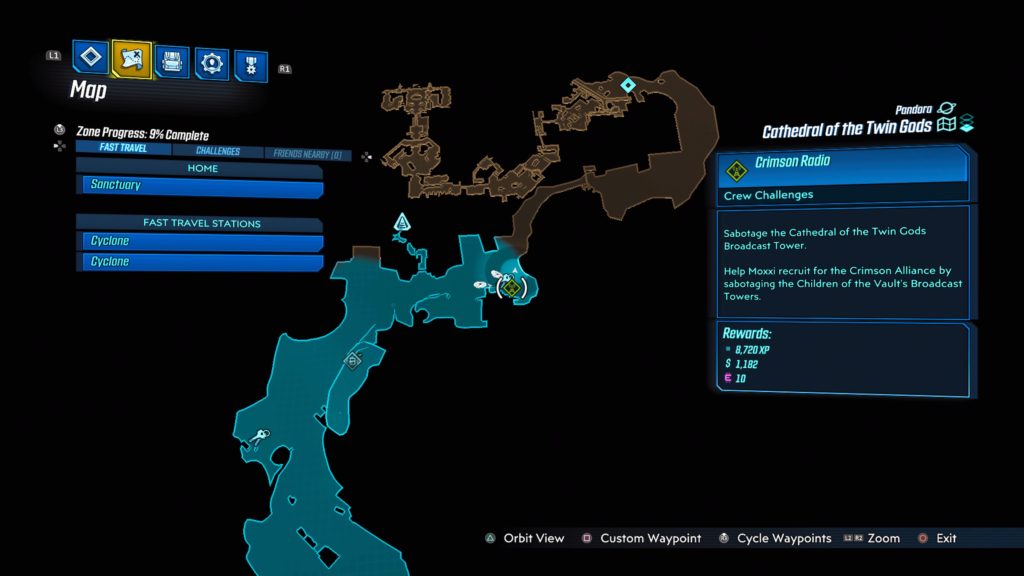
Cathedral of the Twin Gods
Fateward Walk
This log is located in the center of the map just before the COV base entrance. See the map below for the exact location.
Outside the Outer Sanctum
This log is located to the right of the Cathedral of the Twin Gods fast travel station. See the map below for the exact location.
Inside the Outer Sanctum
As you enter the Outer Sanctum, take a left and climb up the metal structure with yellow paint on it. From there, crouch under the metal door and take a right up the stairs. Follow the path until you reach the end of the walkway containing the log. See the map below for the exact location.
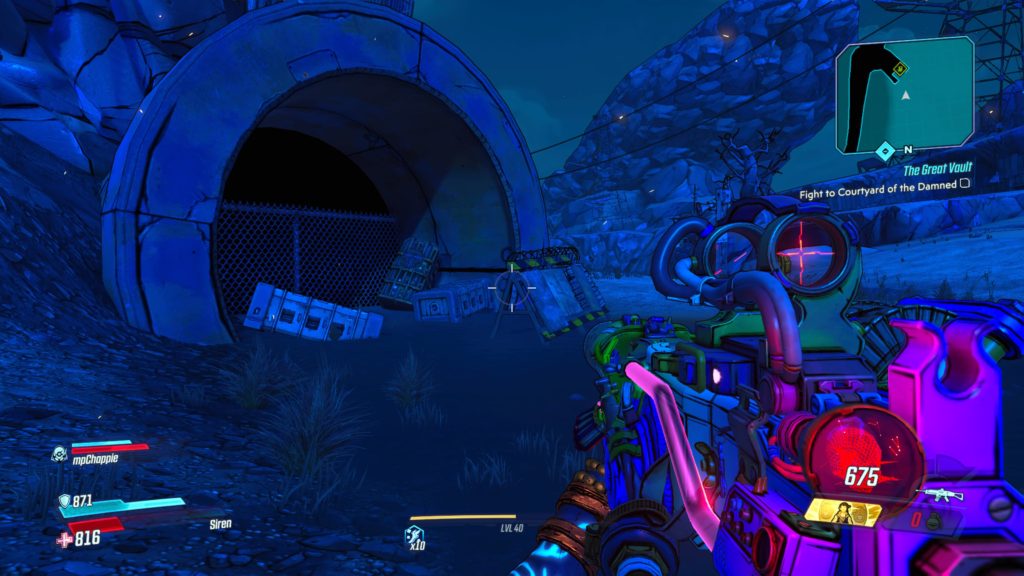
Cathedral of the Twin Gods Dead Drop
This cache is located in the entrance to a drainage pipe near the Fateward Walk Typhon Log. See the map below for the exact location.
The Ascension Bluff Broadcast Tower is located a short ways southeast of the Ascension Bluff fast travel station in an area called the Sty. See the map below for the exact location. Fight your way past the enemies at the tower as you make your way to the top. When you get there, climb on top of the smaller metal room and sabotage the tower to complete the challenge.
Devil’s Razor
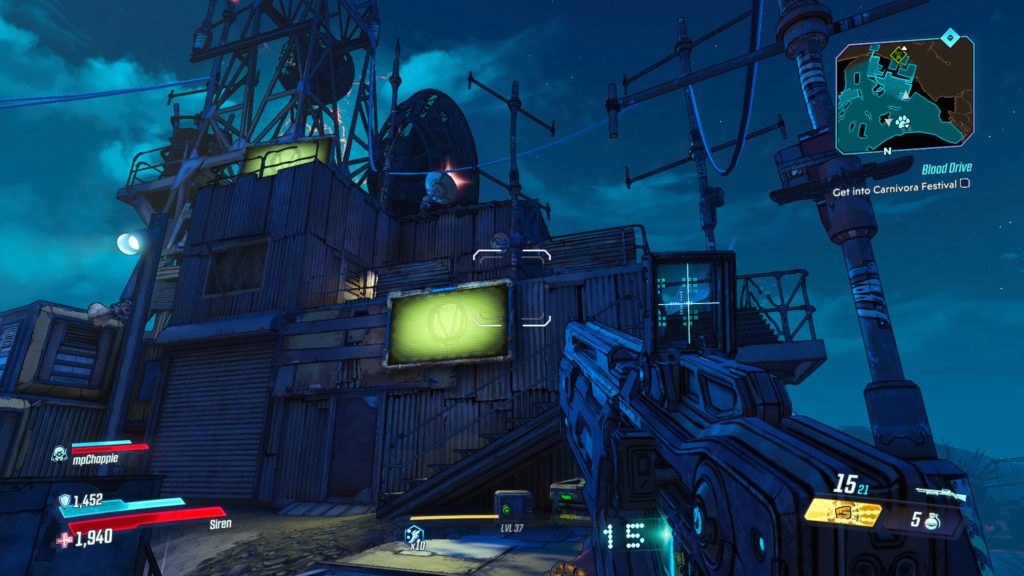
Devil’s Razor Broadcast Tower
This broadcast tower is located on the east side of the map north of The Droughts map transition. See the map below for the exact location.
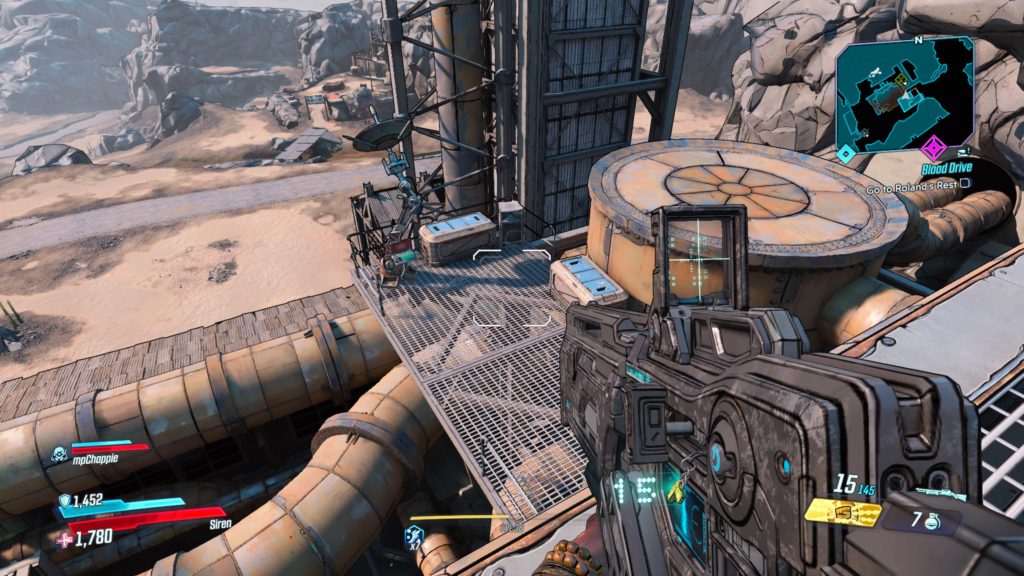
Devil’s Razor Broadcast Tower 2
This broadcast tower is located in the Dahl Refinery in the northern section of the map, northeast of the claptrap in the Sin-A-Plex. See the map below for the exact location.
The Splinterlands
Splinterlands Broadcast Tower
This tower is located southwest of the Logan’s Spar Typhon Log. See the map below for the exact location.
Carnivora
Carnivora Broadcast Tower
This tower is located near the entrance of Carnivora’s Playground to the right of the New You Station. You will be able to reach the tower after you meet Carnivora for the first time. Just walk through the gate and turn right to head along the shipping containers. See the map below for the exact location.
Konrad’s Hold
Konrad’s Broadcast Tower
This tower is located in the Last-Stand Yard on a broken track. To reach the tower, climb up on the wooden platform on the west side of the tower and keep making your way up. See the map below for the exact location.
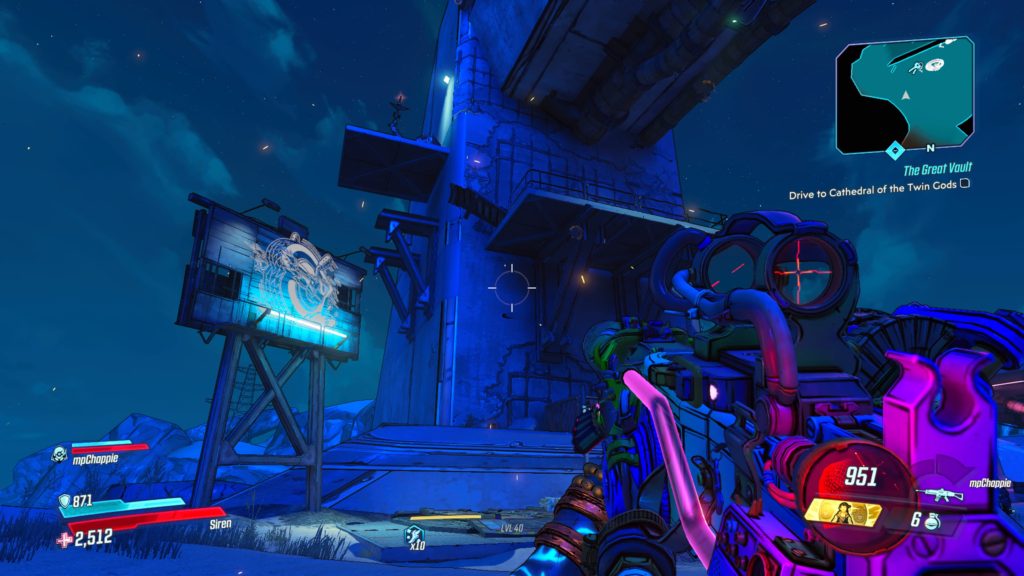
Cathedral of the Twin Gods
Cathedral of the Twin Gods Broadcast Tower
This tower is located in Fateward Walk by a Catch-A-Ride near the center of the map. To reach the top of the tower, jump on the right side of the shipping containers then walk up the fallen debris. Jump up onto the makeshift bridge containing a ladder. Take the ladder to a metal platform and head forward to another makeshift bridge. Jump to the metal platform to the right sticking out of the tower. From there, jump to the next platform and then jump to the metal pipe on the side of the tower to reach the platform where you can sabotage the radio. See the map below for the exact location.
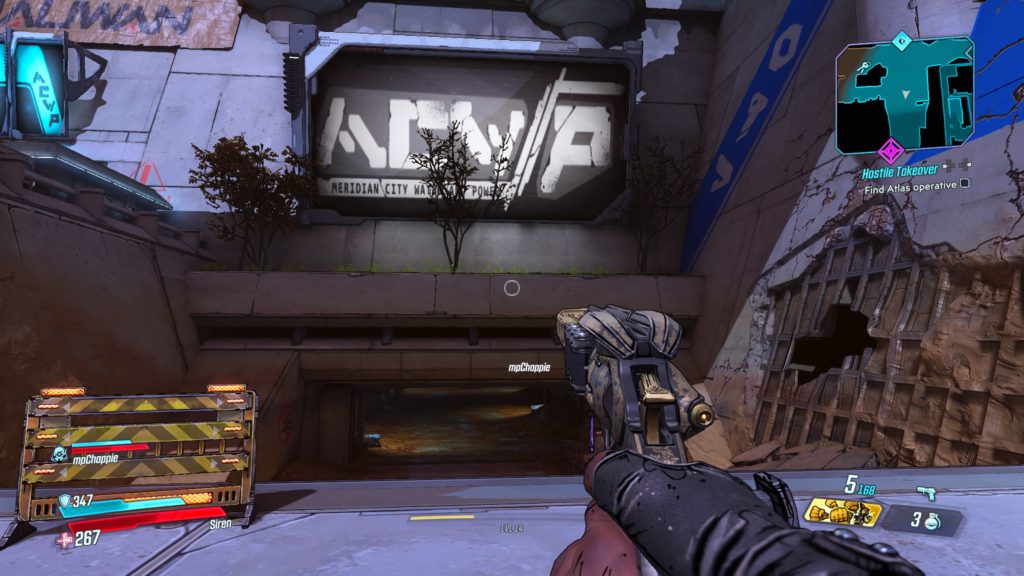
Baron Noggin is located in the sewer below the Meridian City Water and Power sign on the western side of the map, southwest of Dynasty Diner. You can find Baron Noggin during the Dynasty Dinerside mission.
Promethea – Lectra City
Judge Hightower and his Gang
Judge Hightower is located at the very southern tip of the map, west of the Killarena. You can find him near the Kill Killavolt side mission.
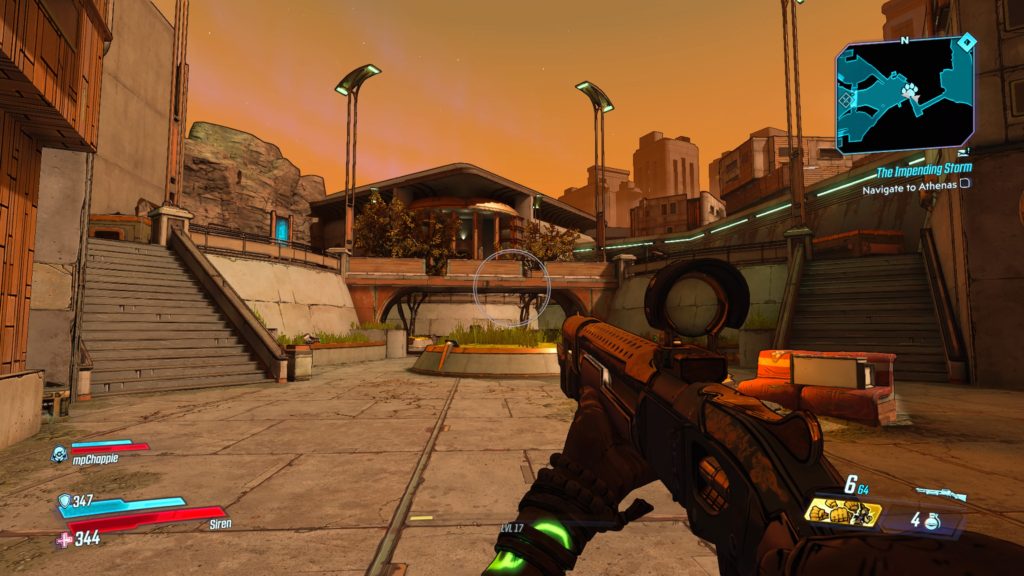
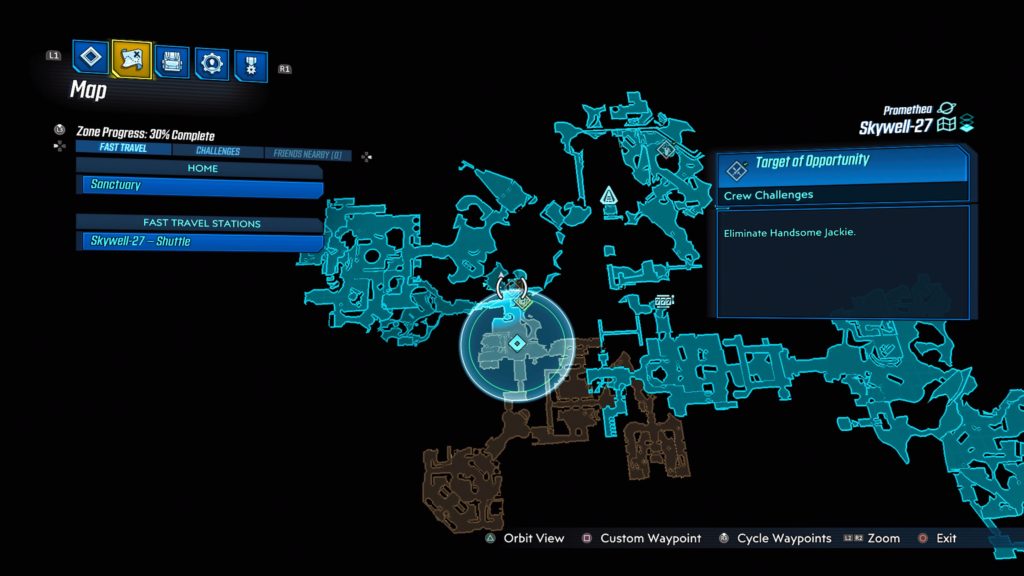
Promethea – Skywell-27
Handsome Jackie
Handsome Jackie is located in a cave near the observation deck. See the map below for the exact location. To reach it, you will need to jump down the long chute in Sector 4. This will place you in Fuel Processing. Exit through the door to enter a room containing a cylinder with a blue sphere in the middle of it. Take a left heading north down the walkway and jump onto a fan below. From there, jump across to the cave where Handsome Jackie lurks.
Eden-6 – The Anvil
Sky Bullies
The Sky Bullies are located in the Devil’s Saucepan, which is in the northern section of a building on the west side of The Yard. See the map below for the exact location.
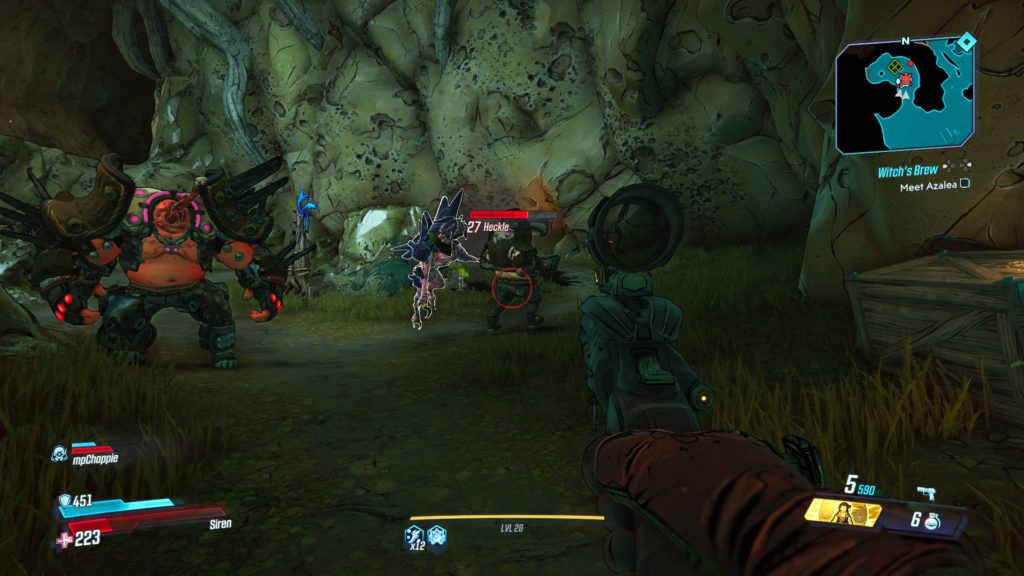
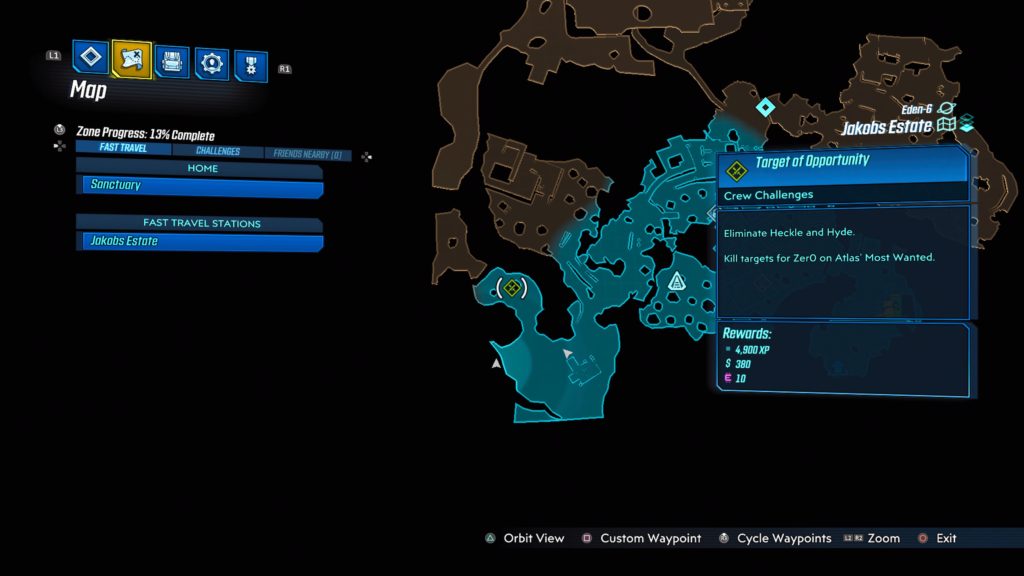
Eden-6 – Jakobs Estate
Heckle and Hyde
Heckle and Hyde are located in the southeastern region of Leery Hamlet near Servant’s Lift. See the map below for the exact location.
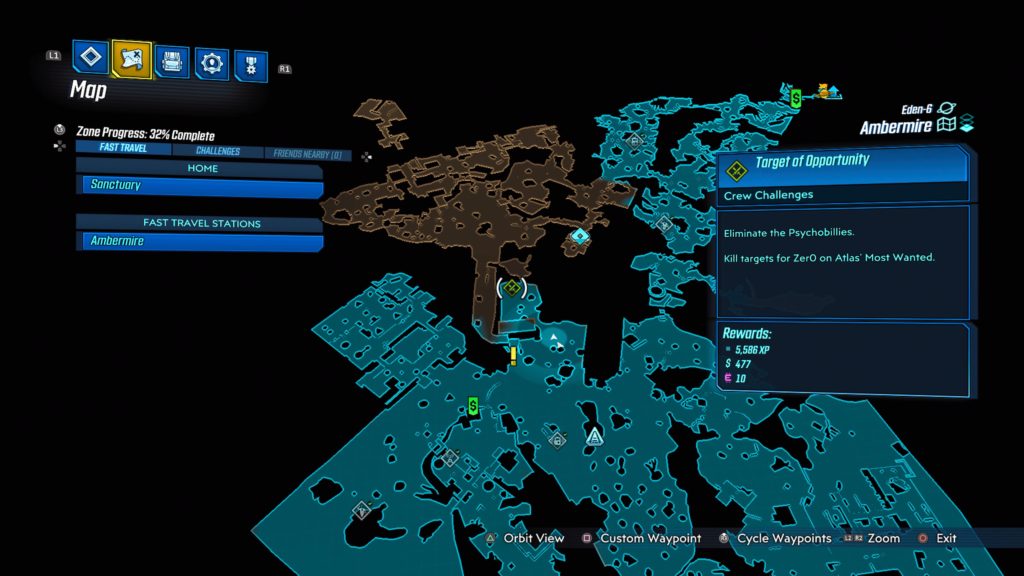
Eden-6 – Ambermire
Psychobillies
The Psychobillies are located near the middle of the map, north of where you pick up the Sell Out side mission and the lone Ammo Dump vending machine. See the above map for the exact location.
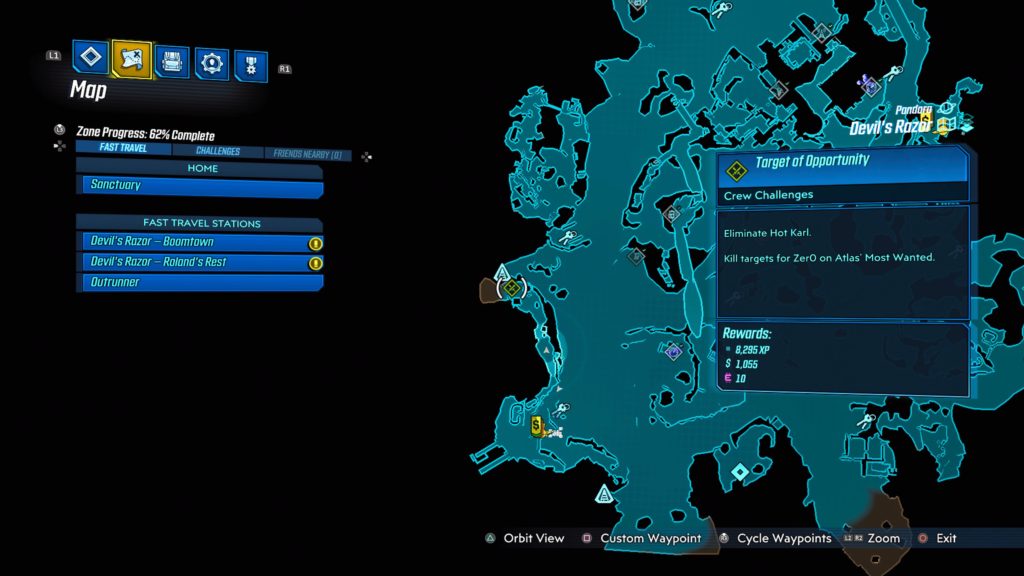
Pandora – Devil’s Razor
Hot Karl
Hot Karl is located north of Roland’s Rest along the side of a cliff. See the map below for the exact location.
Pandora – The Splinterlands
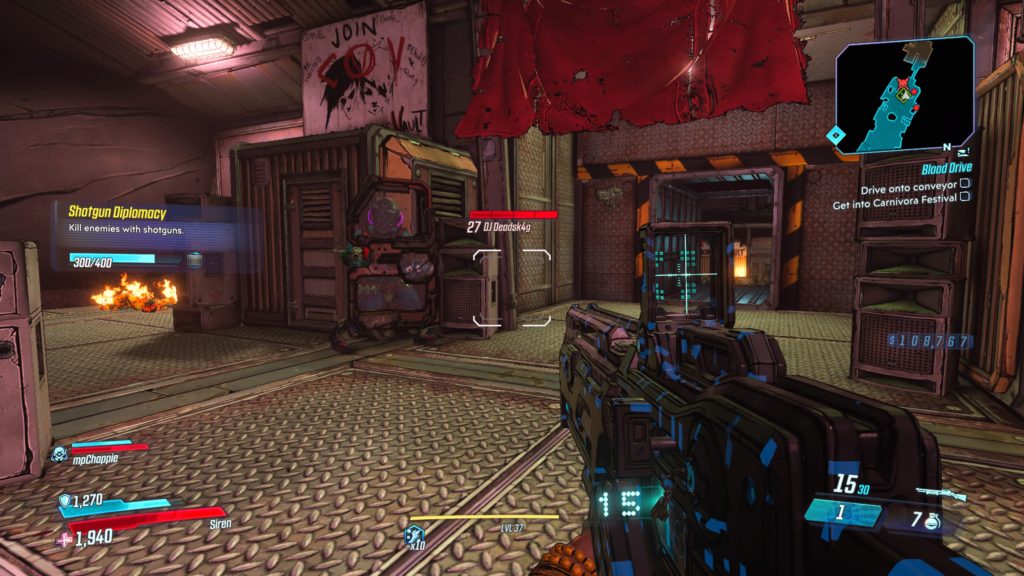
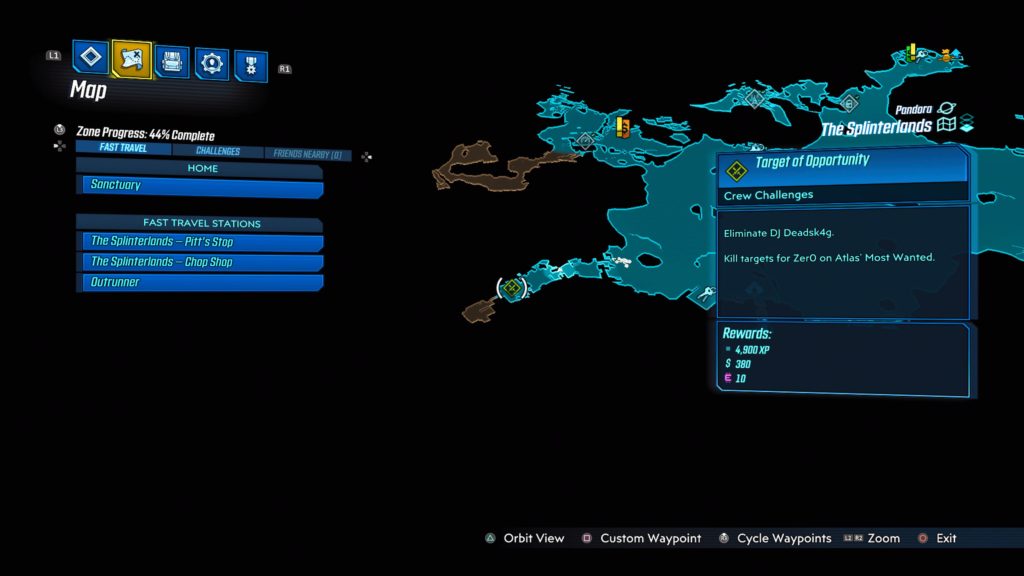
DJ Deadsk4g
This DJ is located in the Rave Cave at the southwestern part of the map. See the map below for the exact location.
Pandora – Cathedral of the Twin Gods
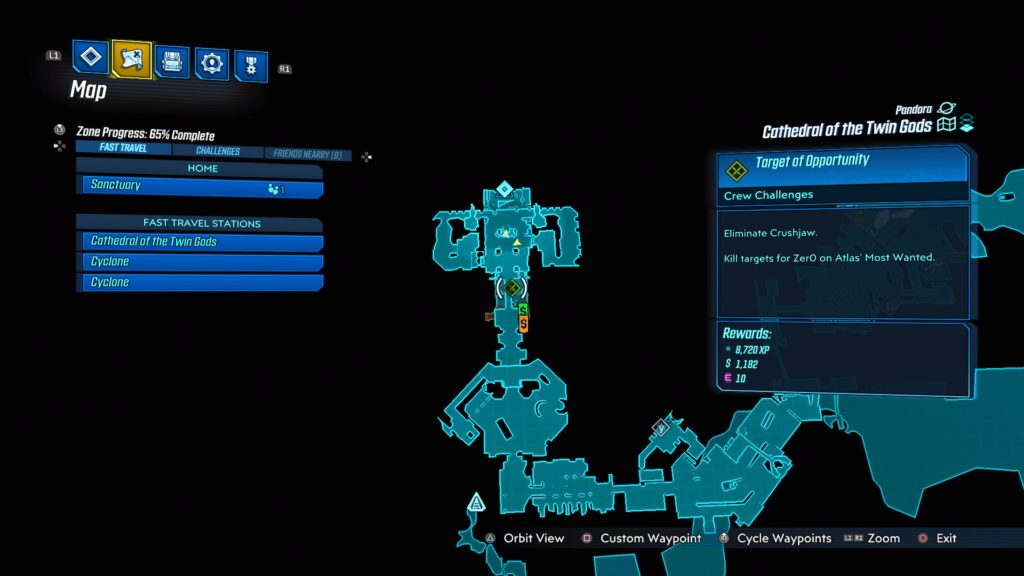
Crushjaw
During The Great Vault main story mission, you will pass through the Eridium Sluice. Crushjaw is located on the opposite side of The Great Vault map transition and is below the Altar of the Twins. See the map below for the exact location.
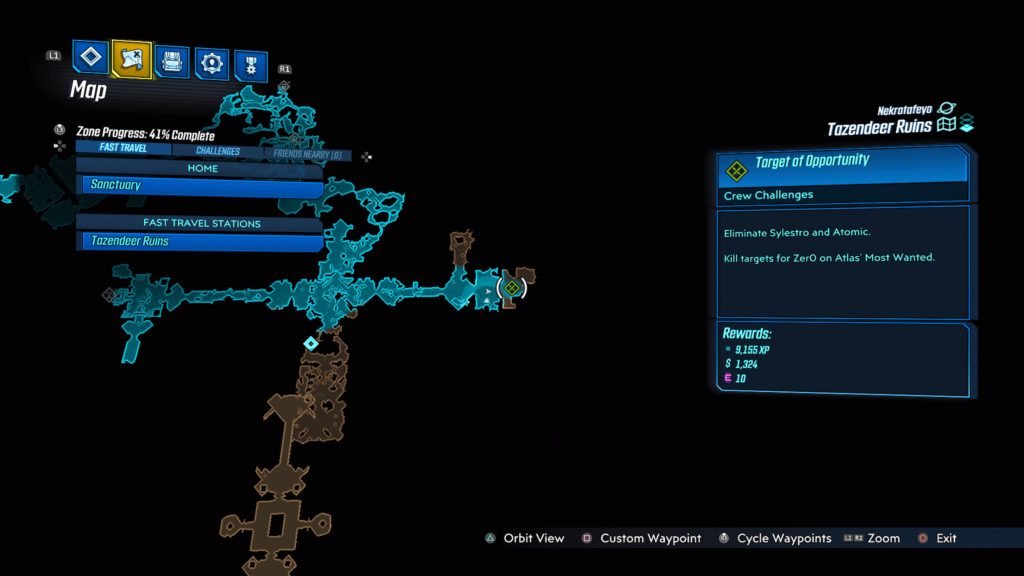
Nekrotafeyo – Tazendeer Ruins
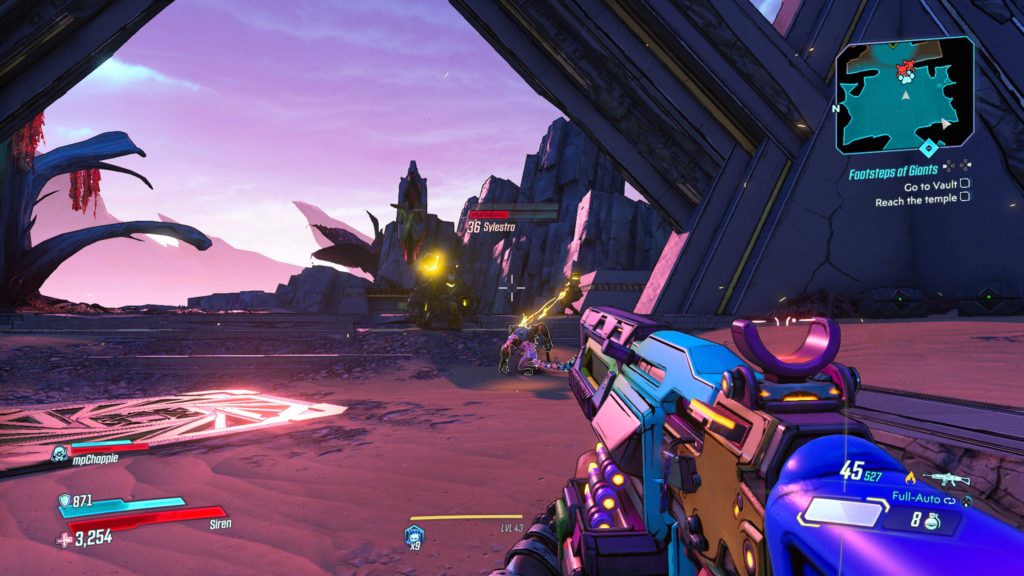
Sylestro and Atomic
Sylestro and Atomic can be found to the far east of the map, east of the vault. See the map below for the exact location.
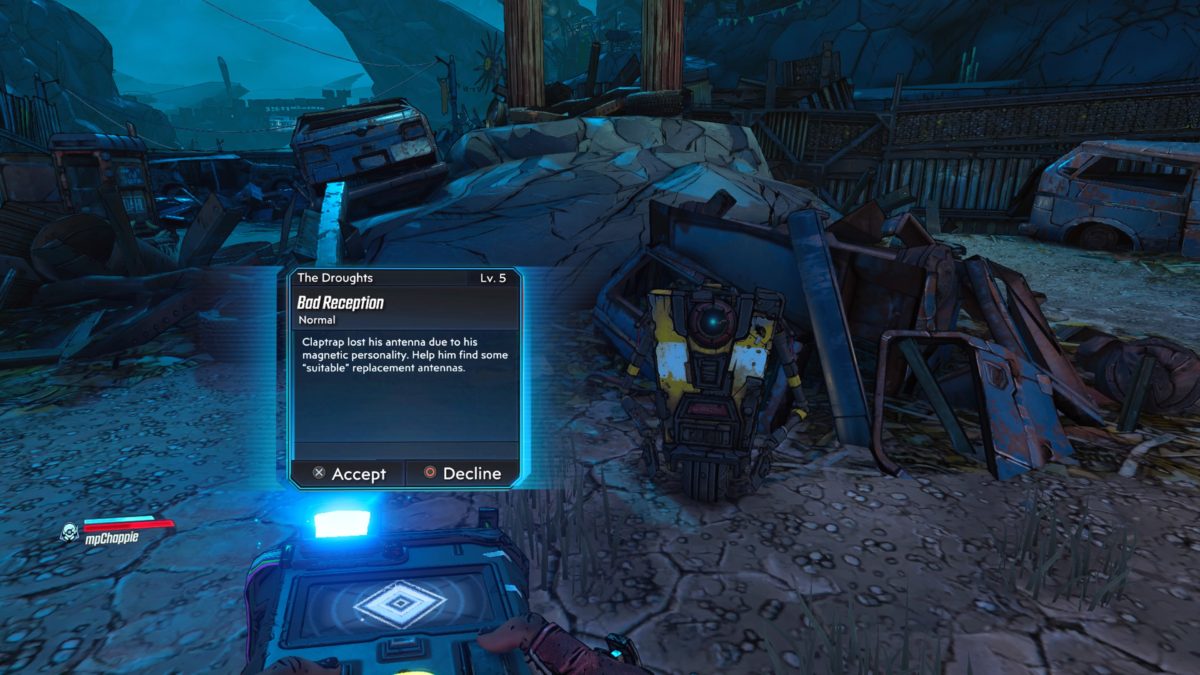
Obtained: Talk to Claptrap in the droughts after completing the “From the Ground Up” main mission
Objective(s):
Search Old Laundry
Open Trap Door
Search Satellite Tower
Search Sid’s Stop
Speak to Sid
Destroy Sid’s Satellite Dish
Speak to Sid
Search Spark’s Cave
Search Old Shack
Give Items to Claptrap
Search Old Laundry
Follow the objective past the Sun Smasher’s camp and over the broken bridge to arrive at a trap door next to a giant rib cage.
Open Trap Door
To open the trap door, head up to the rock ledge behind the door and jump off of it, pressing the crouch button (circle button) to slam down into it. Enter the bunker and collect the hanger in the back of the room.
Search Satellite Tower
Follow the objective to the western section of the Droughts to arrive at Varkid Valley. Make your way to the tower on the western side of the valley and clear out the enemies stationed there. Once they are dealt with, climb up the tower and shoot the satellite at the top to break free the antenna to collect it.
Search Sid’s Stop
Follow the objective past the Sun Smasher’s camp, over the broken bridge and through the Children of the Vault roadblock to reach Sid’s Stop.
Speak to Sid
Talk to Sid.
Destroy Sid’s Satellite Dish
Destroy all three satellite dishes. The first one is located on the roof of Sid’s shack. The second one is located under the giant windmill west of the shack. The final one is located south of the windmill above the Children of the Vault roadblock (follow the power line from the windmill to spot it).
Speak to Sid
Speak to Sid again then defeat him and take his tinfoil hat.
Search Spark’s Cave
Follow the objective north past the Sun Smasher’s camp to reach a broken bridge. Take the path to the left of the bridge leading into a ravine to locate Spark’s Cave. Enter the cave and shoot the target on the top of the power generator in the back to turn it off. This will allow you to pass through the water and retrieve a spork from a dead bandit.
Search Old Shack
Follow the objective to the northern section of the Droughts to locate the Old Shack. As you try to enter it, a turret and Badass Tink will start attacking you. As you approach the door it will close the door. Back off and wait for it to open again, then run and slide in before it closes again. Defeat them and head to the back room to find the umbrella on the toilet.
Give Items to Claptrap
Head back to Claptrap and hand over the antennas to complete the mission.
Search
This site uses cookies. By continuing to use this website, you are giving consent to cookies being used. For more information on cookies, view our Privacy Policy.OkPrivacy Policy