Welcome to NGB and our Mega Man Battle Network 2 guide for the Need a Cupid Request request. In this guide, we’ll cover everything you need to know about this request like where to start it and how to complete it. Completing this request will also reward you with the Silver Love trophy (or achievement).
How to Start the Need a Cupid Request
In Mega Man Battle Network 2, you can accept the Need a Cupid request from the request board in Marine Harbor after obtaining your ALicense and visiting YumLand for the first time.
How to Complete the Need a Cupid Request
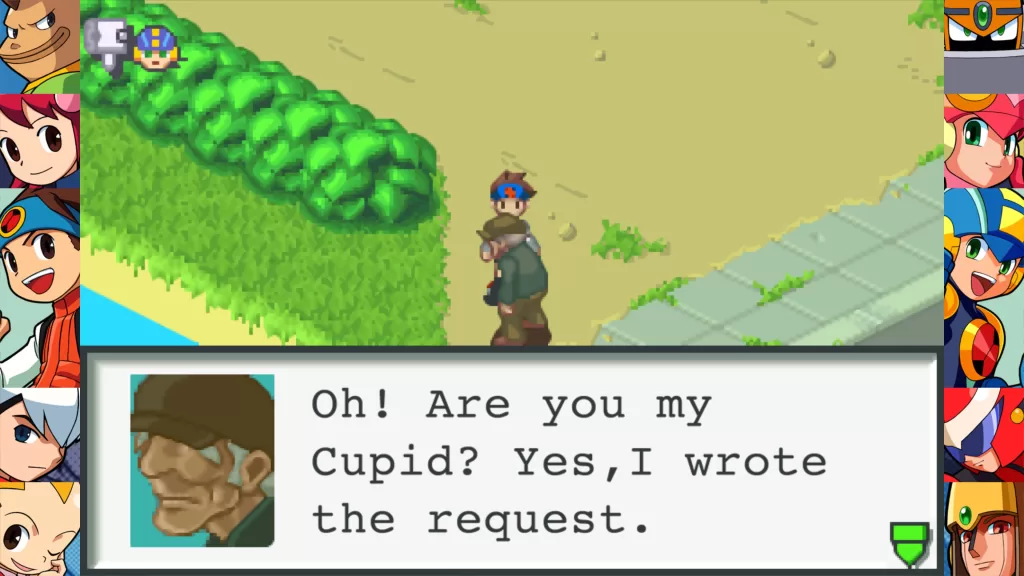
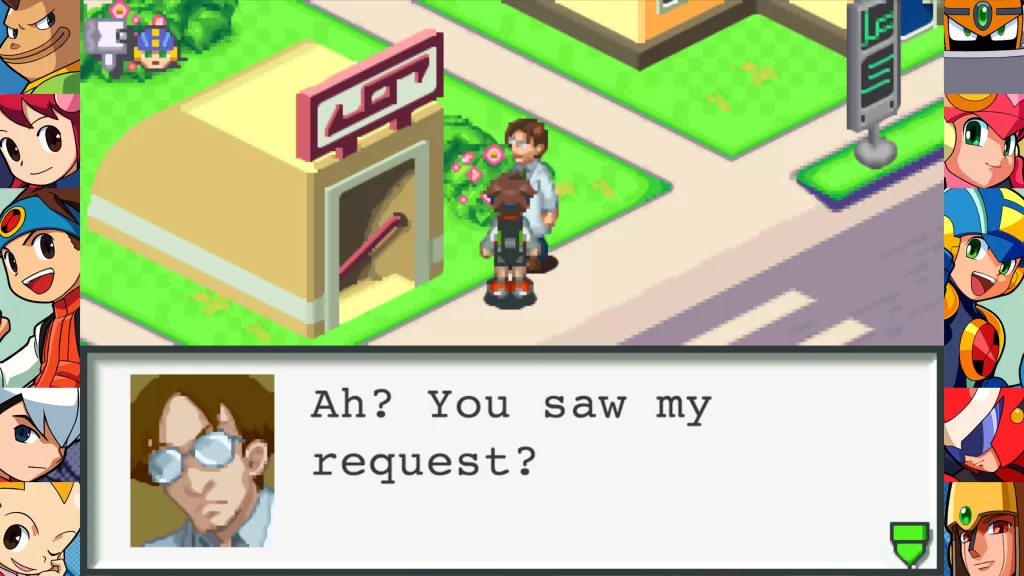
For this request, the requestor has fallen madly in love but is too shy to act on their feelings. They’ll need the expert love advice of 5th grader Lan and his Navi partner Mega Man in their quest for true happiness! To start, travel to Okuden from the Metro Line then speak with the old man standing near the road. After some debate, Mega Man will recommend the old man write a love letter to the special lady. He’ll then ask you to deliver it for him but isn’t sure where she is right now. The only clue he provides is that she’ll be where flowers bloom and that her nickname is Sunflower.
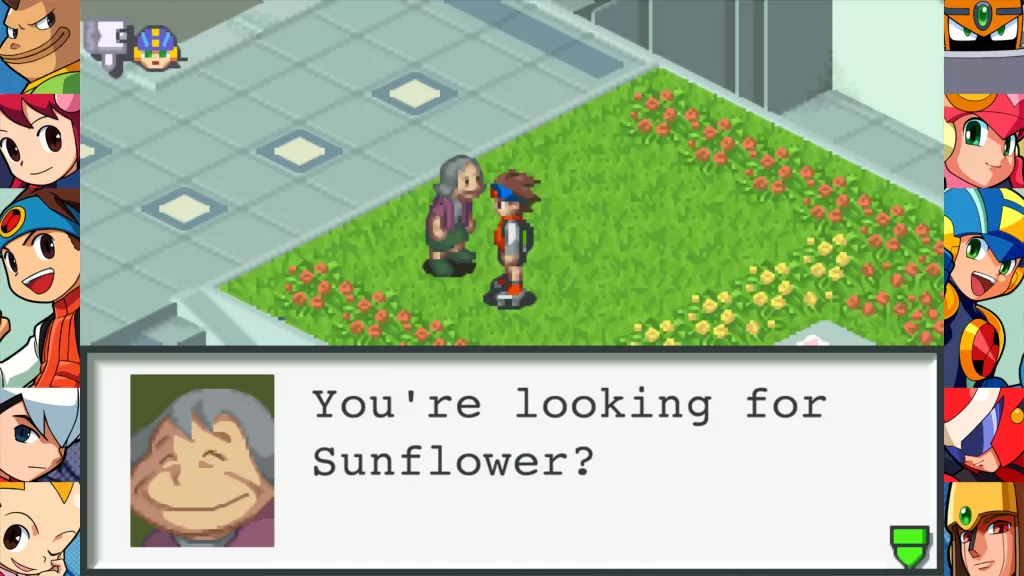
To track down this special lady, head back to the Metro Line and take it to Marine Harbor. You’ll then want to go over to the grouping of flowers near the center of the harbor. Speak with the lady there to deliver the LoveLetr.
After reading the letter, she’ll write her own and ask that you take it back to the old man. Return to him in Okuden to complete the request. He’ll reward you with 10000 zenny and you’ll also receive the Silver Love trophy/achievement.
Welcome to NGB and our Mega Man Battle Network 2 guide for the Paying in Advance request. In this guide, we’ll cover everything you need to know about this request like where to start it and how to complete it. Completing this request will also give you the Fall of the Phisher trophy (or achievement).
How to Start the Paying in Advance Request
In Mega Man Battle Network 2, you can accept the Paying in Advance request from the request board in Marine Harbor after obtaining your ALicense and visiting YumLand for the first time.
How to Complete the Paying in Advance Request
For this request, you’ll need to travel to Yumland 1 in search of a black Navi (this obviously isn’t a trap right?). Once you reach YumLand, head for the pink/yellow sign in the back right of the area.
Speak with the purple/black Navi there to receive a GateKeyB… then be thrown into a fight against a Sparky and 2 Flamey2 viruses. Delete them to complete the request. You’ll also receive the Fall of the Phisher trophy/achievement.
Welcome to NGB and our Mega Man Battle Network 2 guide on the Chip Please! request. In this guide, we’ll cover everything you need to know about this request like where to start it and how to complete it.
How to Start the Chip Please! Request
In Mega Man Battle Network 2, you can accept the Chip Please! request from the request board in Marine Harbor after obtaining your ALicense and visiting YumLand for the first time.
How to Complete the Chip Please! Request
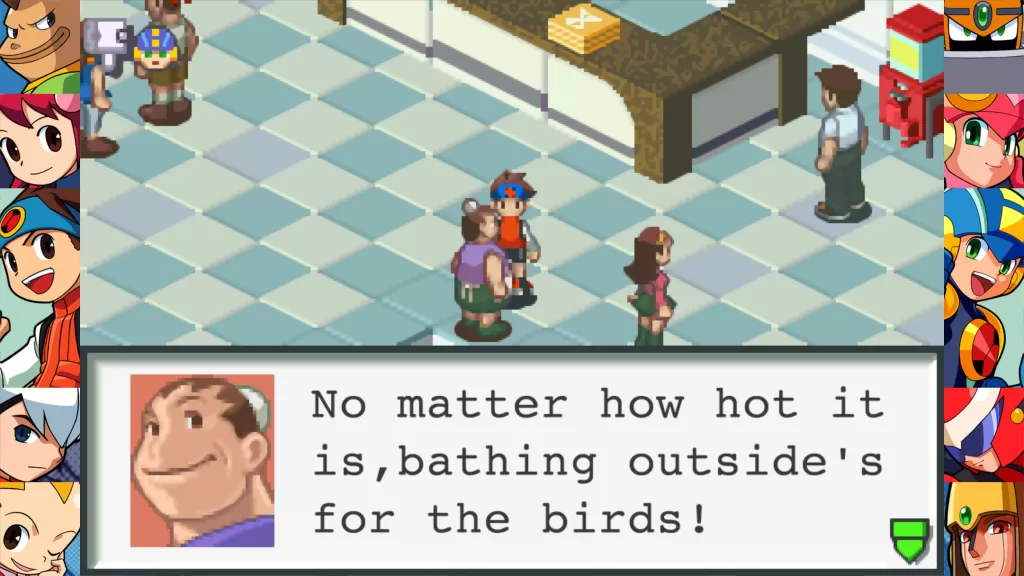
For this request, the requestor’s water heating program is busted and they require a FireSwrd F to fix it. The lady can be found in the Center lobby at Marine Harbor and will trade you a Slasher L chip for the FireSwrd.
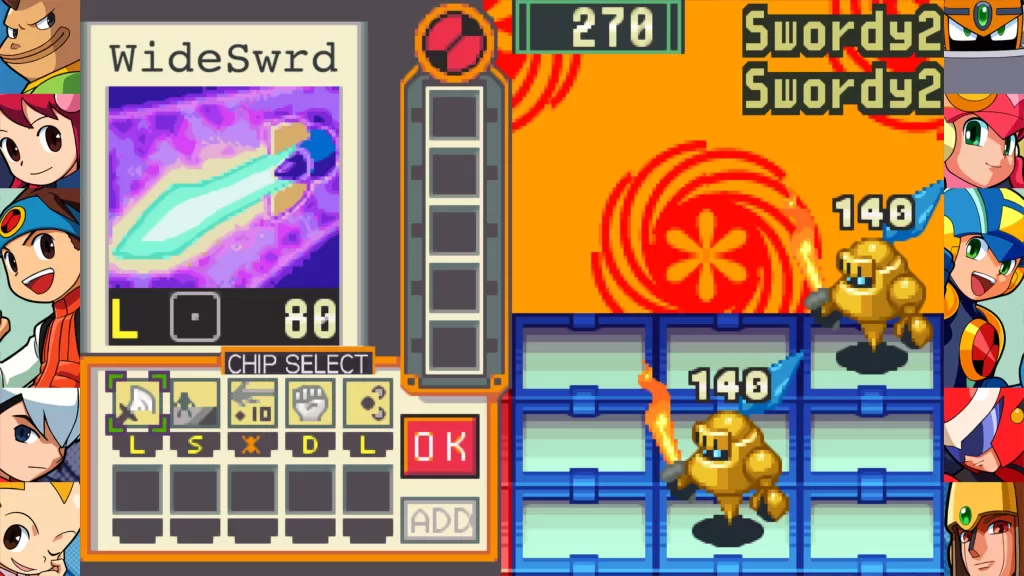
In order to obtain a FireSwrd F chip, you’ll need to travel to the Koto Area and defeat the Swordy2 virus that spawns there. If you are unsure of how to get to Koto Area, the easiest way is by jacking into the net and heading for Square Ent. Once there, locate the bridge leading to the Square warp pad. Don’t cross it, but instead follow it right and use the warp at the end. This will bring you to Den Area 3. Follow the path, passing a Netdealer to eventually end up in Den Area 2. From there just follow the linear path to reach Koto Area. While hunting Swordy2, you’ll want to shoot for a Busting Lv. 9 or something close to that to get the FireSwrd F to drop. Also, keep in mind that it’s all RNG based so it could take a while for the Swordy2 to spawn. Happy busting!
Welcome to NGB and our Mega Man Battle Network 2 guide for the Mother Computer puzzles you’ll need solve in the Mother Computers while defending Electopia from Shadowman’s attack. In this guide we’ll go over how you can solve each puzzle standing between Mega Man and his confrontation with Shadowman.
Mother Computer Puzzles Guide
In Mega Man Battle Network 2 as you progress the story, Lan and Mega Man will have to jump in to help the city net battlers protect the Mother Computer of Electopia from an attack led by Shadowman. This guide will cover the puzzle in each area that you’ll need to solve in order to reach Shadowman and put a stop to his wickedness.
Mother Comp1
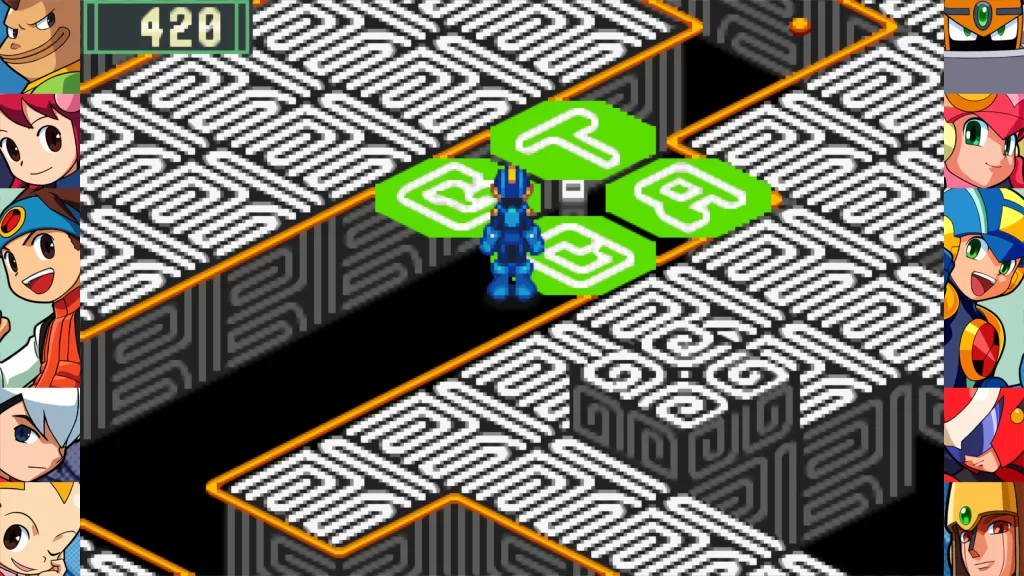
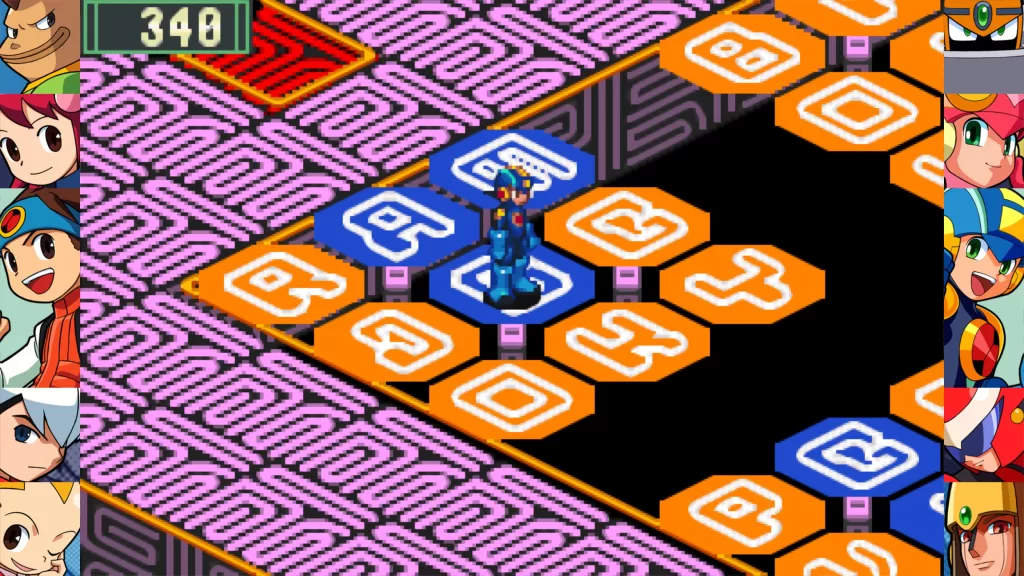
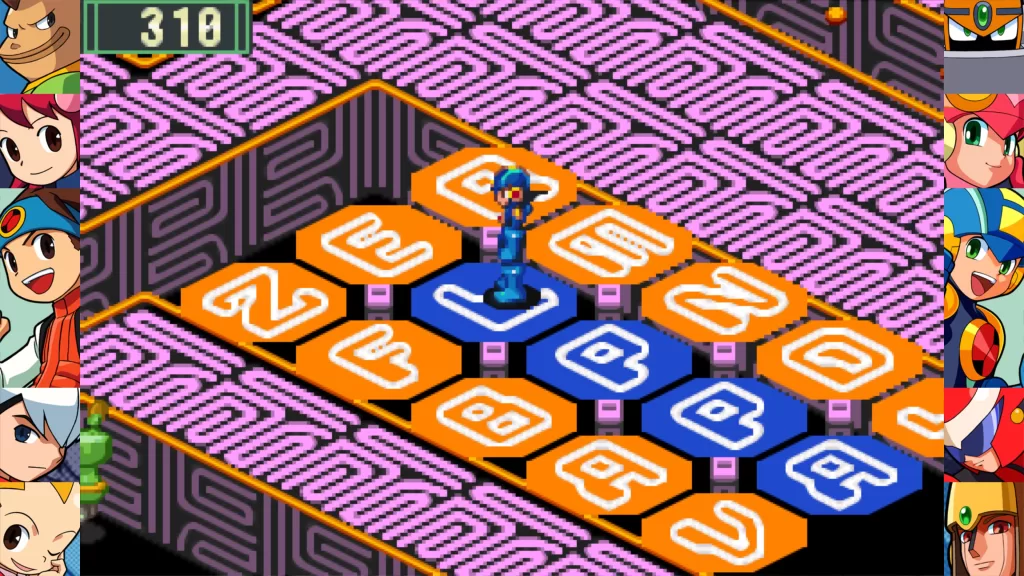
For the first puzzle in Mother Comp1, you’ll be given the phrase “Curiosity Killed the ___” and have to step on the correct tiles in order to spell out the missing word. In this case, the answer is “CAT”. You’ll want to walk on the tiles C-A-T in that order starting with the C next to the C and A tiles.
The second puzzle in the area gives you a riddle “I rest in a bed but never sleep”. The answer to that is a river. So step on the R-I-V-E-R tiles in that order to complete the question.
For the third puzzle, you’ll be given “_ET_ATTLER” and the solution is to step on the tiles for the missing letters. Those tiles are N and B. After doing so, you’ll be clear to reach the control panel for the 2nd wall protecting the mother computer.
Mother Comp2
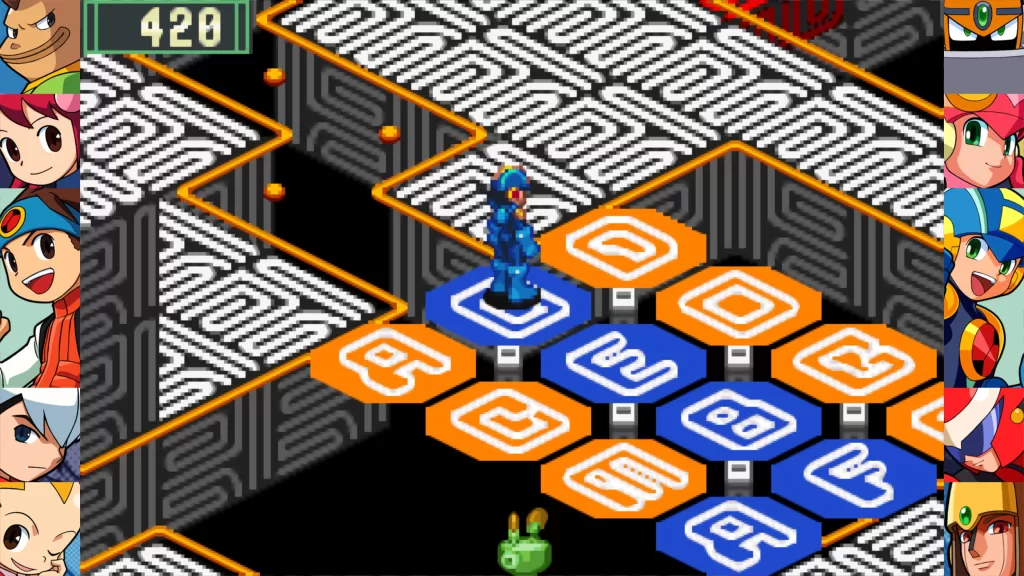
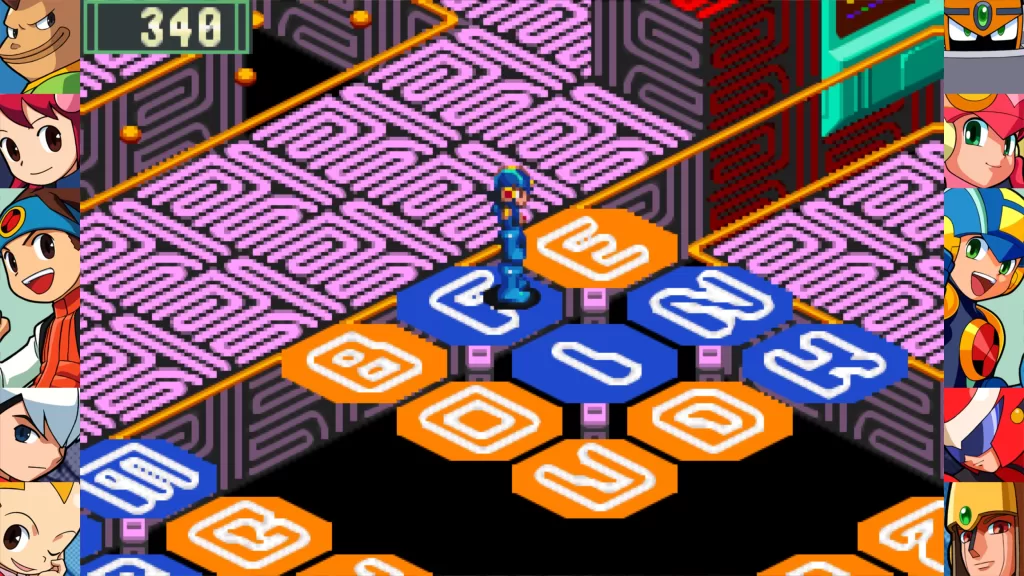
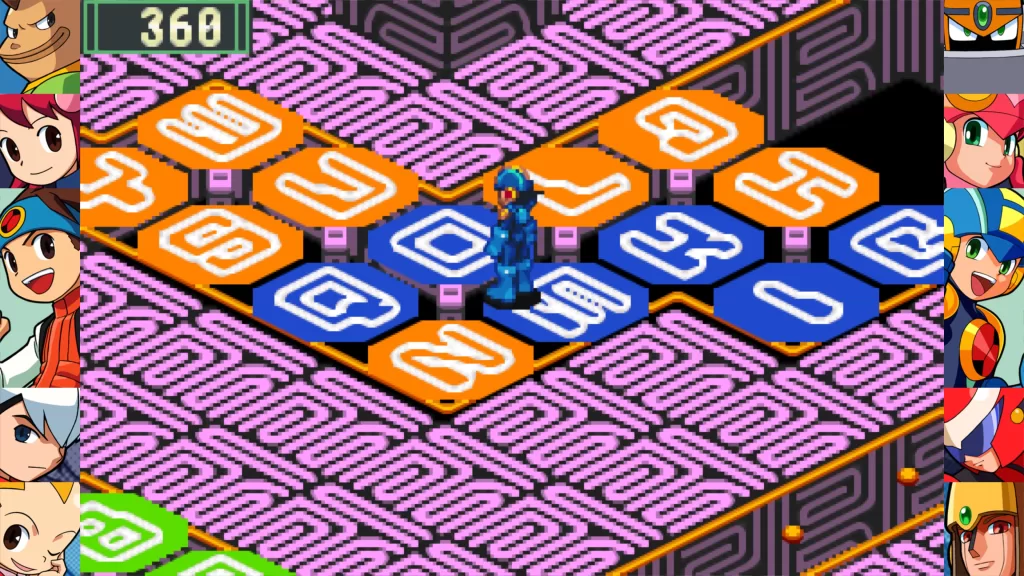
The first puzzle in Mother Comp2 requires you to speak with 4 programs, each giving you a different password. The correct password that you’ll want to input is “AFBECD” given to you by Progame D. Step on the A-F-B-E-C-D tiles in that order starting with the A next to the M and F tiles.
For the second puzzle, you’ll be given the riddle “What do you call a chronometer you can wear?”. The answer of course is a WATCH so step on tiles W-A-T-C-H in that order.
The final puzzle tasks you with making two words from the letters “ere last moth”. If you speak to the nearby programs, they will tell you what 9 of the letters that make up the words are and in what position to place them. The two words are ALMOST THERE, so step on tiles A-L-M-O-S-T-T-H-E-R-E in that order to finally reach the control panel.
Mother Comp3
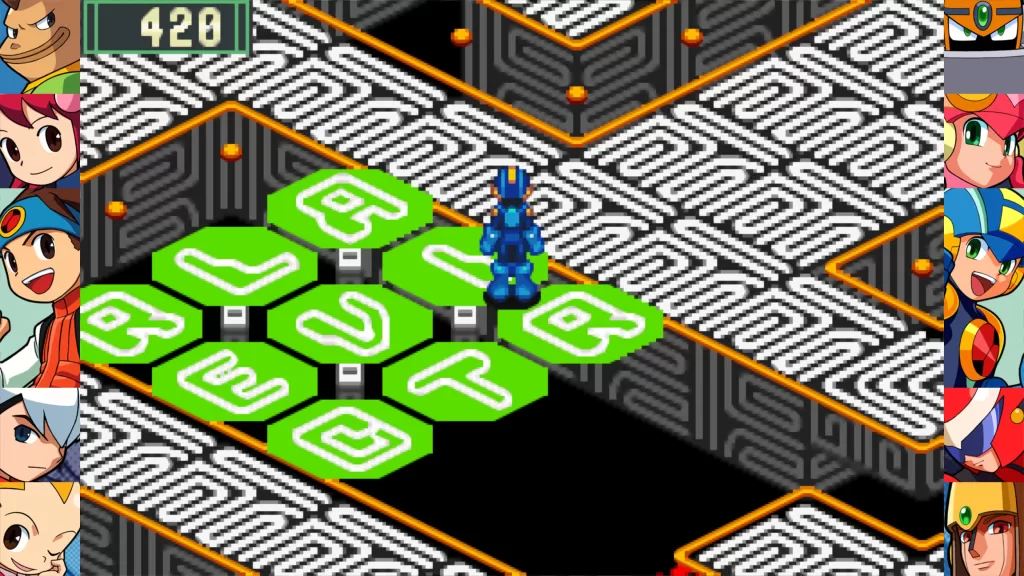
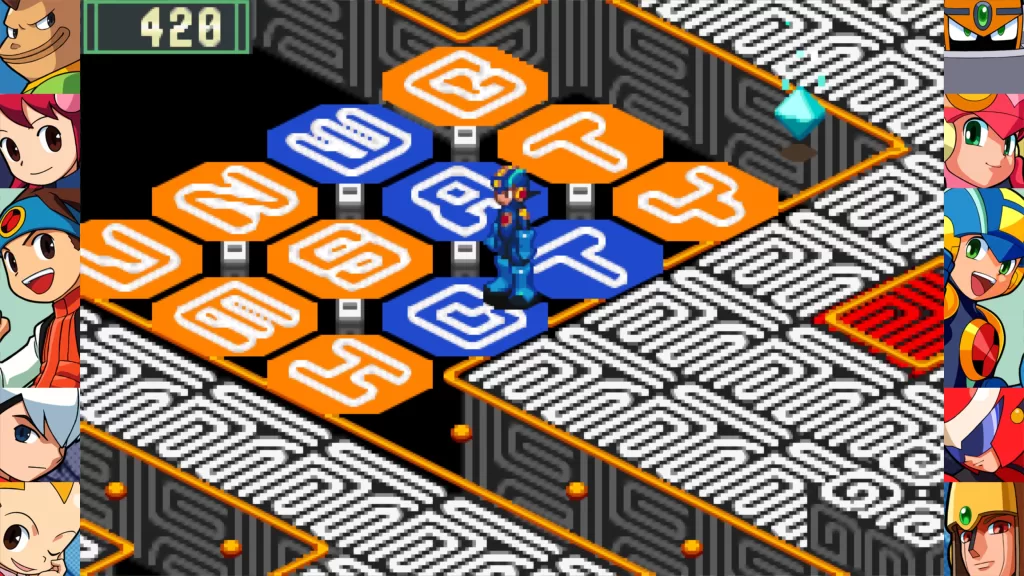
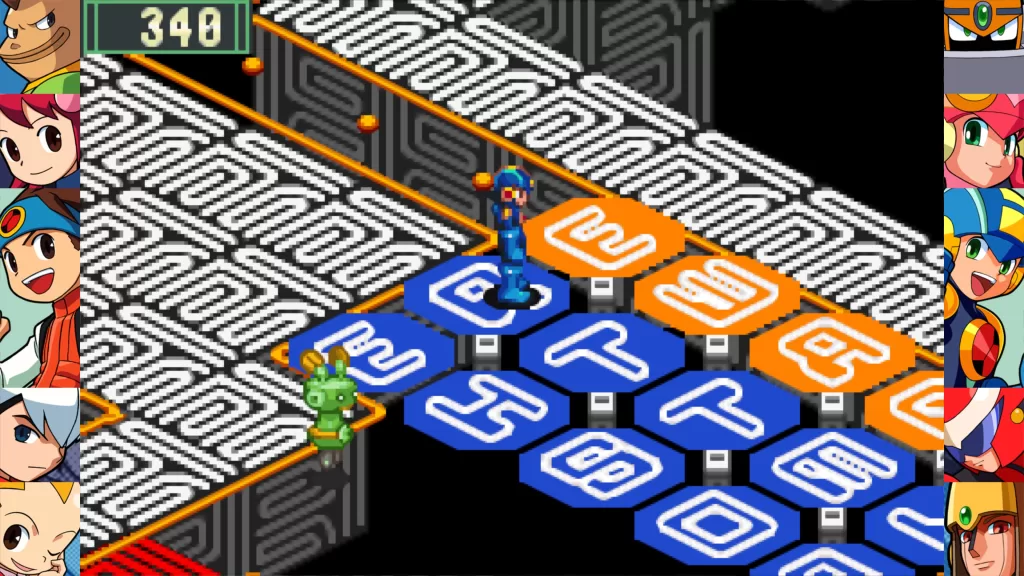
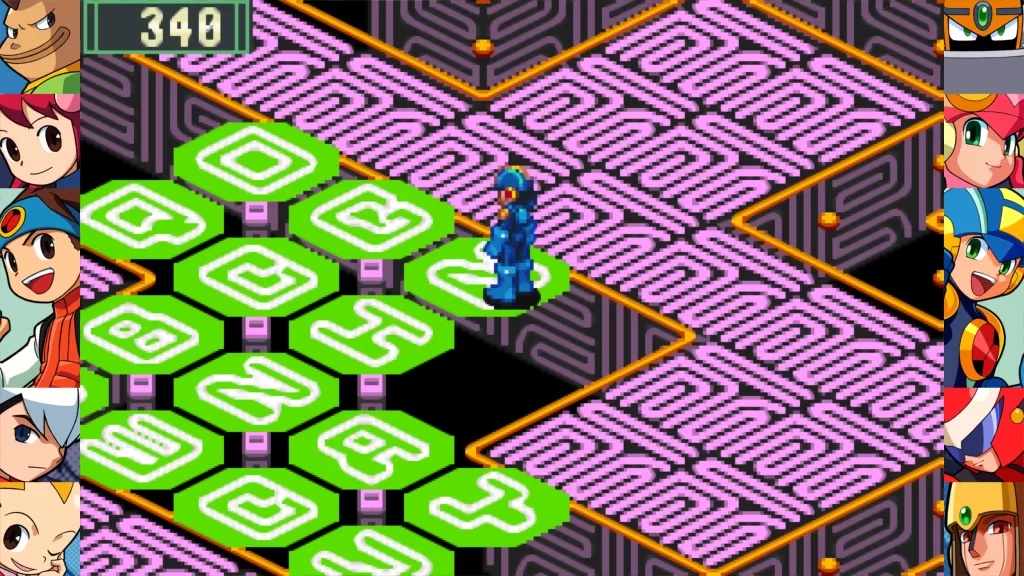
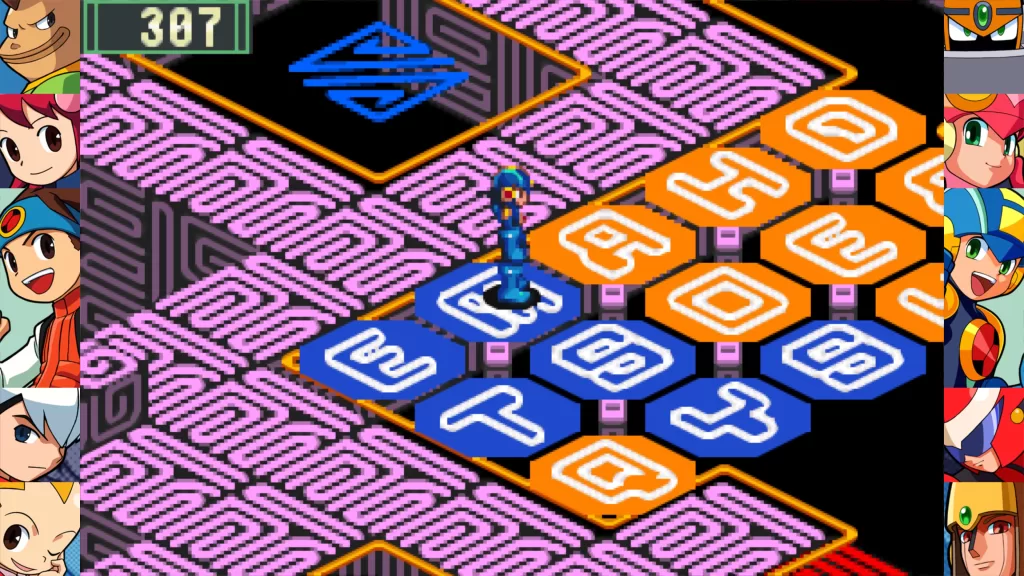
This first puzzle is a little trickier than the others. There will be 4 groupings of letters with four words you have to spell out “GEM KNIFE MASK WIG”. If you have spoken to all of the programs in the area up to this point, one of them will have given you a clue that you’ll have to connect the first letter of one word with the last letter of another word. With that in mind, follow the steps below to solve this puzzle.
Start with the back left grouping of letters, stepping on tiles W-I-G.
Next head over to the back right grouping and step on tiles G-E-M.
Now go to the front left grouping and step on tiles M-A-S-K.
Finally, walk over to the front right grouping and step on tiles K-N-I-F-E.
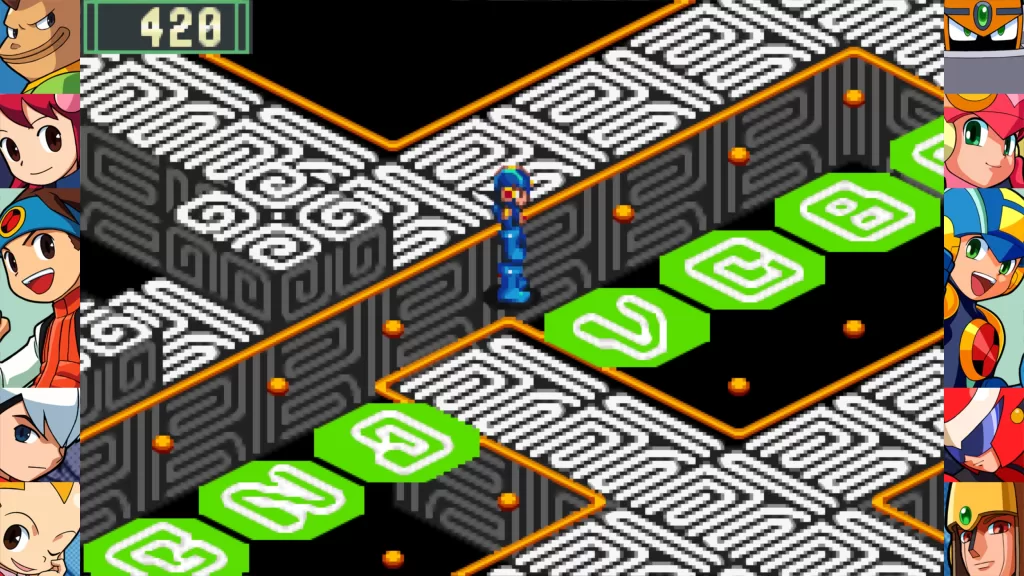
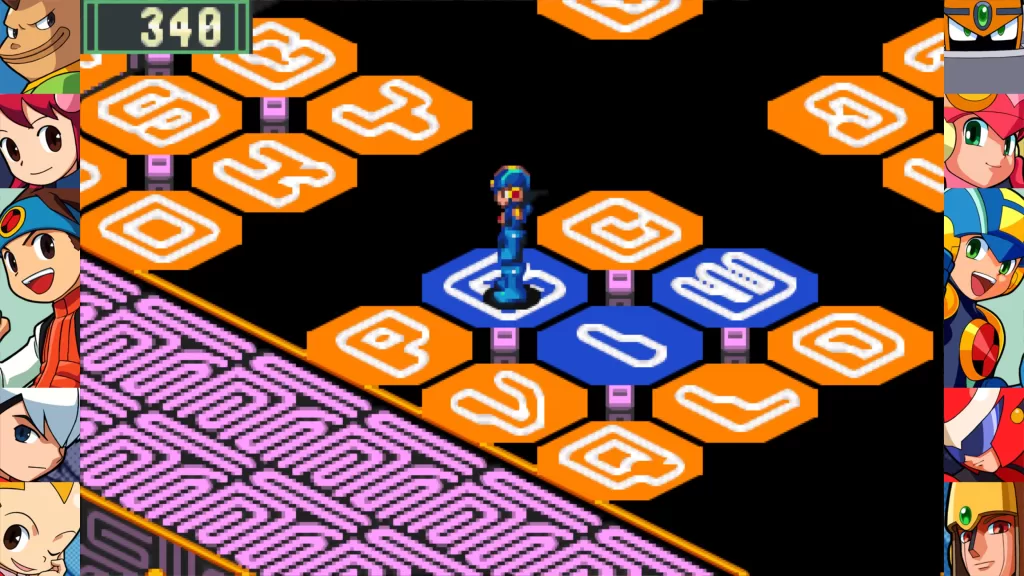
The second puzzle has you interacting with 3 panels to receive 3 different phrases with a program providing the clue “Read the 3rd letter, top to bottom)
PART 1 – YOU CANNOT ESCAPE NOW!
PART 2 – FEAR AND DANGER AWAIT!
PART 3 – BEGINNING TO WORRY? GOOD LUCK!
This basically means you need to walk on the U-C-A tiles and then the N-G-O tiles in that order.
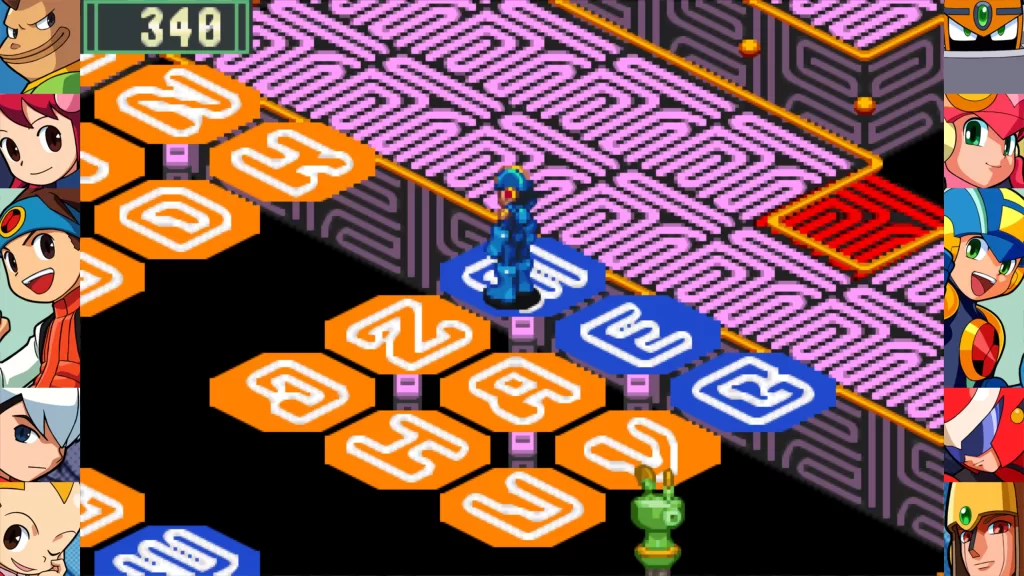
For the final puzzle, you’ll be given the clue “A quick brown fox …” and the solution is JUMPS (I’m guessing it’s a J 🙂 ) Walk over the J-U-M-P-S tiles starting on the J tile between the M and N. You are now free to head for the next area.
Mother Comp4
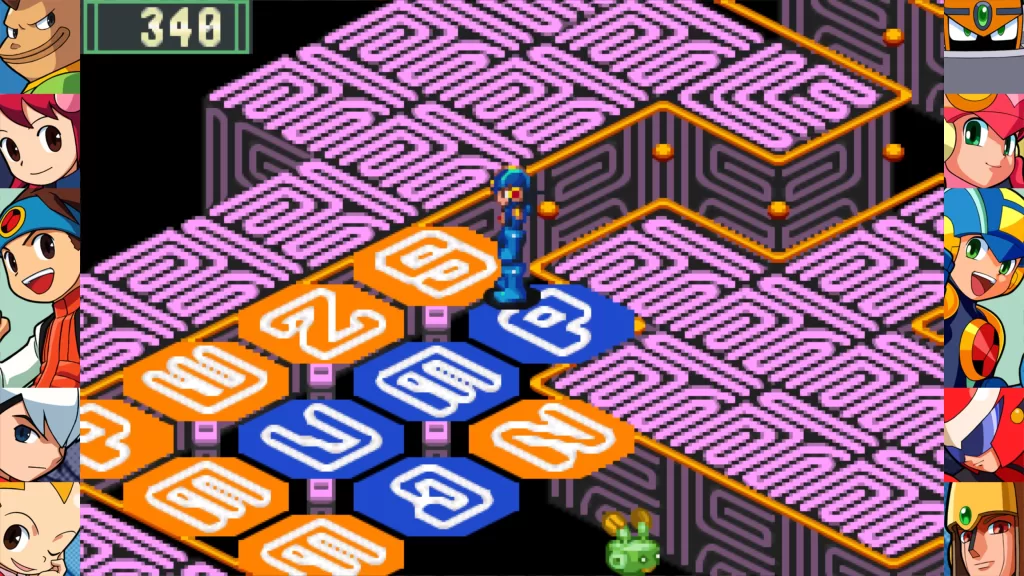
For the first puzzle, speak with the programs to be given clues to the password which is SPIDER. Step on tiles S-P-I-D-E-R starting on the S between the P and C tiles.
At the second puzzle, you’ll be given the clue “What did William Tell hit with his arrow?”. The answer is an APPLE so walk over the A-P-P-L-E tiles to proceed on.
The clue for the third puzzle is “What insect starts bathing, and ends up drab?”. The answer to this one is just B. You know what to do next!
On the fourth puzzle, speak with Program 1 to get “DNGVU” and Program 2 to get “OTIEP”. You’ll want to step on the tiles D-O-N-T-G-I-V-E-U-P in that order to reach the next area.
Mother Comp5
The first puzzle will give you the clues “I am an animal” and “I wear a mast”. The thing that the two programs are talking about is a RACCOON. Walk over the tiles R-A-C-C-O-O-N.
The second puzzle asks, “A-C-E… what are the next 10 letters?”. This makes the password GIKMOQSUWY. Step on tiles G-I-K-M-O-Q-S-U-W-Y in that order to proceed.
The program at the third puzzle will tell you the password is “DARETHEY SLAYME?” while another gives you a hint for decoding the password. If you work it out the password is really SYSTEMHEAD so step on tiles S-Y-S-T-E-M-A-H-E-A-D in that order.
For the fourth puzzle, there will be two programs that each provide you with a password: Program A = STCLS and Program B = YSEMOE. If you take a blue warp pad, there will be another program at the end of the path that gives you the following clue: ABBABBAABAB. If you apply that logic to the two passwords then the true password is: SYSTEM CLOSE. Step on tiles S-Y-S-T-E-M and C-L-O-S-E to reach the next puzzle.
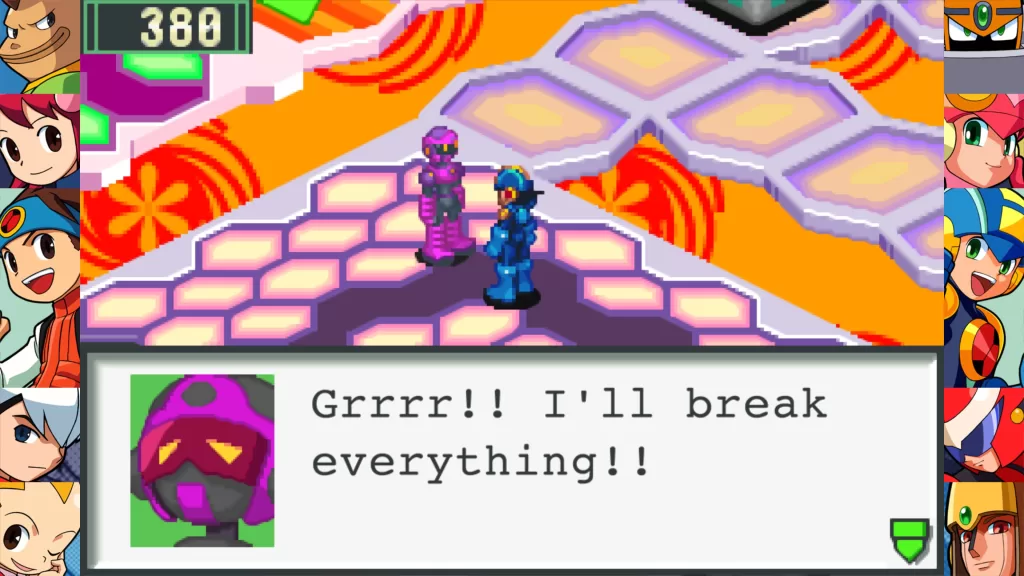
For this fifth and final password, you’ll be given “PSECV WANIR NGURU OISNW” and a few clues: “find one that doesn’t belong, everyone else is a bird” and “black bird, cold bird, water bird”. If you work it out then the final password is VIRUS. Step on tiles V-I-R-U-S to finally reach Shadowman and put an end to his nefarious schemes!
Welcome to NGB and our Mega Man Battle Network 2 guide on how to complete the ALicense Exam. In this guide, we’ll cover everything you need to know to ace the exam and help Lan earn his ALicense.
How to Start the ALicense Exam
You’ll reach a point in Mega Man Battle Network 2 where you’ll need to receive your ALicense so you can progress in the story. Before you can take the exam for the license, you’ll first need to complete the Misson1, Misson2 and Misson3 requests on the request board. Once you’ve completed that, speak with the guy behind the counter to the right of the request board to be granted access to the examination room. Enter the room and jack into the computer there to arrive at the Square. Locate and speak with the green/yellow Net Navi nearby to register for the exam.
How to Complete the ALicense Exam
To complete the Aliscense Examp, you’ll need to solve three problems. Problem 1 of the exam is pretty straightforward. Lan and Mega Man will need to defeat 5 groups of enemies in back-to-back battles without Mega Man getting deleted. Once this is done, you’ll be given Problem 2 which tasks Lan and Mega with tracking down two bad navis on the net and dealing with them.
Bad Navi One
The first of the two bad Navis can be found in Den Area 2. Use the warp pad at Square Ent to reach Den Area 2 then follow that path heading toward Den Area 1. The Navi will be standing on a platform of squares alternating in color between blue and purple. Speak with him to start a battle against a Swordy, Swoardy2 and Swordy3. Delete them to receive BadDataA.
Bad Navi Two
The second of the bad Navis can be located in Koto Area. To reach him, travel to Square Ent then use the warp pad there to reach Den Area 3. Take that to Den Area 2 then finally Koto Area. The Navi can be found along the path leading to KotoSquare Ent. Speak with it to start a battle against 2 Mettaur2 and a MetttFire. Delete the viruses to receive the BadDataB.
Deliver the BadData / Problem 3
Take both BadDataA and BadDataB back to the Exam Proctor Navil at the Square. You can do this quickly by jacking out of the net and then back into the examination PC. Once you hand them over you’ll start Problem 3 which is another survival battle where you’ll have to delete another 5 groups of enemies in back-to-back battles without Mega Man getting deleted. Once you complete problem 3, you’ll be awarded your ALiscense and a PoweerUp: RegUp2. If you want an additional reward, speak with the man behind the counter near the Request Board and he’ll give you a Recov50 * chip.
Welcome to NGB and our Mega Man Battle Network 2 guide on the Mission3 request. In this guide, we’ll cover everything you need to know about this request like where to start it and how to complete it.
How to Start the Mission3 Request
In Mega Man Battle Network 2, you can accept the Mission3 request at the request board in Marine Harbor during the main story when you’re going for your ALicense.
How to Complete the Mission3 Request
For this request, you’ll need to help find a lost program. Make your way to the Okuden Valley campgrounds by traveling to the Metro Line and grabbing a ticket to Okuden. From there, follow the Camp Road to reach the Camp. You’ll then want to head to the farthest rock bridge in the river where you’ll find the person who submitted the request. Speak with him to learn that one of his son’s programs got lost on the net somewhere in the Den Area.
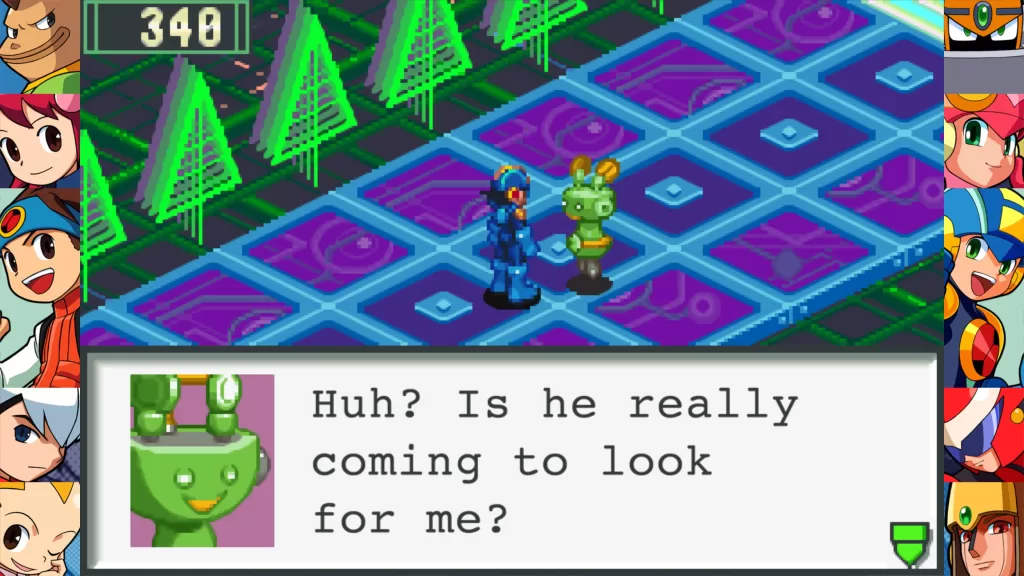
To reach the Den Area, you’ll need to travel somewhere with access to the net. I went to ACDC Town and jacked in from Lan’s bedroom. You’ll want to head from Den Area 1 through Den Area 2 then finally to Den Area 3 near the Entrance to Yumland and Netopia. There will be a green Net Navi with ears moving around the area that you’ll want to speak with.
Return to the client at the Okuden Valley campground to inform him you found the missing program. He will reward you with a PowerUp: HPMemory.
Welcome to NGB and our Mega Man Battle Network 2 guide on the Mission2 request. In this guide, we’ll cover everything you need to know about this request like where to start it and how to complete it.
How to Start the Mission2 Request
In Mega Man Battle Network 2, accept the Mission2 request at the request board in Marine Harbor during the main story when you’re going for your ALicense.
How to Complete the Mission2 Request
To complete the Misson2 request, you’ll need to retrieve a stolen program. To do this, travel to Kotosquare where you’ll meet up with a mean-looking Net Navi. To reach him, make your way to the Square Ent facing the bridge leading to the square. Follow the path right using the warp pad to travel to Den Area 3.
From there follow the path heading past a Netdealer eventually transitioning into Den Area 2. Continue to follow the linear path to reach Koto Area. A quicker way to reach Koto Area is by jacking into the Ribitta’s van in Marine Harbor. You can head to the warp pad at the end of it to reach Den Area 3. You’ll need to get the RibiCode to drop the barrier, but this will bring you near the path leading to Den Area 2 then Koto Area.
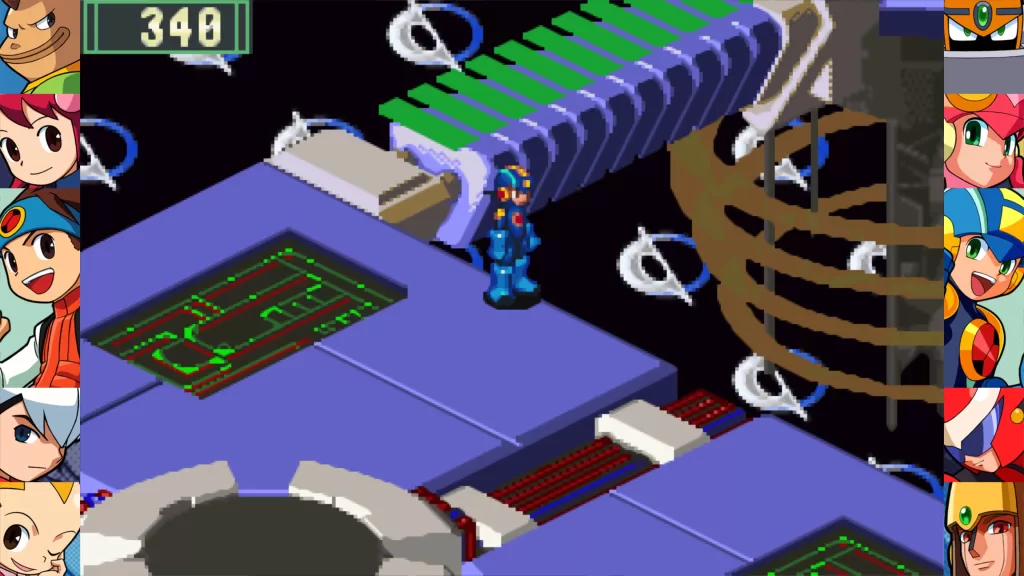
Look for the yellow/blue sign then follow the path left. Toward the end, you’ll pass over a moving pathway then head down a ramp bringing you to a warp pad. Use it to reach Kotosquare Ent which will lead you to another warp pad taking you to Kotosquare1. Continue heading right from the warp to locate the mean-looing Net Navi. Speak with him to learn that a program was stolen and he needs your help getting it back.
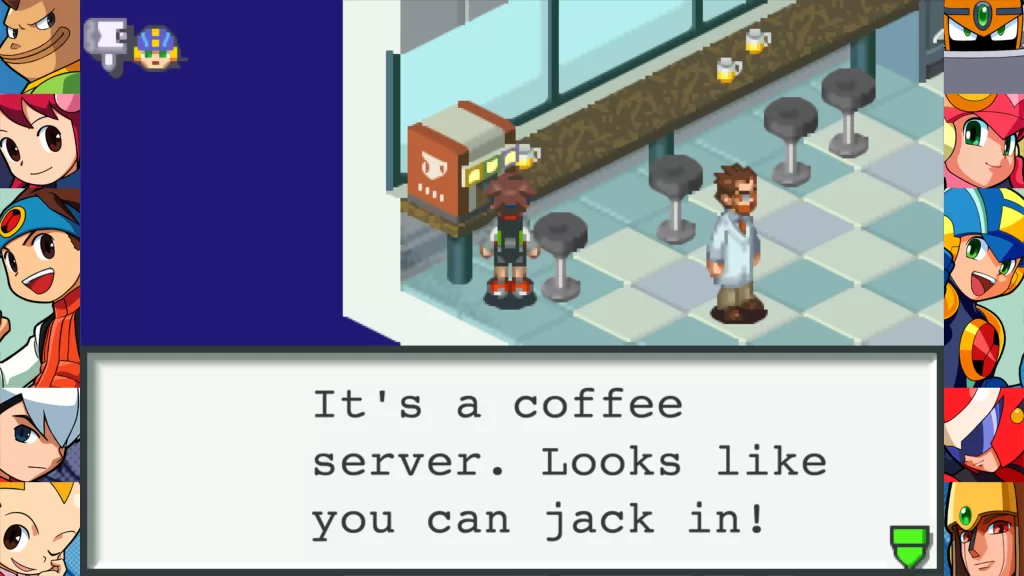
Jack out of the net then make your way over to the Offical Center in Marine Harbor. After entering the building, look to the left to spot a coffee machine behind Mr. Famous. Jack into it then head to the back of the area to find the thief. Speak with them to receive the OddProg leading to a battle with 3 Spooky2. Delete them then make sure to grab the RegUp1 to the left of it before jacking out.
Return to the mean-looking Net Navi at Kotosquare 1 to complete the request. You’ll also be rewarded with a Recover 30 *.
Welcome to NGB and our Mega Man Battle Network 2 guide on the Mission1 request. In this guide, we’ll cover everything you need to know about this request like where to start it and how to complete it.
How to Start the Mission1 Request
In Mega Man Battle Network 2, you can accept the Mission1 request at the request board in Marine Harbor during the main story when you’re going there for your ALicense.
How to Complete the Mission1 Request
For this request, travel to ACDC Town St to hear more about this request. Speak with the science guy in a lab coat next to the entrance to the Metroline.
He’ll inform Lan that three of his experimental Navis escaped and are on the local network in ACDC Town. He’ll then request that Lan and Mega Man locate and destroy them! The experimental Navis can be found by jacking into objects listed below. Once you’ve fought all 3 Navi’s return to the scientist to complete the request and receive a RegUP1 as a reward!
Toy in park
Portable game machine in Dex’s room
Classroom’s blackboard
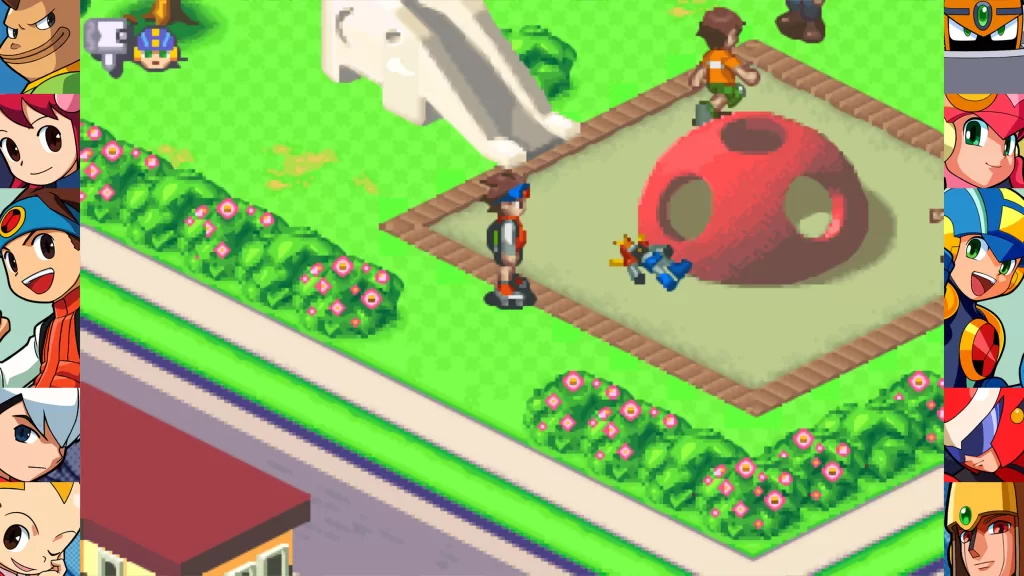
Toy in the Park
For the first wayward Navi, jack into the toy next to the red climbing dome at the park. Once inside, head to the north and interact with the purple Navi there to fight 3 Spikey2 viruses.
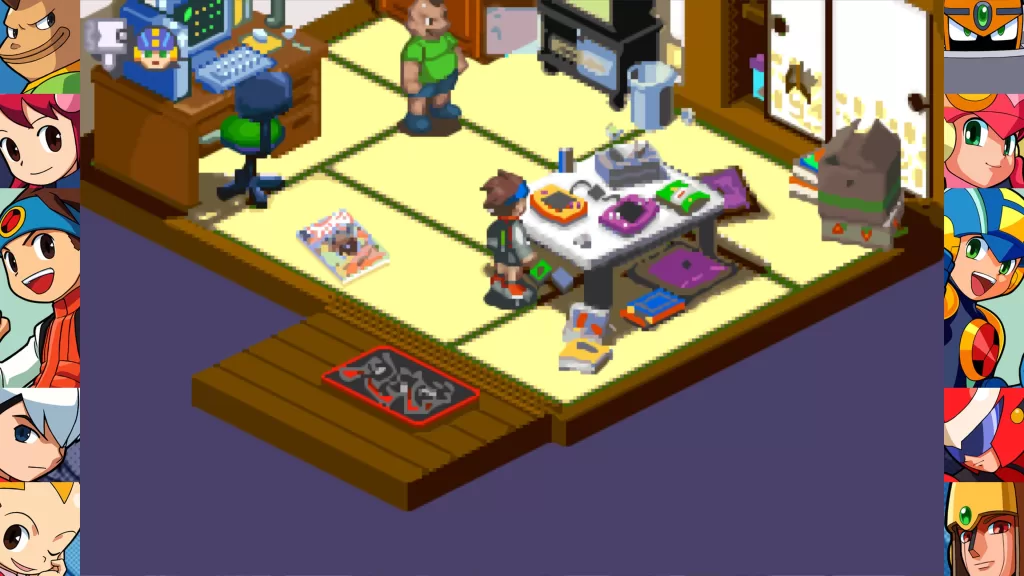
Portable Game Machine
To find the next Navi, head to Dex’s house and jack in the portable game machine on the table in Dex’s room. Once inside, head to the north and interact with the purple Navi there to fight 3 Handy viruses.
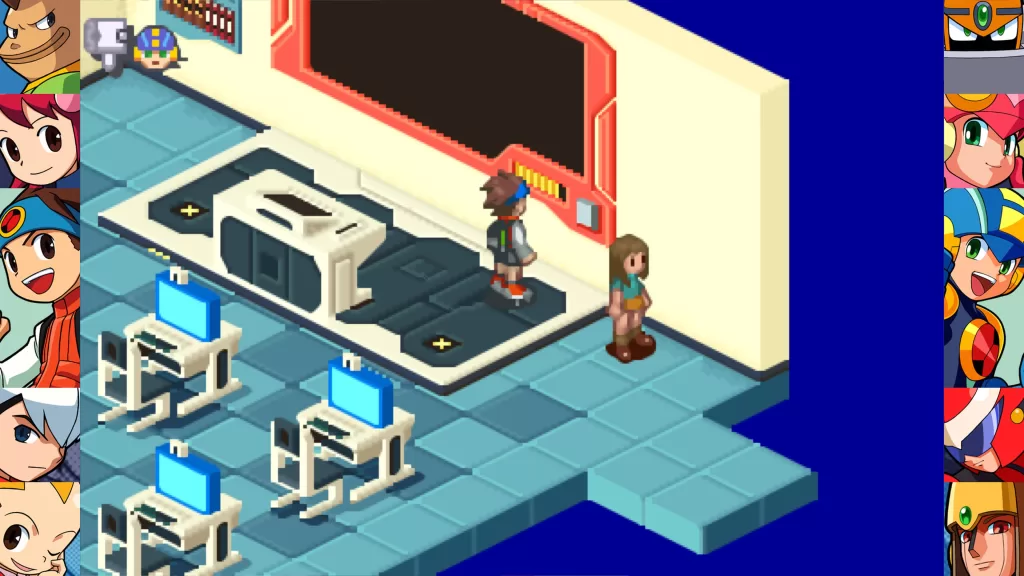
Blackboard
The final experimental Navi can be found at the school. Travel there to enter the classroom and jack into the classroom’s blackboard. Once inside head north and interact with the purple Navi there to fight a Flamey2 and Flamey3.
Welcome to NBG and our Mega Man Battle Network 2 guide on how to obtain the Not Half Bad trophy. In this guide, we’ll cover everything you need to do to make that Not Half Bad trophy (or achievement) pop!
How to Obtain the Not Half Bad Trophy
In order to obtain the Not Half Bad trophy (or achievement) in Mega Man Battle Network 2, you’ll need to defeat GateMan. This can be done by heading to Marine Harbor after surviving the camping trip. When you’re able, head inside the NetBattler HQ and speak with Mr. Famous. He can be found near the coffee server by the main entrance wearing a white lab coat. Select “Yes” when prompted to challenge him to a battle against his Navi, GateMan. The Not Half Bad trophy (or achievement) will trigger after you’ve successfully defeated him in battle!
Welcome to NBG and our Mega Man Battle Network 2 guide on where to find all 4 detonators during the camping trip in Okuden Valley. In this guide, we’ll cover the locations of each detonator along with what you need to do to disarm it.
Where to find All 4 Detonators
Early on in Mega Man Battle Network 2, Lan drags the rest of the gang on a camping trip to Okuden Valley. What was supposed to be a relaxing trip turns into utter chaos as an explosion rocks the camp groups. In search of Chaud, Lan ends up at the Okuden Damn control building where Chaud informs him of a threat posted on the net forums the night prior. He then begrudgingly enlists Lan’s help to deal with bombs scattered around the Okuden Valley. There will be four detonators that Lan will have to jack into and disable. After Lan and MegaMan agree to help, make your way back to the camp.
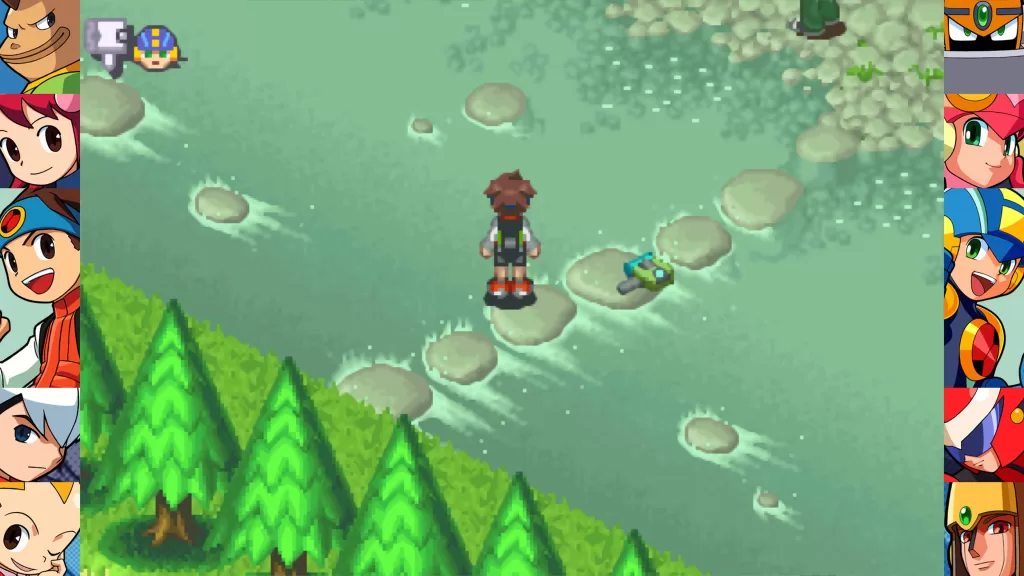
At the camp, you’ll find the first detonator on a rock path crossing through the stream. Jack into the device and work your way to the round monitor inside to disable it.
The second detonator can be found by interacting with a canteen on a yellow polka dot blanket also at the camp. Just like before, jack into the canteen and work your way to the round monitor to disable the detonator.
Head to Camp Road 2 then travel to the bridge overlooking the waterfall. This detonator can be found behind the waterfall, which is reachable via a hidden path between a tree and the left side of the waterfall.
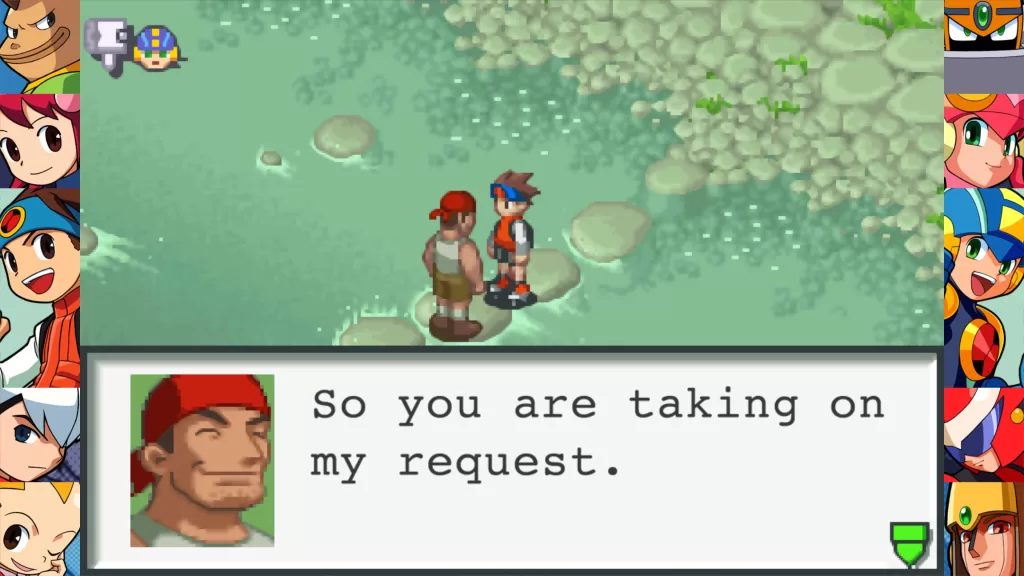
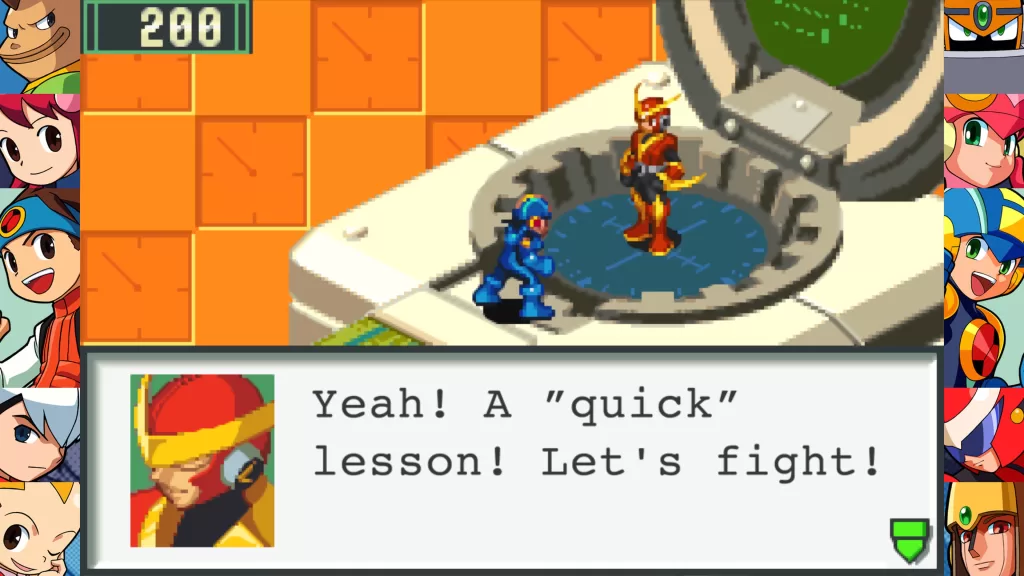
After disabling the third detonator, Chaud will call Lan and tell him that the culprit probably has the last detonator on him. With that knowledge, make your way to Camp Road 1 and speak with the guy wearing the red hoodie. When prompted, choose “Ask Again” then “Get Suspicious”. This will result in Lan jacking into the red hoodie guy’s PET. Once inside, work your way to the circular monitor to disable the device…once you beat Quickman who is guarding the device that is!
This site uses cookies. By continuing to use this website, you are giving consent to cookies being used. For more information on cookies, view our Privacy Policy.OkPrivacy Policy