In Gotham Knights, you’ll come face to face with many villains now that Batman is gone. One of those villains is Clayface. Below is our walkthrough for the CF01: Clayface villain case file. This case becomes available during Case 04 after finding a Mimic attacking civilians around Gotham. You’ll need to defeat 5 of them to obtain Clay samples. We found ours in the West End.
1.1 – The Malleable Mugger
After obtaining the Clay samples, examine the samples at the Belfry near the Batcomputer.
1.2 – Disturbance at Dixon Docks
Go into the Case Files tab in the Batcomputer and launch the 1.2 – Disturbance at Dixon Docks case file. After you start the mission, you’ll load in at the Dock’s warehouse. Head into the warehouse and examine the clay residue on the ground. Follow the tracks and defeat the Clay Mimics to trigger a cutscene. Afterwards, chase Clayface into the sewers. Once inside, follow the trail again to find some enemies. Defeat them then enter the hideout. Inside, defeat Clayface and his Clay Homunculi!
1.3 – Rumble at the Reservoir
Go into the Case Files tab in the Batcomputer and launch the 1.3 – Rumble at the Reservoir. After the cutscene, speak with Montoya next to the SUV then head inside the reservoir. Once inside, you’ll begin your fight against Clayface! After the fight, ride your bike down the tunnel avoiding the tentacles until you reach the smelting factory. When you arrive, take out Clayface!
This walkthrough is for Case File 04: The Masquerade in Gotham Knights.
4.1 – Mark Hendricks
In the Belfry interact with the Evidence Boards to learn Mark Hendricks’ last known location. Next, exit the building and head to the southwestern corner of Tricorner Island. At the objective, you’ll find a crashed car. Head west towards the water to find some enemies. Defeat them to protect Mark then speak with him. Afterwards, return to the Belfry.
4.2 – The Orchard Hotel
Leave the Belfry and make your way to the Orchard Hotel in the western part of Otisburg. Enter the hotel via a door near the top of the building. Once inside, sneak to the ballroom, avoiding detection. Continue into the security room and disable the security system then return to the ballroom. Eavesdrop on the various groups of people to identify Court members. After discovering all the voices, you’ll be tasked with locating the leader of the Court. Follow along the linear path to eventually end up in an air duct where you’ll trigger a cutscene. Afterwards, leave the room via the doors to enter the hallway. Head to the end to reach a stairwell then take the stairs down to the 13th floor. Towards the bottom you’ll find the secret owl door that you’ll need to analyze with the AR. This will then give you a prompt to open the door. Do so then begin your search of the 13th floor. There will be 3 music boxes to interact with and an owl statue to examine. After interacting with the owl statue, a hidden entrance will be revealed. Head on through, dispatching of some Court members in the next room, and interact with the music box. When you’re ready, interact with the touchpad next to the giant map. Next, use a USB to pull some data from the Court of Owls. After removing the USB some goons will show up. Defeat them then head to the next room to find a puzzle. When facing the statues with your back to the door, step on the gold disc in front of the statues in the following order: 4, 2, 1 and 3 (with 1 being on your left and four on your right). This will open another hidden door, allowing you to continue deeper into the building. When you reach a room with a conference table, a cutscene with the Voice of the Court. After the cutscene, return to the ballroom, defeating the enemies as you go. When you reach the ballroom, fight off the waves of assassins. Once done, return to the Belfry.
This walkthrough is for Case File 03: In the Shadows in Gotham Knights.
3.1 – THE KEY
Travel to the roof of the Gotham Gazette, which can be found in the southern part of the West End, and locate the door with the owl symbol on it. Head inside and work your way through the building. When you reach the large room, scan the letter on the letterbox. Next, look for the table to the left of the letterbox. Interact with it to start an investigation. Mark the Ofasiede Card and the Brass Peg that points west towards the Gotham River. Next, hit the solve button. When you’re ready, exit the building.
3.2 – Chelsea Tunnel
Make way to the Chelsea Tunnel, which is west of the Gotham Gazette. Head inside the tunnel and look to the left to find a fan protected by a chain link fence. Grapple to reach a broken section of the fence then follow the path through the tunnel, defeating the enemies along the way. When you reach the main level, examine the concrete wall to find Sample Drilling. Afterwards, climb up the elevator shaft to find 2 ore samples on a table. Examine them. Continue through the door and work your way to the extraction room. Examine the extraction machine with your AR then interact with the table next to the machine to start an investigation. Mark Composite Ore [10588-COS] and Sulfuric Acid to solve the investigation. Make your way to the exit to trigger a cutscene. Defeat all the enemies on the platform to trigger another cutscene then quickly flee the mines. When you reach topside, you’ll be messaged by Talia to meet up. Follow the objective nearby to find her on top of the CCNB building. After the cutscene, return to the Belfry!
Below is a guide on the side activity Barbara’s Story in Gotham Knights. As the name suggests, it focuses on Barbara and how she’s handling the death of Batman.
Click on the characters below to check out their side activities, too!
You can start this activity after completing Case 1.3 – Weird Science during Case 01: Batman’s Last Case. As Barbara, leave the Belfry and travel to the northeast of Old Gotham to reach the Jim Gordon memorial. Interact with the base of the statue to trigger a cutscene.
3.1 – The Key
This activity becomes available in 3.1 – The Key during Case 03: In the Shadows. As Barbara, interact with the dollhouse in the Belfry near the Batcomputer to trigger a cutscene.
5.1 – Little Birds
This activity becomes available in 5.1 – Little Birds during Case 05: The Court of Owls. As Barbara, interact with the shelf near the Batcomputer in the Belfry to trigger a cutscene.
6.1 – Court Judgment
This activity becomes available in 6.1 – Court Judgment during Case 06: Jacob Kane. As Barbara, interact with Harley’s journal on the desk near the Batcomputer in the Belfry.
7.1 – Friends in Need
This activity becomes available in 7.1 – Friends in Need during Case 07: The League of Shadows. As Barbara, exit the Belfry and travel to the Gordon Memorial in the northeastern part of Old Gotham.
Below is a guide on the side activity Tim’s Story in Gotham Knights. As the name suggests, it focuses on Tim and how he’s handling the death of Batman.
Click on the characters below to check out their side activities, too!
You can start this activity after completing Case 1.3 – Weird Science during Case 01: Batman’s Last Case. In the Belfry as Tim, head up to the second level and interact with the chessboard on the table for a cutscene.
3.1 – The Key
This activity becomes available in 3.1 – The Key during Case 03: In the Shadows. As Tim, interact with the Batcycle in the Belfry to trigger a cutscene.
5.1 – Little Birds
This activity becomes available in 5.1 – Little Birds during Case 05: The Court of Owls. As Tim, examine the table upstairs in the Belfry to trigger a cutscene.
6.1 – Court Judgment
This activity becomes available in 6.1 – Court Judgment during Case 06: Jacob Kane. As Tim, interact with the chess set near the Batcomputer in the Belfry to trigger a cutscene.
7.1 – Friends in Need
This activity becomes available in 7.1 – Friends in Need during Case 07: The League of Shadows. As Tim, interact with the chess table on the second floor of the Belfry.
Below is a guide on the side activity Dick’s Story in Gotham Knights. As the name suggests, it focuses on Dick and how he’s handling the death of Batman.
Click on the characters below to check out their side activities, too!
You can start this activity after completing Case 1.3 – Weird Science during Case 01: Batman’s Last Case. In the Belfry as Dick, head over to the Batman Memorial and interact with Batman’s cowl to trigger a cutscene.
3.1 – The Key
This activity becomes available in 3.1 – The Key during Case 03: In the Shadows. As Dick, interact with the fridge in the Belfry to trigger a cutscene.
5.1 – Little Birds
This activity becomes available in 5.1 – Little Birds during Case 05: The Court of Owls. As Dick, exit the Belfry and head east to the marker on the roof across the street from the Powers Club. Interact with the corner of the building to trigger a cutscene.
6.1 – Court Judgment
This activity becomes available in 6.1 – Court Judgment during Case 06: Jacob Kane. As Dick, interact with the workout bench in the Belfry.
7.1 – Friends in Need
This activity becomes available in 7.1 – Friends in Need during Case 07: The League of Shadows. As Dick, leave the Belfry and travel to Bruce’s grave in the northeastern corner of Bristol near the bridge leading to the island.
Below is a guide on the side activity Jason’s Story in Gotham Knights. As the name suggests, it focuses on Jason and how he’s handling the death of Batman.
Click on the characters below to check out their side activities, too!
You can start this activity after completing Case 1.3 – Weird Science during Case 01: Batman’s Last Case. In the Belfry as Jason, head over to the kitchen and interact with the tomato can on the counter for a cutscene.
3.1 – The Key
This activity becomes available in 3.1 – The Key during Case 03: In the Shadows. As Jason, head upstairs in the Belfry and interact with the game console on the entertainment center under the TV.
5.1 – Little Birds
This activity becomes available in 5.1 – Little Birds during Case 05: The Court of Owls. As Jason, examine the training dummy in the Belfry near the windows to trigger a cutscene.
6.1 – Court Judgment
This activity becomes available in 6.1 – Court Judgment during Case 06: Jacob Kane. As Jason, interact with Batman’s cowl near the exit of the Belfry.
7.1 – Friends in Need
This activity becomes available in 7.1 – Friends in Need during Case 07: The League of Shadows. As Jason, interact with the fridge in the Belfry.
Below is a walkthrough for Case File 02: The Rabbit Hole in Gotham Knights! In this guide, we’ll cover how to move through the objectives during Case File 2.1 – AKA Oswald Cobblepot and 2.2 – The Powers Club. During this chapter, you’ll be investigating the infamous Penguin.
2.1 – AKA Oswald Cobblepot
Reach the Iceberg Lounge and Talk to Penguin
Travel to the Iceberg Lounge in the western part of the Financial District then head for the roof. Approach the objective by the window and interact with it to start the mission. When you load into the club, some cool items will be displayed if you are interested in them. Head into the next room to take care of the Penguin’s guards. You’ll get a bonus if you perform 3 silent takedowns. You’ll then want to cross over to the other side of the club on the 2nd level and go through the door there to trigger a cutscene. When it ends, leave the club.
Return to the Belfry
When you’re ready, return to the Belfry and speak to Alfred there. After that, listen to the recorded message on the machine near the Batcomputer.
Penguin’s Criminal Deal
The deal is taking place in an alley west of Gotham City General Hospital. You’ll need to defeat all of the enemies and retrieve 3 modchips from the cases around the area. A bonus can be rewarded if you take out two enemies at the same time.
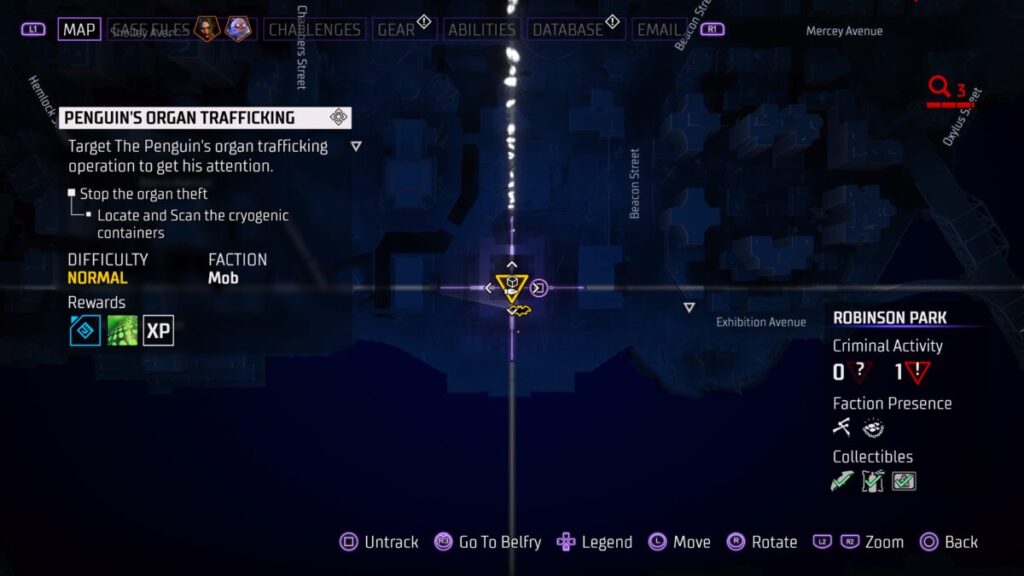
Penguin’s Organ Trafficking
The organ traffickers can be found in the southern part of Robinson Park. You’ll need to scan the cryo container which can be found in the northeastern corner of the courtyard the mob took over. You’ll then need to grab the container. Doing so will give you a 2 minute timer to deliver the “goods” to Tompkin’s mobile clinic near the Aparo Bridge in Gotham Heights.
Detective Montoya
Detective Montoya can be found in a pavilion at the Gordon Memorial in Old Gotham. Speak with her to trigger an event that leads to you unlocking additional side content.
Lucius Fox
Make your way to Foxtecha in Otisburg then head up to the roof and stand in the blue circle for a cutscene. If you speak with him again, you’ll get an activity that leads you down the path of unlocking fast travel.
Reach the Iceberg Lounge
Return to the Iceberg Lounge and deal with Penguin’s lackeys then head into his office for a cutscene. You’ll then need to destroy the bugs on the plant behind the penguin at the base of his bust and on the lamp sitting on his desk. Another cutscene will trigger after picking up the bottle of whiskey.
2.2 – The Power Club
Check on Alfred and His Evening Meeting
Travel to Tricorner Island and head to the roof of the building on the right side of Quarterdeck Road then stand in the blue circle to start a cutscene.
the Powers Club
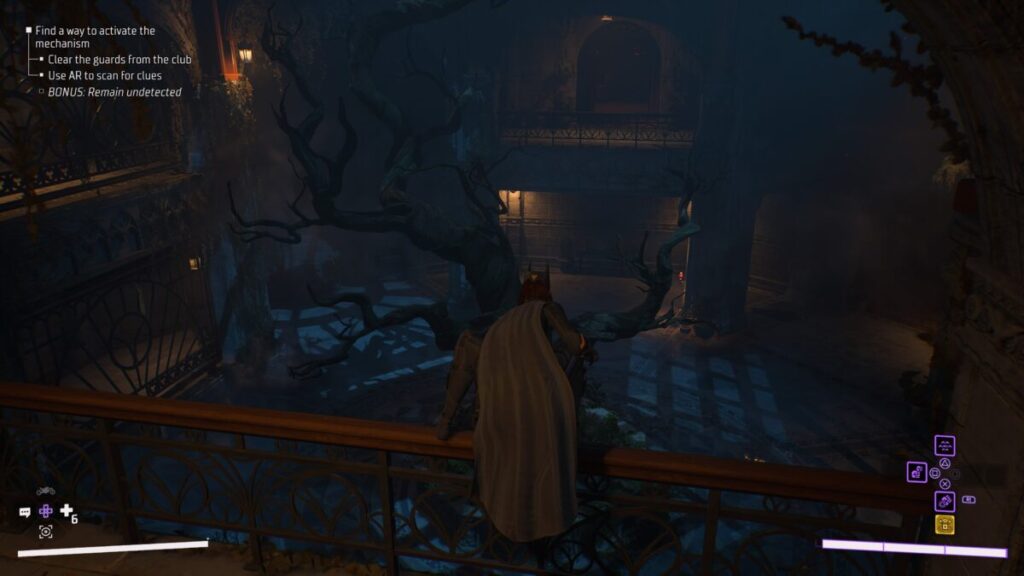
The Power Club can be found in Old Gotham west of GCPD Central. Grapple to the roof and enter through the sunroom. Deal with the guards in the circular room then examine the blood on the floor near the center with your AR. You’ll then need to scan the hidden mechanism under the floor and the lamp then follow the wires leading out from the lamp to the second floor.
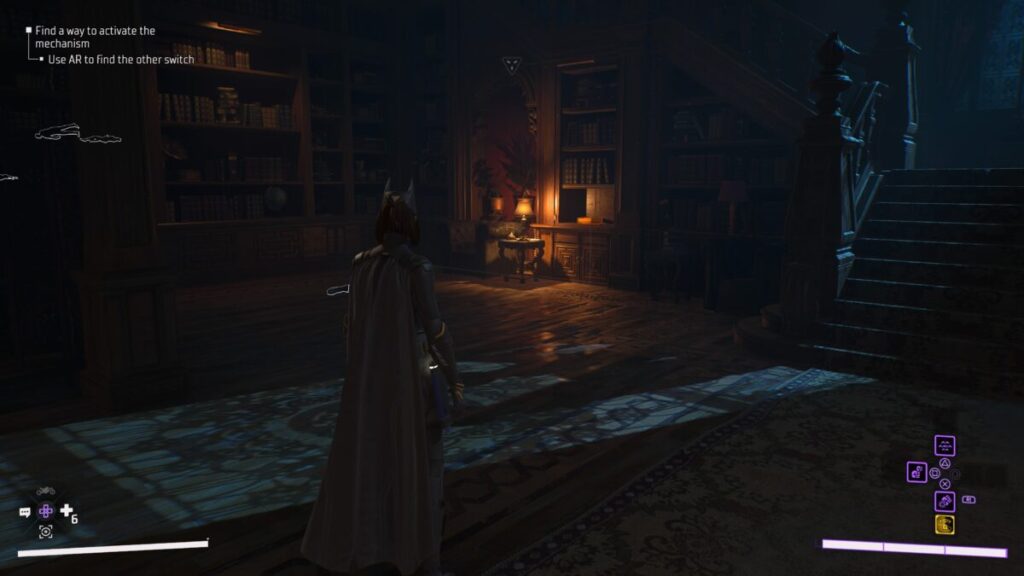
In the next area, deal with all of the guards then head for the room filled with bookshelves. Use your AR to find the book with a red glow to the left of the stairwell and scene it. Interact with it to find the first switch. Next head to the room with the fireplace Scan the bust near one of the bookshelves to find the first switch. The second is located in the room with a fireplace. You’ll need to scan the bust at the opposite side of the fireplace near a bookshelf to find the second switch. Return to the circular room and interact with the lamp from before to make the hidden staircase appear. Follow it to the basement.
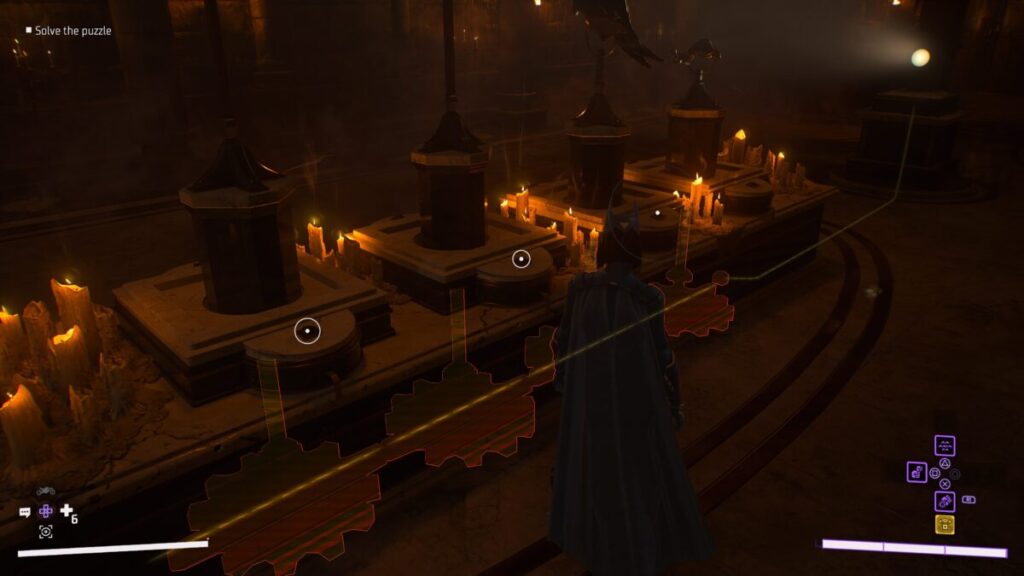
In the basement, scan the spotlight near the entrance then interact with it to turn it on. You’ll now have to solve the puzzle by rating the four objects on the pedestal to for the correct shadow. What you’ll want to do is use your AR while doing this. If the object is in the correct position, the gears in the floor with have a yellow line running through them (which is visible on the AR). From this point, the rest of the mission is pretty straightforward.
Return to the Belfry
After escaping the sewer, return to the Belfry for a cutscene.
For more guides on Gotham Knights check our main guide page here!
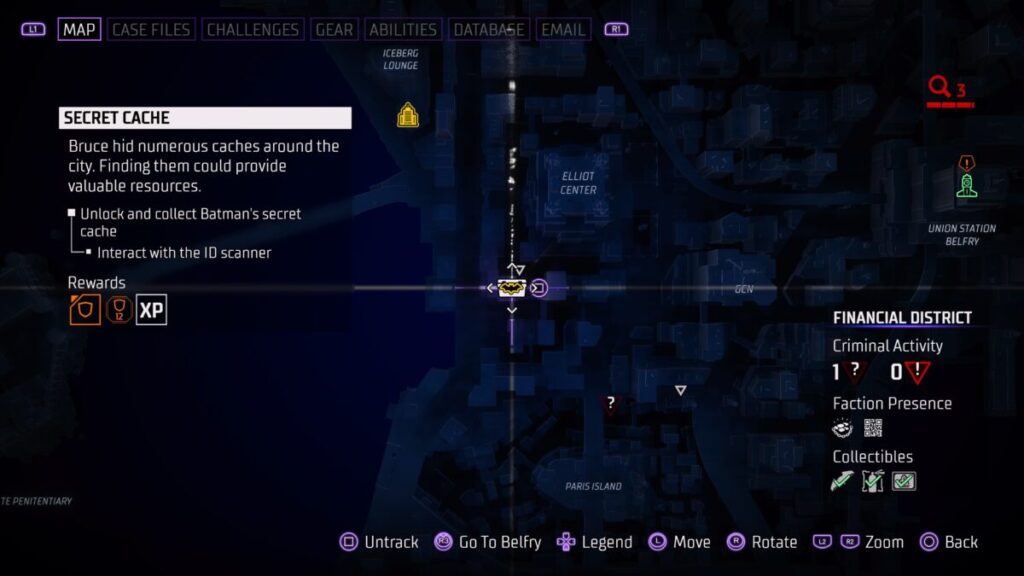
This is a guide for the side activity Secret Cache in Gotham Knights. It becomes available at the start of Case 02: The Rabbit Hole and rewards you with Bruce’s audio recordings. After you collect all of Bruce Wayne’s hidden audio recordings, you’ll receive the Gotham City Confidential trophy!
Reach the Secret Cache
Leave the Belfry (if you’re there) and head to the eastern part of the Financial District southwest of the Elliot Center. You’ll find a building there with the stash icon on top of it. Examine the ID scanner on the roof to make 3 beams appear nearby. Run through them all quickly as you’ll be timed. This will authenticate you and upload the location of the cache. Grapple to the nearby ledge and investigate it to loot the cache to receive one of Bruce’s Audio Logs.
Return to the Belfry
Before you’ll get any more of these activities, you’ll need to return to the Belfry.
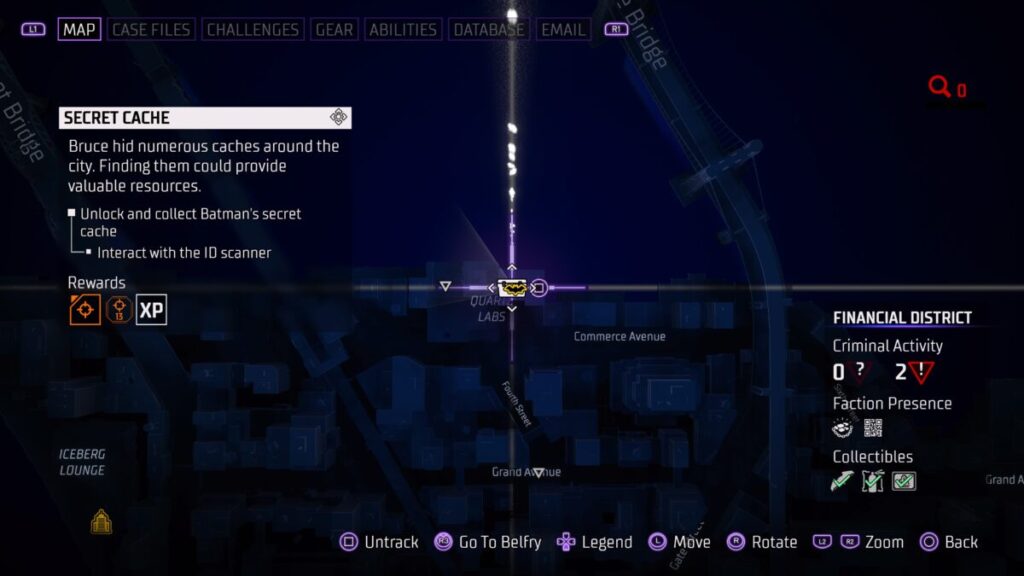
Reach the Secret Cache
Travel to the roof of Quartz Labs in the north central part of the Financial District and interact with the ID scanner there. After you activate the scanner, run through a set of beacons before time runs out. After making it through the last beacon, grapple to the nearby ledge and examine the cache to receive one of Bruce’s Audio Logs.
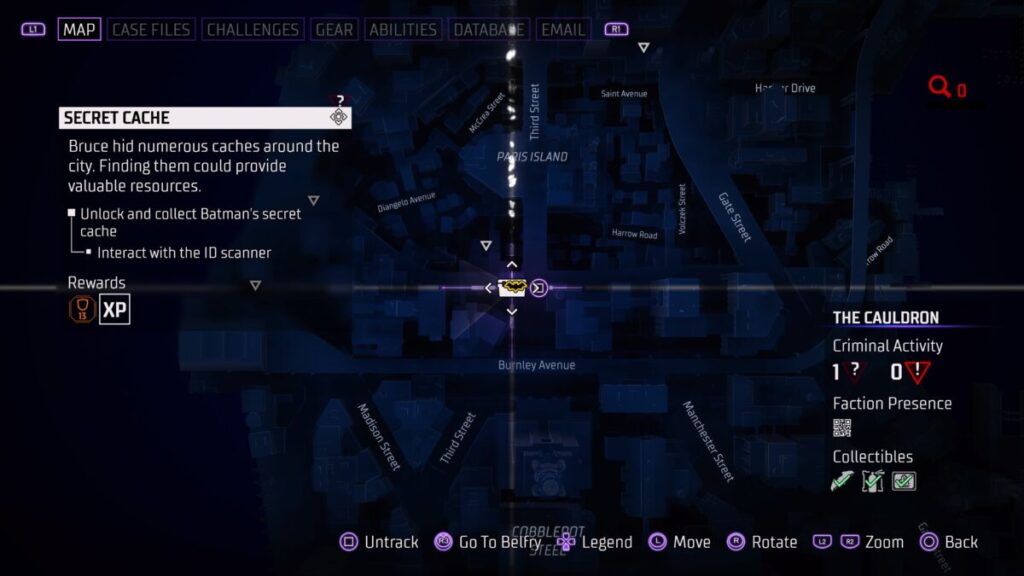
Reach the Secret Cache
Head to the roof of a building south of Paris Island in The Cauldron and interact with the ID scanner there. After you activate the scanner, run through a set of beacons before time runs out. After making it through the last beacon, grapple to the nearby ledge and examine the cache to receive one of Bruce’s Audio Logs.
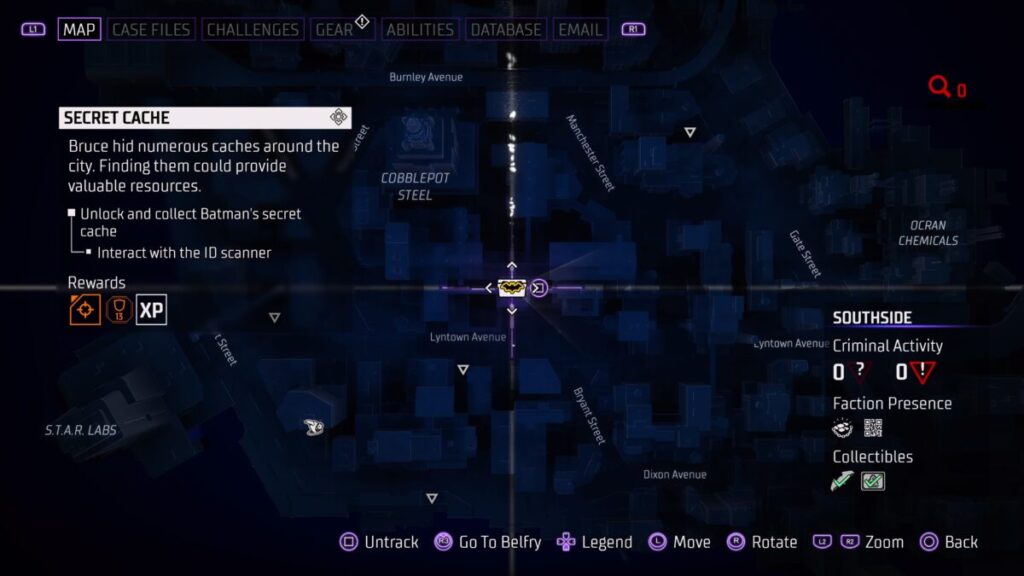
Reach the Secret Cache
Travel to the rooftop of a building in the image above of Southside, southeast of Cobblepot Steel. After you activate the scanner, run through a set of beacons before time runs out. After making it through the last beacon, grapple to the nearby ledge and examine the cache to receive one of Bruce’s Audio Logs.
Reach the Secret Cache
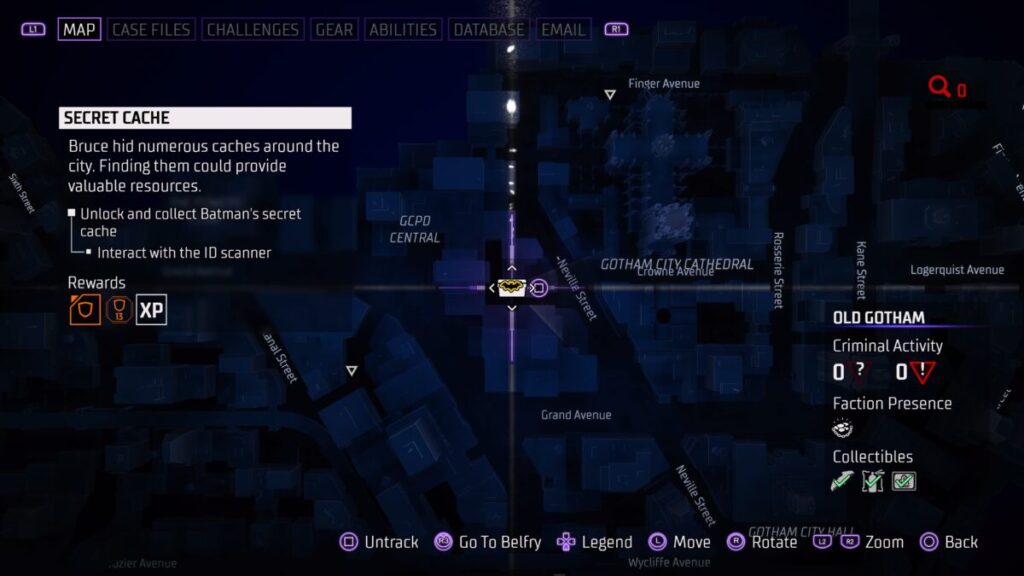
Head to the rooftop of the GCPD building in Old Gotham. After you activate the scanner, run through a set of beacons before time runs out. After making it through the last beacon, grapple to the nearby ledge on the Gotham City Cathedral and examine the cache to receive one of Bruce’s Audio Logs.
Return to the Belfry
Before you’ll get any more of these activities, you’ll need to return to the Belfry.
Reach the Secret Cache
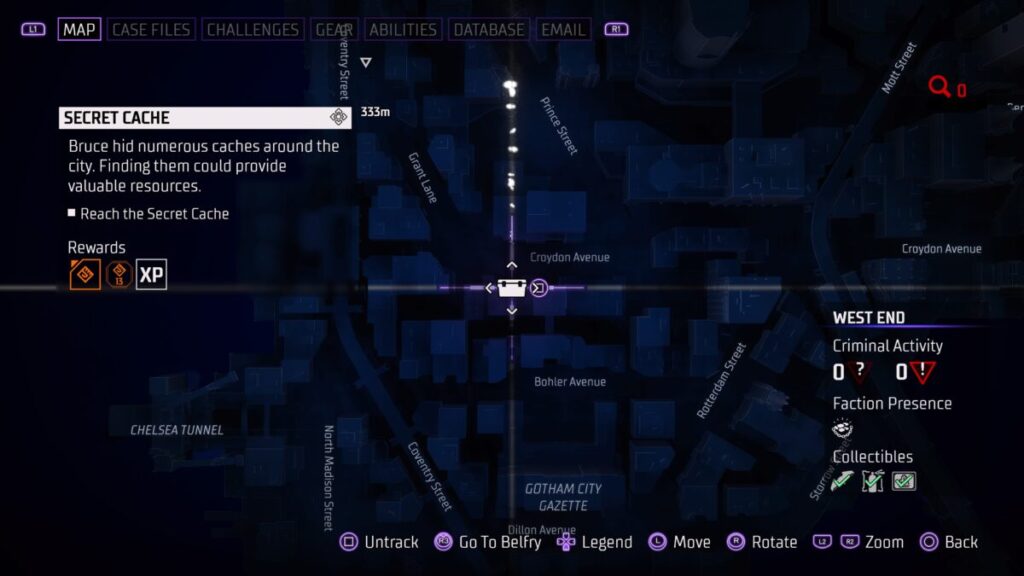
Travel to the roof in West End between Croydon Avenue and Bohler Avenue. After you activate the scanner, run through a set of beacons before time runs out. After making it through the last beacon, grapple to the nearby ledge and examine the cache to receive one of Bruce’s Audio Logs.
Reach the Secret Cache
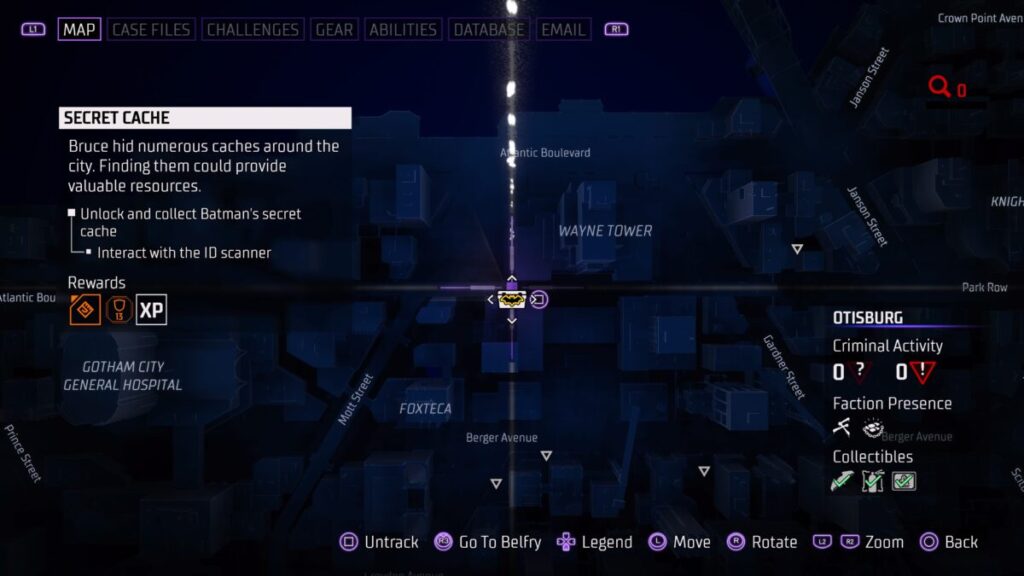
Head to Otisburg to the building southwest of Wayne Tower. After you activate the scanner, run through a set of beacons before time runs out. After making it through the last beacon, grapple to the nearby ledge and examine the cache to receive one of Bruce’s Audio Logs.
Reach the Secret Cache
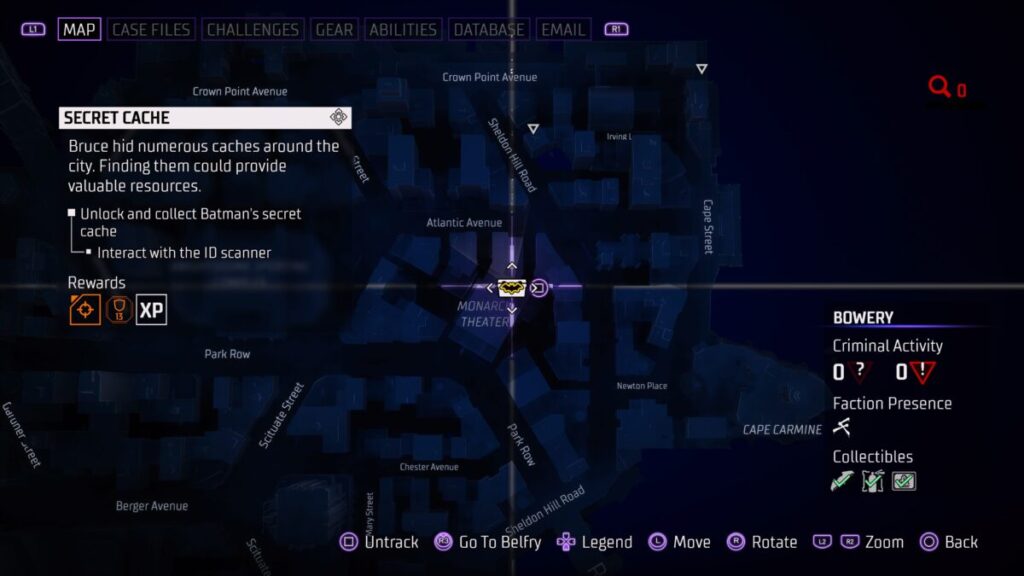
Travel to the roof of Monarch Theater in the Bowery. After you activate the scanner, run through a set of beacons before time runs out. After making it through the last beacon, grapple to the nearby ledge and examine the cache to receive one of Bruce’s Audio Logs.
Reach the Secret Cache
Head to Tricorner Island then make your way to the building east of Quarterdeck Road. After you activate the scanner, run through a set of beacons before time runs out. After making it through the last beacon, grapple to the nearby ledge and examine the cache to receive one of Bruce’s Audio Logs.
Return to the Belfry
Before you’ll get any more of these activities, you’ll need to return to the Belfry.
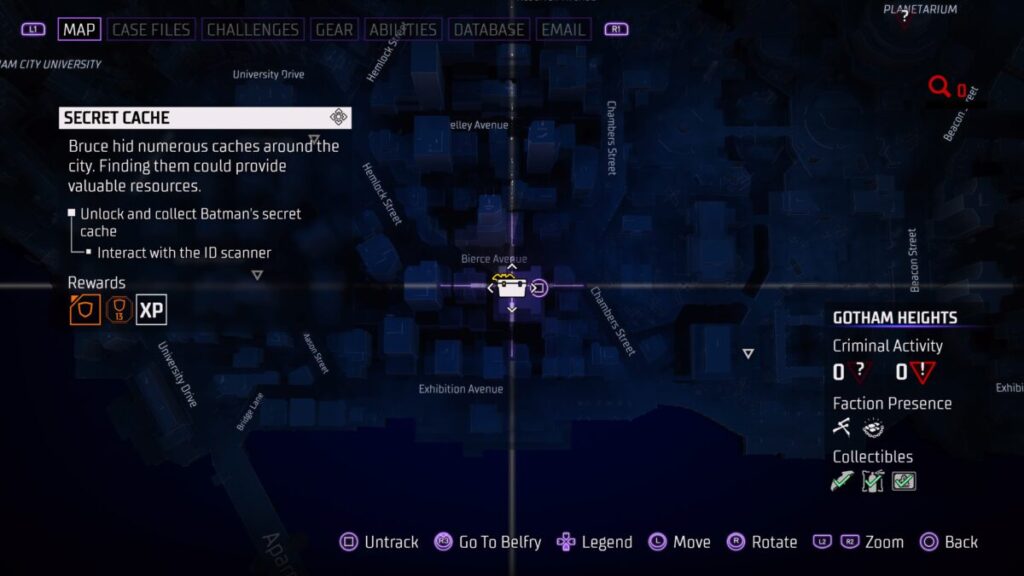
Reach the Secret Cache
Travel to the building just south of Bierce Avenue in Gotham Heights. After you activate the scanner, run through a set of beacons before time runs out. After making it through the last beacon, grapple to the nearby ledge and examine the cache to receive one of Bruce’s Audio Logs.
Reach the Secret Cache
Head to the building near the corner of Mercey Avenue and Oxylus Street in Bristol. After you activate the scanner, run through a set of beacons before time runs out. After making it through the last beacon, grapple to the nearby ledge and examine the cache to receive one of Bruce’s Audio Logs.
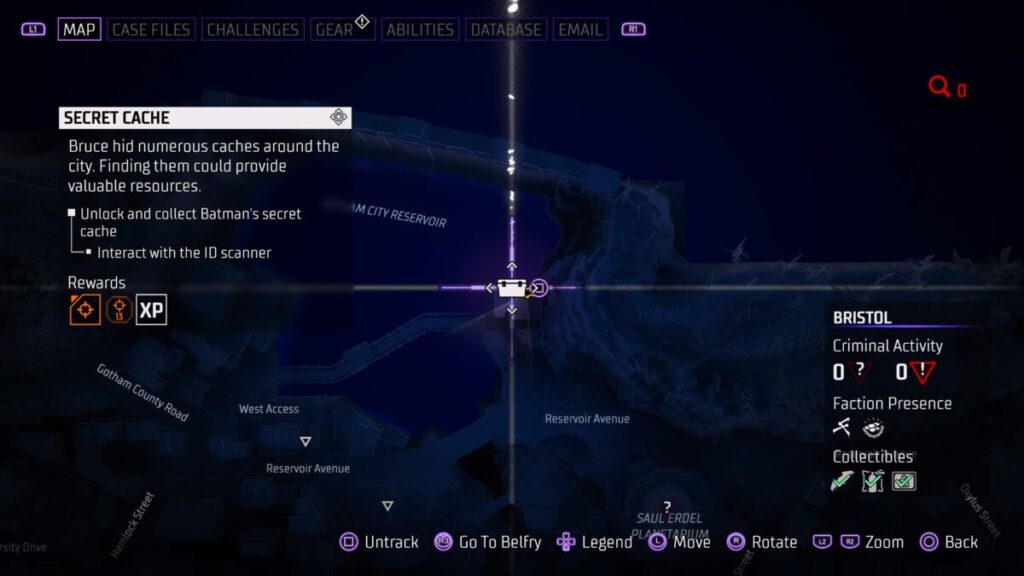
Reach the Secret Cache
Travel to the Gotham City Reservoir to find the next scanner. After you activate the scanner, run through a set of beacons before time runs out. After making it through the last beacon, grapple to the nearby ledge and examine the cache to receive one of Bruce’s Audio Logs.
For more guides on Gotham Knights check our main guide page here!
In Gotham Knights, you’ll come face to face with many villains now that Batman is gone. One of those villains is the cold hearted Mr. Freeze. Below is our walkthrough for the FR01: Mr. Freeze villain case file. This case becomes available at the start of Case 02: The Rabbit Hole.
?.? – Heist at S.T.A.R. Labs
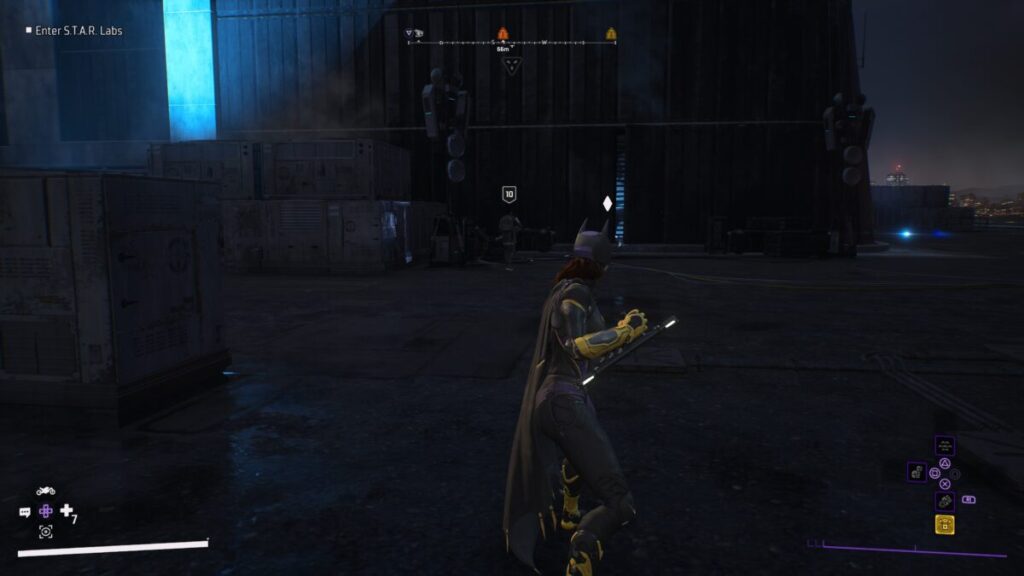
Reach S.T.A.R Labs
Leave the Belfry and head to S.T.A.R. Labs which can be found to the southwest of Southside. Once there, grapple to the roof and head inside by squeezing through the opening in the wall.
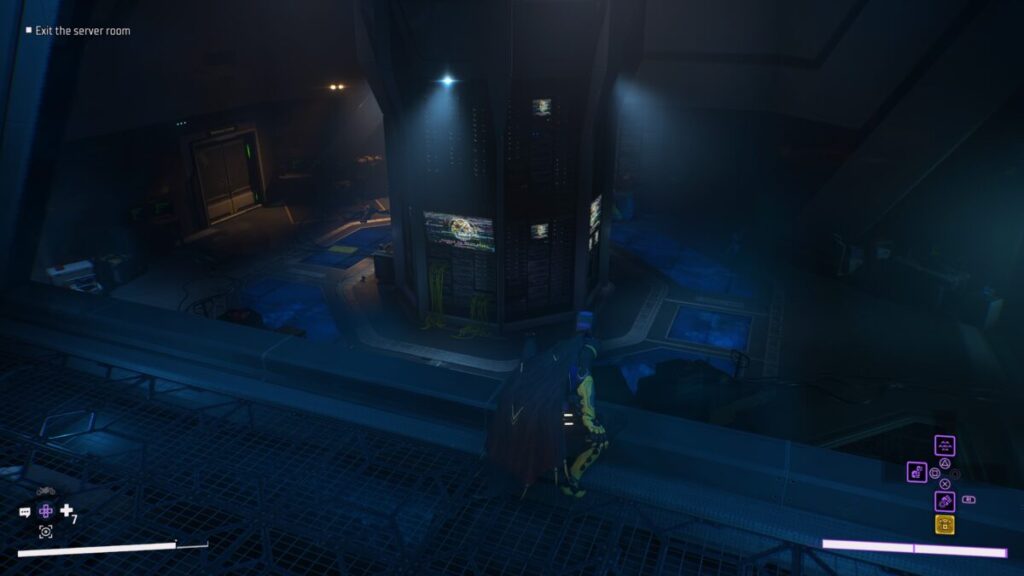
Enter the Complex / Exit the Server Room
Work your way through the fan duct using your grapple when you reach the wall of fans. Continue following the ducts until you reach the room with two regulator enemies. Take care of them then head into Server Room A at the back of the floor. Defeat the regulators here while making sure not to get caught by the cameras. You’ll earn bonus points if you defeat 3 enemies using Silent Takedowns. When they have all been dealt with, head to the console on the other side of the server room and interact with it to open the cooling vents. Jump through the cooling vents to reach another area occupied by Regulators and a turret. You can disable the turret by getting close to it or hacking if you playing the right character. After dealing with both threats make sure to read the S.T.A.R. Labs Research Notes on one of the crates then leave the server room.
Search the Facility for the Regulators
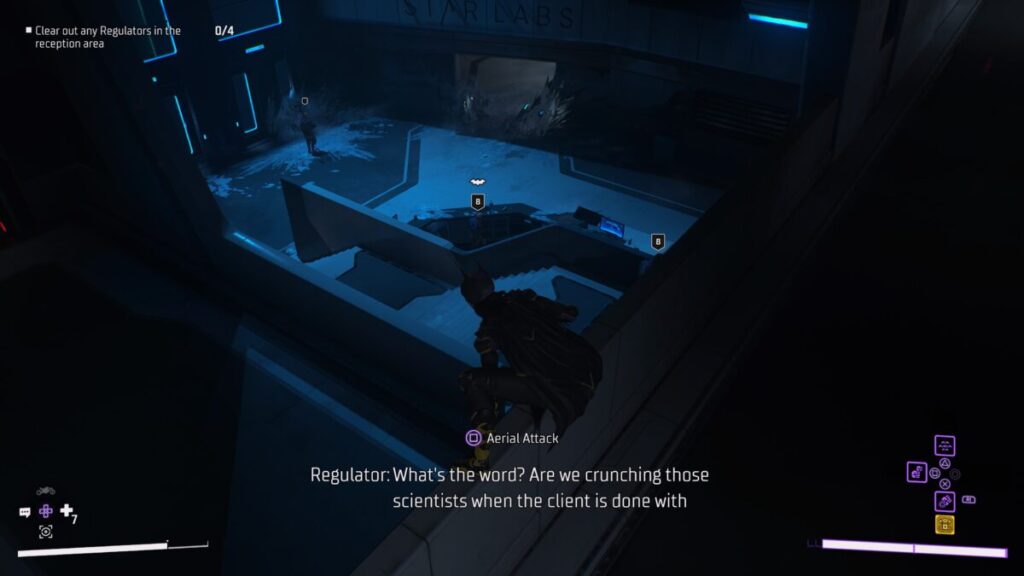
Head into the Employee Lounge then take the stairs up and follow the hallway to the Security Hub. Defeat the Regulators guarding the room. If you remain undetected, you’ll receive a bonus reward (keep an eye on the camera in the center of the room). Check the terminal after dealing with the enemies for a quick event then head through the door behind the terminal. Grapple up to the 12th floor and take out the enemy at the top. Look for the stairwell and take it down to find a chest. Return to the 12th floor and head over a pair of gates to reach the reception area. Take care of them then follow the obvious trail of our villain by scanning their footprint with the AR.
Follow Mr. Freeze’s Footsteps / Locate Mr. Freeze
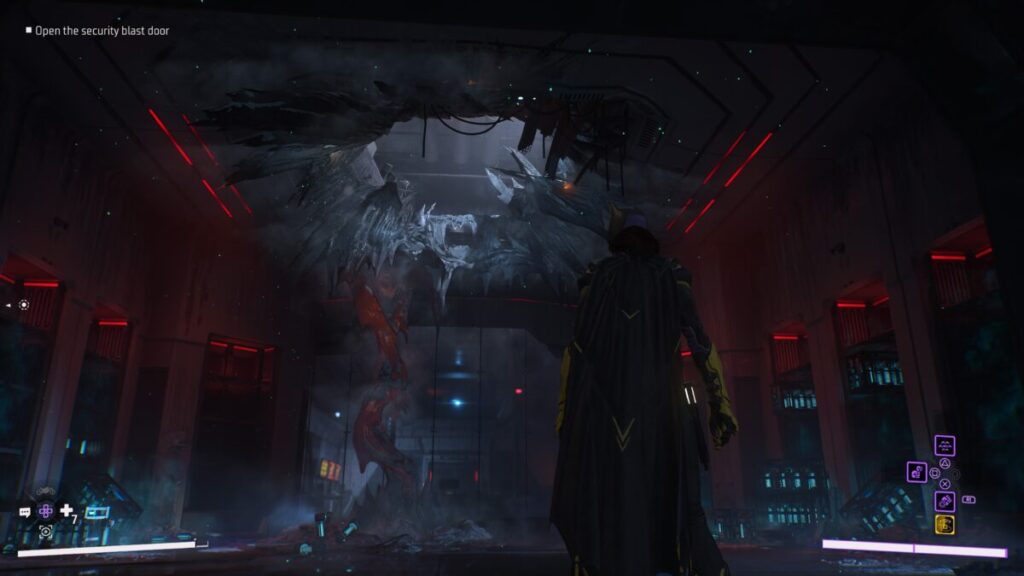
Take out the Regulators then keep following the footprints. When you get to the end of the tracks, grapple up to a vent and head through the vent shaft. When you emerge, you’ll be in a control room. Take out the two enemies then head into the Cryo Storage. Grapple up the hole in the roof of Cryo Storage. You’ll then want to follow the headway to reach the Energy Research Room. Once inside, interact with the terminal on the other side of the room to trigger a cutscene.
Free the Scientists
When you regain control of your character, you’ll be attacked by a horde of enemies. Press the button to rotate the railgun then fight off the enemies while you wait for it to get in place. You’ll then need to press another button to power up the gun. At this point, a new enemy called the shocker will show up. Defeat him and the rest of the enemies then jump up on the raised platform to fire the railgun to trigger a cutscene.
Return to the Belfry
Head back to the Belfry and interact with the projector in the center of room on the floor to trigger a cutscene.
1.2 – Cold Front
Stop Crimes
For this objective, you’ll need to stop crimes around Gotham being committed by the Regulators. Once you’ve stopped 5 of them, this case file will complete.
1.3 – Quartz Labs
Return to the Belfry
Head back to the Belfry and inspect the 1.3 – Quartz Labs subcase in the Case File menu. This will kick off a mission where the team
Reach Quartz Labs
Take out the Regulators guarding the entrance then head inside. Deal with the enemies inside then scan the switch on the upper walkway to open the vault. Scan the scientist inside, his notepad to the left of him, play the Dictaphone on the desk on the right side of the vault and the scan the blueprint on the wall to the left side of the vault. Take the stairs behind the vault switch up and follow the path there to reach the office. Use your AR to find the hidden floor compartment and grab the disruptor. You’ll then be transported back to the Belfry.
1.4 – Gotham City on Ice
Speak with Alfred in the Belfry
Talk to Alfred in the Belfry then investigate the 1.4 – Gotham City on Ice subcase in the Case File menu to kick off a cutscene leading to a mission.
Reach Elliot Center
Follow the train tracks to the Elliot Center then take out the Regulators guarding the entrance. Head inside and work your way to Mr. Freeze taking out the enemies along the way. When you reach the top, use the disrupter on the weather machine. This leads to a fight with Mr. Freeze. If you’re having trouble with him, use the weather machine as cover and attack him using range attacks. After defeating him a cutscene triggers.
1.5 – On Thin Ice
Speak with Alfred in the Belfry
When you return to the Belfry, speak with Alfred.
Interrogate Regulator
After starting the patrols of Gotham, you’ll need to locate some Regulators around town and interrogate them.
Mr. Freeze’s Regulator Operation
The Regulator you interrogated will direct you to a Criminal Stronghold in the northwestern part of The Cauldron. Make your way to the stronghold and defeat all the enemies inside. Afterwards, you’ll then be tasked with stopping two armed robberies. One can be found in Tricorner Island and the other can be found in Gotham Heights. After taking care of the robbers, return to the Belfry.
**Please note this guide is a work in progress!** For more guides on Gotham Knights check our main guide page here!
Search
This site uses cookies. By continuing to use this website, you are giving consent to cookies being used. For more information on cookies, view our Privacy Policy.OkPrivacy Policy