After Chadd lathers himself up, follow him to further into the swamp.
Kill Ravagers
Kill the three Ravagers attacking Chadd.
Revive Chadd
The action got a little too extreme for poor old Chadd. Interact with him to bring him back to life for more extremeness.
Follow Chadd
Follow Chadd back to Reliance.
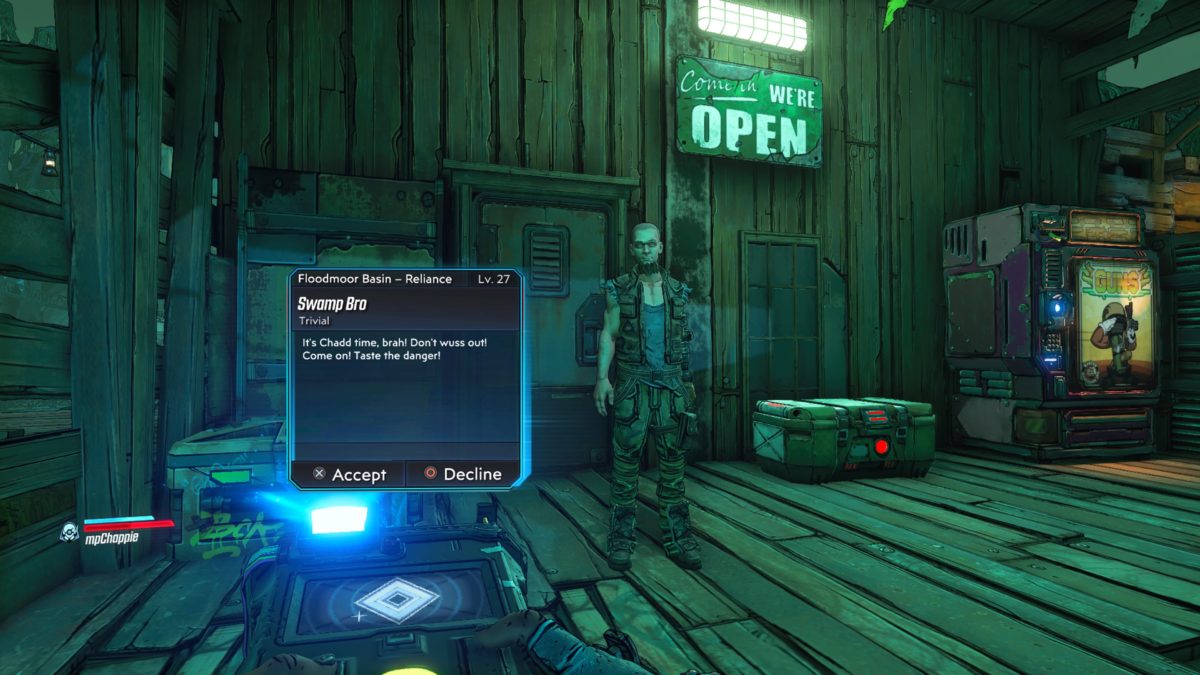
Answer the Call of Danger
Interact with Chadd to answer the call.
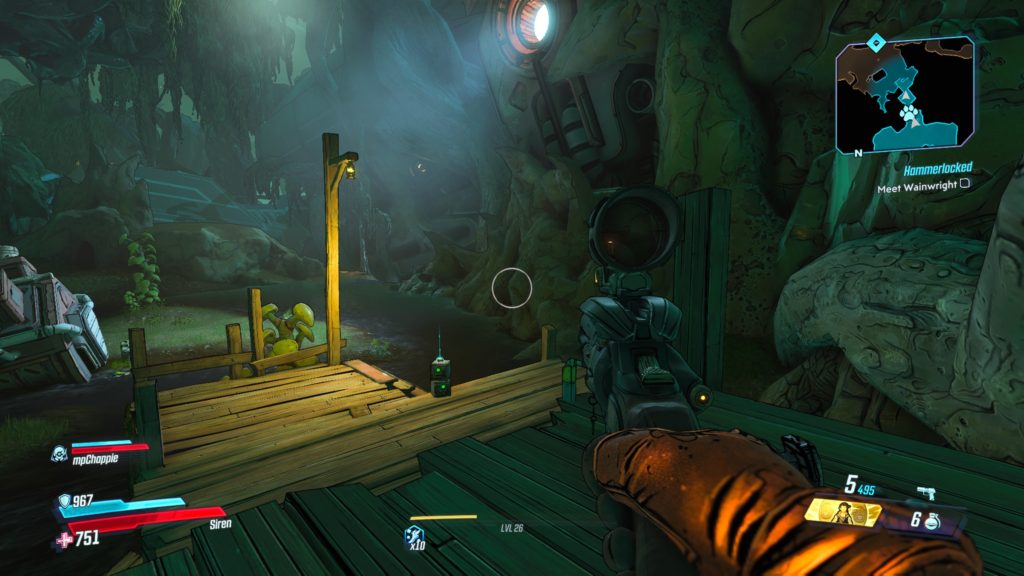
Go to Lover’s Leap
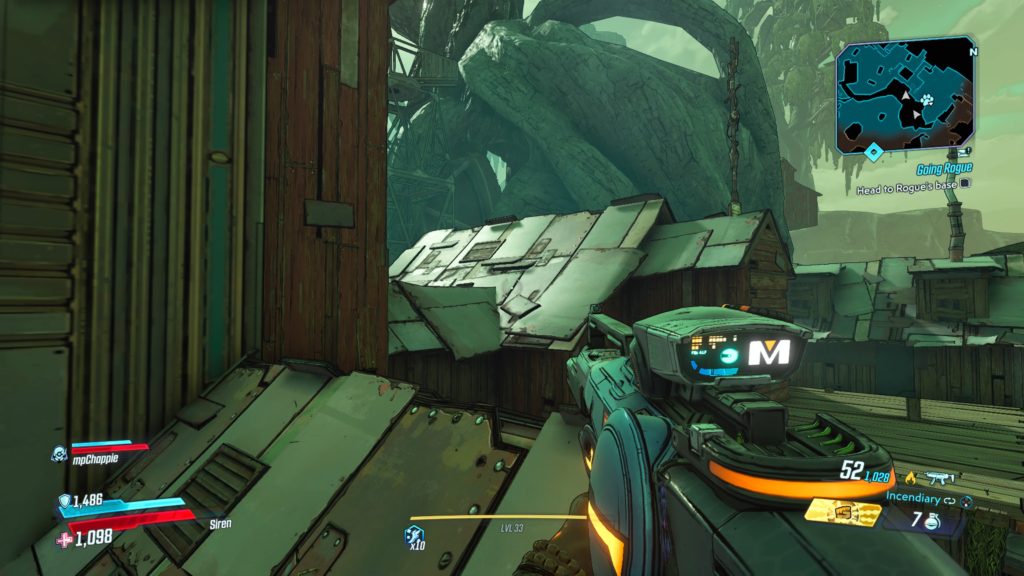
Jump down to the left of the caution sign then climb up the ladder on the wooden platform to Lover’s Leap. Walk out on the diving board.
Jump!
Take the leap!
Revive Chadd
Again, resurrect Chadd so he can live for more extremes.
Get Fuel Cans
For yet another extreme stunt, follow the objectives to pick up the fuel cans for the rocket booster. With your back to the elevator, the first can is on a dock to the left. The next can is located near a shack at the top of the rock directly in front of you from the previous fuel can. The final can is located in the shark’s mouth hanging from a shack a short way ahead.
Attach Fuel Cans to Boosters
Head back to the elevator and attach the fuel cans to the base of the structure.
Shoot Igniter
Shoot the red button in the middle of the platform.
Get Chadd’s Righteous Loot
Head back to where you first met Chadd and loot the chest next to the vending machine to complete this mission.
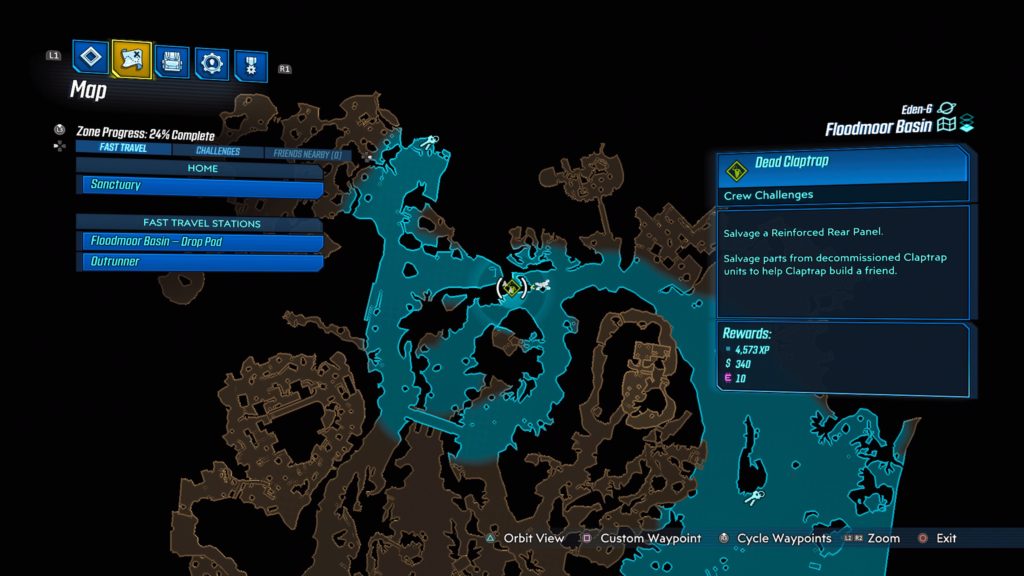
This Echo Log can be found in the north-central section of the map, north of the dead claptrap with the reinforce rear panel, on a banister at the top of a flight of stairs. See the map below for the exact location.
Nilly’s Diary (Part 1)
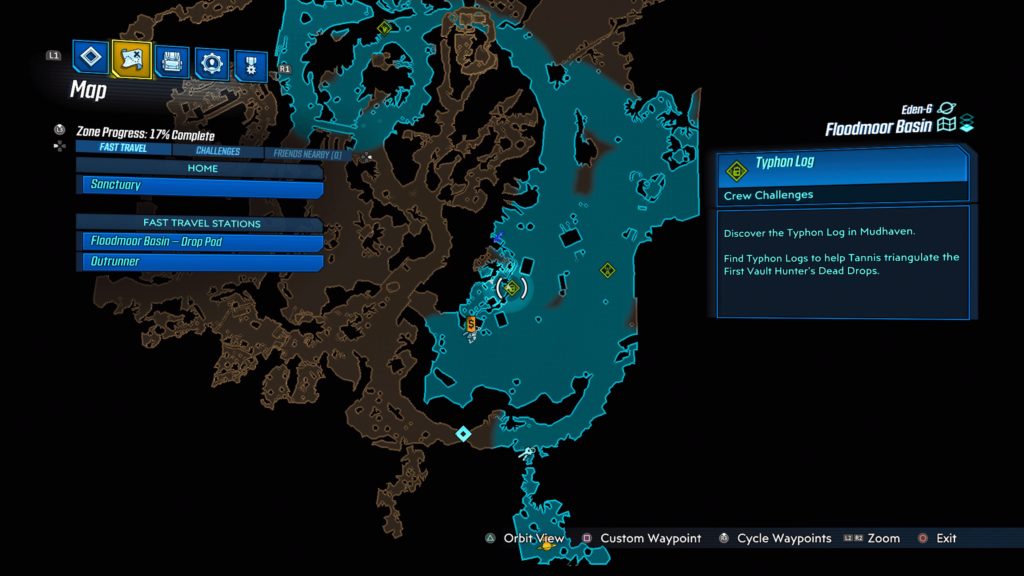
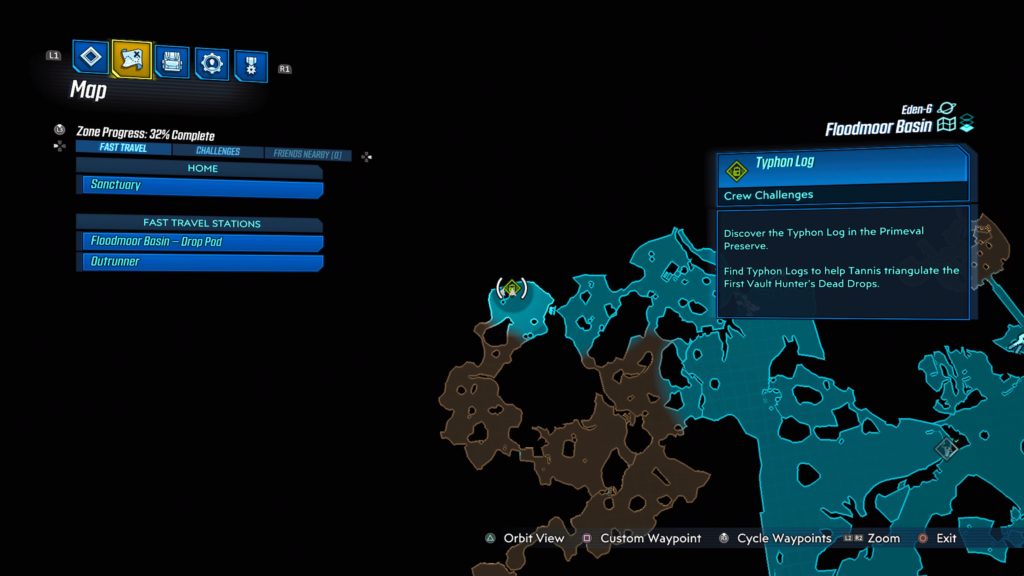
This Echo Log can be found in Primeval Grotto located at the northwestern part of the map. It is south of the Typhon Log.
Nilly’s Diary (Part 2)
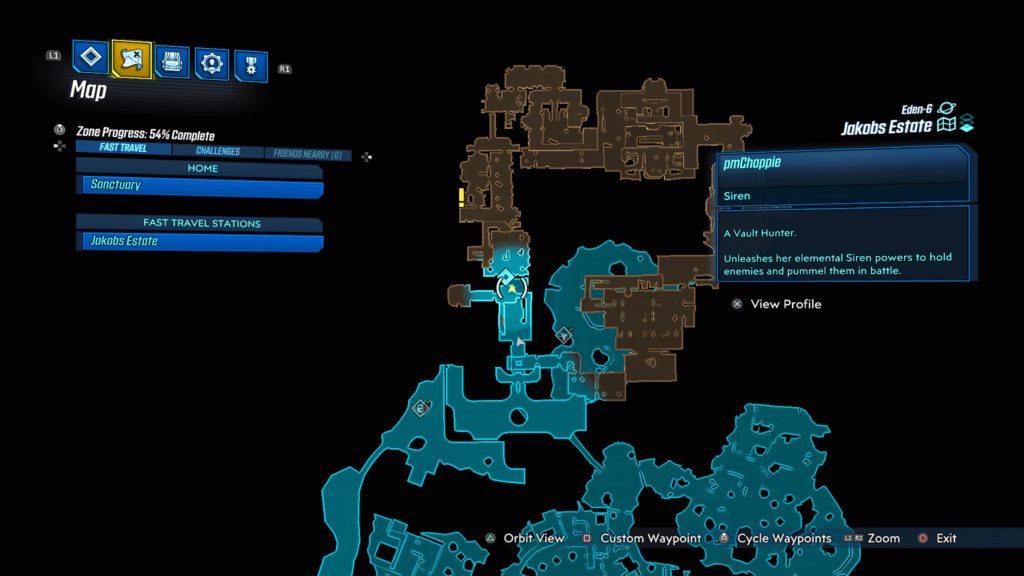
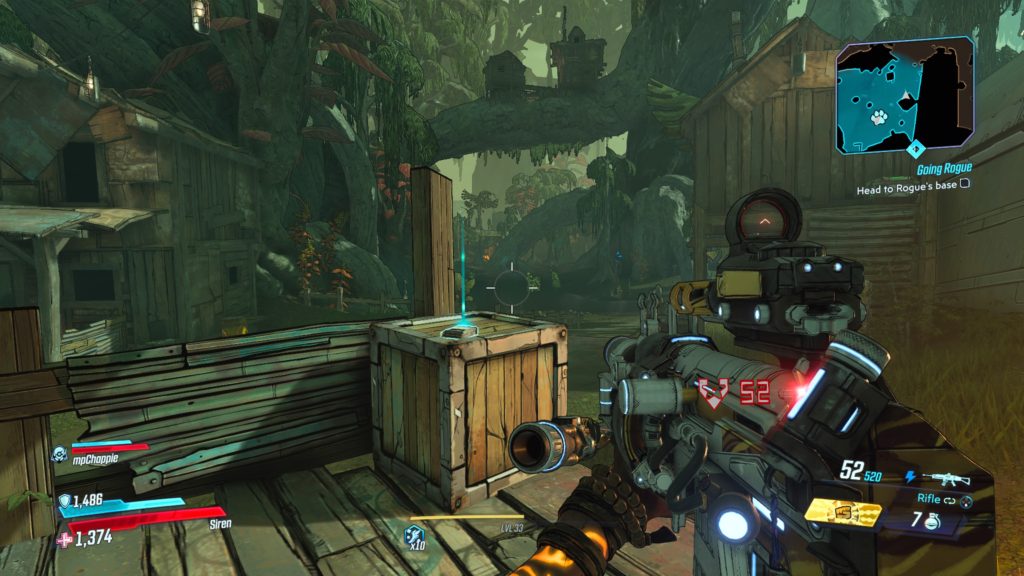
This echo log can be found in Lumberhold on a crate behind the Catch-A-Ride. Lumberhold is located on the west side of the map near the Jakobs Estate. See the map below for the exact location.
The Anvil
Trouble
This echo log is located on a table in the north part of a building on the west side of The Yard. The room is a little farther down from the claptrap you get the hairpiece from. See the map below for the exact location.
Parting Thoughts
This log is located in the Warden’s office after the Warden boss fight during the Hammerlocked main mission. See the map below for the exact location.
Jakobs Estate
My Say
This echo log is located on a shelving unit in the same house as the Jakobs Estate fast travel station. See the map below for the exact location.
The Lizard
This echo log is located on a bookshelf in the small library of the Welcoming Chamber in Jakobs Manor. See the map below for the exact location.
Voracious Canopy
Installing BALEX
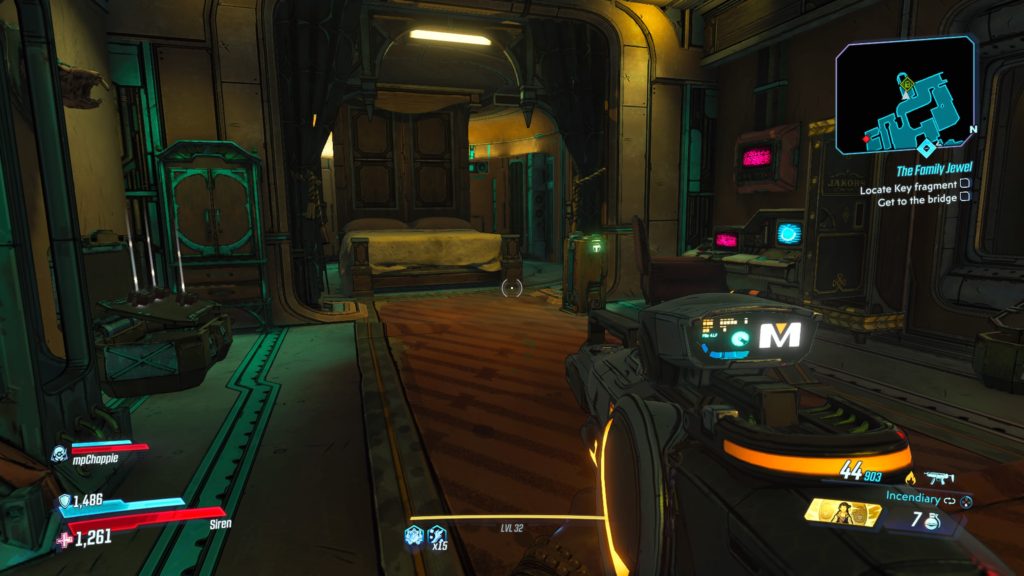
This log is located in a bedroom on a desk in Monty’s Private Cabin of the Monty’s Den part of the ship (southern part of the map).
Installing GenIVIV
This log is located on a table along the path to the bridge from the Private Shuttle Bay.
Ambermire
Talking
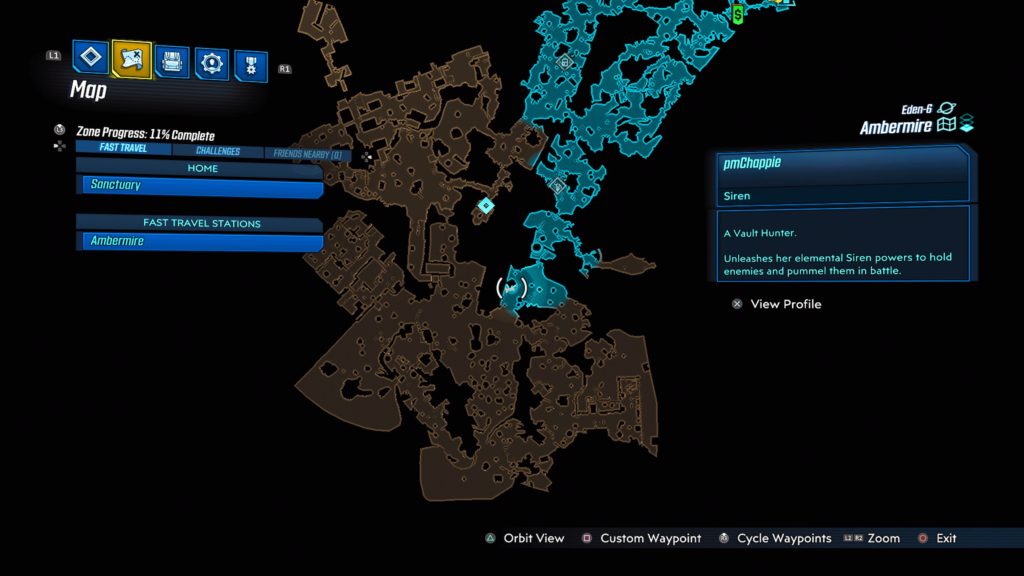
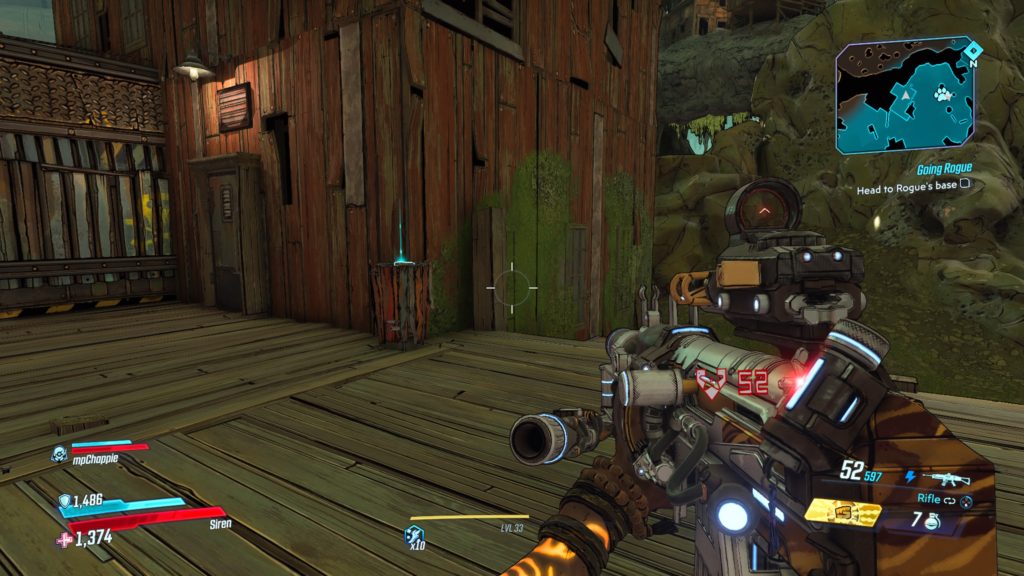
This log can be found laying on a wooden crate that is sitting on a deck in the south-central part of the map, southeast of the dead claptrap with the long term memory. See the below map for the exact location.
The Search for Red Jabber (Part 1)
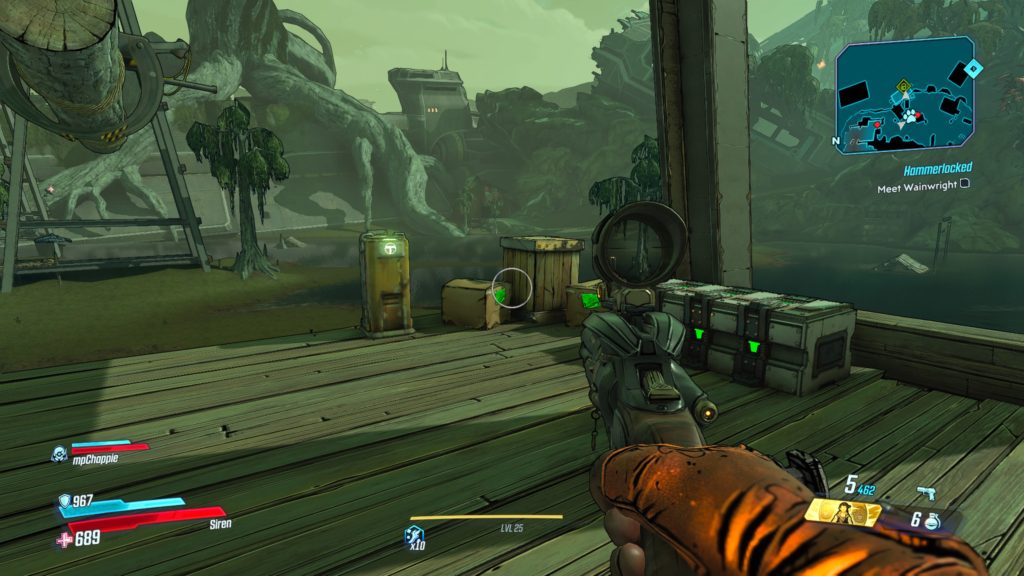
This log is on a barrel in Delvin’s Dock next to an old red building with a fan on it. Delvin’s Dock is located in the southeastern part of the map. See the below map for the exact location.
The Search for Red Jabber (Part 2)
This log can be found in Mirefall Rigs on a metal barrel next to a large pipe on a wooden platform. It is located northwest of the lone Ammo Dump vending machine. See the below map for the exact location.
The Search for Red Jabber (Part 3)
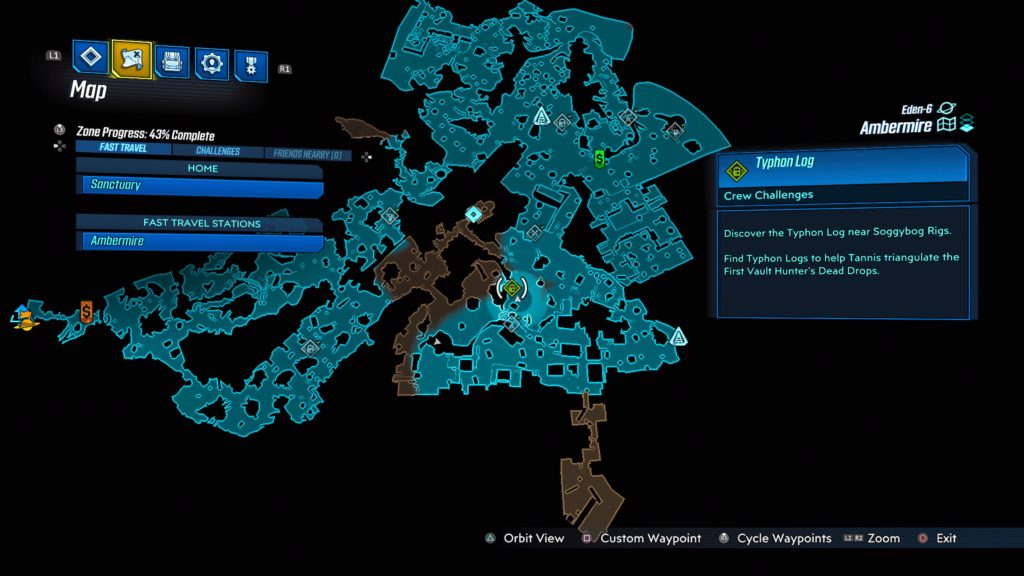
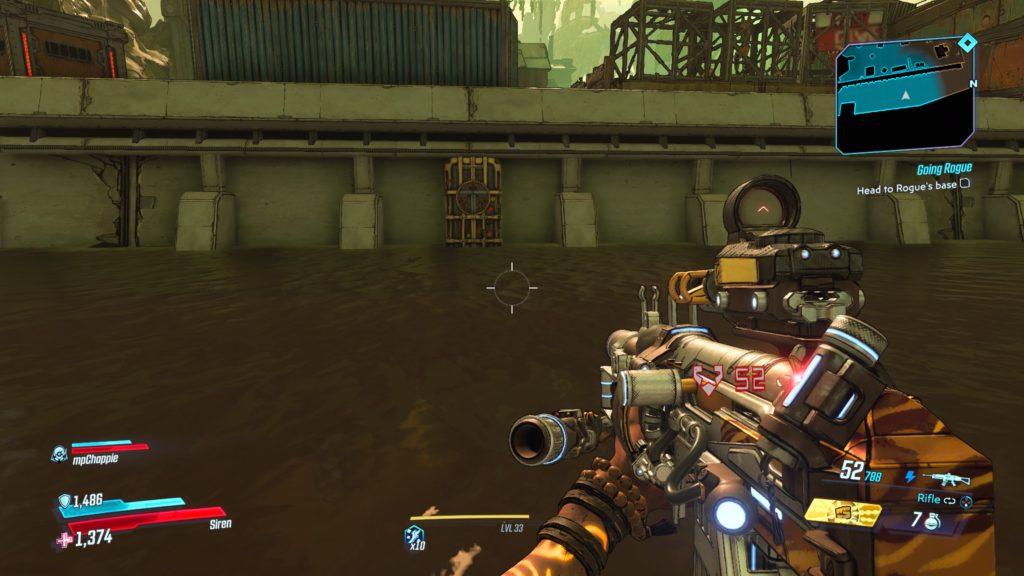
This log can be found sitting on a crate, which is on a wooden platform under a giant pipe running through the Soggybog Rigs area near the broadcast radio tower. See the below map for the exact location.
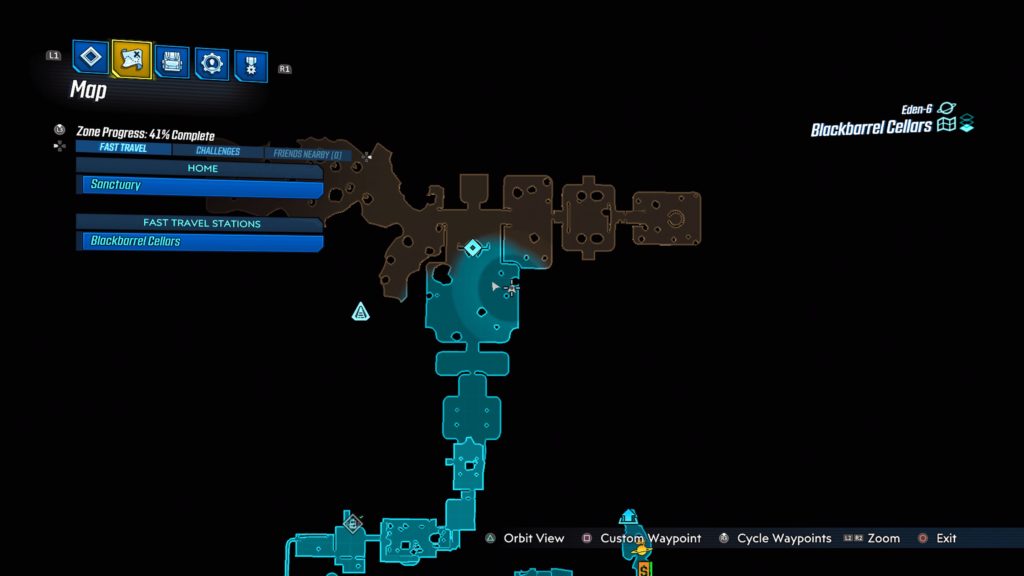
Blackbarrel Cellars
The Call
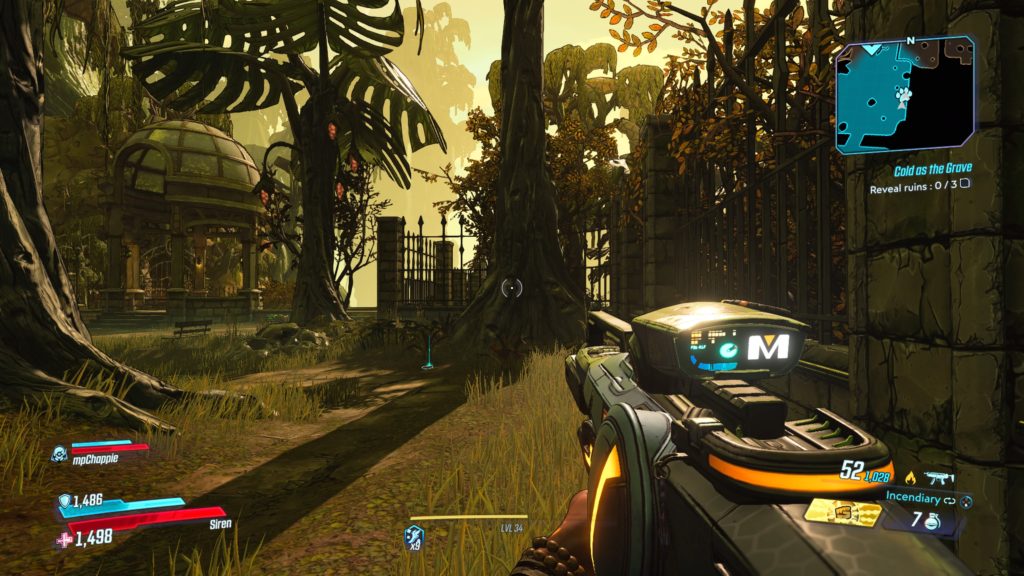
The log is located on the ground next to a tree in the Estate Gardens on the right (east). See the map below for the exact location.
The Gardens Take Care of Themselves
This log is located on a crate in the Observation Grotto. See the below map for the exact location.
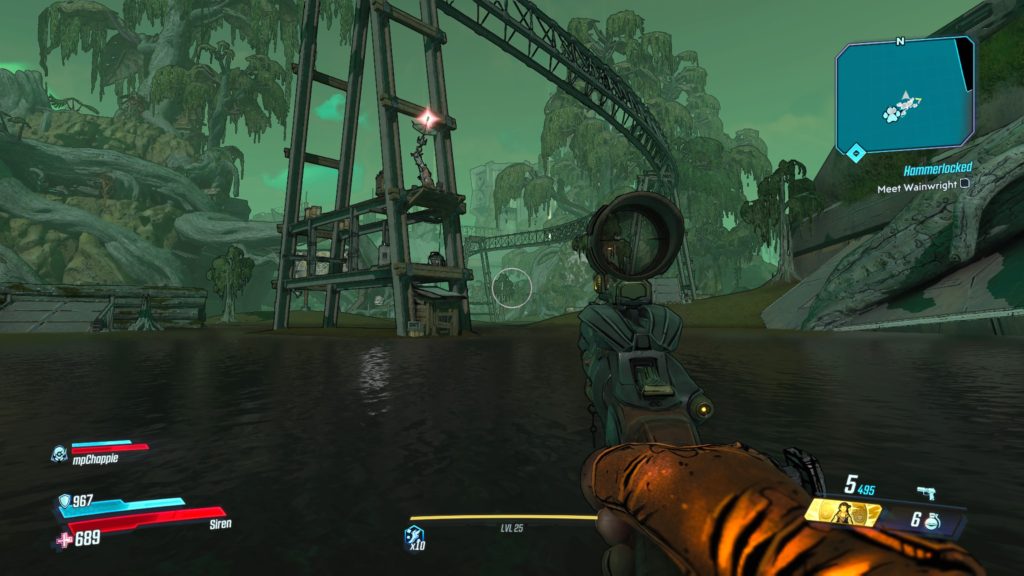
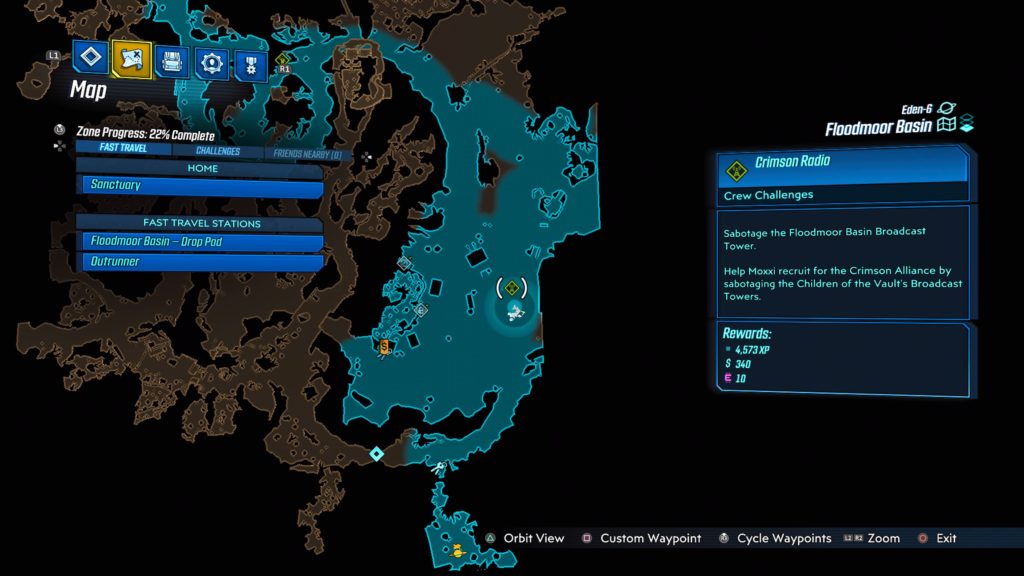
This broadcast tower is located on a support beam for the logging transport system. See the map below for the exact location. To reach it, start at the Catch-A-Ride nearest the drop pod facing north. Follow the road east until you reach a red barn. From the red barn, keep heading north to come across the tower. Climb onto the roof of the little shack, then jump up to the wooden platform. From there, use the generator to boost you up, jump to the metal bar above and then head onto the wooden platform with the broadcast satellite on it. Sabotage the broadcast tower to complete the challenge.
Floodmoor Basin Broadcast Tower 2
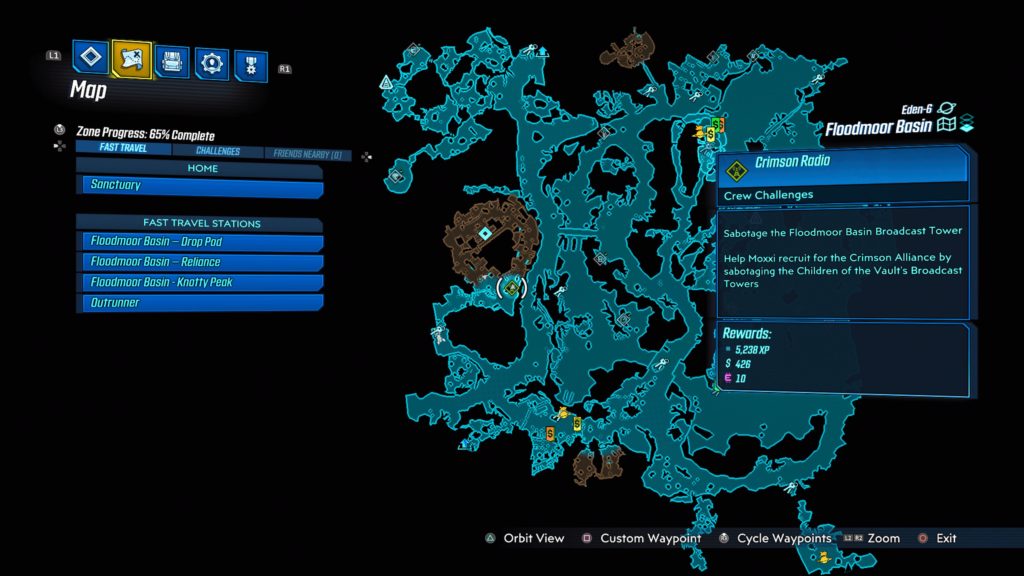
This broadcast tower is in the Lumbermill located on the western side of the map. You will be brought here during the Guns of Reliance main mission. See the map below for the exact location.
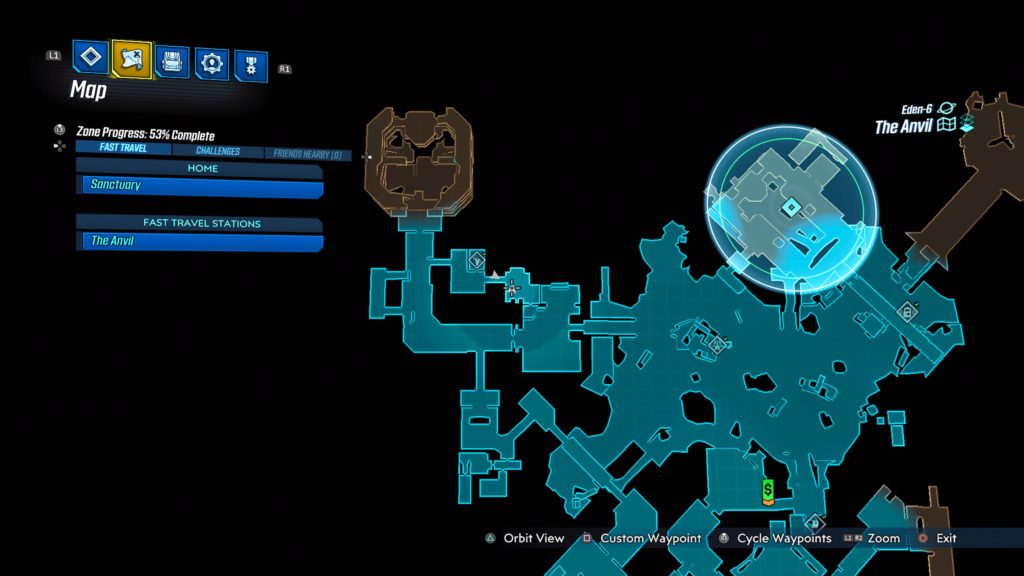
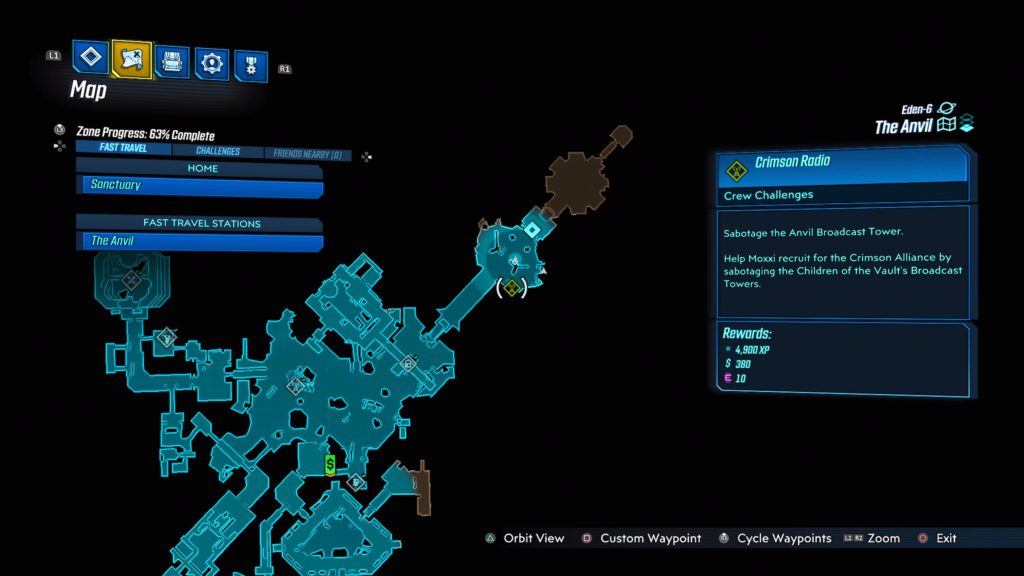
The Anvil
Anvil Broadcast Tower
The broadcast tower is located in the middle of The Yard on the top of some stacked storage containers in the prison on the north side of the map. See the map below for the exact location.
Anvil Broadcast Tower 2
The tower is located on a guard tower in Ultramax Spire. See the map below for the exact location. To reach the tower, use the concrete square on the north side of the tower to jump to the pipes. Once on the pipes, follow the path up to reach the top of the broadcast tower. Sabotage the broadcast tower to complete the challenge.
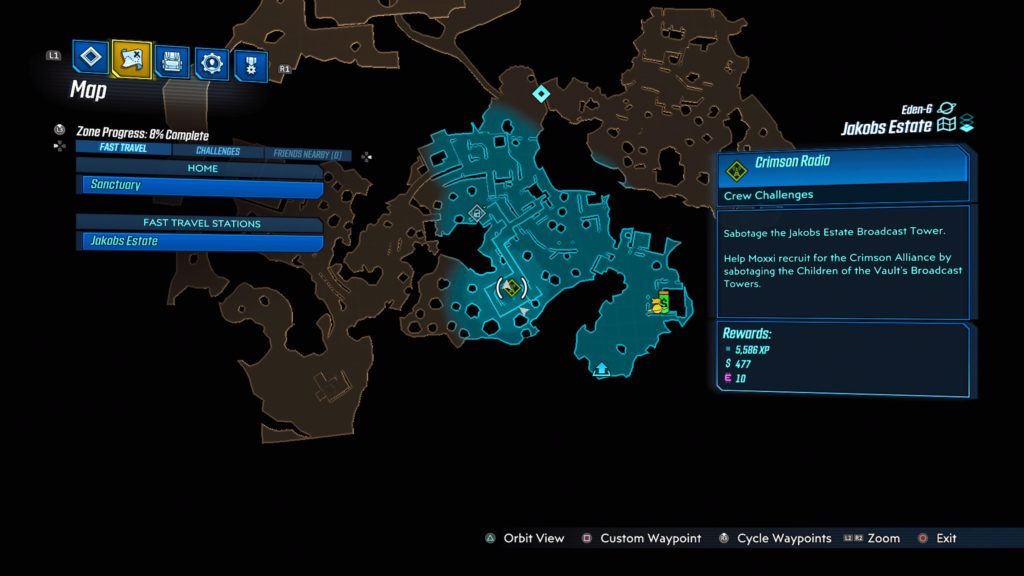
Jakobs Estate
Jakobs Estate Broadcast Tower
This broadcast tower is located in Leery Hamlet directly west of the fast travel station. See the map below for the exact location.
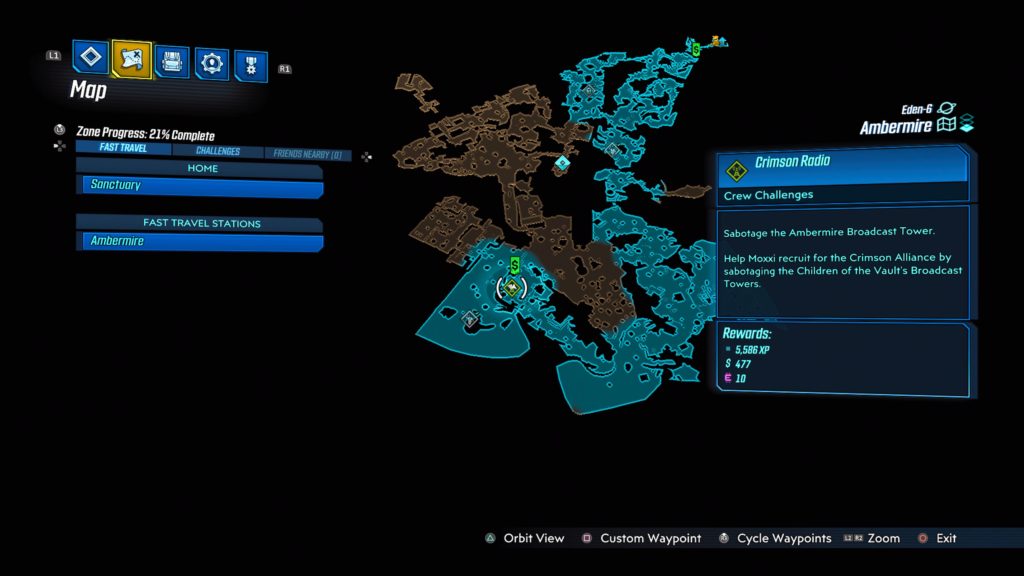
Ambermire
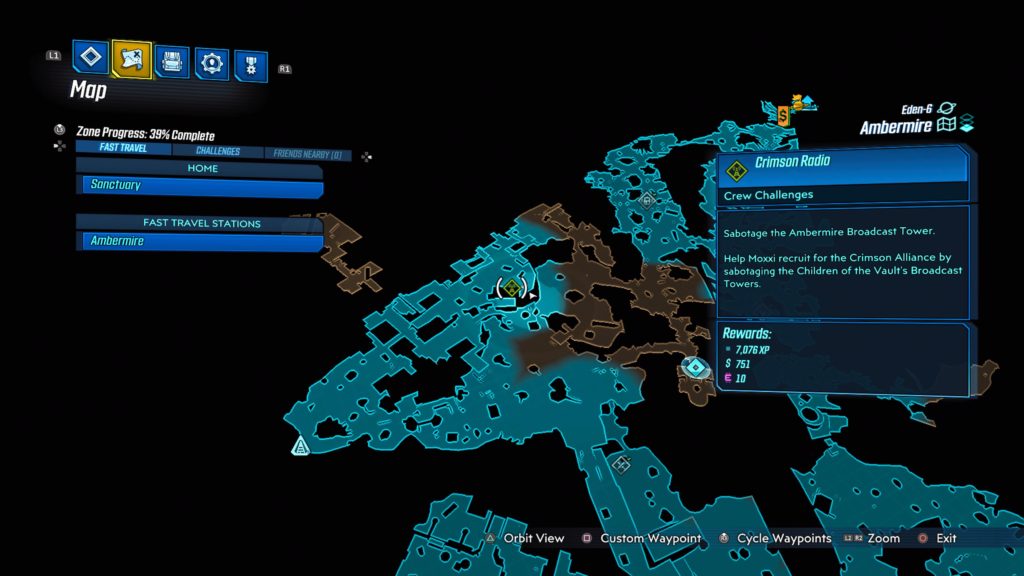
Ambermire Broadcast Tower
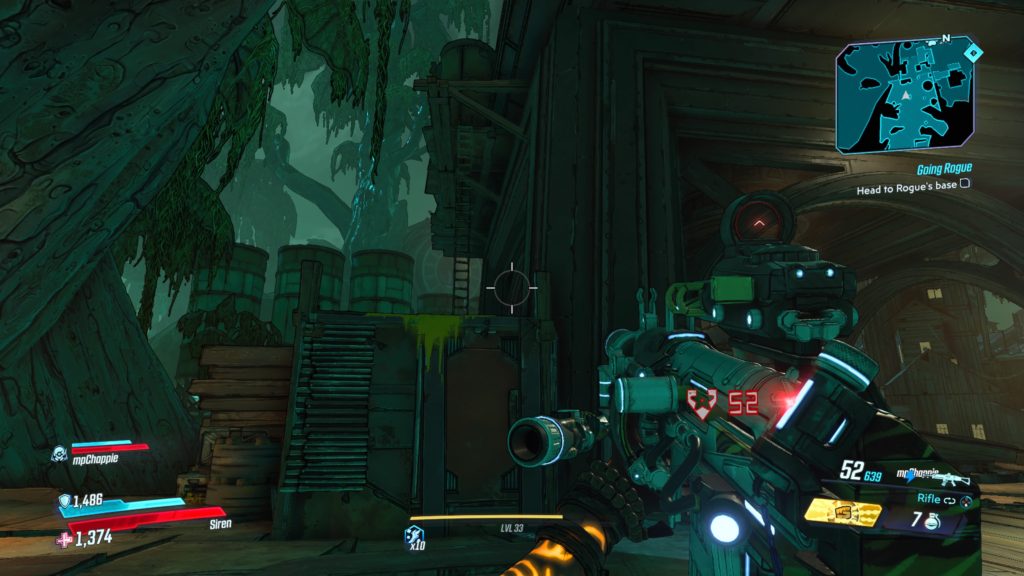
The broadcast tower is located on a platform in the middle of a tall tower between Tig’s Big Rig and The Mudneck’s Hideout. See the above map for the exact location.
To reach the top of the tower, jump onto the metal crate with yellow paint on it and then jump to the ladder straight ahead.
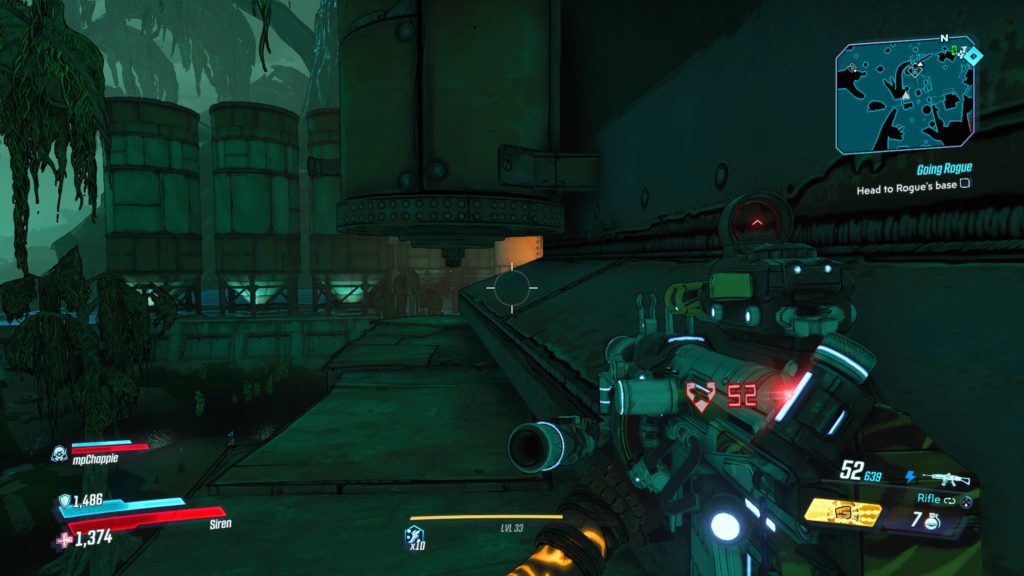
Then crouch under the cylinder and follow the path until you reach the gap.
This next part is a little tricky because the building will knock you off while you try jumping to the ladder in front of you. Stand as close to the edge on the left side as humanly possible and then do a slight run and jump.
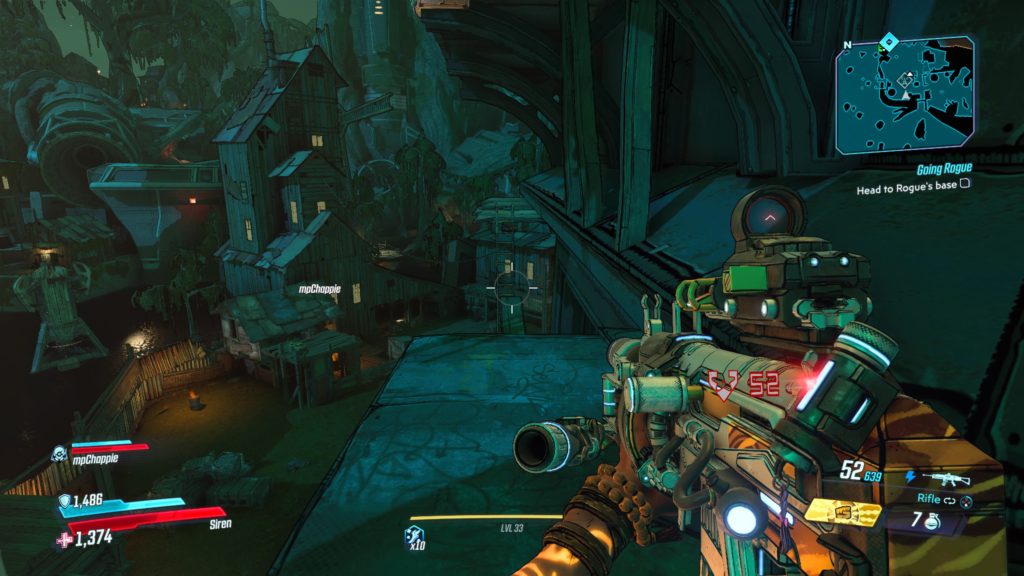
After you make it to the other side, you will need to jump onto the large pipe and then to the roof above the ladder you just climbed up.
Once you make it up here, the rest will be a breeze. Just follow along the edge of the roof to find the radio and sabotage it.
Ambermire Broadcast Tower 2
This broadcast tower is on the roof of a barn with Eden-6 written on the side in Soggybog Rigs. It’s located on the northwestern side of the map.
To reach the top, climb up the irregular rock structure on the far northern side of the camp diagonally from a cluster of red buildings.
Once on the rock, jump onto the slanted roof and head to the peak.
You will then need to jump onto the next roof to reach a large pipe.
Walk along the pipe and take a left when the pipe forks.
You will see the barn with Eden-6 written on the side to your left, which is your ultimate goal to reach. When the pipe ends, jump onto the small slanted section of the roof and climb down the other side. Standing on the left side of the pipe coming out of the roof, jump across to the next portion of the roof.
Head to the satellite dish in front of you and carefully jump down onto the small wooden platform to sabotage the radio.
To reach this claptrap, start at the Catch-A-Ride nearest the drop pod facing north. Follow the road east until you reach a red barn. From the red barn, keep following the road north until you come across an old shack partially submerge in water with two washing machines in front. The claptrap will be caught in one of the giant tree roots behind (west) the shack. Just follow the skidmark down!
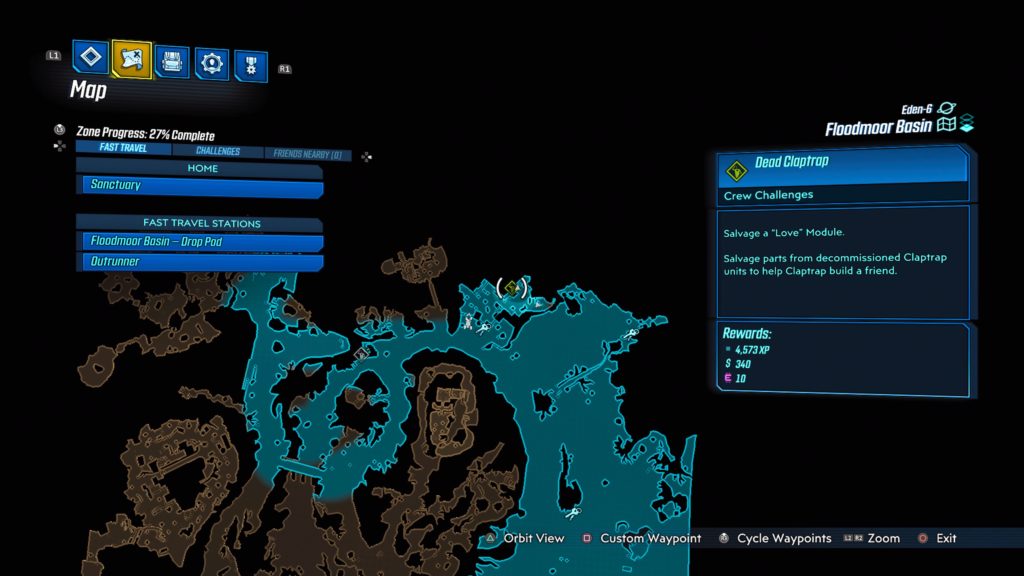
“Love” Module
This claptrap is located under a deck next to a building with a water tower on the top in a logging complex. You can find this complex on the northeastern side of the map near a Catch-A-Ride. See the map below for the exact location.
The Anvil
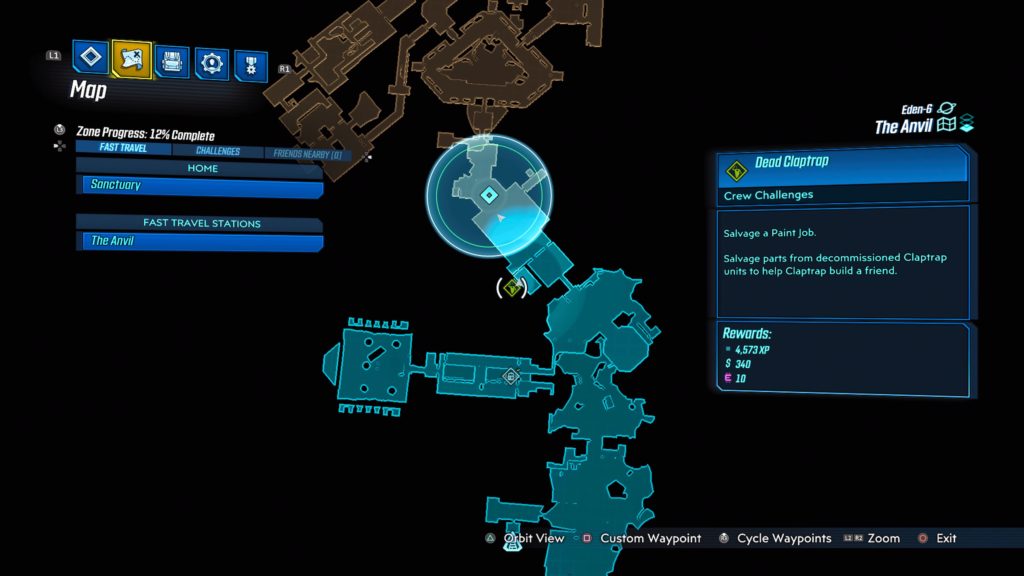
Hector’s Lament (Paint Job)
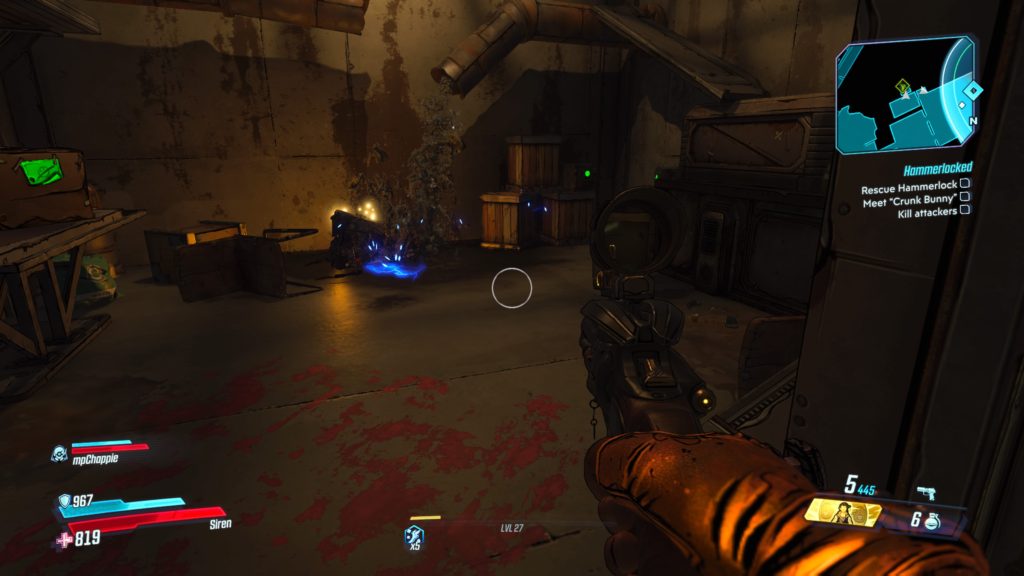
This claptrap is located behind a reception desk in the prison with the image of the Warden painted on it in Hector’s Lament. To reach claptrap, you will need to enter the big warehouse-like room after the reception area and turn left to find the door leading to the receptionist’s room. Claptrap is laying in water being electrocuted. See the map below for the exact location.
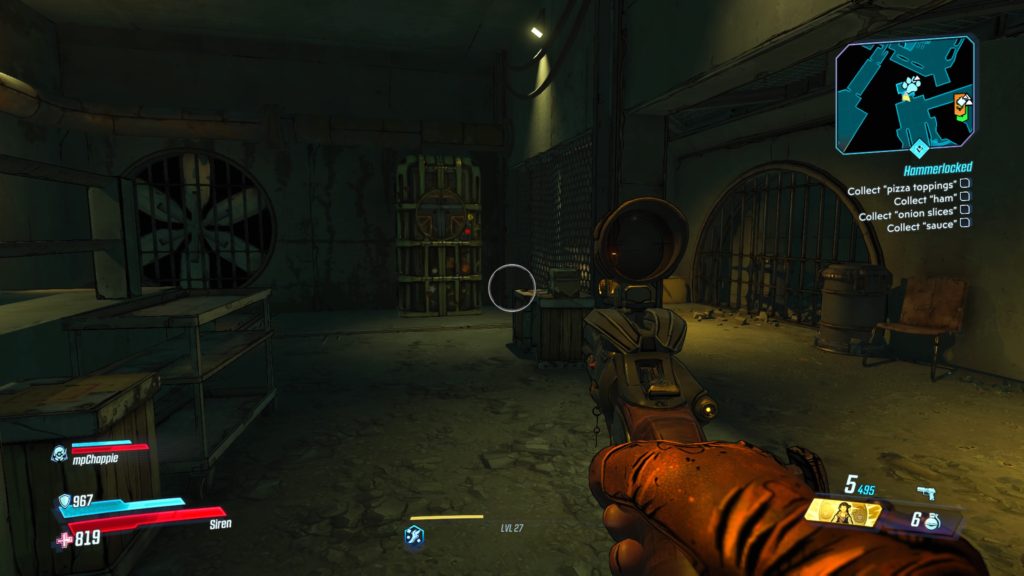
The Yard (Hairpiece)
This claptrap is located in a building on the left side of the Yard where you pick up the On the Blood Path side mission. Head to the north side of that building to find claptrap on a slab in a room. See the map below for the exact location.
Jakobs Estate
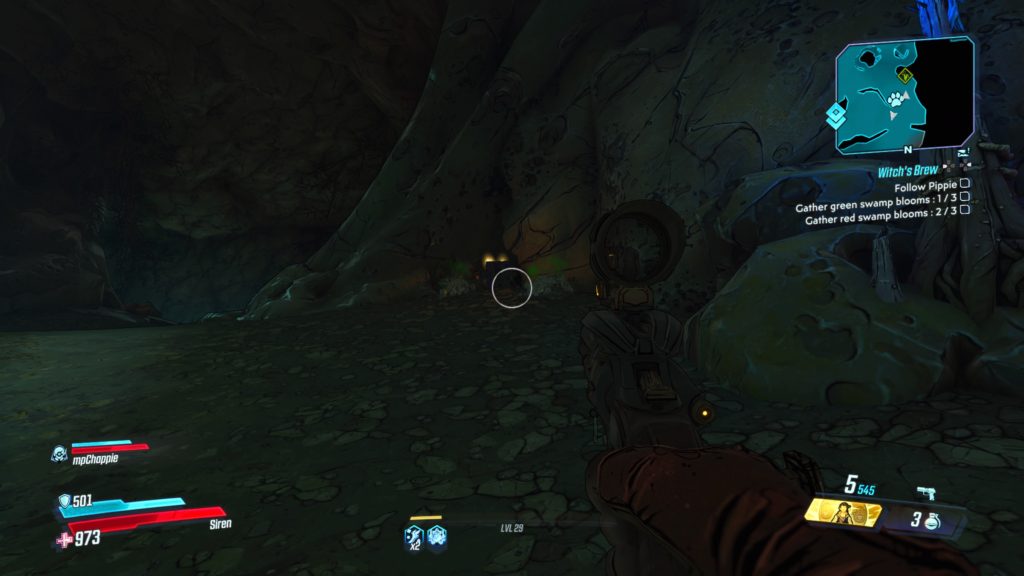
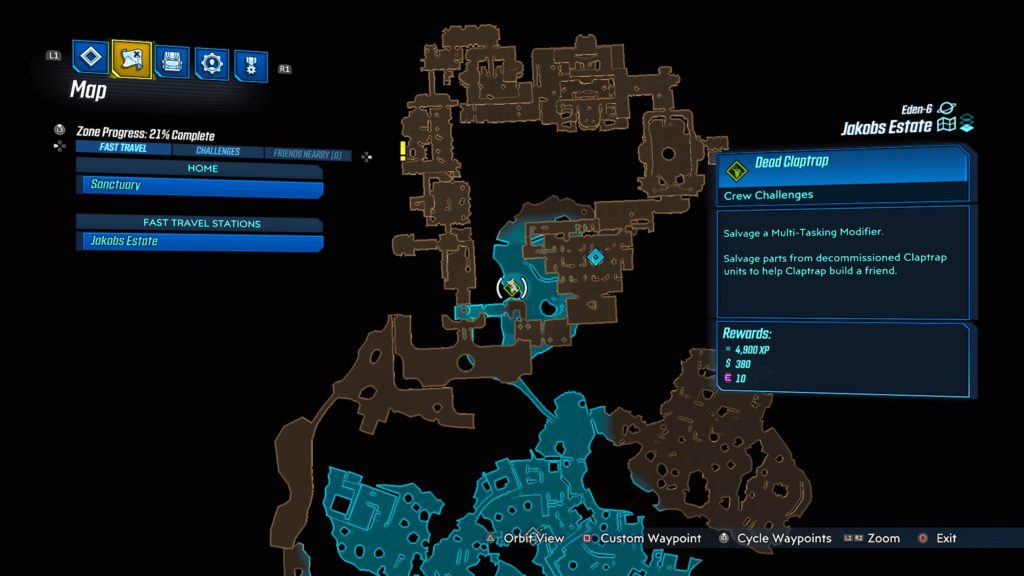
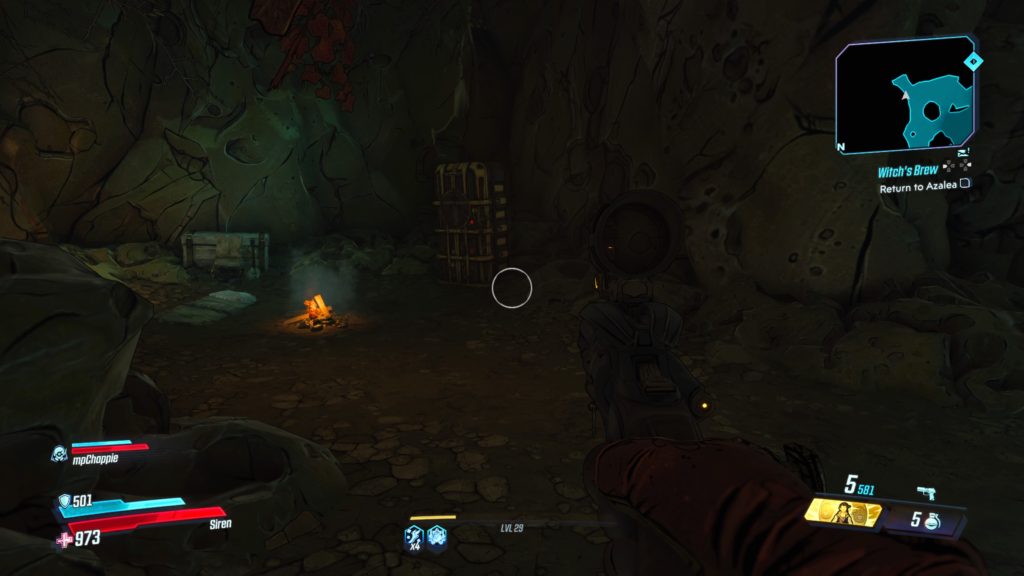
Grotto (Multi-Tasking Modifier)
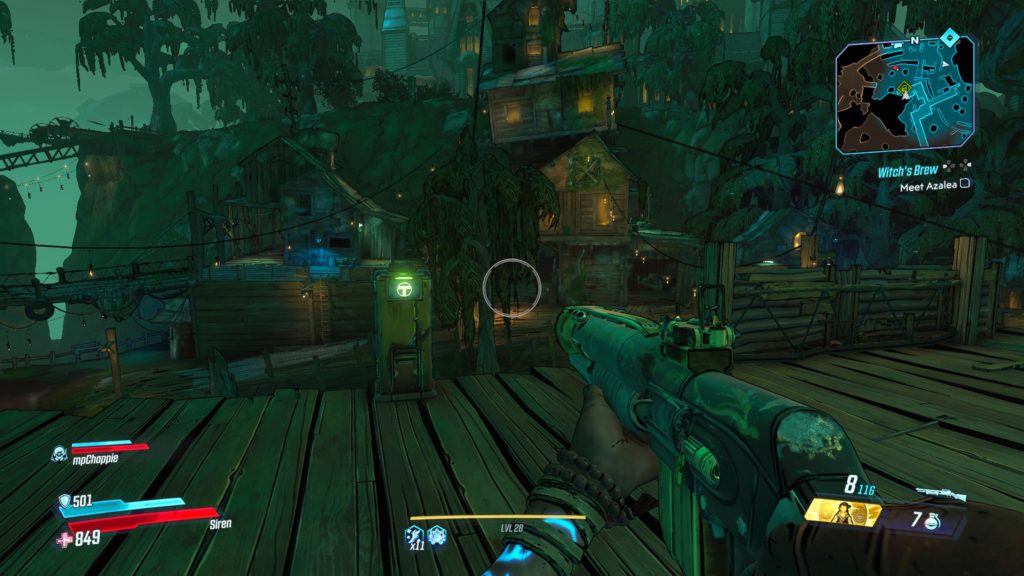
This claptrap is located in the Grotto surrounded by bone piles. You will come across it during the Witch’s Brew side mission. See the map below for the exact location.
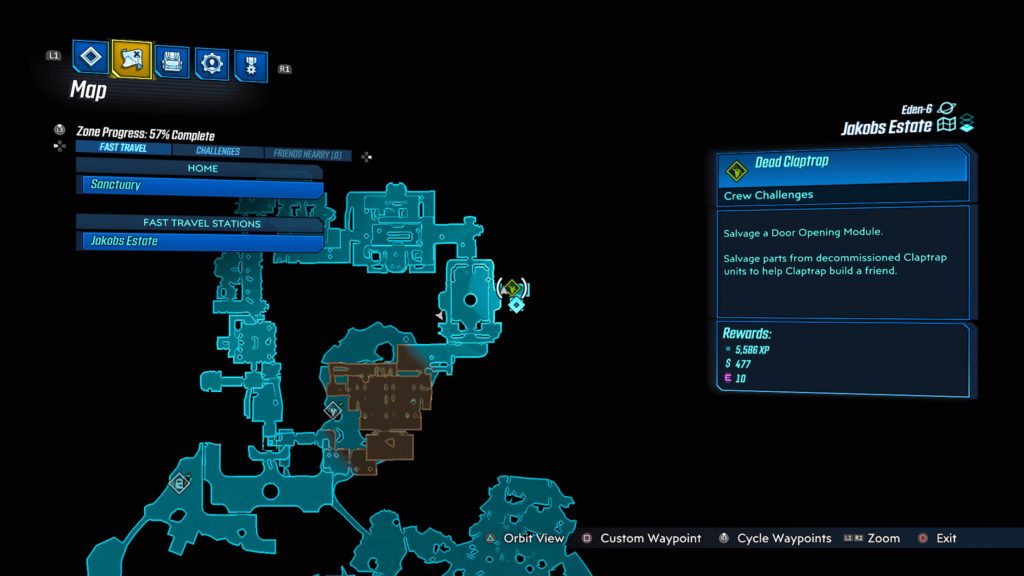
Ancestor’s Hall (Door Opening Module)
This claptrap is located in the hallway leading to the Servant’s Quarters in Ancestor’s Hall. You will come here during the Sacked side mission. See the below map for the exact location.
Voracious Canopy
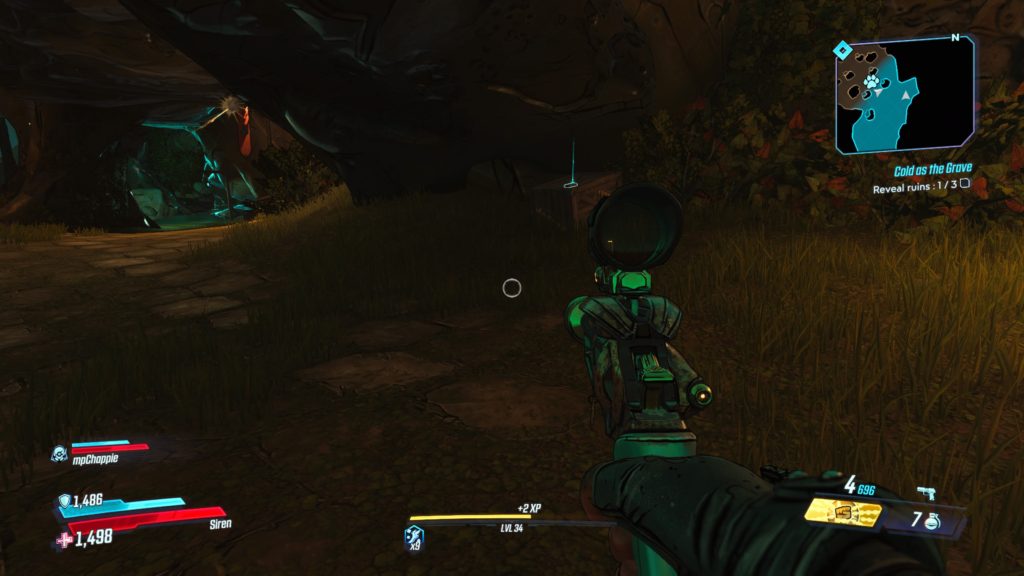
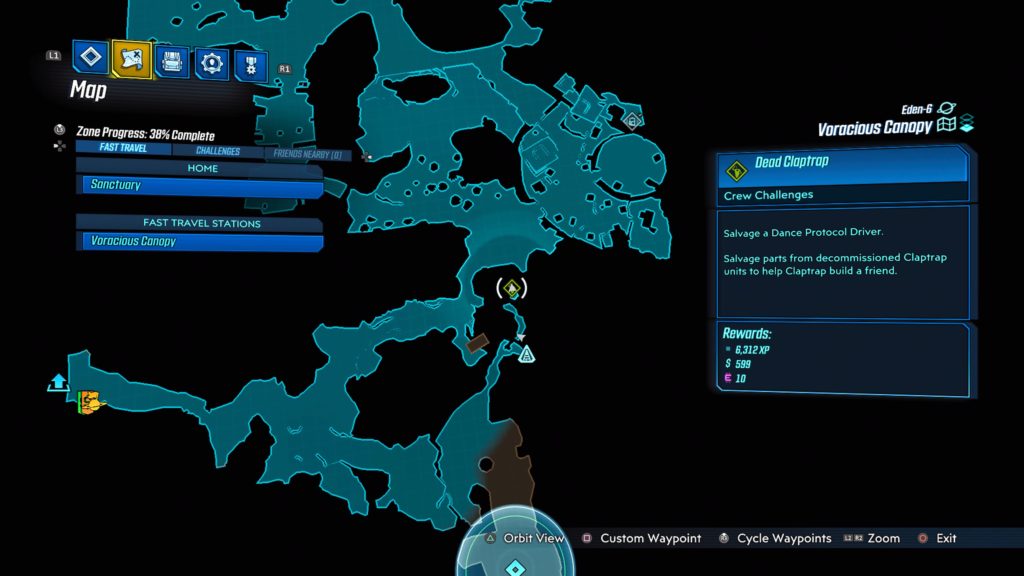
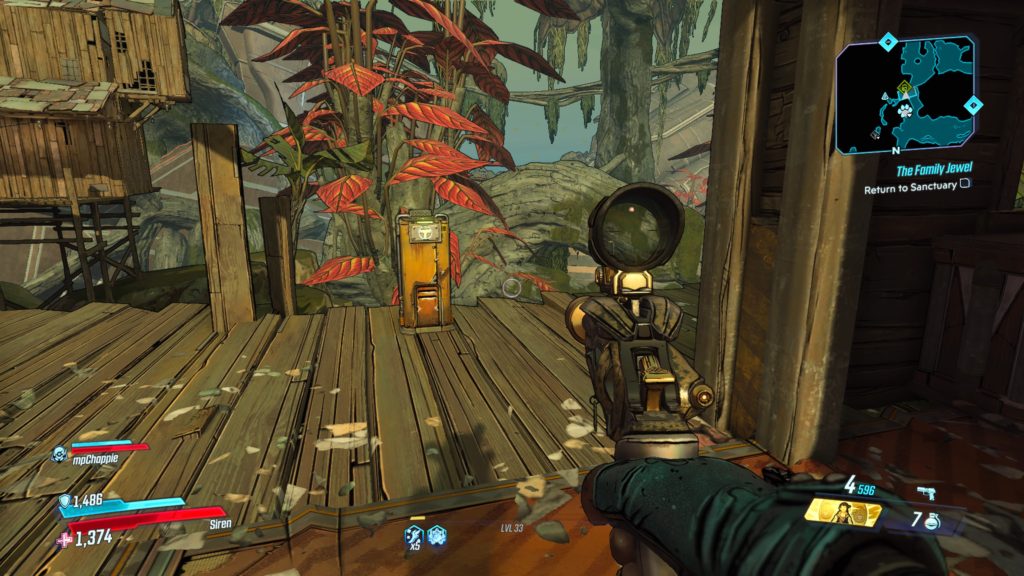
The Green Labyrinth (Dance Protocol Driver)
This claptrap is located in the middle of the map just before the Wreck of the Family Jewel. It can be found in the back of a cave. See the below map for the exact location.
Ambermire
The Moist Hoist (Long Long Term Memory)
This claptrap is in the Moist Hoist near the middle of the map, southwest from the fast travel station. He will be stuck in some gunk attached to a blue wooden building.
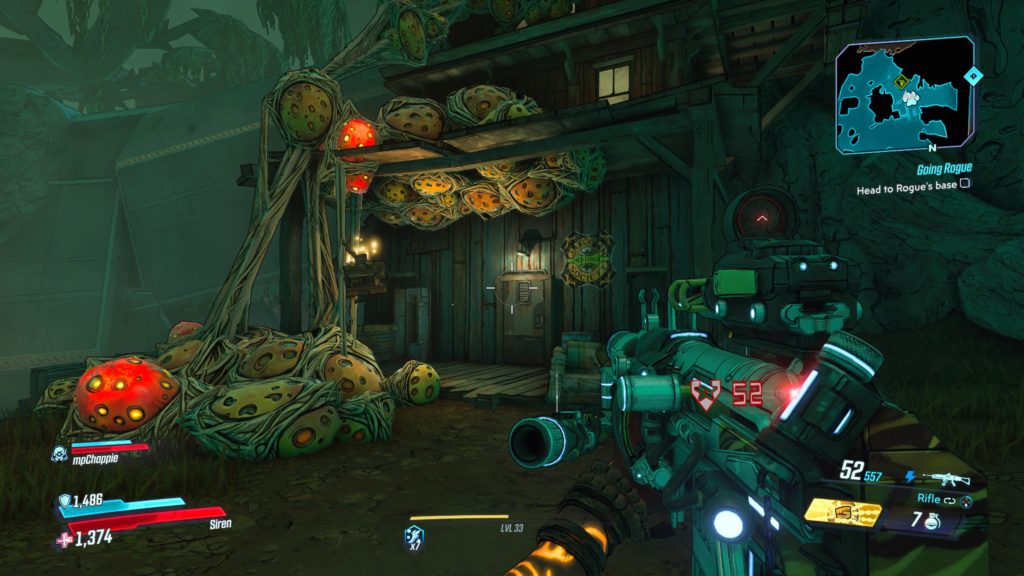
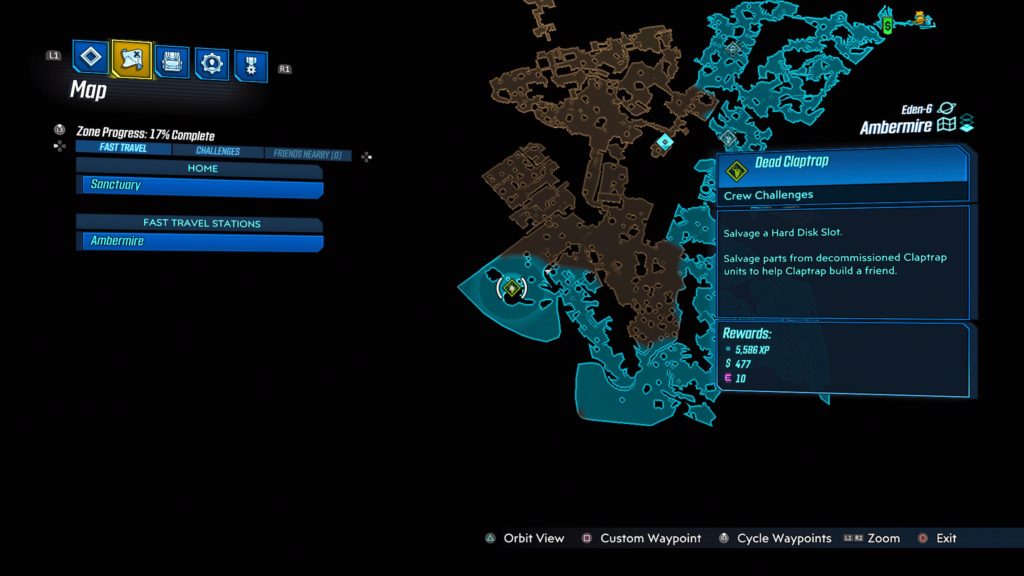
Tig’s Big Rig (Hard Disk Slot)
This claptrap is near a broken metal machine in Tig’s Big Rig located in the southwestern part of the map. See the below map for the exact location.
Blackbarrel Cellars
Premium Casks (Antenna Accessory)
This clap trap is locate in the first room that contains enemies on the lower level laying on a table. See the map below for the exact location.
This log is located on a wooden platform overlooking a swamp. See the map below for the exact location. To reach it, start at the Catch-A-Ride nearest the drop pod facing north. Follow the road east until you reach a red barn. From the red barn, head west to the rundown looking settlement. You will find the wooden platform with the log there.
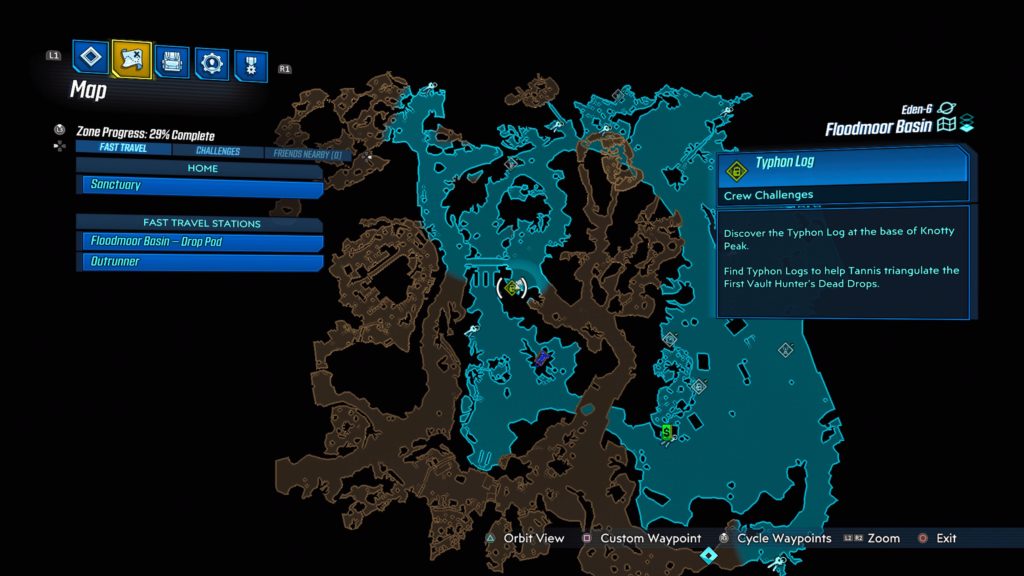
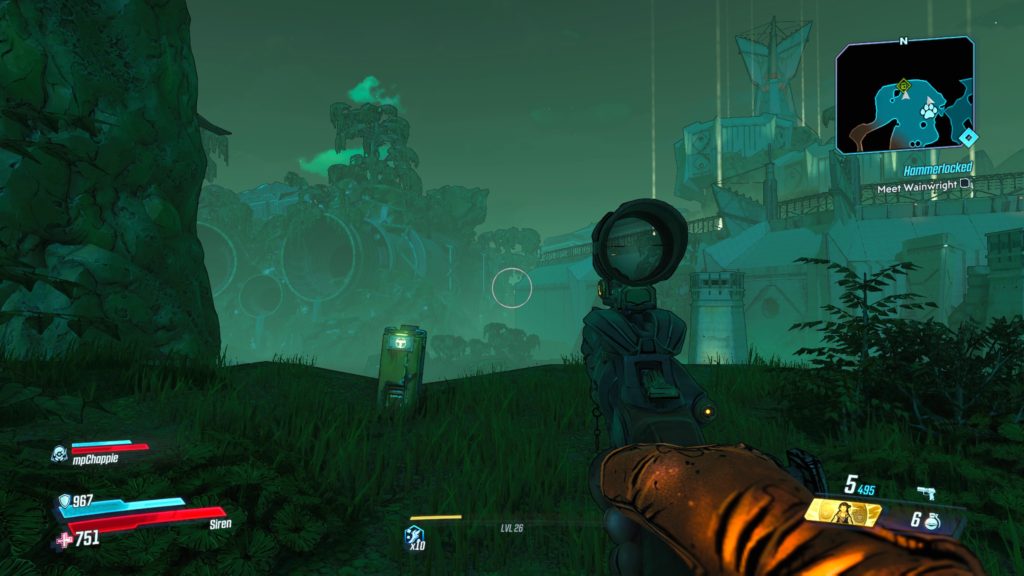
Base of Knotty Peak
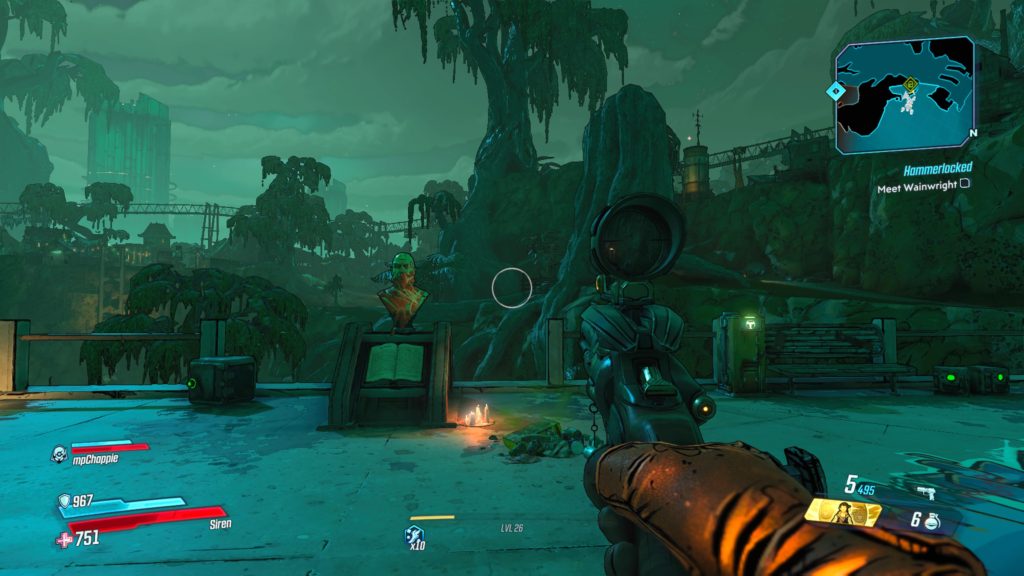
This log is located next to a statue in the middle of the map near Knotty Peak. See the map below for the exact location.
Primeval Grotto
This log is located on a cliffside in Primeval Grotto at the most northwestern point on the map. See the map below for the exact location.
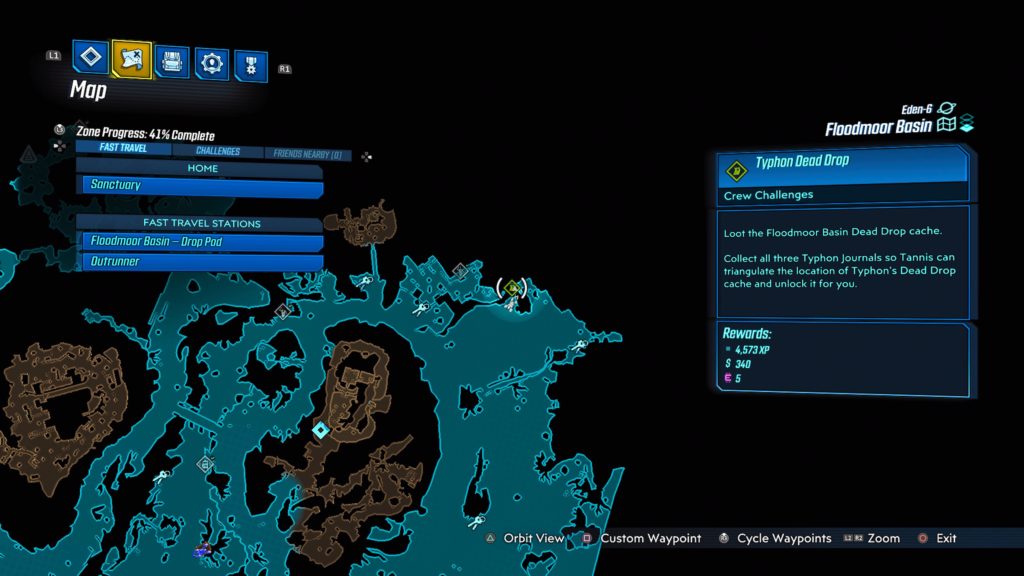
Floodmoor Basin Dead Drop Cache
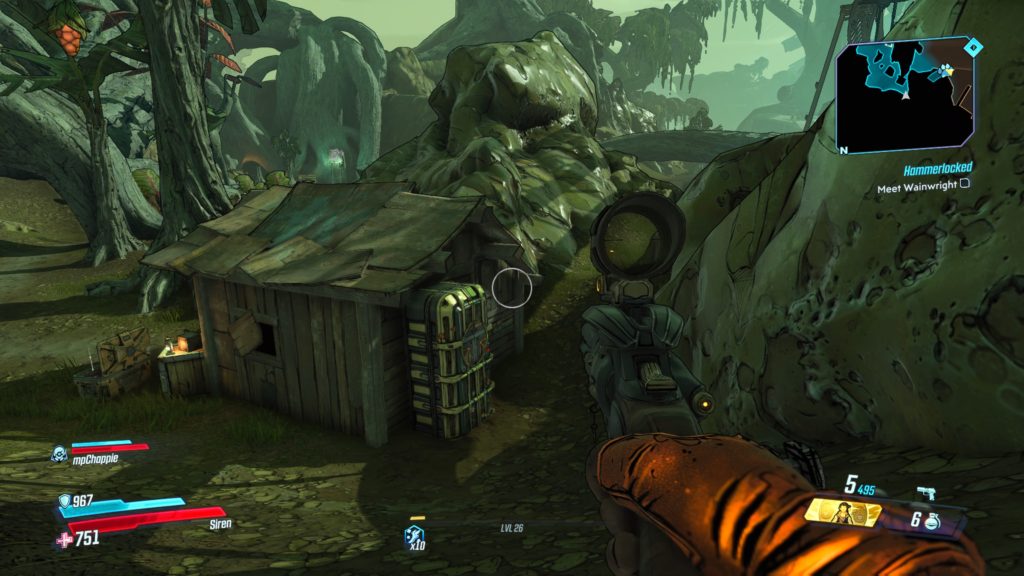
This cache is located behind a wooden shack on the northeastern section of the map. See the map below for the exact location.
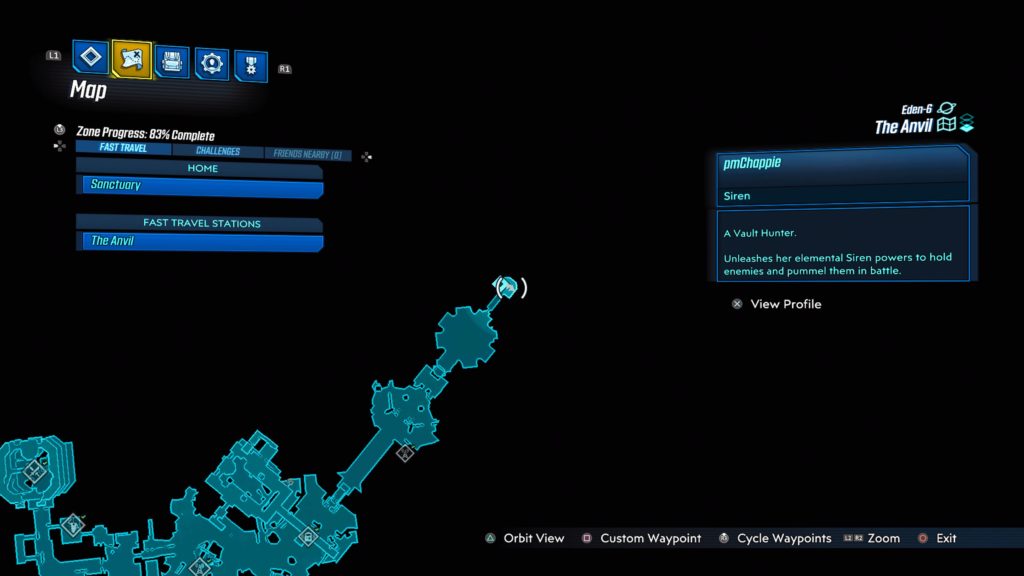
The Anvil
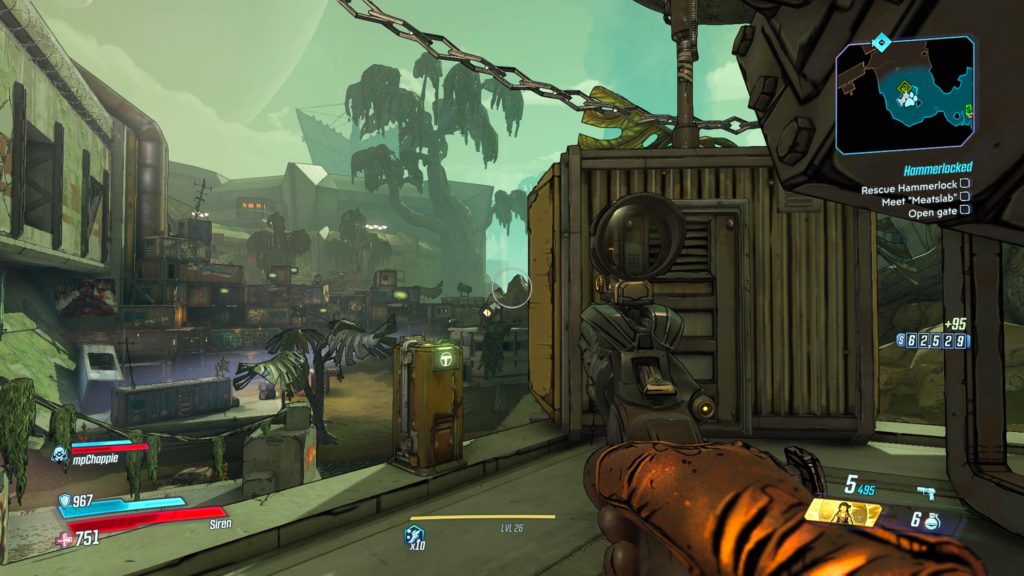
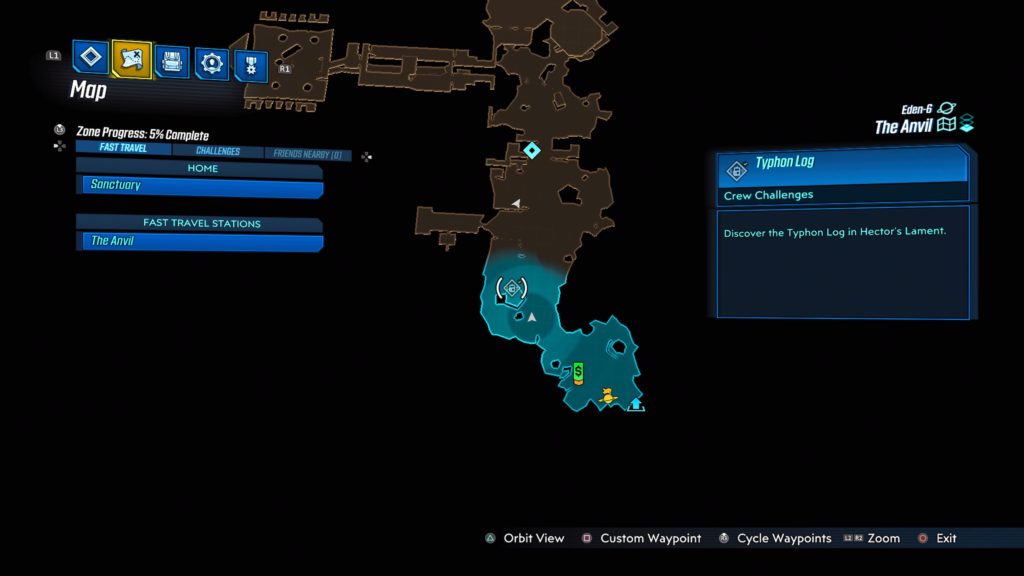
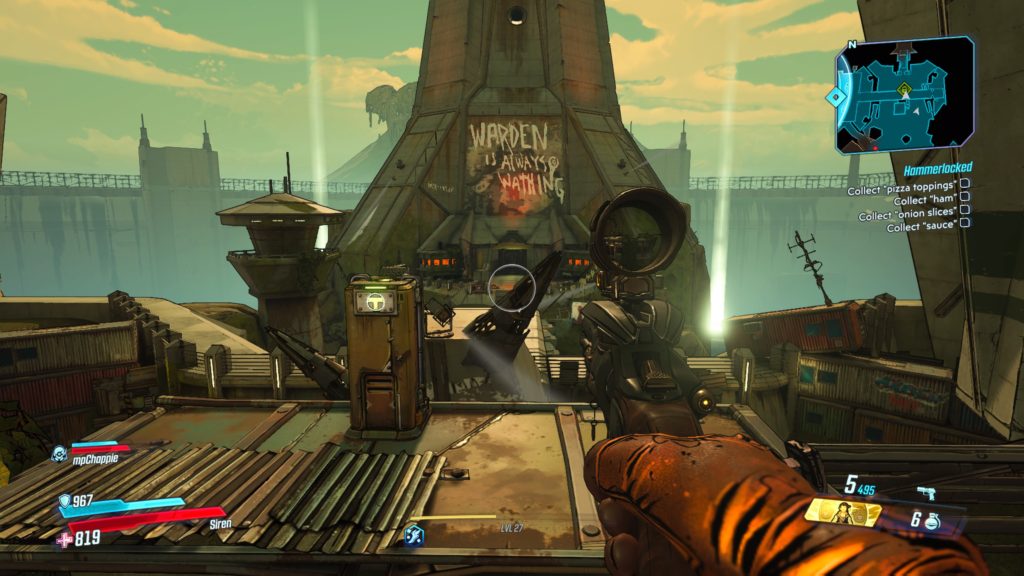
Hector’s Lament
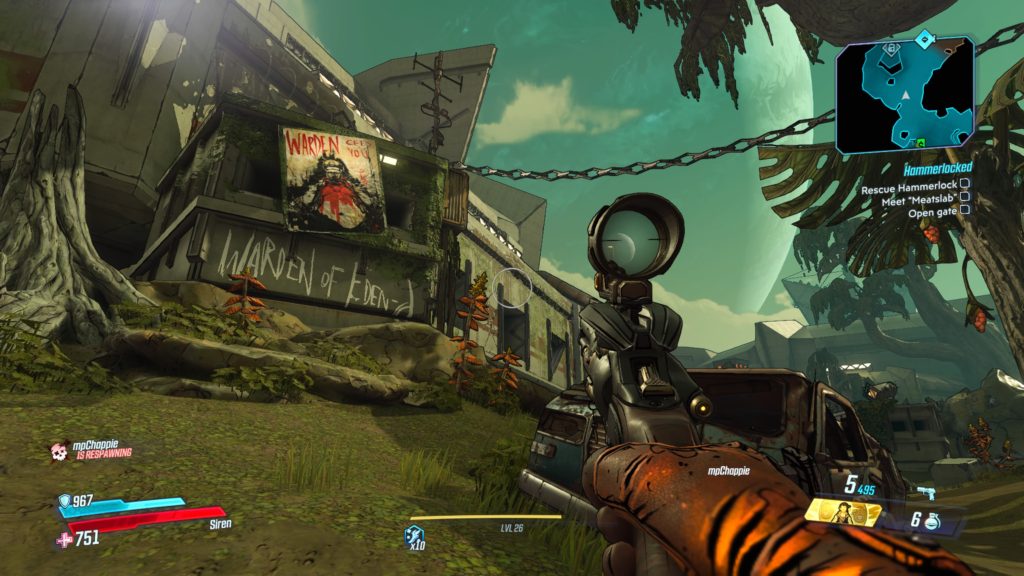
This log is located on top of the first structure you come across in the Anvil. It will have the words “Warden on Eden-6” written in white on the front. You can climb to the top of it from the back of the structure. See the map below for the exact location.
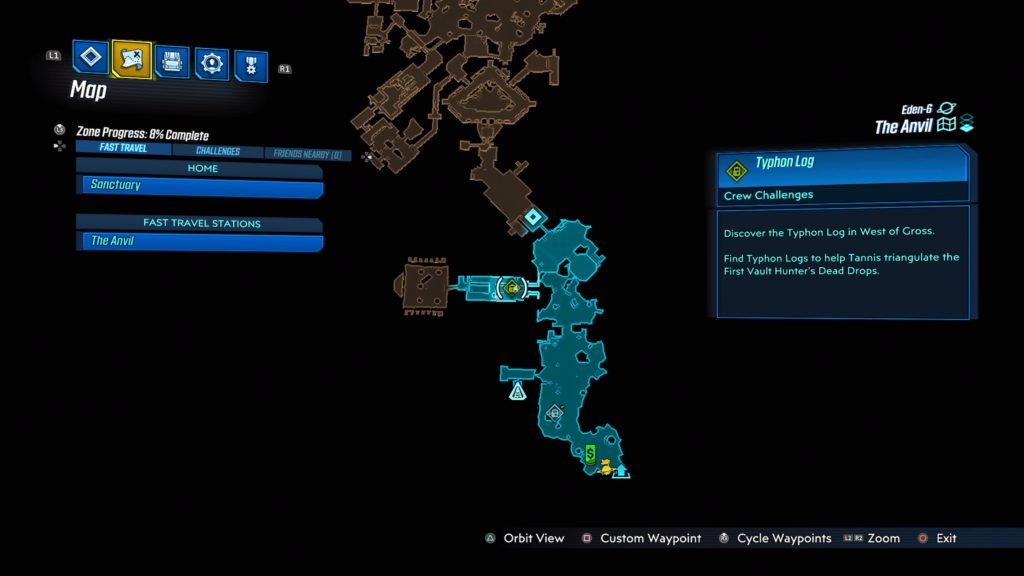
West of Gross
This log is located in West of Gross which is a sewer like place near where you meet up with the Brick. See the map below for the exact location.
The Yard
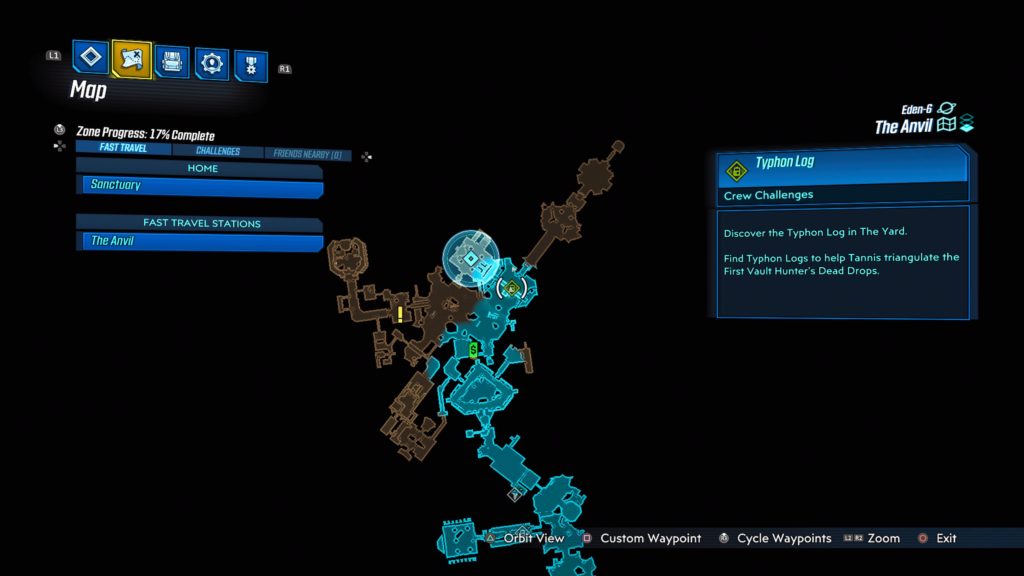
This log is located in The Yard on top of the walkway near the Warden’s room on the northeastern section of the map. See the map below for the exact location.
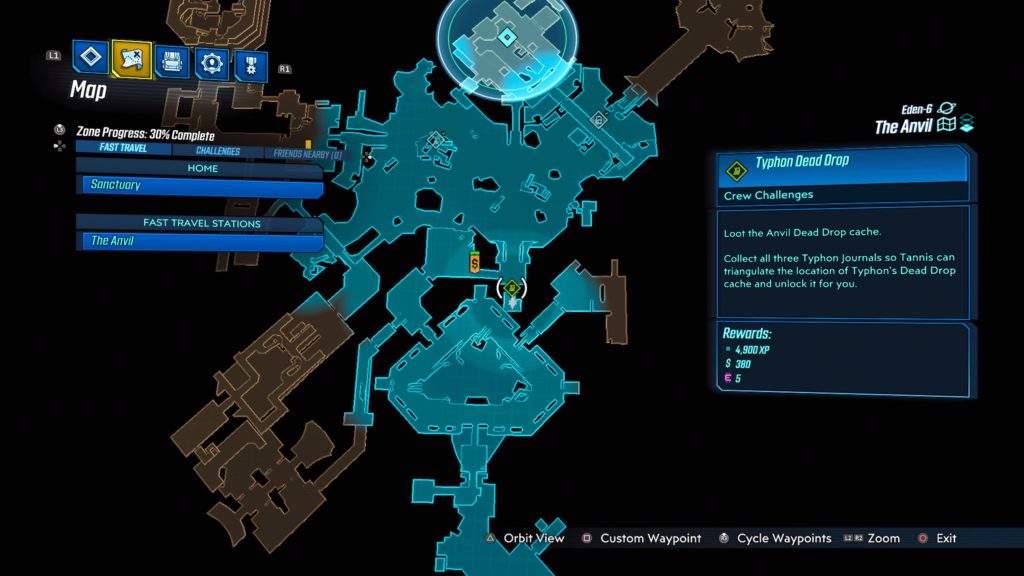
The Anvil Dead Drop Cache
This cache is located at the entrance to The Yard (next to where you meet Tina). When you reach The Yard, turn around and drop down the ladder to enter a bunker containing the cache. See the map below for the exact location.
Jakobs Estate
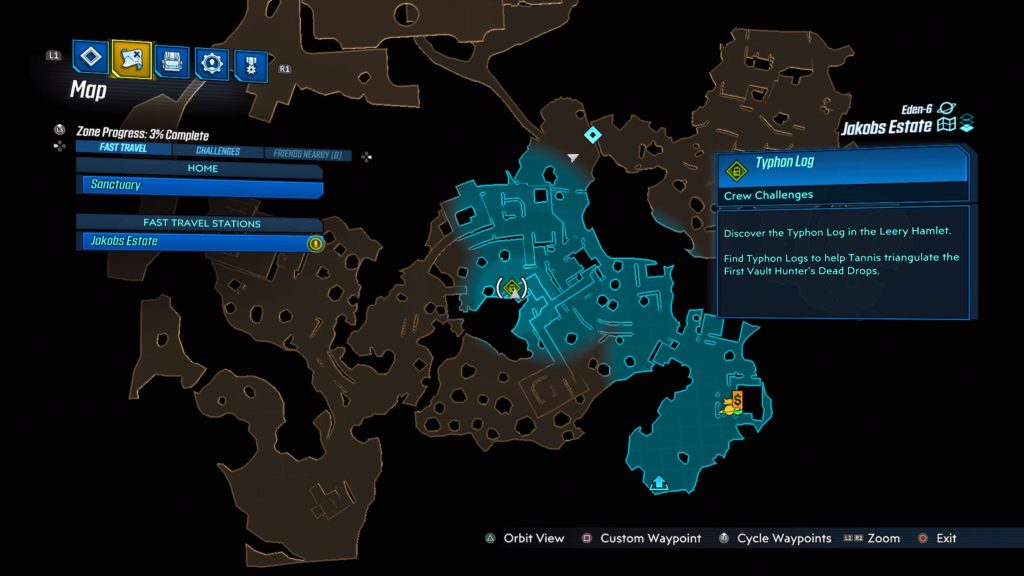
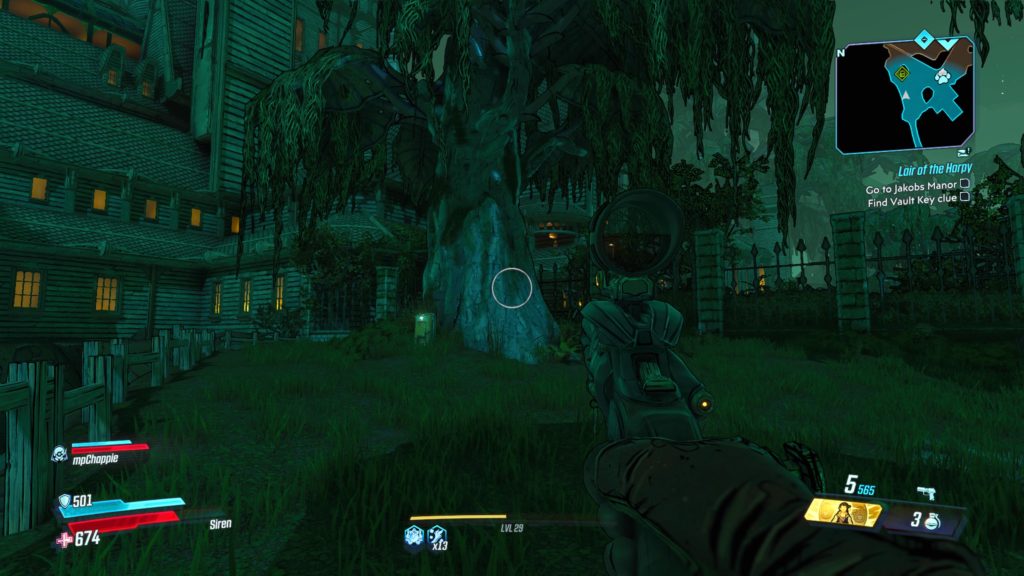
Leery Hamlet
This log is located near the center of Leery Hamlet on a deck northwest of the fast travel station. See the map below for the exact location.
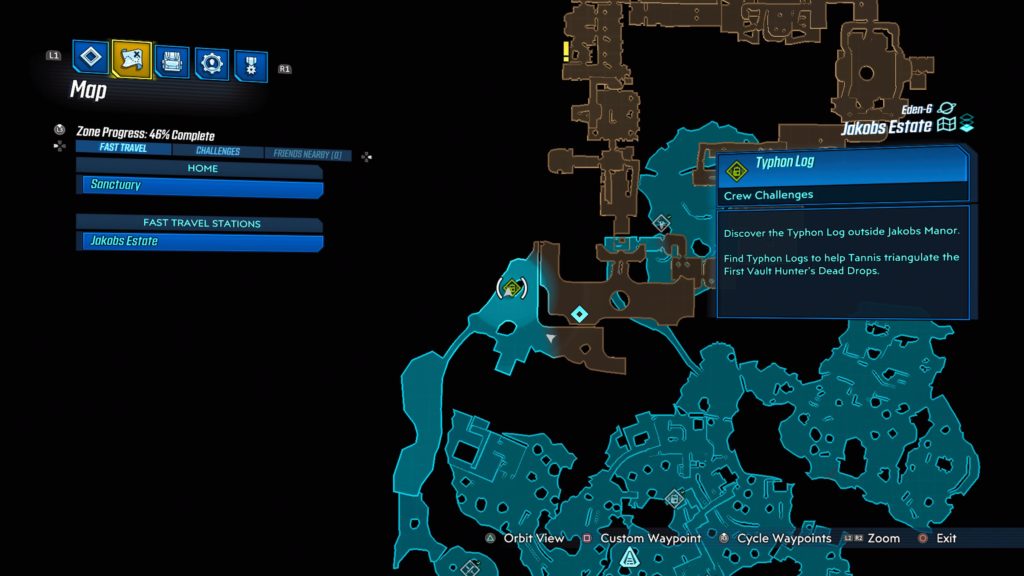
Outside Jakobs Manor
This log is located next to the giant tree by Jakobs Manor near the Servant’s Lift. See the map below for the exact location.
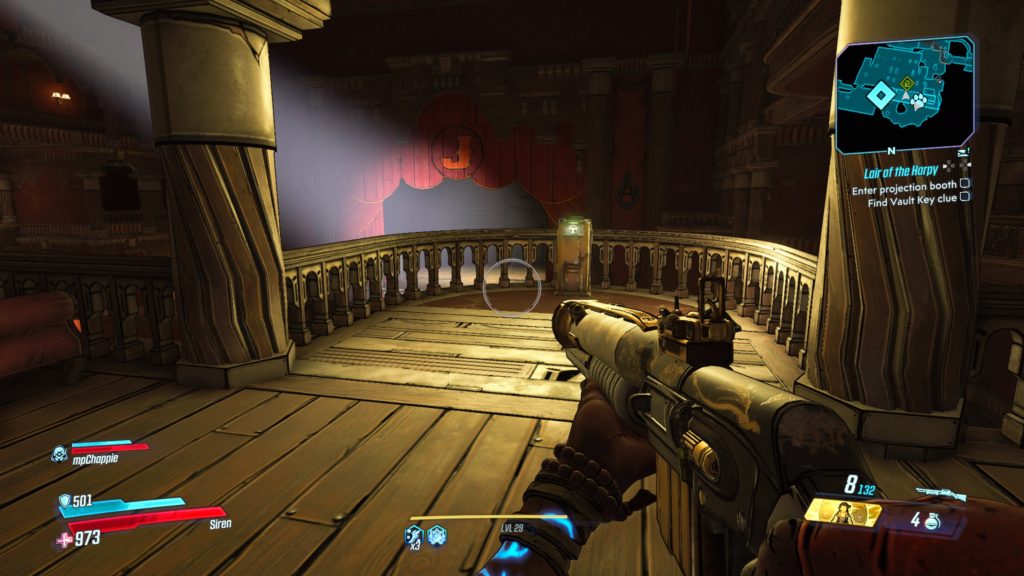
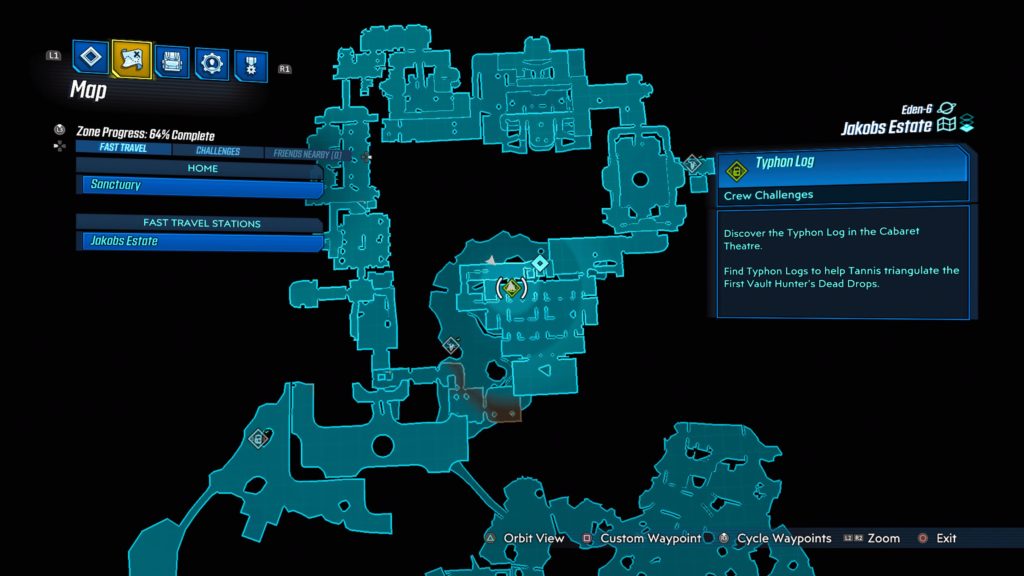
The Cabaret Theatre
This log is located on the top floor of the theater in Jakobs Manor. See the below map for the exact location.
Jakobs Estate Dead Drop Cache
The cache is located in the back of the Grotto on the eastern side. See the map below for the exact location.
Voracious Canopy
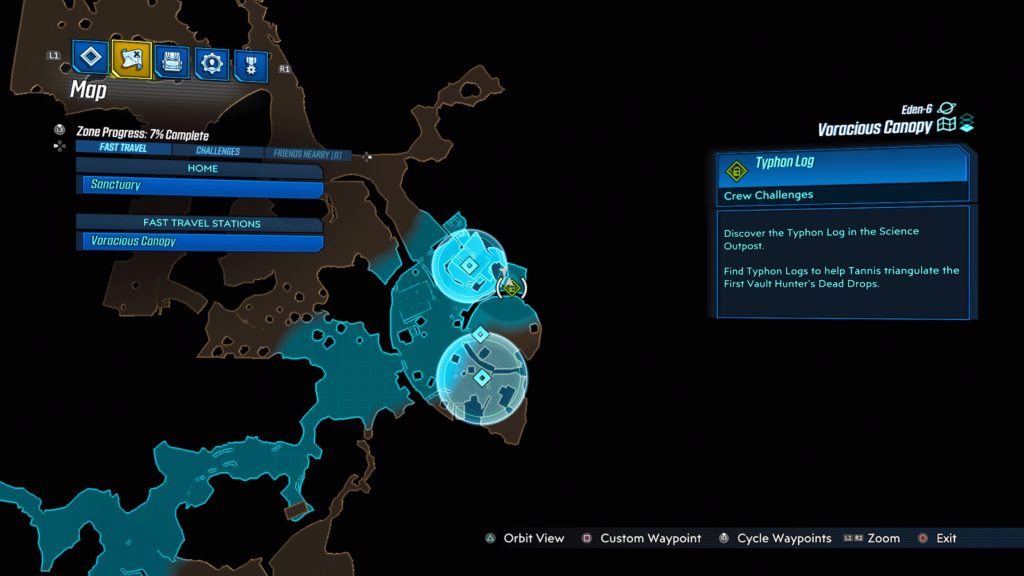
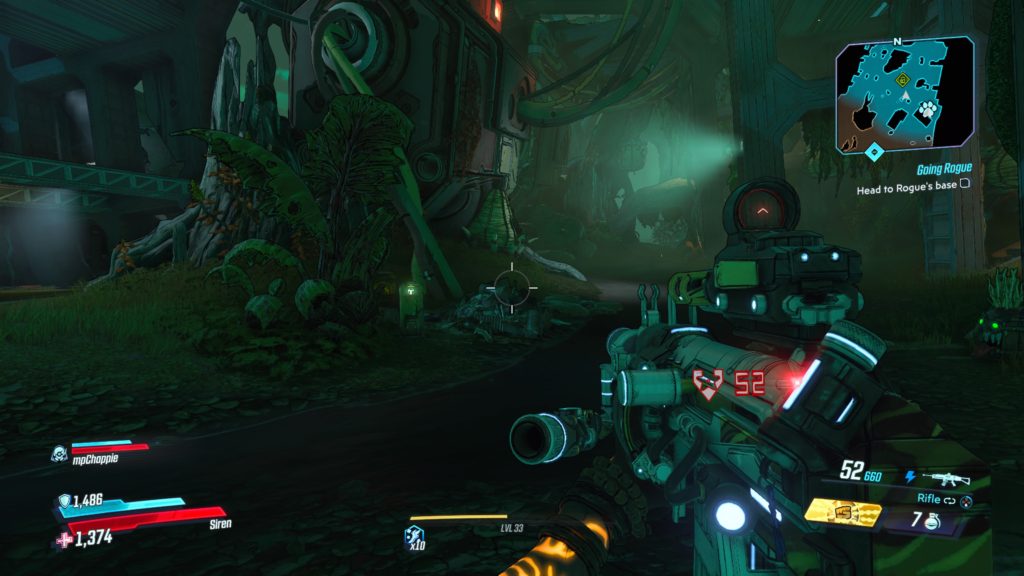
Science Outpost
The log is located in the northern part of the Science Outpost overlooking The Terradome. See the below map for the exact location.
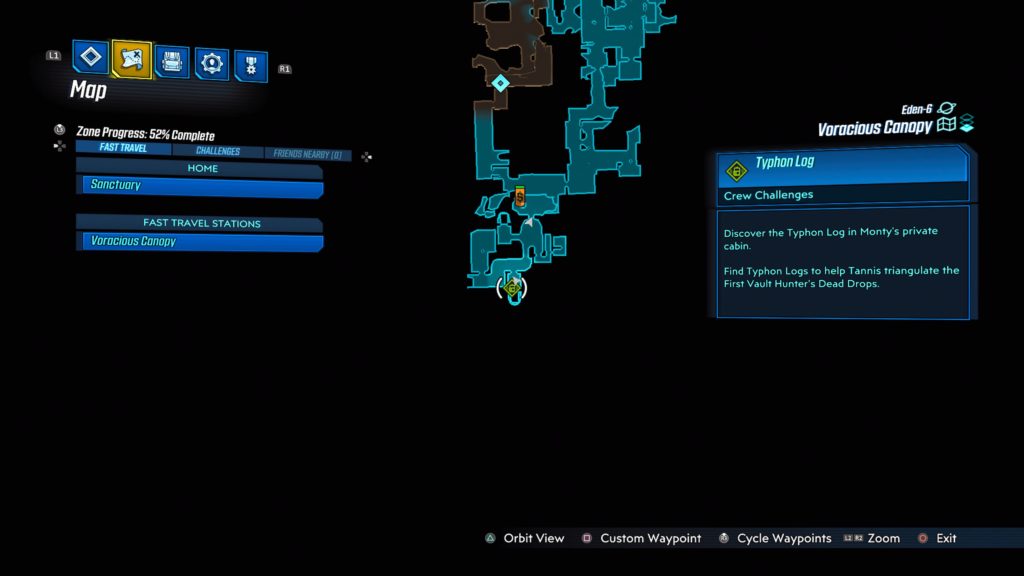
The Green Labyrinth
This log is located high up on at deck next to a shack in the middle of the map. To reach it, you will need to jump to the middle platform of the structure then jump onto the rocks in the east direction to find the path forward. See the below map for the exact location.
Monty’s Private Cabin
This log is located in Monty’s Private Cabin in a bedroom of the Monty’s Den part of the ship (its located to the south of the map). See the below map for the exact location.
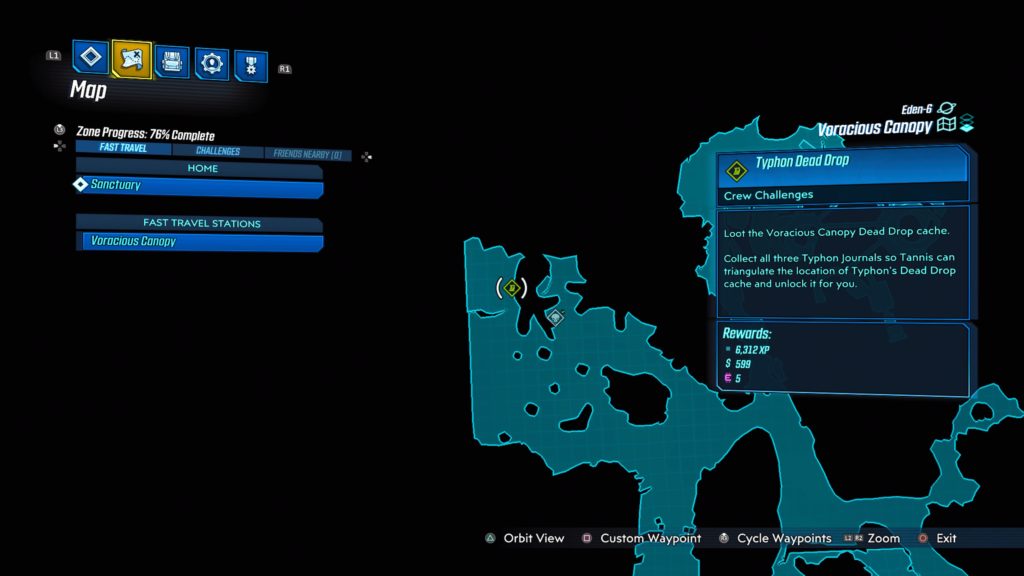
Voracious Canopy Dead Drop Cache
This cache is located in the northwestern region of the map, north of the Jabbermogwai Legendary Hunt. See the below map for the exact location.
Ambermire
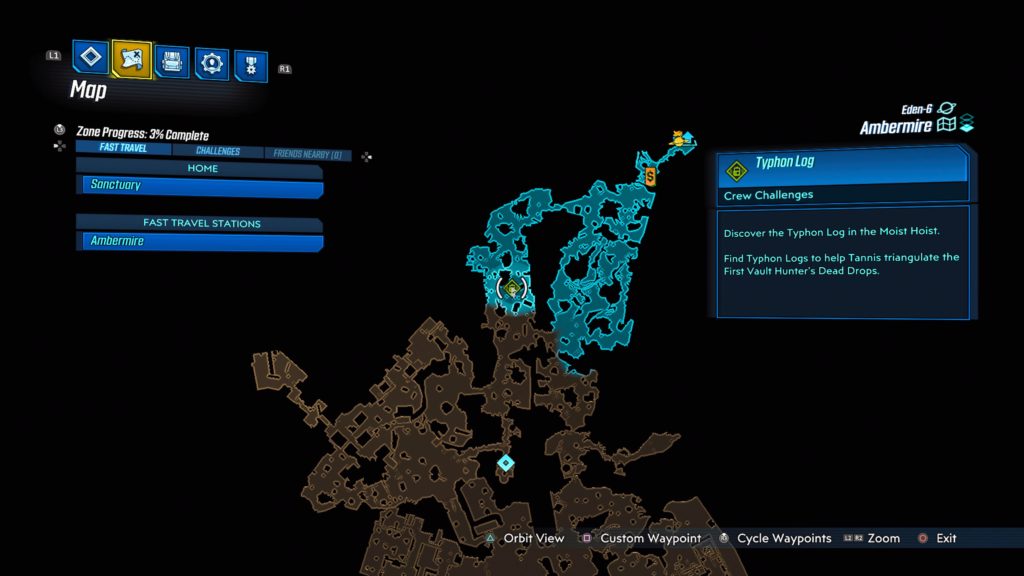
The Moist Hoist
This log is in the Moist Hoist located in the northeastern section of the map, southwest of the fast travel station. See the below map for the exact location.
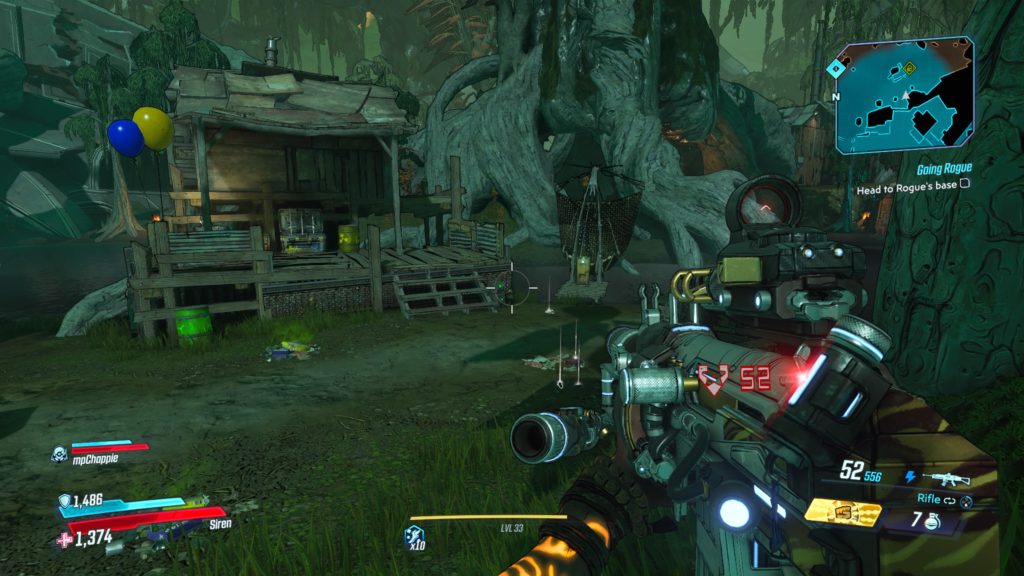
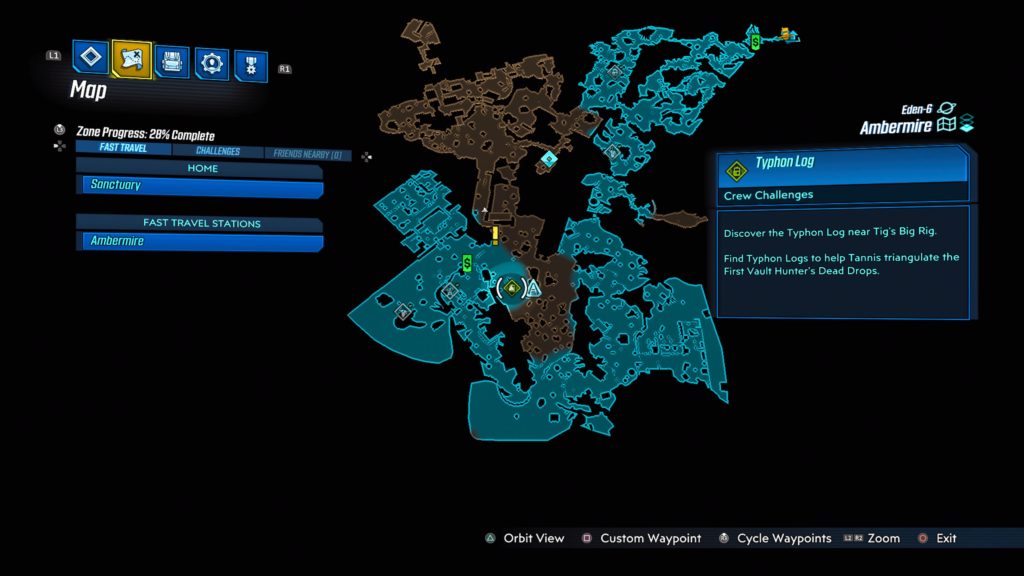
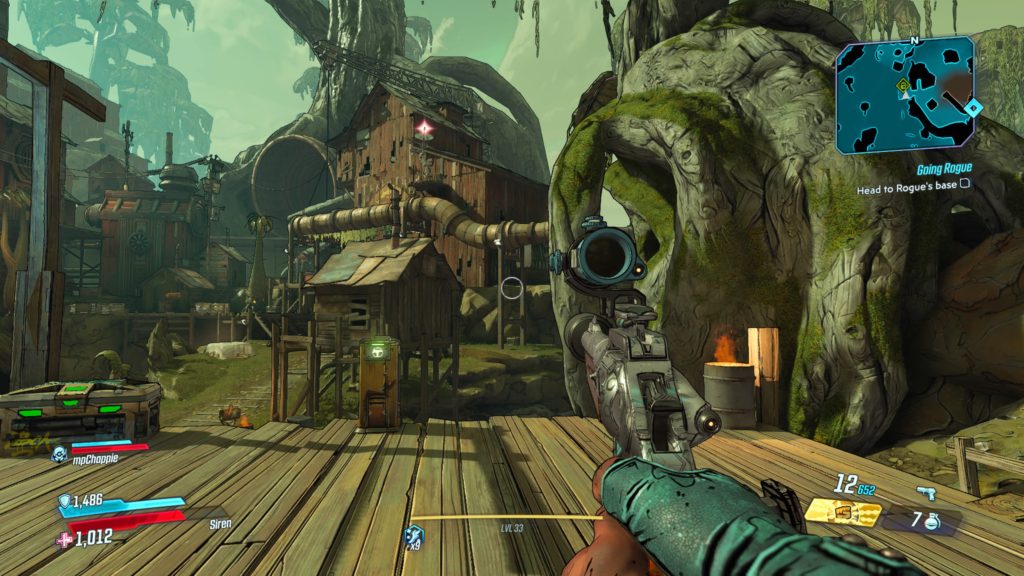
Tig’s Big Rig
This log is located near Tig’s Big Rig in the south-central region of the map. It can be found on a small dock used for fishing right next to a shack with balloons tied to one of the fence posts. See the below map for the exact location.
Near Soggybog Rig
This log is located on a lone raised wooden deck directly south of the Ambermine Broadcast Tower 2. See the below map for the exact location.
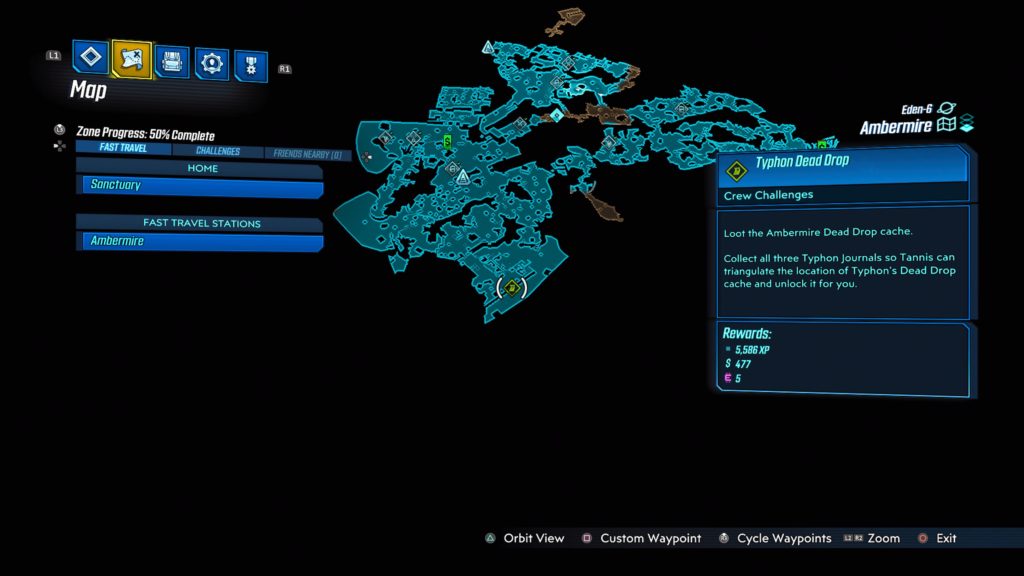
Ambermire Dead Drop Cache
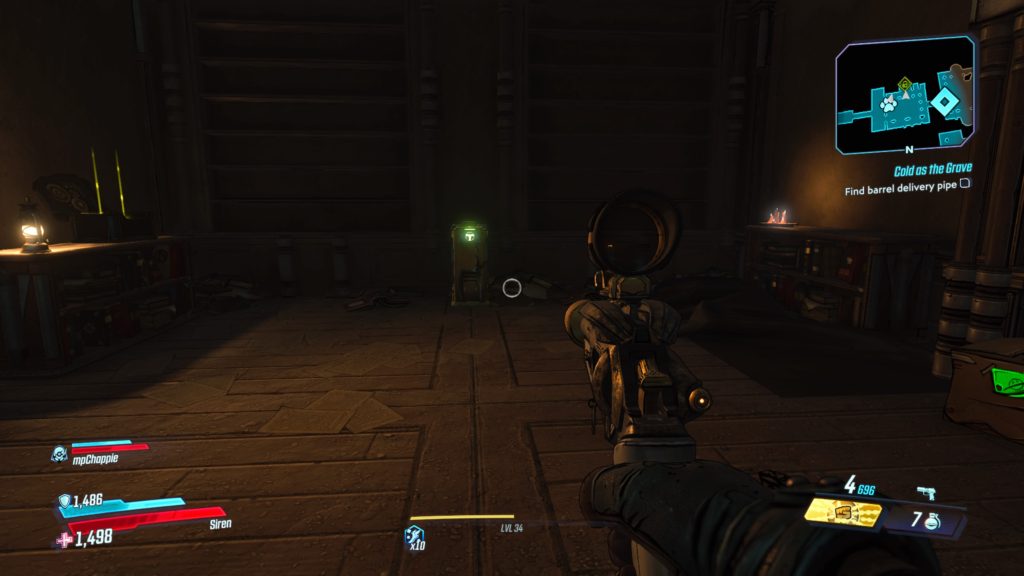
This cache is located in Delvin’s Dock to the east along a cement wall in the water. See the below map for the exact location.
Blackbarrel Cellars
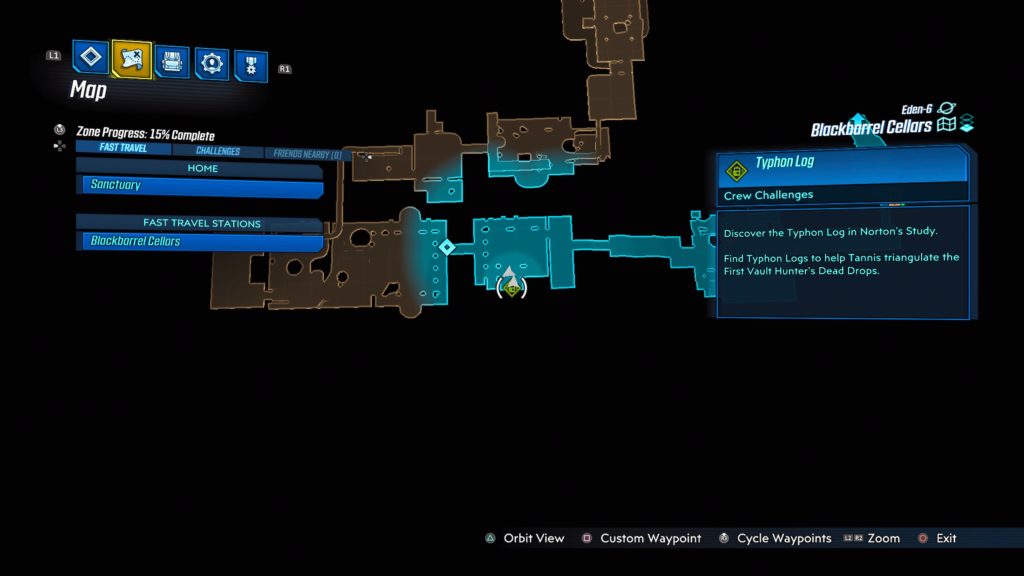
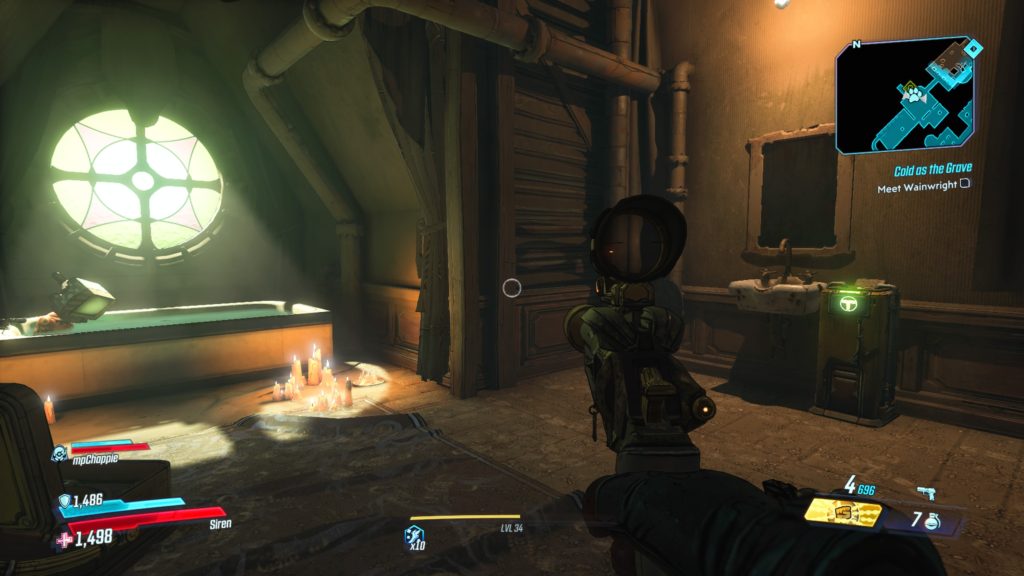
Norton’s Study
This log is located in Norton’s Study on the left (south) side of the room. See the map below for the exact location.
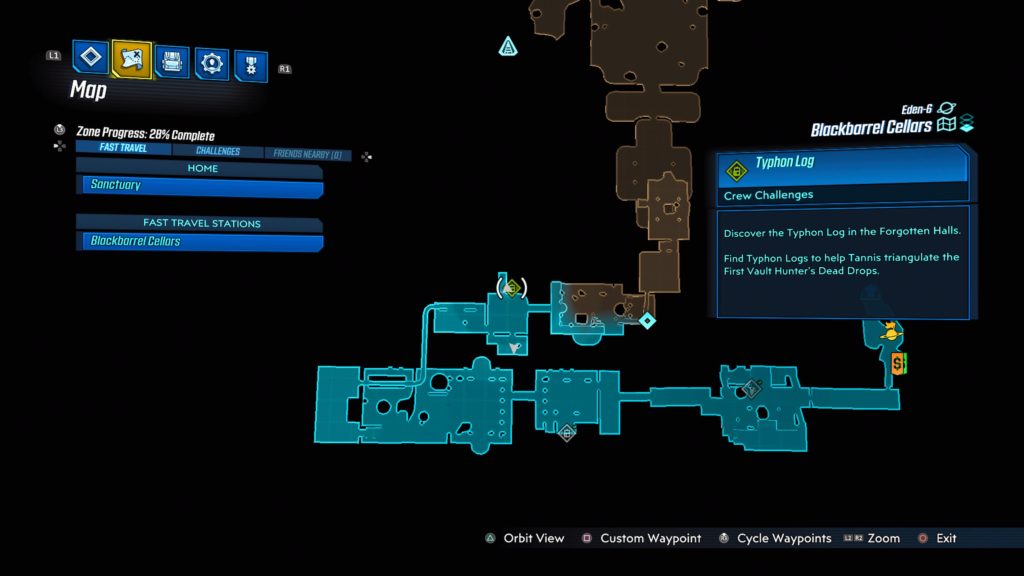
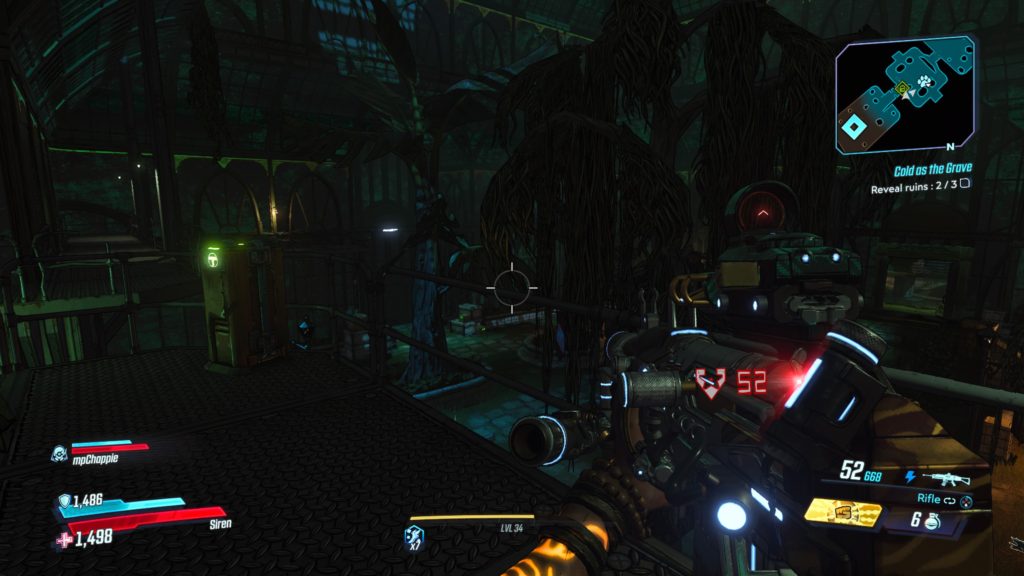
Forgotten Halls
This log is located in the bathroom of the Forgotten Halls. See the map below for the exact location.
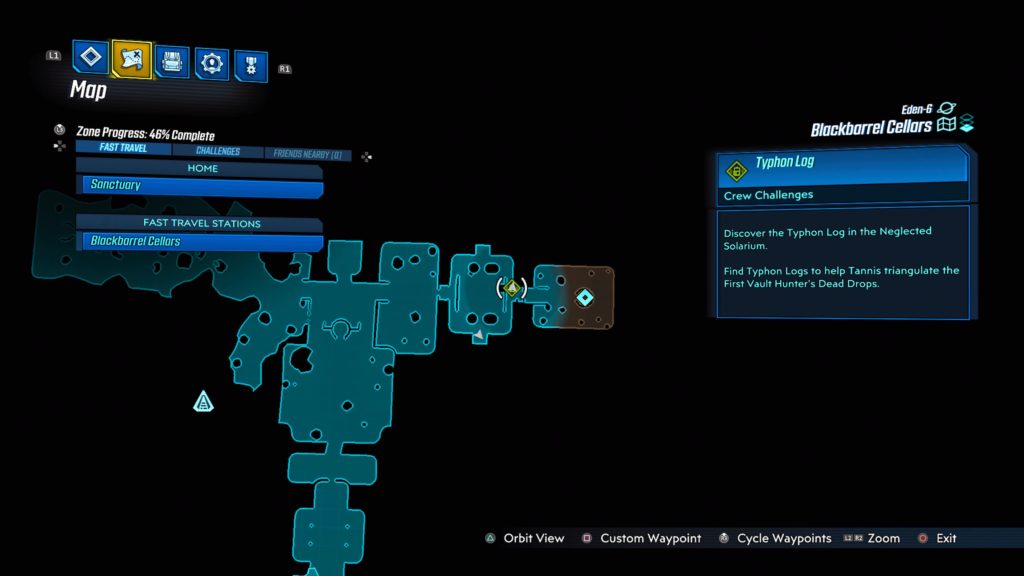
Neglected Solarioum
This log is located on the upper walkway in the Neglected Solarium. See the map below for the exact location.
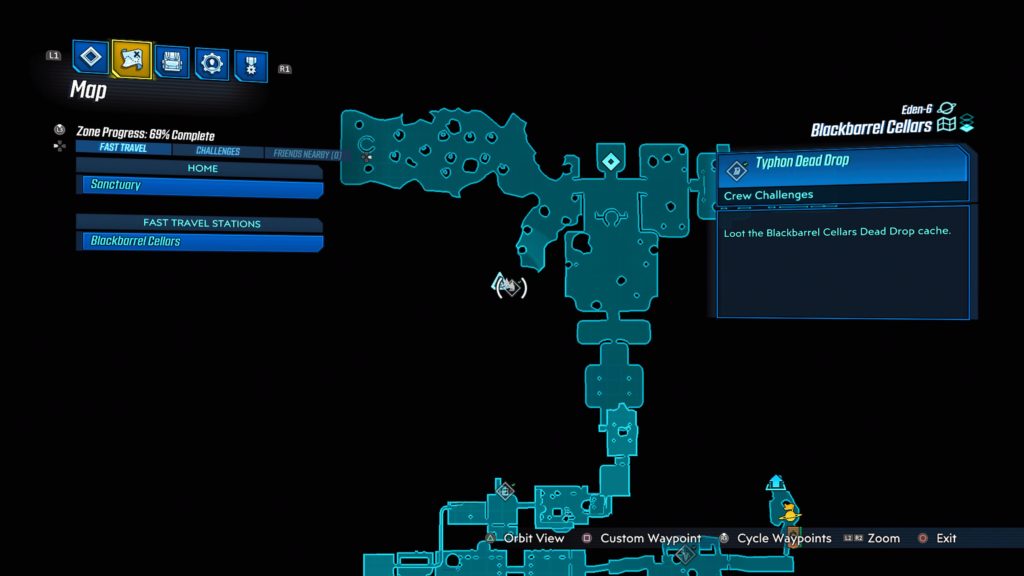
Blackbarrel Cellars Dead Drop Cache
The cache is located behind the waterfall on the way to the Observation Grotto from the Estate Gardens.
Search
This site uses cookies. By continuing to use this website, you are giving consent to cookies being used. For more information on cookies, view our Privacy Policy.OkPrivacy Policy