Below is a guide on the collectibles that can be obtained on 8/17 during Fragments: A Shattered Blade in Trails of Cold Steel IV.
Eryn
Book
- The Chosen One – Part 2
- Purchase from Lemuric General Store for 500 mira
Cards (Vantage Masters)
- Fifenall x3
- Win against KeA who is on a bench near the Fairy Spring
Character Profile
- Renne Bright
- Kitty’s Got Claws – Speak with Renne and Alisa in Lemuric General Goods
- KeA
- Homunculi – Speak with Juna and KeA who are sitting on a bench near the Fairy Spring
- Altina Orion
- Protector – Complete the Repairing the Pendant side quest
Pom! Pom! Party!
- Estelle
- Speak with Renne and Alisa in Lemuric General Goods
Quest
- Repairing the Pendant
- Obtained: Speak with Emma and Gandolf in Gandolf’s Orbal Factory
- Objective: Find the materials to repair the pendant
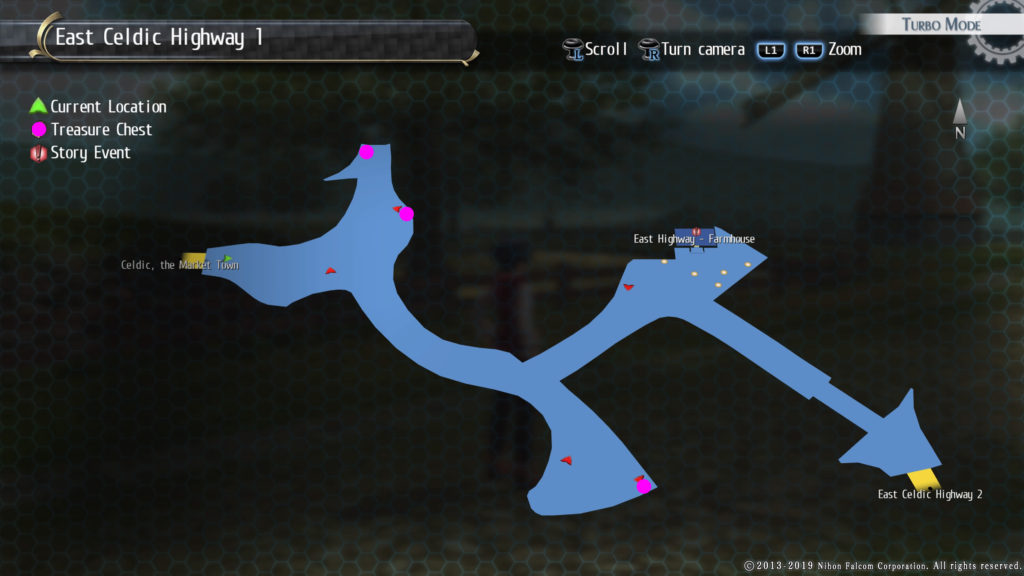
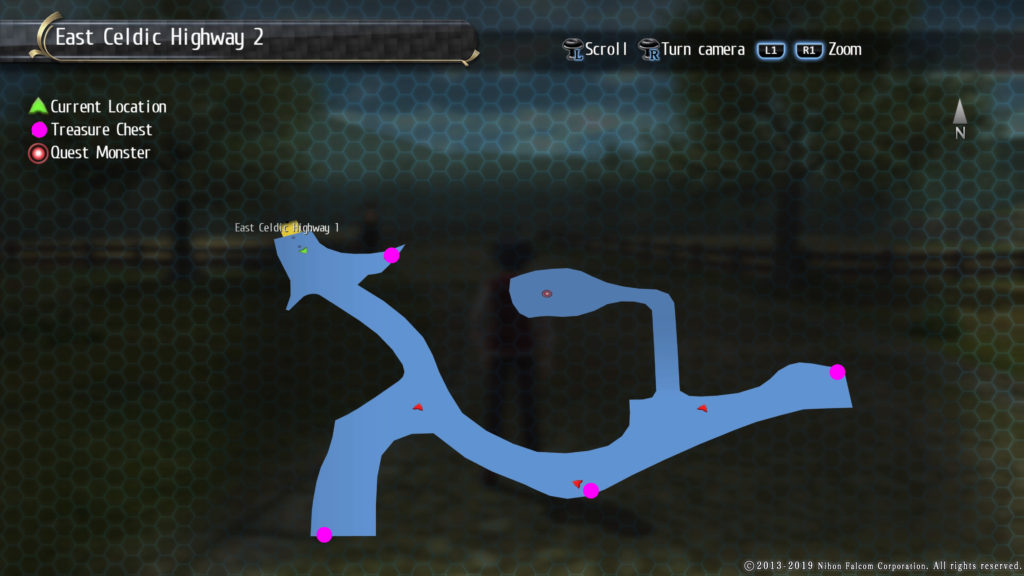
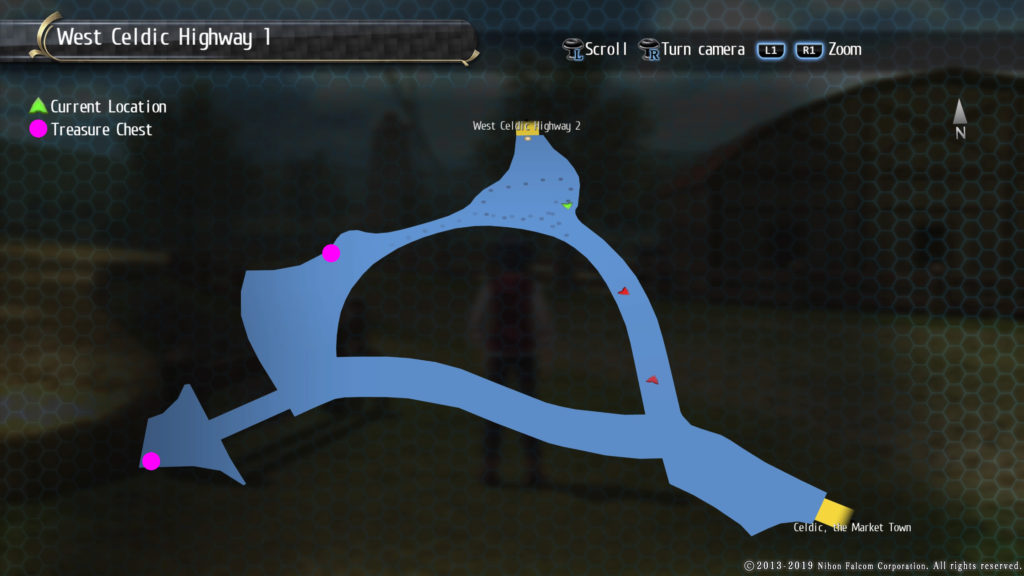
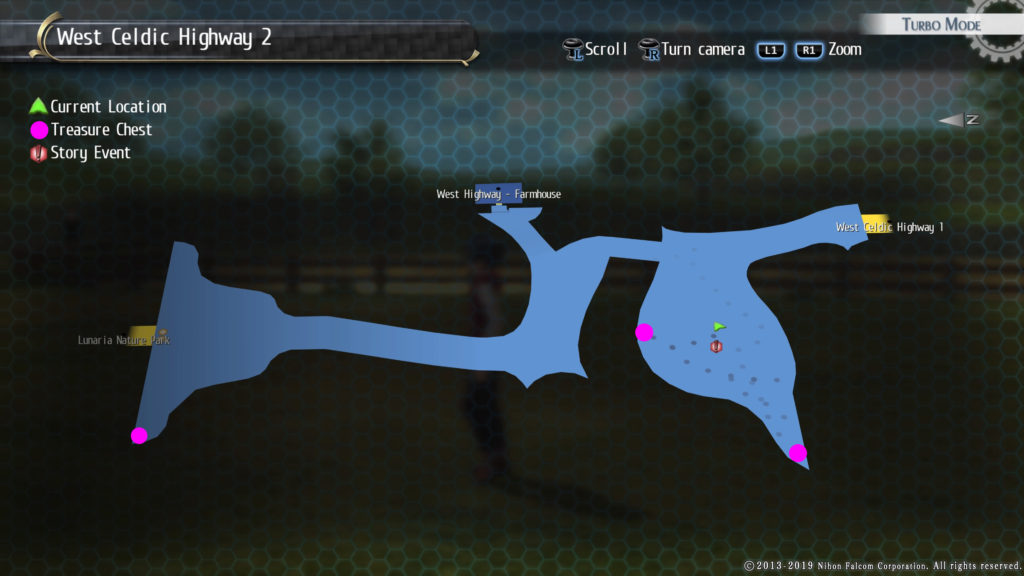
- Head to Eerie Woods – South then travel to the northwestern part of the map to collect Dryad’s Tears, which are at the base of a tree next to a lantern.
- Head to Eerie Woods – North then travel a third of the way down the path to find a Lotus Vine on the side of a cliff between a tree and a lantern.
- Reward: 4,500 mira
Recipe
- Starberry Tart
- Purchase from Lux Lunae Inn for 1,300 mira
Saint-Gral – Phase 4
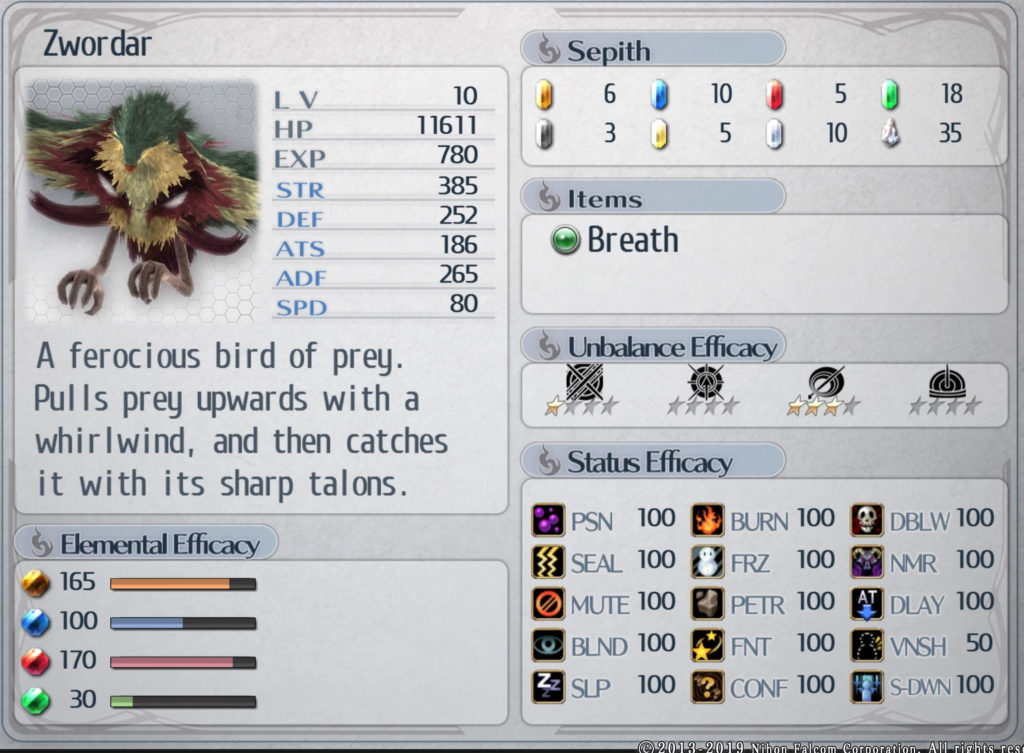
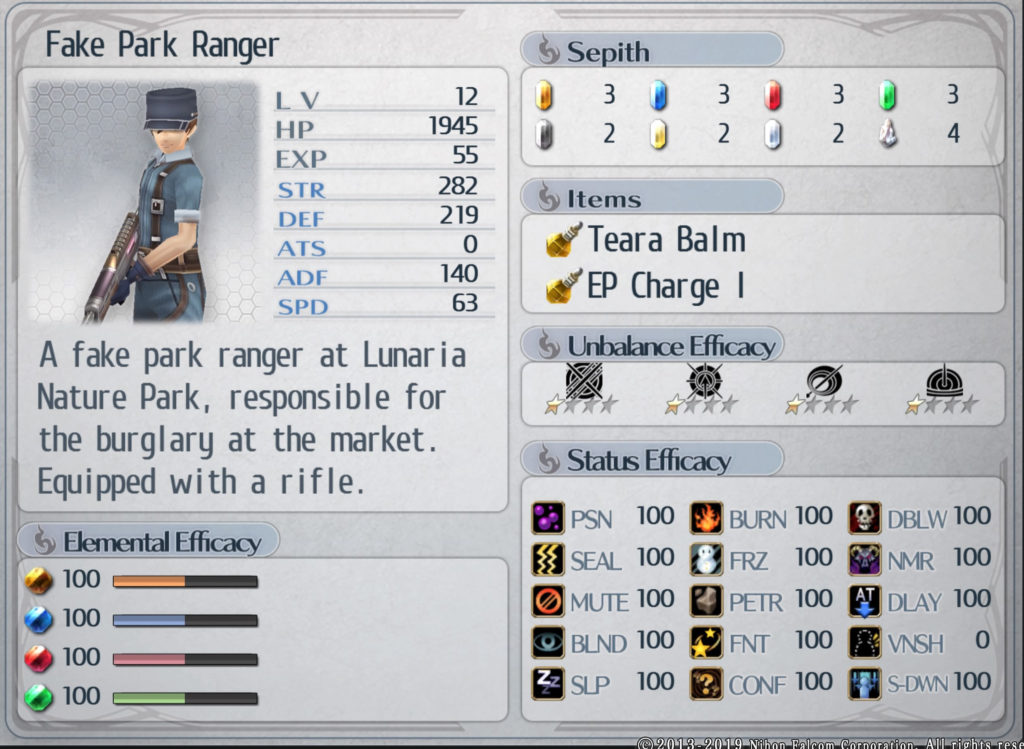
Battle (Monsters)
- Octofiend
- Blurred Shadow
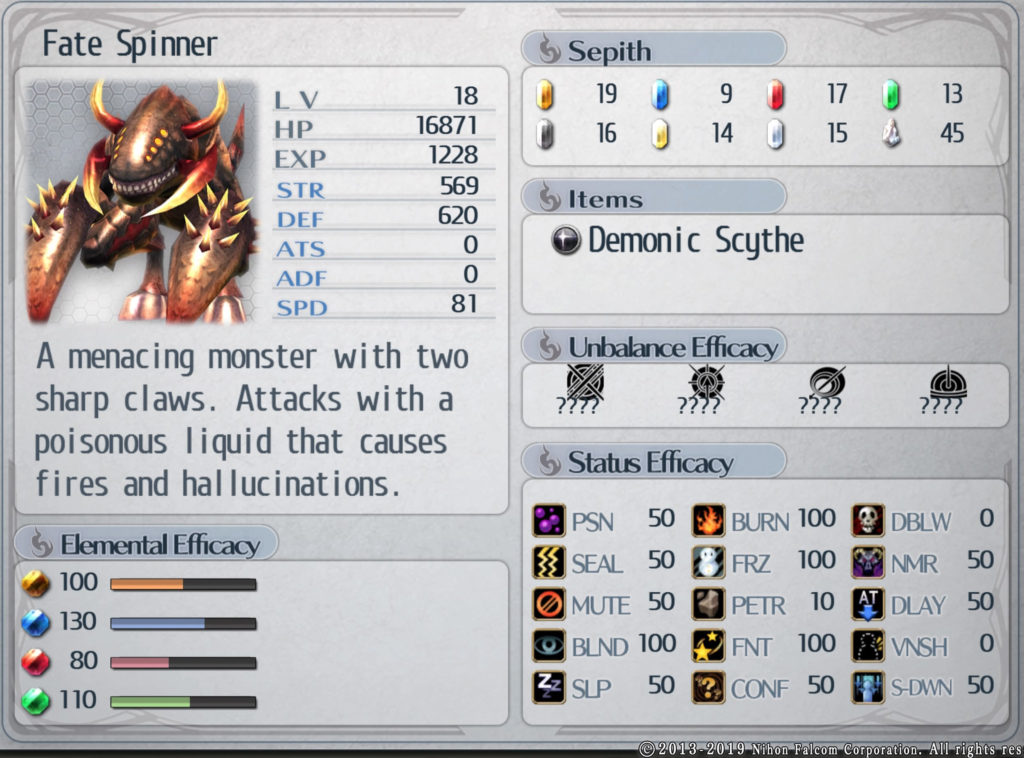
- Ultimate Being
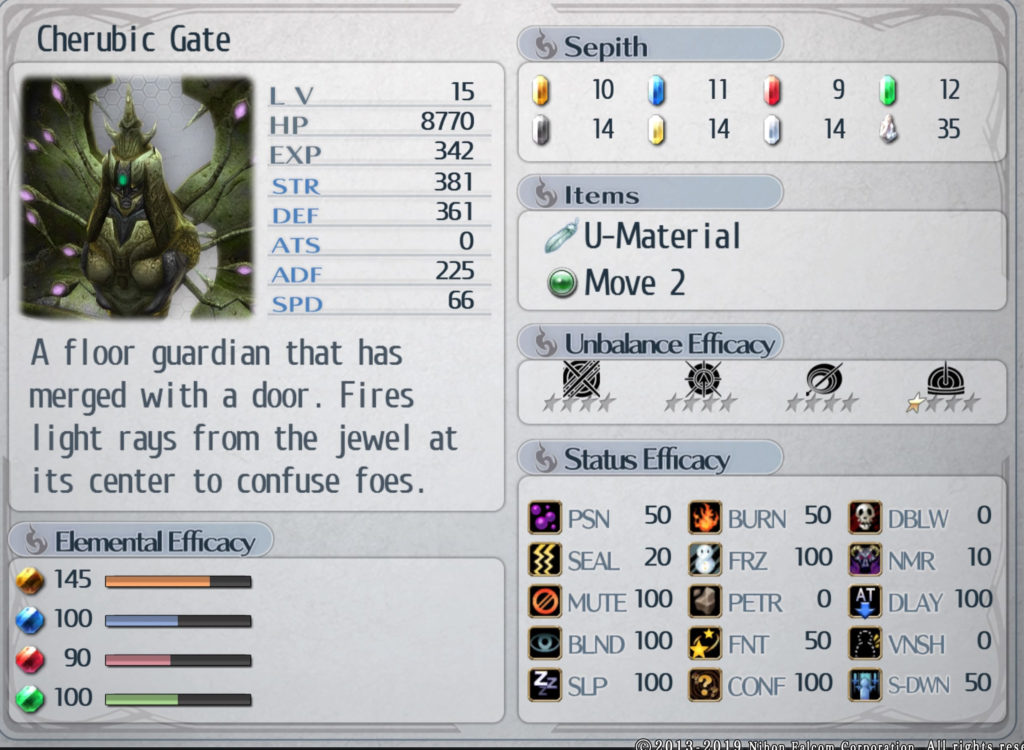
- Arachne Graia
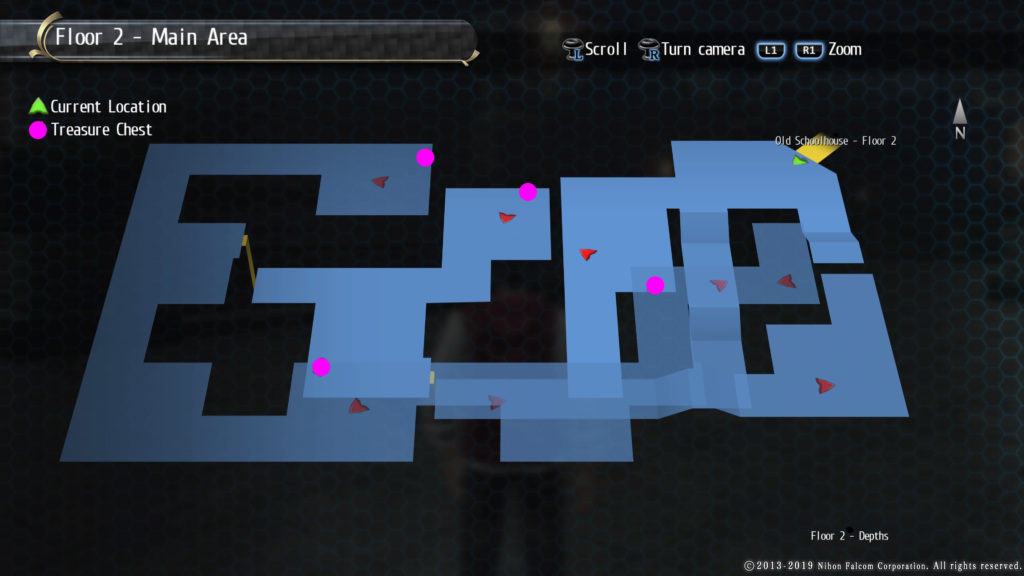
Treasure Chests
- EP 3
- Cast 3
- U-Material x5
- Flare Butterfly R
- 50 of each Sepith
- Brave Seed
The Black Workshop – Route A1
Battle (Monsters)
- Hecatoncheir
- Generot
- Killerpillar
- Sol Blein
- Oz Mirage “Colbalt”
Character Profile
- Celine Millstein
- True Form – Obtained as part of the story
Treasure Chests
- Black Dress
- Spirit Incense
- Evade 3
- Break 3
The Black Workshop – Route B1
Battle (Monsters)
- Easy Trigger
- Mein Gada
- Proto Tron
- Oz Mirage “Crimson”
Treasure Chests
- Tear All Balm
- Jagd Girder
- Blue Emblem
- Action 3
The Black Workshop – Route C1
Treasure Chests
- Attack 3
- HP 3
- Green Emblem
- EP Charge IV
- Dark Emblem
- Zeram Powder
- Move 3
The Black Workshop – Route B2
Battle (Monsters)
- Easy Trigger G
- Copper Georg
Treasure Chests
- Hit 3
- Dark Mail
- EP Cut 3
- Dragon Incense
The Black Workshop – Route A2
Battle (Monsters)
- Red Rossweisse
Treasure Chests
- Yellow Emblem
- Nacht Heel
- Zeram Capsule
- Mind 3
The Black Workshop – Route C2
Battle (Monsters)
- Ines the Stout
- Ennea the Sharp
- McBurn the Blazing Demon
Treasure Chests
- Strike 3
- Celestial Balm EX
- Red Emblem
- Brave Soul
The Black Workshop
Battle (Monsters)
- ???
- Arianrhod the Steel Maiden
- Chancellor Osborne
Bonus AP
- Get both Chancellor Osborne and Arianrhod’s health under a certain amount for +10 AP
Click here for the next guide on 8/19!