Obtained:Talk to Sparrow in In the Wake of Doubt after completing the Footsteps of Giants main mission
Objective(s):
Go to Maliwan’s Camp
Get Flash Trooper Backpacks
Obtain Acid Tank
Find AI Chip
Place Flash Trooper Backpack
Melee It Like You Mean It
Turn On Power
Install AI Chip
Kill The Abomanation
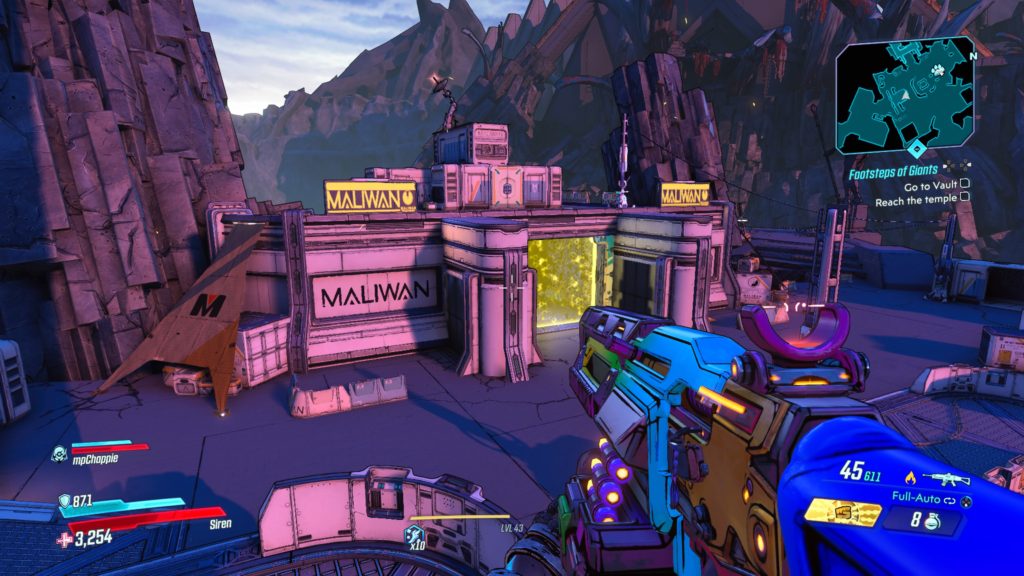
Go to Maliwan’s Camp
Head to the Maliwan camp in the Stain, located in the southwestern area of the map.
Get Flash Trooper Backpacks
Proceed to the objective area of the map and eliminate two Flash Troopers. Commandeer their backpacks.
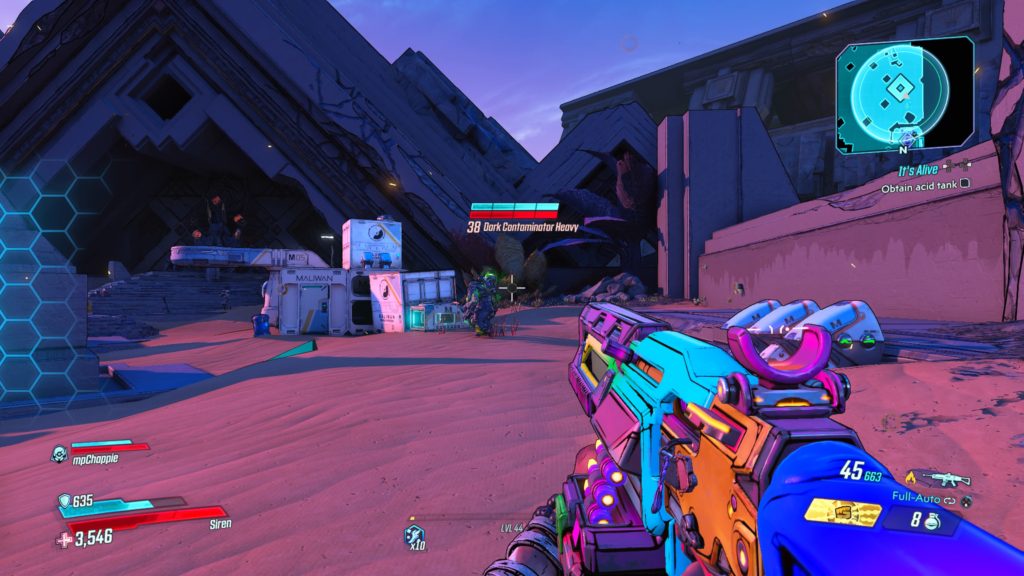
Obtain Acid Tank
Head further into the Maliwan base to locate a Dark Contaminator Heavy. Take him out and grab his acid tank.
Find AI Chip
Exit the Maliwan base and head back to the tunnel leading to In the Wake of Doubt. You will come across an AI chip near a Maliwan crate. Pick it up to receive praise from Sparrow.
Return to Research Center
Head back to the research center.
Place Flash Trooper Backpack
Head over to Sparrow and set the backpack next to the robot on the ground near him.
Melee It In
Melee the backpack until it’s attached to the robot.
Place Acid Tank
Place the acid tank on the ground next to the robot.
Melee It Like You Mean It
Melee the acid tank until it is attached.
Turn On Power
Flip the lever on the platform behind the robot.
Install AI Chip
Install the AI chip in the robots chest plate.
Kill The Abomination
Kill the robot to complete the mission. He’s in pain!
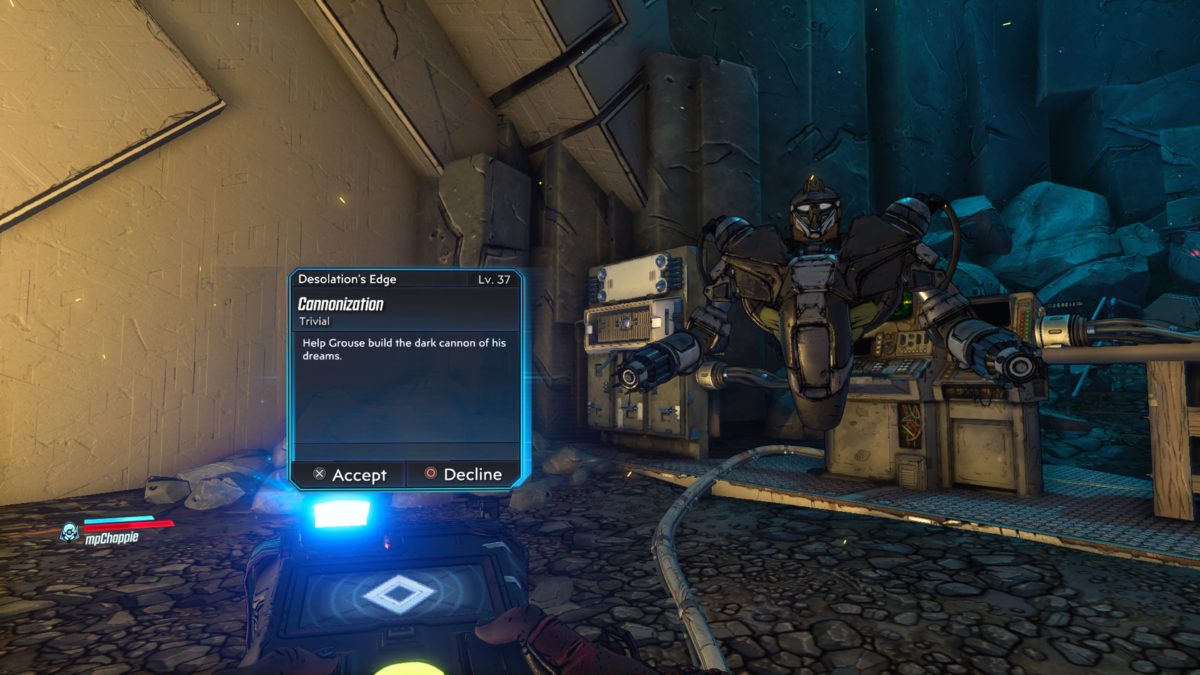
Obtained:Talk with Grouse after completing theCannonization side mission
Objective(s):
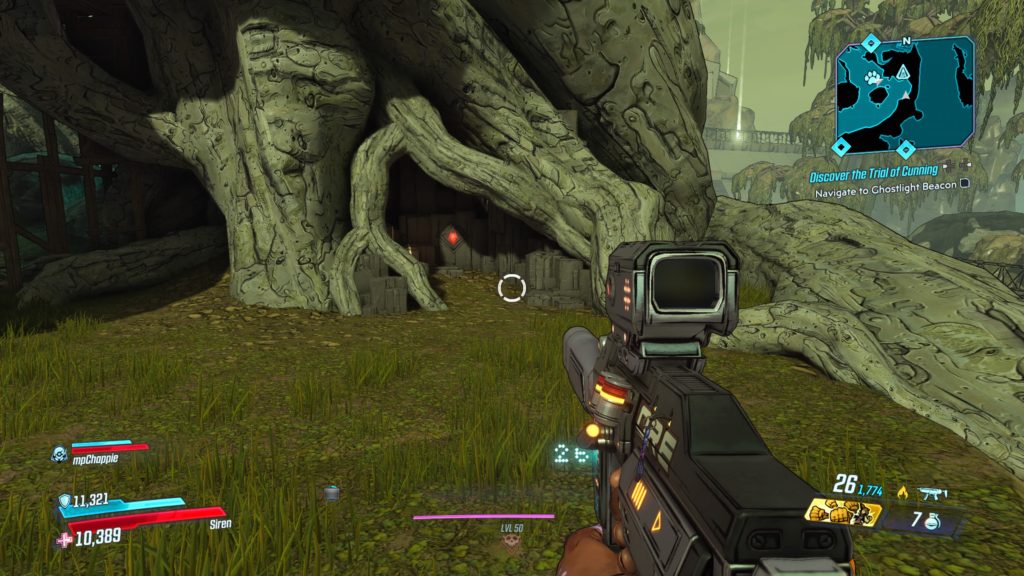
Get Beacons
Get Explosives
Place Beacon
Place Beacons
Place Explosives
Blow Hole in Shaft
Find Epicenter
Place Explosives
Clear Steam Vent
Ride Steam Jet
Talk to Grouse
Get Beacons
Grab the beacons off of a nearby table.
Get Explosives
Collect the explosives off of the table next to the beacons.
Place Beacon
Jump to the nearby ledge and place the beacon.
Place Beacons
The first beacon is located in the north part of the map near the Legendary Hunt. The second beacon will need to be placed in the Engine of Decay on the eastern side of the map.
Place Explosives
Head to the Catch-A-Ride in Quietus Pike, which is north of the Conqueror. Follow along the wall next to the station to locate a crack that you can pass through. Head inside and then plant the explosives at the base of the structure.
Blow Hole in Shaft
Wait for the explosive to explode.
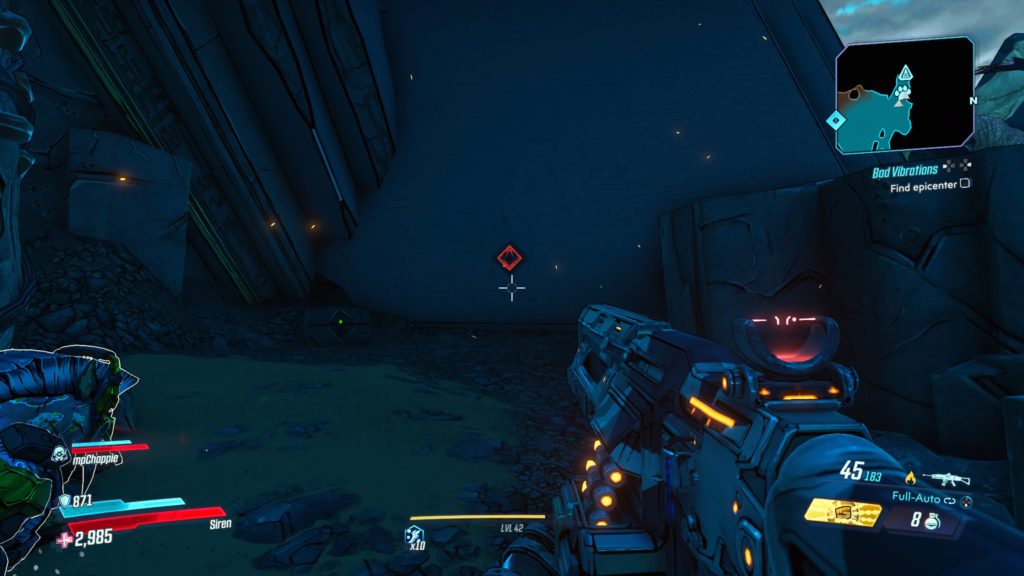
Find Epicenter
Jump into the new hole to arrive at the Chancellor’s Throat. Follow the path until you reach the fallen steaming rock.
Place Explosives
Place the two explosives around the fallen rock.
Clear Steam Vent
Wait for the explosives to explode.
Ride Steam Jet
Jump into the steam jet.
Talk to Grouse
Return to Grouse and talk with him to complete the mission.
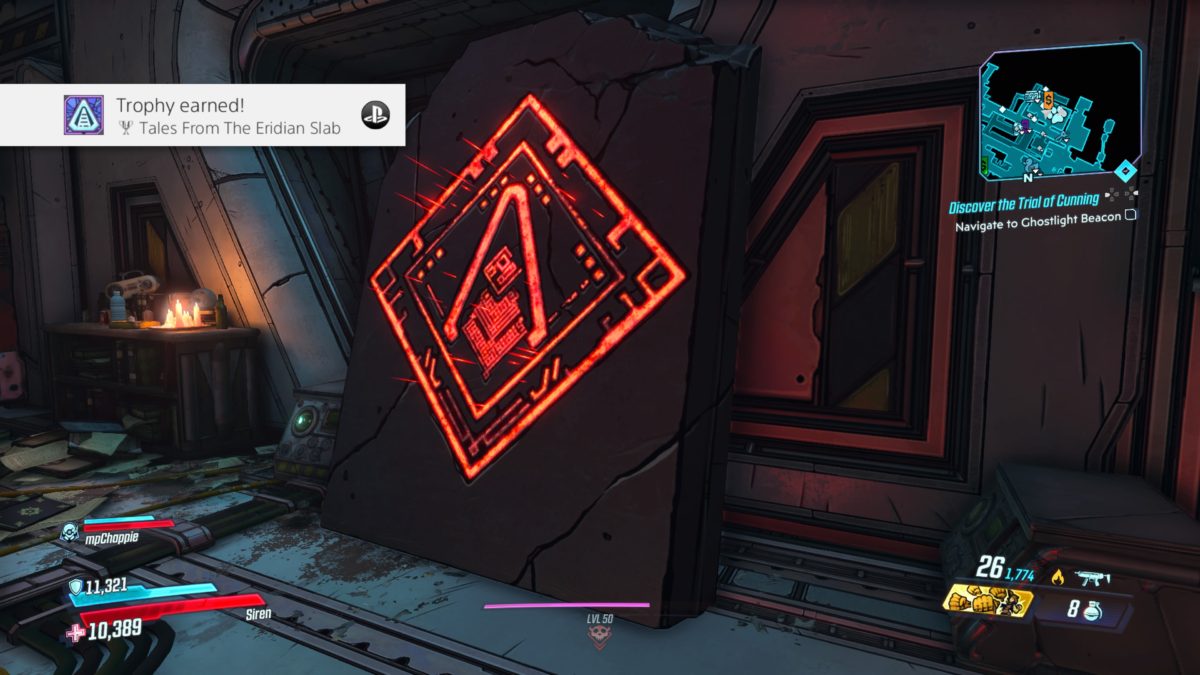
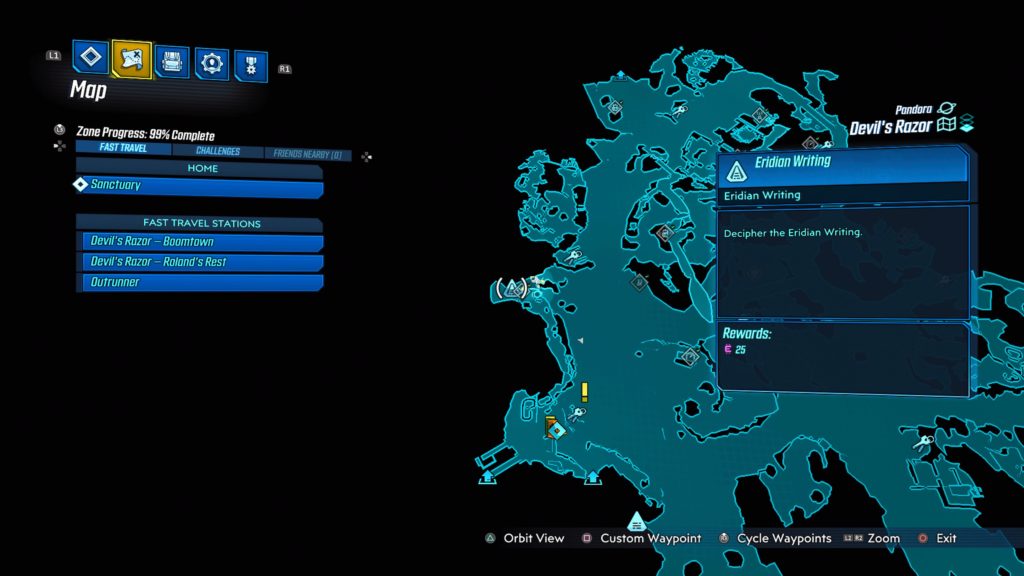
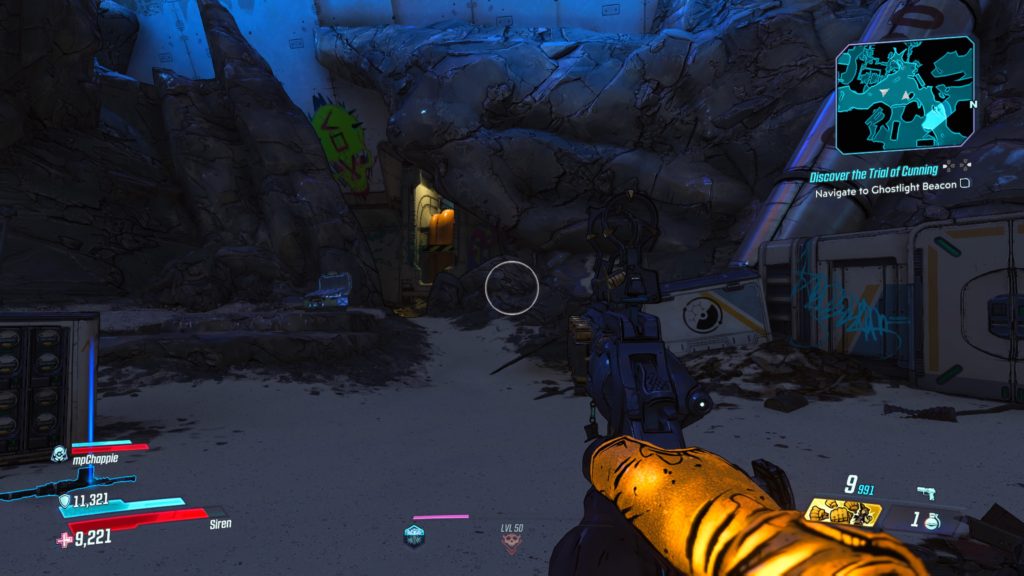
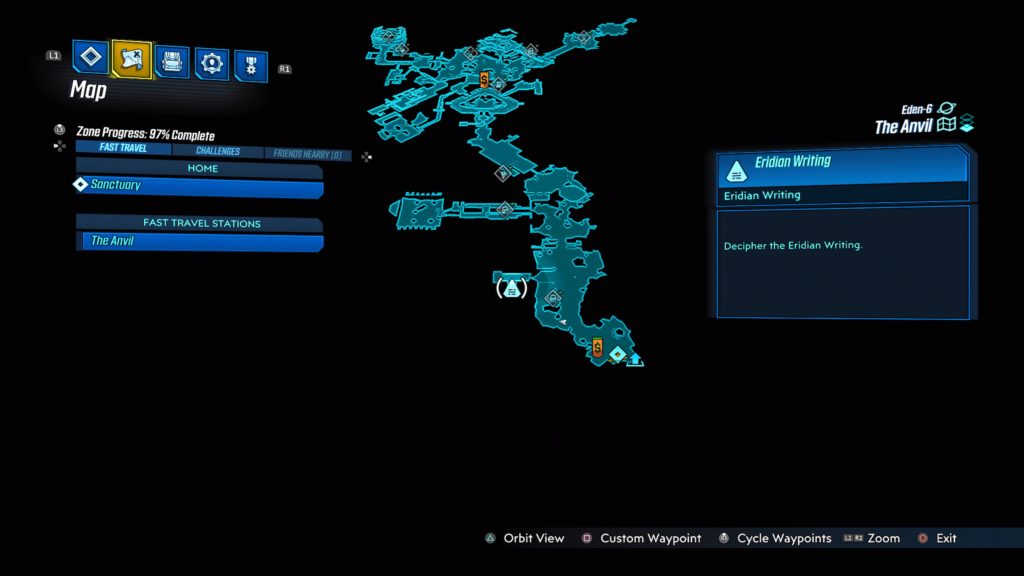
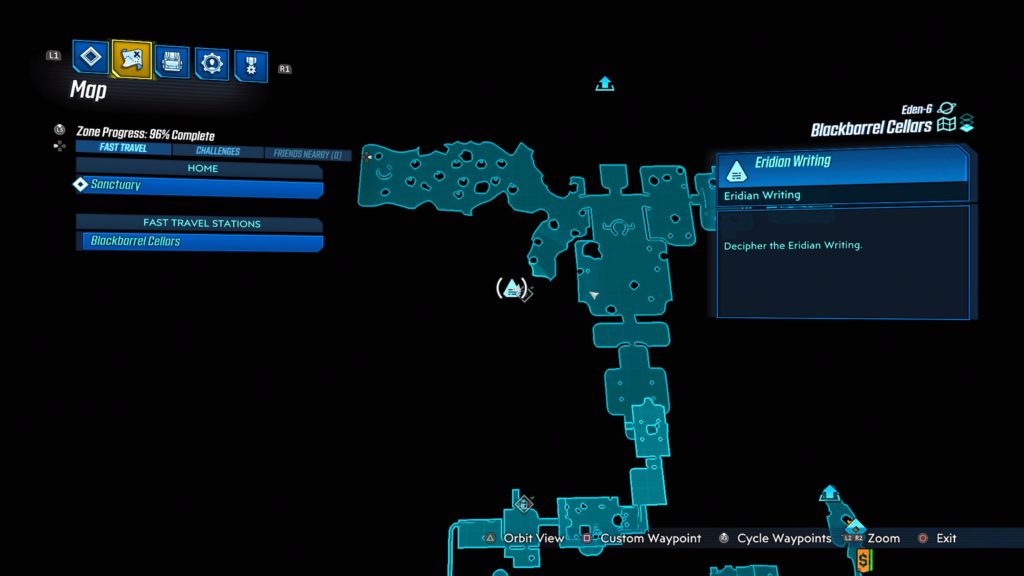
*NOTE: If you did not receive The Tales From The Eridian Slab trophy, head back to the infirmary at Sanctuary and keep translating the Eridian writing until the trophy triggers. (We inspected it approximately six times.)
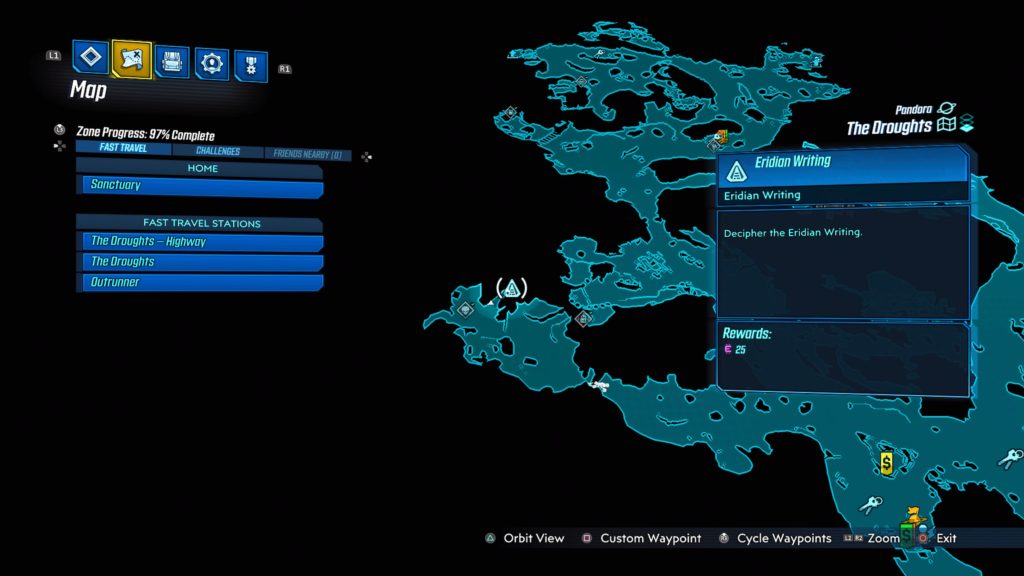
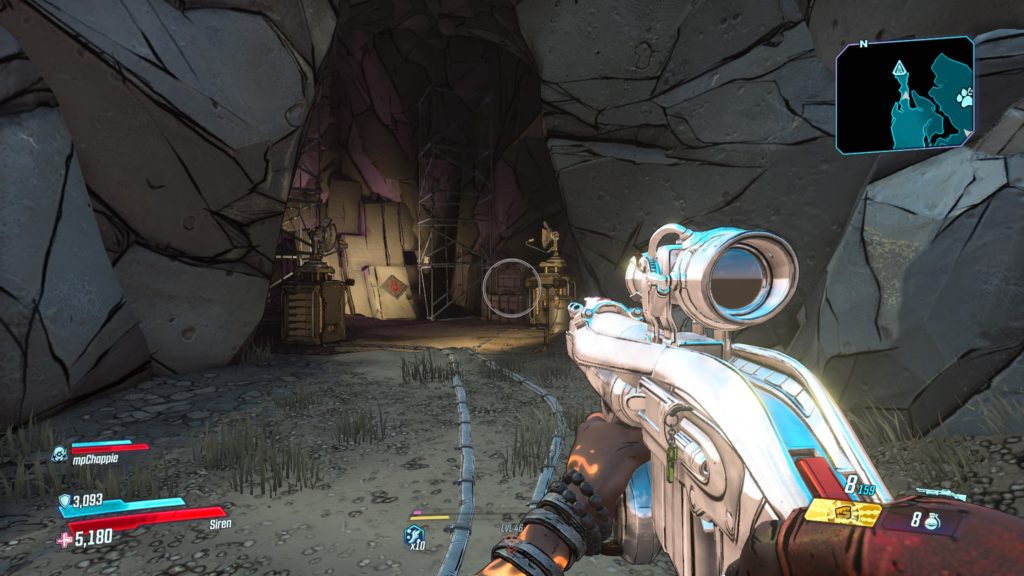
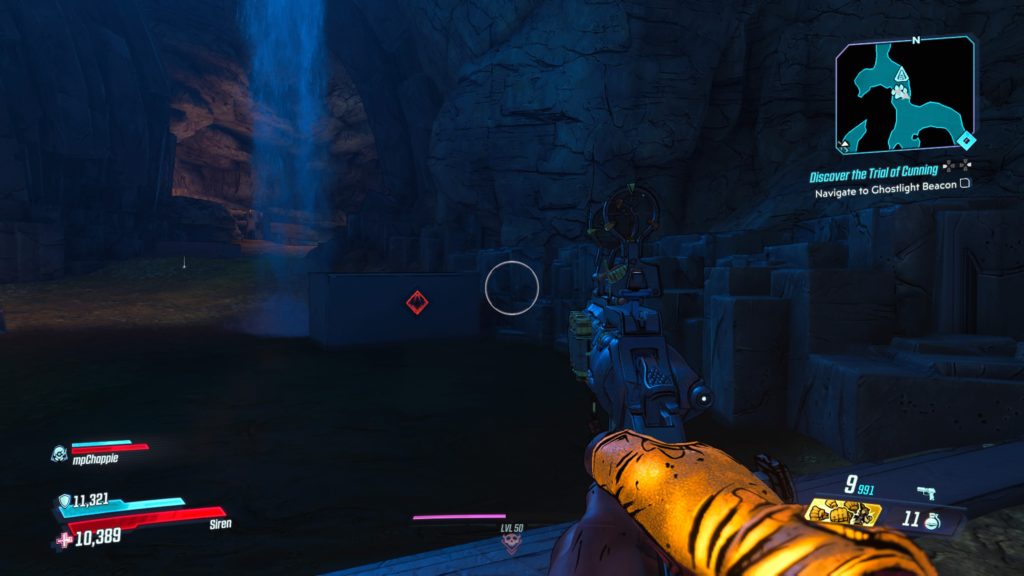
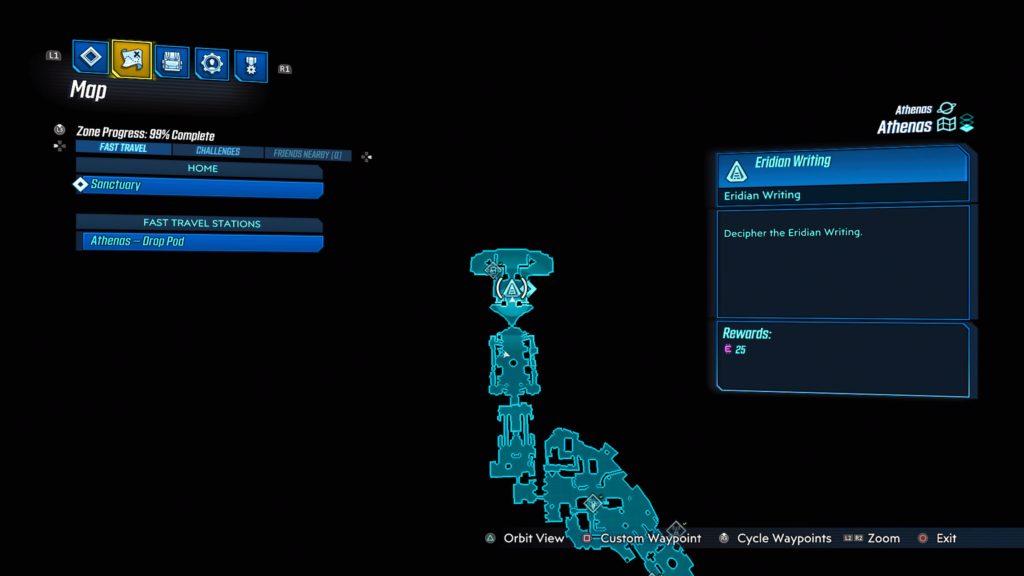
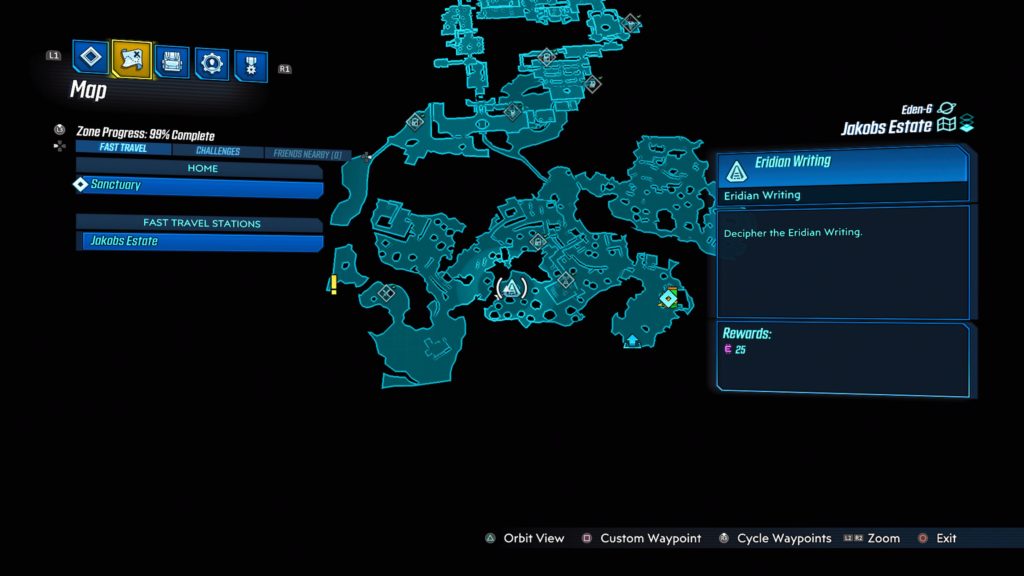
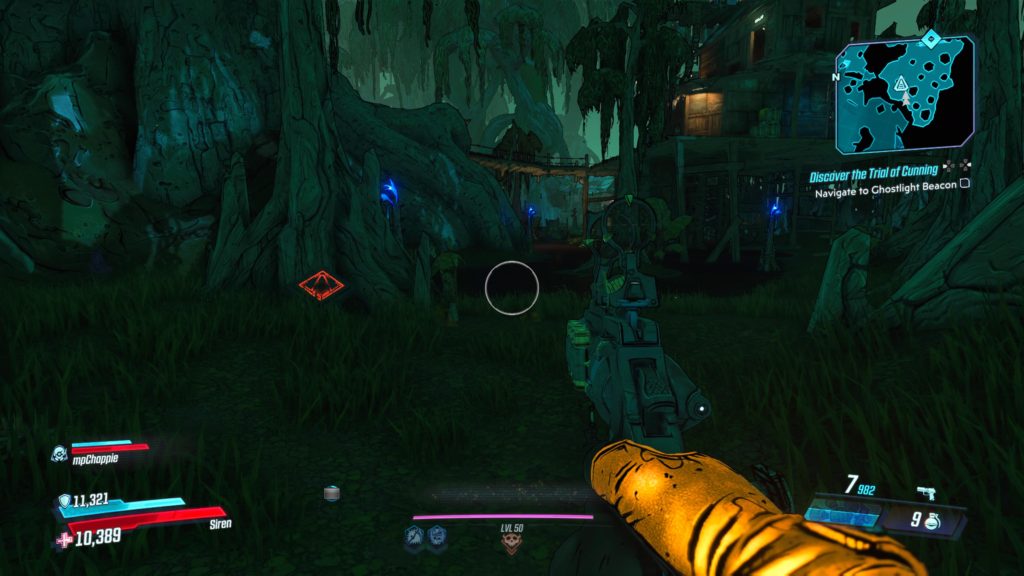
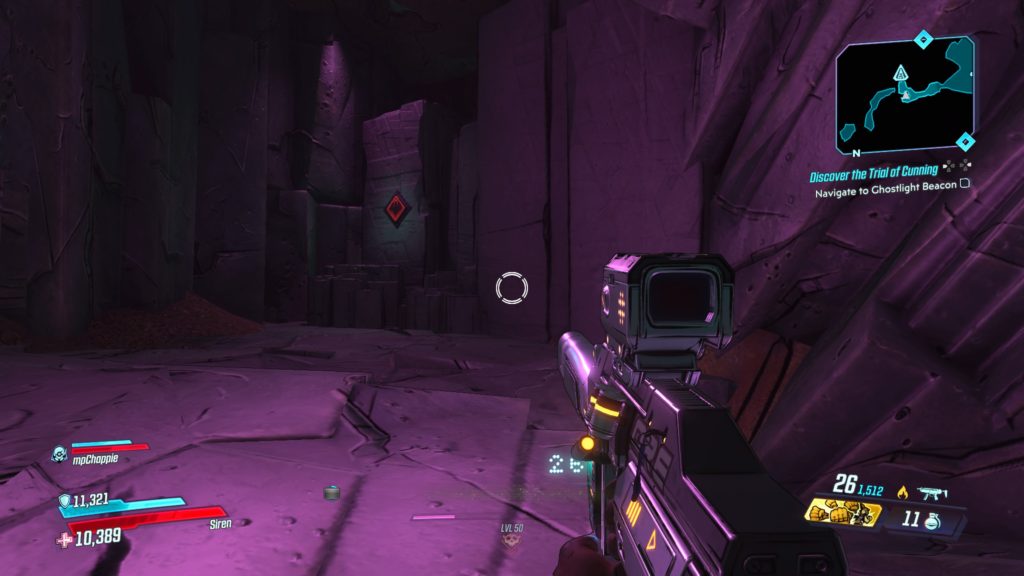
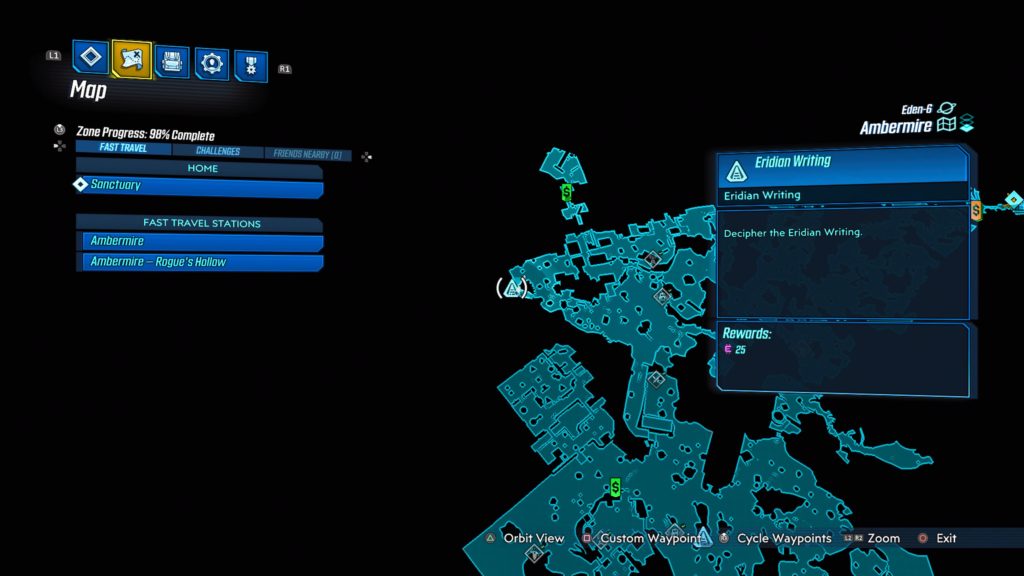
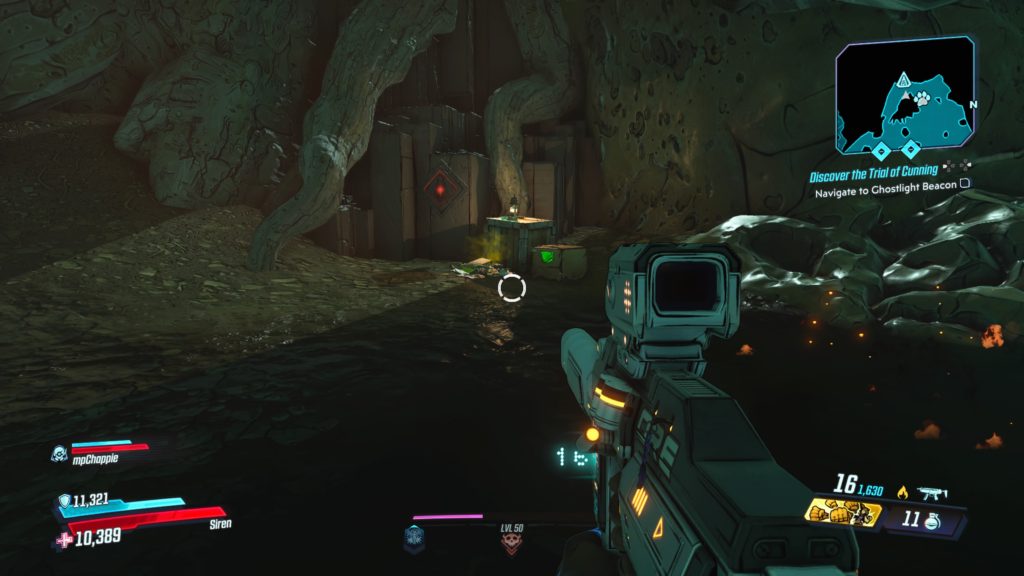
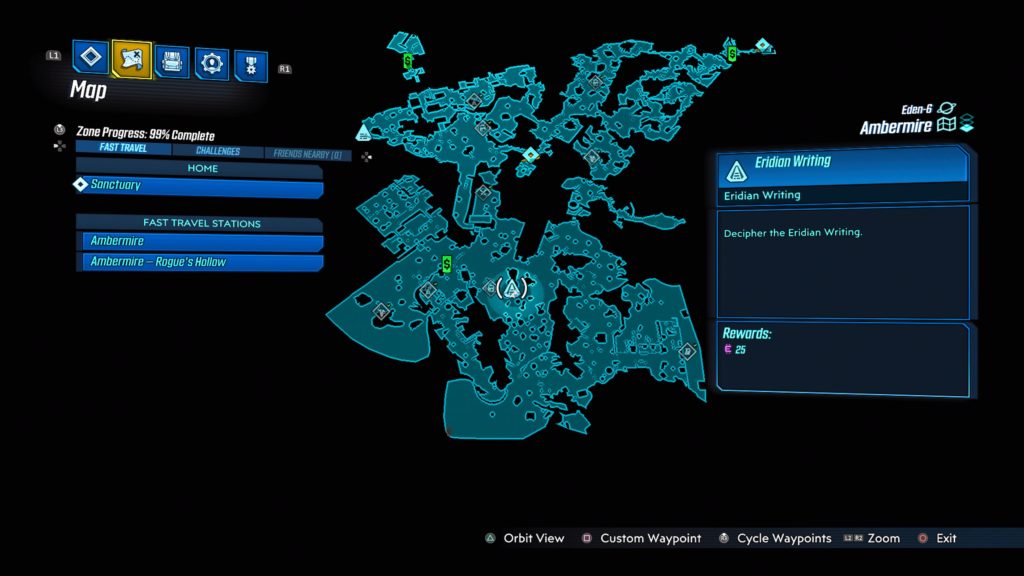
This writing is located in the back of the Eridian Dig Site in a cave next to some scaffolding.
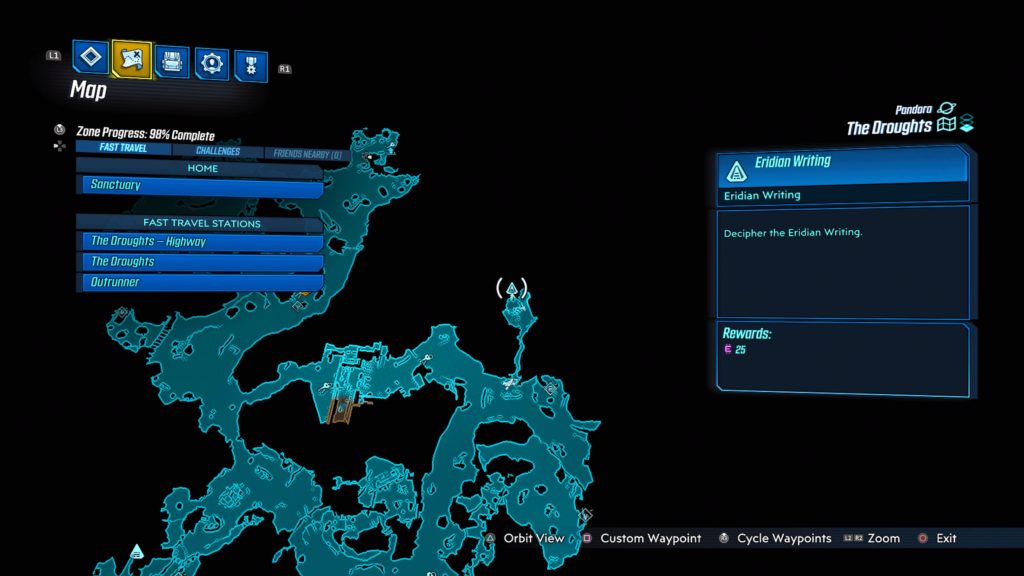
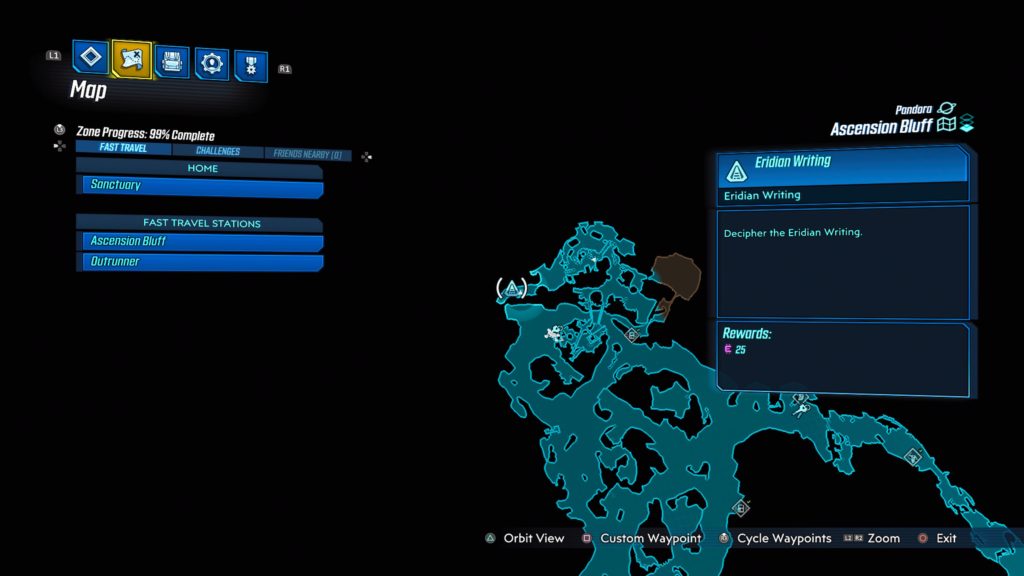
Ascension Bluff
This writing is located in the most northern part of the map, north of the most northern Catch-A-Ride. We previously came here during the Golden Calves side mission.
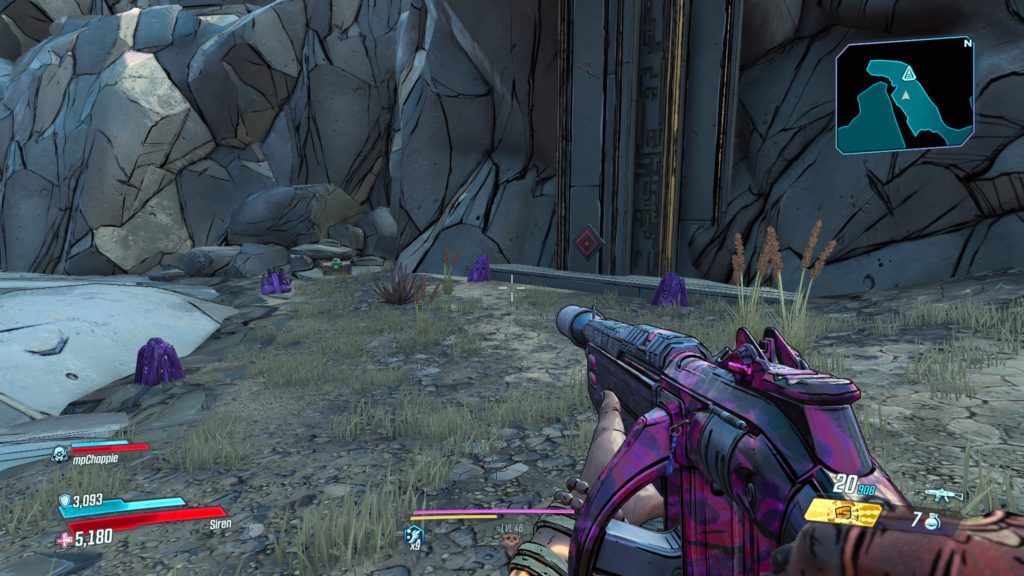
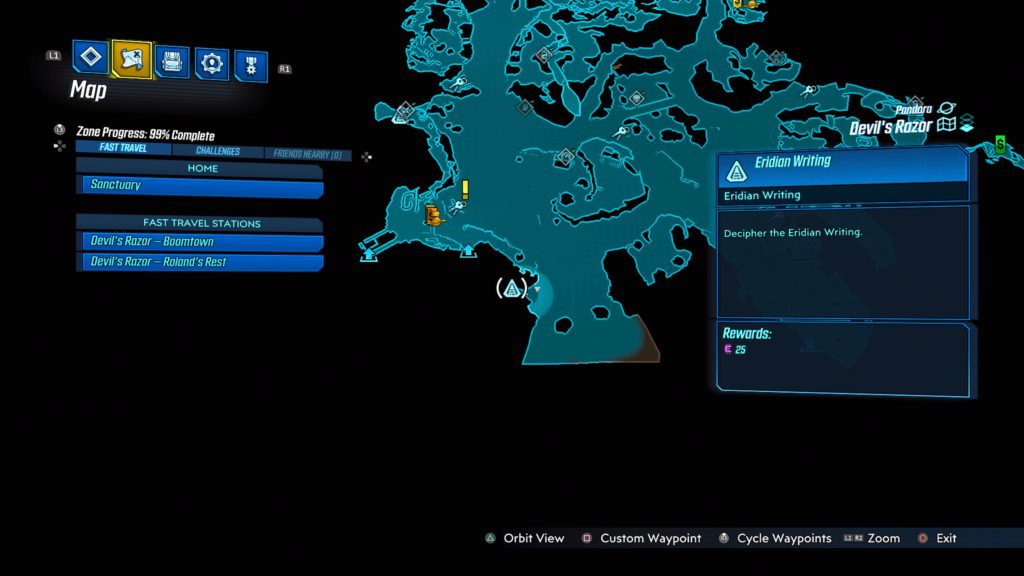
Devil’s Razor
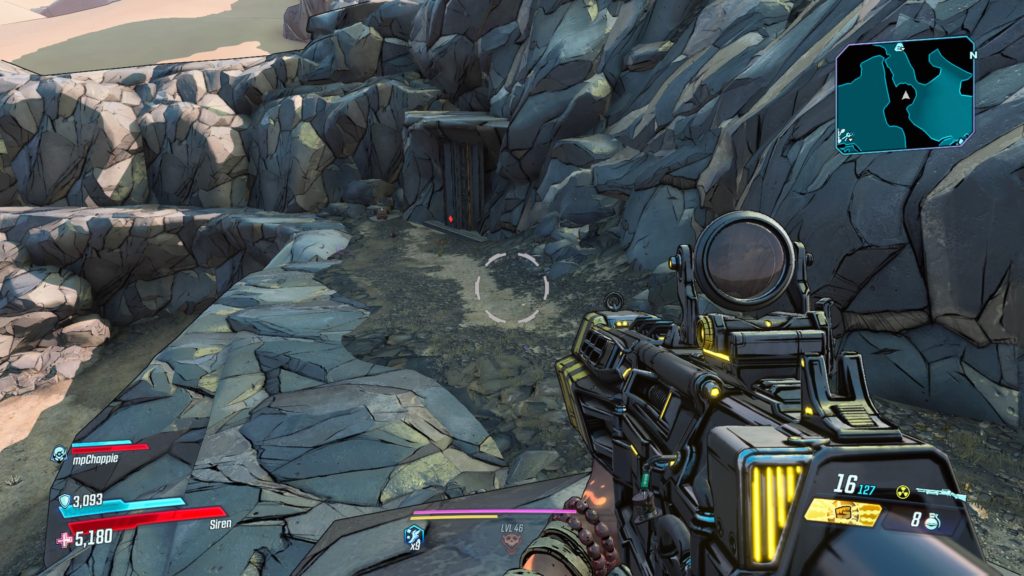
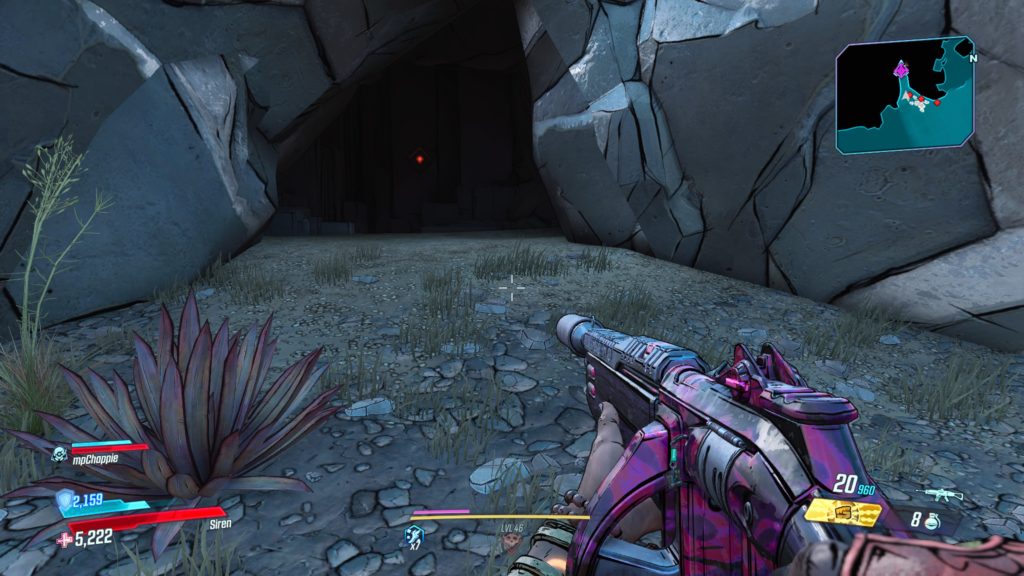
This writing is located in a small cave south of Roland’s Rest. You will need to shoot the boards off to enter the cave.
Devil’s Razor
This writing is located on a rock face overlooking a canyon north of Roland’s Rest.
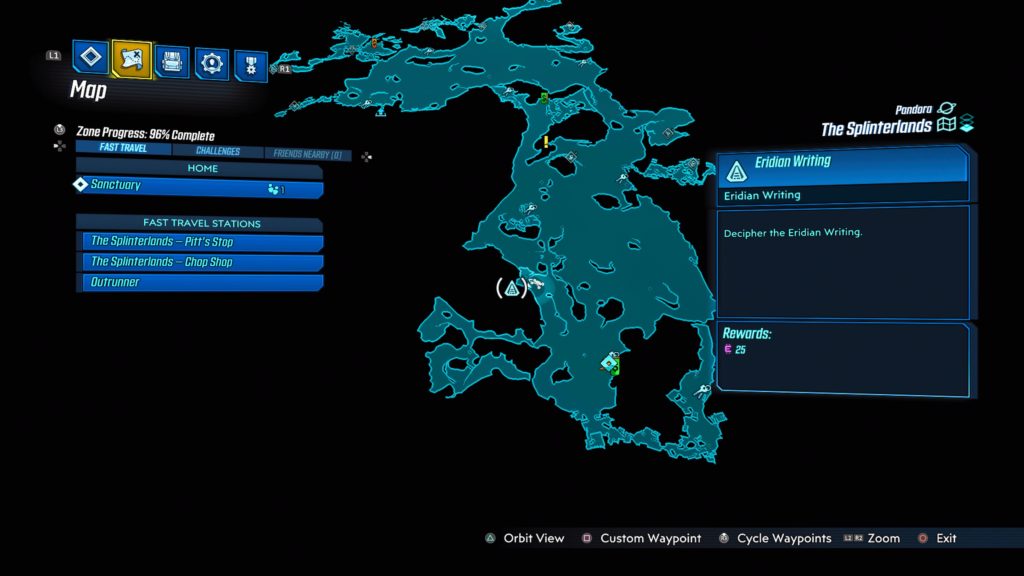
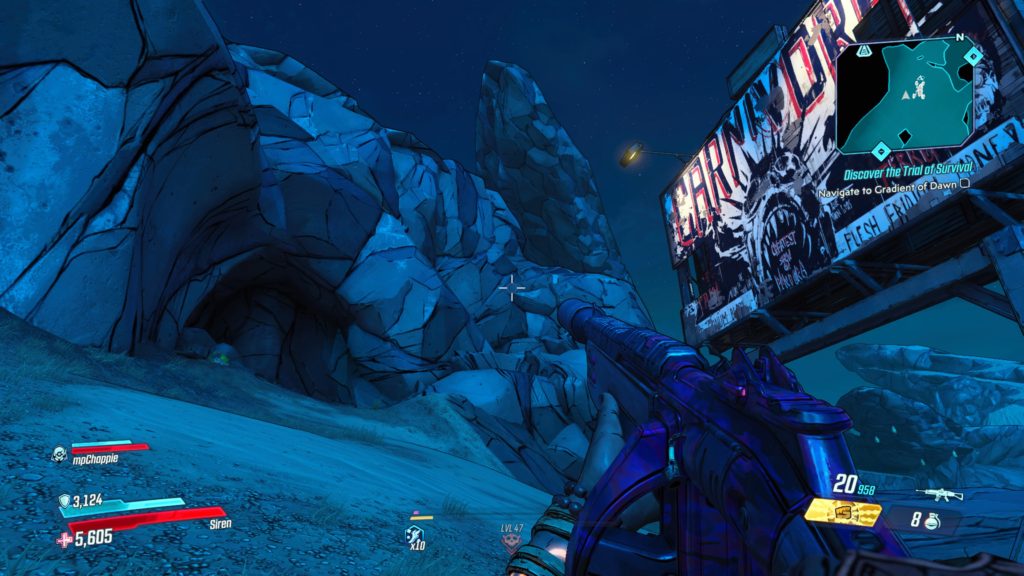
The Splinterlands
This writing is located in a small cave northwest of the Chop Shop, past The Homestead.
Carnivora
This writing is located on a rock face next to the Azlan’s Stash Typhon Log in the north-central area.
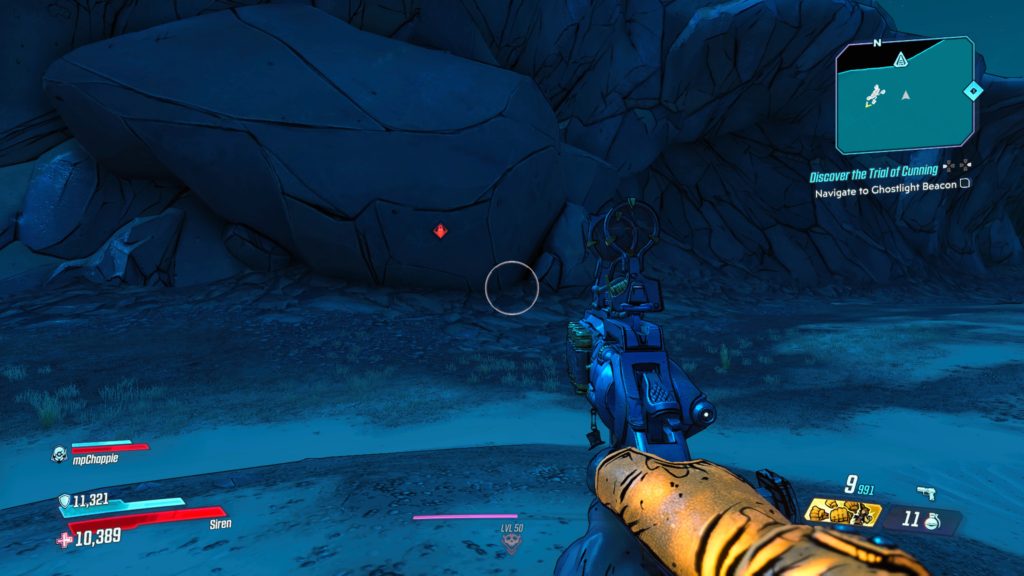
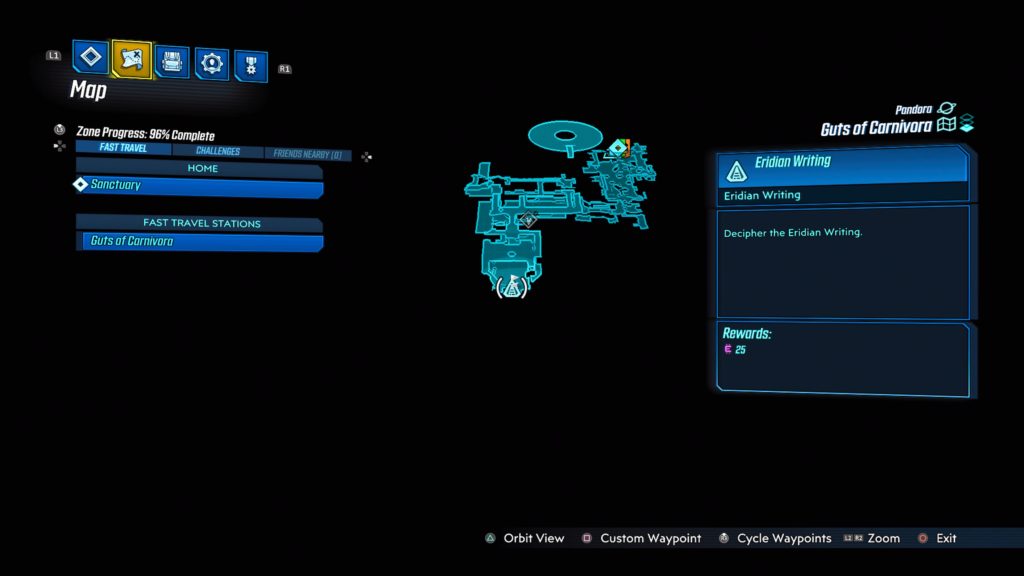
Guts of Carnivora
This writing is located in the back of Mack’s Head Room near some computer monitors.
Konrad’s Hold
This writing is located in the These are No Mines area in the northern part of the map. You will need to start The Demon in the Dark side mission reach it.
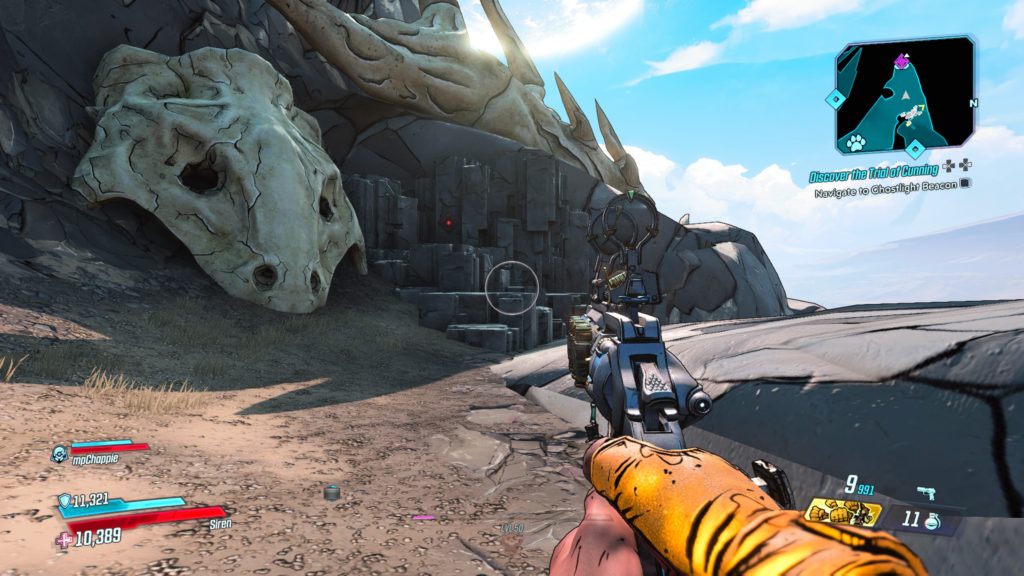
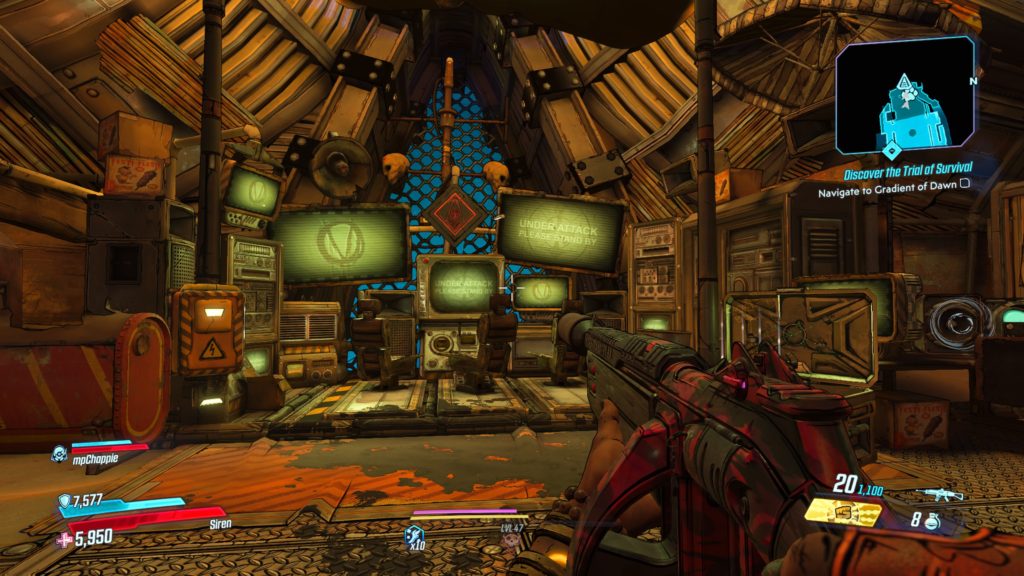
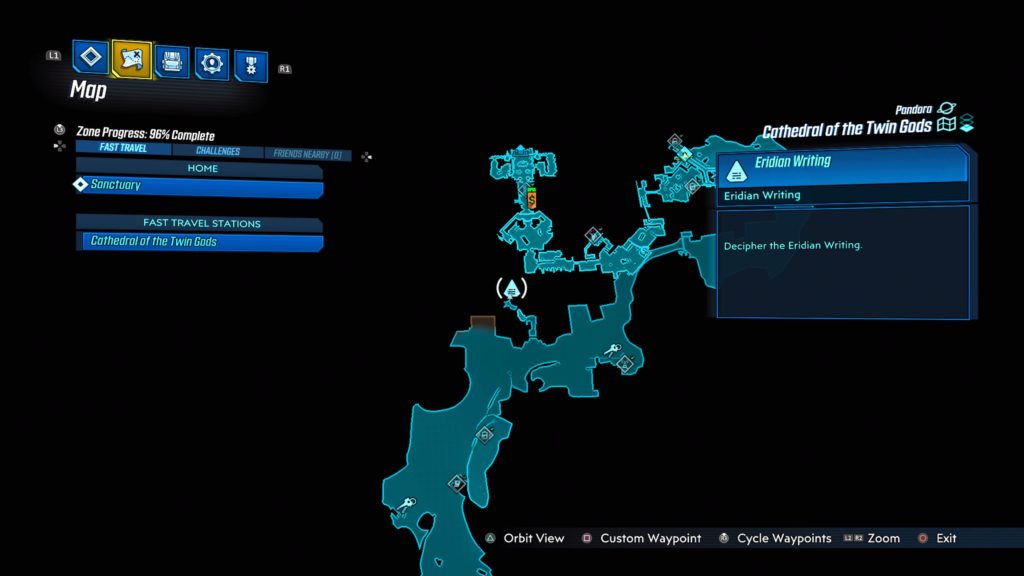
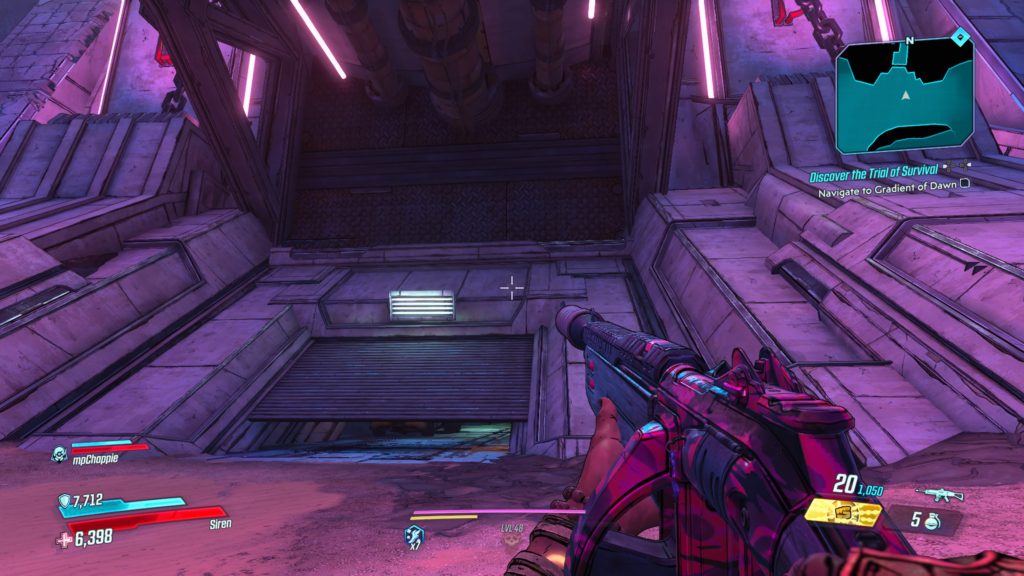
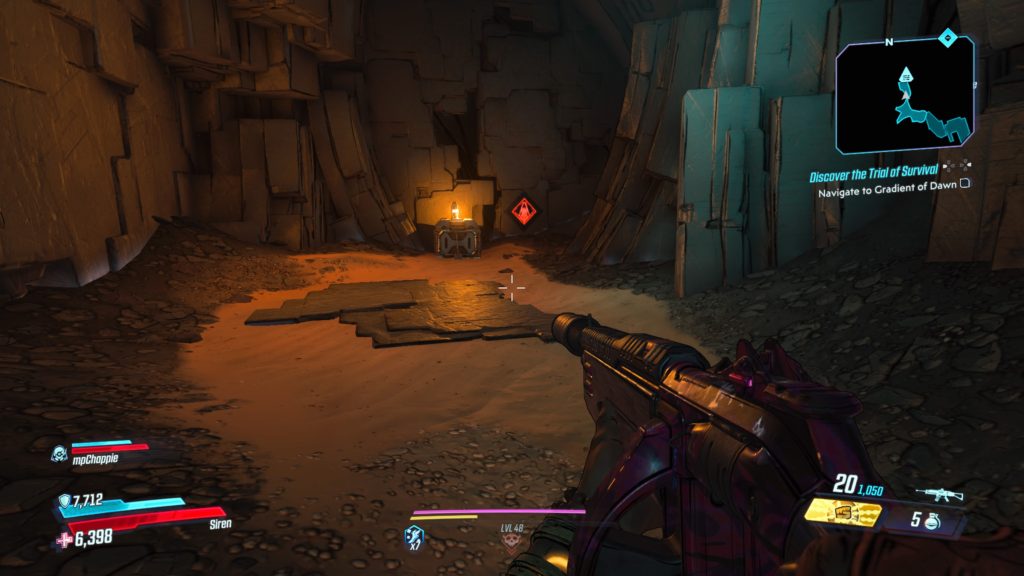
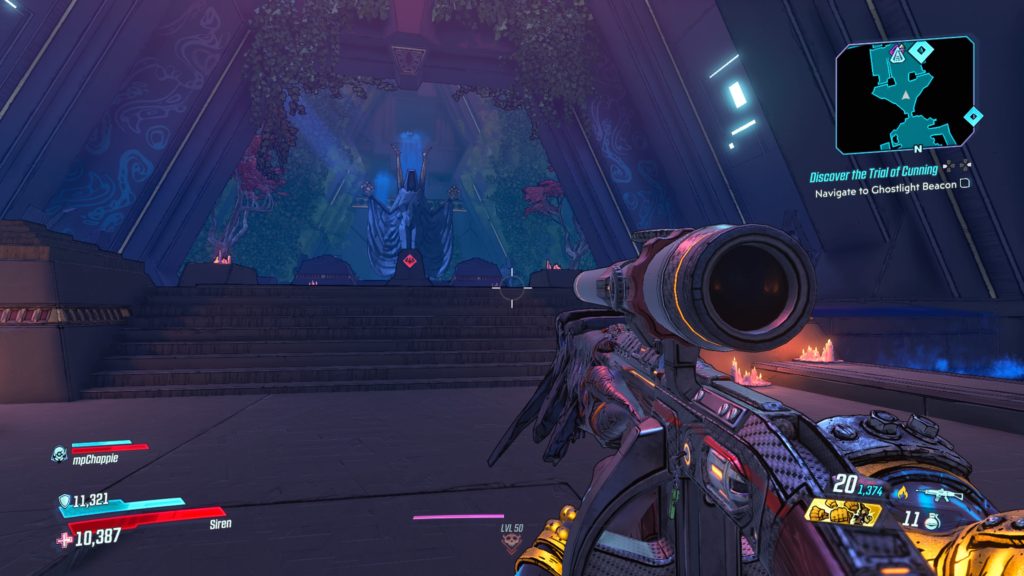
Cathedral of the Twin Gods
This writing is located under the giant skull with a bridge coming out of its mouth. You will have to crouch walk under the partially opened gate then locate the hole in the back of the room and pass through. Follow the tunnel to the end where the writing can be found in the back wall.
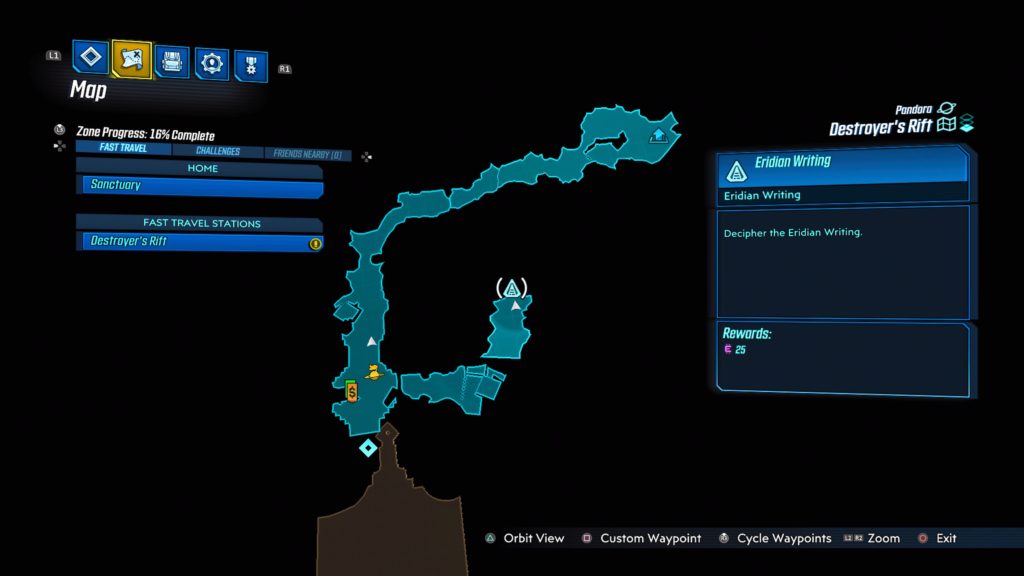
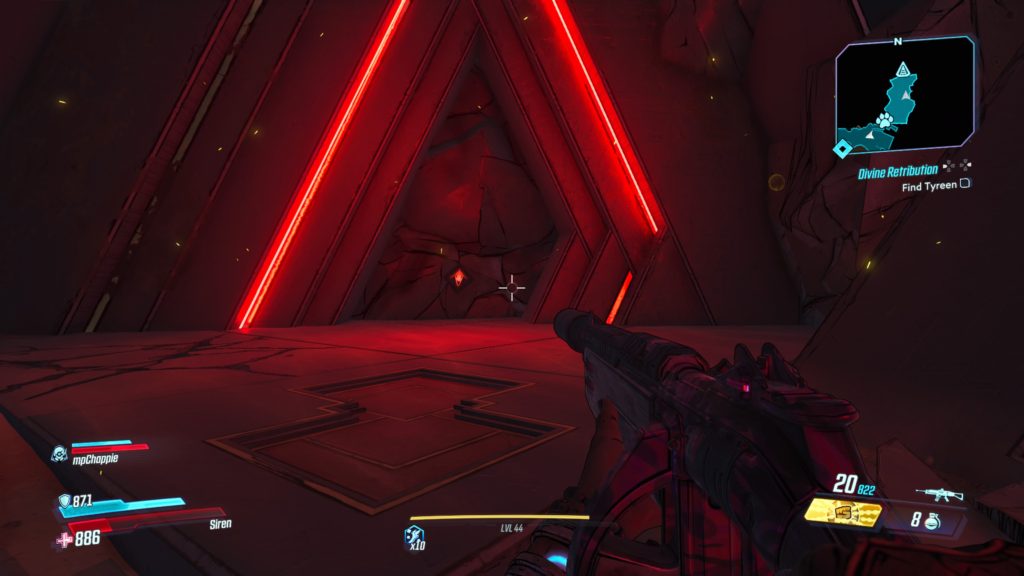
Destroyer’s Rift
This writing is located in the Treacherous Path. Take the path left of the fast travel station before boss fight to find it.
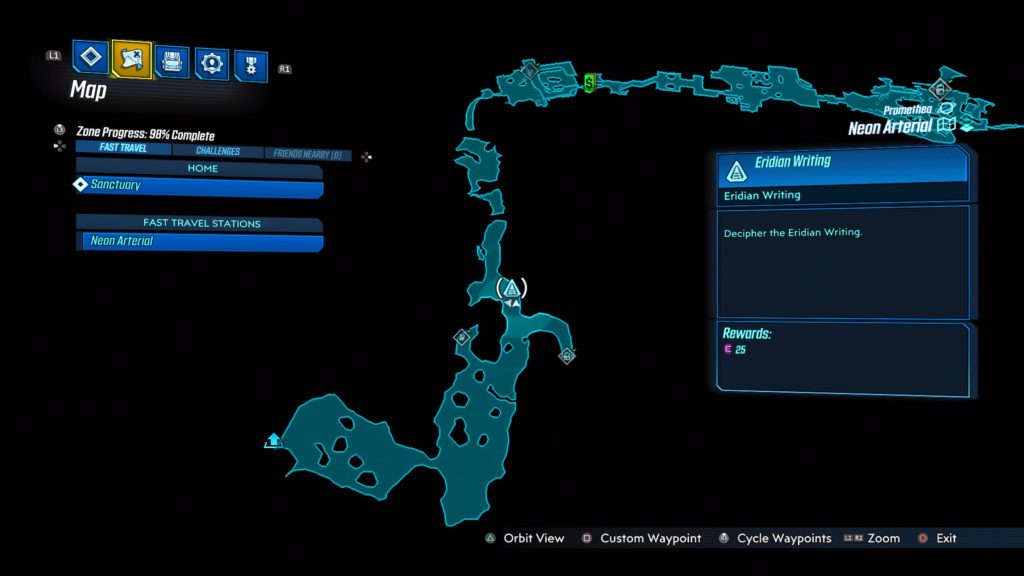
Promethea
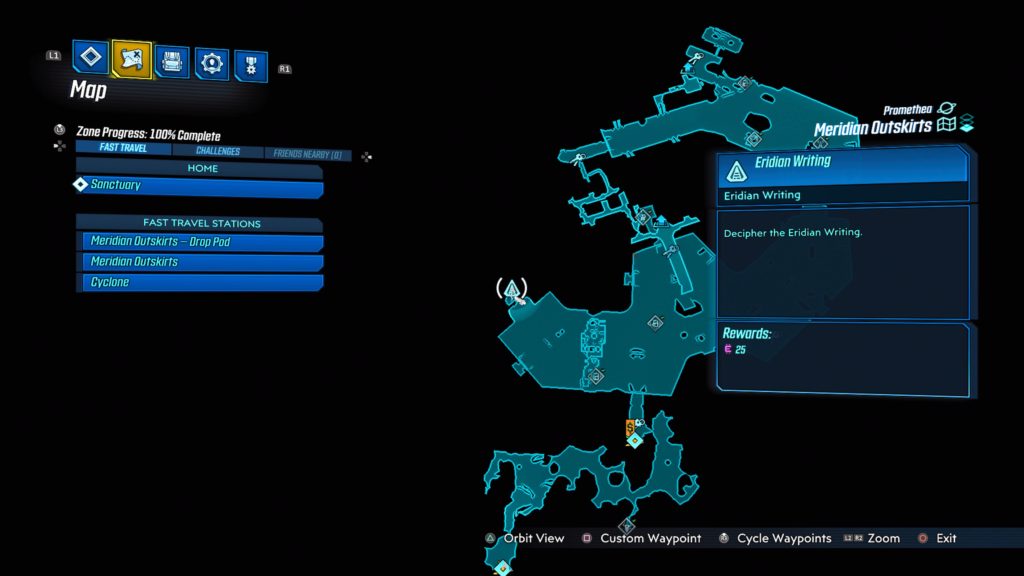
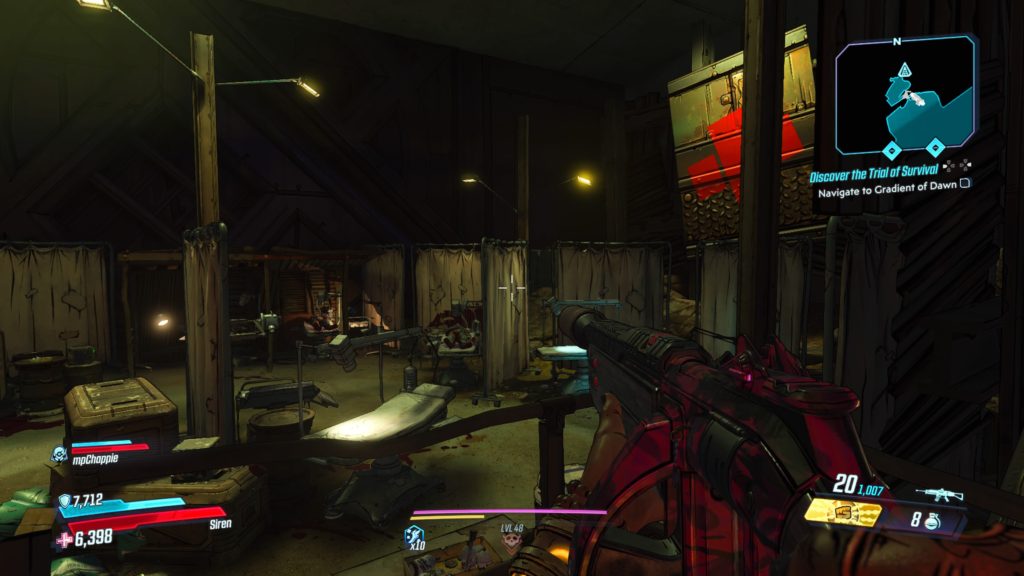
Meridian Outskirts
This writing is can be found in Mt. Schuler Recovery Center located in the northwestern part of the Spillways on a rock behind the gurneys and privacy curtains.
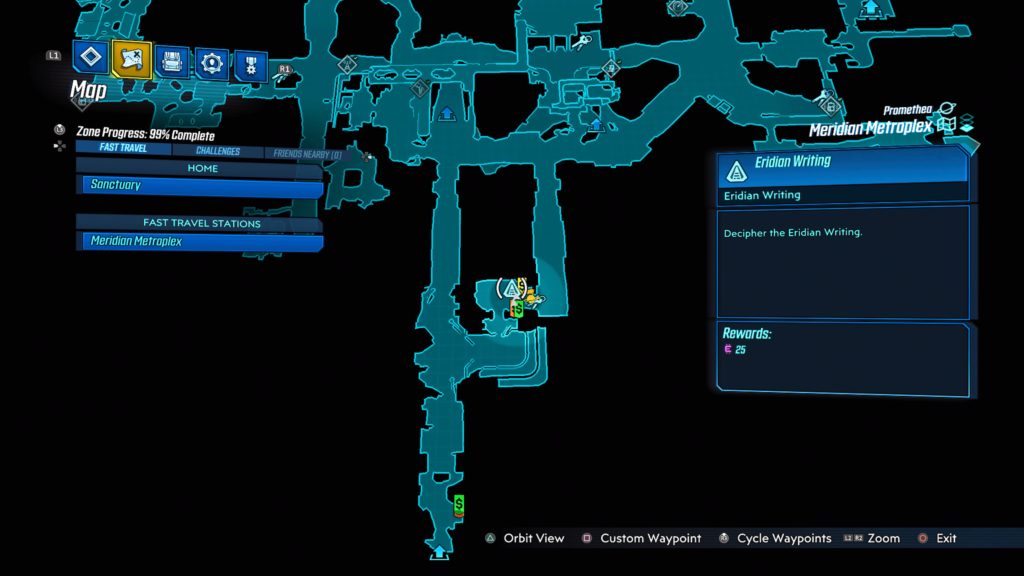
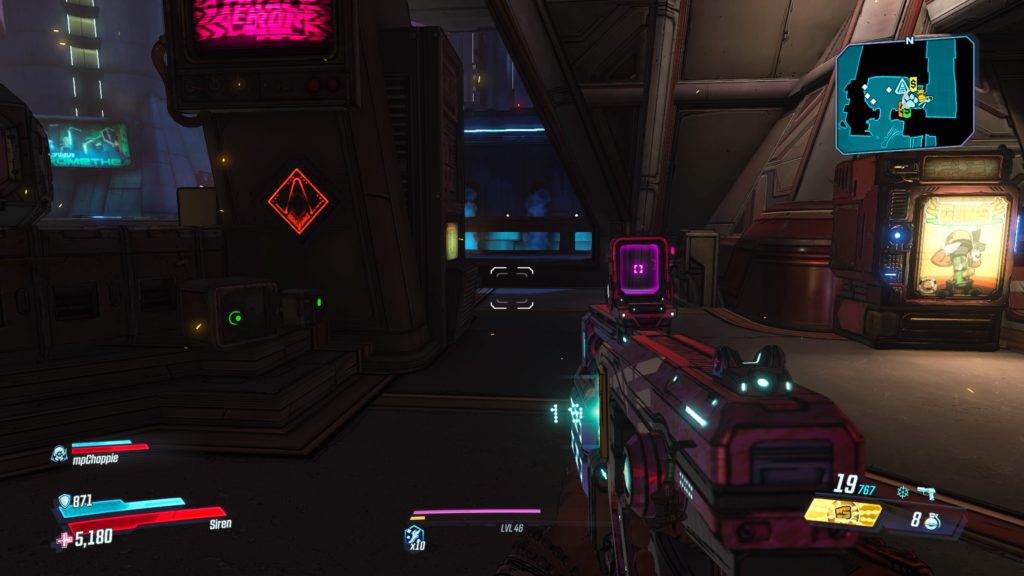
Meridian Metroplex
This writing is located in Watershed Base on a post across from the fast travel station.
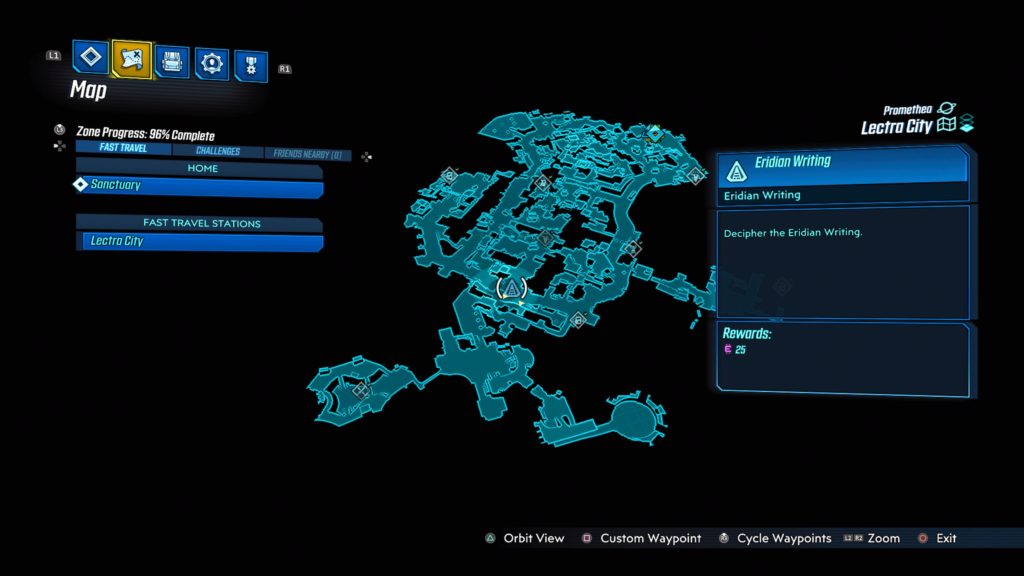
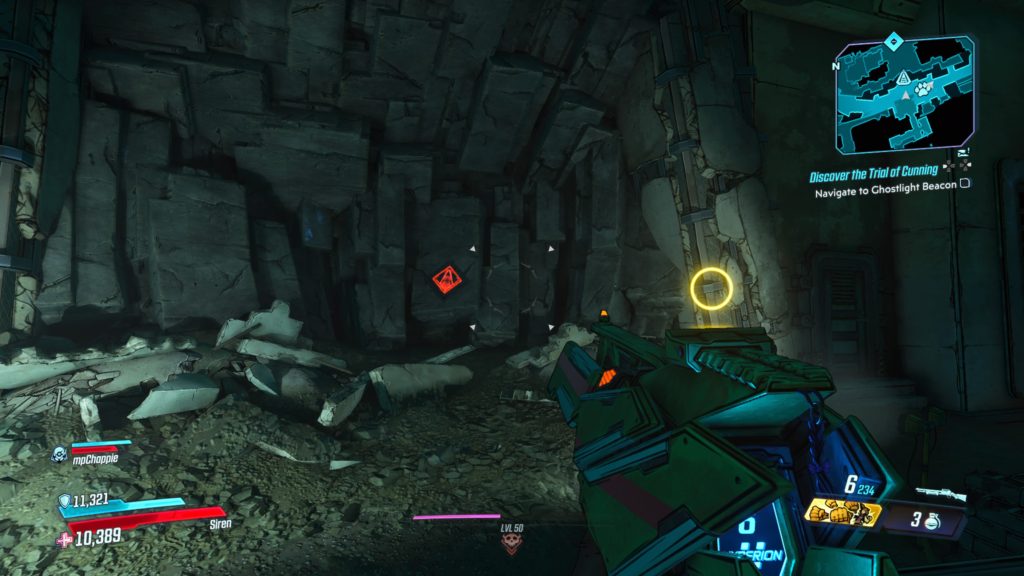
Lectra City
This writing is located in the tunnel that runs underneath Downtown Square.
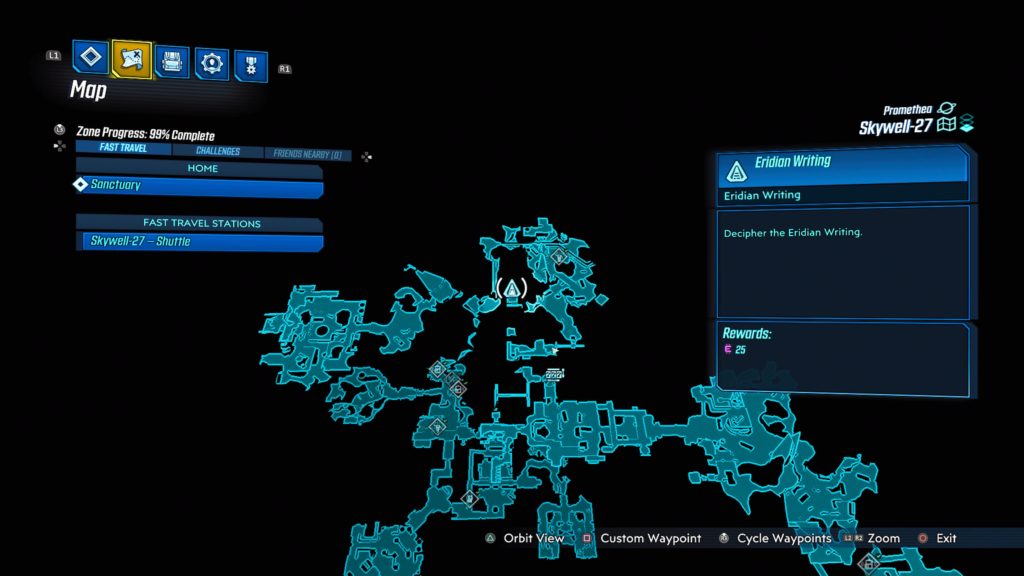
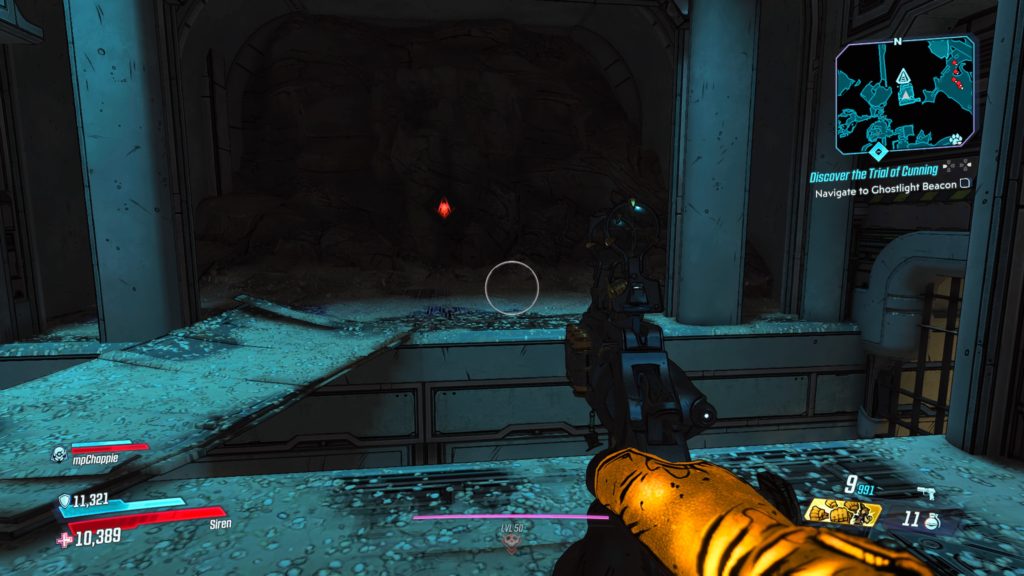
Skywell-27
This writing is located on a wall a little southwest of the dead claptrap with an antenna just before the Tritanium Refinery area.
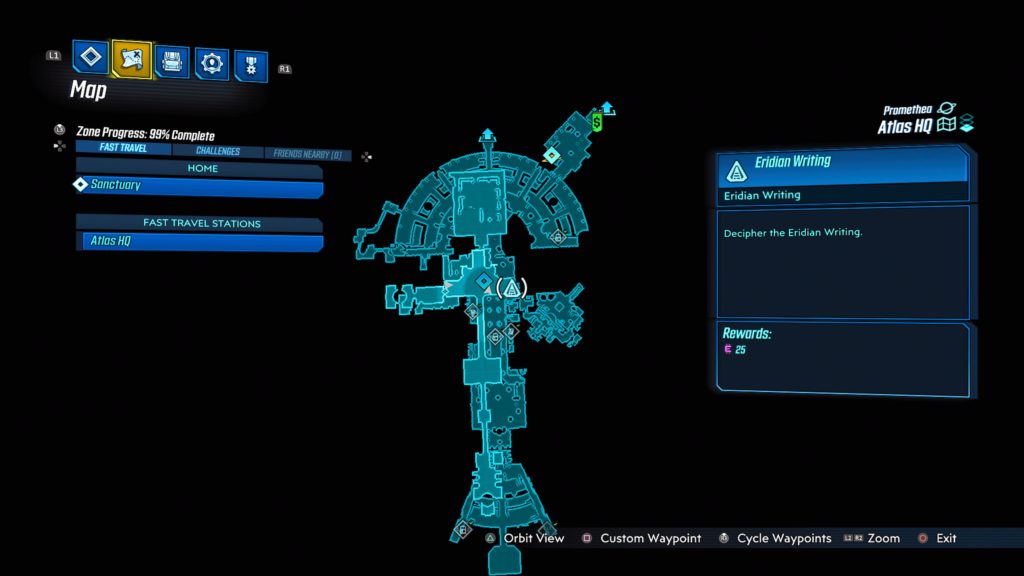
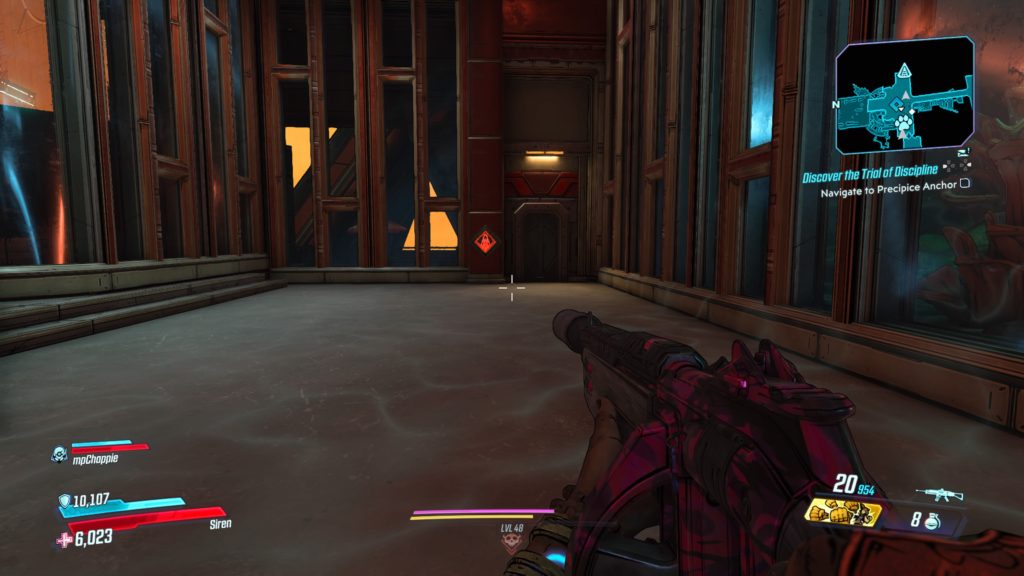
Atlas HQ
This writing is located on the wall in the CEO’s office near a door on the left side.
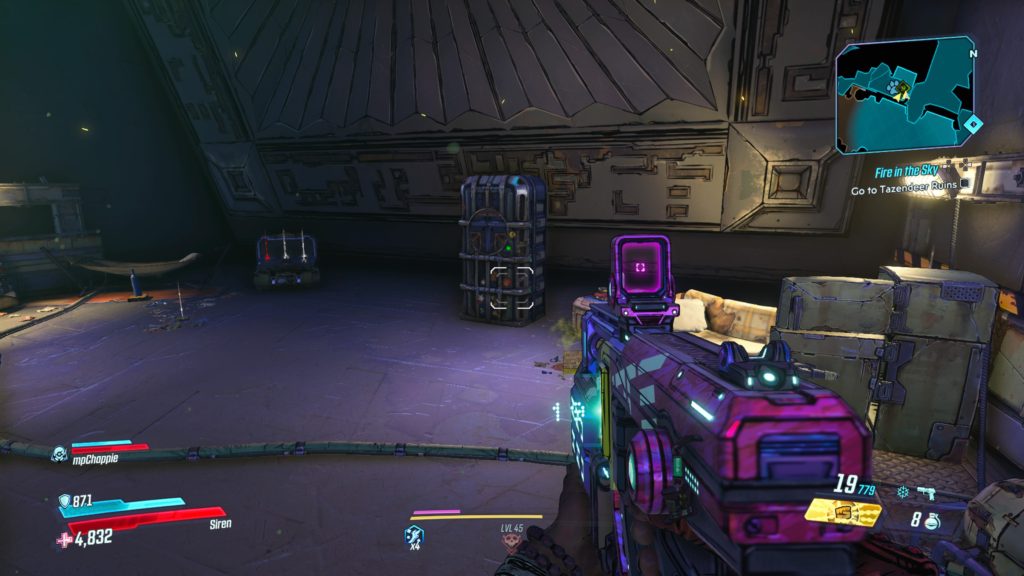
This log is located on a metal crate in An Eternal Silence during the Footsteps of Giants main mission on the south side of the large room. See the map below for the exact location.
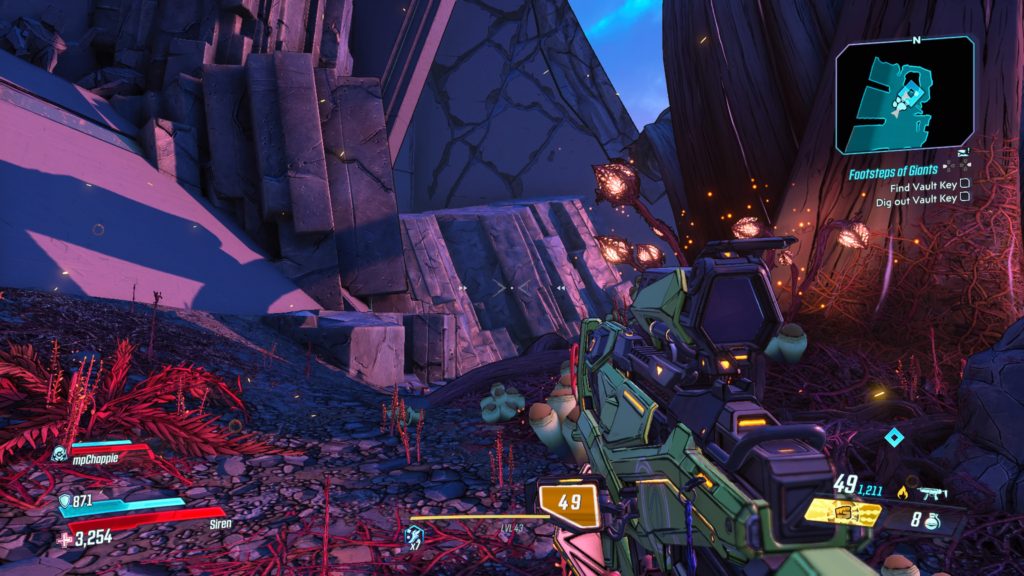
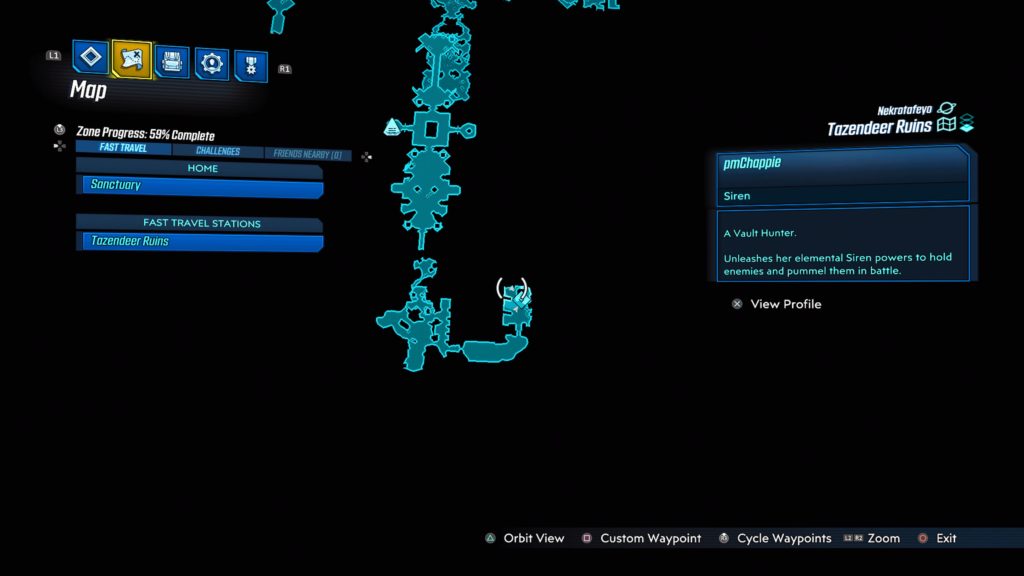
No Coming Back (Part 1)
This log is located on the rock ledge to the left of where you need to dig out the Vault Key during the Footsteps of Giants main mission in The Blind Mill. See the map below for the exact location.
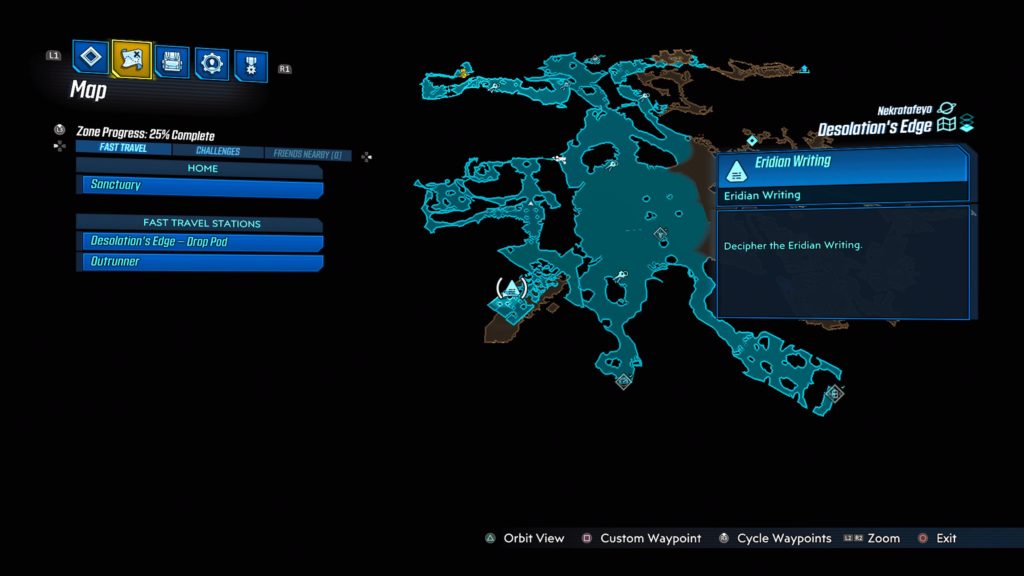
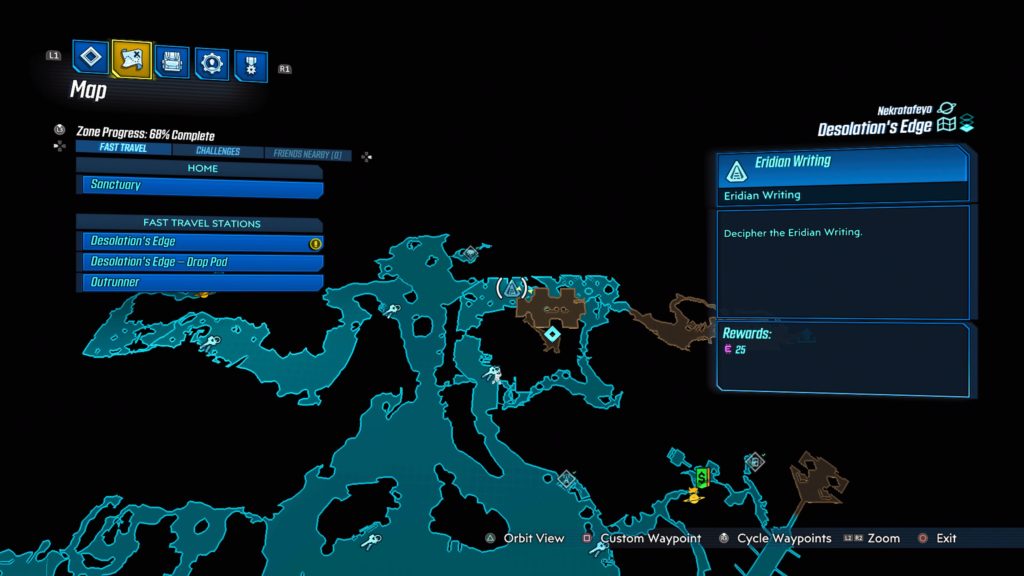
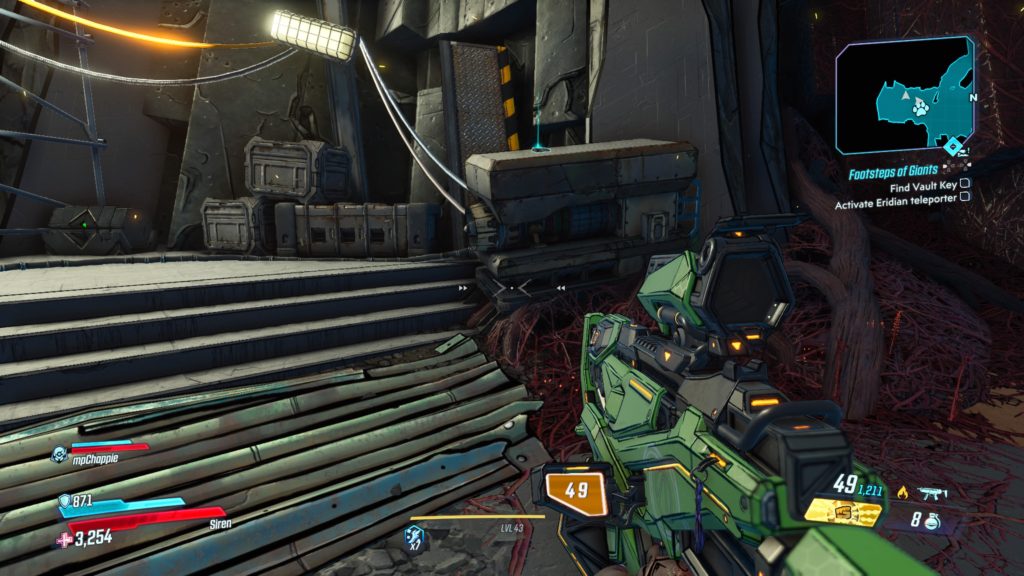
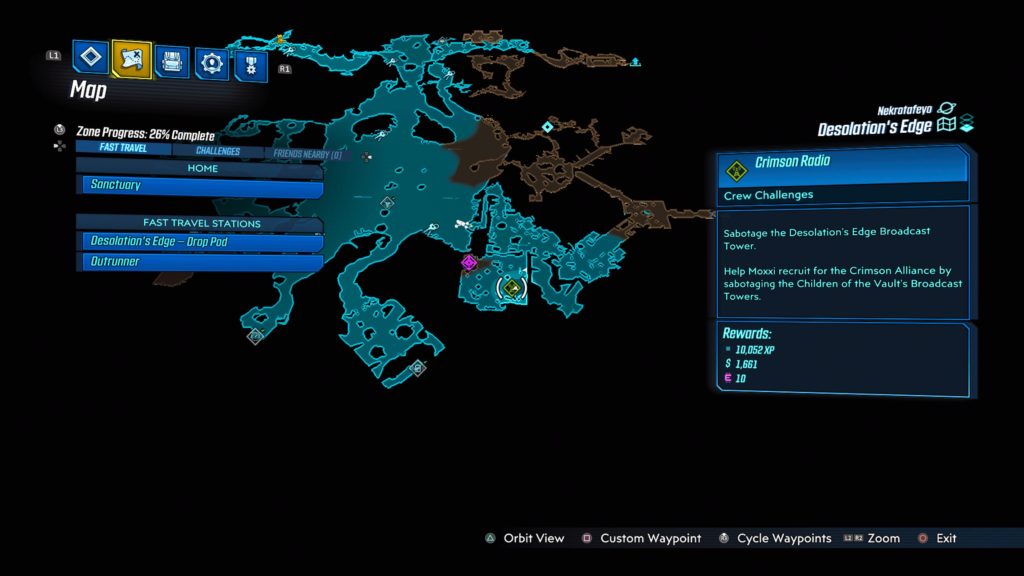
This broadcast tower is located in a Maliwan base on the southeastern part of the map on top of a tower. You can reach it by climbing on the wall with a light next to it and using that to jump up on the storage container next to the tower. See the map below for the exact location.
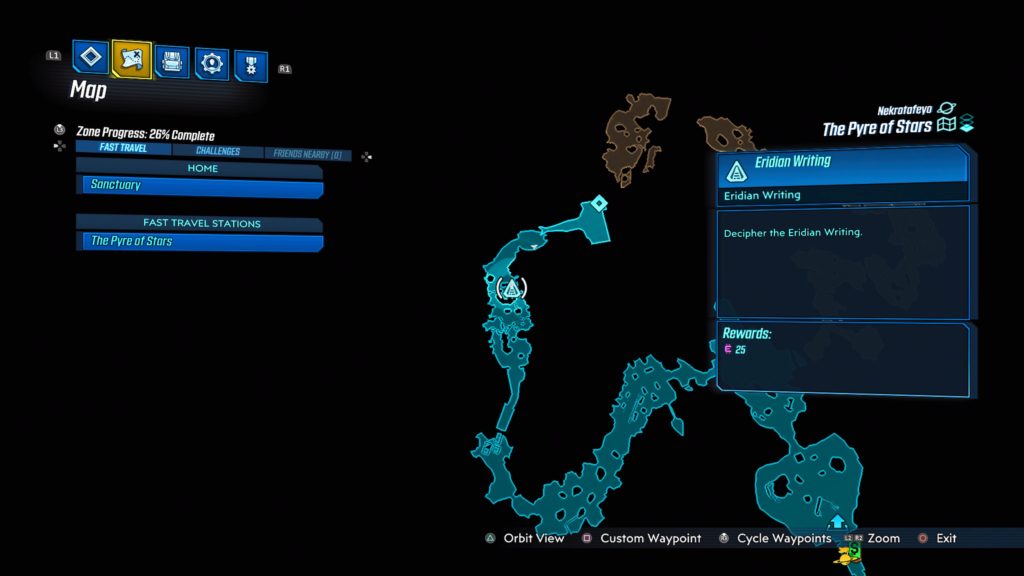
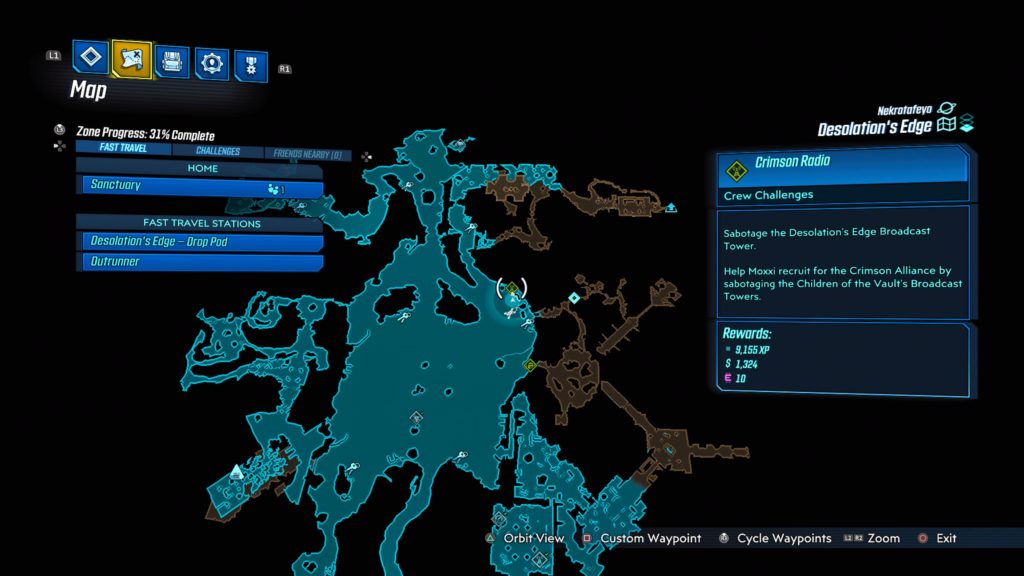
Desolation’s Edge Broadcast Tower 2
This broadcast tower is located in the northeast part of the Conquerors on top of a Maliwan outpost. See the map below for the exact location.
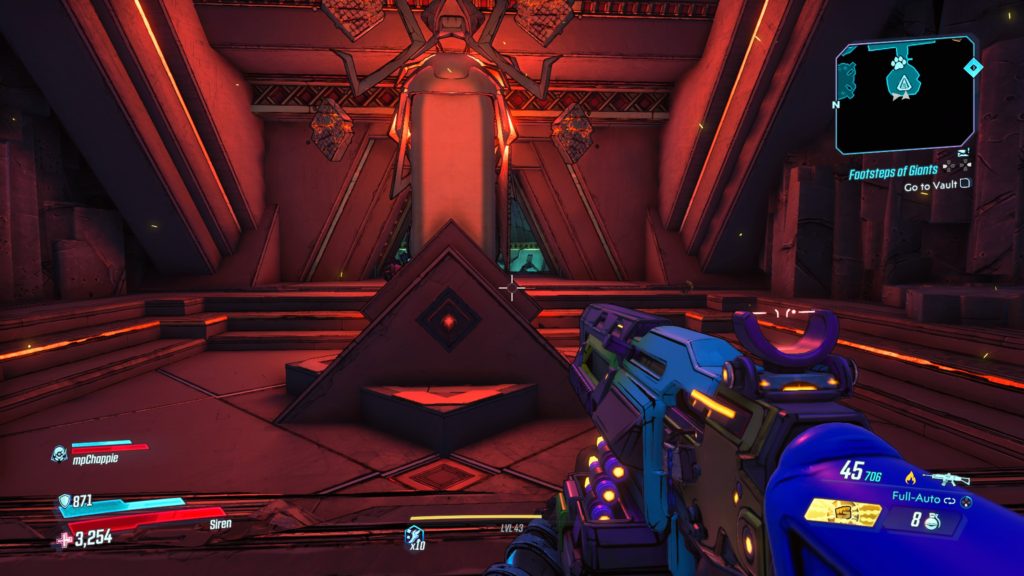
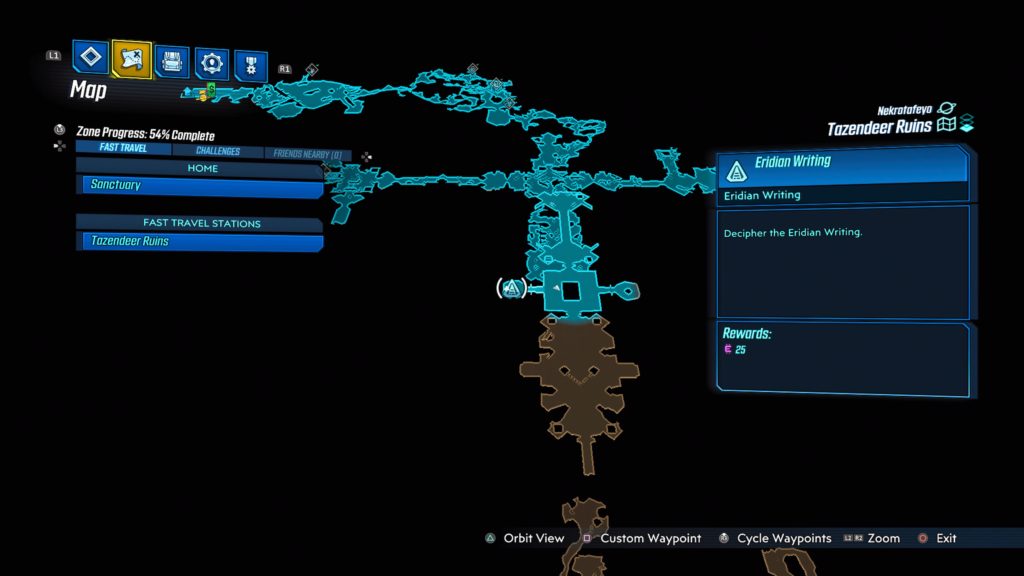
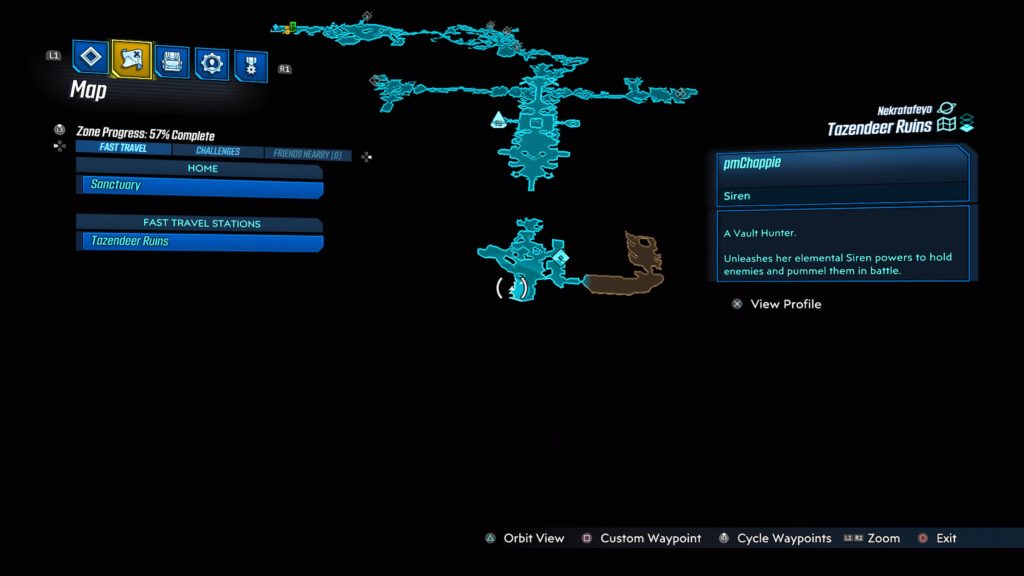
Tazendeer Ruins
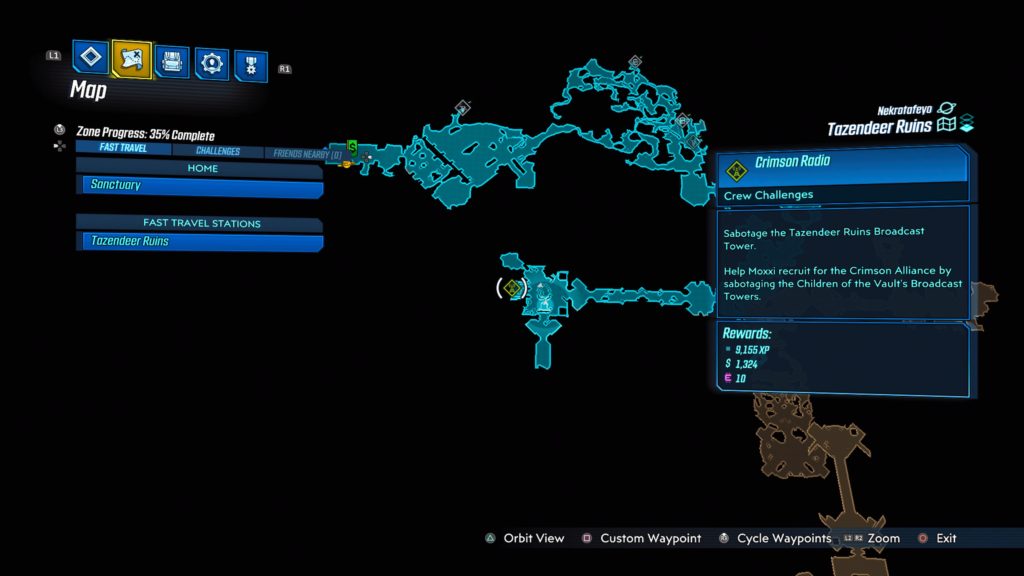
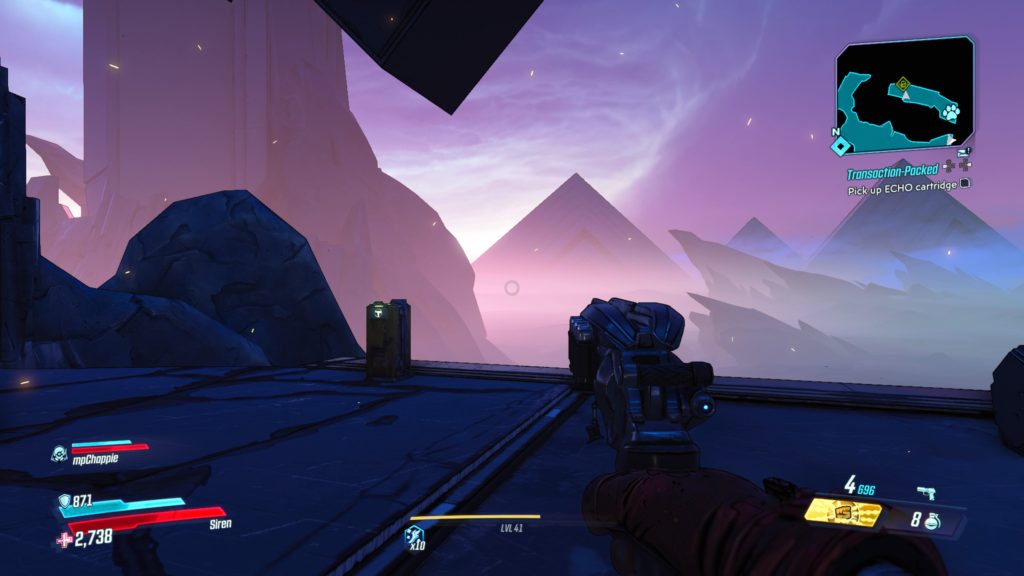
Tazendeer Ruins Broadcast Tower
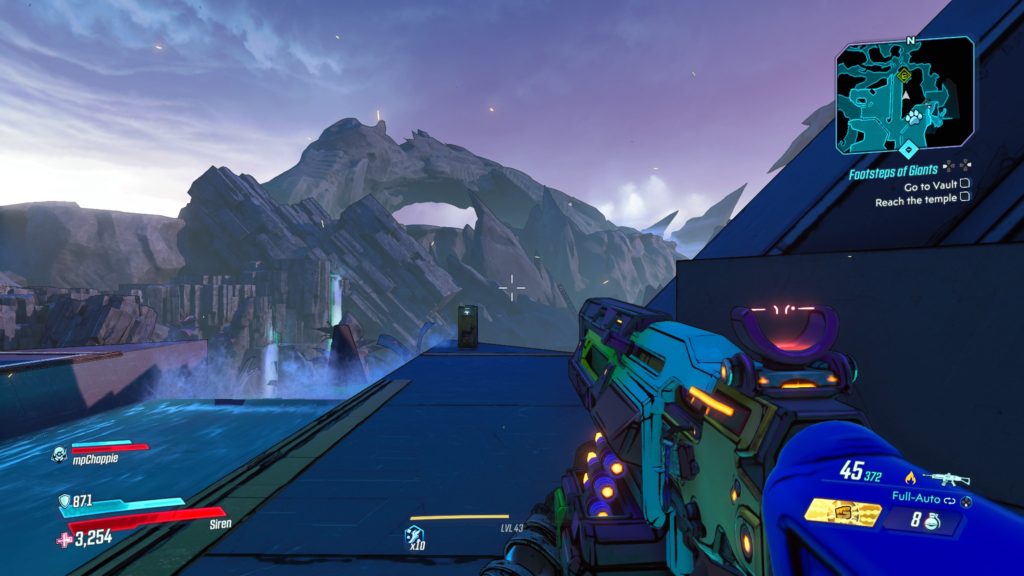
This broadcast tower is located in the southern part of the map, west of the vault in a Maliwan outpost. To reach it, you will have to jump on top of the crate on the right side of the building and use that to reach the roof. See the map below for the exact location.
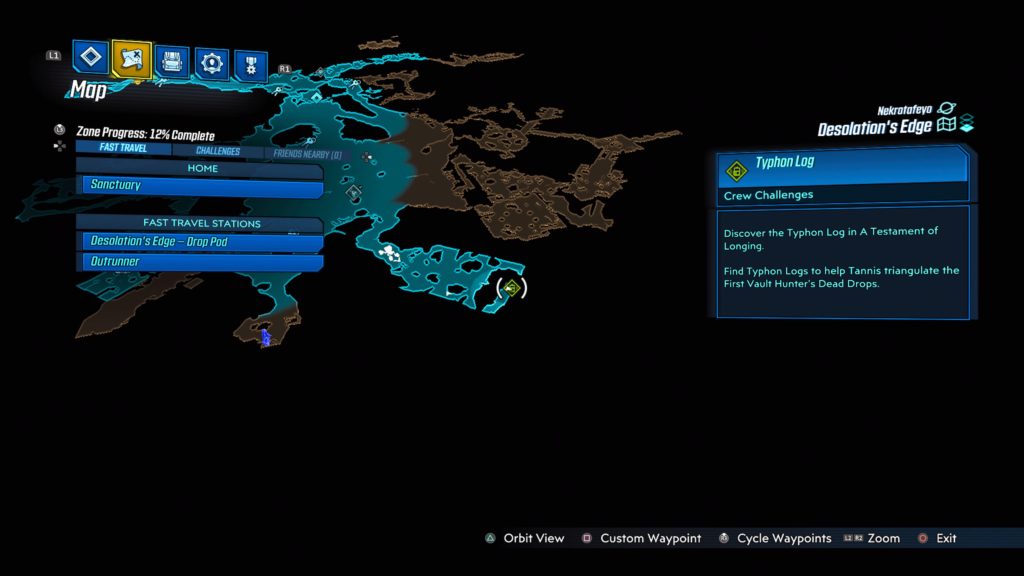
This log can be found at the back of the Testament to Longing on the south side of the map. See the map below for the exact location.
The Conqueror
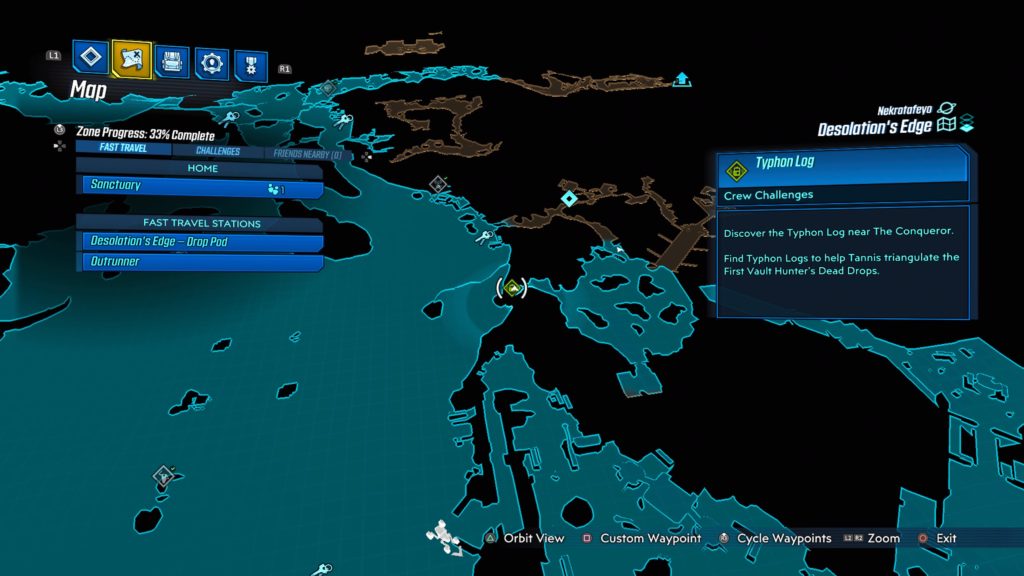
This log can be found overlooking the eastern part of the Conqueror on a small cliff. To reach it you will have to head through the Strain on the southeast side of the map or enter the cave on the eastern part of the Conqueror that is used as the route to find Typhon. See the map below for the exact location.
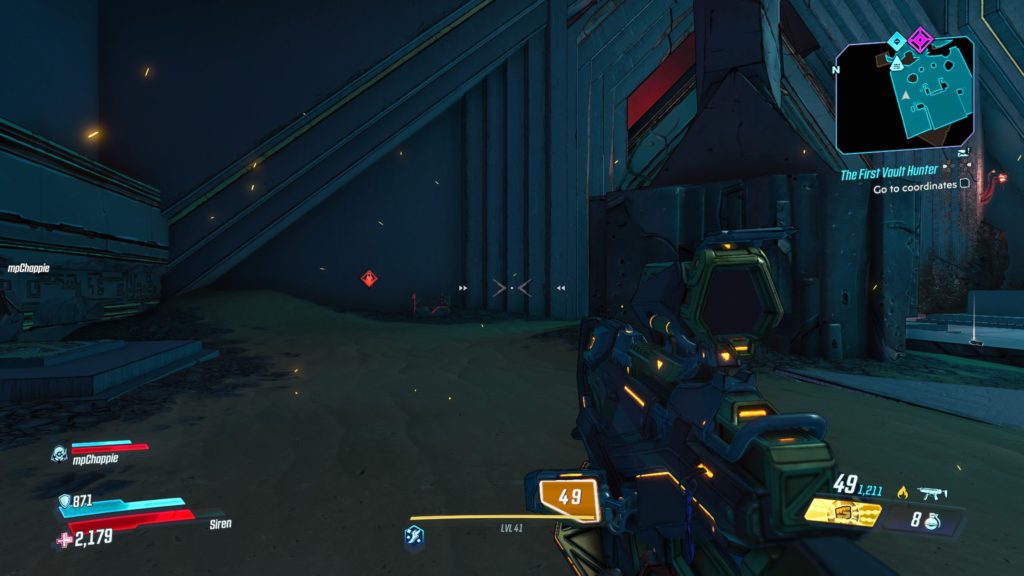
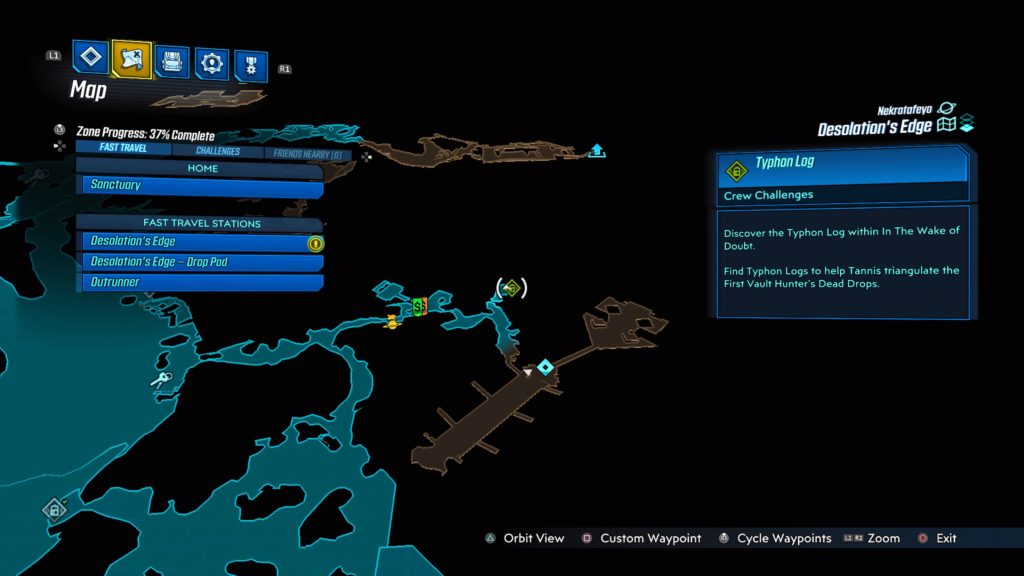
The Wake of Doubt
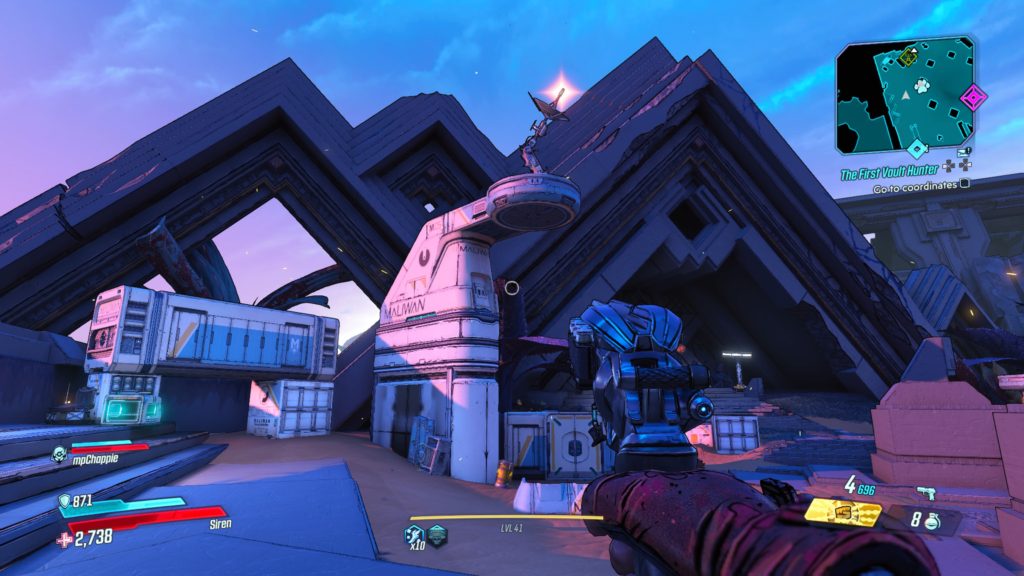
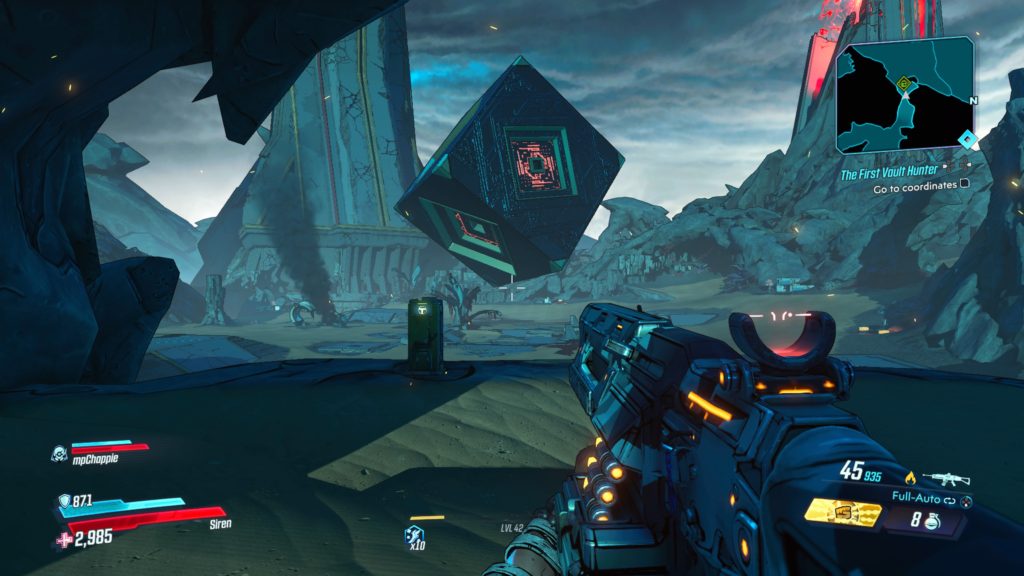
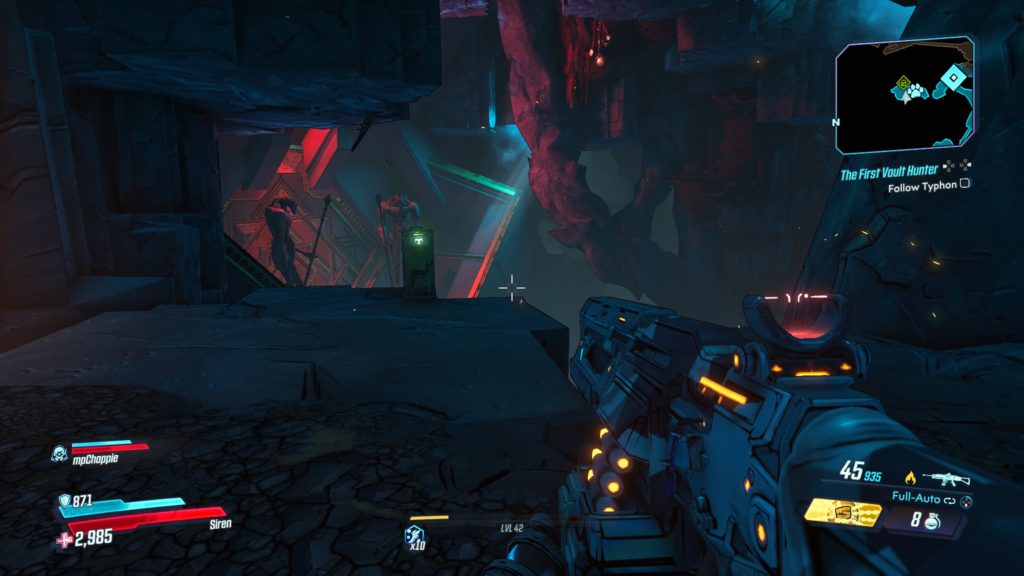
This log can be found in Typhon’s camp on the way to the machine during the First Vault Hunter main mission. See the map below for the exact location.
Desolation’s Edge Dead Drop Cache
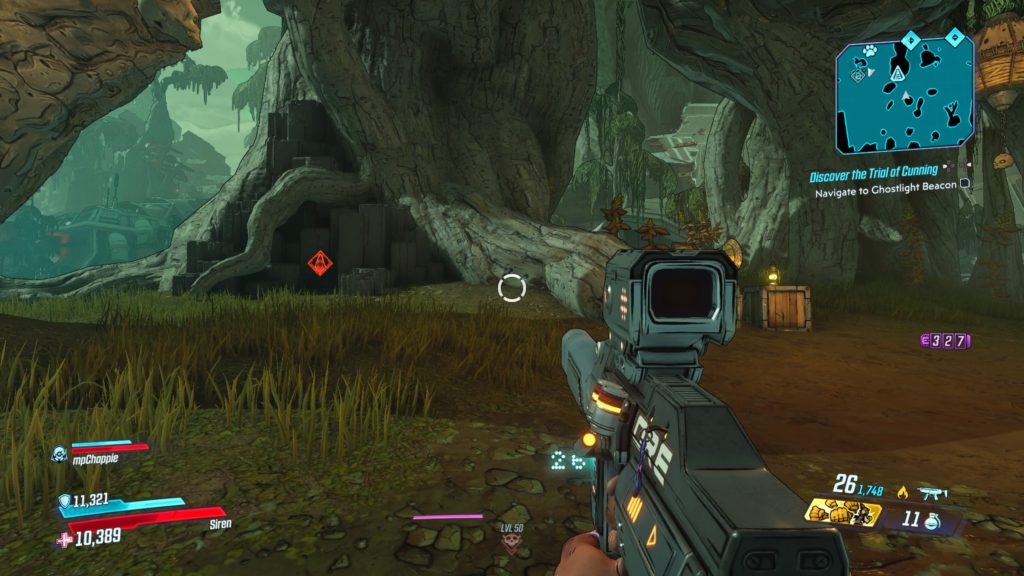
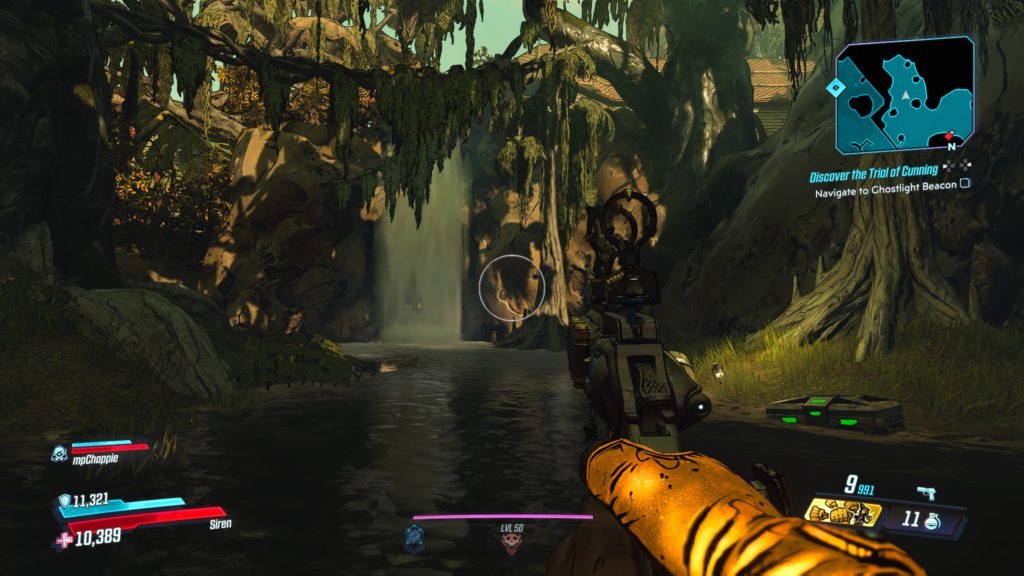
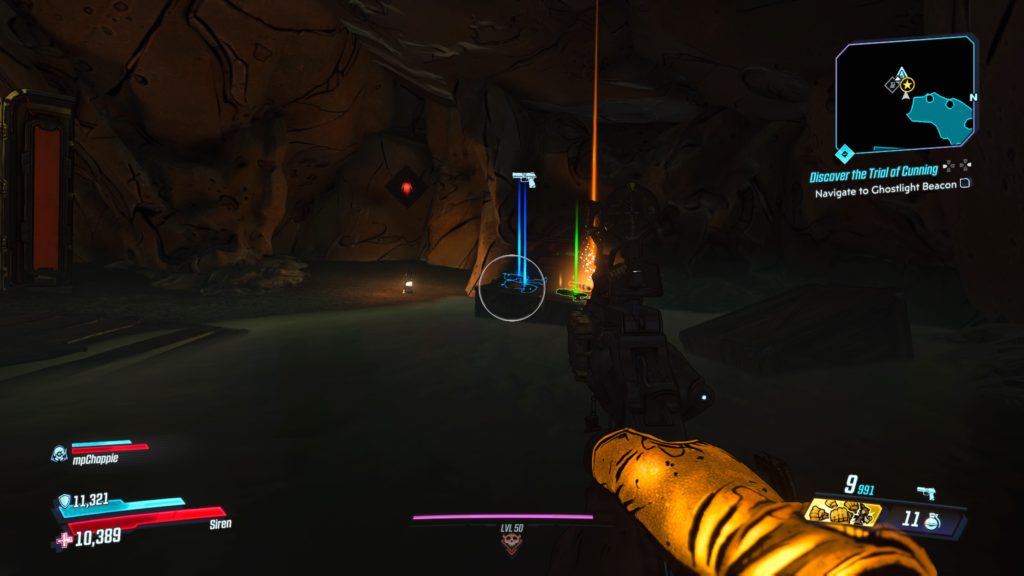
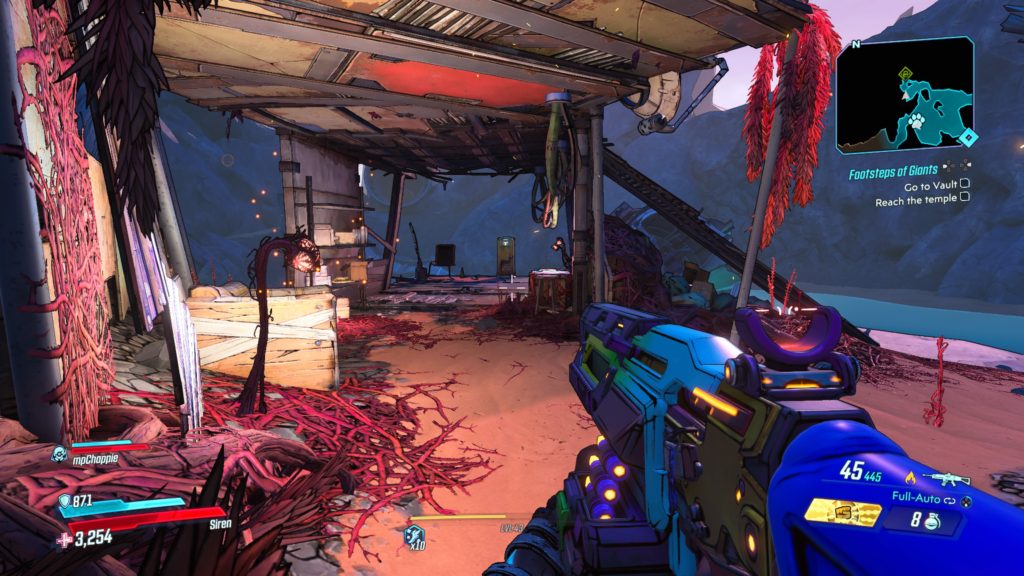
This cache is located under the Twilight Arcade in the southwestern part of the map. To reach it, you will have to melee some red vines on the side of the temple. The cache will be in a side room, through a waterfall.
Tazendeer Ruins
The Last House
This log can be found under a metal shack overlooking a lake in the Last House area located in the north of the map. See the map below for the exact location.
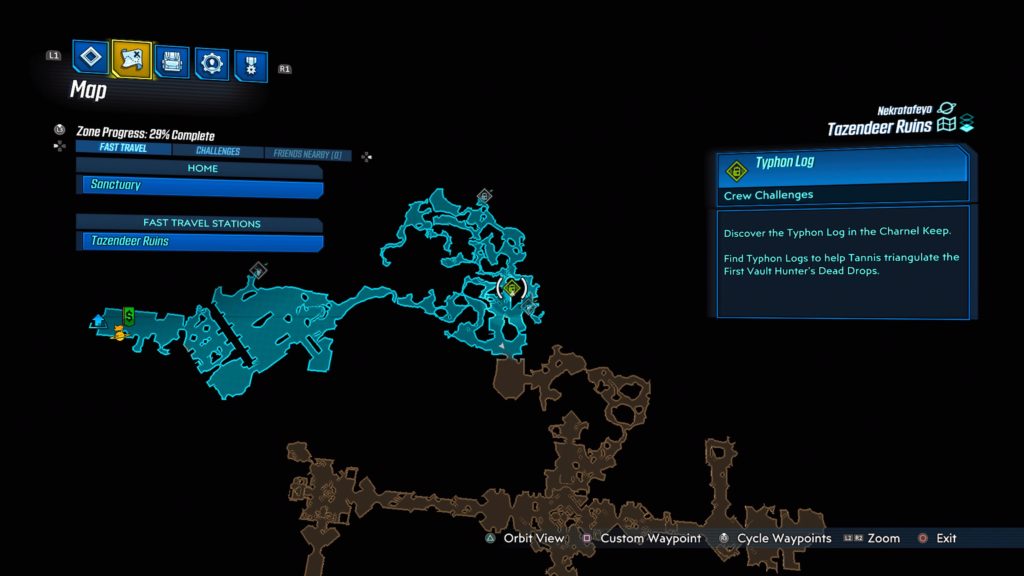
Charnel Keep
This log can be found in the northern part of the map, east of the fast travel station close to the path you travel during the Footsteps of Giants main mission near a stream. See the map below for the exact location.
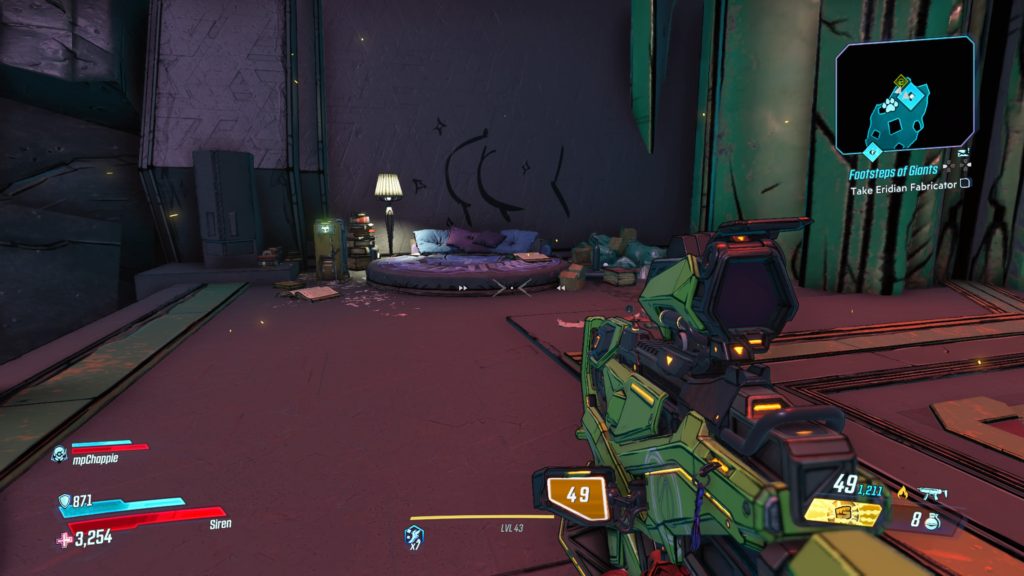
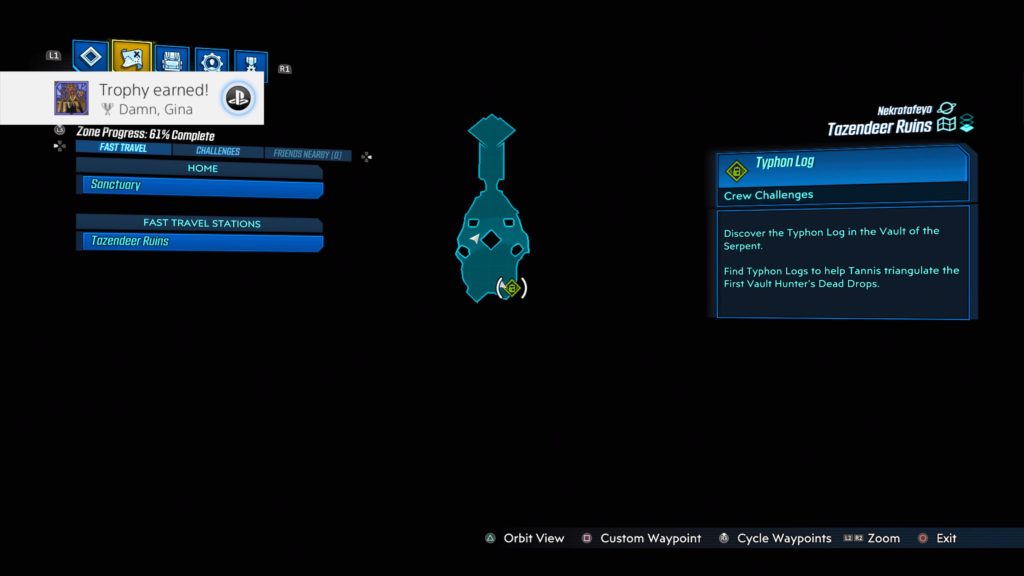
Vault of the Serpent
This log can be found in the Vault of the Serpent near Typhon’s bed. See the map below for the exact location.
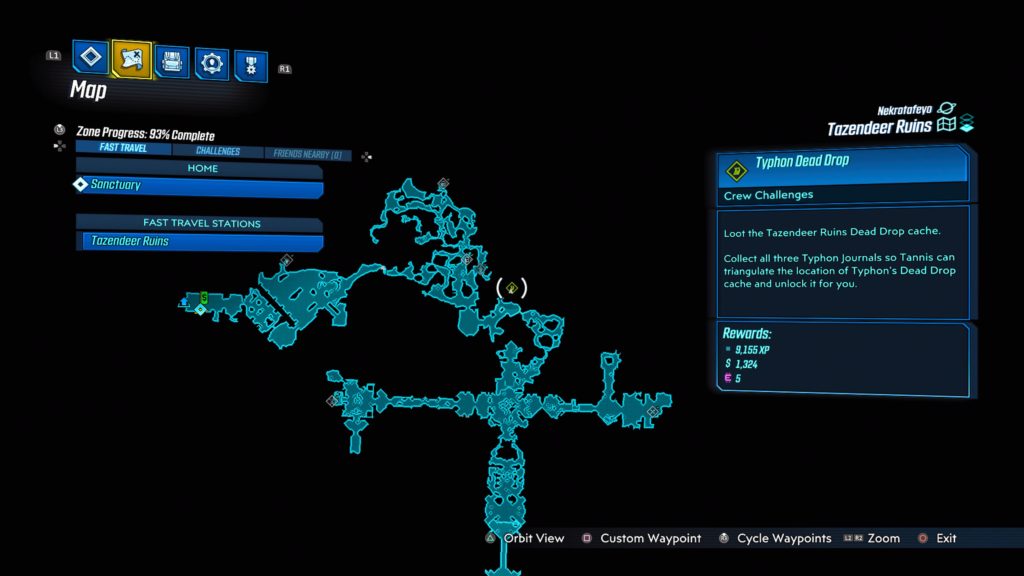
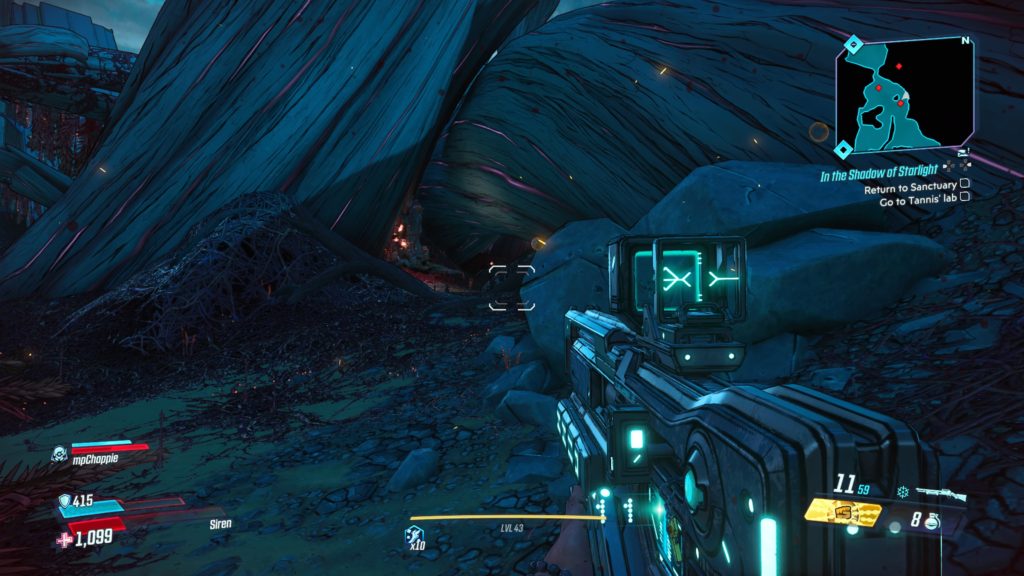
Tazendeer Ruins Dead Drop Cache
This cache is located in Charnel Keep at the central northern area of the map. It will be off the beaten path, so to reach it look for a small opening under some vegetation that will lead you to the cache. When you emerge, take a left and carefully drop down off the cliff to the ledge below.
Search
This site uses cookies. By continuing to use this website, you are giving consent to cookies being used. For more information on cookies, view our Privacy Policy.OkPrivacy Policy