While trying to find a way off Waford Island in One Piece Odyssey, you’ll come across people that need help from the Straw Hats. That help comes in the form of Side Stories that task with completing a specific objective for a reward. You’ll get your first side story in Chapter 2.
A Prisoner’s Desire
Area: Marineford City Area
Objective: Collect 2 repair materials
This side story becomes available during Chapter 7. For this request, you’ll be tasked with gathering Nails from a broken cannon in the city and Ship Lumber from Ox Bell Plaza. The cannon can be found on the west side of South Town at the end of the straight. Speak with the Nail-Gathering Craftsman standing in front of the cannon to receive the nails. For the Ship Lumber, head to Ox Bell Plaza then speak with the Wood-Gathering Craftsman. Now that you’ve obtained both items, return to Jude. He’ll want you to find a sailcloth. Head to South Town and look for the shop stall near Ox Bell Plaza. Speak with the shopkeeper to begin a fight. Defeat him to obtain the sailcloth then return to Jude. Speak with him to complete the case.
Rewards: Prisoner’s Ring x1, 126,000 Berries
Battlefield Courier
Area: Alabasta – Desert Near Alubarna (The Royal Army Garrison)
Objective: Look for Hator
This side story can be started after returning to Alabasta in chapter 3. Speak with Segem in the Royal Army Garrison. He’ll ask you to deliver a letter to his son. Head over to the Rebel Army Camp located west of the garrison. Once there, speak with the Former Rebel Soldier sitting near a ladder on the right just past the main entrance. You’ll then want to take the ladder up and speak with the Veteran Soldier on the walkway. He’ll then send you to a talk to Hator’s Partner wearing a red shirt and sitting under a canopy. Finally, the next destination is the Baroque Works Hideout which can be reached via a northwestern path in the Desert Near Alubarana. Talk to Hator there then return to Segem to close the case.
Rewards: Family Ring x1, 18,000 Berries
Dance Rehearsal
Area: Alabasta – Alubarna (Lovely Spring Plaza)
Objective: Train the pupils
This side story becomes available after completing the Talented Doctor side story for Sardan. This time, she’ll ask you to help train her dancers. You can do this by speaking with her again to fight them. There will be two technique-based enemies and 1 power-based. Defeat them to close the case.
Rewards: Dancer’s Tiara x1, 18,000 Berries
For Whom the Bell Tolls
Area: Marineford City Area
Objective: Talk to the plaza animals
This side story becomes available during Chapter 7. Speak with the man sitting on the ground in Ox Bell Plaza. As Chopper, speak with the cat near the stairs. Next, travel to the fountain in the northeast part of South Town and speak with the dog frolicking in the water. After speaking with the dog, head up the stairs in the north to reach North Town. Once there, head past the horse and take the stairs to the left up to the top. Speak with the black cat next to the tables. Afterwards, head back down the stairs and turn left. Follow the path to the Crumbled Ground and speak with the people next to the bridge that Franky built to trigger a fight. Defeat the enemies then return to Kevin to complete the case.
Rewards: Ox Bell’s Pendant x1, 126,000 Berries
God Usopp 1
Area: Dressrosa City Area
Objective: Reform the violent gladiators
Speak with Blacksmith Garill in Dressrosa City East to obtain this side story then travel to Dressrosa City South in the southern part of the city to find a group of gladiators. Approach the group for an event followed by a battle. Defeat the gladiators then speak with them. Afterwards, speak with Garill to close the case.
Rewards: Fairy Pumpkin Gazpacho x1, 37,000 Berries
God Usopp 2
Area: Dressrosa City Area
Objective: Learn about the mystery seeds
To start this quest, speak with the Worried Old Woman at Foot of New Royal Plateau in the southeastern part of the area. To learn more about the mystery seeds, start by heading to the bookstore, which is the red brick building at Coliseum Path. Once inside the bookstore, speak with the man behind the counter. You’ll need to gather the Bo Bo Bird Egg, which can be looted around the Coliseum. Once you’ve found one, report back to the old woman. Next, she’ll want you to meet her in front of the castle at New Royal Plateau. Travel to the N.R.P. Sunflower Field in the New Royal Plateau: Top at night. Once there, speak with the woman near the sunflowers to trigger a fight against a group of man-eating plants. When you defeat them all, the quest will complete.
Rewards: Team God Badge x1, 49,000 Berries
Grand Line Quiz Kid Level 1
Area: Sandy Oasis (Great Sandy Desert)
Objective: Answer Zoner’s Quiz Correctly
Zoner can be found in the Sandy Oasis after you get Nami’s money back as part of the main episode in Chapter 2. She’ll ask you a series of questions that you’ll need to answer correctly. The questions and answers can be found below. The case will close after answering them all correctly.
| Question | Answer |
|---|---|
| What animal will ask to become your apprentice when beaten in battle? | The Kung Fu Dugong. |
| What’s the name of a poisonous spider that looks like a fruit? | The Desert Strawberry |
| Who is Alabasta’s ruler and twelfth successor of the Nefertari Royal Family? | Cobra. |
Rewards: Scorpion and Clam Soup x1, 100 Berries
Grand Line Quiz Kid Level 2
Area: Sandy Oasis (Great Sandy Desert)
Objective: Answer Zoner’s Quiz Correctly
This side story becomes available after completing the Grand Line Quiz Kid Level 1 side story. Zoner will ask you more questions that you’ll need to answer correctly. The questions and answers can be found below. The case will close after answering them all correctly.
| Question | Answer |
|---|---|
| What animal plays dead to steal the belongings of travelers? | The Bilker Heron |
| What is the name of the large casino in Rainbase? | Rain Dinners |
| What’s the name of the giant gators who inhabit Sandy Island? | Banana Gators |
Rewards: Sazae Kancho Pescatore x1, 200 Berries
Grand Line Quiz Kid Level 3
Area: Sandy Oasis (Great Sandy Desert)
Objective: Answer Zoner’s Quiz Correctly
This side story becomes available after completing the Grand Line Quiz Kid Level 2 side story. Zoner will ask you more questions that you’ll need to answer correctly. The questions and answers can be found below. The case will close after answering them all correctly.
| Question | Answer |
|---|---|
| What is Alabasta Vice-commander Pell’s alias? | Pell the Falcon |
| What is the rare, giant catfish found only in the Sandora River? | The Sandora Catfish |
| What is port city Nanohana’s local specialty? | Perfume |
Rewards: Quiz Researcher’s Badge x1, 300 Berries
Grand Line Quiz Lady Level 1
Area: Fountain Square (Water Seven City Area)
Objective: Answer Zoner’s quiz correctly
This side story becomes available after clearing the story portion of Water Seven. Speak with Zoner near the Yosa sign. When you’re ready, speak with her a second time to begin the quiz. The questions and answers can be found below. The case will close after answering them all correctly.
| Question | Answer |
|---|---|
| What is the name of the Sea Train currently servicing Water Seven? | Puffing Tom |
| What is the mounted transportation essential to living in Water Seven? | Bull |
| What is the name of the annual high tide that overwhelms Water Seven? | Aqua Laguna |
Rewards: Bronze Bat Soup x1, 12,000 Berries
Grand Line Quiz Lady Level 2
Area: Fountain Square (Water Seven City Area)
Objective: Answer Zoner’s quiz correctly
This side story becomes available completing the Grand Line Quiz Lady Level 1 side story. Speak with Zoner near the Yosa sign. When you’re ready, speak with her a second time to begin the quiz. The questions and answers can be found below. The case will close after answering them all correctly.
| Question | Answer |
|---|---|
| What is the highest tier Bull you can rent from the Rental Bull Shop? | King Bull |
| What is the name of the endangered tree that is the strongest in the world? | Treasure Tree Adam |
| How many foremen does the Galley-La Company have for each dock? | 5 |
Rewards: Ogre Sazae Kancho Carbonara x1, 16,000 Berries
Grand Line Quiz Lady Level 3
Area: Fountain Square (Water Seven City Area)
Objective: Answer Zoner’s quiz correctly
This side story becomes available completing the Grand Line Quiz Lady Level 2 side story. Speak with Zoner near the Yosa sign. When you’re ready, speak with her a second time. She’ll then travel to the northwestern corner of Dock One. Speak with her behind a covered wagon to close the case.

Rewards: Quiz Researcher’s Ring x1, 24,000 Berries
Grand Line Quiz Madam Level 1
Area: Marineford City Area
Objective: Answer Zoner’s quiz correctly
You can obtain this side story during Chapter 7. To start the quest, speak with Zoner in South Town near the fountain. When you’re ready, speak with her a second time to begin the quiz. The questions and answers can be found below. The case will close after answering them all correctly.
| Question | Answer |
|---|---|
| What is the name of the prison impossible to break into or out of? | Impel Down |
| What is the name of the bell in western Marineford? | The Ox Bell |
| The “Ultimate Military Force” of Marines HQ are Aokiji, Kizaru, and who else? | Akainu |
Rewards: Shogun Jishi’s Steak x1, 63,000 Berries
Grand Line Quiz Madam Level 2
Area: Marineford City Area
Objective: Answer Zoner’s quiz correctly
You can obtain this side story after completing Grand Line Quiz Madam Level 1. To start the quest, speak with Zoner in South Town near the fountain. When you’re ready, speak with her a second time to begin the quiz. The questions and answers can be found below. The case will close after answering them all correctly.
| Question | Answer |
|---|---|
| What is the name of the warden of Impel Down? | Magellan |
| The Three Great Powers of the Grand Line are the Four Emperors, Marine HQ, and? | The Seven Warlords of the Sea |
| What is the name of the giant gate in both Enies Lobby and Impel Down? | The Gates of Justice |
Rewards: Shay-King Parfait x1, 84,000 Berries
Grand Line Quiz Madam Level 3
Area: Marineford City Area
Objective: Answer Zoner’s quiz correctly
You can obtain this side story after completing Grand Line Quiz Madam Level 2. To start the quest, speak with Zoner in South Town near the fountain. This time she’ll want you to find her. You can find her in Ox Bell Plaza, which is south of South Town. As soon as you reach the plaza, an event will trigger leading to a battle against some escaped prisoners. Defeat them to complete the side story.
Rewards: Quiz Researcher’s Necklace x1, Zoro’s Cube Fragment x3, 126,000 Berries
Grand Line Quiz Mister Level 1
Area: Dressrosa City Area
Objective: Answer Zoner’s quiz correctly
You can obtain this side story during the Final Chapter. To start the quest, speak with Zoner in the Old Royal Plateau Area, which is the northwestern corner of the area. When you’re ready, speak with him again to begin the quiz. The questions and answers can be found below. The case will close after answering them all correctly.
| Question | Answer |
|---|---|
| What is the name of the violent fish that lives in the sea near Dressrosa? | The Fighting Fish |
| What flower blooms in the garden near the Dressrosa Royal Palace? | Sunflower |
| What is the name of the place in Dressrosa where gladiators fight? | The Corrida Coliseum |
Rewards: Merchant Gelato x1, 37,000 Berries
Grand Line Quiz Mister Level 2
Area: Dressrosa City Area
Objective: Answer Zoner’s quiz correctly
You can obtain this side story after completing the Grand Line Quiz Mister Level 1 side story. To start the quest, speak with Zoner in the Old Royal Plateau Area, which is the northwestern corner of the area. When you’re ready, speak with him again to begin the quiz. The questions and answers can be found below. The case will close after answering them all correctly.
| Question | Answer |
|---|---|
| Who is the man called the strongest gladiator of the Corrida Coliseum? | Kyros |
| What are the dwarves who live in Dressrosa called? | The Tontattas |
| The current Ultimate Military Force of Marines HQ are Kizaru, Ryokugyu and? | Fujitora |
Rewards: Fruit Gator Punch x1, 49,000 Berries
Grand Line Quiz Mister Level 3
Area: Dressrosa City Area
Objective: Answer Zoner’s quiz correctly
You can obtain this side story after completing the Grand Line Quiz Mister Level 1 side story. To start the quest, speak with Zoner in the Old Royal Plateau Area, which is the northwestern corner of the area. For this quest, you’ll need to find the kidnapped Zoner. Turn around immediately when you gain control and speak with the Worried man in front of the pink building to learn that he spotted a girl walking near the Colesium. Head south to the fountain at Coliseum Path and speak with the lady wearing an orange dress to learn that Zoner was spotted south of the Coliseum. Follow the road south to Square, At Fountain. Head up the raised road to find a little girl surrounded by a group of dangerous-looking men. Approach them for a cutscene that leads to a fight. Defeat them to close the case.
Rewards: Treasure Chest Key x1, Luffy’s Cube Fragment x3, 74,000 Berries
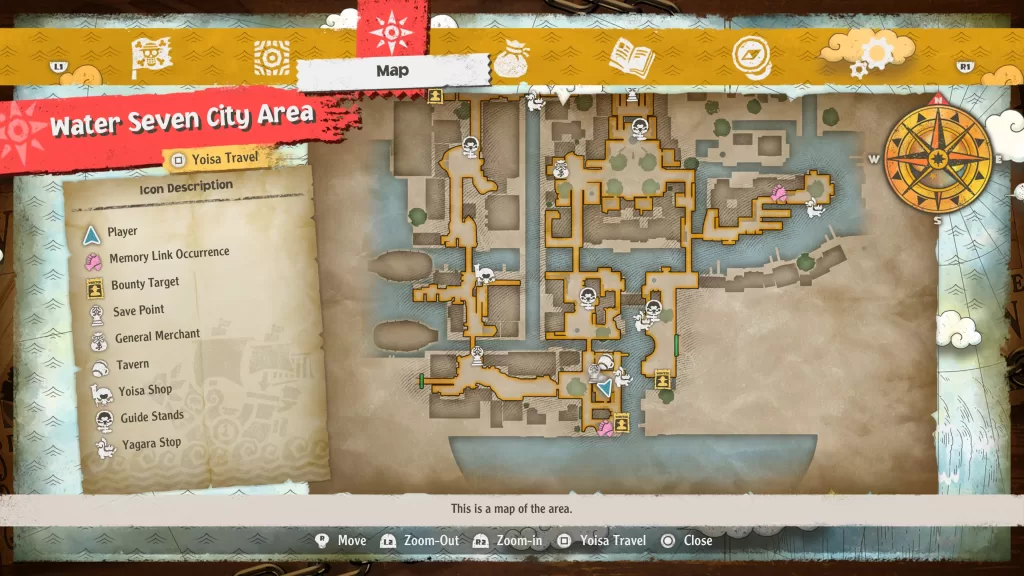
Help Iceberg 1
Area: Water Seven City Area
Objective: Get aqua corn
Talk with Iceberg outside the gate in Front of Mayoral Residence. Next, travel to the Lower Coast and head to the middle of the path traveling north from the harbor to find the shop. Speak with the merchant then keep heading north. After passing under the rock archway, take a right towards the eastern beach where you’ll find a group of pirates. Interact with them to start a fight. The enemies use the following types of attacks: 2 speed and 1 technique. Defeat them then return to the quest giver to close the case.
Rewards: Aqua Cabbage Roll x1, 36,000 Berries
Helping Iceberg 2
Area: Water Seven City Area
Objective: Talk to the tableware factory boss
After completing his first quest, speak with Iceberg again where he’ll request your assistance once more. You’ll need to head west from the mayor’s house to reach the bath. Speak with the man wearing a blue leopard print shirt. Select the following options: “The mayor has a press conference.”, “I hear he’s going to advertise your merchandise.” and “It’s for the city.” Afterwards, return to the mayor’s to get the next task. Head all the way down the stairs to reach Fountain Square. Speak with the guy standing to the right of an orange and white striped overhang. Select the following options: “The mayor has to get ready.”, “He’s preparing for the Aqua Laguna.” and “The mayor trusts you.” Again, return to the mayor’s to get another task. This time head to the Canal Restaurant on the eastern part of Water Seven City Area. You can find him just past the outdoor seating area standing in the corner near a door. He’ll be wearing a green striped shirt. Select the following options: “The mayor has a stomach ache…”, “There’s a dish that is good for stomach aches.” and “He said he’d work with your schedule.” Yet again, report back to Iceberg. This time the case will close.
Rewards: Elephant Tuna Saute x1, 46,000 Berries
Helping Iceberg 3
Area: Water Seven City Area
Objective: Ask around the sewers
After completing Helping Iceberg 2, speak with Iceberg to receive this case. Head to the Sewage Treatment Plant in the southern part of the city to reach the Sewers. Outside the grate, speak with the man wearing the blue button-up shirt. In the sewer, find 3 different groups of the gold bats and defeat them. Once done return to the guy outside the sewer entrance then report back to Iceberg to close the case.
Rewards: Iceberg’s Gift x1, 59,000 Berries
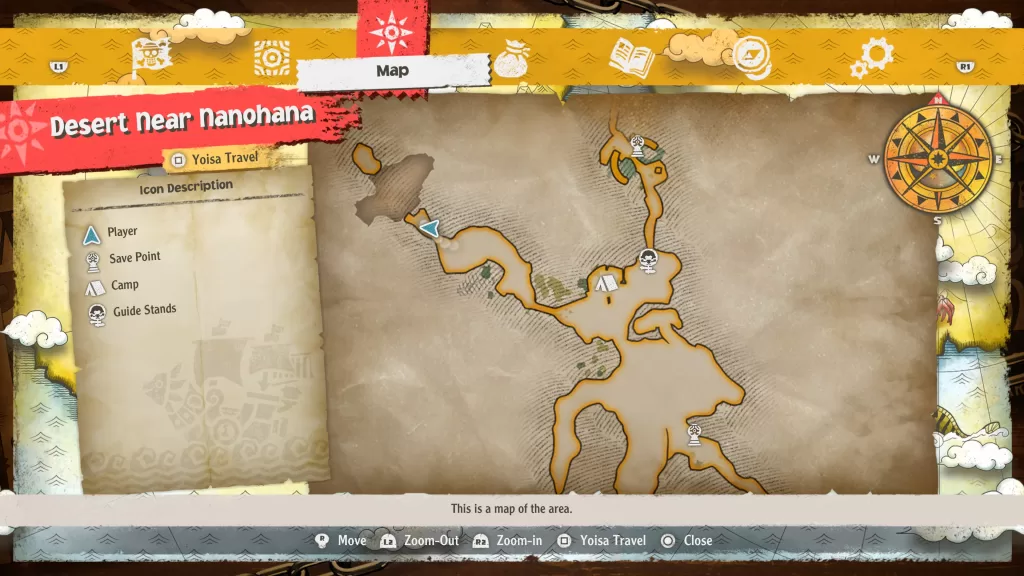
Hungry Navi Bird
Area: Alabasta – Nanohana (Exit to Desert)
Objective: Collect 10 Desert Nuts
You’ll receive this side story during Chapter 2 during the Head to Rainbase Main Episode. The Navi Bird will task you with collecting 10 Desert Nuts. They can be found in bird nests around Nanohana. You’ll need to use Usopp to shoot them down. After getting 10, return to the Navi Bird to close the case.
Rewards: Navi Bird’s Lost Item x1
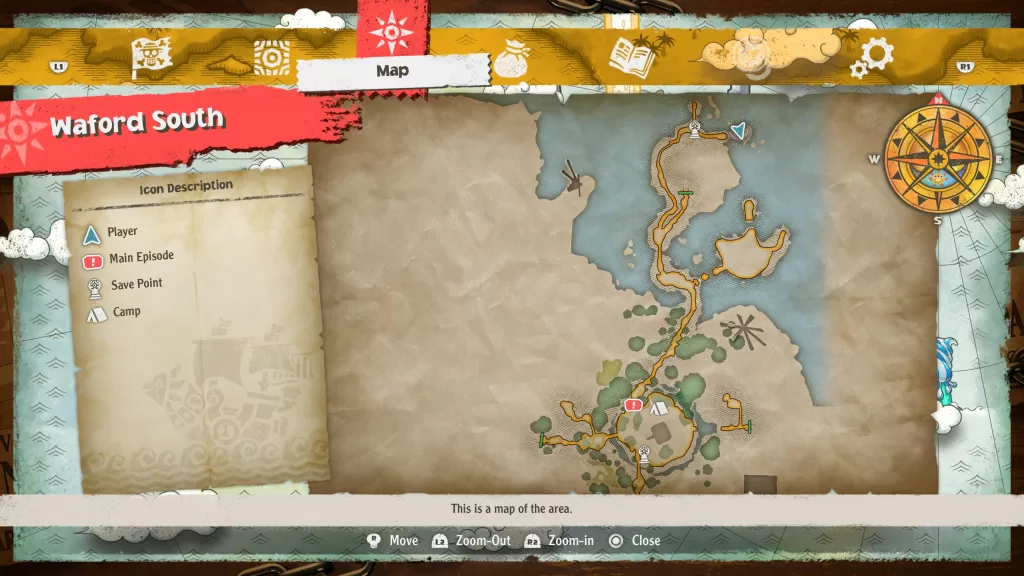
Madame Julie’s Pupil – Part 1
Area: Waford South – Hermit’s Cave
Objective: Syntheziie an Accessory with at Least 2 Effects
To find Julie, you’ll need to make your way to Hermit’s Cave which can be found west of Adio’s house. You’ll need to enter the cave as Chopper then switch to Zoro to cut down a metal gate standing in your way. This will allow you to reach the back room of the cave where Juile can be found. Speak with her and she’ll task you with crafting an accessory that has at least 2 effects. You can do this by using the Robin’s Mystery Craft machine during a party. Pick two accessories you have and fuse them together. Then bring it to Julie to close the case.
Rewards: Gator Durian x3, 18,000 Berries
Madame Julie’s Pupil – Part 2
Area: Waford South – Hermit’s Cave
Objective: Syntheziie an Accessory with at Least 3 Effects
Speak with Julie after completing her first side story and she’ll ask Robin to craft another accessory, but this time she wants at least 3 effects. To do this you’ll need to level up Robin’s crafting skill and also have an accessory with 2 additional effect slots. You should be able to do this after completing the main story for Water Seven City Area. Once that’s done, you’ll just need to craft the accessory the bring it to Julie to close the case.
Rewards: Shock Kabuto Meat x5, 24,000 Berries
Madame Julie’s Pupil – Part 3
Area: Waford South
Objective: Synthesize an accessory
This time you’ll have to make an accessory with 4 effects. You’ll be able to craft this accessory during Chapter 7. Once you have the accessory, deliver it to Julie to complete the case.
Rewards: Julie’s Ring x1, 36,000 Berries
Master and Student Final
Area: Alabasta – Desert Near Alubarna (Alubarna Ravine)
Objective: Train with the Kung Fu Dugongs Again Again
This side story becomes available after completing the Master and Student Rematch side story. The Kung Fu Dugongs will ask to fight against you a final time. Speak with them again to start the fight. Just like the last couple of times, all three of them use power-based attacks. After defeating them, a Sandora Dragon decides to join the party. The beast uses technique-based attacks, so make use of Nami and Usopp for extra damage. Defeat the beast to close the case.
Rewards: Kung Fu Dugong’s Treasure x1
Master and Student Rematch
Area: Alabasta – Great Sandy Desert (Great Sandy Dunes)
Objective: Train with the Kung Fu Dugongs Again
After completing the Master and Student side story, you’ll come across the Kung Fu Dugongs again in the Great Sandy Desert northeast of the ruins in the Great Sandy Dunes. They will ask for a rematch against the Straw Hats. Speak with them a second time to oblige. As before, all three of them use power-based attacks so Robin and Zoro will deal more damage here. Defeat them to prompt a dialog event. When it ends, you’ll need to procure some Bedrock Salt and Sandora Dragon Meat to have Sanji cook steak tips for the Dugongs. You probably have the ingredients by now, but if you don’t there is an enclosed area southeast of your current position that has a Sandora Dragon you can fight. Bedrock Salt can be bought from the Spice Bean Plaza shop in Nanohana. Bring the ingredients to the Dugongs to close the case
Rewards: Bo Bo Bird Breast x5
Master and Student Showdown
Area: Alabasta – Nanohana (Spice Bean Plaza)
Objective: Train with the Kung Fu Dugongs
The Kung Fu Dugongs can be found in an ally southeast of Spice Bean past the Mediator. Speak with the trio and agree to train with them. Talk with them again when you’re ready to start the sparring session. All three of them use power-based attacks so Robin and Zoro will deal extra damage here. Defeating them will close the case.
Rewards: Small Drumstick x1
MEDIATOR MARZIN’S QUEST
Area: Alabasta – Nanohana (Spice Bean Plaza)
Objective: Complete a bounty
Marzin can be found in Spice Bean Plaza across from Spice Bean. Talk with him to learn about bounty hunts then agree to work with him. Next, you’ll want to head to Spice Bean and accept the bounty for Evil Bulbro. Once you do, head to the eastern highway which is directly east of Spice Bean to find the targets in an alleyway. Speak with them to kick off the fight. Both of the brothers use technique-based attacks so Nami and Usopp will deal additional damage to them. Once they both go down the bounty hunt will be completed and the case will be closed.
Rewards: Mediator’s Invitation x1, 6,000 Berries
More Important than Berries
Area: Alabasta – Nanohana (Eastern Highway)
Objective: Look for the Lost Photograph
This quest becomes available when returning to Alabasta during chapter 3. Tam will tell the Straw Hats about his missing photo and Nami will offer to find it for a reward. Start by heading to the Desolate Valley west of Nanohana. If you speak with the group of people near the save point there, they will mention seeing a photograph blowing by. Continue on to the camp in the north. Then go west to find a small tunnel that Chopper can fit in. Keep going west from there to find the photograph on the ground near a broken bridge. Return to Tam and speak with him.
Return to the caravan in the Desolate Valley to learn the other picture flew into the Ravine of No Return. Make your way there, then take the eastern path in the first three areas to reach the place with the scorpions. You’ll find the picture on the ground. Take it back to Tam to close the case.
Rewards: Noble’s Ring x1, 3,000 Berries
My Dearest Violet
Area: Dressrosa City Area
Objective: Find the Autographed Paper
To obtain this quest, speak with Ellio in Dressrosa City East. For this quest, head to the tavern in the southeastern part of the city and speak with the Intoxicated Man standing next to a gladiator near the entrance. Afterwards, head to Blacksmith Road, which is north of the Coliseum. Once there, there will be a kid spazzing out in front of a blue house. Speak with him to learn that his friend has the autographed picture but that friend is playing hide and seek. Head to the next house to the north and look by the patio table to find the kid. Speak with him to learn that Martha is playing by the fountain in front of the Coliseum. When you reach the fountain, head up the stairs facing the red brick building then take a left to find a fabric stand. Speak with the girl then go into the red brick building. Head inside and look for the man wearing a red shirt by a bookshelf. Speak with him to obtain the autograph then return to Ellio to close the case.
Rewards: Gifted Ring x1, Sanji’s Cube Fragment x3, 74,000 Berries
My Treasure
Area: Cafe Park (Water Seven City Area)
Objective: Find the Germa 66 dolls
Speak with Crybaby Hien northeast of the Yoisa sign in Cafe Park to obtain the quest. Afterwards, head to the stairs to the right of the child and speak with the Sad Yagara. It’ll tell you that a passenger with a light blue shirt and glasses took the doll. Return to where the child was and head west. A guy wearing a blue shirt with stripes will be straight ahead. Speak with him to obtain the Poison Pink Figure.
Next, travel south of Cafe Park to the Elevator – Top Floor. Once there, head to the southeastern corner and speak with the Genteel Yagara. It’ll tell you that a family looking for jewelry has it. Look diagonally from the Yagara to find a building with a green wall. Enter the doorway on this wall to reach the Money Exchange. Speak with the girl sitting on a bench to obtain the Stealth Black Figure. She’ll give you a hint that she saw another doll on the ground outside of Canal Restaurant.
Travel to Canal Restaurant on the far eastern side of the area. You can ride a Yagara to reach it quickly. Once there, speak with the Forgetful Yagara and it’ll mention dropping the doll around the area. Travel west along the river. After you pass the outdoor seating area, you’ll see some stairs leading down into the water. The doll will be in the water. Approach the water to receive the Sparkling Red Figure.
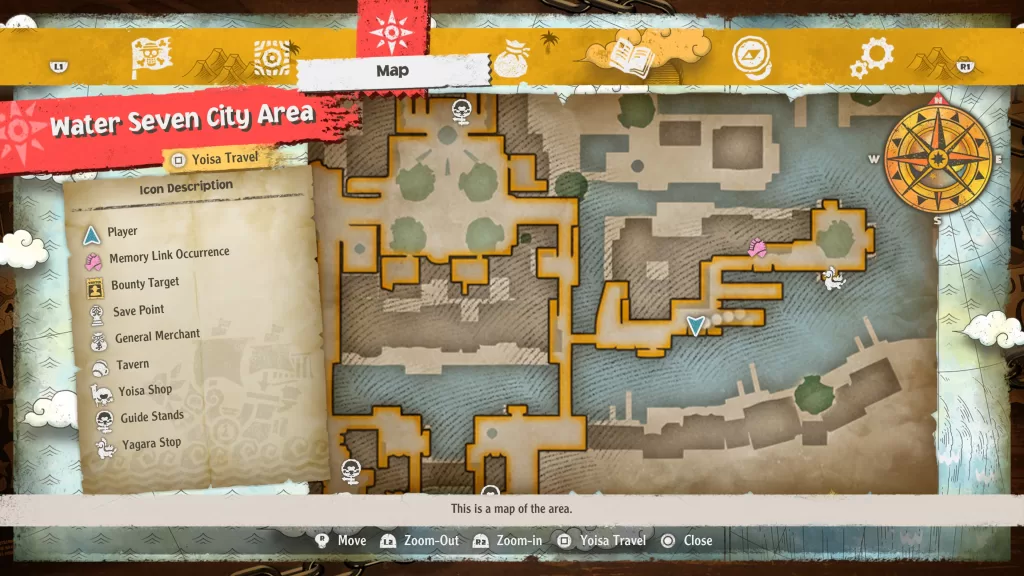
For the next doll, speak with the Friendly Yagara in front of the Canal Restaurant. It’ll tell you that he gave the doll away to an old lady sitting on a bench. Head to the Gallery-La Company Dock One entrance, which is south from the restaurant. Speak with the lady wearing a striped blue dress to receive the Winch Green Figure. She’ll give you a hint that the next doll is near the entrance to Dock One.

From the old lady, head south passing the entrance to Dock One. Go down the stairs and turn right at the bench to speak with the Hungry Yagara. It’ll tell you that it has the doll, however, it wants the Sazae Kancho Pescatore in exchange for it. You can make this dish in any tavern as long as you have the correct ingredients. Once you do, hand it over to the Yagara to receive the Shocking Blue Figure.

With all 5 dolls finally collected, return to Crybaby Hien in Cafe Park to complete the case.
Rewards: Yagara’s Lost Item x1, 500 Berries
Natural Underground Enemies
Area: Water Seven City Area
Objective: Defeat the Berserk Wicked Mice
During Chapter 5, travel to the Canal Restaurant area and speak with the Franky Family Follower to accept his request. You’ll then need to speak with the other Franky Family Follower next to the sewer grate to enter the Sewer. In the Sewer, use the elevator to take it to Sewer B2F. Head west to reach the Old Sewer then keep working your way to the Franky’s Hideout. A cutscene will trigger leading to a fight. Defeat the enemies then return to the quest giver to complete the quest.
Rewards: Mouse Repellent x1, 36,000 Berries
Night Exterminator
Area: Alabasta – Great Sandy Desert
Objective: Defeat 10 Deluck Brothers
This side story becomes available after returning to Alabasta during chapter 3. Speak with Mitt who will ask Zoro to take care of the blue scorpions terrorizing the desert. The Deluck Brothers can be found in the desert at night. You’ll need to use the campfire to change the time of day if it’s not night already. After defeating 10 of them, return to Mitt to close the case.
Rewards: Mitt’s Ring x1, 500 Berries
Rebuilding Dressrosa
Area: Dressrosa City Area
Objective: Talk to the old Tohbo
To obtain this quest, speak with the Thinking Man at the N. R. P. Elevator on the east side of town near the elevator. For this side story, you’ll need to travel to Dock One in Water Seven. Once there, cross the stone bridge to reach the material depot and speak with the Ship Carpenter Tohbo inside the building. Afterwards, travel to Franky’s hideout then speak with the Franky Family Follower on the west side of the map to get the medal. Afterwards, return to Dressrosa and speak with Ship Carpenter Tohbo to hand over the materials. Afterwards, the quest will complete.
Rewards: General Store Gift x1, Zoro’s Cube Fragment x3, 74,000 Berries
Respected Elder
Area: Dressrosa City Area
Objective: Make a special Trick Ball
To start this quest, speak with the Barto Club Apprentice in the Dressrosa City East. He’ll want you to craft a Perfect Exhaust Ball Plus using Mezcal Cactus, Negative Seed, Unlucky Herb and Nimbus Spider. Once you do, speak with him to hand it over to close the case.
Rewards: Barto Club Badge x1, 74,000 Berries
Someone I Must Meet
Area: Dressrosa City Area
Objective: Find Neline
To start this side story, speak with Poppy at Square, At Fountain. She’ll want you to travel to a child-sized hole at the New Royal Plateau: 1st Level. Travel to the N.R.P. 1F Camp Yoisa sign then make your way to the long bridge in the southern part where Frankie had to build and add on to it. Head to the west side of this bridge. From the western part of the bridge, don’t cross the bridge but instead head to the right to find Soldier Ekie. Speak with him to trigger a fight. There will be 2 techniques and 1 speed. After the fight, travel to the northeastern corner of the New Royal Plateau: Bottom across from the savepoint to find the NPC in front of the rubble. For this fight, there are 3 techniques and a speed. You’ll then need to find the guy again. This time he can be found in the New Royal Plateau: Top just before the N.R.P. Sunflower Field. Interact with the guy to trigger a fight. There will be 3 techniques and 2 speeds. Once you defeat them, return to Square, At Fountain and speak with Poppy to complete the case.
Rewards: Nostalgic Necklace x1, Sanji’s Cube Fragment x3, 37,000 Berries
Taken by Tontattas
Area: Dressrosa City Area
Objective: Find the Tontattas
To start this side story, speak with the girl at Coliseum Path. Next, inspect the bush directly behind the girl. You’ll learn that it didn’t take it and suggested looking around the Coliseum fountain. Travel north to the fountain to find a dog barking at a wagon. Speak with the man next to the dog then head around to the back of the wagon and speak with the Tontatta. It doesn’t have it so head up the middle set of stairs. Just before the entrance to the bookstore, take a right then interact with the plant between the benches. You’ll then obtain the Keepsake Ribbon. Return to the girl to close the case.
Rewards: Toy Ring x1, Nami’s Cube Fragment x3, 500 Berries
Talented Doctor
Area: Alabasta – Alubarna (Alubarna – Clock Tower Western Path)
Objective: Find a Doctor
This side story becomes available after returning to Alabasta during chapter 3. To start, head to the main gate and speak with the burly man wearing a white shirt and black hat. Head through the gate going south then enter the tavern by the save point. Speak to the man wearing a red shirt with a yellow bandana. He’ll ask you to bring him two Gator Bananas. You can get them off of the Banana Gators which should be in the Desert Near Alubarna. Deliver the ingredients to get the medicine then take that back to the lady to close the case.
Rewards: Sandora Dragon Steak Tips x1, Herb-Filled Bo Bo Bird x1, 18,000 Berries
Tavern Troubles
Area: Tavern – Kajika (Water Seven City Area)
Objective: Get info from the 3 tourists
Travel to the Cats All Over Bar, which can be found in the Elevator – Top Floor Area in the south-central part of the map. In the bar, speak with the boy wearing a blue shirt, a man wearing a striped shirt and a lady wearing a polka dot shirt. After you speak with them all, return to the Proprietress Lucie in the tavern and speak with her. She’ll task you with obtaining perfume from Nanohama, which is in Alabasta. The soonest you can travel to Nanohama is in Chapter 5 when Franky repairs the bridge leading to the next ruin. In Nanohama head to the Spice Bean Plaza, which is on the north side of town. Look for a lady wearing a navy top who is standing in front of a building west of the Spice Bean Restaurant and Bar. Head into the building and speak with the lady behind the counter to receive Men’s Cologne. Return to Proprietress Lucie to complete the request.
Rewards: Aroma Ring x1, 36,000 Berries
That Tea Tastes Thorny
Area: Alabasta – Alubarna (Palace Western Path)
Objective: Collect the 2 jars of missing tea
This side story becomes available in chapter 3 after securing the crab’s help. Speak to Lief on the Palace Western Path to learn she lost two jars of tea. Sanji, being the lady’s man that he is, will demand the crew help her out. The first tea jar can be found in the alley behind where Lief is standing. Take the path to her right then look to the right to see a soldier standing near some jars. Talk with him to receive the jar. The second jar can be found on the eastern side of the street. You’ll need to head down the alley to the left of the general store. Speak to the guy wearing the long blue coat there to beat him up and take back the second jar. Return them to Lief to close the case.
Rewards: Spiders Cafe Employee Card x1, 18,000 Berries
The Truth About Eye-lashes
Area: Alabasta – Great Sandy Desert (Central Sandy Desert)
Objective: Look for the bait camel
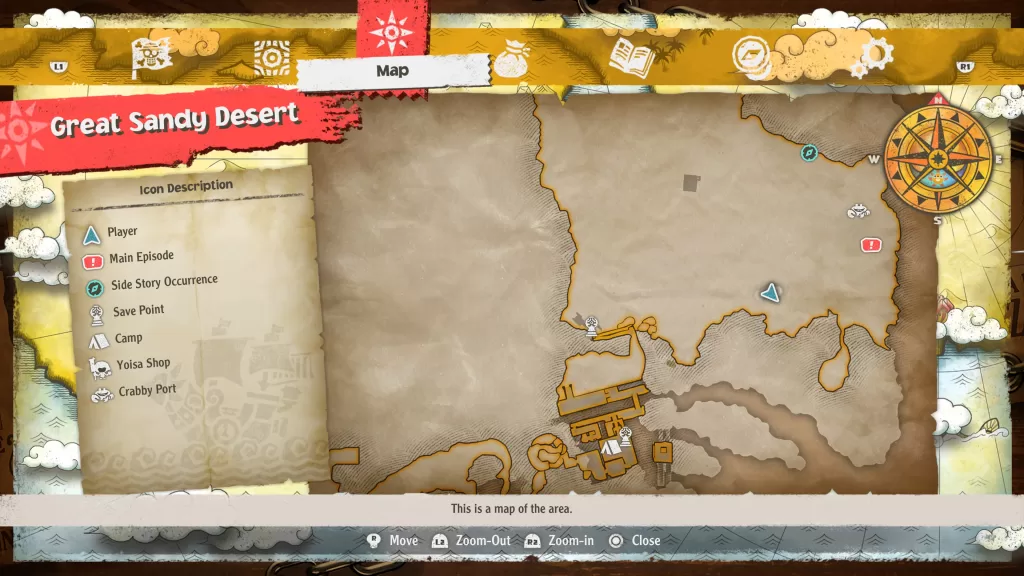
Saien can be found in the Central Sandy Desert near the decoy bandit you’ll pursue as part of the Head to Rainbase Main Episode. He’ll ask you to track down his missing camel with long eyelashes. To begin the search, head for the Sandy Ruins which can be found in the center of the Great Sandy Desert. Once you’re there, speak with two guys talking to learn that a unique camel was spotted northeast of the ruins. Continue heading north until you reach a wooden walkway. Head to the bottom then head east towards Rainbase. The camel will be on the right near a cluster of cacti being harassed by bandits. Defeat them then return to Saien to close the case.
Rewards: Eye-Lashes’s Record Cube x1, Saien’s Necklace x1, 30,000 Berries
Waford Record 1
Area: Waford South – Thunderhead Bluff (under the ruins)
Objective: Collect the King Kong Garden Tablet
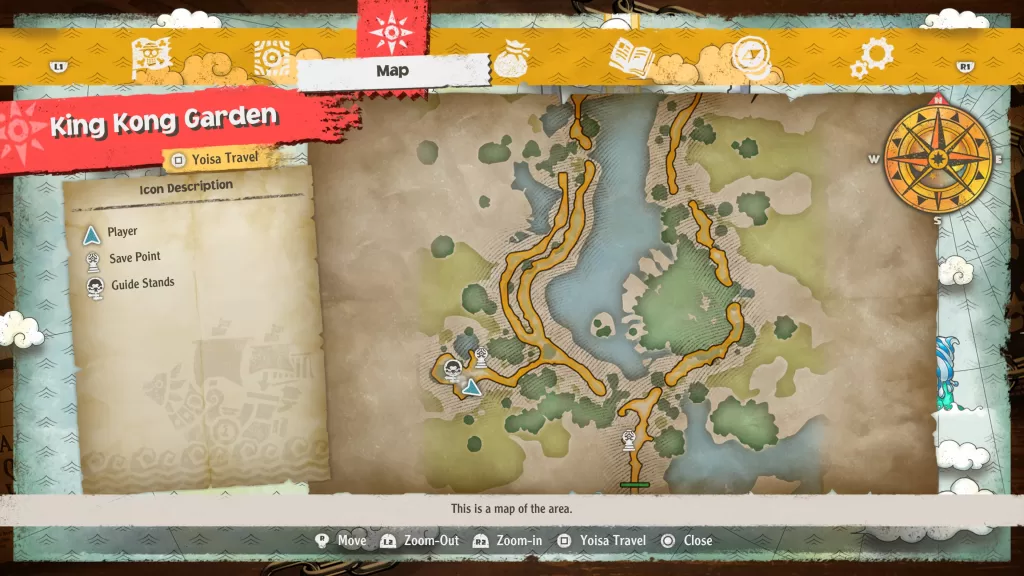
Speak with Stonely who will ask the Straw Hats to gather tables scattered around Waford for her. The first one she asks for is the table located in the King Kong Garden. Make your way there then head to the far west side of the region near the save point. You’ll find the table on a pedestal there. Grab it and return it to Stonely to close the case.
Rewards: Volcano Dragon Tail x3
Waford Record 2
Area: Waford South – Thunderhead Bluff (under the ruins)
Objective: Collect the Forbidden Valley Tablet

Stonely will ask you to get the table from the Forbidden Valley. To reach the valley, head west from Thunderbluff. When you the path leading to south beach, keep going west. You’ll end up at an old ruin that you’ll have to climb down via vine. The table can be found on a pedestal on the land by the waterfall. Return to Stonely with the tablet to close the case.
Rewards: Jelly Rock x5
Waford Record 3
Area: Waford South – Thunderhead Bluff (under the ruins)
Objective: Collect the Ring Inlet Tablet
The third table that Stonely will request is the Ring Inlet tablet. It can be found on the eastern beach in the Circular Inland Sea (north of Adio’s house) on its pedestal. You’ll need to use the Gum-Gum Rocket to reach the beach. With the tablet in hand, bring it to Stonely to close the case.
Rewards: Cozy Beetle x5
Waford Record 4
Area: Waford South – Thunderhead Bluff (under the ruins)
Objective: Collect the Thunderhead Ruins Tablet
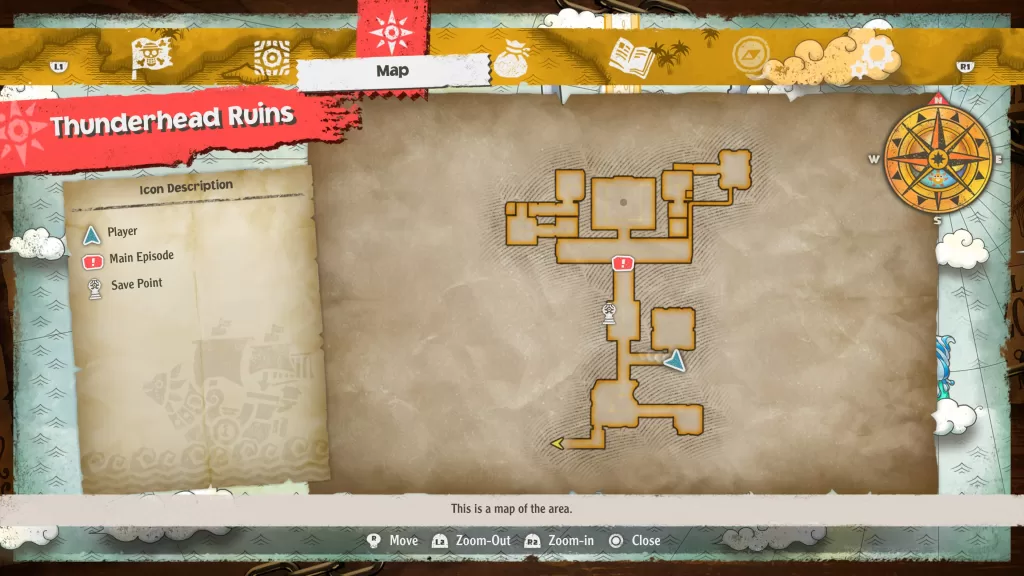
Stonely will request the Thunderhead Ruins tablet next. You can find it in the Thunderhead Ruins on B2F. It will be located in an eastern hallway connected to the hallway leading to the colossus room. Deliver it to Stonely to close the case.
Rewards: Sazae Kancho Ogre Liver x3
Waford Record 5
Area: Waford South – Thunderhead Bluff (under the ruins)
Objective: Collect the Dust Ruins Tablet
The next two tablets that Stonely asks for can be found in the Dust Ruins which you’ll visit during the Chapter 3 main episode. You’ll come across the first one in the Dust Ruins Collapsed Corridor while progressing through the ruins.

The second one can be found behind the wind Colossus. You’ll have to battle and defeat it before you can retrieve the tablet. Once you have both, deliver them to Stonely to close the case. Please note that you won’t be able to return to her until Chapter 5.
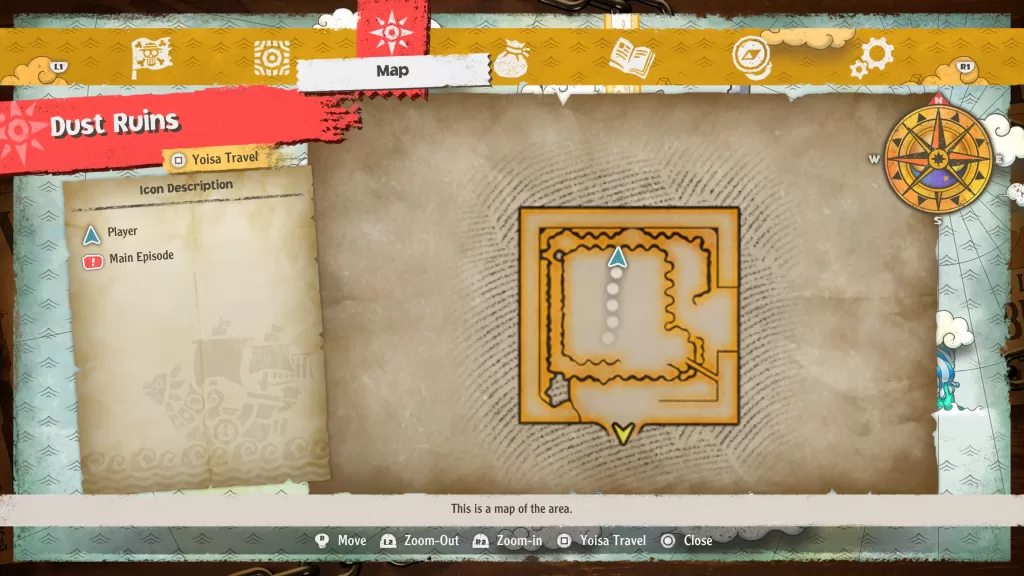
Rewards: Shock Kabuto Meat x3
Waford Record 6
Area: Waford South
Objective: Collect 1 Tablet
This request becomes available during Chapter 5 after turning in the above request. The next two tablets you need to find are in the Ice Block Ruins, which you’ll explore during Chapter 5. The first tablet can be found in the Great Bottomless Waterfall Lower Part. After freezing the waterfall, this will open up a path allowing you to Gum-Rum Rocket up the northwestern side of the room. The tablet can be found after using the first Gum-Gum Rocket point on the right after you land.
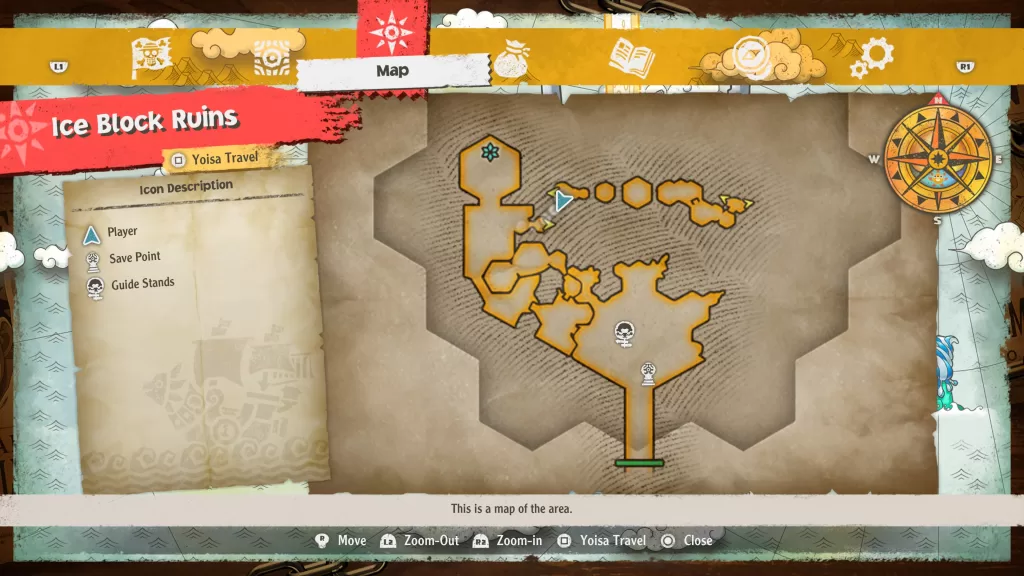
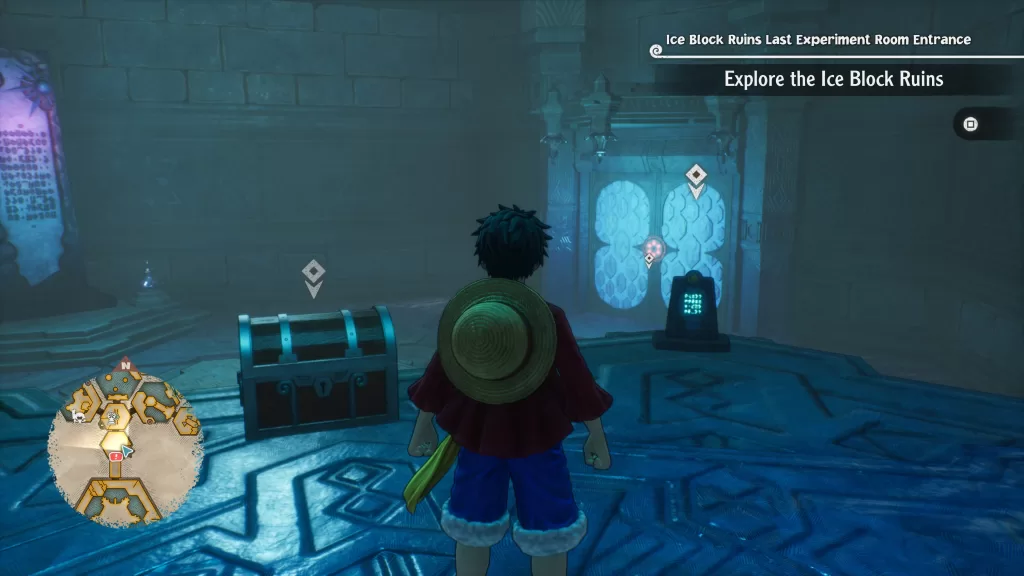
The second tablet can be found in the Last Experiment Room Entrance on an elevated platform. To reach it, you’ll need to defeat the dragon in the Second Vault and loot the chest for the Blue Key. There will then be a door requiring the Blue Key in that room. Use the key on this door to reach the area containing the tablet. Deliver them to Stonely to close the case.
Rewards: Rock Bear Arm x3, Robin’s Cube Fragment x3
Waford Record 7
Area: Waford South
Objective: Collect tablets
This request becomes available during the Final Chapter when heading back to Adio’s House. Madame Stonely will ask you to retrieve the ninth and final tablet from the Sky Tower, which is the final dungeon in the game. In the Sky Tower, keep climbing up until you reach the Purity Garden. The tablet can be found near the center of the gardens on the west side in a little nook along the edge. Deliver it to Stonely…

Rewards: Stonely’s Necklace x1, Robin’s Cube Fragment x3
Why Eye-lashes Enlisted
Area: Alabasta – Alubarna (Palace Square)
Objective: Get some perfumes
This side story becomes available after returning to Alabasta in chapter 3. Travel to Nanohana then head to Spice Bean Plaza. From there, you’ll want to take the road west of the fountain to find the perfume and weapon shop. Talk with the lady behind the counter to kick off a dialog event. Next, fast travel to the Alubarna Palace Square Yoisa sign then head west to the Plaza in Front of Royal Mausoleum. There will be a merchant on the southwest side you’ll need to speak to. After that head to the main gate in the Market District Front Gate Path. On the east side of the gate, there will be a small set of stairs leading down. Take them down to trigger an event leading to a fight. After the fight, you’ll be given some lotion. Return to Eye-lashes to close the case.
Rewards: Aroma Pendant x1, 18,000 Berries
Yaya Cube Collector
Area: Waford South – Circular Inland Sea
Objetive: Bring Yaya Cubes to Madame Trade
Travel to the most northern part of Waford South to find Madame Trade east of the save point. Make sure you have at least 1 Yaya Cube when you speak with her. This will lead to her asking you to bring her 8 Yaya Cubes. They can be found randomly in breakable containers while you explore Waford. Once you find 8 of them return to her to close the case. As you keep turning in the cubes and progressing in the story, return to her for more side stories. Each time she will want you to bring her more cubes! Do so to earn the following rewards:
- Yaya Cube Collector 1 = Banana Gator Pie x1, 10,000 Berries
- Yaya Cube Collector 2 = Remedy Brew x3, 10,000 Berries
- Yaya Cube Collector 3 = Sazae Kancho Pescatore x1, 10,000 Berries
- Yaya Cube Collector 4 = Ogre Sazae Kancho Carbonara x1, 10,000 Berries
- Yaya Cube Collector 5 = Bronze Bat Soup x1, 10,000 Berries
- Yaya Cube Collector 6 = Fire Element Jewelry x1, 10,000 Berries
- Yaya Cube Collector 7 = Brook’s Traveling Outfit x1, 10,000 Berries
- Yaya Cube Collector 8 = Durian Gator Salad x2, 10,000 Berries
- Yaya Cube Collector 9 = Wild One’s Badge x1, 10,000 Berries
- Yaya Cube Collector 10 = Burst Brew x5, 10,000 Berries
- Yaya Cube Collector 11 = Elephant Tuna Saute x2, 50,000 Berries
- Yaya Cube Collector 12 = Shock Element Jewelry, 50,000 Berries
- Yaya Cube Collector 13 = Odyssey Badge x1, 50,000 Berries
- Yaya Cube Collector 14 = Super Burst Brew x5, 50,000 Berries
- Yaya Cube Collector 15 = HP Auto Regen Jewelry x1, 50,000 Berries
- Yaya Cube Collector 16 = Wild One’s Ring x1, 50,000 Berries
- Yaya Cube Collector 17 = Dogol Dragon’s Chilled Pasta x3, 50,000 Berries
- Yaya Cube Collector 18 = Waford Badge x1, 50,000 Berries