Welcome to NGB’s complete Cyberpunk 2077 Watson Gigs Guide! Below you’ll find detailed walkthroughs for every gig available in Watson, including how to start them and key objectives to complete. Whether you’re exploring Little China or Northside, this guide will help you unlock all the content Watson has to offer.
Watson Gigs
In the table below, click the links to find a walkthrough for each of the Watson gigs. For the smaller quests, you’ll find their walkthroughs below the table while longer quests will link to their own pages.
| Quest | How to Obtain |
|---|---|
| Backs Against the Wall | Little China – Approach the gig east of the Afterlife fast travel point |
| Bloodsport | Little China – Approach the gig location slightly northeast of Clarenoon St fast travel point |
| Catch a Tyger’s Toe | Northside – Approach the gig location west of Megabuilding H10 fast travel point |
| Cyberpsycho Sighting: Bloody Ritual | Northside – Approach the gig location southeast of the Docks fast travel point |
| Cyberpsycho Sighting: Demons of War | Kabuki – Approach the gig location slightly northeast of Charter St fast travel point |
| CyberPsycho Sighting: Lt. Mower | Kabuki – Approach the gig location southwest of Creek Loop fast travel point |
| Cyberpsycho Sighting: Six Feet Under | Kabuki – Approach the gig location north of Kabuki Market fast travel point |
| Cyberpsycho Sighting: Ticket to the Major Leagues | Little China – Approach the objective west of Bradbury & Buran fast travel point near the water |
| Cyberpsycho Sighting: Where the Bodies Hit the Floor | Northside – Approach the objective just south of Pershing St fast travel point |
| Dirty Biz | Northside – Approach the gig location at the Docks fast travel point |
| Fixer, Merc, Soldier, Spy | Kabuki – Approach the gig just north of Kabuki: Central fast travel point |
| Flight of the Cheetah | Northside – Approach the gig west of Martin St fast travel point |
| Freedom of the Press | Northside – Approach the gig location west of Pershing St fast travel point |
| Hippocratic Oath | Northside – Approach the gig northeast of Martin St fast travel point |
| Last Login | Kabuki – Approach the gig north of Kabuki Market fast travel point |
| Lousy Kleppers | Northside – Approach the gig location south of Offshore St fast travel point |
| Many Ways to Skin a Cat | Northside – Approach the gig location west of Martin St fast travel point |
| Monster Hunt | Kabuki – Approach the gig location just east of Allen St South fast travel point |
| Occupational Hazard | Northside – Approach the gig location east of Martin St fast travel point |
| Playing for Keeps | Little China – Approach the gig location south of Clarenoon St fast travel point |
| Rite of Passage | Northside – Approach the gig location at the Ebunike Docks fast travel point |
| Scrolls Before Swine | Northside – Approach the location north of All Food Plant fast travel point |
| Shark in the Water | Kabuki – Approach the gig location southeast of Kabuki Market fast travel point |
| Small Man, Big Evil | Little China – Approach the objective slightly southeast of Bellevue Overwalk fast travel point |
| The Heisenberg Principle | Little China – Approach the objective west of Goldsmith St fast travel point |
| Troublesome Neighbors | Kabuki – Approach the gig location south of Kennedy North fast travel point |
| Welcome to America, Comrade | Kabuki – Approach the gig location just east of the Allen St South fast travel point |
| Woman of La Mancha | Kabuki – Approach the gig location southwest of the Kabuki Market fast travel point |
Catch a Tyger’s Toe
Obtained: Northside – Approach the gig location west of Megabuilding H10 fast travel point
Objective: Get to the main server
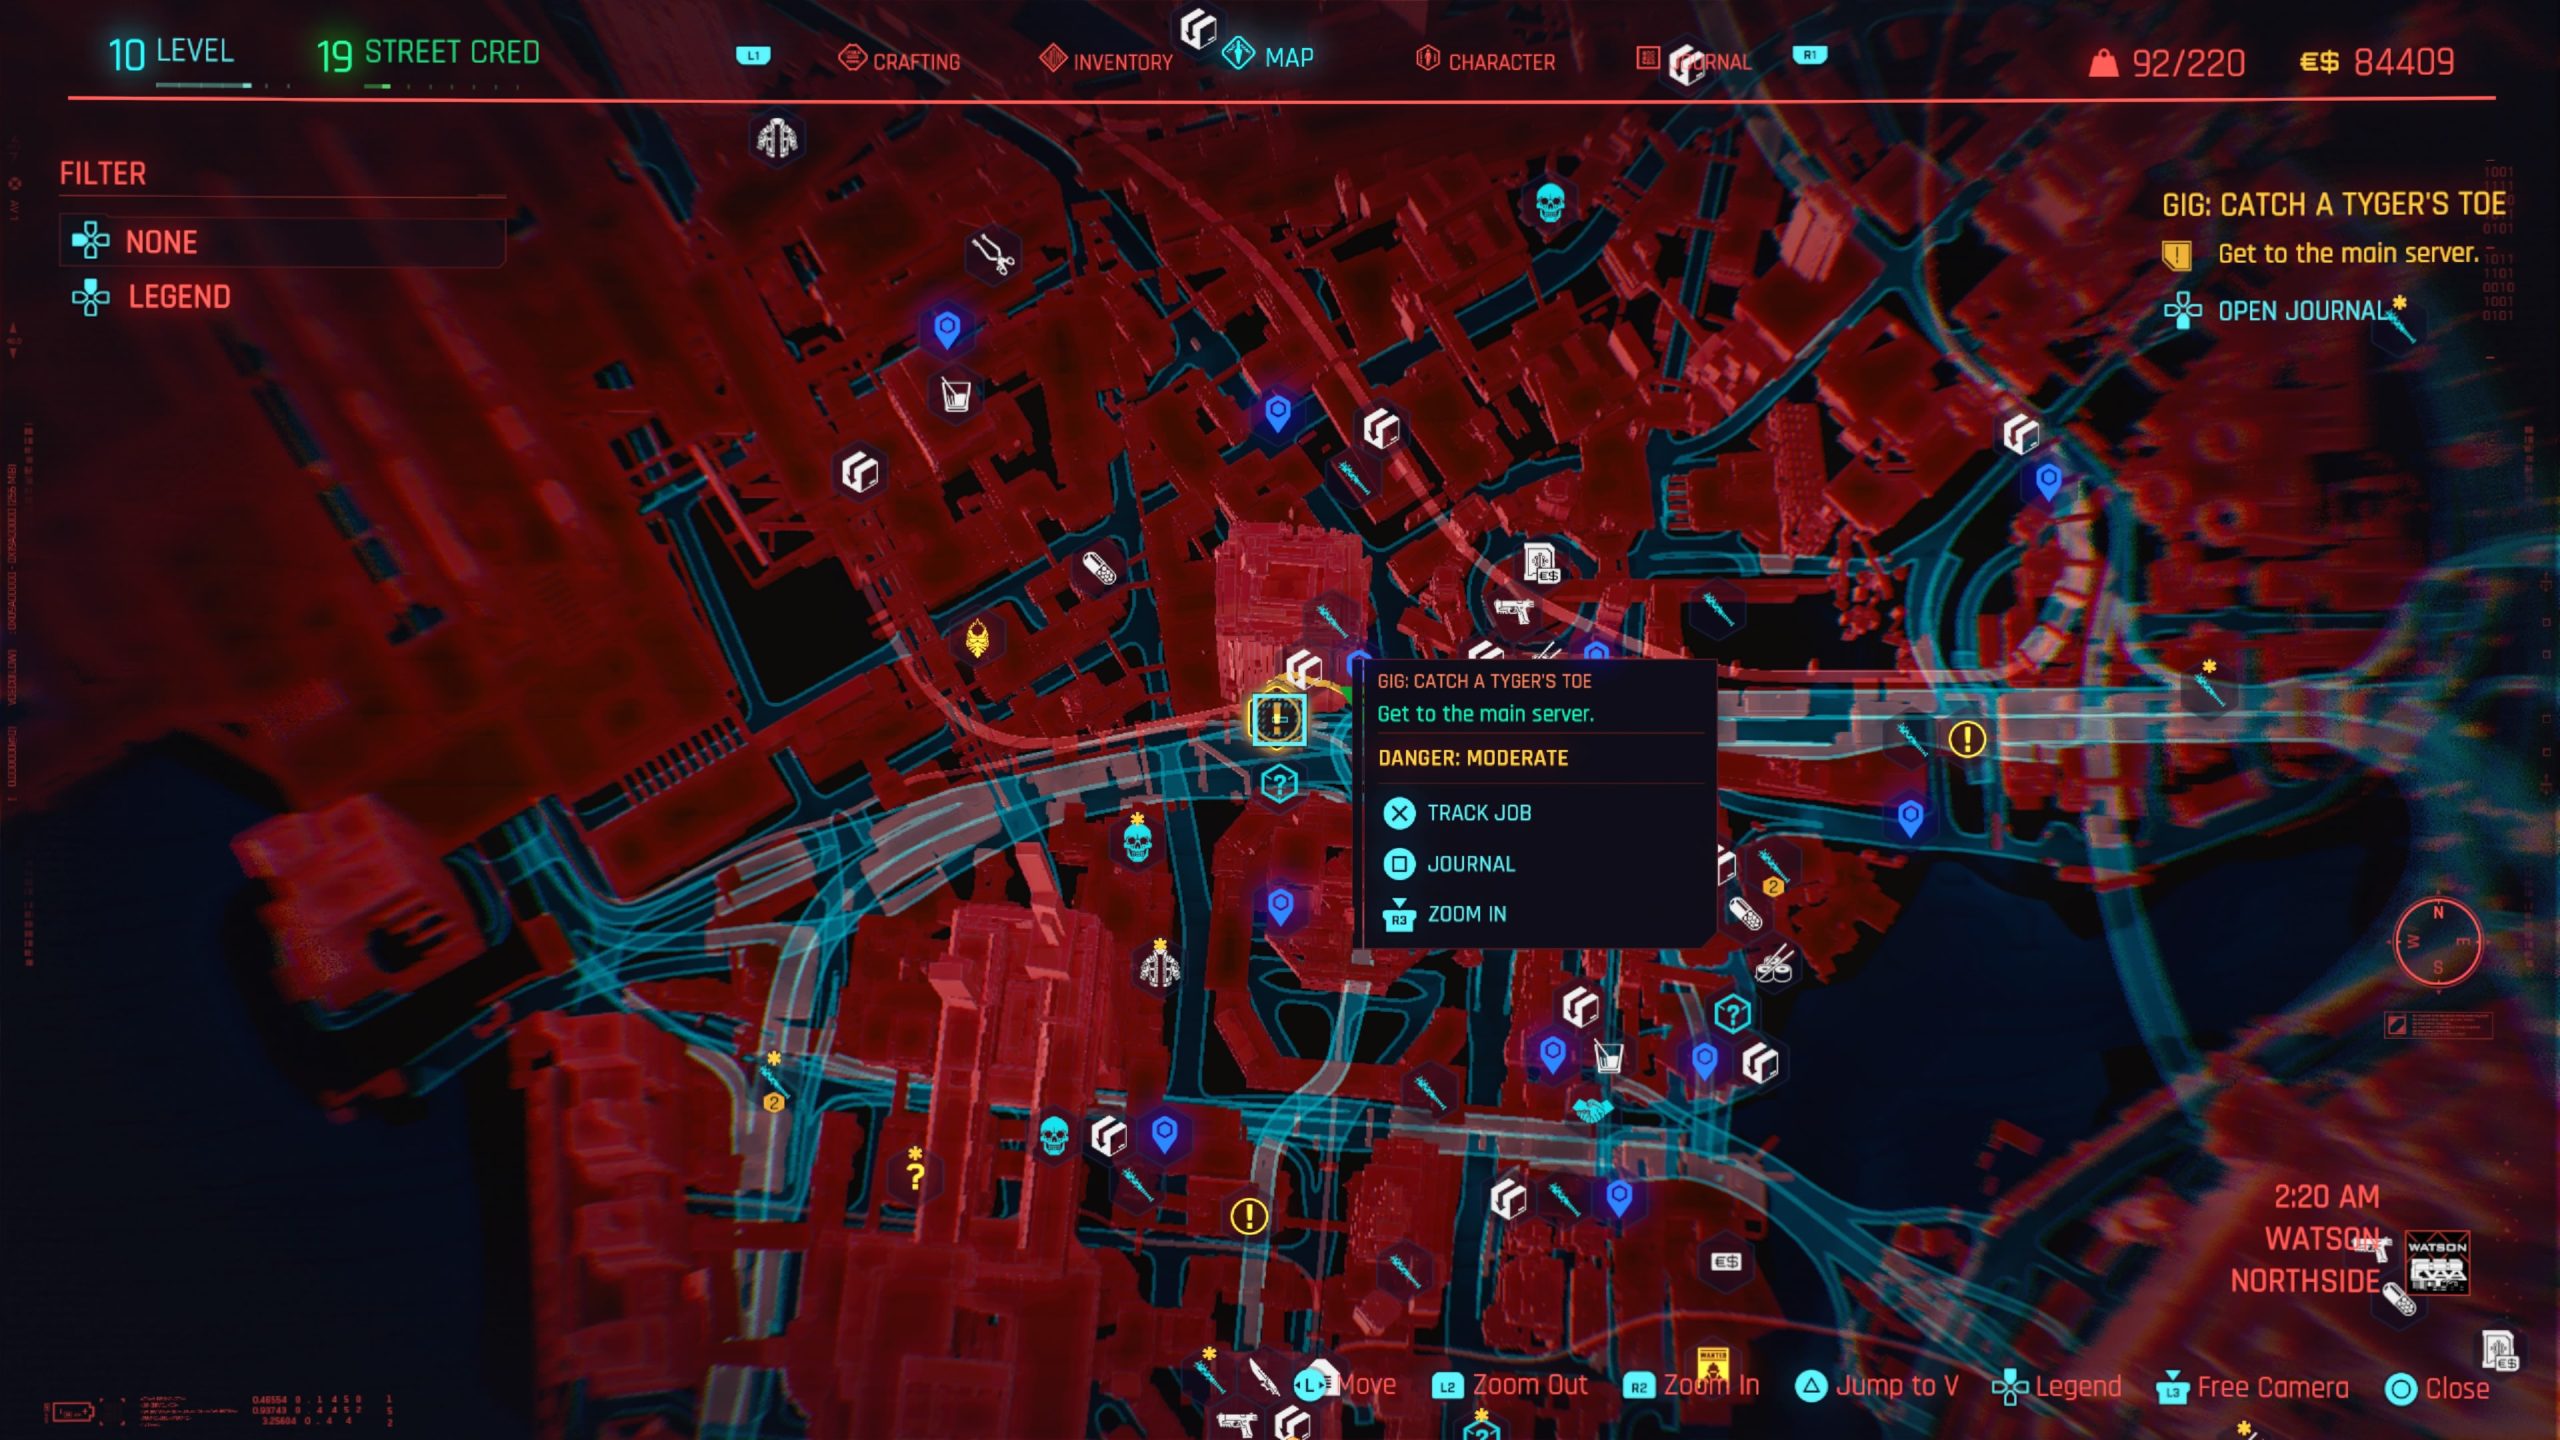
Head into the building, then use the elevator to reach the 5th floor, which contains the Server Room. Eliminate the enemies then head to a side room in the Server Room to upload the malware onto the computer.
Afterwards, exit the Server Room and use the elevator to ascend to the Ground Floor. When you exit the elevator, Regina will call you to close the gig.
Cyberpsycho Sighting: Bloody Ritual
Obtained: Northside – Approach the gig location southeast of the Docks fast travel point
Objective: Neutralize the Cyberpsycho
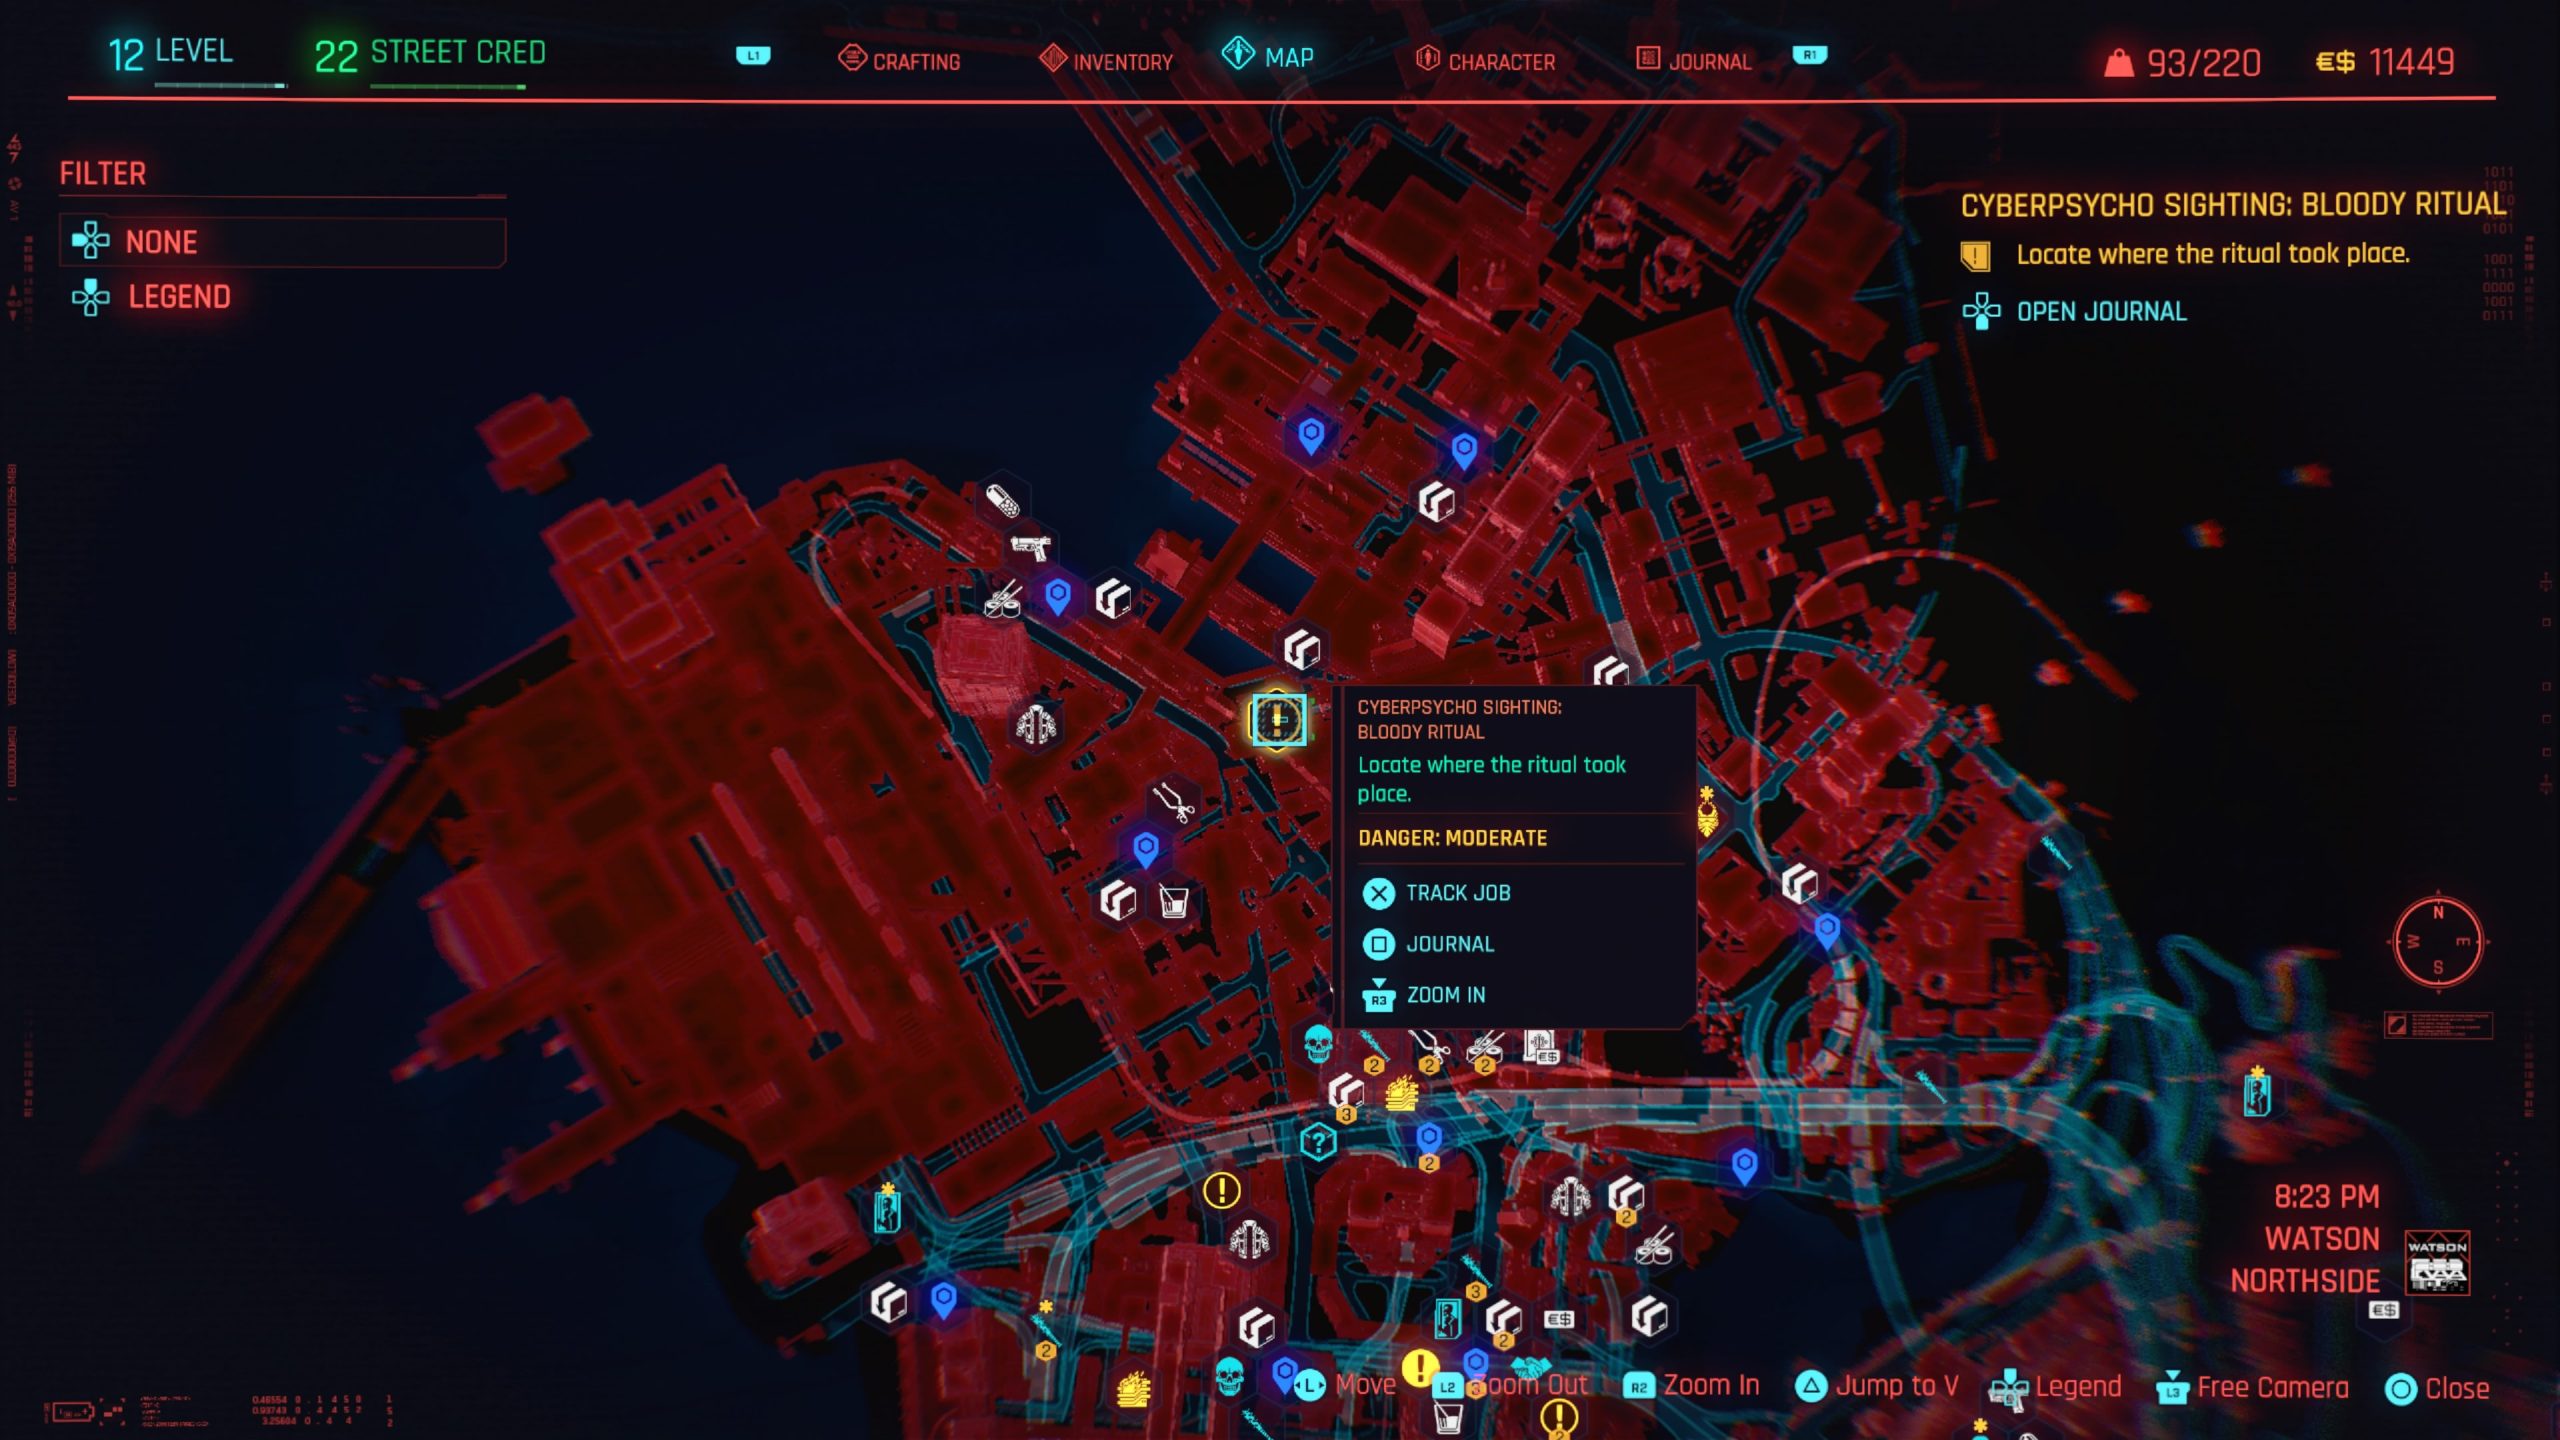
Head into the ritual area and speak to the survivor. Afterwards, inspect his body to obtain a shard. Head to the shard menu and find It’s Time then crack it.
Afterward, continue examining the area. If you’re having trouble finding all of the information, look behind a nearby Militech crate to discover another body that needs to be investigated.
Once you have examined everything, Zaria Hughes makes her appearance. Defeat her (without killing her) then examine her body to find a shard. Read it, then text Regina to complete the gig.
Cyberpsycho Sighting: Demons of War
Obtained: Kabuki – Approach the gig location slightly northeast of Charter St fast travel point
Objective: Investigate the area by the bridge

As you make your way across the bridge, you’ll be attacked by Matt Liaw. Defeat him then search the open blue shipping container with a bed in it to find a laptop. Look at the messages on the laptop to find PTSD Shield – Policy Lapsed. Read that message then send it to Regina via text to complete the gig.
CyberPsycho Sighting: Lt. Mower
Obtained: Kabuki – Approach the gig location southwest of Creek Loop fast travel point
Objective: Find the cyberpsycho
As you arrive on the scene, Regina tells V to track down the cyberpsycho. Jump over the red tape and make your way to the body on the ground. Inspect the item on the ground next to him then head down the stairway for a boss fight.
The Mower zips around the fighting area and attacks using her fists. After doing enough damage, she will start using an electric attack that will damage you while standing in the water, making up a majority of the area. After defeating her, use your phone to send the data to Regina to complete the gig.
Cyberpsycho Sighting: Six Feet Under
Obtained: Kabuki – Approach the gig location north of Kabuki Market fast travel point
Objective: Find the cyberpsycho
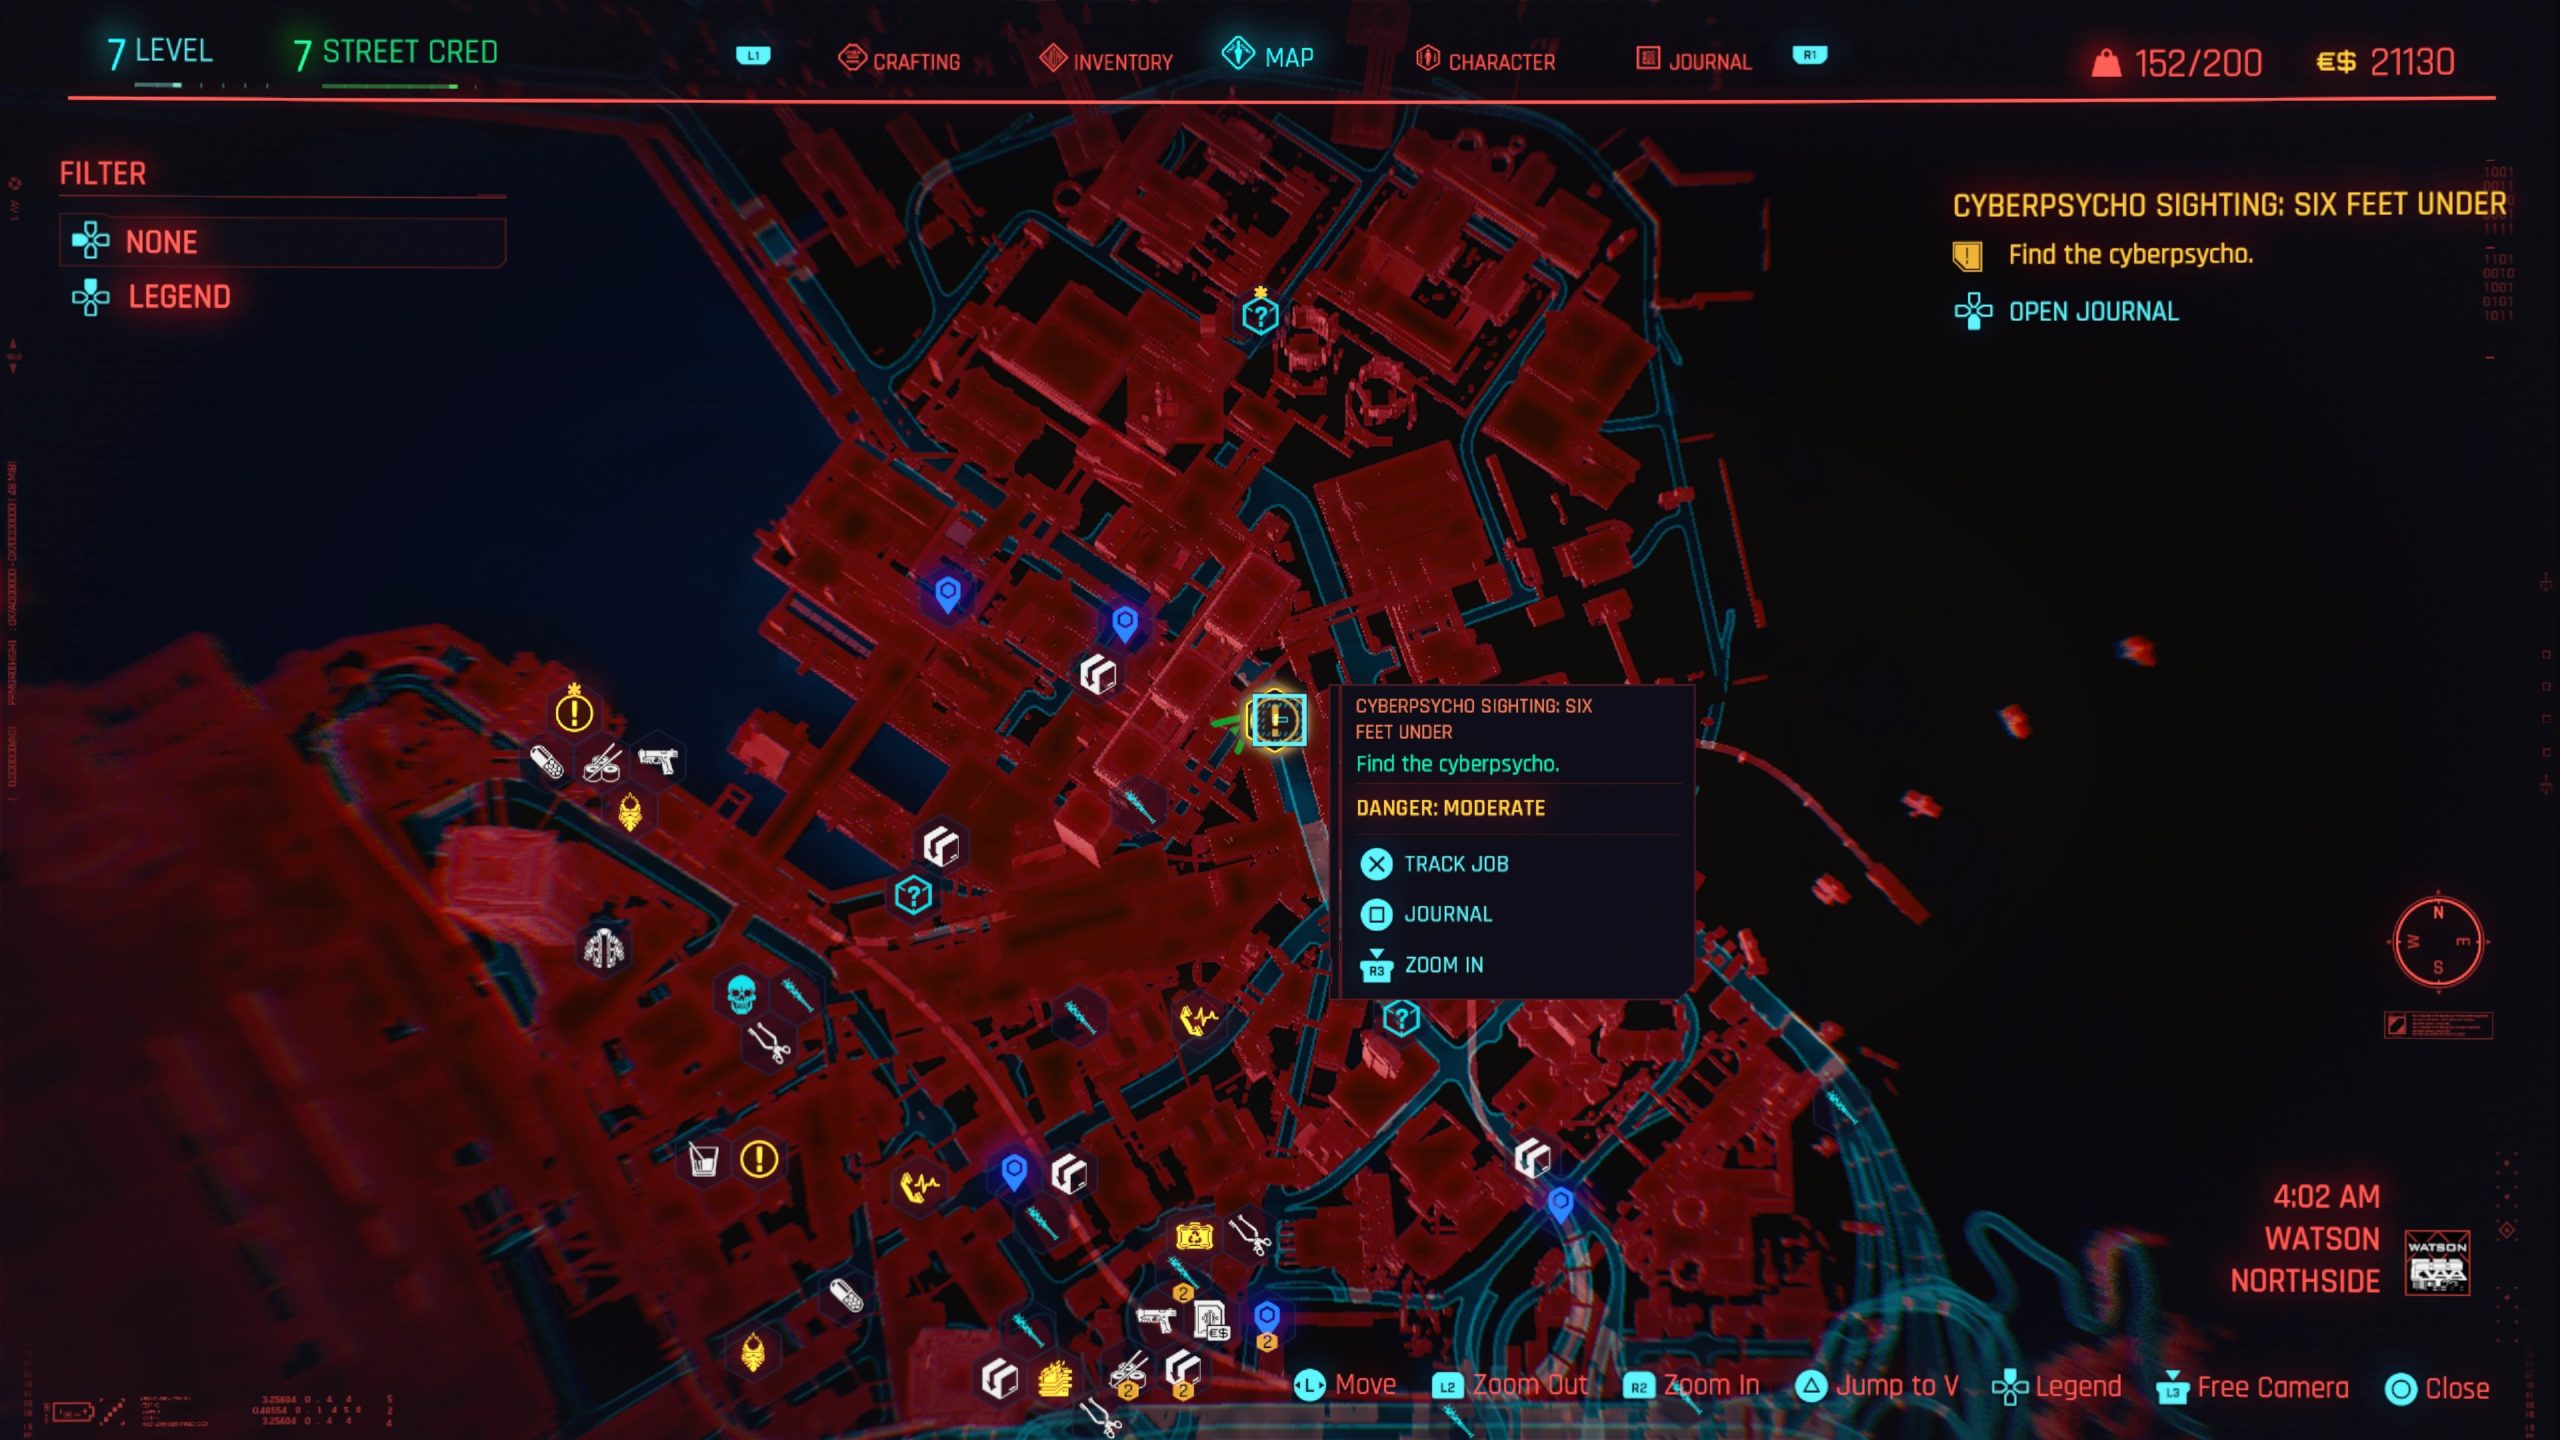
When you arrive underneath the freeway, you’ll see Lely Hein shoot the last person alive in the area. Engage in combat with him. Be careful of his shotgun as it can do a lot of damage.
If you don’t kill him quickly enough, he’ll run into the nearby building. Chase after him to unload more bullets into him. After defeating Lely, loot the body to obtain the Farewell shard then read it. To read the shard, press the touchpad, then move over to the Journal, but don’t click it.
Instead, head down to Shards and select that option. You’ll then need to scroll to the bottom to find the Farewell shard. Afterwards, send a text to Regina to complete the gig.
Cyberpsycho Sighting: Ticket to the Major Leagues
Obtained: Little China – Approach the objective west of Bradbury & Buran fast travel point near the water
Objective: Find the cyberpsycho
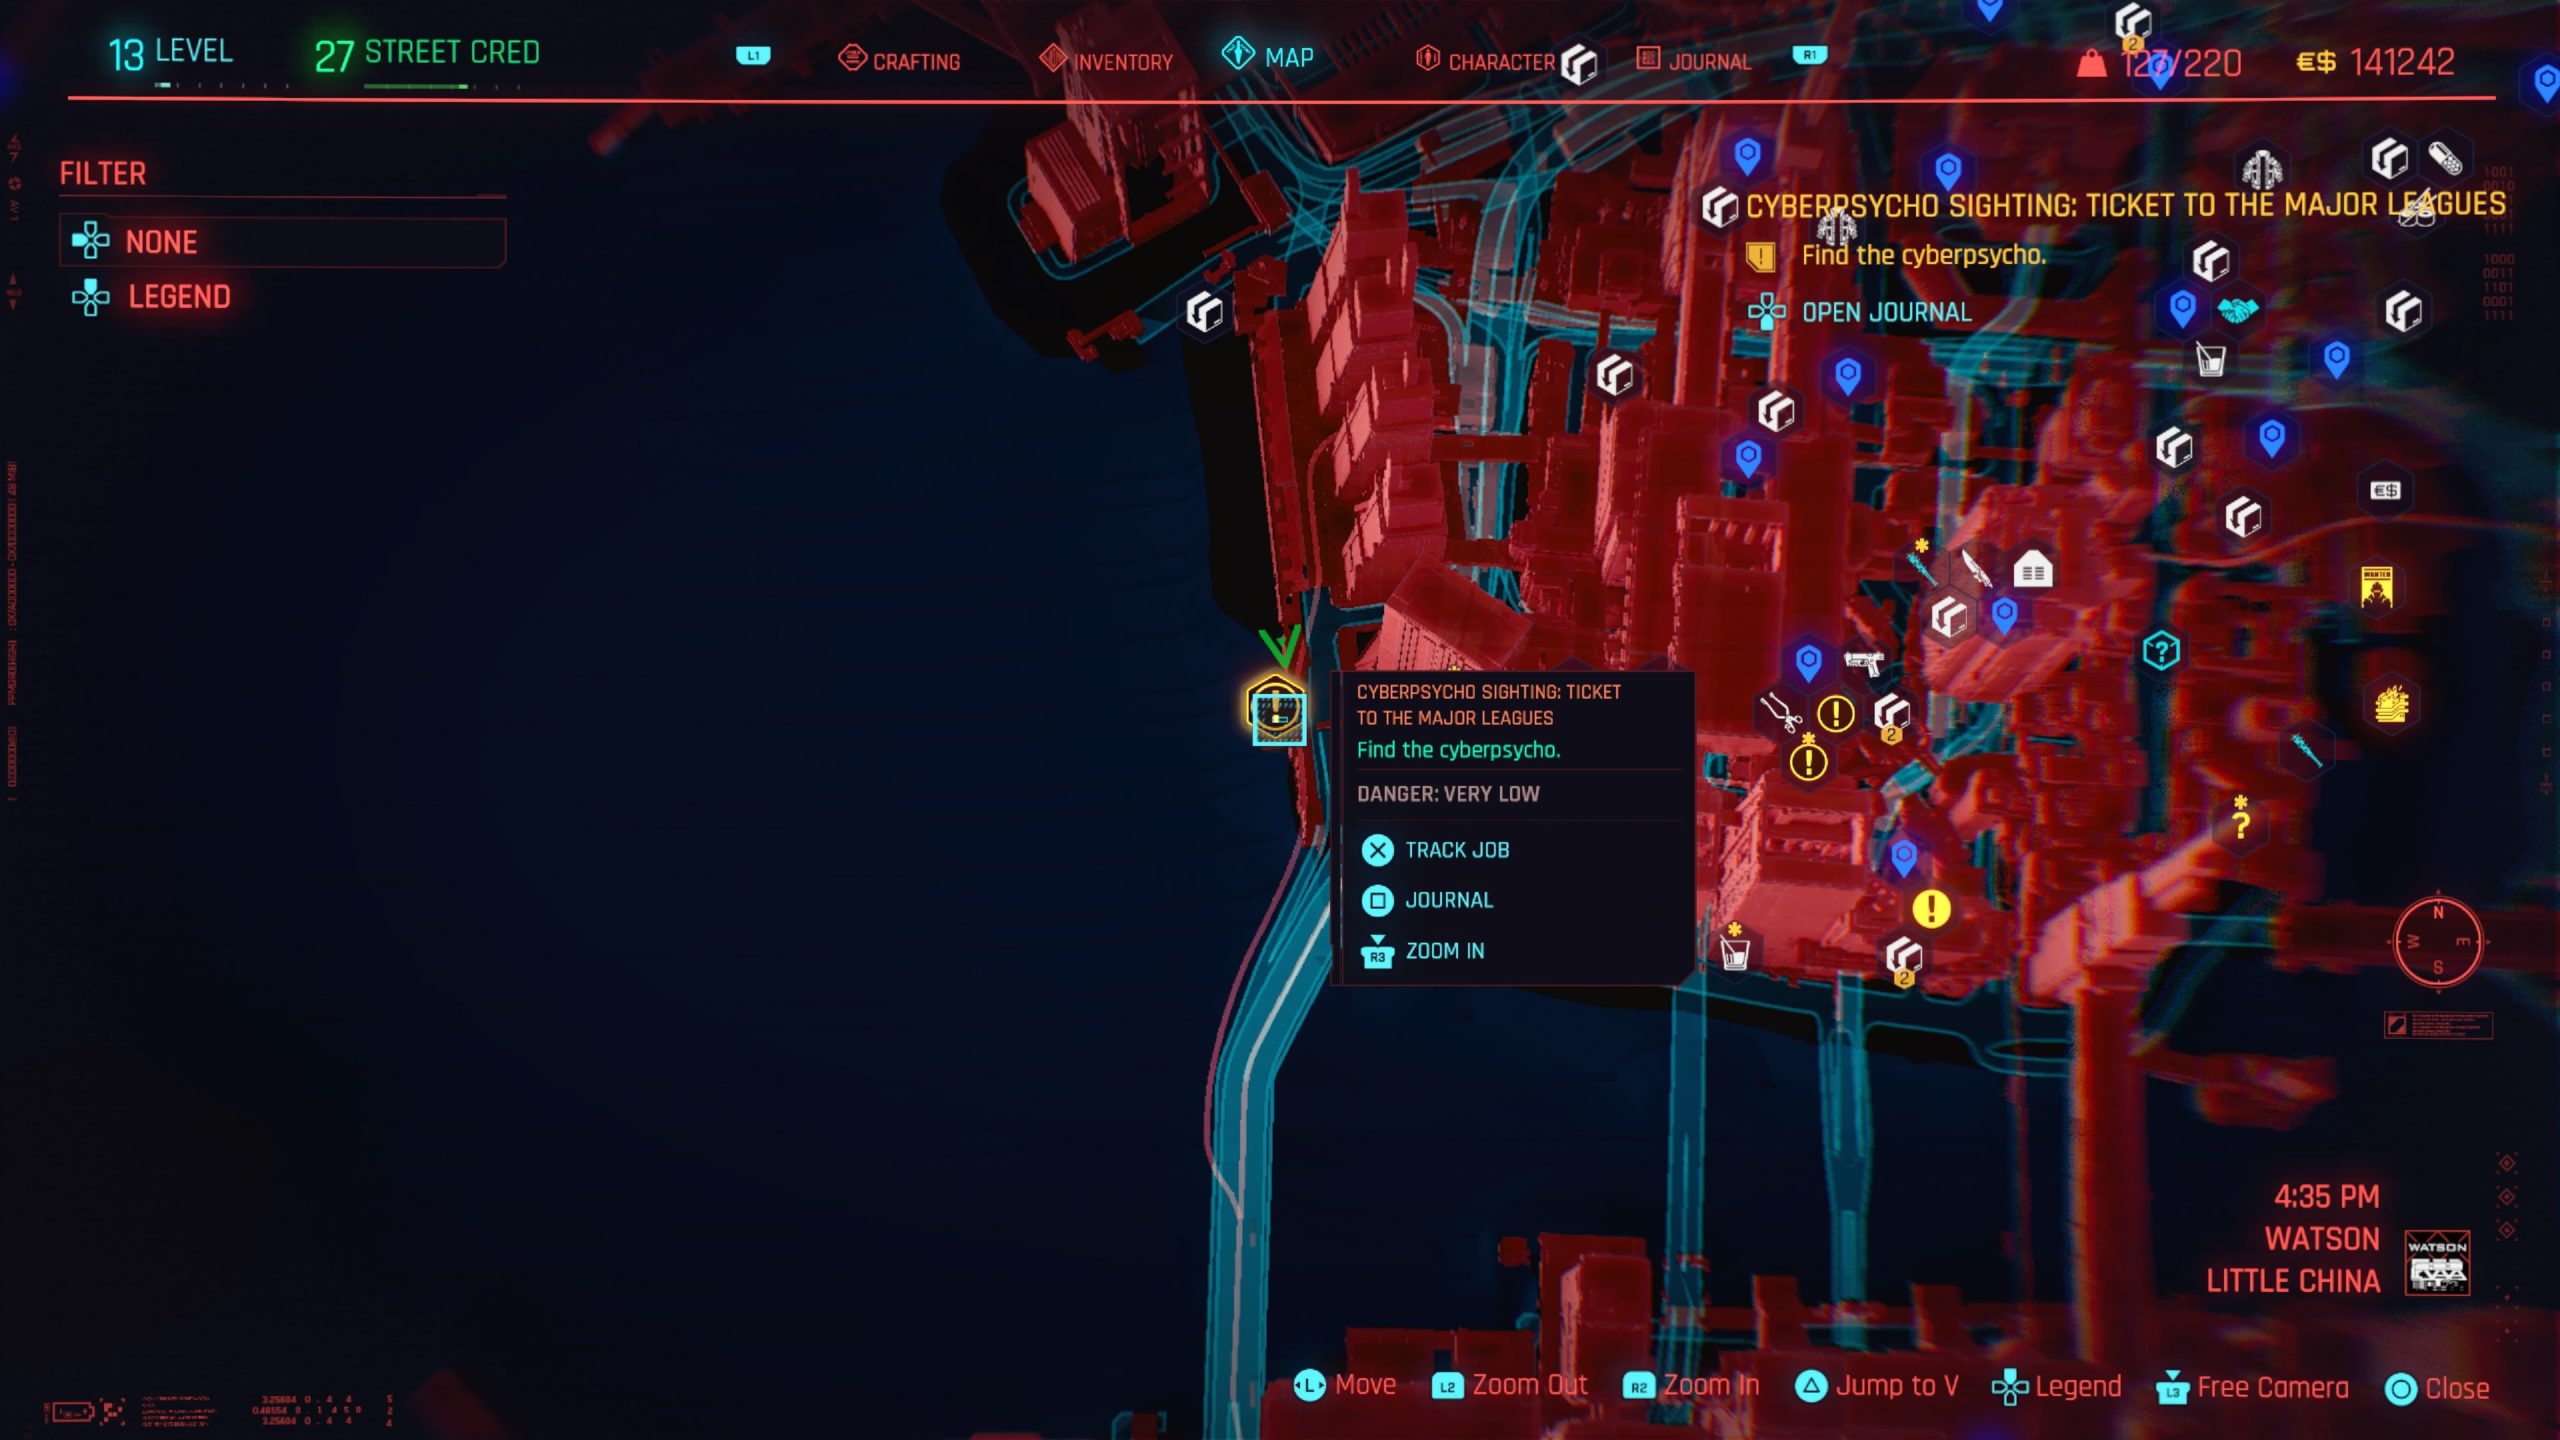
Defeat Alec Johnson then loot his body to collect a message about Glitter. Text this information to Regina to complete the gig.
Cyberpsycho Sighting: Where the Bodies Hit the Floor
Obtained: Northside – Approach the objective just south of Pershing St fast travel point
Objective: Find the cyberpsycho
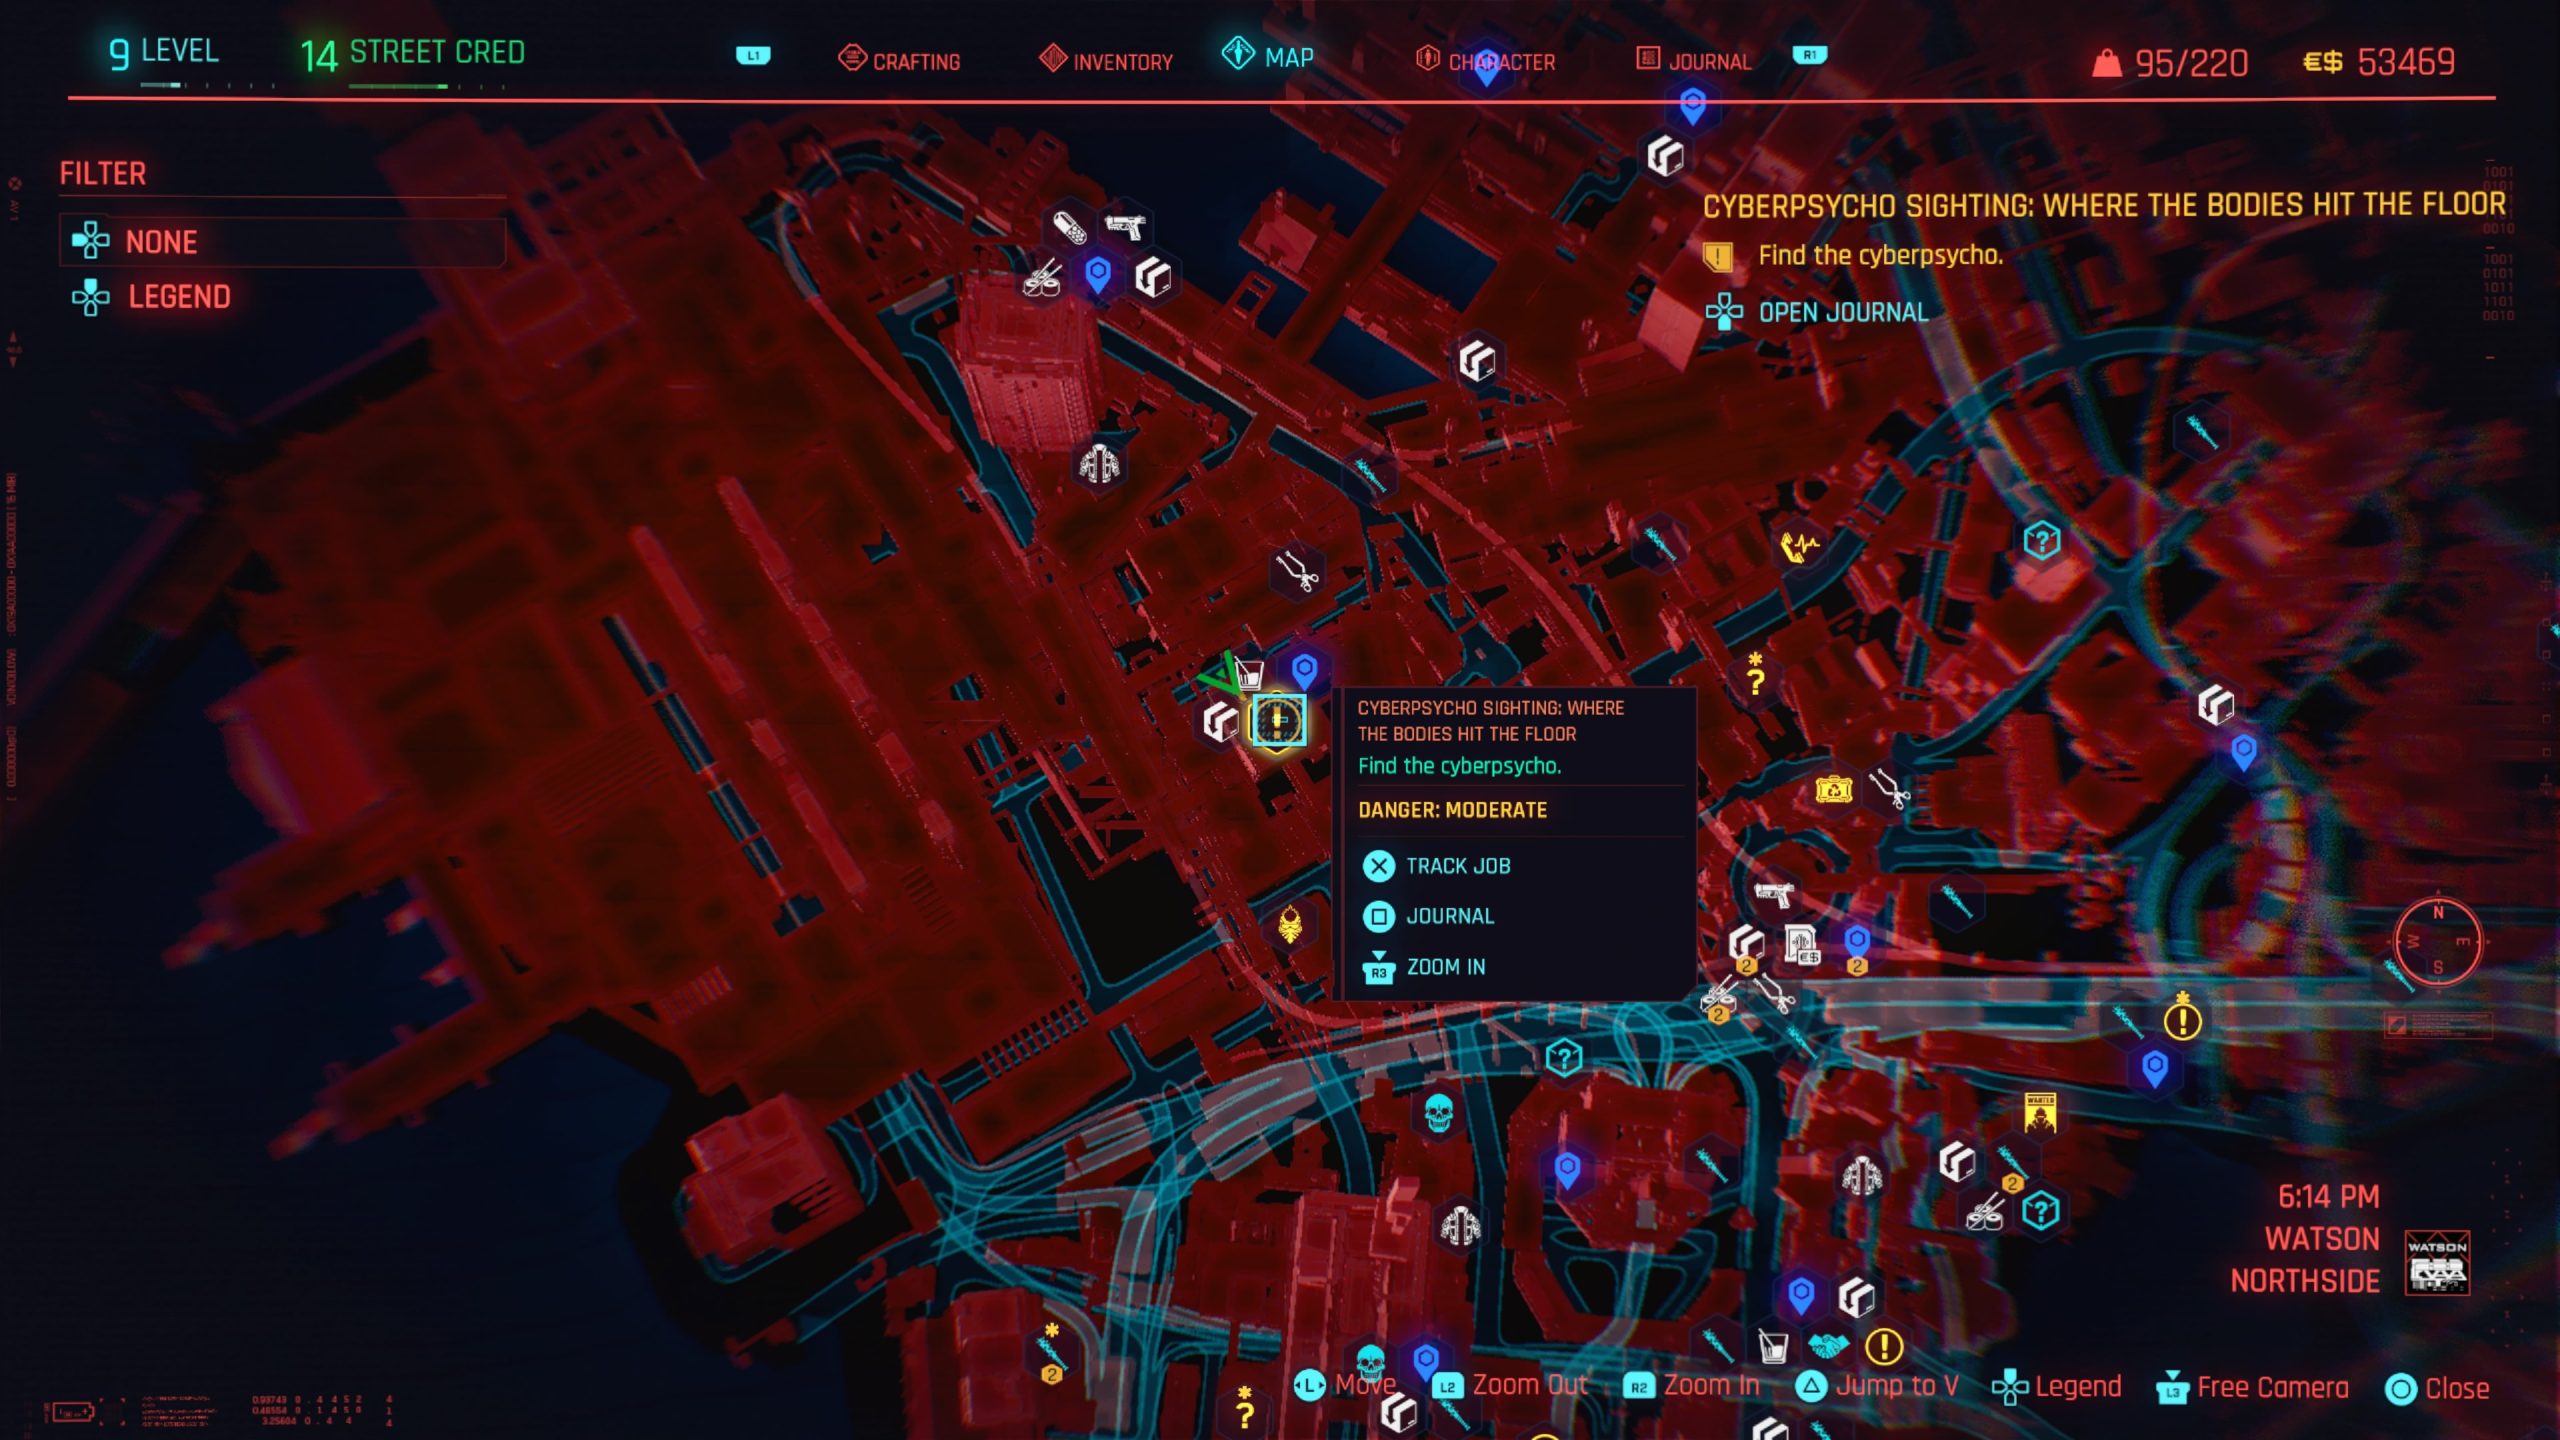
Head to the nook behind the skyscraper to find Ellis Carter waiting for you behind a large container and a pile of trash bags on fire. He’ll attack you with a melee weapon. Defeat him then head back behind the skyscraper to find a shard next to a body. Pick up the Archived Conversation: Brick and Ellis shard then read it. Afterwards, send a text to Regina to complete the gig.
Dirty Biz
Obtained: Northside – Approach the gig location at the Docks fast travel point
Objective: Get the raw BD

After you make your way past the yellow barricade. Enter the small building on the right to locate a PC. Use it to disable all of the security around the docks then exit the room and head up the nearby stairs. Take a left, moving past the pallet of cinder blocks, and enter the doorway. Take the stairs in the back of the room to the top then pass through another door on the left. This should put you in an archive room.
Go to the back of the room and enter the server room, where two guys sit in some chairs. Speak with them to make them hand over the BD or you find it yourself on a shelf in the back of the room. With the BD in hand, exit the area and drop it off in a drop point a little way down the road. Regina will call you to complete the gig.
Hippocratic Oath
Obtained: Northside – Approach the gig northeast of Martin St fast travel point
Objective: Go to the Clean Cut building
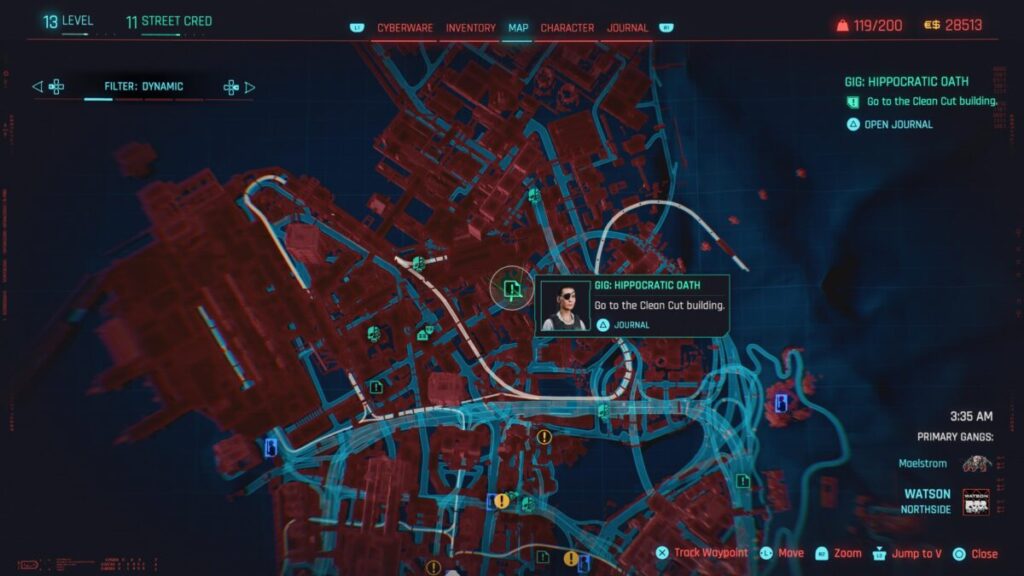
Head into the building and defeat the enemies inside. Afterward, search for Lucy, who is in the northwestern room working on a patient. Speak with her and persuade her to leave.
While talking with her, an option to scan the patient will quickly pop up. Do this; otherwise, she’ll be mad at you and accuse you of killing him. If you choose to scan him, she’ll say that he’s going into shock and ask you to grab the Synthetic Blood on the table to the left of you. Please do so and apply it to the patient.
After a brief chat with her, escort Lucy to the car, which is waiting outside to receive a call. The gig will complete after she enters the car which will reward you with some EXP, Street Creds, and eddies.
Last Login
Obtained: Kabuki – Approach the gig north of Kabuki Market fast travel point
Objective: Enter the building where Alois’ laptop was connected to the Net
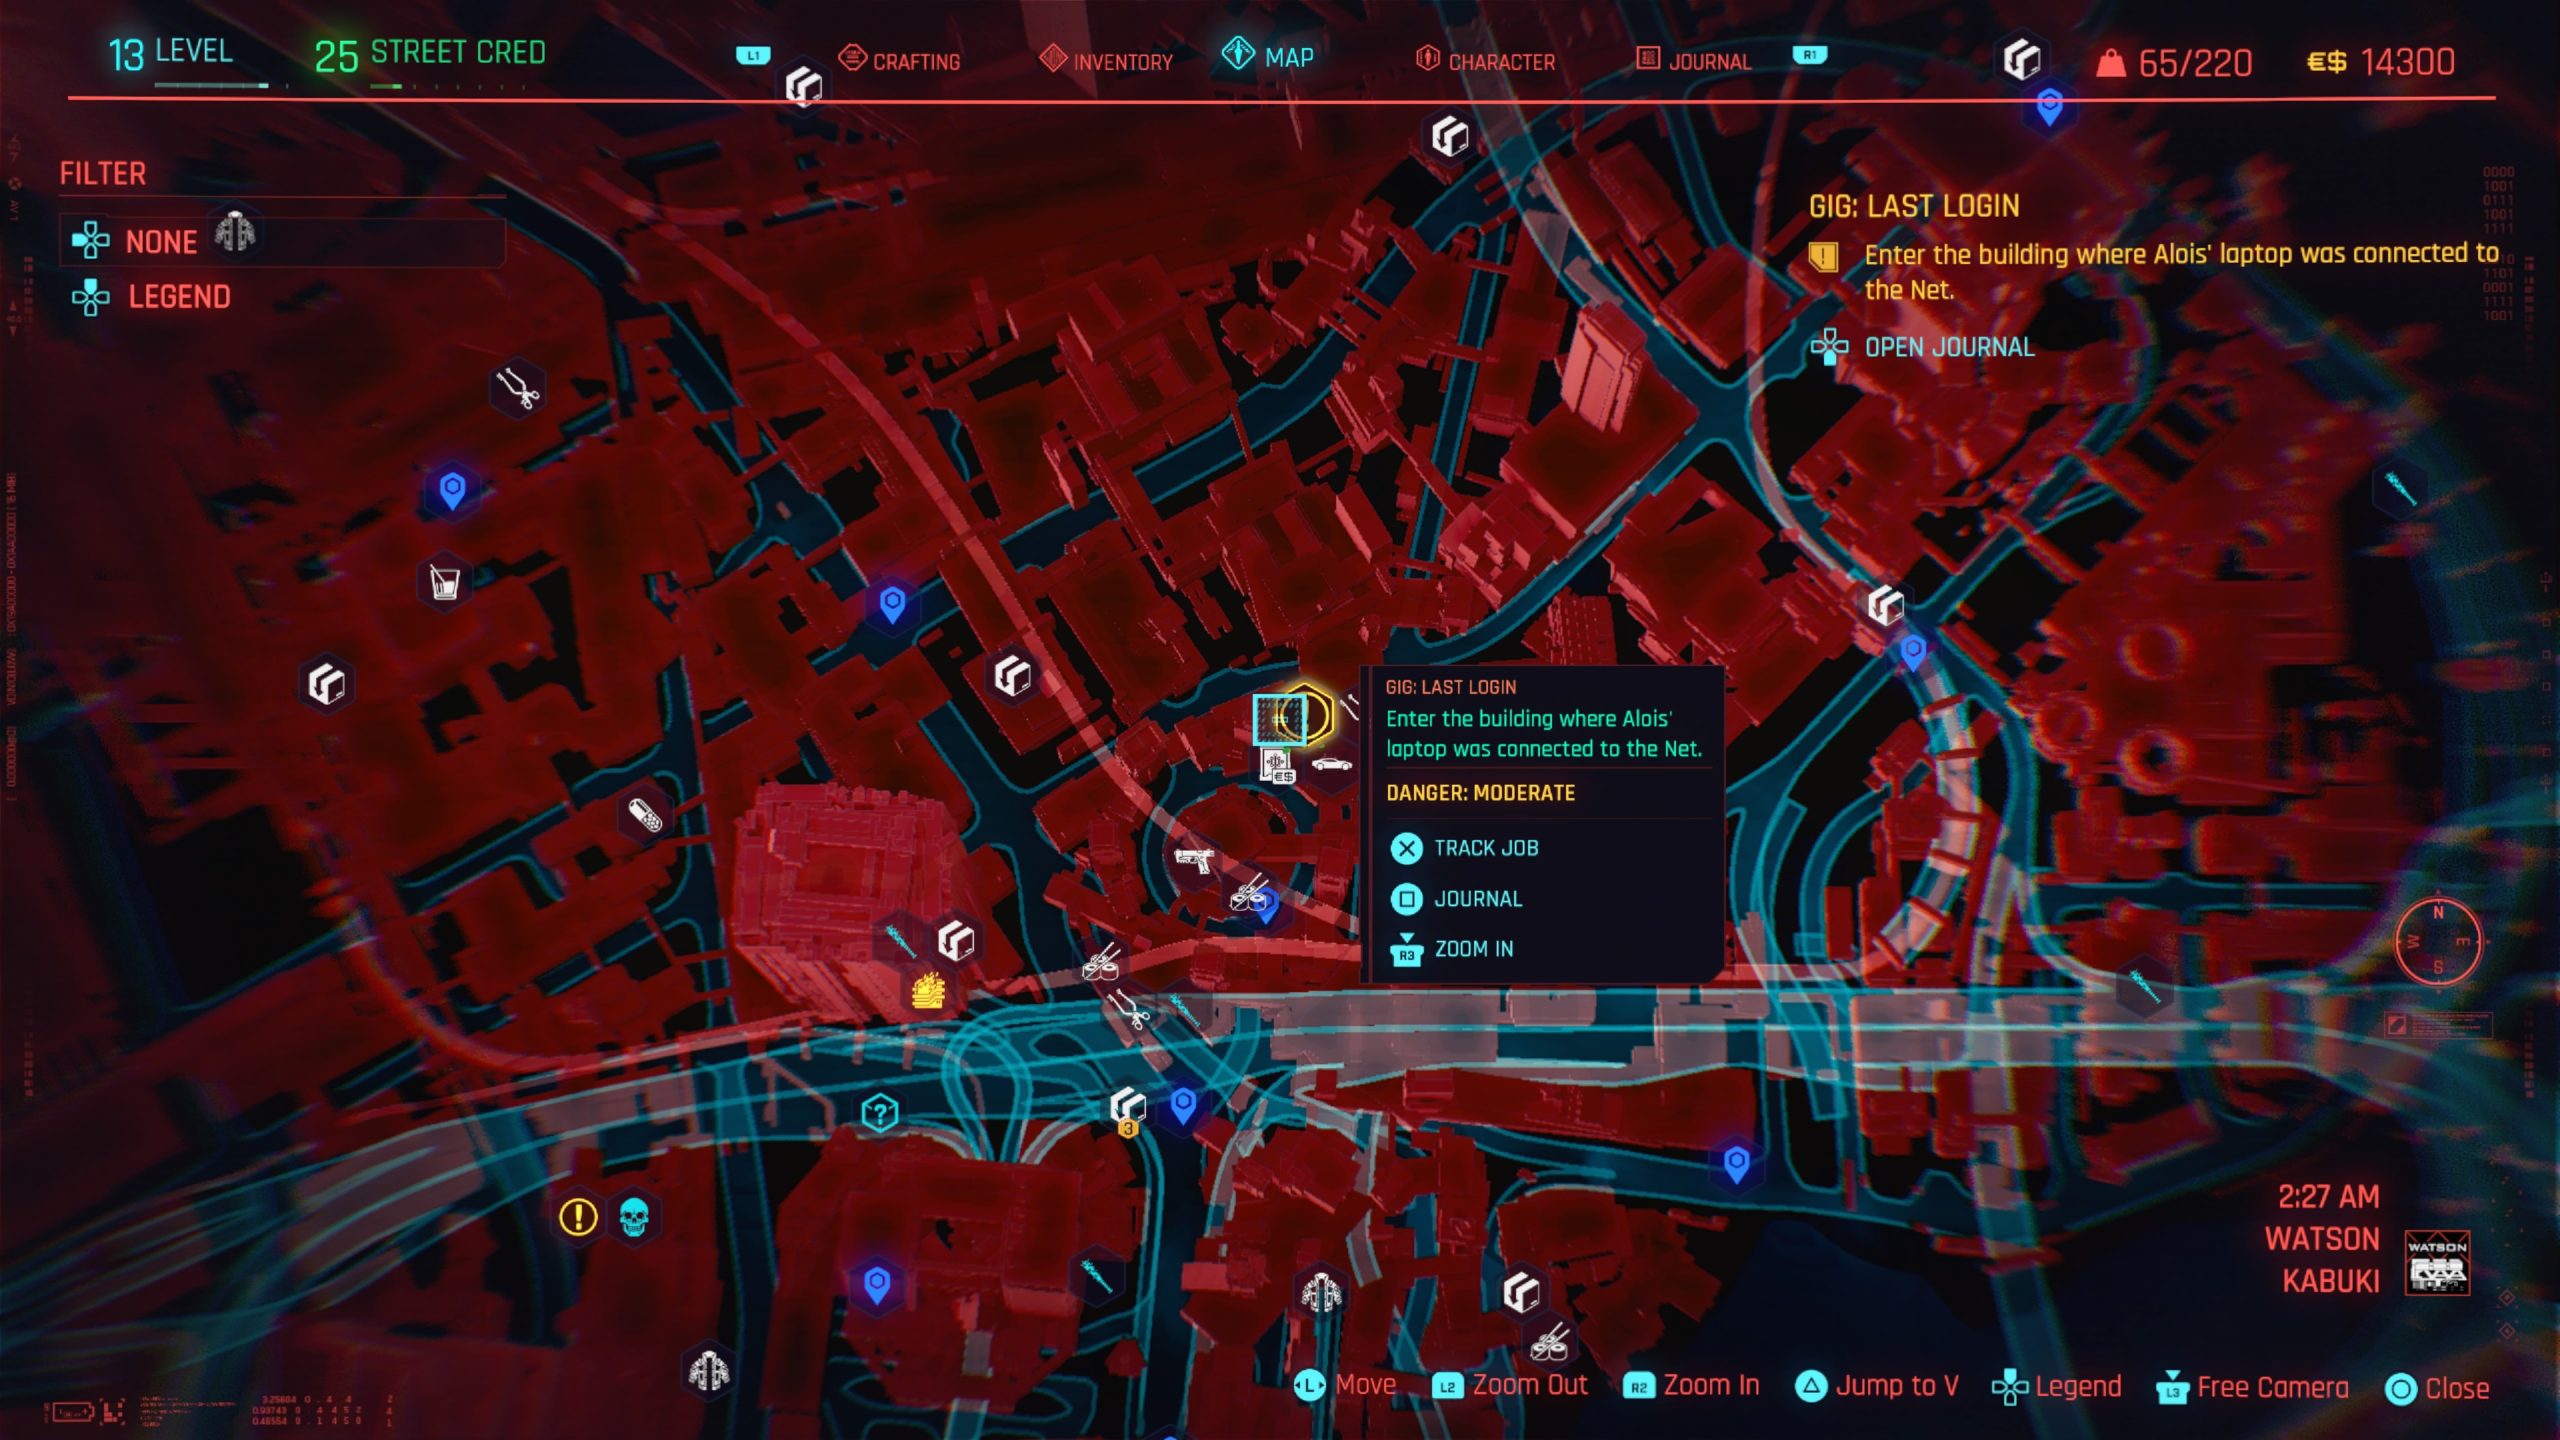
Enter the building where indicated by the objective then take out the enemies inside. Next, you’ll need to find Alois’ laptop, which is downstairs on a table next to a gurney with a body on it. Once you get the laptop, head outside and drop it off in the Drop Point. You’ll receive a call from Regina then the gig will complete.
Lousy Kleppers
Obtained: Northside – Approach the gig location south of Offshore St fast travel point
Objective: Get inside the Maelstrom warehouse

When you reach the warehouse, it’ll be strongly guarded by enemies and surveillance cameras. Defeat the enemies, then work your way into the large warehouse building.
Inside, you’ll find a van in the middle. Search the table next to the van to find the shard that you need. Once you snag it, leave the area then deposit the databank in the Drop Point just north of the warehouse to complete the gig.
Many Ways to Skin a Cat
Obtained: Northside – Approach the gig location west of Martin St fast travel point
Objective: Steal the van filled with leather jackets
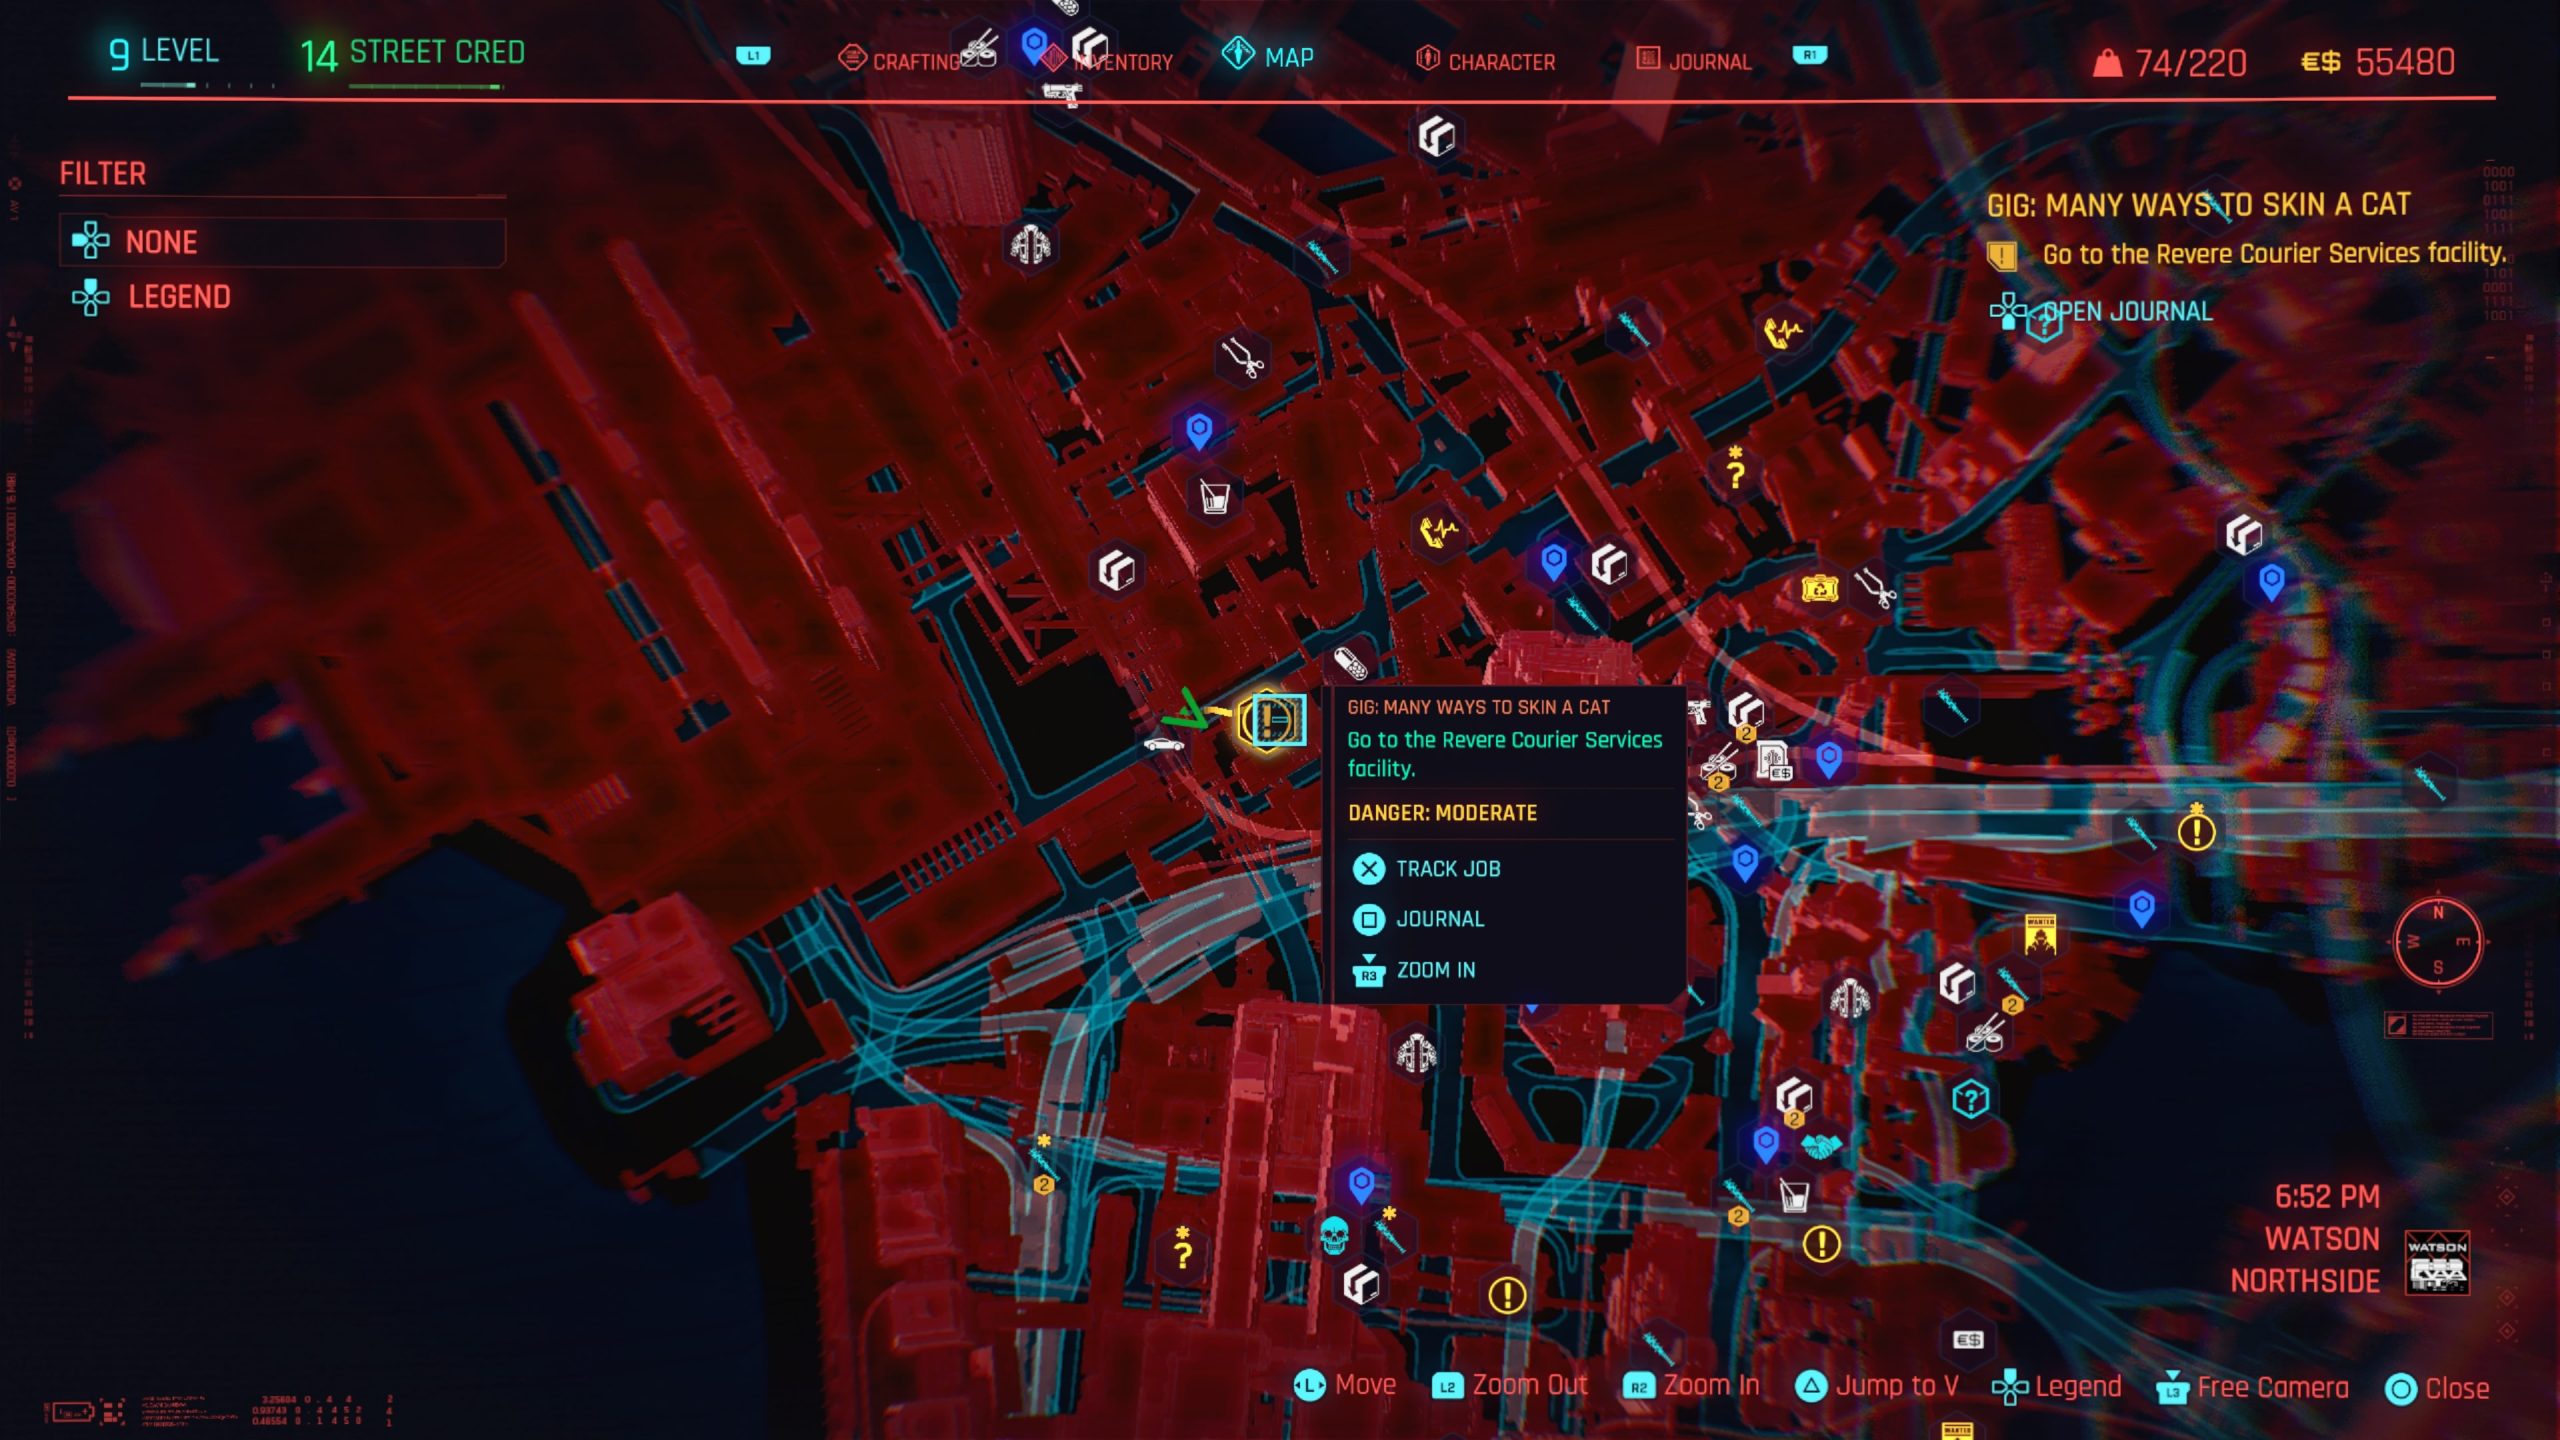
Head to the Revere Courier Services facility and find a way inside. If you have a Technical Ability 5, you can waltz in through the front door, otherwise, you can find a broken section of gate to sneak through on the east side of the facility.
Once you reach the facility courtyard, take care of the enemies and then make your way into the building. Before moving on, look at each one until you find an access card. Head up to the second floor to enter the computer room on the back left side of the building (you’ll need to use the walkway to reach it). Once inside, interact with the PC to “authorize via personal link,” then proceed to the warehouse’s ground floor.
Enter the van and follow the objective northeast of Martin St. to park it in the garage. Along the way, you’ll be attacked by some enemies. Either lose them or take them out. Exit the van after parking in the garage to complete the gig. You’ll be rewarded with EXP, Street Cred, and some eddies.
Monster Hunt
Obtained: Kabuki – Approach the gig location just east of Allen St South fast travel point
Objective: Go to the Ho-Oh club
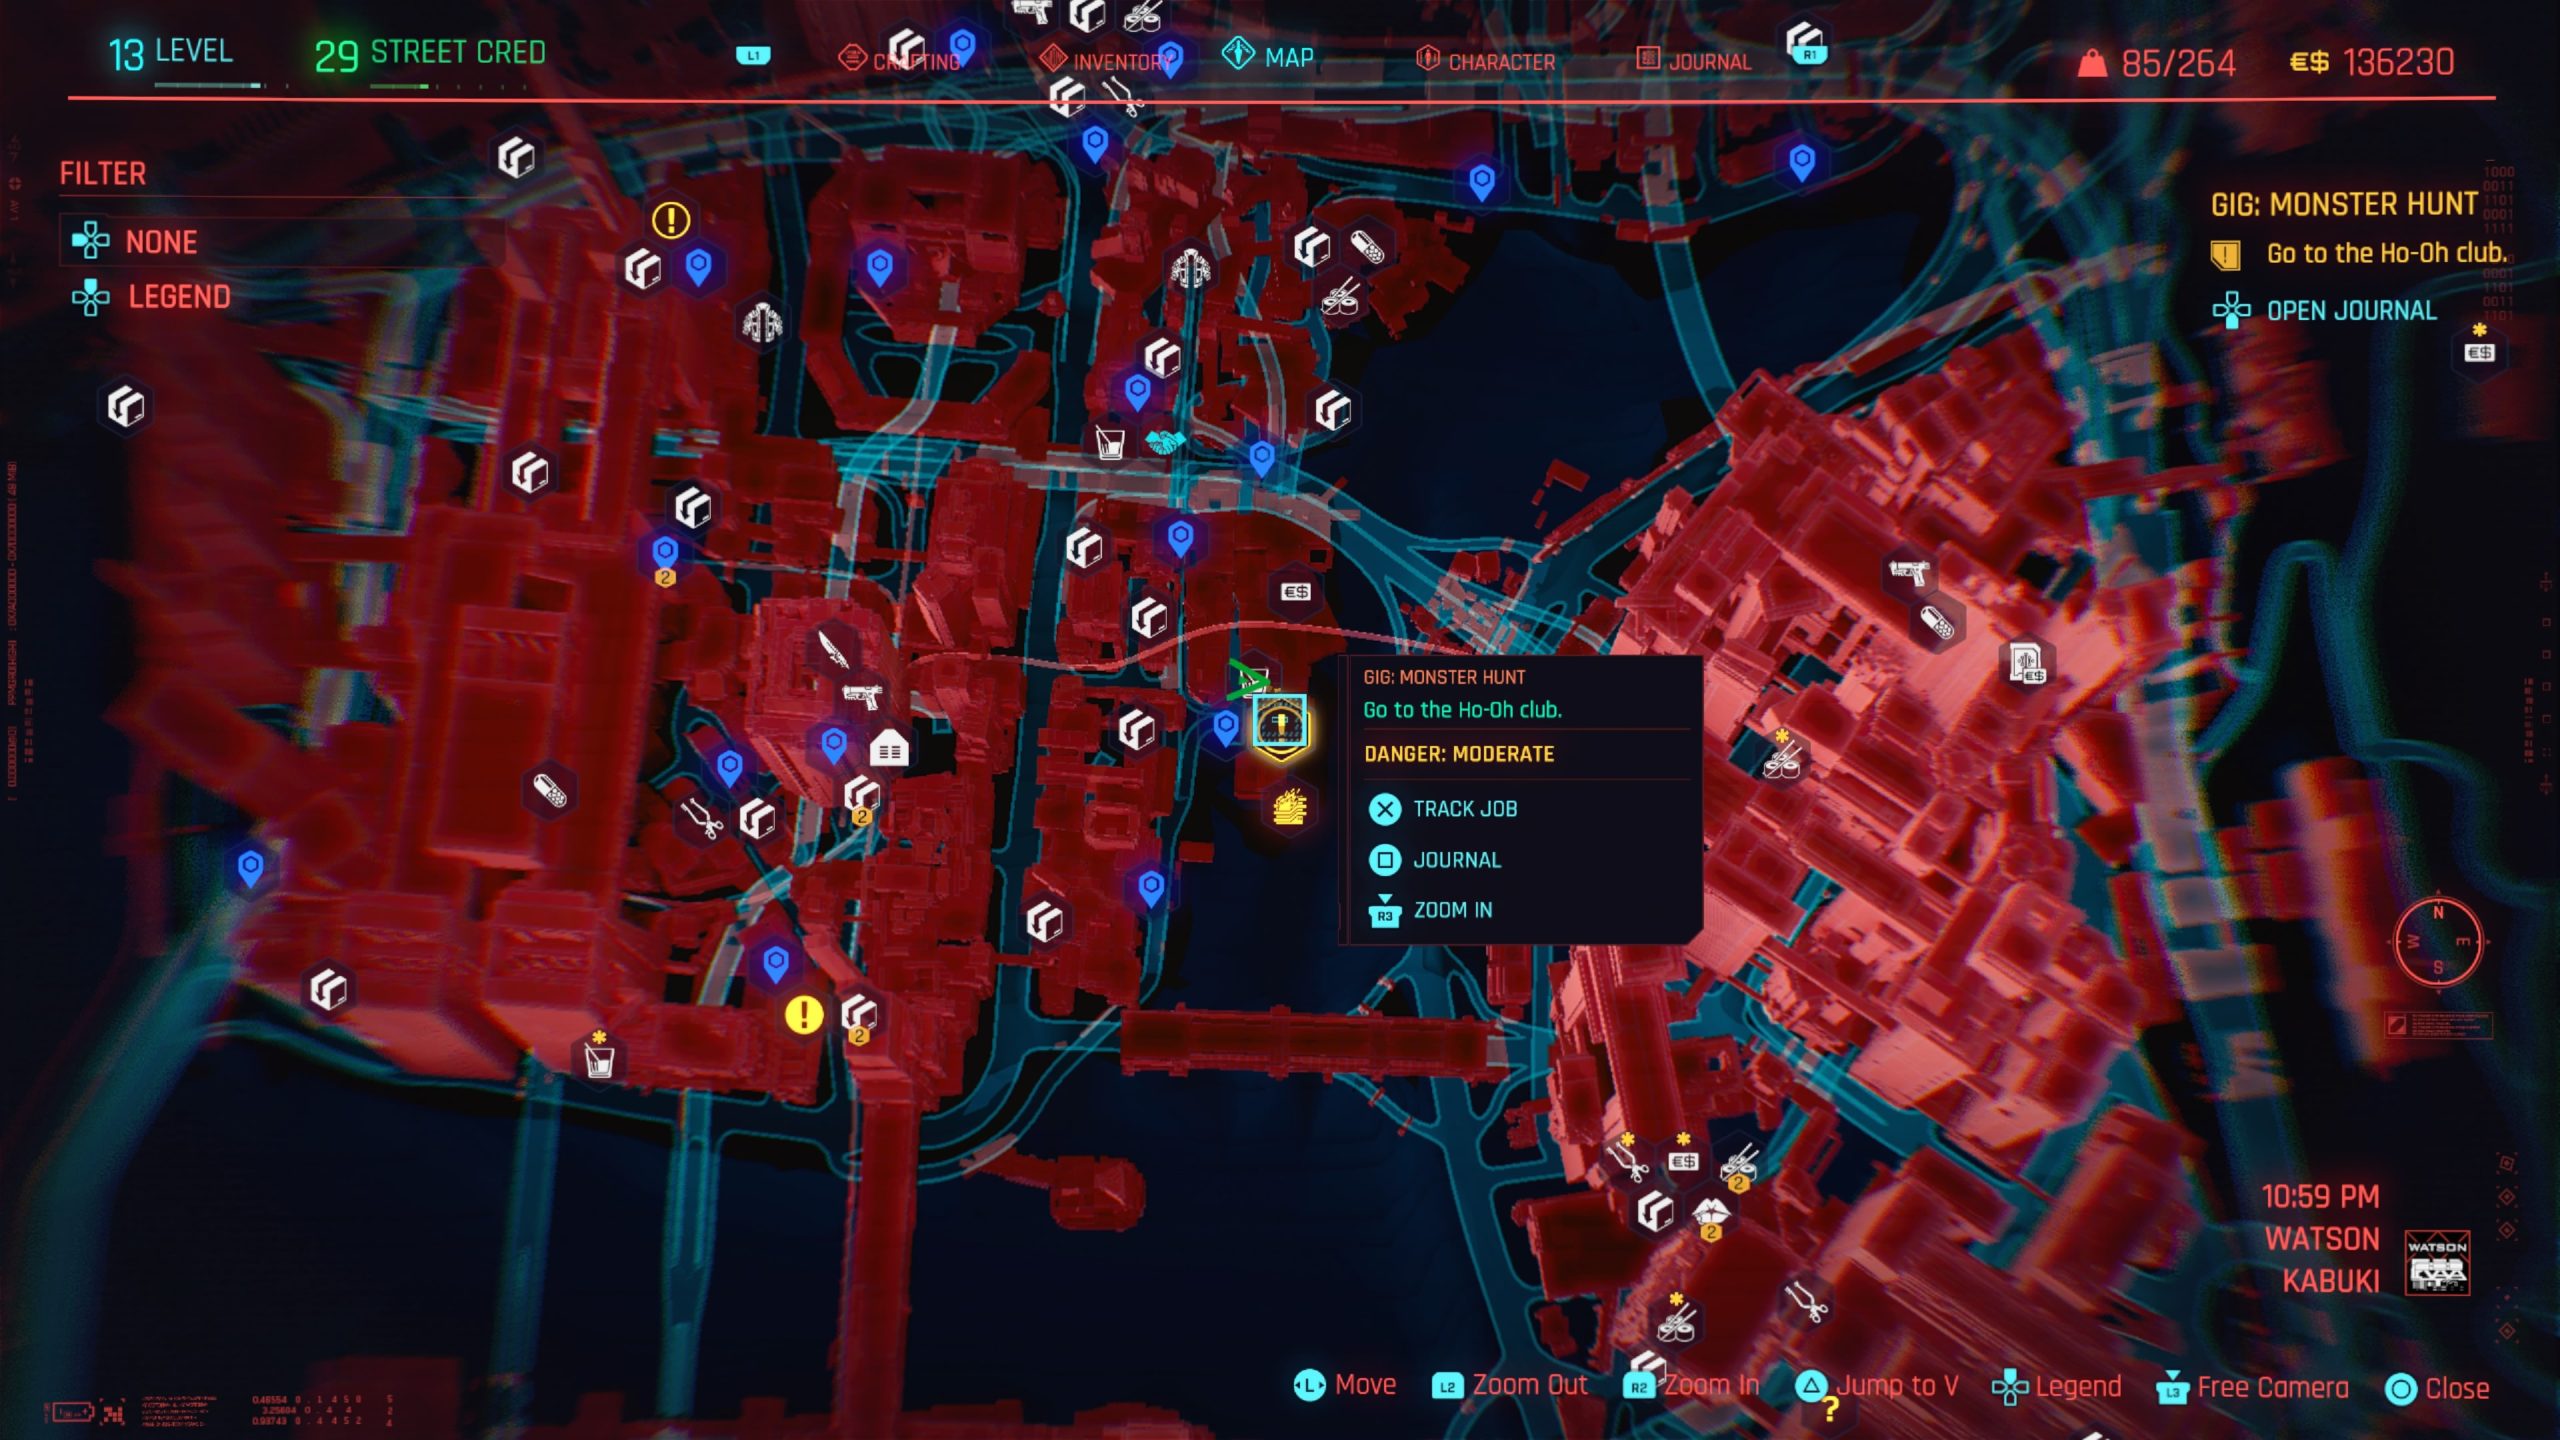
Once inside the club, take out the enemies, then head through the beads to the back room. Follow the path up the stairs and turn immediately to your left to find a door/gate that requires Technical Ability 7 to open.
If you have this, open the door then go forward a short way to find a set of stairs leading up on your left. Take them to the top then turn left and follow the path to reach an open doorway on the right. Head inside and eliminate the enemies, including Jotaro.
Once the task has been completed, take Jotaro’s body and head outside to the fixer’s transport. Dump the body in the trunk to receive a call from Regina, who shuts the gig.
Occupational Hazard
Obtained: Northside – Approach the gig location east of Martin St fast travel point
Objective: Enter the Mox warehouse
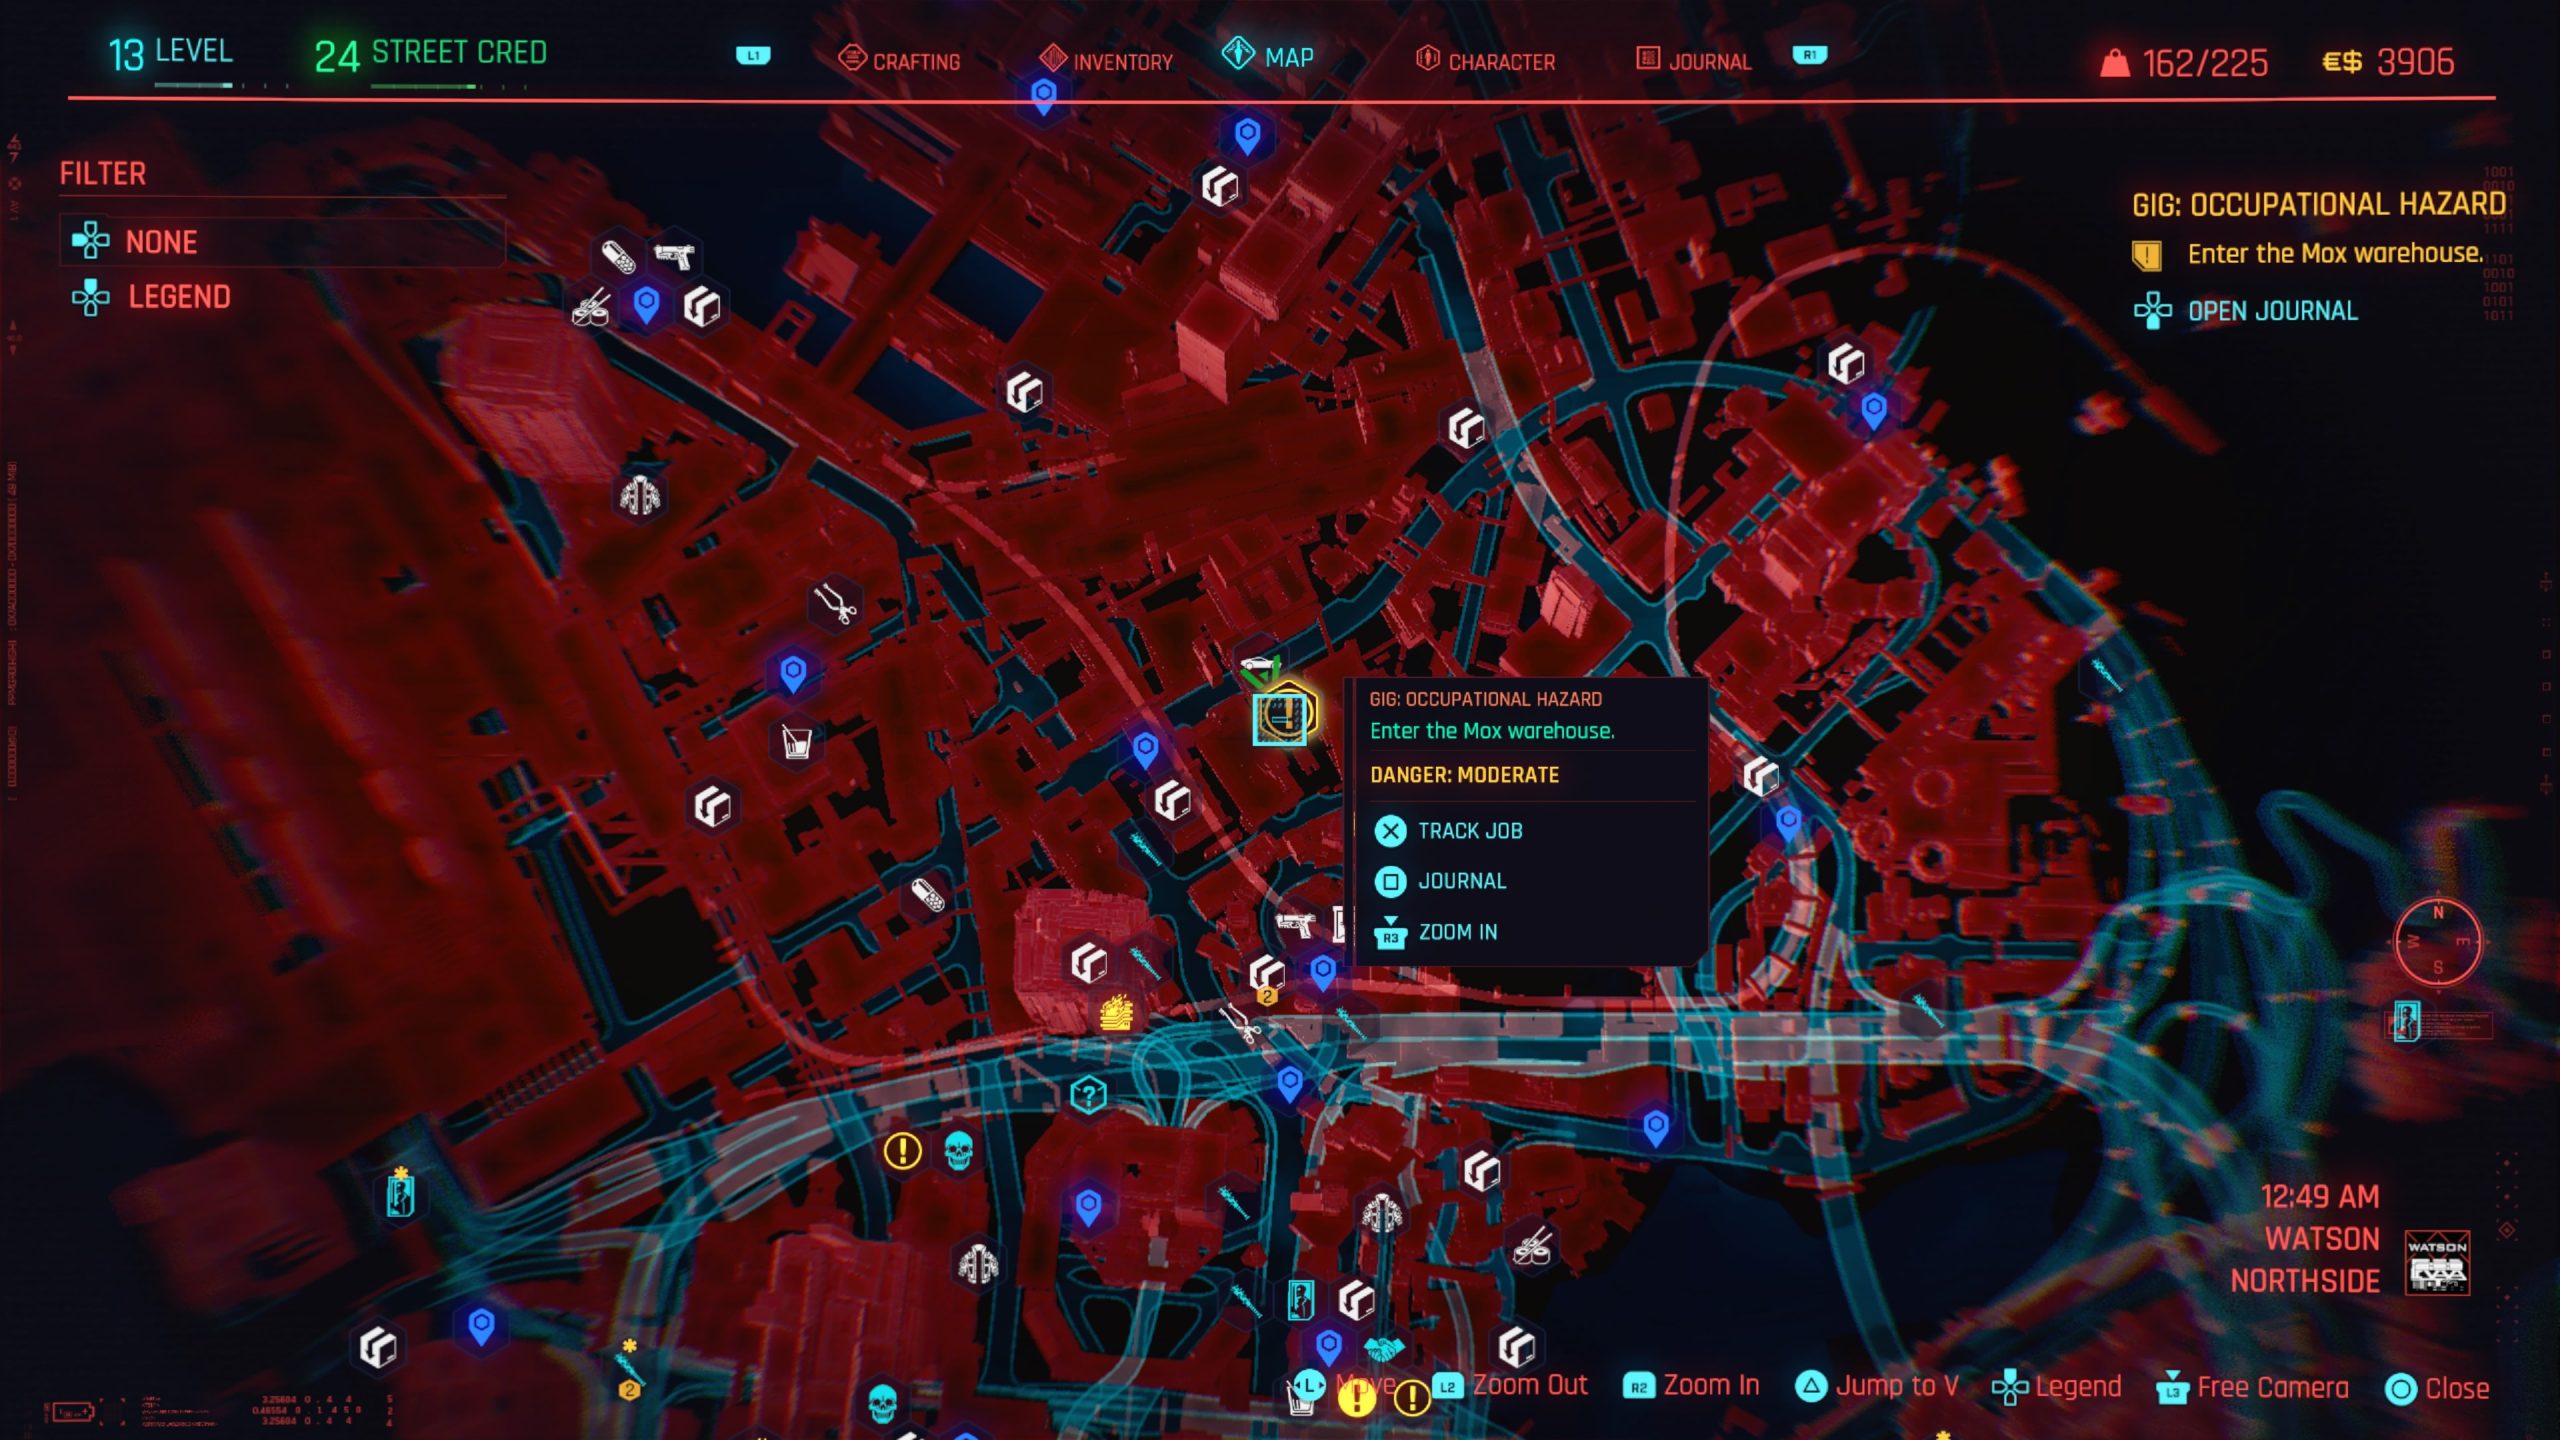
Enter the building where indicated by the objective then proceed through the next door. Please note that you’ll need Technical Ability 5 to enter through this door.
Once inside the next room, head through the silver door on the left to find the cyberpsycho named Anna Nox yelling and screaming. Defeat her then knock on the blue shipping container to speak with Hal Cantos to tell him it’s safe to come out. Afterwards, Regina will call you to close the gig. For additional dialog, you can head upstairs near the blue shipping container and speak with the girl sitting on the chair in the small room.
Playing for Keeps
Obtained: Little China – Approach the gig location south of Clarenoon St fast travel point
Objective: Go to the Kashuu Hanten bar in Little China
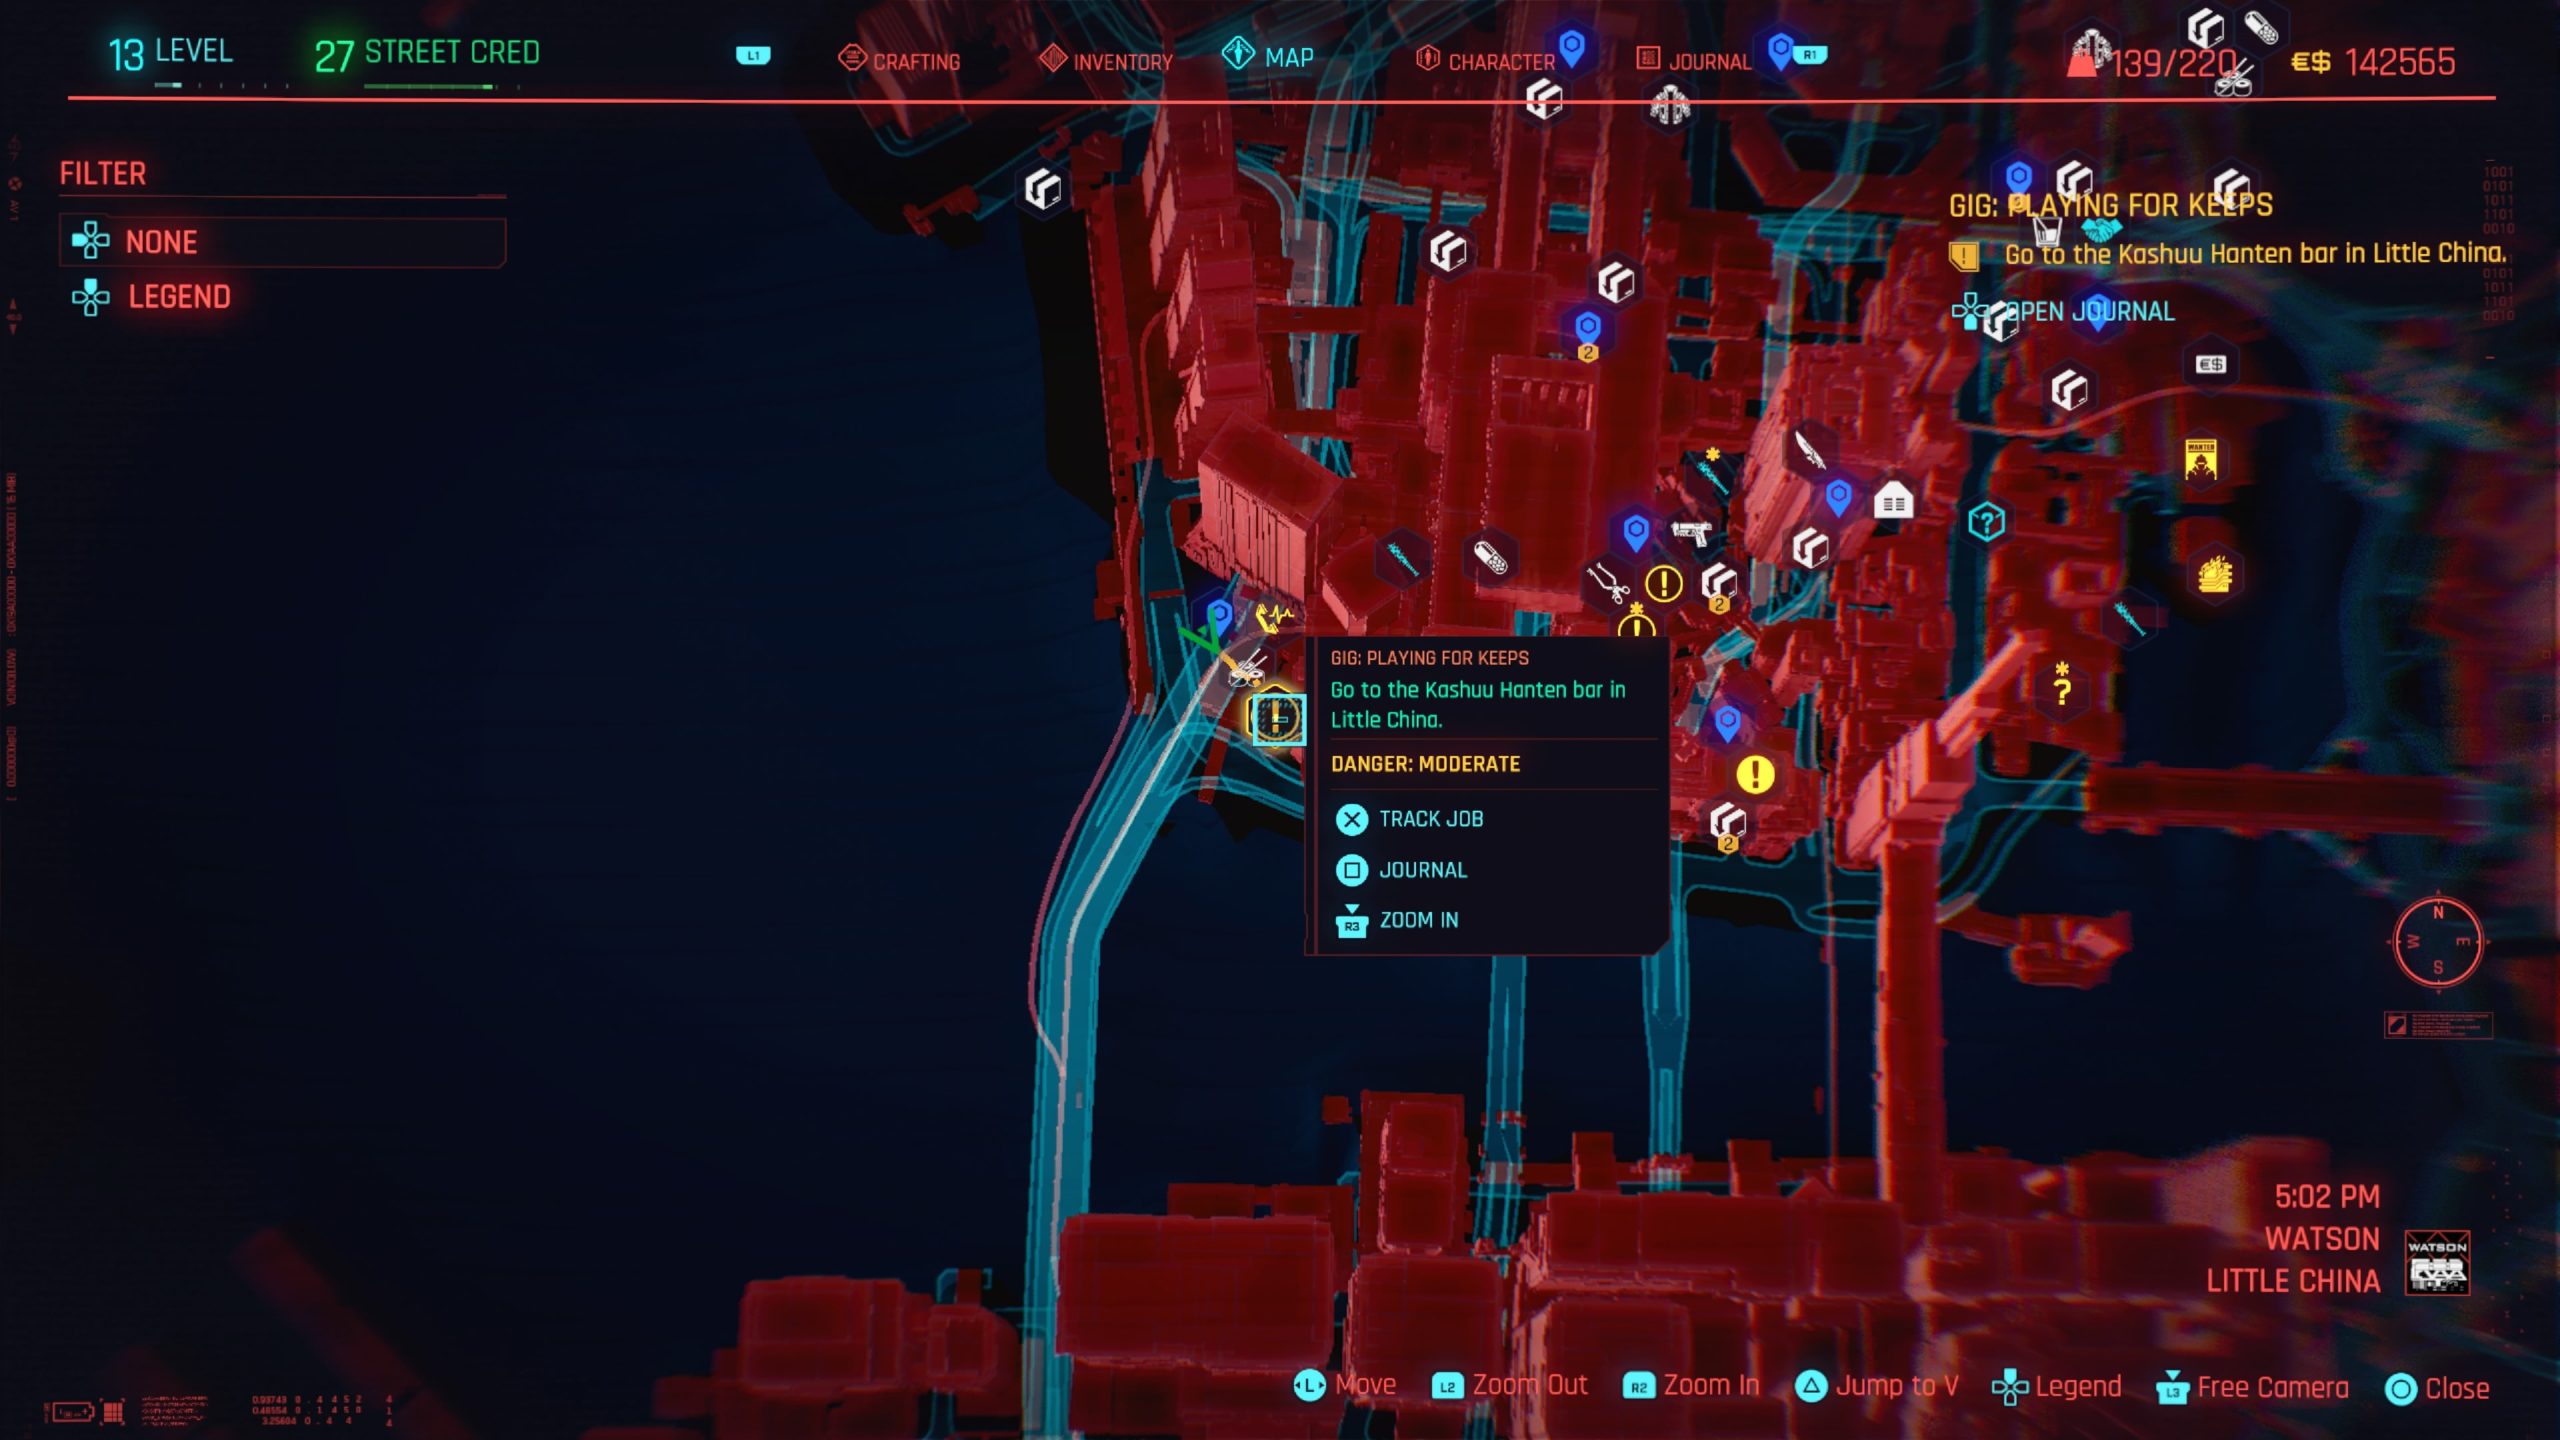
When facing the bar’s entrance, take a right down the alley. Distract the guard at the end of the alley using the vending machine, and then take him out. Enter the building on the left. Be mindful of the lady in here. You’ll need to distract her using the freezer, then sneak up behind her and take her out.
Open the door next to the freezer using Body Value 6, or look for the keycard on a table across from a bulletin board. Once inside the room, grab the implant from the jar on the shelf. Once you take the implant, exit the building and follow the objective to the Drop Point. Deposit the item to complete the gig. You’ll receive some EXP, Street Cred, and eddies for all of your efforts.
Scrolls Before Swine
Obtained: Northside – Approach the location north of All Food Plant fast travel point
Objective: Steal the security cam footage from the warehouse
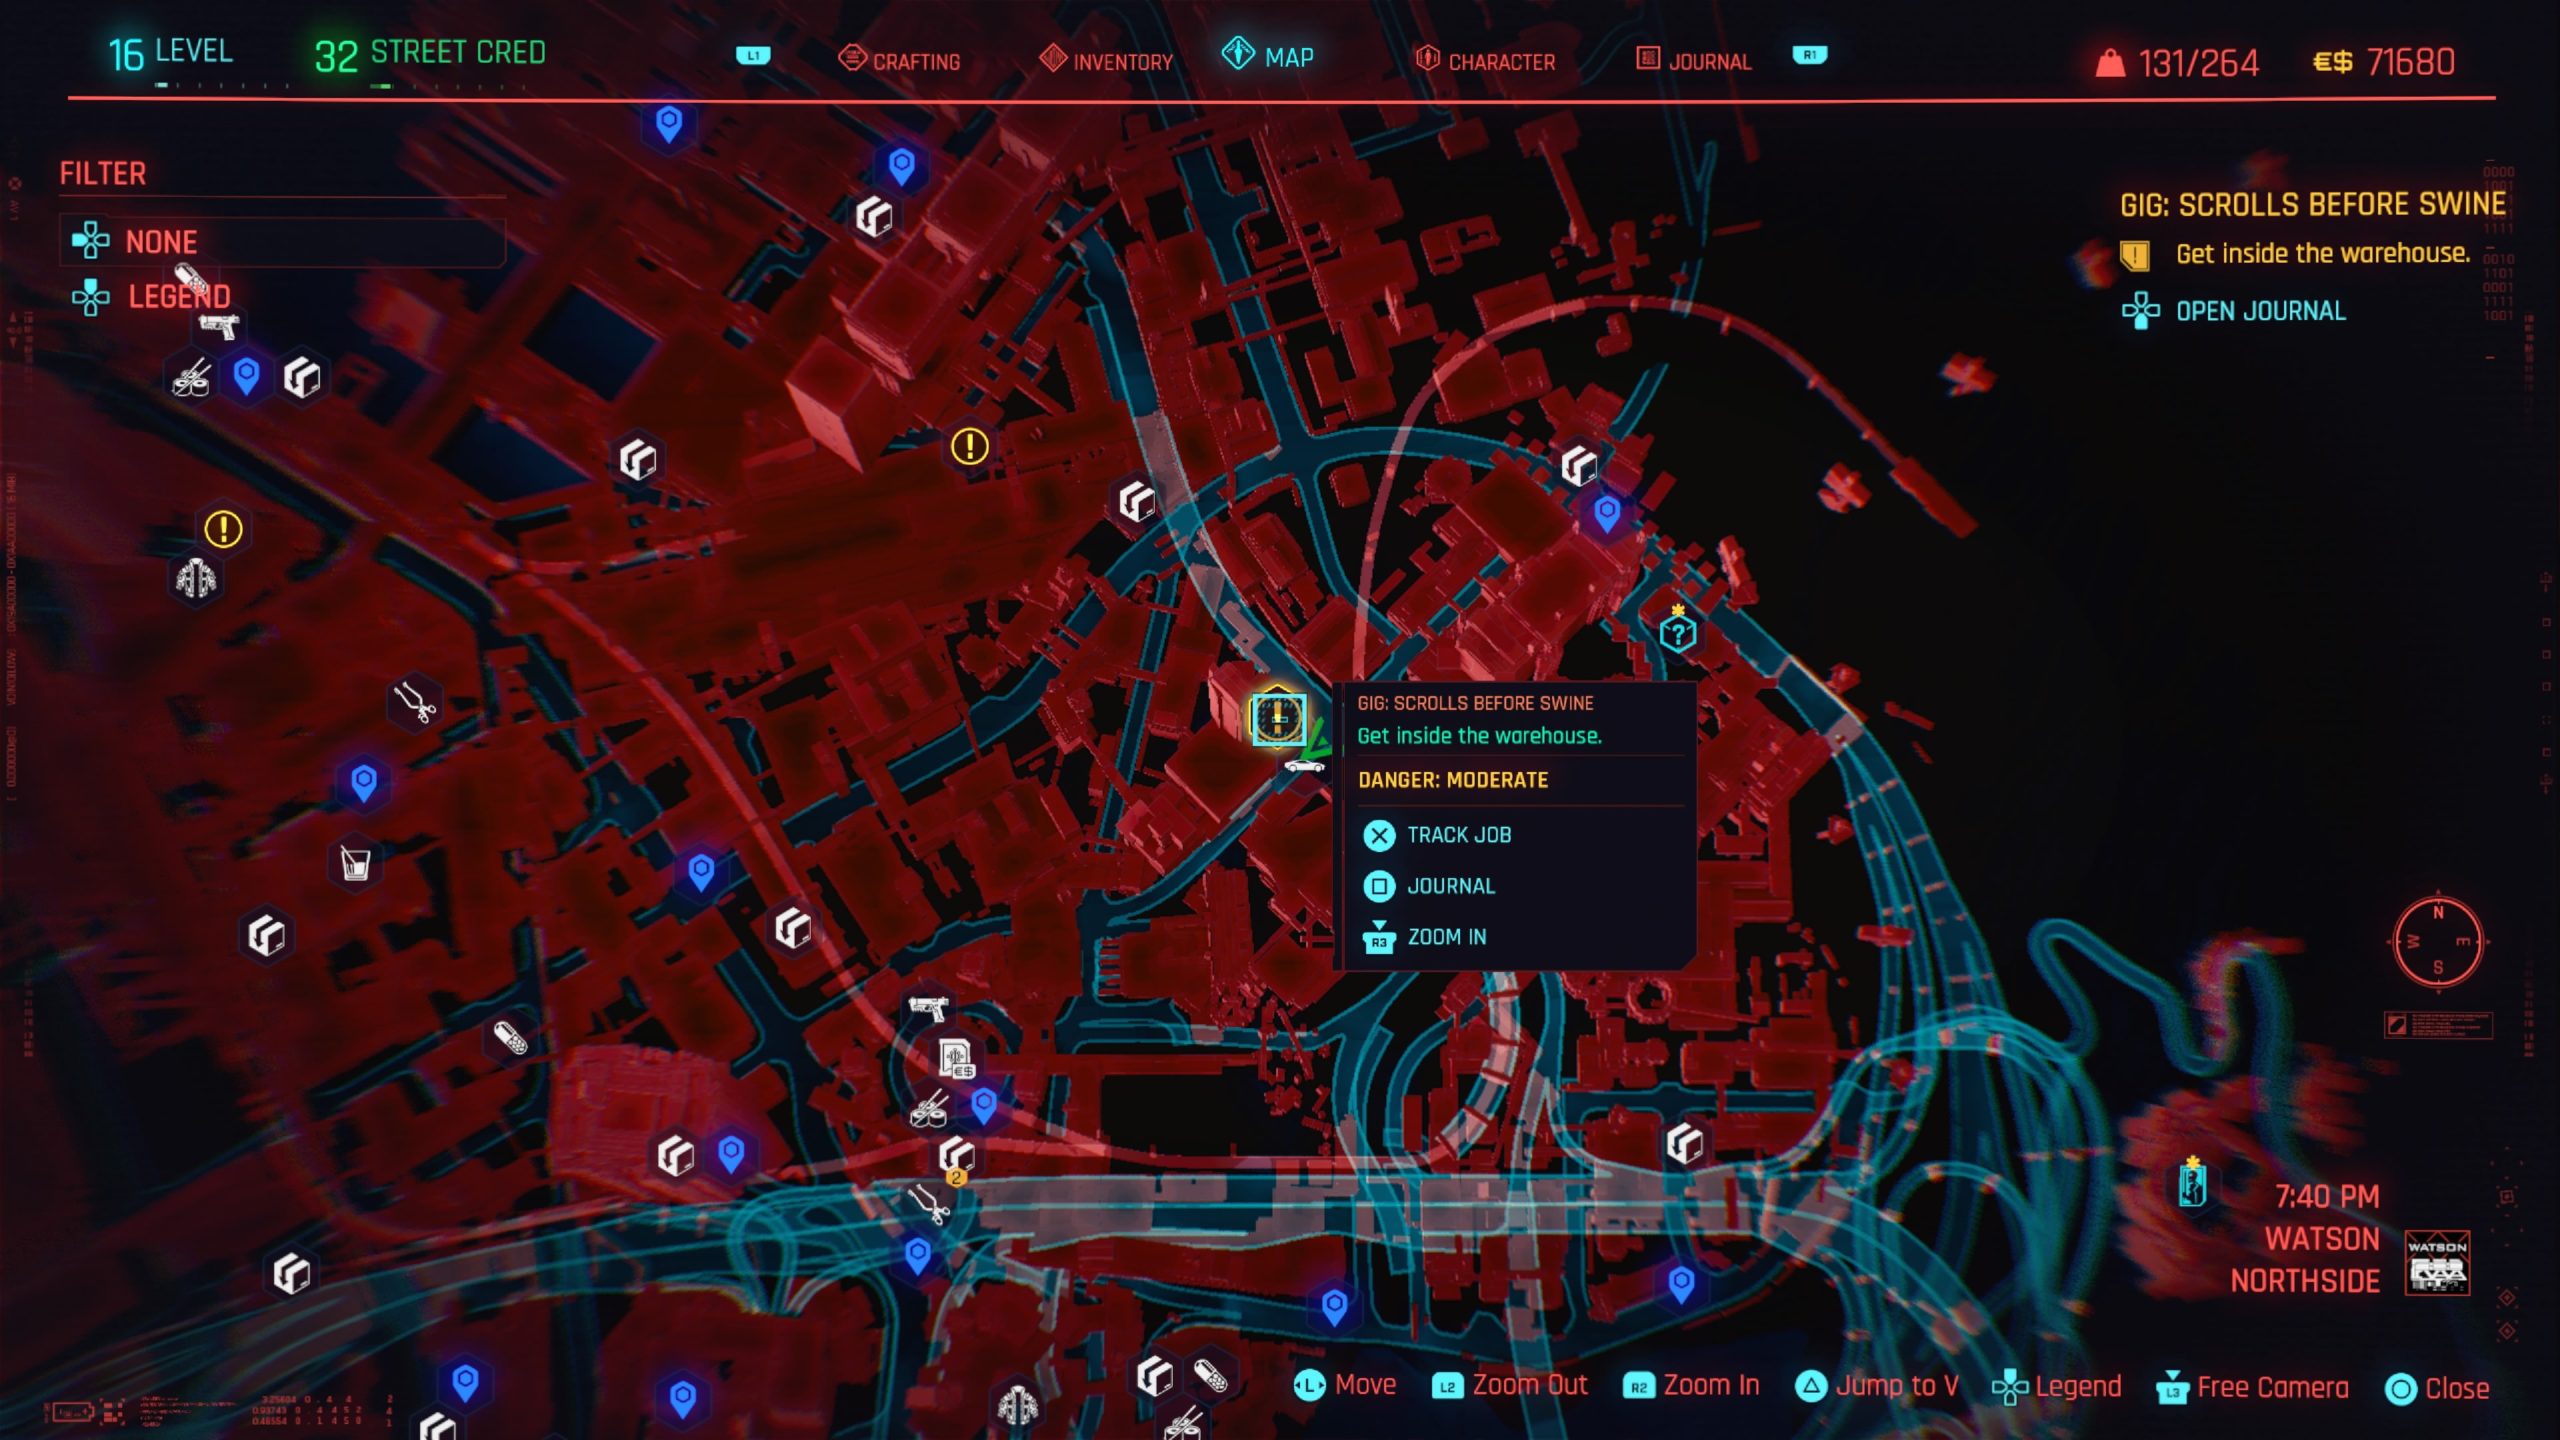
Enter the lot of the warehouse using the main entrance past the barricade, an open gate in the back or sneak in through a side gate if your Body Value is high enough. Neutralize the enemies then make your way into the warehouse.
Head to the computer on the second floor and interact with the PC to steal the footage then exit the warehouse. Follow the objective to a building near the Longshore North fast travel point. There, you will head to the second floor to find Aaron.
To appease Johnny, you can tell Aaron that you’ve watched them and that he needs to be behind bars. This will lead to a fight where you kill him. Alternatively, you can just hand over the footage. When you’re done with Aaron, exit the building to complete the gig.
Shark in the Water
Obtained: Kabuki – Approach the gig location southeast of Kabuki Market fast travel point
Objective: Deal with Blake Croyle
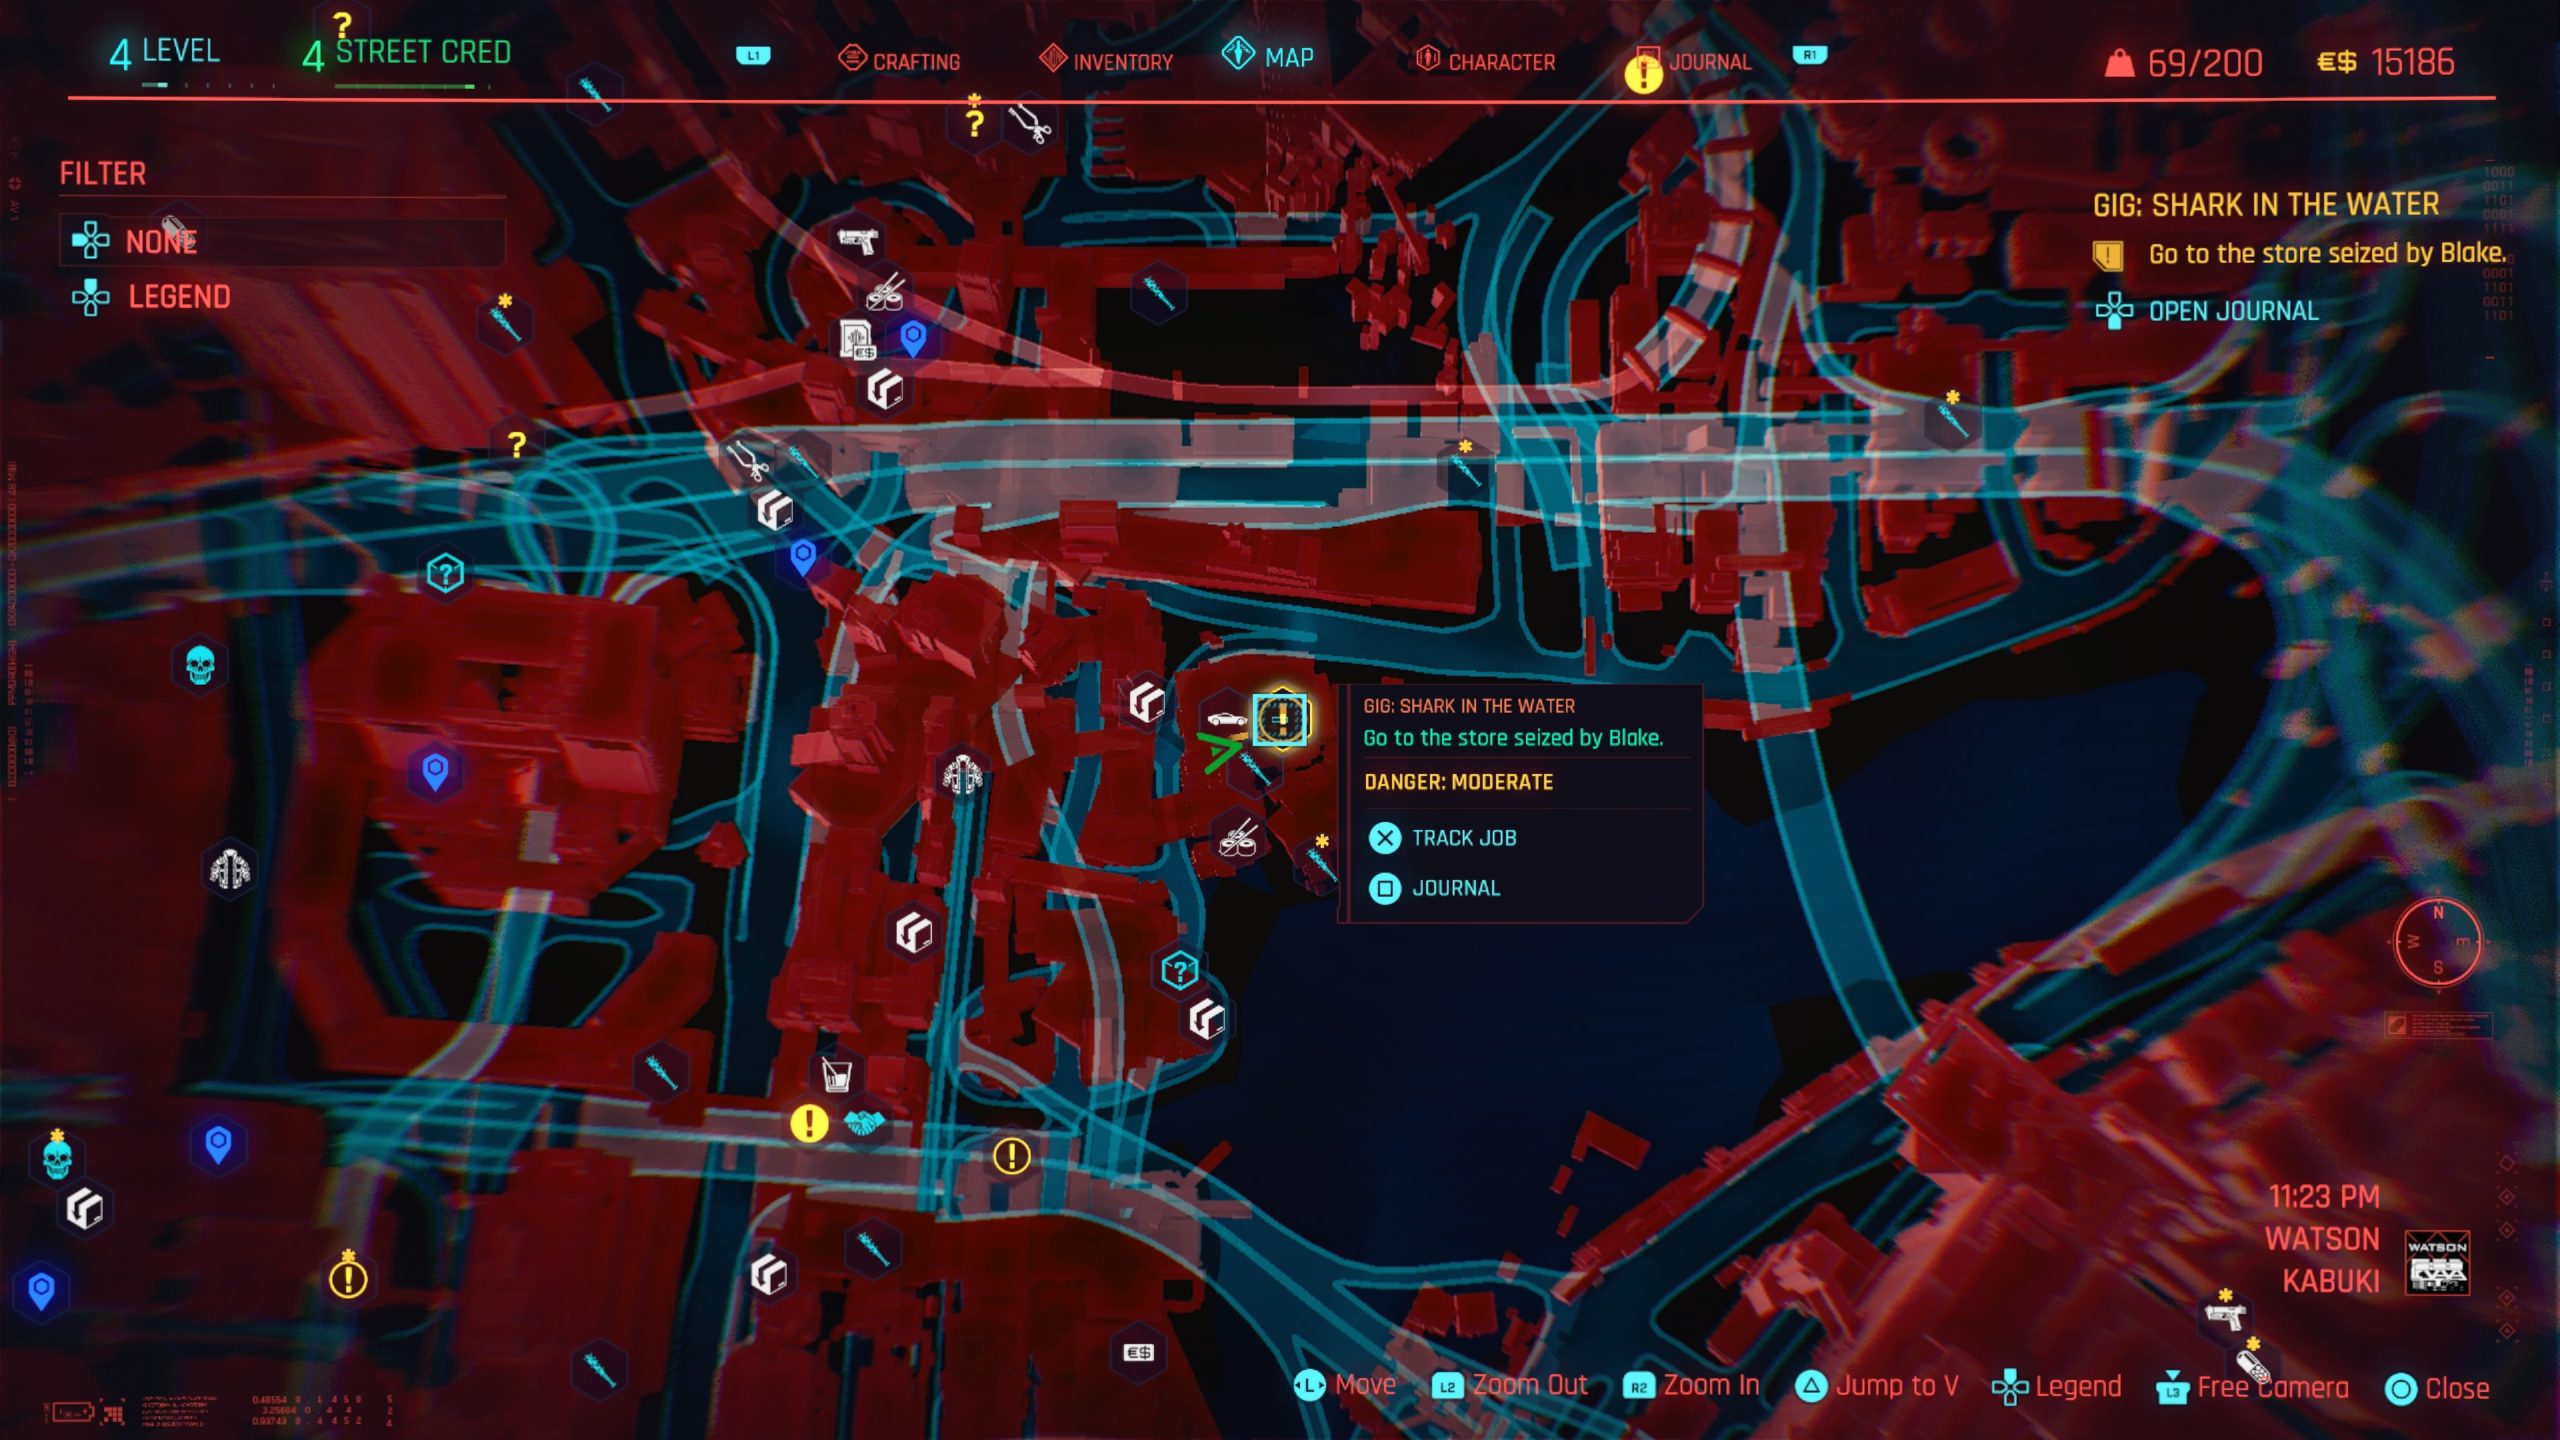
Regina will task V with taking care of Blake Croyle who has seized a pharmaceuticals store. For this one, head into the store and deal with Blake and his men. Regina will then call in a transport car to put Blake’s body in. Place the body in the trunk then answer the call from Regina to complete the gig.
Small Man, Big Evil
Obtained: Little China – Approach the objective slightly southeast of Bellevue Overwalk fast travel point
Objective: Go to the slums
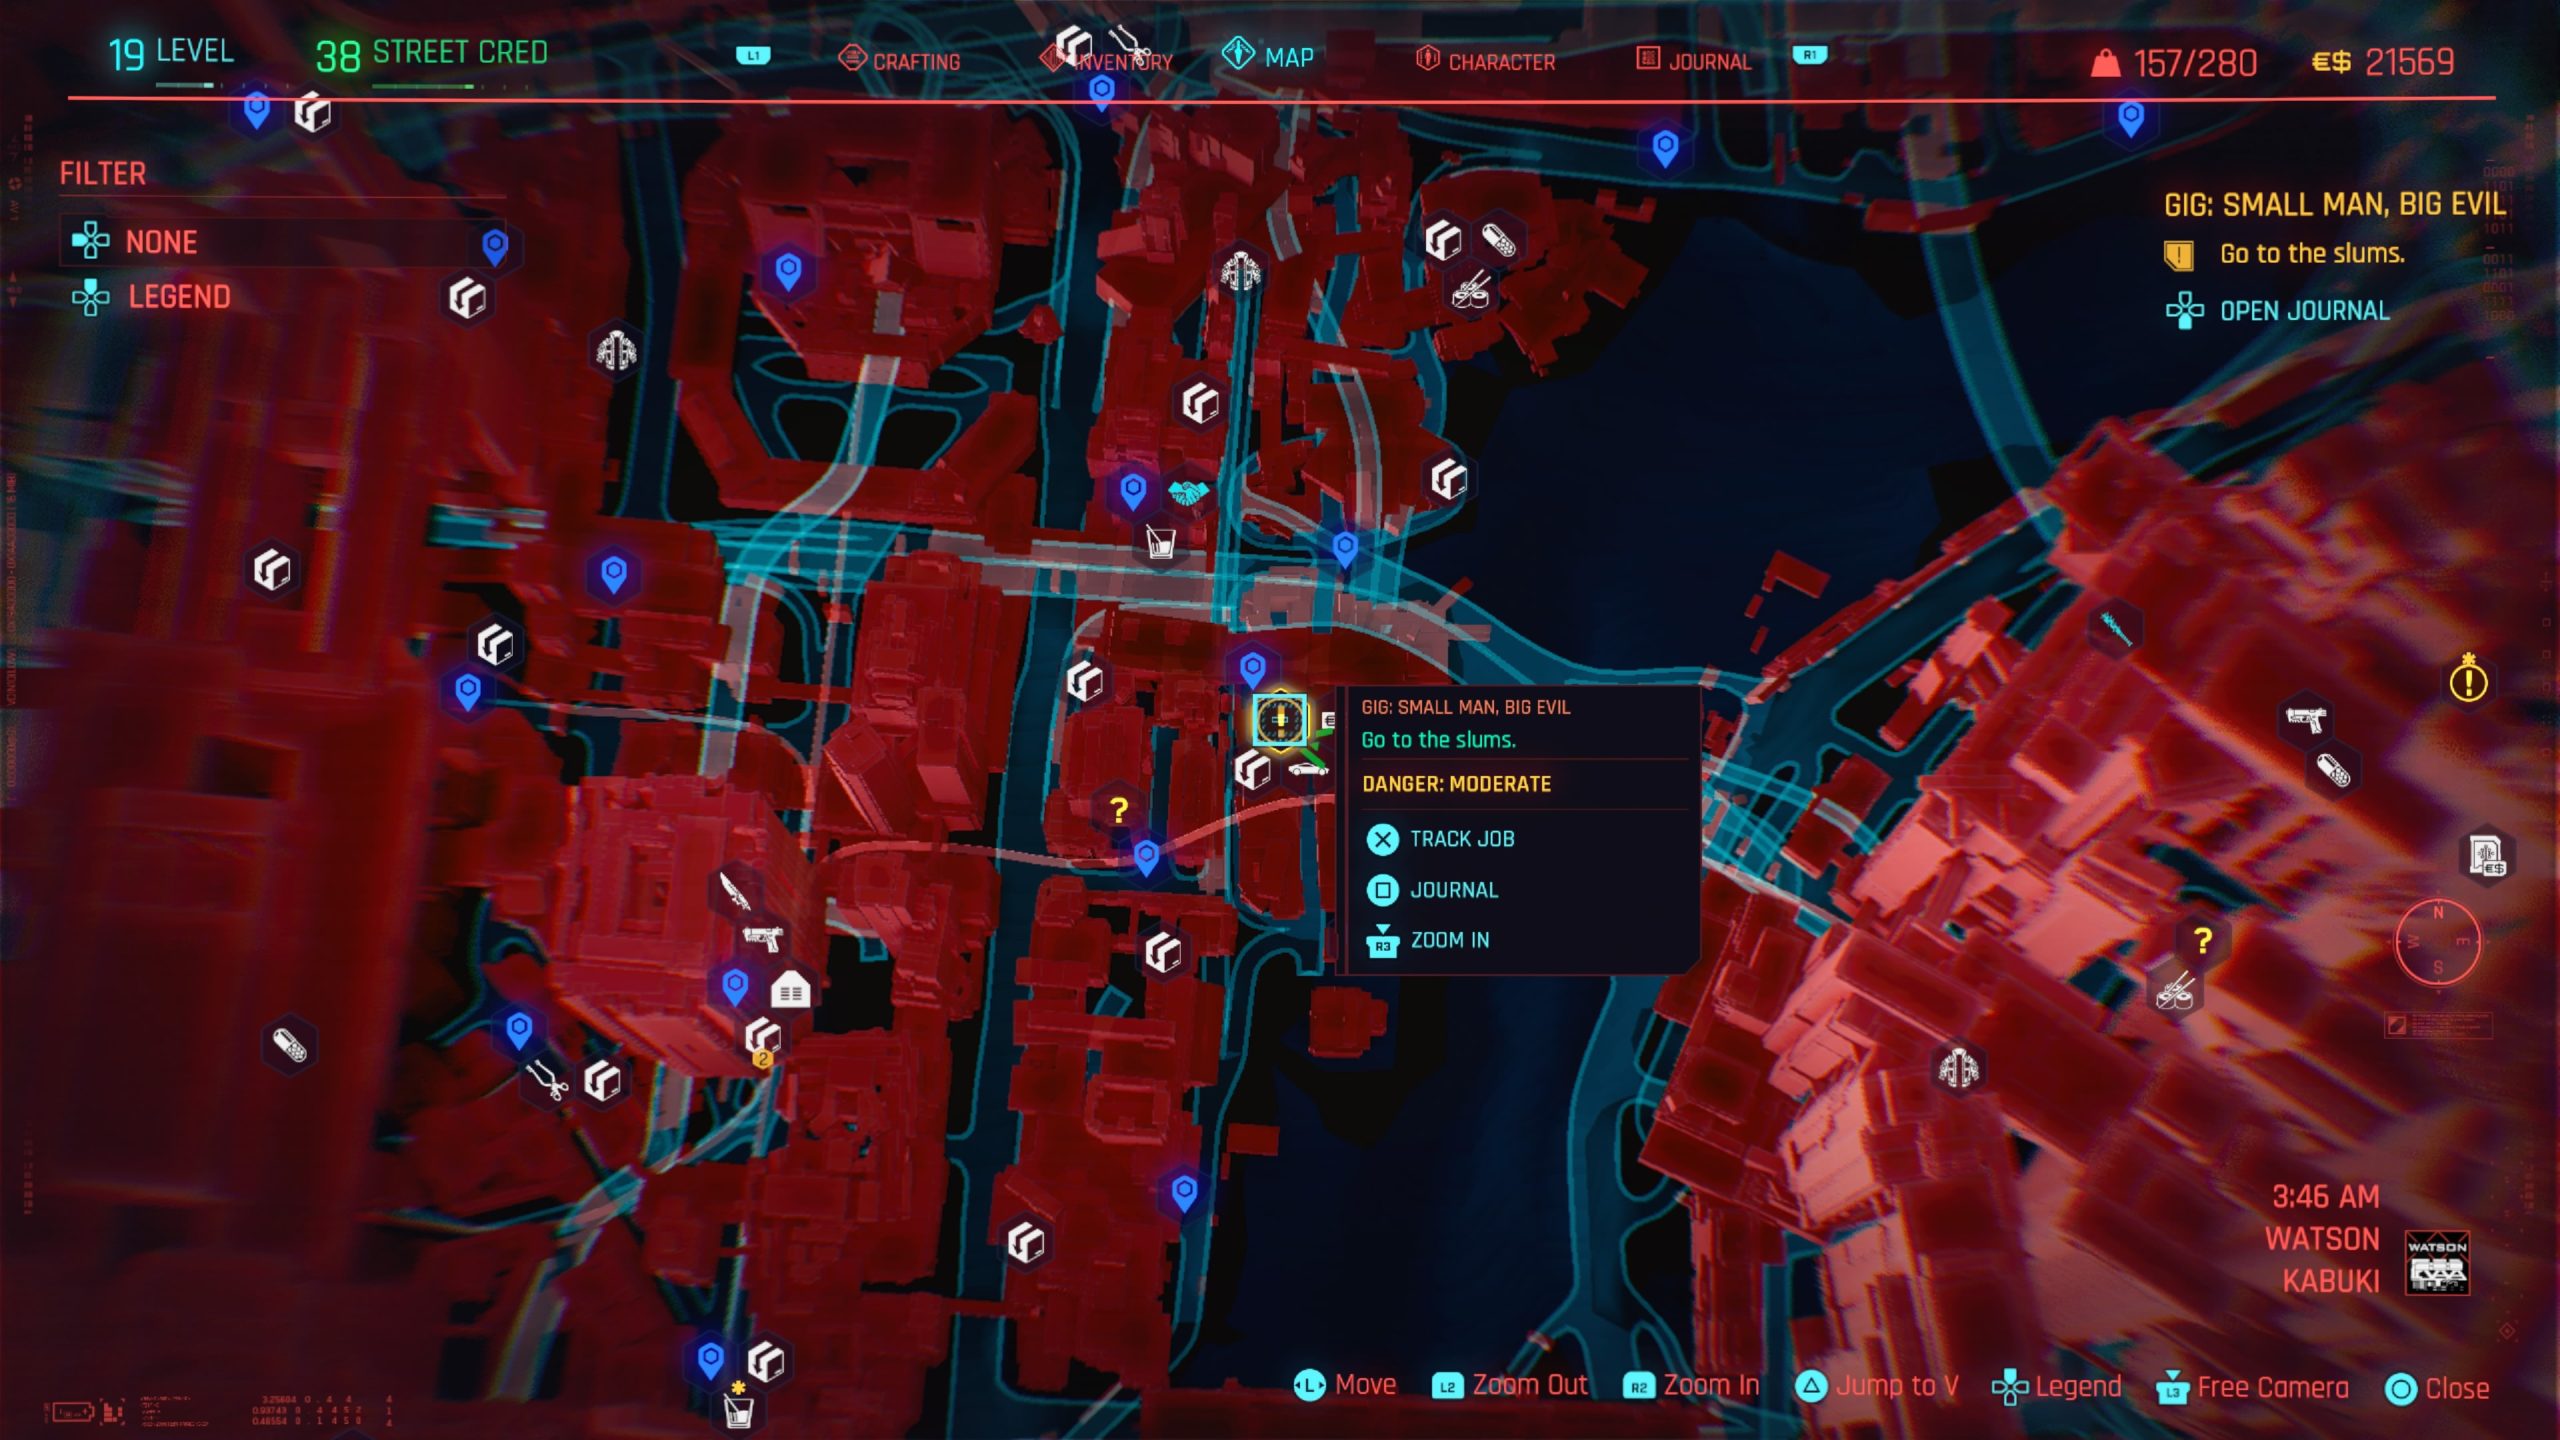
Follow the objective up the stairs to arrive in the slums then defeat all the enemies. Afterwards, leave the area. Regina will call you to close out the gig.
The Heisenberg Principle
Obtained: Little China – Approach the objective west of Goldsmith St fast travel point
Objective: Enter the building
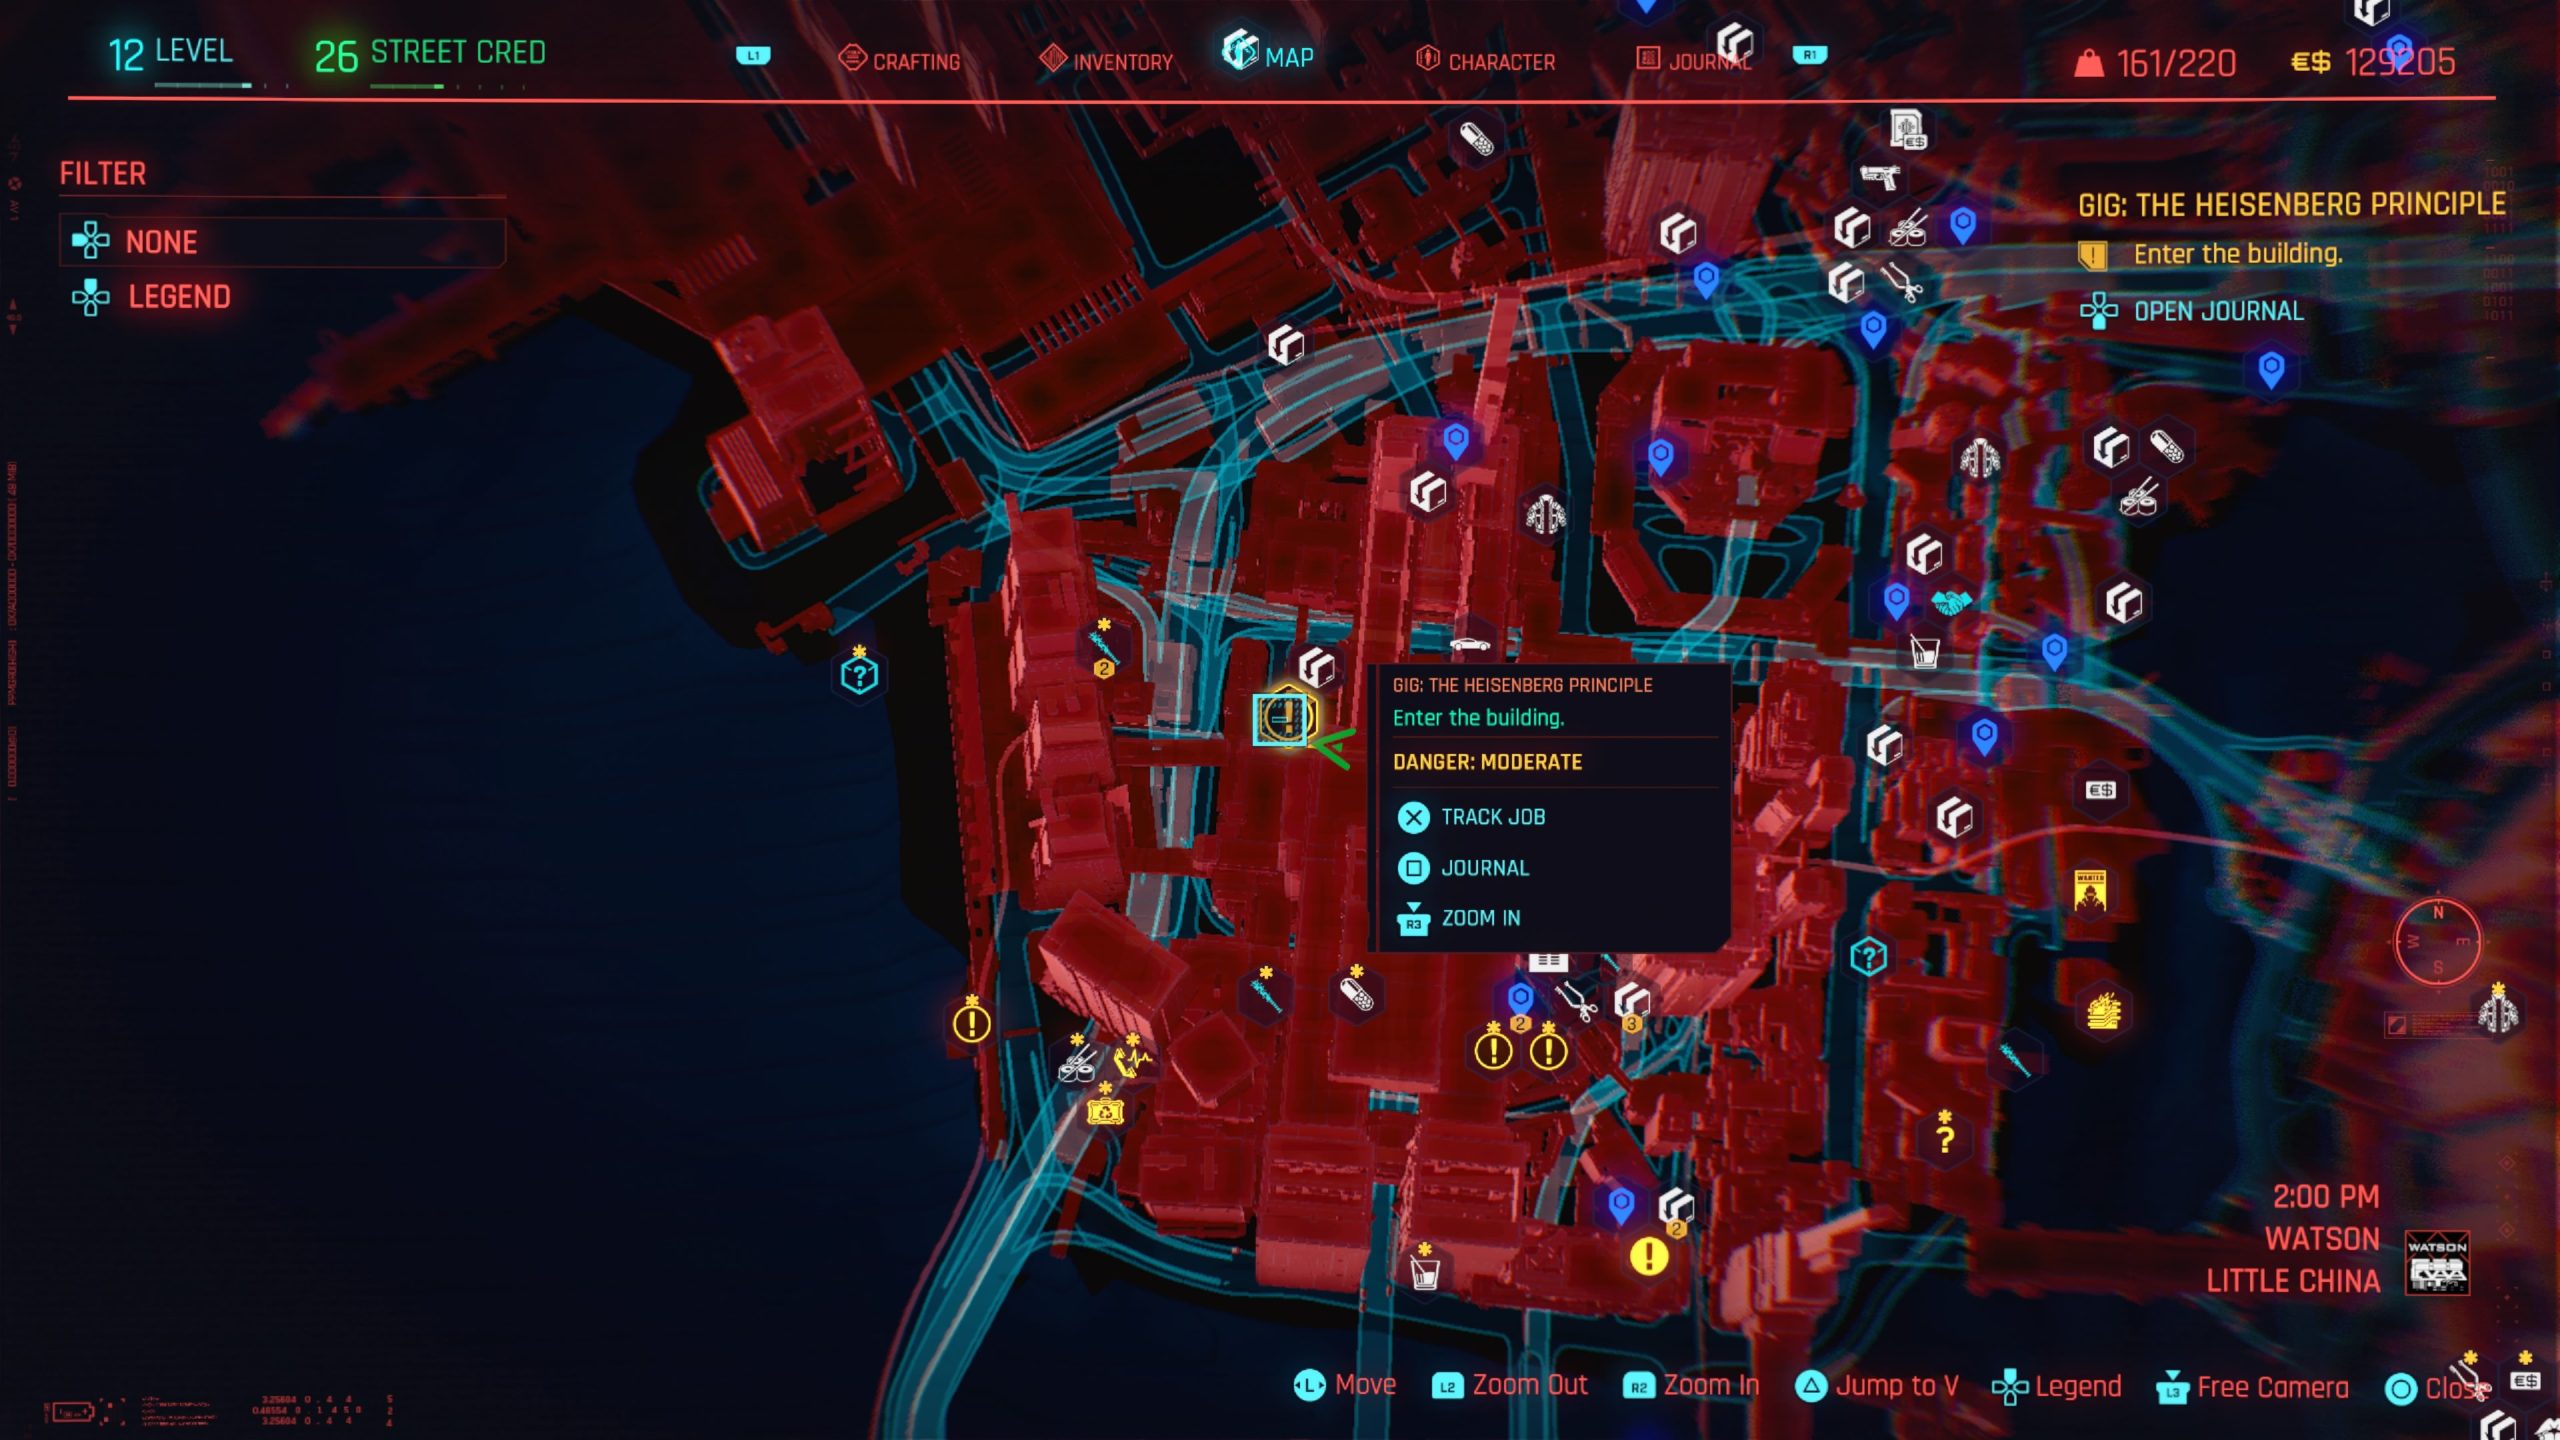
Enter the building, then head to the basement via the door to the left of the Taste the Love vending machine that you’re able to jack into. Once downstairs, you’ll need to locate the lab. The objective will want you to take a shortcut through a door that requires Technical Ability 8.
If you don’t have this value, you’ll need to work your way through the whole basement to reach the lab. Once inside, destroy the equipment used to make glitter by shooting them. Afterwards, leave the area to receive a call from Regina, which completes the gig.
Troublesome Neighbors
Obtained: Kabuki – Approach the gig location south of Kennedy North fast travel point
Objective: Deal with Taki Kenmochi
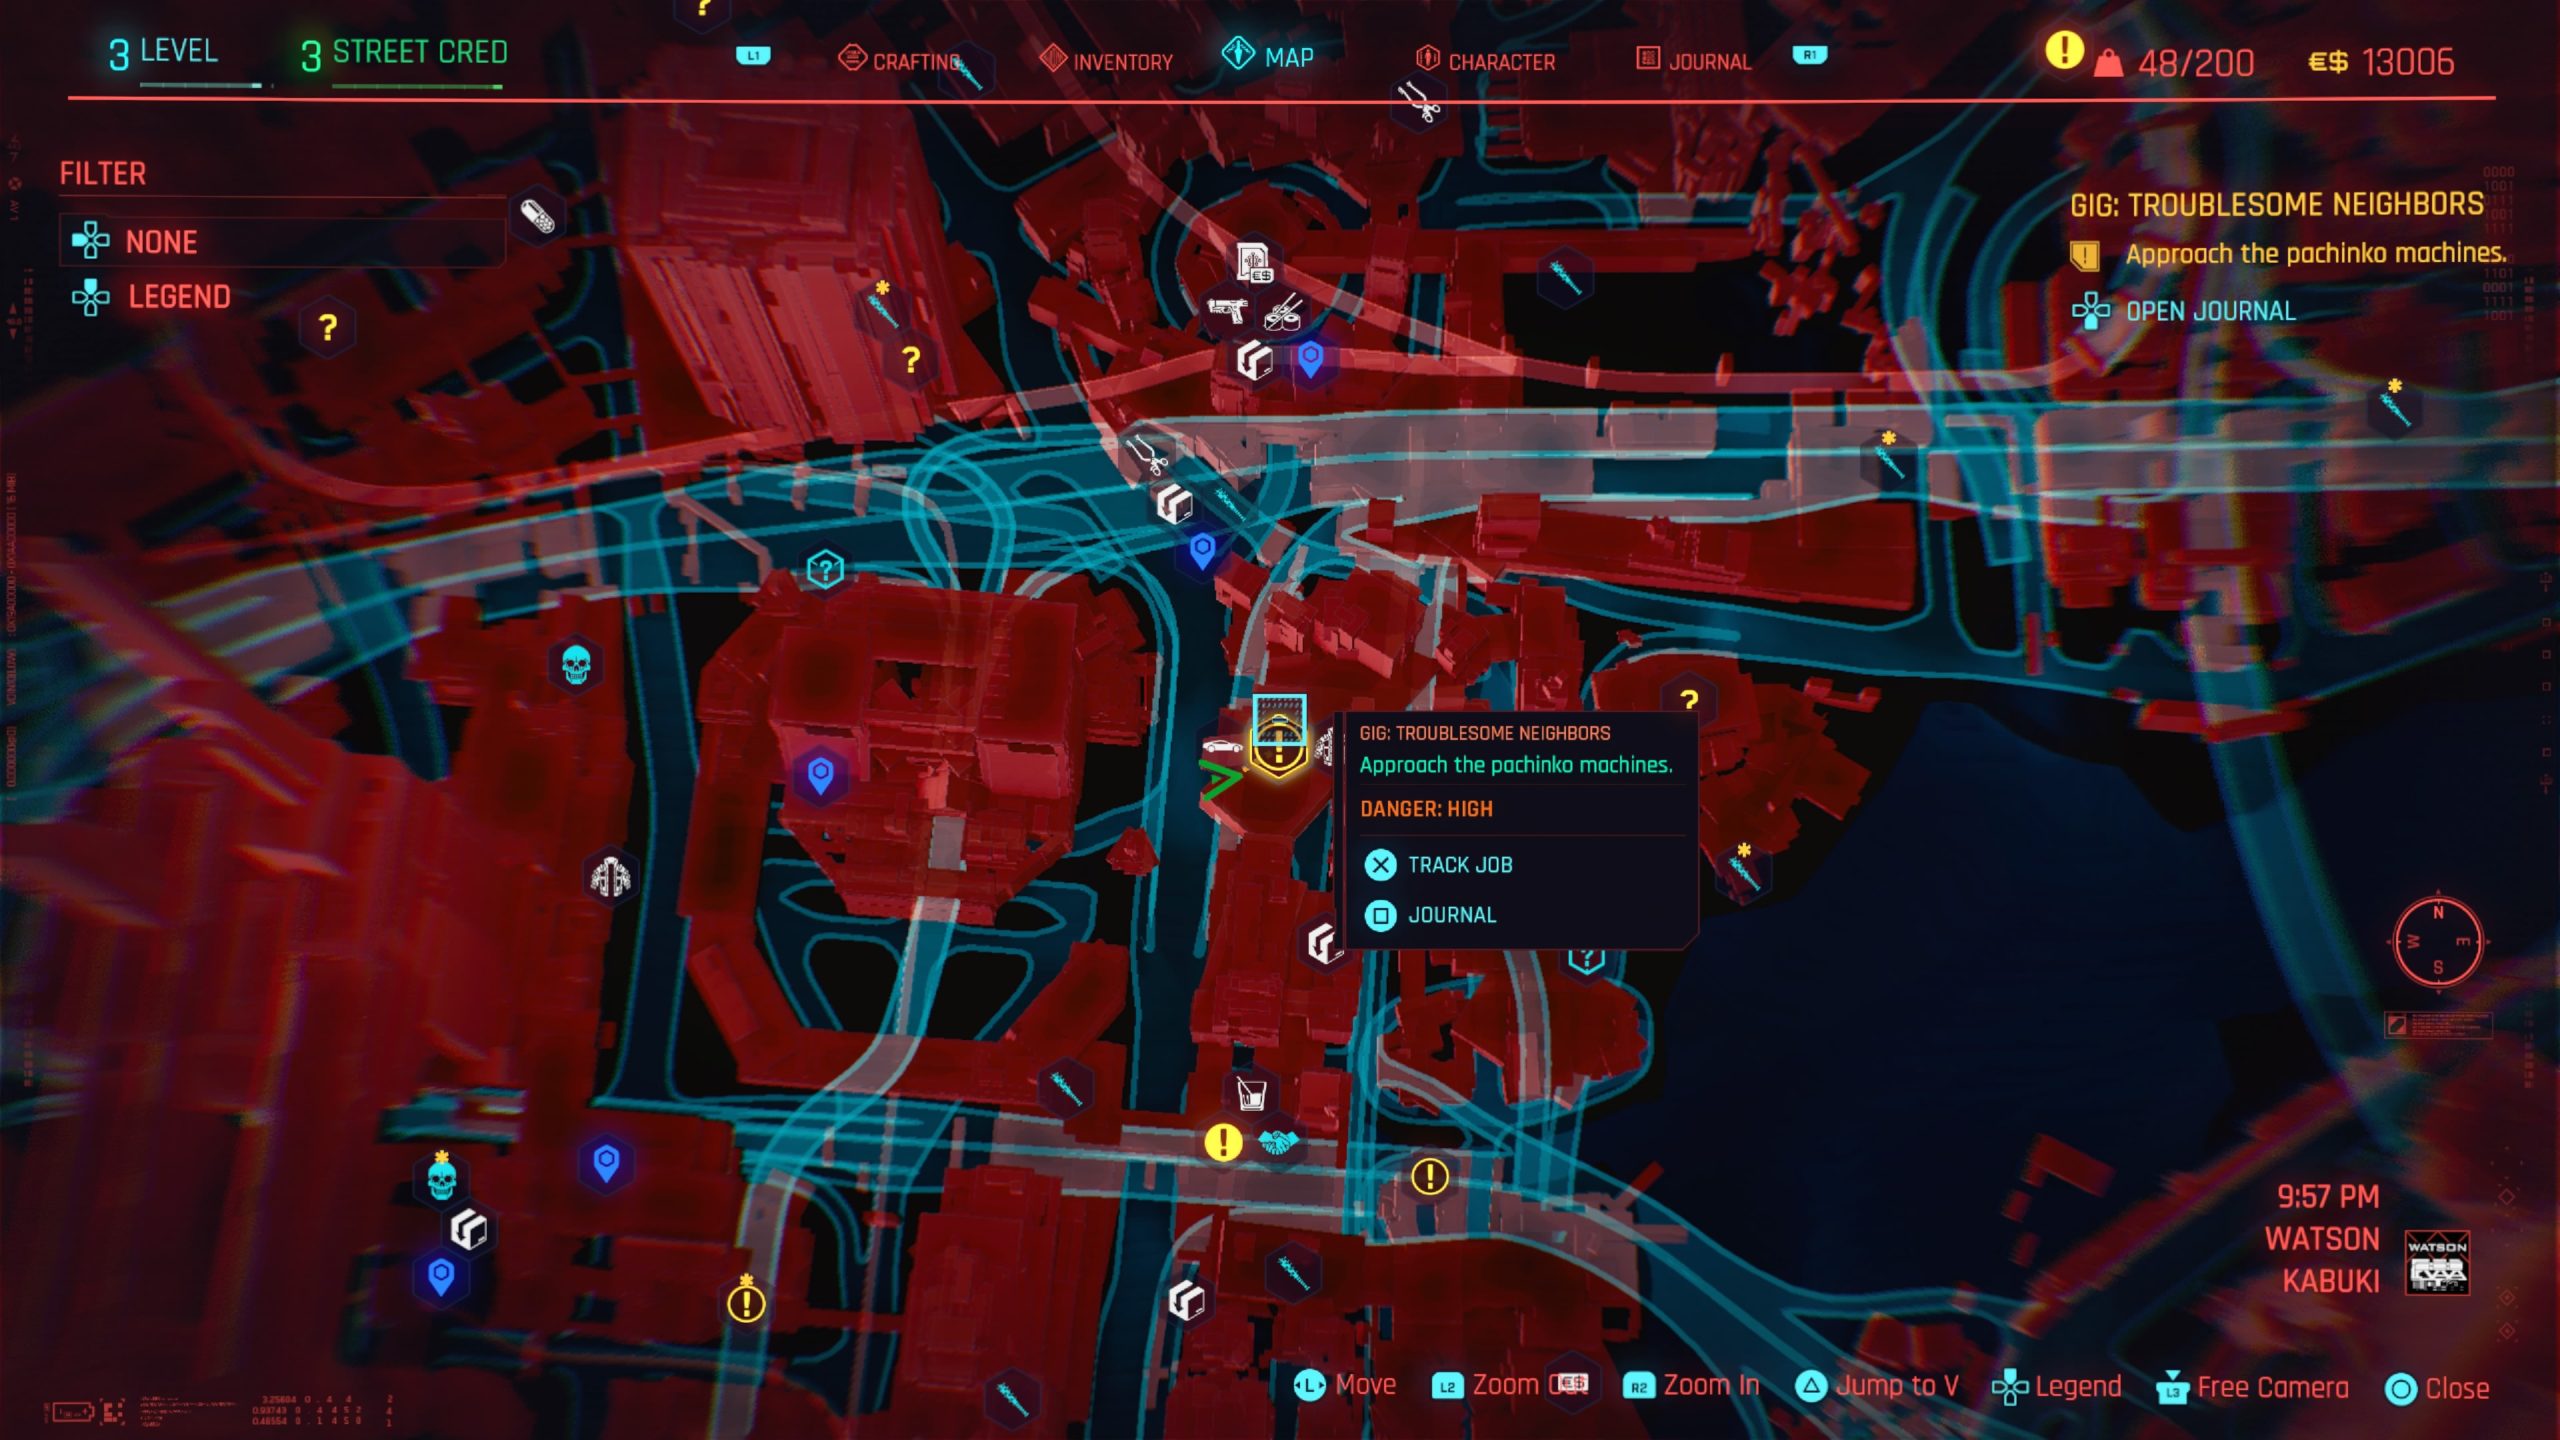
Regina Jones will call you up as you approach the gig location and task you with taking care of a Tyger named Taki Kenmochi, who is running a pachinko parlor.
Enter Motel Hell and take a right following the hallway to the end. Take a left passing Tom’s Diner to reach the gate leading on the left to the pachinko machines. As you approach the gate, the guard will turn the hostel, prompting you to fight a handful of thugs (including Taki). Defeat them all to receive a call from Regina completing the gig.
Welcome to America, Comrade
Obtained: Kabuki – Approach the gig location just east of the Allen St South fast travel point
Objective: Go to the docks in Kabuki
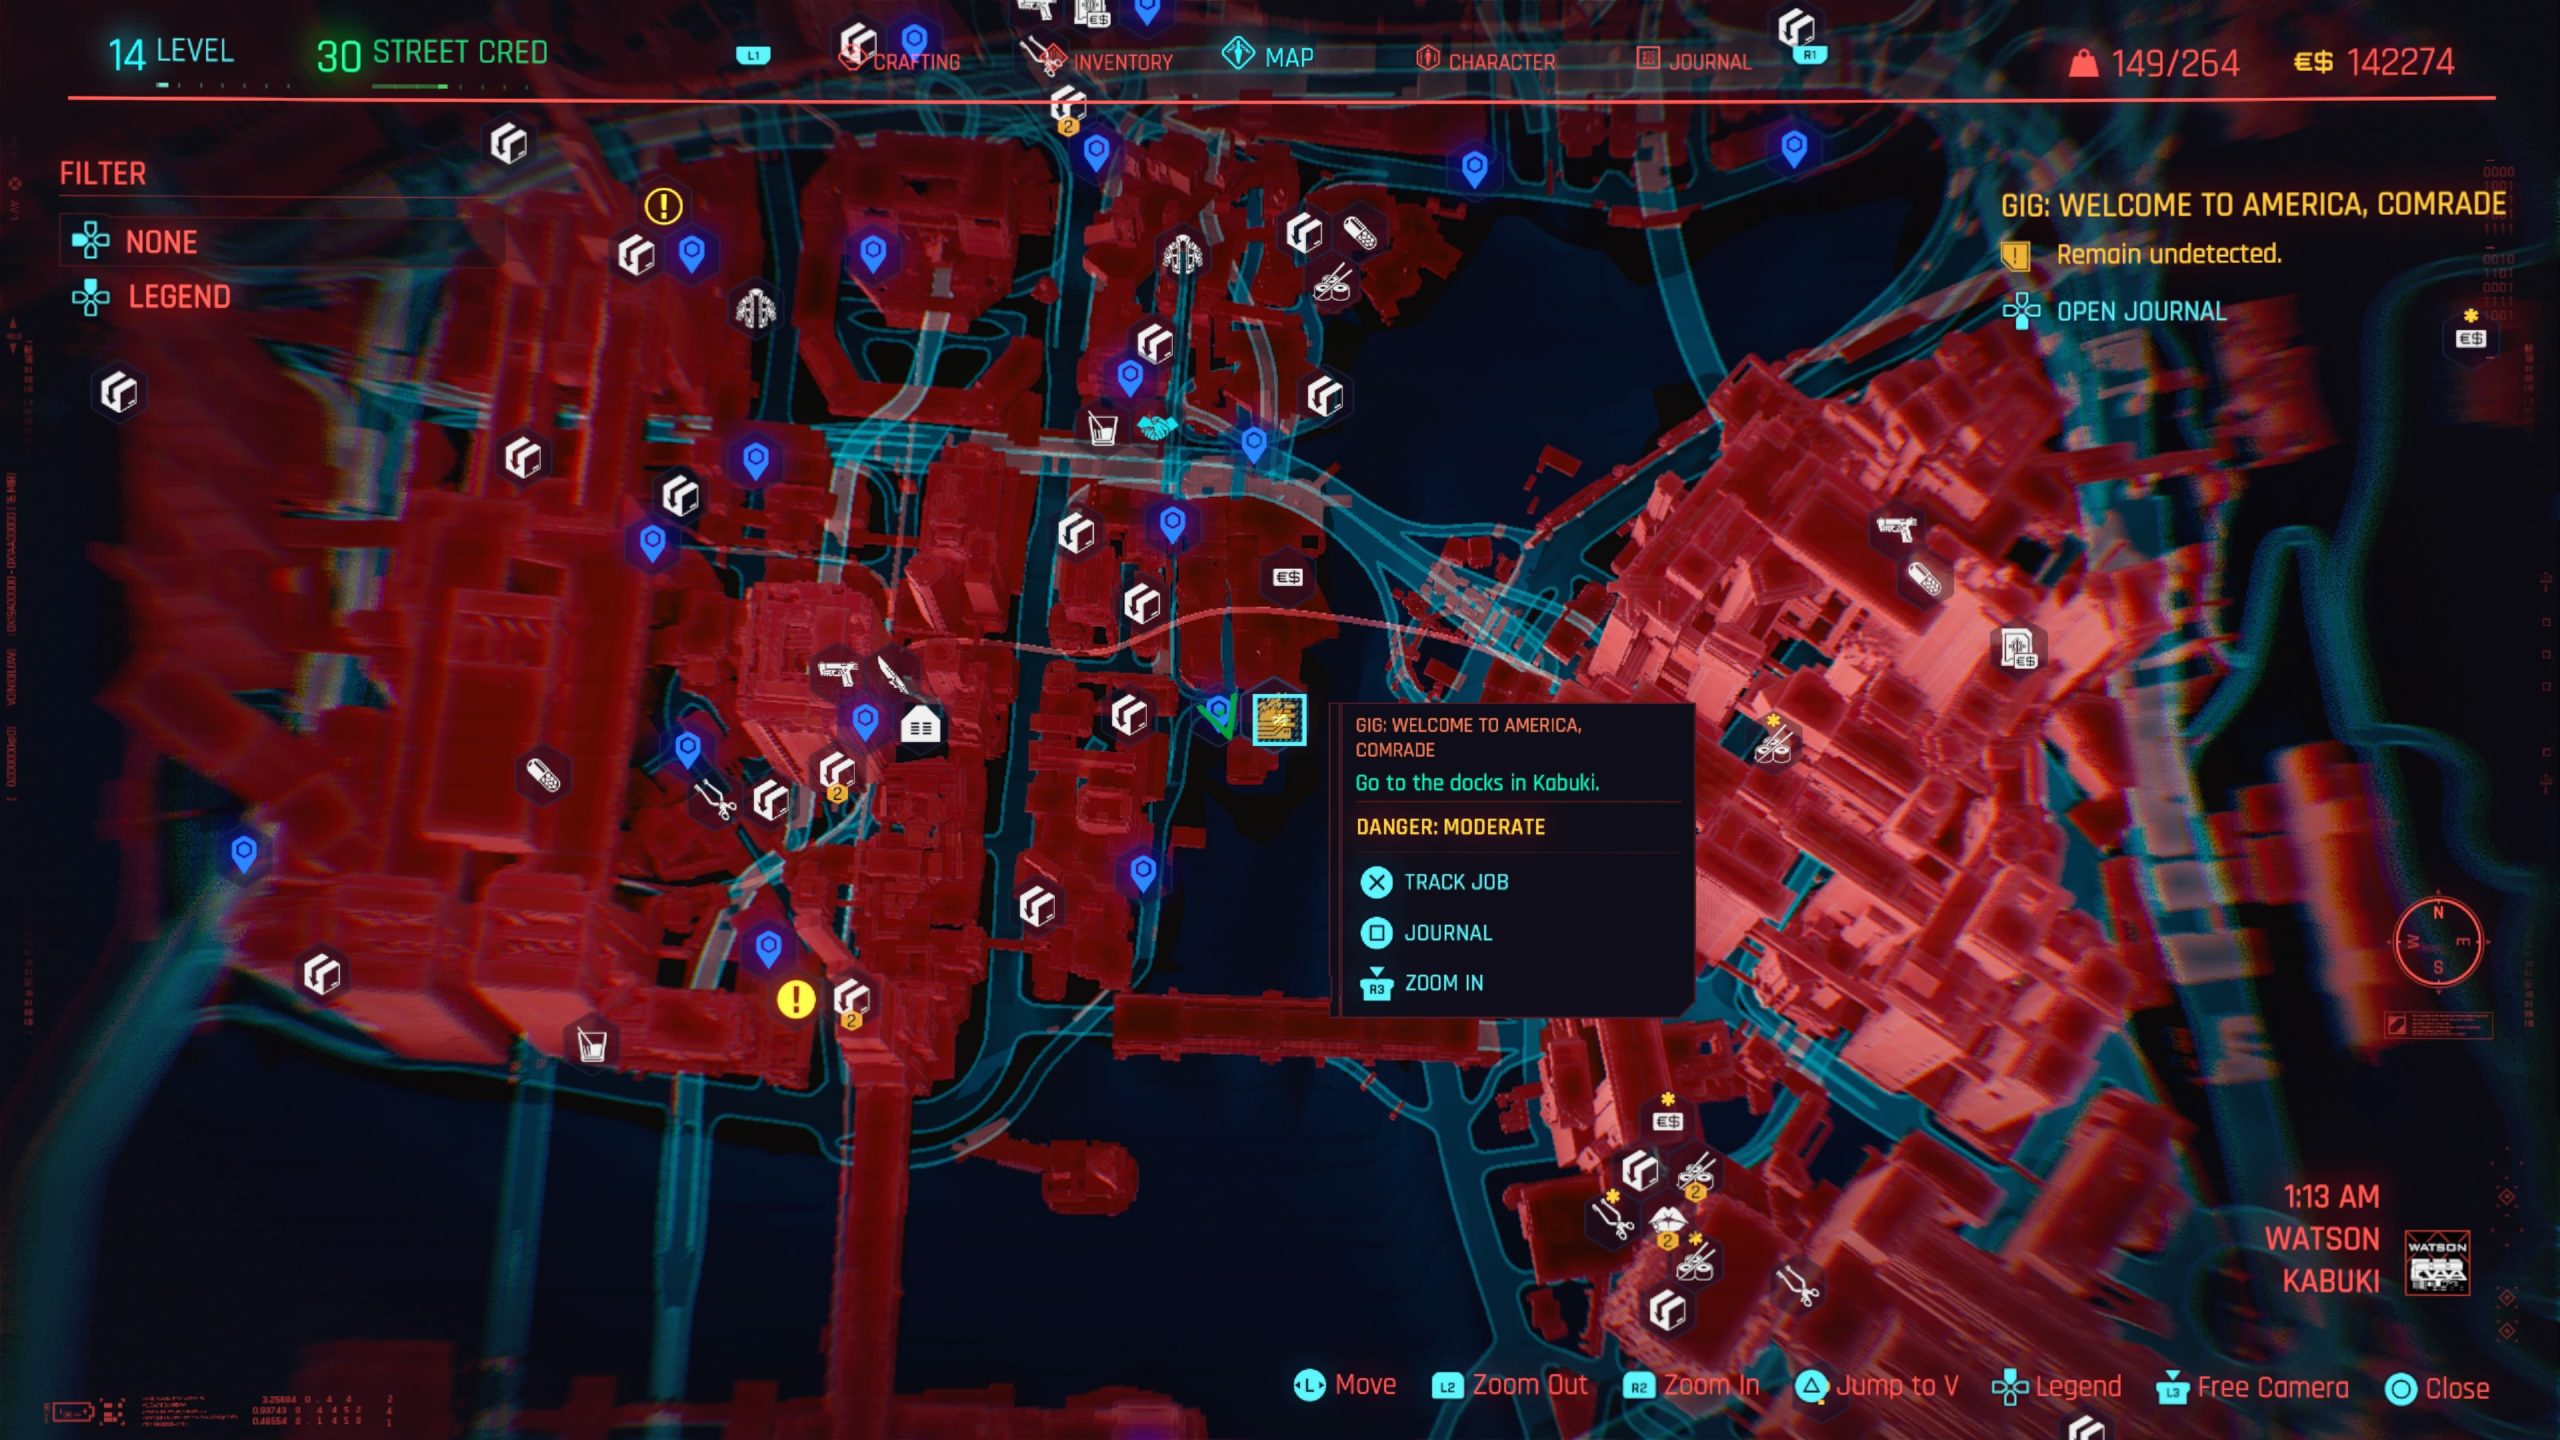
This is another gig that needs to be done sneakily to get the best outcome. Sneak your way through the barricade on the far left at the entrance then take a left and go behind the shipping containers. Keep following that path as close to the gate as you can get, avoiding all the enemies and cameras until you reach a living room set up with 2 couches and a TV.
The car you’re looking for is in an open blue shipping container to the right of this area. Mount the device to the car then leave the area undetected. After Regina calls you, head to the Drop Point to collect your reward.
Related Cyberpunk 2077 Content
Check out our Cyberpunk 2077 Guides and Walkthroughs main page for additional Cyberpunk content!