*Note: This guide focuses on the key items found throughout the Leon A playthrough.
Mizoil Gas Station
- Key – Key holder box on the wall past the Cop/Zombie next to the girls in bikinis pictures
- Used to open the locked door in the back storage room

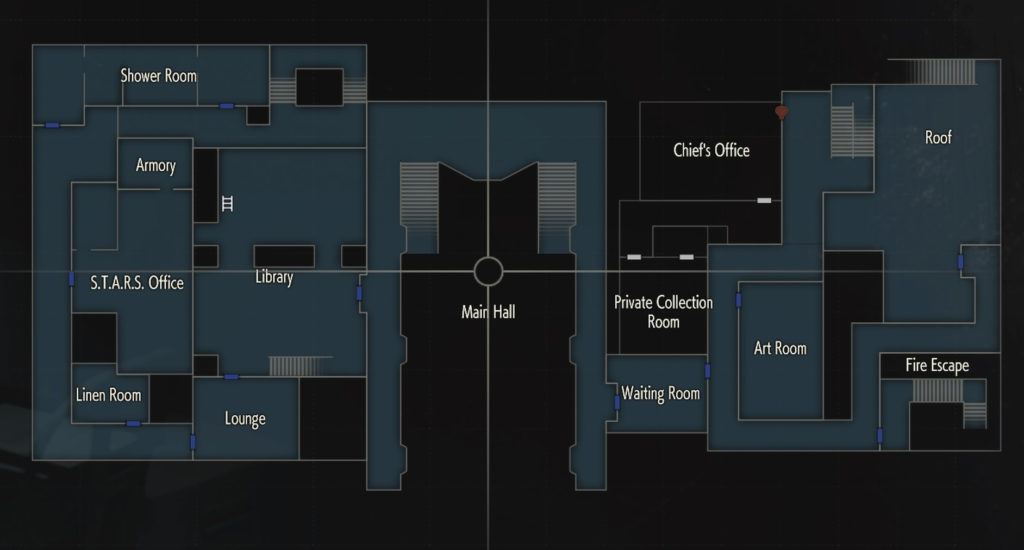
Police Station – First Floor
- Combat Knife – Main Hall – Given to you by Marvin Branagh as part of the story
- Used to cut the tape on the taped box next to the gate leading to the Reception
- First Floor Map – Operations Room – Hanging on a board
- High-Capacity Mag, (Matilda) – West Office – In Leon’s desk
- Leon’s Desk Puzzle (initials of first names)
- Right Lock Code: MRG
- Left Lock Code: NED
- Leon’s Desk Puzzle (initials of first names)
- Roll File (Undeveloped Roll) – Safety Deposit Room – In a locker, enter code 106 in the locker’s terminal
- Develop in the Darkroom to receive Commemorative Photo
- Cutting Tool – Fire Escape – In a toolbox on a trashcan
- Round Handle – East Office – Office room on the desk
- Turns off steam in the 2F Shower Room
- Electric Part – East Office
- Place in fuze box outside of East Office to open the metal gate to the Main Hall
- Battery – S.T.A.R.S Office – In the office room
- High Pouch – West Office – In a safe, code found in S.T.A.R.S Office
- Clover Key – Boiler Room – Taped to a whiteboard
- Box – Observation Room
- S.T.A.R.S. Badge – Combine Box with Red Jewel to open the box containing the badge.
- Examine the badge to find the switch to turn the badge into the Dongle Key.
- The Dongle Key can be used in the S.T.A.R.S. Office on a desktop computer to unlock the MAG.
- Retract the Dongle Key and it can be used to unlock the Special Weapons Case in the Underground Stairs in the lower level of the Underground Facility
- Hip Pouch – Safety Deposit Room – In a locker, enter code 203 in the locker’s terminal
- Requires you to find both spare keys
Police Station – Second Floor
- Portable Safe – Shower Room
- Contains Spare Key after you crack the code
- Red Book – Library
- Item in the Commemorative Photo
- Combine the Red Book with the arm in the Art Room and attach it to the statue
- Weapons Locker Key Card – Art Room
- Opens locker in the back of the Safety Deposit Room holding the W-870 shotgun
- Statue’s Left Arm – Art Room
- Combine with Red Book in Art Room to get Left Arm with Book and place it on the statue of the king with the scepter to receive the scepter
- Scepter – Art Room (see step above)
- Examine the Scepter and press the release switch to extract the Red Jewel
- Red Jewel (see step above)
- Extracted from Scepter
- Muzzle Brake (Matilda) – Waiting Room – In a safe, the code is 6 left, 2 right and 11 left
- MAG – S.T.A.R.S. Office, use Dongle Key to unlock the desktop computer
- Wooden Box – S.T.A.R.S. Office (after getting Hidden Places picture) – Check the desk in the office room
- Red Dot Sight (Lightning Hawk) – Received after opening Wooden Box (see above)
- Roll Film – S.T.A.R.S. Office (after getting Hidden Places picture) – Check the desk in the office room (must search it a second time after receiving the Wooden Box)
- Develops into Rising Rookie
- Fuel x 400 – Press Room (after getting Hidden Places picture) – In desk with a boombox on top in the far left of the room
- Portable Safe – Linen Room
- Contains Spare Key after you crack the code
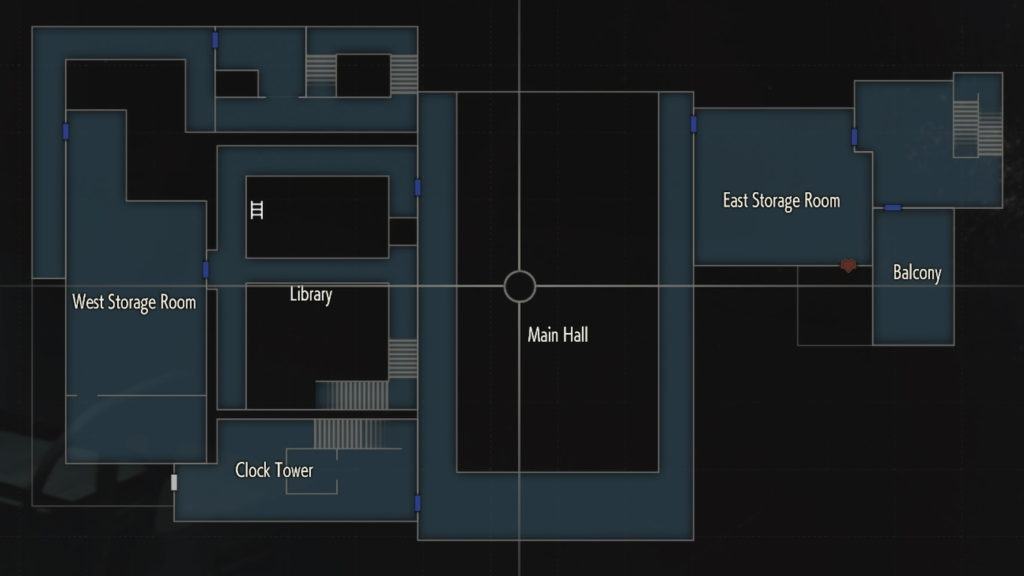
Police Station – Third Floor
- Key (Spade) – On the way to the West Storage Room in the northern part of the map
- High Pouch – West Storage Room – Sitting on a table
- Electronic Gadget – Operations Room – Behind a door that is chained shut
- Use to detonate C4 on 3F West Storage Room
- Large Gear – East Storage Room
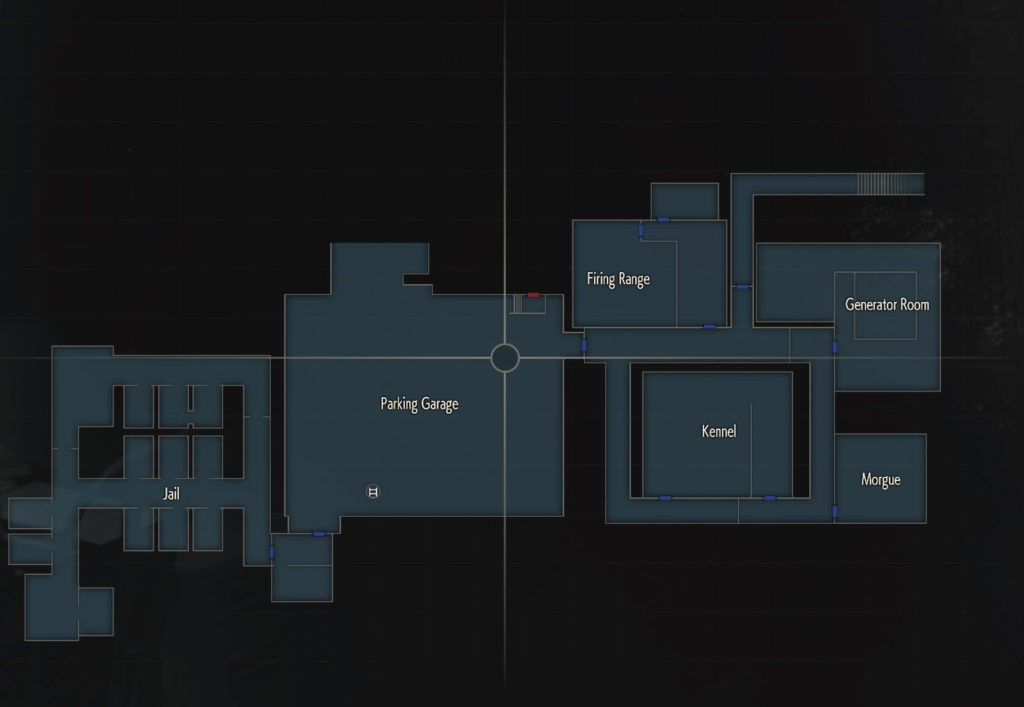
Police Station – Basement
- Tool (Round Crank) – Jail – On at desk at the end of the jail
- Boxed Electronic Part – Generator Room
- Box – Firing Range
- Examine the box and open it to find a Car Key to R.P.D. car# 7439
- Car Key – Obtained from Box (see above)
- Opens police car in Parking Garage (flip key over and unlock the car to figure out which car it opens)
- Roll Film – Firing Range – Behind the diamond door
- Gun Stock (Matilda) – Parking Garage – Use the Car Key (see above) to open the police car

Underground Facility – Middle
- Hip Pouch – Operators Room – In a locker
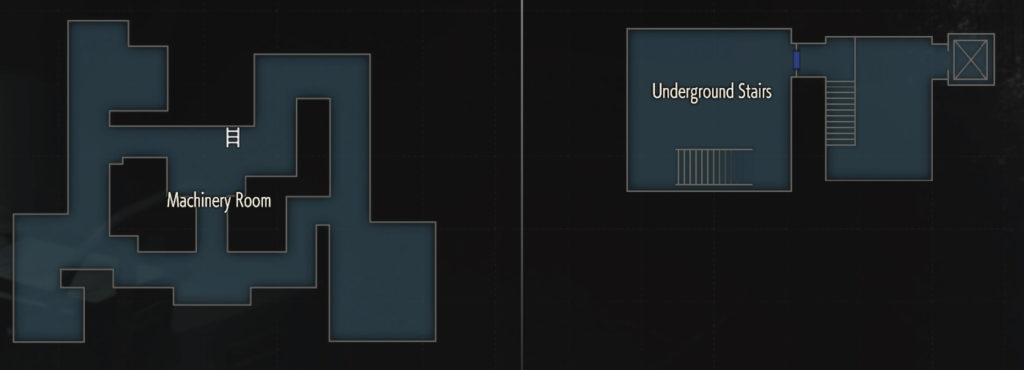
Underground Facility – Lower
- Long Barrel (Lightning Hawk) – Underground Stairs
- Use S.T.A.R.S. Badge to unlock the Special Weapons Case
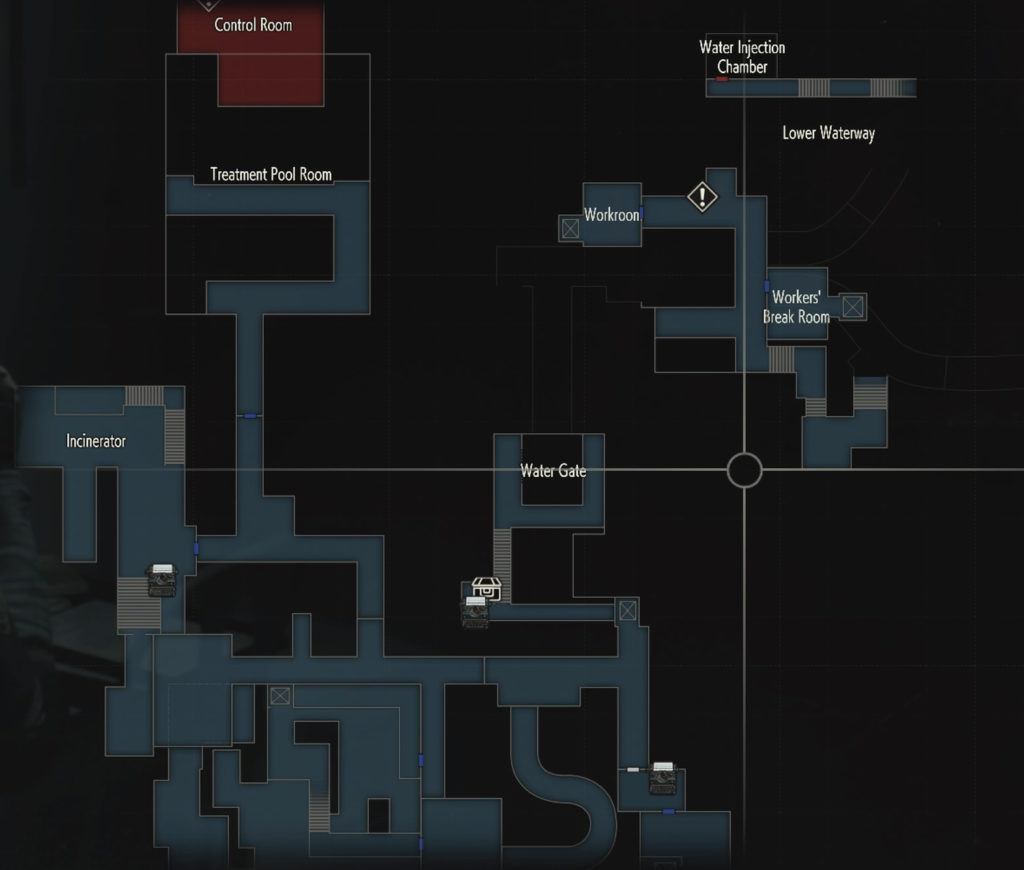
Sewers – Upper
- U.S.S. Digital Video Cassette
- Roll Film – Workroom
- Develops into the Hiding Place picture
- Hip Pouch – Workroom
- Electronic Part – Rook – Right outside of Workroom on the wall
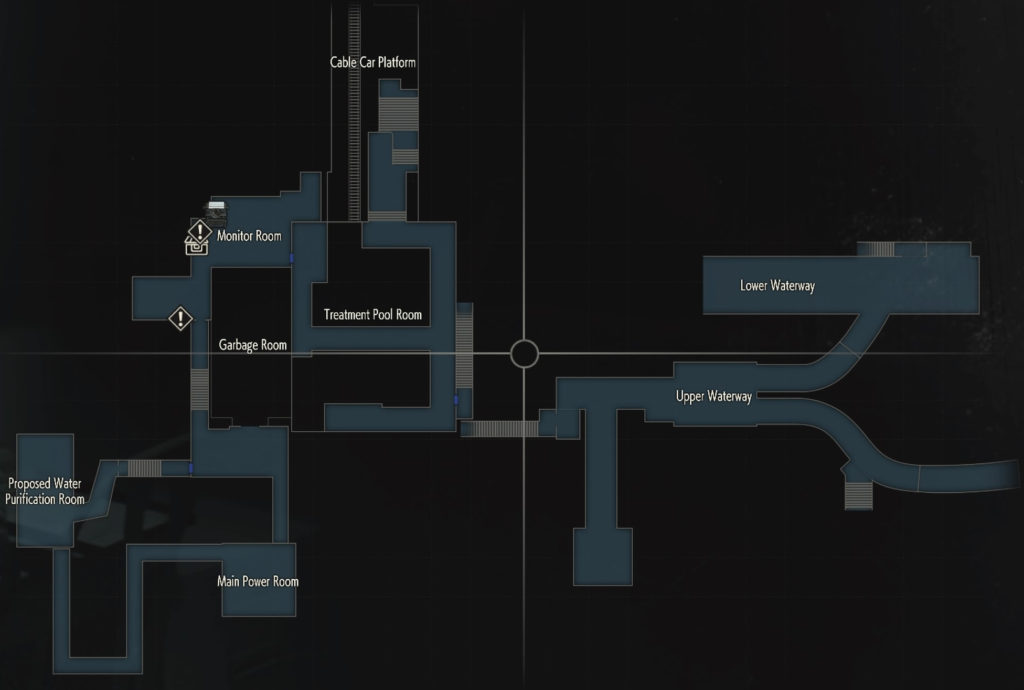
Sewers – Middle
- Electronic Part – Knight – Monitor Room
- Electronic Part – Bishop – Monitor Room
- Electronic Part – Pawn – Monitor Room
- Tool (T-Tool) – Between Treatment Pool Room and Cable Car Platform
- Shotgun Stock (W-870) – Treatment Pool Room – In a safe
- The code is on the right side of safe: left 2, right 12 and left 8
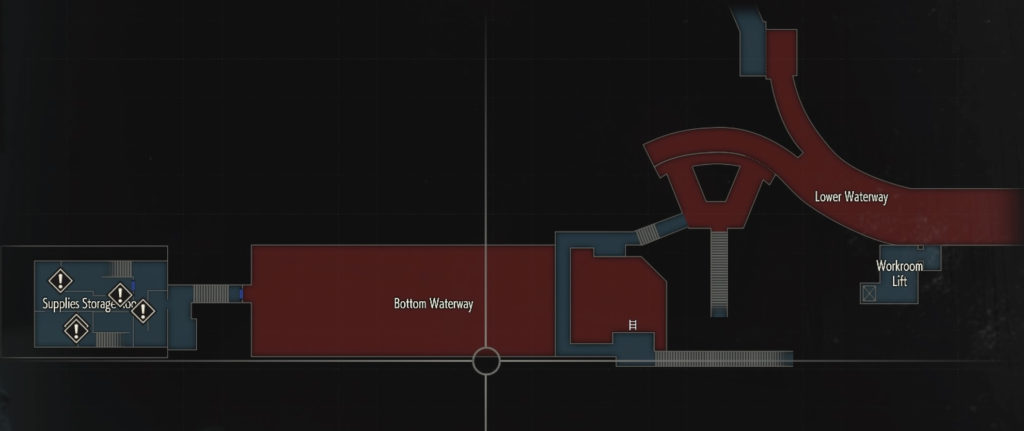
Sewers – Lower
- Key – To the right of the Bottom Waterway
- Used to open Workers Breakroom (Upper Sewers)
- Electronic Part – Queen – Supplies Storage Room
- Electronic Part – King – Supplies Storage Room
- Chemical Flamethrower – Supplies Storage Room
- Use the Electronic Part – King to open the locked area

Laboratory
- Research Lab Map – Security Room
- Regulatory (Flamethrower) – Nap Room
- Special Forces Recording – North Area
- Dispersal Cartridge – Greenhouse Control Room
- Hip Pouch – Nap Room (after obtaining Signal Modulator)
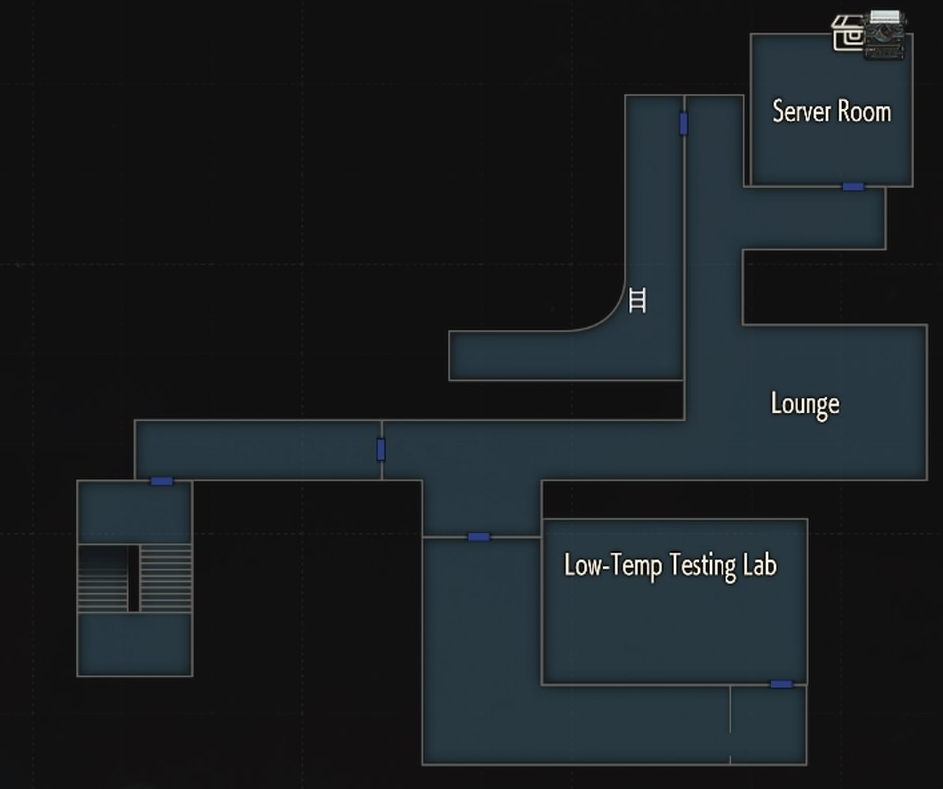
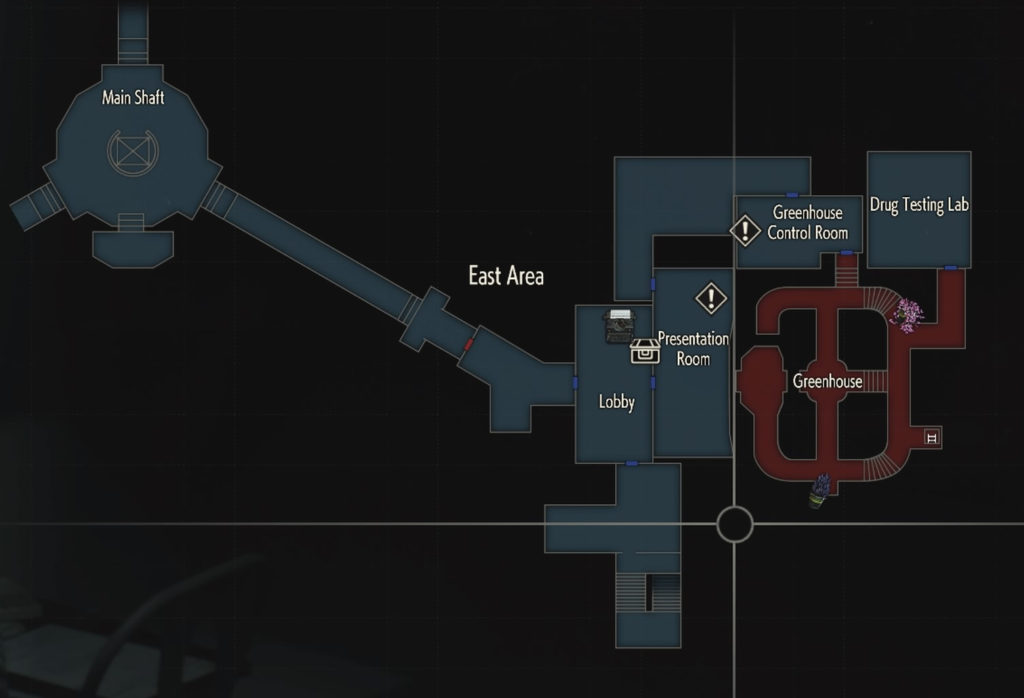
Laboratory – B2
- Research Lab East Area Map – Hallway
- Trophy – Lounge
- The code on the bottom is for the Drug Testing Room and the Greenhouse Control Room
- Signal Modulator – Stairwell outside of Lounge
- Use on Circuit Breaker in the Lounge to unlock the Server Room, Low-Temp Testing Lab and Nap Room to unlock the sleeping pods