The Trial of the Labyrinth shrine quest in Breath of the Wild challenges you to navigate the mysterious Lomei Labyrinth on the Akkala coast. Inside, you’ll face a massive maze filled with enemies and treasure before reaching the Tu Ka’loh Shrine at its heart. This guide will walk you through how to enter the labyrinth, the best path to take, and the rewards waiting at the end.
Quick Links
Trial of the Labyrinth Shrine Quest Walkthrough
How to Start the Trial of the Labyrinth
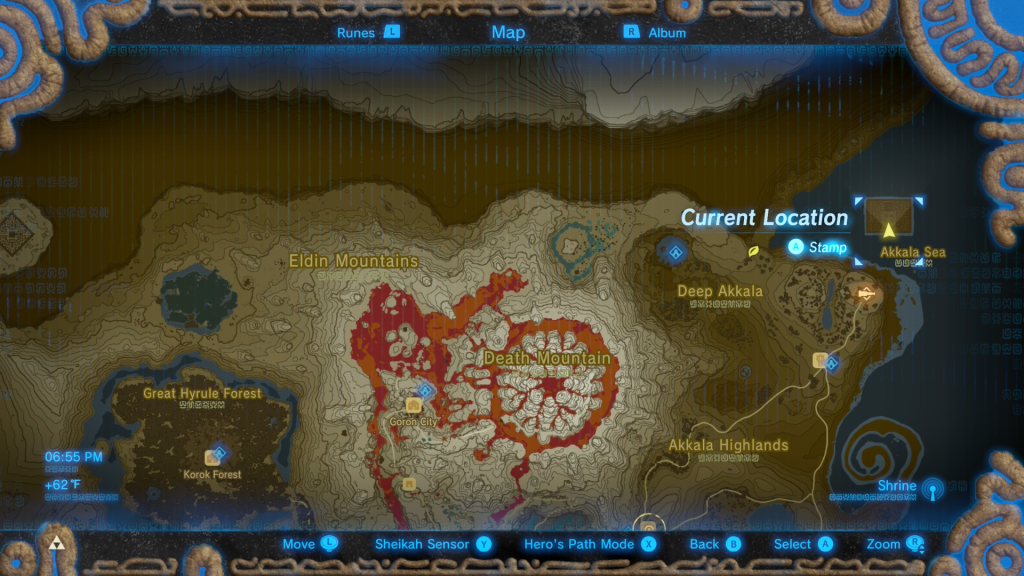
To begin the Trial of the Labyrinth shrine quest, head to Lomei Labyrinth Island, located in the northeastern part of the Akkala Sea. From behind the Akkala Ancient Tech Lab, you can glide straight to the island, which will consume about 1.5 stamina bars.
If you’d like to conserve stamina, there’s an alternative route: use Cryonis to create ice platforms across the water. As you approach the entrance, you’ll spot a wind stream that can carry you directly to the shrine while using significantly less stamina.
Once you step inside the shrine, the trial officially begins, challenging you to navigate the labyrinth and face the enemies and obstacles within!
How to Complete the Trial of the Labyrinth
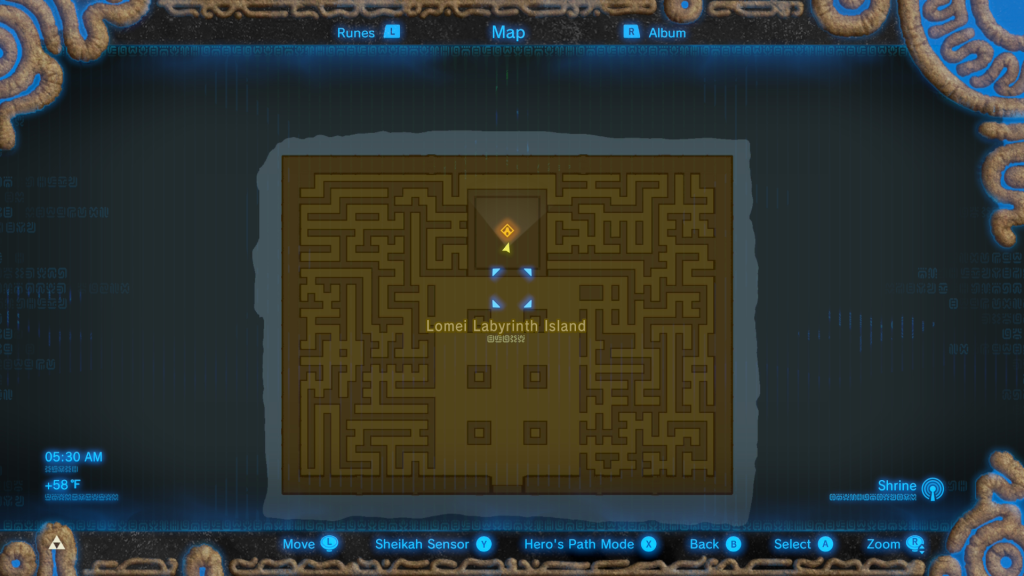
From the entrance of Lomei Labyrinth, turn left and follow the winding path through the maze. Stay alert for patrolling Guardians along the way, as they can make navigation more challenging.
After carefully making your way through the labyrinth, you will reach the Tu Ka’loh Shrine, marking the completion of the Trial of the Labyrinth. Upon completing the shrine, you’ll be rewarded with the Barbarian Helm, a powerful piece of armor that boosts your attack power!