Welcome to NGB and our Stellar Blade guide for the Fish Research request. Here we will cover where to start the request, how to complete it and the rewards you’ll receive for all of your efforts.
How to Start the Fish Research Request
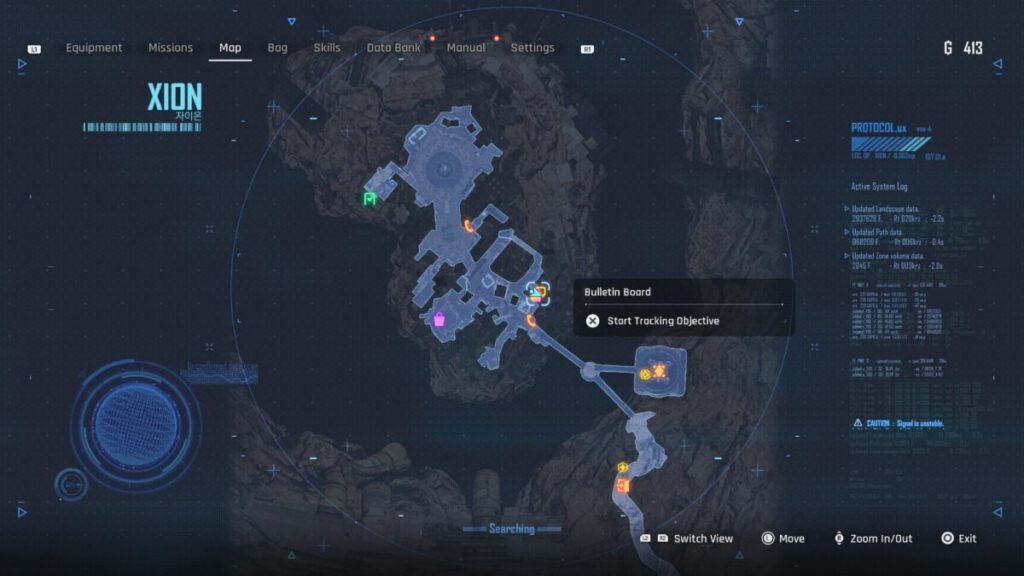
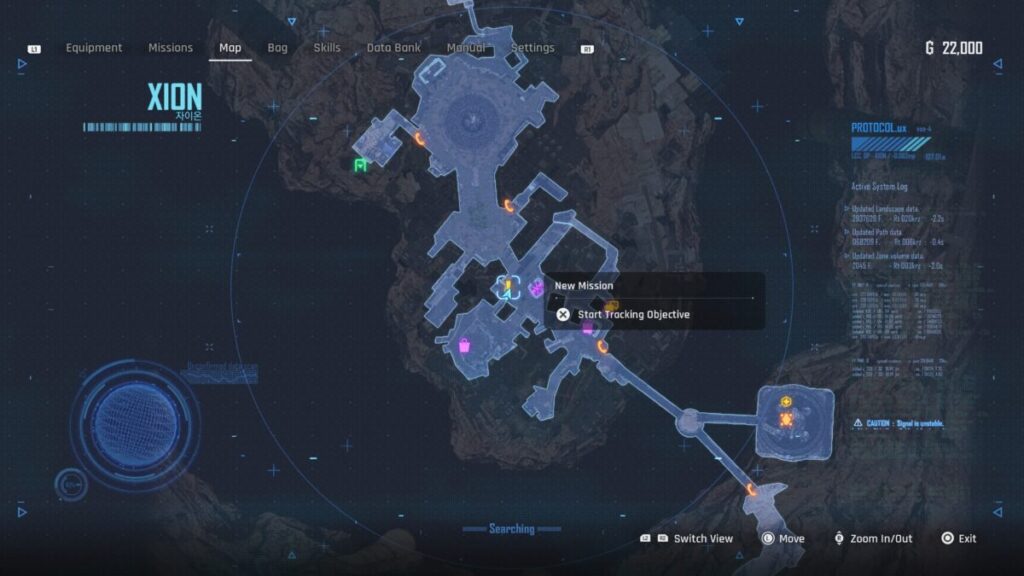
You can accept this request from the bulletin board in Xion. In order for it to show up, you’ll need to complete the Looking Glass mission to receive the fishing rod and complete a couple of the other fishing requests as well.
How to Complete the Fish Research Request
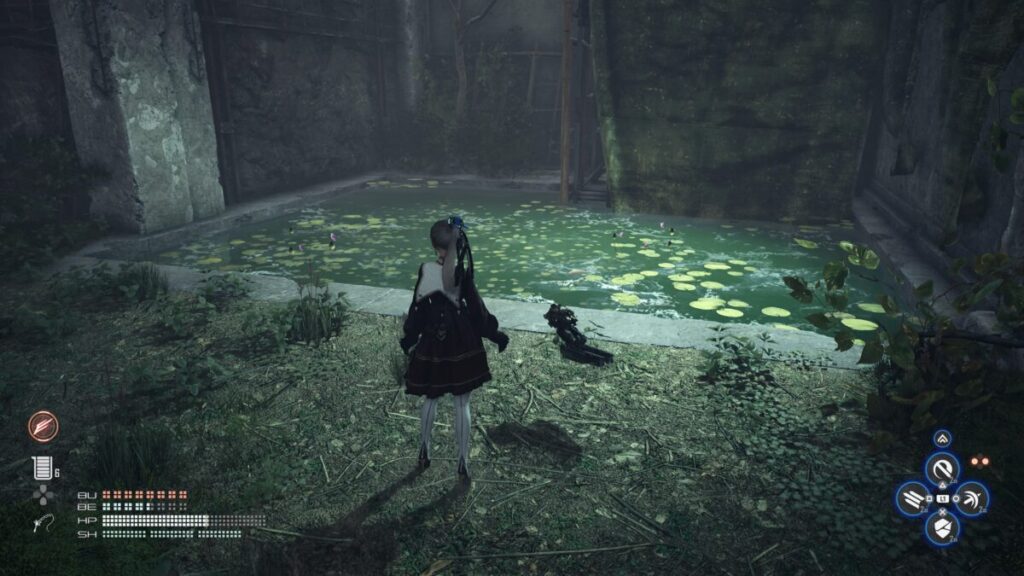
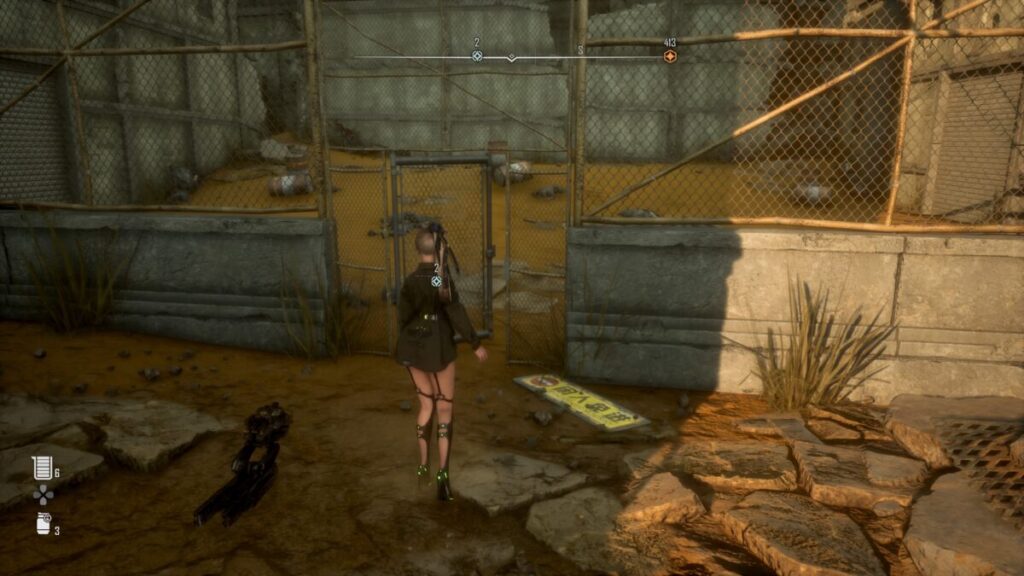
For this request, the requestor will ask EVE to bring them a Halibut and then point her toward the clock tower in Eidos 7. Speak with Adam to travel there then use the telephone booth to travel to the Plaza Entryway. Push forward until you reach the small area under the clock tower.
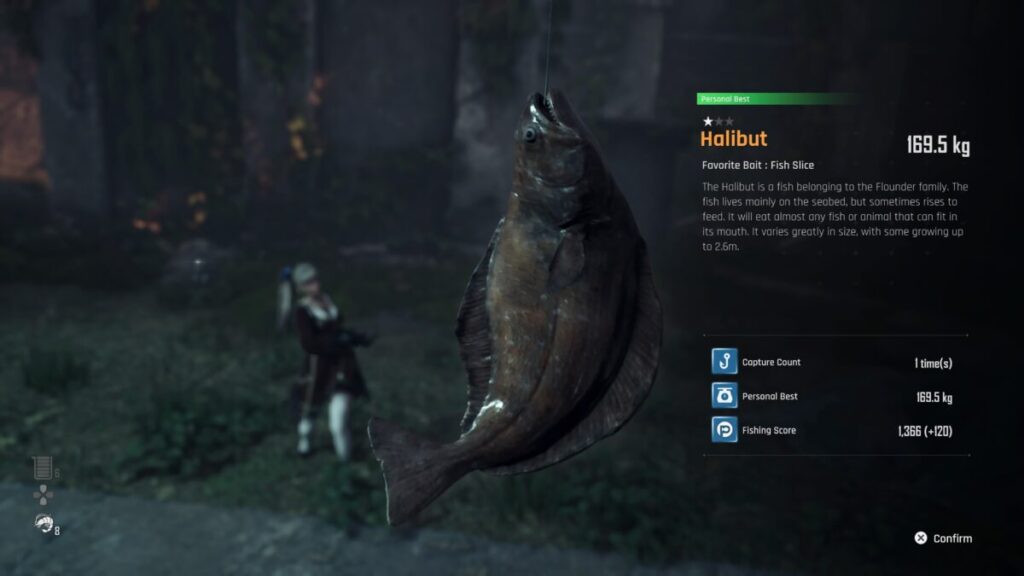
Fish in the pond there to catch a Halibut. They like the Fish Slice bait, so be sure to use one to increase the chance of catching it. You can buy them from Clyde at the Oasis in the Great Desert using the points you earn from fishing. After you have a Halibut in your possession, return to the bulletin board in Xion to complete the request and receive your rewards.
Request Rewards
Once you’ve completed the request/mission you’ll be rewarded with the items in the list below.
4,000 Gold
Stellar Blade Guides and Walkthroughs
For more Stellar Blade guides and walkthroughs, click here!
Welcome to NGB and our Stellar Blade guide for the Barry in Trouble mission. Here we will cover where to start the mission/request, how to complete it and the rewards you’ll receive for all of your effort.
How to Start the Barry in Trouble Mission
This request will become available in Xion after completing the Stubbornness, Barry and Wine missions and the Last Wine request. Head to Barry’s shop and speak with him to which he’ll ask EVE for help. The wine she got for him is no good, so now he wants grapes to make his own.
How to Complete the Barry in Trouble Mission
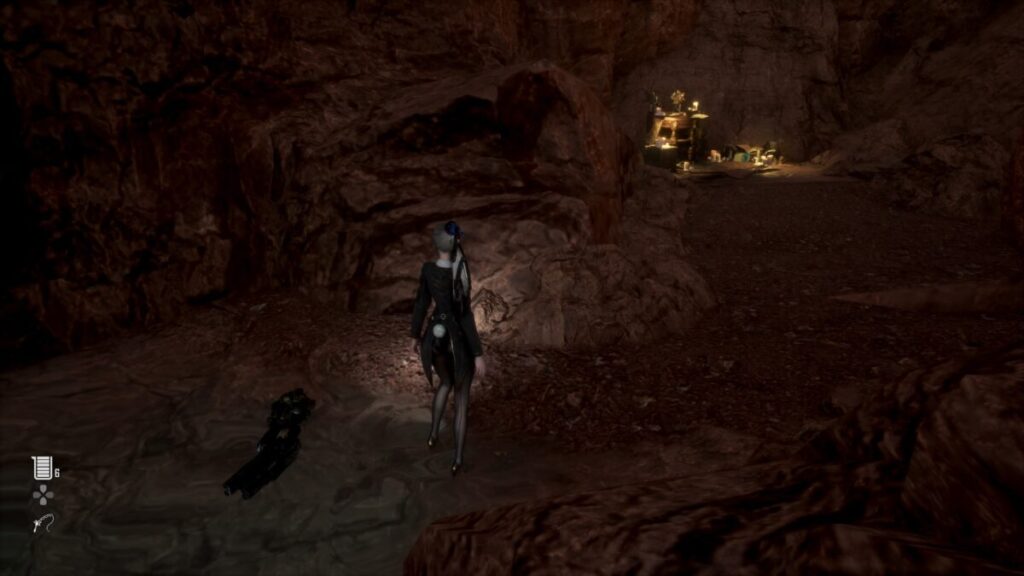
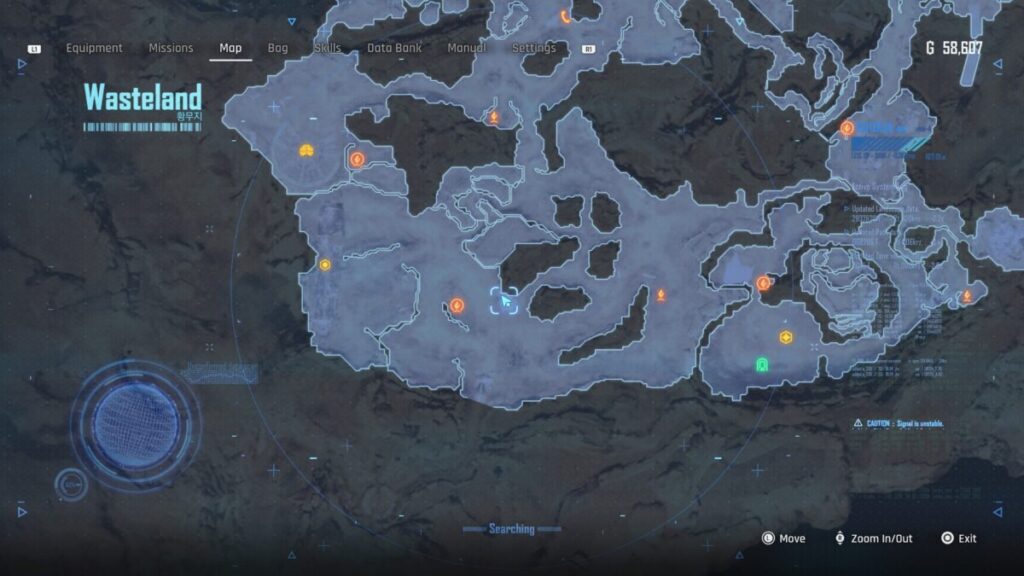
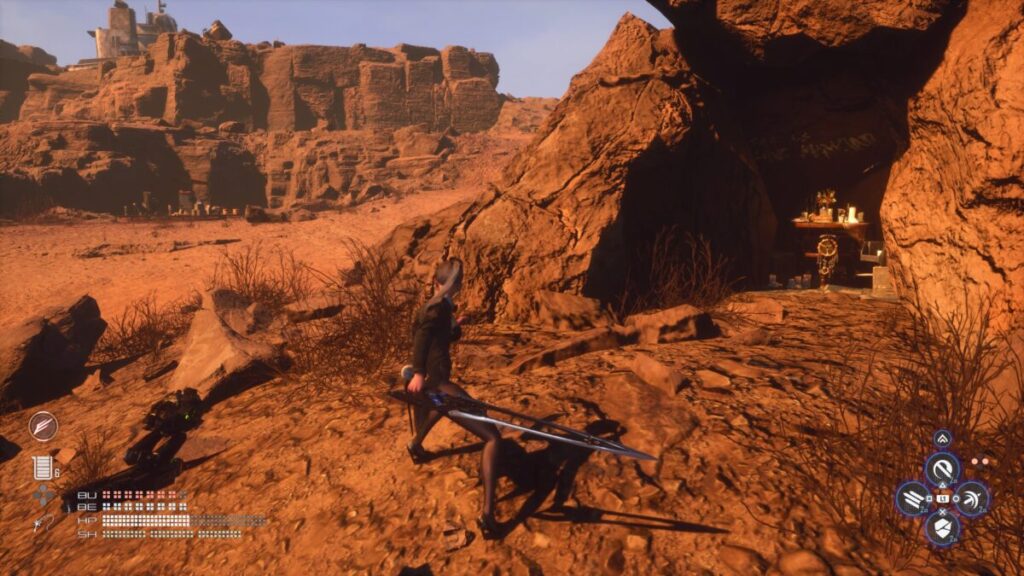
Speak with Adam to travel to the Wasteland then head for the Solar Tower Entrance Supply Camp. From there, travel north to find a hidden pond in a cave. Head inside and swim to the middle island to find 3 bunches of grapes. Collect all of them then return to Barry to drop them off. This will complete the mission and you’ll receive your reward.
Mission Rewards
Once you’ve completed the mission you’ll be rewarded with the items in the list below.
SP
300 Fishing Score
Fish Slice x2
Small Shrimp x8
Stellar Blade Guides and Walkthroughs
For more Stellar Blade guides and walkthroughs, click here!
Welcome to NGB and our Stellar Blade guide for the Siren’s Song mission. Here we will cover where to start the mission, how to complete it and the rewards you’ll receive for all of your effort.
How to Start the Siren’s Song Mission
To start the mission, travel to Eidos 7 and use the telephone to fast travel to the Plaza Entryway. From there exit to the shopping mall and head for the supply camp outside the abandoned station. Speak with Olivia there and agree to help her investigate the clue. You’ll also need to have drained the water from the plaza. We were also on the Abyss Levoire main mission when we came here!
How to Complete the Siren’s Song Mission
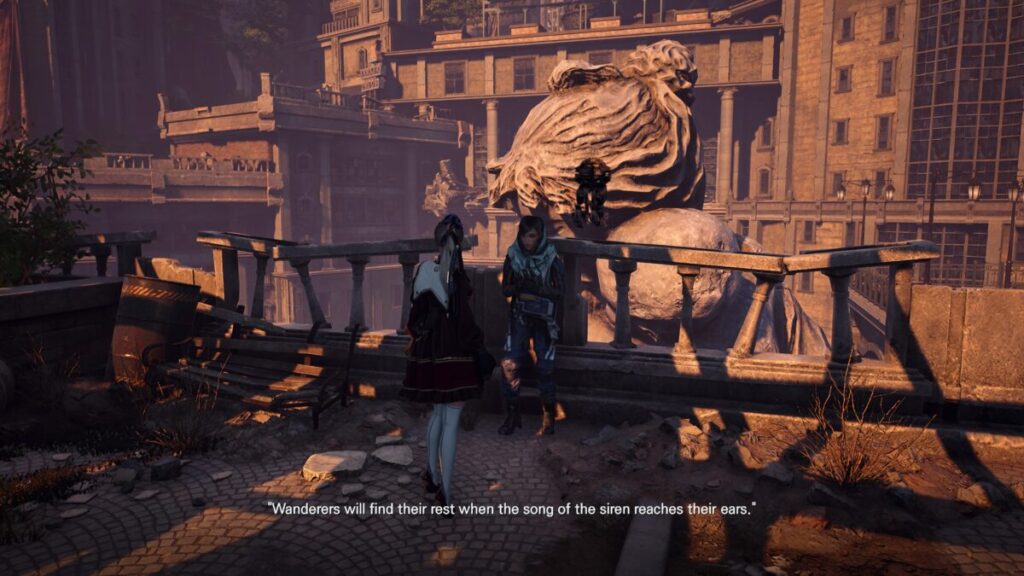
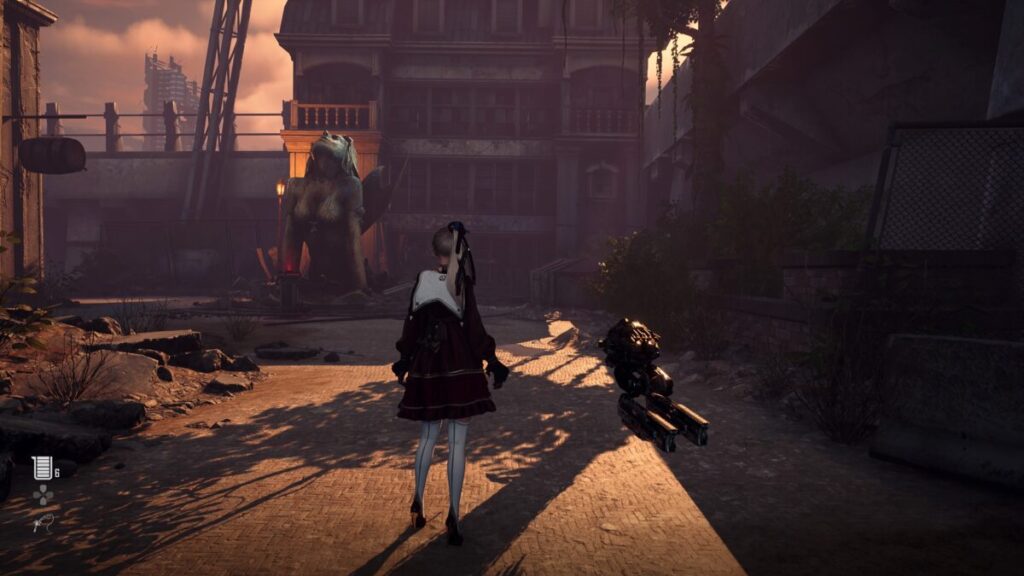
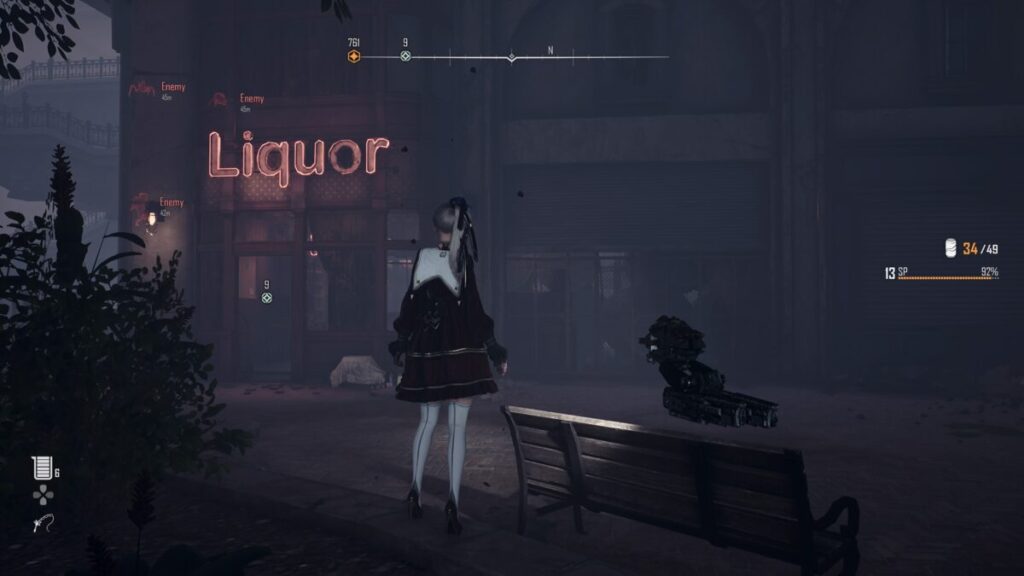
To find the siren, you’ll need to head to the other side of the plaza, opposite the Supply Camp where you met Olivia. When you get in front of the steps near the Abandoned Station, cross the bridge taking a right down the walkway. Head all the way to the bottom of the ramp then go straight past the liquor store taking a right when you reach the brick wall. Go up the ramp taking the next left and follow it around to the siren statue.
Place the fusion cell in the fusion drive in front of the siren to trigger an event. After it concludes, travel to Xion and speak with Olivia who can be found in front of the liquor side west of Gwen’s Hair Salon. This will complete the mission and you’ll receive your rewards.
Mission Rewards
Once you’ve completed the request/mission you’ll be rewarded with the items in the list below.
SP
Vitcoin
Pulse Grenade
200 Gold
Stellar Blade Guides and Walkthroughs
For more Stellar Blade guides and walkthroughs, click here!
Welcome to NGB and our Stellar Blade guide for the Barry and Wine mission. Here we will cover where to start the mission, how to complete it and the rewards you’ll receive at the end for all of your efforts.
How to Start the Barry and Wine Mission
This mission becomes available after completing the Stubbornness mission for Barry. He’ll request that EVE travel to the old shopping mall in Eidos 7 to grab 3 bottles of wine from the cellar there.
How to Complete the Barry and Wine Mission
Speak with Adam to travel to Edios 7 then use the telephone booth to travel to the Plaza Entryway. Exit through the nearby gate to reach the shopping mall then head to the lower level. You’re looking for the liquor store to collect the wine from.
When you get there, head inside and collect the three bottles left in the room. Two are on shelves and another is on a crate in the corner. Once you have them all in your possession, deliver them to Barry in Xion to complete the mission and receive your rewards.
Mission Rewards
Once you’ve completed the mission you’ll be rewarded with the items in the list below.
Special Bait x2
Fish Slice x4
Small Shrimp x18
Stellar Blade Guides and Walkthroughs
For more Stellar Blade guides and walkthroughs, click here!
Welcome to NGB and our Stellar Blade guide for the Recruit Passcode Specialists request. Here we will cover where to start the request, how to complete it and the rewards you’ll receive for all of your effort.
How to Start the Recruit Passcode Specialists Request
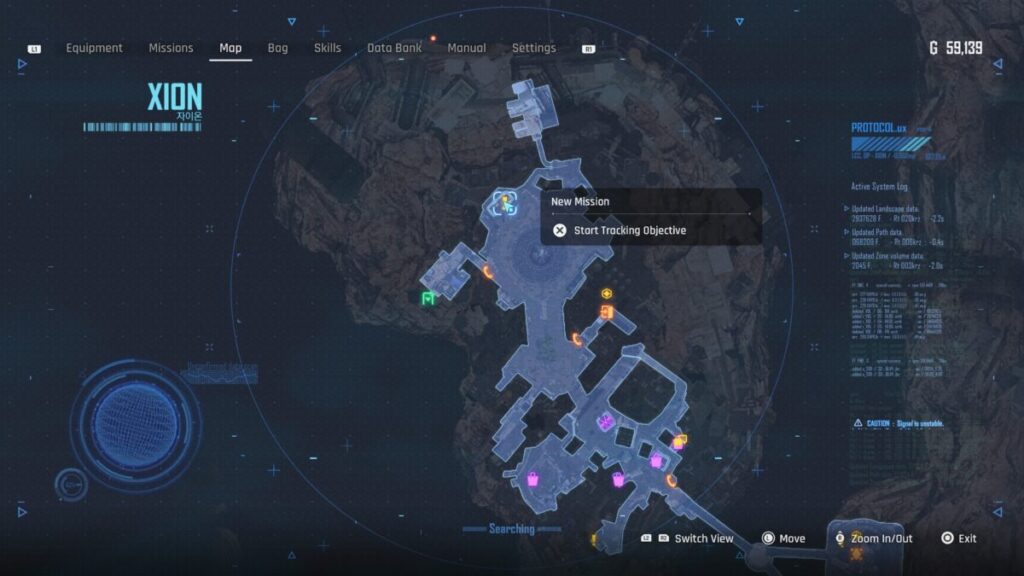
This request becomes available during the main mission, Hidden Truth. Head to the bulletin board in Xion and interact with it to accept the request. If it’s not showing up, you may have to complete a couple of the requests to make it appear in the list.
How to Complete the Recruit Passcode Specialists Request
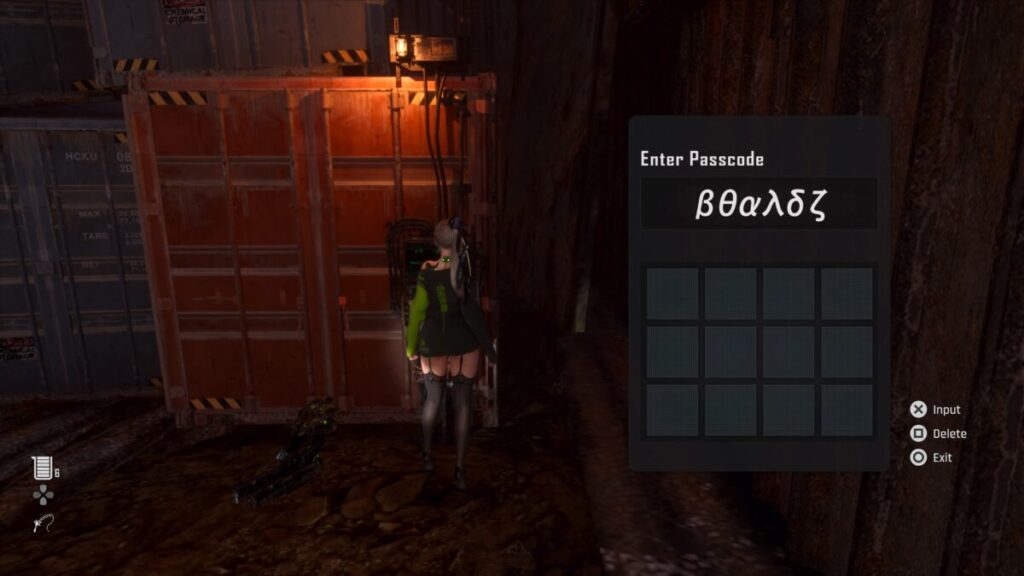
For this request, the requestor is asking for someone to travel to the ship stranded in the middle of the desert and try to unlock a certain storage container there that is sealed with a passcode. In order to unlock the storage container in question, you’ll need to collect the Prayer Documents 1-6. Each of them has a code and when put together, it makes the passcode required to open the container. The subsections below will detail how to obtain each Prayer.
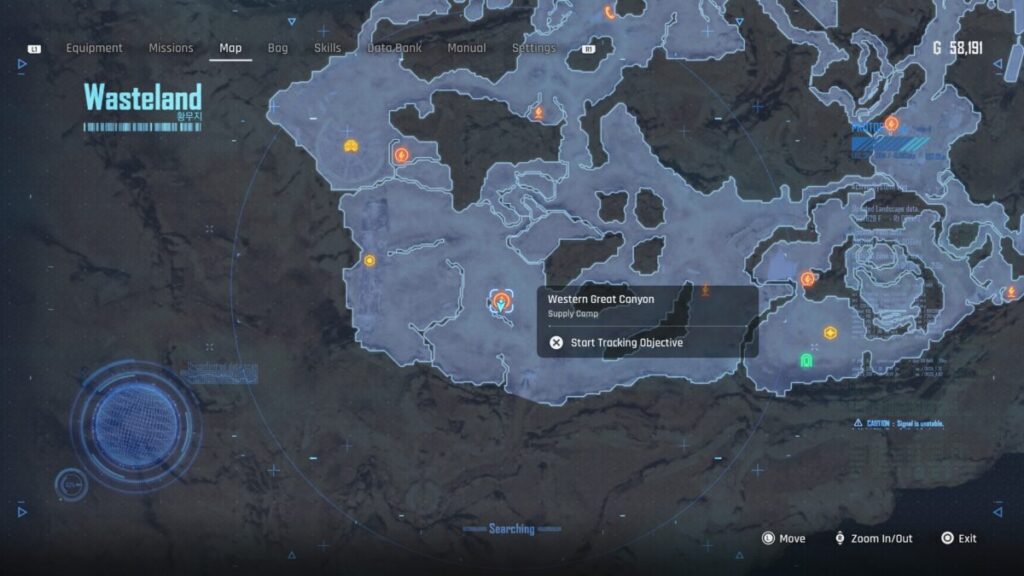
Once you have all six, set out for the Wasteland then head to the Western Great Canyon Supply Camp. From there, go west to reach the ship in question (make sure you’re at the raised section of the ship). Head inside and take a right, dealing with the enemies along the way, to spot a red container. Interact with the input device and enter the passcode to open it then inspect the Altar inside and loot the chest. Return to the bulletin board in Xion to complete the request and receive your gold!
Chapter of Trial 1 (MAtrix 11)
You can find the Chapter of Trial 1 Prayer at the altar in Matrix 11 on the upper level of the living quarters just past the sewers. You’ll come here and interact with the altar upon traveling to Matrix 11 as part of the main story.
Chapter of Trial 2 (Great Desert)
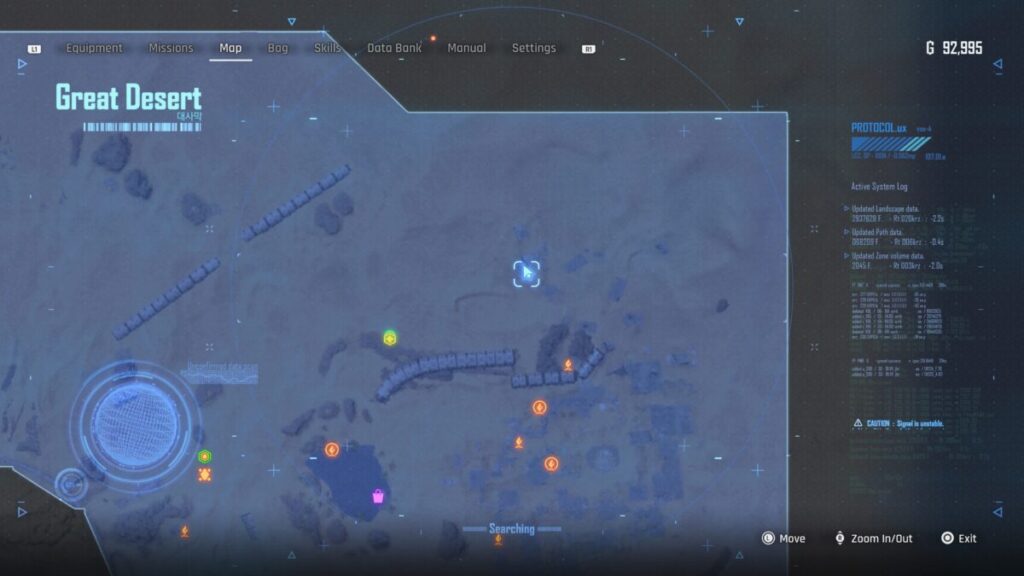
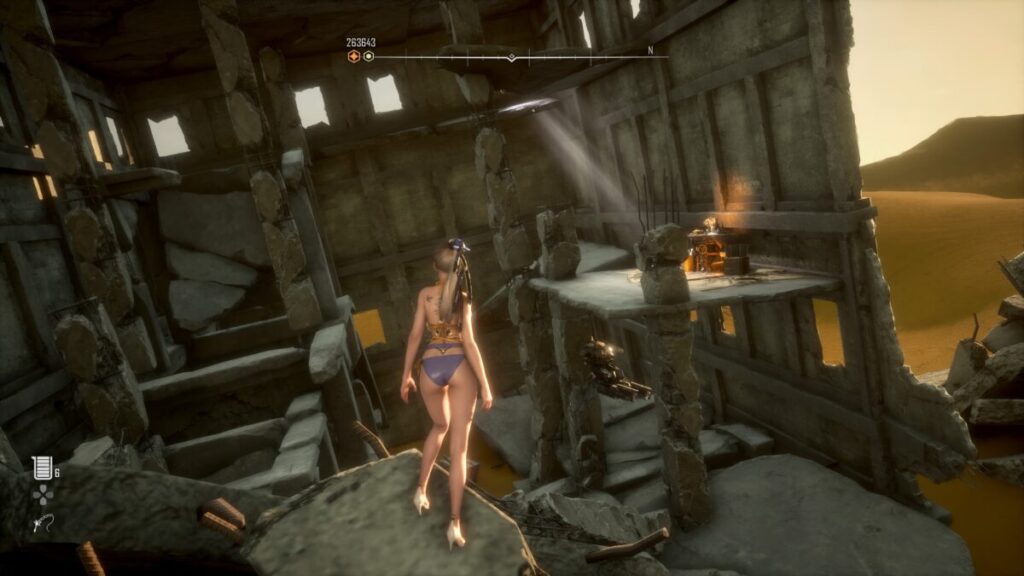
Chapter of Trial 2 can be found in a half-destroyed building on the second floor north of the Buried Ruins Outskirt Supply Camp.
Chapter of Trial 3 (Great Desert)
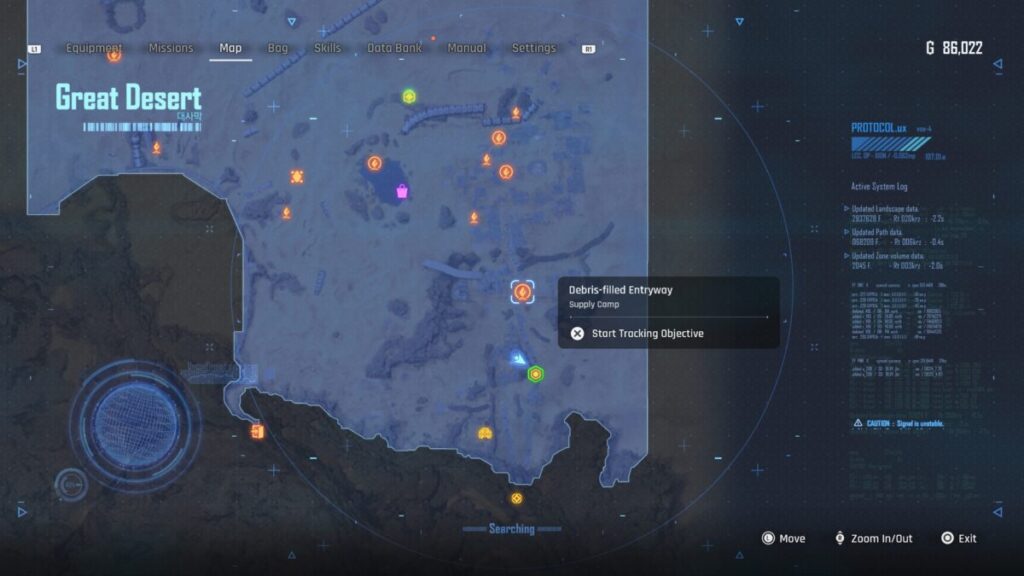
To find Chapter of Trial 3, travel to the Debris-filled Entryway Supply Camp in the eastern part of the area then go south. Toward the end of the collapsed overpass, there will be an area on the right you can head through leading you towards a group of buildings and a gate blocking your way. Take a right just before the gate to enter one of the buildings and the Prayer altar will be in that room.
Chapter of Trial 4 (Great Desert)
Chapter of Trial 4 can be found at the bottom of the Hybertube (which becomes accessible once starting The King of the Tunnel mission). Once you land in the water at the end of the tube, head to the south side of the pool to find the altar with the Prayer.
Chapter of Trial 5 (Wasteland)
The Chapter of Trial 5 can be found in a small cave to the east (and slightly north) of the West Great Canyon Supply Camp.
Chapter of Trial 6 (Wasteland)
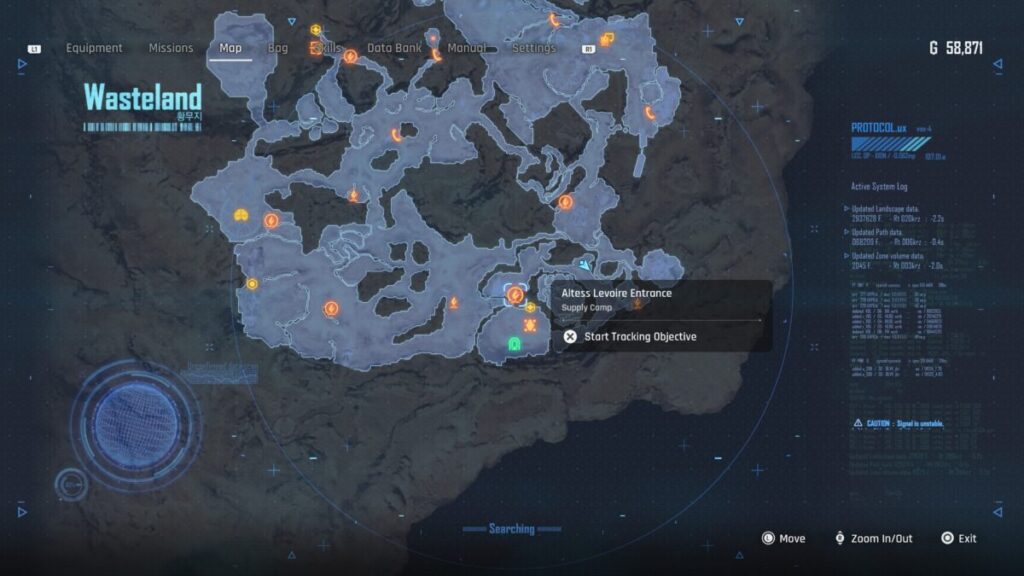
Chapter of Trial 6 can be found by traveling to the Altess Levoire Entrance and following the path north-northeast to a smaller side area. There will be a small cave there with the Prayer inside.
Request Rewards
Once you’ve completed the request you’ll be rewarded with the items in the list below.
20,000 Gold
Stellar Blade Guides and Walkthroughs
For more Stellar Blade guides and walkthroughs, click here!
Welcome to NGB and our Stellar Blade guide for the Fallen Angel mission. Here we will cover where to start the mission, how to complete it and the rewards you’ll receive for all of your efforts.
How to Start the Fallen Angel Mission
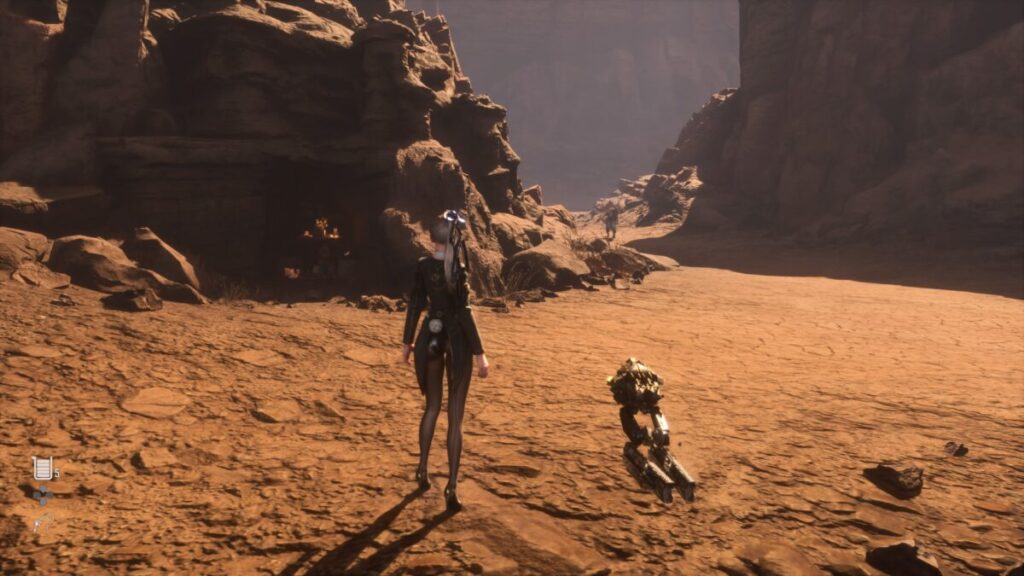
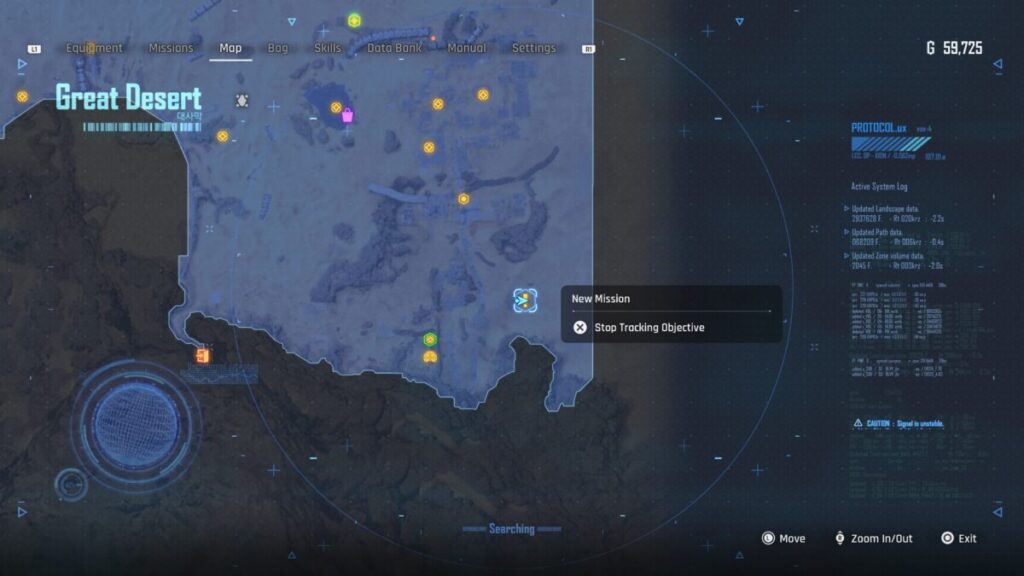
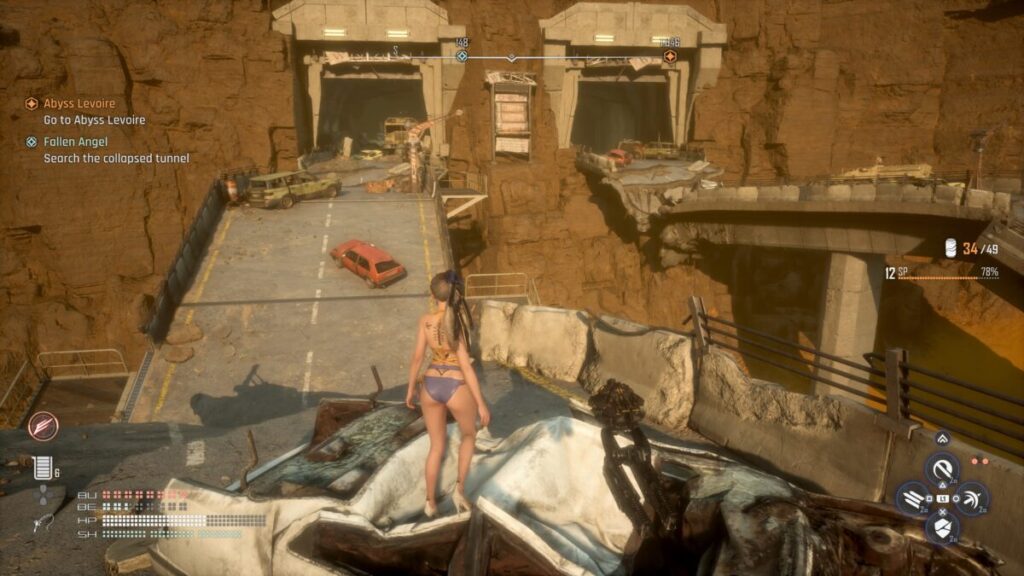
This mission becomes available after reaching the Great Desert. Travel to the southeastern part of the area (east of the Solar Tower) to find a person hiding behind some wooden crates next to a giant rock. As you approach him, you’ll be attacked by some Naytiba. Defeat them then speak with Griffin. He’ll tell EVE that he saw another Angel in need of saving nearby at the collapsed tunnel. EVE thanks him for the info and sets out to find the Angel.
How to Complete the Fallen Angel Mission
To reach this mission, travel to the southeastern corner of the map past the Solar Tower following along the overpass. Head into the tunnel on the left side leading into the mountain while doing the turret’s shot.
Inside part of the road will fall into the ground making a ramp you’ll want to walk down. Follow the tunnel at the bottom to reach the angel. Approach her to trigger an event then interact with her when prompted to complete the mission.
Mission Rewards
Once you’ve completed the mission you’ll be rewarded with the items in the list below.
SP
Extreme Nano Element x5
Advanced Nano Element x25
Nano Element x35
Stellar Blade Guides and Walkthroughs
For more Stellar Blade guides and walkthroughs, click here!
Welcome to NGB and our Stellar Blade guide for the An Unforgettable Fish Dish request. Here we will cover where to start the request, how to complete it and the rewards you’ll receive for all of your effort.
How to Start An Unforgettable Fish Dish Request
This request can be accepted on the bulletin board in Xion. In order for it to show up in the list, you’ll need to complete the Looking Glass mission to receive the fishing rod and then complete the Wife’s Water Tank request.
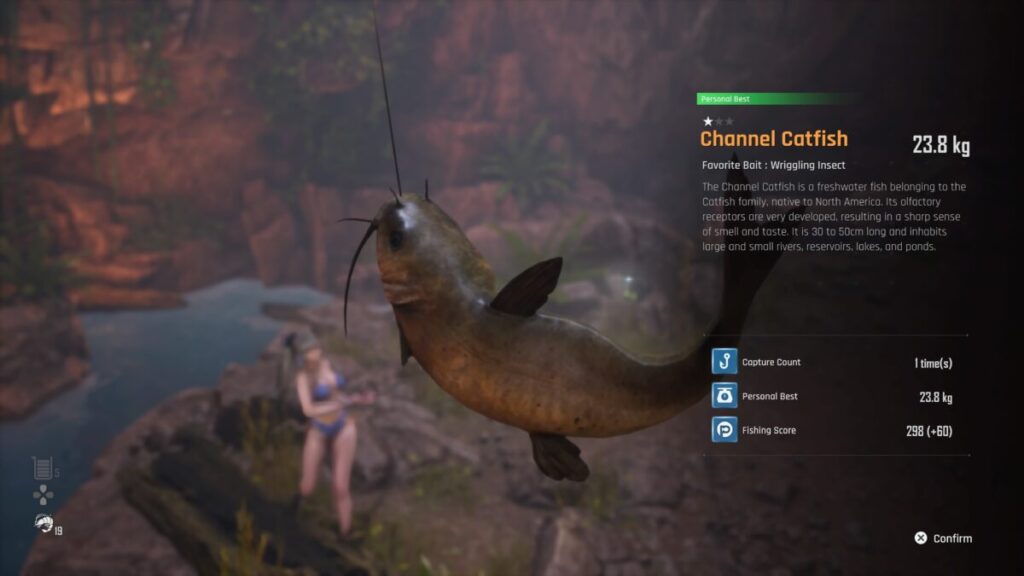
How to Complete An Unforgettable Fish Dish Request
The requestor will ask EVE to bring them a Channel Catfish so that they can cook the fish the way their father taught them. To do this, travel to the cave leading to the Wasteland in Xion and fish there. The Channel Catfish likes Wriggling Insect bait, so using that will give you a better chance to land one. You can purchase that from Clyde at Oasis in the Great Desert with the points you earn from fishing. We caught ours using the Small Shrimp that we got from completing Barry’s mission. Either way, it might take a while to snag one. Once you do, return to the bulletin board to complete the request and receive your rewards.
Request Rewards
Once you’ve completed the request you’ll be rewarded with the items in the list below.
3,000 Gold
Stellar Blade Guides and Walkthroughs
For more Stellar Blade guides and walkthroughs, click here!
Welcome to NGB and our Stellar Blade guide for the Where’s the Item request. Here we will cover where to start the request, how to complete it and the rewards you’ll receive for all of your effort.
How to Start the Where’s the Item Request
This request becomes available during the main mission, Hidden Truth. Head to the bulletin board in Xion and interact with it to accept the request. If it’s not showing up, you may have to complete a couple of the requests to make it appear in the list.
How to Complete the Where’s the Item Request
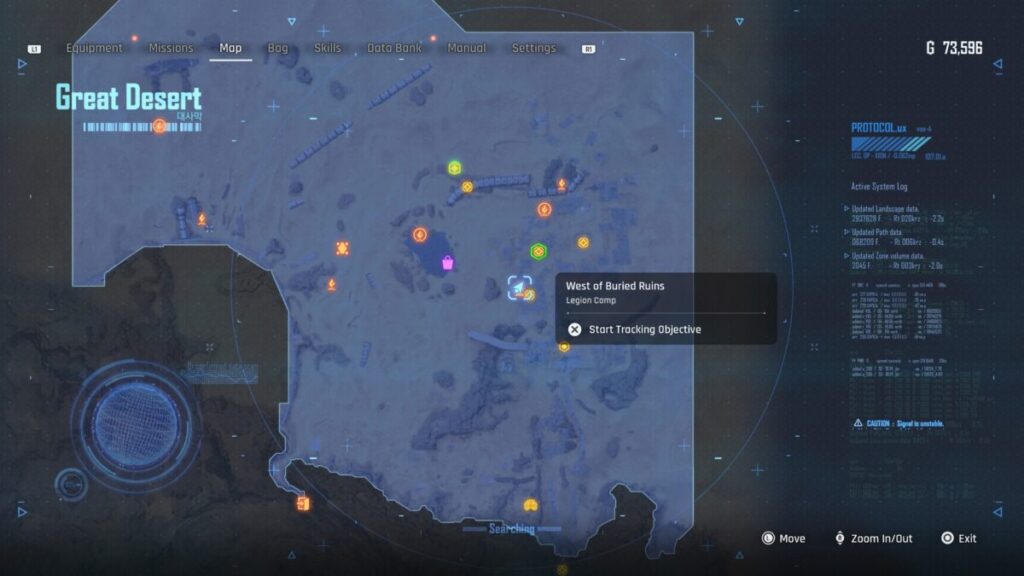
For this request, the requestor is asking for someone to retrieve the items that he requested Frank the Scavenger to since he’s probably Naytiba food by now. You’ll need to head to the Great Desert and travel southeast to reach the West of Buried Ruins Legion Camp. From there, head south and you’ll find a broken section of road on the left past a couple of ruined buildings. Cross over it then take a right following a narrow path between two rock walls.
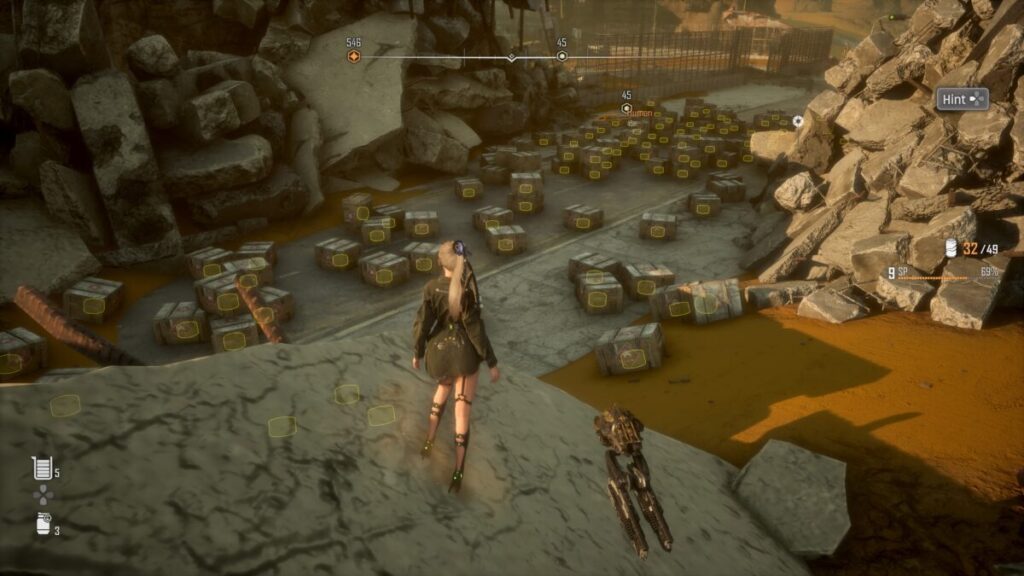
After exiting the path go left heading east to arrive on a road littered with crates containing explosives. The items we are after can be found in the middle of all of them. Use your scanner to find a safe path through then collect the bag. Return to the bulletin board to complete the request and receive your rewards.
Request Rewards
Once you’ve completed the request you’ll be rewarded with the items in the list below.
2,500 Gold
Vitcoin x4
Stellar Blade Guides and Walkthroughs
For more Stellar Blade guides and walkthroughs, click here!
Welcome to NGB and our Stellar Blade guide for the Let There Be Light Again mission. Here we will cover where to start the mission, how to complete it and the rewards you’ll receive for all of your efforts.
How to Start the Let There Be Light Again Mission
This mission becomes available during the main mission, Abyss Levoire. Speak with Francis who heard from a Scavenger that his brother was seen alive recently. He’ll then ask if EVE will travel to a location in the Great Desert to verify if it’s true. You’ll need to have completed The Words of the Mother Sphere mission for this one to show up.
This mission didn’t show up for us until we traveled to the Great Desert and then returned to Xion.
How to Complete the Let There be Light AGain Mission
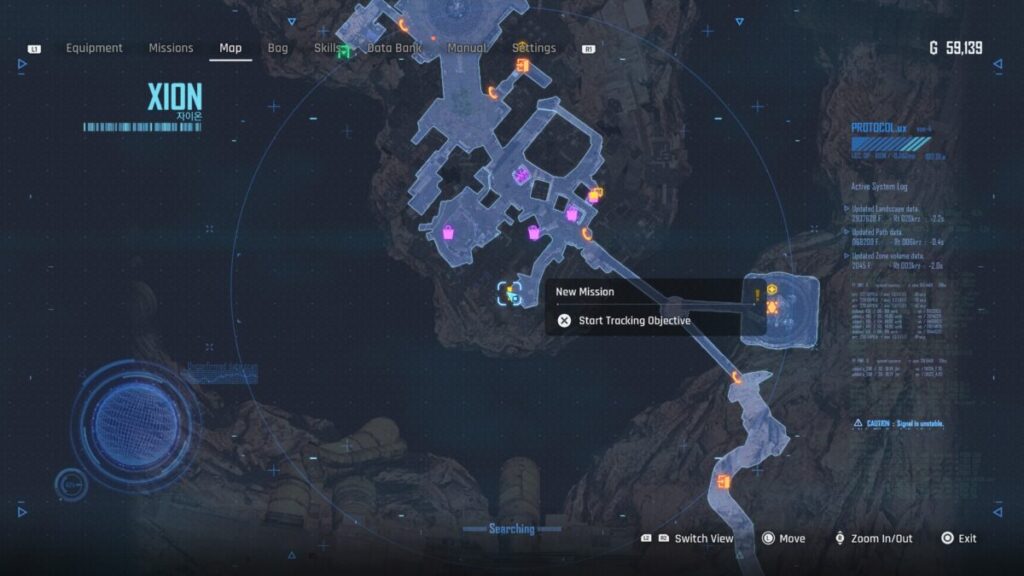
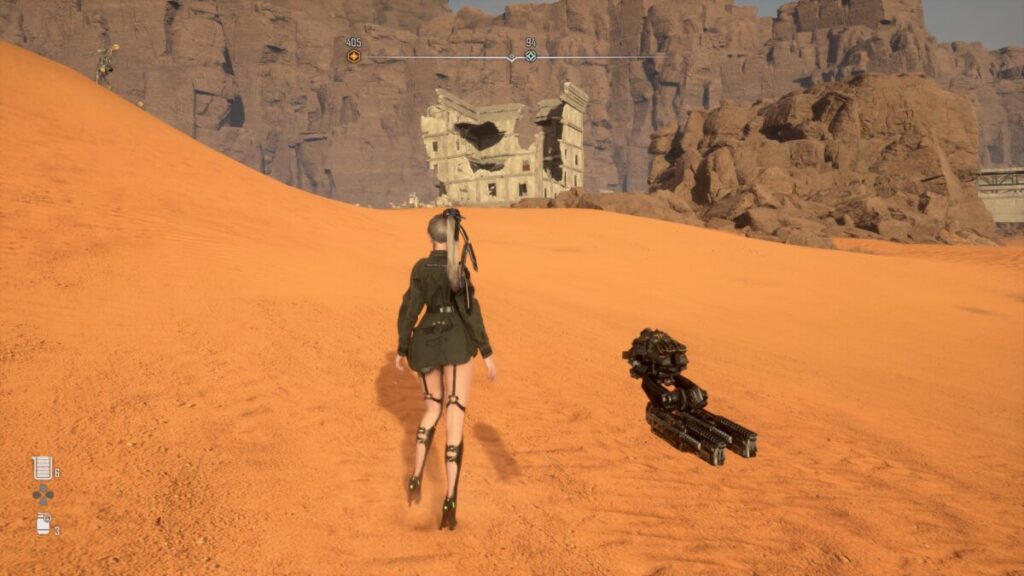
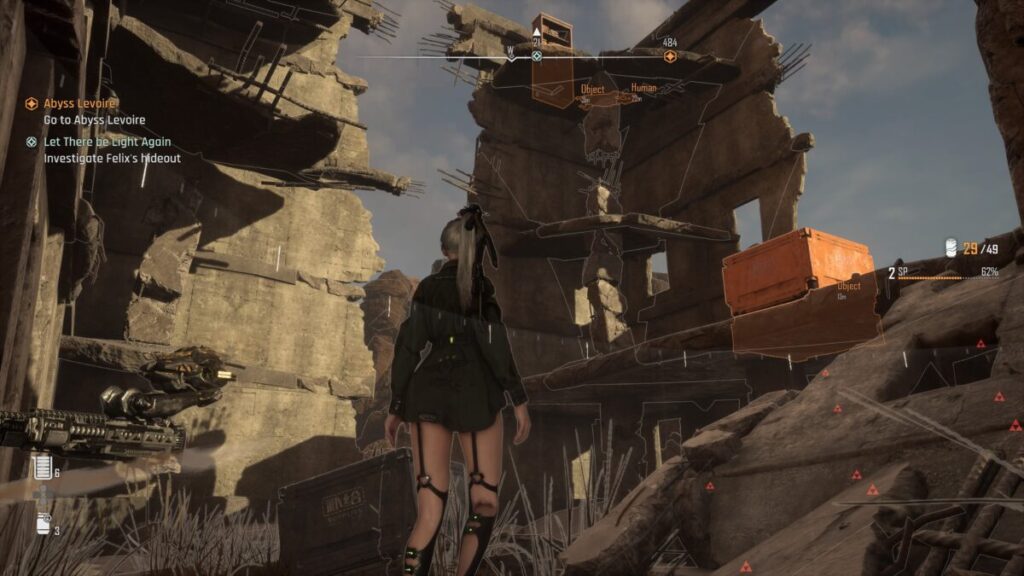
To kick off this mission, travel to the Great Desert then head slightly southwest from the Tetrapod to reach the North Great Desert Legion Camp. Enter the ruins and work your way up to the top level.
You’ll need to use the orange cube to reach the next level on the left side. From there swing off the metal bar sticking out of the wall grabbing onto a ledge beyond that. Next, climb up to the top level and jump across to the bookshelf. Interact with the body and then the bookshelf to receive the I Head It document.
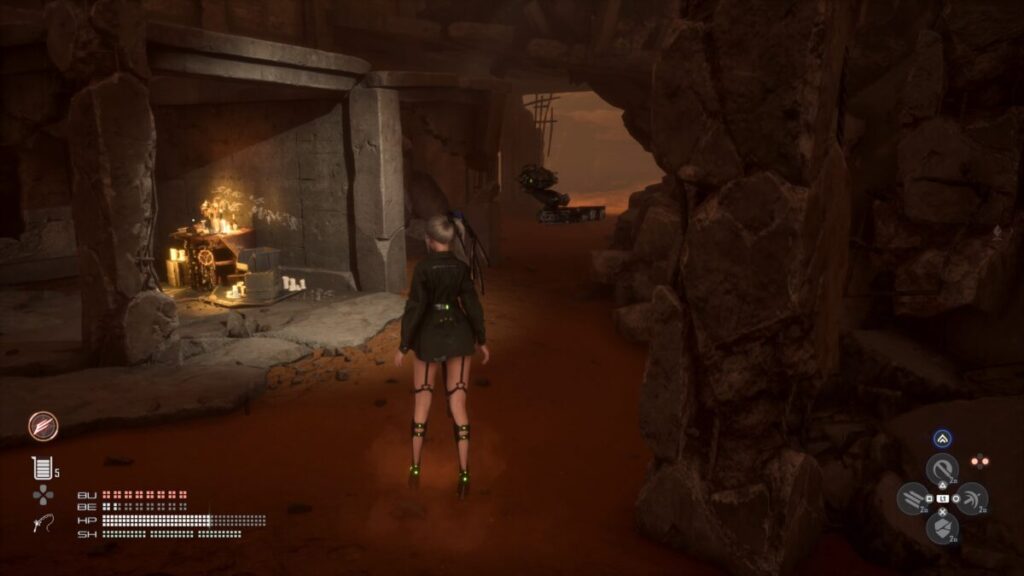
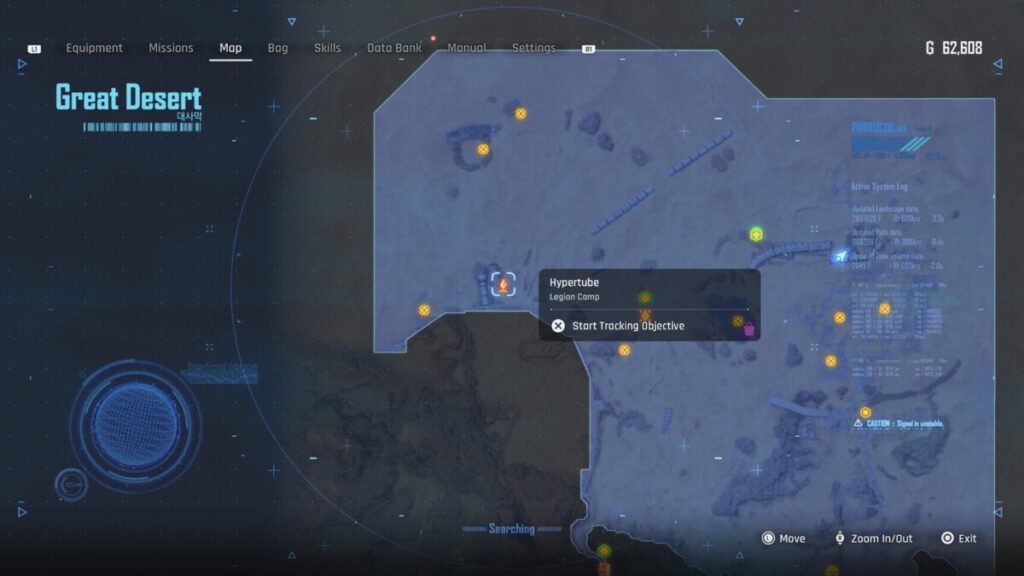
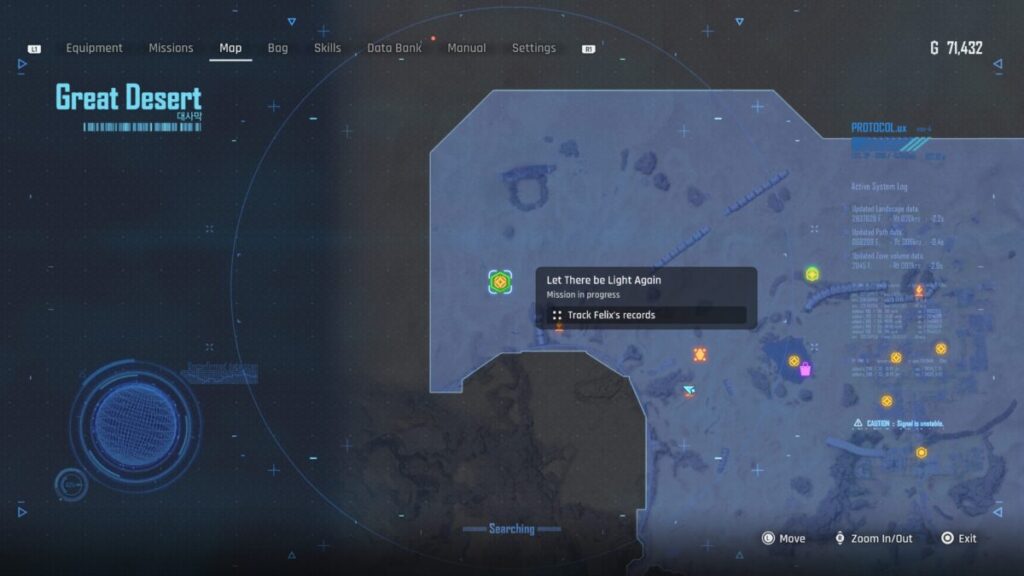
After a brief event, Adam will notice that there are coordinates attached to the note. Travel west, past the Hypertude Legion Camp to find a drop pod half buried in the sand. Interact with it to view the I Saw It message.
Your next destination after this is the Abyss Leviore, specifically the long tube behind it. Climb on top of the tube to find another corpse you’ll need to investigate. Afterwards, interact with the device on the ground next to him. Return to Francis and deliver Felix’s Memorystick to complete the mission and claim your rewards.
Mission Rewards
Once you’ve completed the mission you’ll be rewarded with the items in the list below.
SP
WB Pump
1,000 Gold
Nano Element x35
Stellar Blade Guides and Walkthroughs
For more Stellar Blade guides and walkthroughs, click here!
Welcome to NGB and our Stellar Blade guide for the A Treasure with a Name mission! Here we’ll cover where to start this mission, how to complete it and the rewards you’ll receive at the end.
How to Start the A Treasure with a Name Mission
Speak with June in front of the liquor store near Gwen’s Hair Salon to receive this mission. It showed up during the Light of Hope main quest after we completed the Stolen Treasure mission. You may get this quest before reaching the Great Desert. Just keep pushing forward with the main story and you’ll get there eventually.
How to Complete the A Treasure with a Name Mission
While speaking with June, she told EVE about her treasure and how she left some of it behind when the Naytiba attacked. Intrigued, EVE decided to head to the Great Desert to see if she could find this treasure. Once at the Great Desert, travel east to reach the Oasis then from there go slightly southeast to arrive at the West of Buried Ruins Legion Camp.
Open the gate to the left of the camp (when facing it) and take a right crossing the courtyard. Open the gate on the other side then head through. After a quick event, you’ll be amused by three Old Droid Naytibas followed by a couple of waves of Lurkers and Lesser Lurkers. You’ll know you’re almost done when the Lesser Behemoth busts through the wall.
After defeating all of the Naytiba, activate your scanner to tag 3 bodies in the area you’ll need to investigate. After doing that, return to June in Xion and speak with her. EVE will hand over the memorysticks completing the request and you’ll receive your rewards.
Mission Rewards
Once you complete this mission, you’ll be rewarded with the items listed below!
SP
Vitcoin x2
Sonic Grenade x2
Biotic Field Generator x2
Stellar Blade Guides and Walkthroughs
For more Stellar Blade guides and walkthroughs, click here!
Search
This site uses cookies. By continuing to use this website, you are giving consent to cookies being used. For more information on cookies, view our Privacy Policy.OkPrivacy Policy