Welcome to our Street Vultures Turf RoboCop guide where we’ll go over everything you’ll need to do to get a RoboCop evaluation score of A for the Street Vultures Turf objective in Robocop Rogue City.
Street Vultures Turf RoboCop Evaluation Report
The list below contains everything you’ll need to do during the Street Vultures Turf RoboCop objective to receive enough XP for a RoboCop Evaluation Report rank of A.
Miscellaneous Objectives
Police Work
Secondary Objectives
Hostage Rescue
Unwanted Goods
Biker’s Secrets
Investigations
Briggs’ Squad Car Investigated
All stolen OCP Chests Found
Police Work
The challenge against ED-209 won
Intoxicated Hostage Saved
Pieces of Crime Evidence Collected
Trophies
Live by the Bike…
Good Eyes, Murphy!
Police Work – Pieces of Crime Evidence Collected
While exploring the Steel Mill looking for Briggs, you’ll need to watch for crime evidence to collect. Your goal is to reach 1500 points of evidence by the end of the Street Vultures Turf objective. These will be in the form of Fake ID Cards, Nuke, Stolen Wallets, Fake Money, Incremedating Documents/Pictures and Stolen Handbags. You can find them pretty much anywhere so be sure to keep an eye out for them.
Investigations – Briggs’ Squad Car Investigated
Near the beginning of the Mill, you’ll come across Brigg’s squad car hidden in a garage. You’ll need to scan the driver’s side door to begin the investigation. Then scan the below clues to complete it:
Blood stain on the driver’s seat
OCP Tracker removed from dash (left of the wheel)
Bullet holes on the driver side passenger door
Live by the Bike Trophy
To obtain the Live by the Bike trophy, you’ll need to shoot the gas tank of a motorcycle driving around. There will be a few opportunities to accomplish this during the level.
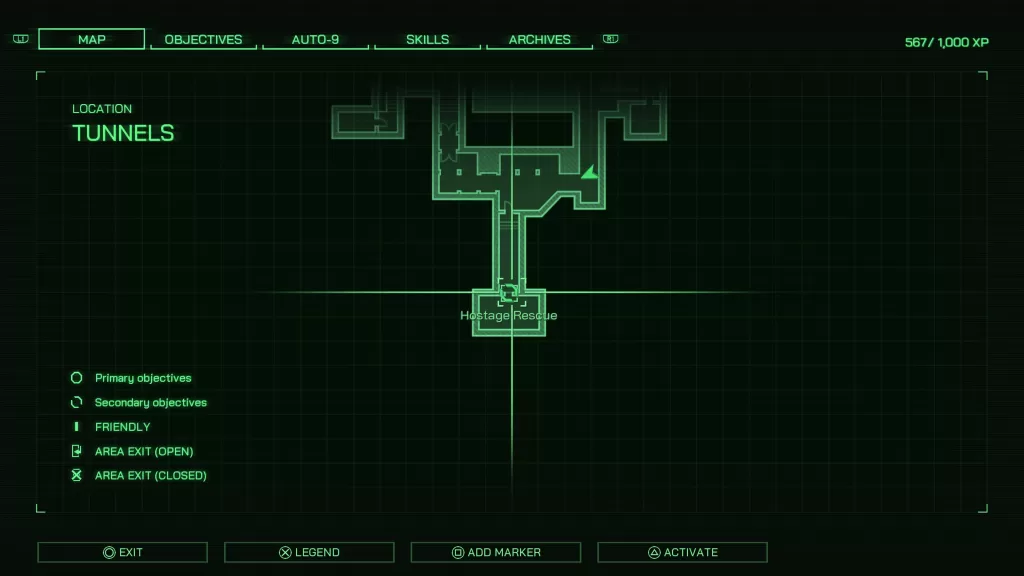
Hostage Rescue
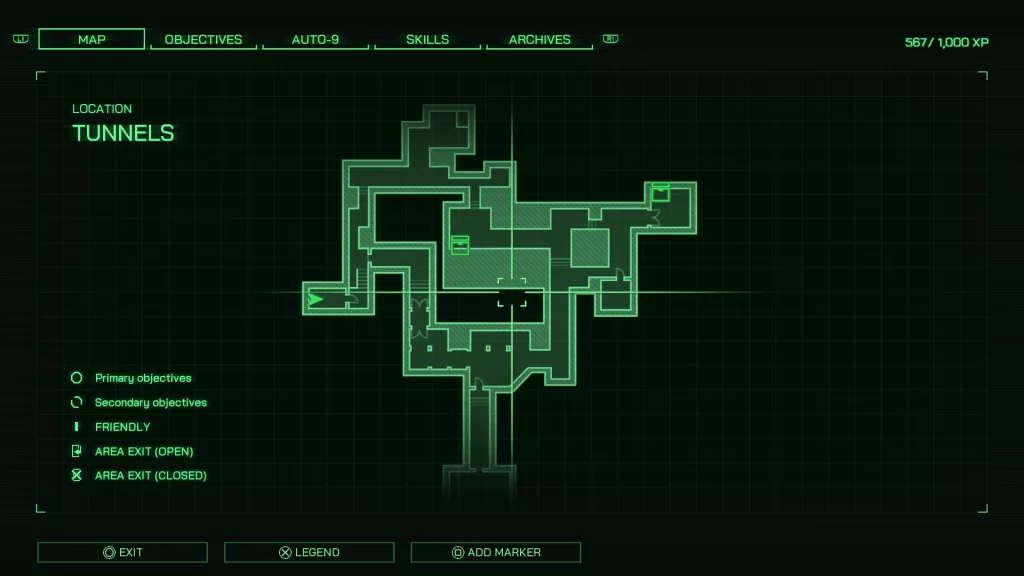
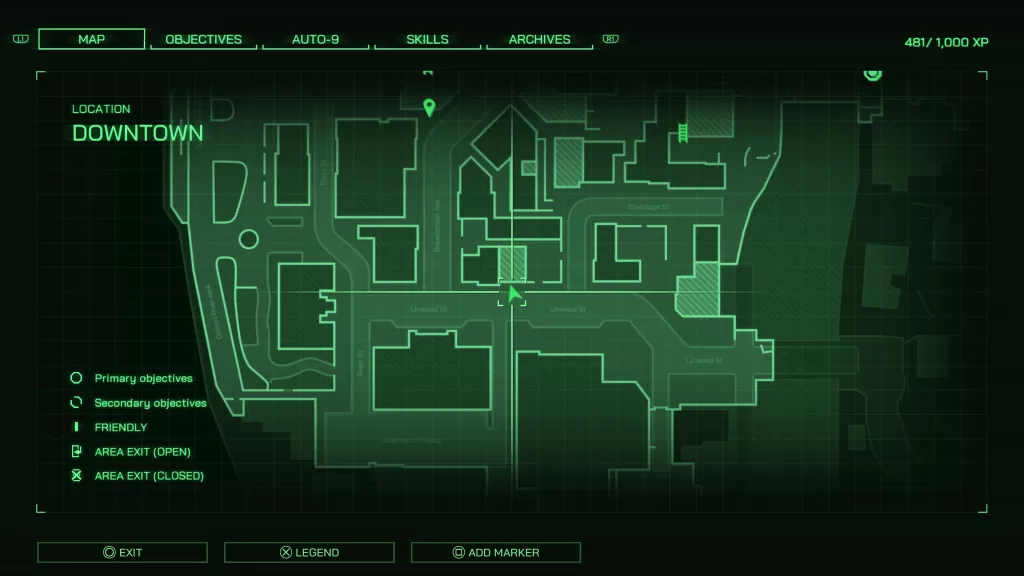
To find the Hostage Rescue objective, you’ll need to enter the Tunnels in the center of the Steel Mill as shown in the image above. Once there, work your way to the southern part of the Tunnels to trigger the objective.
For this objective, you’ll need to rescue a member of the Torch Heads from the Street Vultures. Breech the cell and take out the 3 vultures interrogating the Torch Head. Make sure that the hostage isn’t killed. If he does get taken out, you’ll need to reload and try again. Afterwards, the Hostage Rescue objective will be completed.
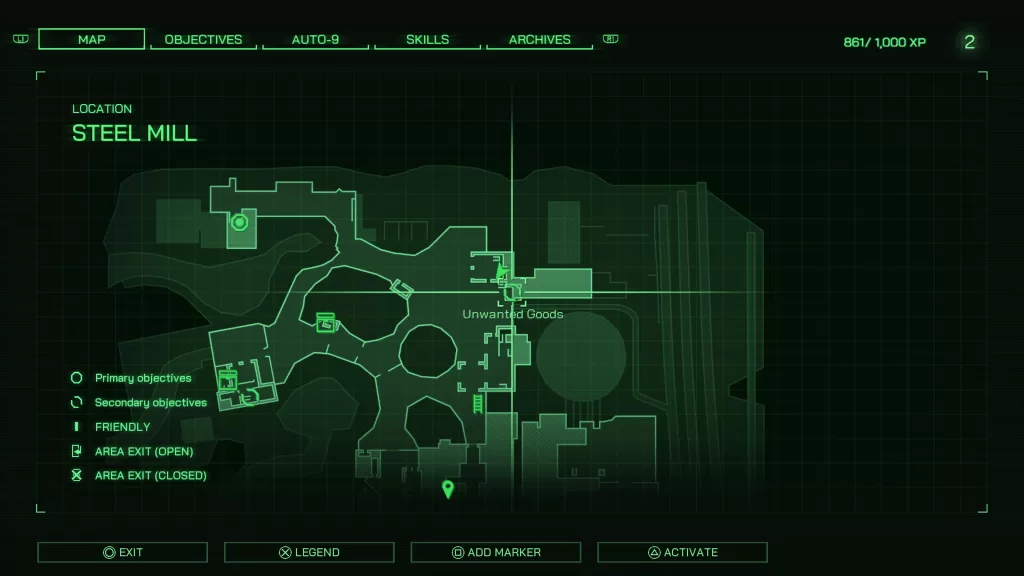
Unwanted Goods
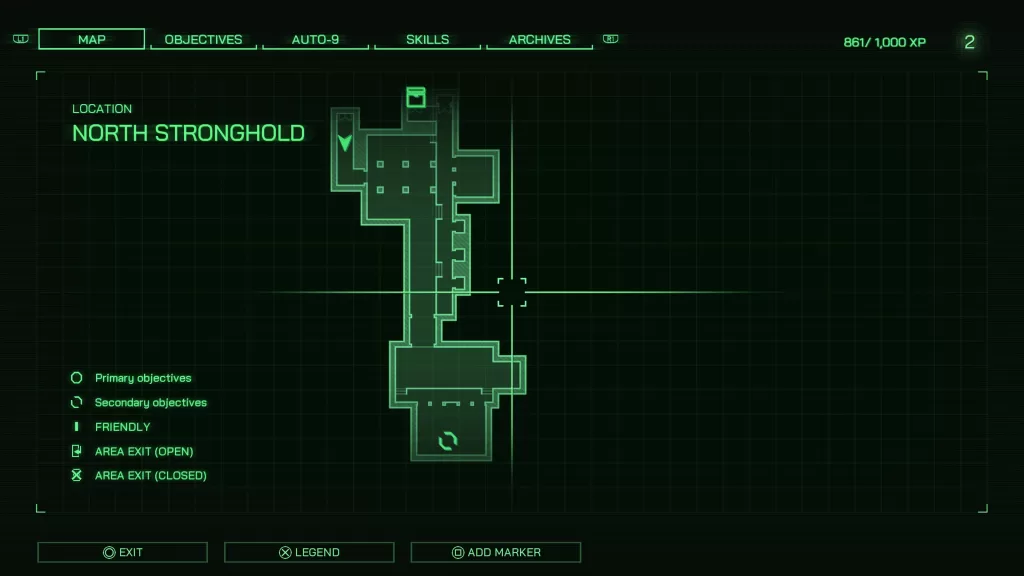
This objective will trigger as you approach the metal barbed wire gate in the north central part of the Steel Mill during the “Follow Officer Brigg’s trail” objective. Head to the northeastern part of the Steel Mill past the barbed wire gate through the minefield. When you reach the building there will be a group of enemies that you’ll need to take out. When that’s done, find the set of stairs leading down to reach a bunker. When you find the mounted heavy machine gun, turn left and head through the doors to enter the building.
In the North Stronghold, you’ll need to fight your way to the southern part of the structure to find the drug stash. Shoot all 15 of the boxes with the drugs to complete the Unwanted Goods objective. They will be cardboard boxes with NUKEM printed on the side.
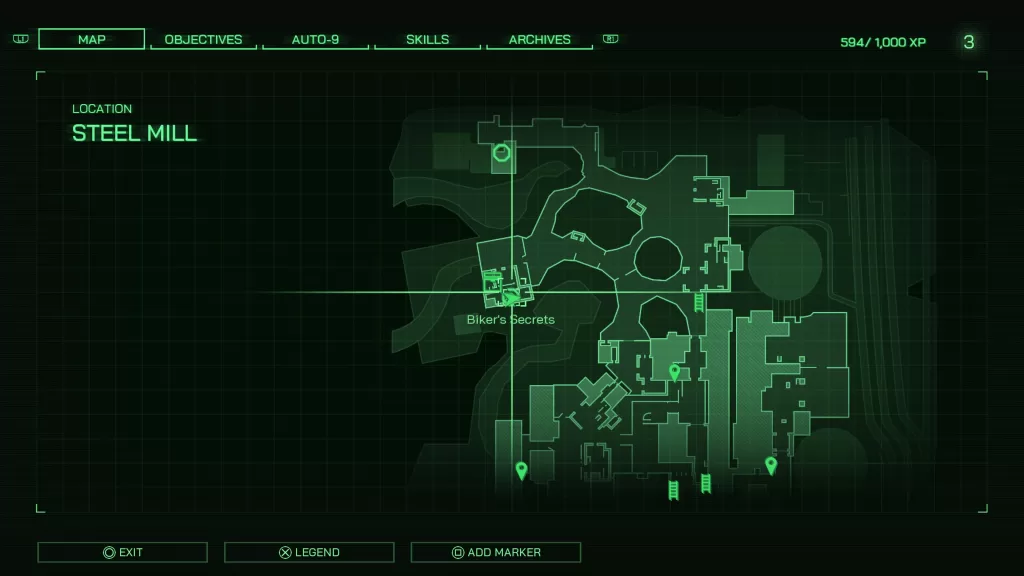
Biker’s Secrets
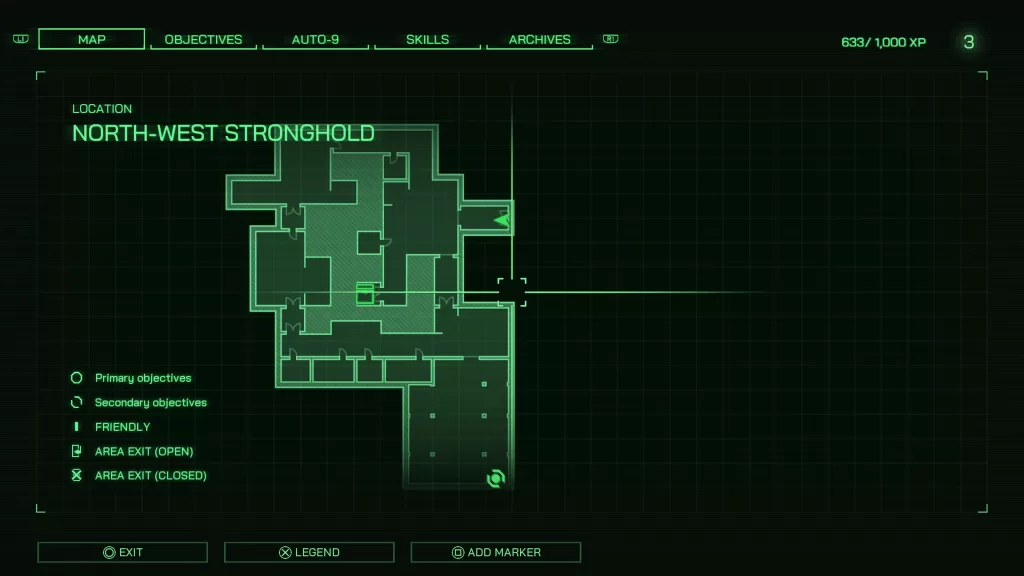
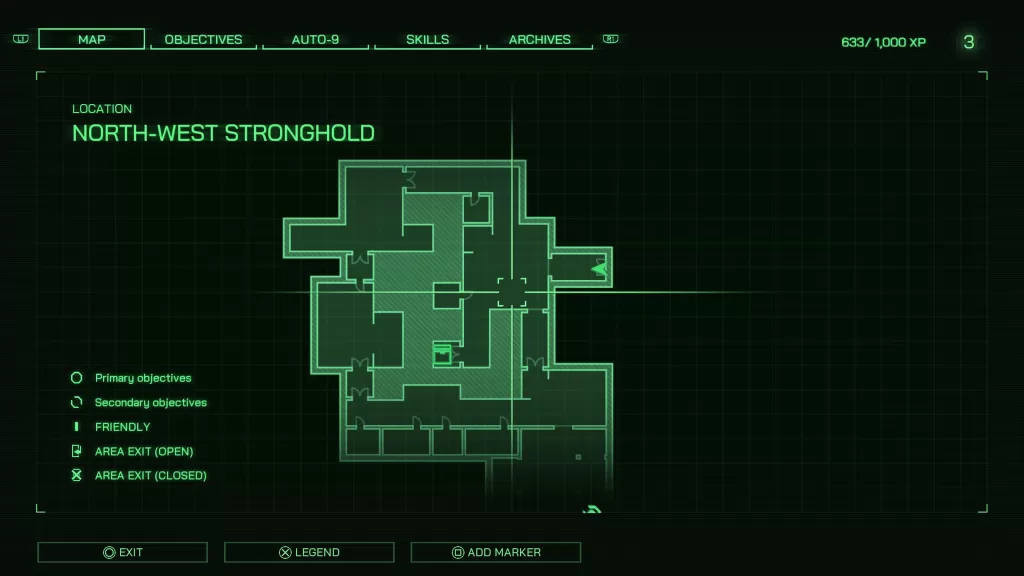
This objective will trigger as you approach the metal barbed wire gate in the north central part of the Steel Mill during the “Follow Officer Brigg’s trail” objective. Head to the western building past the barbed wire gate where you’ll need to defeat enemies and a mounted machine gun. Once they’re taken care of, locate the stairs and head down to the basement. Head through the doorway there to enter the North-West Stronghold.
Work your way to the southeastern corner. You’ll need to breach the door then fight through the enemies. You’ll then need to breach another door where you’ll have to fight some more enemies. Afterwards, interact with the Not All That Glitters book on the desk to complete the objective.
Good Eyes, Murphy Trophy
To get this trophy, you’ll need to head to the northern part of the Steel Mill and then look for the yellow train car on the eastern side. Interact with the control panel on the back of the car to start the engine. You’ll be required to have Engineering Level 3. If you don’t have skill points to invest there is another way to start the train. Head to the northeastern building where the Unwanted Goods objective took place. Head downstairs to where the mounted machine gun was. Take a right where the machine gun was mounted and enter the door at the end of the hallway on the right. There will be a book inside that you can scan. Doing so will give you the knowledge to start the train.
Once you activate the train, it will shoot down the track, busting through a closed door. Head through the doors and follow the track all the way to where the train stopped. Climb up the ladder on the side of the train to reach the top then walk across the makeshift bridge to enter a room. Open the chest inside to pop the Good Eyes, Murphy Trophy!
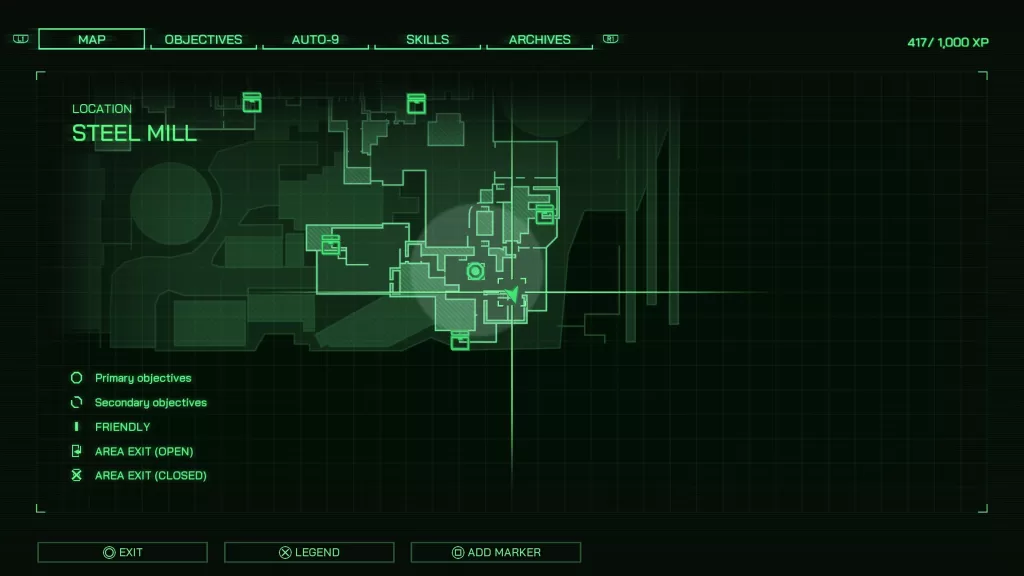
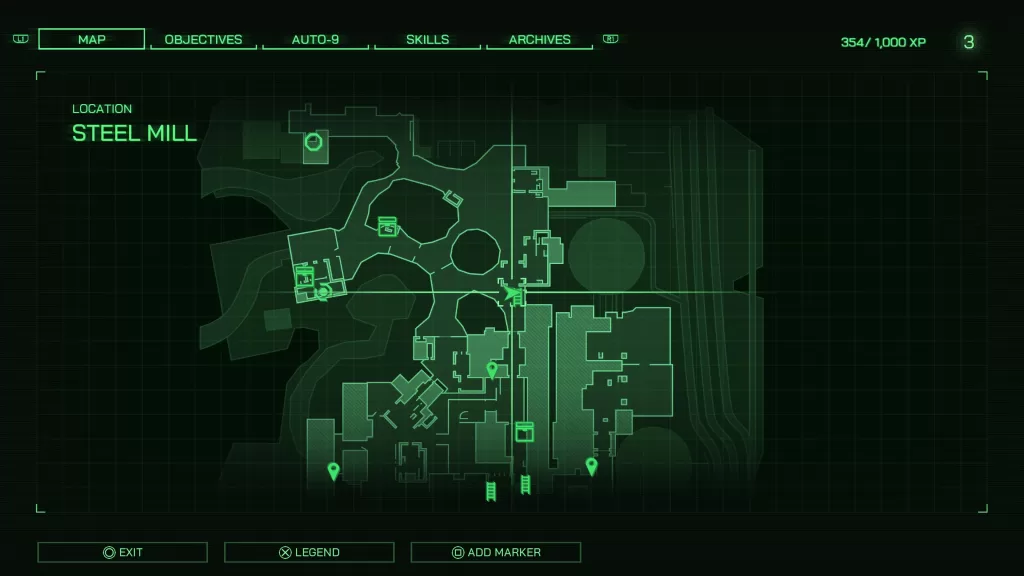
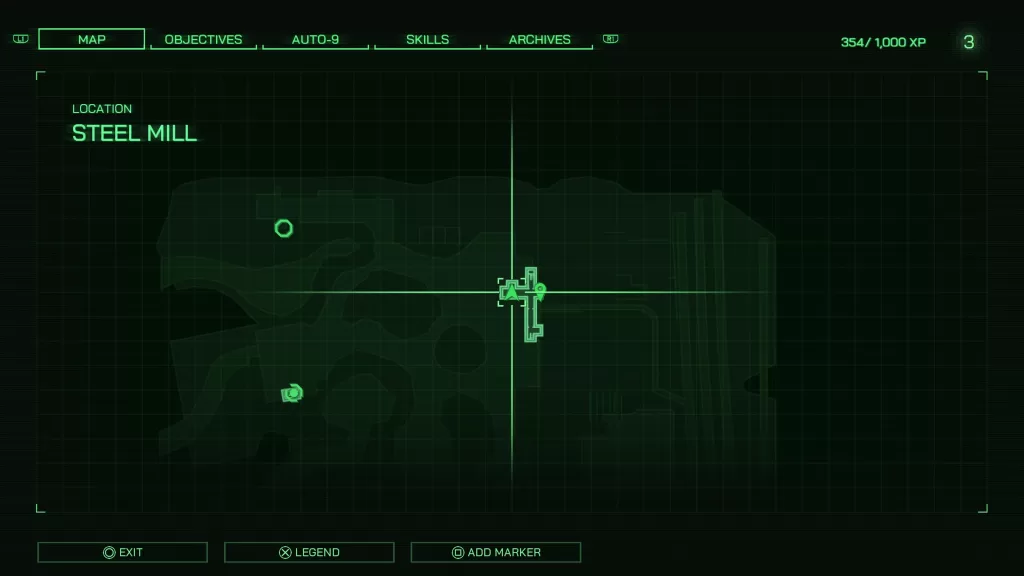
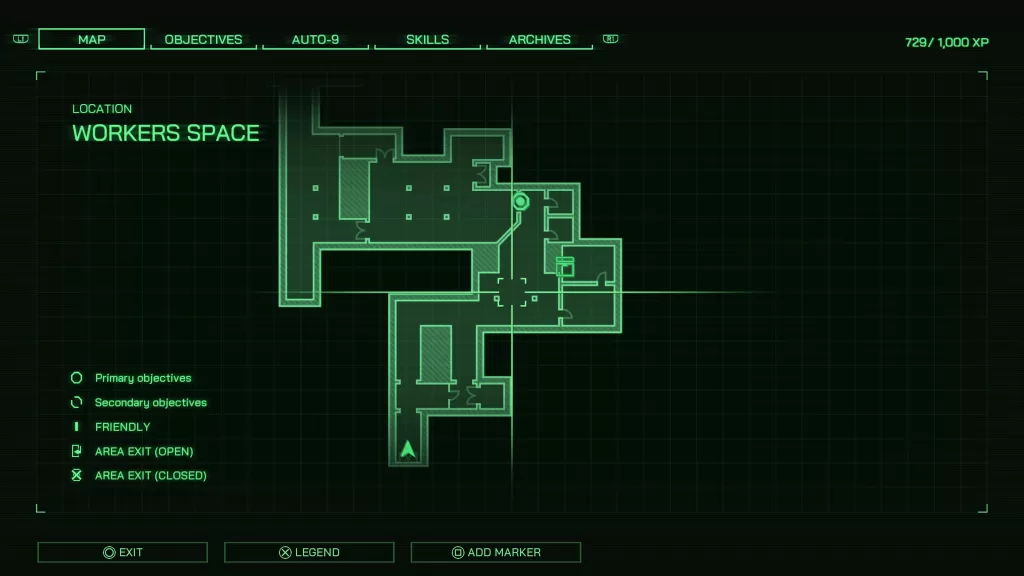
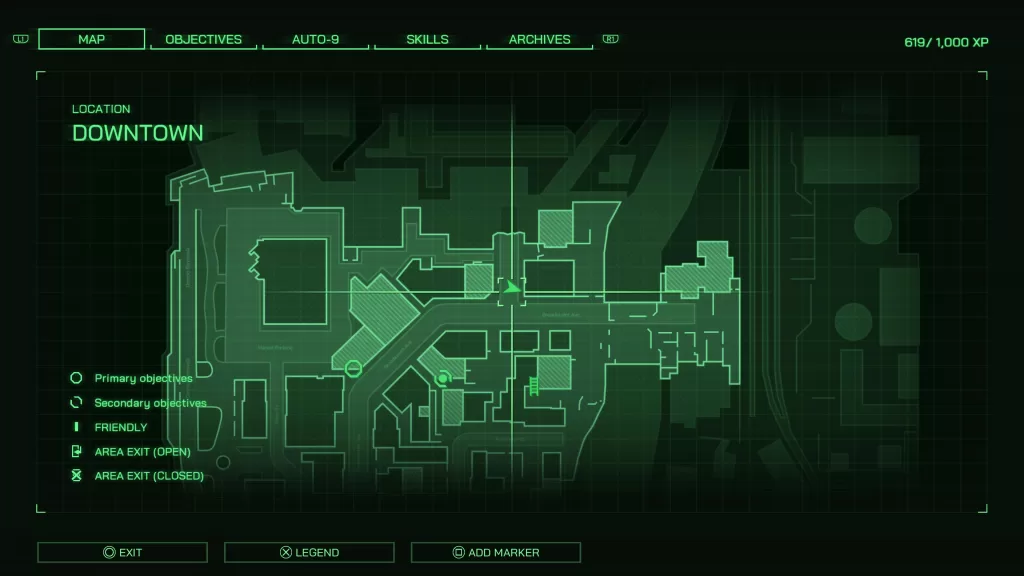
Investigations – All stolen OCP Chests Found
To get the XP for this objective, you’ll need to collect all of the OCP chests scattered around the Mil. Below is a series of 7 images for each area of the Mill where you can find the OCP chests marked by the chest icon on the map.
Police Work – The challenge against ED-209 won
Towards the end of the level after the DPD shows up. You’ll need to speak with one of the officers to deal with the remainder of the Street Vultures accompanied by an ED-209. In order to get this objective, you’ll need to take out more vultures than the ED-209.
Welcome to our Search for Soot RoboCop guide where we’ll go over everything you’ll need to do to get a RoboCop evaluation score of A for the Search for Soot objective in Robocop Rogue City.
Search for Soot RoboCop Evaluation Report
The list below contains everything you’ll need to do during the Search for Soot RoboCop objective to receive enough XP for a RoboCop Evaluation Report rank of A.
Primary Objectives
All main objectives completed – 1000 XP
Secondary Objectives
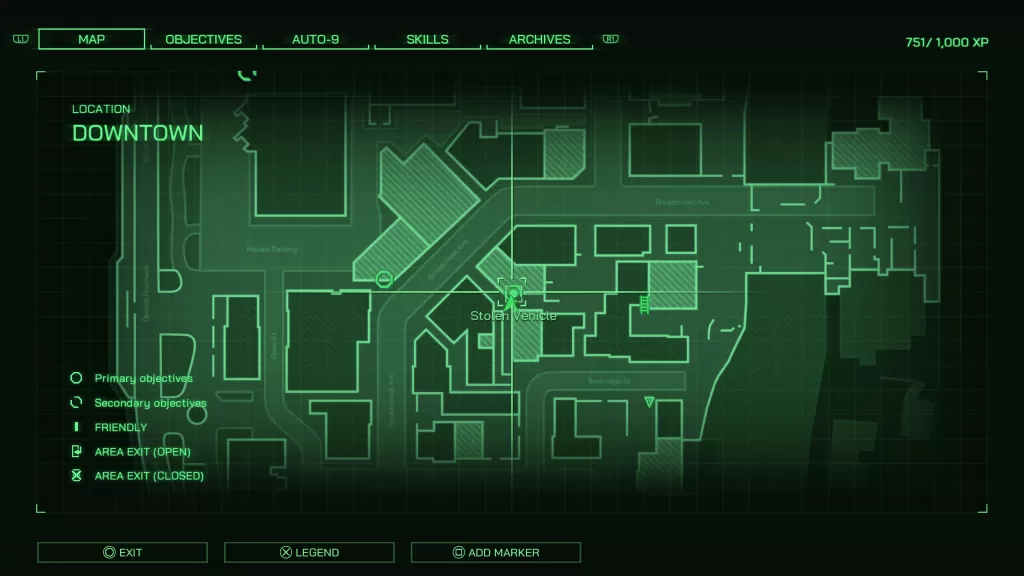
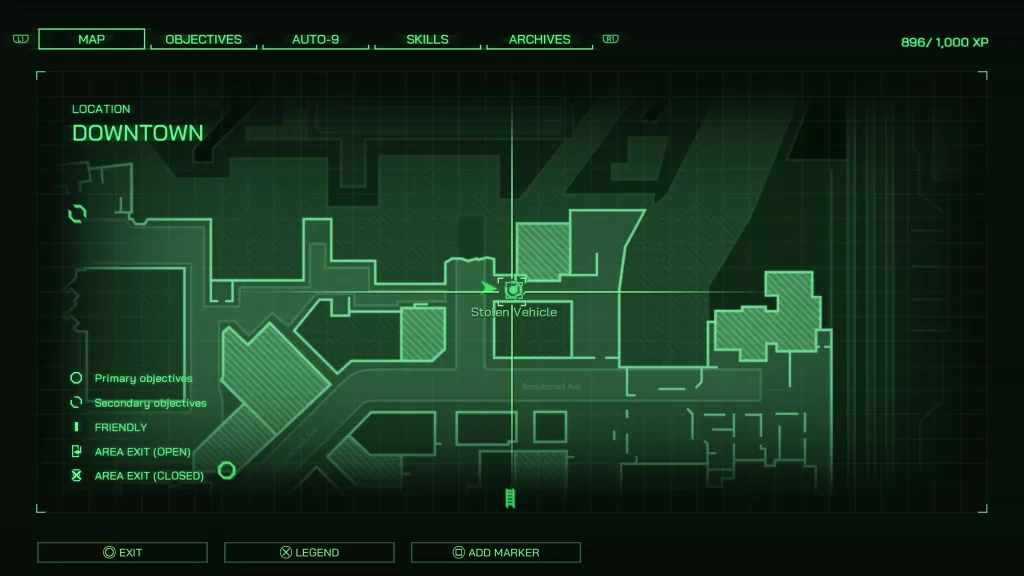
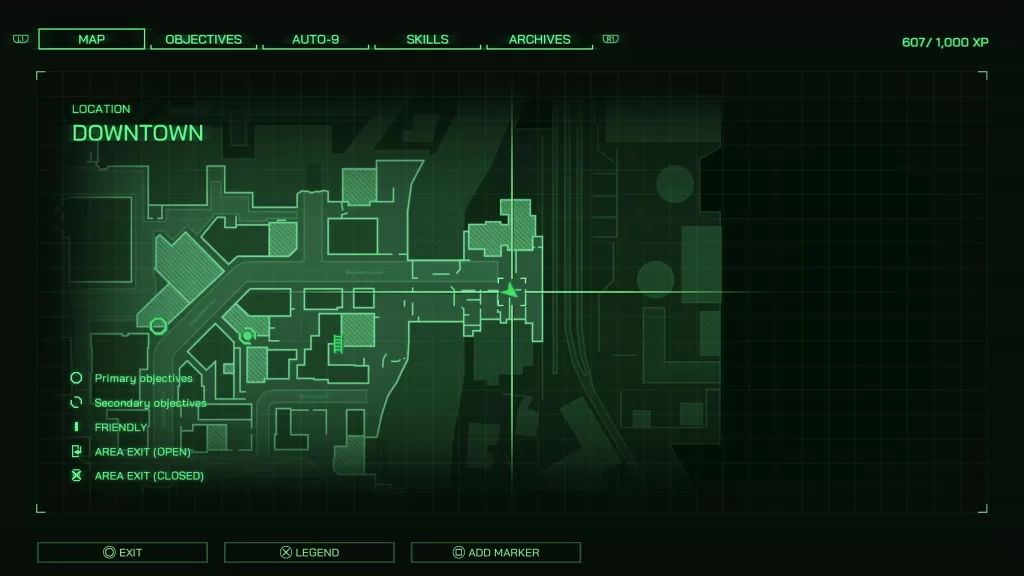
Stolen Vehicle – 250 XP
The Discount Dealer – 250 XP
Who Killed Casey Carmel? – 250 XP
Time to Repent – 250 XP
Investigations
Warning Note for Maurice Found – 100 XP
Arcade Owner Connections Discovered – 100 XP
Police Work
Graffiti Artist Busted – 100 XP
The Grocery Store Incident Resolved – 100 XP
All Violations Found – 100 XP
Pieces of Crime Evidence Collected – 500 XP
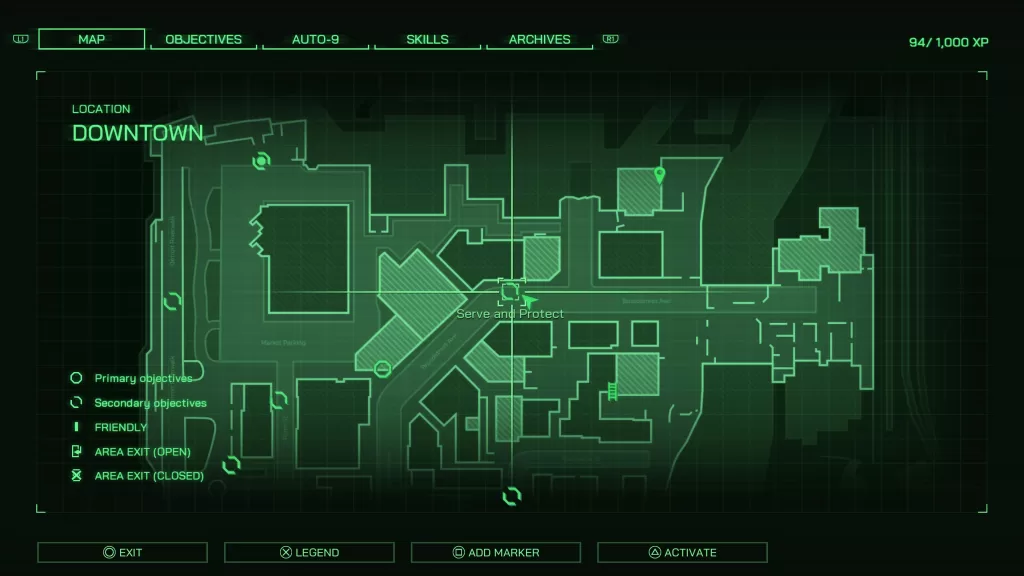
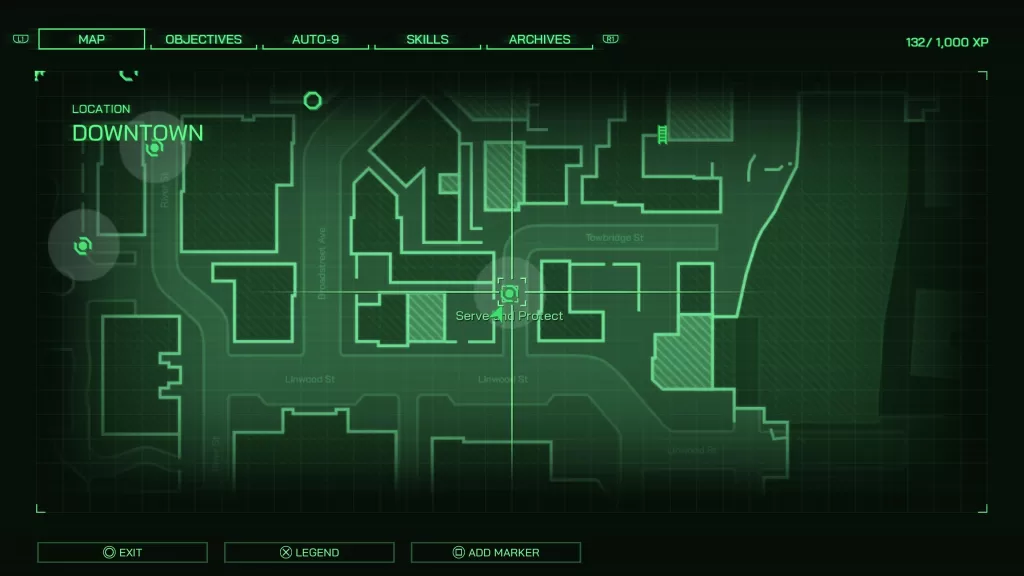
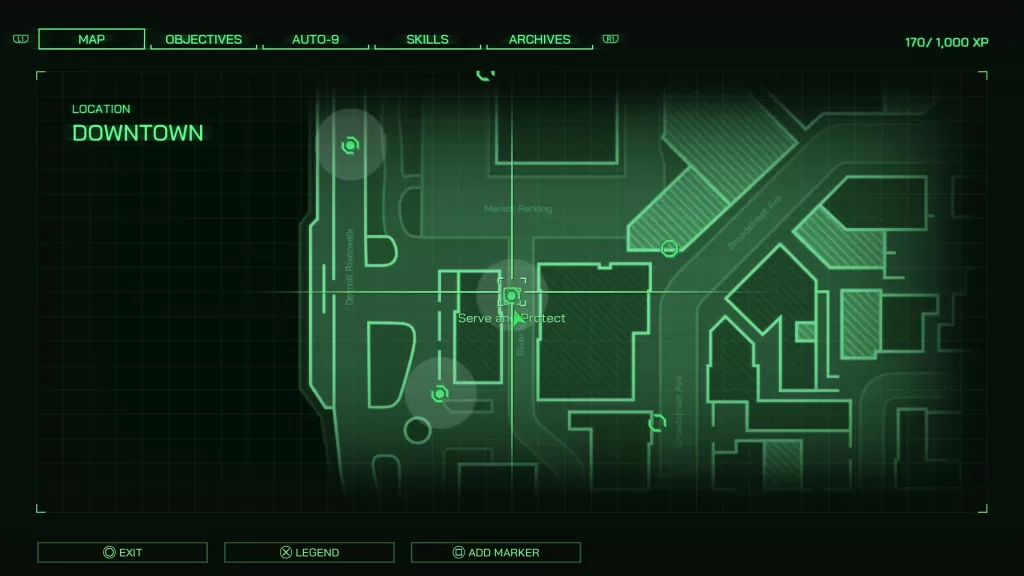
Serve and Protect
Violation: Drinking in Public
Violation: Destruction of Public Property
Violation: Parking Meter Expired
Violation: Obstruction of the Fire Hydrant
Violation: Hazardous Oil Spillage
Violation: Civilian Harassment
Violation: Unauthorized Garbage Disposal
Trophy
No Stone Unturned
Before “Ask About Soot’s Whereabouts” Main Objective
Police Work – Crime Evidence
While wandering around Downtown Detroit, you’ll need to watch for crime evidence to collect. Your goal is to reach 1000 points of evidence by the end of the Search for Soot RoboCop objective. These will be in the form of Fake ID Cards, Nuke, Stolen Wallets, Fake Money, Incremedating Documents/Pictures and Stolen Handbags. You can find them pretty much anywhere so be sure to keep an eye out for them.
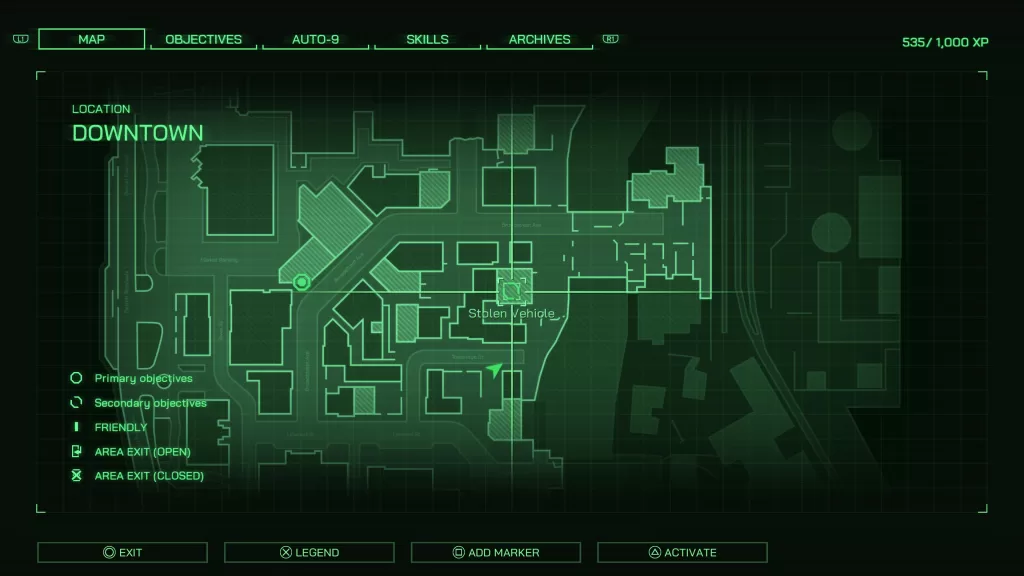
Stolen Vehicle
You’ll get this objective when you are near Ben’s Auto Repair. Sgt Reed will radio Robo and tell him about a stolen car that is a top priority. Head into the garage and speak with Ben near the car lift. Ask him about the car then choose any option you want. If you have Psychology leveled up 6 points, you’ll have a special option where Ben will lead Robo to a locker that he can scan. If not, you’ll need to scan one of the below items:
Tax Records – table near back left door (requires Deduction 2
Batteries – wooden table in back (requires Engineering 2)
He Did It Again Note – on the floor in the upstairs office near the trash can
Return to Ben and speak with him then use the evidence you collected. He’ll then bring you to a locker. Scan it to trigger a cutscene where Ben will give you some info about Scott.
You’ll now have an objective leading you to a garage in the alley between Broadstreet Ave and Towbridge St. Head in then enter the garage. Read the crumpled note on the nearby toolbox. After that, head to the back room to find Scott. Speak with him then deal with the intruders that break in. After they have all been neutralized, Scott will tell you where you can find their leader, Rex.
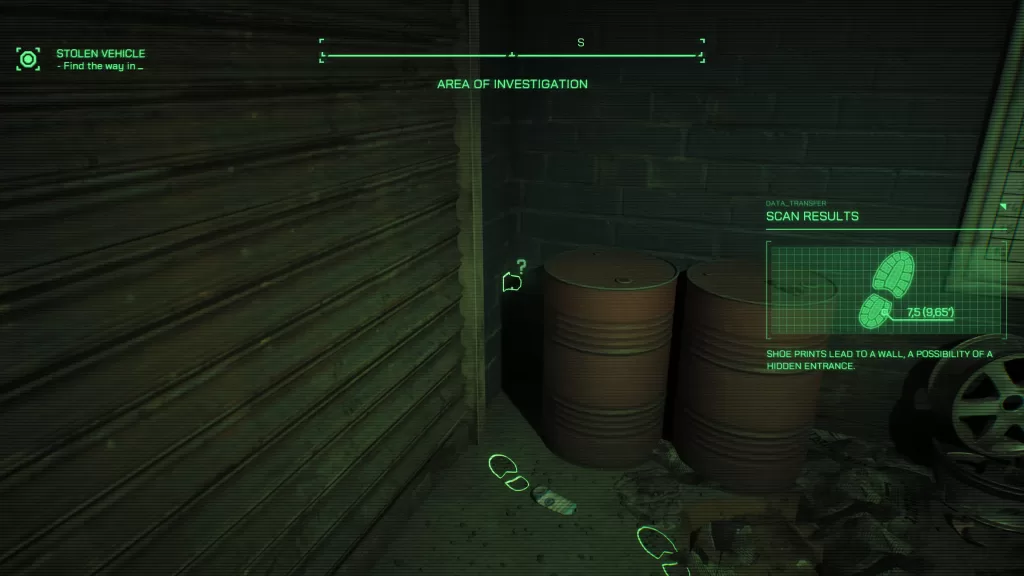
Follow the objective to reach the chop shop in the northern part of Bradstreet Ave. Head through the gate then swing a left to find the garage door. Interact with it to head inside. Scan the footprints on the ground then locate some red barrels near the garage door and use your scanner to find a secret button. Press the button to open a secret door with a ton of goons on the other side.
If you go straight ahead and enter the room on the left, you’ll find an OCP Training Disk that will reward you will 1 skill point. After defeating the enemies, interact with the garage door at the back of the room. This will open up the back part of the garage with more enemies for you to neutralize.
After you take care of all the enemies, head under the stairs to find a COP Container you can loot. Also in the room at the back of the garage, you’ll find a locker near the southeastern doorway with a post-it note you can scan if you have Deduction level 2 for a safe code. Go up to the upper leaven and enter the room on the south side to find a boarded-up all you can scan if your Deduction is level 2. This will give you a breech point with lots of crime evidence on the other side.
Now head to the room on the east side of the upper level. If you were able to get the safe combination from the post-it note, you can open the safe for some crime evidence. Continue on to the other side of the room and use to the left of the recharge station to enter the front room of the garage. Hit the button there to open the paint booth. Exit the chop shop heading back to the street where Scott will show up. He’ll ask Robo if he can return the car and apologize. You can choose to let him or arrest him. This will then complete the objective.
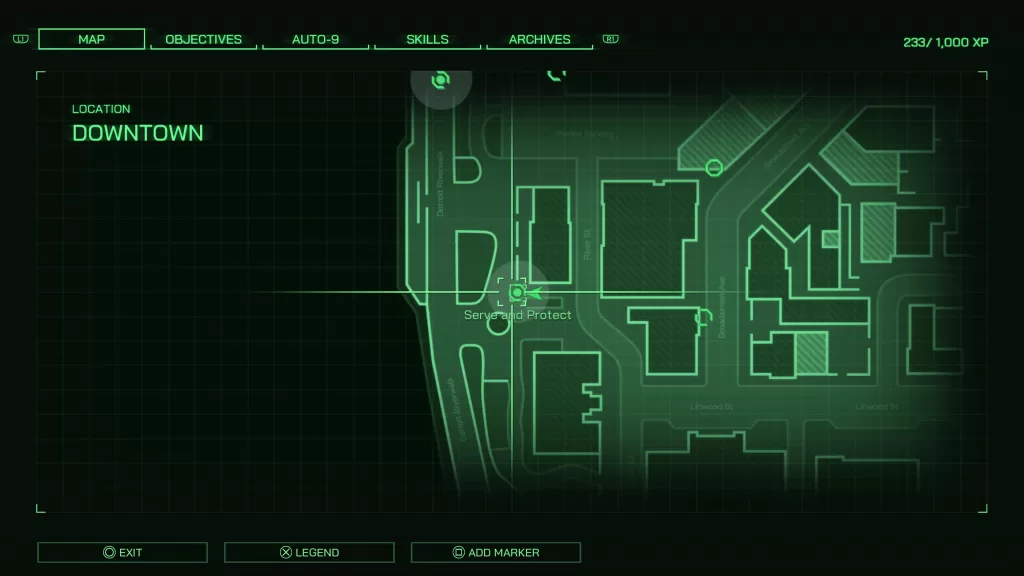
Serve and Protect – Violation: Drinking in Public
This one can be found in the northeastern part of the map. You’ll find a guy there sitting on a sofa near a burn pit. Scan the bottle of wine on the ground next to the sofa then decide if you want to give the man a ticket or a warning.
Graffiti Artist Busted
Head to the northern part of the map along Broadstreet Ave to find a guy spraying graffiti on the side of a building. Approach him to trigger a cutscene where he will run off. Chase after him, scanning his footsteps when they appear, Follow them to a dumpster in the nearby all then approach and interact with it. You’ll then have the choice to either issue a ticket or give him a warning. If your psychology is level 6, you’ll have an additional option to give him community service.
Serve and Protect – Violation: Parking Meter Expired
Walk along Broadstreet Ave until you reach the Super Star Theatre. Scan the parking meter next to the vehicle there to learn that it’s expired. Head over to the windshield and interact with the prompt to issue a ticket.
Violation: Obstruction of the Fire Hydrant
Look for a car on the road between Towbridge St and Linwood St parked in front of a fire hydrant. Scan the hydrant then interact with the windshield to issue a ticket.
Serve and Protect – Violation: Hazardous Oil Spillage
Follow along River St. where you’ll find a vehicle just before the All Mega Store. Scan the oil leaking out from in front of it then interact with the windshield to issue a ticket.
Serve and Protect – Violation: Civilian Harassment
Head to the alley on the west side of River St. near the center. You’ll find a homeless man with his cart tipped over and a harasser. Scan the cans then approach the pair to trigger a conversation. You’ll then need to decide if Robo is going to issue a ticket or warning to the harasser.
Serve and Protect – Violation: Unauthorized Garbage Disposal
Walk north along the Detroit Riverwalk to find a man throwing trash into the ocean. Scan the garbage next to him then approach him to trigger an event where Robo will need to decide if he’s going to issue a ticket or a warning.
Who Killed Casey Carmel?
You’ll pick up this objective while exploring the northwestern part of the map on the north side of Market Parking. Approach Officer Kurtz at the crime scene to trigger a cutscene. Exhaust all the dialog options then scan the following items:
Body
Head
Mark on arm
Right shoe
Stiletto next to pair of trashcans across from the body
Blood stain near D12 dumpster
Tire tracks near the witness
After you’ve scanned all the items, question the witness and exhaust all of his dialog options. Now that the crime scene has been fully investigated, head to the Judgment Parking Lot in the southern part of Downtown.
Approach the guard of the filming set to trigger an event where Robo will be granted access to look around. Speak with the Set Manager then scan the below items:
Sunblock on the table next to the red car
Tire tracks near the gate next to the red car
Whiteboard across from the green screen
Computer to the right of the green screen – Read all the messages
After investigating, speak with Jenkins and use one of the clues to get him to talk. He’ll send you back to the Set Manager. Speak with her and exhaust all the dialog options then interact with the monitor behind the set chairs to play the footage. Once you’re done with the footage, speak with Jenkins again and he’ll point you to a nearby gas station.
Head east from the parking lot to the gas station on the east side of Linwood St. At the Hell gas station, scan the handprints on the door then interact with it to breach the building. Make your way into the private room and speak with the Understudy there. Exhaust his dialog options then you’ll be free to investigate the area. Scan the following:
Private Room
Tracks behind the white vehicle
Back Room
Bed
Blood stain
Sunglasses
Hammer
Graffiti on the wall to find a camera lens
Private Room
Blue Shelf in front of the white vehicle
Hidden Bathroom
Camera
After watching the footage, there will be a cutscene with the Understudy. When it ends, make your way back to the set at the Judgment Parking Lot to trigger a cutscene. Afterwards, the objective will complete!
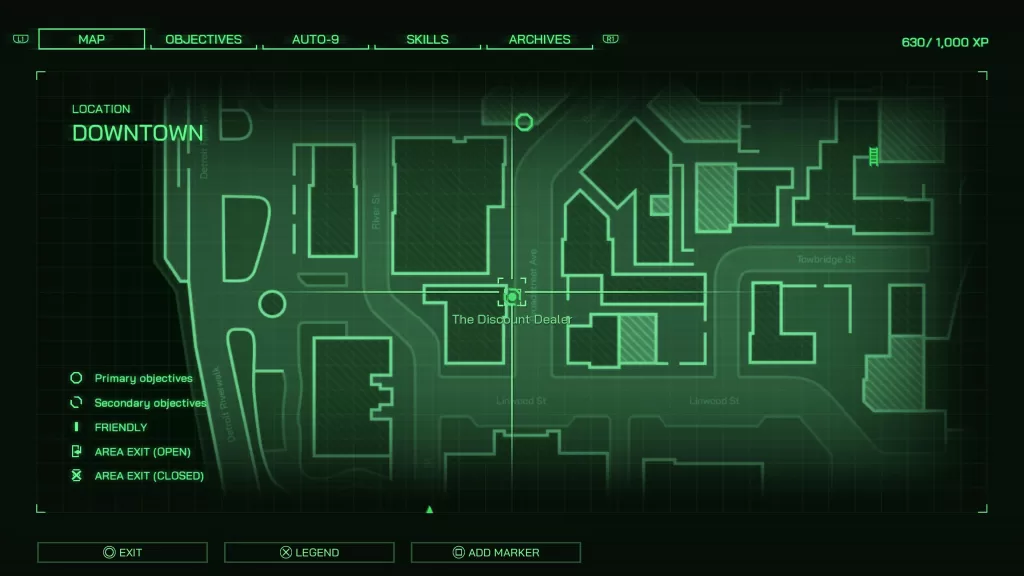
The Discount Dealer
Wonder around the southern part of Broadstreet Avenue to pick up this objective. Once there, speak with Officer Kowalsky near his squad car. During the conversation, make sure to select the first option. You’ll then need to find a pay phone in the vicinity of Market Parking.
Next, head to the phone booth next to the Super Star Theater on Broadstreet Avenue to call the Drug Dealer. During the conversation, pick any of the options. After the cutscene, head down the alley to the left of the phone booth. At the end of the building, turn left and enter the building via the door.
Once inside the building, head up the stairs then head down the hallway. Take the stairs at the end of the hallway up. Again, follow the hallway and enter the door on the left with the blue light. You’ll need to scan the following items:
Living Room
Scale on the table
Shoe prints on the ground next to the circular table
Damaged phone in front of the TV
Bedroom
Friendly Warning on mini fridge
File on bed
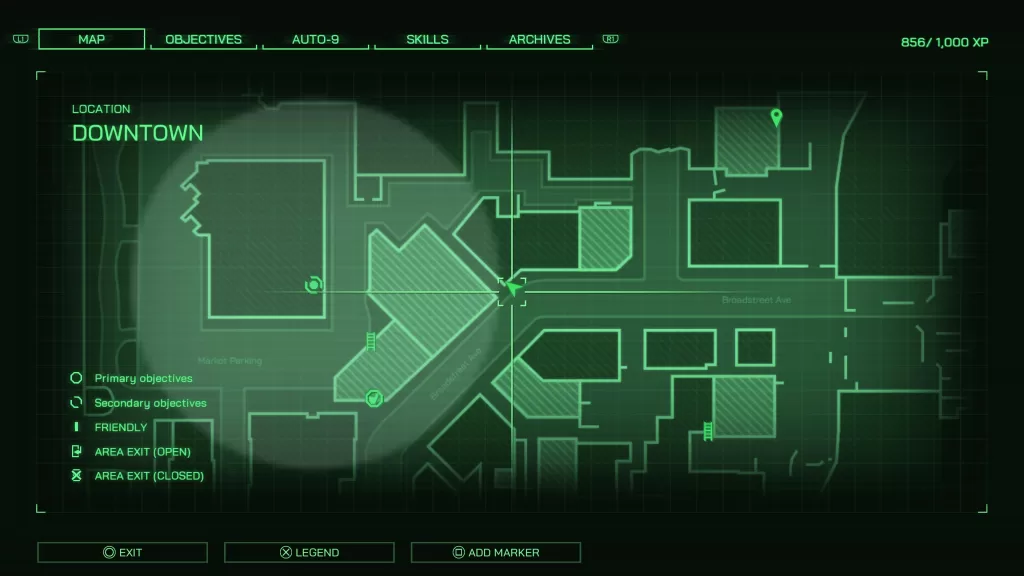
When you’re done investigating, use your scanner to follow the shoe prints leading out of the room. This will take you up to the roof. After reaching the roof, a cutscene will trigger followed by a shoot out. Take out the 3 dealers harassing Maurice to trigger a conversation with him. Make sure to use the “(Clue) Soot is looking for you.” to convince him to come quietly. Afterwards, the objective will complete.
During the “Ask About Soot’s Whereabouts” Main Objective
Arcade Owner Connections Discovered
To find this piece of evidence, head into the storage room to the left of the Skee Ball machine. In the storage closet, turn right and head to the end to spot a pizza box. Scan the letter resting on this box to receive the Business Letter.
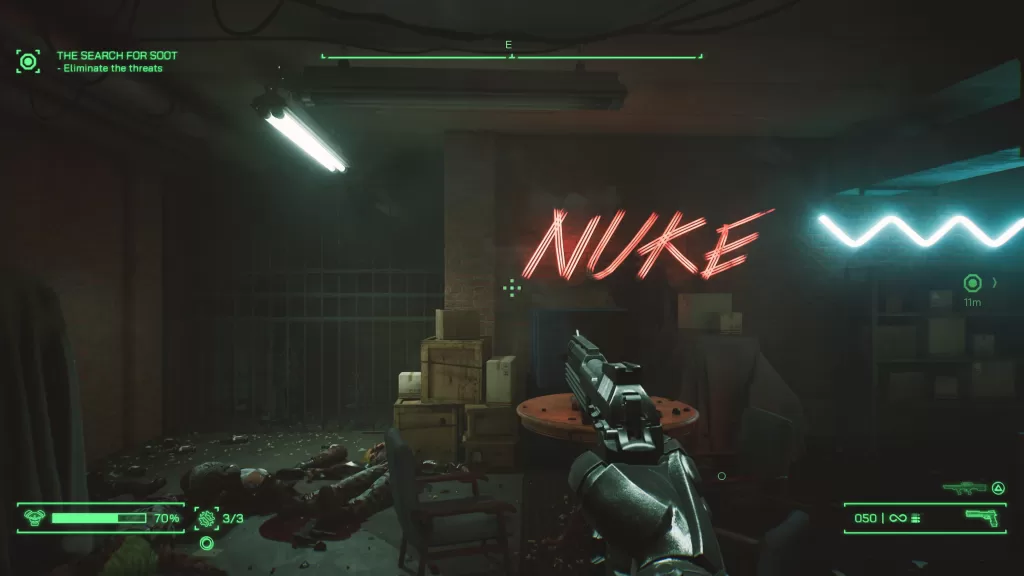
Trophy: No Stone Unturned
This trophy is obtained in the basement of the arcade. To unlock it, head to the room with two fusball tables in the center and a NUKE neon sign on the back wall.
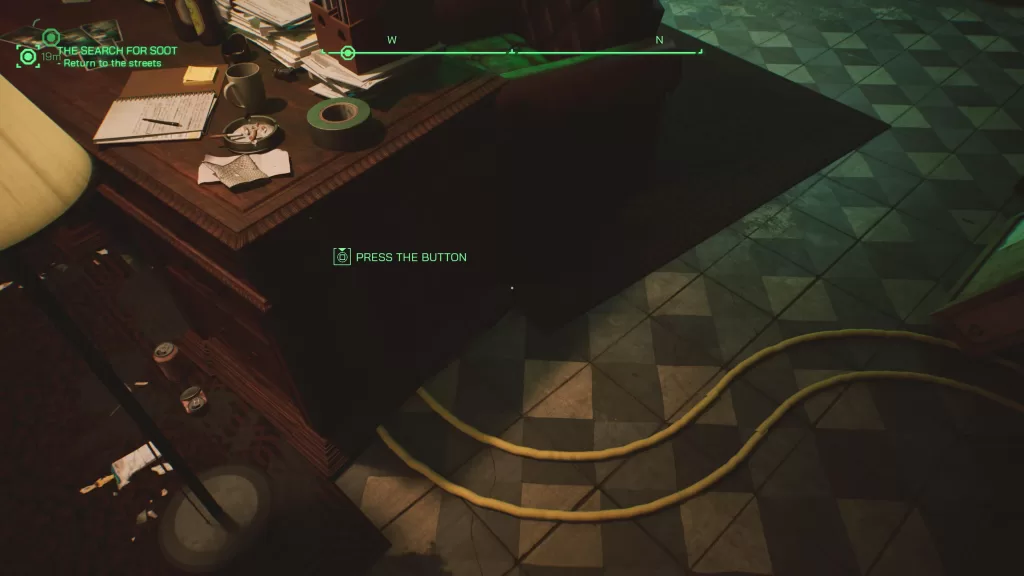
To the left of the sign, there will be a gate. The secret area is behind the gate. In order to open it, head into the manager’s office and scan the left side of his desk where you’ll find a hidden button.
Press the button then head to where the gate was. Loot the items inside including the OCP Training Disk.
During the “Locate the Ghost House” Sub Objective
The Grocery Store Incident Resolved
Head to Ronny’s Grocery on Linwood St. to find the store clerk being harassed by some gang bangers. Speak with the store clerk to trigger a cutscene. Pick one of the options to get them to leave (the first option is obviously the best option).
During the “Drive to the Old Slaughterhouse” Objective
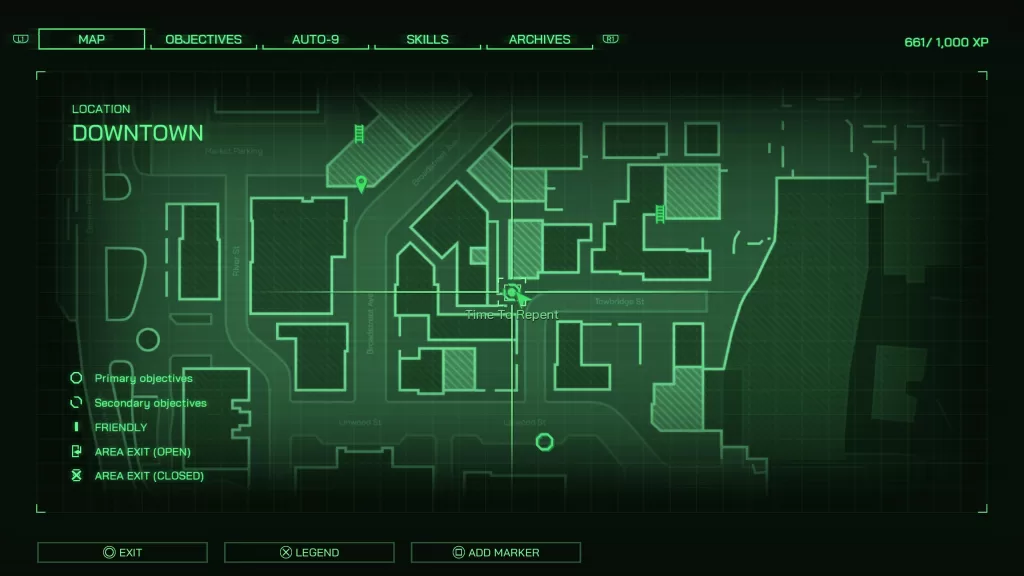
Time to Repent
You’ll get this secondary objective after completing the Ghost House during the primary objective. If you didn’t agree to go with Pickles, then you’ll need to head to Officer Briggs’ house on Towbridge St. Enter the building.
If you head down into the basement and follow the hallway to the end, there will be a door with a doormat in front of it. If you scan the graffiti on the doormat, you’ll be granted a search warrant which will allow you breach the door to loot the contents inside. This may require having a Deduction Level of 2.
Make your way up to the third floor and knock on the door of Apartment 21. This will trigger a cutscene where you’ll speak with Officer Briggs’ wife. Exhaust all of the dialog options to end the conversation. Before exiting the apartment, scan the picture next to the TV and a recommendation letter on the kitchen table. Exit the building and head over to the basketball court southeast of the apartment.
When you reach the basketball court, speak with the two guys on the bleachers who will give you some more information on Daniel. Follow the white chalk drawings on the ground, going past the gas station, to reach a closed gate. Open the gate and continue forward until you reach a dead end. Scan the oil spillage in the middle of the area. This will reveal multiple sets of footprints. Scan all of the highlighted areas for extra XP. To find Daniel, you’ll need to scan the third white truck on the left side. This will give you a prompt for Robo to make a way to head behind the truck. Follow the path around to reach Daniel, which will trigger a cutscene leading to the completing of the objective.
Welcome to our Isolated Incident RoboCop guide where we’ll go over everything you’ll need to do to get a RoboCop evaluation score of A for the Isolated Incident objective in Robocop Rogue City.
Isolated Incident Secondary Objectives
The list below contains all the secondary objectives you can complete while at the precinct. Please note that these objectives do not count towards the next RoboCop Evaluation Report.
Police Work
Locked and Loaded
Stinky Situation
Too Many Complaints
Isolated Incident RoboCop Misc. Items
The items listed below are miscellaneous documents you can pick up around the precinct for general world info and some exp. They don’t affect the RoboCop Evaluation, but wanted to mention them anyway.
RoboCop’s Room
RoboCop Program – On a fold up table
To Sgt. Reed – On a black case
Main Room
Police Going Private – In the phone booth
Incident Report – On a green chair next to a desk
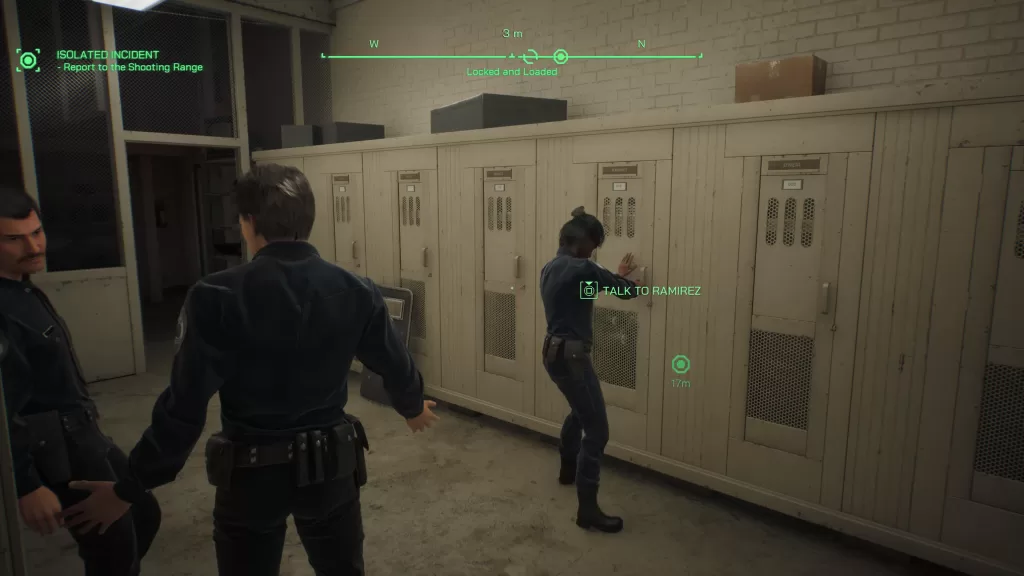
Locked and Loaded
After heading to the holding cell, head to the locker room in the precinct. Locate and speak with Ramirez then interact with her locker to open it for her. This will complete the objective.
Too Many Complaints
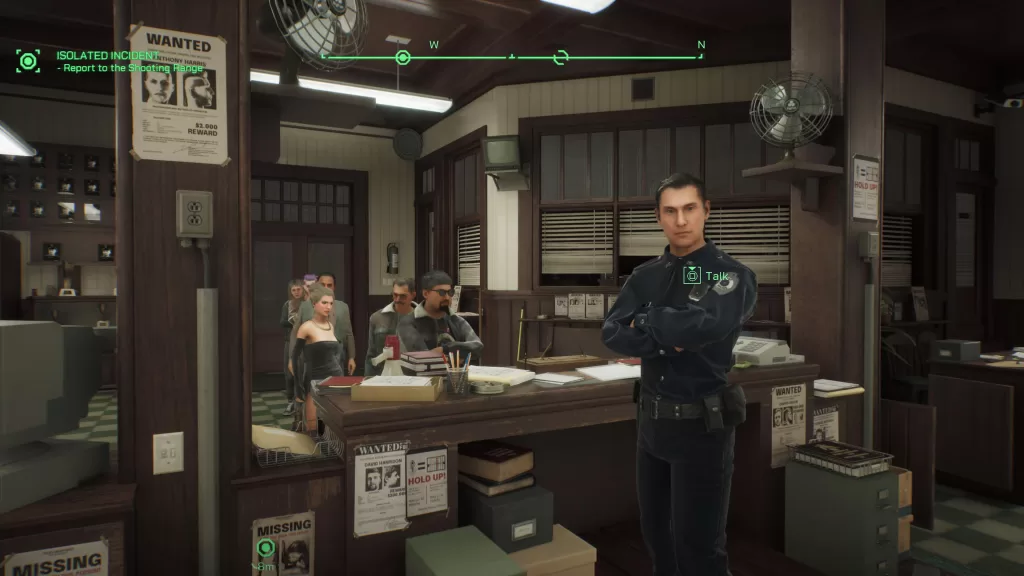
Head to the central area of the precinct and speak with Officer Chessman behind the main desk. He’ll ask Robo to open up another line and assist him with the civilian complaints. After the conversation, interact with the desk to his left to open up the additional line. Feel free to choose whatever options you want. After the last one, the objective will be completed.
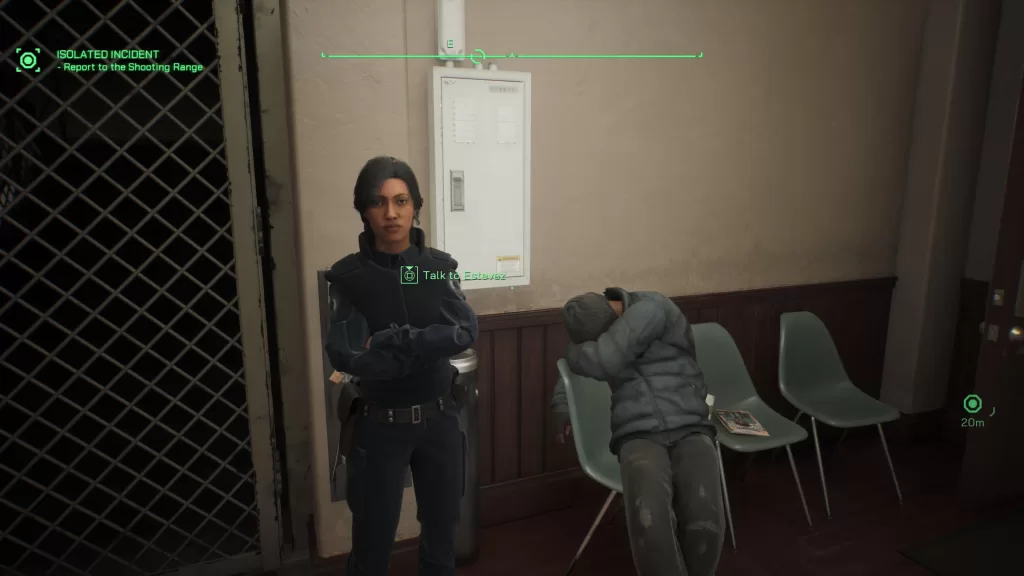
Stinky Situation
Make your way to the hallway with the Briefing Room, Surveillance and Chief Office to find Officer Estevez. Speak with her then pick up the drunk on the chair next to her. Carry the guy downstairs and toss him into the first holding cell to complete the objective.
** After completing the above three objectives, you can leave the precinct. This will complete the Isolated Incidentobjective.**
Welcome to our Breaking News RoboCop guide where we’ll go over everything you’ll need to do to get a RoboCop evaluation score of A for the Breaking News objective in Robocop Rogue City.
Breaking News RoboCop Evaluation Report
The list below contains everything you’ll need to do during the Breaking News RoboCop objective to receive enough XP for a RoboCop Evaluation Report rank of A.
Primary Objectives
All main objectives completed – 1000 XP
Secondary Objectives
None
Investigations
TV Station Secret #1 Found – 500 XP
TV Station Secret #2 Found – 500 XP
Police Work
All Office Hostages Saved – 150 XP
All Studio Hostages Saved – 350 XP
Pieces of Crime Evidence Collected – 500 XP
Police Work – Crime Evidence
As you progress throughout Channel 9 Headquarters, you’ll need to watch for crime evidence to collect. Your goal is to reach 750 points of evidence by the end of the Breaking News RoboCop objective. These will be in the form of Fake ID Cards, Nuke, Stolen Wallets, Fake Money, Incremedating Documents/Pictures and Stolen Handbags. You can find them pretty much anywhere. Be sure to check counters, desks and the ground.
Investigations – TV Station Secret #1
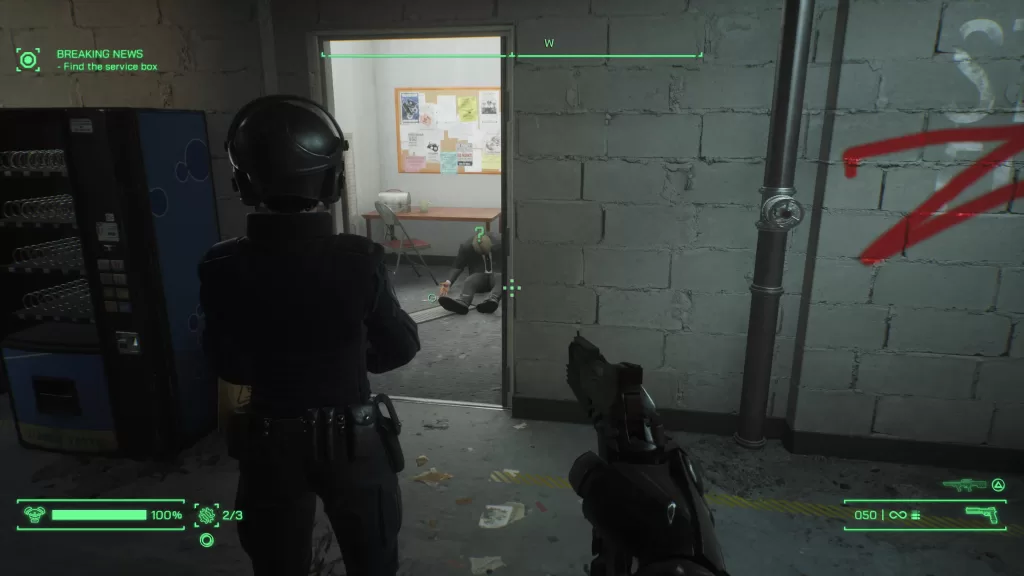
Shortly after meeting up with Lewis and doing your first breach, the pair will arrive in a hallway. Lewis will stop there and look into a side room. Enter that room and scan the guy in the suit lying against the desk.
Investigations – TV Station Secret #2
After getting the Objectis Investigation tutorial, Robo will scan a generator which will trigger a cutscene where he and Lewis are in the elevator. When you get off, you’ll be in a work area filled with enemies and cubicles. As you fight your way through the rows of cubicles, there will be a conference room on the northwestern side of the floor. Head inside and scan the bottles of pills sitting on the counter near a TV.
Police Work – Save the Office Hostages
Shortly after the conference room, you’ll reach the 2nd breath point of the Breaking News RoboCop objective. Interact with the doors to get the Hostage Situation tutorial then do so again to breach. There will be a few enemies in the room along with a single hostage. Take out the enemy standing next to the hostage in the middle of the room first, then the guy to his right followed by the rest on the left side. If you fail to save the hostage, you’ll need to restart from checkpoint to try again. Note that doing this will result in you being loaded back at the elevators meaning you’ll need to fight through the cubicles again and do the Investigations – TV Station Secret #2 above again.
Police Work – Save the Studio Hostages
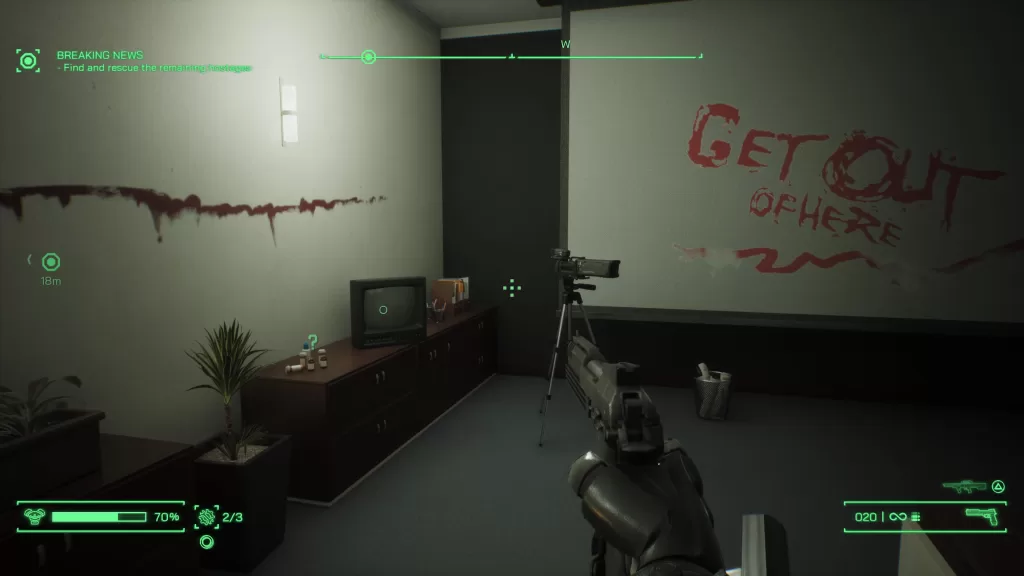
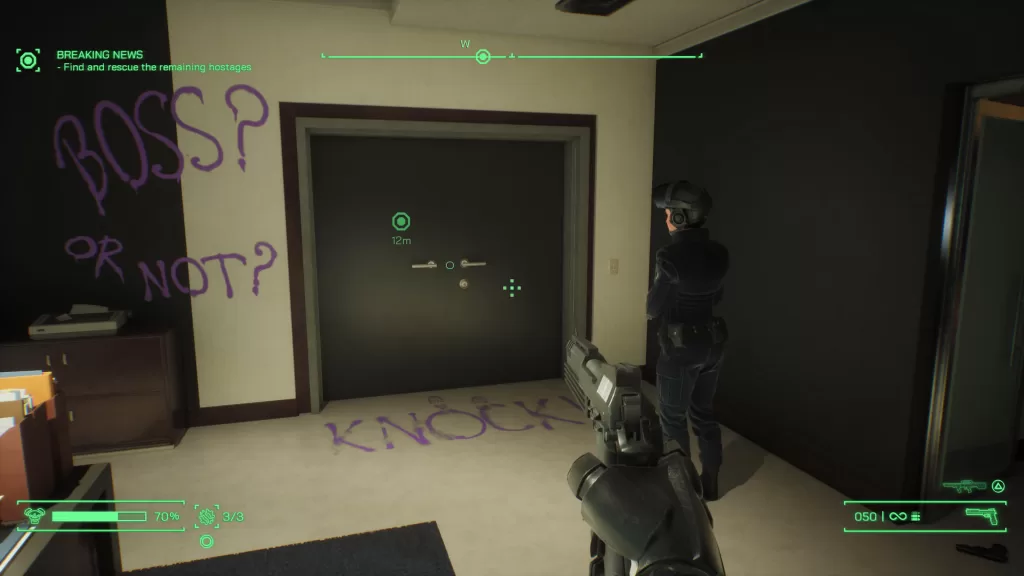
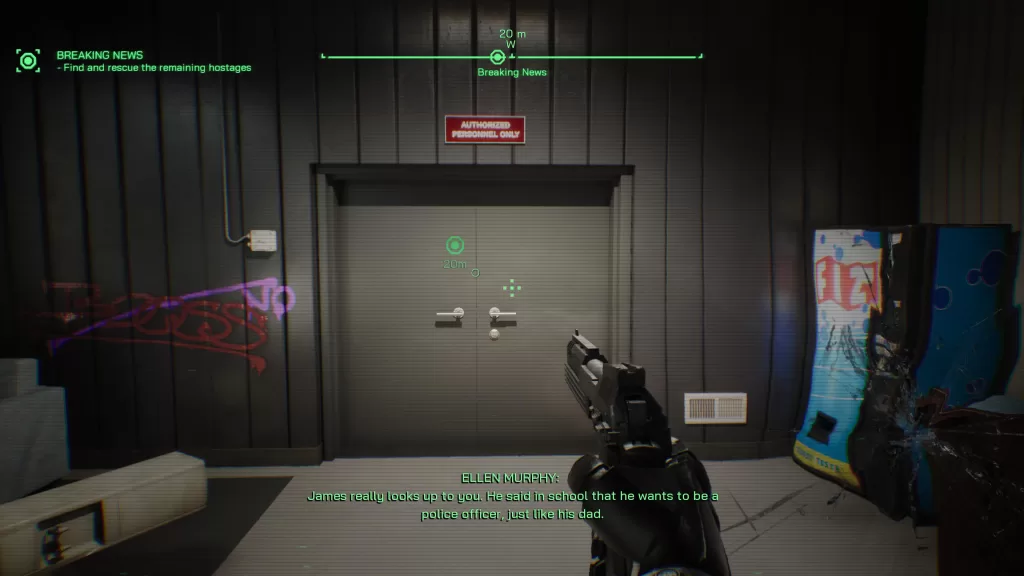
After an explosion on the metal walkway, Robo will fall into a studio set. Follow that path through the set to reach some Authorized Personnel Only doors. Once you breach the doors, you’ll need to move quickly to save all 3 hostages. There will be one guy to the right, three in the middle, one to the left and one in the back with a face mask. The way that worked for me was to target the guy on the right first, then the three in the middle to the left of the hostages. You’ll want to deal with these four as close to the slow-mo effect wearing off as possible. Once it’s up, they will target the hostages. After they are down, take out the guy wearing the mask in the back and finally the guy on the far left. If you fail to save all three hostages, you’ll need to restart from checkpoint. Doing this puts you back on the metal bridge just before the explosion.
Welcome to our Robocop guides and walkthroughs! In these guides we’ll go over everything you’ll need to do to get a RoboCop evaluation score of A on the objectives in RoboCop: Rogue City!
RoboCop Evaluation Guides
**The final RoboCop Evaluation takes place after completing the Wendell’s Confession Objective. The guides after that objective will still cover optional objectives such as secondary objectives and miscellaneous things you can do.**
This site uses cookies. By continuing to use this website, you are giving consent to cookies being used. For more information on cookies, view our Privacy Policy.OkPrivacy Policy