Welcome to NGB and our Stellar Blade guide for the Fish Research request. Here we will cover where to start the request, how to complete it and the rewards you’ll receive for all of your efforts.
How to Start the Fish Research Request
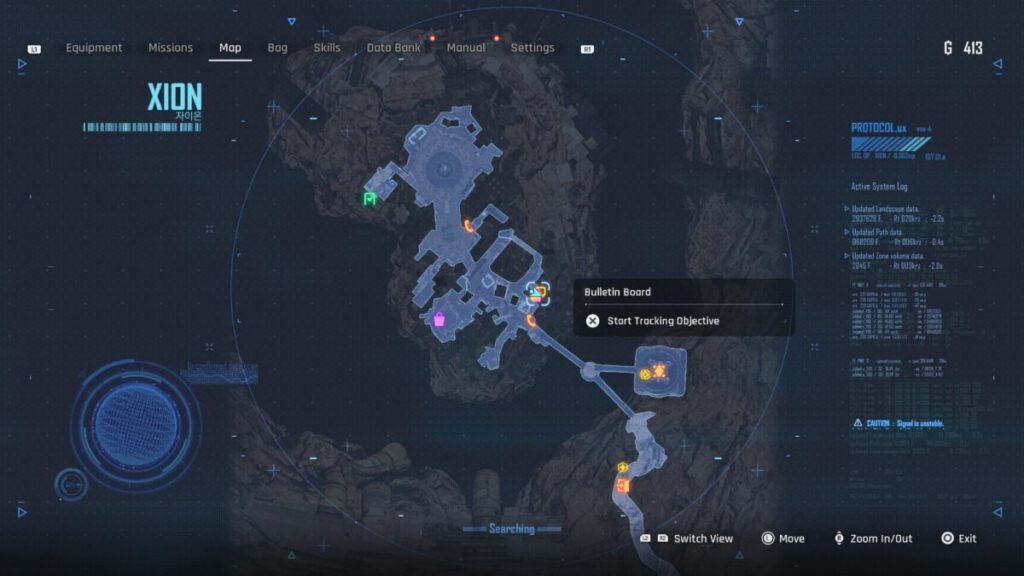
You can accept this request from the bulletin board in Xion. In order for it to show up, you’ll need to complete the Looking Glass mission to receive the fishing rod and complete a couple of the other fishing requests as well.
How to Complete the Fish Research Request
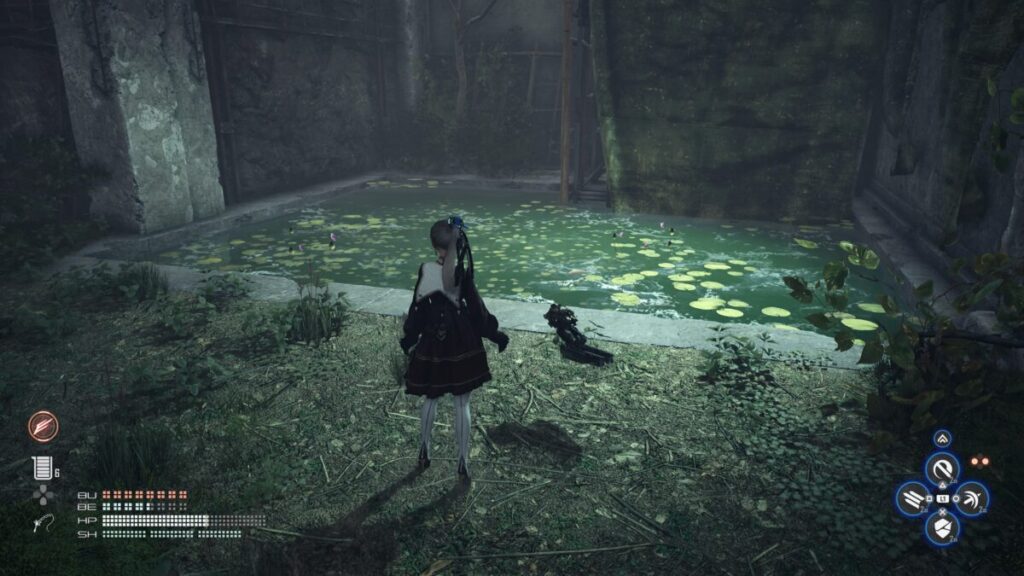
For this request, the requestor will ask EVE to bring them a Halibut and then point her toward the clock tower in Eidos 7. Speak with Adam to travel there then use the telephone booth to travel to the Plaza Entryway. Push forward until you reach the small area under the clock tower.
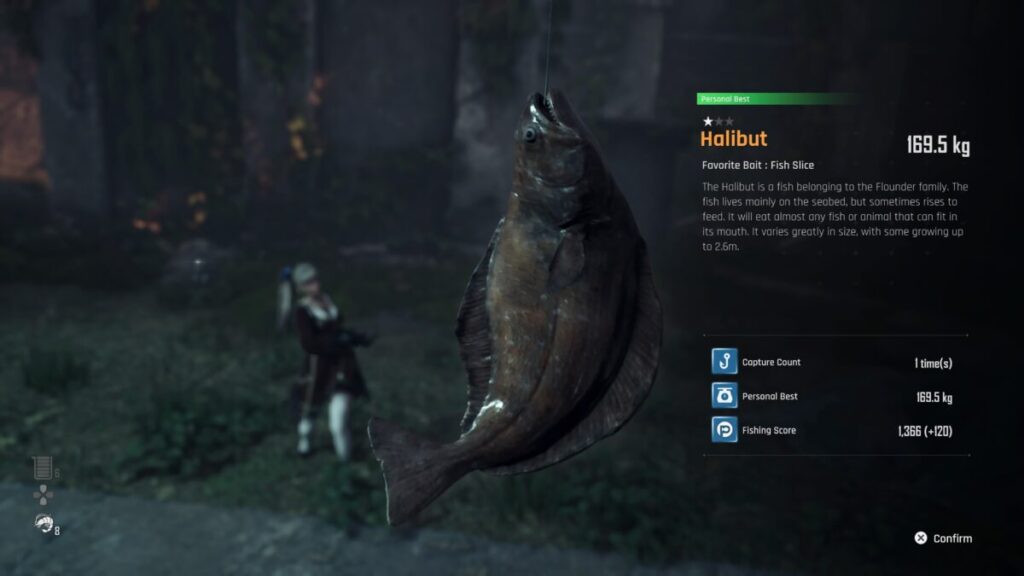
Fish in the pond there to catch a Halibut. They like the Fish Slice bait, so be sure to use one to increase the chance of catching it. You can buy them from Clyde at the Oasis in the Great Desert using the points you earn from fishing. After you have a Halibut in your possession, return to the bulletin board in Xion to complete the request and receive your rewards.
Request Rewards
Once you’ve completed the request/mission you’ll be rewarded with the items in the list below.
4,000 Gold
Stellar Blade Guides and Walkthroughs
For more Stellar Blade guides and walkthroughs, click here!
Welcome to NGB and our Stellar Blade guide for the Recruit Passcode Specialists request. Here we will cover where to start the request, how to complete it and the rewards you’ll receive for all of your effort.
How to Start the Recruit Passcode Specialists Request
This request becomes available during the main mission, Hidden Truth. Head to the bulletin board in Xion and interact with it to accept the request. If it’s not showing up, you may have to complete a couple of the requests to make it appear in the list.
How to Complete the Recruit Passcode Specialists Request
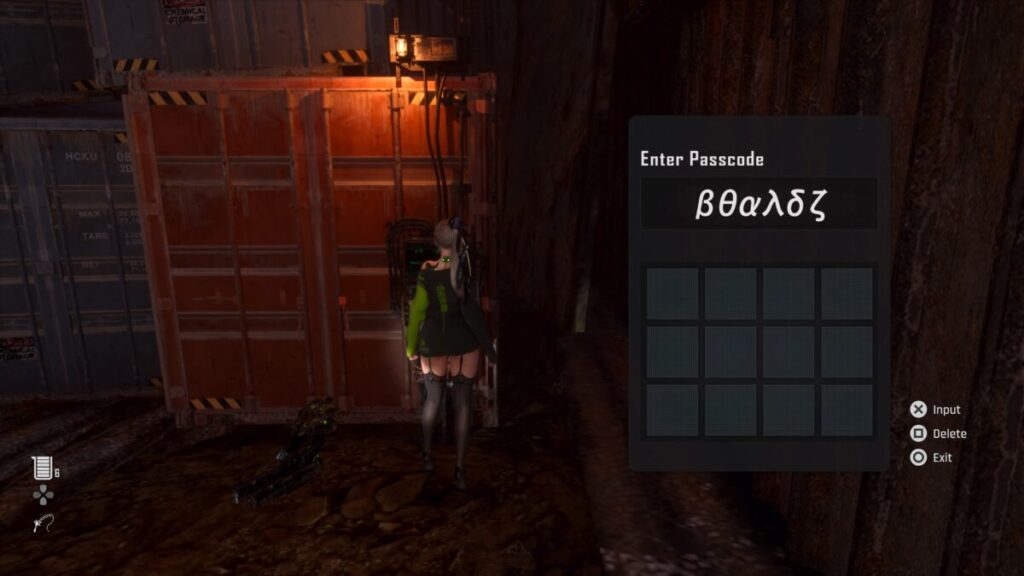
For this request, the requestor is asking for someone to travel to the ship stranded in the middle of the desert and try to unlock a certain storage container there that is sealed with a passcode. In order to unlock the storage container in question, you’ll need to collect the Prayer Documents 1-6. Each of them has a code and when put together, it makes the passcode required to open the container. The subsections below will detail how to obtain each Prayer.
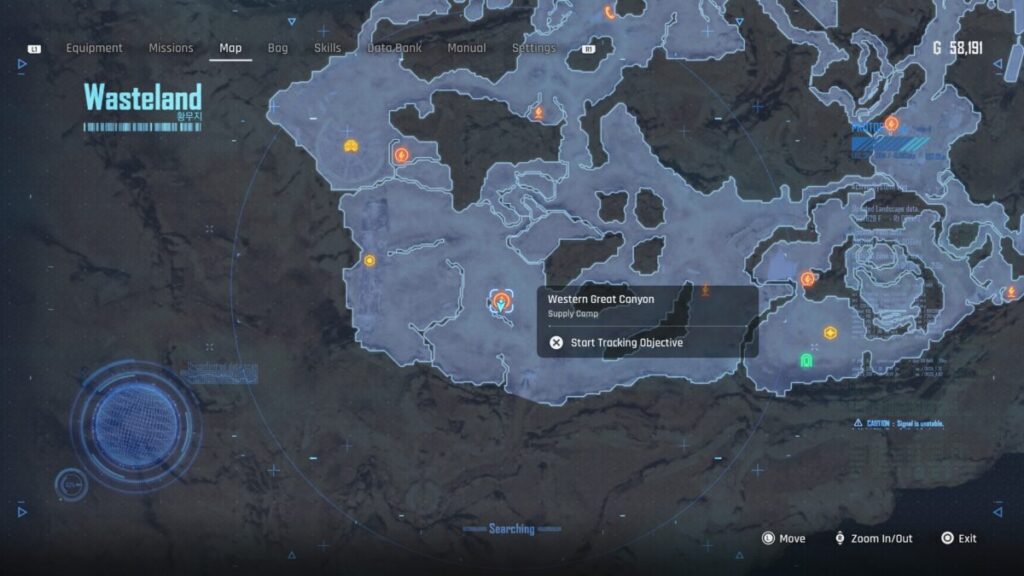
Once you have all six, set out for the Wasteland then head to the Western Great Canyon Supply Camp. From there, go west to reach the ship in question (make sure you’re at the raised section of the ship). Head inside and take a right, dealing with the enemies along the way, to spot a red container. Interact with the input device and enter the passcode to open it then inspect the Altar inside and loot the chest. Return to the bulletin board in Xion to complete the request and receive your gold!
Chapter of Trial 1 (MAtrix 11)
You can find the Chapter of Trial 1 Prayer at the altar in Matrix 11 on the upper level of the living quarters just past the sewers. You’ll come here and interact with the altar upon traveling to Matrix 11 as part of the main story.
Chapter of Trial 2 (Great Desert)
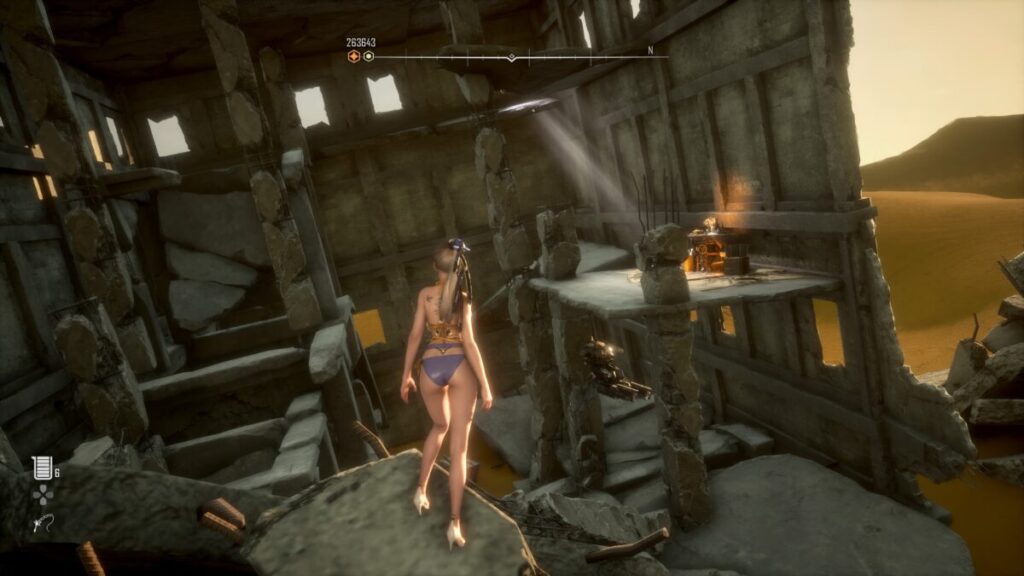
Chapter of Trial 2 can be found in a half-destroyed building on the second floor north of the Buried Ruins Outskirt Supply Camp.
Chapter of Trial 3 (Great Desert)
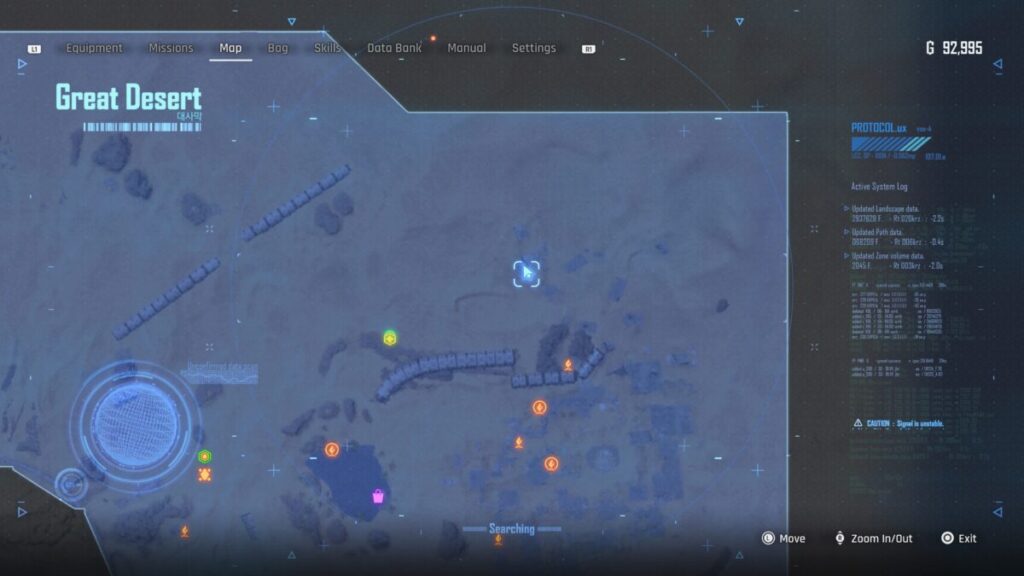
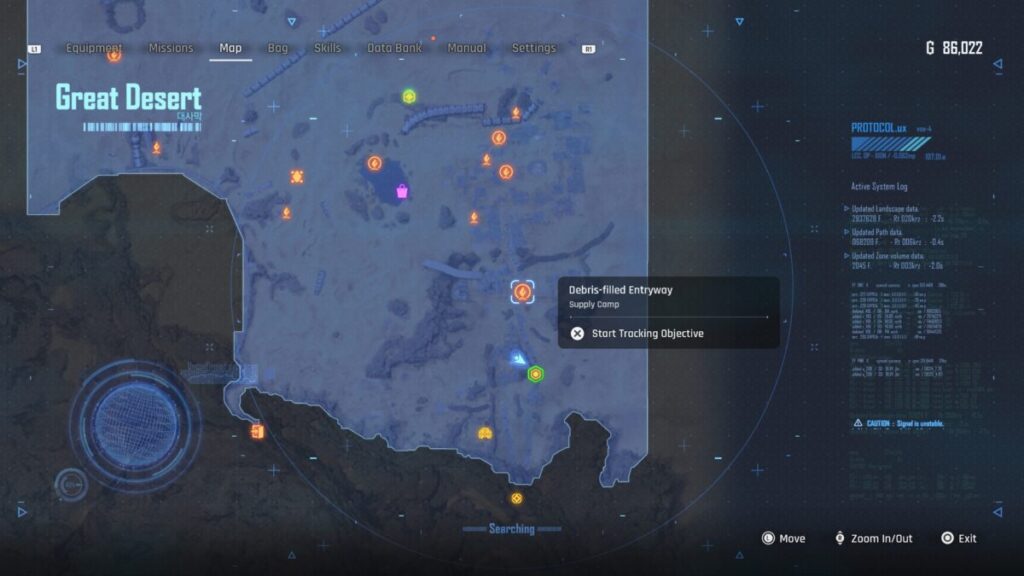
To find Chapter of Trial 3, travel to the Debris-filled Entryway Supply Camp in the eastern part of the area then go south. Toward the end of the collapsed overpass, there will be an area on the right you can head through leading you towards a group of buildings and a gate blocking your way. Take a right just before the gate to enter one of the buildings and the Prayer altar will be in that room.
Chapter of Trial 4 (Great Desert)
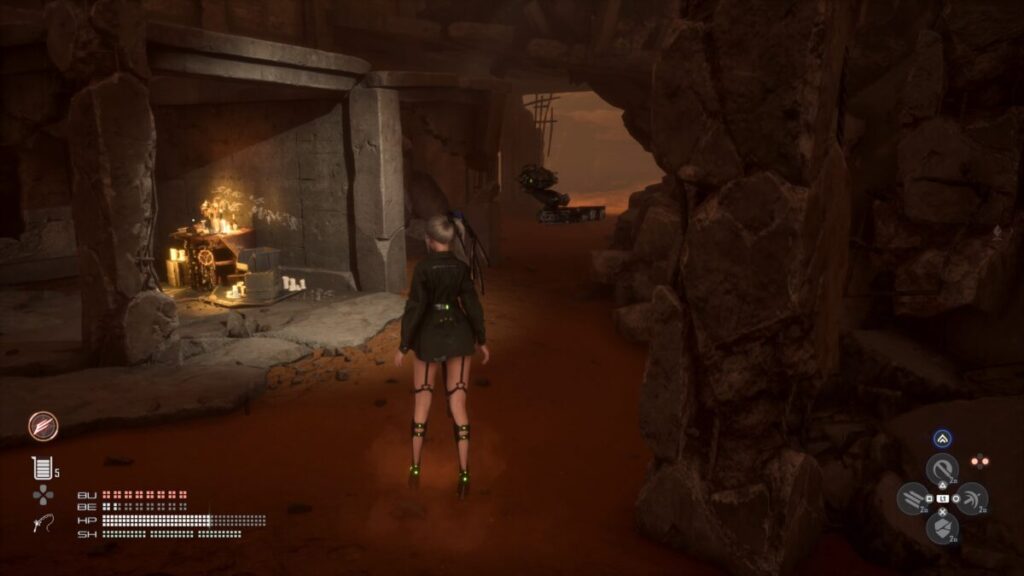
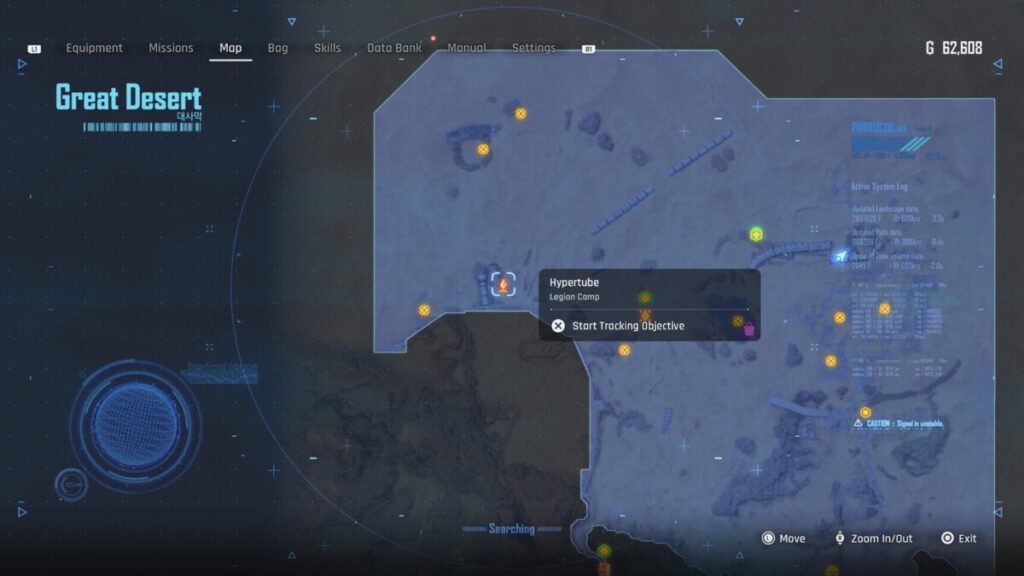
Chapter of Trial 4 can be found at the bottom of the Hybertube (which becomes accessible once starting The King of the Tunnel mission). Once you land in the water at the end of the tube, head to the south side of the pool to find the altar with the Prayer.
Chapter of Trial 5 (Wasteland)
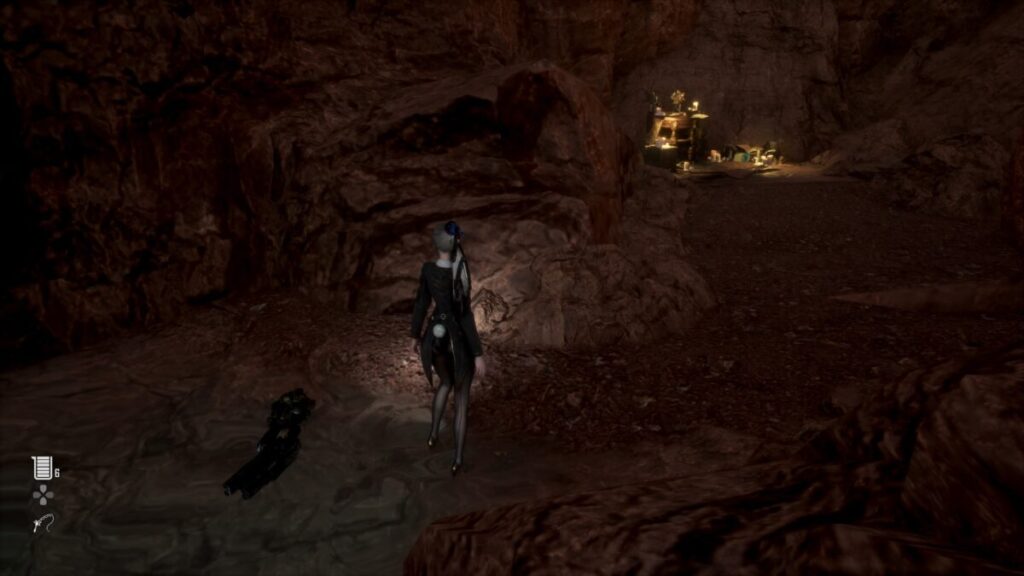
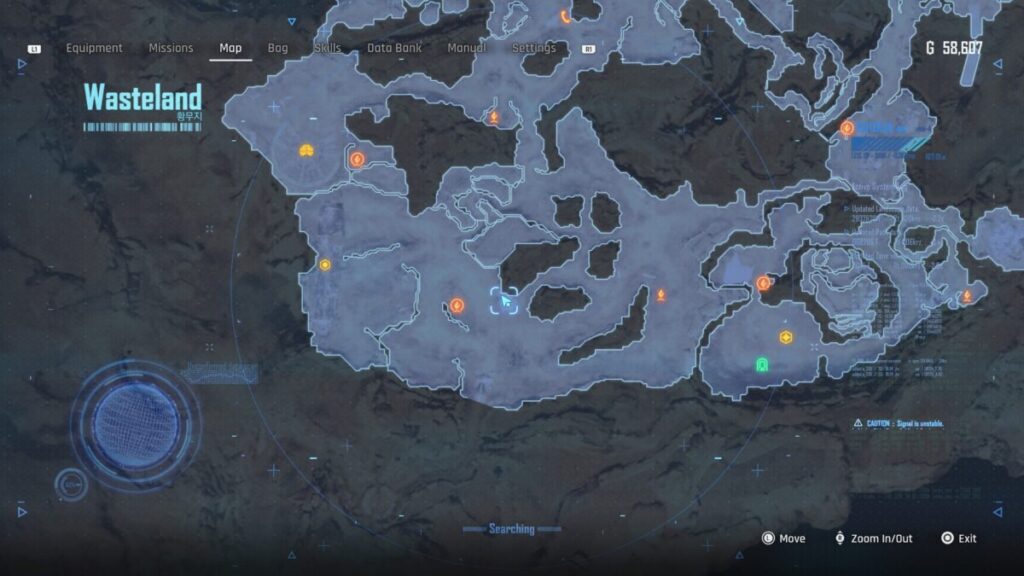
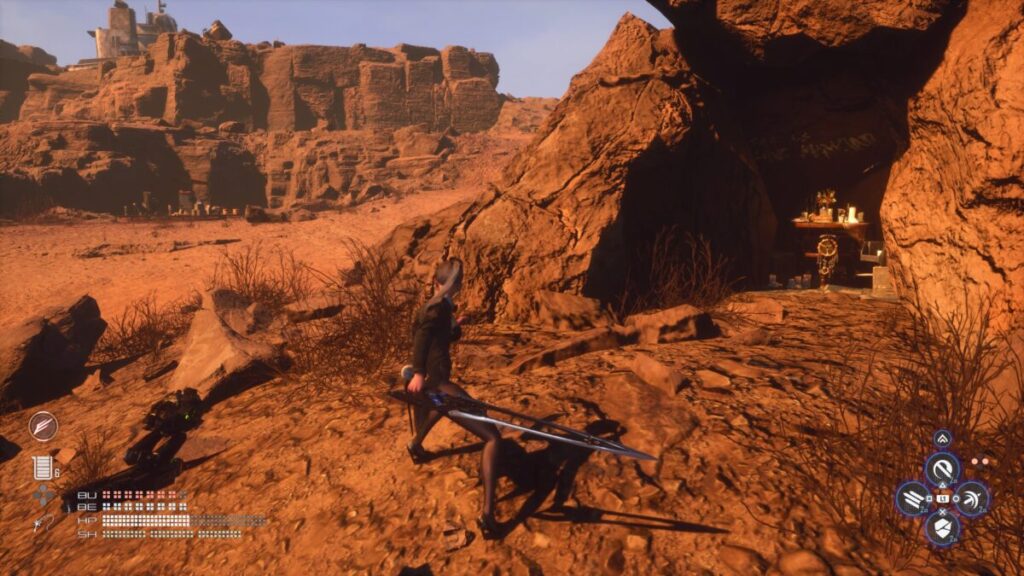
The Chapter of Trial 5 can be found in a small cave to the east (and slightly north) of the West Great Canyon Supply Camp.
Chapter of Trial 6 (Wasteland)
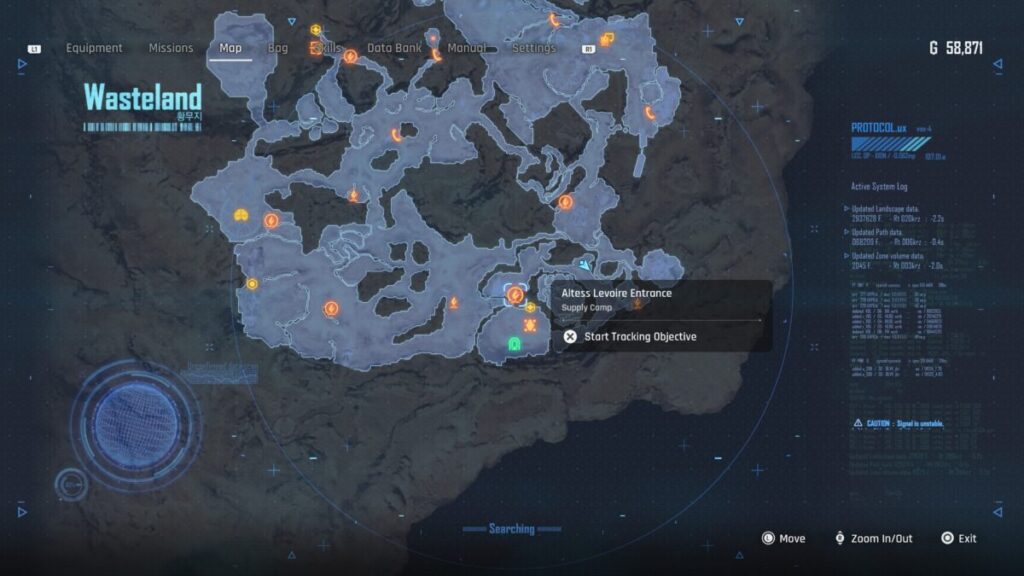
Chapter of Trial 6 can be found by traveling to the Altess Levoire Entrance and following the path north-northeast to a smaller side area. There will be a small cave there with the Prayer inside.
Request Rewards
Once you’ve completed the request you’ll be rewarded with the items in the list below.
20,000 Gold
Stellar Blade Guides and Walkthroughs
For more Stellar Blade guides and walkthroughs, click here!
Welcome to NGB and our Stellar Blade guide for the An Unforgettable Fish Dish request. Here we will cover where to start the request, how to complete it and the rewards you’ll receive for all of your effort.
How to Start An Unforgettable Fish Dish Request
This request can be accepted on the bulletin board in Xion. In order for it to show up in the list, you’ll need to complete the Looking Glass mission to receive the fishing rod and then complete the Wife’s Water Tank request.
How to Complete An Unforgettable Fish Dish Request
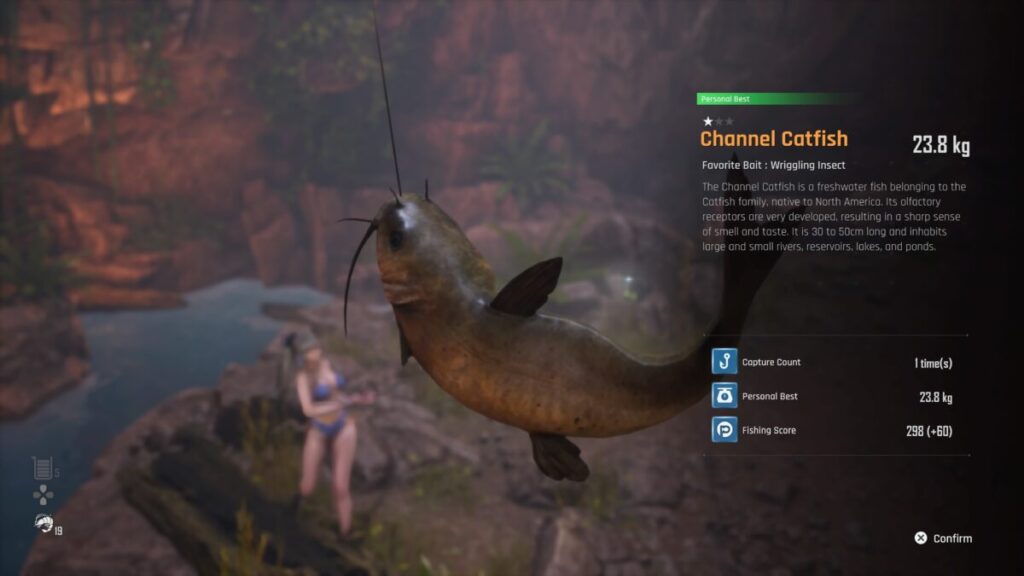
The requestor will ask EVE to bring them a Channel Catfish so that they can cook the fish the way their father taught them. To do this, travel to the cave leading to the Wasteland in Xion and fish there. The Channel Catfish likes Wriggling Insect bait, so using that will give you a better chance to land one. You can purchase that from Clyde at Oasis in the Great Desert with the points you earn from fishing. We caught ours using the Small Shrimp that we got from completing Barry’s mission. Either way, it might take a while to snag one. Once you do, return to the bulletin board to complete the request and receive your rewards.
Request Rewards
Once you’ve completed the request you’ll be rewarded with the items in the list below.
3,000 Gold
Stellar Blade Guides and Walkthroughs
For more Stellar Blade guides and walkthroughs, click here!
Welcome to NGB and our Stellar Blade guide for the Where’s the Item request. Here we will cover where to start the request, how to complete it and the rewards you’ll receive for all of your effort.
How to Start the Where’s the Item Request
This request becomes available during the main mission, Hidden Truth. Head to the bulletin board in Xion and interact with it to accept the request. If it’s not showing up, you may have to complete a couple of the requests to make it appear in the list.
How to Complete the Where’s the Item Request
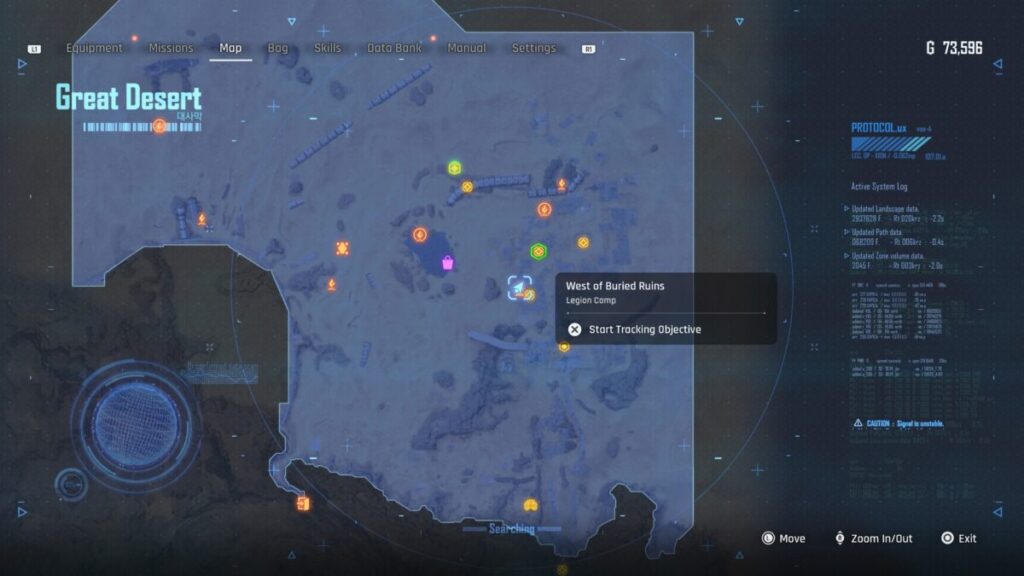
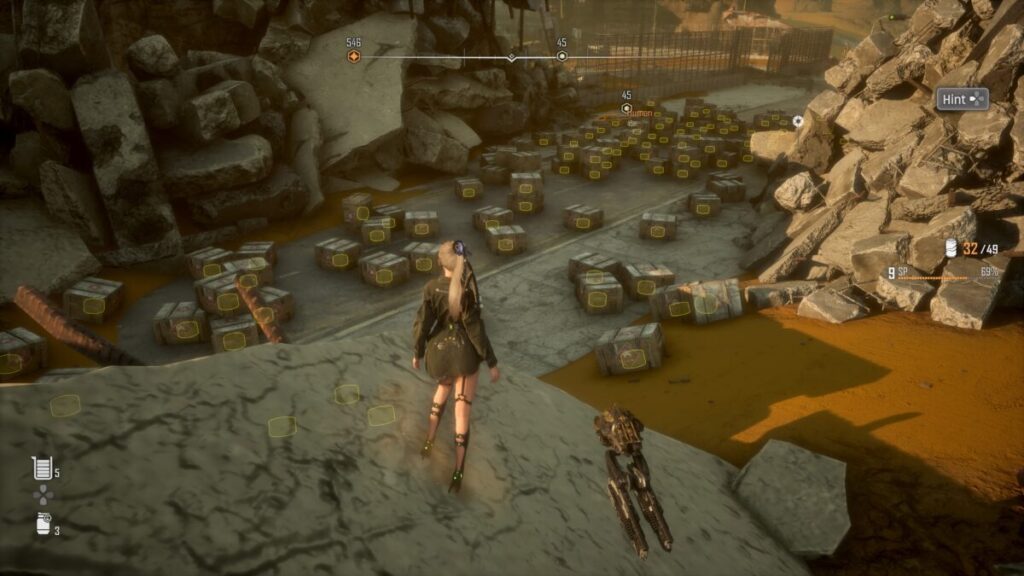
For this request, the requestor is asking for someone to retrieve the items that he requested Frank the Scavenger to since he’s probably Naytiba food by now. You’ll need to head to the Great Desert and travel southeast to reach the West of Buried Ruins Legion Camp. From there, head south and you’ll find a broken section of road on the left past a couple of ruined buildings. Cross over it then take a right following a narrow path between two rock walls.
After exiting the path go left heading east to arrive on a road littered with crates containing explosives. The items we are after can be found in the middle of all of them. Use your scanner to find a safe path through then collect the bag. Return to the bulletin board to complete the request and receive your rewards.
Request Rewards
Once you’ve completed the request you’ll be rewarded with the items in the list below.
2,500 Gold
Vitcoin x4
Stellar Blade Guides and Walkthroughs
For more Stellar Blade guides and walkthroughs, click here!
Welcome to NGB and our Stellar Blade guide for the Lurker Hunt request. Here we will cover where to start the request, how to complete it and the rewards you’ll receive at the end for all of your efforts.
How to Start the Lurker Hunt Request
This request becomes available during the main mission, Hidden Truth. Head to the bulletin board in Xion and interact with it to accept the request. If it’s not showing up, you may have to complete a couple of other requests to make it appear on the list.
How to Complete the Lurker Hunt Request
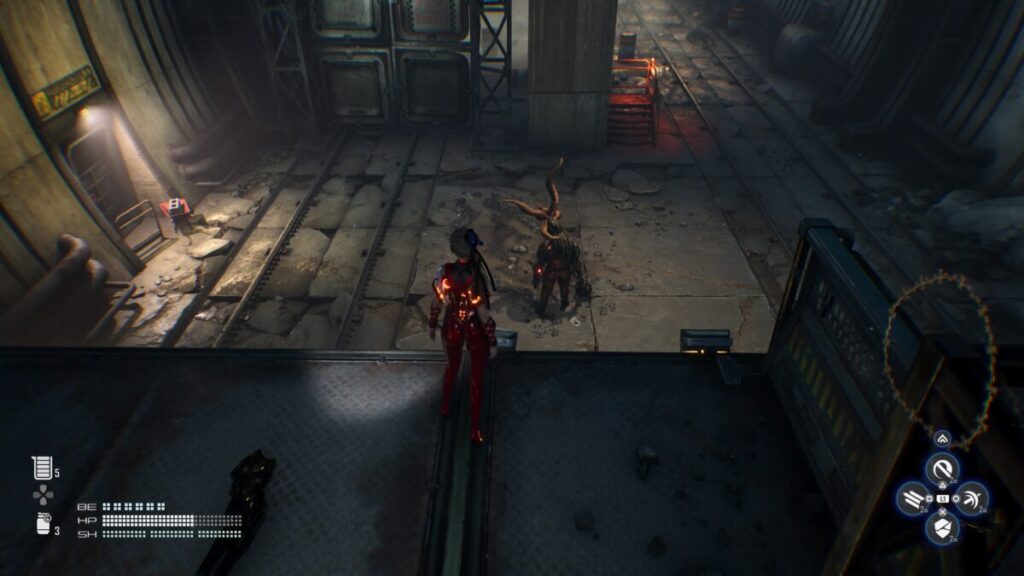
To hunt all of the Lurkers, you’ll need to travel to the Great Desert. Once you’re there, they can be found around through the map swimming through the sand. The below image shows what they look like, so make sure to keep an eye out for them.
Once all 10 have been defeated, return to the bulletin board in Xion to complete the request and claim your rewards.
Request Rewards
Once you’ve completed the request/mission you’ll be rewarded with the items in the list below.
4,600 Gold
Stellar Blade Guides and Walkthroughs
For more Stellar Blade guides and walkthroughs, click here!
Welcome to NGB and our Stellar Blade walkthrough for the Wife’s Medicine request! Here we’ll cover where to start the request, how to complete it and what rewards you’ll receive at the end.
How to Start the Wife’s Medicine Request
To begin the Wife’s Medicine request in Stellar Blade, you’ll need to interact with the request board in Xion after you reach the Light of Hope. If it doesn’t show up, you may need to complete a couple of other requests first to make it appear.
How to Complete the Wife’s Medicine Stash Request
For this request, you’ll need to travel to Matrix 11 in search of the Sand Disease Medicine. After arriving, progress through Matrix 11 until you reach the Rail Yard Supply Camp just before the sewers. At that point, you’ll need to flood an area of the sewers to progress. After doing that, you’ll come to a living area that EVE keeps saying it is filled with warmth. The medicine can be found on a cabinet here just past the ladder leading to a supply camp. Collect it then return it to the bulletin board in Xion to complete the request and receive your rewards.
Wife’s Medicine Request Rewards
Once you have completed the request, you’ll be rewarded with the items listed below!
Gold x3,000
Vitcoin x4
Stellar Blade Guides and Walkthroughs
For more Stellar Blade guides and walkthroughs, click here!
Welcome to NGB and our Stellar Blade walkthrough for the Source of the Nightmare! Here we’ll cover where to start the request, how to complete it and the rewards you’ll receive at the end.
How to Start the Source of the Nightmare Request
To begin the Source of the Nightmare request in Stellar Blade, you’ll need to interact with the bulletin board in Xion after you reach the Light of Hope. If it’s not immediately available to you, you may need to complete some of the other requests to get it to show up on the bulletin board.
How to Complete the Source of the Nightmare Request
For this request, you’ll need to travel to Martix 11 (which you’ll go to during the main story) and defeat 10 of the Skull enemies that are located there. One thing to note is you have to defeat them while they are controlling a host. Killing any skulls not in a host will not count towards the 10 you need for the request.
Source of the Nightmare Request Rewards
Once you have completed the request, you’ll be rewarded with the items listed below!
Gold x3,600
Vitcoin x4
Stellar Blade Guides and Walkthroughs
For more Stellar Blade guides and walkthroughs, click here!
Welcome to NGB and our Stellar Blade walkthrough for the Generous Drop Pod request! Here we’ll cover where to start the request, how to complete it and what rewards you’ll receive at the end.
How to Start the Generous Drop Pod Request
To begin the Generous Drop Pod request in Stellar Blade, you’ll need to interact with the request board in Xion after you reach the Light of Hope. If its not there, you many need to complete some of the other requests to make it appear.
How to Complete the Generous Drop Pod Request
For this request, EVE will need to race to the drop pod at Eidos 7 before anyone else has a chance to loot its special parts. Head to the safehouse and speak with Adam to travel to Eidos 7. Once you land, use the nearby phone booth to travel to the Crater. Make your way over to the drop pod and interact with it to find a pair of earrings completing the objective. Return to the Bulletin Board in Xion to complete the request and receive your reward.
Request Rewards
Once you have completed the request, you’ll be rewarded with the items listed below!
Gold x1,000
Stellar Blade Guides and Walkthroughs
For more Stellar Blade guides and walkthroughs, click here!
Welcome to NGB and our Stellar Blade walkthrough for the Legion’s Secret Stash! Here we’ll cover where to start the request, how to complete it and the rewards you’ll receive at the end!
How to Start the Legion’s Secret Stash Request
To begin the Legion’s Secret Stash request in Stellar Blade, you’ll need to interact with the request board in Xion after you reach the Light of Hope. If it’s not there, then you may need to complete some of the other requests for it to show up.
How to Complete the Legion’s Secret Stash Request
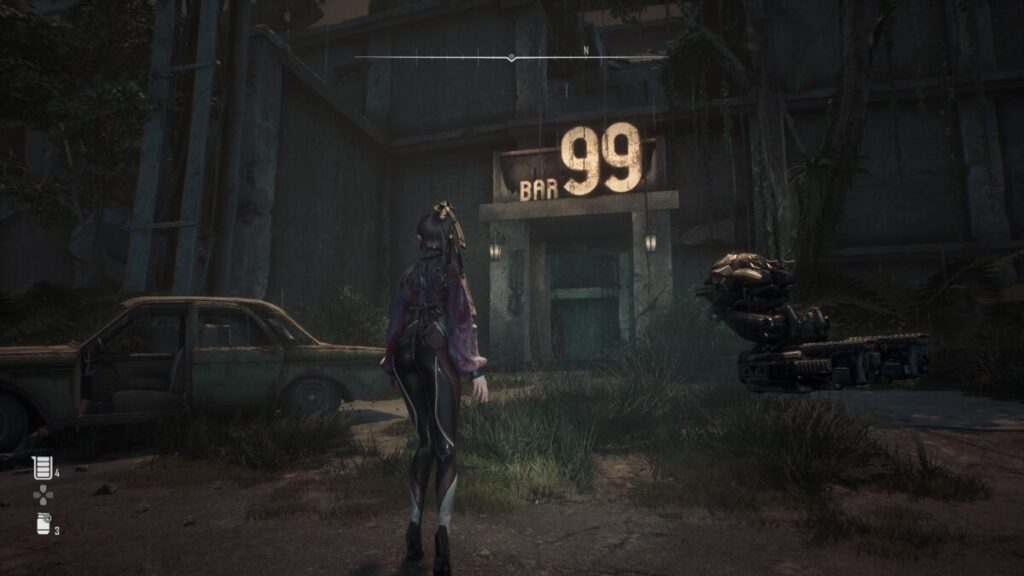
For this request, EVE is asked to head to BAR 99 in Eidos 7 and investigate the place for the Legion’s secret stash. Travel to the safehouse and speak with Adam to travel to Eidos 7 landing on Silent Street. Follow the way forward passing over the broken bridge. When you reach the other side of the river, head straight down the road a bit to reach BAR 99 behind a broken-down car.
Enter the bar being mindful of the enemy hiding just beyond the entrance waiting to jump you when you enter. Deal with it then head to the left side of the bar and take out the Hydra. Now that the building is clear, you’re free to examine the stash under the train car that is protruding through the side of the wall. Enter the passcode you were given (1228) to open it and collect the Nano Elements inside. Return to the Bulletin Board in Xion to complete the request and receive your rewards.
Request Rewards
Once you have completed the request, you’ll be rewarded with the items listed below!
Gold x1,500
Stellar Blade Guides and Walkthroughs
For more Stellar Blade guides and walkthroughs, click here!
Welcome to NGB and our Stellar Blade walkthrough for the Time for Revenge Request! Here we’ll cover everything you’ll need to easily breeze through this quest!
How to Start the Time for Revenge Request
You can grab this quest from the Bulletin Board in Xion. In order for it to show up, you’ll first need to complete a good amount of the other requests first.
How to Complete the Time for Revenge Request
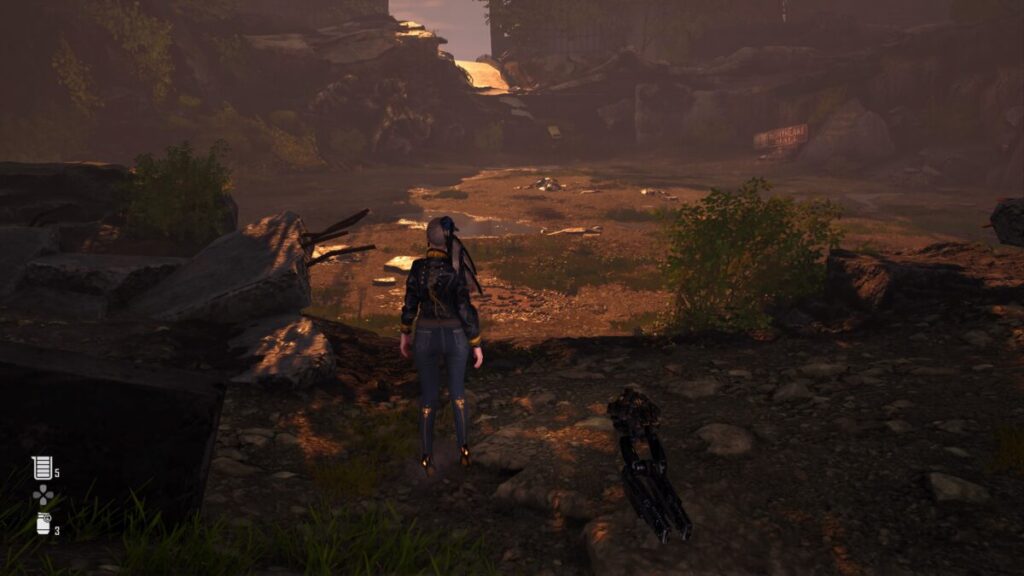
For this request, the requestor will ask that you slaughter 10 Hedgeboars to avenge the death of her son.
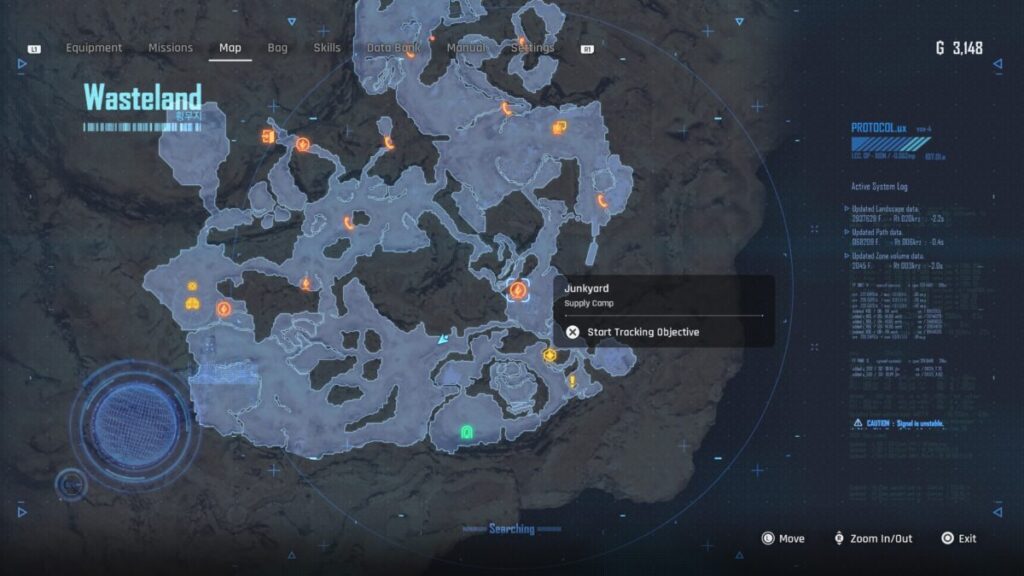
To do this, travel to the Wasteland where these particular Naytiba can be found. If you travel to the Junkyard Supply Camp then follow the path west there, you’ll be able to quickly locate about 6 in that area. You can then return to the camp to reset the enemies or explore a bit more to find the rest. Once 10 of the Hedgeboars have been taken down, return to the Bulletin Board to complete the request and receive your rewards.
Request Rewards
For completing this request, you’ll be rewarded with the items listed below:
5000 Gold
Stellar Blade Guides and Walkthroughs
For more Stellar Blade guides and walkthroughs, click here!
Search
This site uses cookies. By continuing to use this website, you are giving consent to cookies being used. For more information on cookies, view our Privacy Policy.OkPrivacy Policy