Hogwarts Legacy Logo
Guides

Hogwarts Legacy – Portrait in a Pickle

by NightlyGamingBinge in

The Portrait in a Pickle side quest in Hogwarts Legacy can be obtained during the Lodgok’s Loyalty main quest. Travel to the Library Floo Flame then interact with the nearby portrait of Ferdinand Octavius Pratt. He’ll inform you that his other frame has been stolen and will task you with recovering it.

Travel to the Three Broomsticks in Hogsmeade then speak with Astoria Crickett near the entrance. She’ll mention that the portrait is being kept with the people who stole it. Travel to the Marunweem Ruins at Marunweem Lake and deal with the enemies there. In the ruins, find the set of stairs next to a stack of barrels and take them down.

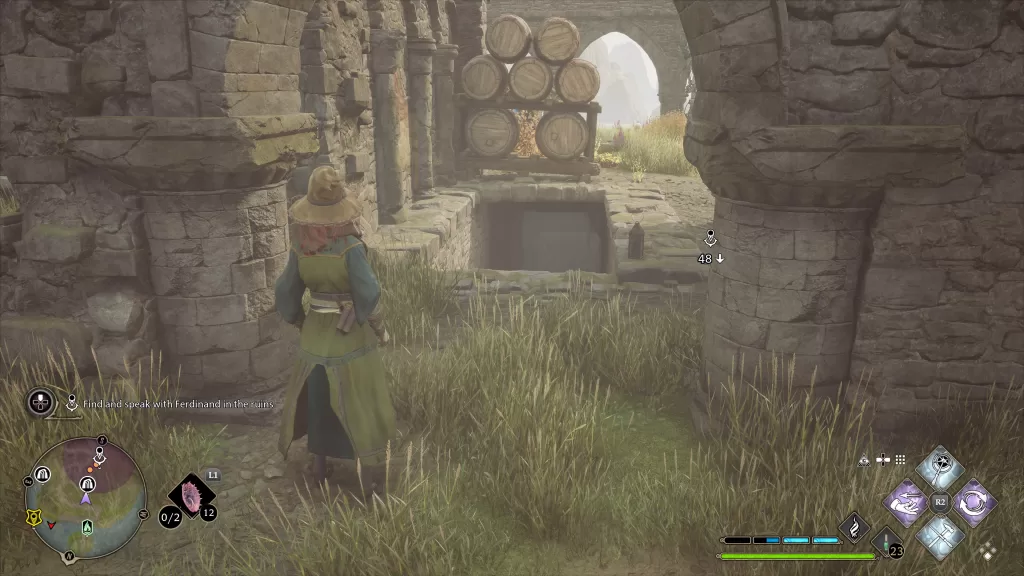
You’ll need Alohomora Level II to pick the lock of the gate. Once inside, speak with the portrait. Afterwards, you’ll have the option of returning it to the Three Broomsticks or Hog’s Head. Do whatever you see fit to the portrait. The quest will complete and you’ll be rewarded with an Oddities Shelf configuration.

Hogwarts Legacy Logo
Guides

Hogwarts Legacy – Phoenix Rising

by NightlyGamingBinge in

The Phoenix Rising side quest in Hogwarts Legacy becomes available during the Prepare for Your O.W.L.S main objective. Make your way to the Room of Requirement and speak with Deek. He’ll mention a Phoenix is nesting nearby. Set out in search of the mythical bird by heading to the northeastern part of the Poidsear Coast to find the Phoenix Cave Mountain. Head inside then follow the path through the cave. Eventually, you find the Phoenix. Follow it while taking out the Dark Wizards hunting it. When you reach the end, the Phoenix will let you rescue him. Return to Deek to complete the quest.

Like a Dragon Ishin Logo
Guides

Hogwarts Legacy – The Unique Unicorn

by NightlyGamingBinge in

The Unique Unicorn side quest in Hogwarts Legacy becomes available during the Prepare for Your O.W.L.S main objective. Travel to Hogsmeade and speak with Betty Bugbrooke near Hogsmeade Square. She’ll ask you to check on her friend Hazel, the unicorn. Exit Hogsmeade and travel to Upper Hogsfield. From there, go west into the Dark Forest to find the Unicorn Den. When you reach the search area, you can easily locate Hazel by looking for the white dot on your mini map. Once you find her, capture her using your bag. Use Levioso to make catching her easier. Once you’ve caught her, return to Betty and let her know Hazel is safe to complete the quest. You’ll receive Wooden Maiden configuration as a reward.

Hogwarts Legacy Logo
Guides

Hogwarts Legacy – History of Magic Class

by NightlyGamingBinge in

The History of Magic Class side quest in Hogwarts Legacy becomes available during the Prepare for Your O.W.L.S main objective. Travel to the Bell Tower Courtyard Floo Flame then head up the stairs on the southwest side and through the door straight ahead. Go up the stairs and into the History of Magic class the being the quest. You’ll have to follow Professor Binns through the school on a guided field trip. You’ll then have to collect the Grimbald Weft Field Guide Page. It can be found next to right of the Floo Flame (when looking at it) in the nook of the stairs. Use Revelio to make it appear and collect it.

Next, you’ll be tasked with locating the Waving Knight Guide Page. It can also be collected by using Revelio on the stone statue in the wall to the left of the Floo Flame (when looking at it) at the top of the second flight of stairs.

Speak with the professor afterward. This will complete the quest and you’ll be rewarded with a Books and Cauldrons Shelf conjuration.

Hogwarts Legacy Logo
Guides

Hogwarts Legacy – Rescuing Rococo

by NightlyGamingBinge in

The Rescuing Rococo side quest can be obtained at Bainburgh in Manor Cape. Head there then speak with Agnes Coffey at her shop stand. She’ll tell you her beloved Rococo scampered off to Henrietta’s Hideaway south of town at the southern tip of Manor Cape. Head there and enter the hideaway. Press on until you reach the Gryphon statue. From there use Revelio to find treasure on the ground on an upper walkway. Follow that treasure to reach Rococo. Along the way, the floor prevents you from progressing. Use Arresto Momentum to stop this from happening allowing you to cross. When you find Rococo, use Levioso on it then capture the critter in your bag. Return to Agnes and speak with her. You can hand him over or keep Rococo for yourself. This will complete the quest and you’ll be rewarded with a Niffler Fur-Lined Hat.

Hogwarts Legacy Logo
Guides

Hogwarts Legacy – Birds of a Feather

by NightlyGamingBinge in

To obtain the Birds of a Feather side quest in Hogwarts Legacy, speak with Marianne Moffett in Marunweem to find out that she is worried about a large albino Diricawl known as “Gwyneira”. Agree to help her then travel to the Diricawl Den east of the South Poidsear Coast Floo Flame at night. Capture the bird then return to Marianne and speak with her. You can then choose to give her the bird or keep it. You’ll receive the Debonir Socialite Ensemble as a reward either way.

Hogwarts Legacy Logo
Guides

Hogwarts Legacy – Sacking Selwyn

by NightlyGamingBinge in

The Sacking Selwyn side quest in Hogwarts Legacy can be obtained from Cragcroft in Cragcroftshire. Speak with Hyacinth Olivier on a hill overlooking the town. She’ll tell you about Ashwinders who are causing problems nearby. Travel to Clagmar Castle south of Cragcroft then deal with Silvanus Selwyn and his Ashwinders there. Return to Hyacinth to let her know you’ve taken care of her problem. This will complete the quest and you’ll receive the Ashwinder Skull Gloves appearance.

Hogwarts Legacy Logo
Guides

Hogwarts Legacy – Solved by the Bell

by NightlyGamingBinge in

The Solved by the Bell side quest in Hogwarts Legacy can be obtained by traveling to the southern tip of Manor Cape where you’ll find Henrietta’s Hideaway. Work your way through this area, using Arresto Momentum to slow the floors that whisk you away. Eventually, you’ll reach a room with a bunch of Ashwinders. Once there, defeat them then follow the objective marker to a magical wall you can walk through revealing a hidden room. Grab the map off the table in this room then leave the hideaway.

Travel to Clagmar Castle Floo Flame east of the hideaway to find the bells from the map. Land on the wooden platform next to the bells. You’ll need to hit the bells in order based on the melody to play on the map. Doing so will cause a chest to drop. Loot the chest to complete the quest and receive the Treasure-Seeker’s Longcoat appearance. You can find the order of what bells to hit below.

  • Right – 4th bell from the top
  • Left – 3rd bell from the top
  • Left – 2nd bell from the top
  • Right – 2nd bell from the top
  • Left – 3rd bell from the top
  • Left – 1st bell from the top
  • Right – 1st bell from the top
  • Right – 2nd bell from the top
Hogwarts Legacy Logo
Guides

Hogwarts Legacy – The Hippogriff Mark’s the Spot

by NightlyGamingBinge in

The Hippogriff Mark’s the Spot side quest in Hogwarts Legacy can be obtained from Poidsear Castle Floo Flame on the Poidsear Coast. Head there and deal with the poachers. There will be a tent on the west side with a map on the table. Grab the map then travel to the far southern tip of Manor Cape.

There you will find Henrietta’s Hideaway. Enter the hideaway and use a fire spell on the brazier under that statue on the left side of the room. This will reveal a cube that you’ll need to move on the platform in front of the door. Cast a fire spell on the left cube and ice on the right to open the door. Head through the doorway to find some Ashwinders lurking about. Deal with them then look at your map.

It will indicate which braziers under the Gryphon statue should be lit. Make them match then loot the chest behind the Gryphon to receive the Treasure-Seeker’s Gloves appearance completing the quest.

Hogwarts Legacy Logo
Guides

Hogwarts Legacy – Cursed Tomb Treasure

by NightlyGamingBinge in

The Cursed Tomb Treasure side quest in Hogwarts Legacy can be obtained by heading to Manor Glen at Manor Cape near the West Manor Cape Floo Flame. Enter the gated manor then head inside the ruined house to find a set of stairs leading down to the basement.

Use Alohomora Level II to unlock the door then head inside and work your way through the basement fighting Inferi along the way. When you reach the big open room, you’ll have to fight off a wave of Inferi then the Lord of the Manor shows up. Take care of him then head into the back room. Ailsa Travers will then appear and you’ll need to defeat her too. Examine the body next to the chest to find a note from Photine then use Alohomora Level I to open the chest.

You’ll receive a map officially starting the quest. Travel to the Tomb of Treachery Floo Flame in the northern part of Poidsear Coast, which can be found behind a waterfall. Head inside the tomb then follow the path north. Take the second left to find a room with a collection chest in it.

When you reach the coffin, collect the note on it then continue heading north using a fire spell to burn the web blocking your path. This will bring you to a sealed door that requires three moths to open. They can be found in the two adjacent rooms. Bring them to the door using Lumos to open it then head up the stairs. Defeat the Inferni then look at the map you received in the manor.

You’ll need to use Flipendo on the tiles to make them match the map. This will cause a chest to rise out of the ground. Loot it to receive the Treasure-Seeker’s Attire appearance and complete the quest.