Eiyuden Chronicle Hundred Heroes Logo
Guides

Eiyuden Chronicle: Hundred Heroes – To the Safehouse

by NightlyGamingBinge in

Welcome to NGB and our Eiyuden Chronicle: Hundred Heroes walkthrough for the To the Safehouse main quest. Here you’ll find everything you’ll need to breeze through this quest.

To the Safehouse Goals

Go to Lowtown, on the west side

After you finish the New Forces main quest, you’ll automatically start this quest! When you gain control of Seign, you’ll find yourself in Ardinale City. Head down to the southwestern side of the city then enter the room at the back of the General Store to trigger a cutscene.

Ardinale City Collectibles

  • Speak with the resident in the house on the east side of the inn to receive the Raclette Recipe!
  • Speak with the guy standing outside of the third house to the right of the General Store to obtain the Spicy Pigs’ Ear Recipe!
  • Speak with the lady inside the second house to the right of the General Store to obtain the Maqluba Recipe!

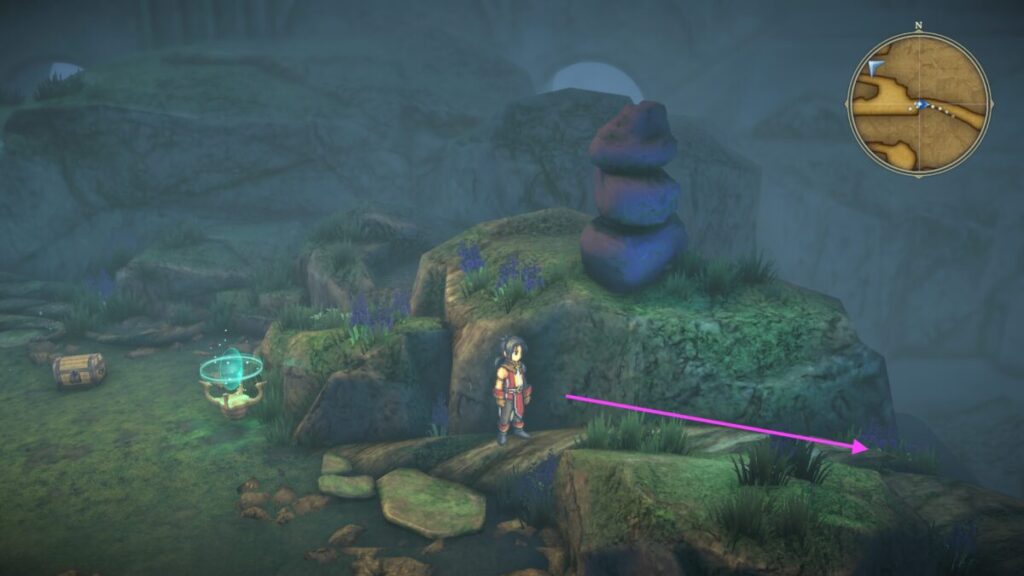
Find the hidden rune tank on the east side of town

Eiyuden Chronicle: Hundred Heroes To the Safehouse

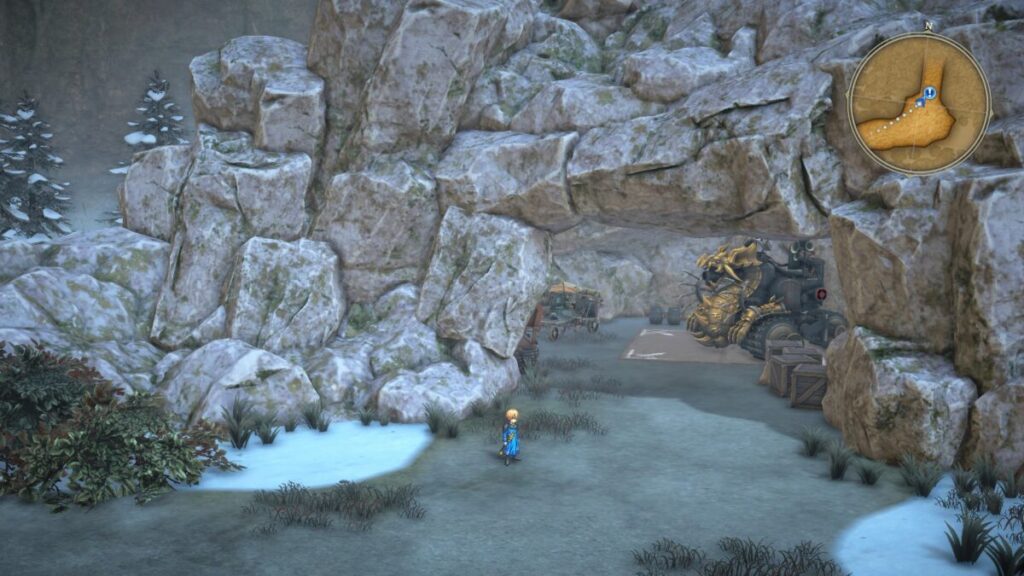
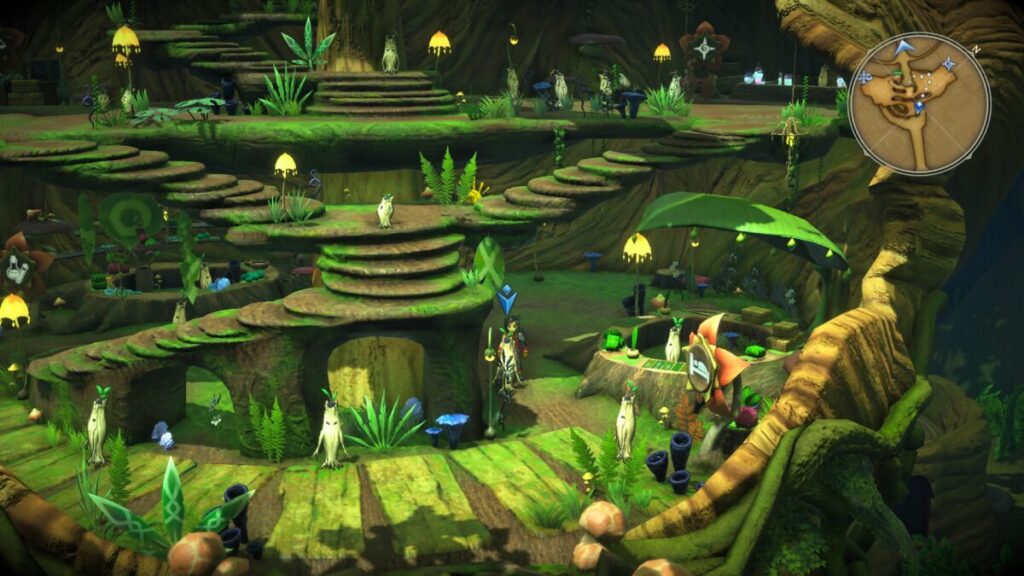
Make your way to the east side of town to find a cave containing the rune tank. Along the way, you’ll be treated to a cutscene!

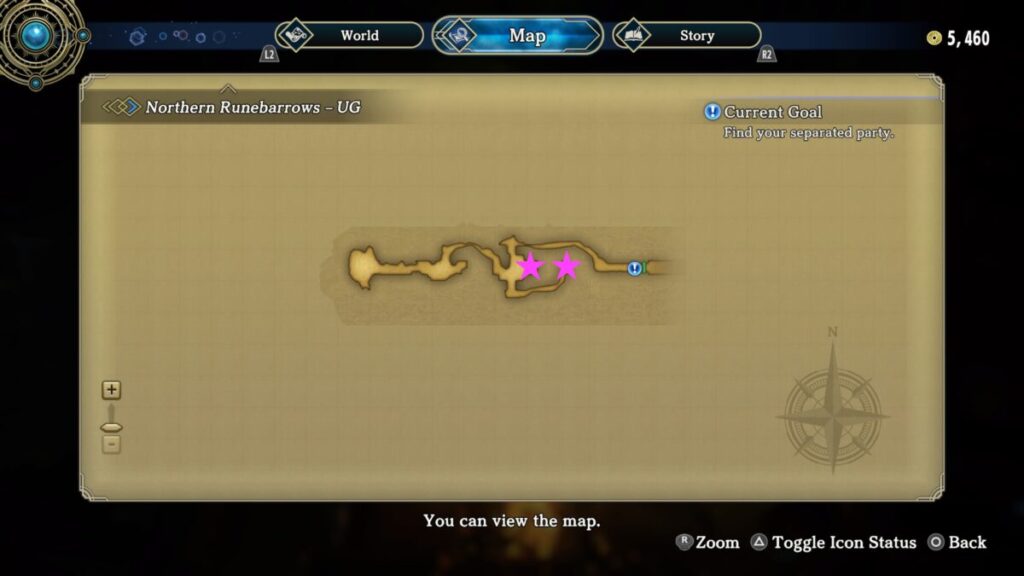
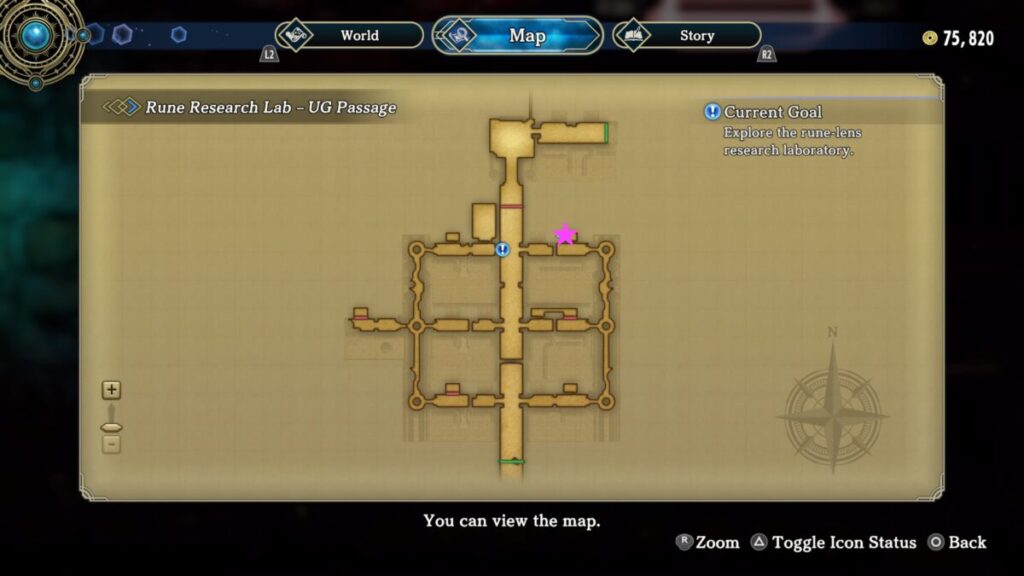
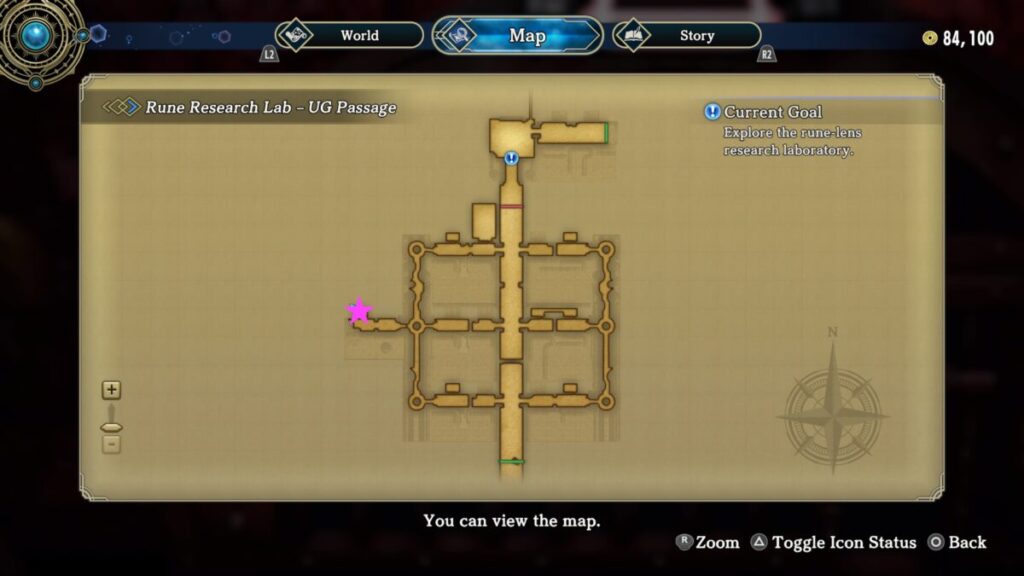
Explore the rune-lens research laboratory

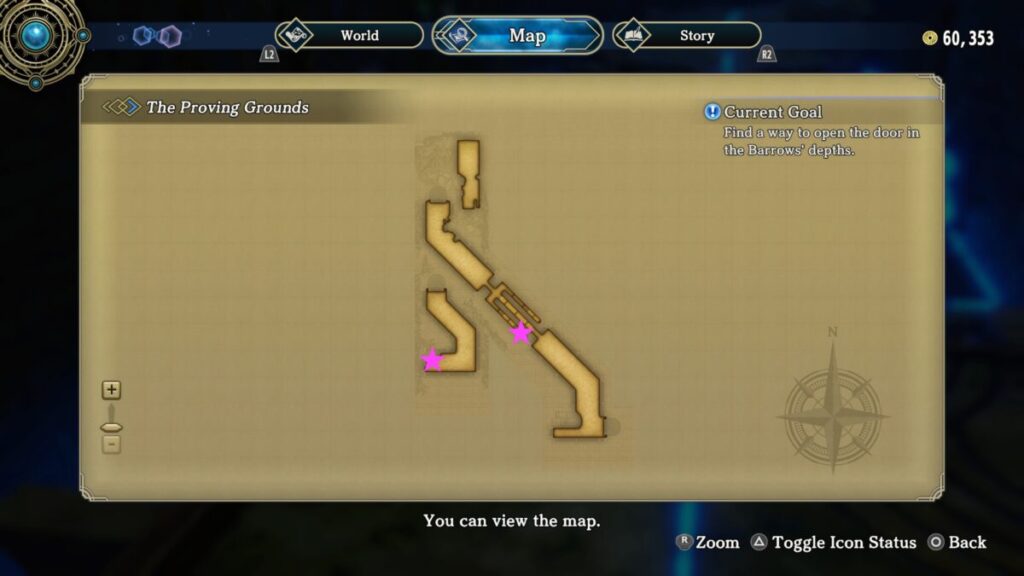
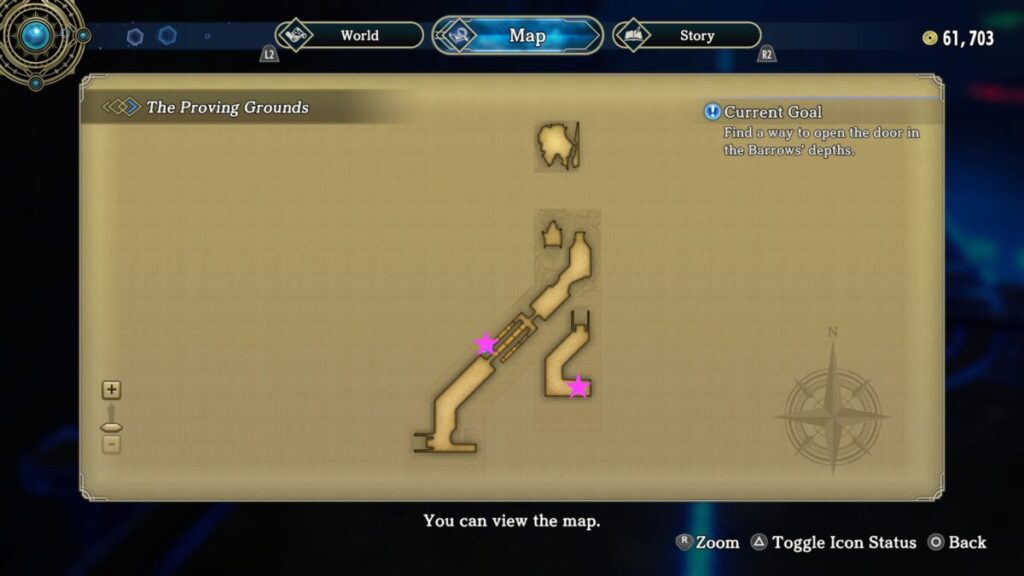
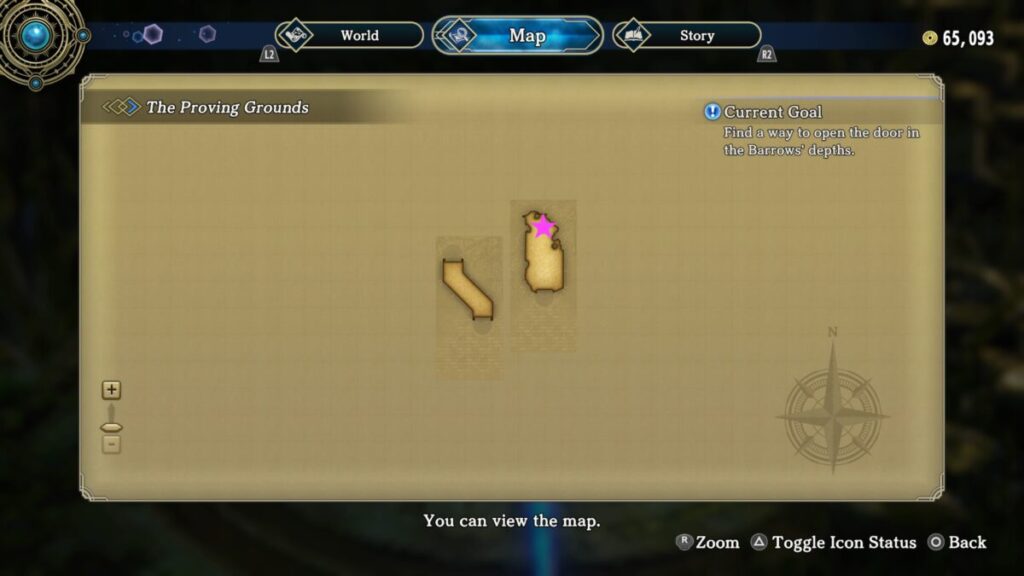
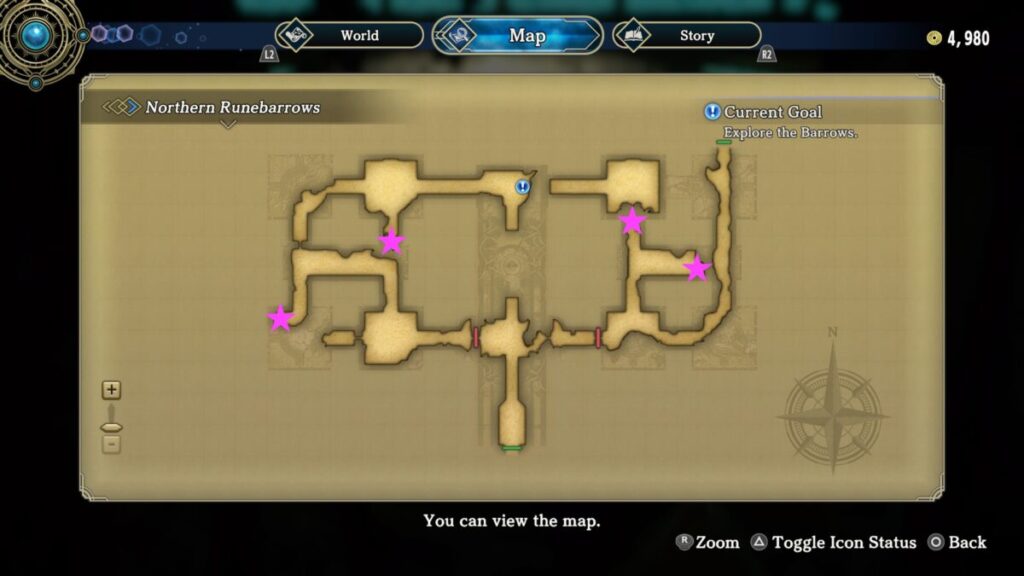
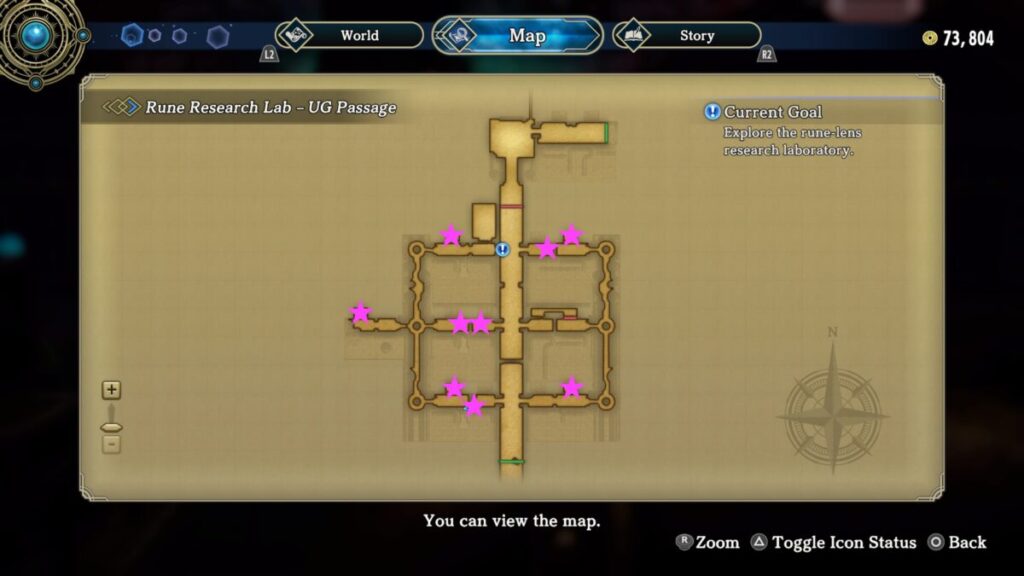
Travel east to reach the Rune Research Lab – UG Passage! Take the first right then enter the jail cell to find a chest containing a Red Key! Bring this key following the path north then swinging west to find another chest in a cell.

Blue Key Eiyuden Chronicle Hundred Heroes

This time it will contain a Blue Key! Backtrack south and take the central path. Use the Blue Key to unlock the cell then continue forward.

Blue Cell

When you reach the !, a cutscene will trigger followed by a fight with a group of enemies. After you take them out, head west and enter the cell to find another Blue Key.

Blue Key

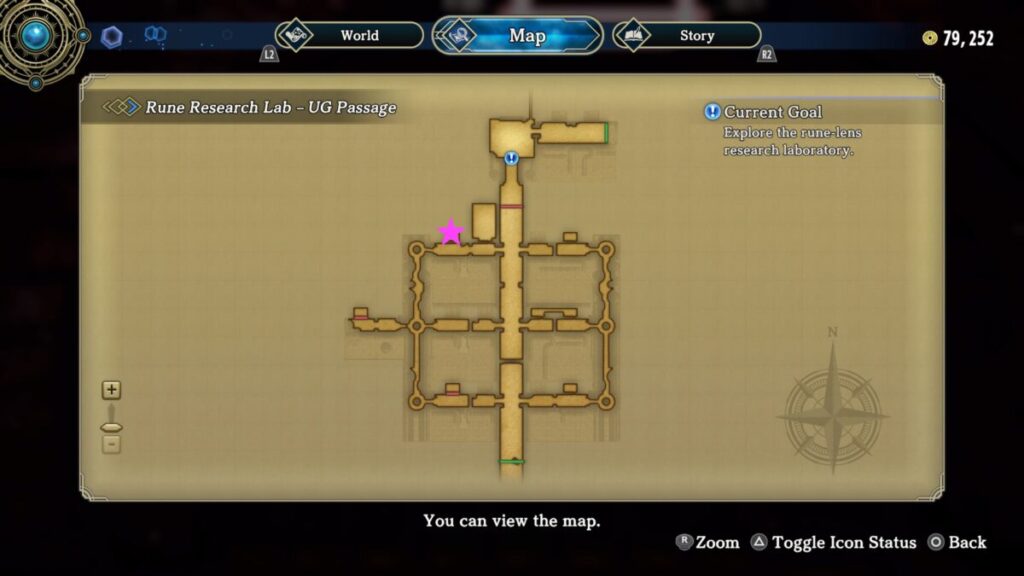
Snag it then keep following the path all the way to the south. There you’ll find the cell that this Blue Key unlocks.

Red Key

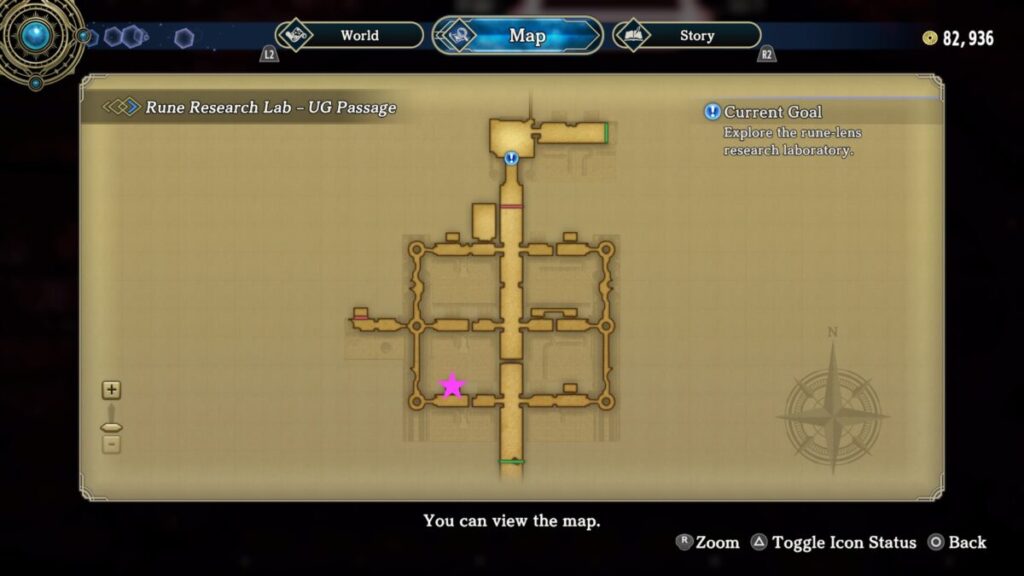
Open the chest inside to receive a Red Key! Take this red key to the central western part of the area and use it to open the cell.

Crankshaft Chest

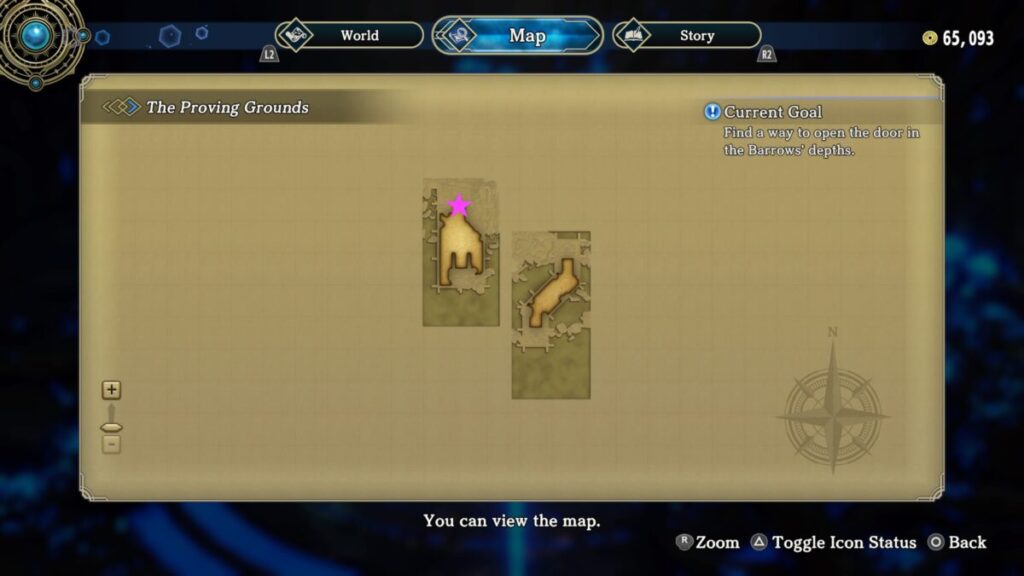
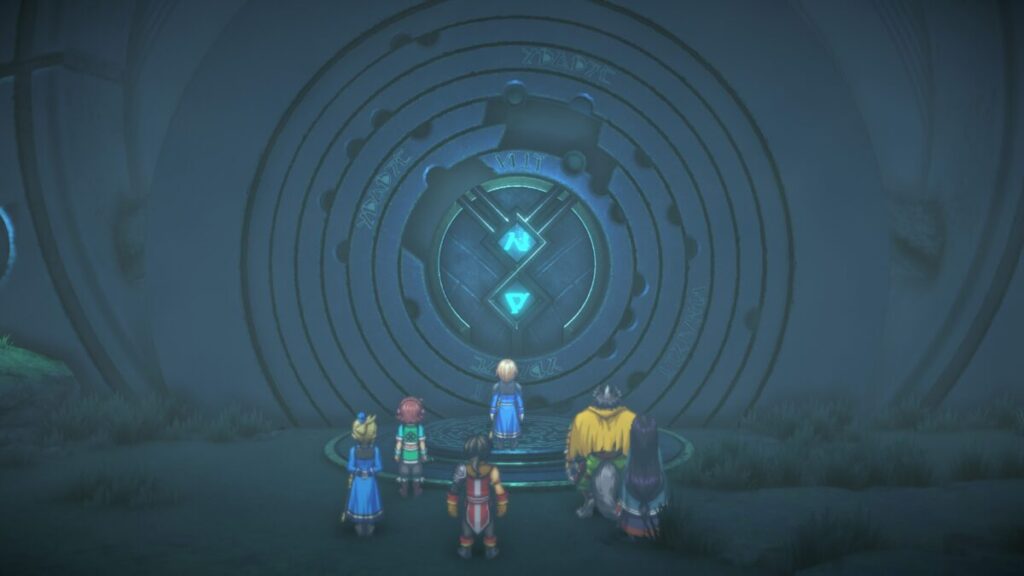
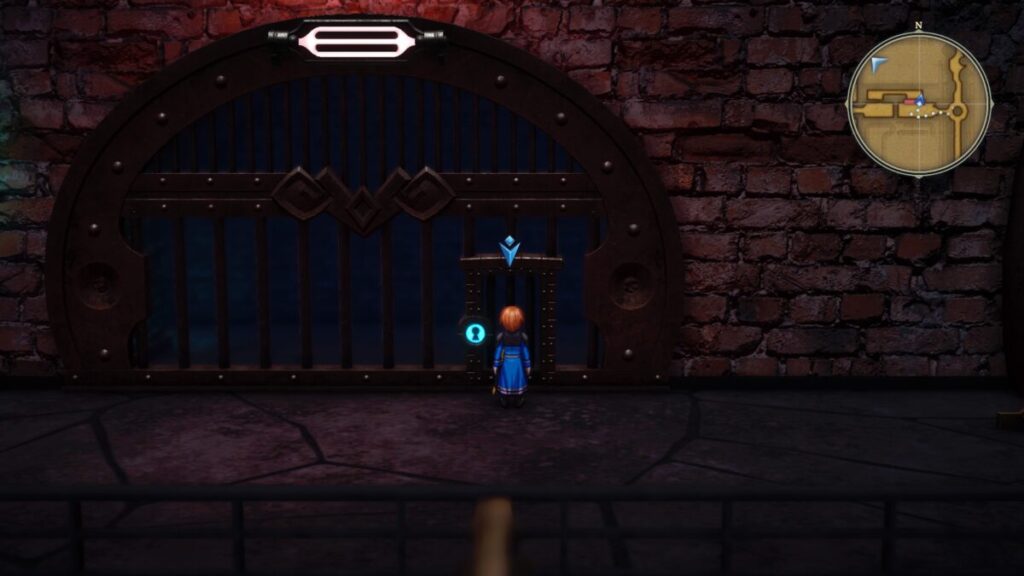
Loot the chest inside to receive the Crankshaft! Now that you have the missing piece, return to the northern part of the area. Near the save point, you’ll find a giant sealed door. To open it, interact with the panel to the right of the door.

Eiyuden Chronicle Hundred Heroes Rune Research Lab

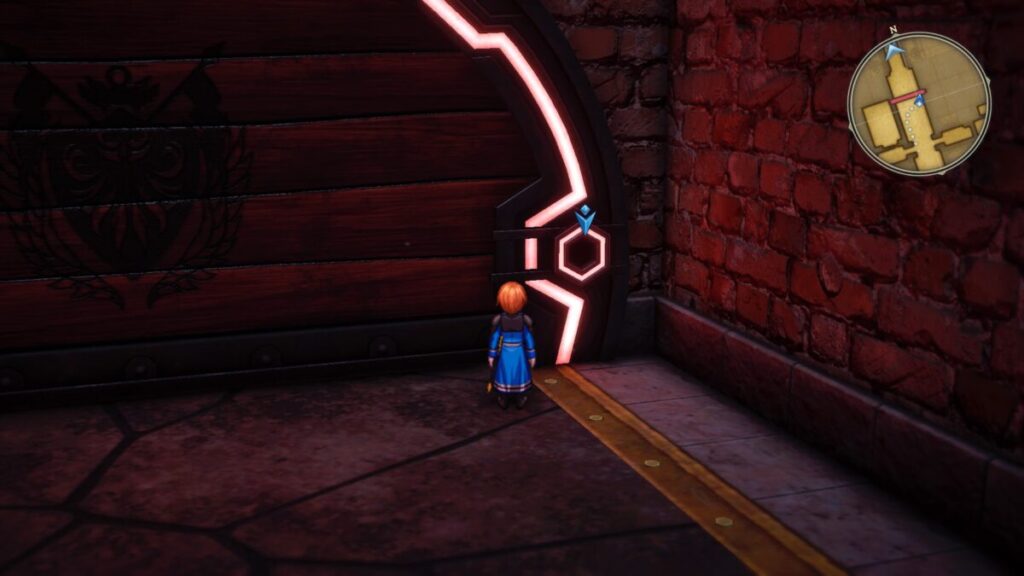
Approach the ! to trigger a cutscene followed by a battle against Dux Aldric. It will be one of those Attack/Counter/Break battles.

Rune Research Lab – UG Passage Collectibles

Enemies

  • Andromalius
  • Assault Cleaner
  • Lesser Demon
  • Murdersoul
  • Protoguard
  • Wandering Golem

Chests

Rune Research Lab Chests Eiyuden Chronicle Hundred Heroes
  • Anti-Confuse Scarf
  • Red Key
  • Blue Key
  • Patchwork Armor
  • Tom Yam Kung Recipe
  • Blue Key
  • Breton Galette Recipe
  • Red Key
  • Crankshaft

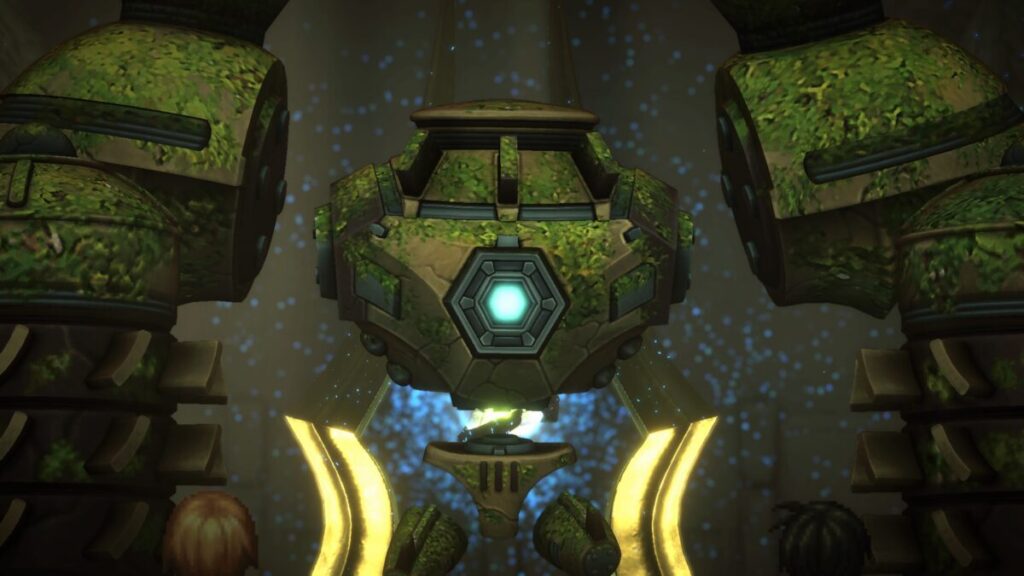
Make a diversion with the rune tank and escape

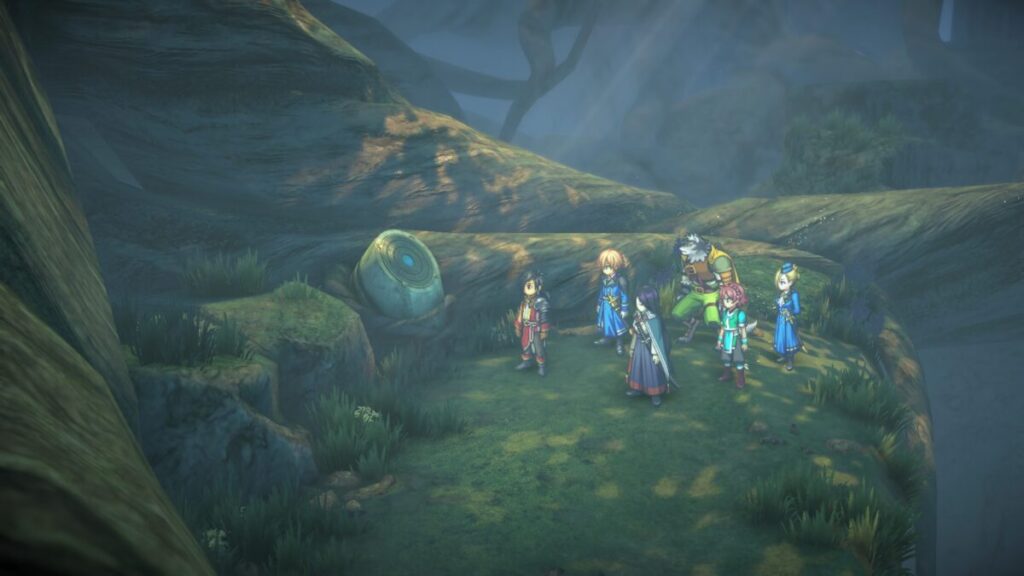
Afterwards, you’ll be returned to the Outskirts. Speak with the villagers to be healed and receive a healing potion. When you’re ready to proceed, speak with Pohl to begin the operation. Yaelu and Ivy will officially join the Alliance. When riding in the tank, you’ll come across Modified Specimen W_1155. Take it down then the ride will continue until you bump into Heavy Modified Specimen B_1929. Again, you’ll need to take this creature out to continue your ride where you’ll then encounter Synthetic Specimen R_0812. Defeat it to continue the ride. Up next, you’ll encounter the Chimera. This is the final boss on this crazy ride. Watch out for when the creature builds up its Hurricane Wing attack as it will unleash a devastating hit to all party members! To avoid it, use the gimmick of attacking with the rune tank whenever the creature starts building up to cancel its attack. Upon killing it, a cutscene will trigger during which Seign will see his father. Afterwards, the chapter will end and you’ll be Nowa again!

Eiyuden Chronicle Hundred Heroes Guides and Walkthroughs

For more Eiyuden Chronicle: Hundred Heroes guides and walkthroughs, click here!

Eiyuden Chronicle Hundred Heroes Logo
Guides

Eiyuden Chronicle: Hundred Heroes – The Proving Grounds

by NightlyGamingBinge in

Welcome to NGB and our Eiyuden Chronicle: Hundred Heroes walkthrough for The Proving Grounds main quest. Here you’ll find everything you’ll need to easily breeze through this quest.

The Proving Grounds Goals

Head for Runebarrows

Before leaving The Treefolk Village, make sure to speak with the Treefolk next to the inn to receive a Vegetable Juice Recipe.

Eiyuden Chronicle Hundred Heroes The Proving Ground

When you’re ready to proceed, head down the stairs to the level with the General Store and Inn. Take the path to the right of the General Store then head straight towards the spinning blades. After the quick cutscene, you’ll find yourself on the Road to the Proving Grounds!

Road to the Proving Grounds Collectibles

Enemies

  • Forest Lizard
  • Shadow Unicorn
  • Sky Sahagin

Collectible Materials

  • Iron Ore
  • Stone

Chests

Road to the Proving Grounds Chests Eiyuden Chronicle Hundred Heroes
  • 1500 Baqua
  • 1500 Baqua
  • Magic Drop x2

Find Leene and the bandit

Now that you’re in the Proving Grounds, you’ll need to make your way through this area by activating the pedestal multiple times to turn the rooms, allowing new passageways to open each time. Your goal in this area will be to interact with two separate gears, one on each side of the area, to open the door in the main room with the pedestal.

Eiyuden Chronicles The Proving Grounds find Leene and the Bandit

Inside, you’ll face Astraea the Judge and Slaosha the Enforcer. After this battle, we highly recommend returning all the way to town before proceeding as you’ll have another boss fight against Hurstwine and Narungarde in the next room. It’s best to be fully stocked on supplies! After the battle, a cutscene will trigger and Kallathor will join your party!

The Proving Grounds Collectibles

Enemies

  • Astraea the Judge (Boss)
  • Golem Cleaner
  • Greedtoy
  • Hardknock
  • Hurstwine (Boss)
  • Narungarde (Boss)
  • Pawn Demon
  • Shadow Unicorn
  • Slaosha the Enforcer (Boss)
  • Spy Orb
  • Yellow Slime

Chests

Eiyuden Chronicle Hundred Heroes The Proving Grounds Chests
  • 1500 Baqua
  • Ruby Brooch
  • Magic Drop x2
  • Tanzanite Brooch
  • Quality Healing Herb x6
  • 1500 Baqua
  • Rune of Quick Slash
  • Rune of Sidewinder
  • Palenight Mail
  • Topaz Brooch
  • Rune of Fire Enchantment

Eiyuden Chronicle Hundred Heroes Guides and Walkthroughs

Click here for more guides and walkthroughs on Eiyuden Chronicle Hundred Heroes!

Eiyuden Chronicle Hundred Heroes Logo
Guides

Eiyuden Chronicle: Hundred Heroes – The Eltisweiss Front

by NightlyGamingBinge in

Welcome to NGB and our Eiyuden Chronicle: Hundred Heroes walkthrough for the The Eltisweiss Front main quest. Here you’ll find everything you’ll need to easily breeze through this quest.

The Eltisweiss Front Goals

Attend the war concil

Speak with Ymir in the Hero’s Den to trigger a cutscene. Afterwards, you’ll be introduced to the concept of war. In war, you’ll form your allies into legions to fight the Empire’s own. Your allies will lead the units that comprise a legion. The more allies you recruit, the stronger your legions grow. Point where you want your legion to move, then select “Begin Battle” to progress the turn. If they move to an area with an enemy legion, they will engage in battle. A legion that sustains enough damage will retreat from the area, while a legion wiped out will leave the battlefield. If you can’t stop an attacking legion, your legion’s movement will end. If two opposing legions try to enter the same area, the one with more power gets priority.

The Eltisweiss Front Eiyuden Chronicle Hundred Heroes

After the fight, you’ll need to retreat up the stairs. After your discussion, you’ll need to leave Eltisweiss via the eastern gate. Along the way, you’ll fight some Imperial Soldiers. When you reach the eastern gate, you’ll encounter Seign and will need to fight him. We ended up loosing this fight and it seems like that was suppose to happen.

Eltisweiss Collectibles

Enemies

  • Imperial Soldier (Bow)
  • Imperial Soldier (Spear)
  • Imperial Soldier (Sword)

Eiyuden Chronicle Hundred Heroes Guides and Walkthroughs

Click here for more guides and walkthroughs on Eiyuden Chronicle Hundred Heroes!

Eiyuden Chronicle Hundred Heroes Logo
Guides

Eiyuden Chronicle Hundred Heroes – First Mission Walkthrough

by NightlyGamingBinge in

Welcome to NGB and our Eiyuden Chronicle: Hundred Heroes walkthrough for the First Mission main quest. Here you’ll find everything you’ll need to easily breeze through this quest.

First Mission Goals

Get to the Village Chief’s manor on the hill

At the start of Eiyuden Chronicle: Hundred Heroes, Garr, Lian and Mio will join your party! Make your way up to the northeastern side of Arenside to reach the manor. Along the way, a cutscene with Perrielle will trigger.

Eiyuden Chronicle Hundred Heroes - First Mission

Afterwards, continue heading up the stairs towards the manor. Once inside, head up the stairs and speak with the duo at the top to be introduced to Hildi and Seign.

Locate the Runebarrows through the northern forest

Now the town’s amenities will open up for you to explore! If you’d like to check them out, head down the stairs and make your way over to the Inn/General Store. Speak with the guy at the counter to stay at the inn for 300 baqua or save your game. Speak with the girl on the right side of the counter if you wish to purchase some items for your upcoming adventure!

Arenside Collectibles

Animals – I Love Animals Trophy

  • Komugi (cat) – Just east of the Inn / General Store
  • Ganmo (mouse) – In front of the stables
  • Melon (raccoon) – Southeastern side of town in Imperial Soldier’s encampment

Once you’re ready to continue with the story, exit Arenside via the southern exit to find yourself in Grum County-North. Once in Grum County-North, make your way to the northwestern side of the area where you’ll find the Northern Forest.

Eiyuden Chronicle Northern Forest

Grum County-North Collectibles

Enemies

  • Rabbit Knight
  • Plantvine

Northern Forest Collectibles

Enemies

  • Huge Mite
  • Plantvine
  • Rabbit Knight
  • Rabbit Wizard
  • Forest Eater (boss)

Collectible Materials

  • Lumber

Chests

Eiyuden Chronicle Hundred Heroes Northern Forest Chests
  • Healing Herb x6
  • Ruby Ring
  • 400 Baqua
  • Revival Medicine x2
  • Tricorne Hat

As you make your way through the Northern Forest, you’ll come across a weird looking device.

Eiyuden Chronicle Hundred Heroes Northern Forest Device

Interact with it to trigger some dialog then continue forward up the vine. When you reach the misty area of Northern Forest 2, you’ll need to keep heading up a long vine. On this vine, a scene will trigger where you’ll be teleported back to the shrine you previously found. Re-enter the misty area and head down the small path to the east of the save point.

Eiyuden Chronicle Hundred Heroes First Mission Northern Forest

At the end of this path, a cutscene will trigger during which Mio will spot that something’s amiss. Take out the Forest Eater that drops from above. After the fight, interact with the shrine like device and all the mist will clear! Return up the vine that had previously teleported you to find that it will no longer do such a thing. Continue to the top to find the door to the Runebarrows!

First Mission Hundred heroes

Explore the barrows

With the door now open, head inside the North Runebarrows. Stand on the left circular platform before the sealed door to trigger a cutscene during which Nowa will open it! After stepping inside, the door will seal shut behind you.

North Runebarrows Collectibles

Enemies

  • Golem Cleaner
  • Golem Pulverizer
  • Huge Mite
  • Spy Orb
  • Wandering Golem

Chests

Eiyuden Chronicle Hundred Heroes North Runebarrows Chests
North Runebarrows Chests Eiyuden Chronicles
  • 400 Baqua
  • 400 Baqua
  • Healing Herb x6
  • Bronze Mail
  • Revival Medicine
  • 400 Baqua

Proceed through this area until you reach a device that will allow a new door to be opened. Interact with it again to get the sequence needed to open said door! Next, head west to reach this new door! Step on the 3 platforms in the following order: circle, triangle, square! Afterwards, head through the newly opened door and continue through the area until you reach some rubble where a cutscene will trigger.

Find your separated party

When you gain control continue through the barrow with just Nowa and Seign. As you make your way through the area, you’ll get a tutorial for Hero Combos. Continue through the area until you reach another platform to step on. This will of course allow another door to be opened. Before leaving, interact with it once more to get the sequence. Afterwards, head to the southwestern door and interact with the platforms in the following order: square, circle, triangle. Head through the newly opened door to reach the entrance where a cutscene will trigger. Afterwards, you’ll have a boss fight against the Golem Pulverizer!

Golem Pulverizer

Thankfully after you deal some damage, the rest of your party will show up! Take it out to trigger a cutscene!

Afterwards

When the cutscene concludes, you’ll find yourself in the Hero’s Den. Speak with Garr and agree to be acting team captain! Afterwards, the party will then speak to Ymir!

Eiyuden Chronicle Hundred Heroes Guides and Walkthroughs

For the next walkthrough on The Watch Captain’s First Job main quest, click here! For other Eiyuden Chronicle: Hundred Heroes guides and walkthroughs, click here!