Dragon's Dogma II Logo - Dragons Dogma 2 Logo
Guides

Dragon’s Dogma 2 Post Game – The Unmoored World Walkthrough

by NightlyGamingBinge in

Welcome to NGB and our The Unmoored World walkthrough for Dragon’s Dogma 2 (DD2)! Here you’ll find everything you’ll need to breeze through the post game.

For the post game, you only have 4 days before everything is destroyed!! Resting at a campsite or inn will advance time more quickly, giving you less time to actually accomplish what you need to do. Minimize sleeping as much as possible! Please note that prior to post game, we completed every possible quest! We are not sure if this added to the ease of any post game convincing!

The Unmoored World Objectives
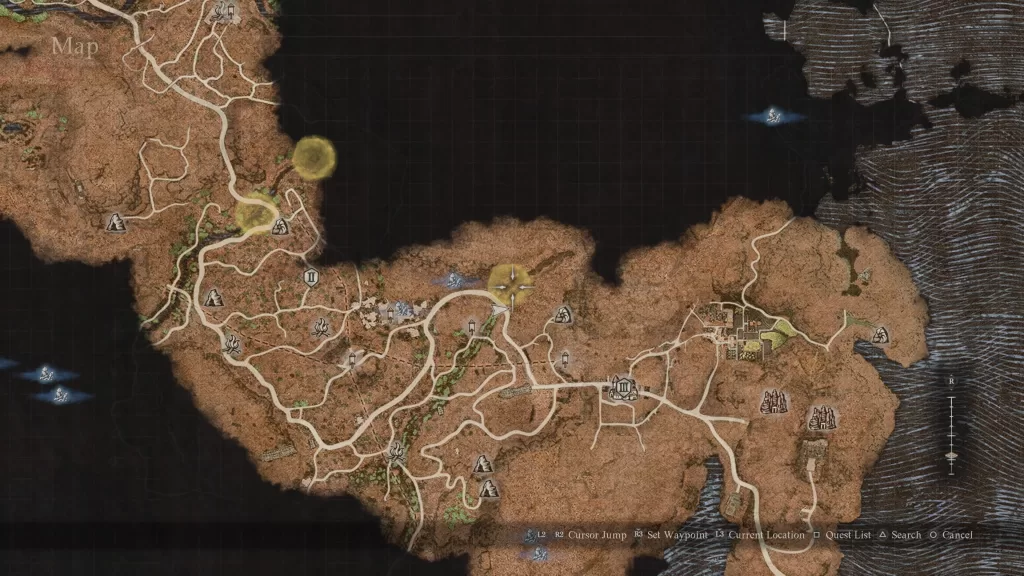
Retrieve Your Pawn

Forbidden Magick Research Lab Location

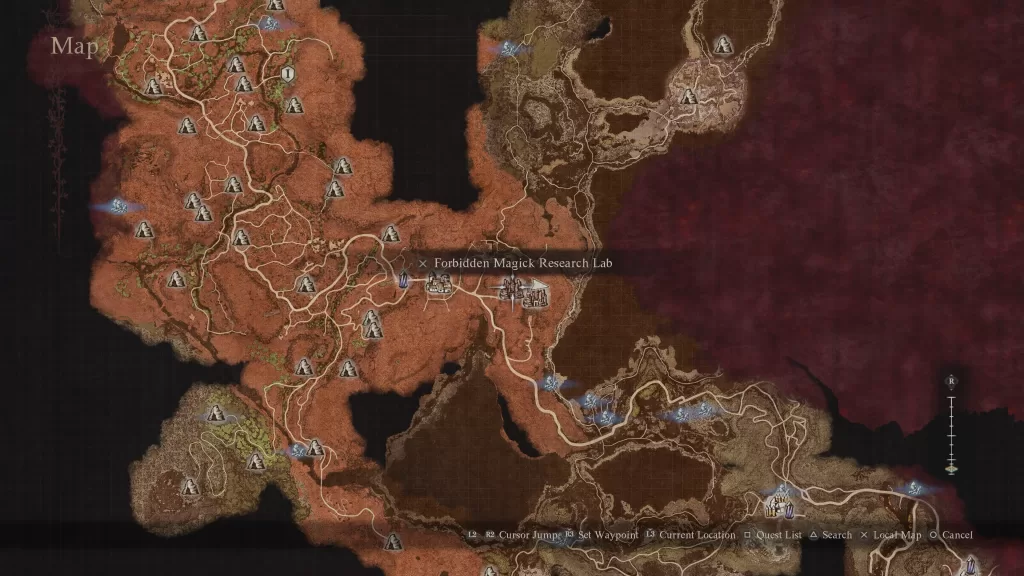
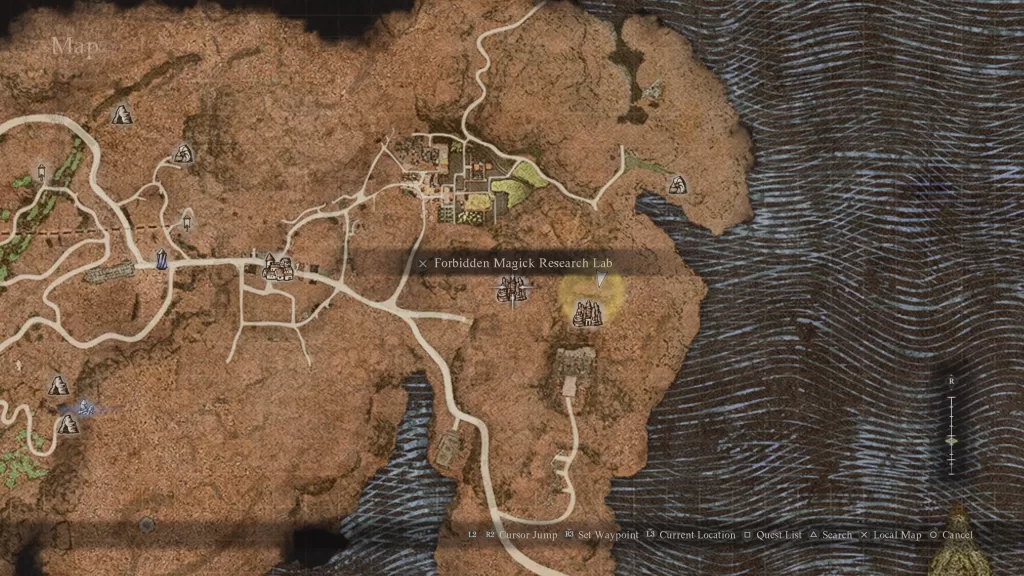
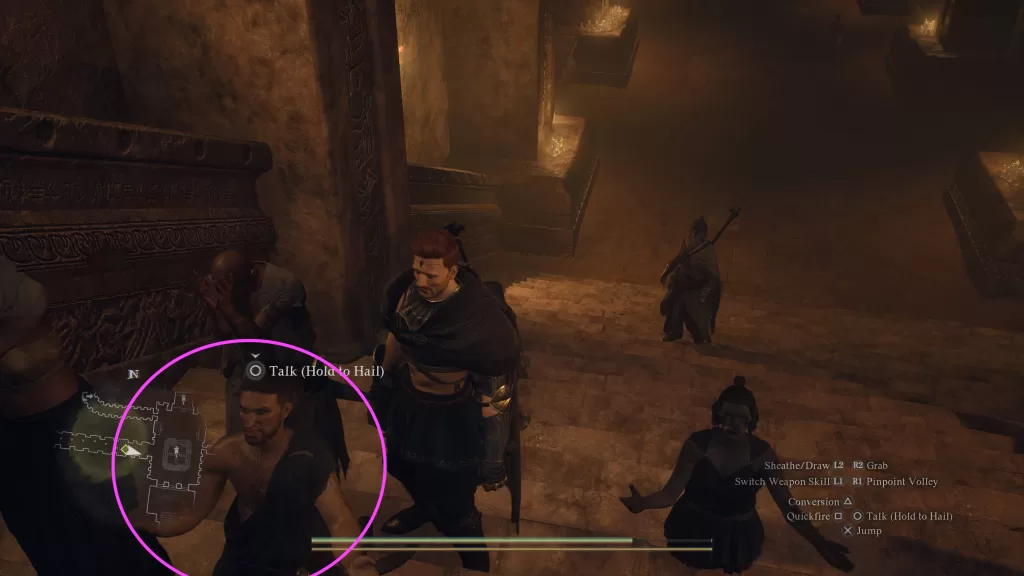
When you gain control of the Arisen, you’ll find yourself just north of Bakbattahl. Make sure the Dreams Apart quest is active then head south into the city. Once you’re there, make your way to the Forbidden Magick Research Lab and go to Phaesus’s Chamber to trigger a cutscene with the man himself. Exhaust his dialog options to learn a bit more about what’s going on. After the conversation, your pawn will rejoin you.

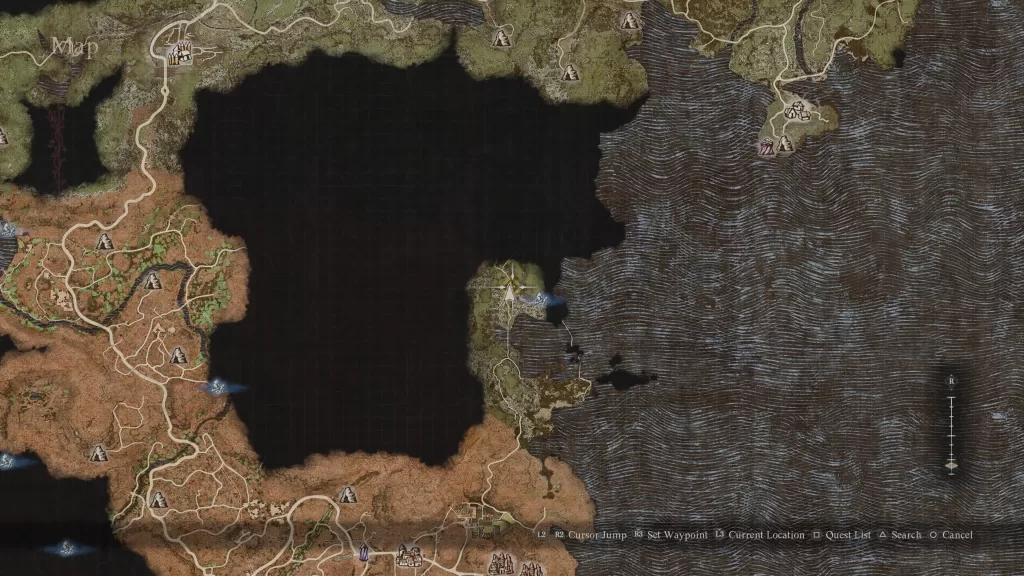
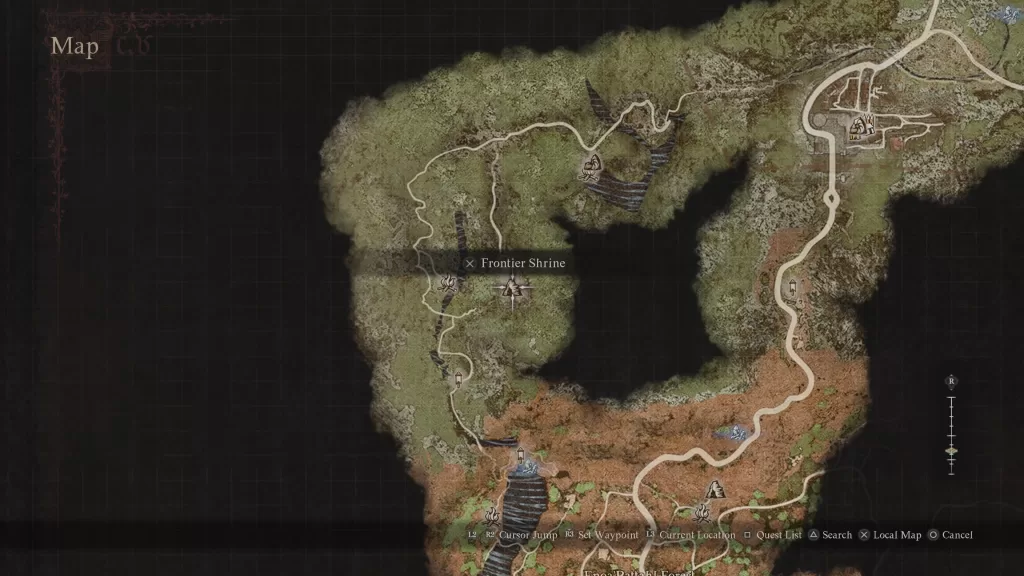
Visit the Seafloor Shrine

Seafloor Shrine Location

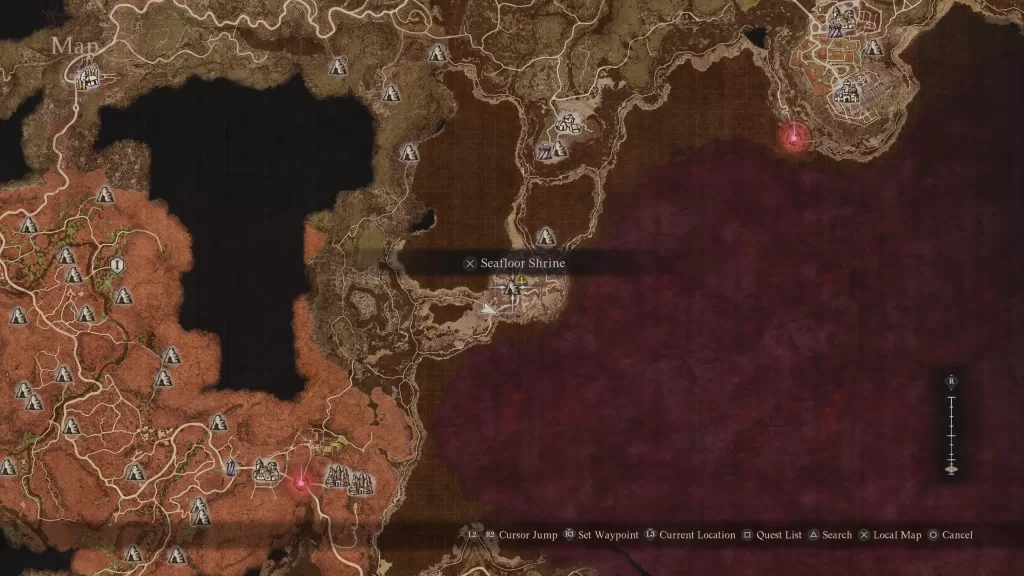
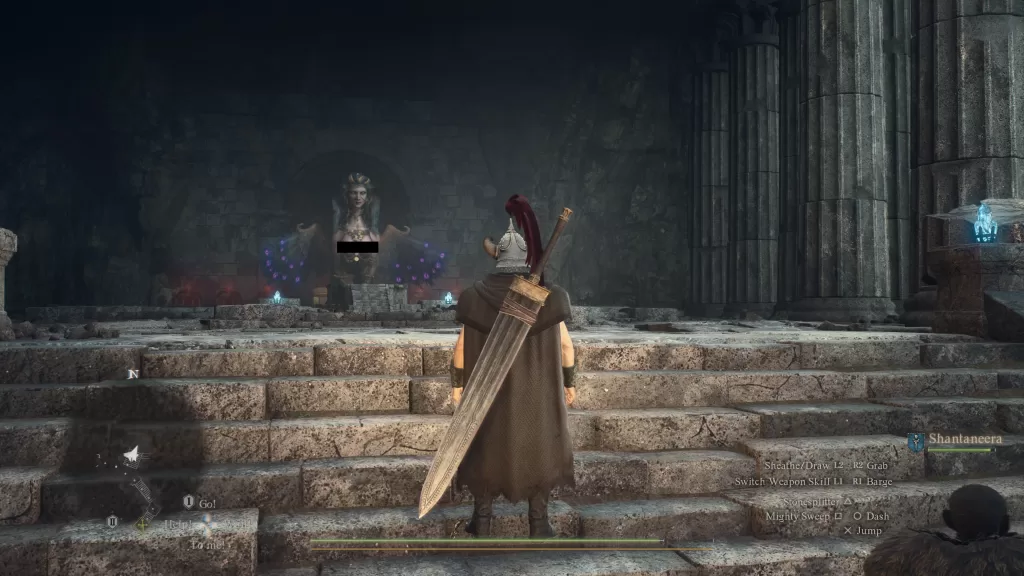
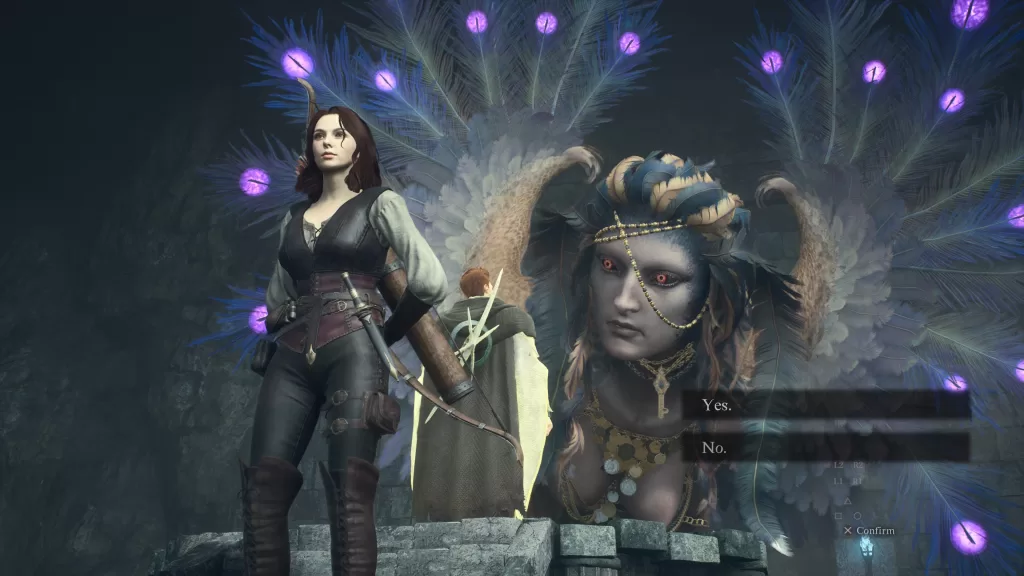
Now that you’ve been reunited with your pawn, head to the Seafloor Shrine north of Bakbattahl near where you started. On the way out, Ambrosius will stop the Arisen to mention that he and Phaesus are heading to the Volcanic Island inviting you to assist them. This will start the When Wills Collide quest. Make your way to the Sacred Grounds in the Seafloor Shrine. When you arrive, interact with the Portcrystal then approach Rothais in the blue bubble and speak with him. He’ll tell you to gather allies from the places we’ve previously visited.

Please note that you can gather allies from the locations in any order! We just listed the locations based on the order we completed them.

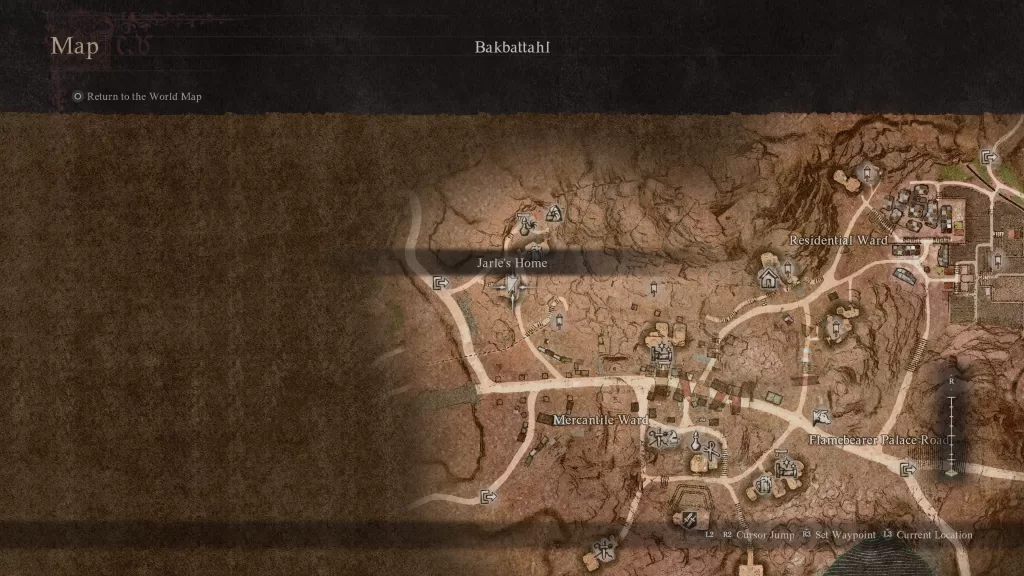
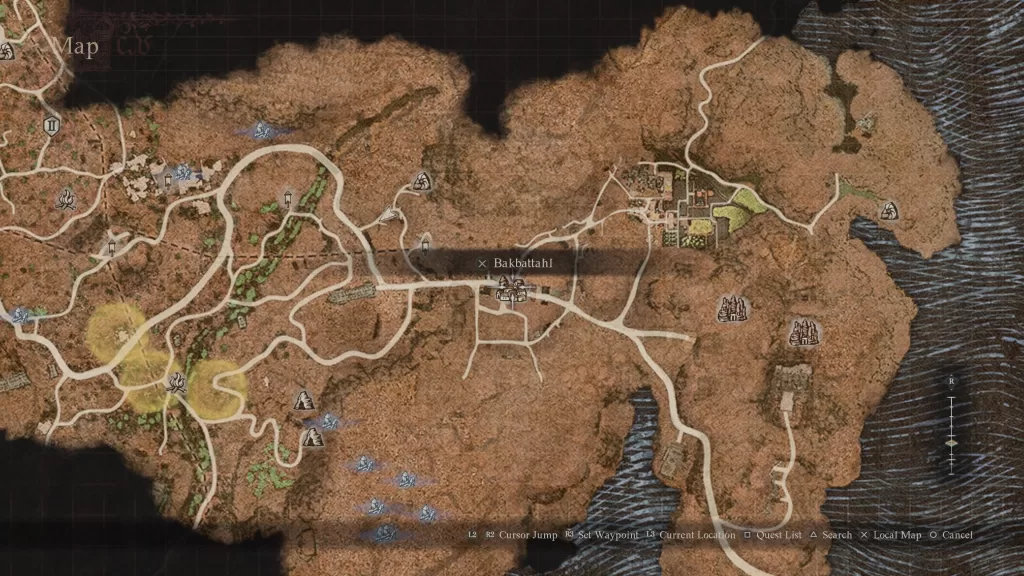
Travel to Bakbattahl

Civil Unrest Quest

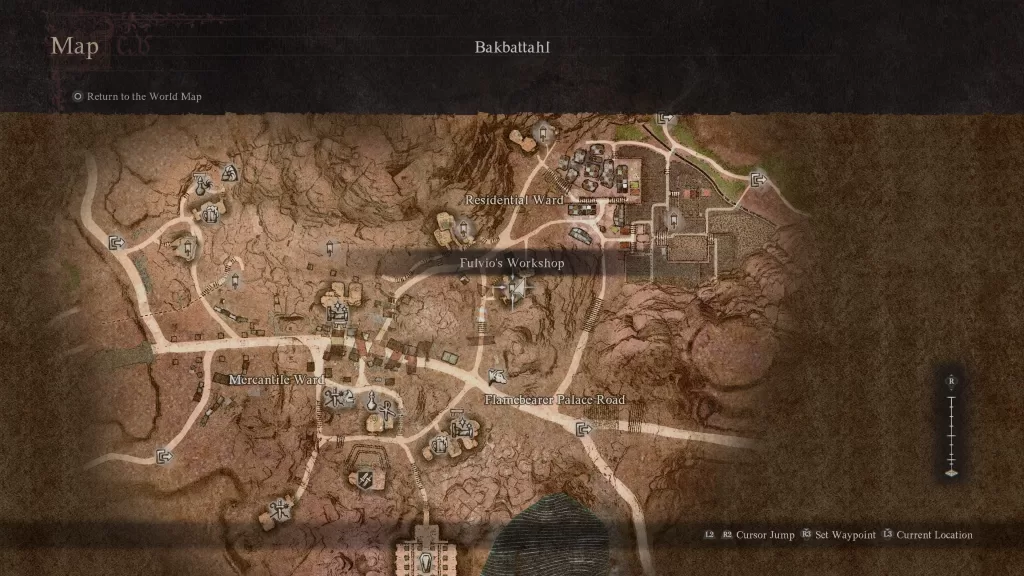
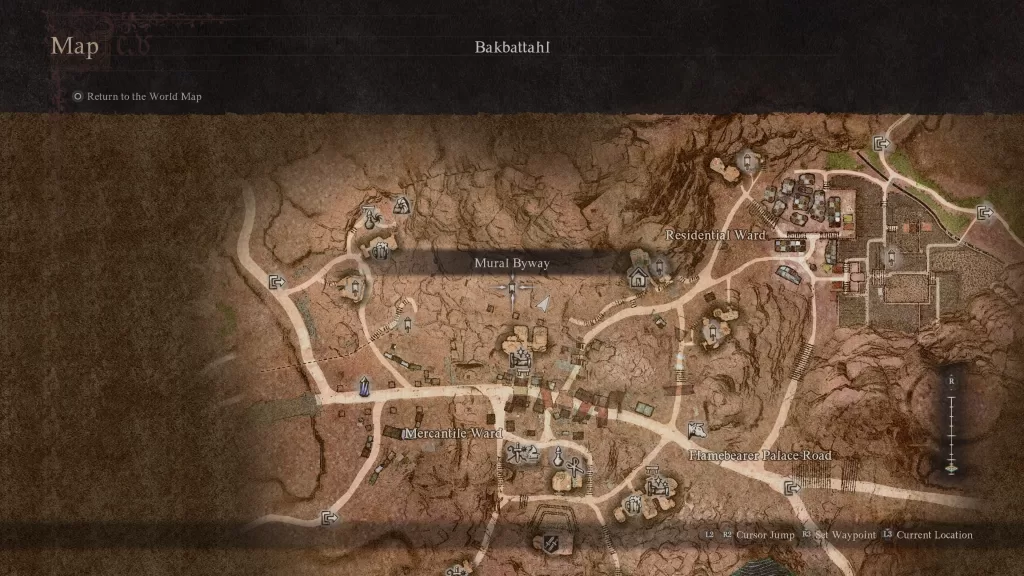
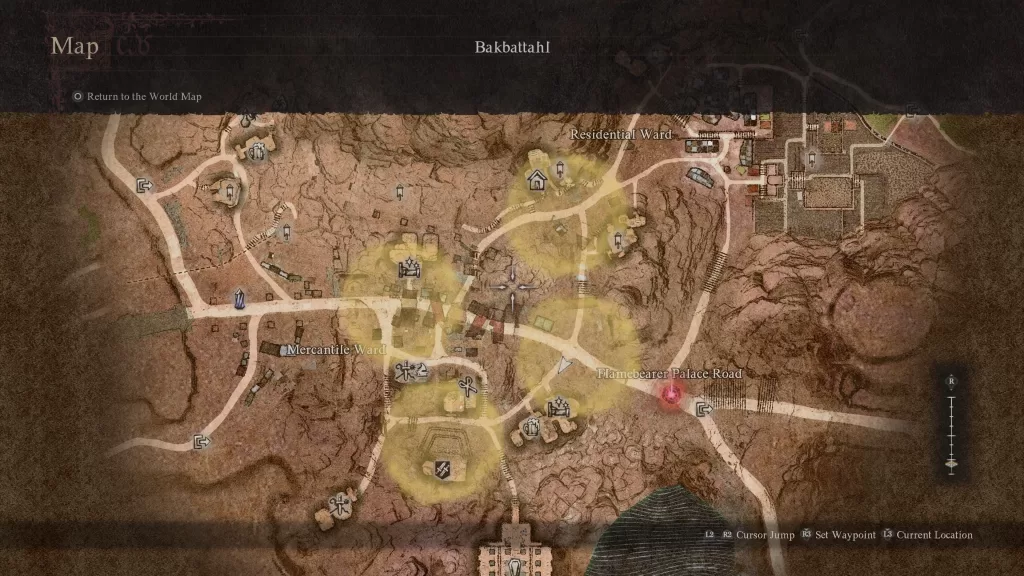
Make your way to Bakbattahl. When you reach the Mercantile Ward and approach the palace, a cutscene will trigger and Menella will show up to settle a dispute. Speak with her afterwards to trigger the Civil Unrest main quest where you’ll need to take a stroll through Battahl to help settle the quarrels of its citizens.

Civil Unrest Quest

Grantt and Abba – South of Residential Ward

Just south of the Residential Ward, you’ll find Grantt and Abba bickering. When they start fighting, approach them. They will then attack you instead. DO NOT kill them or hit back. Instead just let them hit you!

Glintt and Nomos – Pilgrims’ Inn

Near the Pilgrims’ Inn in the Mercantile Ward, you’ll find this duo arguing outside of the inn. You’ll then need to choose who you believe is wrong. Pick whoever you’d like as the ending doesn’t matter.

Scario and Nabrah – Bakbattahl Vocation Guild

Outside of the Bakbattahl Vocation Guild you’ll find this pair fighting. For these two, approach them and they will ask you to be the observer for their duel. Ask for the reason then agree to bare witness.

After solving the three quarrels, return to Menella then speak with the Empress Nadinia in her chambers at the Flamebearer Palace. She’ll then say they are going to evacuate but ask that we speak with Lord Phaesus about evacuating as well. You’ll then be rewarded with 30 Wyrmslife Crystals and 10,000G for your efforts.

A Scholarly Pursuit Quest

Before leaving the city, interact with the giant red beam of light on Flamebearer Palace Road where a dragon statue fell from the sky. Phaesus will show up and you’ll need to escort him to the object. This will lead to an event where monsters will be summoned. Take them out then follow Phaesus around Bakbattahl, defeating the monsters in your way. When you reach the palace, a bunch will spawn, however, you can ignore them and just make a beeline to the dragon statue that you’ll need to destroy it. Once broken, you’ll get 30 Wyrmslife Crystals and 10,000G.

Travel to the Volcanic Island Camp

The Importance of Aiding Ernesto Quest

When you arrive at the Volcanic Island Camp, speak with Ernesto on the north side of the camp about evacuating. He’ll give you The Importance of Aiding Ernesto quest during which you’ll need to travel to the Windwalker’s Home retrieve the blacksmith and his wife. Place a Portcrystal here as it’ll make this quest go much faster! Next, travel west of the Volcanic Island Camp to the Windwalker’s Home. When you arrive, Gautstafr and Cliodhna will agree to come with you. You can use a Ferrystone to quickly escort the pair to the camp for evacuation. Afterwards, speak with Ernesto near the giant wooden wheel in the northern part of the camp. He will then ask you to convince Ser Lamond to join the evacuation. Make your way to the hot spring on the south side of camp. We asked him to be a guard for the smithy and his wife. He agreed. We then spoke with Ernesto to complete this quest. As a reward, we received 40 Wyrmslife Crystals and 15,000G.

Travel to Excavation Site

Shepard of the Pawns Quest

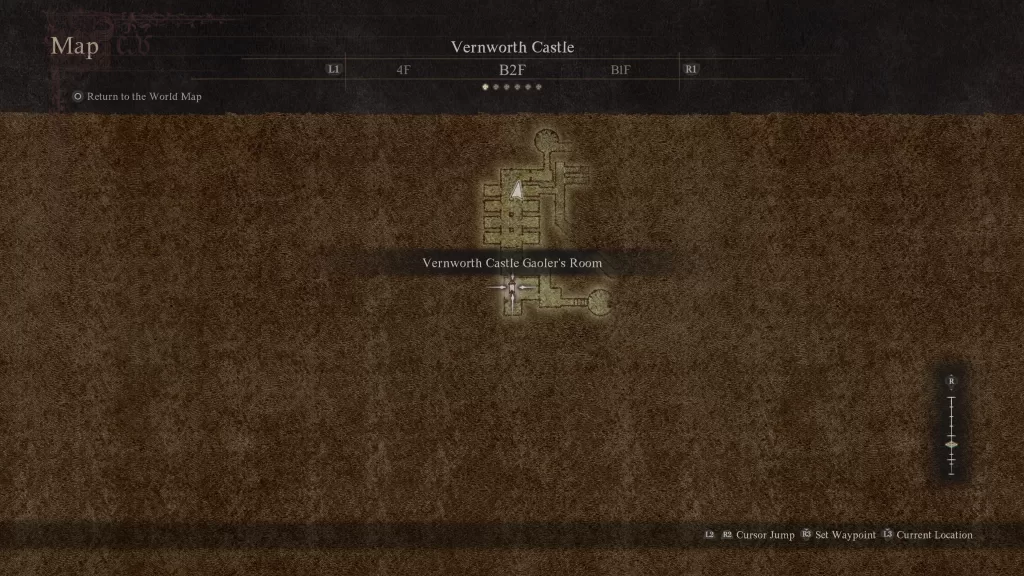
Next up, travel to the Excavation Site. When you arrive, a golem will be attacking so take it down! After the battle, Henrique will come offer his thanks then bade the Arisen follow him. He’ll show you that the pawns are staying put because they were ordered to remain. To remedy this, you’ll need to seek out the Overseer using the key that Henrique provided you. You’ll find him in the locked house southeast of the Agamen Ruins Inn.

Shepard of the Pawns Quest during The Unmoored World post game in Dragon's Dogma 2

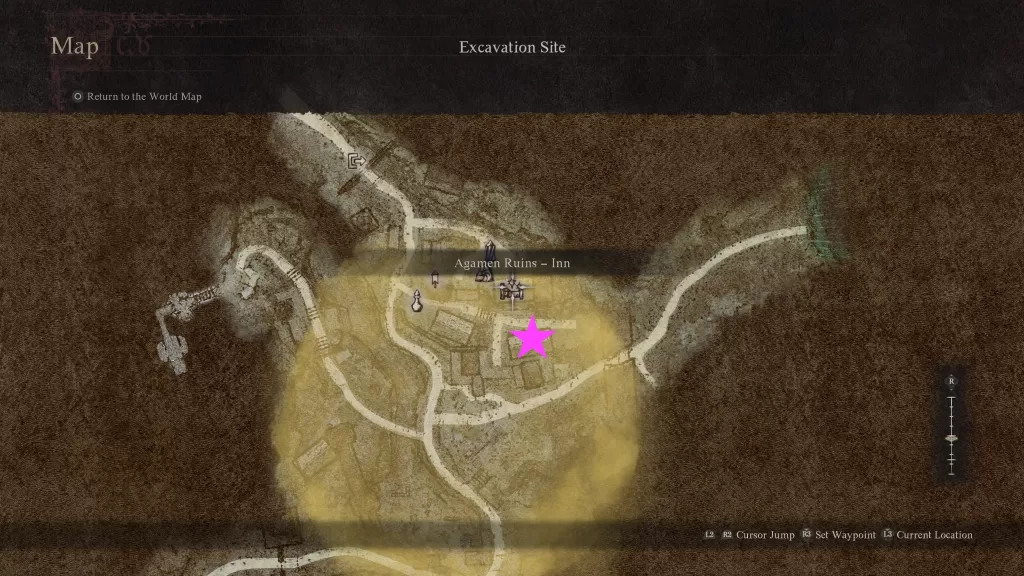
Pick up the Diminished Godsway from the floor then return to where the pawns were then deliver the godsway to Henrique. AS a reward, you’ll receive 30 Wyrmslife Crystals and 15,000G.

Travel to Volcanic Island Camp

When Wills Collide Quest

Return to the Volcanic Island Camp and head north along the main road then take the western path to trigger a cutscene as you approach Gigantus (you might need to speak with Ambrosius first). When you gain control, just stand there and watch the fight. After the winner prevails, another creature will appear from the sky. Again, watch the battle unfold. When it concludes, so will the When Wills Collide quest. As a reward, you’ll receive 32,500G.

Travel to Sacred Arbor

Wandering Roots Quest

When you arrive at Sacred Arbor, a cutscene will trigger showing you the red beam. Speak with Glyndwr in the middle of town then follow him to his father who will give you an Arborheart cutting. You’ll need to bring this to the Seafloor Shrine immediately.

Dragon's Dogma 2 Wandering Roots Quest

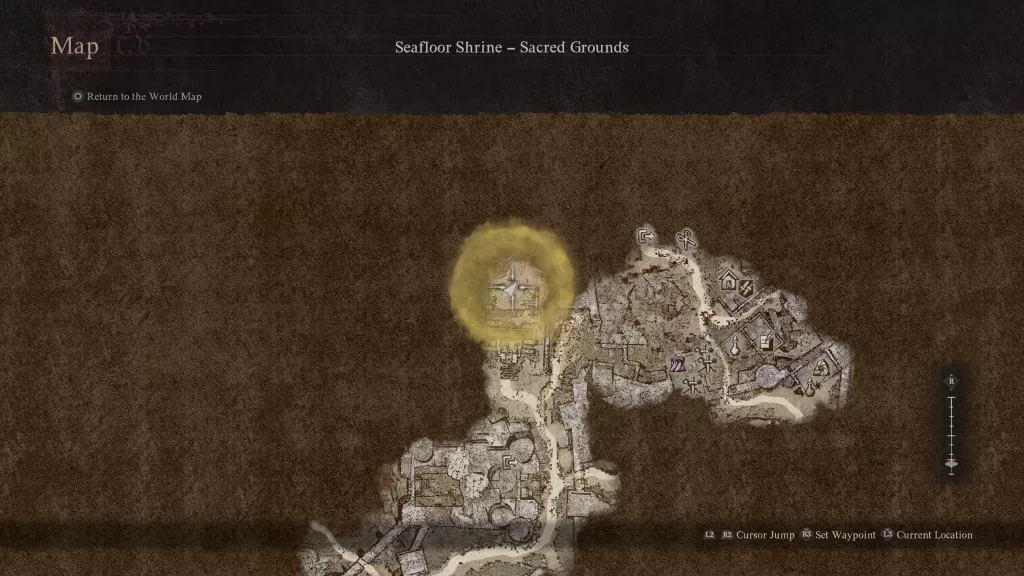
Once at the shrine, make your way to the yellow search area marked on the map then examine the spot by a crumbly wall to plant it. cThe plant will take root so return to Sacred Arbor and speak with Taliesin. As a reward, you’ll receive 30 Wyrmslife Crystals and 25,000G.

Red Beam of Light

Before leaving Sacred Arbor, head to the red beam of light and examine it. This will cause a dragon to fall from the sky. Take it out by damaging the weak spots on its body to earn Wyrmslife Crystals.
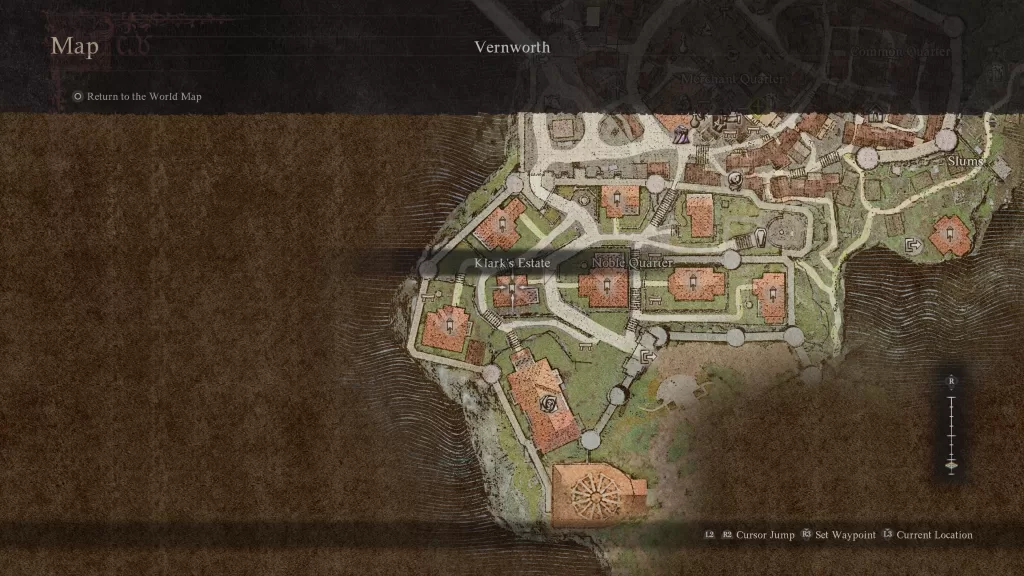
Travel to Vernworth

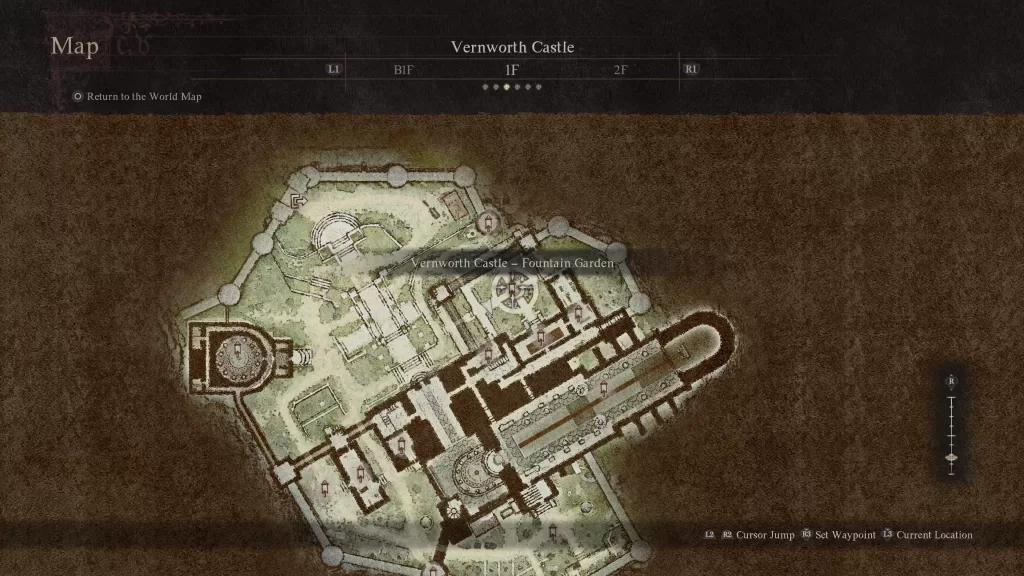
The Regentkin’s Resolve Quest

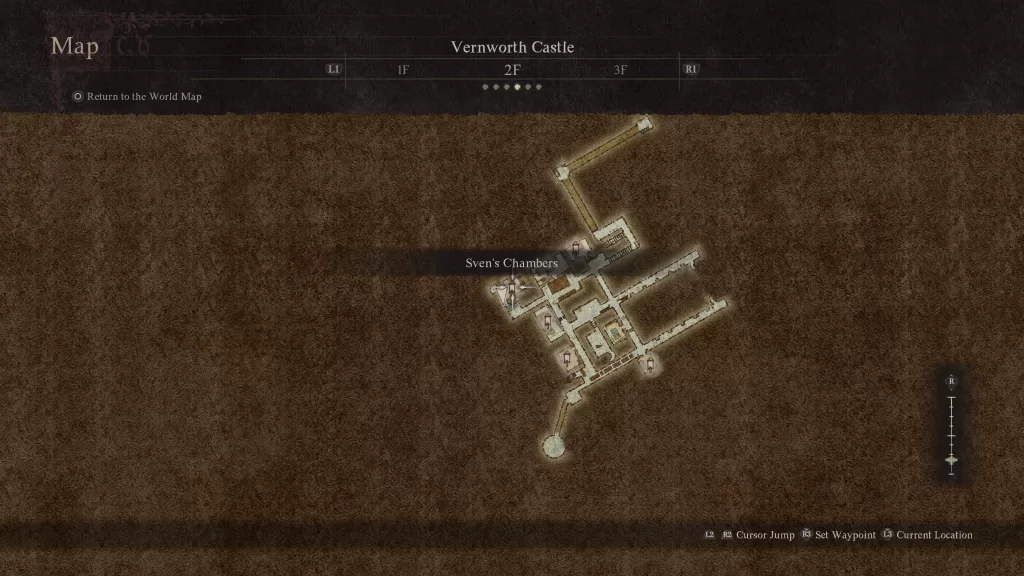
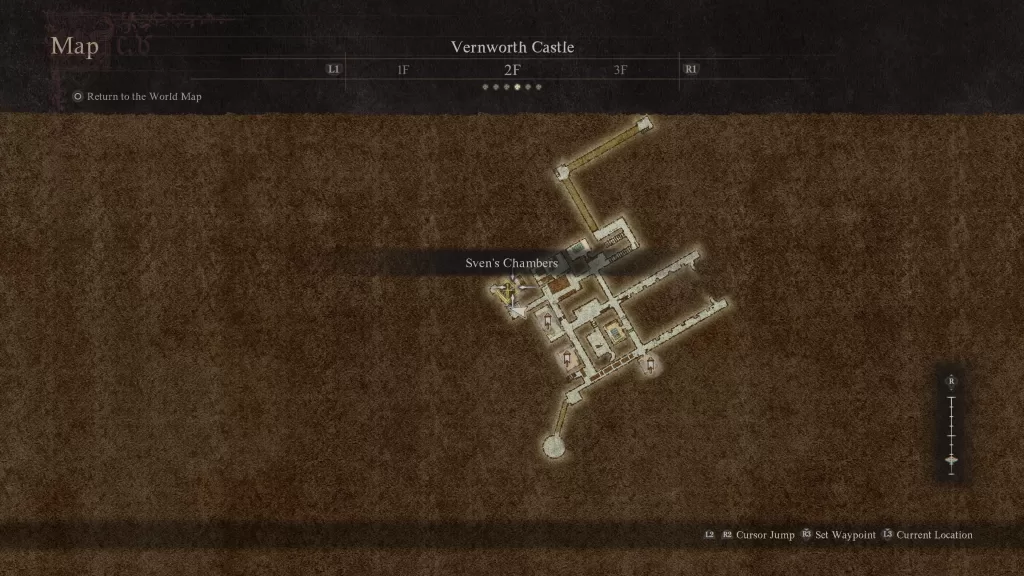
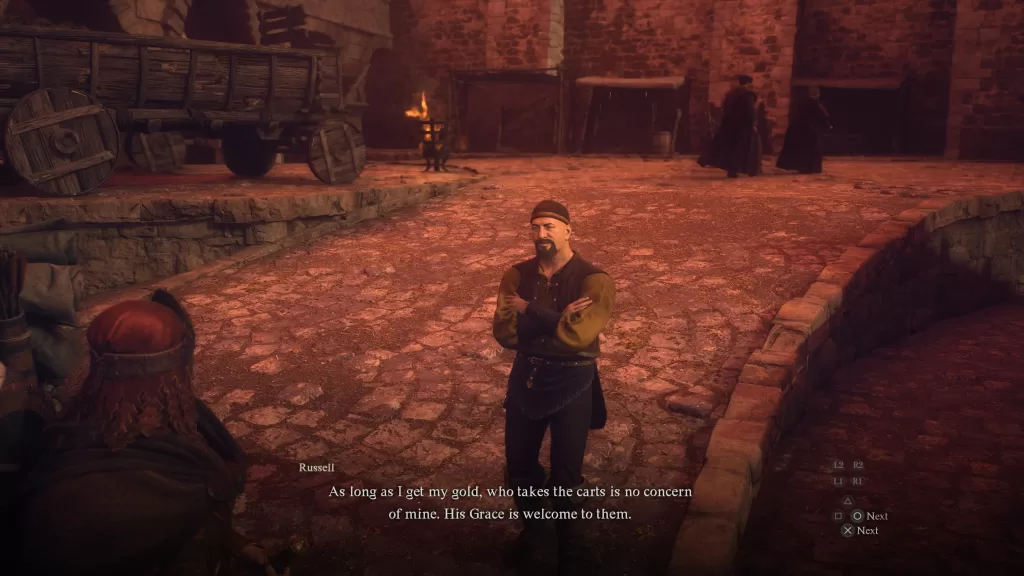
Once in Vernworth, speak with Brant in the Stardrop Inn about evacuating the city. You’ll then need to speak with Sven at the Vernworth Castle. He can be found in his chambers as usual! Afterwards, head to the oxcart station by the northwestern exit of town across from Clovis’s Barberie and speak with Russell who will agree to let us use them.

The Regentkin's Resolve Quest

Report back to Sven in Disa’s room with the good news. As a reward, you’ll receive 35 Wyrmslife Crystals.

Red Beam of Light

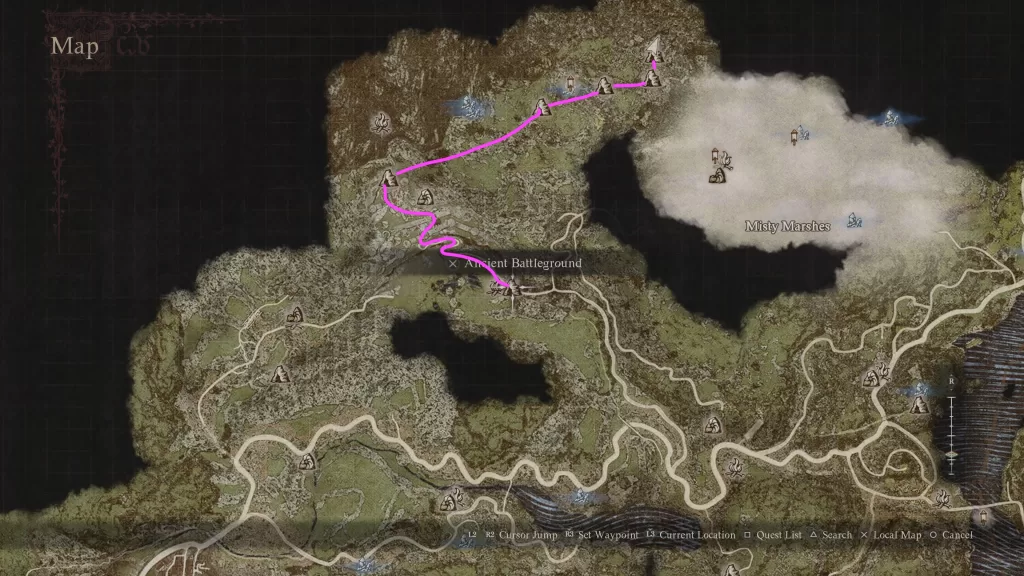
Before leaving the Vernworth area, head to the southwest side of Vernworth to the red beam of light. The easiest way to reach the area where the red beam of light awaits is to travel to Melve then follow the eastern narrow path along the coast. Once you arrive at the red beam, examine it then take out the dragon by damaging its weak spots. As a reward for defeating it, you’ll earn Wyrmslife Crystals.

Travel to the Seafloor Shrine

Once you’ve evacuated everyone and dealt with all the red beams, head to the Seafloor Shrine. Resting here will cause people to spawn. You can purchase items if you’d wish or speak to the people here. When you’re ready, head to the red beam of light and examine it to spawn the biggest dragon yet. When you gain control, make for the dragon’s neck, avoiding the obstacles along the way.

Dragon’s Dogma 2 Guides and Walkthroughs

For more Dragon’s Dogma 2 guides and walkthroughs, click here!

Dragon's Dogma II Logo - Dragons Dogma 2 Logo
Guides

Dragon’s Dogma 2 – A Case of Sculptor’s Block Quest

by NightlyGamingBinge in

Welcome to NGB and our Dragon’s Dogma 2 walkthrough on the A Case of Sculptor’s quest. Here you’ll find everything you’ll need to breeze through this quest.

How to obtain the A Case of Sculptor’s quest

Dragon's Dogma 2 A Case of Sculptor's Location

To begin the A Case of Sculptor’s quest in Dragon’s Dogma 2, you must pass by the Klark’s Estate in the Noble Quarter. Klark will begin talking to you about speaking with a sculpture in Bakbattahl. Agree to help him to begin the quest.

A Case of Sculptor’s Objectives

Visit Fulvio in Battahl

DD2 Fulvio

Fulvio can be found in Fulvio’s Workshop, which is located just south of the Residential Ward. He’ll request that you get a Medusa head to freeze a griffin in place long enough so he can draw it.

Find Medusa

Before heading for the meeting place, you’ll need to track down Medusa. In Dragon’s Dogma 2, Medusa can be found southwest of Bakbattahl at the Nera’Battahl Windrift.

Medusa DD2 Dragon's Dogma 2

To decapitate her, you’ll need to focus your attention on her head. We were of the thief vocation to accomplish this! While fighting her, she will throw you off so quickly climb back on and deal more damage to her head until it finally comes off.

Make for the meeting place

A Case of Sculptor's Block Fulvio's Location Dragon's Dogma 2

Now that you have Medusa’s head, travel northwest of Bakbattahl and east of the Enoa Battahl Forest near the Riftstone of the Summit. There you’ll find Fulvio.

Accompany Fulvio

Follow Fulvio up the path to reach the griffin.Equip Medusa’s head by going into the items menu then going to the implements tag (where your lantern is). There you can equip it. Once that’s done, use the head on the griffen to turn it to stone. You can do this by pushing the same button combination to activate the lantern. Once the griffen is turned to stone, Fulvio will make a comment on how awesome you were and can now finish the sculpture.

Wait a few days

You’ll need to wait a few days then check on Fulvio’s progress. After a few day’s have passed, return to Fulvio’s workshop and speak with him. He’ll tell you that it’s complete and will extend and invitation for you at Klark’s Estate in Vernworth.

Attend Unveiling

Travel to the Noble Quarter in Vernworth and enter Klark’s Estate. Head up to the second level and enter the room to trigger a cutscene. As a reward, you’ll receive, 18,500G.

Dragon’s Dogma 2 Guides and Walkthroughs

For more Dragon’s Dogma 2 guides and walkthroughs, click here!

Dragon's Dogma II Logo - Dragons Dogma 2 Logo
Guides

Dragon’s Dogma 2 – A Veil of Gossamer Clouds Quest

by NightlyGamingBinge in

Welcome to NGB and our Dragon’s Dogma 2 walkthrough on the A Veil of Gossamer Clouds quest. Here you’ll find everything you’ll need to breeze through this quest.

How to obtain the A Veil of Gossamer Clouds quest

To begin the A Veil of Gossamer Clouds quest in Dragon’s Dogma 2, you’ll first need to complete all of Captain Brant’s quests and attend the coronation. When you leave the Stardrop Inn, someone will approach you saying that Sven is awaiting your prescense in his chambers. Afterwards, head to the castle and make your way up to the second floor where you’ll find Sven’s Chambers on the northwestern side.

A Veil of Gossamer Clouds Dragon's Dogma 2 (DD2)

Upon entering, Sven will strike up a conversation with you and hand over an Unfinished Letter.

A Veil of Gossamer Clouds Objectives

Investigate the letter and report back to Sven

For this quest, you’ll first need to complete The Heel of History and The Caged Magistrate quests if you have not already done so. These quests will send Magistrate Waldhar to The Gracious Hand’s Vaults in Vernworth. When you’re ready for this objective, you’ll need to deliver the letter to Magistrate Waldhar in The Gracious Hand’s Vaults in Vernworth.

Investigate the Letter and Report back to Sven DD2

Next, travel to the Vernworth Castle Gaol Tower and speak with Lady Elena in the row on the left side. She’ll look it over and tell you more information about Lord Phaesus and direct you to the Forbidden Magick Research Lab in Battahl. When you speak with her, the guards might start to attack you. If this happens, quickly run out the back door to escape.

Forbidden Magick Research Lab

Travel to the Forbidden Magick Research Lab east of Bakbattahl. In order to go inside, you’ll need to have the Battahl Residence Permit. When you walk into the room with a dragon on a pedestal, you’ll witness a scene between Jerome and Yglie. Afterwards, head into the room they were in and loot the Letter to Lord Phaesus on the table.

Vernworth Castle Sven's Chambers

Next, travel to Vernworth Castle and enter Sven’s Chambers on the second floor. Choose the see for yourself option and show him the Letter to Lord Phaesus. As a reward, you’ll receive a Ferrystone and 20,000G.

Dragon’s Dogma 2 Guides and Walkthroughs

For more Dragon’s Dogma 2 guides and walkthroughs, click here!

Dragon's Dogma II Logo - Dragons Dogma 2 Logo
Guides

Dragon’s Dogma 2 – A Poisonous Proposal Quest

by NightlyGamingBinge in

Welcome to NGB and our Dragon’s Dogma 2 walkthrough on the A Poisonous Proposal quest. Here you’ll find everything you’ll need to breeze through this quest.

How to obtain the A Poisonous Proposal quest

DD2 A Poisonous Proposal

To begin the A Poisonous Proposal quest in Dragon’s Dogma 2, speak with Jarle in Jarle’s Home, which is in the northwestern corner of Bakbattahl.

A Poisonous Proposal Dragon's Dogma

A Poisonous Proposal Objectives

Allow yourself to be poisoned by an asp

Asps are purple lizard-like creatures that can be found at the below locations marked by the yellow circles.

Asp location in DD2

Once you’ve found some, allow yourself to become poisoned by them by standing in their spew then return to Jarle in Bakbattahl while still in a poisoned state. He will heal you then give you another task!

Allow yourself to be poisoned by a venin harpy

You can find venin harpy at the below locations marked by the yellow circles!

Dragon's Dogma 2 Venin Harpy Locations

Once you’ve found some, allow yourself to become poisoned by them by standing in their spew then return to Jarle in Bakbattahl while still in a poisoned state. He will heal you then give you another task!

Join Jarle at the meeting place

A Poisonous Proposal Jarle Meeting Place

Travel north of the Residential Ward of Bakbattahl then keep going until you reach a campsite where you’ll find Jarle. Head inside.

Aid Jarle in getting poisoned

During this battle, kill the goat head so it focuses its attacks using the snake. Whatever you do, don’t kill it or cut off its tail as that is what will poison Jarle! When the chimera does the roar you’ll know the poison comes next! Make sure that Jarle gets in the poison by either carrying him into it or standing next to him to encourage the chimera to target you/him. You’ll know when Jarle is poisoned, because he’ll tell you then run off. Once Jarle is poisoned, you can either leave the fight or finish it off.

Find out how Jarle faired

Return to Jarle’s house in Bakbattahl and speak with him to complete the A Poisonous Proposal quest. As a reward, you’ll receive Ring of Purification and 19000G.

Dragon’s Dogma 2 Guides and Walkthroughs

For more Dragon’s Dogma 2 guides and walkthroughs, click here!

Dragon's Dogma II Logo - Dragons Dogma 2 Logo
Guides

Dragon’s Dogma 2 – Steel Resolve Blazing Forge Quest

by NightlyGamingBinge in

Welcome to NGB and our Dragon’s Dogma 2 walkthrough on the Steel Resolve Blazing Forge quest. Here you’ll find everything you’ll need to breeze through this quest.

How to obtain the Steel Resolve Blazing Forge quest

The Steel Resolve Blazing Forge quest in Dragon’s Dogma 2 will automatically begin after completing the Dulled Steel Cold Forge quest.

Steel Resolve Blazing Forge Objectives

Check on Sara’s Progress

After some time passes, return to Sara in Brokkr’s Smithy in Bakbattahl and speak with her. Afterwards, you’ll need to wait some more time so she can think about the patterns. When you return to check on her, you’ll find that Sara is missing.

Find Sara

Steel Resolve Blazing Forge Dragon's Dogma 2 DD2

Travel to the Mountain Base Cave, which is to the far southeast of Bakbattahl. Make your way through this cave to reach Sara at the end next to a forge.

Deliver Sara to the cave entrance

Make your way back to the entrance with Sara in tow.

Return to the smithy

Travel all the way back to Brokkr’s Smithy in Bakbattahl. Once there, you’ll witness a scene and you’ll receive the Restored Regalia Sword.

Report back to Roman

Vernworth Castle Fountain Garden

Head to the Vernworth Castle – Fountain Garden and speak with Roman, the soldier, to hand it over. As a reward, you’ll receive 35,000G.

Dragon’s Dogma 2 Guides and Walkthroughs

For more Dragon’s Dogma 2 guides and walkthroughs, click here!

Dragon's Dogma II Logo - Dragons Dogma 2 Logo
Guides

Dragon’s Dogma 2 – A Game of Wits Quest

by NightlyGamingBinge in

Welcome to NGB and our Dragon’s Dogma 2 walkthrough on the A Game of Wits quest. Here you’ll find everything you’ll need to breeze through this quest.

How to obtain the A Game of Wits quest

Sphinx Mountainside Shrine in Dragon's Dogma 2

To begin the A Game of Wits quest in Dragon’s Dogma 2, you’ll need to find the sphinx in the Mountain Shrine. To reach this shrine, you’ll need to find the Ancient Battleground, which is northeast of Checkpoint Rest Town. Follow the road to the northwest of the Ancient Battleground to the structure. Once in the structure, work your way to the top and locate the Worldsend Cavern to the north of the structure. Follow the path through the mountain to reach the Shrine Corridor. Keep following the path to reach the Mountain Shrine. Approach the sphinx who will challenge you to a set of riddles.

Sphinx - DD2 - Dragon's Dogma 2

A Game of Wits Objectives

Answer the sphinx’s riddles at the Mountain Shrine

Stand on the pedestal in front of the sphinx to select a riddle.

Riddle of Eyes

Answer: Sealing Phial

Sphinx Riddle of Eyes Dragon's Dogma 2

Head through the newly opened door then turn around and look up to spot a chest. Loot this chest above the door to receive a Sealing Phial, which is what you want to give the sphinx to correctly answer the Riddle of Eyes. As a reward for answering correctly, loot the newly unlocked chest behind the sphinx to receive a Wakestone.

Riddle of Madness

Answer: A character you’ve romanced

For the Riddle of Madness, you’ll need to bring the sphinx a character you have romanced. Our choice was Ulrika! You have several different ways to bring your romanced character back to the sphinx. We dropped a Portcrystal at the sphinx then used a Ferrystone while we were carrying our romanced character. Put her down next to you then speak with the sphinx to select “yes”.

Riddle of Madness DD2

As a reward for solving the Riddle of Madness, you’ll be able to open the chest containing a Portcrystal.

Riddle of Wisdom

Answer: “SphynxMother” or “SphynxFather” Pawn that is from CAPCOM

For the Riddle of Wisdom DD2, you’ll need to head to the Riftstone of Fellowship at Harve Village. Interact with it then view the Pawns it has. You’re looking for the “SphynxMother” or “SphynxFather” Pawn from CAPCOM. Please make sure it is from CAPCOM before you recruit them!

Riddle of Wisdom DD2 Dragon's Dogma 2

Once you have the Pawn, return to the sphinx. You’ll need to carry the Pawn close the the sphinx then speak with her. As a reward for completing the Riddle of Wisdom, you’ll receive 1200 RC.

Riddle of Conviction

Answer: Any item you’d like duplicated

For the Riddle of Conviction, you’ll need to deliver a prized possession. You can choose whatever item you’d like duplicated. As a reward for solving this riddle, you’ll be able to open the chest containing whatever item you gave her hence it was duplicated as she doesn’t actually take the item you give her.

Riddle of Rumination

Answer: Your first Seeker’s Token location

For the Riddle of Rumination in DD2, you’ll need to remember the location of the first Seeker’s Token you collected! In the location of your first token, you’ll find a Finder’s Token. Bring this token back to the sphinx to complete the Riddle of Rumination. As a reward, you’ll be able to loot the chest containing Ferrystone x3.

Answer the sphinx’s riddles at the Frontier Shrine

Stand on the pedestal in front of the sphinx to select a riddle.

Riddle of Reunion

Sphinx's second location at Frontier Shrine in DD2

For this riddle, you just have to locate the sphinx at the Frontier Shrine, which is southwest of Checkpoint Rest Town. As a reward for solving this riddle, you’ll be able to open the chest containing 100,000G.

Riddle of Recollection

Answer: 6

For the Riddle of Recollection, you’ll need to know how many riddles you’ve solved. As an easy way of finding out, just count the chests you’ve opened at both shrines! As a reward for solving this riddle, the chest containing an Unmaking Arrow will unlock.

Riddle of Futility

Riddle of Futility Dragon's Dogma 2

For the Riddle of Futility in DD2, you’ll need to bring the amphora (aka pot) all the way to Ser Maurits, who can be found on the north side of Bakbattahl at the Mural Byway, without breaking it.

Riddle of Futility DD2

Alternatively, you can save yourself a lot of time by just teleporting Ser Maurits to the amphora via a Ferrystone or Sealing Phial. As a reward for solving this riddle, you can open the chest containing an Eternal Bond.

Riddle of Differentiation

For the Riddle of Differentiation, you’ll need to find the man the sphinx shows you. When you’re shown the man, pay close attention to the man’s hair as this will dictate whether you need to find Vergil or Dante. Vergil has wavy hair and Dante has straight hair. Both men can be found in Checkpoint Rest Town. Vergil can be found wandering around the south side of town near the South Border Checkpoint Oxcart Station, whereas, Dante will be found on the north side of town near The Sword & Staff. Collect your person then bring him to the sphinx. As a reward for solving this riddle, you can open the chest containing the Whimsical Daydream.

Riddle of Contest

Riddle of Contest DD2 Dragon's Dogma 2

For the Riddle of Contest in Dragon’s Dogma 2, you’ll need to fight a man wielding a sword and shield that the sphinx spawns while wearing a Ring of Derision that the sphinx automatically equips on you. This ring makes all your attacks as weak as possible. We were able to knock him out of the shrine and our Pawns joined in the fight. Additionally, we were able to push him off the cliff where he fell to his death which ended the battle. As a reward for solving this riddle, you can open the chest containing a Ring of Ambition.

Defeat Sphinx

After solving all the riddles, approach the platform and an event will trigger during which she’ll attempt to fly away. Quickly run around behind her and equip the Unmaking Arrow. Shoot her in the back causing her to die instantly. Make sure to pick up the Key of Sagacity and use it to open the giant gold chest to receive an Eternal Wakestone.

Dragon’s Dogma 2 Guides and Walkthroughs

For more Dragon’s Dogma 2 guides and walkthroughs, click here!

Dragon's Dogma II Logo - Dragons Dogma 2 Logo
Guides

Dragon’s Dogma 2 – Off the Pilfered Path Quest

by NightlyGamingBinge in

Welcome to NGB and our Dragon’s Dogma 2 walkthrough on the Off the Pilfered Path quest. Here you’ll find everything you’ll need to breeze through this quest.

How to obtain the Off the Pilfered Path quest

To begin the Off the Pilfered Path quest in Dragon’s Dogma 2, you’ll need to run into a guard near the shops in the Mercantile Ward to learn of this quest.

Off the Pilfered Path Objectives

Offer Hugo guidance

So this quest is super particular and can seem bugged, however, you just need to complete certain quests! First, you’ll need to complete Every Rose Has Its Thorn as you’ll need to offer Hugo a job! Second, you’ll need to complete Tolled to Rest. If you do not complete this quest, Brefft will not appear in the jail cell next to Hugo!!

For this quest, you’ll need to exit on the eastern side of town then speak with Ekratt. Next, follow him into the gaol. Speak with Hugo twice then Dietrich to learn that there is a way to release Hugo by providing Ekratt with money to expedite the proccess. First he’ll ask for 1000G then you’ll wait some more time and he’ll ask for 2500G. Unfortunately this way did not work for us as we delivered the money to Ekratt, however, Hugo was never freed.

Instead, speak with Brefft in the jail cell next to Hugo to learn of the Coral Snakes’ new hideout and what happened to Hugo’s parents. Speak with Hugo and tell him what happened to his parents. Afterwards, quickly make your way to the Ancient Battleground to find Lanzo before Hugo does. If you wait, Hugo will die!!

Ancient Battleground for Off the Pilfered Path in Dragon's Dogma

In the Ancient Battleground make your way through the area until you reach the roof of the castle. There you’ll find Lanzo.

Off the Pilfered Path Lanzo

Take him out and his gang out. Hugo will then show up and you’ll need to tell him to live an honest life and offer him a job at the Myrmecoleon. As a reward, you’ll receive White-Leather Kerchief, Frosted Edges and 7000G.

Dragon’s Dogma 2 Guides and Walkthroughs

For more Dragon’s Dogma 2 guides and walkthroughs, click here!

Dragon's Dogma II Logo - Dragons Dogma 2 Logo
Guides

Dragon’s Dogma 2 – Tolled to Rest Quest

by NightlyGamingBinge in

Welcome to NGB and our Dragon’s Dogma 2 walkthrough on the Tolled to Rest quest. Here you’ll find everything you’ll need to breeze through this quest.

How to obtain the Tolled to Rest quest

To begin the Tolled to Rest quest in Dragon’s Dogma 2, you’ll need to head east of the Ancient Battleground dungeon, which is northeast of Checkpoint Rest Town. When we arrived, we found Oskar dead so we revived him using a Wakestone and the quest began. If you cannot find his body, check the Vermund Charnel House in the Noble Quarter of Vernworth to see if it’s there.

Tolled to Rest Objectives

Escort Oskar

You’ll need to protect Oskar as you escort him northwest through the Ancient Battleground. When you arrive to the castle, he’ll be looking for his grimoire! If you previously explored this area and took the grimoire, you’ll need to bring it back and give it to him. Once he finds the grimoire, he’ll ring the bell and the quest will complete. As a reward, you’ll receive the Ancient Battleground Key and 9000G. You can use this key to open a room in the hallway that has two chests inside. One chest contains a ferrystone and the other has an enchanted fire weapon for the Mystic Spearhand.

Dragon’s Dogma 2 Guides and Walkthroughs

For more Dragon’s Dogma 2 guides and walkthroughs, click here!

Dragon's Dogma II Logo - Dragons Dogma 2 Logo
Guides

Dragon’s Dogma 2 – Shadowed Prayers Quest

by NightlyGamingBinge in

Welcome to NGB and our Dragon’s Dogma 2 walkthrough on the Shadowed Prayers quest. Here you’ll find everything you’ll need to breeze through this quest.

How to obtain the Shadowed Prayers quest

Shadowed Prayers Dragon's Dogma 2 DD2

To begin the Shadowed Prayers quest in Dragon’s Dogma 2, speak with Manella at Flamebearer Palace in Bakbattahl.

Shadowed Prayers Objectives

Go to Flamebearer Palace in the morning

This is a TIMED request! Wait until the next morning then approach Manella who will give you a description of the target of he wears his head tied back and his right arm was wounded during the attack. The correct guy is kneeling on the stairs praying. His name is Herman! He has dark hair and is wearing a dark outfit.

Shadowed Prayers Assassin

Grab the guy (press R2 if playing on Playstation). As a reward for finding the correct guy, you’ll receive Jasper x5 and 18,000G.

Dragon’s Dogma 2 Guides and Walkthroughs

For more Dragon’s Dogma 2 guides and walkthroughs, click here!

Dragon's Dogma II Logo - Dragons Dogma 2 Logo
Guides

Excavation Site / Agamen Ruins – Dragon’s Dogma 2

by NightlyGamingBinge in

Welcome to NGB and our guide on all the things to do at Excavation Site / Agamen Ruins in Dragon’s Dogma 2!

Chests

  • Tarring Arrow x10 – Just outside of inn
  • 1750G – On wooden ledge by the Agamen Ruins Ropeway Station
  • Detoxifying Decoction – In house next to apothecary
  • 3430G – Behind house on southwest side of town
  • Fine Harspud Roborant – Up the ladder on the southern side of town
  • Fuligin Ore x2 – Up the ladder on the southern side of town across from the above
  • Emergent Vitality – Southeast side of town
  • 2370G & Dried Fruit – Southwest side of town

Shops

Apothecary

ItemPrice
Ferrystone10000G
Panacea5000G
Salubrious Draught250G
Detoxifying Decoction500G
Waking Powder400G
Quenching Syrup400G
Warming Salve450G
Sobering Tonic450G
Soothing Brew500G
Lantern (Fueled)1000G
Lantern Oil100G
Modest Camping Kit500G
Mundane Camping Kit1000G
Explorer’s Camping Kit2000G
Fulgurous Lord900G
Igneous Melody500G
Hiemal Euphony500G
Governing Soul900G
Stability Extract1500G
Savagery Extract1500G
Stoutness Extract1500G
Ring of Motility20000G

Zachary’s Shop (Next to Apothecary)

ItemPrice
Laurel Circlet26000G
Elegant Petticoat43050G
Braided Boots16800G
Monarch’s Mantle8980G
Wyrmhunter’s Cloak16700G
Ring of Profusion10000G
Ring of Triumph20000G

Dragon’s Dogma 2 Guides and Walkthroughs

For more Dragon’s Dogma 2 guides and walkthroughs, click here!