Welcome to NGB and our Bravely Default Flying Fairy Finale Lying Airy walkthrough! This guide will help you navigate the climactic final battle against the deceitful guide who’s been manipulating your journey from the very beginning. We’ll break down Lying Airy’s powerful attacks, offer strategies to survive each phase of the fight, and help you bring the story to its dramatic conclusion. Whether you’re aiming to see the true ending or just survive one of the toughest boss fights in the game, we’ve got you covered.
Quick Links
Finale Lying Airy Walkthrough
Destroy the Crystal
Boss Fight: Airy
At the beginning of the chapter, an event will unfold, leading to a confrontation with Airy. She is a bug-type enemy with 150,000 HP and has a weakness to fire. For this fight, you will only have Tiz, Ringabel, and Edea in your party. The good news is that it is a scripted encounter, so you only need to survive for a few turns while dealing damage to Airy. Eventually, she will use the Slaughter skill, which will defeat the party instantly. This will trigger another event.
Finale Lying Airy – Pursue Airy
Stock Up and Travel to the Great Chasm
Once you regain control of your party, exit the Temple of Earth and return to the world map. Before pursuing Airy, take this opportunity to stock up on essential items and ensure you have the necessary gear. When you feel prepared, make your way to the Norende Ravine and pass through it to reach the Great Chasm.
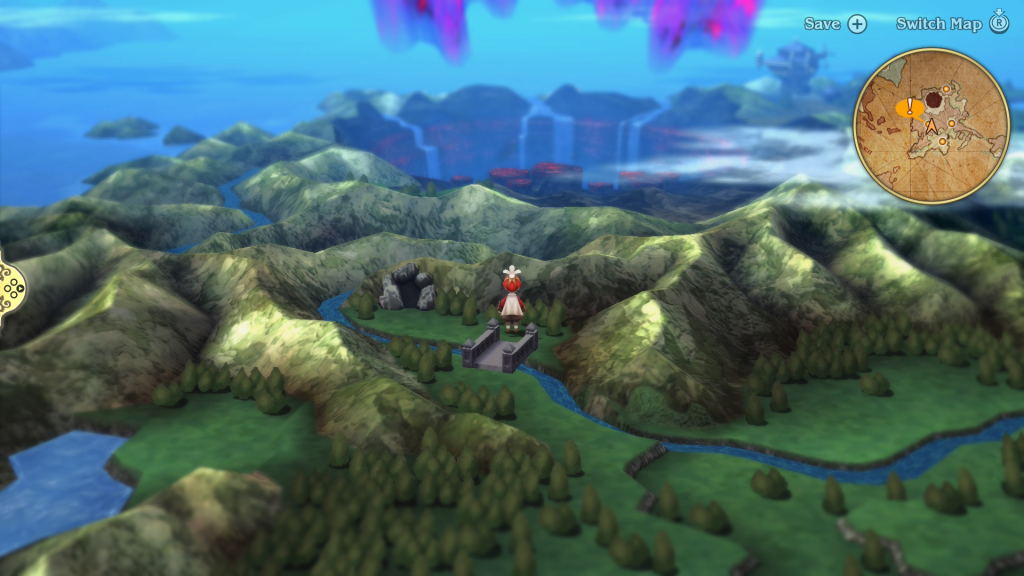
This will trigger an event just outside the Dark Aurora. Step onto the platform to enter.

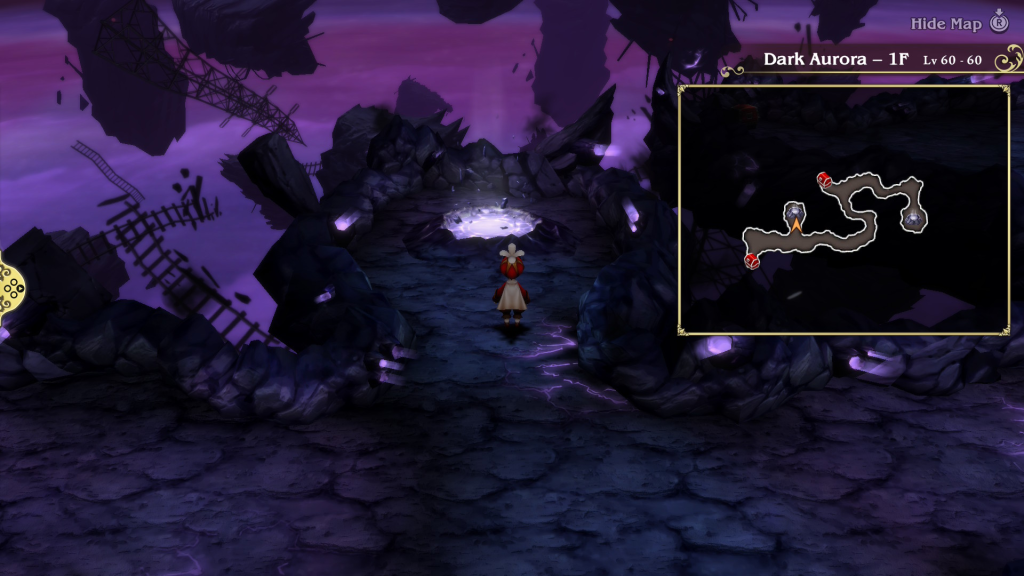
Reach Airy in the Dark Aurora’s Altar of Darkness
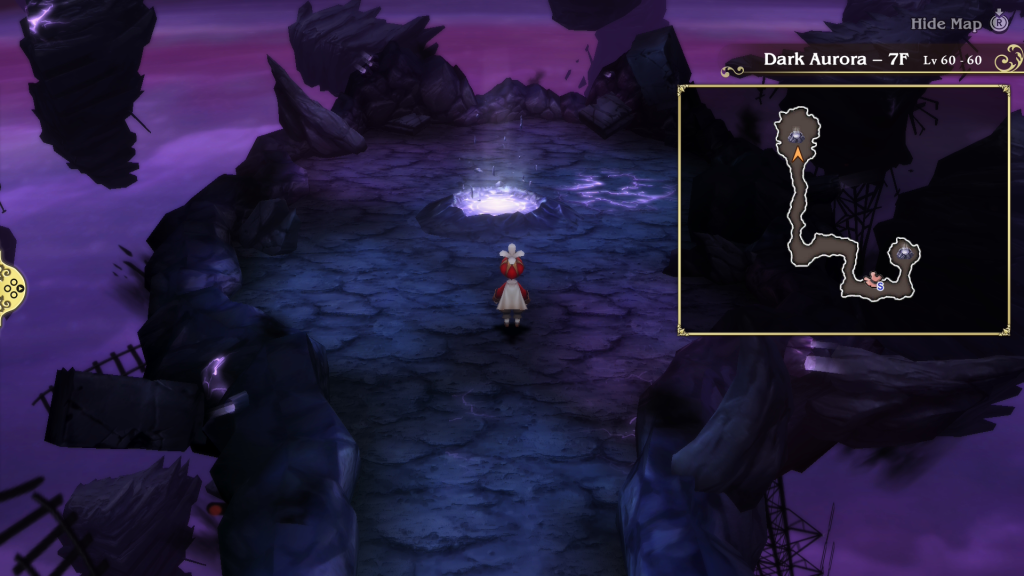
In the Dark Aurora, you’ll need to work your way through it to reach the Altar of Darkness. Below, you’ll find the layout of each floor, the chests you can find along the way, and what is inside them. When you reach Dark Aurora 7F, you’ll run into a man in red that you can use to heal up and save. From there, you’ll be able to reach the altar.
Dark Aurora – 1F
- Safety Ring
- Megalixir
Dark Aurora – 2F

- Life Ring
- Lamia’s Tiara
- Black Belt
Dark Aurora – 3F
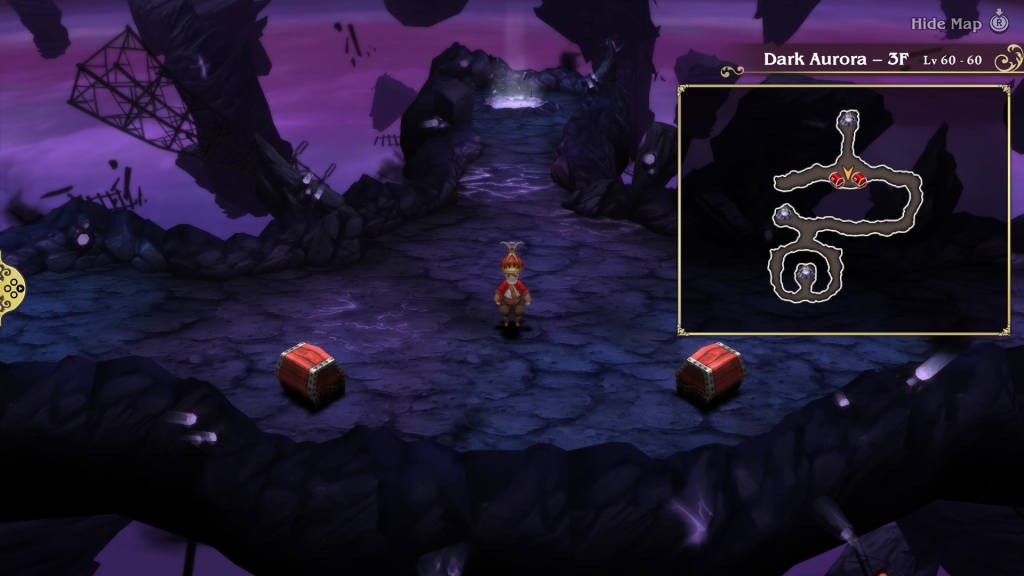
- Heart Ring
- Megalixir
Dark Aurora – 4F
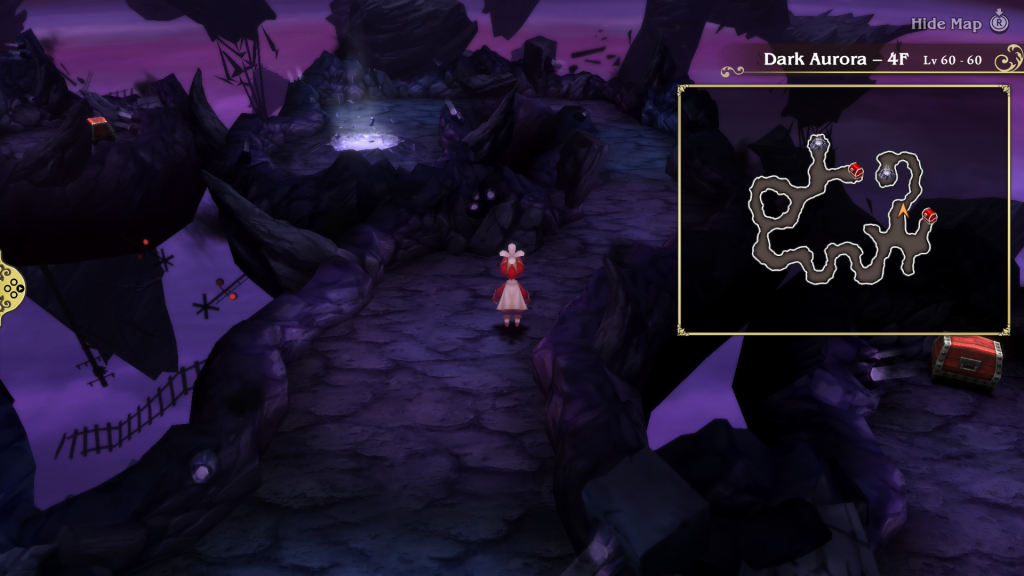
- Gold Hairpin
- Ribbon
Dark Aurora – 5F
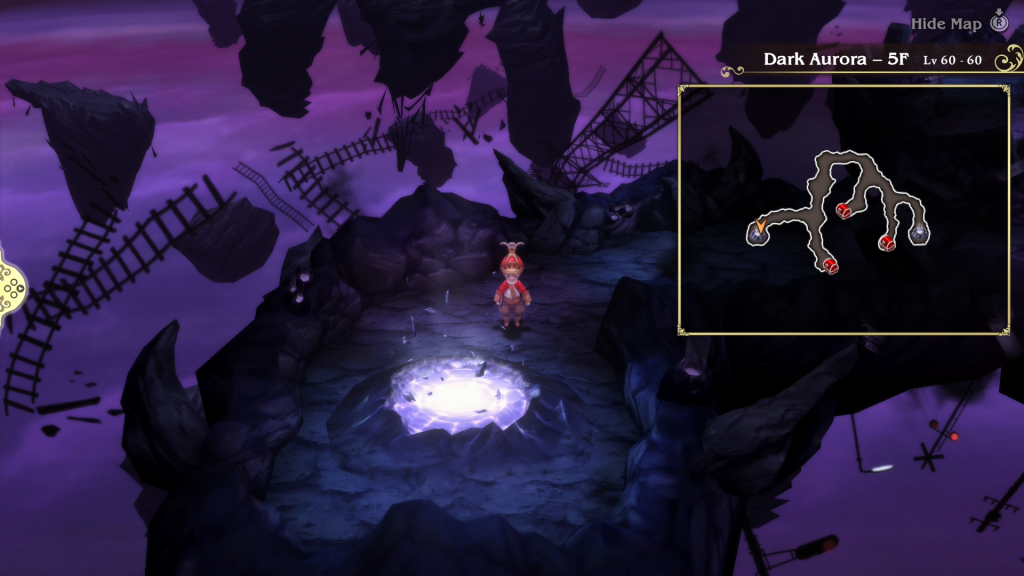
- Brave Suit
- Lilith’s Rod
- Aegis Shield
Dark Aurora – 6F
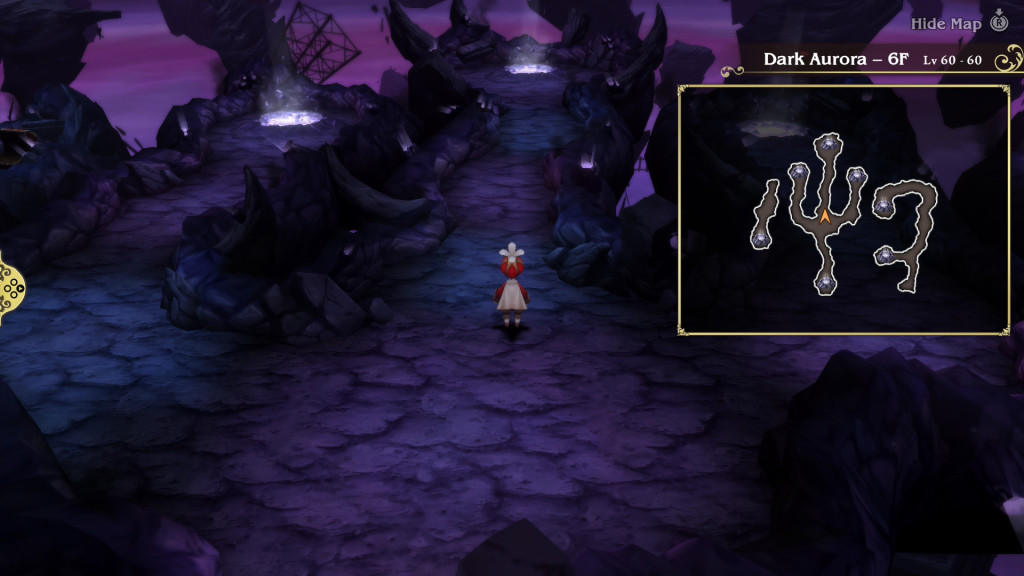
- Blood Blade
- Accessible from 3F
- Lordly Robes
Dark Aurora – 7F
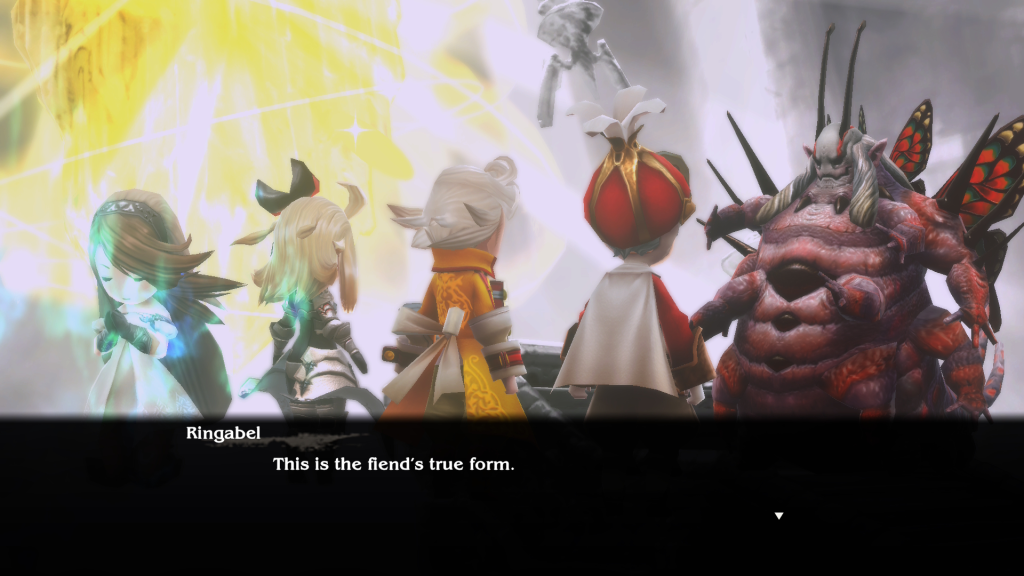
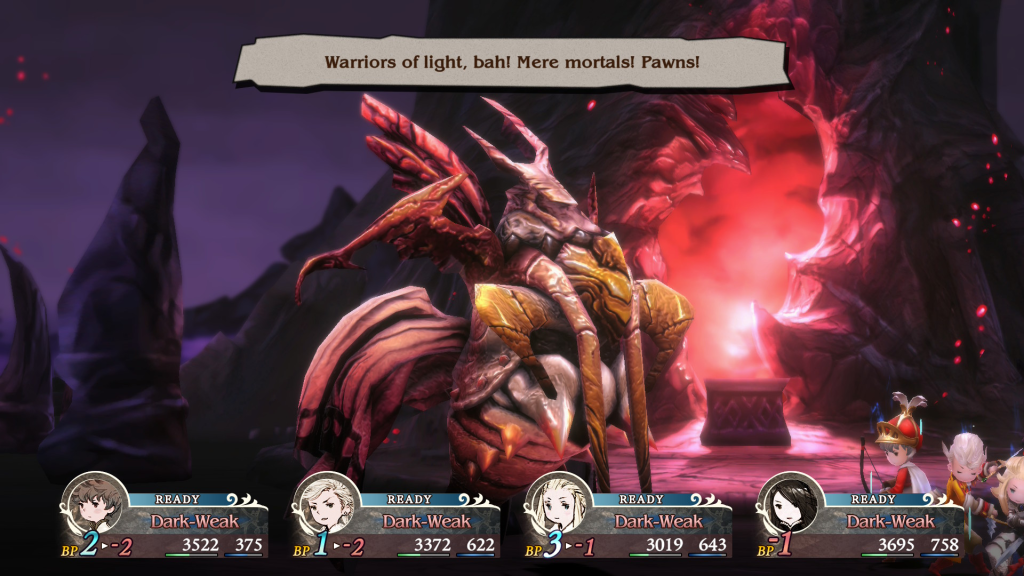
Boss Fight: Airy Phase 1
Upon reaching the Altar of Darkness, approach Airy to trigger an event leading to a challenging boss fight. In this first phase, Airy will be in her new form of a giant bug with a massive 150,000 HP pool and a notable weakness to fire-based attacks.

During the battle, Airy employs several dangerous abilities:
- Slaughter – A powerful five-hit multi-attack that targets each party member individually.
- Poison Punisher – An area-of-effect attack that inflicts poison status across the entire party.
- Spike Guard – Which creates a protective barrier around Airy, countering any physical attack directed at her while active.
- Tight Bind – A debilitating status move that attempts to inflict the stop ailment, freezing party members in place and preventing their actions.
To survive this fight, focus on exploiting Airy’s fire weakness while carefully managing your party’s status ailments and timing attacks to avoid triggering Spike Guard’s counters. When you reduce her HP to zero, an event triggers, leading to Phase 2 of the fight.
Boss Fight: Airy Phase 2
In the second phase of the battle, Airy reveals her true form—a still-bug-like creature with a reduced HP pool of 99,999. Her vulnerability to fire remains a key weakness that can be exploited.
Airy’s arsenal becomes even more dangerous in this phase, featuring:
- Irritate – Attempts to inflict the berserk status on party members, causing them to lose control and attack indiscriminately
- Acedia – A debilitating move that makes the entire party weak to every elemental attack, amplifying incoming damage
- Recover – Allowing Airy to heal herself back to full HP
- Flare – A powerful fire-elemental attack that damages the entire party
- Dark Abyss – Tries to inflict dread, significantly reducing the party’s defense and magic resistance
- Plague – A lethal attack that instantly KOs any party member suffering from a status ailment, making status management critical
For phase 2, prioritize removing status ailments quickly to avoid the deadly Plague and be prepared to counter Berserk and Dread effects. All the while, keep hammering her with attacks. Make sure to include anything with fire, or that deals extra damage to bugs, to hit her weak point. When her health gets below half, she will use her recovery skills. This will restore Airy’s HP to full, but it only happens once in the fight.
Queue the Credits!
Once you defeat Airy, a lengthy event will trigger. When it concludes, the credits will roll, and the game will be completed! After the credits are finished, you’ll be able to save clear data that will bring you back to just before you destroyed the crystal. This will enable you to continue playing the game and achieve the true ending.
More Bravely Default Flying Fairy Guides and Walkthroughs
For additional guides and walkthroughs on Bravely Default Flying Fairy, be sure to check out our Bravely Default Flying Fairy HD Remaster main page!