Welcome to NGB! In this Bravely Default Flying Fairy Chapter 4 walkthrough, we’ll guide you through each step of your journey as the story takes a dramatic turn. With the crystals awakened, new locations open up, and the Eternian Forces grow more aggressive. From exploring fresh dungeons to tackling tougher bosses, we’ll help you survive the rising stakes and uncover the secrets hidden within this chapter.
Quick Links
Bravely Default Flying Fairy Chapter 4 Walkthrough
Head for the Earth Crystal in Bravely Default Flying Fairy Chapter 4
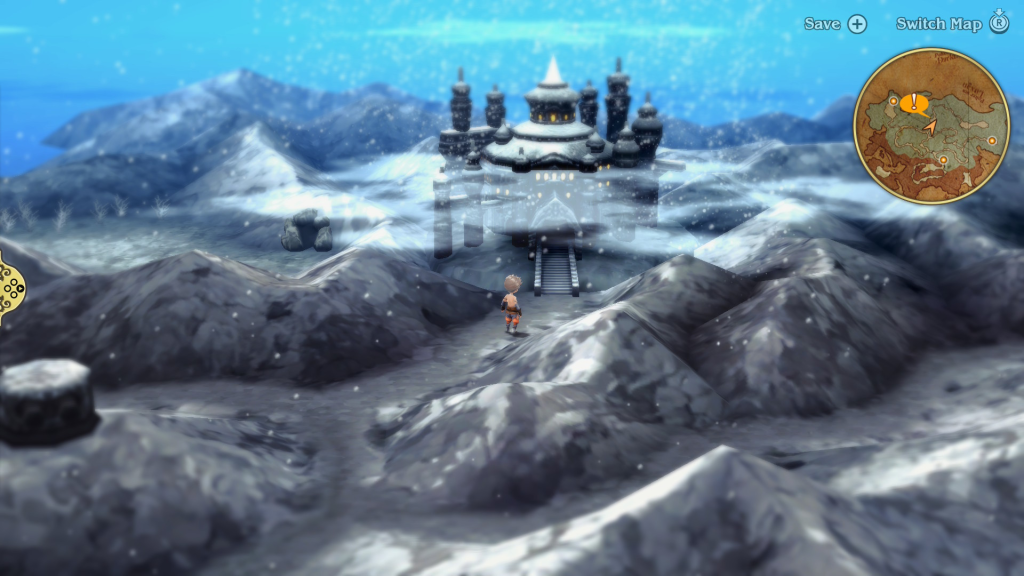
Boss Fight in Frostpeak Passage

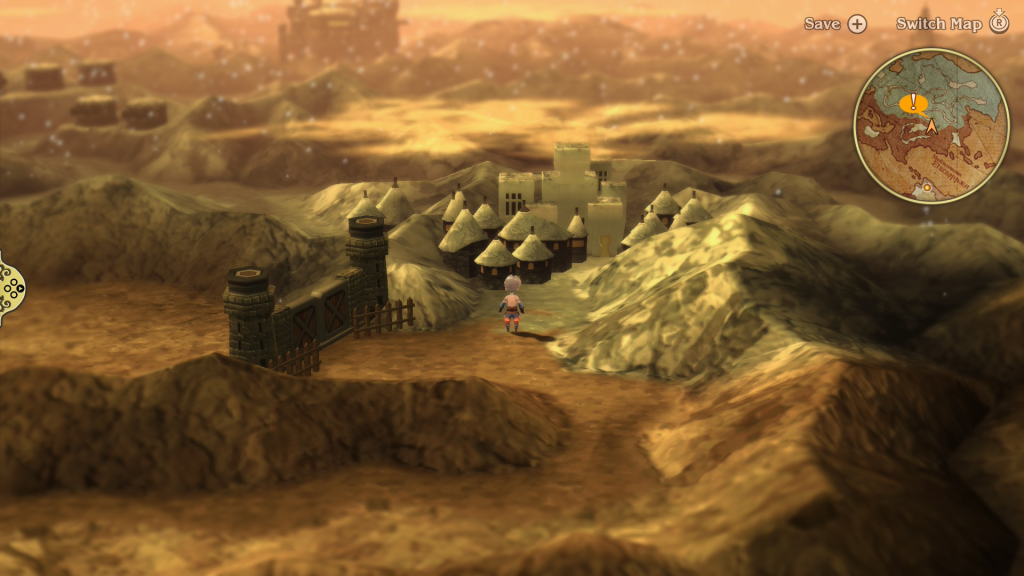
From the starting point on the world map, head west and follow the path around to reach an Ice Golem. Approach it to begin the boss fight. The inorganic golem will have 60,000 HP and is weak to fire skills/spells. It uses two main skills to attack. It’s Freezing Punch attack targets a single party member and can inflict stop on them, while its Blizzard Blast is a multi-target attack that will hit the whole party. In between skills, it will launch its fist at a party member for its basic attack.
This boss shouldn’t cause too much trouble if you assault it using fire attacks. The Black Mage, Red Mage, and Spell Fencer can all help with this, either being the main job or set as the job command. After the Ice Golem goes down, continue following the mountain path to reach the city.
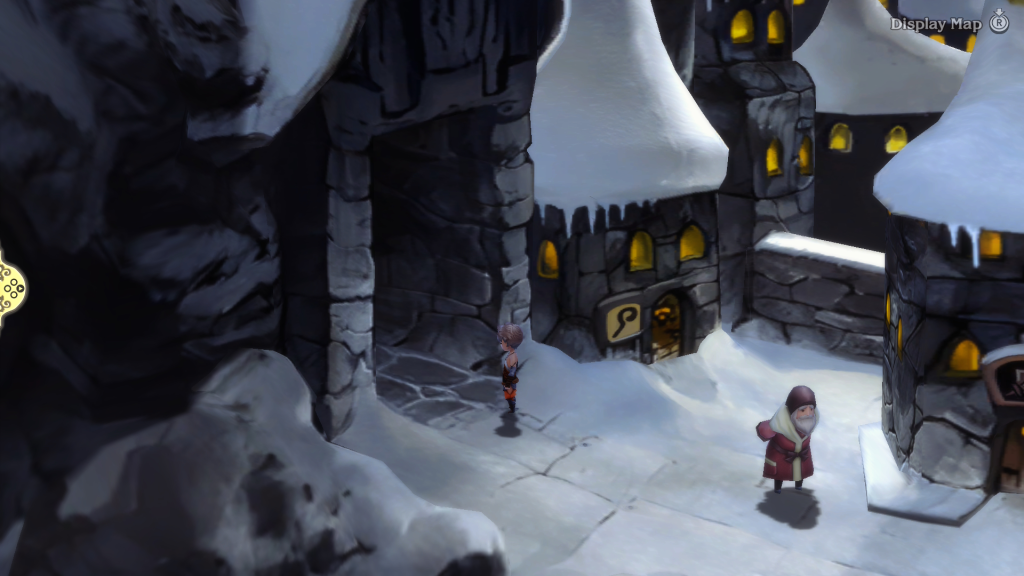
Heal and Restock in Eternia, Land of Immortality
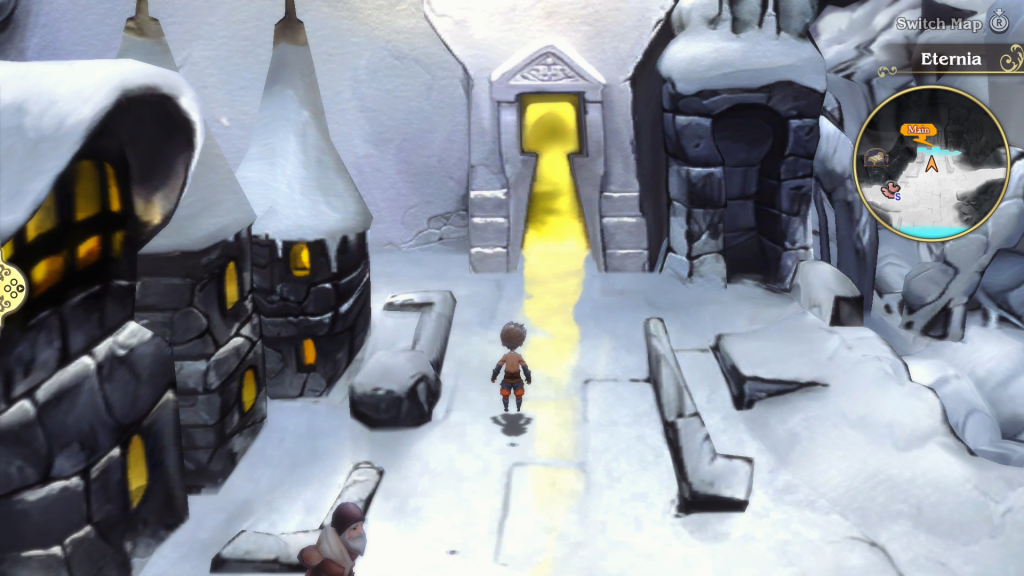
Upon reaching the city, an event will trigger where the party will ask Edea about the town, since she’s from here. Afterward, you can use the inn to heal up and the man in red to save. Eternia also has Trader, Armory, and Magics shops as well. Check them out to restock on any supplies, upgrade your gear as needed, and pick up some new White, Black, and Time Mage spells.
When you’re done, head through the yellow door, down the street on the right side of the inn to enter the Central Healing Tower.
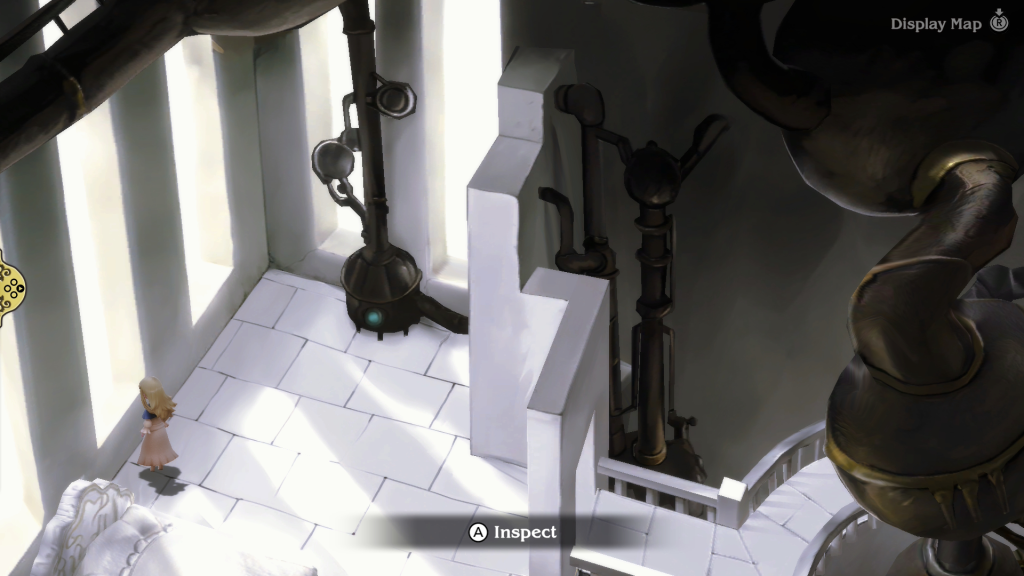
Inside, you’ll want to take the stairs up and speak with the nurse. This will trigger an event where the party gets to meet Edea’s mother. Once it’s over, head back into her and go to the corner, where the pipe comes down the wall. There will be a Rebuff Locket there that you can loot.
To proceed with the story, head back out to Eternia and make your way over to the inn. Follow the road west in front of the inn and head through the doorway at the end.
Attacking Eternia’s Central Command
Begin the March to Central Command
On the world map, you’ll see that three passages lead to Central Command. The western and central paths are both guarded by enemies, while the eastern path will lead you straight to our destination. If you’re out to earn some EXP and JP, you’ll find the details on the two enemies below. If you’d rather skip them and proceed to the central command, please see the next section.
Western Path Boss: Dragon Zombie
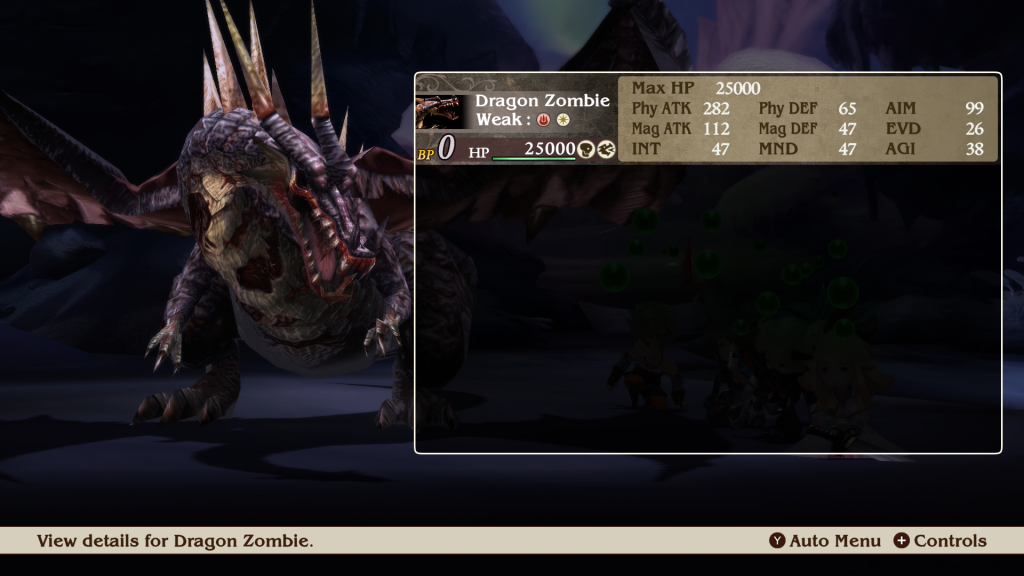
Dragon Zombie has 25,000 HP and is weak to both Fire and Light attacks. The undead beast also has two main skills it uses. The first is Poison Breath, which affects the entire party and has a chance to inflict poison. The other is its Bite attack, which targets a single party member and deals a moderate amount of damage. After you manage to defeat the Dragon Zombie, it will use its Rise from the Dead skill, which revives the dragon with full HP.
If you have the Freelancer job leveled up to 9, then you’ll have access to the Poison Immunity ability, which will make this fight a whole lot easier. You could equip a few Star Pendants for the same effect. As for actually fighting the dragon, make sure to utilize fire and light skills/spells. You can also use cure/cura/curada to damage the zombie as well. If you’re feeling dangerous, you could also try using a Phoenix Down on the zombie. It has a slight chance to kill it instantly.
Central Path Boss: Guardian
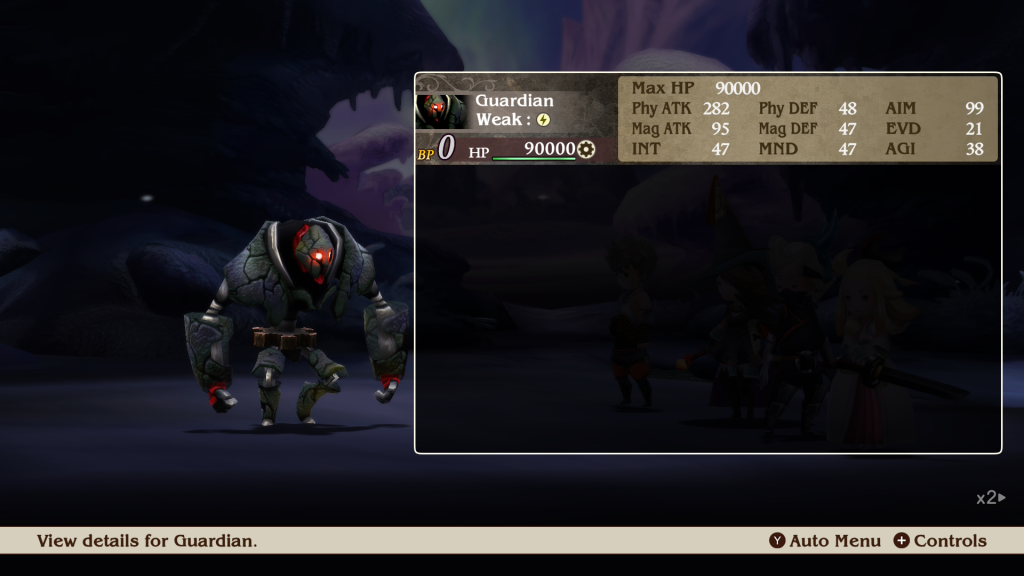
Going up the central path, you’ll have to face the inorganic Guardian. It has 90,000 HP and is weak to electric skills/spells. It will buff its stats and unload on the party, dealing a significant amount of damage. Its Optical Camouflage skill increases its evasion by 50% while its Limiter Rescission skill increases its physical attack by 50% at the cost of dropping its defense by 25%. The Guardian will then attack the party using a single-target punch attack or its Rocket Punch, which hits the whole party and deals massive damage. Throughout the fight, you’ll also take damage every few turns from the Eternian Forces, who will bombard the party.
For this fight, you’ll want to use electric-based skills/spells to deal weak point damage to the Guardian. This can be done using the Spell Fencer, Black Mage, or Red Mage. You’ll also want to make sure to bring a White Mage to heal the party using the curada spell if you have it. Another option is to use the Ninja job, specifically the Utsusemi skill you get at level 4, which causes you to evade a physical attack.
The Assault on Central Command Begins
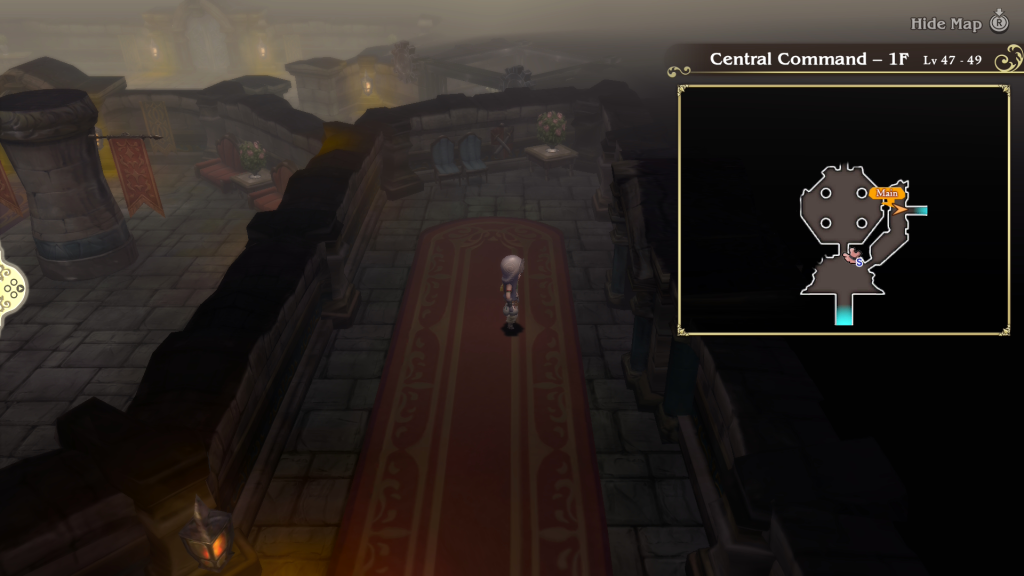
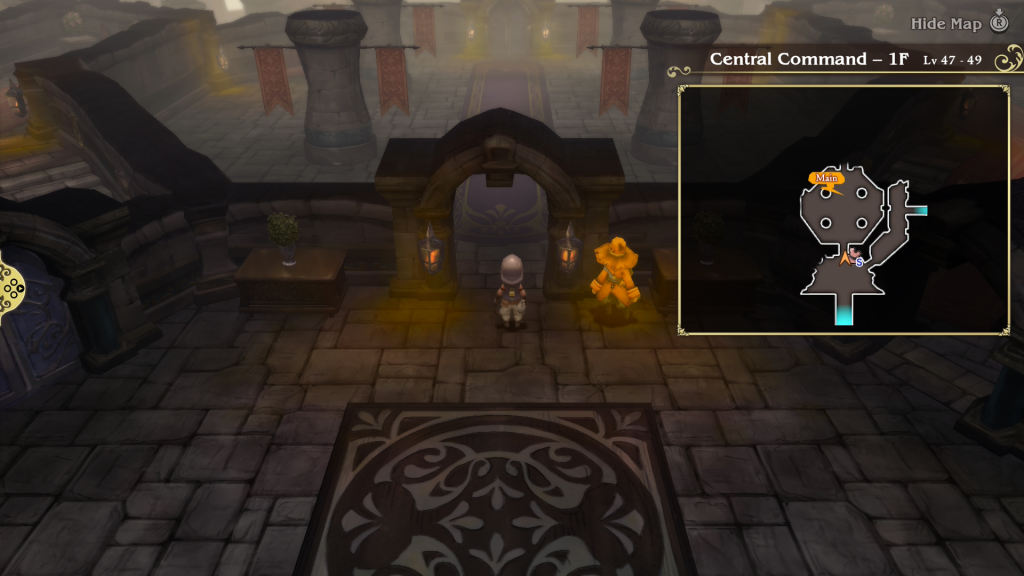
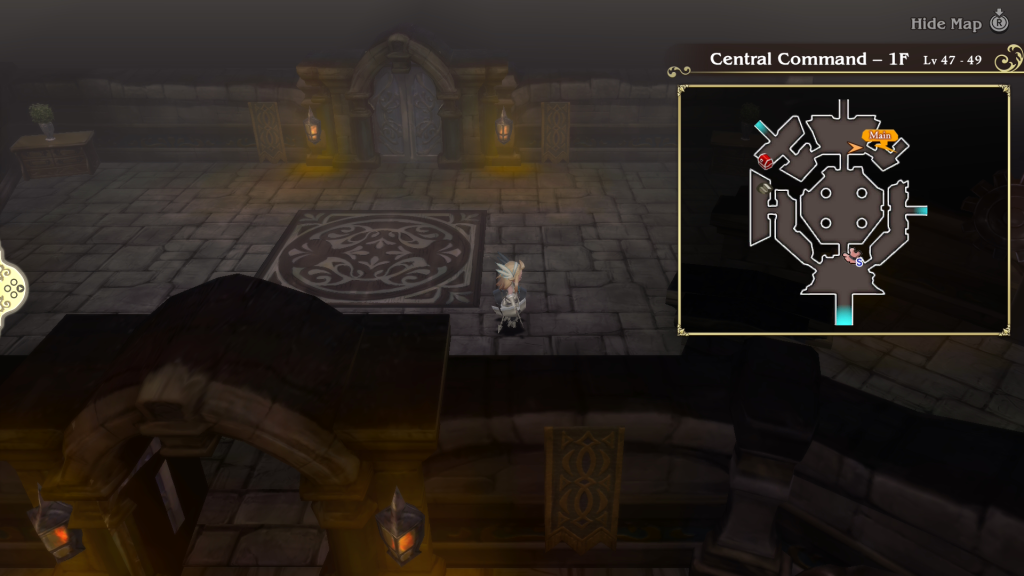
When you reach Central Command, enter the structure to trigger an event where Victoria and Victor show up to greet the party. Once it concludes, you’ll be on the stairs outside. Enter the building to find a man in red, whom you can use to save. Afterward, you’ll want to head through the eastern doorway on Central Command 1F.
Follow the hallway to the end and pass through the doorway on the right. This will trigger another cutscene where the party reaches Victor’s lab. Victor will then tell you a story about Victoria, which will lead to a boss fight against the pair.
Before confronting Victor and Victoria, we recommend that you equip items or abilities that nullify Poison. It will make the upcoming battle a bit easier. If you bring someone who can steal items to the fight, you’ll be able to steal the Poison Rod from Victoria and a Yggdrasil Staff from Victor.
Boss Fight: Victor and Victoria
As stated previously, you’ll be facing both Victor and Victoria in this fight. Victor will have 80,000 HP and is weak to dark-based skills/spells, while Victoria has 70,000 HP and is weak to light-based skills/spells. Victora has four skills that you’ll need to deal with, with the first being Poison. She will try to inflict poison on the whole party.
After doing that, she likes to follow up with Exterminate, which deals massive dark damage to those suffering from poison. Victoria also uses the single-dark Dark spell and will try to cast Corpse occasionally. It has a chance of inflicting doom on the target, which will reduce their HP to zero after several turns pass.
Victor, on the other hand, will spend most of the fight supporting Victoria. He’ll cast Fairy’s Aid, which increases the damage of all elemental attacks for the pair. He’ll also use Curada on the Victoria when her health starts to get low. His single-target spell is Holy, dealing light damage. The Spiritmaster will also smack the party around using his staff here and there.
To combat the pair, we recommend focusing on Victoria first, as she deals the most damage. You’ll want to have someone on healing full-time to remove the poison and keep the party’s HP topped off. Once she’s taken care of, Victor should be easy to take down. Their magical and physical defenses are the same, so it doesn’t matter too much what you use to face them.
We opted for someone with the Ninja job who could get two sets of 32 attacks in to deal significant damage. We also had a Thief to steal the items from the bosses. Once you defeat the pair, you’ll be rewarded with both the Arcanist and Spiritmaster Astericks, unlocking the Arcanist and Spiritmaster jobs for the party.
Resume the Command Center Result
After the fight with Victor and Victoria, return to Central Command 1F and head back to the man in red. You’ll now want to head through the doorway on his left. Pass north through the room to trigger an event when you reach the door.
Find the Rest of the Party
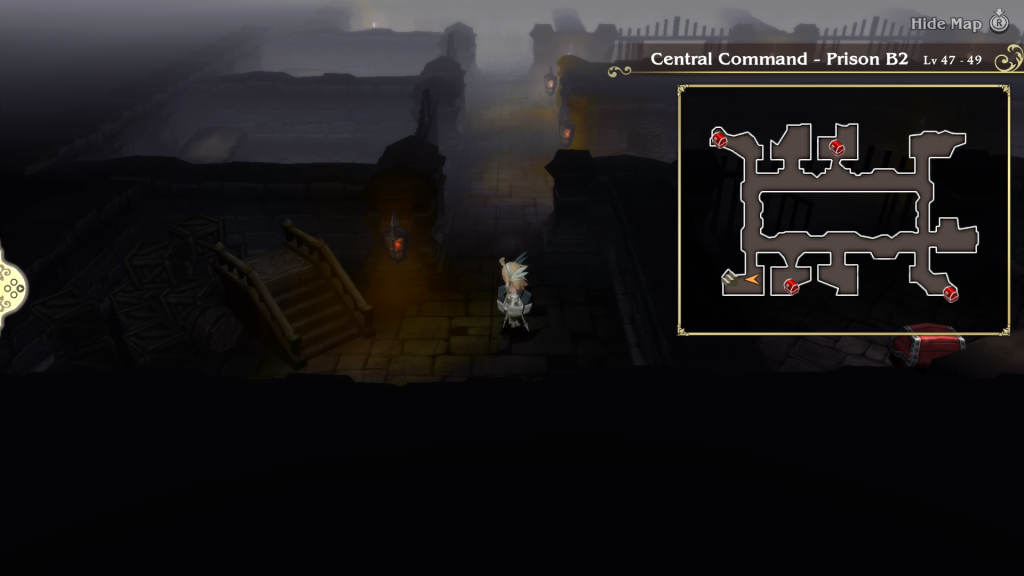
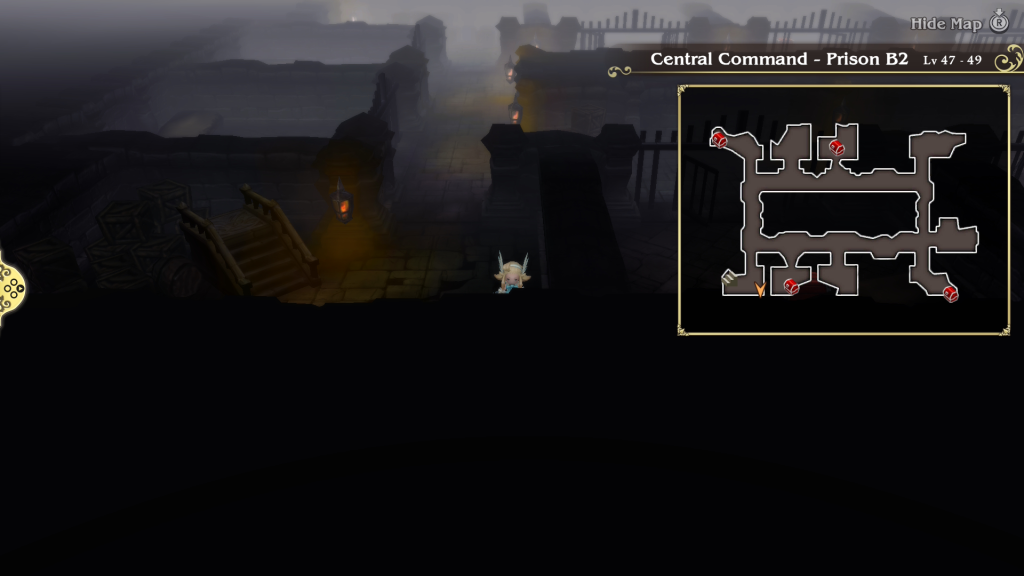
Following the cutscene, you’ll be in control of Edea in her room. Exit through the door on the west side to initiate a lengthy event, where Edea’s father will appear to speak with her. Once it concludes, you’ll gain control of Edea in Central Command Prison B2. The whole area is composed of jail cells, three of which house Tiz, Agnes, and Ringabel.
You’ll need to go to each cell to let them out individually. There are also five chests you can loot. Four of them are easily accessible by traveling around the room, while the 5th one is in a locked cell. The four contain the following items: a Light Curtain, 3,000 pg, an X-Potion, and 5,000 pg.
To reach the 5th chest, you’ll want to travel to the southwestern corner of the room near the stairs. Approach the wall to the right of the stairs and follow it south. This will lead you down a secret path to the cell housing the chest. Open it to receive the sword, Excalibur. Return to the stairs and take them to reach Prison B1.
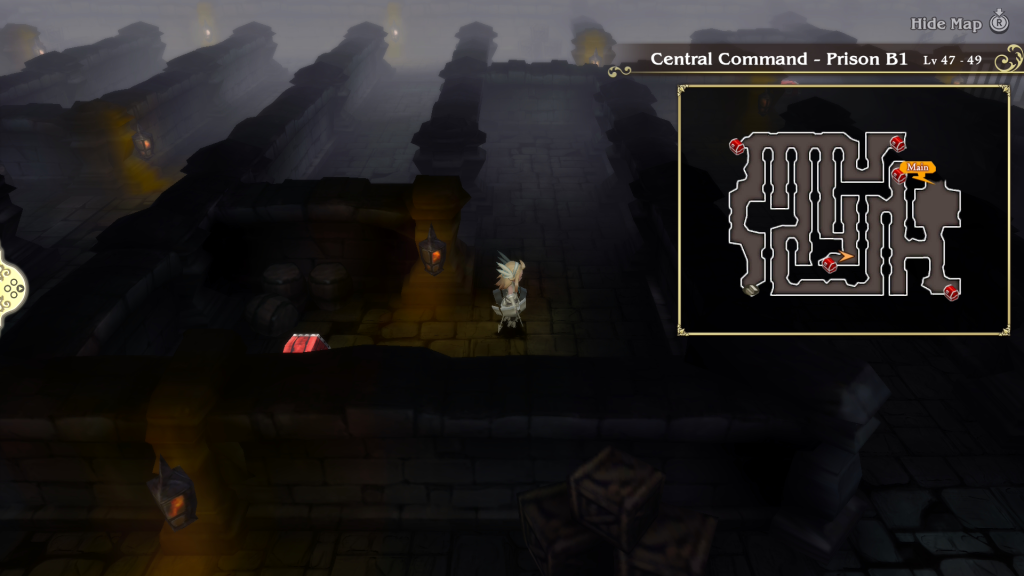
Once on the floor, follow the path to reach the east side of the area. Along the way, you’ll come across five chests containing a Light Charm, X-Potion, Dragon Fang, a Zeus’s Wrath, and a Bacchus’s Wine. Just before the stairs leading up will be a gate. Approach the gate for another event where an old friend will appear. Afterward, head up the stairs to return to Central Command 1F.
Gain Access to the Earth Crystal
Retrieve the Key to Everlast Tower
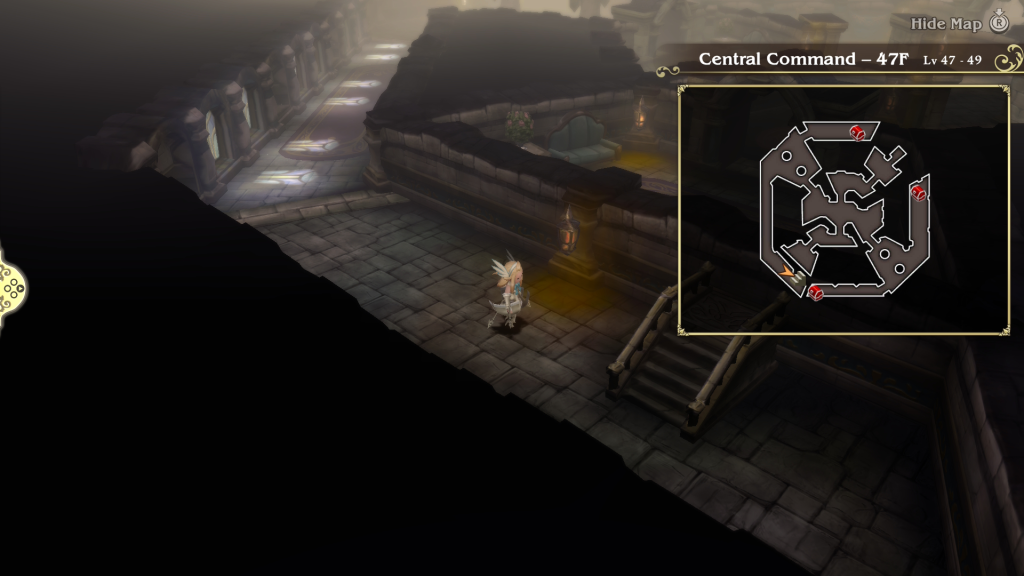
Stop by the man in red to save, then head through the door on his left. Continue north through the room and pass through the door you were stopped at before. Next, go west to find a chest containing a Pantheon’s Wrath. After collecting that, head east and enter the elevator to trigger an event. Once it concludes, you’ll gain control of the party on Central Command – 47F.
To reach the next floor, you’ll need to travel to the southwestern corner of the area to find the stairs. Along the way, there will be three chests in the eastern, southern, and northern sections of the floor containing Gold Hourglass, Lilith’s Kiss, and Turbo Ether.
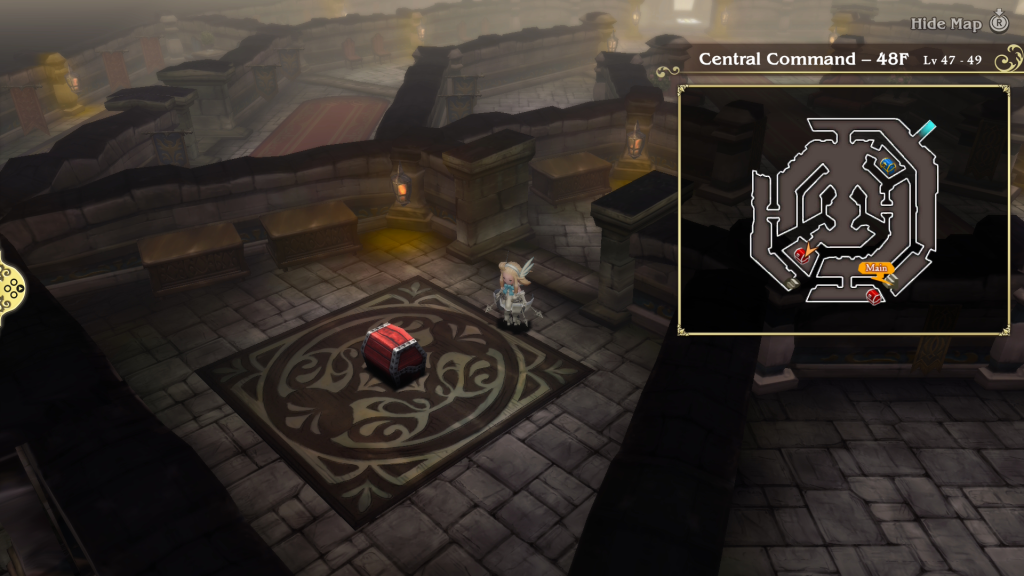
When you reach 48F, you’ll be in the southwestern corner of the floor with the stairs to the next level in the southeastern corner. There are two chests accessible from the center of the room, containing a pair of Divine Fists and an Assassin Dagger. You’ll also find a blue chest on this floor, but we are currently unable to open it. Before heading to the next floor, you can also swing by Edea’s room in the northeastern section of the floor for an event with the party. You can also use her bed to sleep and rest up from the party.
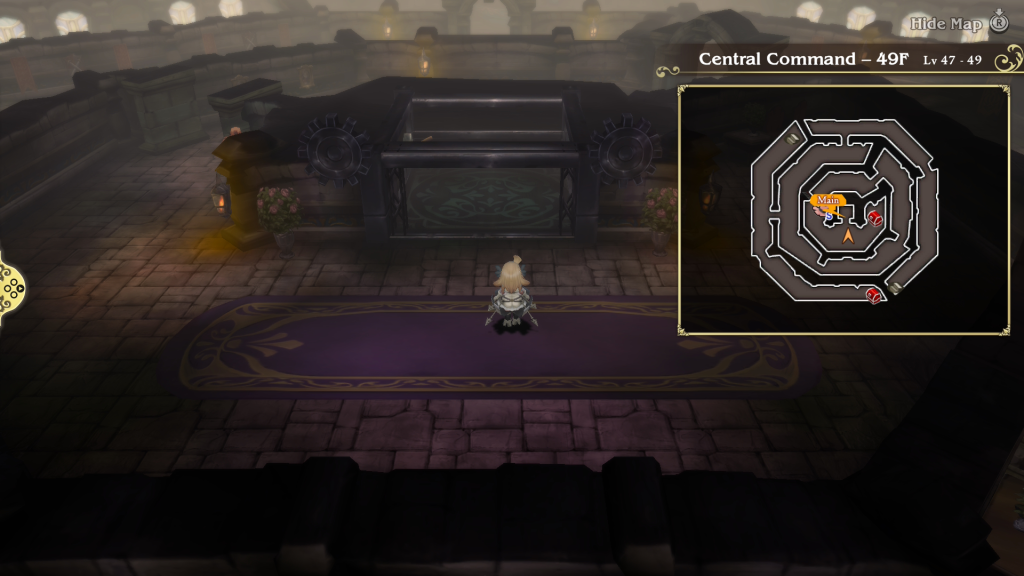
Upon climbing the stairs to the next floor, another event will trigger between the Grand Marshal and Alternis. When you regain control of the party, you’ll be in the southeastern corner of the room. Start by working your way to the northwestern corner, where you’ll find some stairs. These stairs will lead to a chest back down on 48F, containing a Holy Lance.
Go back up to 49F and grab the chest in the southern part of the floor before heading to the center of the room for the second one. They will contain a Stardust and an Elixir. There will also be a man in red in the center of the room that you can use to save and heal up. When you’re ready to face the Grand Marshal, use the nearby elevator.
Boss Fight: Grand Marshal
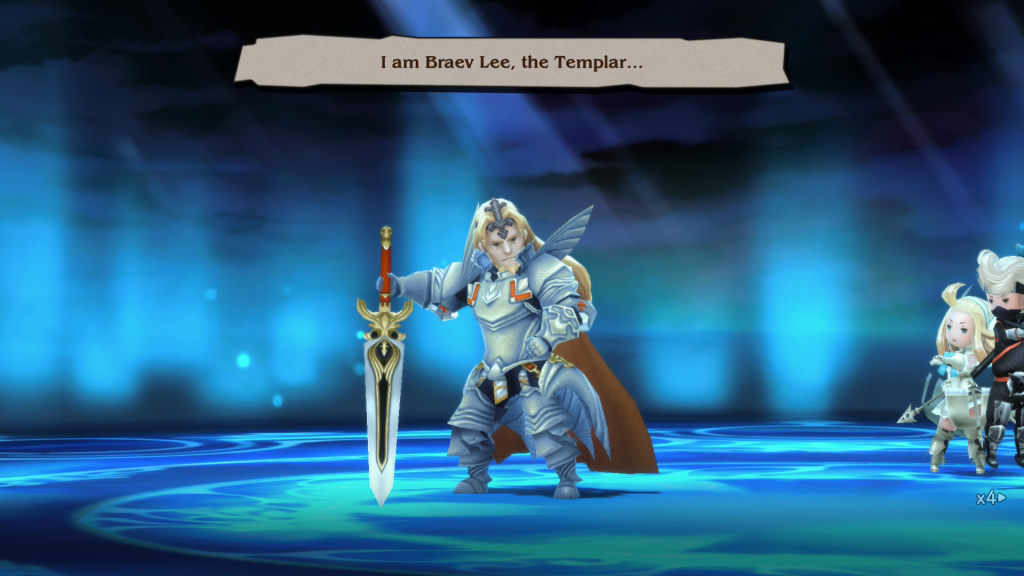
After some back and forth between Edea and her father, the battle will commence. Braeve the Templar has 35,000 HP and is weak to dark-based skills and spells. Throughout the fight, the Grand Marshal will constantly use Default to build up BP, allowing him to unleash his powerful skills. There are three that you’ll need to watch out for.
The first is Heart Strike, a single-target attack that guarantees a critical hit, dealing twice the damage. Next up is the Giant Slayer. It deals 1.5 more damage to a single target with more HP than the user. Lastly, there is Radiant Blast. This skill is a single target and ignores the damage reduction effect of Defaulting, dealing 1.5 times more damage. The more annoying part of the fight is that when you reduce Braeve Lee’s HP to zero, he will get a full head. This will happen a total of two times.
If you bring a Thief or someone who can steal, you can steal a Claymore off the Grand Marshal.
For this fight, you’ll want to equip items that reduce light damage. Additionally, Skills that can pierce through Defaulting will also be helpful in this fight, like the Hunter’s Targeting skill. As always, you’ll need a healer to get the party healthy. Once you manage to bring down the Grand Marshal, you’ll receive the Templar Asterisk, unlocking the Templar job. A cutscene will also trigger, concluding with the party being able to access the Earth Crystal.
Awaken the Earth Crystal
Vampire Sub-Scenario
Before heading off to awaken the Earth Crystal, you can head to Vampire Castle, east of Central Command, to begin the sub-scenario to unlock the Vampire Asterisk. Be warned that this sub-scenario is a bit tougher than the others and is intended to be completed in future chapters; however, it is possible to complete it now. If you would like more details, check out our Vampire Asterisk guide.
Enter and Work Through Everlast Tower
When you’re ready, head to Everlast Tower and begin working your way up to the Earth Crystal. There will be four floors you’ll need to pass through to reach the Temple of Earth. Below, you can find the layout of each floor, including the chests they contain and their contents.
Everlast Tower – 1F
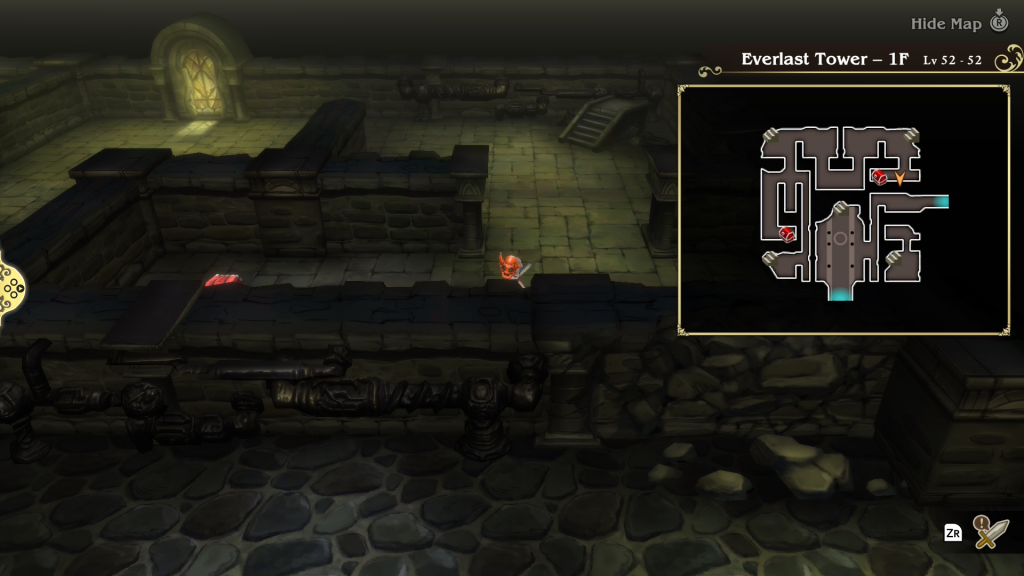
- Ancient Bow
- Earth Drum
- Turbo Ether
Everlast Tower – 2F
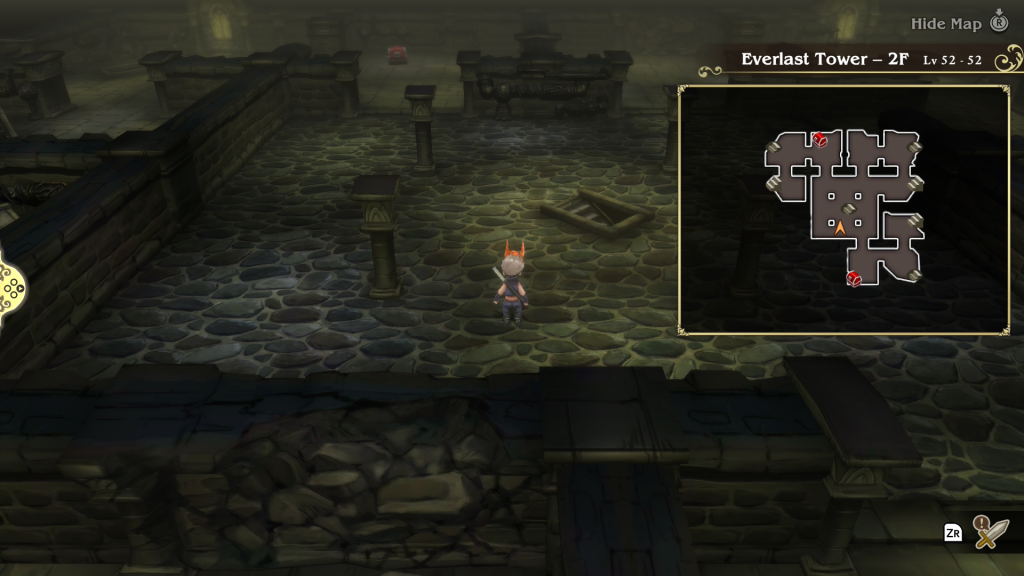
- X-Potion
- Turbo Ether
Everlast Tower – 3F
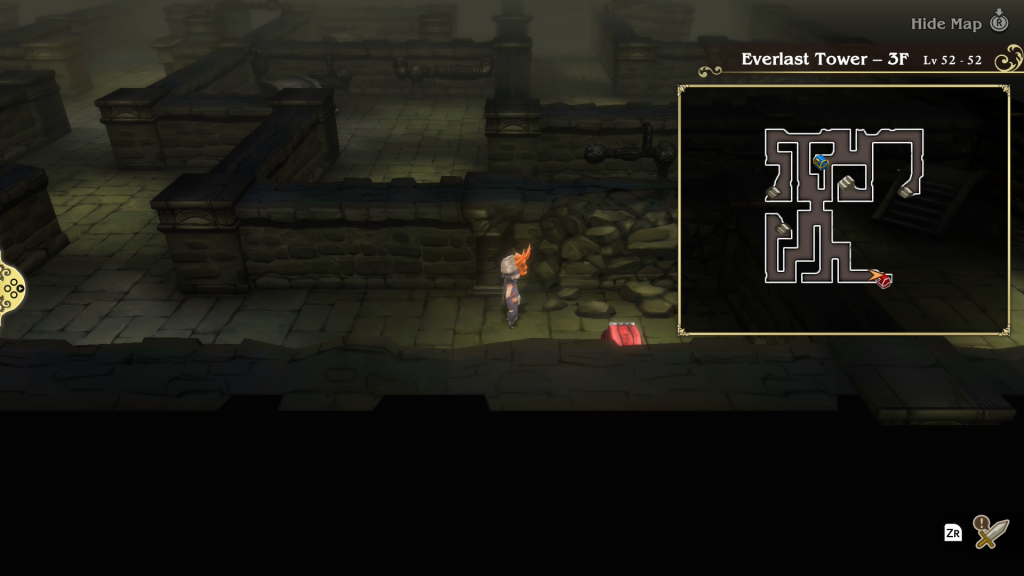
- Elixir
Everlast Tower – 4F
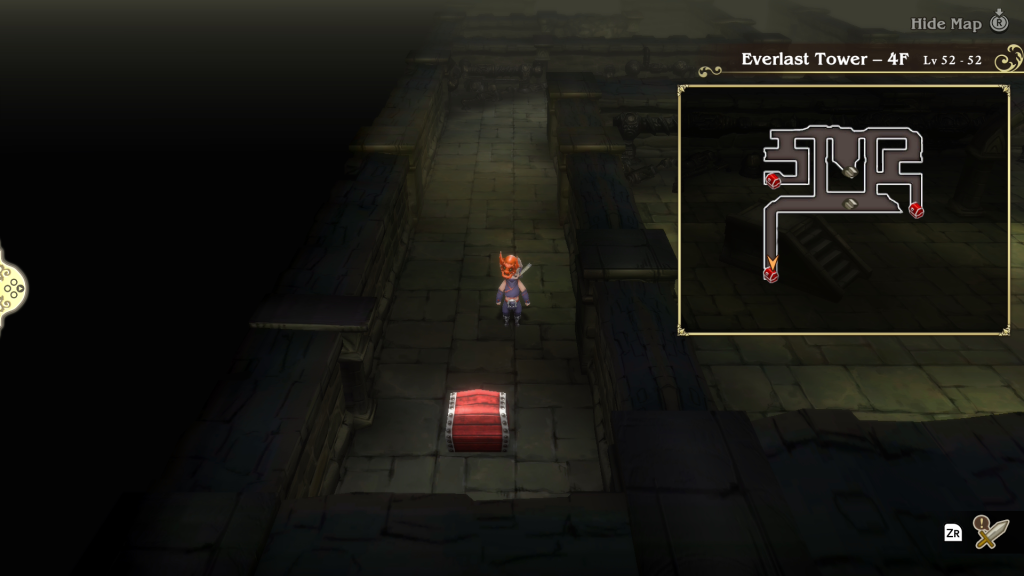
- Dragon Fang
- Dark Shield
- Gold Hourglass
Explore the Temple of Earth
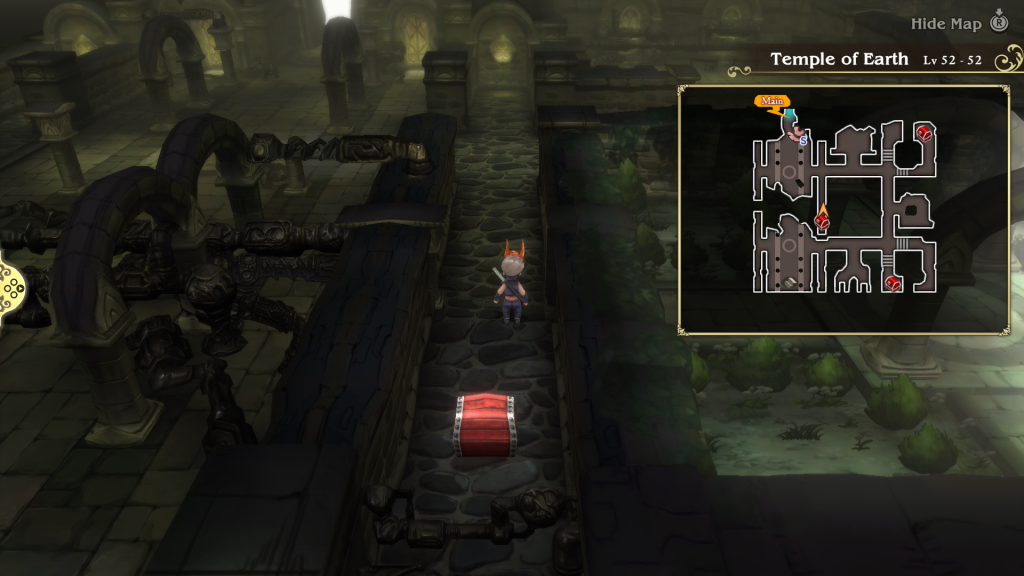
When you reach the Temple of Earth, you’ll need to head to the northwestern part of the room to reach the altar. Along the way there, you’ll find three rooms to examine and three chests to loot. Inside the chests, you’ll find an Earth Charm, an Earth Mallet, and a Light Curtain. When you reach the northwestern corner, you’ll find a man in red waiting. You can speak with him to heal up and save before heading to the altar. It’s time to take down the next boss and awaken the Earth Crystal!
Boss Fight: Gigas Lich
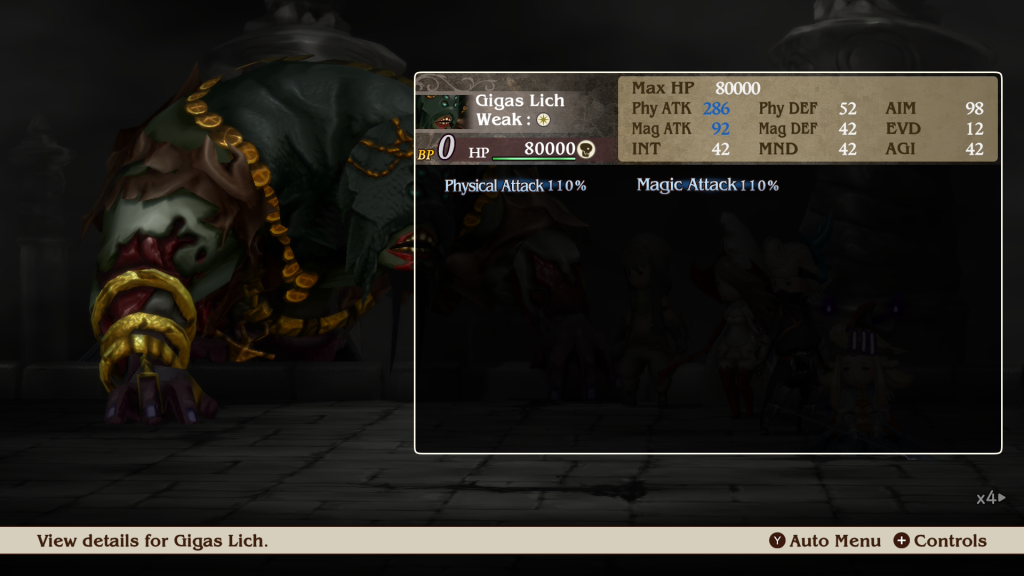
Upon entering the altar room, a cutscene will trigger, leading to a battle against the undead Gigas Lich. It will have 80,000 HP and is weak to light attacks. The lich also has several skills that you’ll need to deal with, the first being Fear, which can inflict dread on the target. It will also use Negative Power, which boosts its physical and magic attack a bit with each use.
The lich can also cast Death on a party member, which has the chance to instantly KO them. Its last two skills are Slam and Quada. Slam is a multi-target physical earth-based attack that can hit the whole party, whereas Quada is a single-target earth-based spell. It will use Quada on itself to heal when its HP gets low.
If you bring someone who is the Thief job, or has it set as the Job Command, you can steal the Giant’s Gloves off the Gigas Lich.
For this fight, you’ll want to make sure you bring someone like a White Mage or Spirit to remove or negate status ailments. You might also want to use a Templar to dish out light attacks or another job like the Hunter that has skills that deal additional damage to undead enemies.
Awaken the Crystal
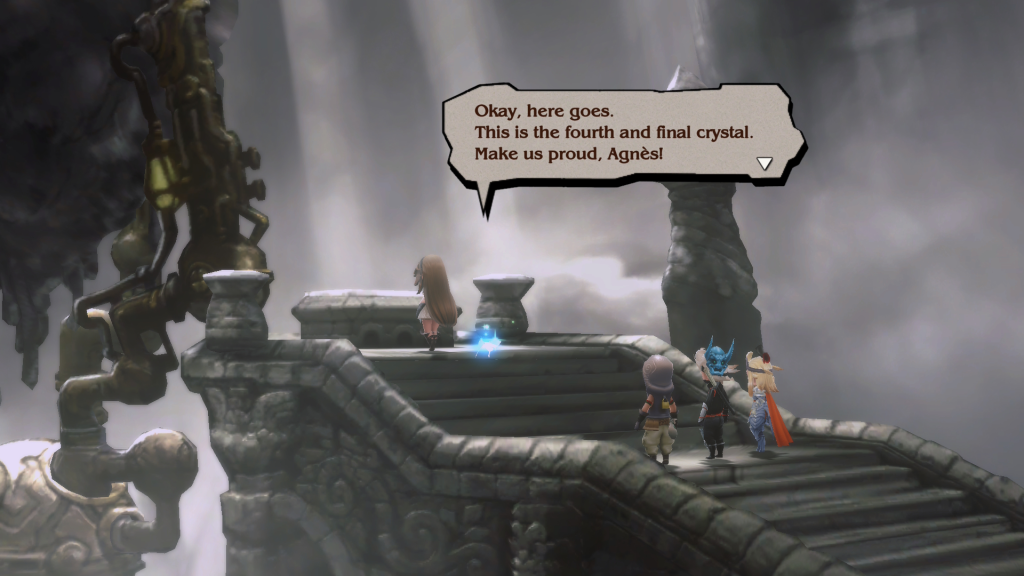
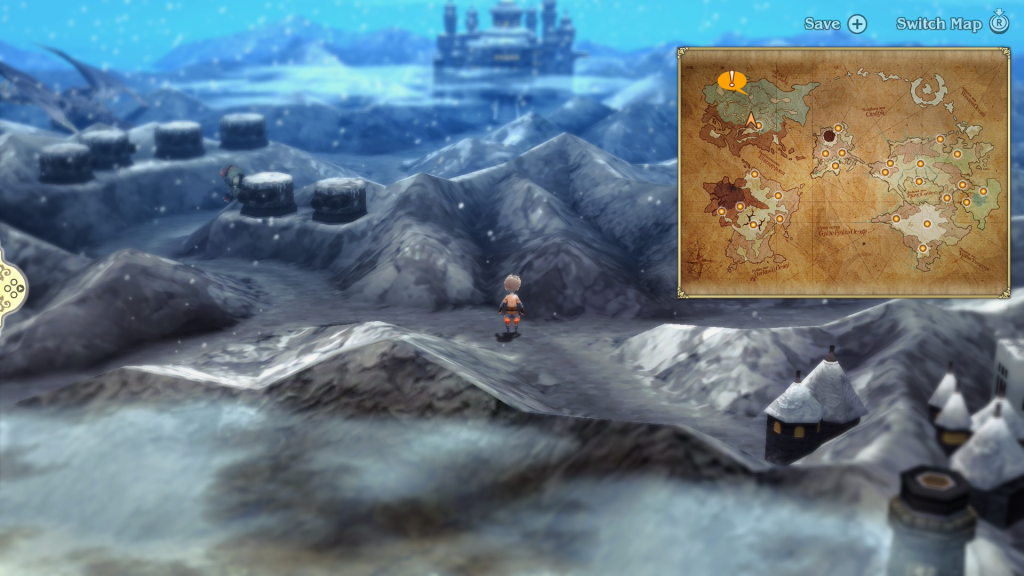
Following the battle, have Agnes do her thing and awaken the Earth Crystal. Doing so will lead to an event where you’ll learn about the Pillar of Light. You’ll then want to travel back to the world map and summon the airship to trigger another cutscene.
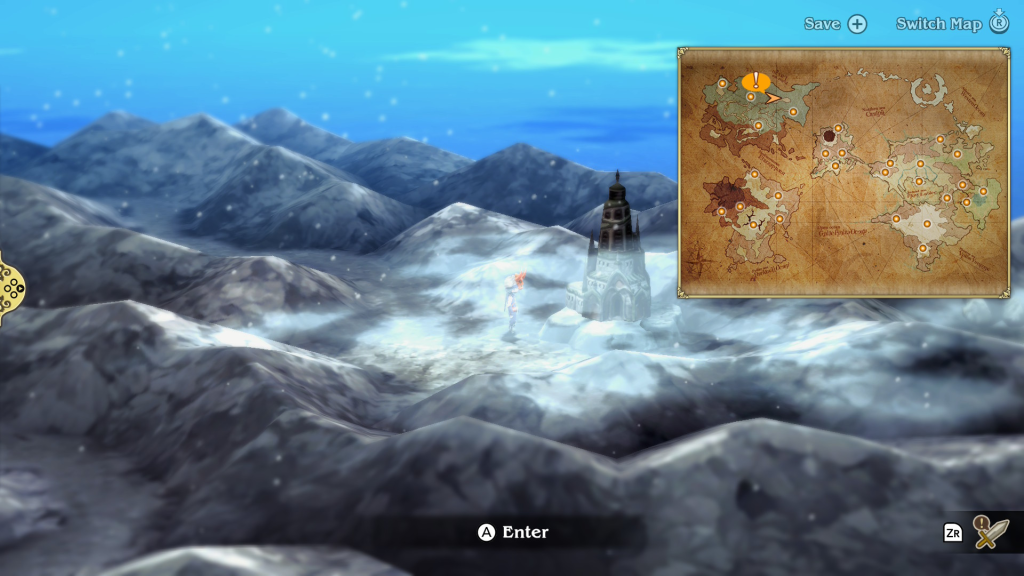
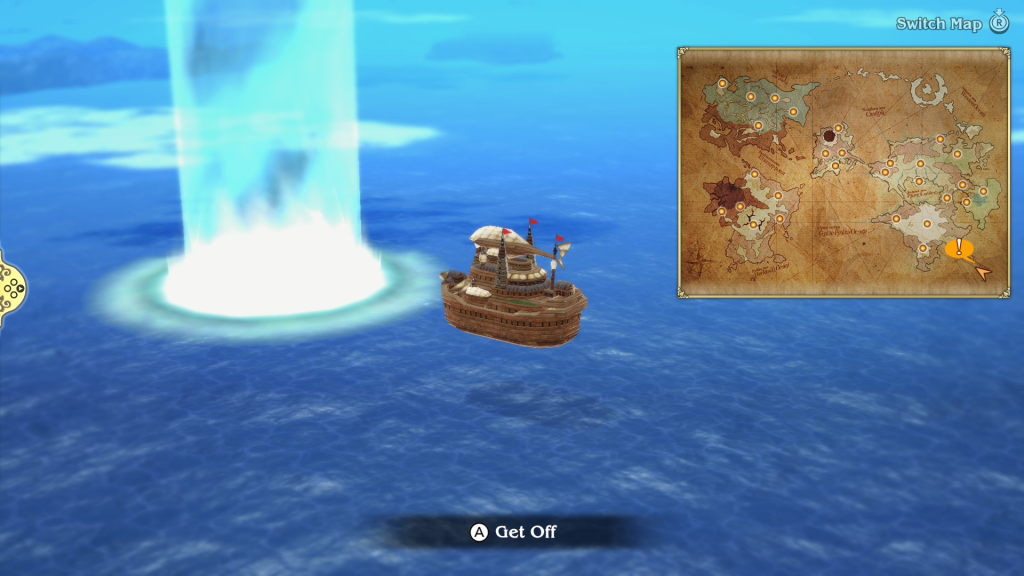
Travel to the Pillar of Light
Travel to the Pillar of Light
Now would be the time to prepare! Make sure to heal, stock up on items, and finally consider purchasing that shiny piece of equipment you’ve been staring at through the window. When you’ve finished, board your airship and travel to the southeastern corner of the world to find the pillar of light. Fly into it and land with your ship to trigger an event where the game will give you one more chance to back out before continuing. Choose the “We’re ready!” option to get the show on the road!
Boss Fight: Alternis
During the cutscene, Alternis makes his grand entrance to stop the party, leading to a boss fight. He’ll have 100,000 HP and no notable weaknesses. During the battle, he’ll mainly use his Dark Bane skill, which deals 1.25 times more damage at the cost of 20% HP. He’ll also attack the party using his sword as a basic attack.
For this fight, you’ll want to make sure you have at least one healer, then focus on dealing damage with the rest of the party. Once he goes down, you’ll receive the Dark Knight Asterisk, unlocking the Dark Knight job. Another cutscene will trigger, completing the chapter!
More Bravely Default Flying Fairy Guides and Walkthroughs
For additional guides and walkthroughs on Bravely Default Flying Fairy, be sure to check out our Bravely Default Flying Fairy HD Remaster main page!