Welcome to NGB and our Bravely Default Flying Fairy Chapter 3 walkthrough! In this chapter, Tiz and the party journey to the land of Eisenberg, a war-torn region plagued by conflict and corruption. Prepare for intense battles, tricky decisions, and key story developments as you work to awaken the Fire Crystal. This guide will walk you through major story events, dungeon strategies, boss tips, and hidden treasures to help you stay ahead of the game.
Quick Links
- Bravely Default Flying Fairy Chapter 3 Walkthrough
- More Bravely Default Flying Fairy Guides and Walkthroughs
Bravely Default Flying Fairy Chapter 3 Walkthrough
Visit Grandship and Find Zatz
Find Zatz
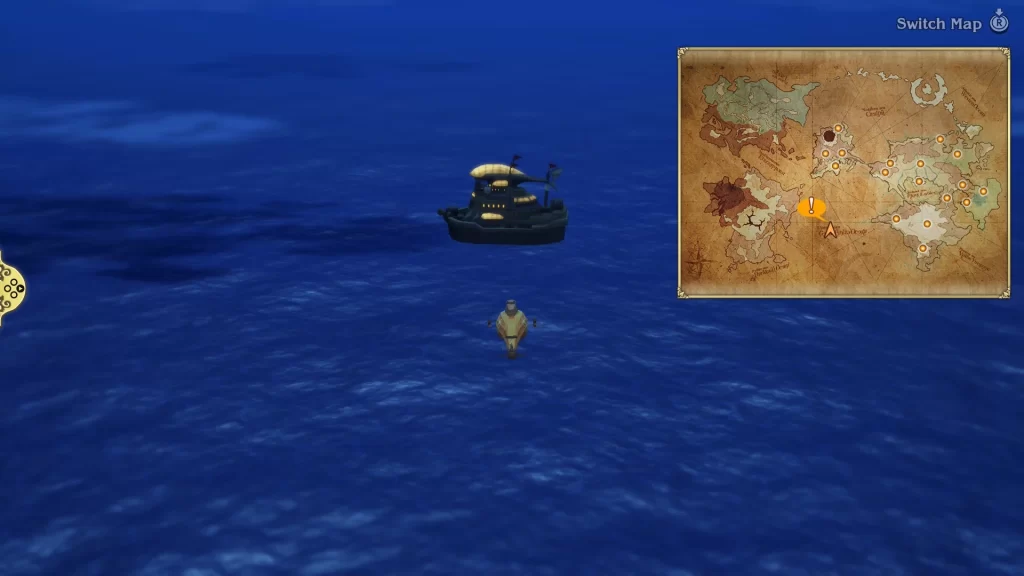
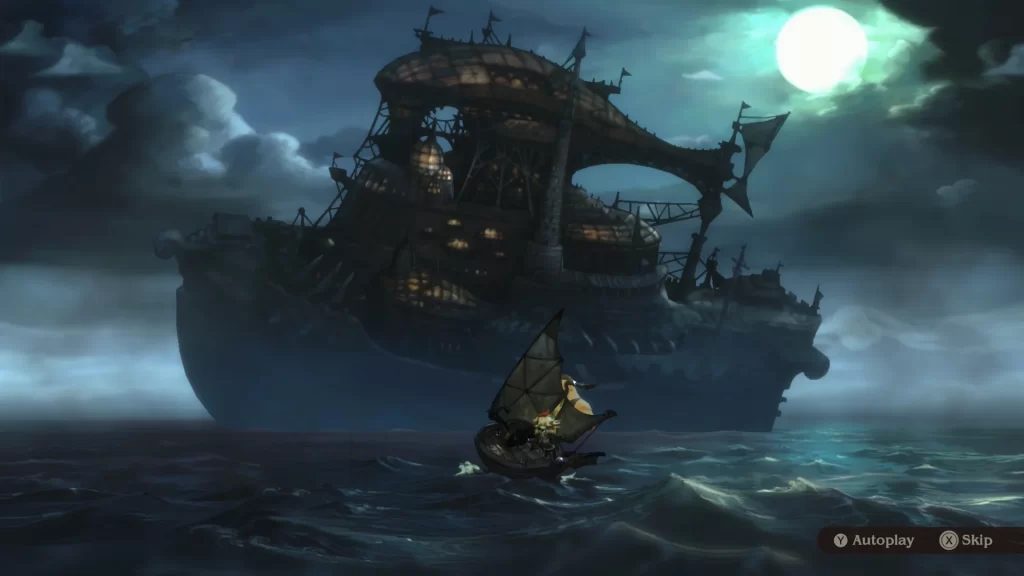
When you regain control of the party on the open sea, swim up to the giant ship and interact with it to dock. Once you’re aboard the boat, head left over the bridge where one of the residents will introduce herself. Following that conversation, go north up the stairs to reach the next area, triggering another event where you’ll meet Zatz.
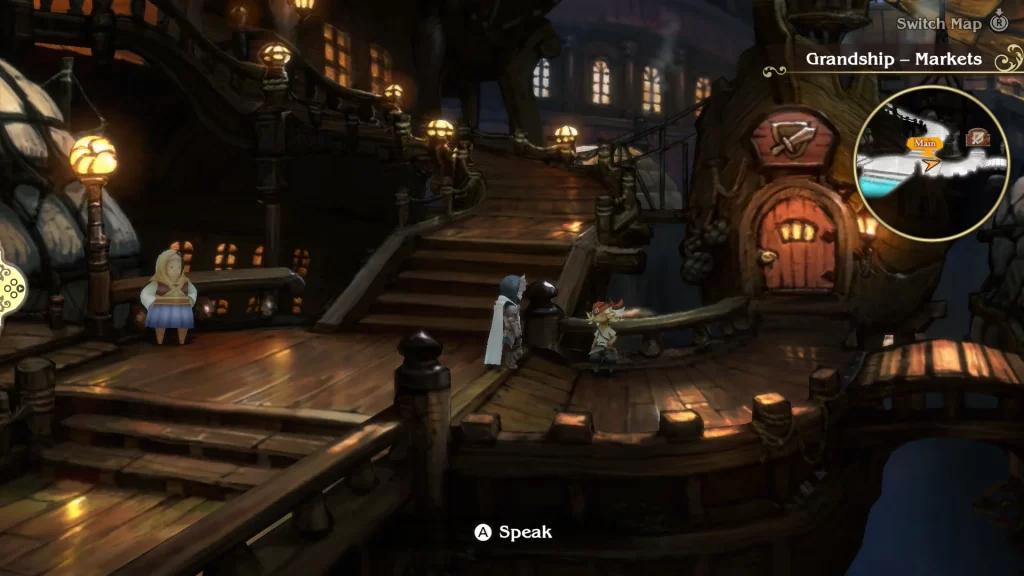
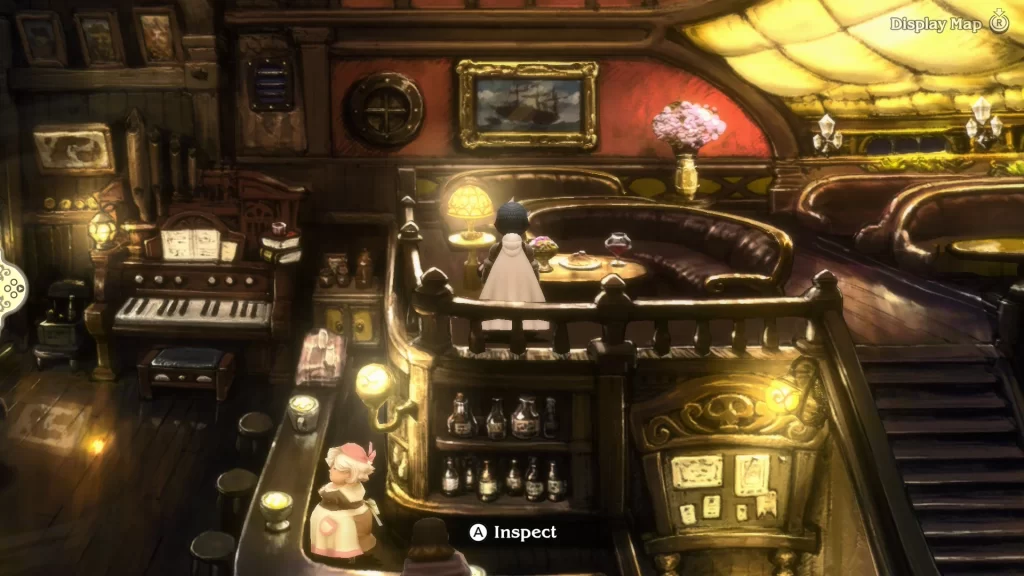
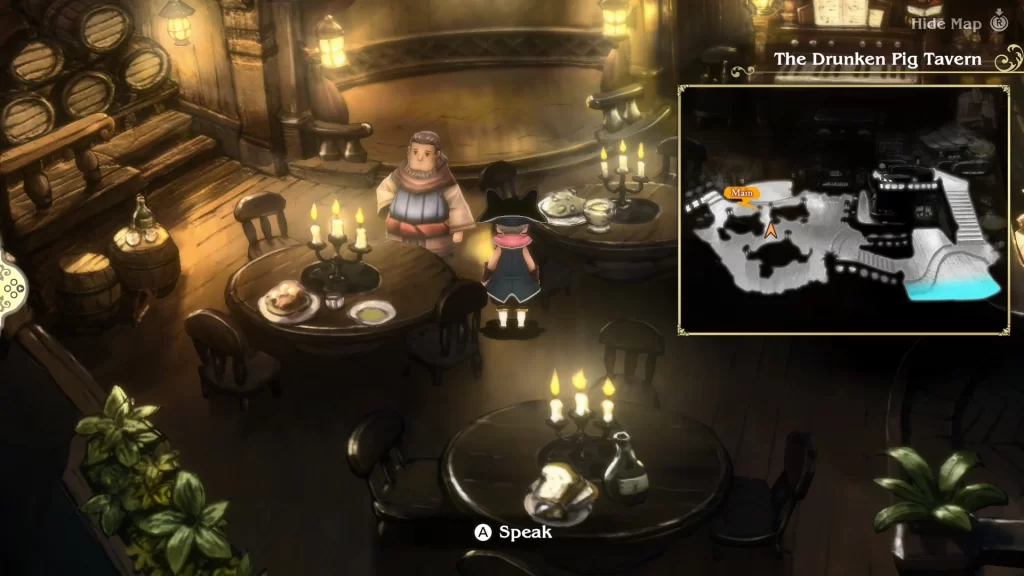
Afterward, you’ll find an inn to the left with a man in red you can use to save. Do so, then head to the right side of the path and speak with Zatz, wearing a white shirt and red hat. Return to the Upper Deck and head inside the Drunken Pig Tavern, where you’ll want to speak with him near the bar.
Before leaving the tavern, head to the upper level and interact with the first table on the left to receive a Flame Charm.
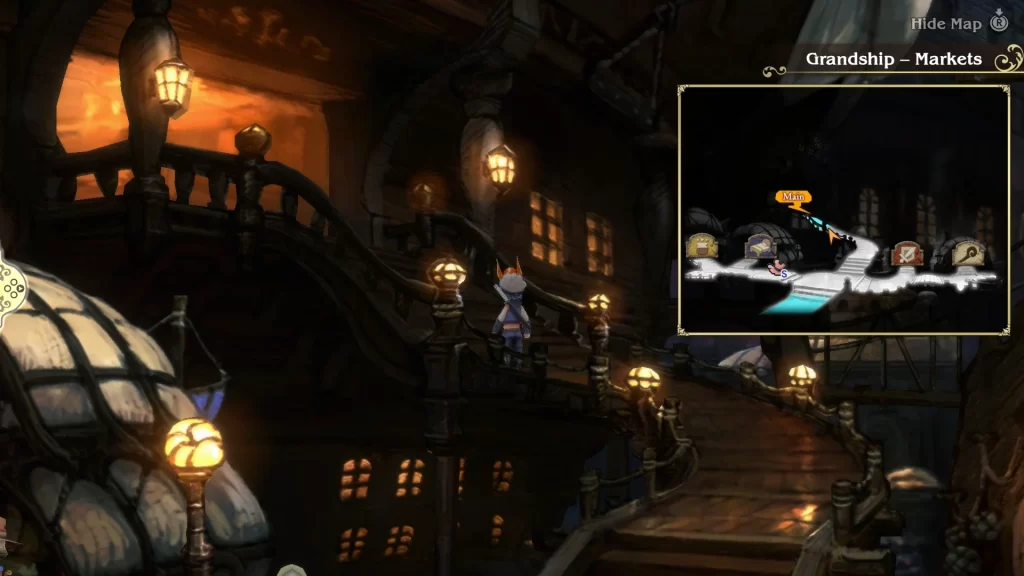
Exploring Grandship
You’ll now be free to leave Grandship. But before doing so, feel free to visit the Markets area to stock up on items or upgrade gear. Return to the airship when you’re ready to proceed with the story.
Search for the Fire Crystal
Sail West Towards the Fire Crystal
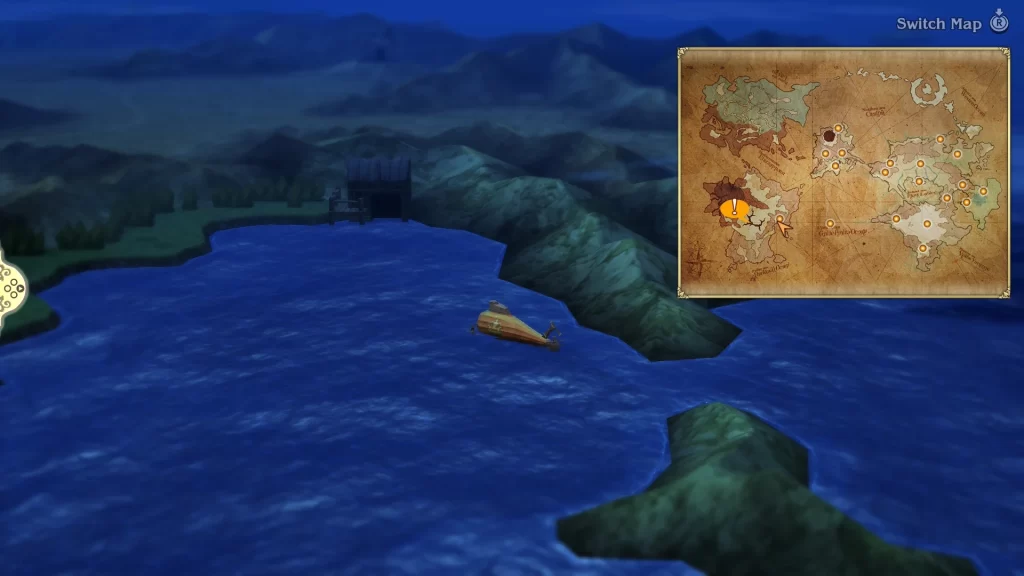
Back on the airship, you’ll be treated to an event where Zatz will give the party their heading. Travel west from Grandship, pass through the peninsula, and dock the airship at the nearby dock. This will trigger another event where you’ll meet Zatz’s comrades. You can speak with Zatz to get more information about the region afterwards. When you’re ready, exit the house to reach the world map.
Stop by Eisen Gate and Enter Hartschild
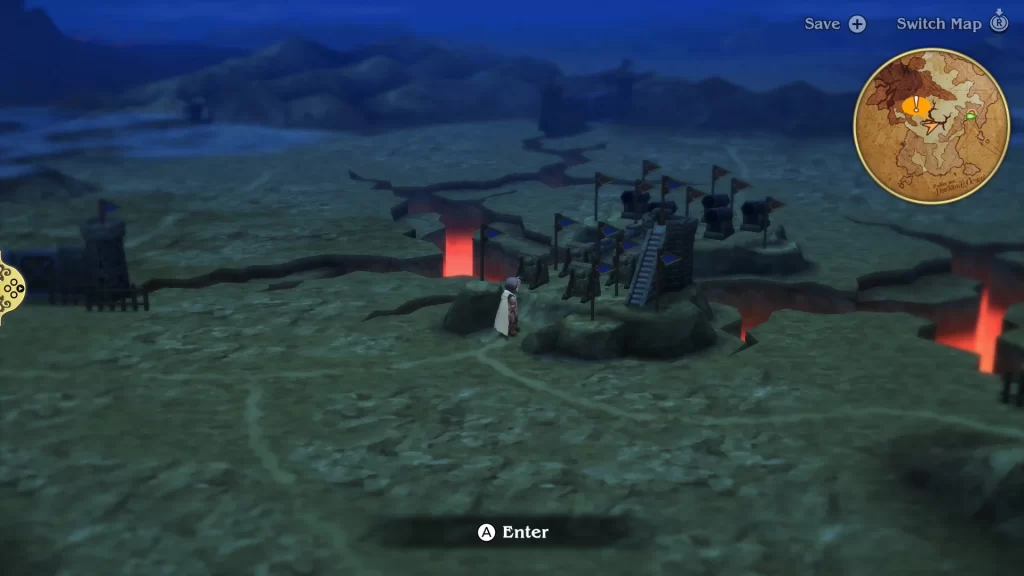
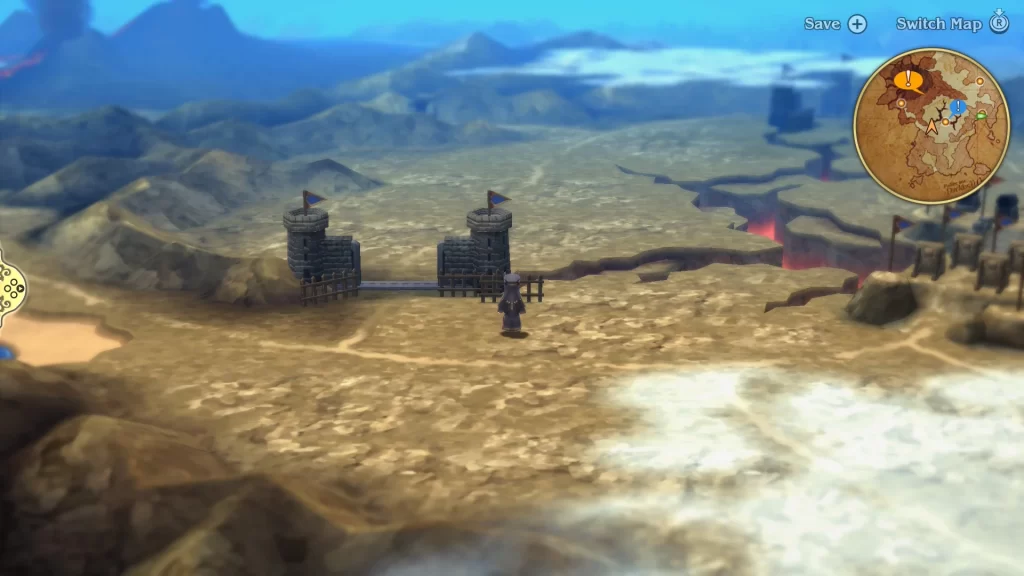
On the world map, follow the path southwest, where you’ll want to keep heading towards the Shieldbearers’ base at Eisen Bridge. Reaching the bridge will kick off an event where you’ll meet Commander Goodman. Once it’s over, leave the bridge and continue heading west to reach the town of Hartschild.
Explore Hartschild

Upon arriving in Hartschild, you’ll be treated to an event. Afterward, you’ll be free to explore the town. There are Armory, Magics, and Trader shops you can visit to upgrade equipment, purchase new magic, and stock up on supplies. If you head to the side street under the Trader, you’ll come to a group of barrels. Interact with them to receive an Elixir.

When you’re ready to progress the story, head to Commander Goodman’s Residence to begin another event. During which, Agnes will reluctantly agree to lend a hand to locals while they search for a way to reach the Fire Crystal.
Find a Way to Reach the Fire Crystal
Follow Up with Goodman at Eisen Bridge
Following recent events, make your way back to Eisen Bride and inform the commander that the party has decided to help out while they search for a way into the Temple of Fire. Commander Goodman will thank the parts and then task them with scouting out Grapp Keep in search of a toxin that was used to take out a lot of his men. With any hope, you can find evidence to craft a cure.
Pirate Sub-Scenario
Before heading to Grapp Keep, you can travel back to the house where the airship is docked and speak with the people there. They will tell you about a ghost ship that has been seen nearby. This begins the sub-scenario to unlock the Pirate Asterisk. For more details, check out our Chapter 3 Jobs and Asterisks guide.
Scout Out Grapp Keep
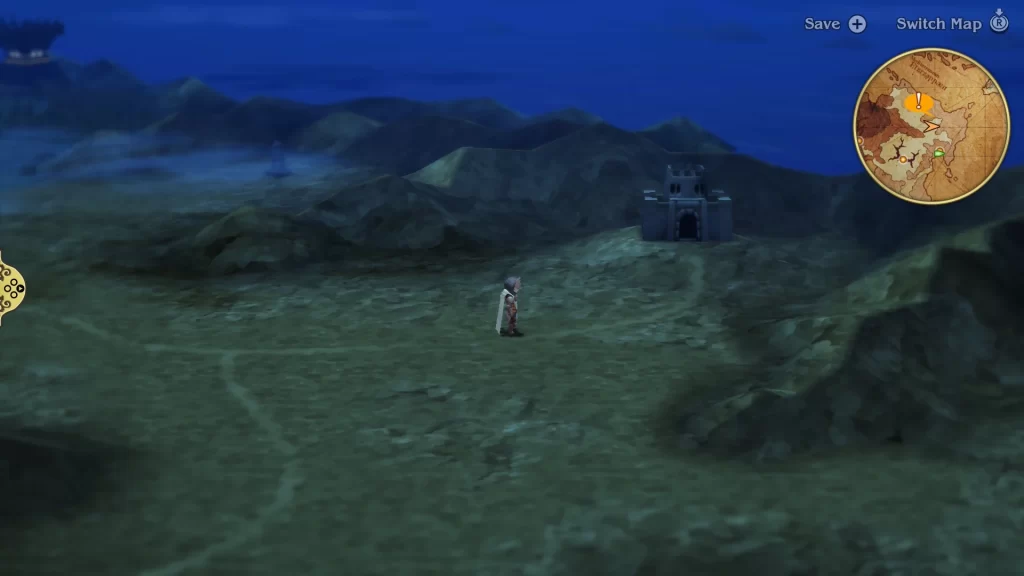
When you’re ready to travel to Grapp Keep, head through the newly opened gate on the east side of Eisen Gate. Follow the path northwest to the end, and it will lead you to your destination.
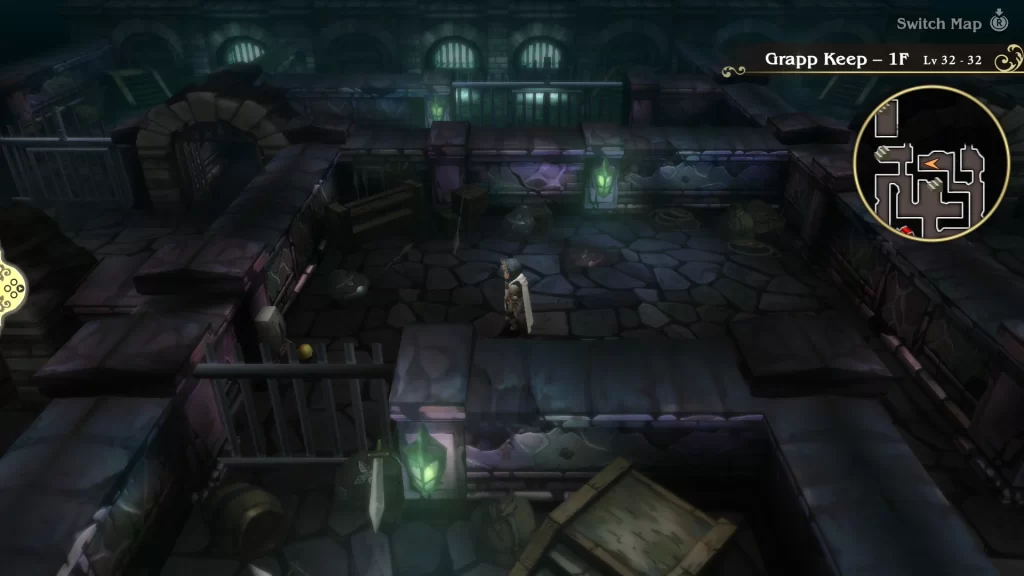
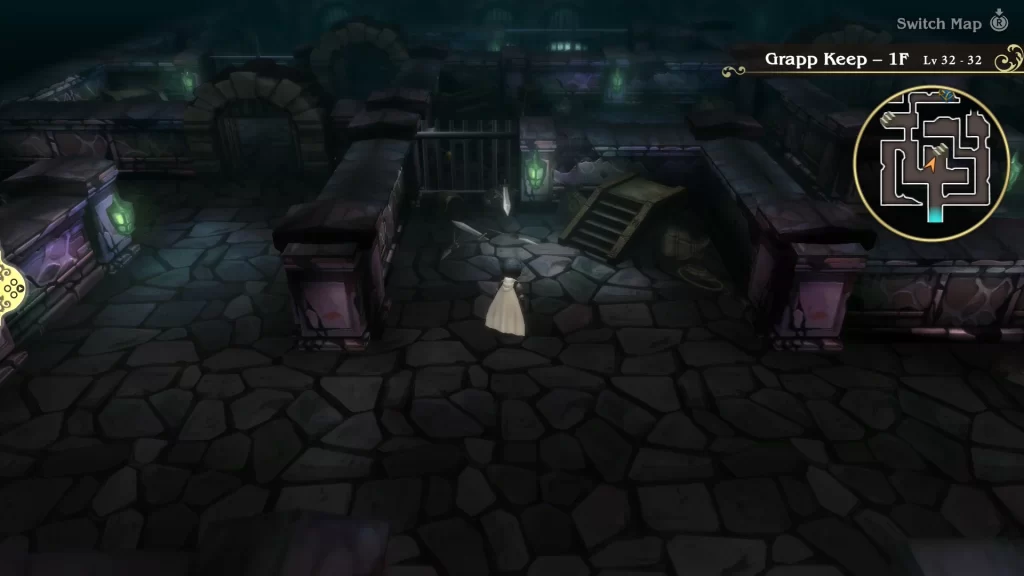
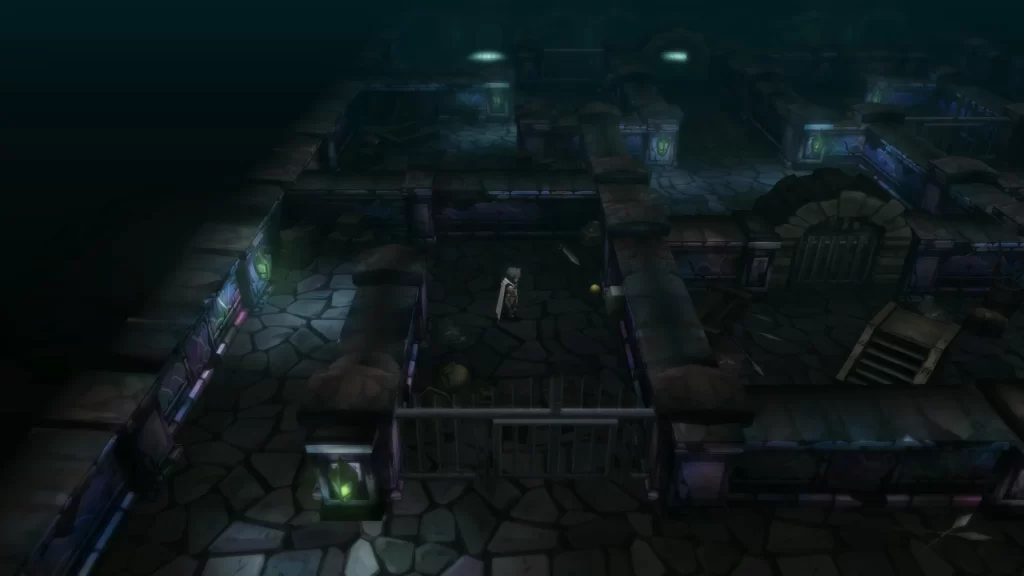
Upon entering the keep, head straight past the stone archway to trigger an event. Afterward, follow the hallway just past the archway east and then take the next left. This will take you to the center of 1F, where you’ll spot a lever on the wall next to a metal fence. Interact with it to open a gate on the other side of the room.
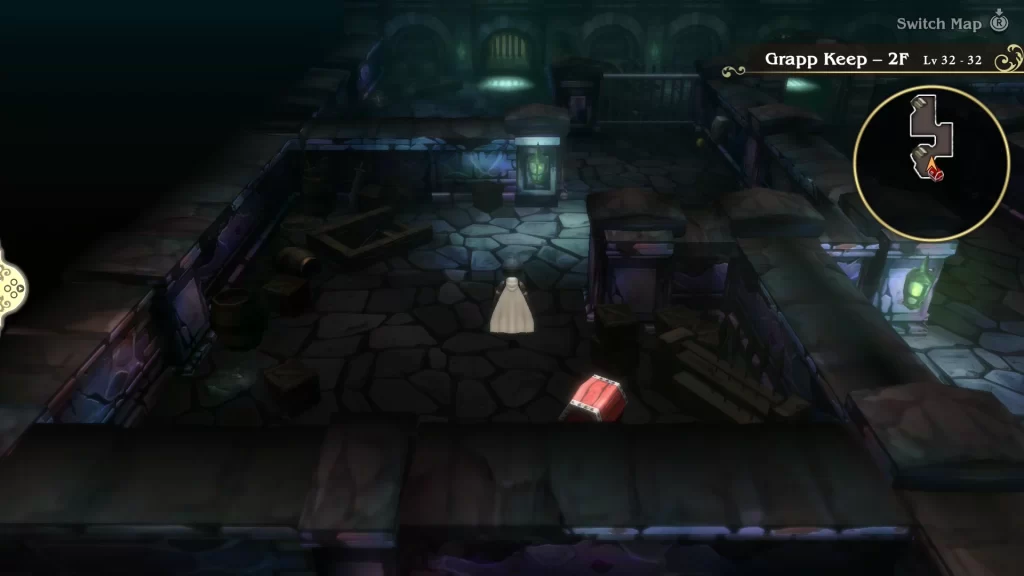
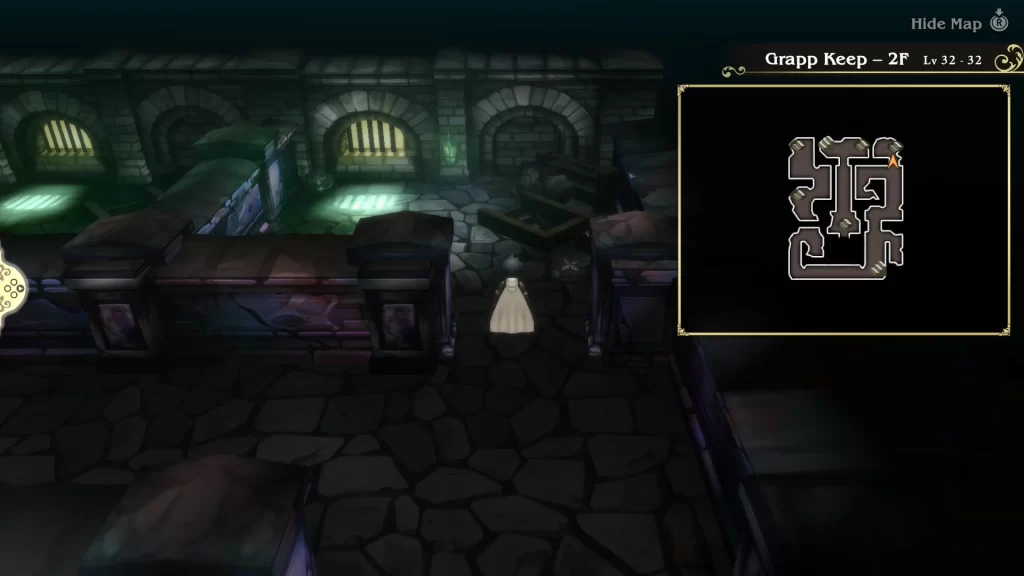
Return to the stone archway and then head north, take the first left, and pass through the gate you just unlocked. Take the stairs on the left up to 2F, then head south and grab the chest there, which contains 2,000 pg. Go north, past the stairs, and flip the lever on the right wall. This will open up a door in the center of the floor. Keep going north and take the stairs back down to 1F. There will be another lever there you’ll want to flip, opening another gate on the first floor.
Backtrack to the other section of 1F, where you’ll be able to loot two chests. One will be past the gate you just opened, next to a blue chest containing a Turbo Ether. The other can be found just before the 1st door you opened on 1F. After you head south through it, take a left and follow the path south to reach the chest with an X-Potion.
Now head to the center of 1F (north of the entrance/stone archway) and use the stairs there to reach the 2F.
You’ll then want to head north through the door you just unlocked. Take the set of stairs on the right down to head back to the 1st floor, where you’ll find a chest containing a Glaive spear. Head back up to 2F and take the stairs on the left up to 3F.
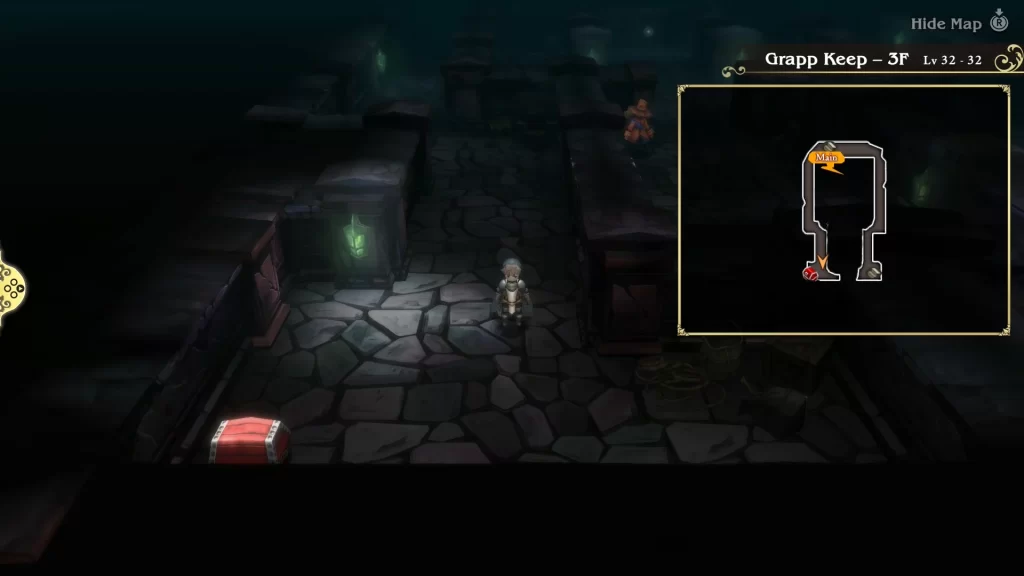
On 3F, follow the path going south to the end to reach a chest with a Rebuff Locket inside. Head back to the stairs and follow the path east and then south to trigger an event. Keep heading south after it ends and take the stairs down to 2F.
When you reach 2F, head west and follow the path around to reach a lever on the wall. Flip it to unlock the gate leading to the boss.
Return to the stairs and head north. Make sure to explore the side paths as they contain chests with a Bomb Fragment and Bacchus’s Wine. You’ll then want to take the stairs in the northeastern part of the room down to 1F.
Back on the first floor, flip the nearby lever to open the gate blocking your path. You’ll then want to take the stairs north of the Grapp Keep entrance/exit. When you reach the 2nd floor, head south through the recently opened gate, and take the stairs up there. This will bring you just outside the boss’s room. There will be a man in red nearby that you can speak with to save and heal up (for 1500 pg). When you’re ready, approach the sparkling shelf in the next room to trigger an event leading to a mini-boss fight.
Grapp Keep Mini-Boss Fight: Automatons
For this fight, you’ll be facing off against three Automatons. Each one has 10,000 HP and is weak to electric attacks. They also have two main attacks. One involves punching a single party member, and the other is a rocket punch that damages all three.
Make sure to utilize their electric weakness to take them down quickly. Specifically, you could use a Black Mage or Spell Fencer. We like to use a Valkyrie Edea with a Spell Fencer Job Command so she can enchant her spear! Once they go down, you’ll collect the toxin sample. Exit Grapp Keep and return to Eisen Bridge for another event.
Free the Canary Kids at Mythril Mine
Now that we’ve secured the toxin sample, it’s time to free some kids forced to work in the mines. From Eisen Bridge, head west and go through the newly opened gate along the path. From there, head north, taking a left when it splits off. This will bring you right to the Mythril Mine.
Upon entering the mines, the party will run into one of the canary kids. While talking to him, a guard shows up, throwing the party into a fight. He has 3000 HP and is weak to electric, so it shouldn’t take too long to make quick work of him.
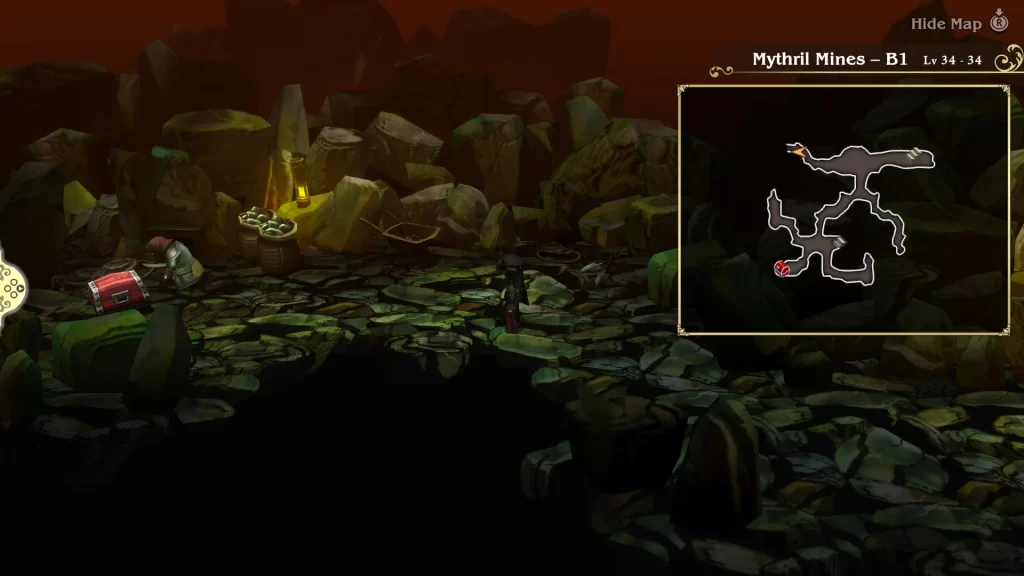
When it ends, you’ll be on Mythril Mines B1. There will be eight more kids on this floor that you’ll need to rescue by defeating a guard. They can be found on each dead-end section of the map. There are also two chests you’ll come across while looking for the children, containing an X-Potion and an Earth Drum. When you’re ready to head to the next floor, you’ll find the stairs in the southwestern corner of the area.
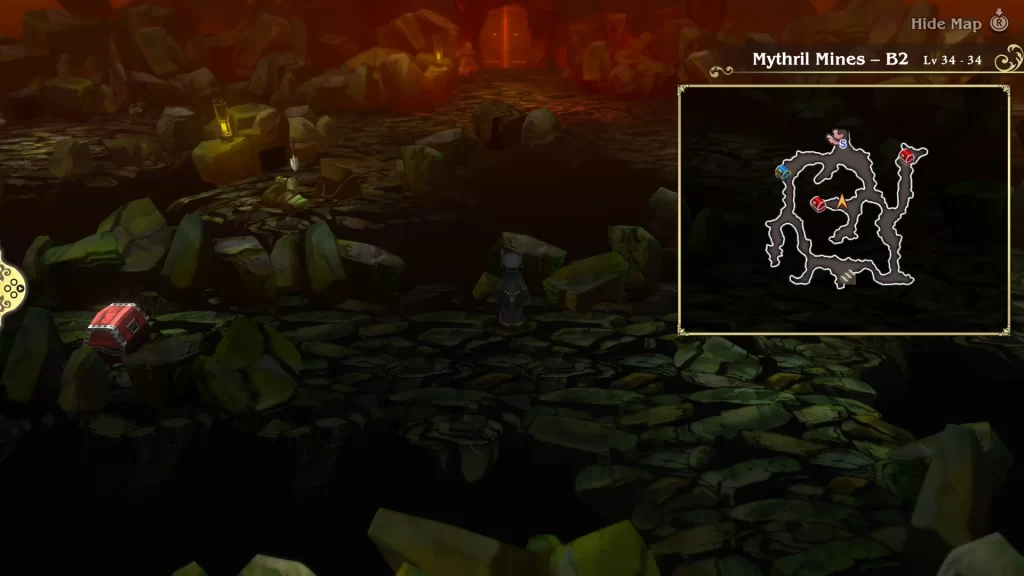
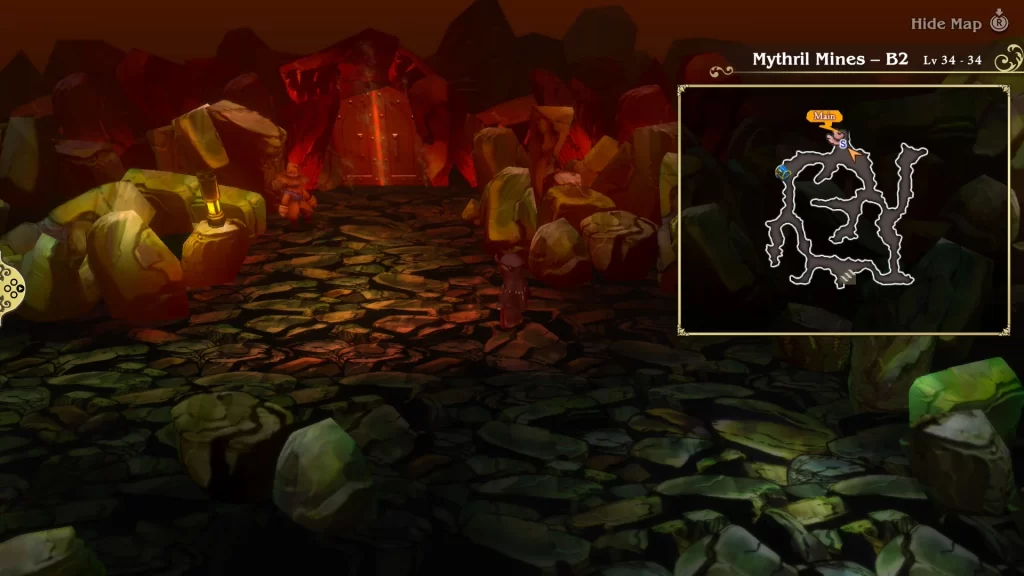
On B2, there will be ten children that you’ll need to save. As with the B1, they will be around the area at the end of dead-end paths. You’ll also come across two chests containing 1000 pg and a Turbo Ether. On the north side of the floor, you’ll find a man in red. You can use him to save and heal up (for 1500 pg) if you wish. Once you have saved all of the kids, exit the mines. On the way out, a Canary Boy will mention another boy who hasn’t been seen in a while. Tiz will agree to save him while the other boys escape. Our next destination is Starkfort in the north.
Performer Sub-Scenario
Before heading to Starkhold, you can go to Eisen Bridge to get the sub-scenario to unlock the Performer Job. It does require some backtracking to previous regions and areas, so be prepared for that. You can check out our Bravely Default Flying Fairy Chapter 3 Jobs and Asterisks guide for more details.
Locate Egil in Starkfort, Lair of the Swordbearers
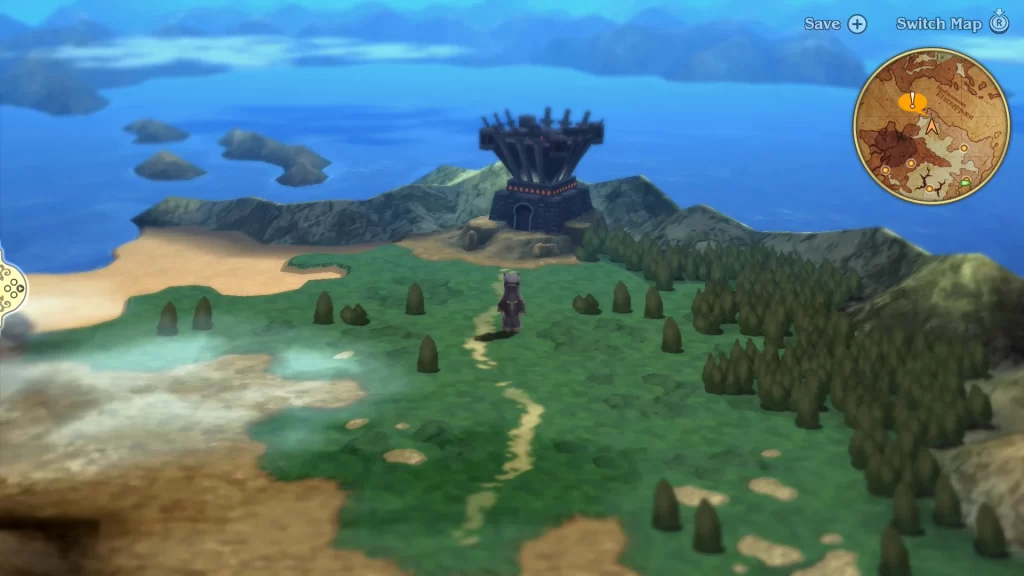
Back on the world map, follow the path northeast through the next gate. Then head to the northernmost part of the area to reach the enemy stronghold. Make a save and then head inside when you are ready!
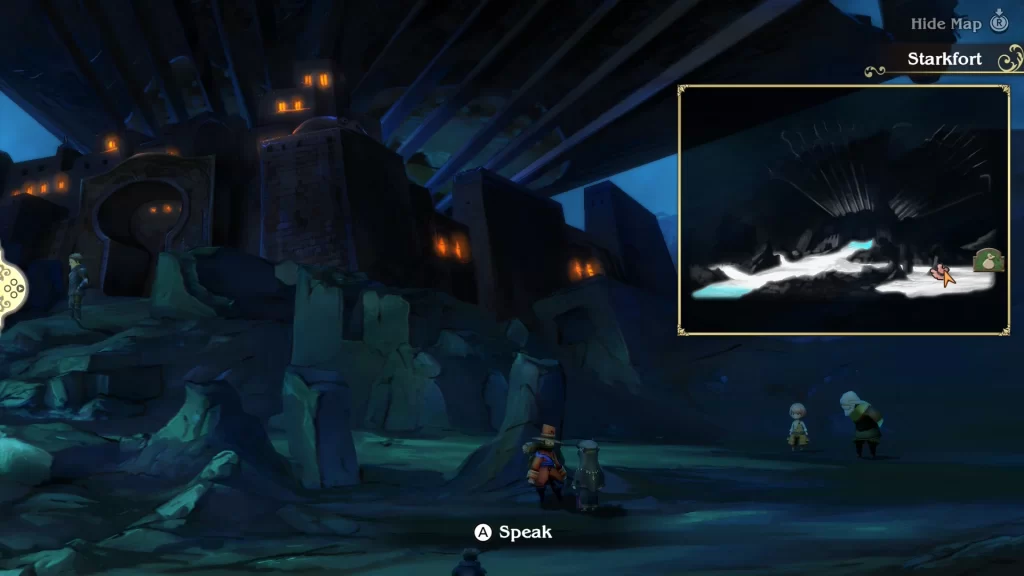
When you reach Starkfort, head to the east side of the area to find a man in red along with a trader. You can upgrade your gear with him if you want, or use the man in red to save before entering the fort. He does have some spells for the Black and Time Mages as well. When you’re ready, enter Starkfort.
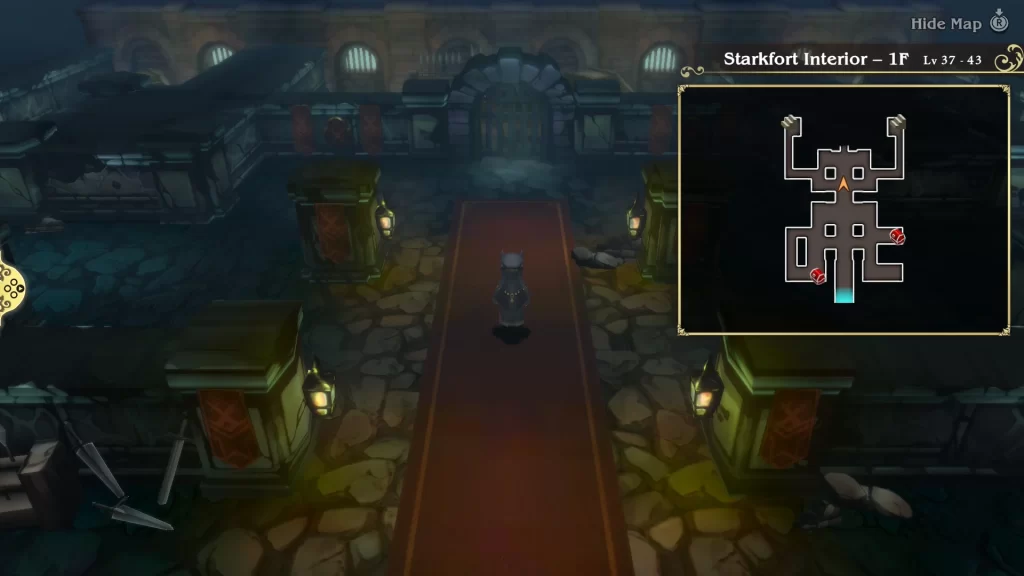
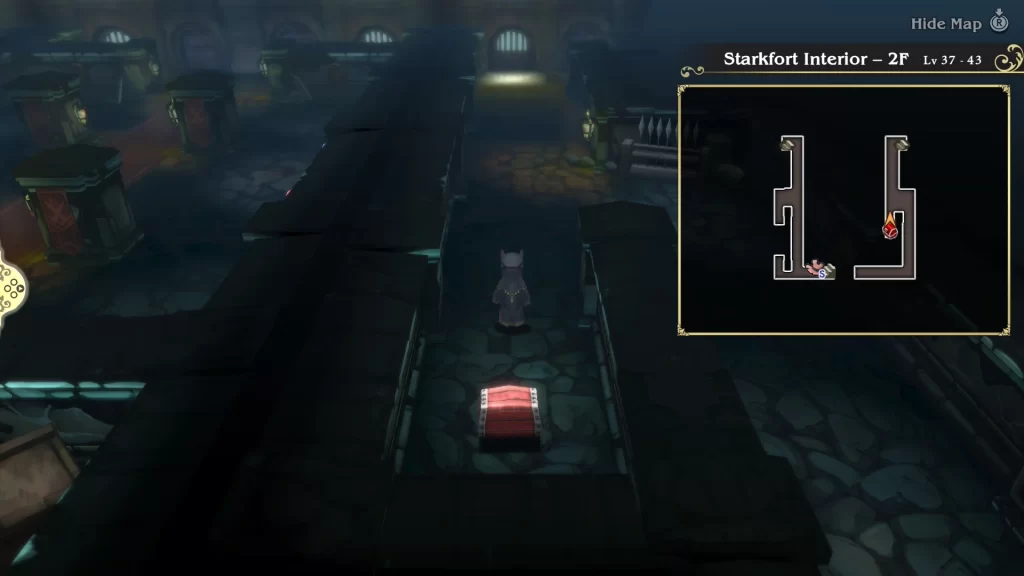
Once inside, you’ll be on 1F. Head forward a bit until an event triggers. Once it does, you’ll want to grab the two chests, one on each side of the room, that contain 500 pg and a Hi-Potion. To proceed looking for the canary boy, take the stairs in the northwestern corner up to 2F.
On 2F, follow the hallway south to trigger an event where the party finds Egil. Also, be sure to grab the lone chest in this hallway to receive the Ice Brand sword. Once you have it and the boy, you’re free to exit Starkfort back to the world map and escort Egil back to Hartschild. But, before doing that, check the next objective, which covers a sub-scenario you can do in the fort.
Salve-Maker Sub-Scenario
On Starkfort Interior 1F, if you take the stairs in the northwestern part of the area, this will lead you to the sub-scenario where you can unlock the Salve-Maker Asterisk. For more details on that, please check out our Bravely Default Flying Fairy Chapter 3 Jobs and Asterisks guide. You’ll also find a chest containing 1,000 pg in the hallway on 2F, just before the stairs leading to the sub-scenario boss.
Escort Egil Safely to Hartschild
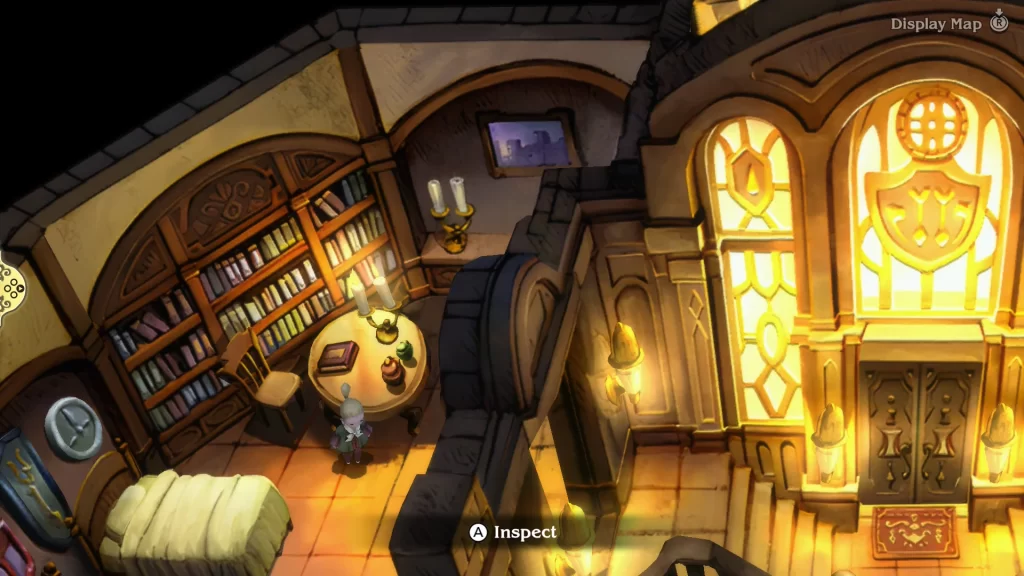
Back in Hartschild, an event will trigger when you reach the town. Afterward, head to Commander Goodman’s residence for another event. When you regain control of the party, follow Egil down the stairs on the left of the inn. This will kick off a third event, bringing the party back to Commander Goodman’s residence. Before leaving, go to the corner of the room that is diagonally across from Eleanor. You’ll find a prompt to interact with something. Do so to receive a Kunai dagger. Take some time to heal up and equip the part if needed, then make your way back to the Mythril Mine.
Time to Awaken the Fire Crystal in this Bravely Default Flying Fairy Chapter 3 Walkthrough
Return to Mythril Mine
As you approach the mine, an event will trigger where a group of enemy soldiers is chasing Egil. This will lead to a battle against a Black Axefighter, Blade, and Pikeman. Once the battle is over, the Ringabel will convince Tiz to let Egil accompany them to the mine.
Back in the mine, make your way down to the Mythril Mines -B2 and head to the northern part of the area near the metal door. Speak with the nearby man in red to save and heal up, then approach the door for an event where Egil opens the door. Head through it to reach the Underflow.
Pass Through the Underflow to Reach the Temple of Fire
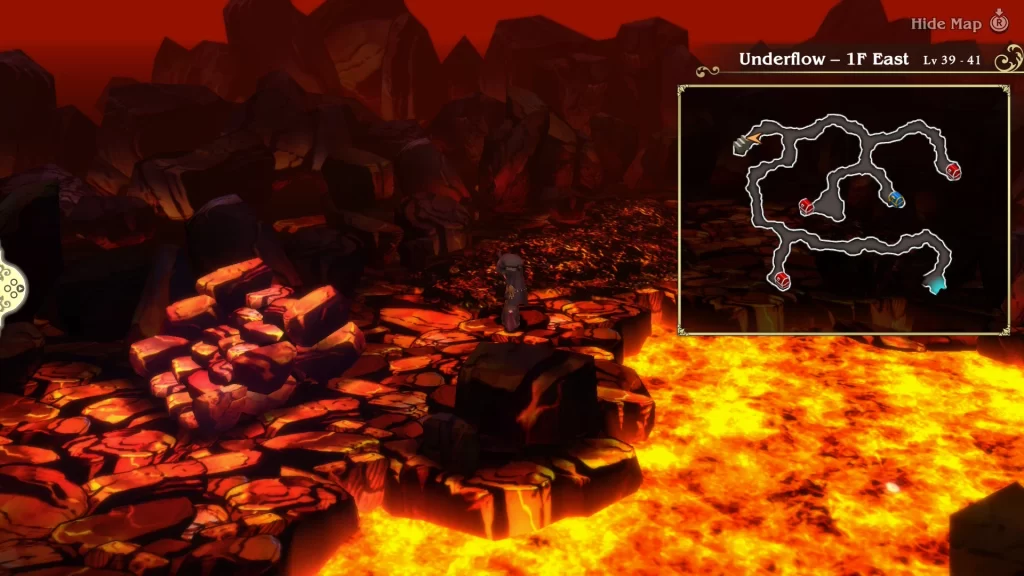
In order to reach the Temple of Fire, you’ll need to work your way through the Underflow. Keep an eye on the ground because the floor is lava and will damage the party. If you have the Dungeon Master ability from the Freelance job equipped, then you’ll be able to head through the dungeon without taking damage from the fire.
When you begin, you’ll be in 1F East of the Underflow. Follow the main path west to reach the stairs leading to the next floor. Along the way, you’ll come across three chests containing the following: 1,000 pg, a Bomb Fragment, and a Bomb Arm.
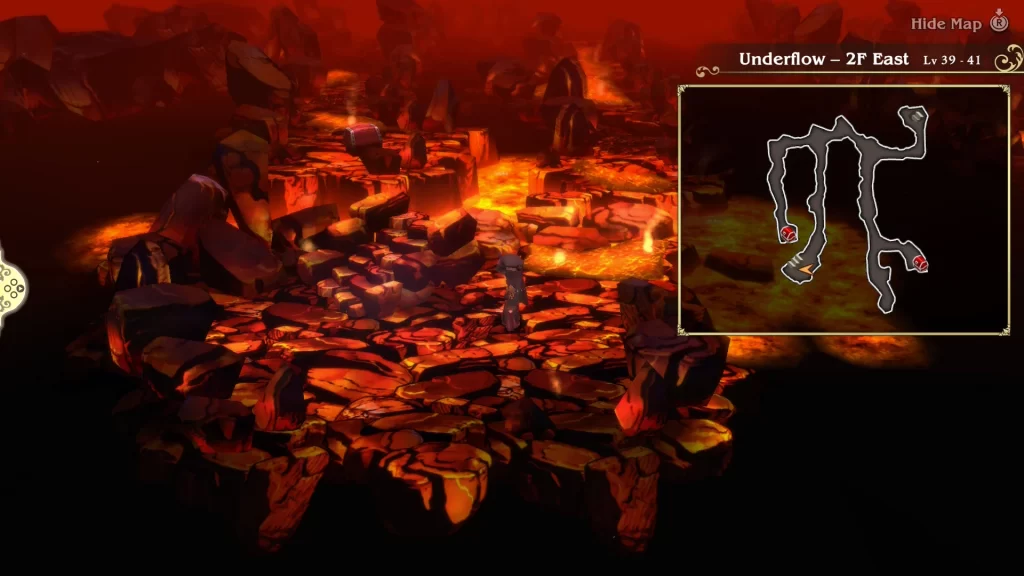
The next area the party will come to is 2F East. Head east through the area, and you’ll come to three side paths. The first and third ones have chests containing 2,000 pg and a Safety Ring. To reach the next floor, take the middle path.
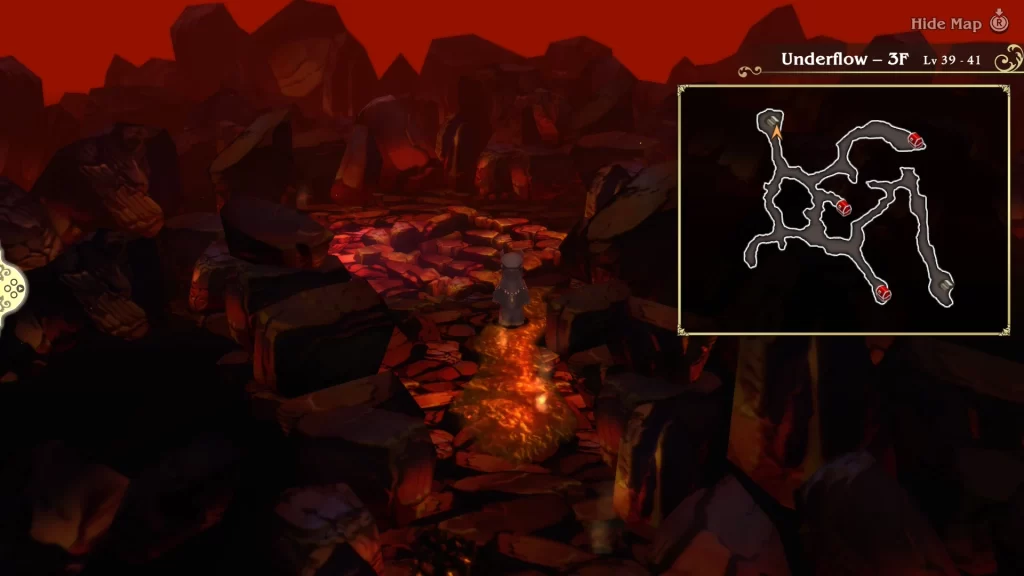
Our next stop will be on Underflow 3F. You’ll notice that as you traverse the area, the ground will start shaking, which causes some of the paths to get destroyed. You’ll want to head for the northwestern corner of the area to reach the next floor. Along the way, there will be chests in the south, central, and northeastern sections of the floor that contain an X-Potion, a Flame Charm, and a Turbo Ether.
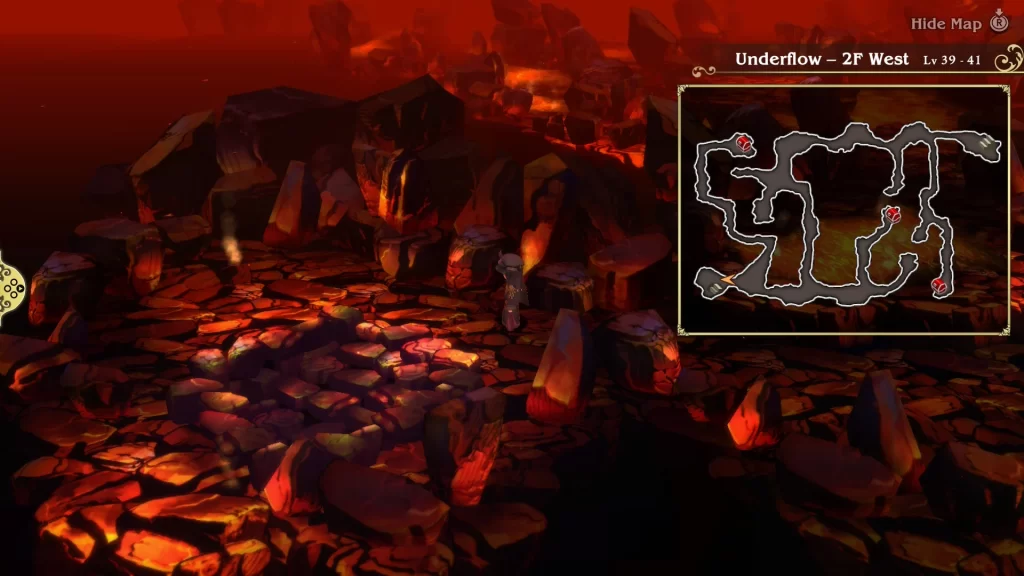
Now, you’ll reach Underflow 2F West. Make your way to the southwestern corner of the floor. There will also be three more chests you can loot that contain a Diamond Staff, a Flare Hatchet, and a Gale Bow.
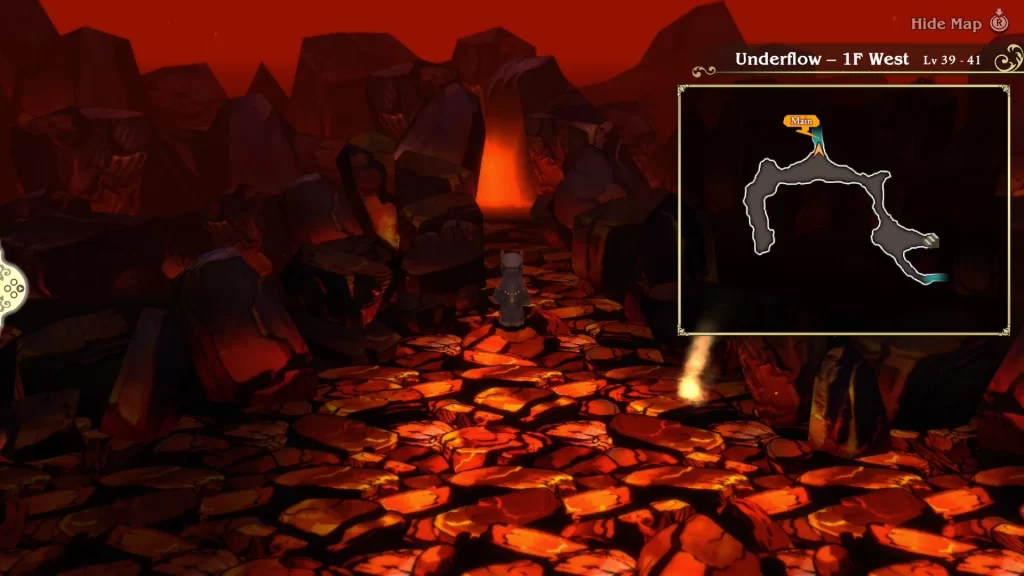
The final floor is Underflow 1F West. After you reach it, an event will trigger. Once it concludes, head north following the path to find an opening in the rocks leading to the Temple of Fire.
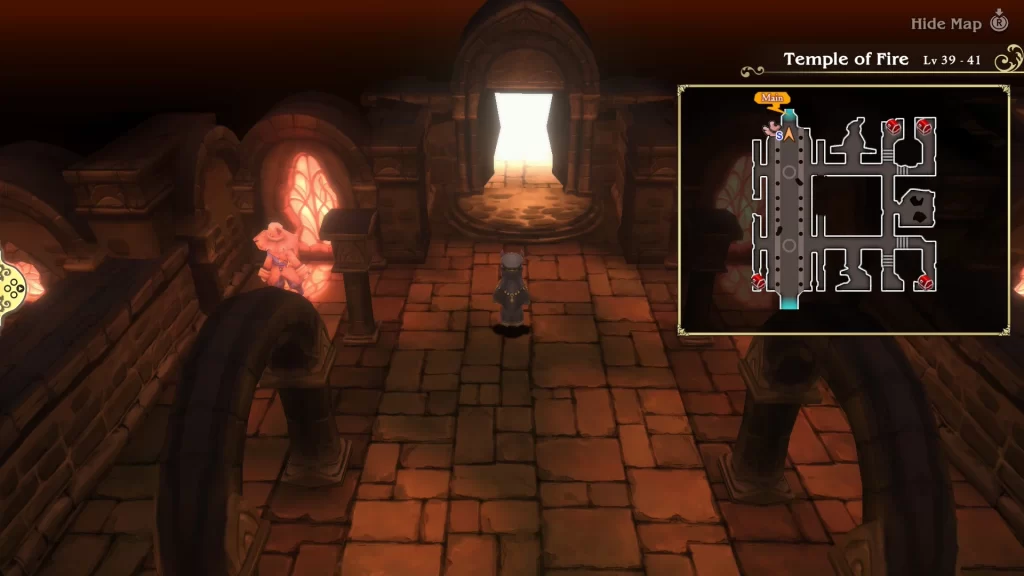
Explore the Temple of Fire
Hurray! We finally made it to the Temple of Fire! Just like the Temple of Water, the Temple of Fire only has one floor with five chests and three rooms to explore. You can receive the following items from the chests: Flametongue sword, an Iceflame shield, an X-Potion, and a Tuirbo Ether. Additionally, if you have the Summoner job, you’ll be able to speak with the own person in the southeast corner. They will give you a trial that will reward you with a new summon if you pass. Luckily, equipping the Iceflame shield will guarantee this. When you’re to progress the story, enter the altar room to trigger an event leading to a boss fight!
Temple of Fire Boss Fight: Chaugmar, the Mark of Doom
To awaken the Fire Crystal, we’ll need to defeat the Chaugmar! It has 40,000 HP, is weak against electric attacks, and is a demonkind species. When the fight begins, Chaugmar will have a shield up, which prevents it from taking much damage. You’ll want to Default for the first 4-5 turns until it uses the Transform skill, which will remove the shield. Once it does this, Default one more time as its next attack will be the Energy Burst skill, which deals massive damage (about 1000 each when in Default) to the whole party. Some other skills you’ll want to look out for are Blood Suck which steals HP from the target, Soul Suck which steals MP from the target, and Heart Suck which steals BP from the target.
Our strategy for this fight was to wait for the shield on Chaugmar to drop, then unload on him after. We had Tiz as a Spell Fencer who added electric to his sword, dealing extra damage to the boss. We used this same setup for Edea, but she was a Valkyrie with the Spell Fencer job command. Ringabel was a Hunger and uses the Demon Slayer skill to deal extra damage, while Agnes was a Red Mage who could both heal and deal damage as needed. We also had her job command set to Time Mage so she could also buff the party. Don’t forget to use your Special attacks as they become available as well.
Awaken the Fire Crystal
Once Charugmar falls, an event will trigger, leading to Agnes performing the Rite of Awakening on the Fire Crystal. Exit the Temple of Fire and then use a Teleport Stone to reach the entrance of the Underflow. Return to the mines to trigger an event and then use another Teleport Crystal to leave the mines.
Bravely Default Flying Fairy Chapter 3 Clean Up
Swordmaster Sub-Scenario
Before returning to Hartschild to progress the main story, a new sub-scenario has become available at Starkfort following the awakening of the Fire Crystal. If you complete it, you’ll receive the Swordmaster Asterisk. For more details, check out our Chapter 3 Jobs and Asterisks guide.
Give the Commander the Good News
Now that the Fire Crystal has been awakened, you’ll want to head to Eisen Bridge to give Commander Goodman your report. He’ll be surprised and pleased to hear what the group has to say.
Bring Egil Back to Hartschild
Once you’re done speaking with the commander, travel back to Hartschild for another event. After it ends, head over to the commander’s residence for the next event. Following that, you’ll be free to wander around town for a bit. Take the time to stock up on items or look at upgrading your gear. Also, make sure to heal up at the inn and save by speaking with the man in red. When you’re ready to proceed, return to your airship and sail it back to Grandship.
Check in with Grandship
When you reach Grandship, head to the Drunken Pig Tavern and speak with the man standing next to the far left table on the 1st floor. He’ll mention to the party that the Inn in Caldisla is going under because the old innkeeper has finally succumbed. Make your way back to the airship and sail to Caldisla.
Help the Old Innkeeper in Caldisla Out
Head into the town’s inn to trigger an event where the party goes to check up on the innkeeper. During the conversation, Tiz comes up with the idea of having Egil stay with the old man to help him recover.
To put this plan into action, return to the airship and sail back to Hartschild. Make your way to the Goodman Residence for an event where the party speaks with Egil. He’ll agree to spend some time with the innkeeper.
Travel back to Caldisla and head to the palace. This will trigger an event between Tiz and the King where the latter agrees to Tiz’s plan, welcoming Egil to the kingdom. When it concludes, you’ll receive the Hyper Bracers.
Ninja Sub-Scenario
Before heading to Grandship, the last sub-scenario of Bravely Default Flying Fairy Chapter 3 will become available. Travel to Goodman’s Residence in Hartschild to begin the Ninja Sub-Scenario. For more details, please refer to our Chapter 3 Jobs and Asterisks guide.
Figure Out How to Reach the Earth Crystal
Head to Grandship for Leads
The last stretch of Bravely Default Flying Fairy Chapter 3 takes place at Grandship. Head there and dock to trigger an event with the Tavern Proprietress. After it concludes, make your way over to the Markets for another event. Once that one is finished, go to the Drunken Pig Tavern for one more, where we’ll learn that Grandship is sinking.
Return to the Markets and head up the stairs on the right of the inn, entering the room at the top. This will kick off yet another event, during which the part learns they need Orichalcum for the ship to fly. Travel to Caldisla and stop by the inn to speak with Egil about it. A grateful Egil happily hands the rock over.
Go back to Grandship and return to the Bridge. Interact with the door just before the stairs for an event. Afterward, do so again to reach the Engine Room.
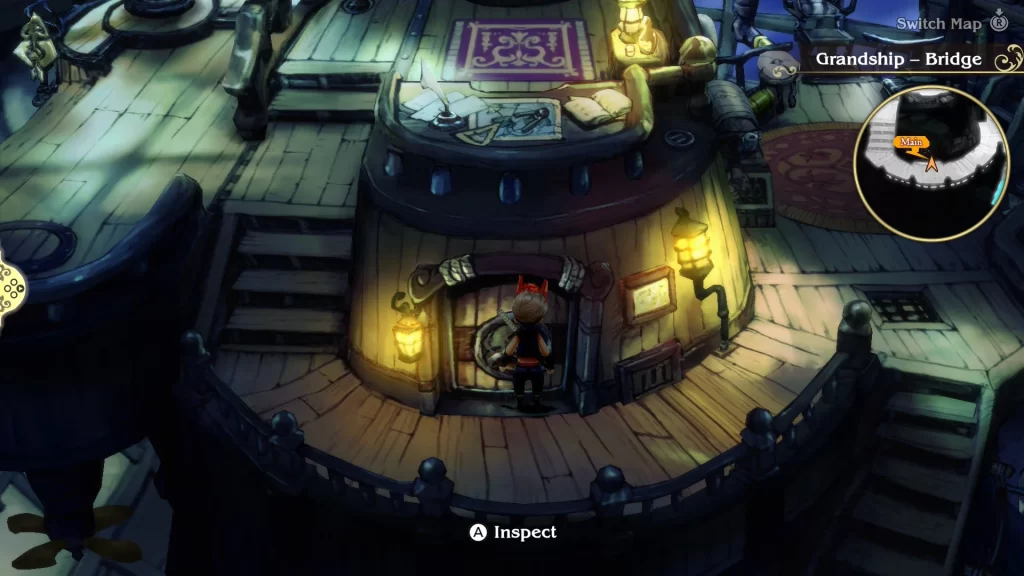
In Gandship’s bridge, you can find a Zeus’s Wrath by entering the elevator on the west side and intersecting with it. There is also a Turbo Ether in front of the telescope.
Explore the Engine Room
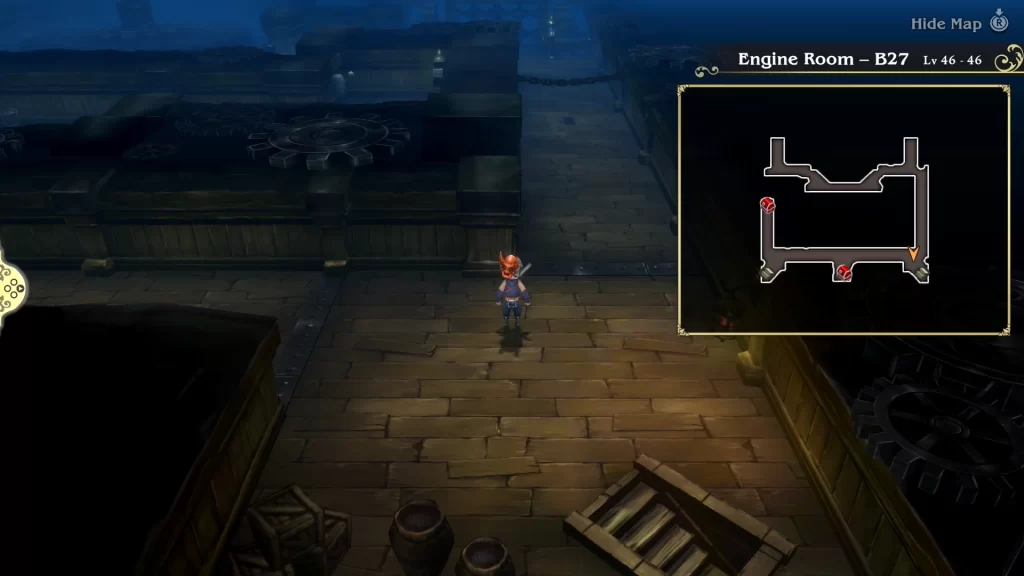
When you reach the Engine Room, you’ll be on B27. Follow the path heading east all the way around the room to find two chests containing 1,000 pg and an Antarctic Wind. Next, take the stairs in the southwestern corner down to B28.
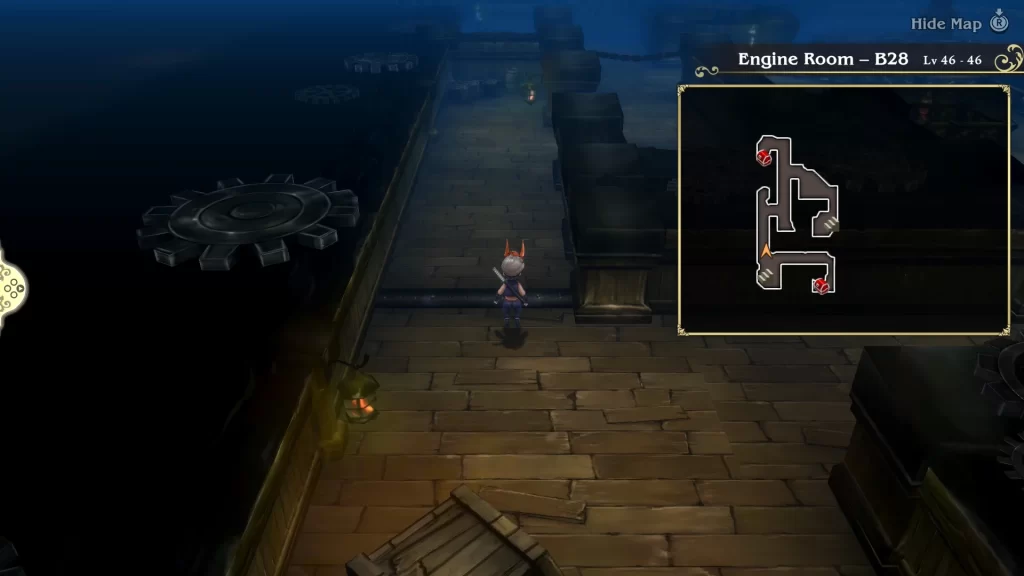
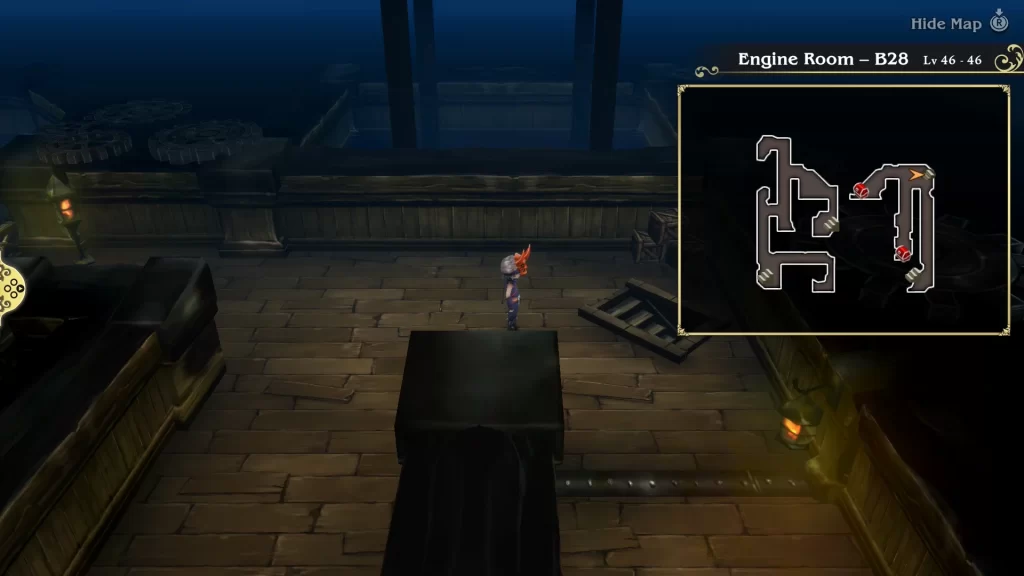
On B28, if you follow the path east of the stairs, you’ll reach a chest with a Turbo Ether. Return to the stairs and follow the other path north to get a second chest with a Gold Hourglass. East of this chest, you’ll find another path with some stairs at the end. Take them back up to B27F and head west. You’ll spot a lever on the wall that you’ll want to pull, then make your way back to the main area of B27.
Back on B27, take the stairs in the southwestern corner down to reach the other side of B28. Follow the path north to the end, where you’ll find two chests. They contain a Cross Axe and 2,000 pg. Take the nearby stairs down to reach B29.
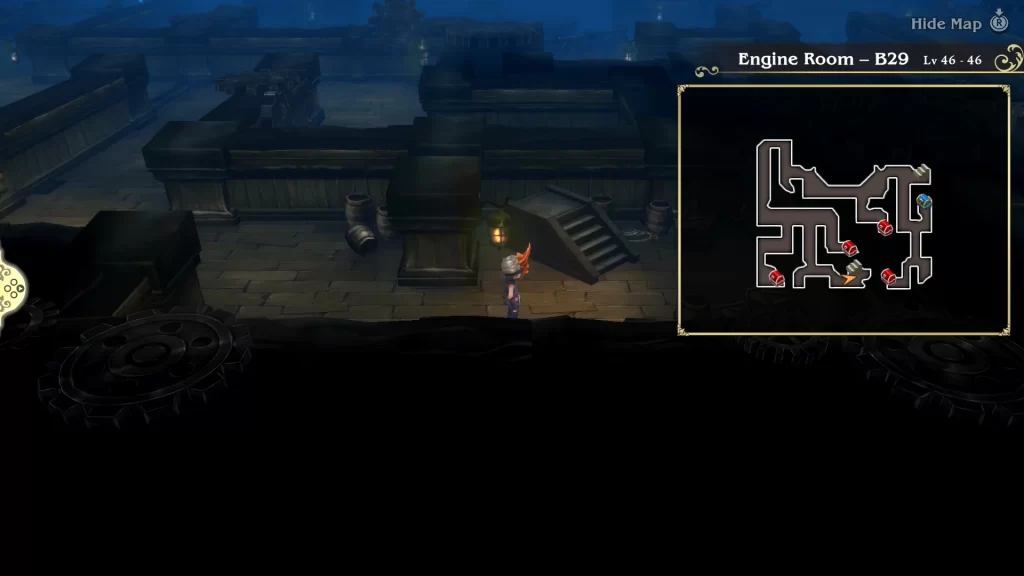
When you reach B29, head south to grab a chest containing a Trident spear. Next, head back down the path you came from and work your way around the room counterclockwise, making sure to explore each side area. You’ll come across three more chests containing a Hammer Mace, a Raikiri katana, and some Bacchus’s Wine. Near the last chest, you’ll find a set of stairs that you’ll want to take back up to B28 and B27, where you’ll be able to flip the other lever.
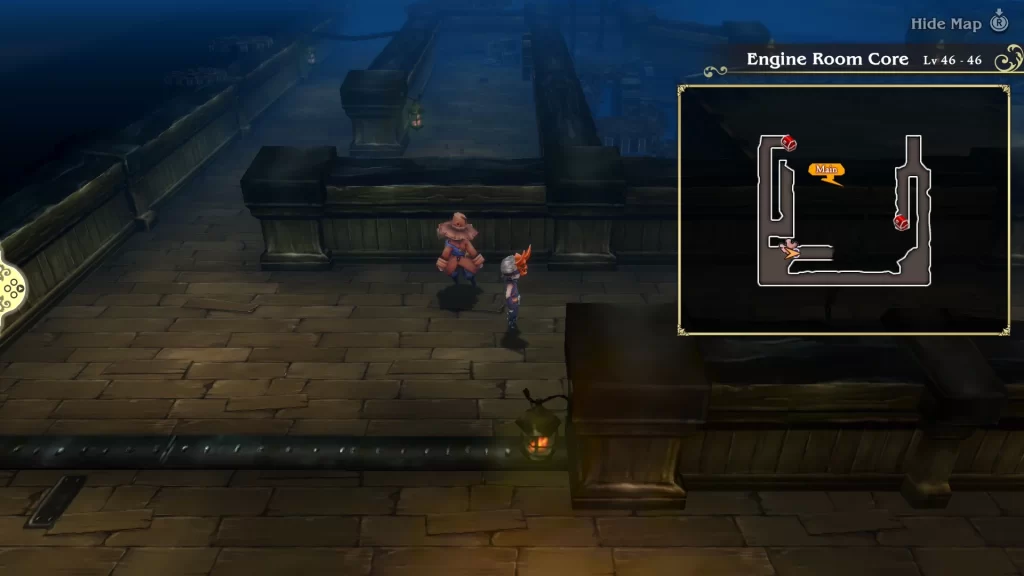
Return to the main area of B27 and use the newly accessible elevator in the northeastern corner to reach the Engine Room Core. Near the elevator, you’ll find a chest down a side path containing an Arctic Wind. Continue following the main path around the room until you reach the man in red. You’ll then want to head down the path on his left to reach a second chest with a Barrier Shroud. With the two chests out of the way, return to the man in red to save and heal up. When you’re ready, follow the path to his right to the engine core.
Engine Room Boss Fight: Behemoth
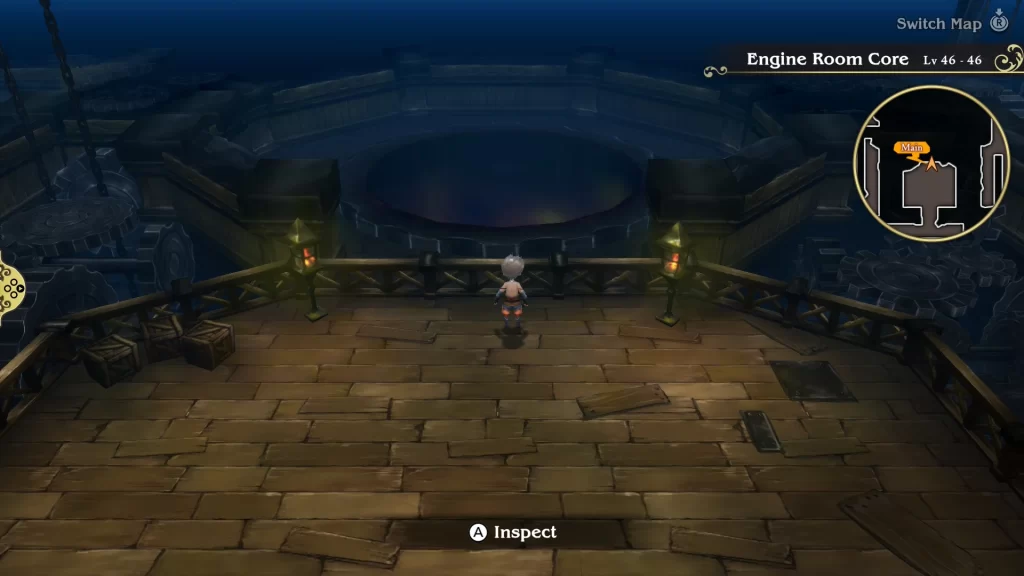
Interact with the Grandship’s core to trigger an event leading to a boss fight. You’ll be facing the aquatic Behemoth with 80,000 HP and a weakness to electricity. The monster will have four main attacks that it uses. Toothy Rend will deal high damage to a single party member. Its Roar attack will damage the whole party for moderate damage. There is also its Venomous Bite attack, which can inflict poison on the target. Lastly, there is its basic attack, bite.
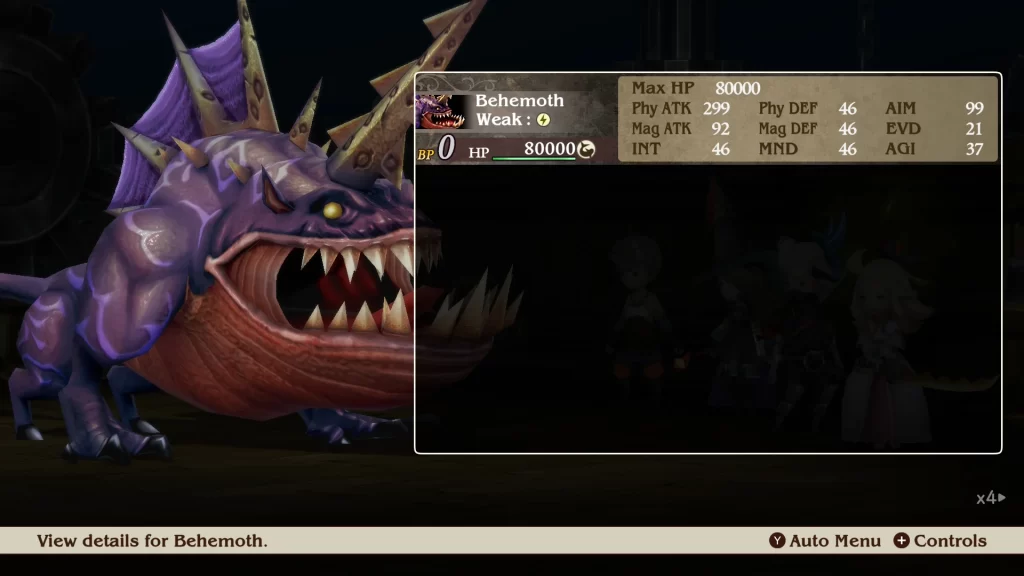
For this fight, we used electric-based skills and spells to damage the Behemoth. That came in the form of a Black Mage and Spell Fencer. You’ll also want to bring someone with White Mage skills to heal up the party and remove any inflicted poison. Once the beast falls, another cutscene will trigger.
Head for the Earth Crystal
When you regain control of the party, you’ll be back on the world map. Head to the objective marker on the northwestern continent to trigger an event. After it concludes, land at the objective site to kick off another one, leading to the end of Bravely Default Flying Fairy Chapter 3.
More Bravely Default Flying Fairy Guides and Walkthroughs
For additional guides and walkthroughs on Bravely Default Flying Fairy, be sure to check out our Bravely Default Flying Fairy HD Remaster main page!