Welcome to NGB and our walkthrough for the An Instrument to Unfold Space & Time main quest in The Outer Worlds 2. For this quest, you’ll need to find the gadget that can unfold rifts. Our guide will walk you through all the objectives, highlight the best strategies, and make sure you don’t miss any rewards.
Quick Links
An Instrument to Unfold Space & Time Main Quest Guide
How to Start the An Instrument to Unfold Space & Time Main Quest
You’ll begin the An Instrument to Unfold Space & Time main quest automatically after completing the Fiends in High Places main quest.
An Instrument to Unfold Space & Time Walkthrough
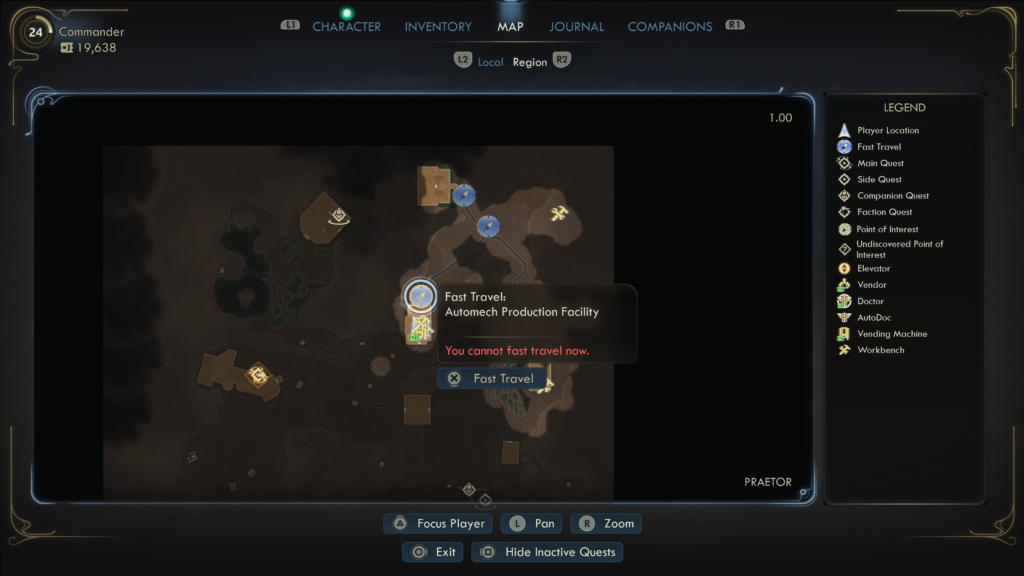
Find a Way to the Western Side of Praetor
You’ll need to access the Interstitial Reconfiguration Center (IRC), which is blocked by a Protectorate fortification in the middle of Praetor. To access the western side of Praetor, head through the Automech Production Facility near the center of Praetor.
To reach the other side, you’ll need to pass through the facility that is packed full of Protectorate enemies.
Acquire the Rift Anomaly Modulator
When you arrive at the IRC, head inside the compound and take the lift in the southwestern corner up. At the top, avoid the Dragoon patrolling and make your way to the back right side.
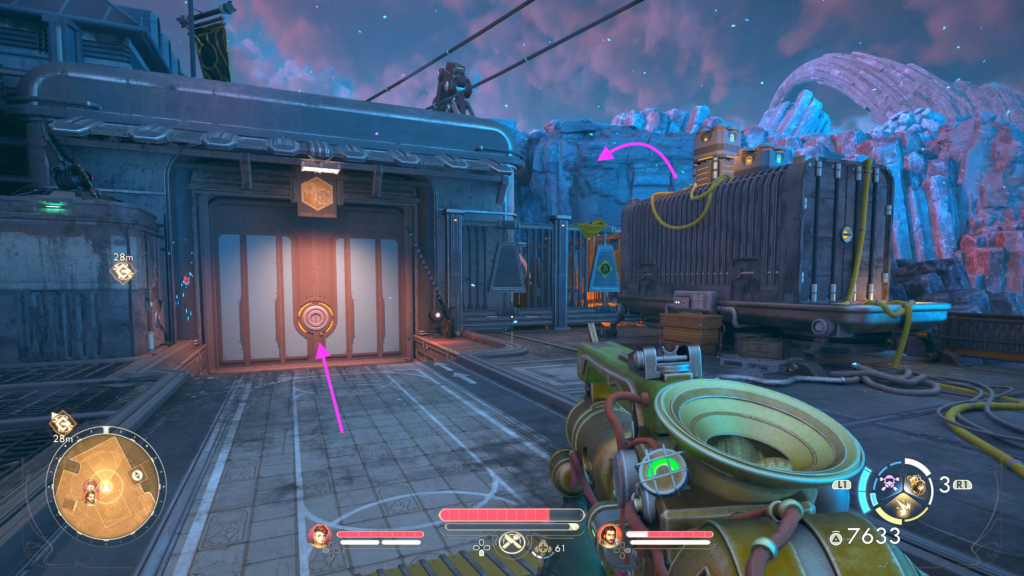
If you have Lockpick 4 and 1 Mag-Pick, unlock the giant door. Otherwise, use the crates to the right of the door to hop the fence. On the wall that contains the door, flip the switch to enable the power.
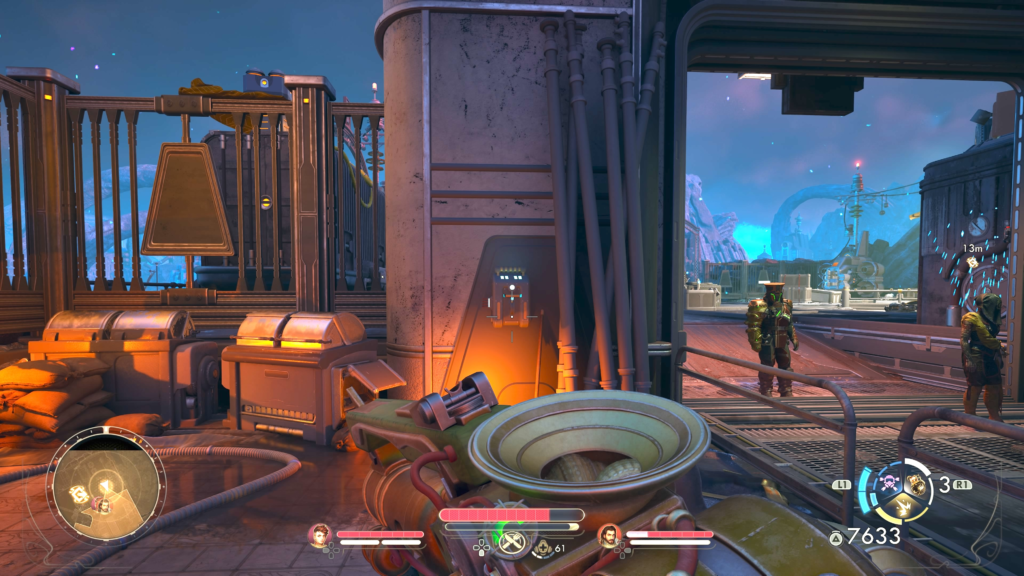
Enter the building’s door to transition to the Interstitial Reconfiguration Center. Once inside, head through the empty rooms, passing through the door marked “Security”.
If you have the Brawny Trait or Engineering 7, unjam the door on the right. Inside, you’ll find some supplies you can loot!
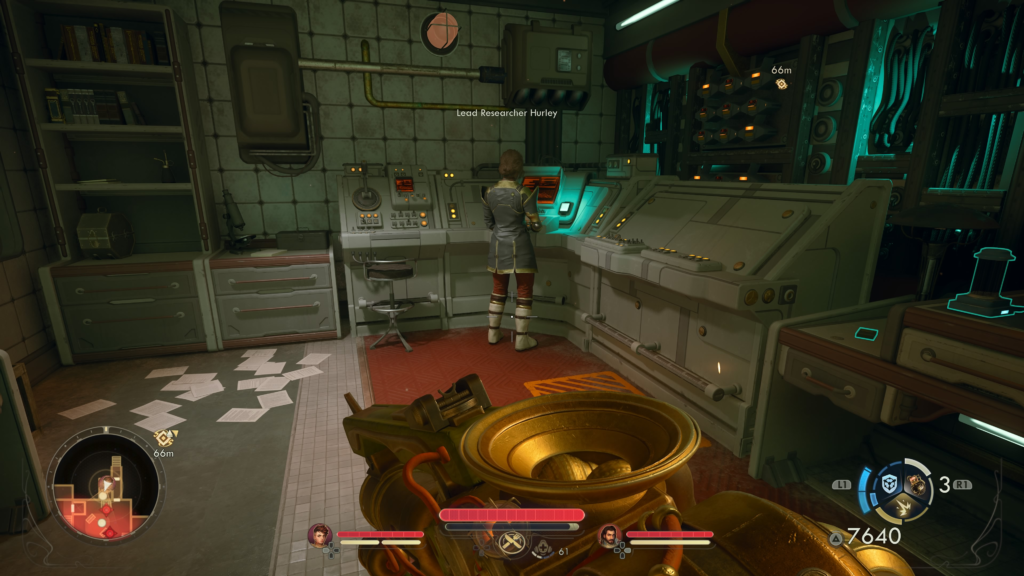
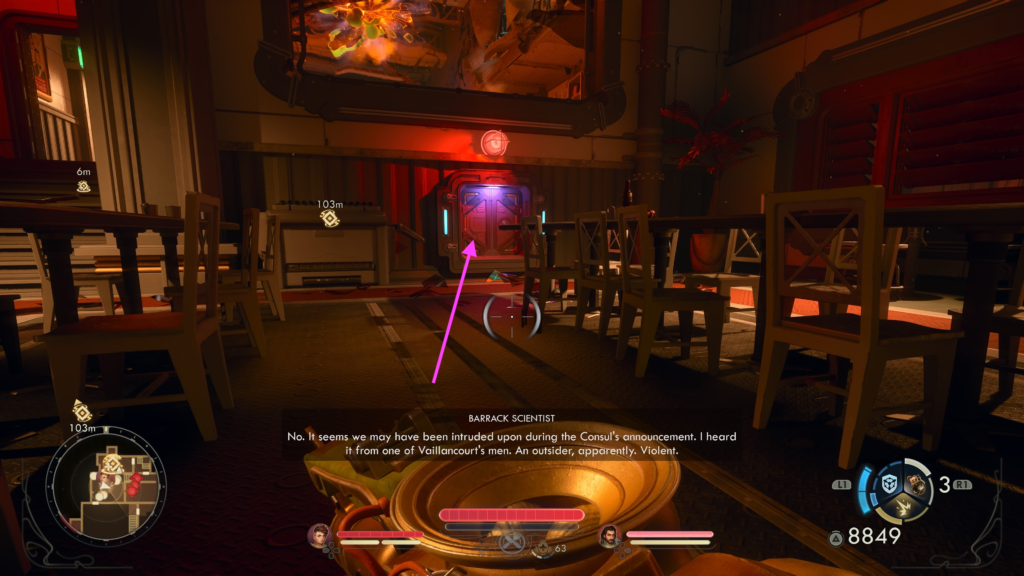
When you’re ready, continue through the next door where enemies will be patrolling. Make your way to the west side and enter the door labeled “Lead Researchers Office”.
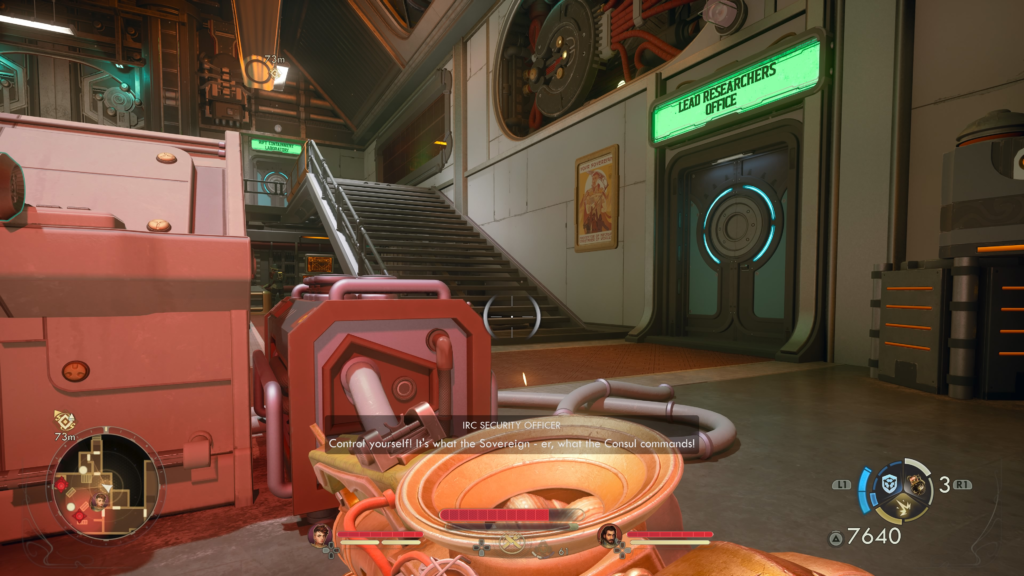
Speak with Lead Researcher Hurley inside!
If you pickpocket Lead Researcher Hurley, you can acquire THREE Advanced Decryption Keys!!
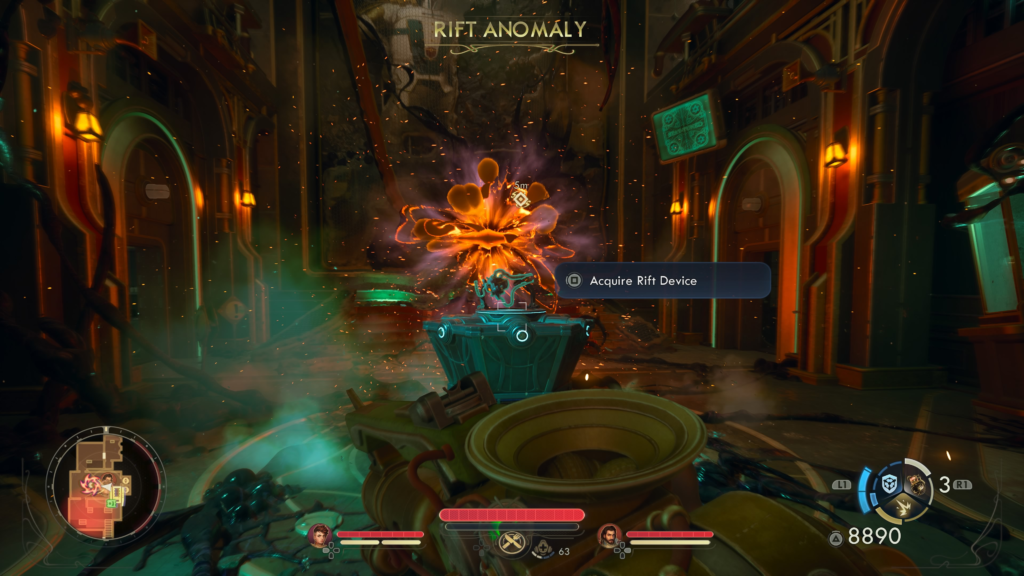
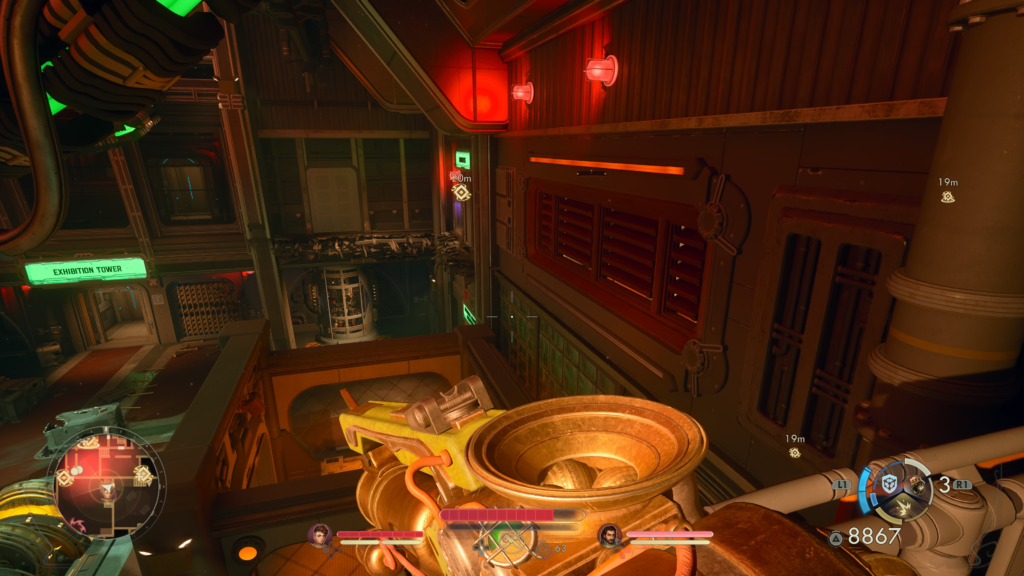
Next, exit the room and head up the stairs, entering the Rift Containment Laboratory. Head down the stairs then slip through the tiny space underneath the stairs to remain undetected by the guards in this room as you make your way to the elevator through the doorway marked “Exhibition Tower”.
At the top, you’ll spot a giant rift with the Rift Anomaly Modulator in front of it. Grab it to acquire the Left to Your Own Device trophy! You’ll also receive a tutorial on the prototype rift device.
Use your fun new tool on the rift then climb the broken ledges behind it to reach the upper level where Security Chief Vaillancourt will speak with you through the intercom.
If you discuss Hurley and reveal the information she gave to you, he’ll offer you an ultimatum: your freedom in exchange for Hurley’s life.
Escape Through the Hangar
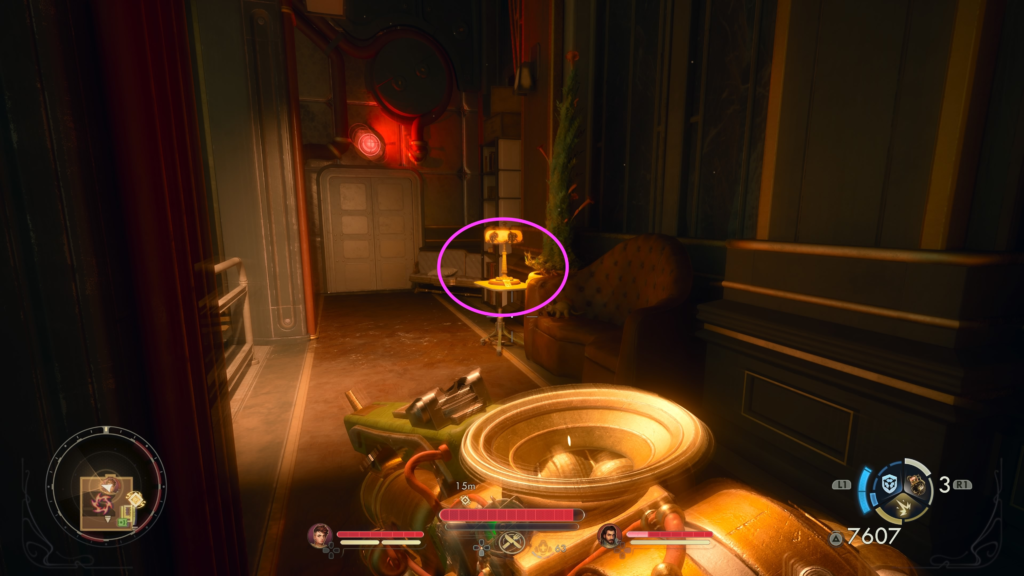
After your conversation, head to the other side of the walkway and pick up the Maintenance Access Card from the table underneath the lamp by the couch.
If you use it to enter the vent on the northeastern side of the room, you can acquire the On the Nature of Rifts (1) device and learn some more information from the terminal, using Hack 2 and a Bypass Shunt.
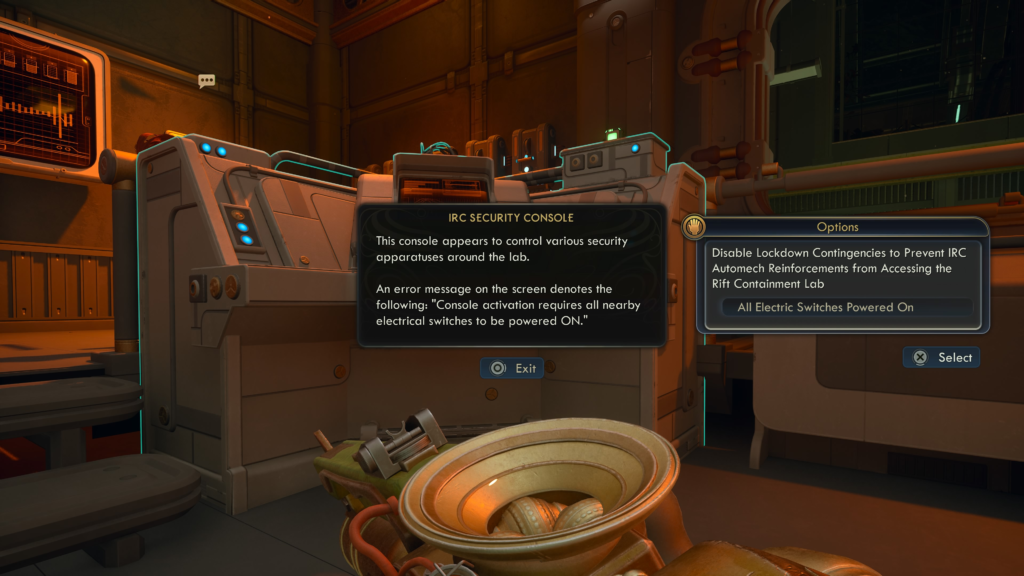
If you use the card to enter the vent on the southeast side of the room, slide down the ladder then unbar and open the vent next to the ladder. Watch out for the guards in this room. Head straight and go down the small set of stairs then up the stairs. Take a right and enter the room across the hall. Sneak your way behind the console to find a bunch of switches on the wall.
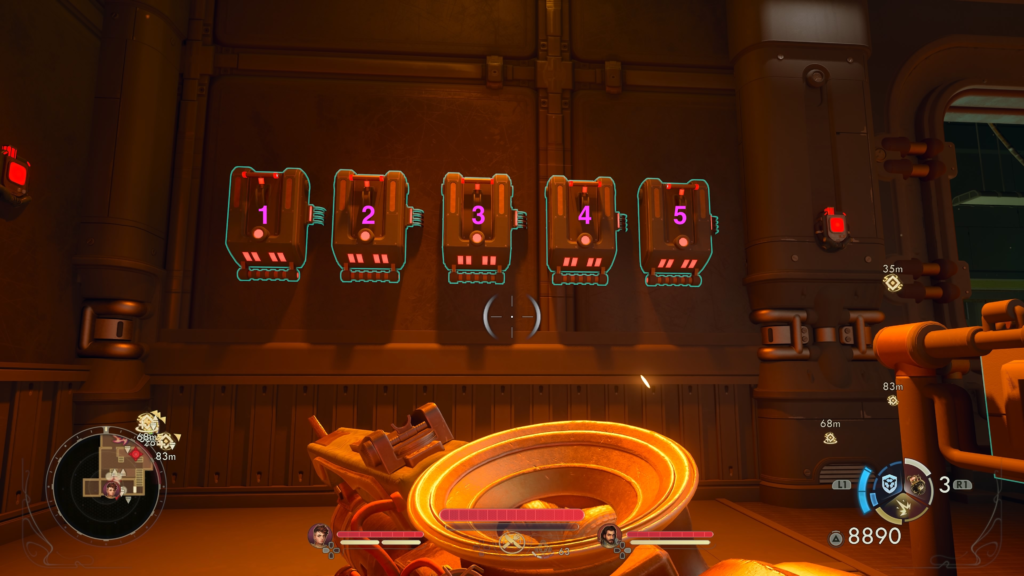
You’ll need to flip them in the following order to get them all on:
- 2, 4, 1, 5, 1, 4
Once all the switches are blue, interact with the IRC Security Console to disable lockdown contingencies to prevent IRC Automech Reinforcements from accessing the Rift Containment Lab.
Next, backtrack the way you came, return to the vent, and climb up the ladder.
When you’re ready to proceed, enter through the door on the upper walkway and take the VIP lift to Floor 2: Prestige Observation Suite. On the southern side of the room, use the containers to reach a vent.
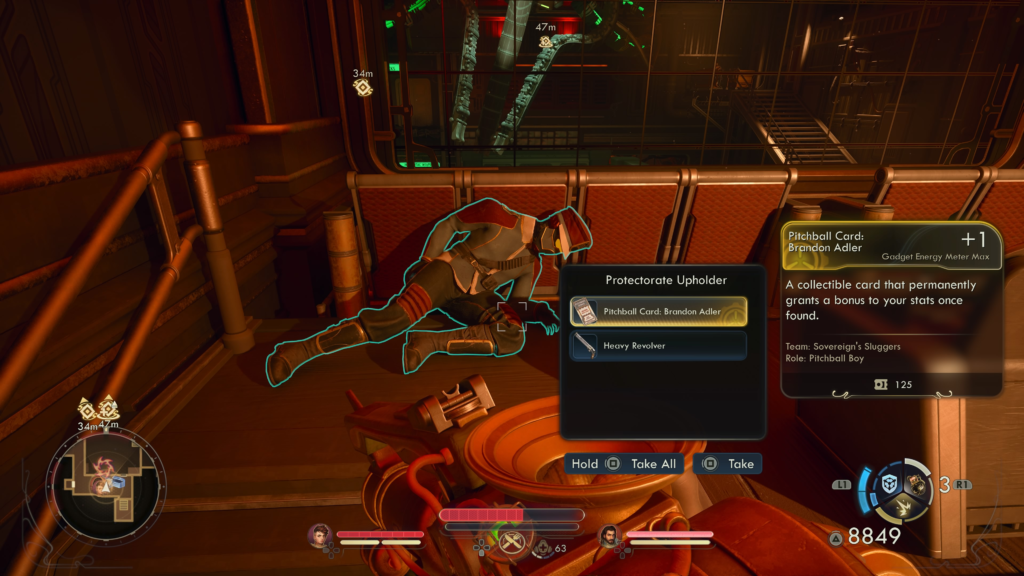
Pitchball Card: Brandon Adler – One of the Protectorate Upholders in this room with the bar will have this card on him.
Enter the vent across the room and drop down onto some stairs that should look familiar. At the top of these stairs, look left to spot a vent across the room.
You’ll need to jump over to this area and head inside. Once inside the next room, take a left, sneaking behind the person then take a right.
In the dining area, go down the middle of the tables to reach another vent.
Use this vent to reach the Security Chiefs Quarters. Head inside and loot the Restricted Wing Access Card from the desk with the terminal.
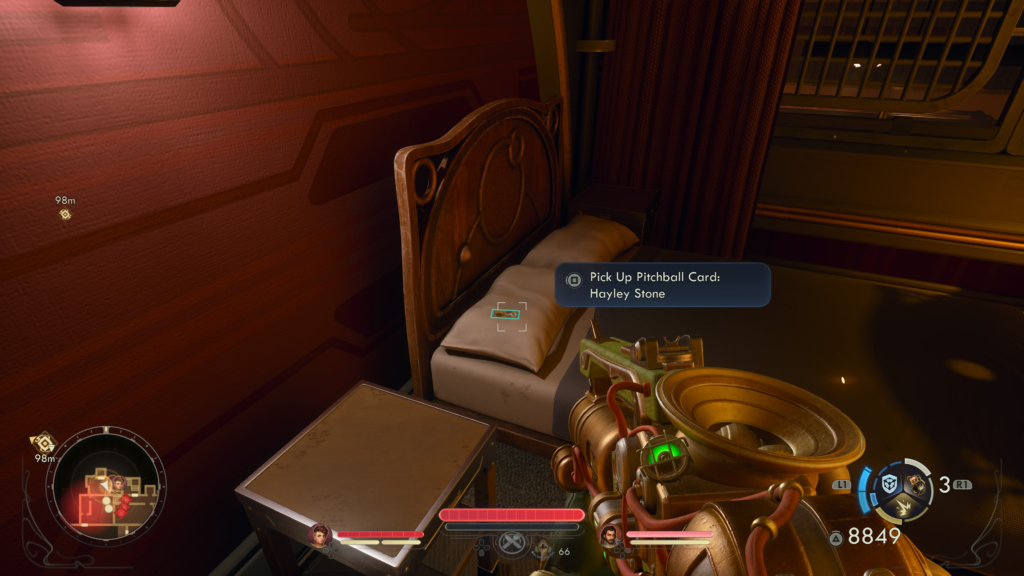
Pitchball Card: Hayley Stone – On the bed, you’ll find this card resting on a pillow!
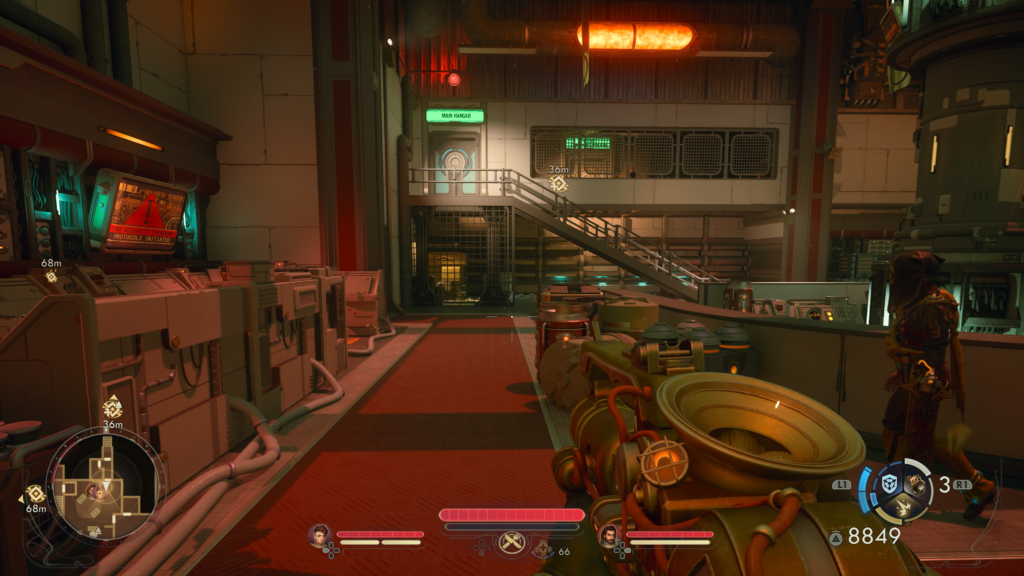
Exit the quarters and head through the door on the right to reach the barracks. Here, take an immediate left and head through the door to the Main Hangar. Follow the stairs down then take the door on the right to reach the Lead Researchers Office and speak with Hurley. Either select to kill her or hand her the key.
Kill Hurley
If you kill her, you’ll need to reach the hangar. Exit the Lead Researchers Office and take a right, heading through the door. Next, take the stairs across the room up and enter the Main Hangar door.
You will then take a left and enter the Main Hangar door, where Security Chief Vaillantcourt’ll greet you.
He will remain true to his word and let you go without a battle. Additionally, he will give you 2,000 bits and an Advanced Decryption Key.
Give Hurley Key
If you give her the key, follow her out the door. Across the room, take the stairs up and enter the Main Hangar door.
Take a right to find her next to the entrance to the Prestige Experimentation Wing. Use the Restricted Wing Access Card to open the door then head inside and open the rift.
Loot the Reassembled Note from the corpse of a Protectorate Officer suspended in the air. If you have Science 7 or Observation 11, examine the reconstituted rift generator to investigate the cause of the failed experiment.
Once you’ve completed your investigation, speak with Hurley and tell her what you’ve discovered. She’ll then want to go and confront Vaillancourt. If you have Speech 7 or the Connoisseur perk, you can convince her to stay where it’s safe and you’ll need to make your own way to the Main Hanger.
If not, follow her to the Main Hangar. Please note that you will need to take Vaillantcourt out sooner rather than later as he will kill Hurley if you wait too long.
Once you reach the Main Hangar, take a right. If you have Engineering 4, you can seal the ancillary hangar doors, preventing additional enemies from coming in by using the device on the wall.
When you are ready to confront Vaillantcourt, head down the nearby stairs and take him out! Make sure to loot his body to receive an Advanced Decryption Key and Notice of Disciplinary Review.
After Vaillantcourt has been eliminated, speak with Hurley. Afterwards, exit the facility using the northeastern door in the Main Hangar. When you exit the facility, the main quest will complete!
Related The Outer Worlds 2 Content
Looking for more The Outer Worlds 2 content? Use the links below to keep exploring our guides:
- Main Page: Visit our The Outer Worlds 2 Guides and Walkthroughs hub for all our latest content!
- Official Website: Check out the official The Outer Worlds 2 website for news and updates!