Welcome to NGB and our walkthrough for the On Strange Shores main quest in Avowed. For this quest, you’ll need to explore the beach, escape the outpost, and reach the smuggler’s boat. Our guide will walk you through all the objectives, highlight the best strategies, and make sure you don’t miss any rewards.
Quick Links
On Strange Shores Guide
How to Start the On Strange Shores Quest
The On Strange Shores main story quest in Avowed is the very first quest of the game!
On Strange Shores Walkthrough
At the start of the gam, you will find yourself shipwrecked on an island off the coast of the Living Lands. You’ll need to investigate your surroundings and find a way to reach the port of Dawnshore.
Talk to the survivor
Upon waking, you’ll find yourself washed ashore on an island. First, open the menu and select the inventory tab. From there, read through The Emperor’s Orders to understand why you are here in the first place.
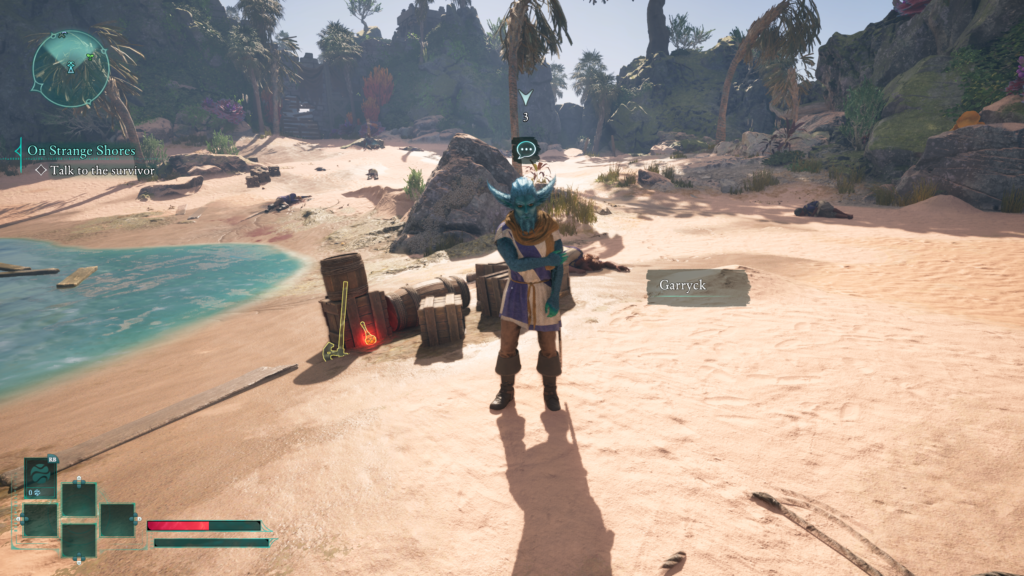
Afterwards, speak with Garryck, who is standing next to the pile of crates, and exhaust all his dialog options. The attributes you selected during character creation will determine the dialog you’ll receive.
After your conversation, pick up the Axe and Health Potion from the ground next to Garryck. Make sure to equip these vital tools!
Reach the Outpost
Next, explore the beach by breaking the crates to receive some additional items. Make sure to pick up the Health Potion from near the graves marked by the oars jutting out from the sand.
Once you are finished exploring, break the boards on the east side of the beach and continue along the path until you reach the fort.
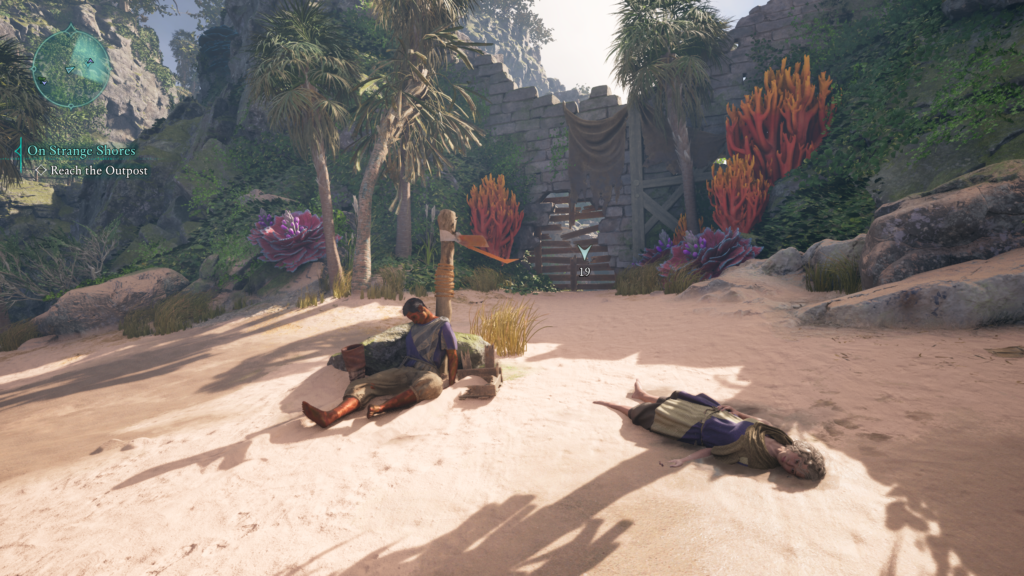
Be mindful of the trip wire as you go!
Escape the Outpost
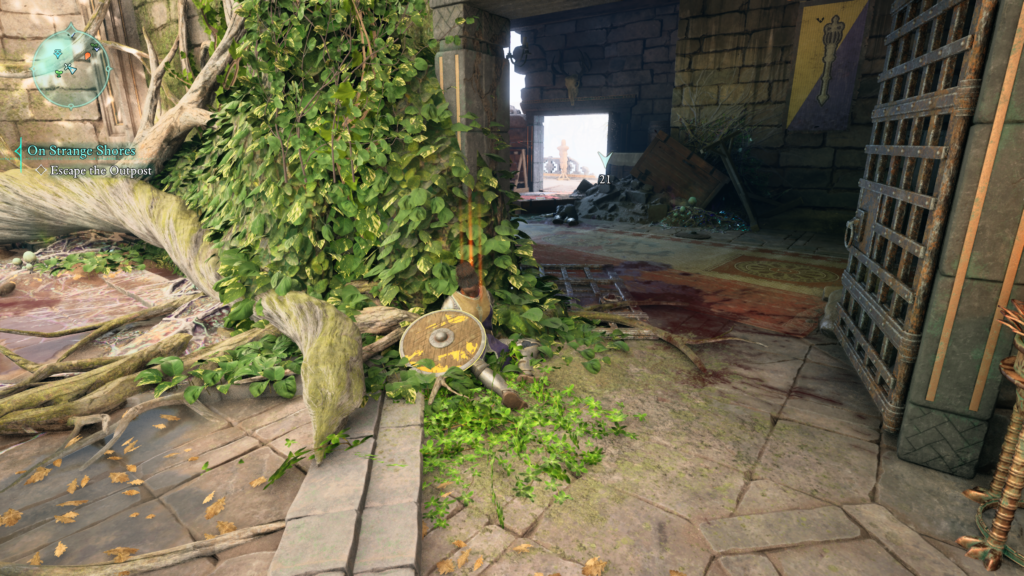
When you arrive at Fort Northreach, you’ll notice that all the soldiers have been killed. Immediately to the left in the room with all the dead, read the note on the table.
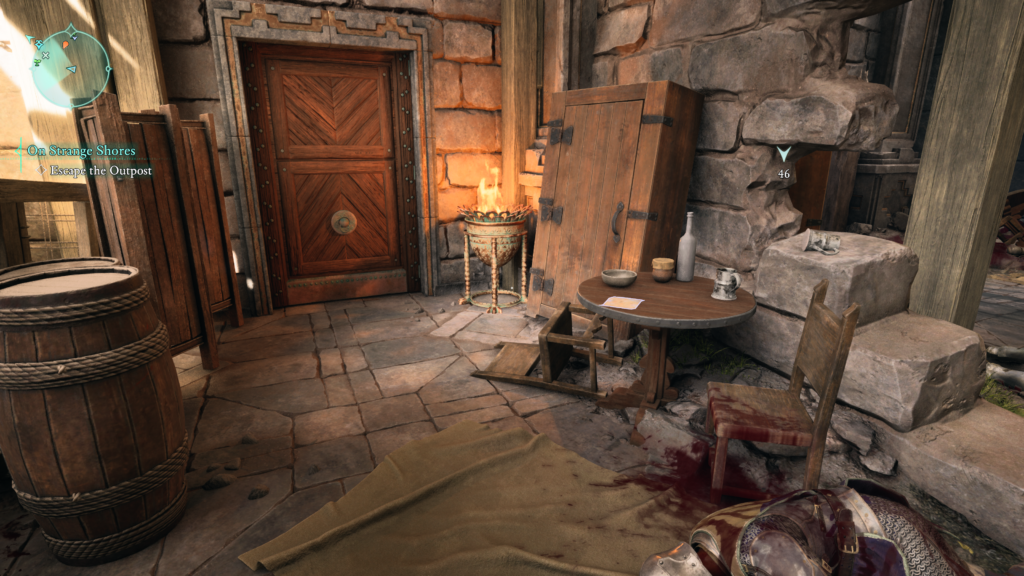
To the left of this table, you’ll find a locked door that requires the Fort Northreach Storage Key to open it. To find this key, head into the room with the giant blue crystal.
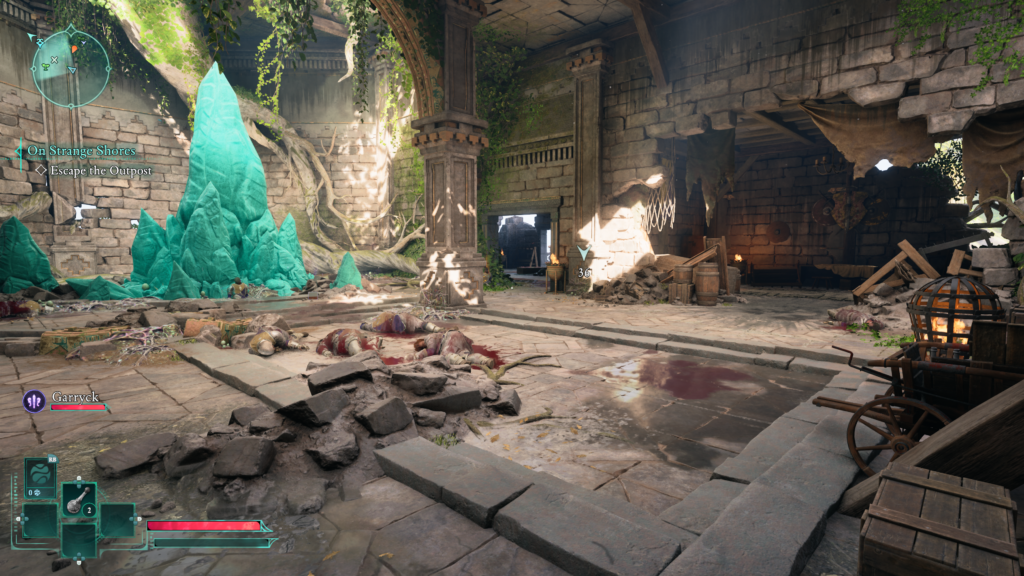
At this crystal, take a right to find a corpse in some vines next to an open gate. Loot the Fort Northreach Storage Key and the shield from this corpse.
With the key in hand, return to the locked door and open the chest inside, which contains the Common Breastplate, a medium armor piece.
Next, head back to the room with the giant crystal and look to the left to spot a hole in the wall. Enter this hole to find yourself in a room with some breakable boards. Breaking these boards will grant you entry to a hidden room containing a bunch of goodies.
After you’ve explored, return to the giant crystal room. Once there, make your way to the northeastern corner of the room to spot a corpse leaning against a wall. Interact with the circular switch above this corpse to reveal a secret room containing an enemy. Discovering this room will trigger the Hawkeye Trophy/Achievement. Make sure to grab all the goodies inside, including a small lockbox with some Vambraces inside.
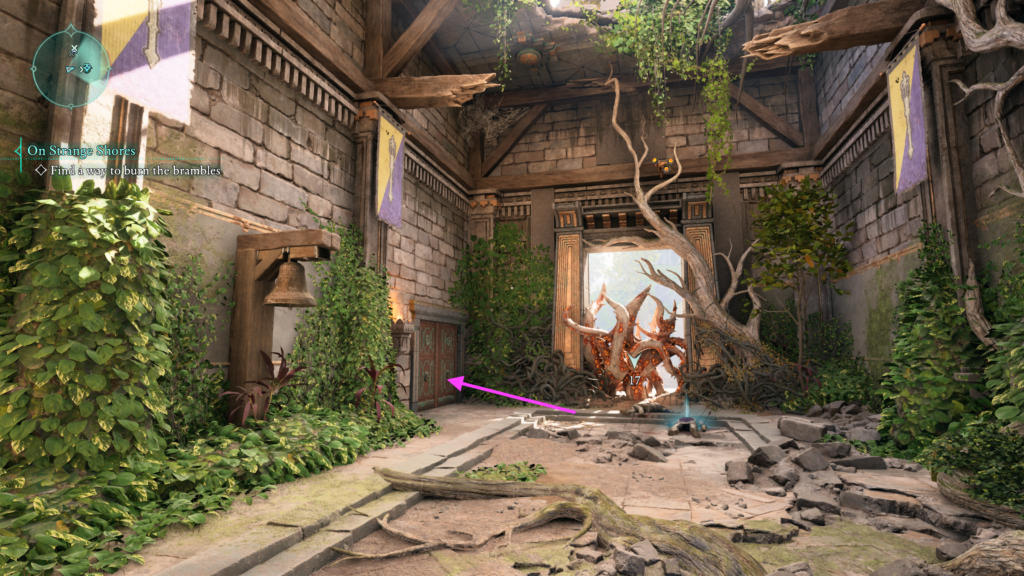
To proceed, head through the open gate to the right of the giant crystal. Read the Mad Soldier’s Ramblings note on an overturned cupboard then continue along the linear path. To burn the bramble blocking the doorway, enter the door to the left of the bramble.
Inside, you’ll find Ilora, who is trapped in a cell. If you speak with her, she’ll tell you of a boat that you can use to escape the island. After hearing this information, climb up the ledge on the southwestern side of the room across from the cell.

At the top, take a right, destroy the wooden floor planks, and drop down.
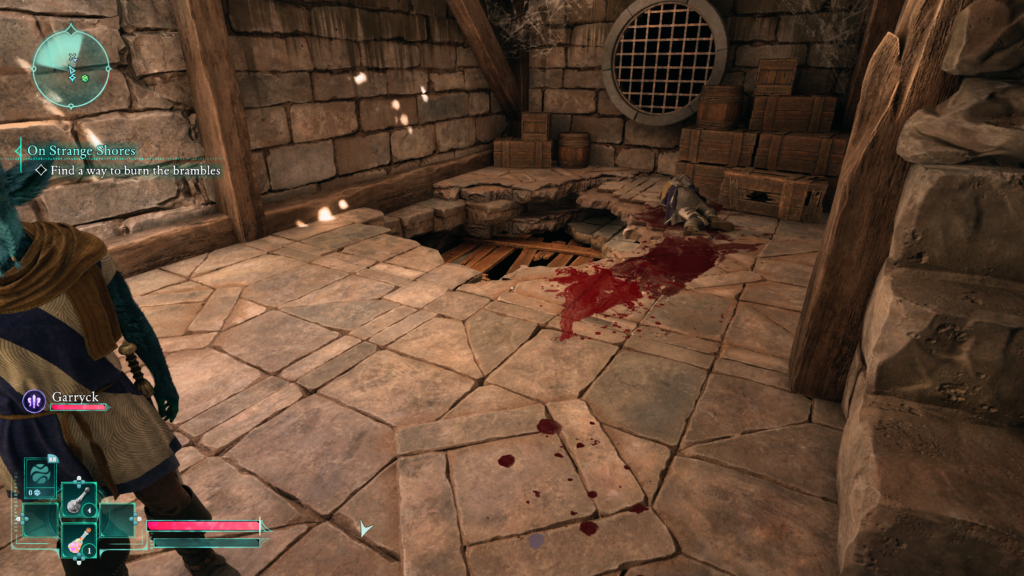
Inside, you’ll find an Interrogation Log and the Fort Northreach Jail Key, which can be used to unlock Ilora’s cell. Also, in this room, you’ll find a large chest containing an assortment of items, including a Common Robe, which is light armor.
When you are ready to continue, exit through the door to return to the area with the cell. Next, open the cell to the left of Ilora, head inside, and crouch through the wall to find some Deerskin Gloves.
At this point, you can release Ilora if you wish. We recommend releasing her, as she will help you at the end of this chapter during a boss fight. If you don’t, she will appear anyway during said fight and try to kill you, causing you to have to kill her.
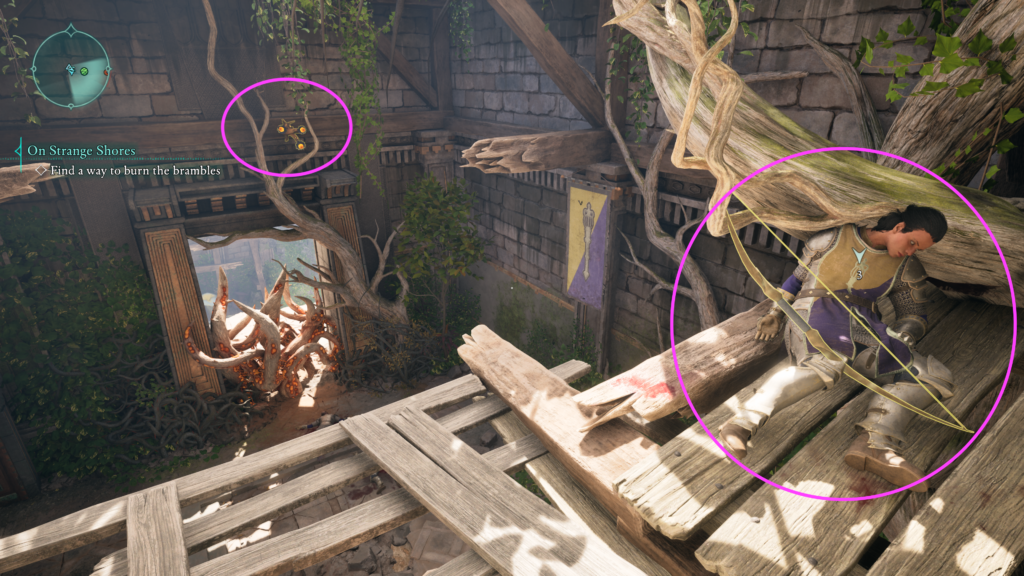
When you are ready to proceed, climb back up the crates to the ledge. Equip the bow resting on the corpse and shoot the Magran’s Bramble above the door to remove it!
Reach the Smuggler’s Boat
With the way forward clear, head through the doorway and deal with the enemies across the gap. Take a right and follow the path, jumping on the platforms and rock ledges as needed. Along this path, you’ll pass through a cave. When you emerge, you’ll find a corpse of a mage nearby, next to some bramble.
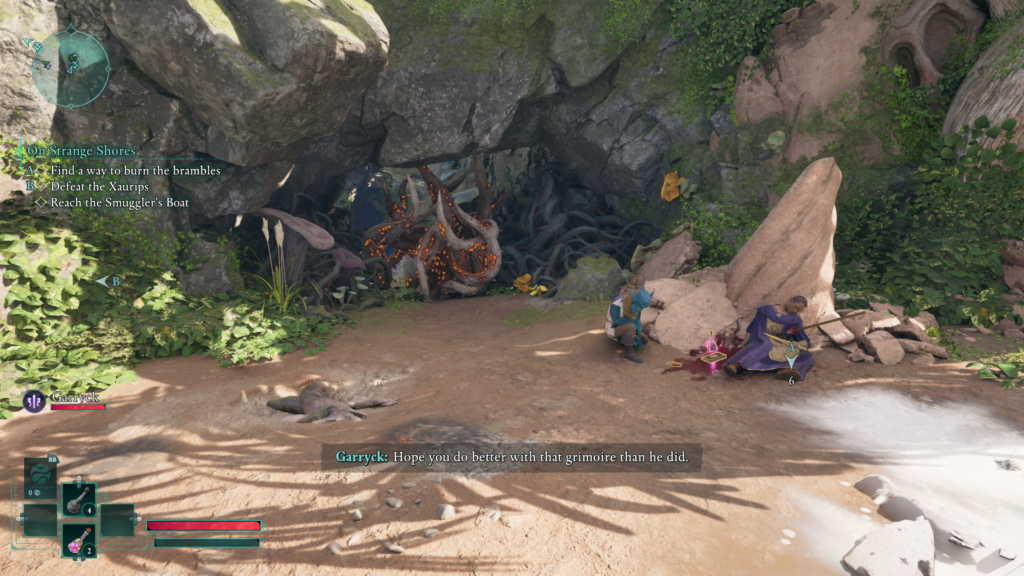
Loot the Common Wand and Common Grimoire of Elements from the corpse then use a fire spell to burn the bramble away, allowing you to continue. Just before the boat, you’ll reach Steadman Ralke, looting a corpse.
Your conversation with him will quickly turn to a fight. Depending on what you did with the prisoner, Ilora, she will either help you in this fight or attack you, too, causing you to have to kill her.
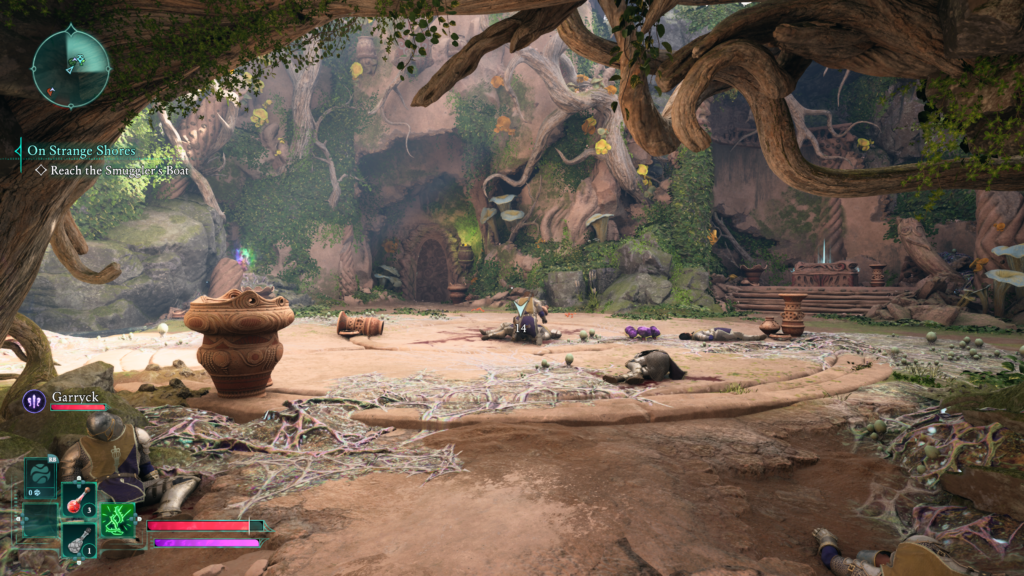
After the fight, take your time exploring this area, looting all the goodies, including the ones in the sarcophagus. Next, enter the doorway and interact with the giant crystal inside to hear the Voice.
Once you’ve finished exploring, continue along the path to reach the boat. When the cutscene concludes, so will the quest!
Related Avowed Content
Looking for more Avowed content? Use the links below to keep exploring:
- Next Guide: Continue the story with our Message from Afar Main Story Walkthrough!
- Main Page: Visit the Avowed Guides and Walkthroughs hub for all our latest content!
- Official Website: Check out the official Avowed website for news and updates!