Welcome to NGB and our Bravely Default Flying Fairy Chapters 5 and 6 Side Content guide! As the story enters its mysterious loop, players will find themselves revisiting familiar regions and facing off against previously defeated Asterisk holders. This guide covers all the repeatable side quests, optional bosses, and unique rewards available in Chapters 5 through 6. Whether you’re aiming to unlock every job, max out your party, or just make sense of the looping structure, we’ve got you covered with tips and strategies to make each revisit worth your while.
Quick Links
- Bravely Default Flying Fairy Chapters 5 and 6 Side Content Guide
- More Bravely Default Flying Fairy Guides and Walkthroughs
Bravely Default Flying Fairy Chapters 5 and 6 Side Content Guide
Intro
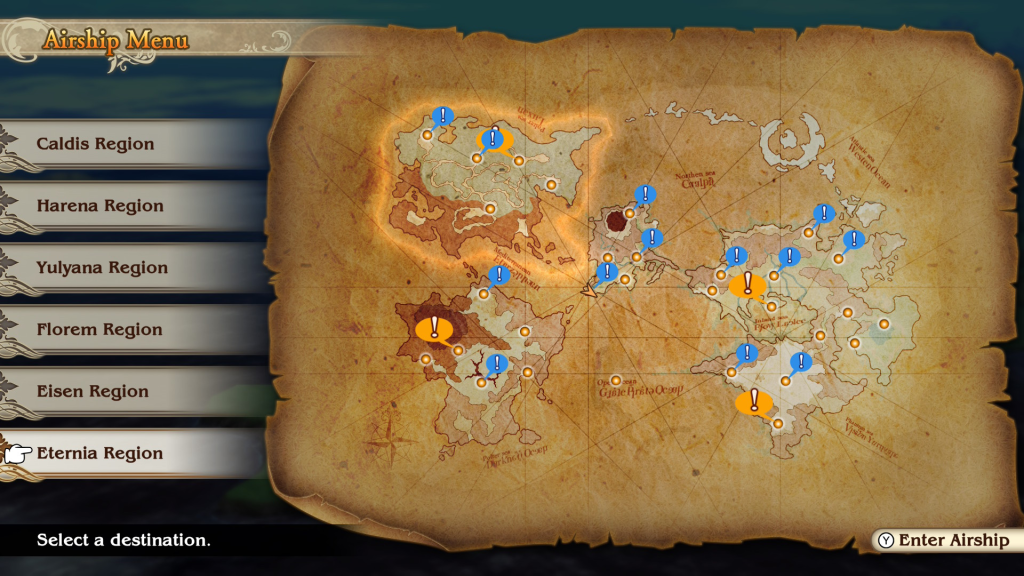
Beginning in Chapter 5 of Bravely Default: Flying Fairy HD Remaster, players will need to awaken all four crystals once again. Additionally, all previously completed side content will be available again. This pattern will continue in Chapter 6 and is known as “the loop.” In this guide, we will cover all the side content, which mainly consists of sub-scenarios. It will be listed based on the order in which you first visited each region.
Caldis Region Content in Bravely Default Flying Fairy Chapters 5 and 6
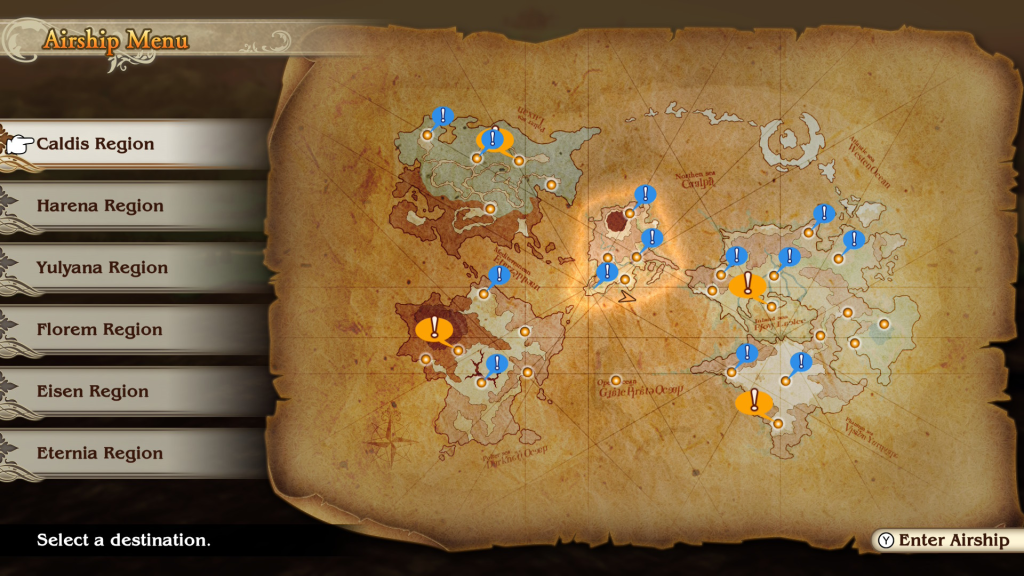
Monk Barras Lehr and White Mage Holly Whyte

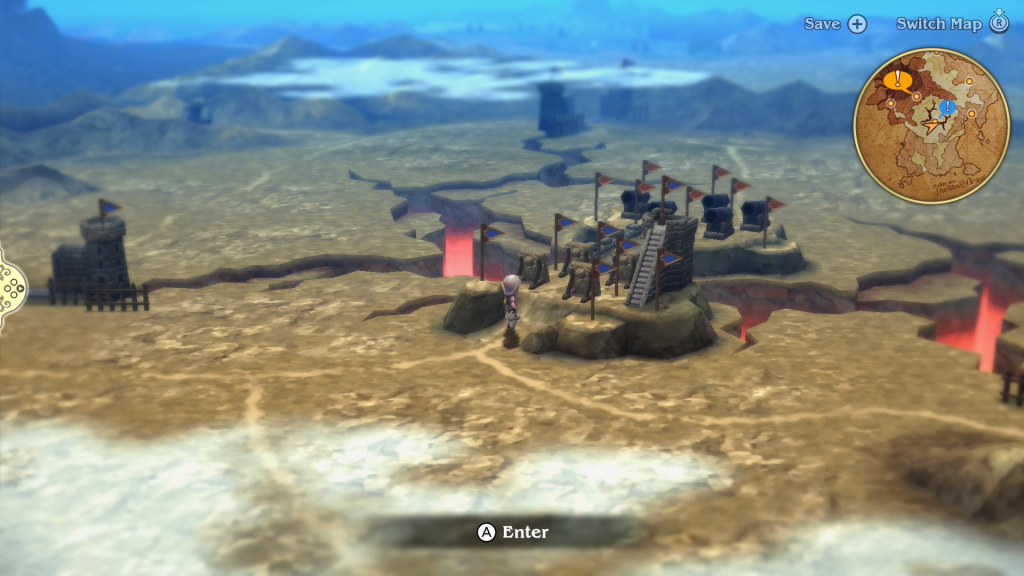
Head to the lake southwest of Caldisla and interact with it to kick off an event, leading a fight against Barras and Holly. For this fight, the pair will use the skills and attacks as they did the first time you faced them. They also do not have any notable weaknesses.
Barras will use Invigorate and then attack party members using his fists. When the buff expires, he’ll recast Invigorate and then go back to assault the party. Holly will cast Protect on him and support by casting Aéro. When their health starts to get low, she may start using the cure spell to heal some of the damage. Another thing to watch out for is that Barras will trigger an explosion when his health is almost depleted, which will damage everyone.
Barras and Holly’s Max HP
The table below lists Barras and Holl’s max HP, broken out for each chapter. The HP value is based on playing the game with Normal difficulty. If you’re playing on hard, then the HP values will be higher.
| Boss | Ch. 5 HP | Ch. 6 HP |
|---|---|---|
| Barras | 60,000 | 65,000 |
| Holly | 60,000 | 65,000 |
Barras and Holly Skills and Spells
- Barras
- Invigorate – Increases physical attack by 25%
- Holly
- Aero – Single-target wind magic attack
- Cure – Single-target spell that heals some HP
- Protect – Increases the target’s defense by 25%
Black Mage Ominas Crowe
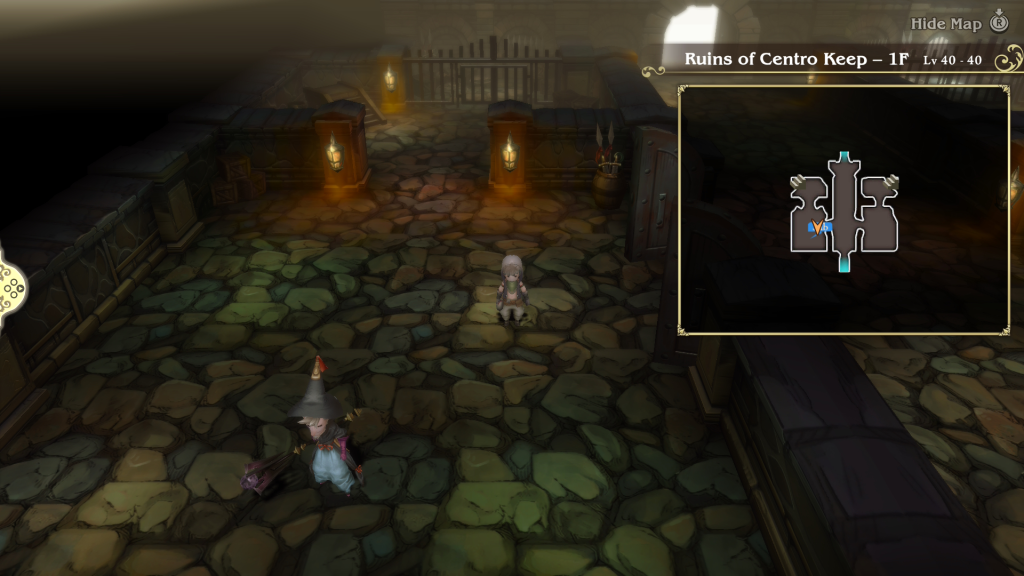
Make your way to the Ruins of Centro Keep to find Black Mage Ominas Crowe, where you fought him before. Speak with the mage to trigger an event leading to another fight against him. Just like that last fight, the Black Mage will have no notable weaknesses and will attack the party with magic spells, namely Poison, Fira, and Thunder. He can also inflict the Silence and Sleep status conditions.
Omnias’ Stealable Items
The items listed below can be stolen during this fight.
- Chapter 5 – Wizard’s Rod
- Chapter 6 – Wizard’s Rod
Ominas Crowe’s Max HP
The table below lists Ominas’ max HP, broken out for each chapter. The HP value is based on playing the game with Normal difficulty. If you’re playing on hard, then the HP values will be higher.
| Boss | Ch. 5 HP | Ch. 6 HP |
|---|---|---|
| Ominas | 80,000 | 85,000 |
Ominas Crowe Skills and Spells
- Omnimas
- Poison – Inflicts the poison ailment on the target
- Silence – Inflicts the silence ailment on the target
- Sleep – Inflicts the sleep ailment on the target
- Fira – Fire spell that deals moderate damage to the whole party
- Thunder – Electric spell dealing some damage
Knight Argent Heinkel
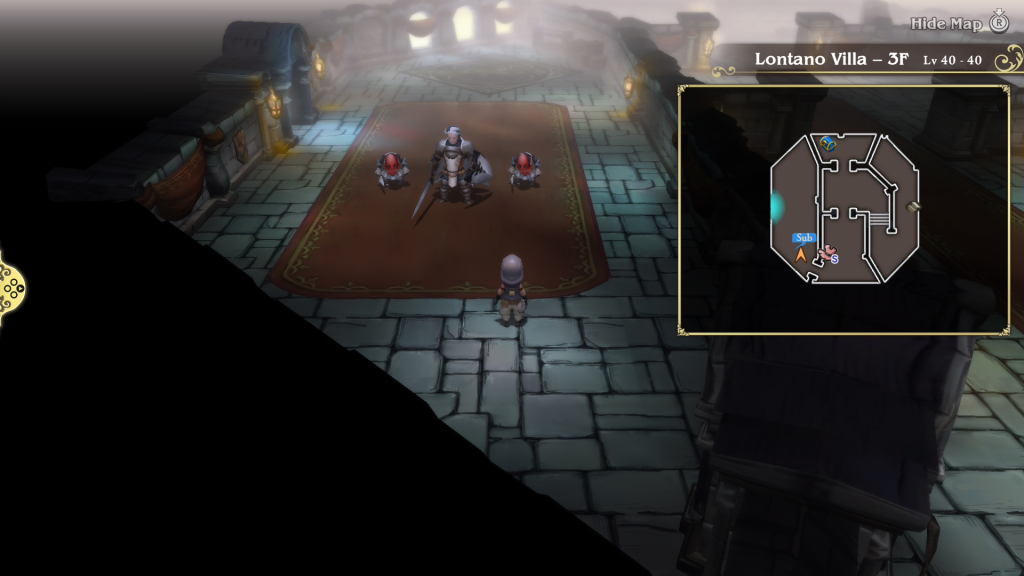
Next stop on our reunion tour is the Lotano Villa, north of the Ruins of Centro Keep. Head there, then work your way up to the Lontano Villa 3F to reach Heinkel. Speak with the knight to trigger an event leading to a fight against him.
As before, Heinkel is still weak to electric skills and attacks, and two Sky Archers will also accompany him. The archers will attack with either a basic arrow or by using their Poison Arrow skill, which has a chance of inflicting poison on the target.
Meanwhile, Heinkel will defend them with his Protect Ally ability, taking half of the damage on their behalf. An easy way around this is to attack them with a spell that targets all enemies. The knight will mainly use his Shield Strike ability, with Stomp thrown in for some diversity.
Heinkel’s Stealable Items
The items listed below can be stolen during this fight.
- Chapter 5 – Iceflame Shield
- Chapter 6 – Iceflame Shield
Heinkel’s Max HP
The table below lists the max HP of Heinkel and the Sky Archers, broken down by each chapter. The HP value is based on playing the game with Normal difficulty. If you’re playing on hard, then the HP values will be higher.
| Boss | Ch. 5 HP | Ch. 6 HP |
|---|---|---|
| Heinkel | 80,000 | 85,000 |
| Sky Archers | 7,000 | 7,000 |
Heinkel’s Skills and Spells
- Heinkel
- Shield Strike – Single-target attack, hitting the target with a shield
- Protect Ally – Takes damage on behalf of an ally
- Stomp – Deals 1.25 times damage, but decreases the user’s physical and magic defense by 25% for 2 turns
- Sky Archer
- Poison Arrow – Single-target attack that has a chance to poison the target
Harena Region in Chapters 5 and 6
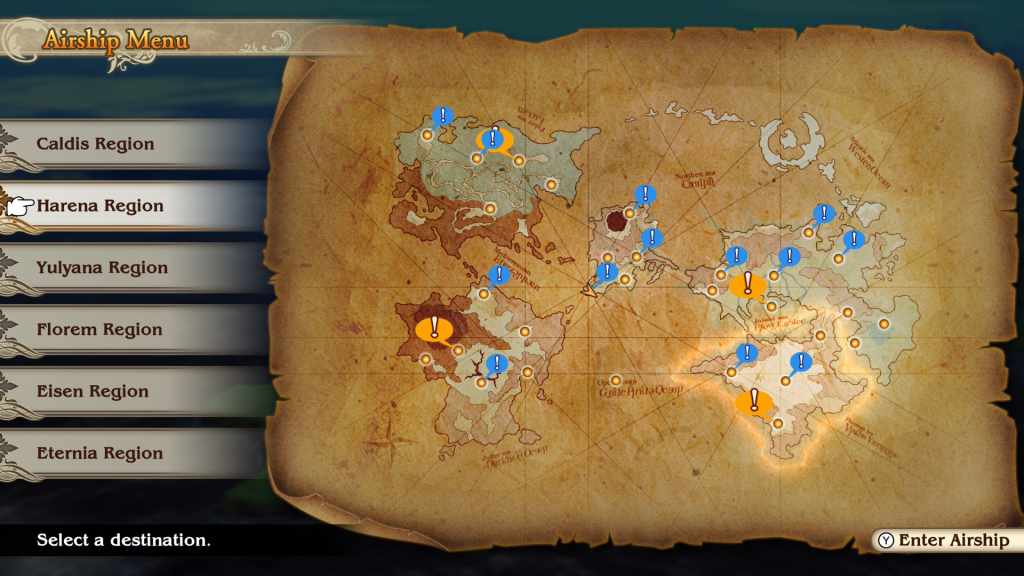
Next, we’ll be traveling to the Harena Region, which includes Ancheim and the surrounding desert area.
Bandit Jackal the Thief and Spell Fencer Khint
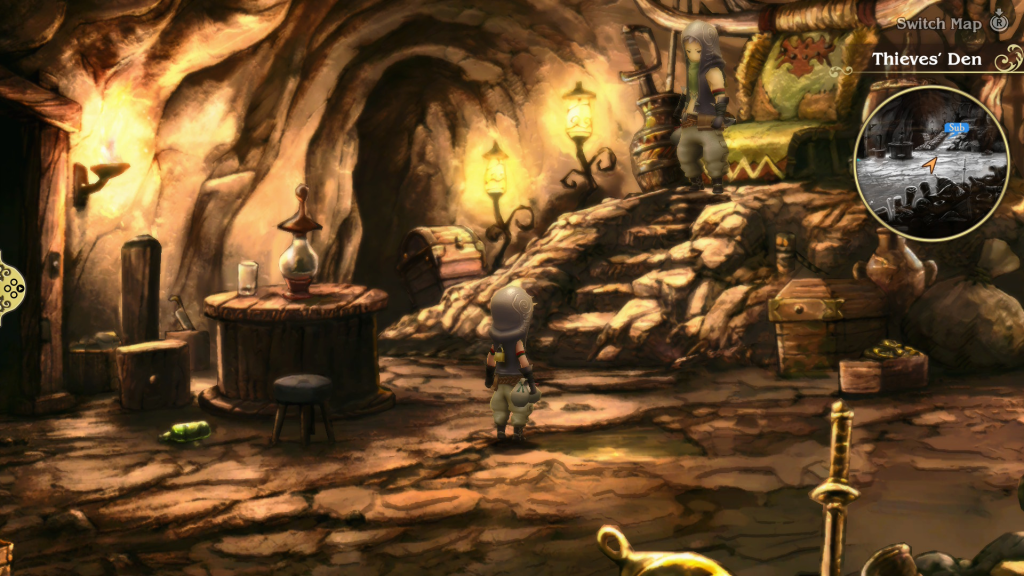
Travel to the Harena Ruins located west of Ancheim, just past the Oasis. Head inside, then work your way back to the Thieves’ Den. You may want to equip the Dungeon Master Freelancer ability to make traversing the ruins easier. When you reach the den, approach Bandit Jackal on the throne to trigger an event leading to the boss fight!
In this rematch, neither Khint nor the Jackal will have any notable weaknesses. Like last time, Khint will either use his Sword Magic Fire or Silence and use it to attack the party. When his health drops to around half, he will exit the battle, leaving the Jackal to fend for himself. The Jackal will attack mainly using his dagger and will occasionally steal an item (primarily a potion) from the party. He’ll then use it when his health gets low.
The Jackal and Khint Stealable Items
The items listed below can be stolen during this fight.
- The Jackal
- Chapter 5 – Thief’s Knife
- Chapter 6 – Thief’s Knife
The Jackal and Khint Max HP
The table below lists the max HP of the Jackal and Khint, broken down by each chapter. The HP value is based on playing the game with Normal difficulty. If you’re playing on hard, then the HP values will be higher.
| Boss | Ch. 5 HP | Ch. 6 HP |
|---|---|---|
| The Jackal | 60,000 | 65,000 |
| Khint | 80,000 | 85,000 |
The Jackal and Khint Skills and Spells
- Khint
- Sword Magic Fire – Imbues the caster’s weapon with fire
- Sword Magic Silence – Imbues the caster’s weapon with the ability to inflict Silence
- The Jackal
- Steal – Steals an item from the party
Merchant Erutus Profiteur and Spell Fencer Khint

Our next stop in the Harena Region is Khamer & Profiteur Merchantry, located on the eastern side of Ancheim. Enter and speak with Chairman Profiteur to trigger an event that results in a fight against the Merchant. Khint will also show up to assist him in battle.
As with the Jackal, both Chairman Profiteur and Khint will have no notable weaknesses. Khint will use the same skills as in the last fight, while the chairman will mainly use his Takeover ability, dealing 2,000 damage per hit. Occasionally, he may cast Angel Investment on himself or Khint to increase their crit rate.
Profiteur and Khint’s Max HP
The table below lists the max HP of Chairman Profiteur and Khint, broken down by each chapter. The HP value is based on playing the game with Normal difficulty. If you’re playing on hard, then the HP values will be higher.
| Boss | Ch. 5 HP | Ch. 6 HP |
|---|---|---|
| Chairman Profiteur | 80,000 | 85,000 |
| Khint | 80,000 | 85,000 |
Profiteur and Khint’s Skills and Spells
- Chairman Profiteur
- Takeover – Deals 2000 damage to a single party member
- Angel Investment – Applies crit up to the target
- Khint
- Sword Magic Fire – Imbues the caster’s weapon with fire
- Sword Magic Silence – Imbues the caster’s weapon with the ability to inflict Silence
Time Mage Khamer and Spell Fencer Khint
Once both the Jackal and Chairman Profiteur have been dealt with, wait for night to fall and then enter Anchiem. Head to the Grand Mill Works and pass through it to reach the castle. Approach King Khamer and Khint to kick off an event, eventually leading to a fight with the pair.
In this fight, neither Khamer nor Khint will have any notable weaknesses. Khint will use the same attacks as the last two fights, while the King will use his Time Mage spells. You make this fight trivial by doing two things. The first is by bringing a Spiritmaster and casting the Fairy Ward (level 11) ability to prevent all status ailments for five turns. You can also equip the Iceflame Shield (you can potentially have two at this point), which nulls fire damage. This will block Khint’s attack when he uses the Sword Magic Fire skill and prevent his other skill from inflicting Silence.
Khamer and Khint Stealable Items
The items listed below can be stolen during this fight.
- Khamer
- Chapter 5 – Rune Blade
- Chapter 6 – Hermes Sandals
Khamer and Khint’s Max HP
The table below lists the max HP of King Khamer and Khint, broken down by each chapter. The HP value is based on playing the game with Normal difficulty. If you’re playing on hard, then the HP values will be higher.
| Boss | Ch. 5 HP | Ch. 6 HP |
|---|---|---|
| King Khamer | 60,000 | 65,000 |
| Khint | 80,000 | 85,000 |
Khamer and Khint Skills and Spells
- Khamer
- Stop – Prevents the target from moving for several turns
- Quara – Multi-target earth spell
- Khint
- Sword Magic Fire – Imbues the caster’s weapon with fire
- Sword Magic Silence – Imbues the caster’s weapon with the ability to inflict Silence
Florem Region Content in Bravely Default Flying Fairy Chapters 5 and 6
The Florem Region comprises Florem and its surrounding areas.
Red Mage Dandy DeRosa
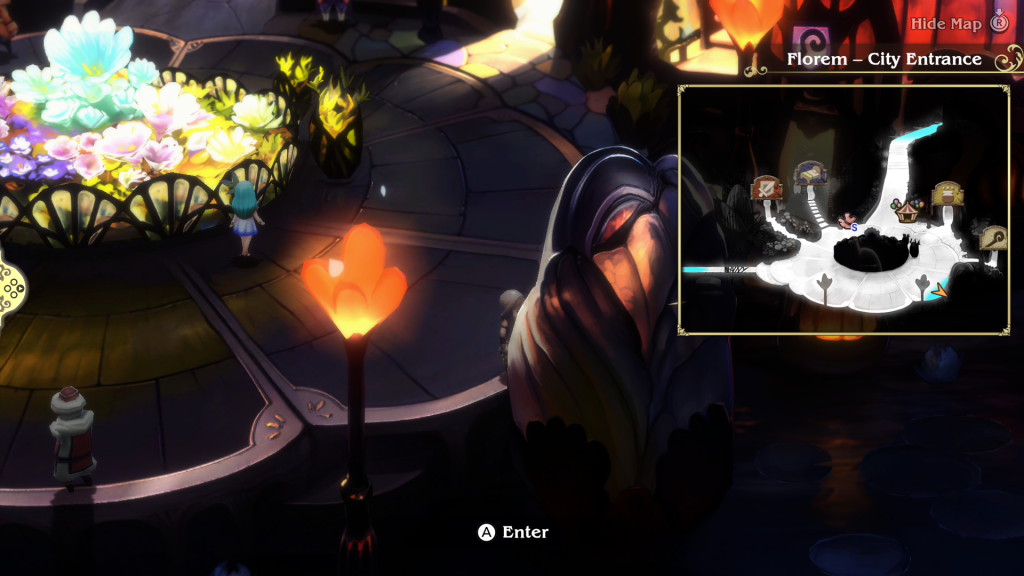
Enter the Florem City Entrance at night, then interact with the secret entrance to Dandy DeRosa’s secret hideout, located southeast of the area’s center. Head down the stairs to trigger an event, leading to a fight against the man himself.
In this battle, DeRosa will have no notable weaknesses. He’ll also use some White and Black Mage spells against you, including Thundara and Cura. Thundara will hit the whole party while he’ll restore around 2,000 HP when using Cura.
As with the first time, you’ll want to watch out for his Captivating Cologne skill, which will inflict charm on whoever he targets. You can avoid this by bringing a Spiritmaster with the Fairy Ward ability. Outside of those skills, the Red Mage has the Revenge passive ability, which has a small chance of giving him 1 BP when attacked. For defeating DeRosa, you’ll receive the Bravo Bikini outfit for Edea. This also unlocks a Bravo Bikini at the men in red’s shop, where you can purchase for Agnes.
Dandy DeRosa’s Stealable Items
The items listed below can be stolen during this fight.
- Chapter 5 – Hermes Sandals
- Chapter 6 – Hermes Sandals
Dandy DeRosa’s Max HP
The table below lists the max HP of Dandy DeRosa, broken down by each chapter. The HP value is based on playing the game with Normal difficulty. If you’re playing on hard, then the HP values will be higher.
| Boss | Ch. 5 HP | Ch. 6 HP |
|---|---|---|
| Dandy DeRosa | 80,000 | 85,000 |
Dandy DeRosa’s Skills and Spells
- Dandy DeRosa
- Thundara – Electric-based spell that hits the whole party
- Cura – Heals self for around 2000 HP
- Captivating Cologne – Will inflict charm on the target
Ranger Artemia
This sub-story will not be available during Chapter 6.
Travel northeast of Florem to reach the Twisted Treetop. Interact with the tree to trigger an event that leads to a battle against Artemia.
For this fight, you’ll be facing Artemia, who will be partnered with a Legion Impaler and a Legion Mage. She is weak to fire, while the Imapler has a weakness to electric-based attacks, and the Mage has no notable weaknesses. You’ll want to take out the mage first, as she can inflict silence on a party member. You can prevent this by using the Spiritmaster’s Fairy Ward ability. Artemia herself will utilize Hunter abilities, such as Multiburst or Targeting.
Ranger Artemia’s Max HP
The table below lists the max HP of Artemia, the Legion Impaler, and Legion Mage, broken down by each chapter. The HP value is based on playing the game with Normal difficulty. If you’re playing on hard, then the HP values will be higher.
| Boss | Ch. 5 HP | Ch. 6 HP |
|---|---|---|
| Artemia | 80,000 | N/A |
| Legion Impaler | 7,000 | N/A |
| Legion Mage | 7,000 | N/A |
Ranger Artemia’s Skills and Spells
- Artemia
- Multiburst – 4-Attack on random targets
- Targeting – Attack that pierces the Default effect
- Legion Mage
- Silence – Will try to inflict silence on a party member
- Gravity – Deals damage equal to 50% max HP of the target
Summoner Mephilia
This sub-story will not be available during Chapter 6.
Make your way west of Florem to reach the Florem Gardens. Head inside and go to the deepest part of the gardens to trigger a cutscene, which will lead to a boss fight against Mephilia.
Mephilia will have no notable weaknesses and mainly attacks using her wand as a melee weapon or by calling her summons to deal damage to the party. You can mitigate a bit of the damage by using a Spiritmaster.
Mephilia’s Max HP
The table below lists the max HP of Mephilia, broken down by each chapter. The HP value is based on playing the game with Normal difficulty. If you’re playing on hard, then the HP values will be higher.
| Boss | Ch. 5 HP | Ch. 6 HP |
|---|---|---|
| Mephilia | 60,000 | N/A |
Mephilia’s Skills and Spells
- Girtabulu – Summon that hits the whole party with earth-based damage
Valkyrie Einheria
This sub-story will not be available during Chapter 6.
To reach Einheria, you’ll want to travel northeast of Florem to the Witherwood. Once inside, work your way to the Interior area, then head past the man in red to reach the next area.
A cutscene will trigger, leading to a fight against Valkyrie Einheria, who will have no notable weaknesses. She also has a high magic defense, so you may want to stick with physical damage for this fight. You can make it go quicker by buffing your physical attack. Consider raising the party’s physical defenses to decrease the damage that they take.
Einheria’s Stealable Items
The items listed below can be stolen during this fight.
- Chapter 5 – Holy Lance
Einheria’s Max HP
The table below lists the max HP of Einheria, broken down by each chapter. The HP value is based on playing the game with Normal difficulty. If you’re playing on hard, then the HP values will be higher.
| Boss | Ch. 5 HP | Ch. 6 HP |
|---|---|---|
| Einheria | 80,000 | N/A |
Einheria’s Skills and Spells
- Einheria
- Crescent Moon – Attack that hits the whole party
- Jump – jumps up in the air when used to slam down on a single target in the following turn
- Spirit Barrier – Negates damage while losing MP equal to 10% of the damage taken
Eisen Region
The Eisen Region encompasses Hartschild, Eisen Bridge, and the surrounding area.
Gaining Access to Hartschild
In order to gain access to Hartschild, you’ll need to do the two things listed below:
- Stop by Eisen Bridge
- Travel to Hartschild and visit the Commander’s Residence
Ninja Konoe Kikyo
Unlike the first time you were here, you’ll be able to face the ninja after you visit Commander Goodman’s Residence for the first time. Head back inside, and an event will trigger, leading to the fight against Kikyo, who has no notable weaknesses.
This battle will also be a little bit of a pain because of the Shippujinrai skill that lets Kikyo attack before you get a chance to set anything up. She can easily KO one of your party right out of the gate due to this. If you can survive the first turn, the Templar’s Rampart skill can help mitigate some of the damage. Kikyo will also use a combination of Utsusemi and Trasience to dodge a physical attack, then follow up with a counterattack.
Konoe Kikyo’s Max HP
The table below lists the max HP of Konoe Kikyo, broken down by each chapter. The HP value is based on playing the game with Normal difficulty. If you’re playing on hard, then the HP values will be higher.
| Boss | Ch. 5 HP | Ch. 6 HP |
|---|---|---|
| Konoe Kikyo | 80,000 | 85,000 |
Konoe Kikyo’s Skills and Spells
- Kikyo
- Shippujinrai – Attack at the start of the turn
- Utsusemi / Transience – dodge a physical attack, then follow up with a counter
Performer Praline
Travel to Eisen Bridge and speak with Commander Goodman. When prompted, select the Let’s take care of that option. This will trigger an event, leading to a battle with Performer Praline.
For this fight, you’ll be facing Praline and her lachys, Black Blade and Black Axefighter. Our starting lady will have no noticeable weaknesses, while both the Black Blade and Axefighter are weak to electric-based attacks. Praline will buff her and her allies’ attack with Love Power while providing them with additional BP using her One More For You spell. When you defeat the Black Axefighter and Black Blade, she will then summon a new pair into the battle.
During the fight, the Axefighter will lower the party’s defense while the Blade tries to inflict confusion on its targets. Our strategy for this fight was to ignore the Axefighter and Blade, focusing our attention on Praline. If you bring a Spiritmaster, you can use its Fairy Ward ability to prevent status conditions for five turns. That will help tremendously throughout the fight.
Praline’s Stealable Items
The items listed below can be stolen during this fight.
- Praline
- Chapter 5 – Star Pendant
- Chapter 6 – Star Pendant
Praline’s Max HP
The table below lists the max HP of Praline, broken down by each chapter. The HP value is based on playing the game with Normal difficulty. If you’re playing on hard, then the HP values will be higher.
| Boss | Ch. 5 HP | Ch. 6 HP |
|---|---|---|
| Praline | 80,000 | 85,000 |
| Black Axefighter | 10,000 | 10,000 |
| Black Blade | 10,000 | 10,000 |
Praline’s Skills and Spells
- Praline
- One More For You – Give 1 BP to the target
- Love Power – Increases the party’s physical attack by 25%
- Bodyguards – Summons a Black Blade and Black Axefighter
- Black Blade
- Edge of Madness – An attack that may inflict confusion on the target
- Black Axefighter
- Shell Split – Attack that also drops the target’s defense by 25%
Salve-Maker Qada
To find the Salve-Maker, travel to Starkfort, which can be found north of Eisen Bridge. Upon arrival, proceed inside to reach Starkfort Interior, 1F. Head to the northwestern set of stairs and take them up to 2F. Follow the hallway south to find a man in red next to another set of stairs leading up to 3F. Use him to save, then take the stairs. Follow the hallway east to reach Qada. Approach him to trigger a cutscene that will lead to a fight.
For this battle, you’ll be facing Salve-Maker Qada, who will have no notable weaknesses. As before, he’ll use mainly three skills. The first of which is Poison Hi-Potion, which deals damage to the target with a chance of inflicting poison.
When his health starts to decline, Qada will use Water of Life, granting himself a health regeneration effect that regenerates a percentage of his HP every turn. He’ll also start using the Dark Breath skill, which deals damage to the target based on the caster’s missing health. It can essentially one-shot any member of your party.
To make the battle easier, consider bringing a Spiritmaster to prevent status ailments and a White Mage to keep the party healed up. Keep them ready to revive any party member that gets KO’d. Also, be sure to bring some Phoenix Downs in case your healer is the one targeted.
Qada’s Max HP
The table below lists Qada’s max HP, broken out for each chapter. The HP value is based on playing the game with Normal difficulty. If you’re playing on hard, then the HP values will be higher.
| Boss | Ch. 5 HP | Ch. 6 HP |
|---|---|---|
| Qada | 60,000 | 65,000 |
Qada’s Skills and Abilities
- Qada
- Dark Breath – Deals users missing HP as damage to the target
- Poison Hi-Potion – Deals about 1,000 damage and can inflict poison
- Water of Life – Adds Regen to the target (1,800 HP)
Pirate Captain Barbarossa
To unlock this sub-scenario, you’ll first need to awaken the Water Crystal to clear the ocean. Once that’s done, travel to the House by the Sea to trigger an event where one of the Shieldbearers will talk about a mysterious ghost ship recently seen around the waters. After the event, you’ll need to hop aboard your mighty vessel and sail near Grandship, looking for a big patch of fog. Enter it to find the ship, choosing the Board option when prompted.
Aboard the ship, head over to the wheel and speak with the captain. This will trigger an event, leading to a fight against Barbarossa, who is weak to electric-based skills and spells. For this fight, he’ll mainly use Shell Split to lower your defenses and then hit you with Double Damage, which can potentially KO a party member if it crits.
Barbarossa’s Stealable Items
The items listed below can be stolen during this fight.
- Chapter 5 – Heavy Axe
- Chapter 6 – Heavy Axe
Barbarossa’s Max HP
The table below lists Barbarossa’s max HP, broken out for each chapter. The HP value is based on playing the game with Normal difficulty. If you’re playing on hard, then the HP values will be higher.
| Boss | Ch. 5 HP | Ch. 6 HP |
|---|---|---|
| Barbarossa | 80,000 | 95,000 |
Barbarossa’s Skills and Spells
- Barbarossa
- Double Damage – Deals double the damage of a basic attack
- Shell Split – Deals the same damage as a basic attack while decreasing the target’s defense by 25%
Swordmaster Nobutsuna Kamiizumi
To face the Swormaster, you’ll first need to awaken the Fire Crystal. Once you’ve done that, head back to Starkfort and work your way up to the Starkfort War Room to find Swordmaster Kamiizumi. Speak with him to begin the boss battle.
You might just need to see the cutscene between Qada and Kamiizumi by exiting the fort to begin the sub-scenario.
In this fight, Kamiizumi will have no notable weaknesses. You’ll want to make sure to default or heal up when he uses Nothing Ventured to avoid the counterattack and massive damage. You could use a Ninja here to dodge the physical attacks to minimize the damage you take. You could also use a Valkyrie to jump out of the battlefield one turn to crash down into him the next.
Kamiizumi’s Stealable Items
The items listed below can be stolen during this fight.
- Chapter 5 – Rebuff Locket / Kiku-Ichimonji
- Chapter 6 – Kiku-Ichimonji
Kamiizumi’s Max HP
The table below lists Kamiizumi’s max HP, broken out for each chapter. The HP value is based on playing the game with Normal difficulty. If you’re playing on hard, then the HP values will be higher.
| Boss | Ch. 5 HP | Ch. 6 HP |
|---|---|---|
| Kamiizumi | 80,000 | 85,000 |
Kamiizumi’s Skills and Spells
- Kamiizumi
- Before Swine – Halve the damage you get from a magical attack, and counter with three times the damage
- Know Thine Enemy – Counterattack with four times the damage when hit by a single-target attack from the selected enemy
- Nothing Ventured – Counterattack on whoever last attacked, dealing massive damage
Eternia Region
Arcanist Victoria and Spiritmaster Victor
Travel to Central Command north of Eternia City. Upon reaching the grounds, an event with Victor and Victoria will trigger. When it concludes, head up the stairs and go through the door to reach Central Command 1F. You’ll then want to enter the doorway on the east side and follow the hallway to the end, passing the doorway on the right. This will trigger an event leading to a boss battle.
For this fight, you will be facing both Victor and Victoria. Victoria is weak to Light-based skills and spells, while Victor is weak to Dark-based skills and spells. Victoria will try to inflict poison on the party and then deal massive dark-based damage to them with her Exterminate spell. She’ll also cast Dark, targeting a single party member.
Meanwhile, Victor will spend the fight supporting Victoria. He’ll cast Fairy’s Aid to boost both of their elemental damage and the Curada as their health gets low. He also has access to Holy to deal some light-based damage to a single target.
For this fight, we’d recommend focusing on Victoria, who will deal the most damage to the party out of the pair. You can prevent her ailments by bringing a Spritmaster and using its Fairy Ward ability. You can also deal weak point damage to her using a Templar or a Holy spell of your own. As for Victor, you can hit his weak point with a Dark spell or use a Dark Knight to deal extra damage.
Victor and Victoria’s Stealable Items
The items listed below can be stolen during this fight.
- Victor
- Chapter 5 – Yggdrasil Staff
- Chapter 6 – Soul of Thamasa
- Victoria
- Chapter 5 – Poison Rod
- Chapter 6 – Magic Armlets
Victor and Victoria’s Max HP
The table below lists Victor and Victoria’s max HP, broken out for each chapter. The HP value is based on playing the game with Normal difficulty. If you’re playing on hard, then the HP values will be higher.
| Boss | Ch. 5 HP | Ch. 6 HP |
|---|---|---|
| Victor | 75,000 | 80,000 |
| Victoria | 70,000 | 75,000 |
Victor and Victoria’s Skills and Spells
- Victoria
- Poison – Chance of inflicting poison on the whole party
- Exterminate – Deals massive dark damage to those suffering from poison
- Dark – Spell that deals Dark damage to a single target
- Corpse – Can inflict doom on the target
- Victor
- Fairy’s Aid – Increases the Magic damage for all elements on the target
- Holy – Spell that deals Light damage to a single target
- Curada – Heals the target’s HP
Templar Braev Lee
This sub-story will not be available during Chapter 6.
Head back to the man in red in Central Command 1F following the fight with Victor and Victoria to heal up, then head to the northeastern section of the room and use the elevator to reach Central Command 47F. Continue heading up the floors until you reach Central Command 49F. You’ll then want to use the elevator in the center of the floor to reach Braev Lee, triggering an event which will lead to a battle.
For this fight, you will be facing the Templar Braev, who is weak to dark-based skills and spells. Throughout the fight, he will Default quite regularly to build up 2-3 BP before launching multiple attacks in a turn. One of those attacks will be Radiant Blast, which can bypass the Default, dealing 1.5 times the damage to the target. He’ll also use Heart Strike, which will always be a crit, dealing double the damage. The other skill he liked to use is Giant Slayer. It will deal 1.5 times damage to a target that has more HP than the user.
To mitigate damage in this fight, consider bringing a Spiritmaster to reduce elemental damage or a Performer who can boost both physical and magical defense. You can also use either the Monk or Ranger to pierce through his defenses when he defaults, or a Dark Knight to capitalize on his weakness to Dark-based attacks.
Braev Lee’s Stealable Items
The items listed below can be stolen during this fight.
- Chapter 5 – Excalibur
Braev Lee’s Max HP
The table below lists Victor and Victoria’s max HP, broken out for each chapter. The HP value is based on playing the game with Normal difficulty. If you’re playing on hard, then the HP values will be higher.
| Boss | Ch. 5 HP | Ch. 6 HP |
|---|---|---|
| Braev Lee | 112,500 | N/A |
Braev Lee’s Skills and Spells
- Braev
- Radiant Blast – A light-based physical attack, ignoring Defaut’s damage reduction and dealing 1.5 times the damage
- Heart Strike – An attack that is always a Crit, dealing double the damage
- Giant Slayer – Deals 1.5 times the damage of a basic attack to an opponent with more HP than you
Vampire Lord DeRosso
Travel to Vampire Castle, which is located west of Central Command. You’ll then want to head inside and work your way up all seven floors to reach the lord of the castle. Along the way, interact with the giant painting at the end of each floor to learn about past events.
If you have not obtained the Vampire Asterisk, check out our Vampire Asterisk Guide on how to access the castle. If you have obtained this Asterisk, you’ll just be able to walk right in.
During this fight, Lord DeRosso will be weak to Light skills and spells. One thing we noticed was that the attacks and patterns he uses seem to be based on the party you bring. You can find the ones we saw in the Skills and Spells section below.
While facing DeRosso, he mainly used his Energy Burst attack against us, which we were able to counter using the Templar job’s Rampart skill easily. We also had a Ninja, White Mage, and Monk. Each one of them also had the Ninja set as the Job Command so they would have access to Utsusemi to dodge all of the vampire’s physical attacks. The White Mage focused on supporting the party and healing up any damage that got past our defenses while the Ninja and Monk dealt constant damage to DeRosso.
DeRosso’s Stealable Items
The items listed below can be stolen during this fight.
- Chapter 5 – Megalixir
- Chapter 6 – Megalixir
DeRosso’s Max HP
The table below lists DeRosso’s max HP, broken out for each chapter. The HP value is based on playing the game with Normal difficulty. If you’re playing on hard, then the HP values will be higher.
| Boss | Ch. 5 HP | Ch. 6 HP |
|---|---|---|
| DeRosso | 150,000 | 150,000 |
DeRosso’s Skills and Spells
- Energy Burst – Multi-target attack that will hit the whole party for massive damage
- Battle Thirst – Absorbs 1 BP from the target
- Bone Rush – Single-target attack that deals more damage based on how much HP has been lost
- Graviga – Deals 75% damage of your max HP
After the fight, interact with the last painting.
More Bravely Default Flying Fairy Guides and Walkthroughs
For additional guides and walkthroughs on Bravely Default Flying Fairy, be sure to check out our Bravely Default Flying Fairy HD Remaster main page!